Horseman1
Members
-
Joined
-
Last visited
Everything posted by Horseman1
-
-
Oh. LoL! I didn't realize that it took longer than it did for the pictures to come through. Good joke.
-
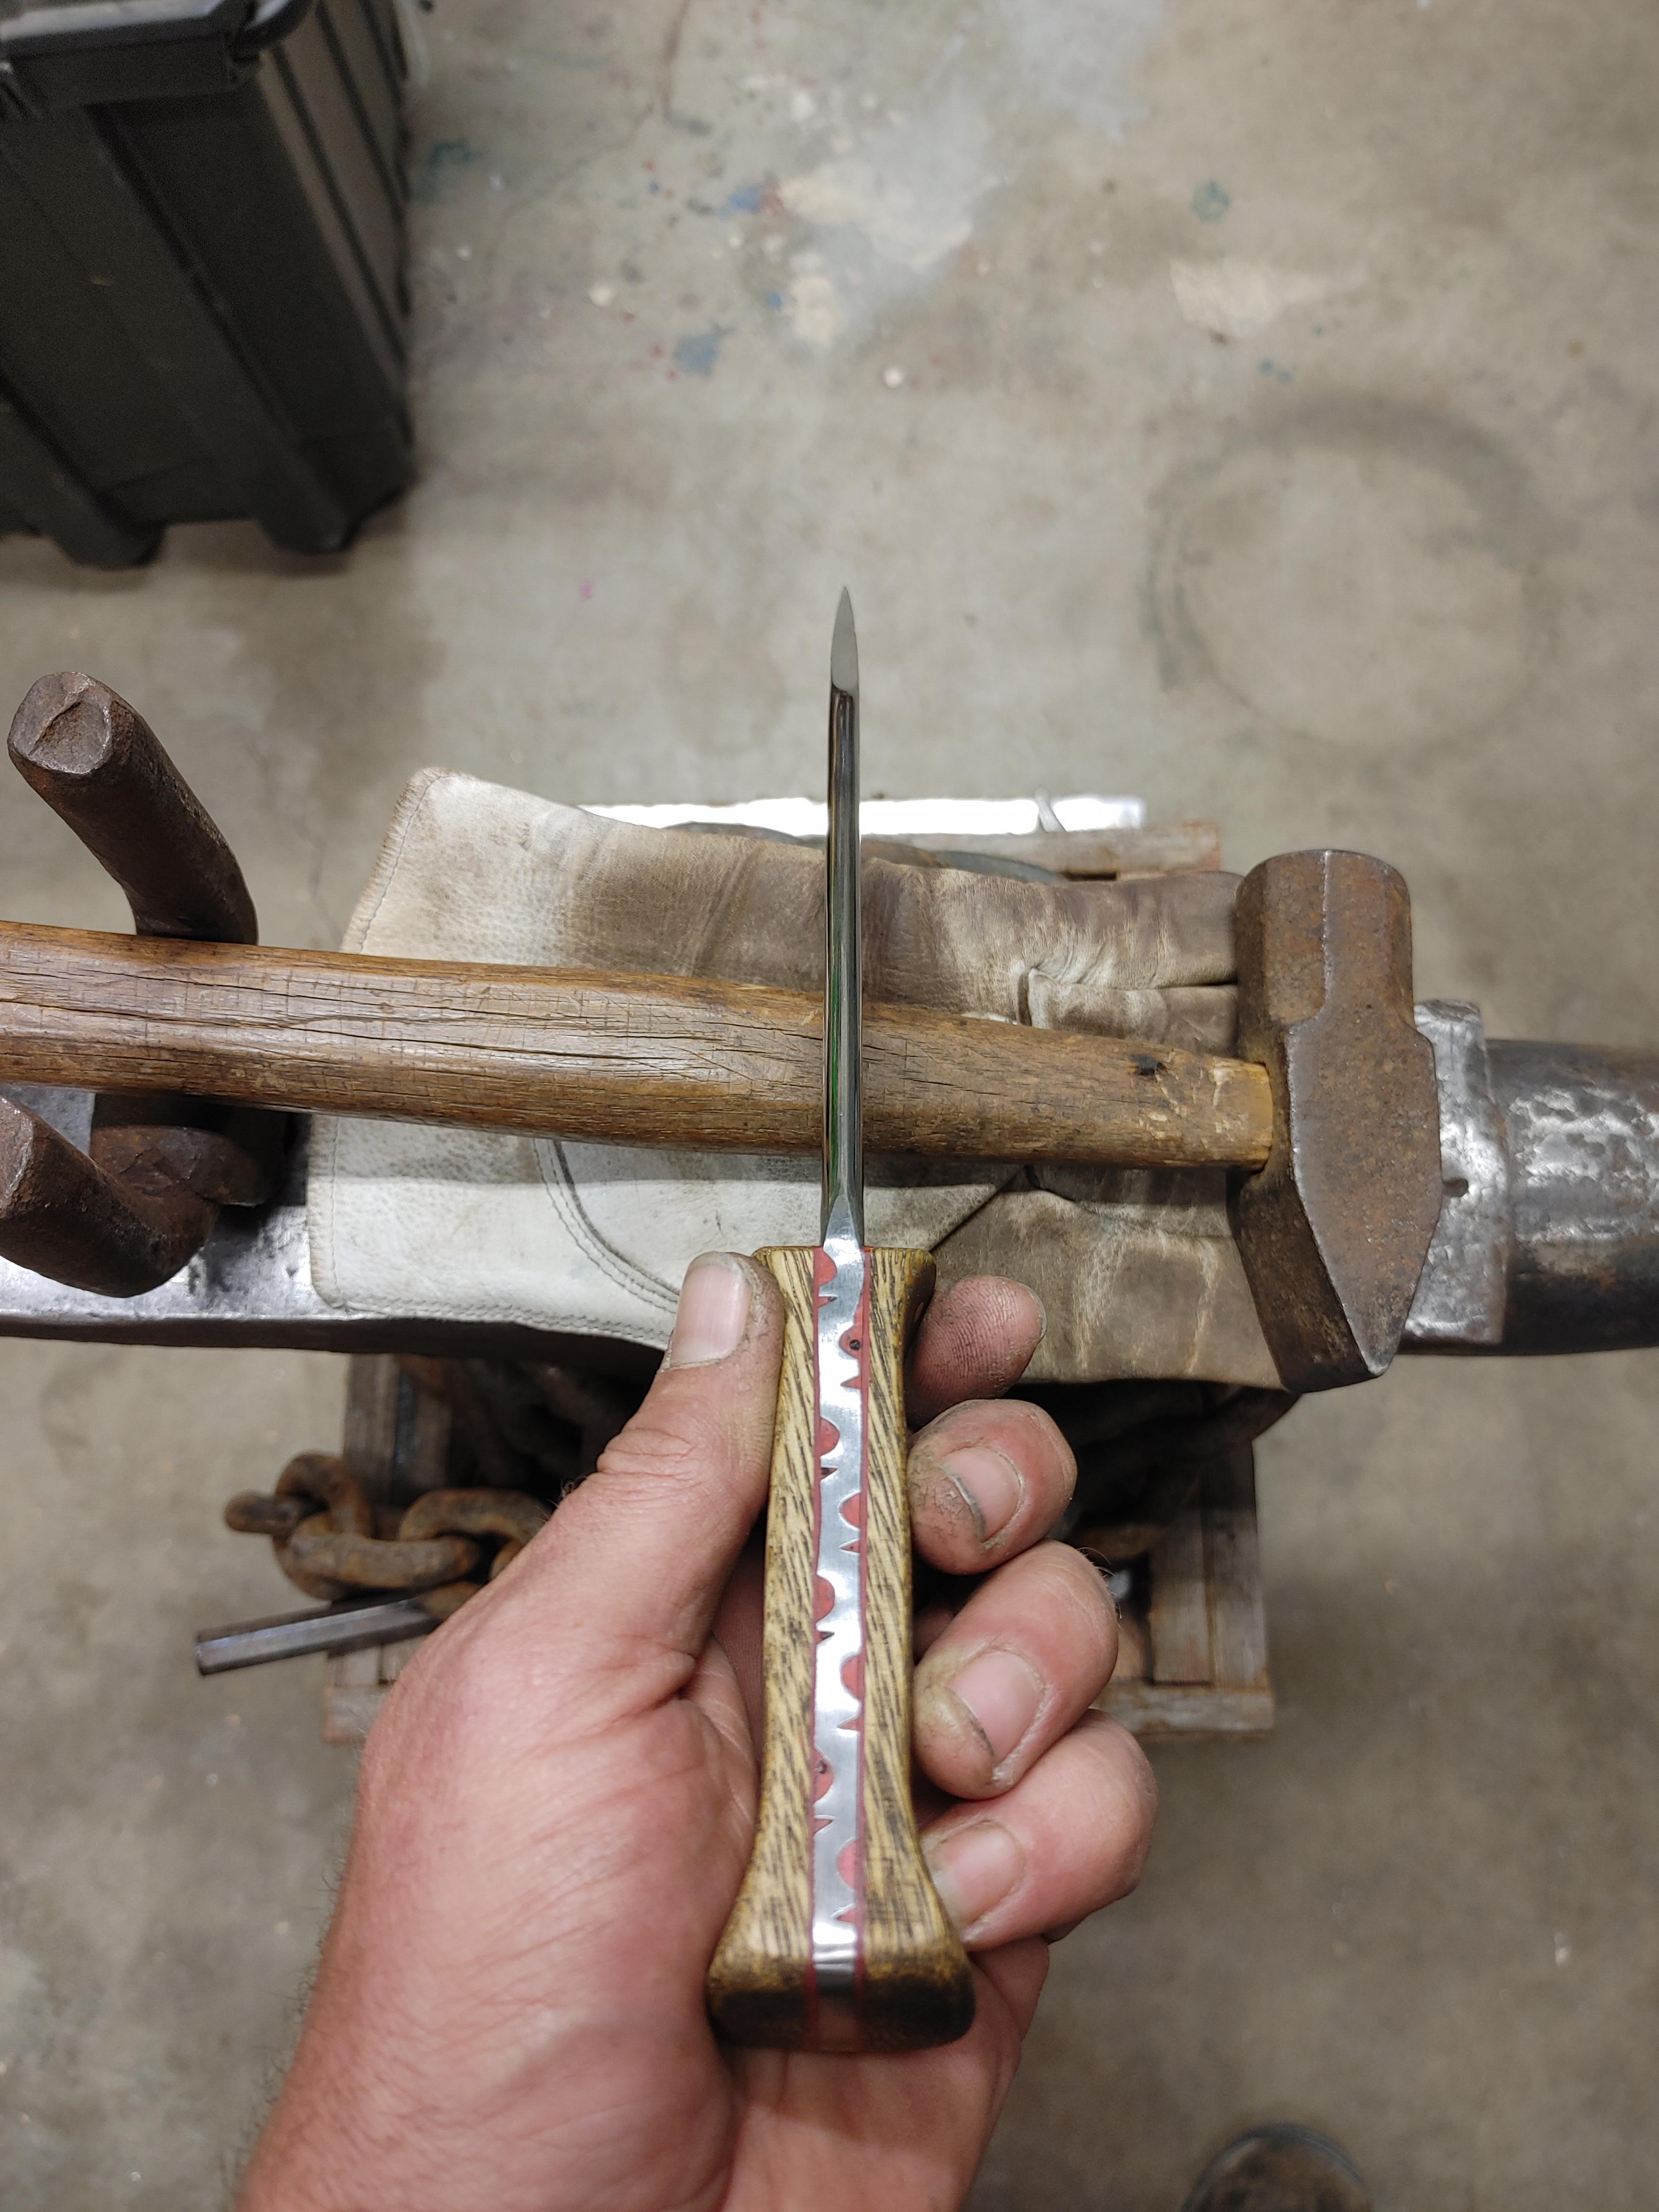
Thanks y'all. I appreciate it. I don't actually have any clear coat on it at all, just a single cost of stain. I'll be sure to put up a picture once I've done a couple coats of them tung oil.
-
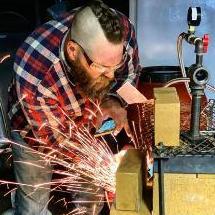
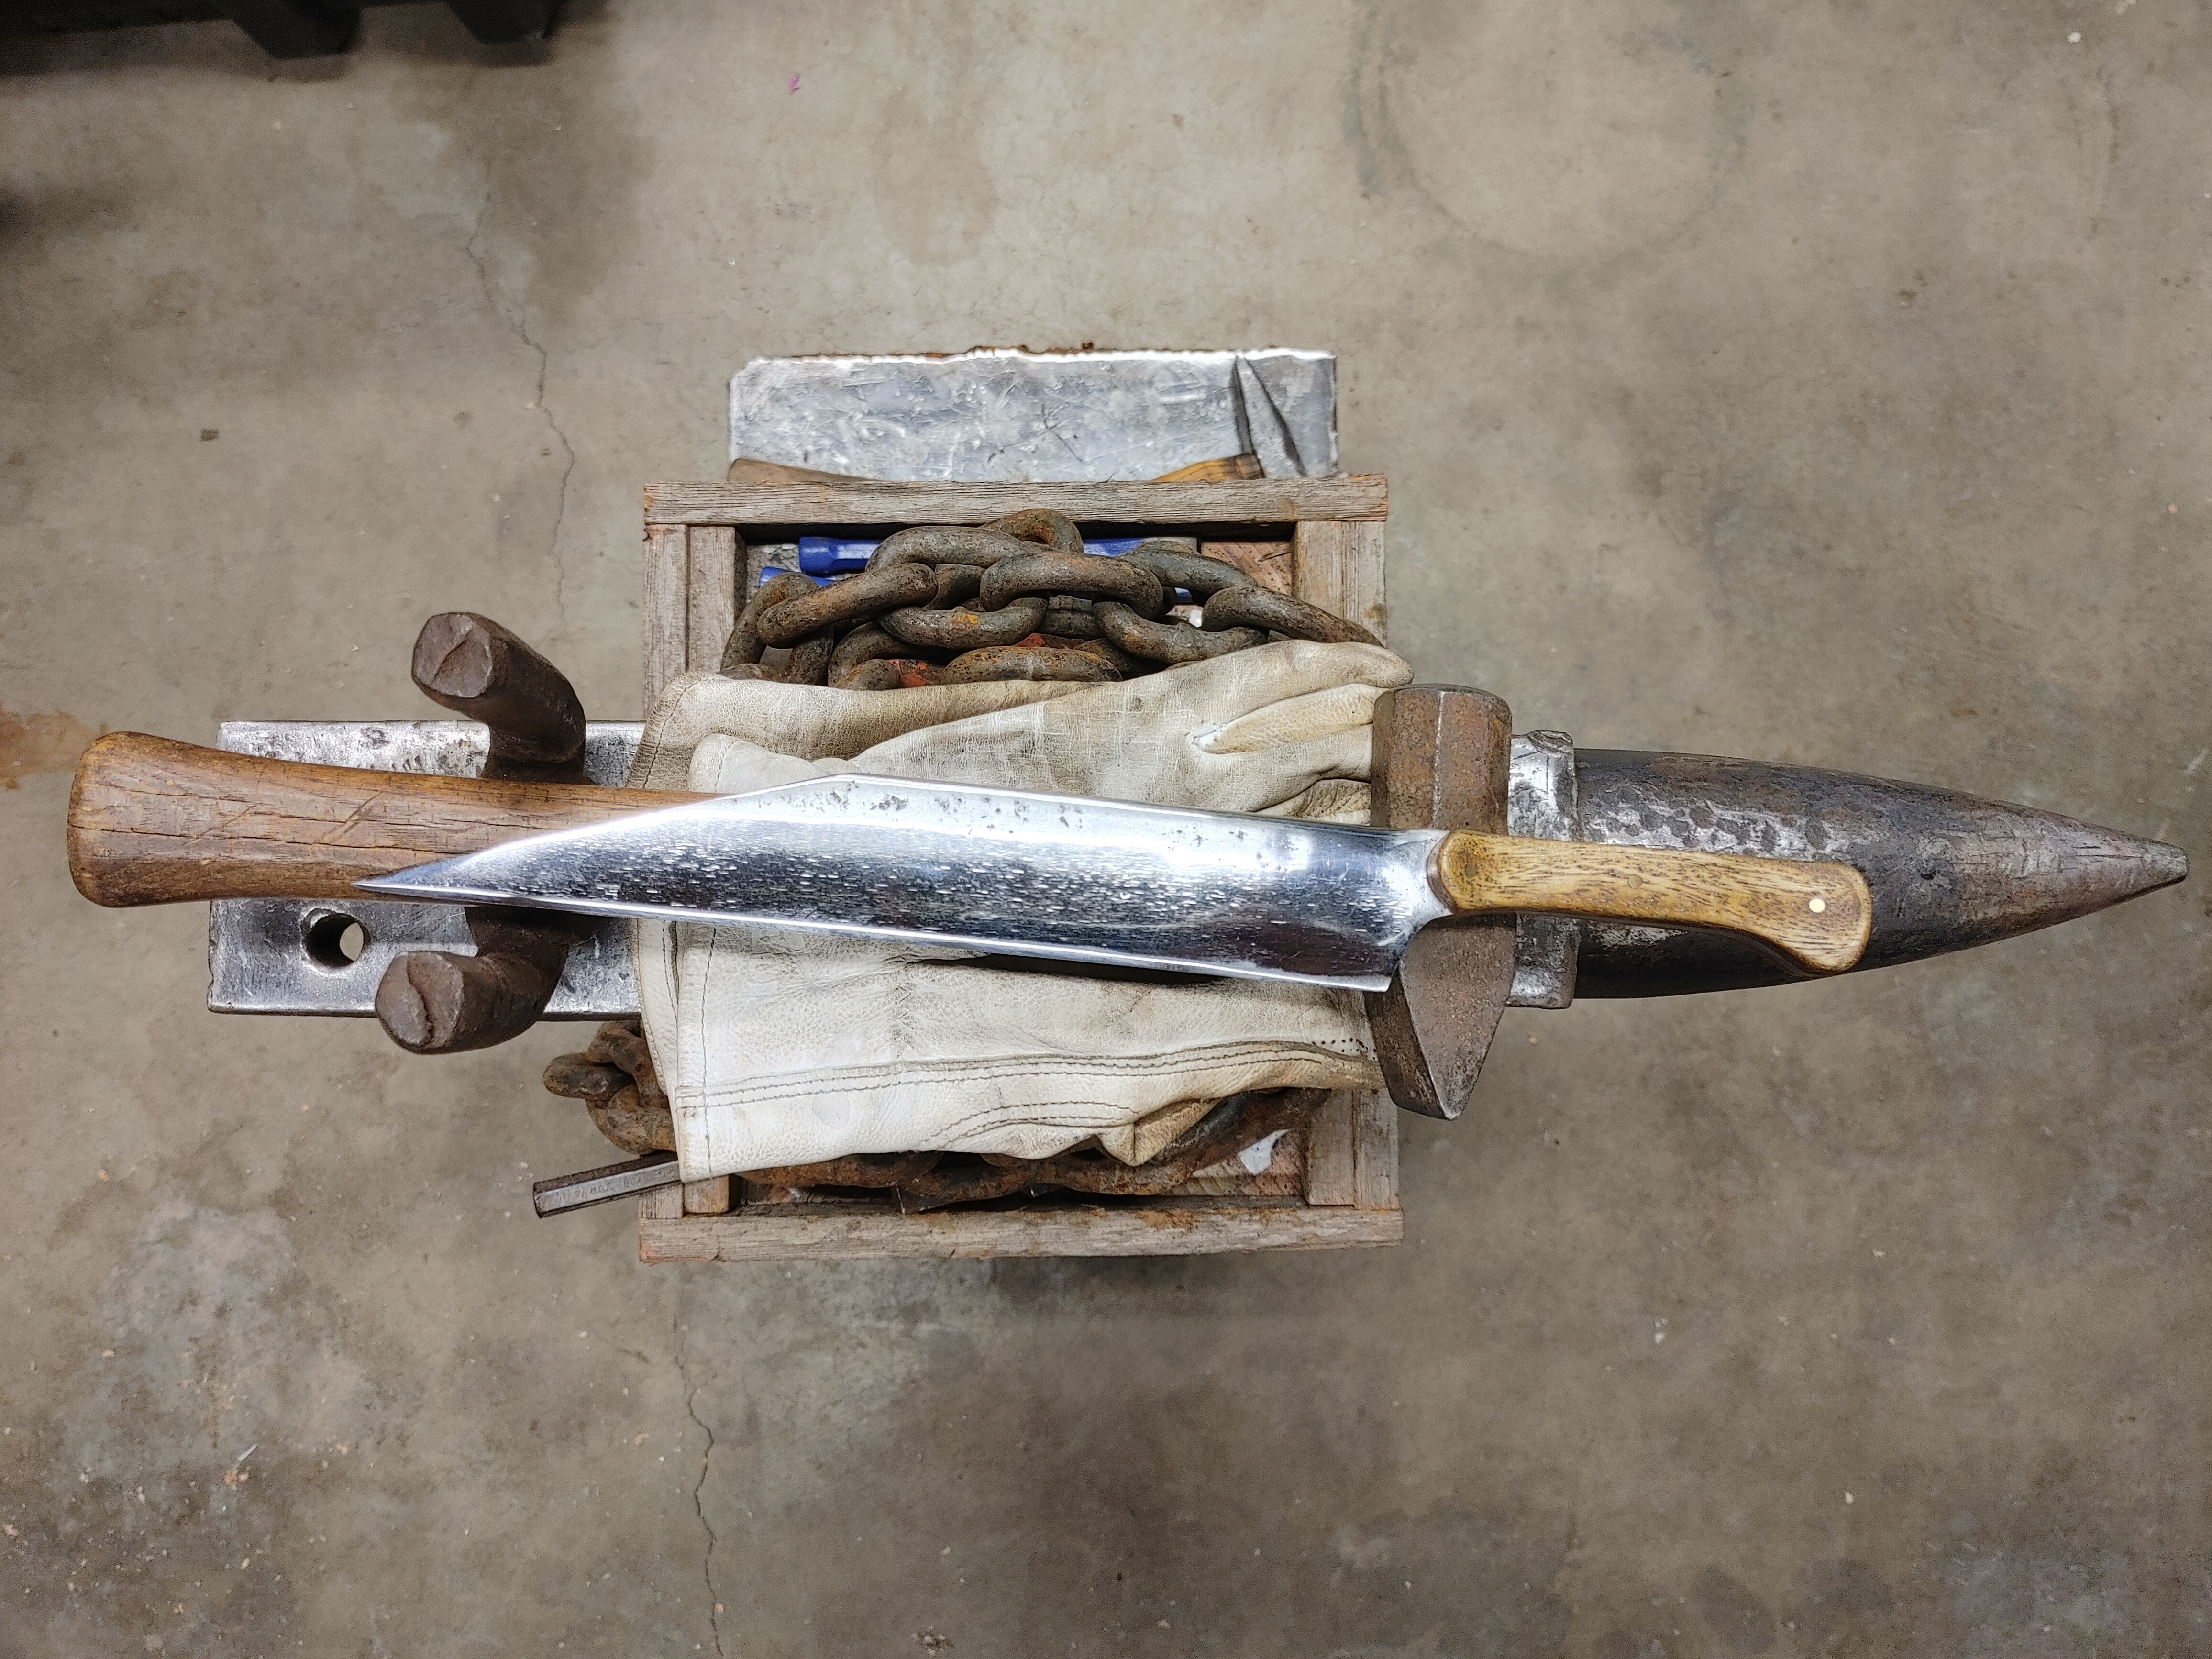
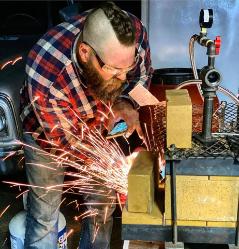
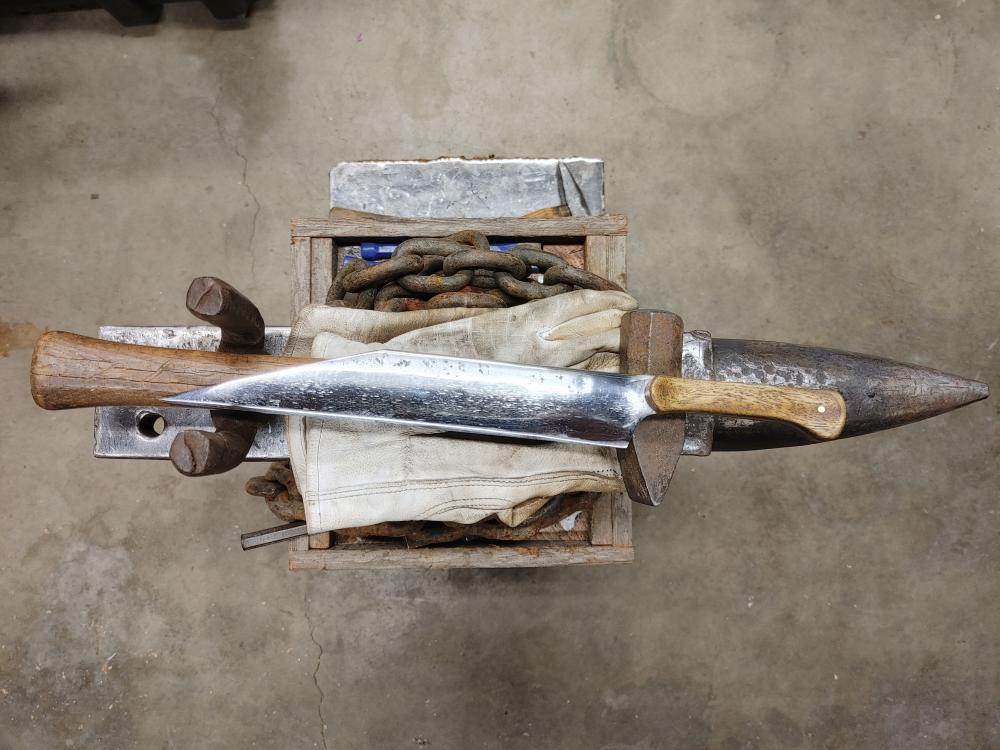
So I just made the knife shown in the picture bellow and was wondering if anyone had suggestions on what I should use as a finish coat on the handle? I was thinking maybe bee's wax or linseed oil. I don't really want to do a poly coat though.

-
What should I do then to improve the quality of flame?
-
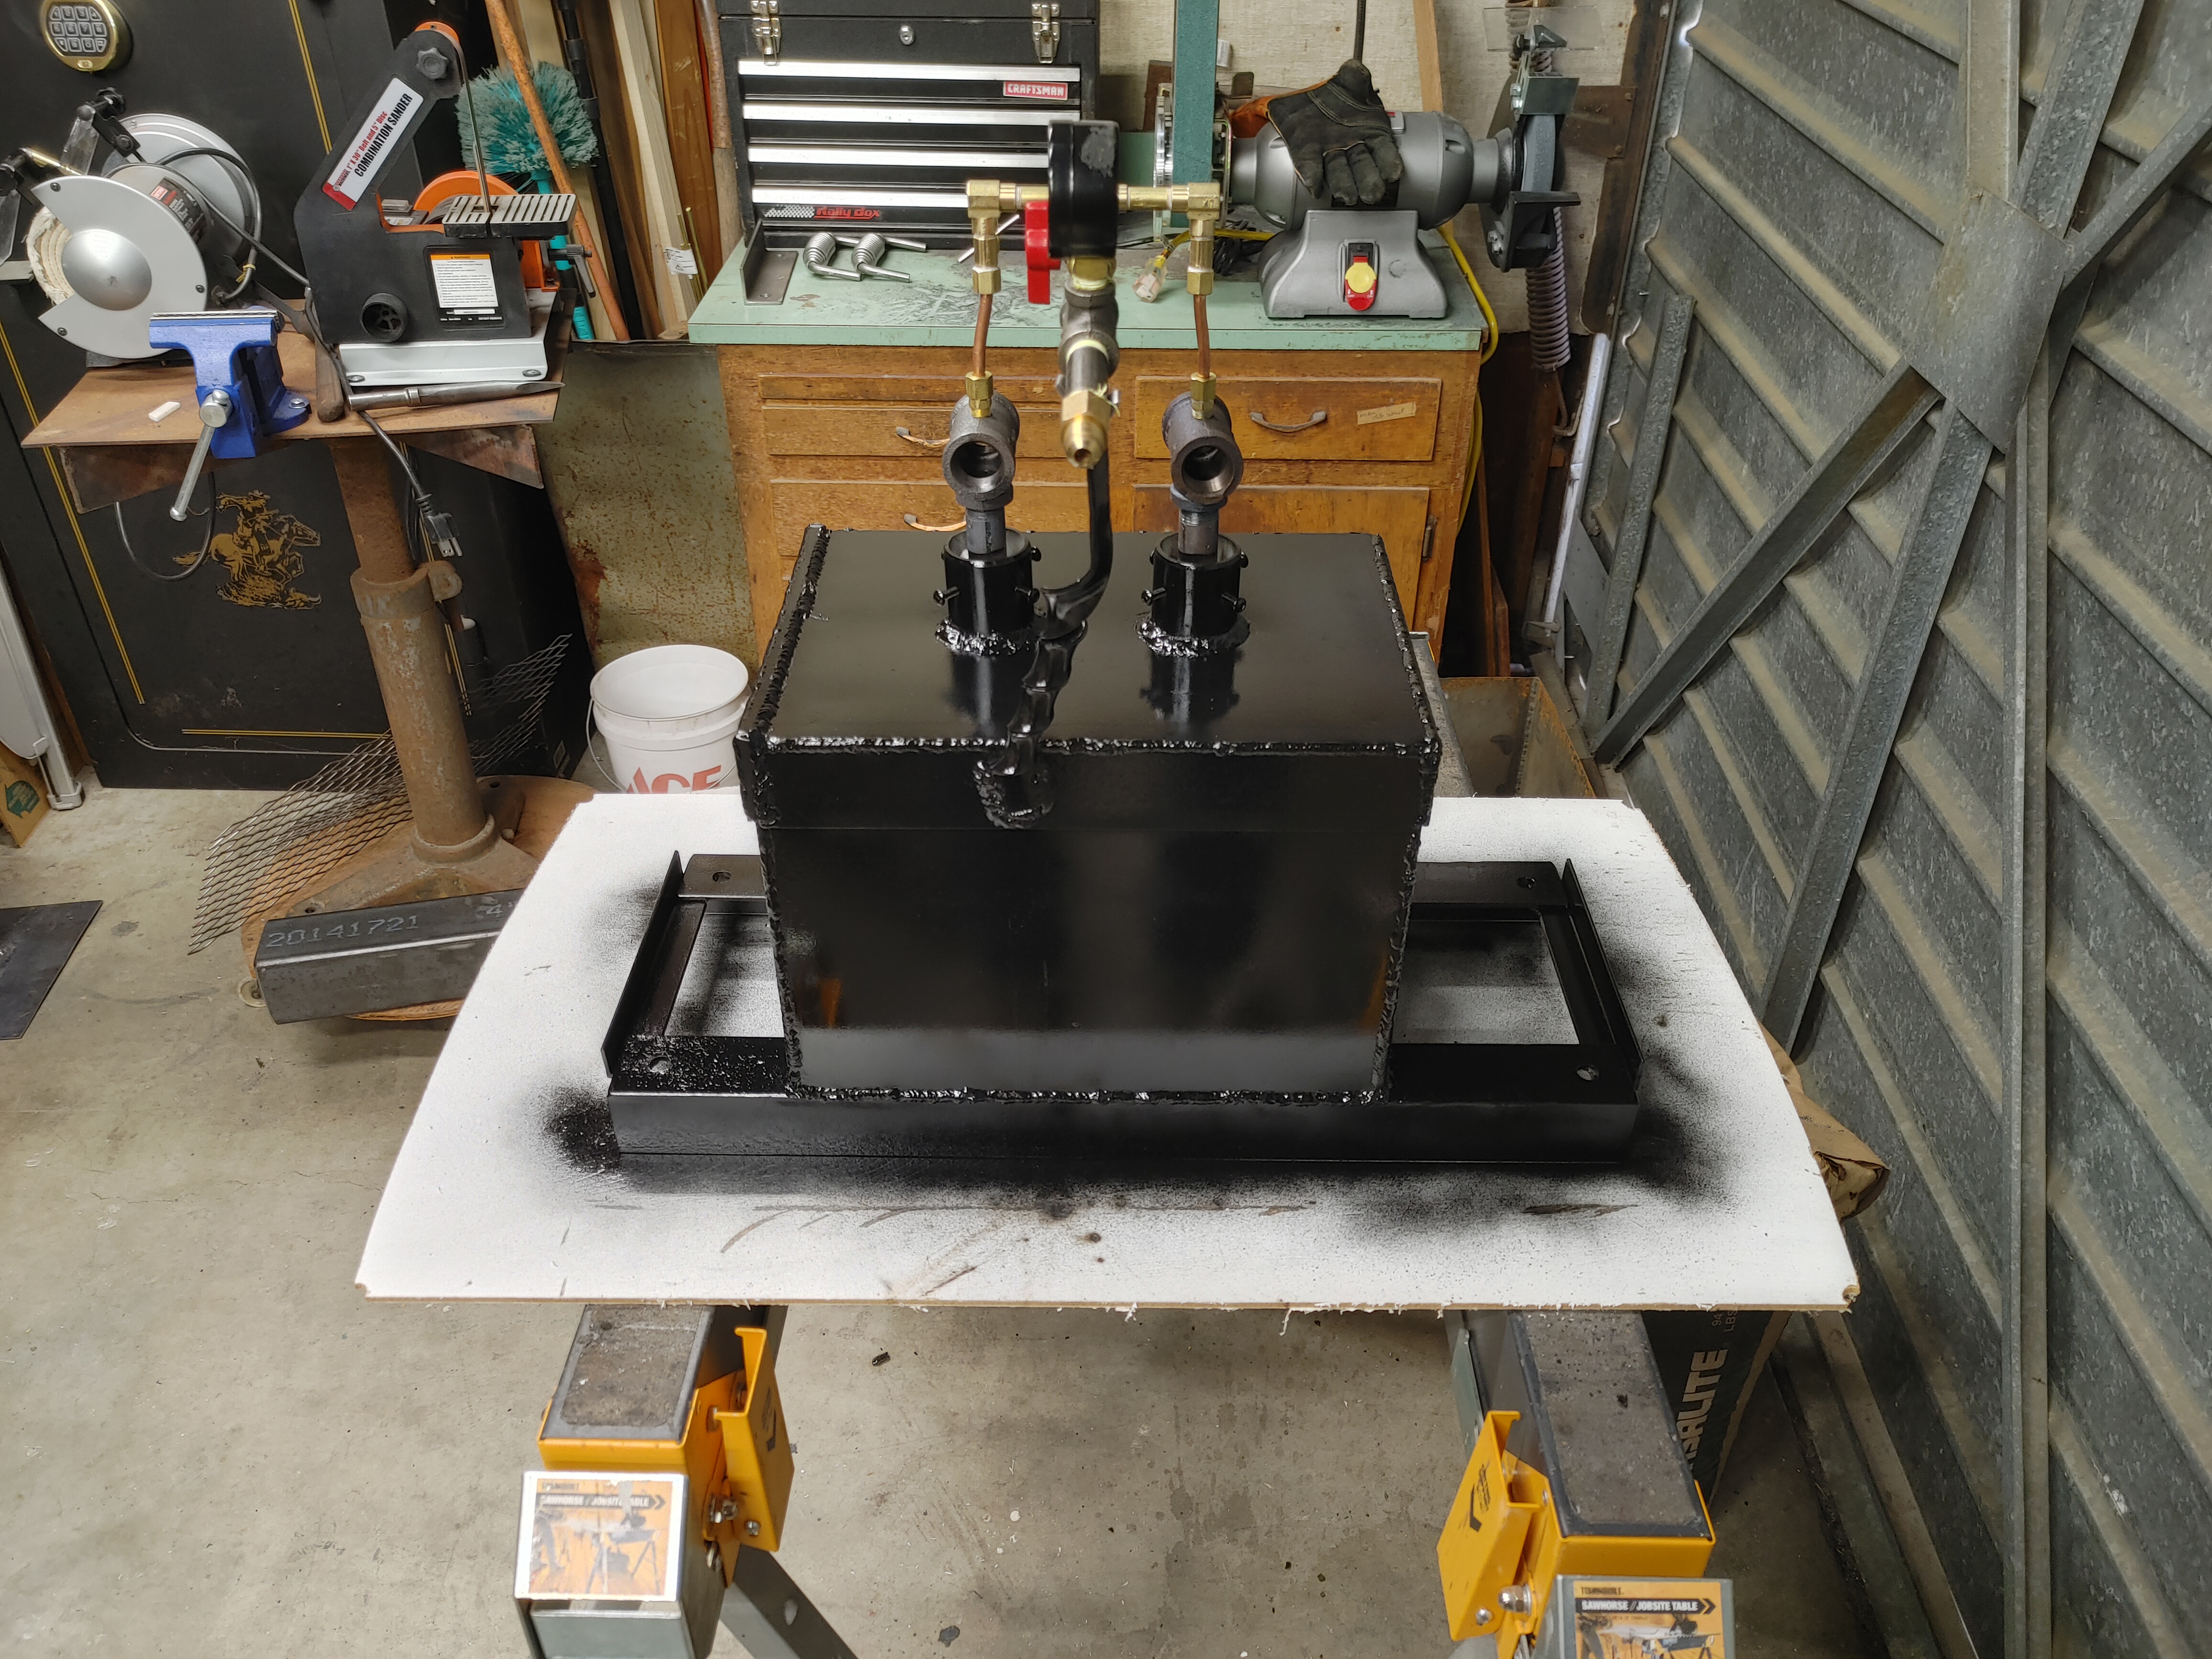
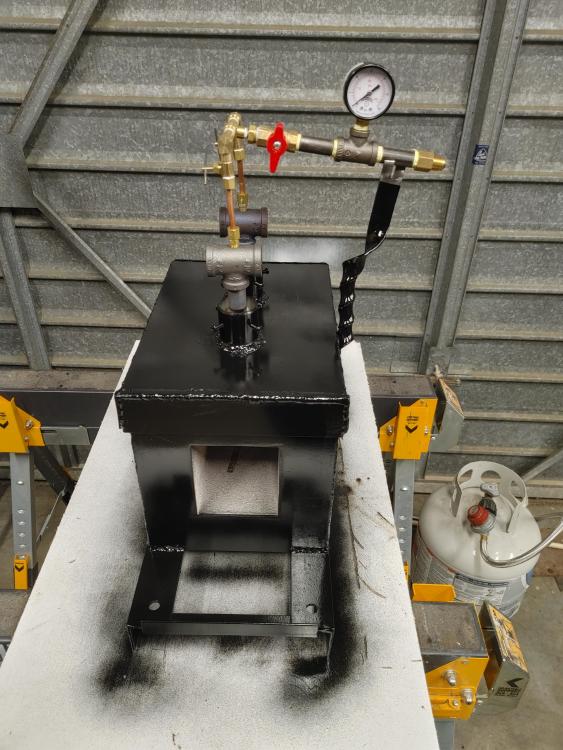
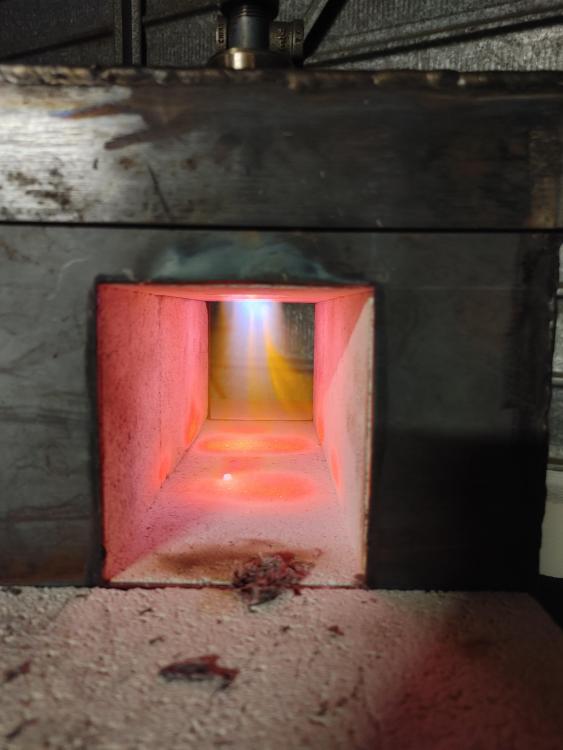
So here's the forge after making some adjustments to the fuel lines adding a fuel line support. I felt comfortable enough at this point to add a coat of high temp engine paint. Also included a picture of the burners running with the adjustment that Friday made mention of.

-
That is a really good idea, I never thought of that. Thanks Mikey.
-
Awesome suggestions guys thank you! I'll be sure to come back to the forum once I've supported things.
-
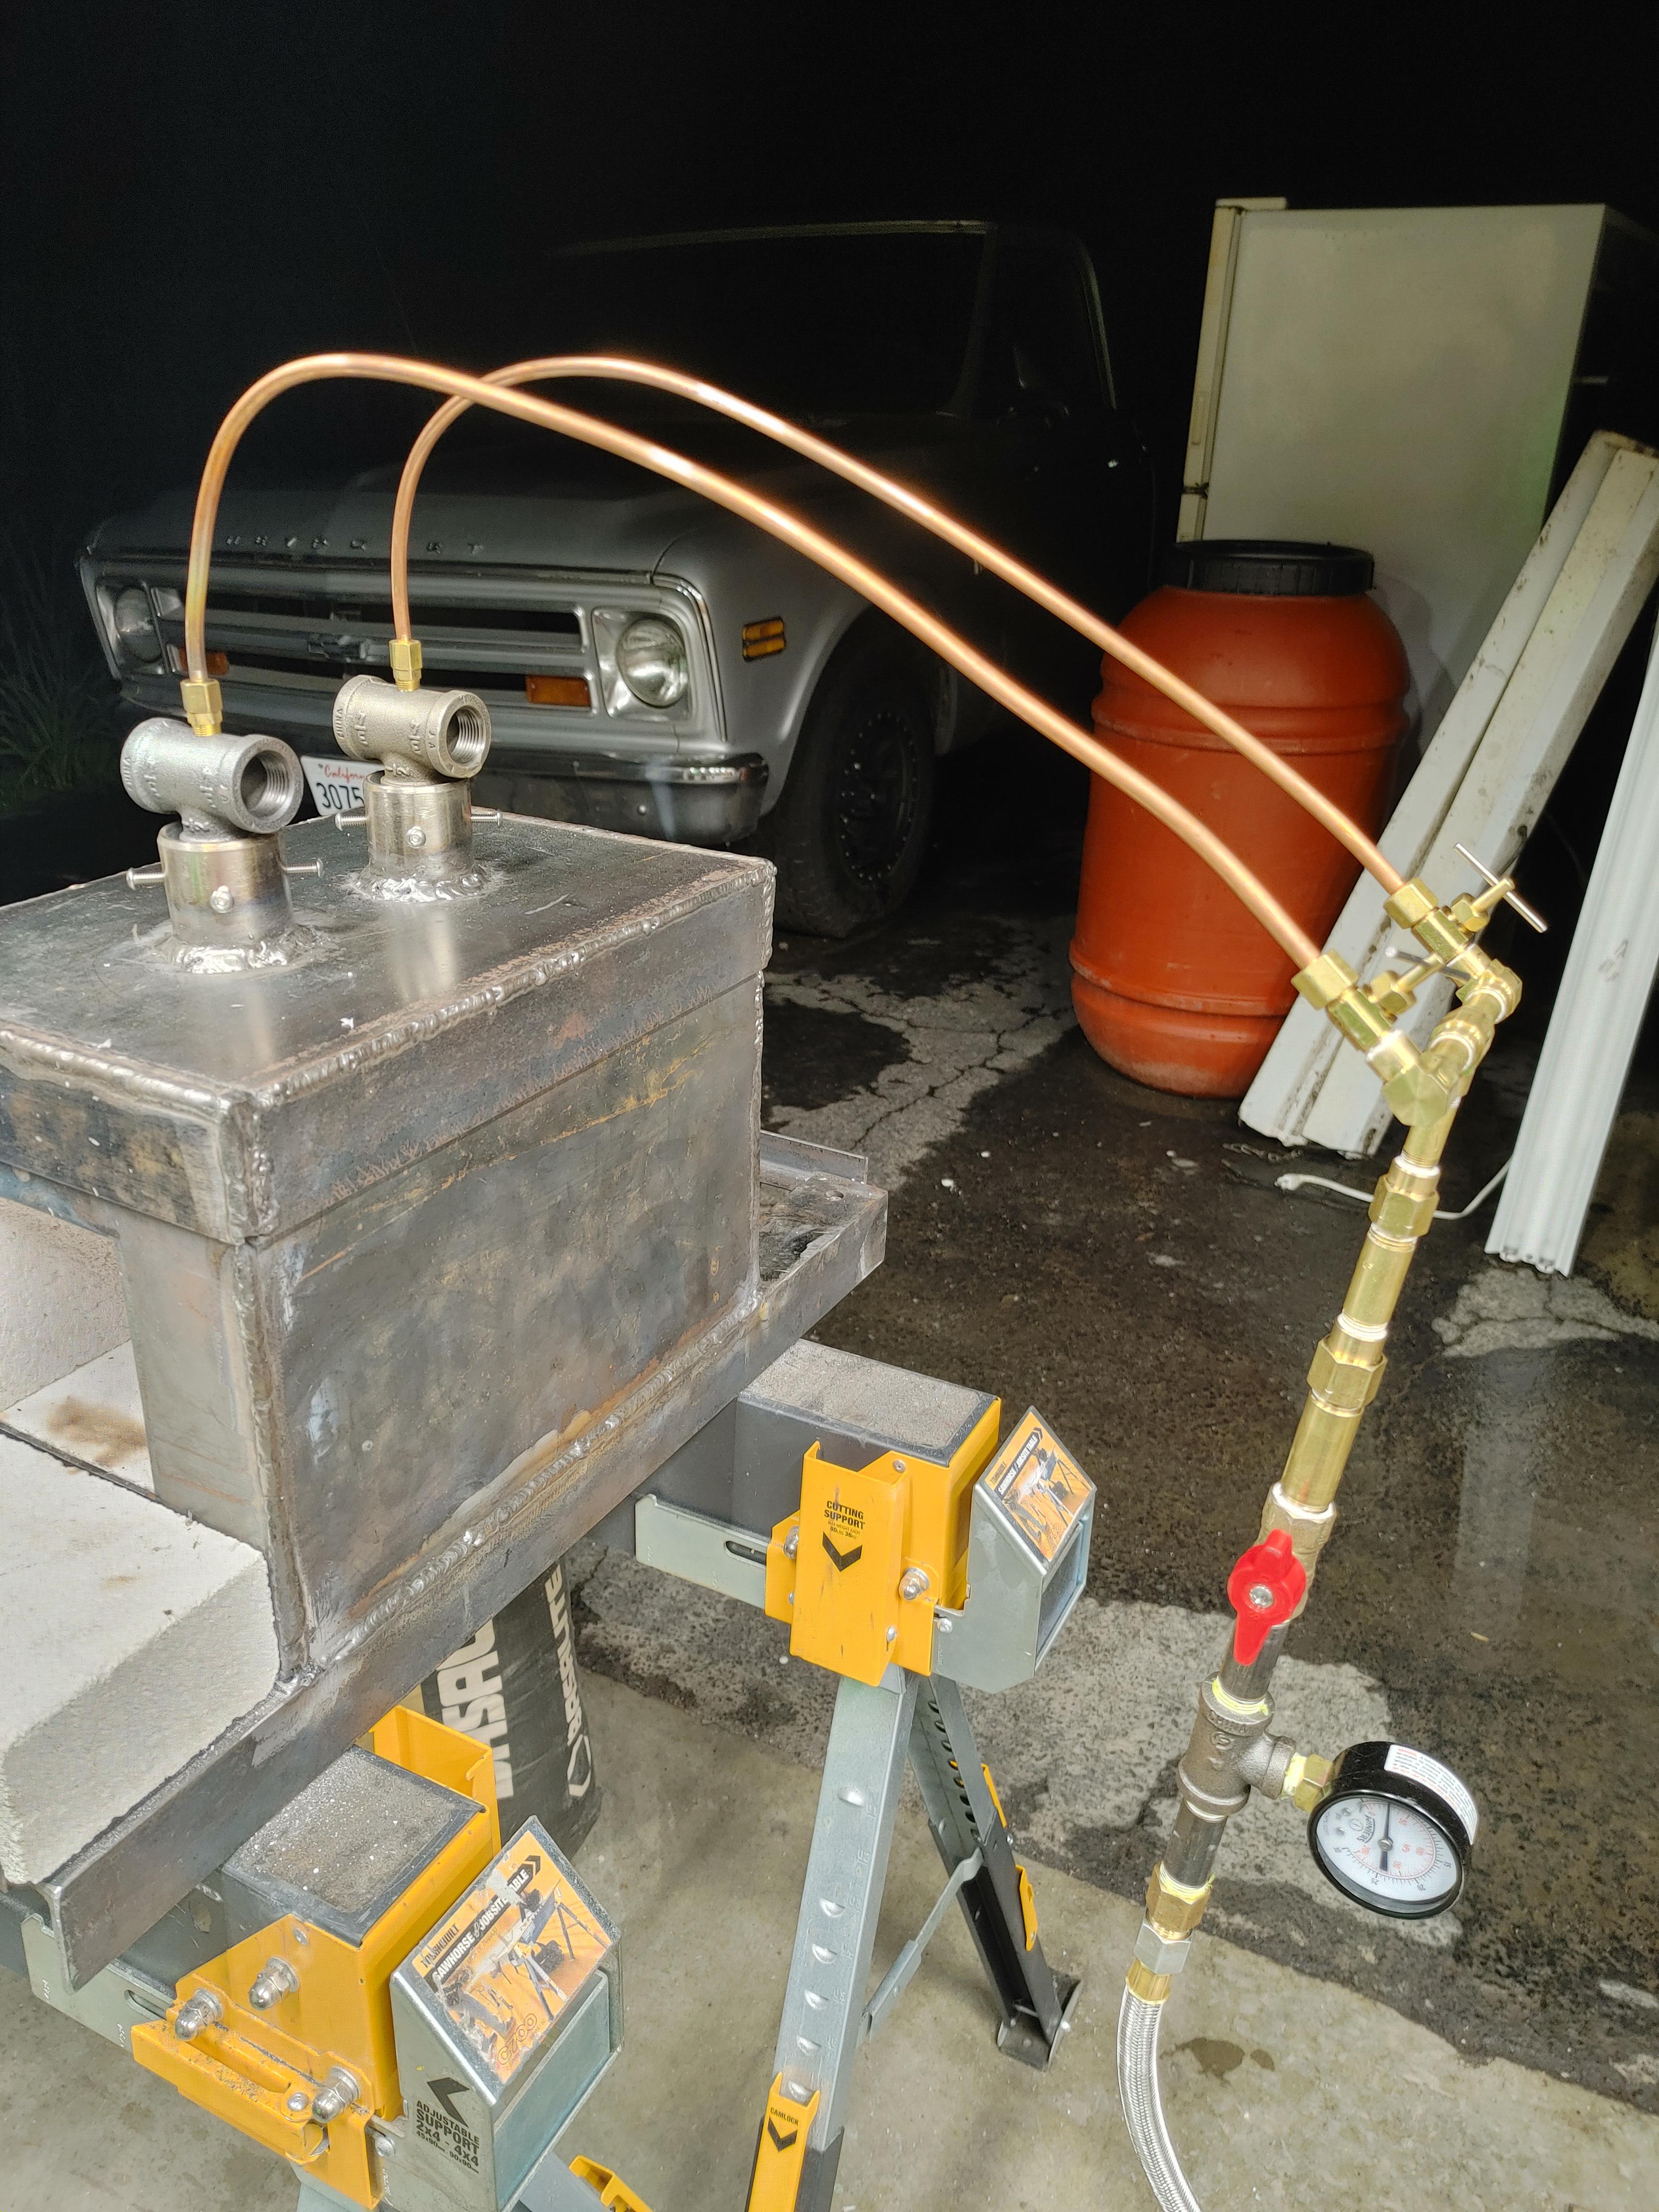
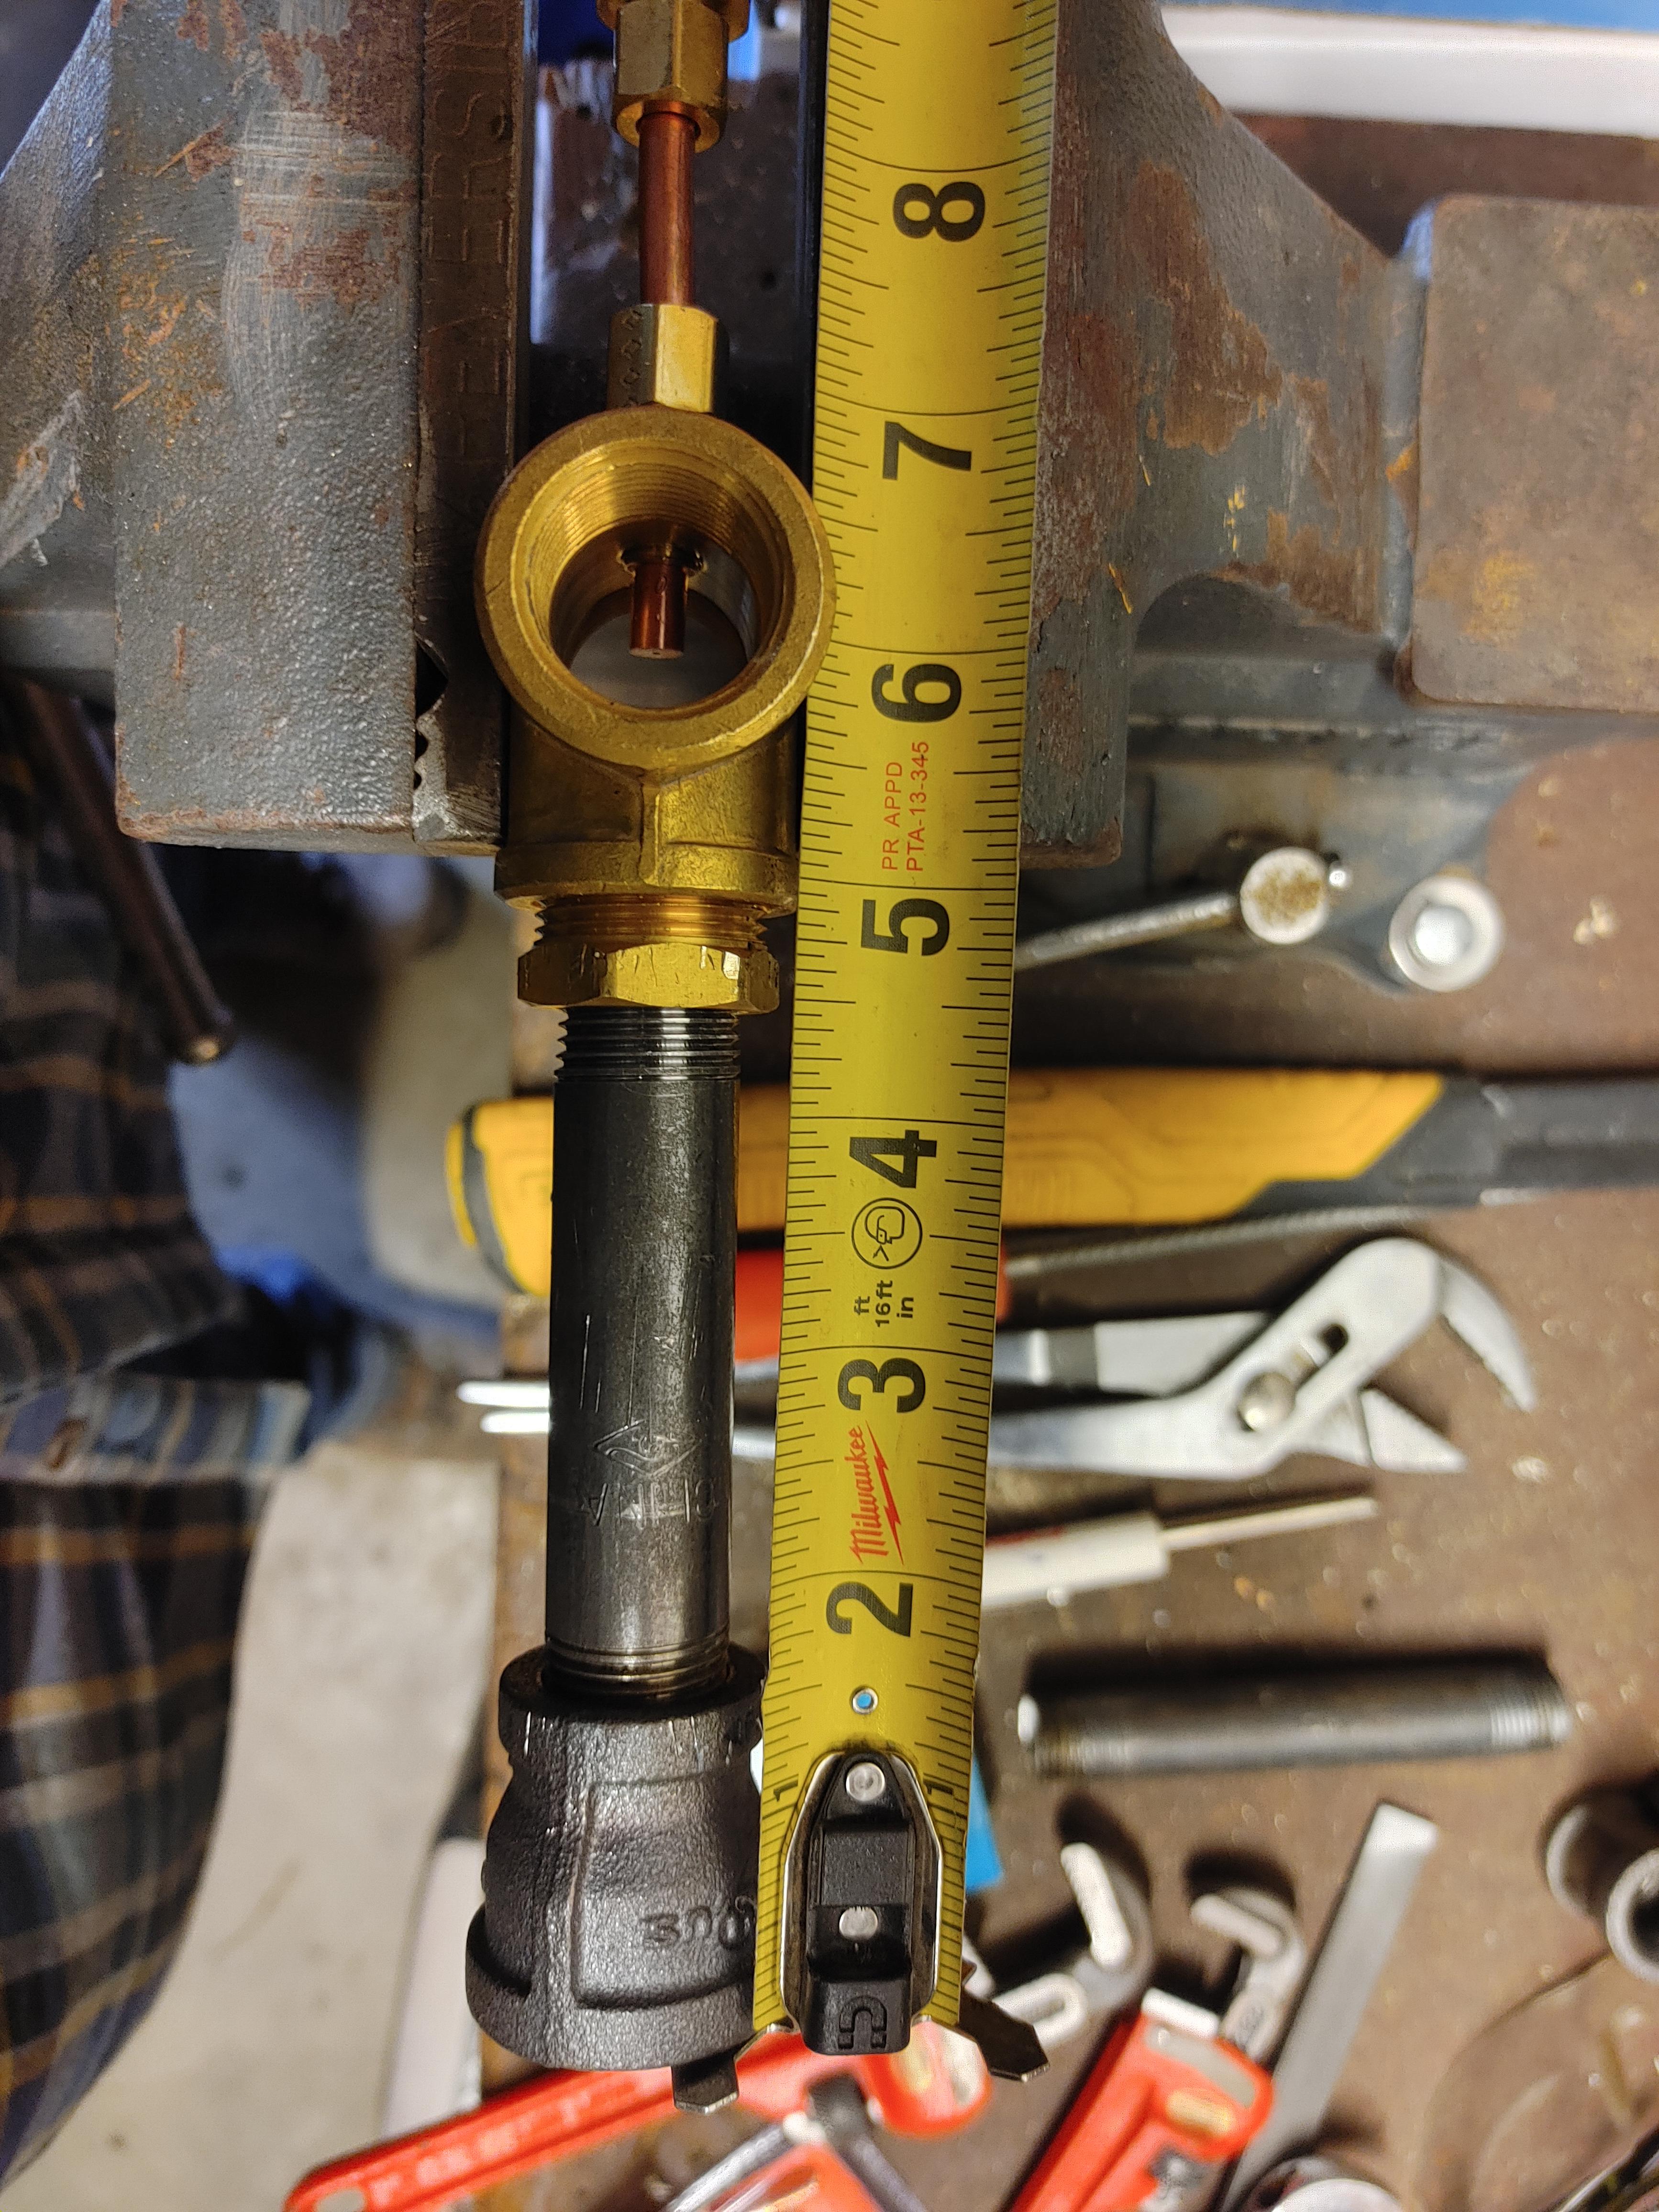
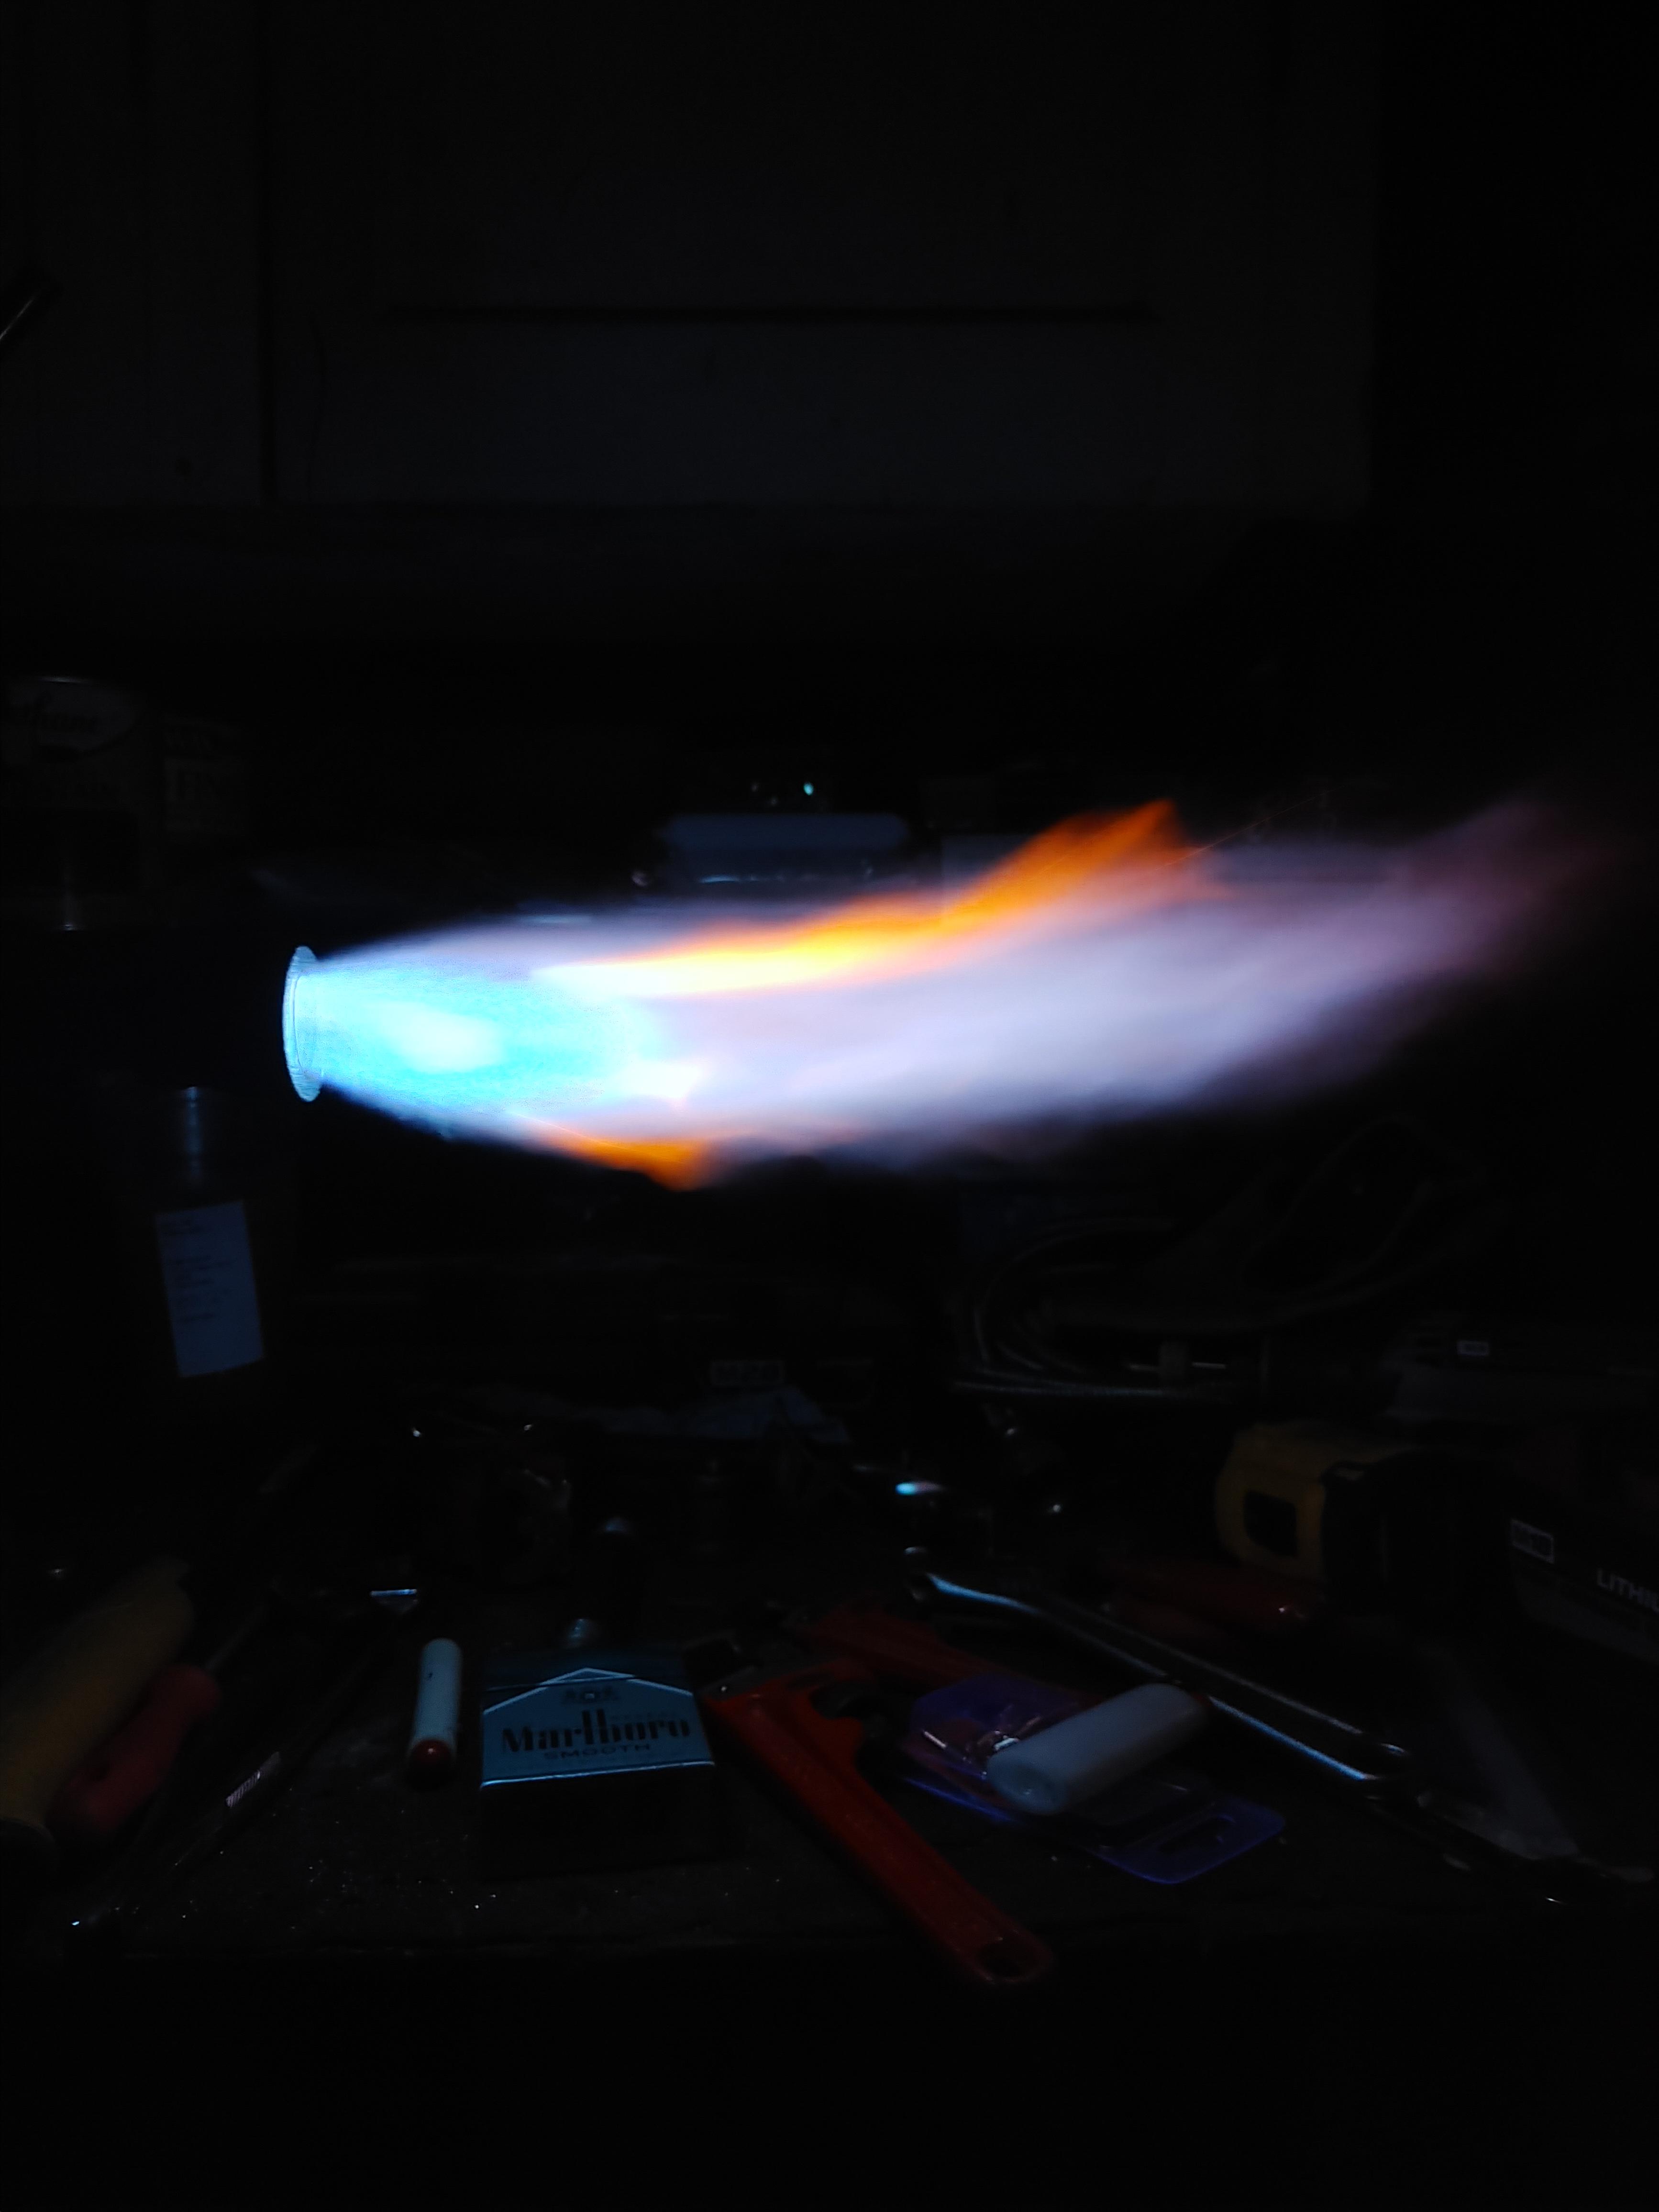
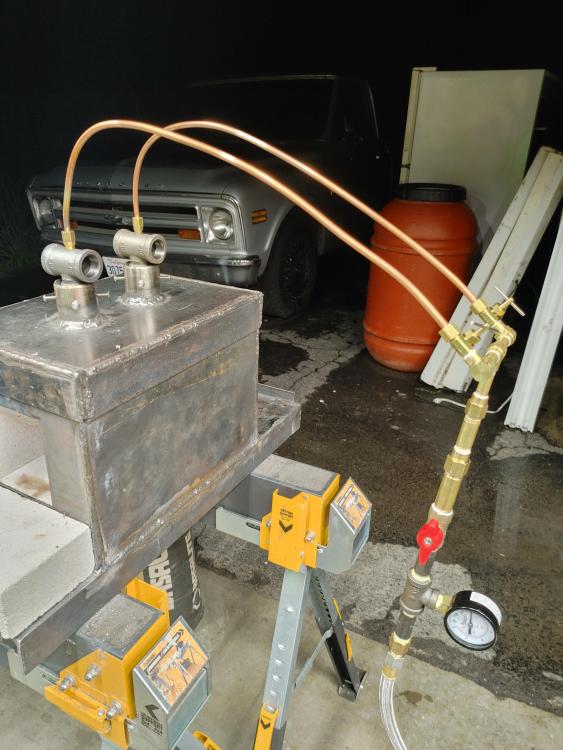
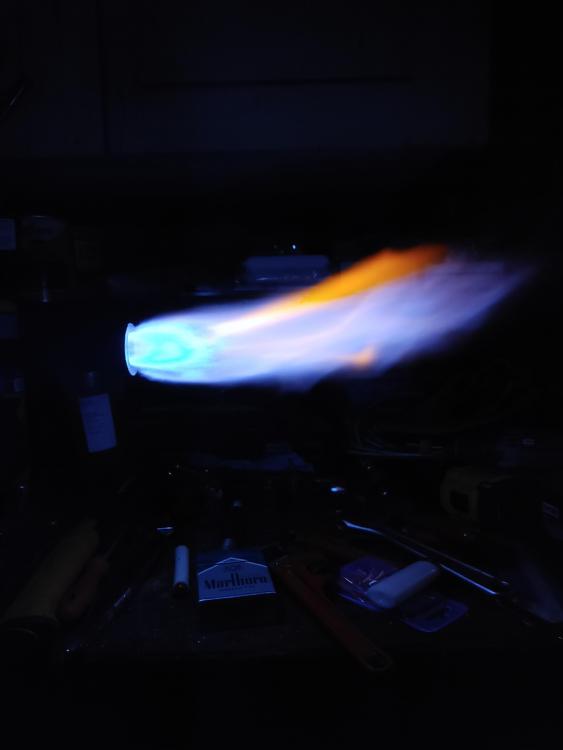
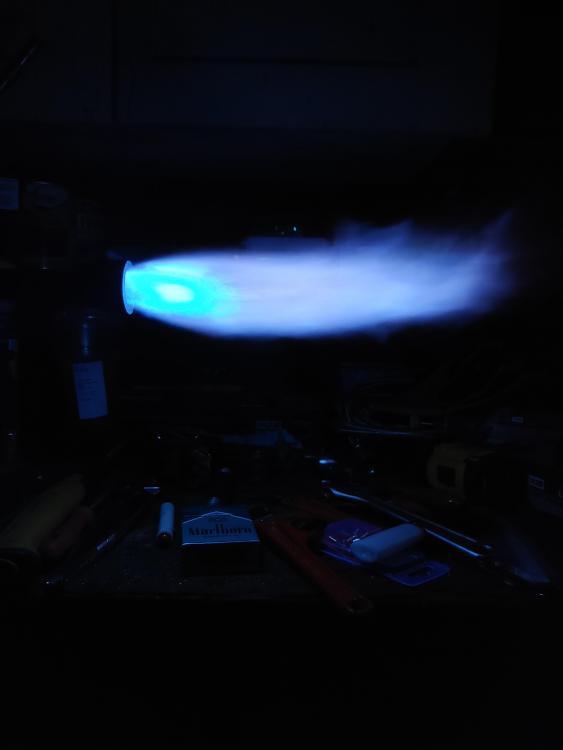
Well, here it goes. I first repaired the leak. Turns out I forgot to put thread paste on that fitting, (I did use threat paste as I know teflon tape doesn't react well with propane). Still had the issue. Next I took the mig tip out and cleaned it out with the proper sized mig cleaning tool. Put it back together and it worked just fine. Frosty, I realize that my setup is a bit unorthodox with the copper tubing and brass fittings and all that. I was doing the best I could with the supply that I have at hand. With 3 different hardware stores in close proximity to me I was unable to find the hard lines that I've seen so many people use. I currently don't have an official support for all of it, but the braided propane hose is stiff enough and the way it sits on the tank provides just enough support to take the stress off the copper lines. However, I do plan on improving this part of my design in the very near future. I'm thinking I'll have to go to a plumbing supply place in a different area entirely to find what I need. Check out the picture to see the burner in action and let me know what you think of its shape, color and if you think I need to do anything to make it neutral. The top picture is of the problem burner after I got it going again. The last picture is of all the plumbing.

-
I certainly hope you're wrong. I have looked over a few things that are/could be problematic. First one is a problem, and that is that I have a small fuel leak in the line that goes to the problem burner. Second is that my mig tips are both completely flat and could have burred edges. Third is that I may have some crud in the burner from when I put the burner into the forge it scraped the interior wall so could have some brick pieces in it. I will be sorting this out later this evening and will get back to you all about what the issue was or if I figured it out at all.
-
Sounds simple enough. Thank you for your time in giving me these ideas to think about as I go through my trouble shooting process. I'll let you know how it goes. Thanks, Phil
-
Hello everyone, So I've completed my forge build and started my burners. One burner stays on with no issues but the other one has a flame back up into the mixing tube and sputters with small flames coming out of the air intakes. I am running 2 1/2in burners at 4.5in apart, my interior dimensions are 4.5Hx4Wx13.5L, if my math is correct I'm at 243cu. My burners are both dropped into the forge at roughly 3/16in. I've tried increasing and decreasing my fuel pressure from 5psi up to 10 and back down to 3psi. The sputter at 10psi is much faster at this point with less flame out the intakes. The one burner continues burning just fine. Any ideas on what is causing this? Some pictures below.


-
Awesome! Thanks Frosty!
-
So I have two 1/2in Frosty T burners that Frosty himself helped me with. I'm now trying to mount them in my forge and am wondering on placement measurements. About how far apart should I place them from each other? Also, how far into the forge should they go? The interior dimensions of my forge are: 6"x4"x12" Any guidance will be helpful.
-
Well, not exactly local. That's about 600miles away
-
Thanks Mikey. I hope there is somewhere close by.
-
Hello everyone, I built a forge, but used firebrick that goes into the fireplace rather than in a forge. I know now that these will be more of a problem as they absorb allot more heat and make for a colder forge. I'm located in Ukiah, California and am wondering if anyone knows of a supplier in my area that carries the correct bricks?
-
Nice collection.
-
Don't be jealous. Hahaha! :b
-
Right on, thanks so much for the quick response. What stories this anvil must have to tell! Thanks Rustyanchor
-
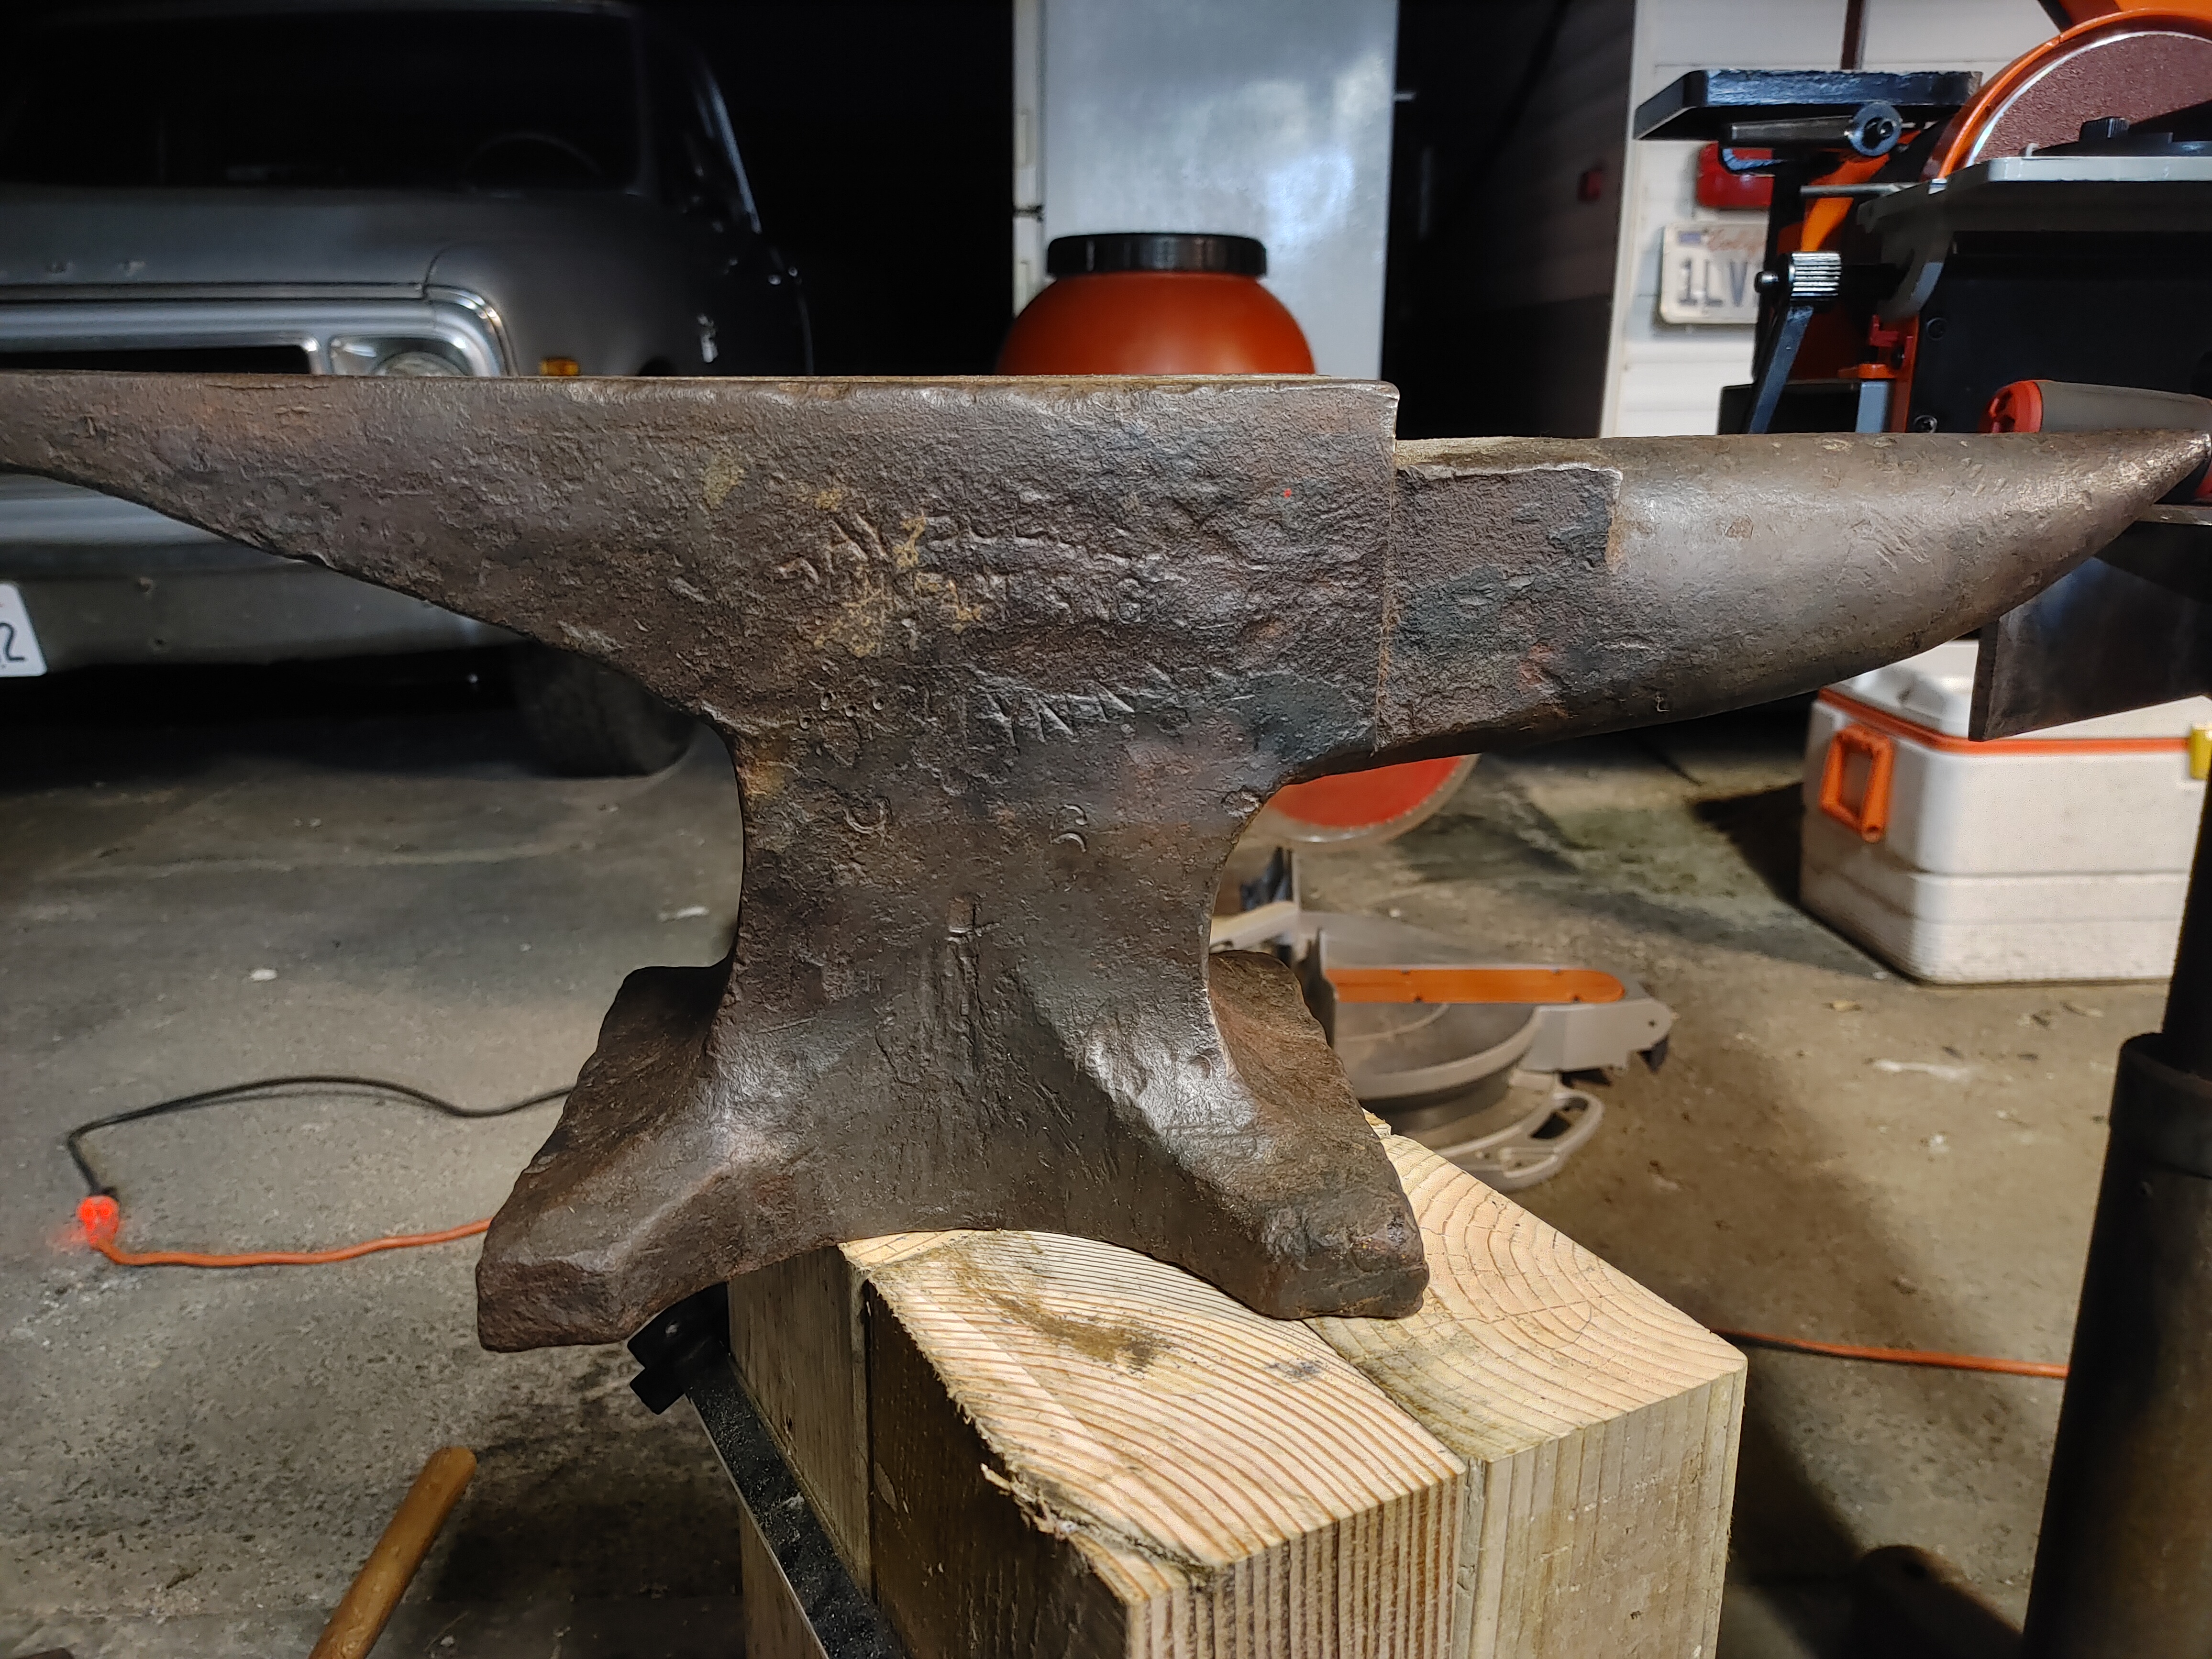
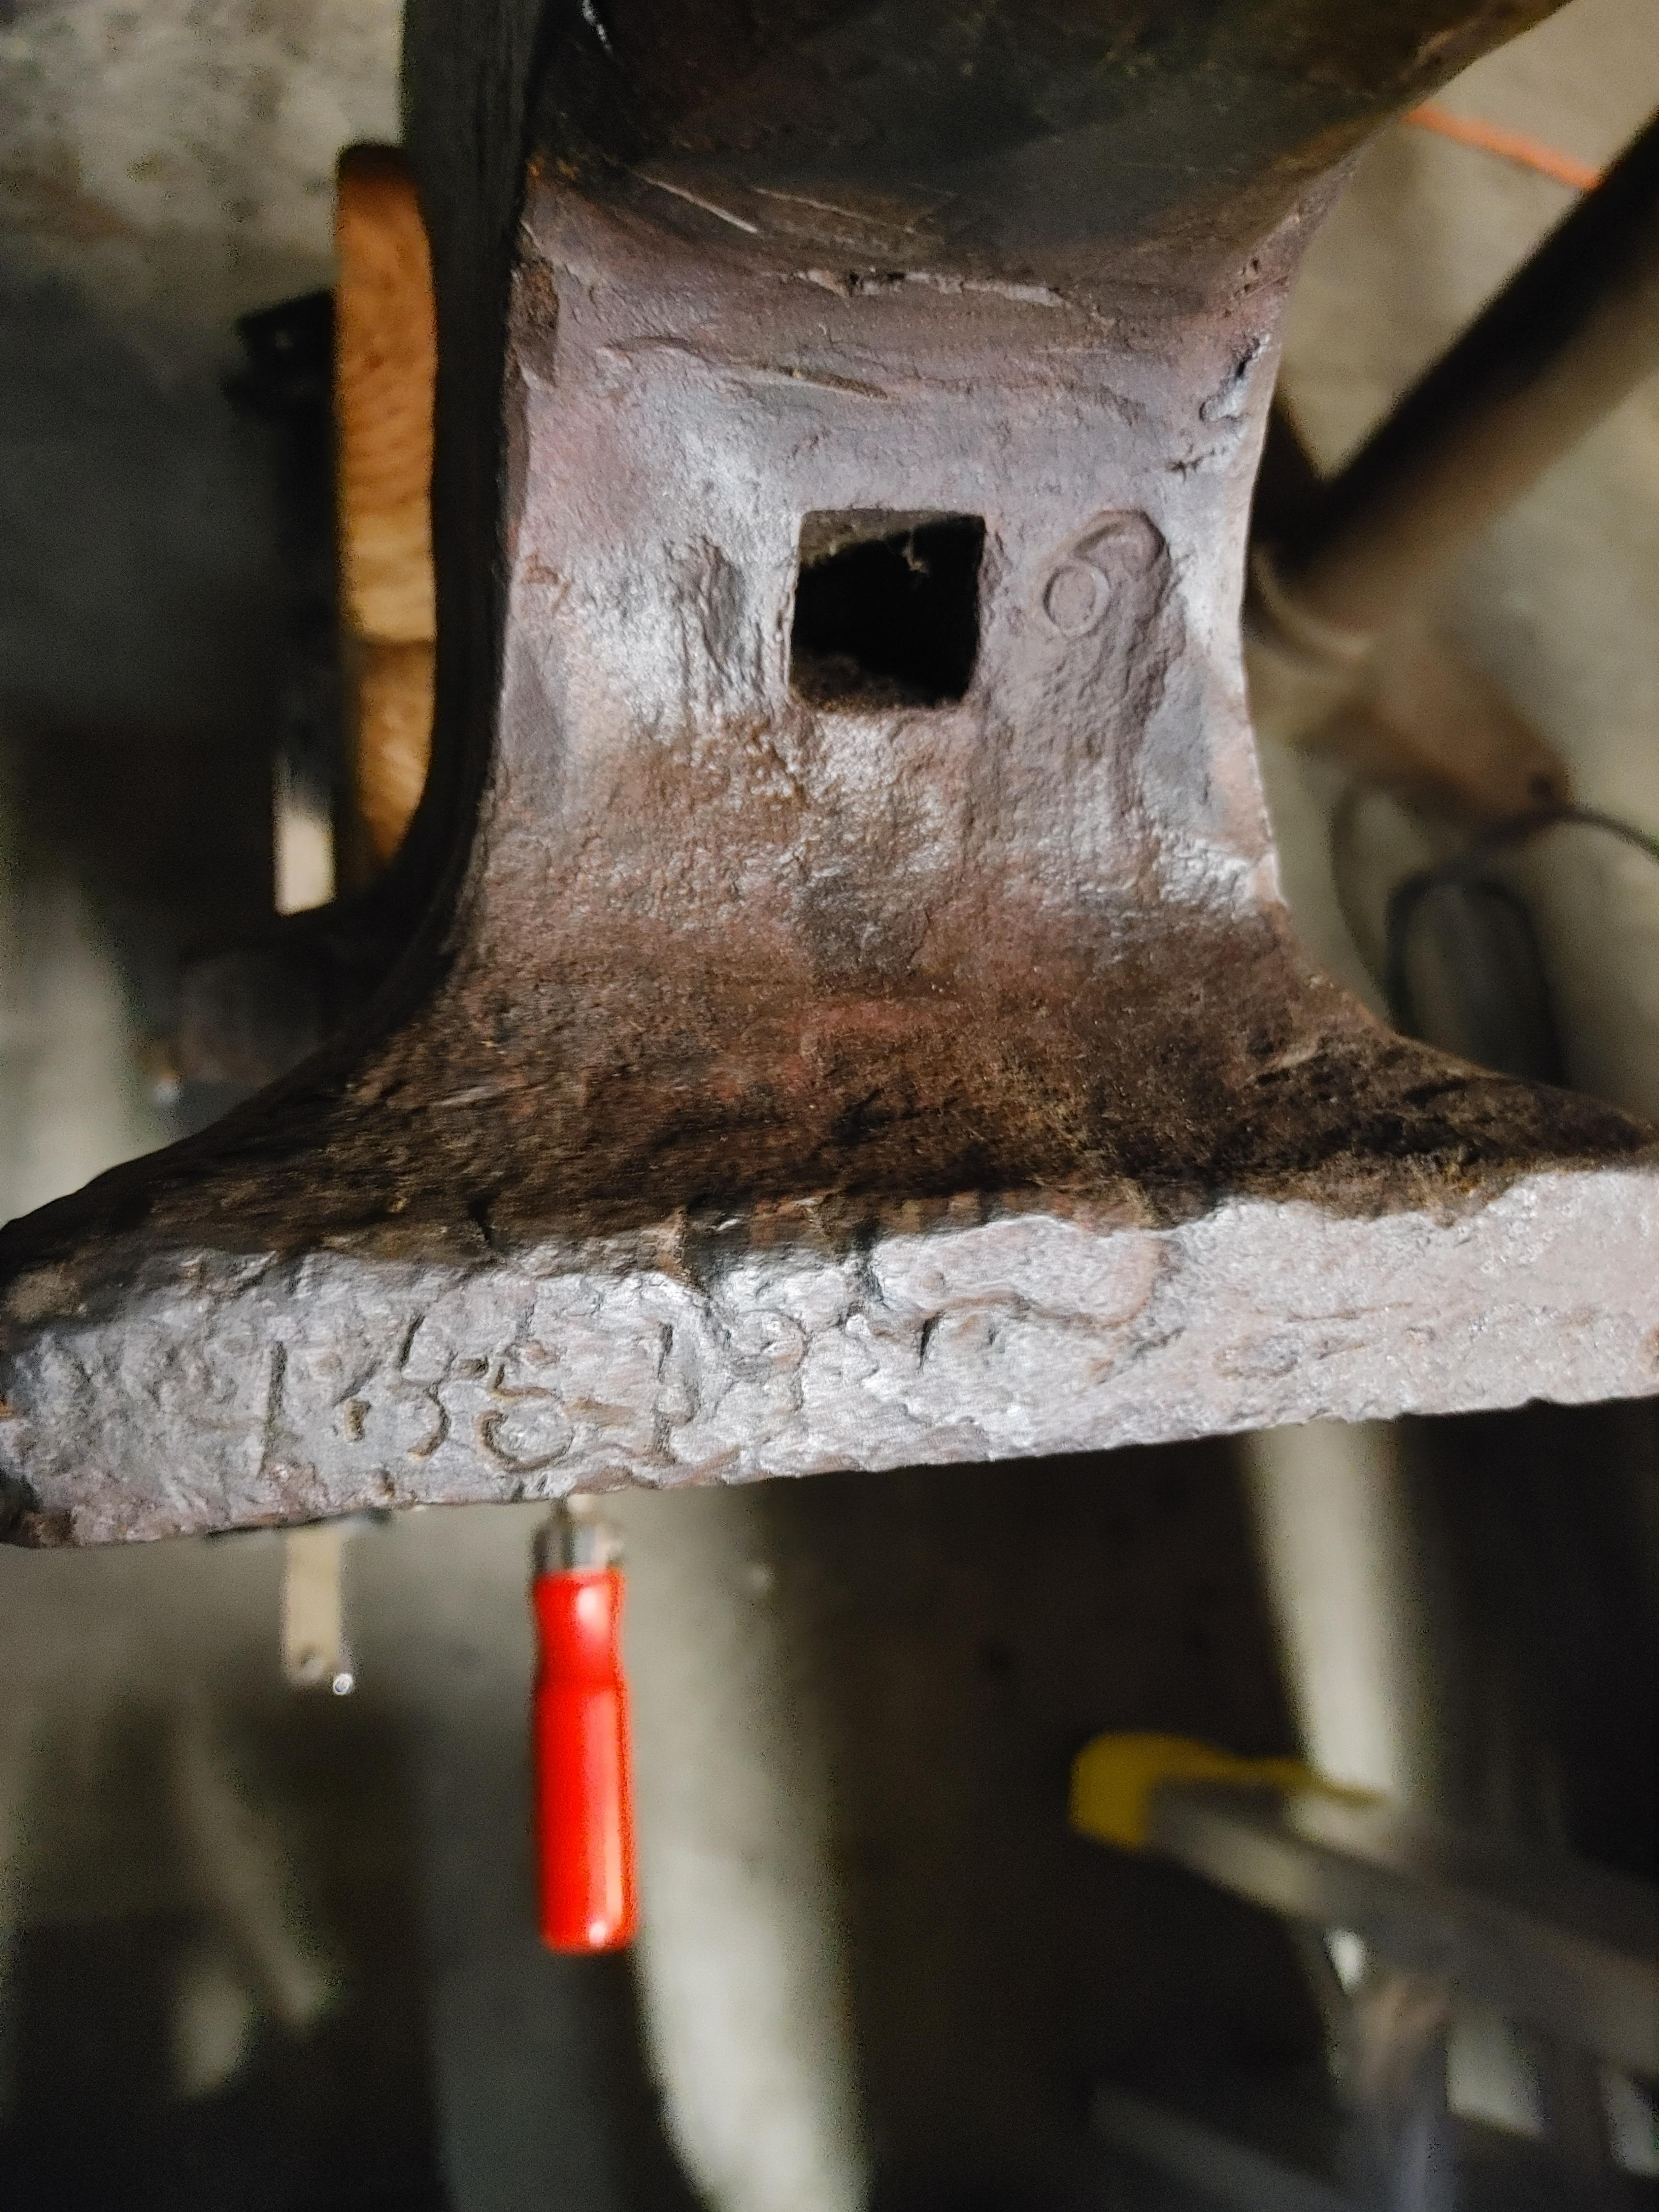
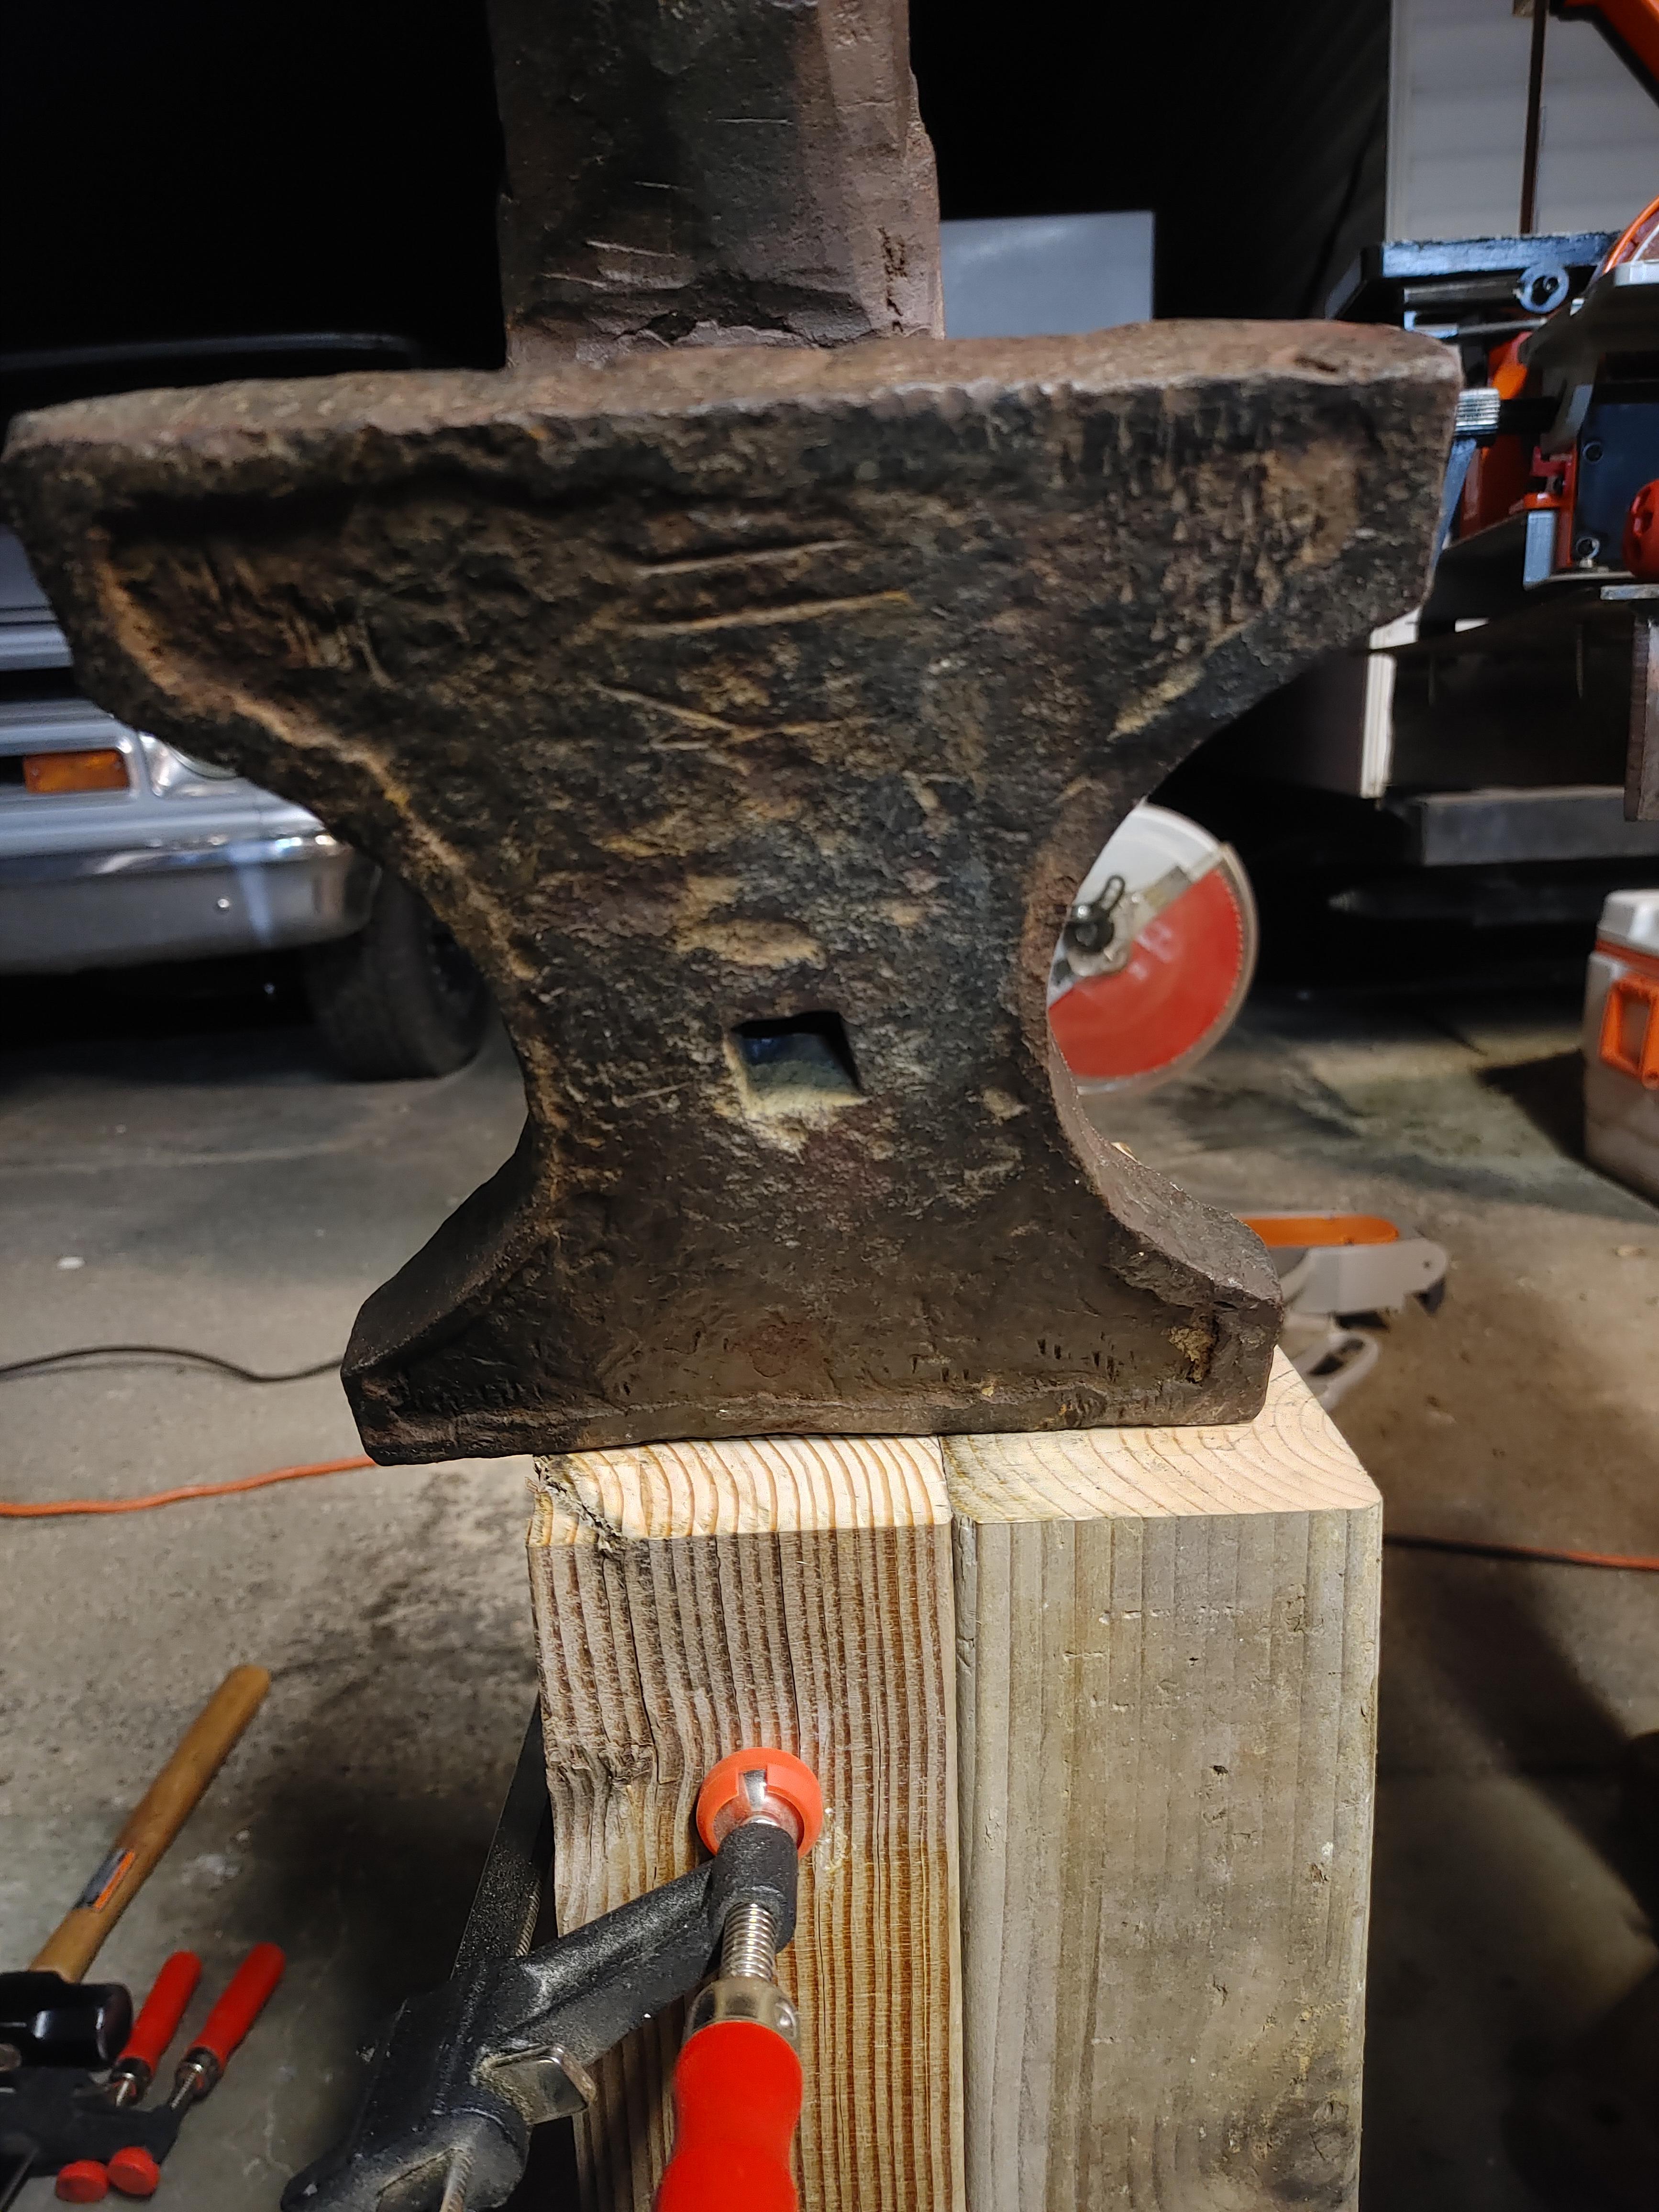
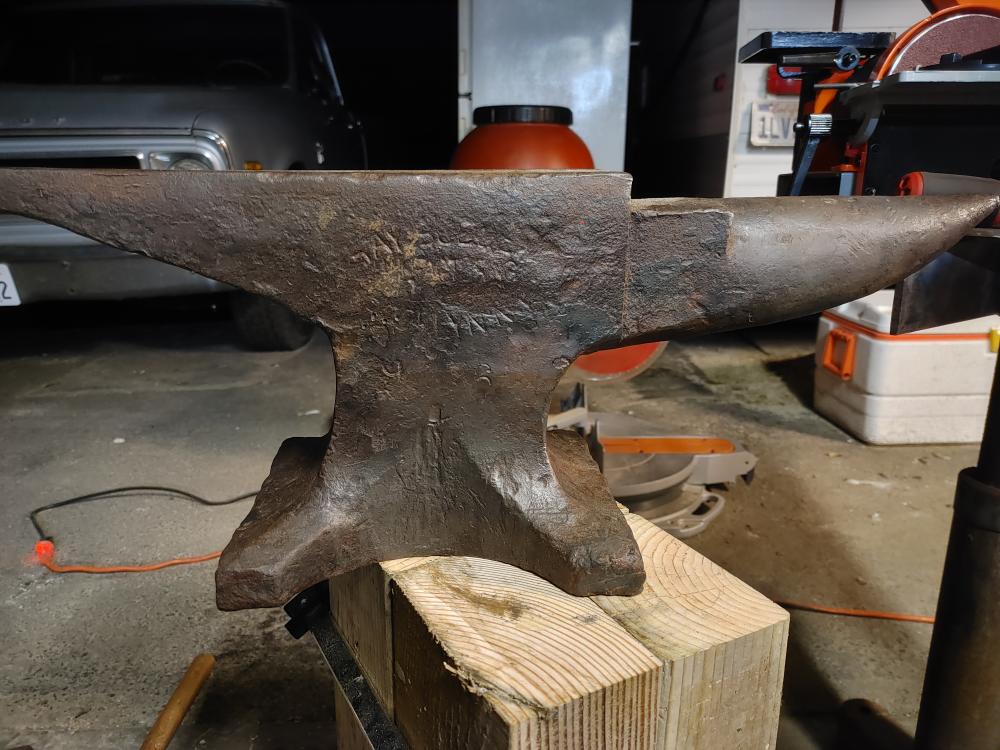
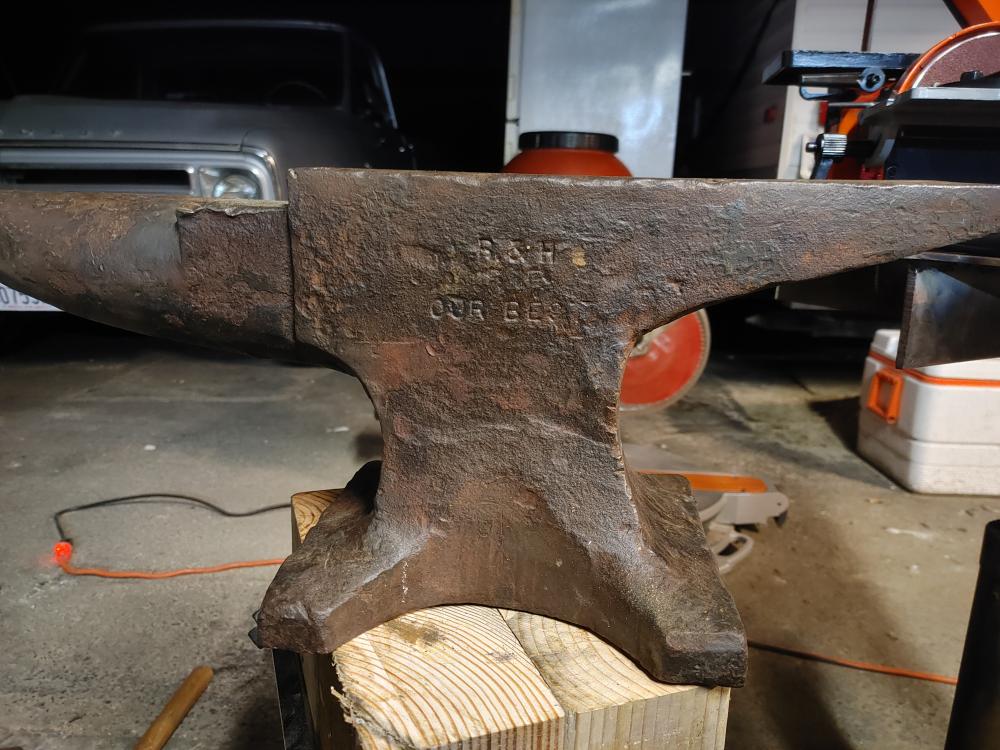
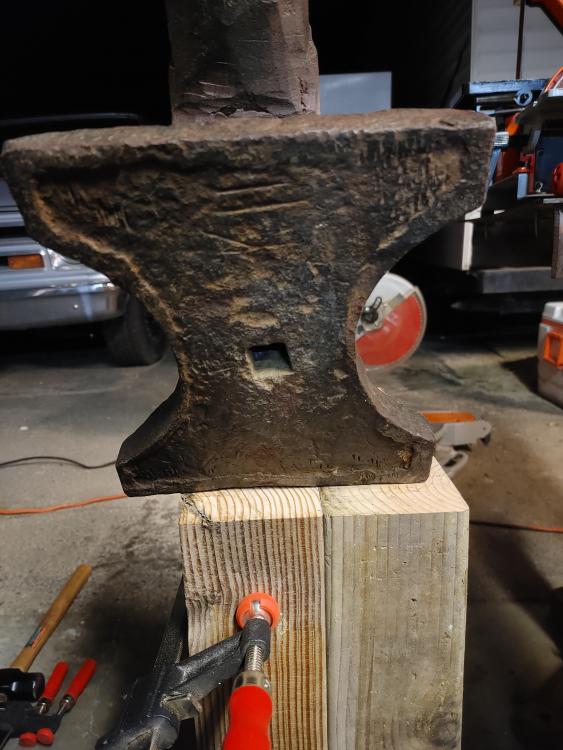
Hi everyone, I just bought a Hat Budden anvil and I've followed the info trail to lead me to believe it is a pre 1895 HB. It's a 96 pounder and has the Hay Budden company logo on one side with weight under it and on the other side has B&H OUR BEST on it. Below the horn next to the handling hole is either a 6 or upside down 9. It has 3 handling holes, one under horn, one under heel and one in center on the underside of the base. It looks like it could be a three piece anvil butt it's hard to tell. The numbers on the left foot face appear to be 43548 or 48543. Any help determining the year this beauty was born would be appreciated. Thanks

-
I'm getting really frustrated with this whole process of building my own forge. I've built this setup bit by bit over the last few months, but from what I've been told by so many on this forum is that my setup is not so good. I'm honestly to the point of throwing in the towel and buying a forge, however, I'm here to learn the craft as a whole and not just give up when it gets hard. I've put so much time into this setup already I don't want to give up on it yet. I am getting so many variable opinions of what I should or need to do and I don't know which direction to go with this forge. I have put so much time and energy into building a 1/2" dia. Frosty burner with Frosty's guidance, and a forge that doesn't seem to be usable. If anyone could tell me or direct me to the plans of how I can change what I've got to make it workable and efficient I am all ears.
-
Alright. Good to know. I'll now get my forge rebuilt correctly and then get to tuning the burner in the forge. Thank you sir
-
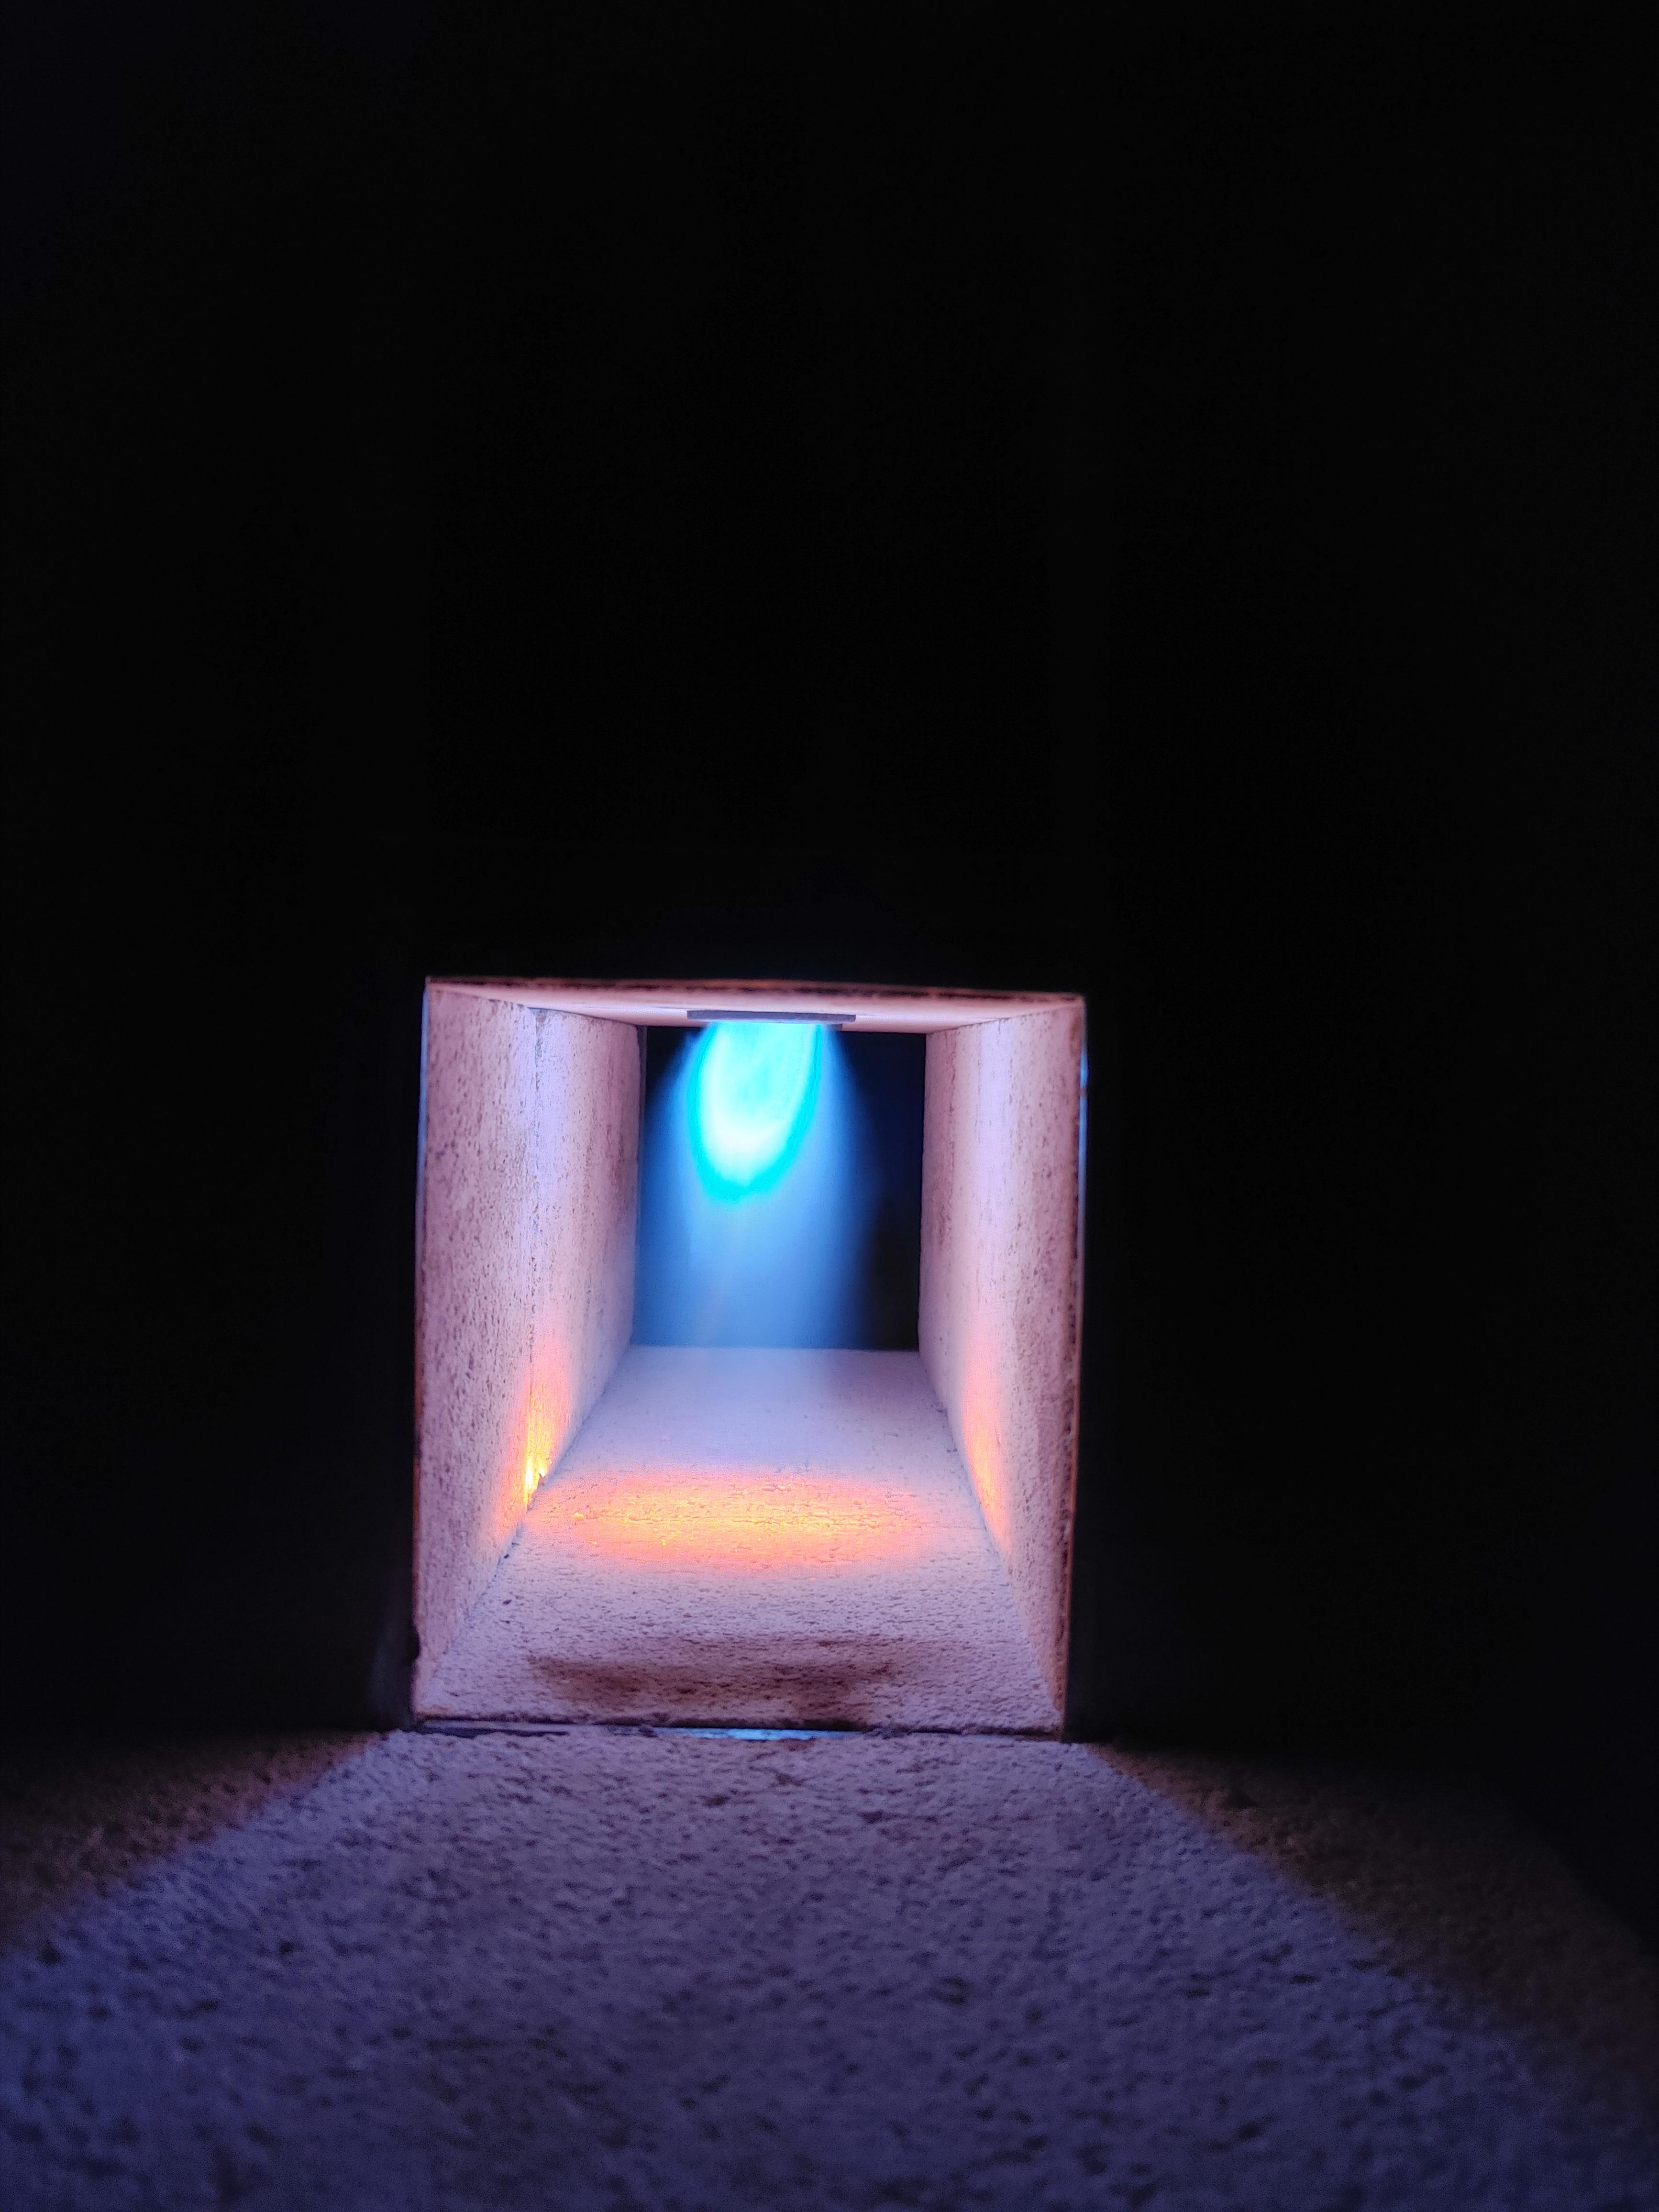
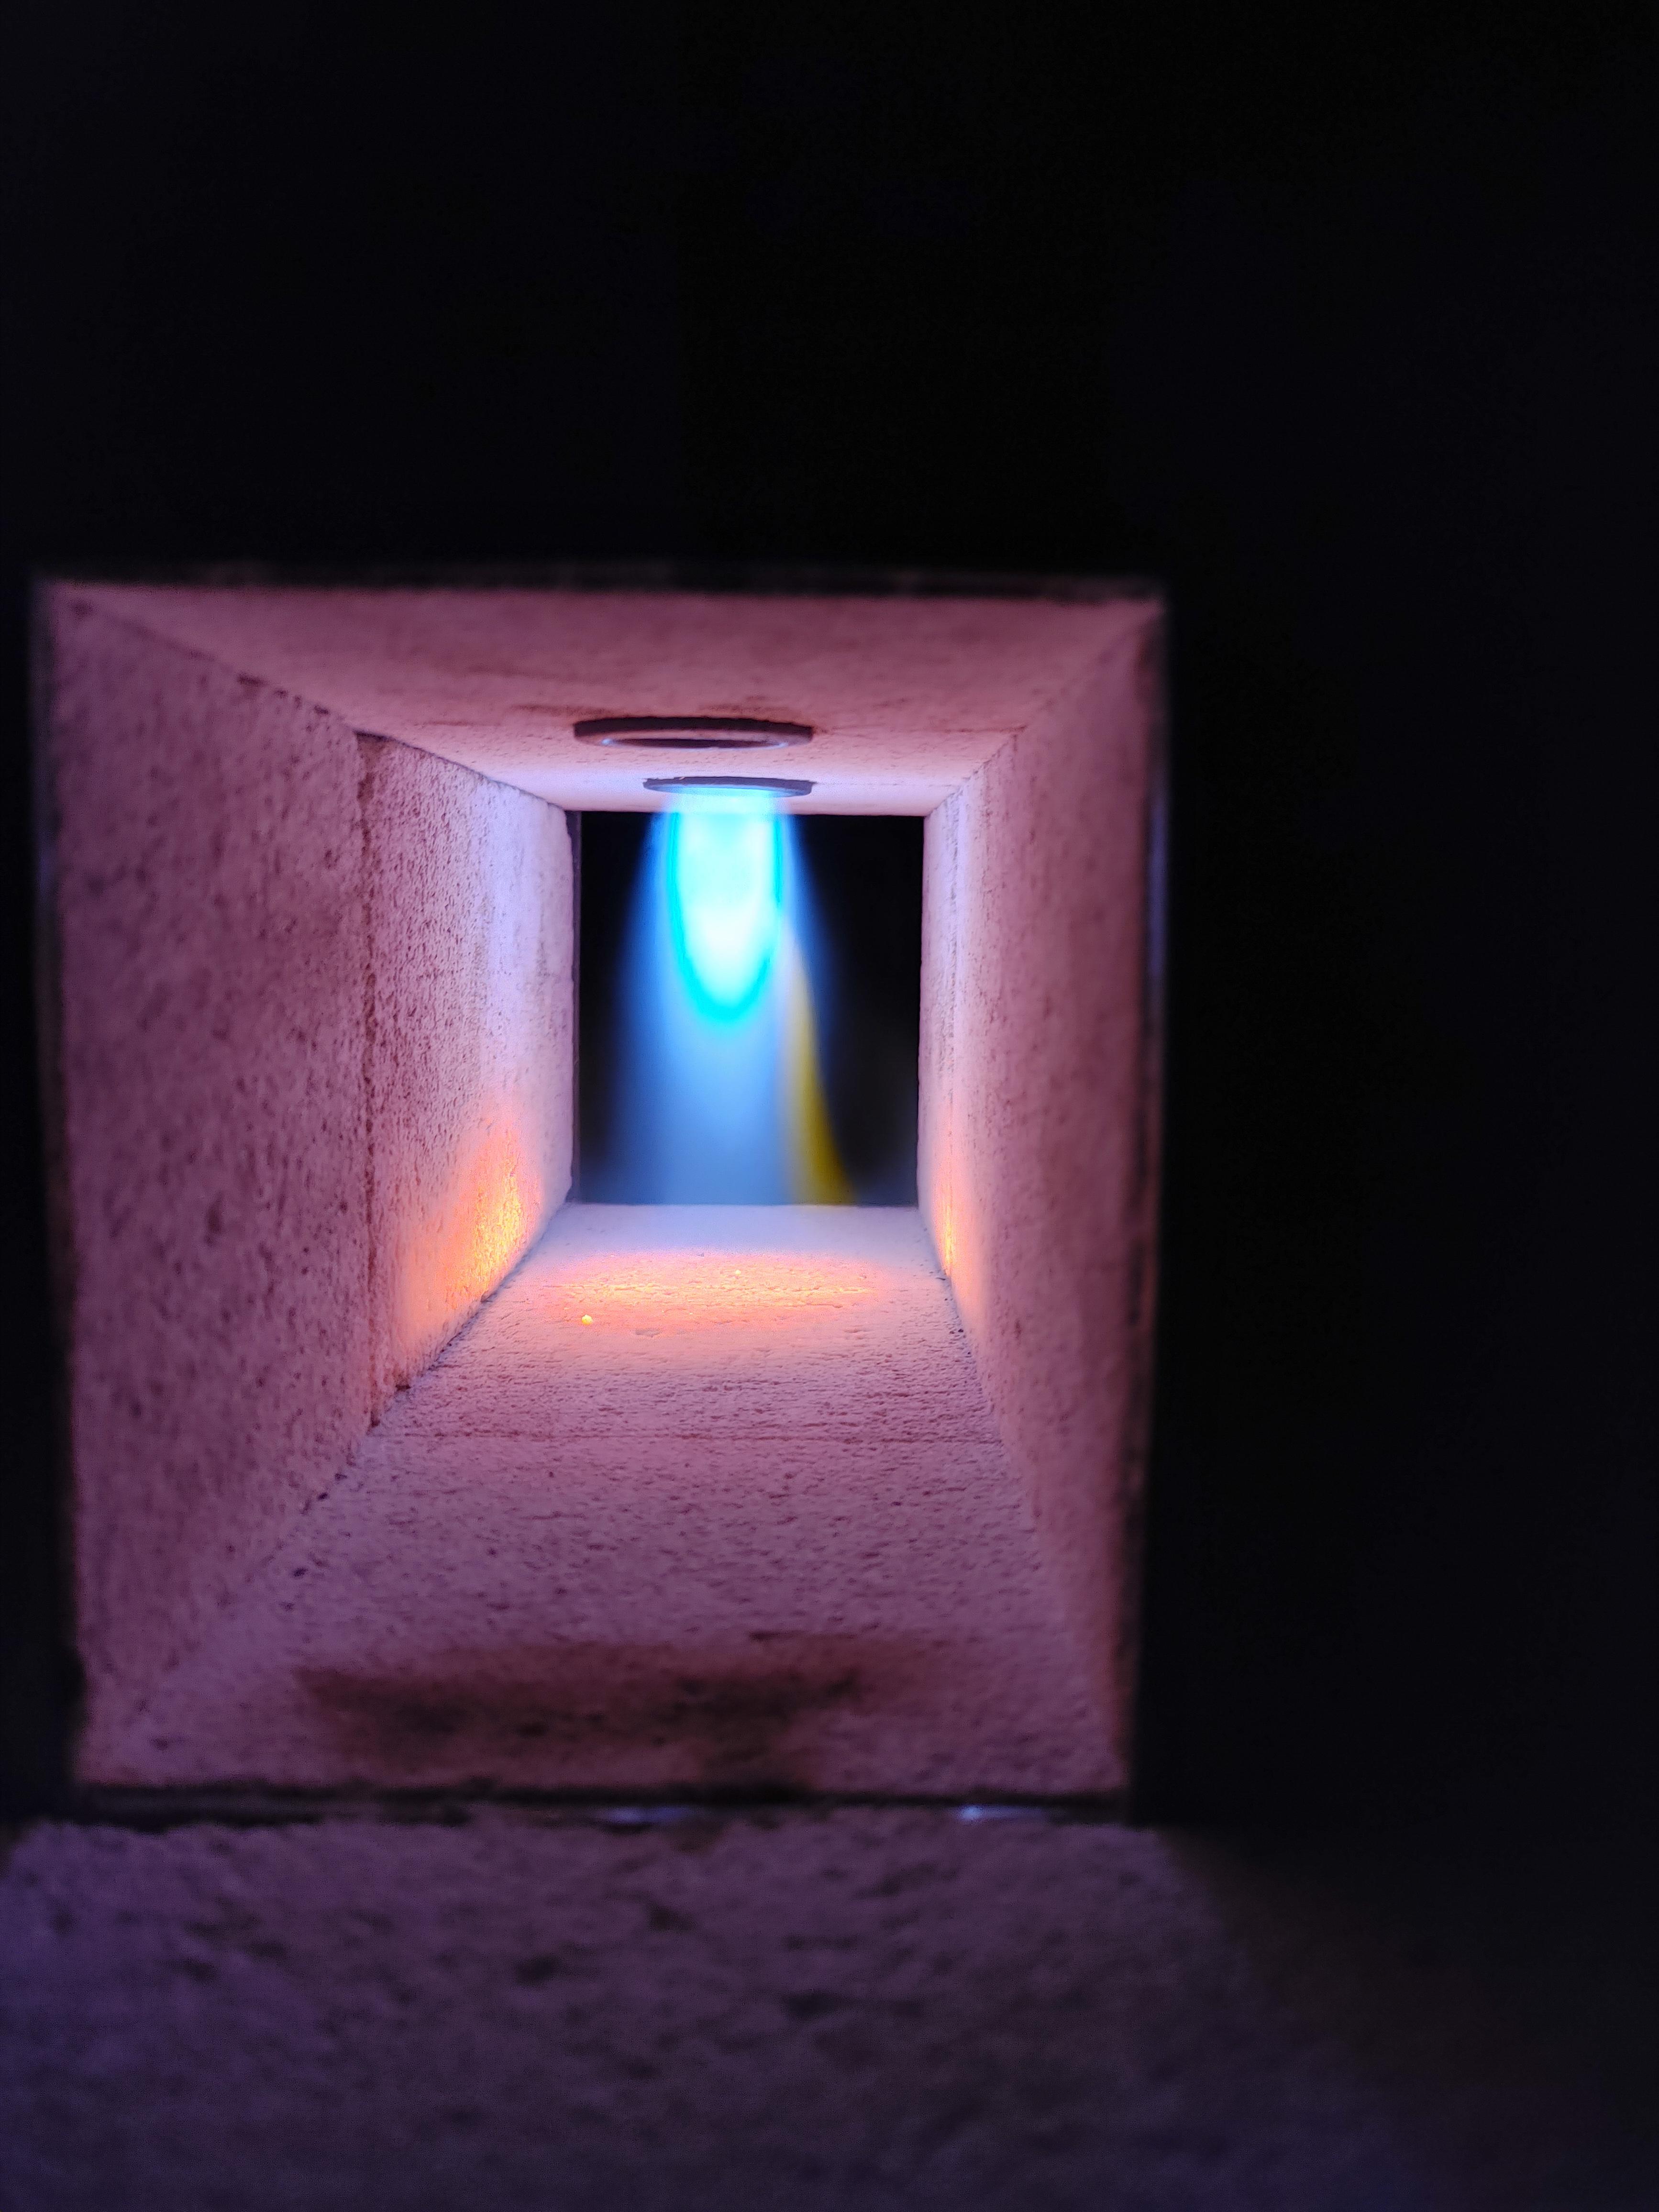
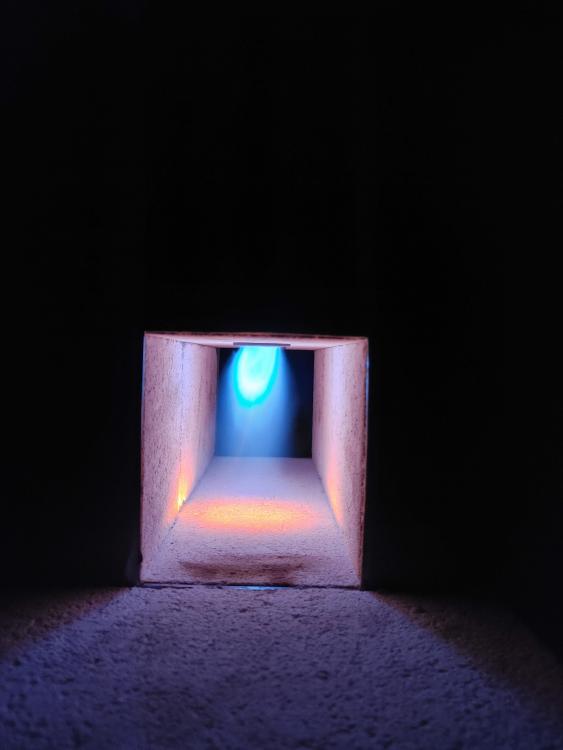
Okay, so here I am again! I've changed the length of mix tube, done a little fine tuning of the orifice, tapered the inside of the mix tube so that there is a smoother transition between all the parts down from the T. The mix here are some pictures of what I'm working with now. The flame shown is while running my propane at 5, 8, then 10psi. I feel like I'm close, but please tell me what y'all think.


-
So You're saying that I should smooth out all of the air intake threads as well as the area that leads to the reducer and mixing tube? I already beveled the edge of the reducer and mixing tube.