apexmateria
-
Posts
50 -
Joined
-
Last visited
Content Type
Profiles
Forums
Articles
Gallery
Downloads
Events
Everything posted by apexmateria
-

[urgent] lining up the burner in optimal position
apexmateria replied to apexmateria's topic in Gas Forges
Frosty, don't worry I'm not going to blow myself up or anything, at worst I'll waste some time and money on materials. I'm on this forum to get advice from experts, I get you guys know far more than me about forging and I should take your advice. I'm going to build a proper forge next, I'm just messing around right now with this cheap project to see what it's capable of on an extremely low budget. I appreciate your advice that plaster of paris doesn't work well and everything else you've helped me with. I ended up putting 1/2" starlite lining in the can then covered that with imperial furnace cement. It could heat up a small 1/4" steel bar to cherry red in a couple of minutes, but you guys are right, overall it has lots of problems and isn't a good enough setup for forge welding. It gives off some smoke and stinks which make it unusable for me. I wasn't able to run it long enough to see the max temp but could tell the insulation wasn't adequate (quite a bit of heat transfer out to the can). I noticed there was some kind of condensation building inside the t-fitting and on top of the mig tip. Any ideas what causes that? Also sometimes my t-burner makes a repeated whooping noise that eventually goes away, is that flashback from the wind pushing the flame back towards the air intake? For the new forge I'm going to buy the following materials: 1" Thick 2600°F REFRACTORY WOOL Forge Lining Mizzou Castable Plus Rigidizer Spray IRC 100HT Ceramic Coating My plan is to add 2 layers of 1" of refractory wool, rigidize it, then cover it in Mizzou castable plus. Finally I'll add a thin ceramic coating. Am I missing anything? Any advice, as always, is appreciated. Cheers. -
[urgent] lining up the burner in optimal position
apexmateria replied to apexmateria's topic in Gas Forges
Sure I've looked at plenty of pictures. Most of you guys are building forges out of propane tanks or steel cylinders though. I'm just throwing together something cheap and xxxxxx right now to learn the basics. It's a coffee can forge. I just want it to be functional enough to forge weld small billets until it eventually falls apart, then I'll build something better. I won't be working on large billets. There are coffee can forges with horizontal or vertical burners, some have an air entry hole opposite the exhaust. I'm seeing lots of variations. Some people put the burner at an angle to try to create a vortex etc. Where's the ideal placement? Refractory isn't added yet but it will be plaster of paris / sand mix or starlite. I know it won't last long I'm ok with that. -
Is this the ideal burner input position? Do I want the flame hitting directly onto the billet right in the center of the forge? Trying to finish up my forge ASAP and don't want to bungle it all up by drilling into the incorrect spot. Thanks in advance.
-
I'm building a forge to create some Damascus billets for knife making. I have 2 mini BBQs, I'm not sure if either is suitable to modify into a forge. My burner is the usual T burner with a 0-30 psi regulator. I could build a second one if necessary. I'd be using the forge as a hobby, not for any kind of professional work. If either of them are ok how many cubic inches should the heating area be? how large should the exhaust be?
-
Primitive Clay Based Refractory Mix
apexmateria replied to apexmateria's topic in Insulation and Refractories
Very good points, I didn't consider fuel costs, insulative performance, or how well it will hold up to a flame. I think I'll buy some bricks / refractory mix and make my own and do a comparison. I'm just really curious about the performance of the primitive mix. -
I'd like to use a mix for my forge with clay as the main ingredient. Anyone have experience making a mix like this? Instead of soil I was thinking of using dry, hollow, straw-like material chopped into small pieces. That would create lots of air pockets in the clay.
-
^ Very interesting to know about old design choices. I already had a bit of oil leak out. I barely put any in lol. Good news is it spins freely and is much smoother than before. Here are some pics, I'm sure the paint job won't last long I might repaint the "heat pipe" that attaches to the forge eventually. Good enough for now! Took 2 1/2 days of work to finish, I spent half that cleaning the garage and banging my head of stuff though.
-
thanks for the tips. I should have mentioned in the original post I have a 2-3lbs hammer head to work with as well as the 8lbs. I won't be forging for more than a few hours per day. most of my time will probably be grinding and shaping bevels of blades, handles etc. really cool JHCC great ideas.
-
I'm considering using it as a hand hammer but I'm not sure if it's suitable (mostly due to weight). I'll be working on Damascus steel (forge welding). Is it a good idea to grind the head into this sort of shape? I think I'd like to bring it down to 5-6 lbs.
-
Hmm. There's a small screw hole around the center of the case, I could feed oil through that using an eyedropper. I think I'll feed in a small amount for now then keep an eye out for any leaks and slowly add more each use. Dirt floored shop sounds awesome, right now I'm working in a garage and the concrete got all stained for the rust lol.
-
I'm wondering if it has any uses for blacksmithing.
-
anyone know how much oil to put in the tray? I assume I fill it the way it's positioned in this picture. so how do I calculate how much volume of oil will be needed to touch the lower gear. also is it worth spray painting the gears? I just have cheap rust paint. I worry about it coming off then mixing with the oil.
-
Should I hit it with paint or leave it?
-
That's why I love this forum, you guys save me from making mistakes. I'll just finish cleaning up the exterior and put it back together. It still works, I just really wanted to remove a lot of the rust and grime. Unfortunately I'm up in Canada so I can't take you up on that, appreciate the offer though. Cheers!
-
Need Advice Regarding Knife Design
apexmateria replied to apexmateria's topic in The Business Side of Blacksmithing
Sorry didn't see the sticky, I'll be sure to look around first next time. Cheers -
Show me your blacksmith pets
apexmateria replied to Glenn's topic in Blacksmithing, General Discussion
she's a 9 year old female american akita -
I need to remove the handle and the fan blade but I'm not sure how. Also anyone know what kind of grease to use around the gears?
-
I'm designing a knife and am drawing inspiration from a someone elses design. It's a very unique blade. I need industry advice about this... is it generally seen as ok to use elements you like from other knives as long as you add your own unique spin? As long as all elements are changed to some degree its cool right?
-
Need Help Identifying This Tool
apexmateria replied to apexmateria's topic in Tools, ID, and pictorial reference
Good advice, thanks JHCC. I'll do that. Maybe you guys can help me ID these hoof nippers too: -
Need Help Identifying This Tool
apexmateria replied to apexmateria's topic in Tools, ID, and pictorial reference
Thanks guys, I was really curious what it was. I don't think I'll have any use for it, is there something more useful I can re-forge it into? -
-
I made a quick mockup in photoshop, lmk what you guys think. The copper pipe would be at least 3" outside the forge.
-
Ok that's great to know, thanks for your help, much appreciated!
-
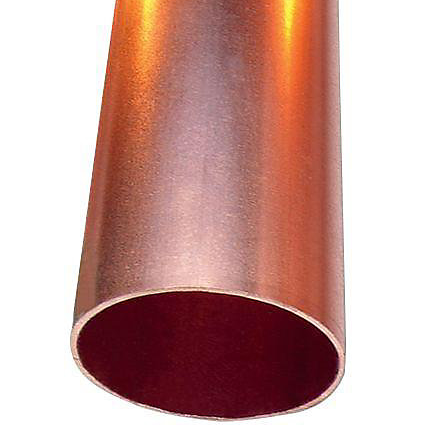
How would this work as the end of the burner (instead of a steel nipple)? 3/4 in. x 6 ft. Copper Type L Hard Temper Straight Pipe Will the copper not bend under the heat of the forge? How does copper do with extreme heating and cooling? No cracks or distortions?