

Bearded Welder
-
Posts
31 -
Joined
-
Last visited
Content Type
Profiles
Forums
Articles
Gallery
Downloads
Events
Posts posted by Bearded Welder
-
-
Thomas, is that 11" after kaowool or before so more like 11" minus 4" for either side of kaowool? Just trying to get a picture in my head..
Like I said, I've made it too big, but for the amount of work I put into it I would like to see it finished, I thought I might want to forge some big stuff now and again, I'm thinking of putting in a thicker floor of kaowool to bring the shape to more of a D shape, then if I want to in the future I can take out the temporary "thick floor" change the burner position since they are adjustable and forge something larger, then but the thick floor back in, worst comes to worst I'll build a smaller tube shape for knife making and keep this behemoth for large projects as most people here say they build multiple forges for differant tasks..
That sounds interesting but to be honest I wouldn't know where to begin, I know I'm getting a fairly large propane tank installed outside the building per the landlords request (we share the shop) I think it's a 400lb tank and he said it made more sense if we are both using it, it will be cheaper than filling up small tanks my self.
I'm still learning little things about the trade, I went for hot and effective and large and never thought of the why behind it all.
I'm going to try and make this forge work on a smaller scale with added kaowool just to decrease volume, if worst comes to worst I can cut it in half and make it a true D forge and that will cut the volume in half if not more..
Despite what my Wife thinks I'm trying to do this on a buget haha! Total amount I've spent so far for 2 burners and the forge with kaowool and everything... About 400 bucks.. I thought that was decent? Or am I way off the mark? Keep in mind the stainless is free or I would have taken a freon tank or something like that..
Thanks for the input
Cheers!
The Bearded Welder
-
I try Frosty, I like to soak in as much as possible. That's good to know, I'll stick with my current design then!
OK well to be a 100% honest I built the forge before the burner so in essence I made the forge to large and then the burner to match, I hope that with the variable baffle wall I will be able to bring the size down to a more managable size for smaller stuff, I'm hoping around 600 cu/in, maybe I should have listened to my gut and made the secondary floor even higher up.. I can always put 4 inches of kaowool in it to bring the volume down even further? Not necessarily for the insulating factor as you have stated here and in other posts that past 2 inches there isn't much point.. My goal was to do exactly what everyone here advises against and build an all in one forge.. Shame on me for not listening... So once it's finished I will see how large of a hole I dug for my self.. Im looking at ways to be able to temperarily make the volume even smaller, by possibly sliding in insertes of refactory to fill the volume up.. But we'll see how those experiments go..
I did realise about the whole "can only work so much metal at one time" thing, so I'm hoping the baffle wall with a small hole will allow me to heat smaller sections of what I'm working on and then if I'm doing larger things or heat treating I can take the wall out/push it all the way to the back.. My main focus will be knives, but who knows, anchors sound fun! As well as ornitmental iron work!
I will post the build after it is finished and hopefully show the recuperative aspect working well. (fingers and eyes crossed)
I also have something else in the works to induce swirl into the top of my burner intakes via a cyclone forced air type of rig... Running off a little battery pack welding belt for clean air into the welding helmet, highly mobile. I will post pictures of that once I work out the kinks..
Cheers!
The Bearded Welder
-
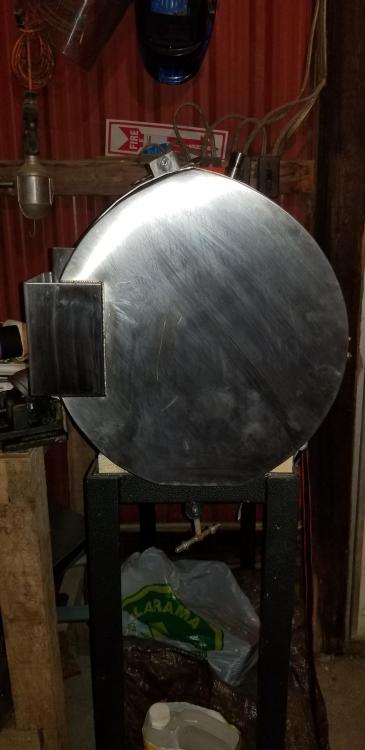
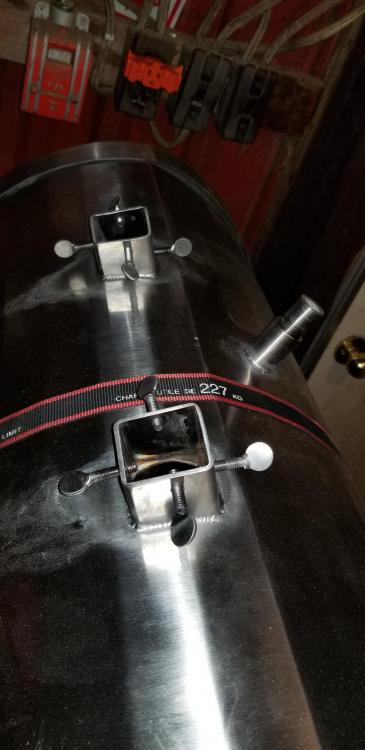
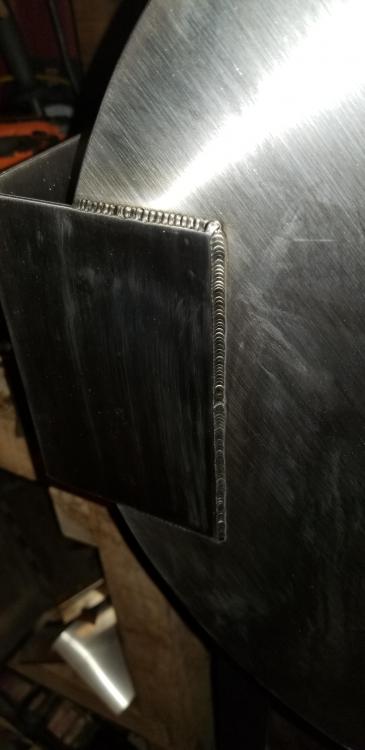
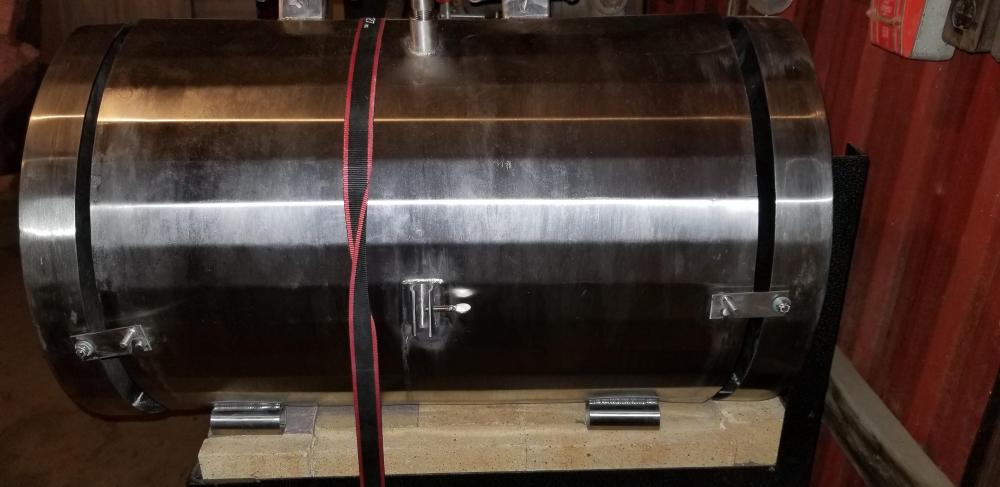
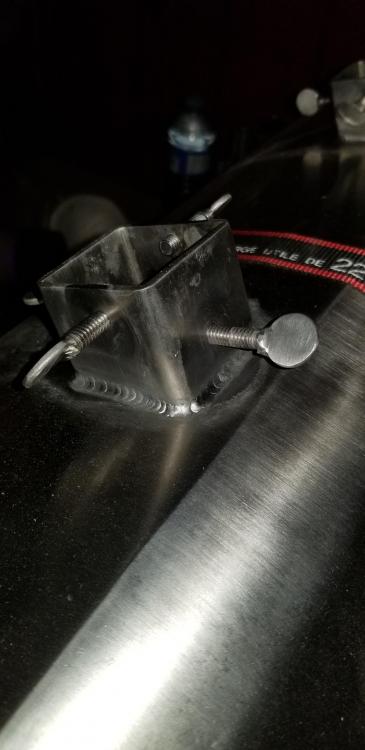
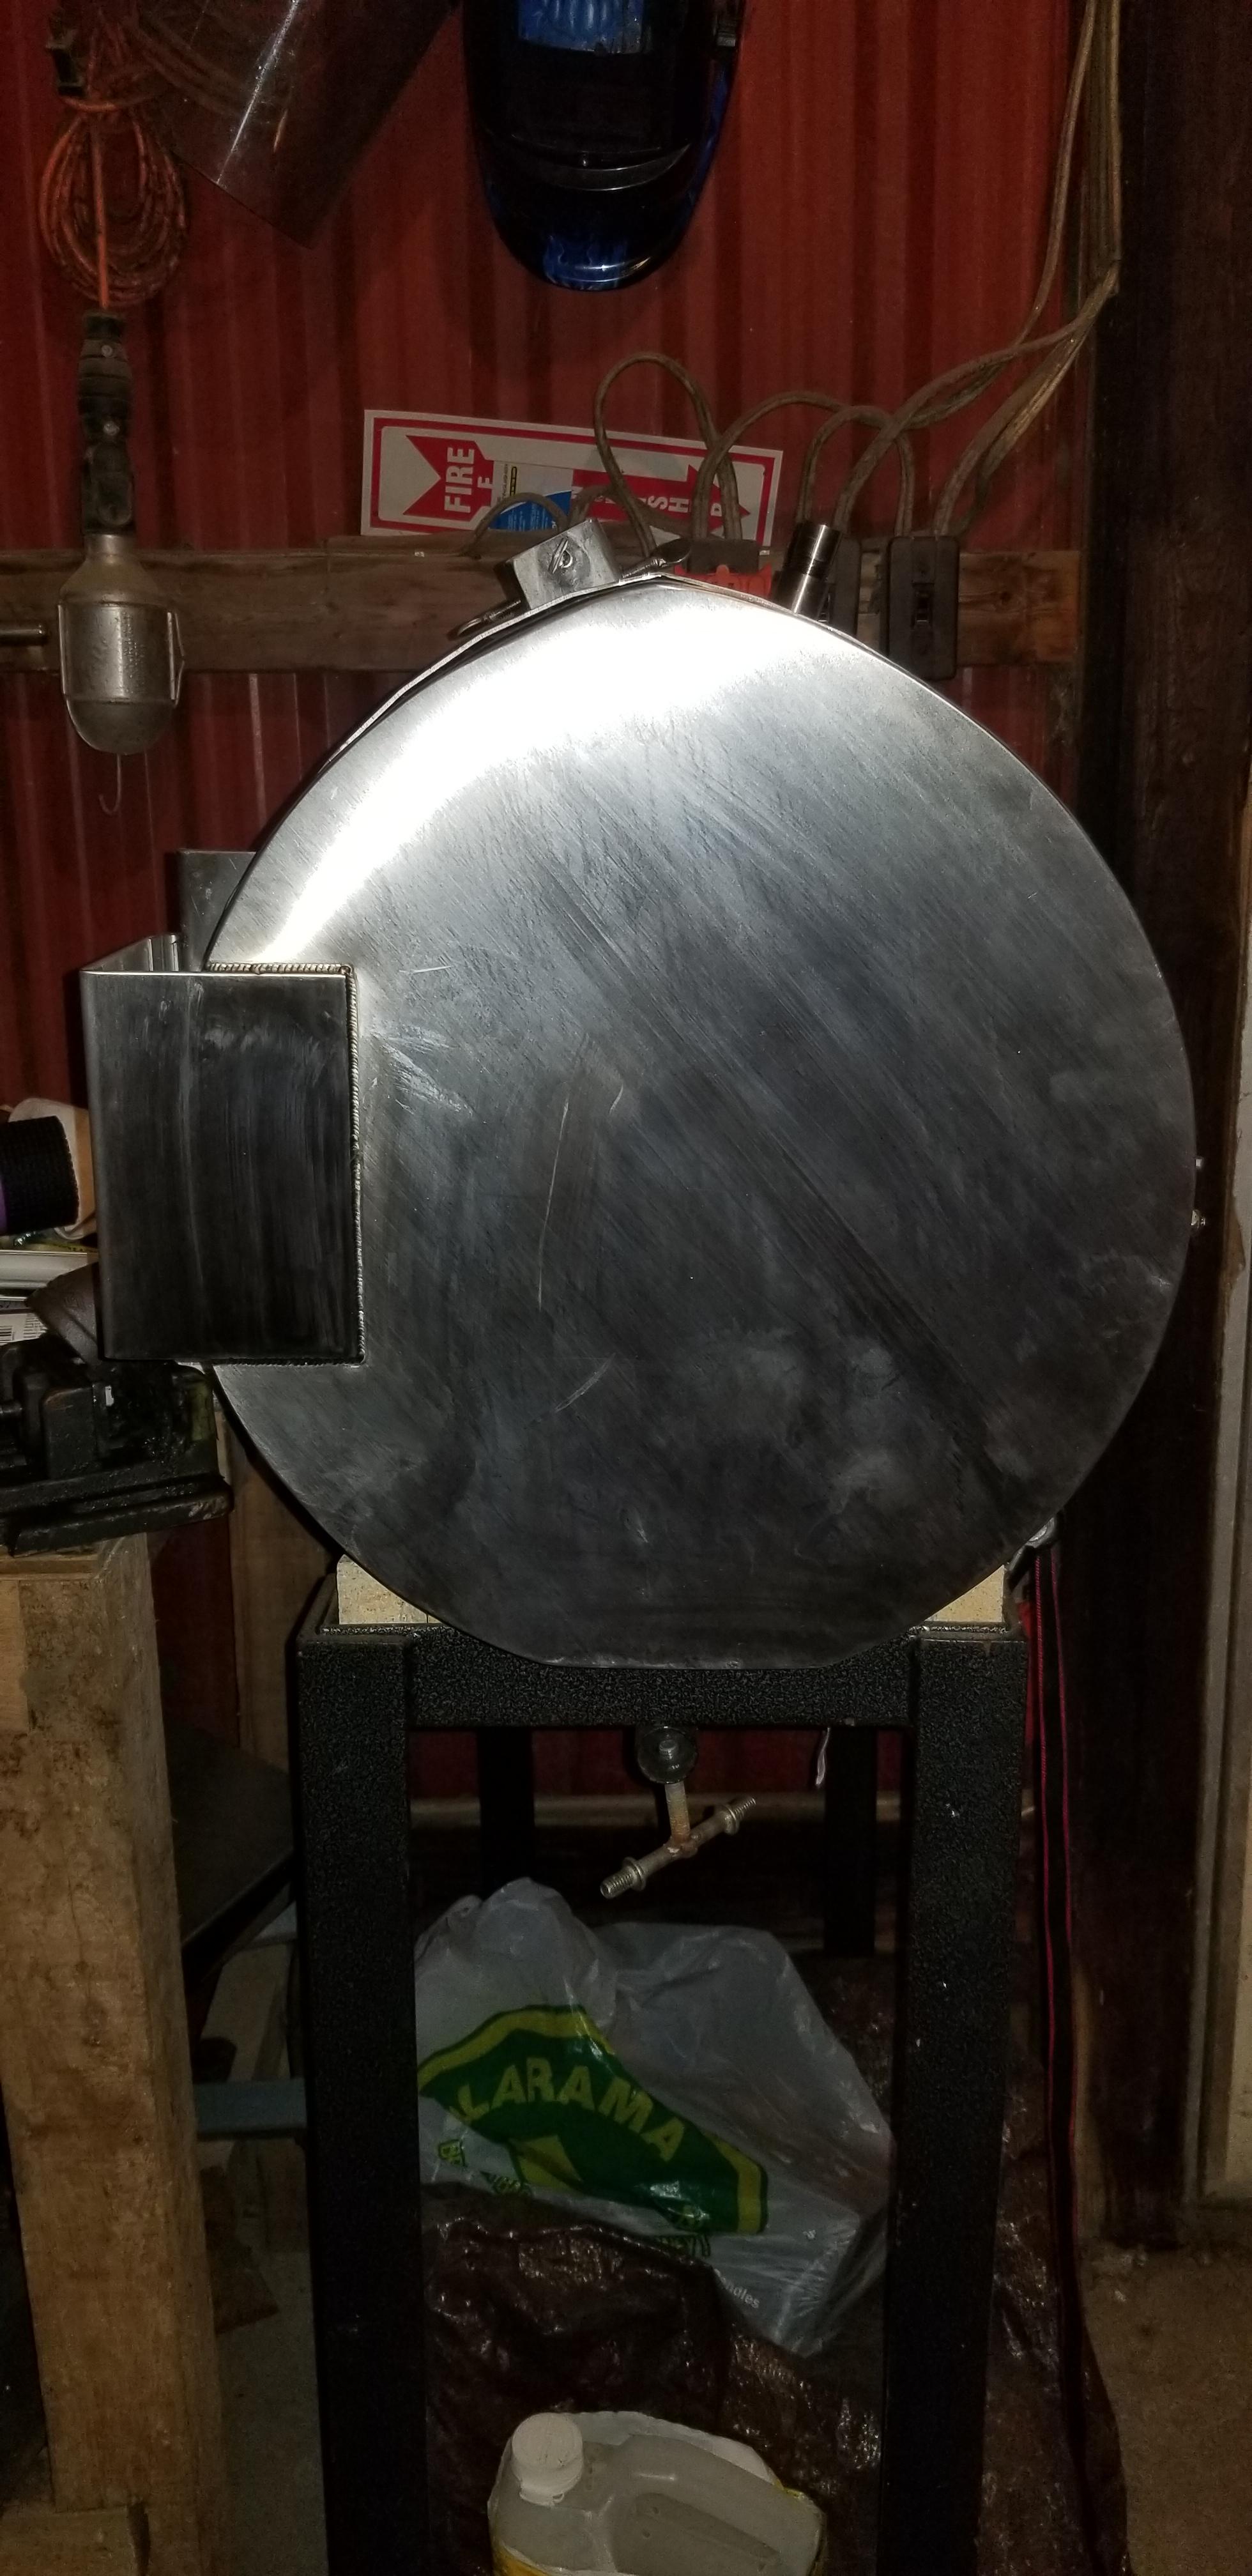
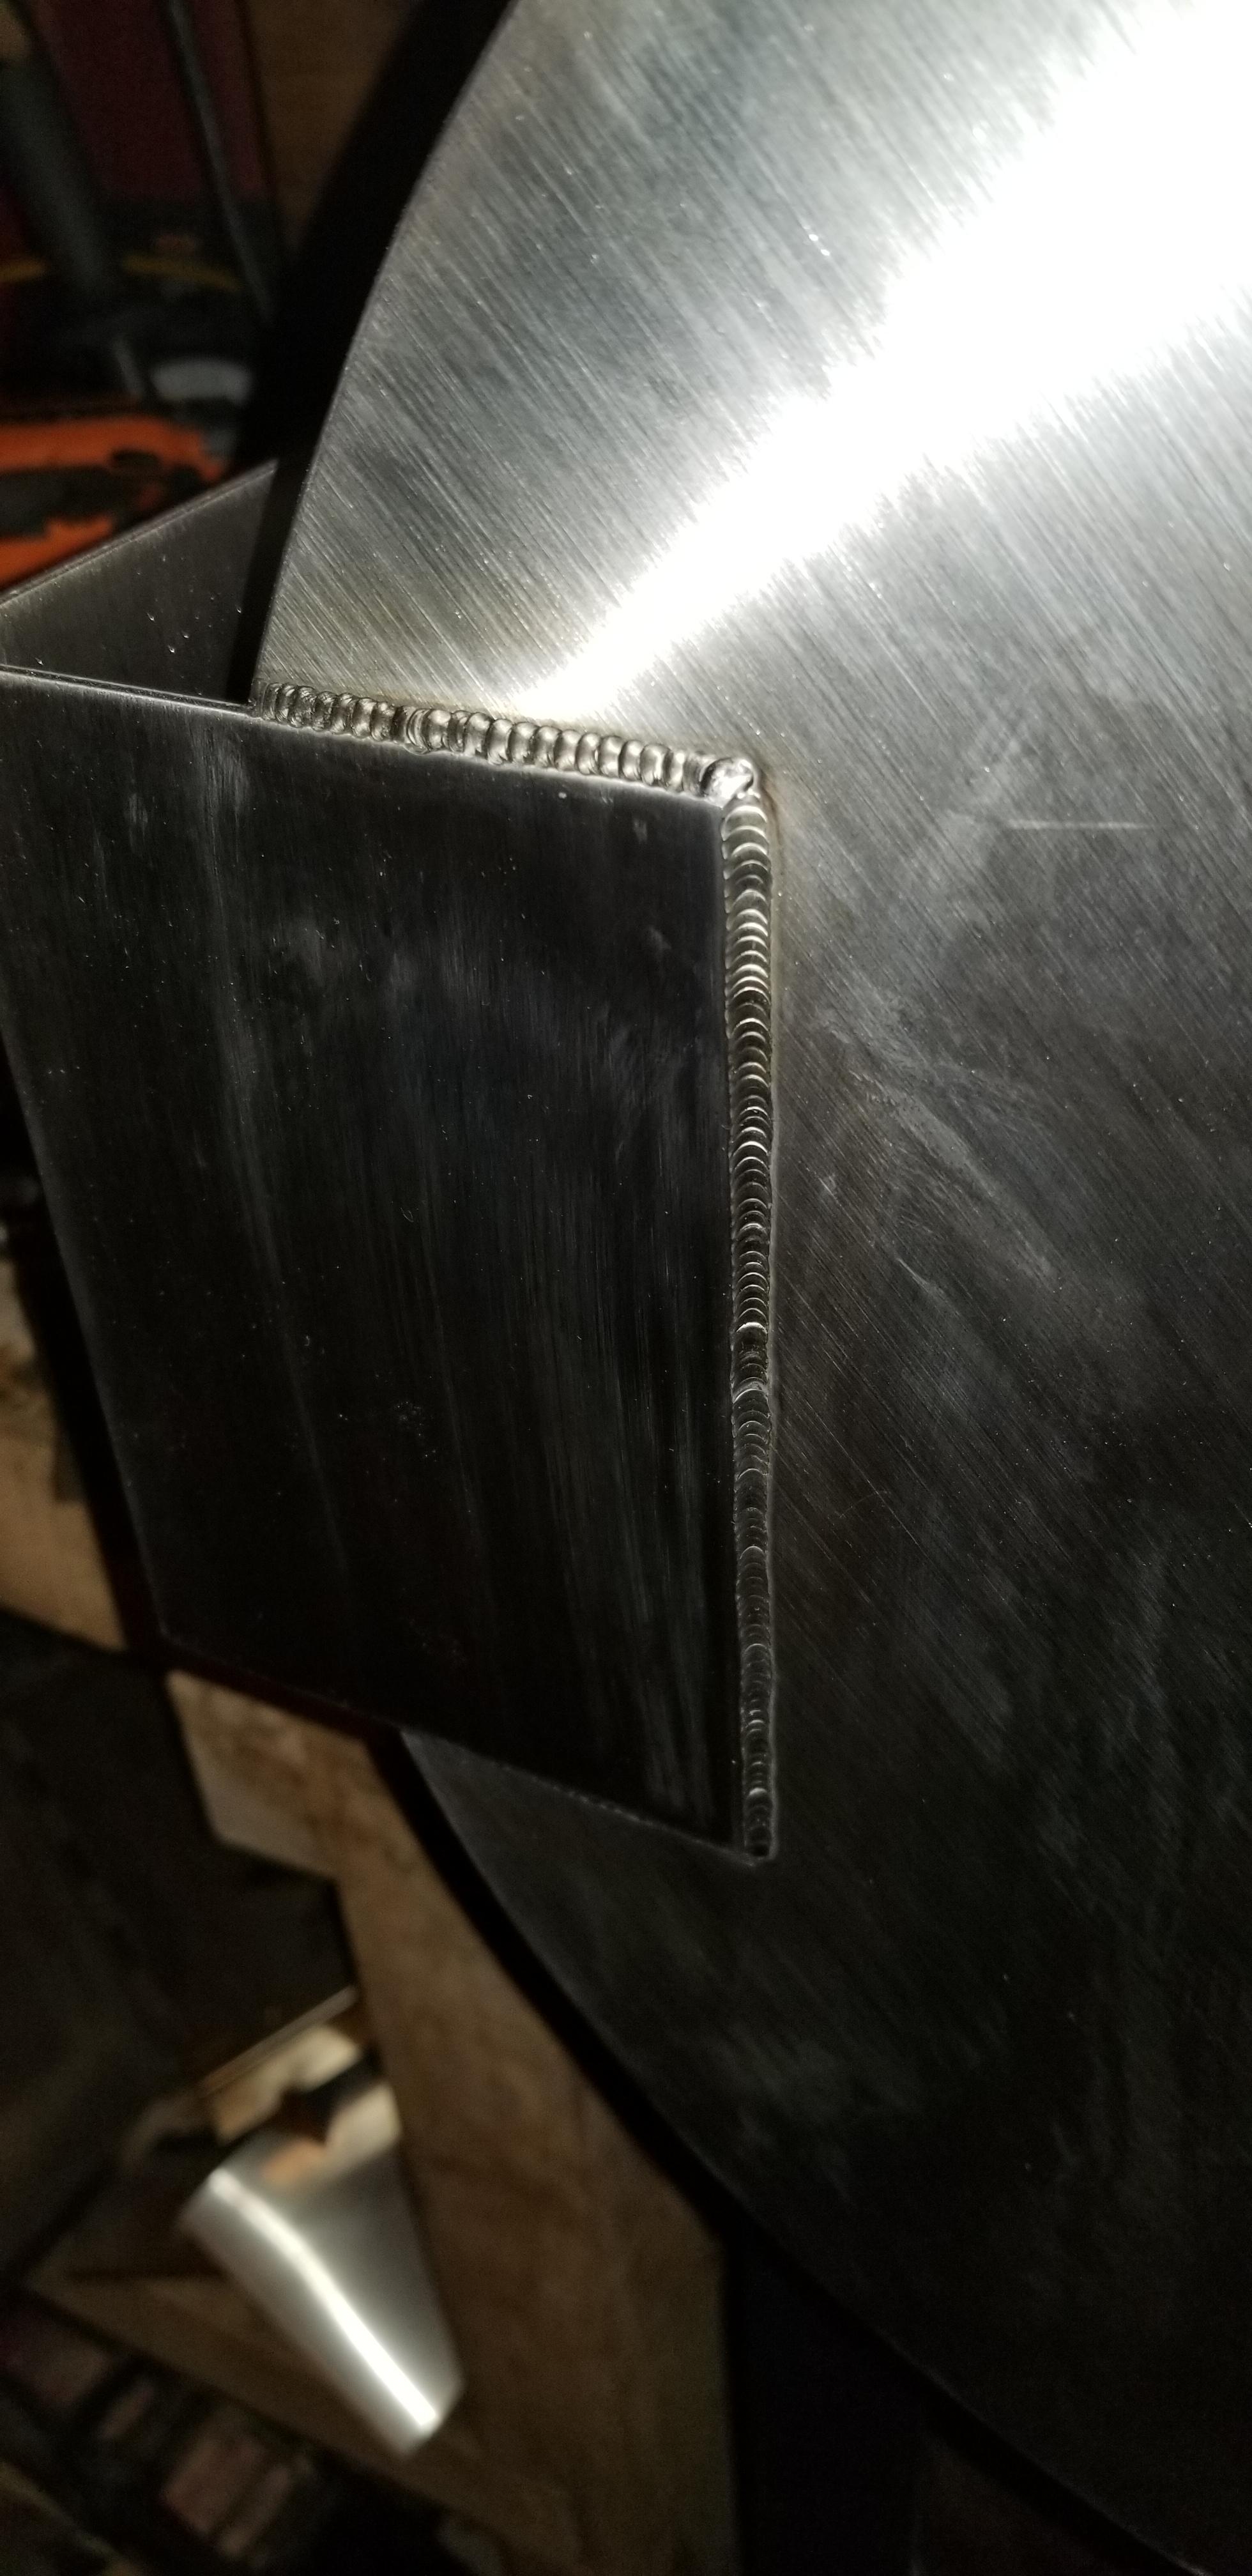
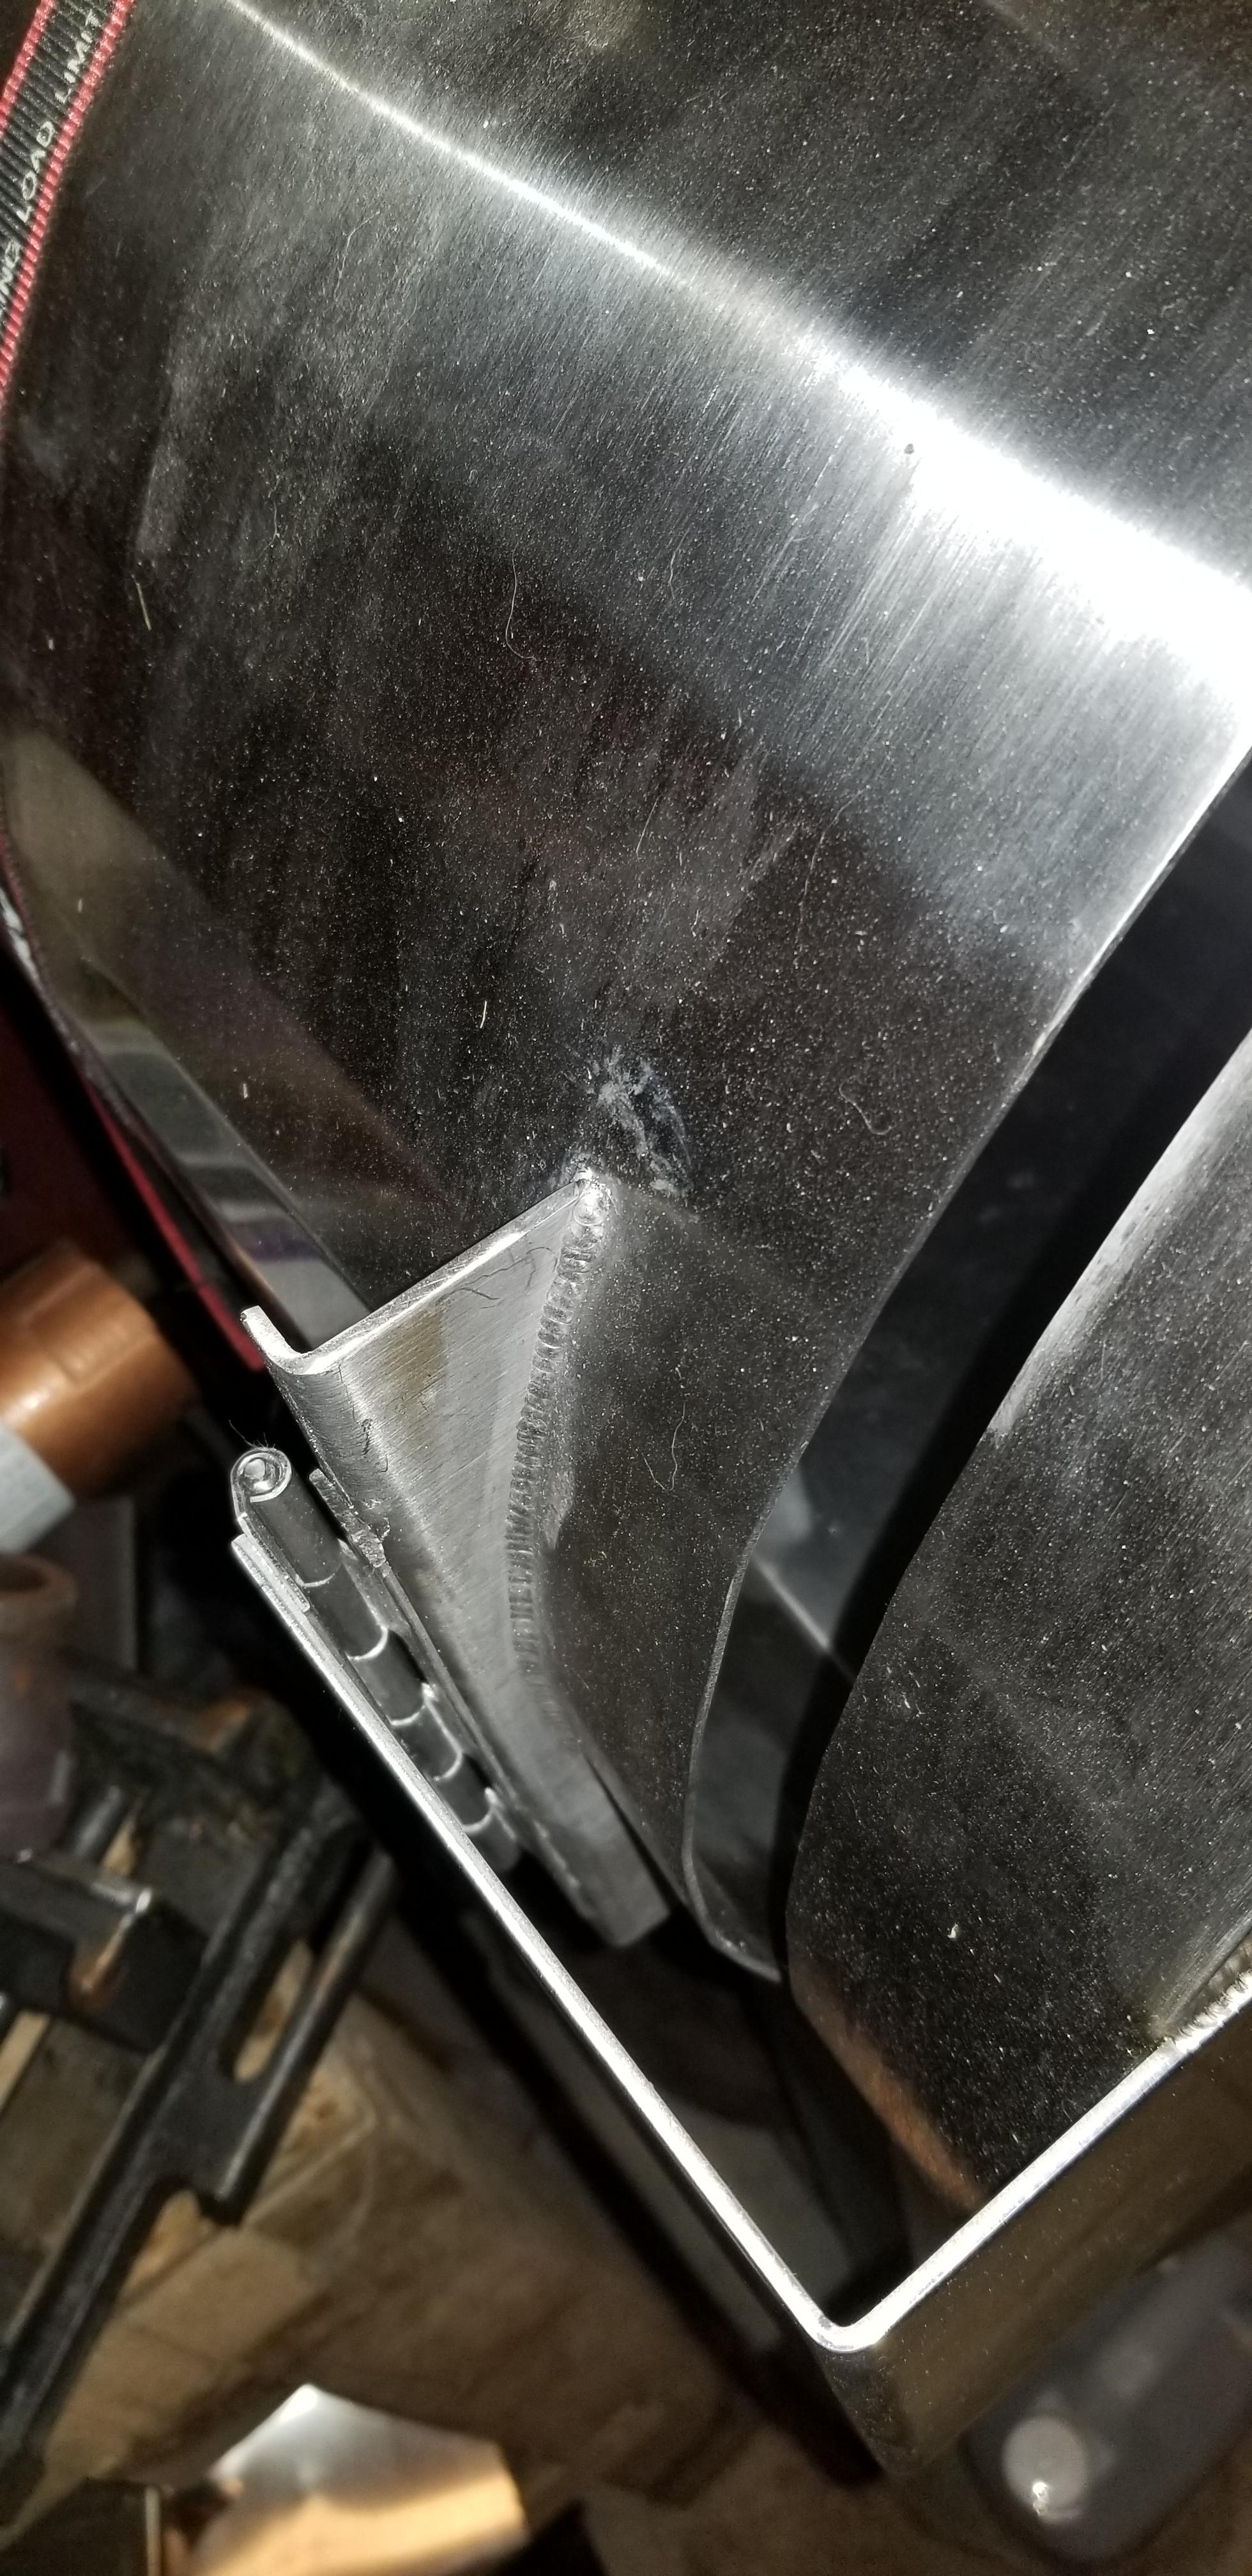
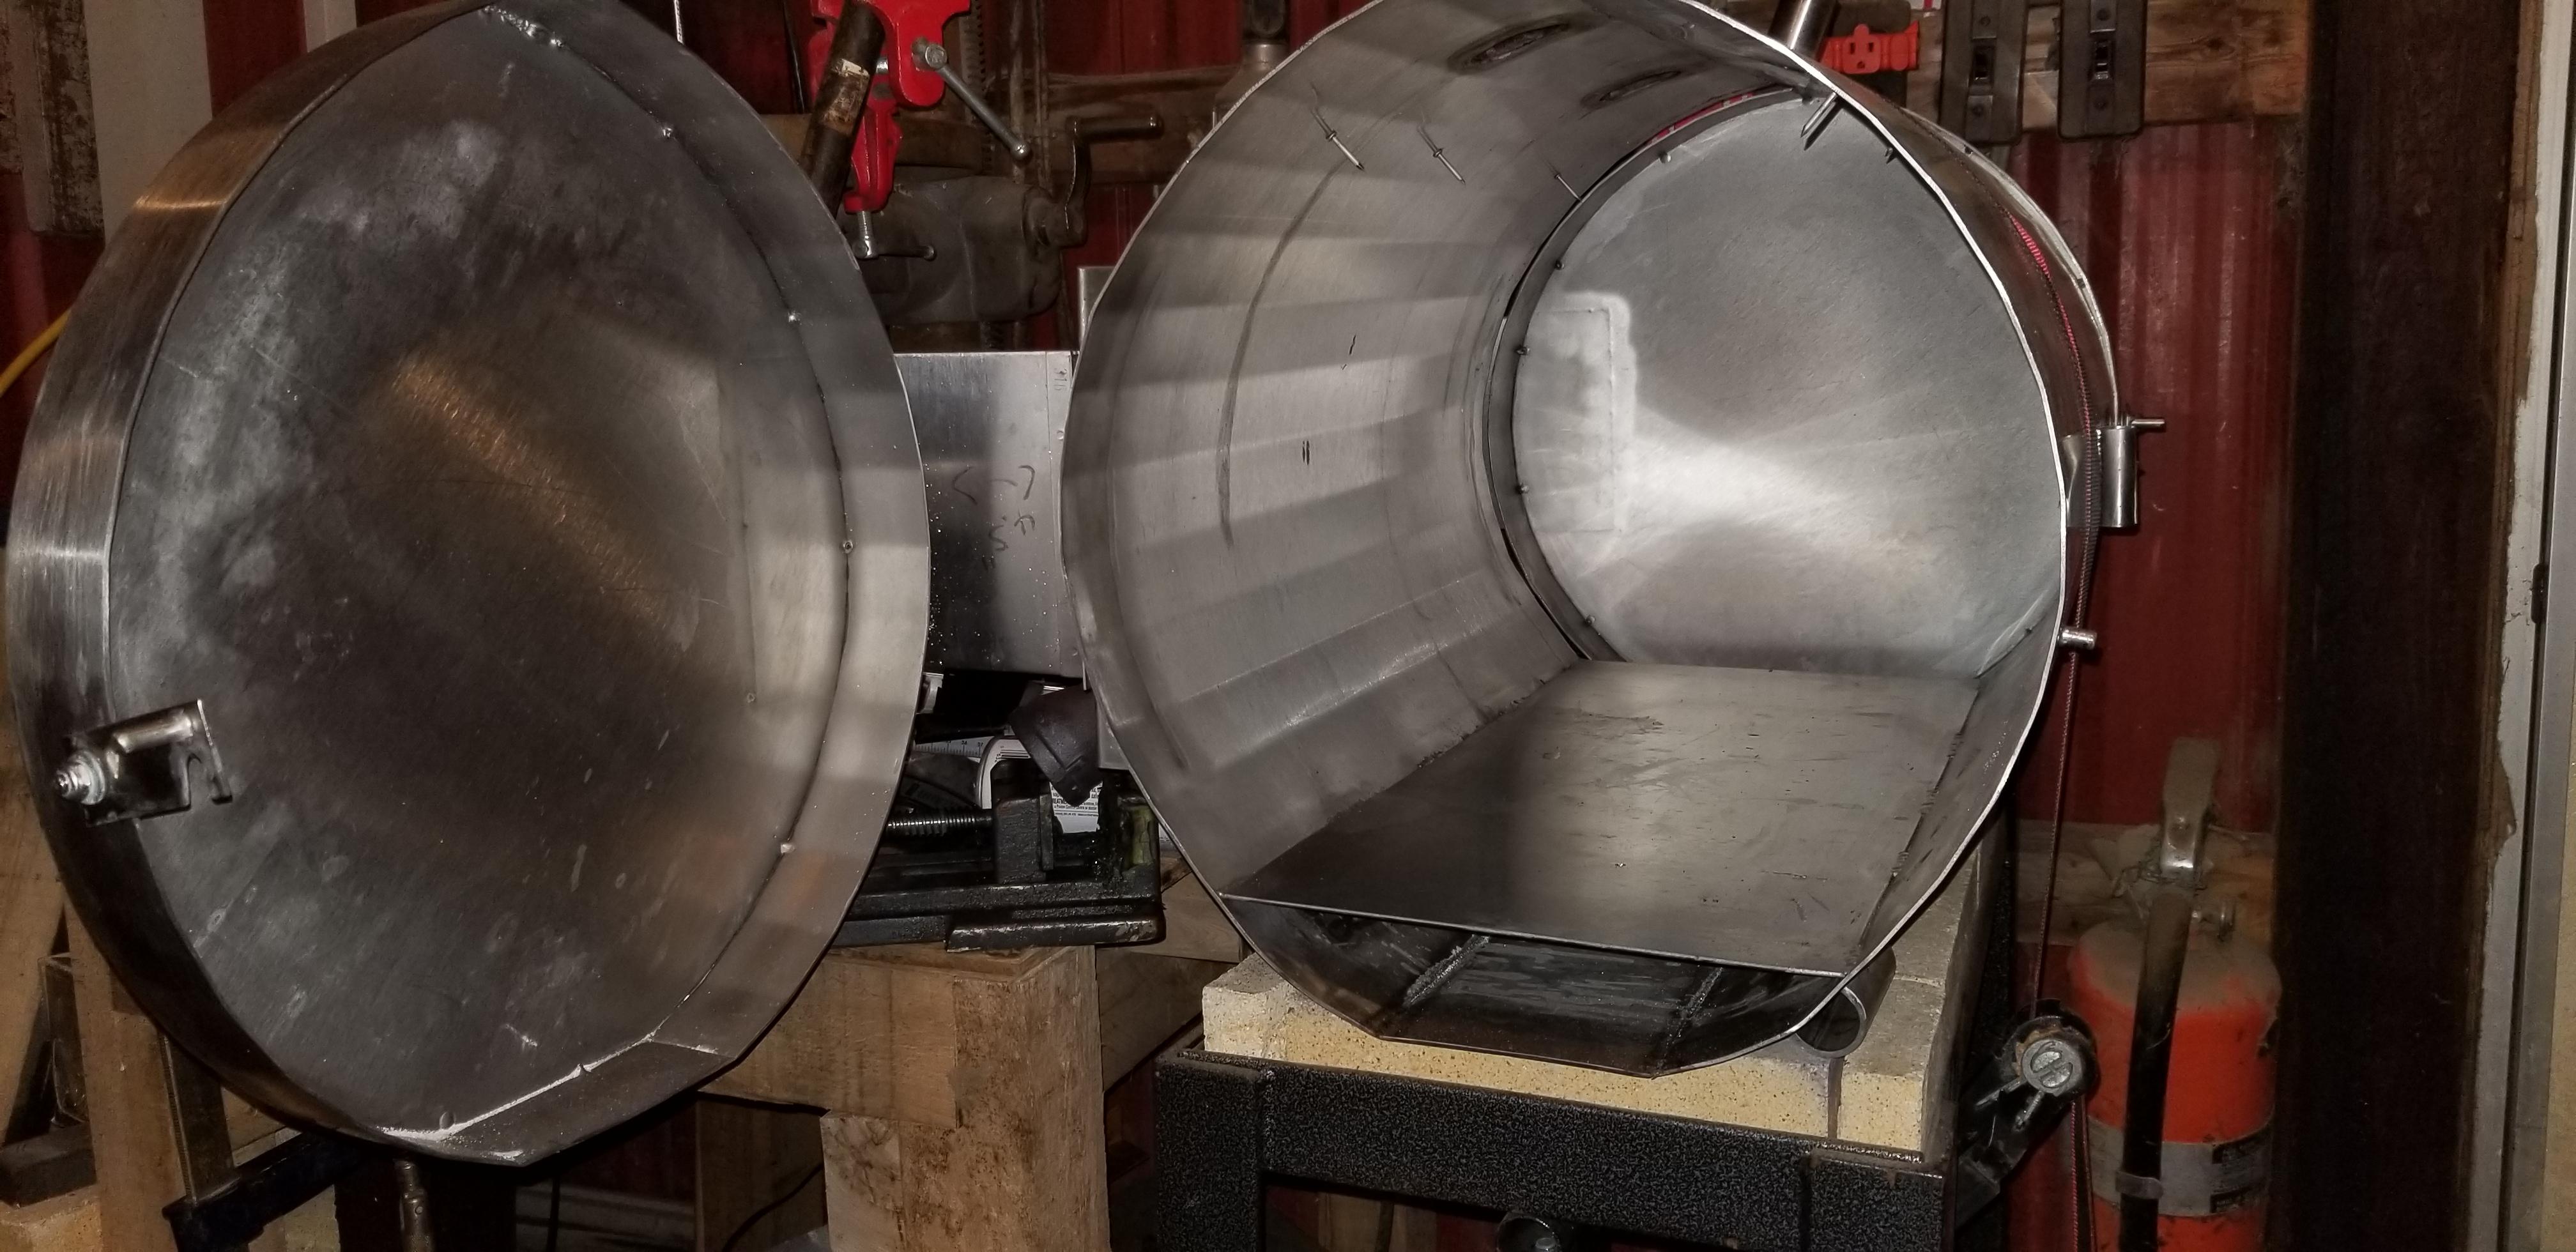
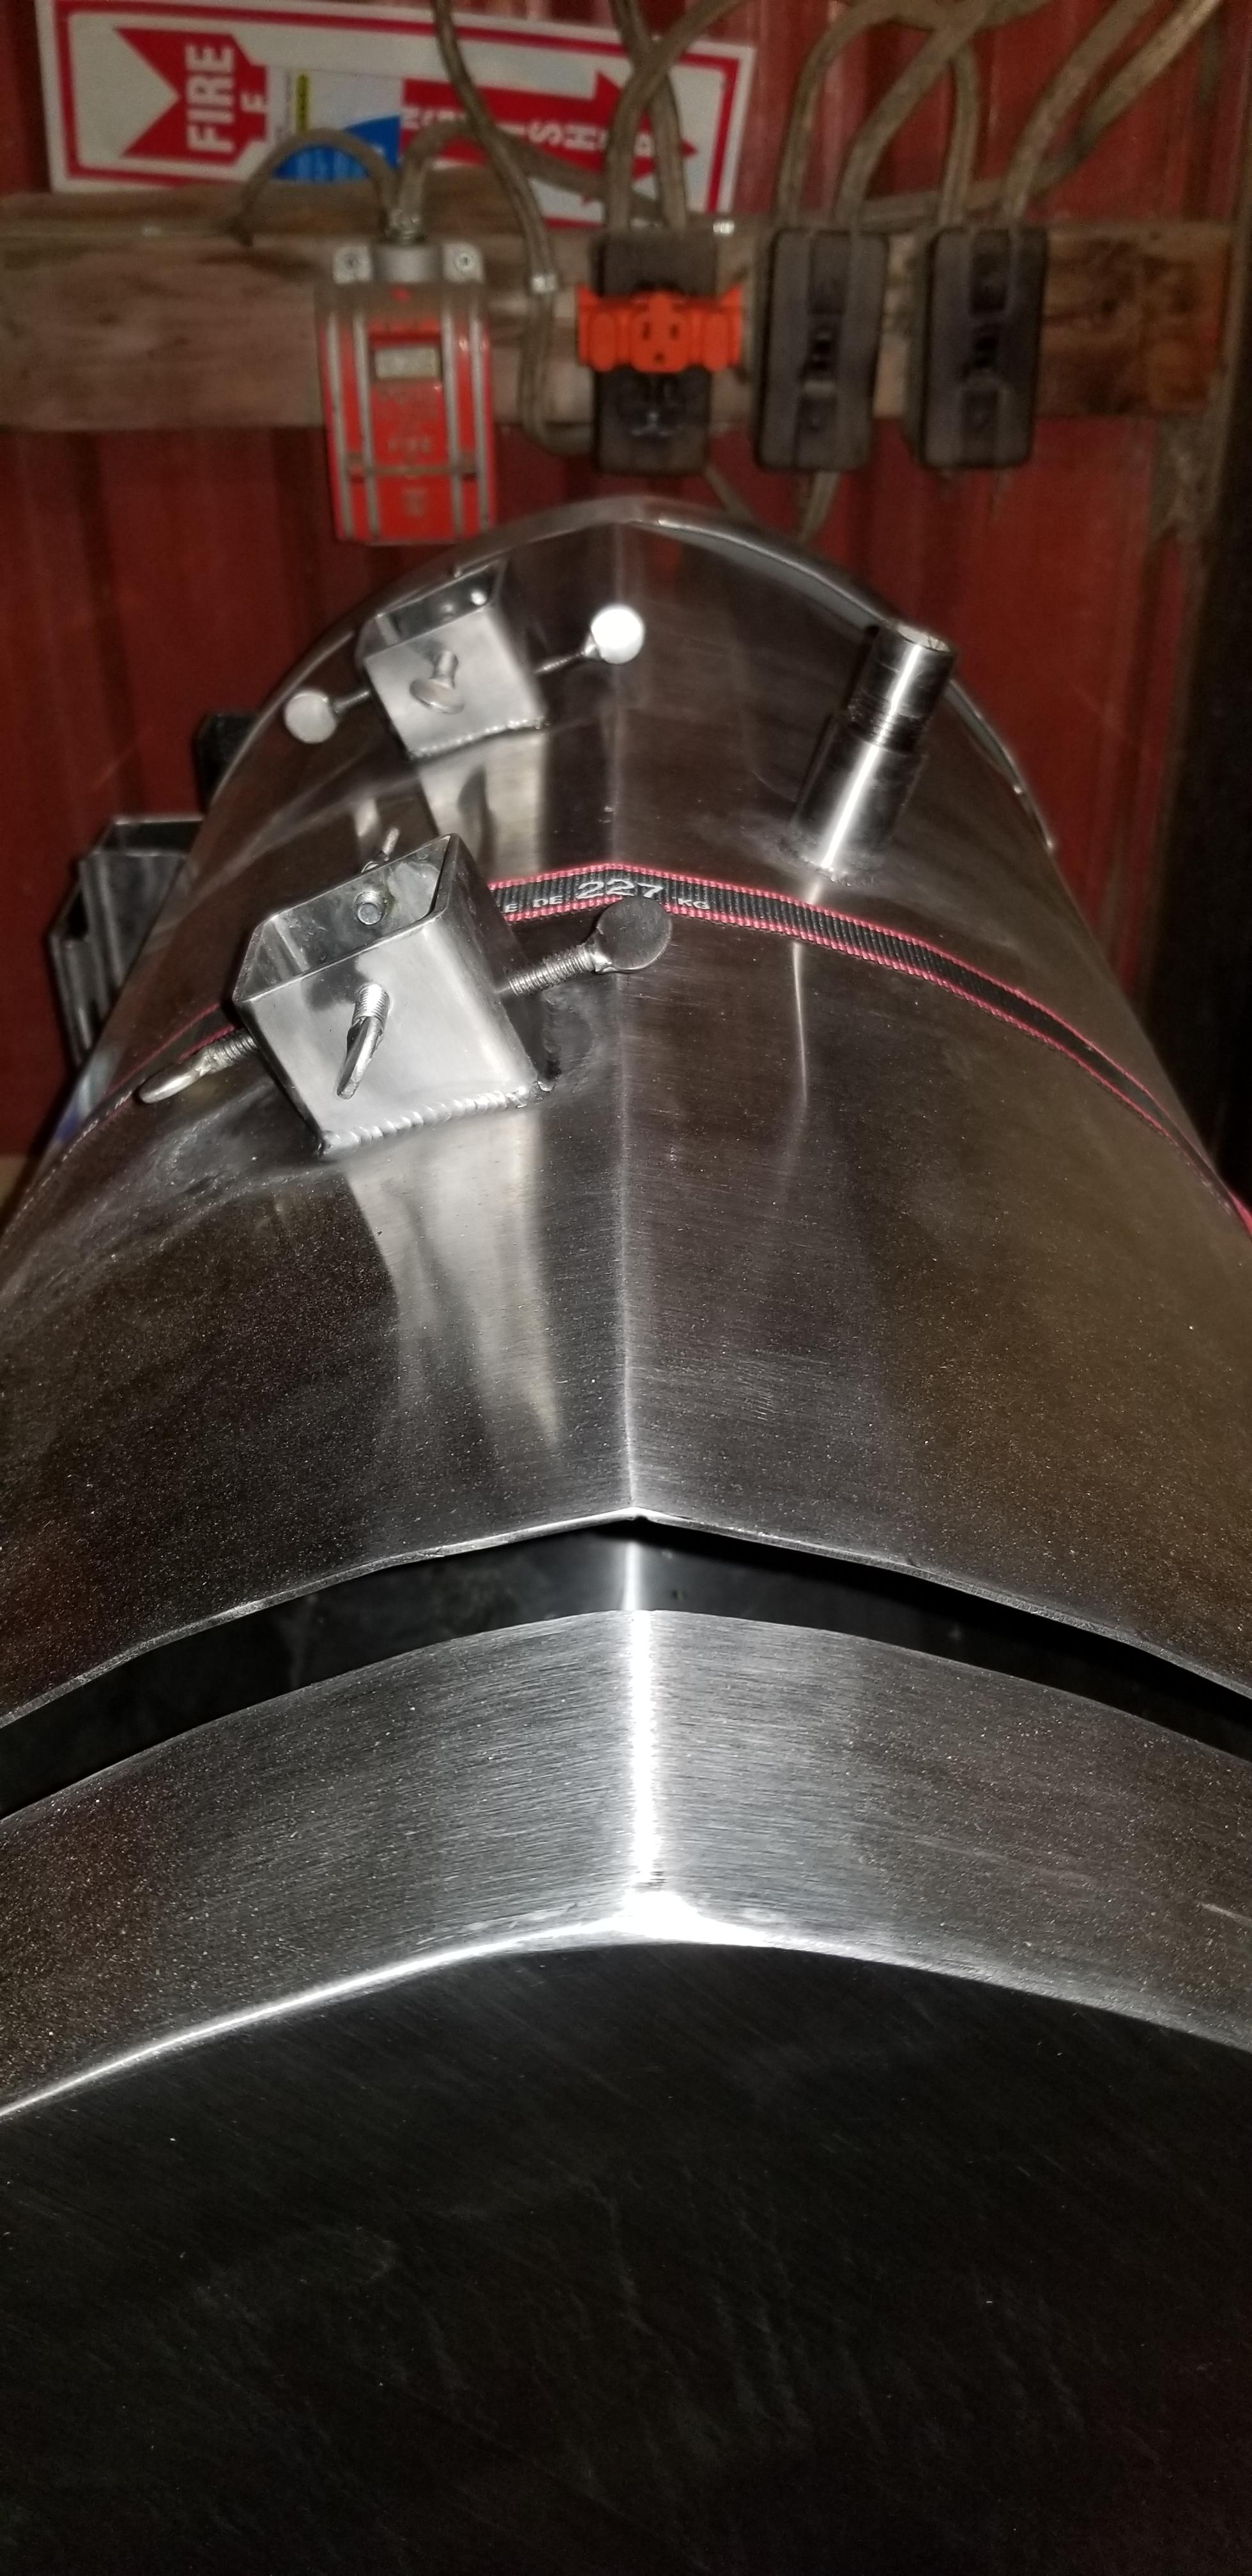
Apologies if this is the wrong spot to post this being the burner thread but here are a few pictures of my forge shell I made from 14 gauge stainless. The secondary floor inside was because after building the outside shell and doors, I realized I went to big (still probably did but that's ok since it will have the internal baffle wall) so rather than cut everything up I just put a high floor in cutting down on the volume, not quite a D forge and not quite an oval forge so we'll see how it works. Used a break press to fold in the creeses to get the round shape, welding the 2 halves at the top and metal finished it for a seamless look welded together the set screws out threaded stainless rod, and the odd looking thing on the side is a clamp I made to hold the stainless steel line for the propane. The small nipple coming out of the top is for a heat exsaust which I'm hoping will preheat the line so the propane is about 400 degrees as jt goes into the burner. Incase it wasn't obvious ha! Ive tried to keep everything stainless from top to bottom as its the material I had the most access to for little to no charge.
I have probably went a little over board but I love to tinker and make things so I figured why not put as much of myself into this project as possible. Sorry for the lighting, it's not great in the shop at the moment.
Cheers!
The Bearded Welder


-
Thank you both Frosty and Mikey! I'm glad you gave it the seal of approval!
I think I can see the three zones you are referring too, took a while to understand what I was looking for but I think I have it know.
So Frosty, in terms of not inducing enough air for complete combustion, what would happen if I went down 1 size of mig tip? That would pull more air correct? Giving me a higher turn down range, but possibly not getting the max heat this current set would give me..? Am I understanding that correctly?
My current forge is actually almost finished, unfortunately with this whole virus businesses I'm waiting a month for my fumed silica to arrive, but I have everything else, kaowool, a refractory which I hope will be sufficient and I custom made the shell from stainless sheat metal (I work at a stainless cabinet production facility) I'll upload a picture of it possibly tonight, I'm looking at 3" of kaowhool, and after doing the math it will leave me with an inside volume (after kaowool) of about 1300, so I will have 2 burners, but I'm also making everything about my build variable, there will be an internal baffle wall to slide back and forth depending on my size of work, I do admit I went a little large on the build but I wanted more kaowool than average to better insulate..im also trying a recoupritive(not sure on spelling) design which will pre heat the propane as it goes into the burner, though rest assured it will easily be by passable if it doesn't work and I will be doing some very specific testing for saftey purposes as to not reach the flash point of the propane. I am excited to post a picture of it all, should I post here or else where in the forum?
Cheers
The Bearded Welder
-
Hello everyone!
My name is Phil and this is my first time posting, but I've been lurking on this forum for a couple months now and have read the forges 101 and burners 101 a couple times and before that have done 400+ hours of research on forge and burner building from various other sites (until I found this one)
First let me just say that I, as well as many others I'm sure are so very grateful for the people here whom their expertise is freely given and shared and enjoy doing it.I have learned alot (I hope)
I wanted to try and do as much of this on my own so I could learn through trial and error (without blowing myself up!) doing my own independant research is important to me, but at the end of the day you can't replace years of knowledge and experience so I am now going to break my extreme shyness and post something on the internet (which I've never done) to seek opinions and thoughts on what I have created.
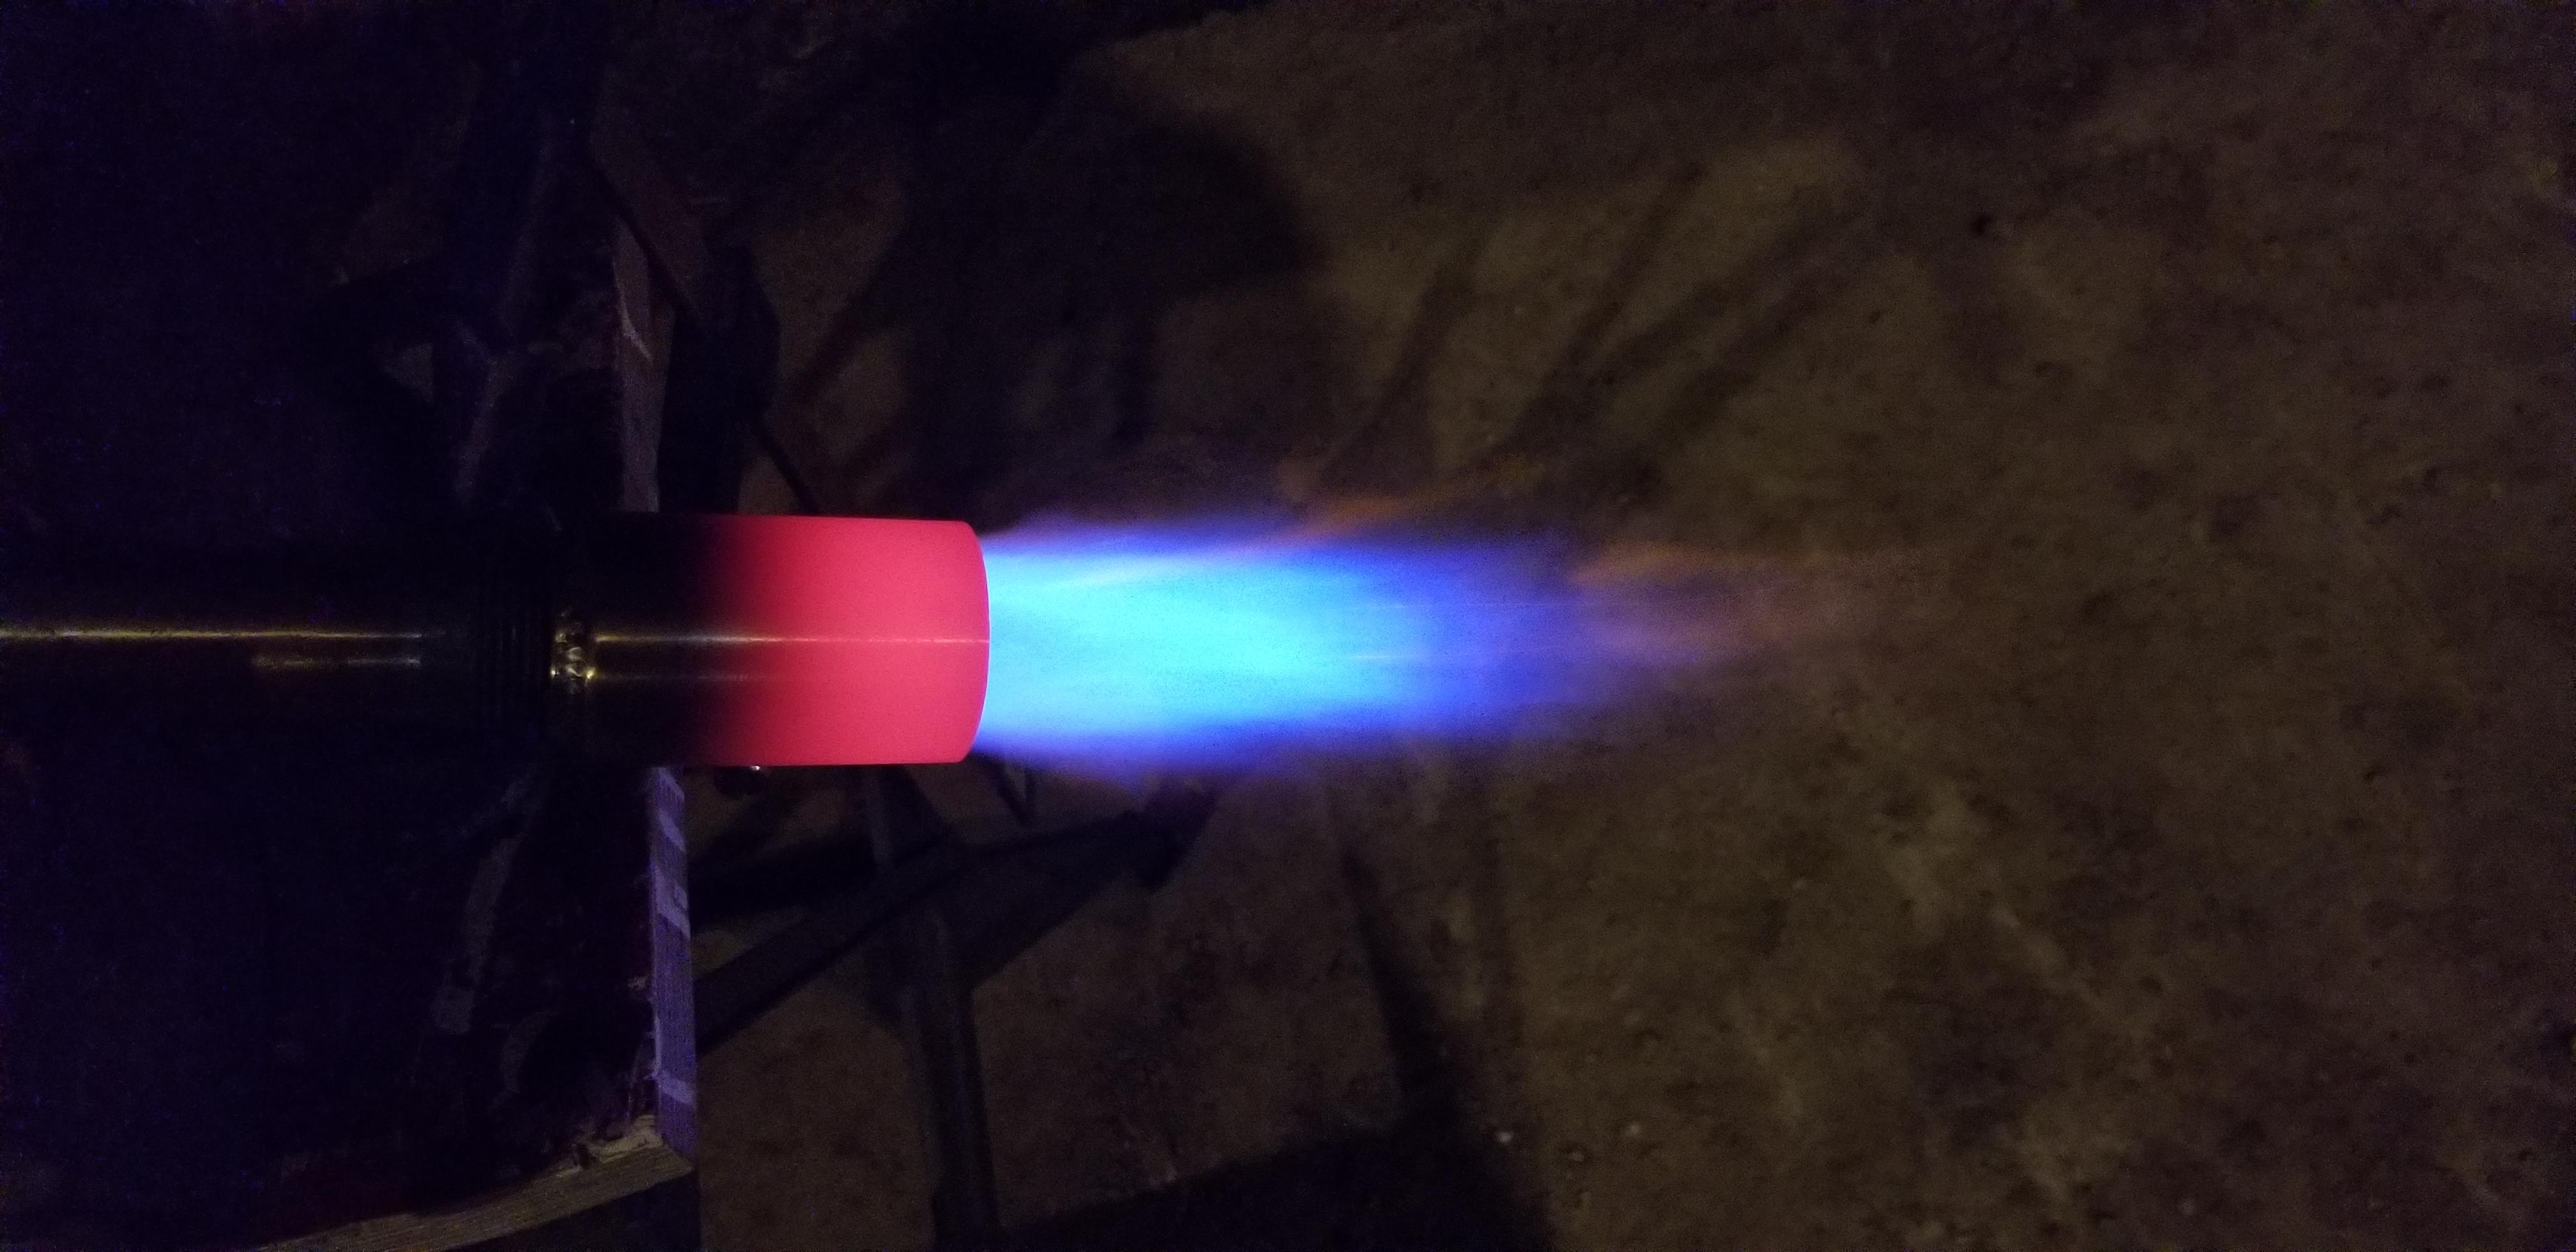
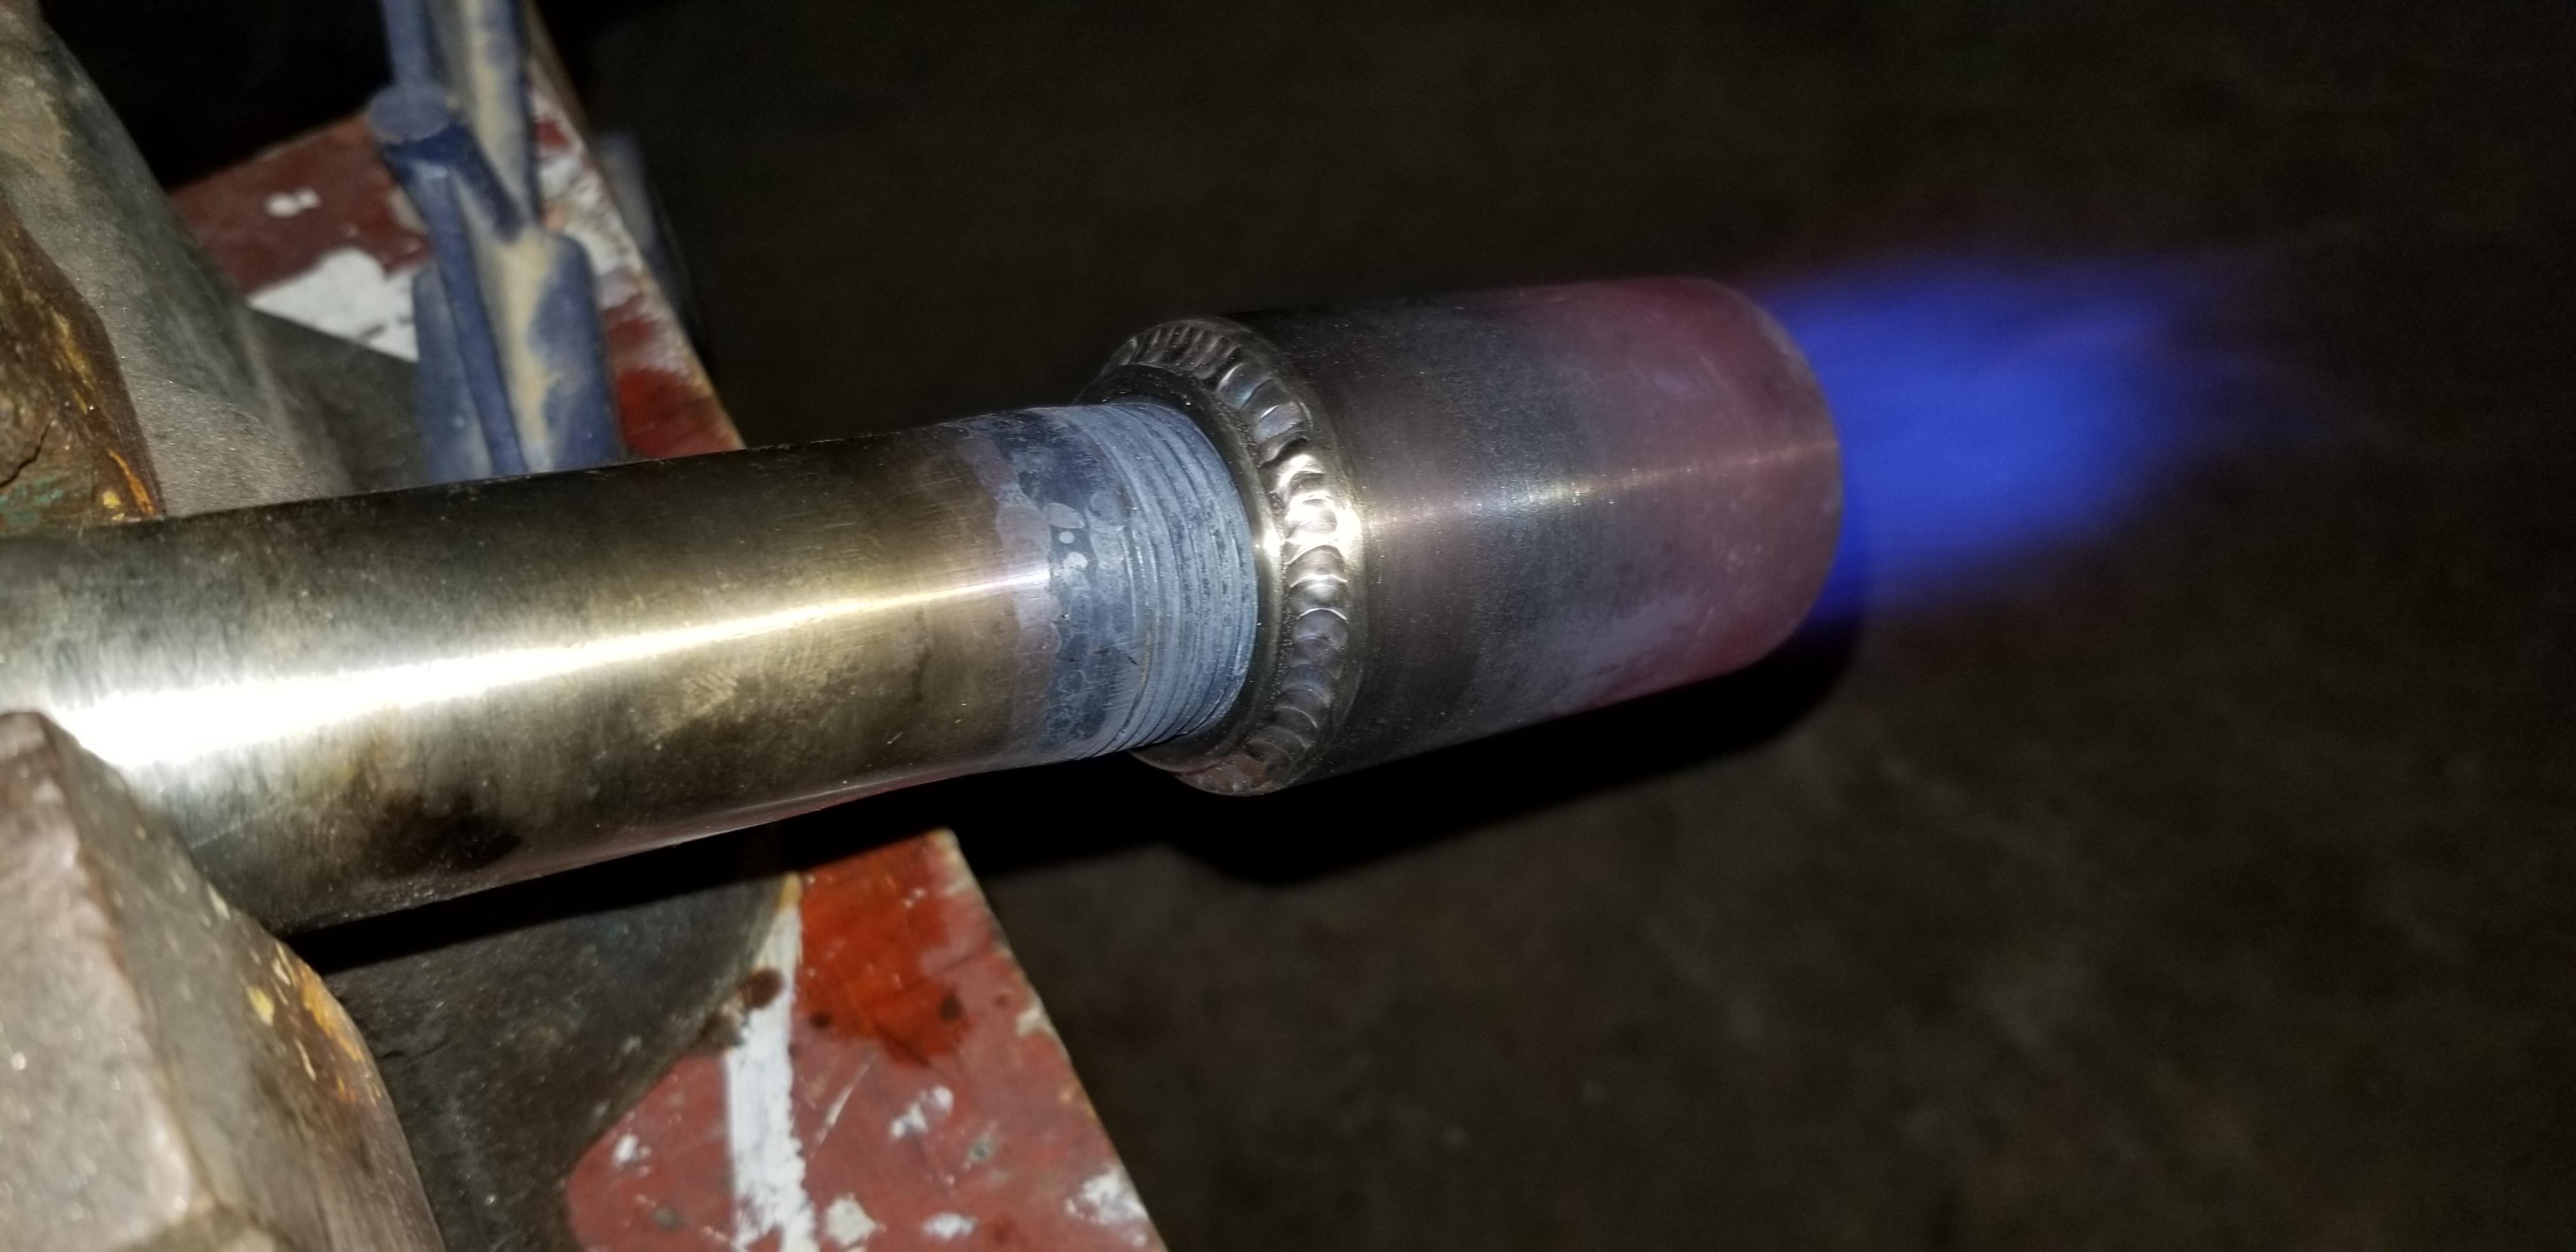
My specs for this burner are 1" mixing tube, 9" long. It is technically stainless pipe that I got for free and I TIG welded mild threads on either end. The nozzle is 316 Stainless 1 1/2" step variant with a 1 1/4 spacer ring. The "intake head" is something I ordered from China a year ago because I thought at the time hey this will work, I cut off the top of it and used a Dyna file to bore out the funnel Shape to get the large end bigger (too about 2.5") and then TIGed it back on, its made out of some sort of aluminum cast. I used a 1/8" sch#80 4" 316 stainless nipple for my gas tube and threaded the entire thing for depth adjustment of the jet into the head, I tapped into the end a 1/4-28 mig contact tip, tried a. 035 tip first but then went to a. 044 taper tip after I didn't like the results of the. 035. The air choke is a wavy bent priece of aluminum that travels up and down on the 1/8" jet tube assembly for control of air flow. I'm hooked up to a 20lb propane tank for now and have a 1-20 psi regulator with a gauge. All tephlon tape you see is gas rated and I used some tephlon tape on the outside of the 1/8 nipple to make it "travel tighter" through the top of the intake head if that makes sense.

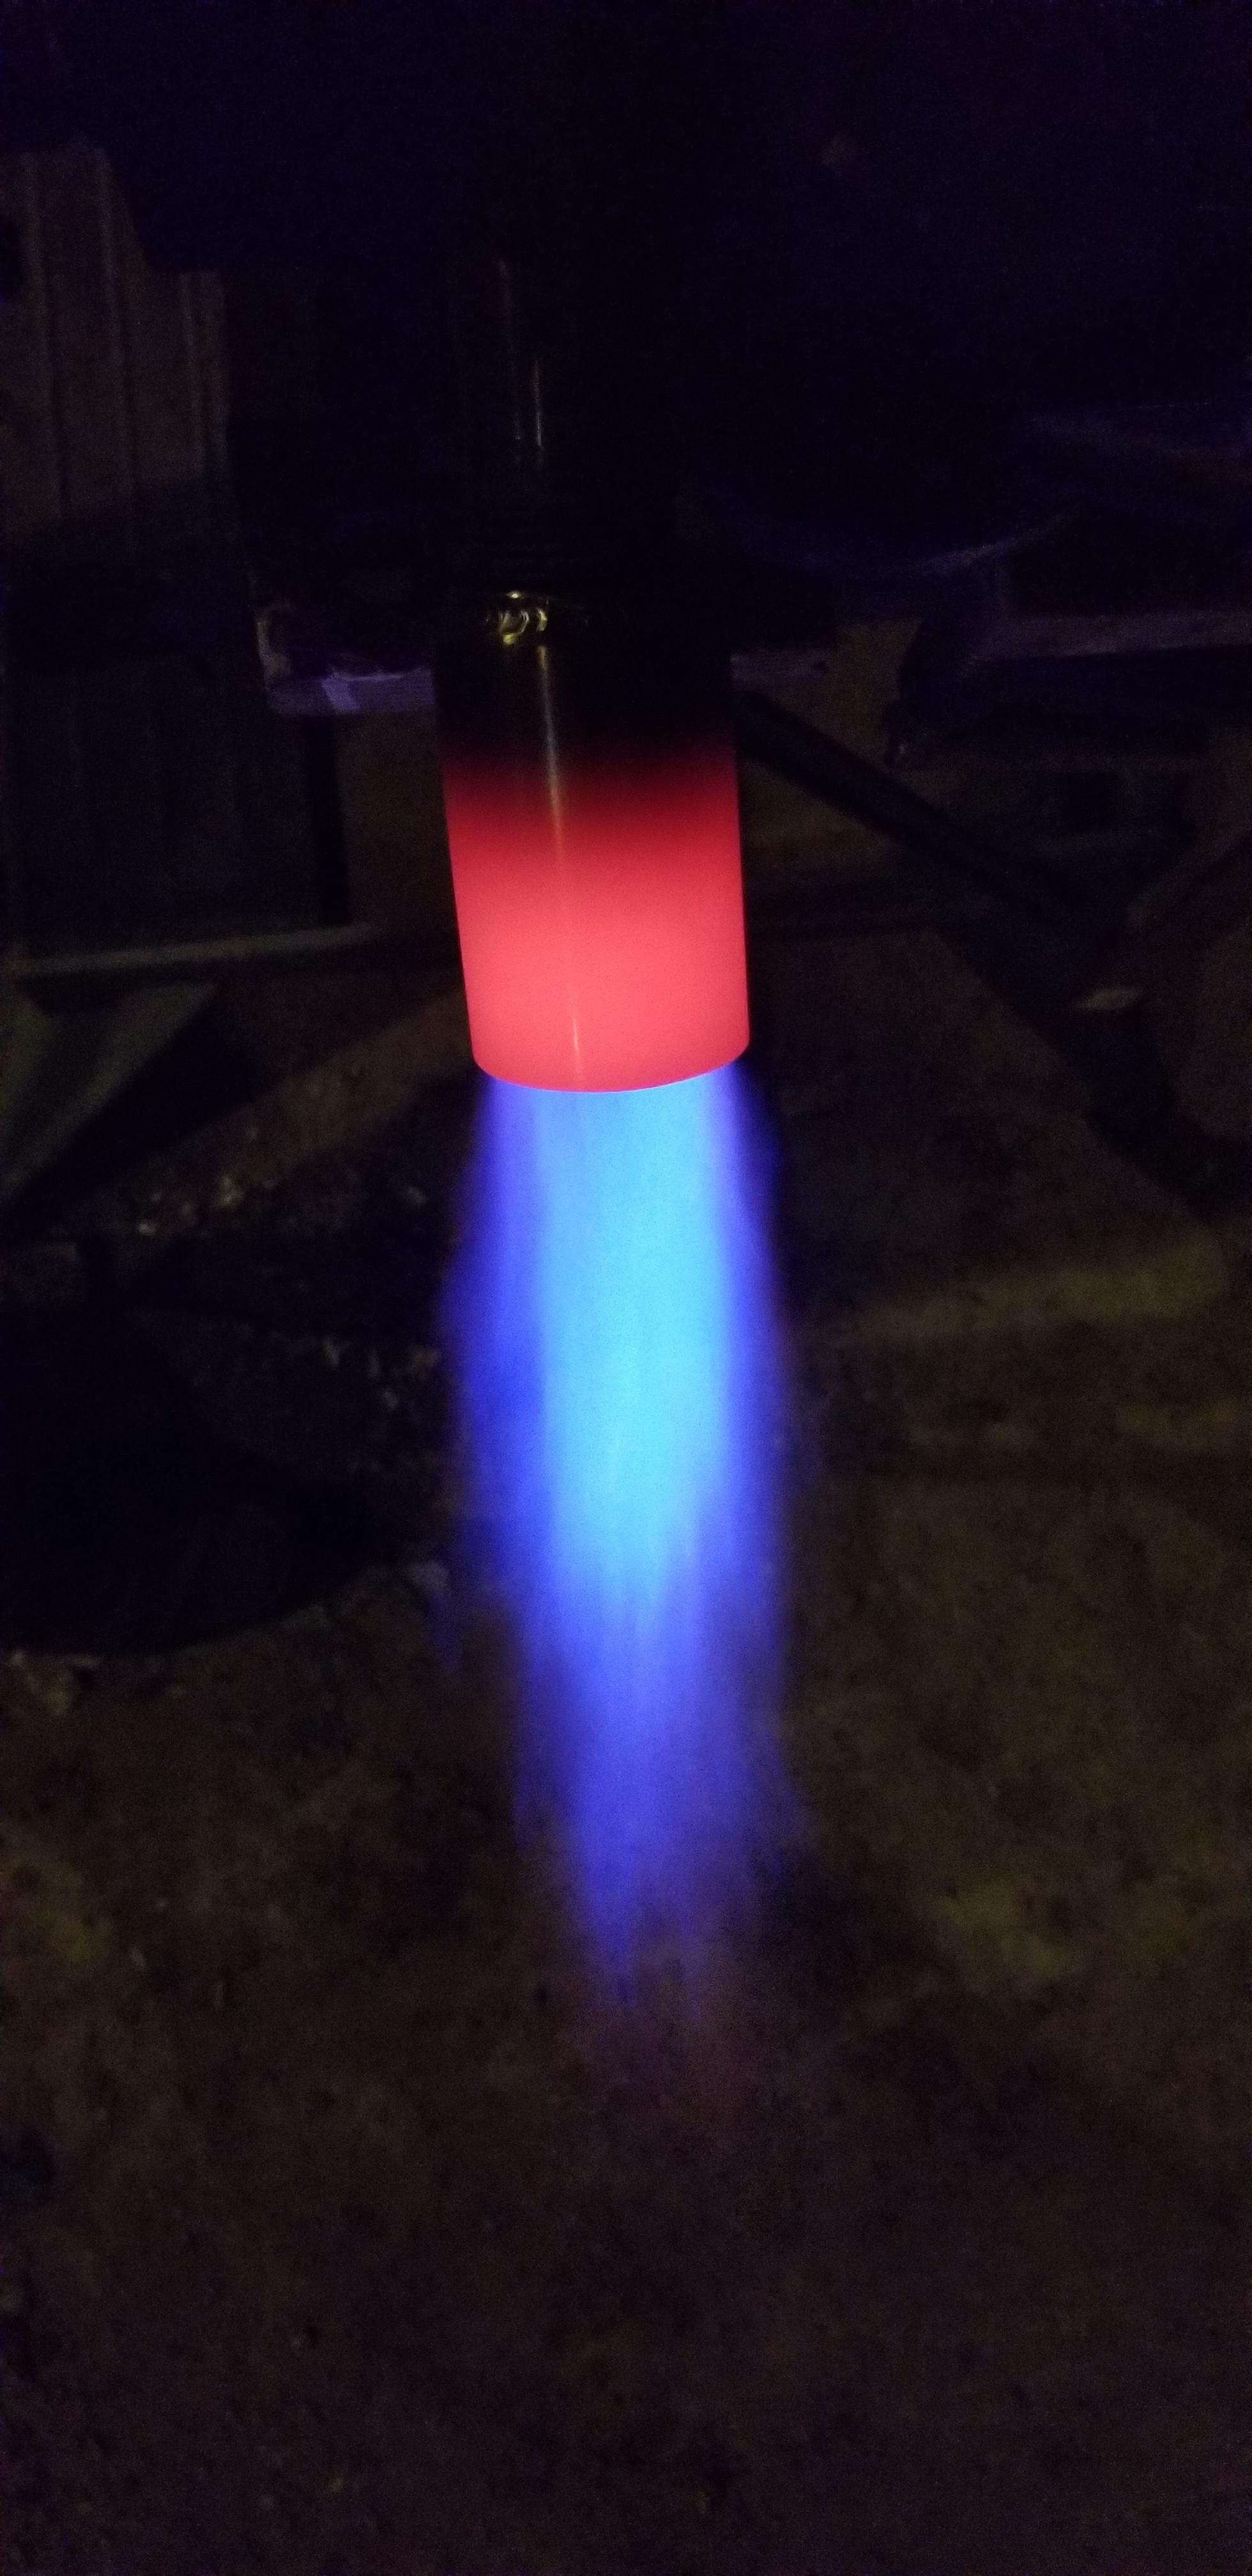
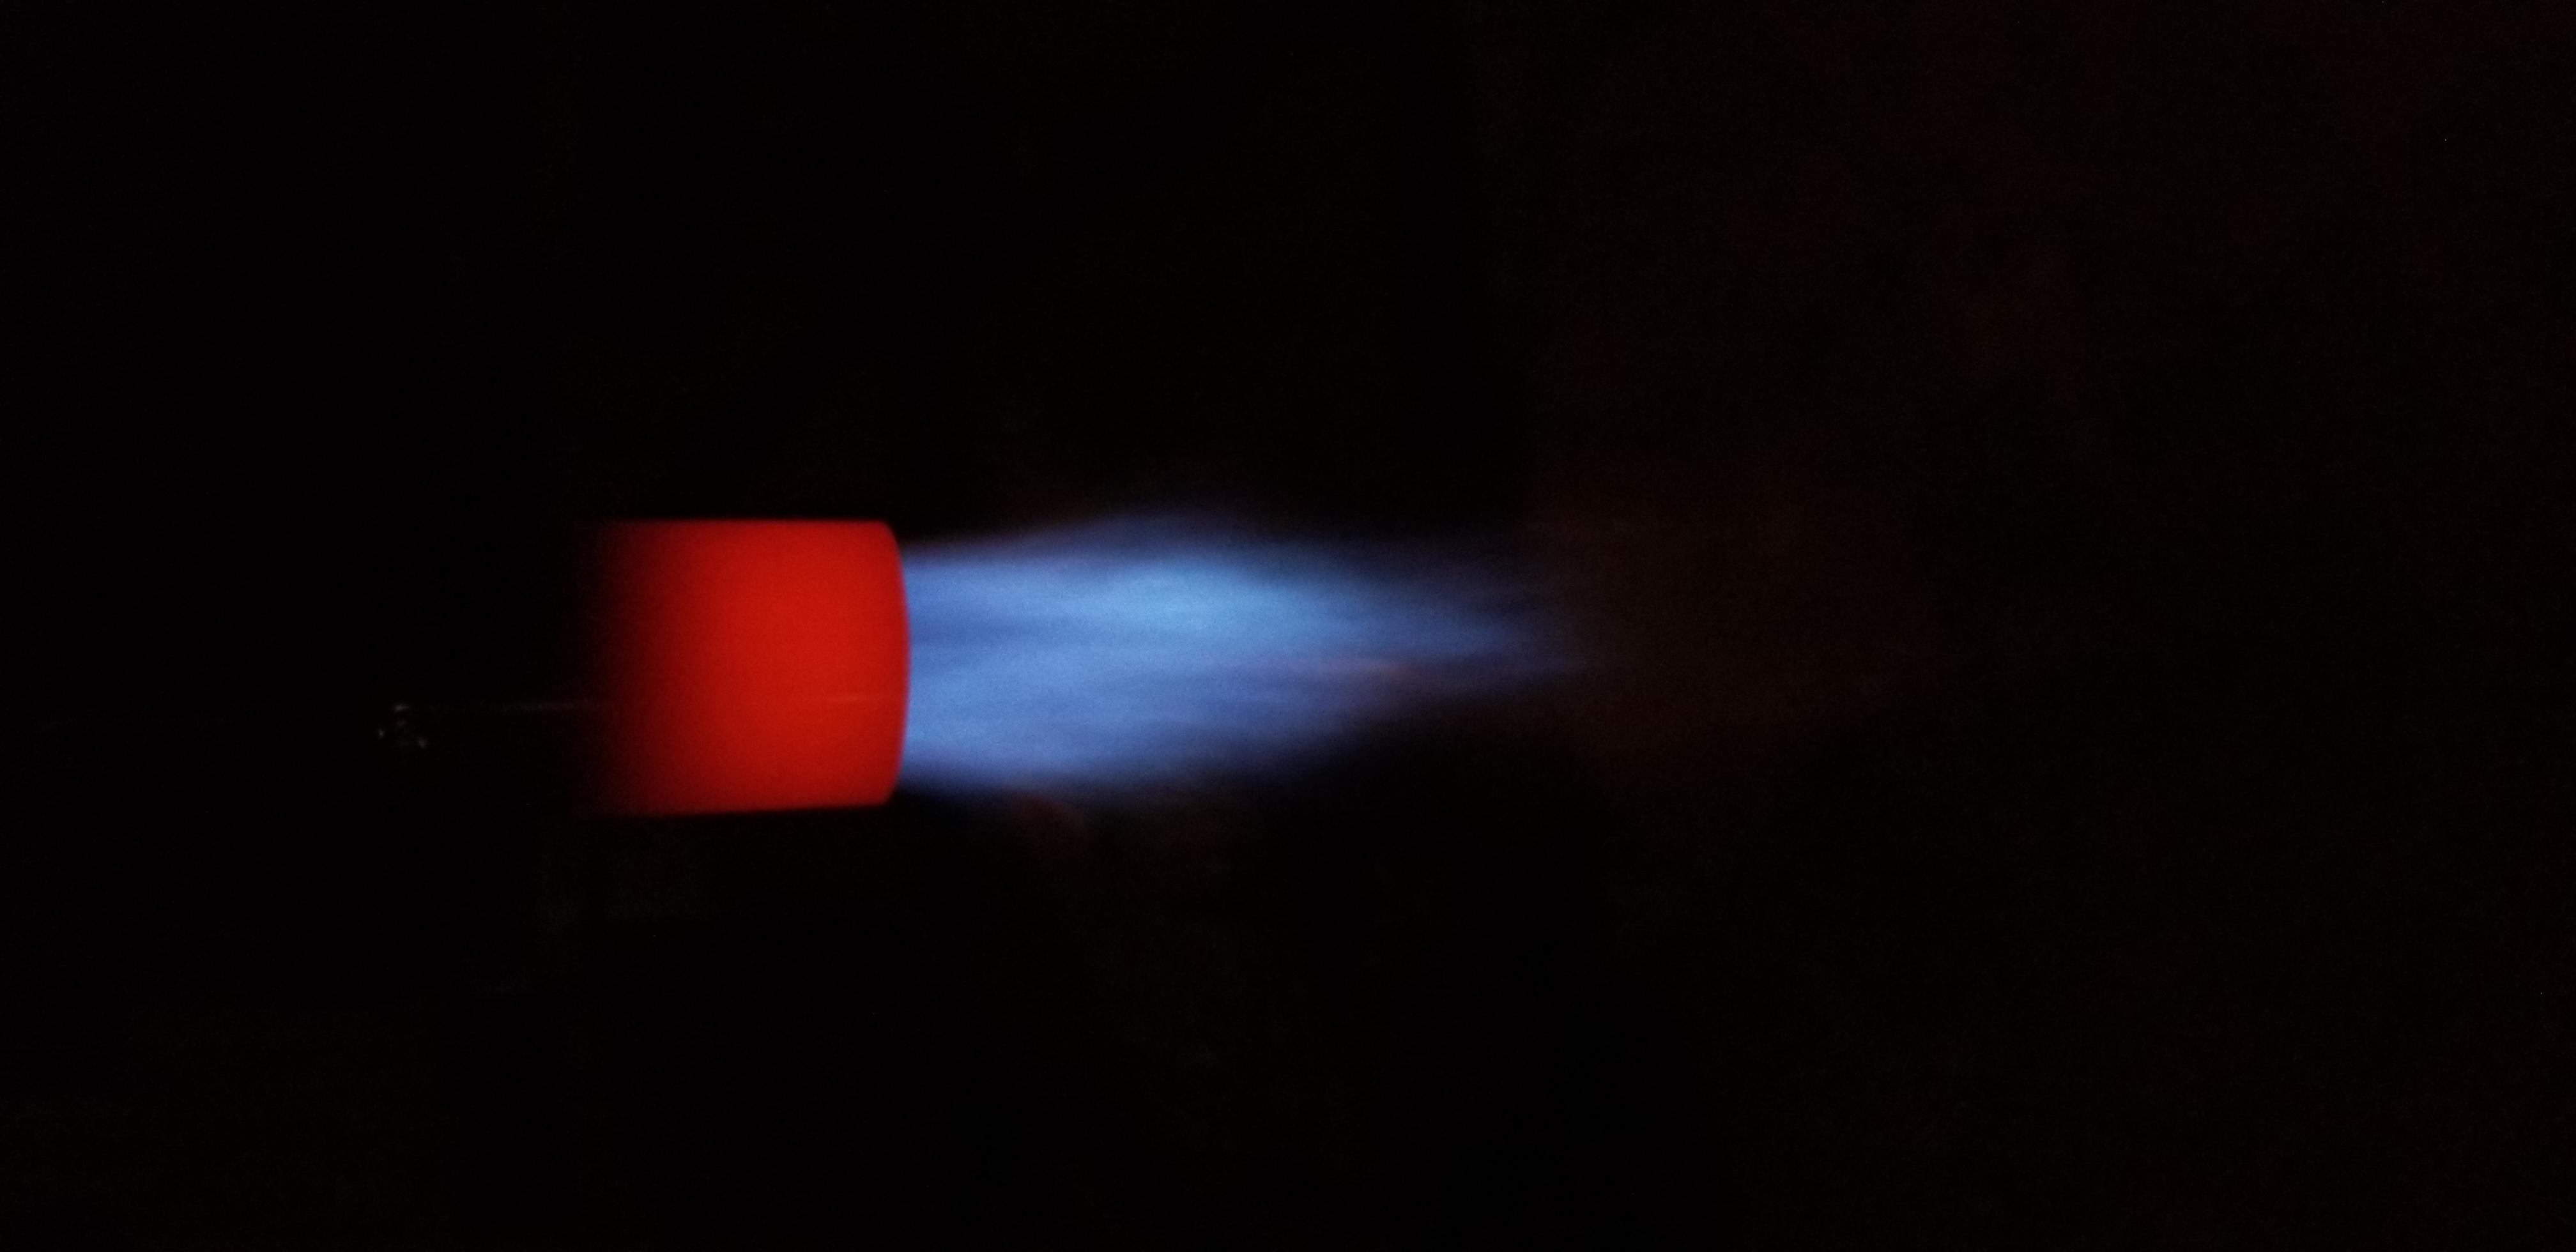
this first picture is with 5 psi, half choke and exposure turned down on my phone
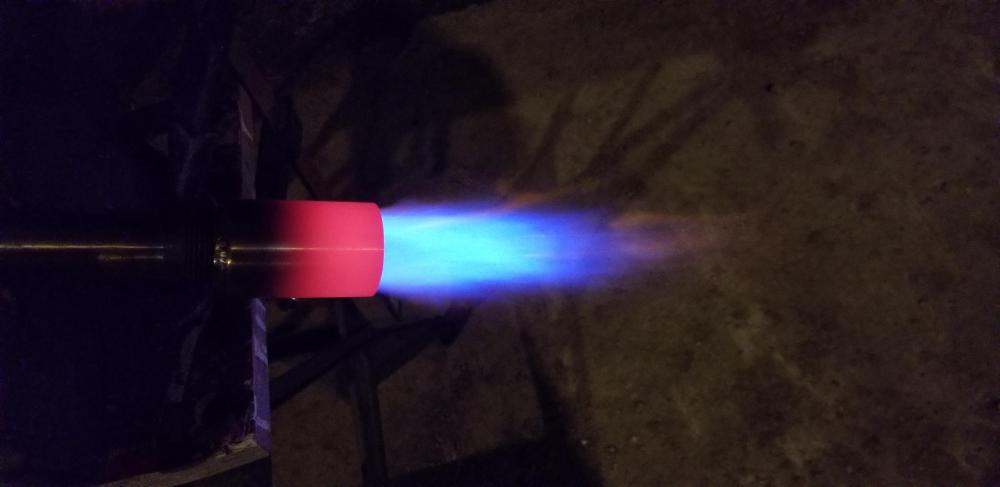
This is same settings but with normal camera settings, what I actually see in this picture is almost completely blue and no green.

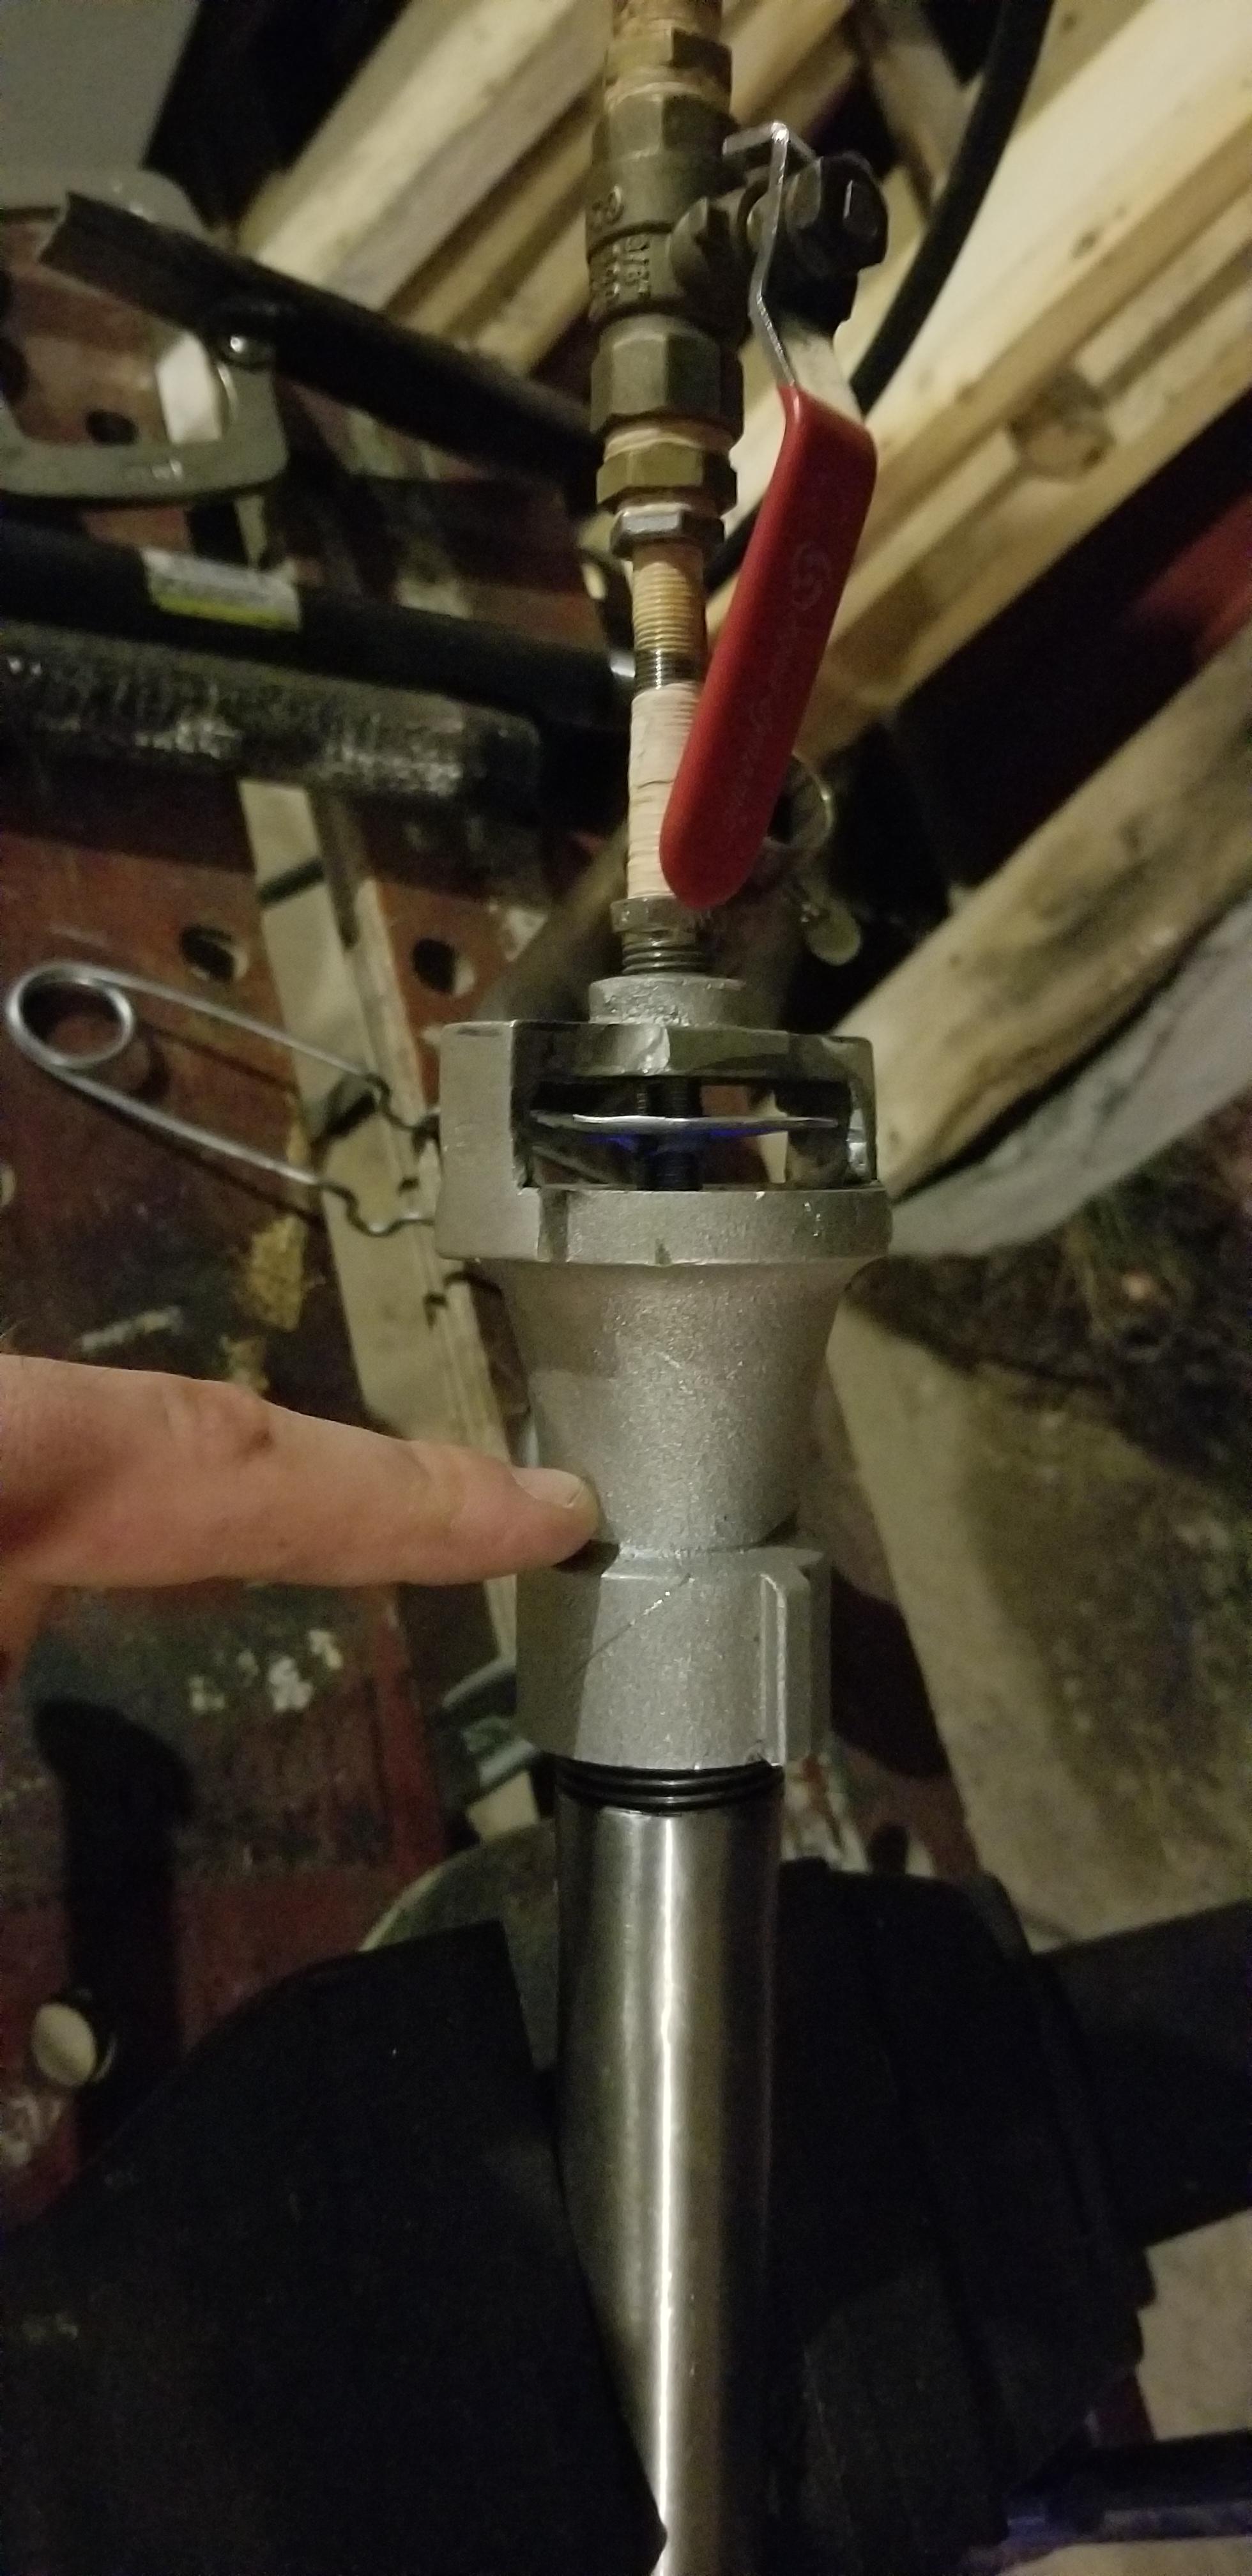
This is the "intake head", I have to switch out my ball valve for a gas rated one, just using this one for testing.
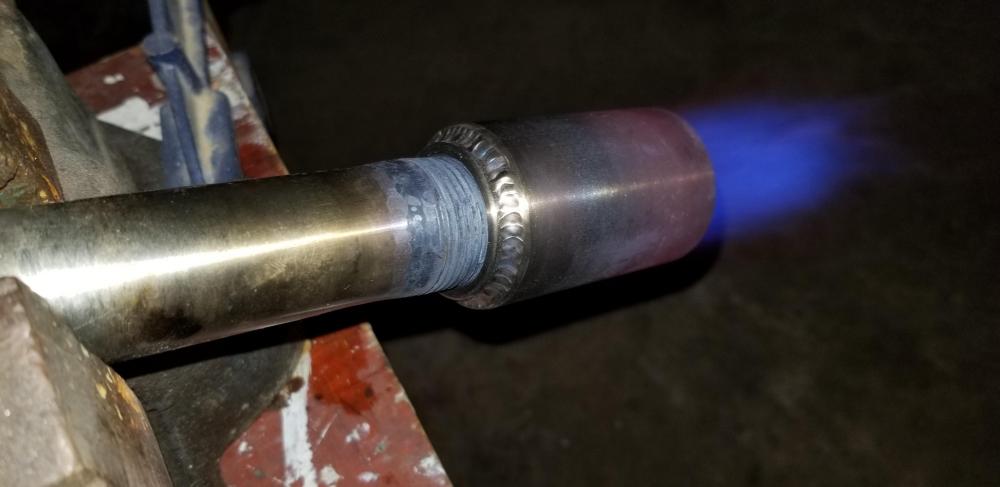
So this is my step nozzle, it's a bit differant as I took a small bit of 1inch coupler for thread, and TIG welded the 1 1/2 pipe to that so it's a threaded step nozzle, kind of a hybrid between Frosty's thread protector nozzle and Mikey's step nozzle. My one main concern is it is slightly too long but I'm waiting for when I have time to do small trim tests on it.

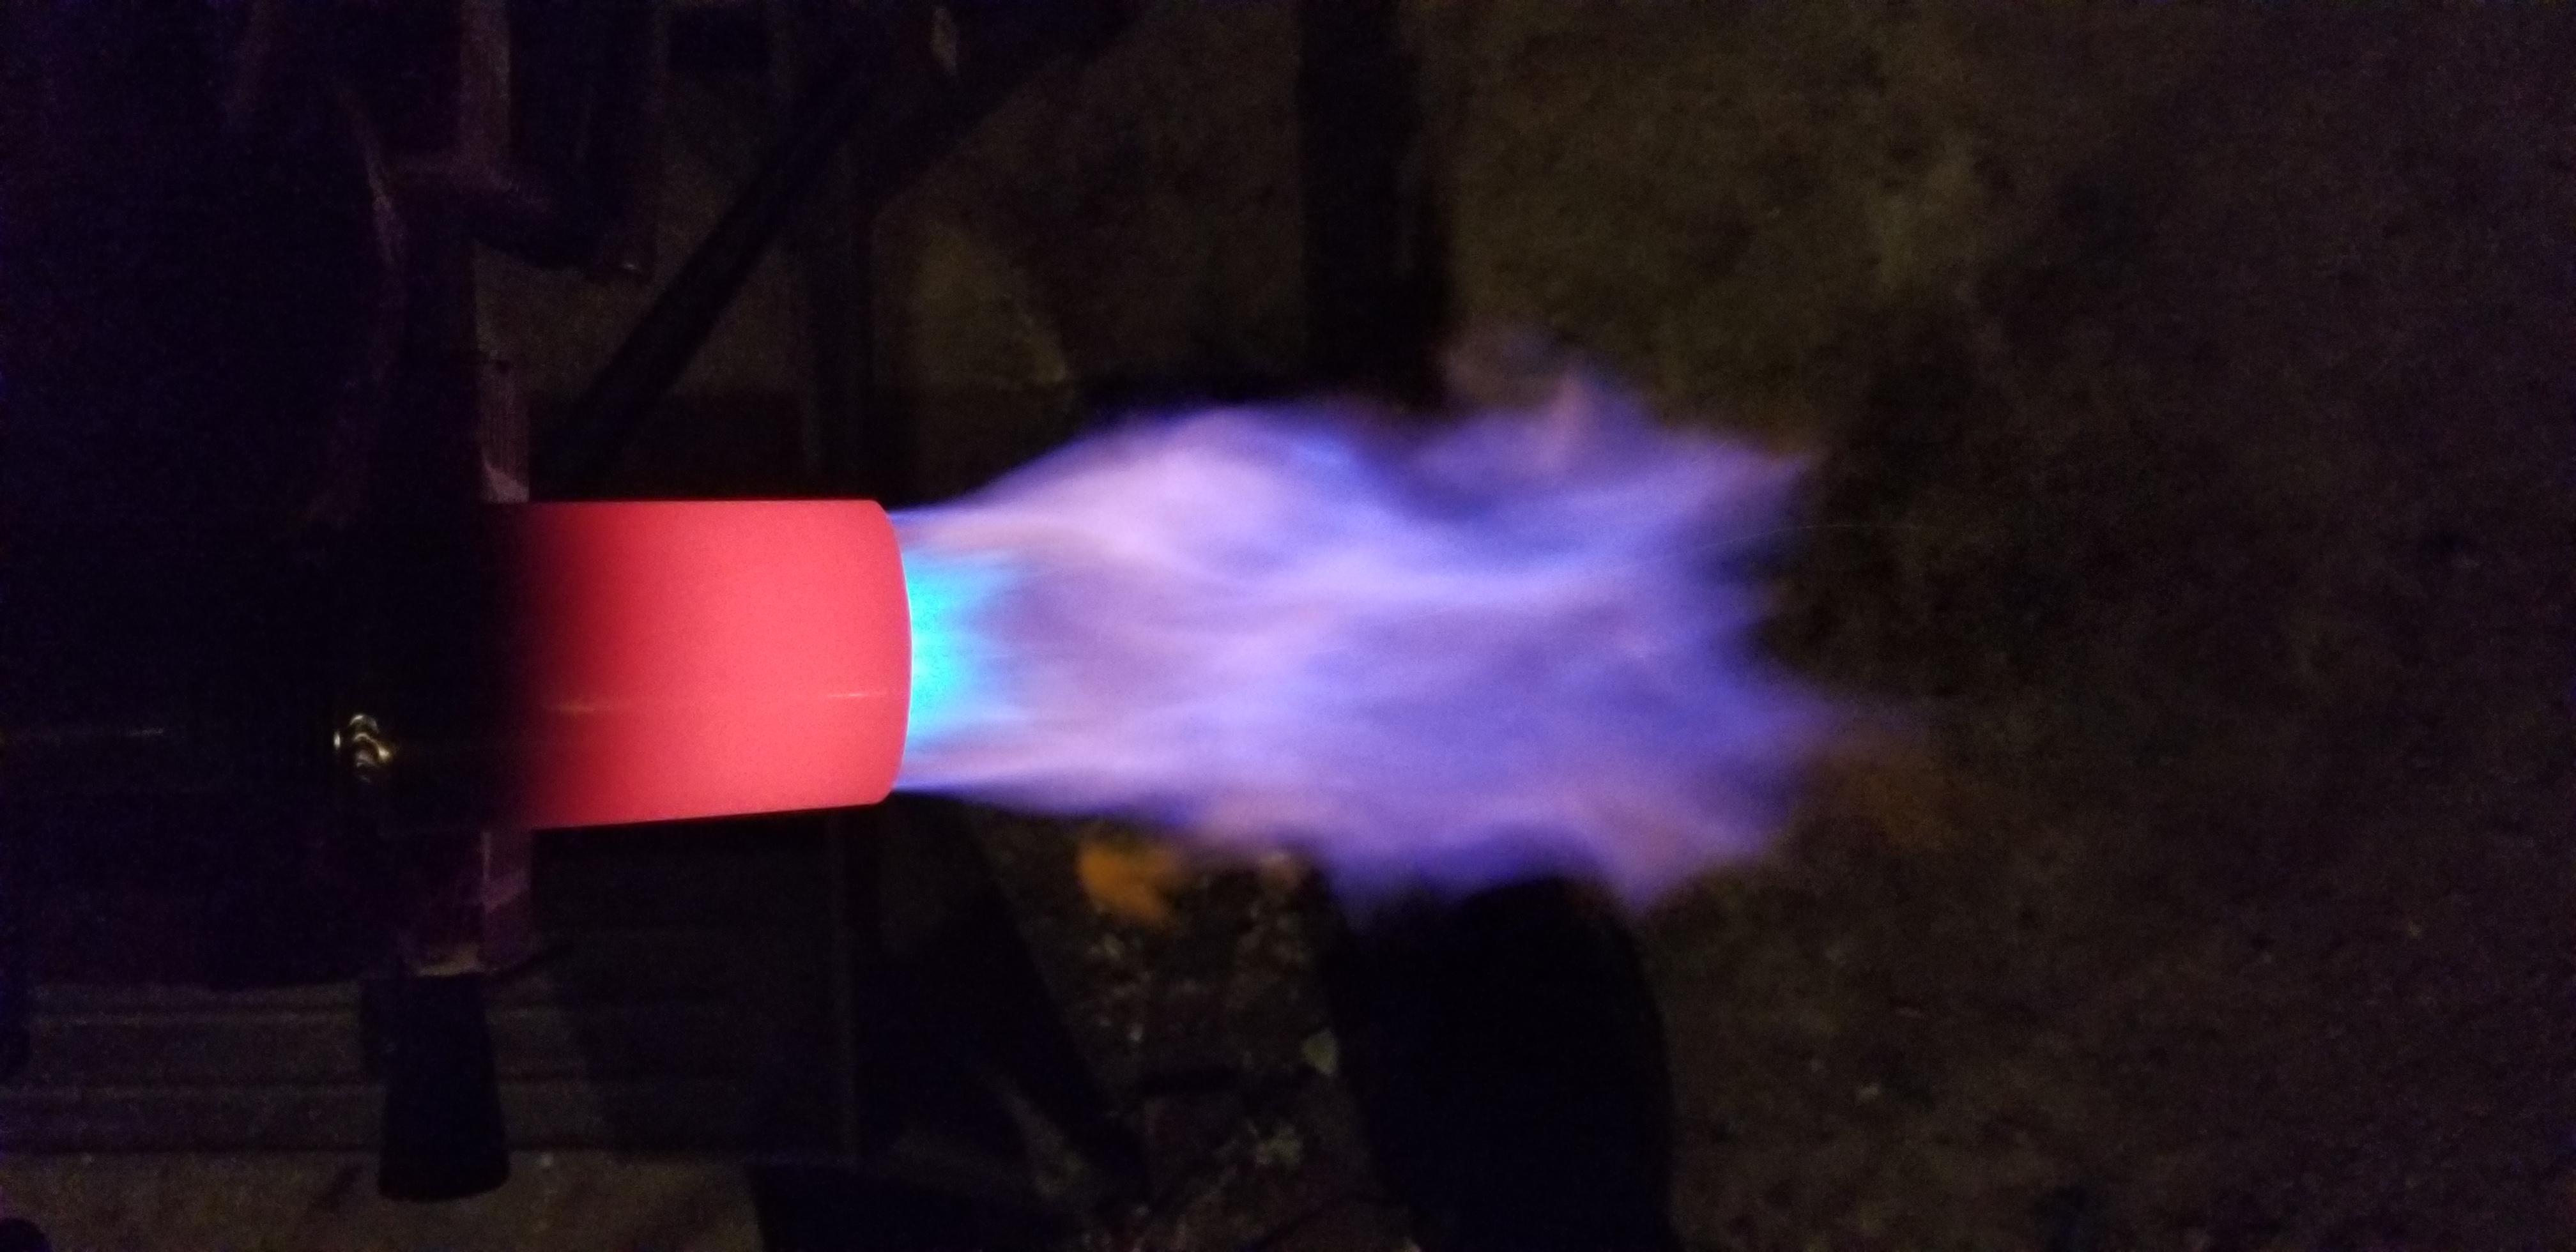
Slightly richer (by way of the air choke) but with a flash on my camera
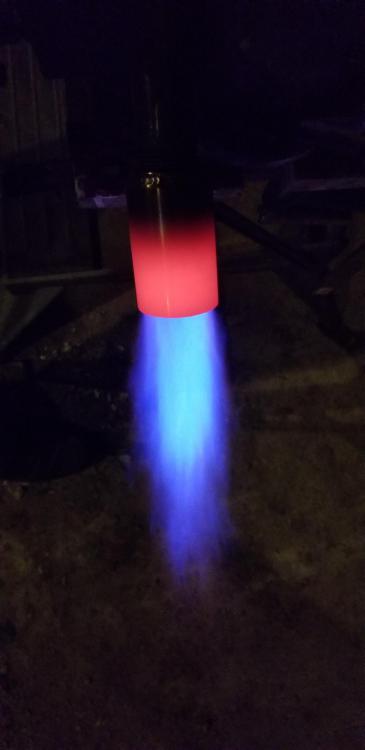
This is rich, it isn't as green as the picture but definitely had some green in it, also at 10 psi.

I don't know what this is... I have the air choke opened all the way so I assume it's reducing but I also have it at 2 psi, it isn't chugging though it does at 1.5, so yeah.. What does anybody make of that?

MIG tip comes to about the top of my finger nail
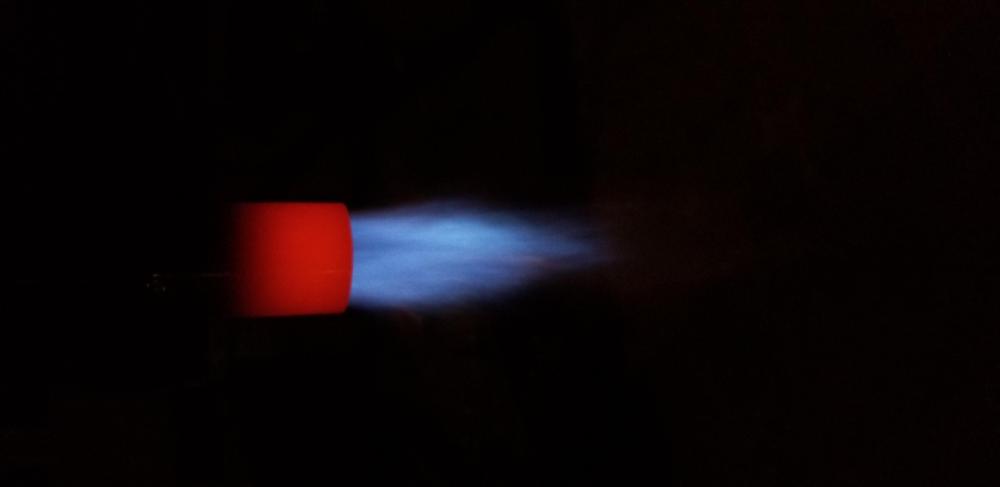
15 psi, less exposure
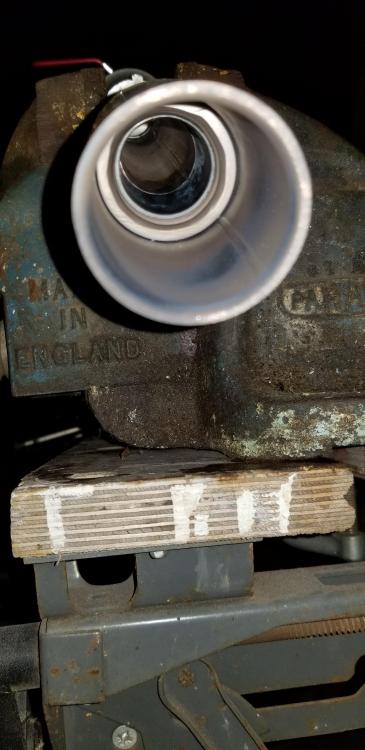
Inside of the nozzle which from the end of the threads to the beveled tip is 2" 7/8ths, which I think is too long since one of the recommendations for the Mikey step nozzle is 1/8" to 1/4" larger than mixing tube diameter for over hang, but I thought I would try anyway because I can always make it shorter.
So that's all I have to share for now, I look forward to anybody's thoughts and constructive criticism (even if it isn't constructive, call me a dolt if you need to!)
Cheers!
The Bearded Welder


Burners 101
in Gas Forges
Posted
Frosty, I didn't see your reply till after my last message,
Haha... Um yeah, I figured build the shell which I thought would be harder and then build the simple burner to match... Boy oh boy was that off the mark! Ha!
All that horse power and no where to roam? That sound about right?
Well I guess that's good news! I'm headed in the right direction!
OK so I have a couple ideas then, I have some crappy hard fire bricks from a while back, could I set those in the bottom and then do the usual kaowool, backbutter, rigidize, refractory on top of that? Or will the loose bricks want to move causing my refractory to crack? Just spit balling ideas...
Damascus is a goal I admit....but both that and a great sword will be a few years ftom now I'm sure! Ha
I'll keep the smaller size in mind.. As in the the front of my mind.. All the time... Everytime I look at it!
Well thank you for the warm welcome, I was a little worried to be honest
Cheers
The Bearded Welder
Pnut,
Good to know I wasn't too far off then!