IgnrntNewb
Members
-
Joined
-
Last visited
Everything posted by IgnrntNewb
-
Thank you for the tip, Buzzkill. You're correct. My mixing tubes are 6" long. I'll be getting some 4" tubes today and playing with the flame again. Two weeks ago, I tried using some stainless steel pipe coupler instead of the 1/2" to 1" bell reducers. I don't know if it was due to the long mixing tubes or what, but the flame didn't like the pipe coupler setup at all. One of the burners absolutely refused to stay lit. I will try the the couplers again with the shorter pipe and see how it does. Thanks again for the tip!
-
Ah, I see... My mistake.
-
You just quoted exactly what I said in my previous post, and nowhere did I say "I have to use what I already have". I said I'm trying to use what I already have. And I suppose I can take that a step further and say I'm using what I already have. The wool is bought and paid for and I already got more than I needed in case I make any mistakes. Also, being that I'm cutting the tank in half, I'll have more than enough wool left over to play with a second forge project at some point. Thank you for clearing that up, Latticino. I was about to waste a lot of refractory...
-
It's hard to get any cheaper than "free", which is how much that compressor tank cost me. I mainly wanted to make sure it wasn't a completely terrible idea. At this point, I'm just trying to use what I have to get my first forge built. The more efficient the better, obviously, but again... I'm trying to use what I currently have. One of the few times I'm happy to be wrong. Perhaps I misread or misunderstood what I was reading about having more than two layers of wool. I appreciate your response! Thanks! I'm almost certain I'm not understanding this correctly. Are you saying that I should NOT put castable refractory in between each 1" layer of kaowool? Should I only use the castable as a protective layer over the final layer of kaowool? If this is the case, than I've definitely been misunderstanding a lot of what I've been reading about insulating a forge. Thank you all for taking the time to reply. This would be a miserable endeavor without guys like you willing to walk guys like me through the process.
-
I've read over and over again that two 1" layers of ceramic fiber insulation is all you want to lay down (with refractory, rigidizer and whatnot...). And I understand (I think...) that you don't want to use more than that because it creates more of a heat sink...? Please correct me if I'm wrong. (My username almost certainly applies here) But what do you do if you need to bring your inside diameter down in size to achieve the overall cubic inch range that you had planned to match your burners? The empty inside diameter of my tank is about 13-3/4" with a length of about 14" inches (after I cut it in half). I need to get as close to a 6" inside diameter as possible to achieve the 300-400 (roughly) cubic inches that my two 1/2" burners will heat. The only way I can see to do this is to add at least one more 1" layer of kaowool, and layer the refractory thick enough between the layers of wool to achieve my final inside diameter. Is this not a good idea or is this one of those "gotta do what you gotta do" scenarios? Thanks in advance!
-
Found these on Amazon. They should be here tonight... Remove commercial link per TOS
-
Thank you, sir!
-
All I know for sure is when I asked if they had any, they said "No"... On a different note, I absolutely love a good "Airplane" reference. Well played...
-
Yes sir, I have. Around here, all the black steel pipe nipple comes with plastic thread protectors. They don't even bother taking them off of the pipe. They allow the customer to do that when they're ready.
-
Thank you very much for your response. I see what you're saying about moving the gauge and shut-off valve back to the tank. Makes perfect sense to keep it further from the heat. I'll make that happen. I read in your instructions about bell reducers not being ideal, but I was unable to find the thread protectors you mentioned. All the suppliers around here just use plastic thread protectors. Do you have a link where I could get some 1/2" black steel thread protectors, or maybe some pretty stainless steel units? I'd like to do this as correctly as possible, and even if my bell reducers aren't technically "wrong", I'd still rather do it the way the guy that designed these burners recommends... Thanks again!
-
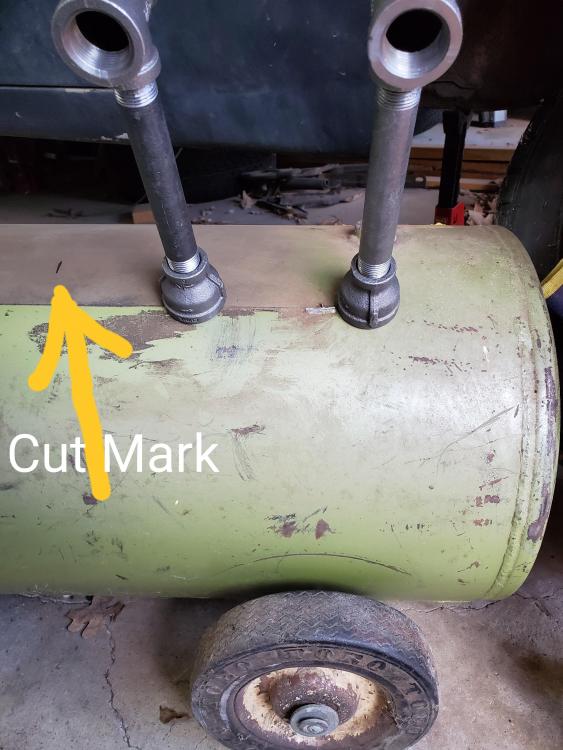
Lol... Will do! I'm pretty sure the tip in the burner furthest from view still need to be trimmed a bit. It's a little longer than the other. I just figured I'd wait until they were in the forge to do the final tune. Should the holes in the tank for the burners be cut to fit as tightly to the half inch pipe as possible while still allowing it to slide up and down (when not tightened, obviously...) for adjustment?
-
My burner spacing look ok? I haven't cut the tank in half yet, but I put a black mark where it'll be cut to show where these burners will be centered. Should the holes in the tank for the burners be cut to fit as tightly to the half inch pipe as possible while still allowing it to slide up and down for adjustment?
-
Tried to just reduce the 3/4 T down to 1/2" pipe... (1st video) That certainly didn't work... So I went and got the 3/4 - 1/2" T and, trimmed the tips back quite a bit, and it looks like I'm back to a similar flame as where I was with the 3/4" burners. I'm gonna leave it a lone until I get them mounted in the forge, at which point I'll finish tuning them. Anybody see anything right off the bat that I missed or could do different/better? 20191206_100805.mp4 1/2" burners, take 2... 20191206_134823.mp4
-
Thanks again, Mikey, and to Monkey Forge as well, for the responses. I'm sure Frosty is a very busy man, but I am VERY interested to read what he has to say about this one. In the mean time, I could always try to reduce it and see how the flame looks, post a video, get some input, etc...
-
Well crap... Now you went and woke up every little OCD monster I've got running around in my head. They were fast asleep until I read that comment... Are these 1/2" burners you suggest still Frosty's 'T' design? If so, can I just reduce 1"x1"x3/4" 'T' down to 1/2" black pipe Or would I need to go 3/4" T reduced to 1/2"?
-
Thanks again to everyone who has taken the time to respond. Being that I don't even know how to build the hypothetical mousetrap here, I certainly don't assume I can build a better one. Thank you all for the insight and advice. I will be cutting my tank down by half and using a single burner. After that comes lots more study on the proper insulation process. I've read a lot, but there are still a few things I'm not sure I've fully grasped yet, possibly because I'm unfamiliar with most of the terminology. Anyway... I'll start another topic for those questions if I'm unable to figure it out through study. Thanks again!
-
So Mikey... Is it your opinion as well that I should cut my tank down to 300-350 cubic inches and go with a single burner?
-
That is good news! Thank you, sir!
-
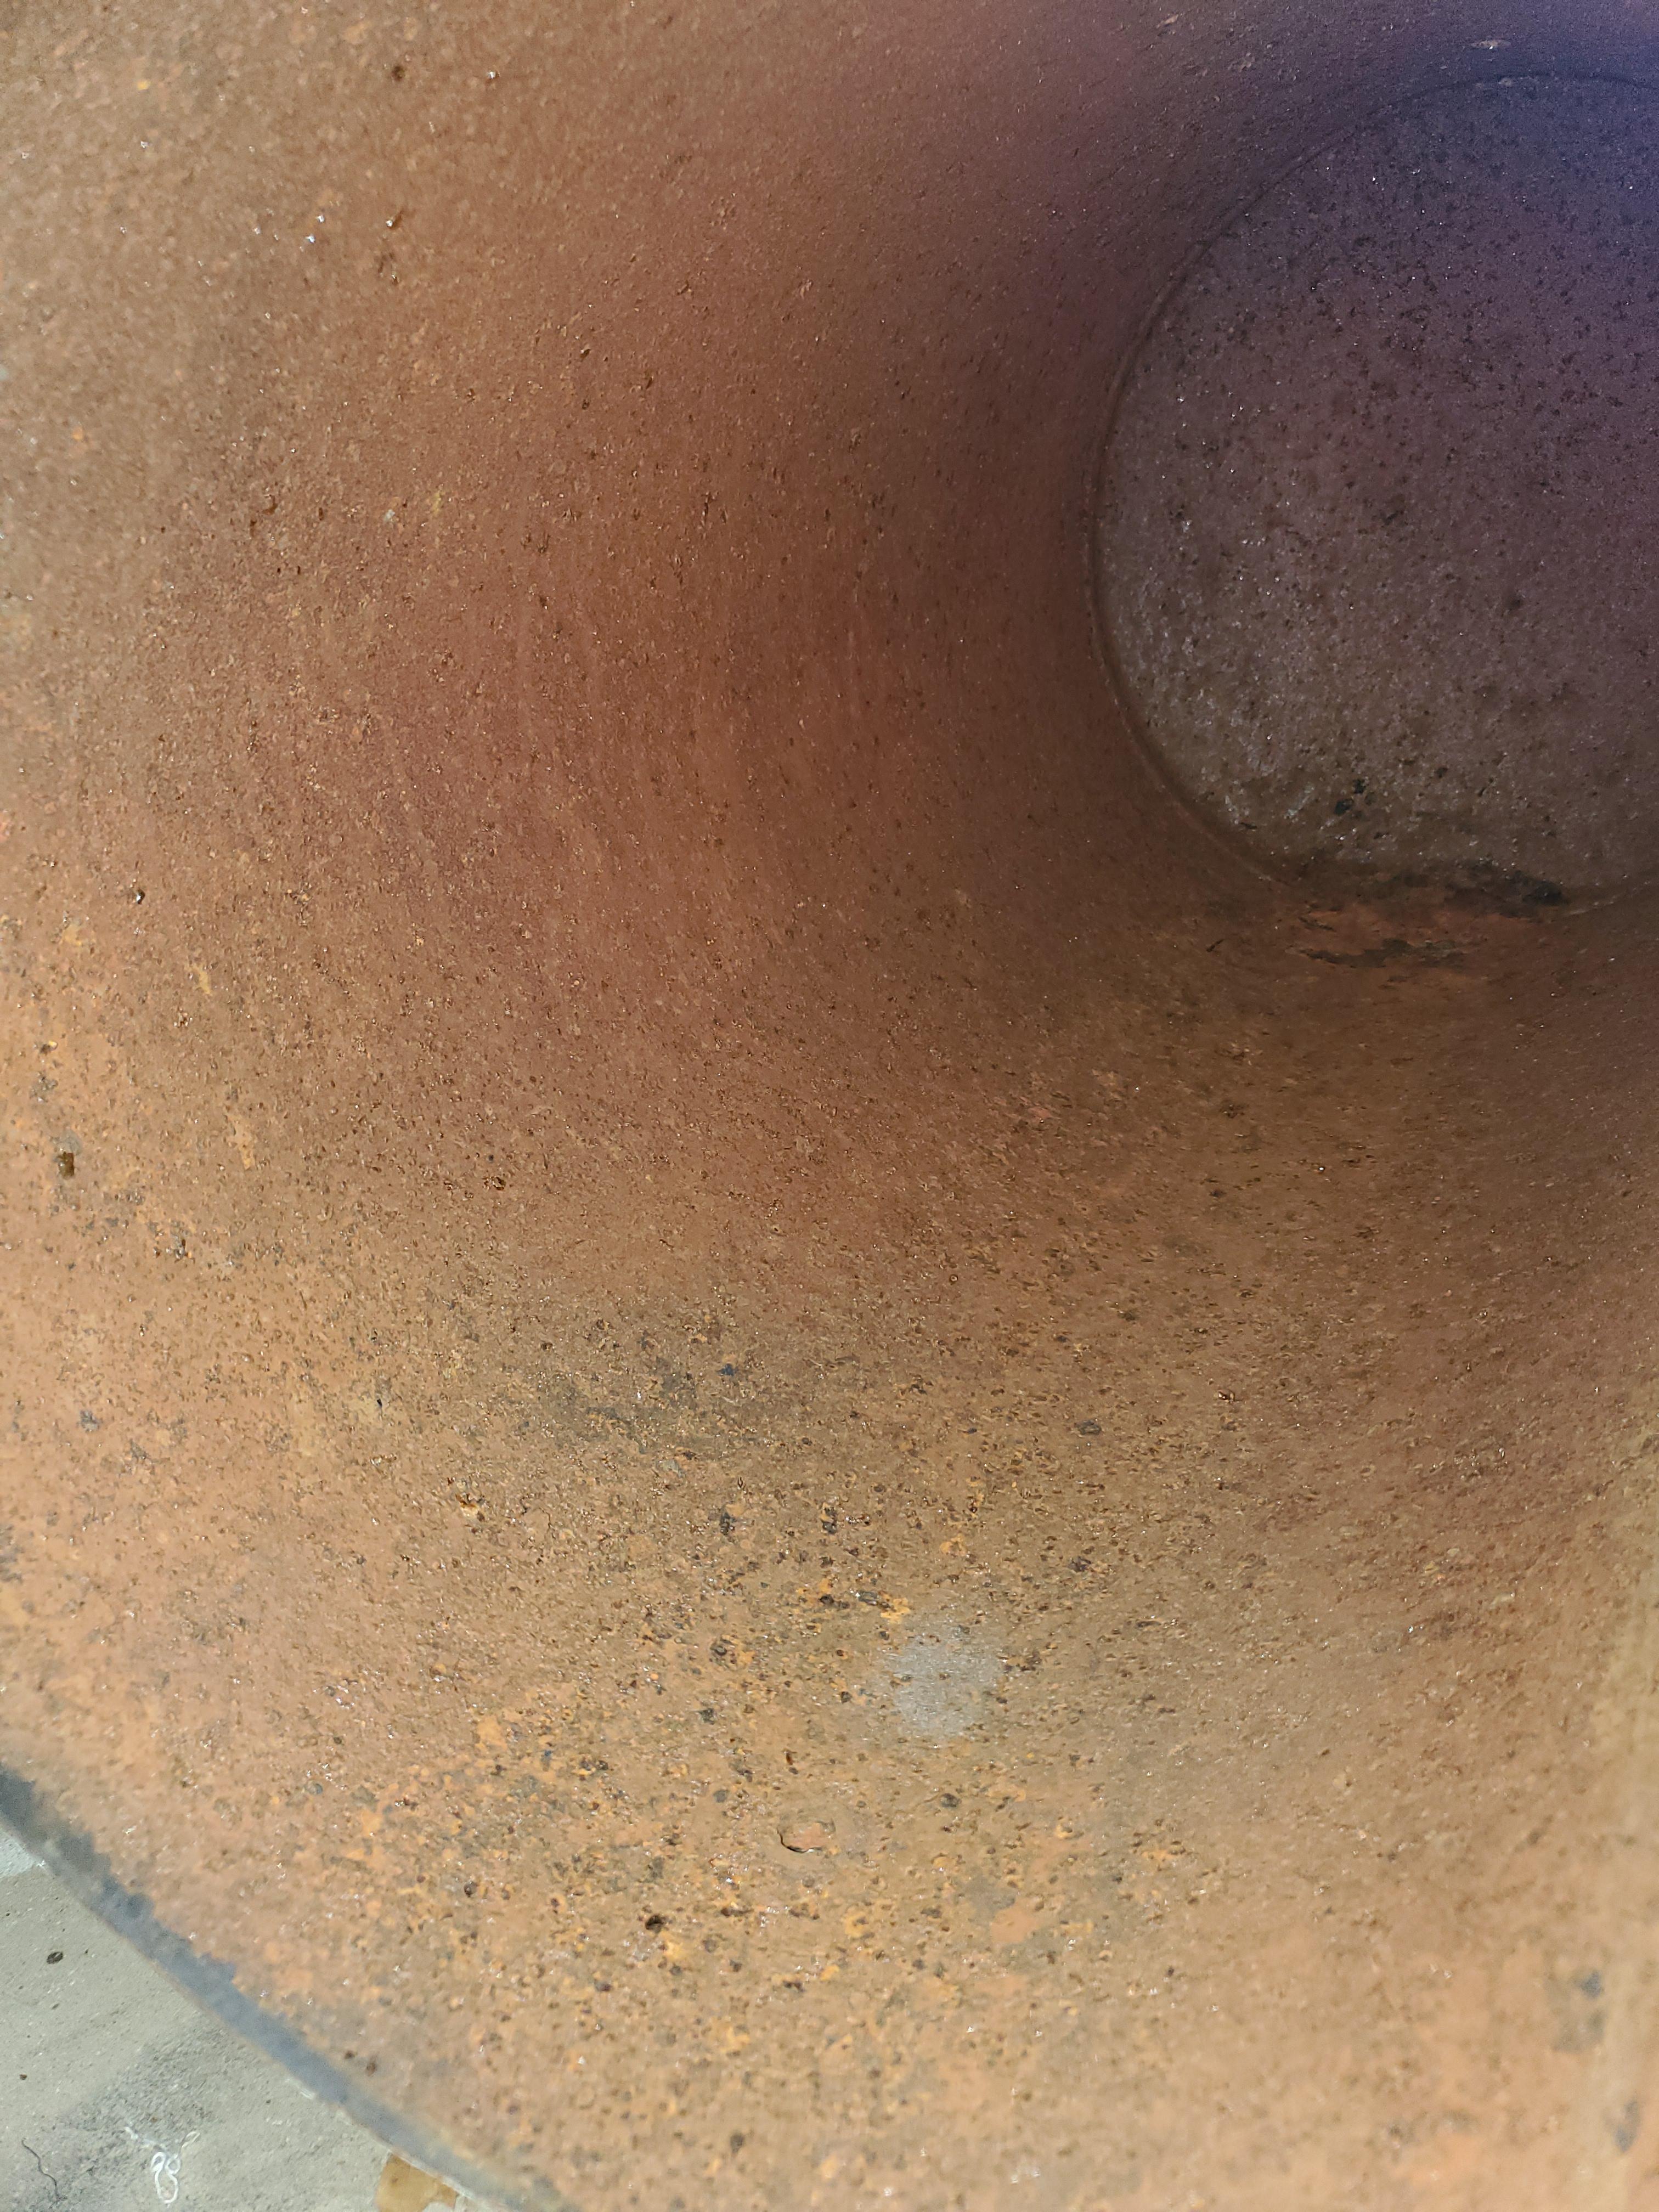
Thank you for your response. I have skimmed more than a few threads over the past few weeks, including the 'Forges 101' thread. There is an inexhaustible amount of info here. So much so that finding answers to specific questions can be quite difficult. I'm still hoping that someone will have some insight for me on my original question as to whether or not to paint the inside of the forge after I knock the rust off. I do appreciate the link very much. I've gone through some of it over the past hour or so, but the drink is currently taking effect in the best possible way, and I am subsequently losing my ability to remain focused. So while I look forward to gleaning as much knowledge as possible from those who know WAY more about this than I do, I'm afraid I'll have to postpone any further gleaning until tomorrow. Thanks again for all your responses!
-
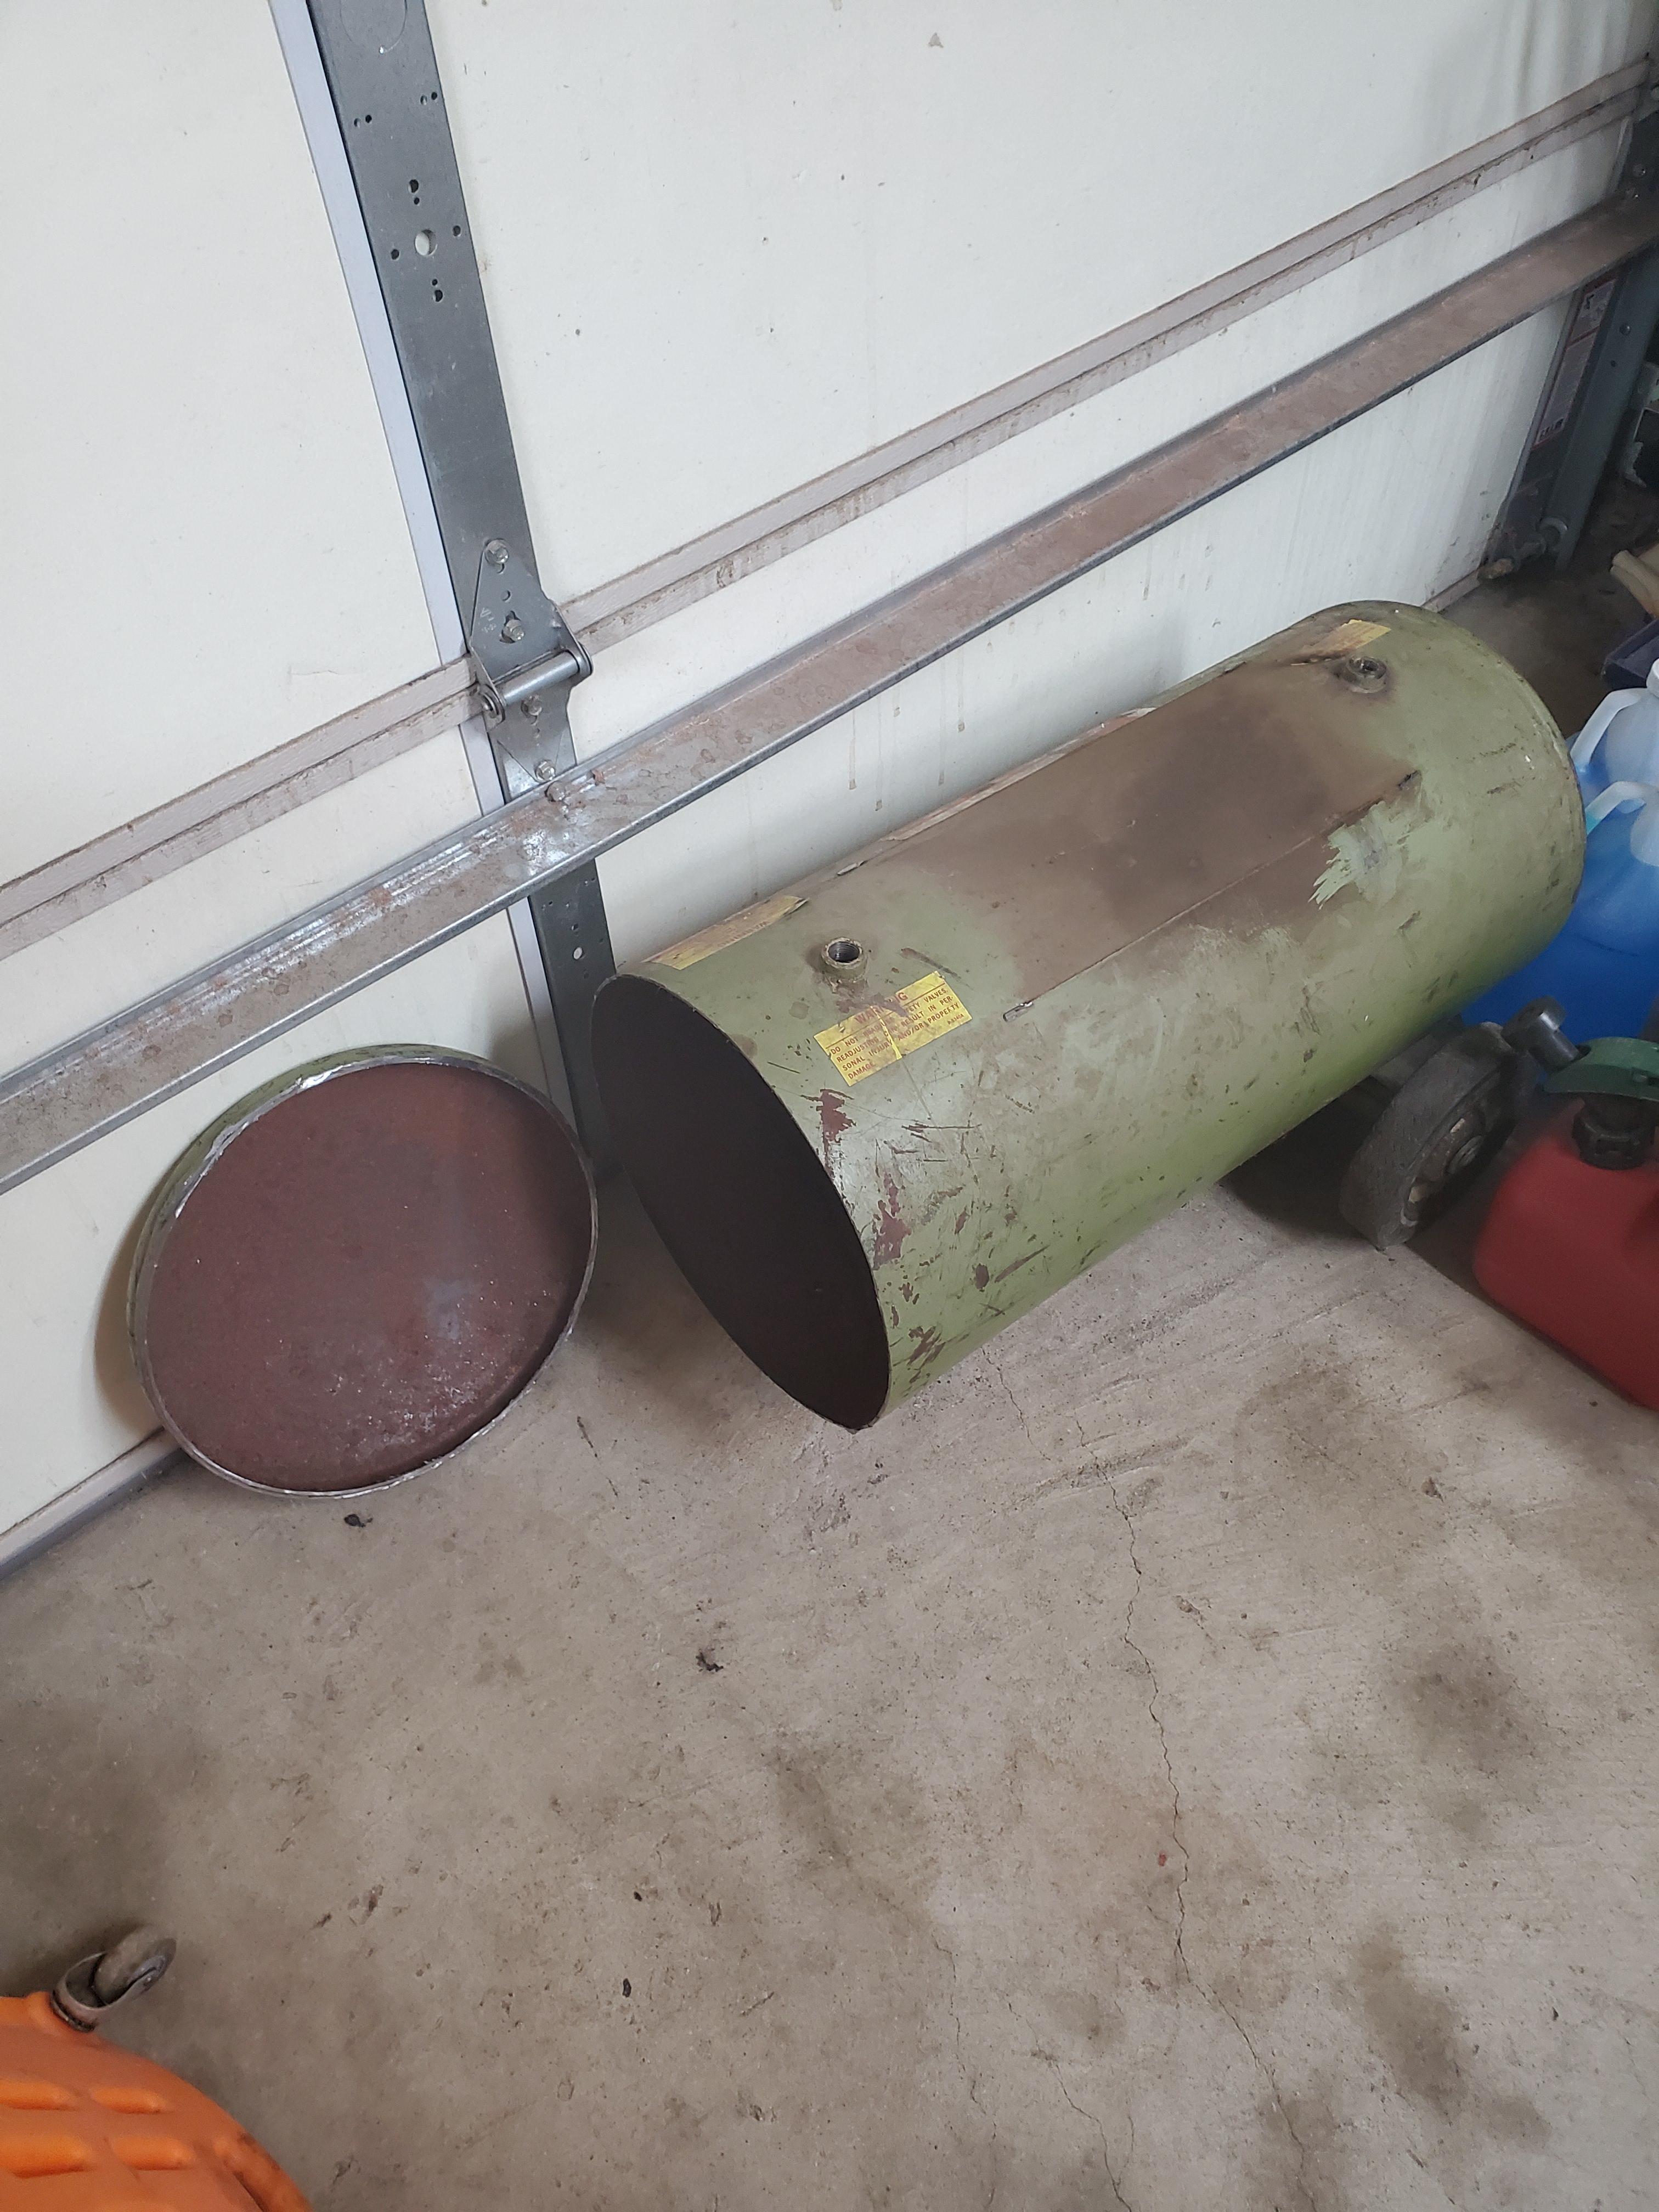
My username isn't a joke. I'm as ignorant in these matters as they come. I haven't come here thinking I know anything about what I'm doing. I've come here to make sure I do it as close to correctly the first time as I possibly can by asking those who've already done it correctly. The reason my tank is as long as it currently is is because that's what I was given. I've done a lot of research looking for answers to questions that I have, but there are many questions that I don't even know I need to ask. What interior diameter/length should I shoot for? Should I avoid building something that requires two burners for the time being? While I'm not currently aiming at forging sword-length blades, I am interested in doing some 18-24" blades along with the other smaller blades that I'll do more often. I'm not married to any particular dimension. I'm here for the sole purpose of humbly asking those who know to teach one who doesn't. Tell me what I'm doing wrong and I'll fix it.
-
Thanks again for the info, Mikey! I'm gonna do my best to remember to video the progression as I tune the burners. I'm very glad I read this before starting to trim the tips. Thanks so much!
-
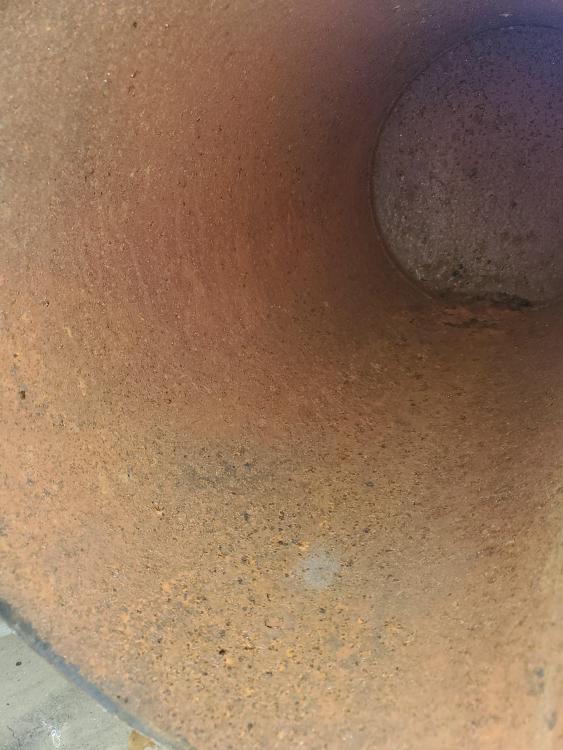
I'm in the process of building a propane forge from an old air compressor tank I was given. The current interior dimensions are 13-3/4" diameter x 28" length. After insulation, I plan on having a 6" diameter x 25-26" interior length, giving me a volume of between 705 and 735 cubic inches. I've just finished building the double Frosty T burner set up to heat the cook chamber. None of this really has anything to do with my question(s). I just wanted you to know what I'm working with. Question for anyone who's used an air compressor tank, or anyone else who knows...: What kind, if any, prep-work should I do to the interior surface of the tank before laying down insulation? Mine has a fair amount of surface rust and I'm wondering if I should paint the interior after taking out the rust. Thanks in advance!
-
I apologize. I didn't initially see your question at the end of your last response.
-
Thanks again, Mikey. Roughly how much should I aim to take off the tips at a time? 1/16"? 1/8th"?
-
Excellent! If you don't mind, let me know if you see anything that doesn't look right in the video and what can be done about it. Thank you!