Melancholy Rivet
Members
-
Joined
-
Last visited
Everything posted by Melancholy Rivet
-
I haven't had a chance to forge on it since dressing it but I think I'll like it quite a bit. I'm hoping to try it out this weekend. A rivet doesn't stay melancholy for long when there's a hot forge!
-
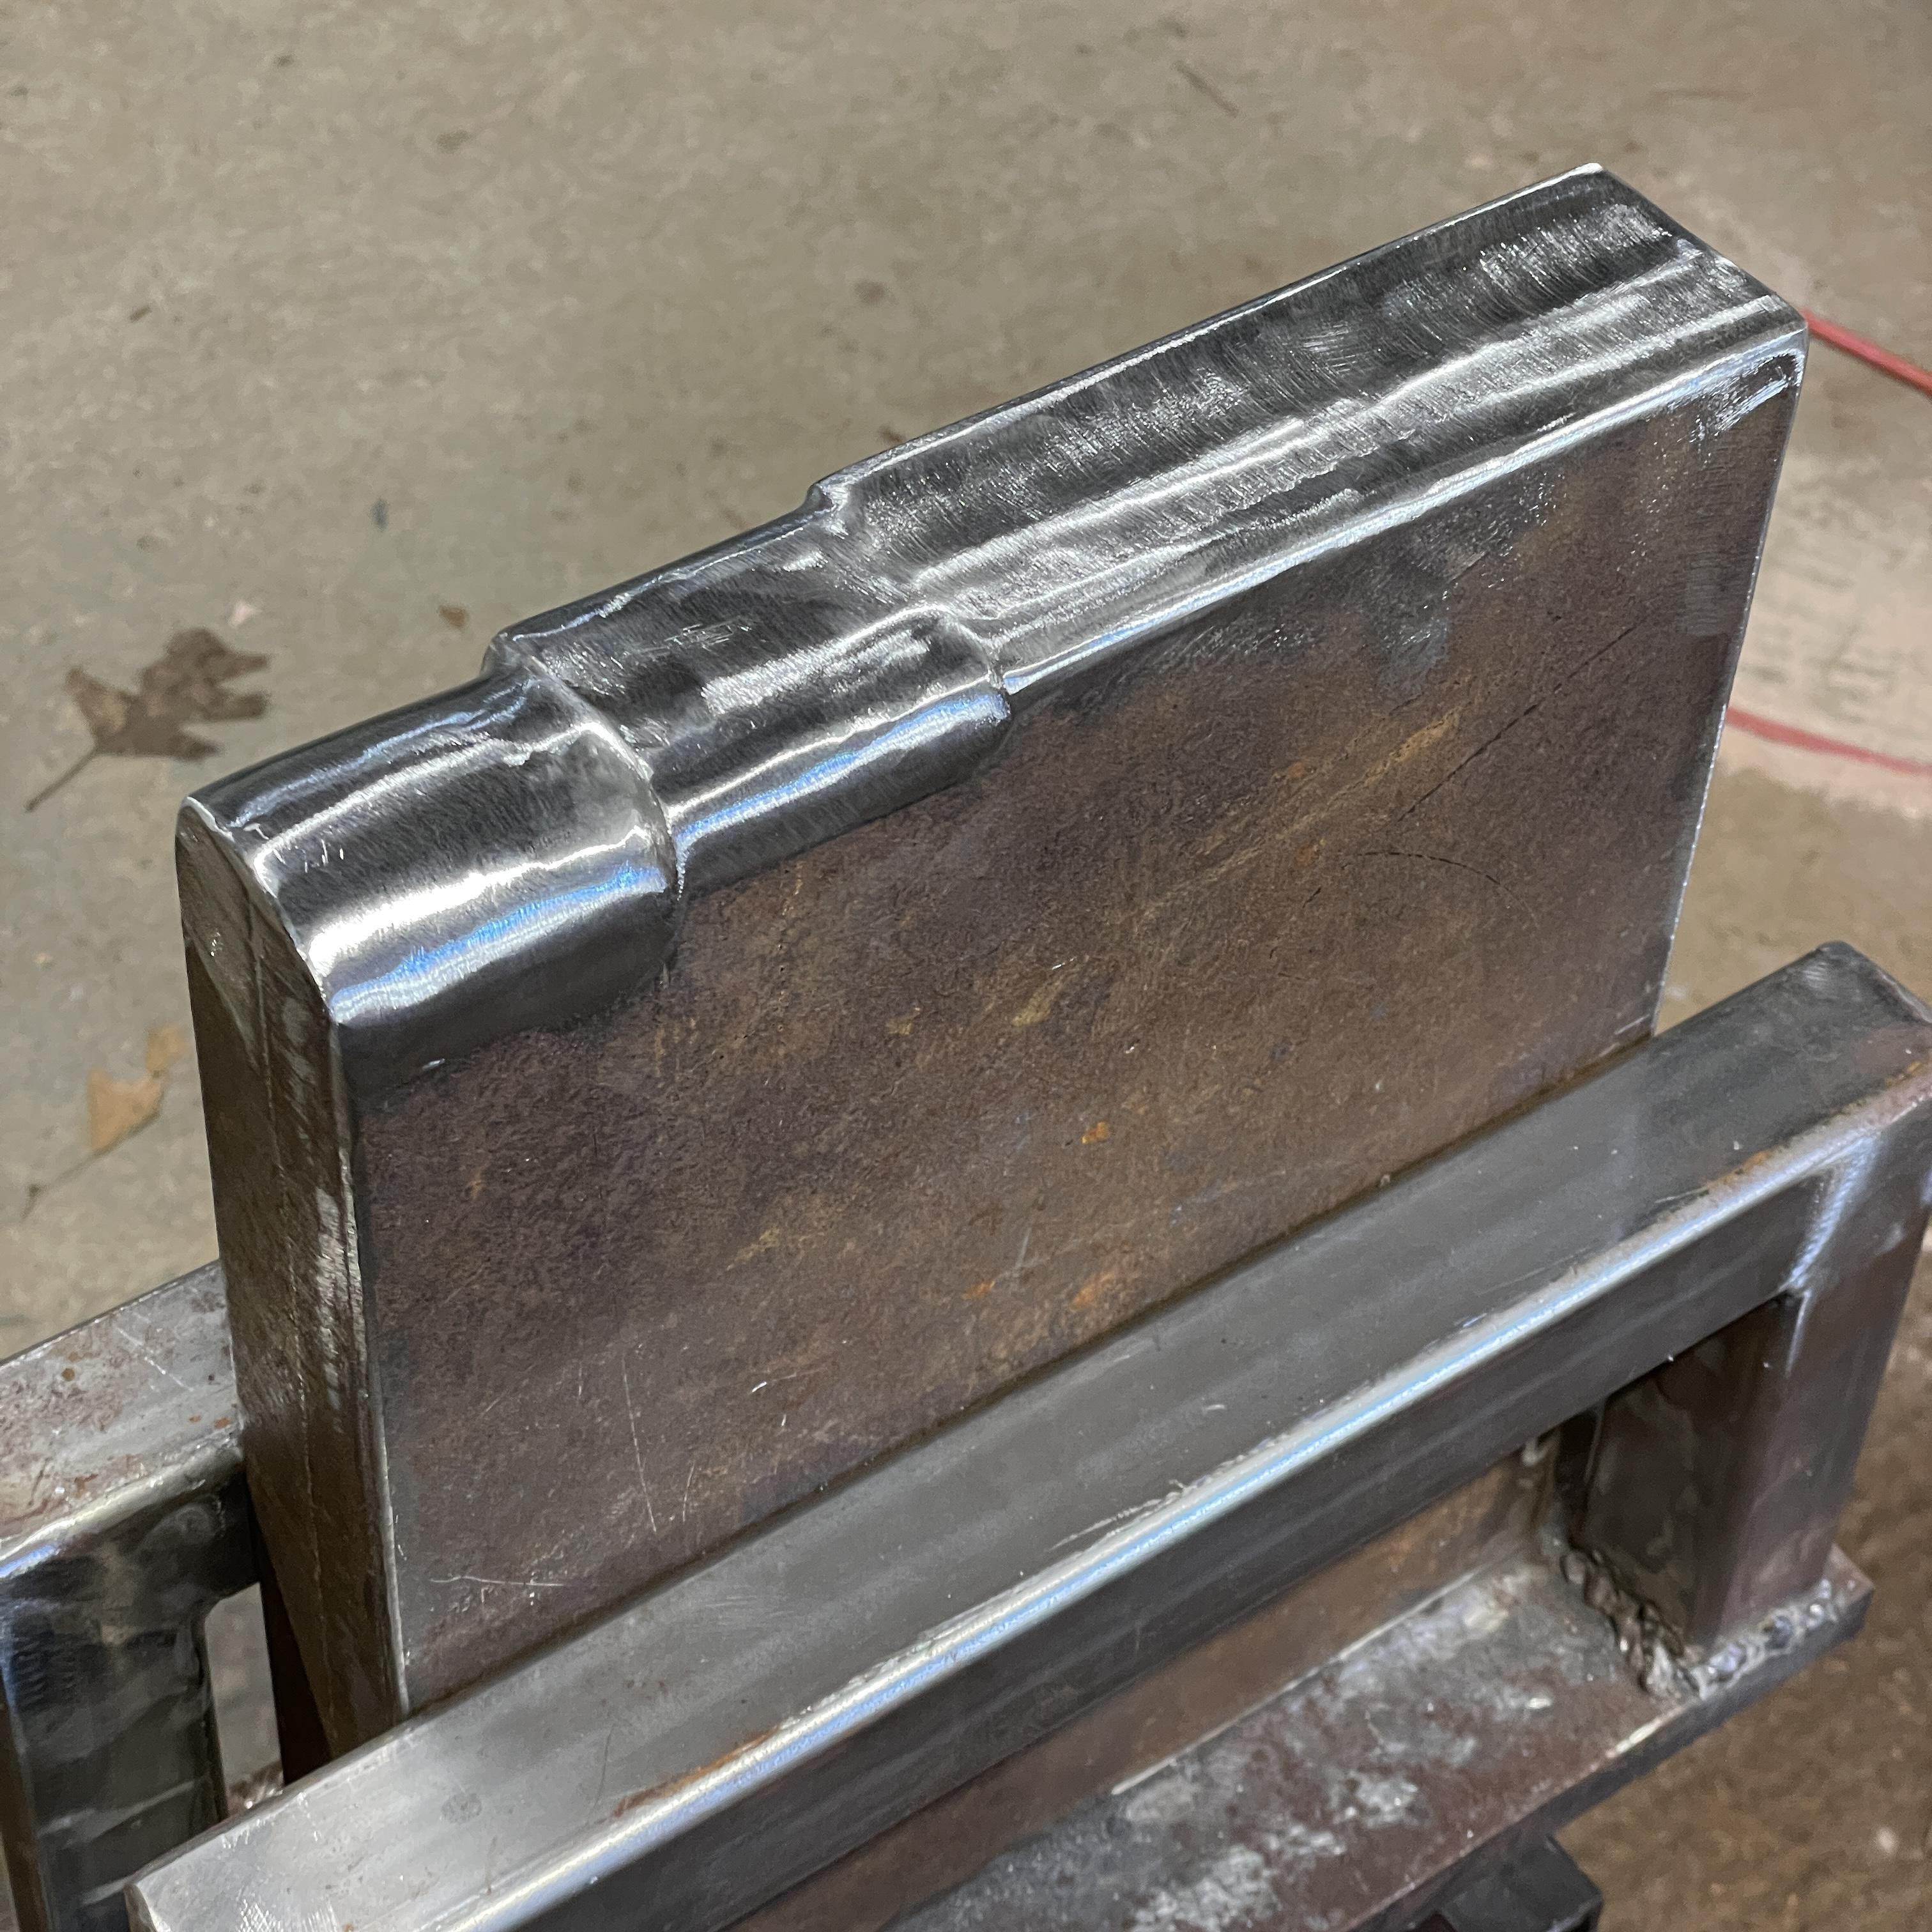
Added some radii to the top for better utility.

-
Thanks gewoon!
-
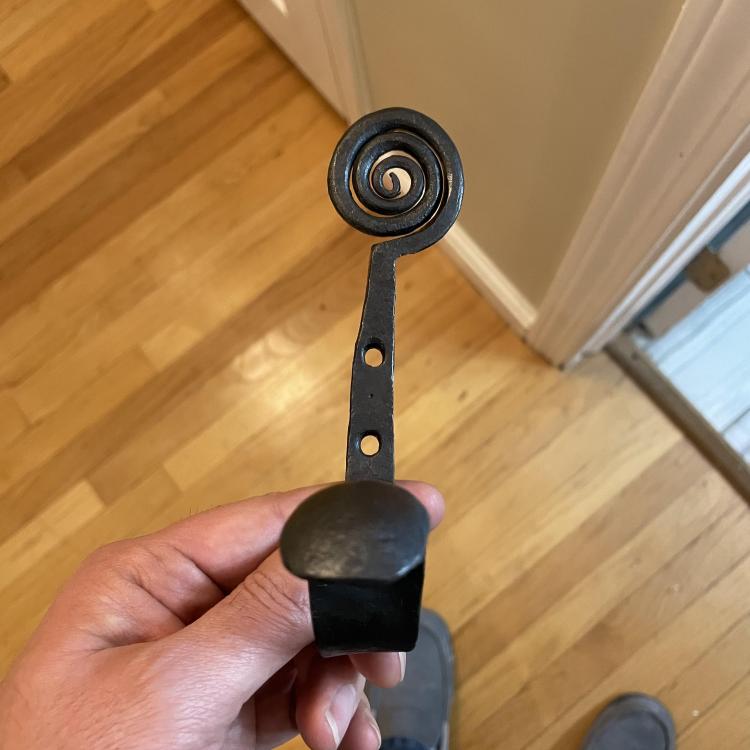
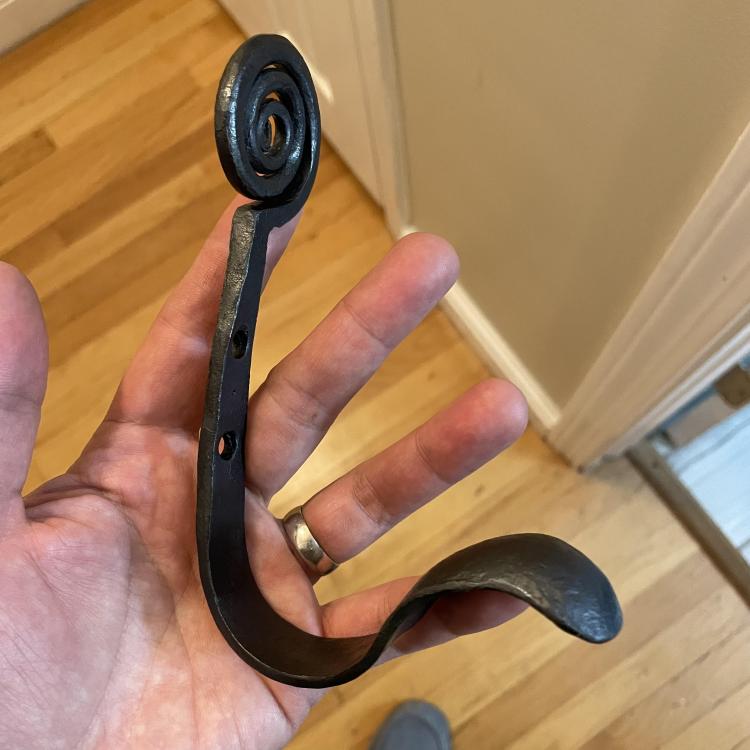
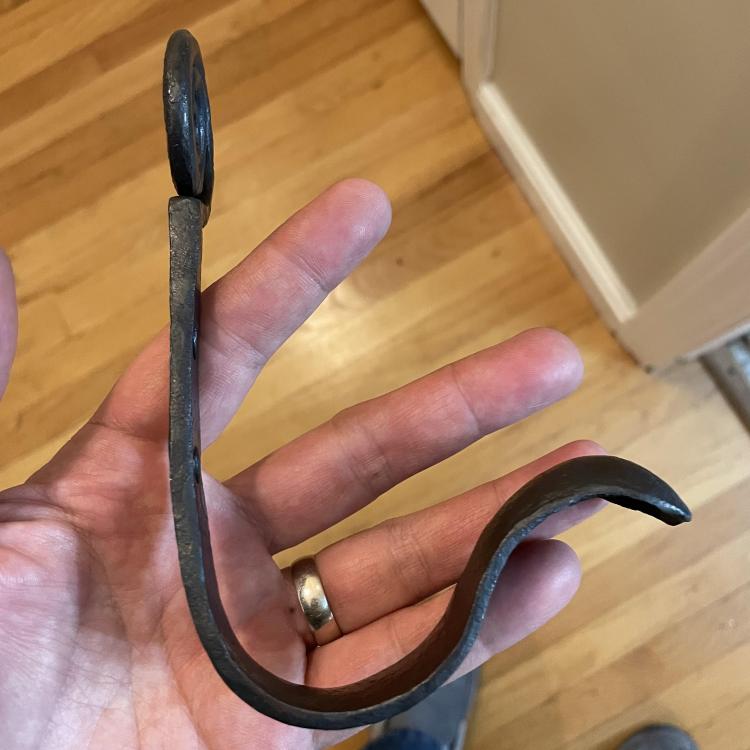
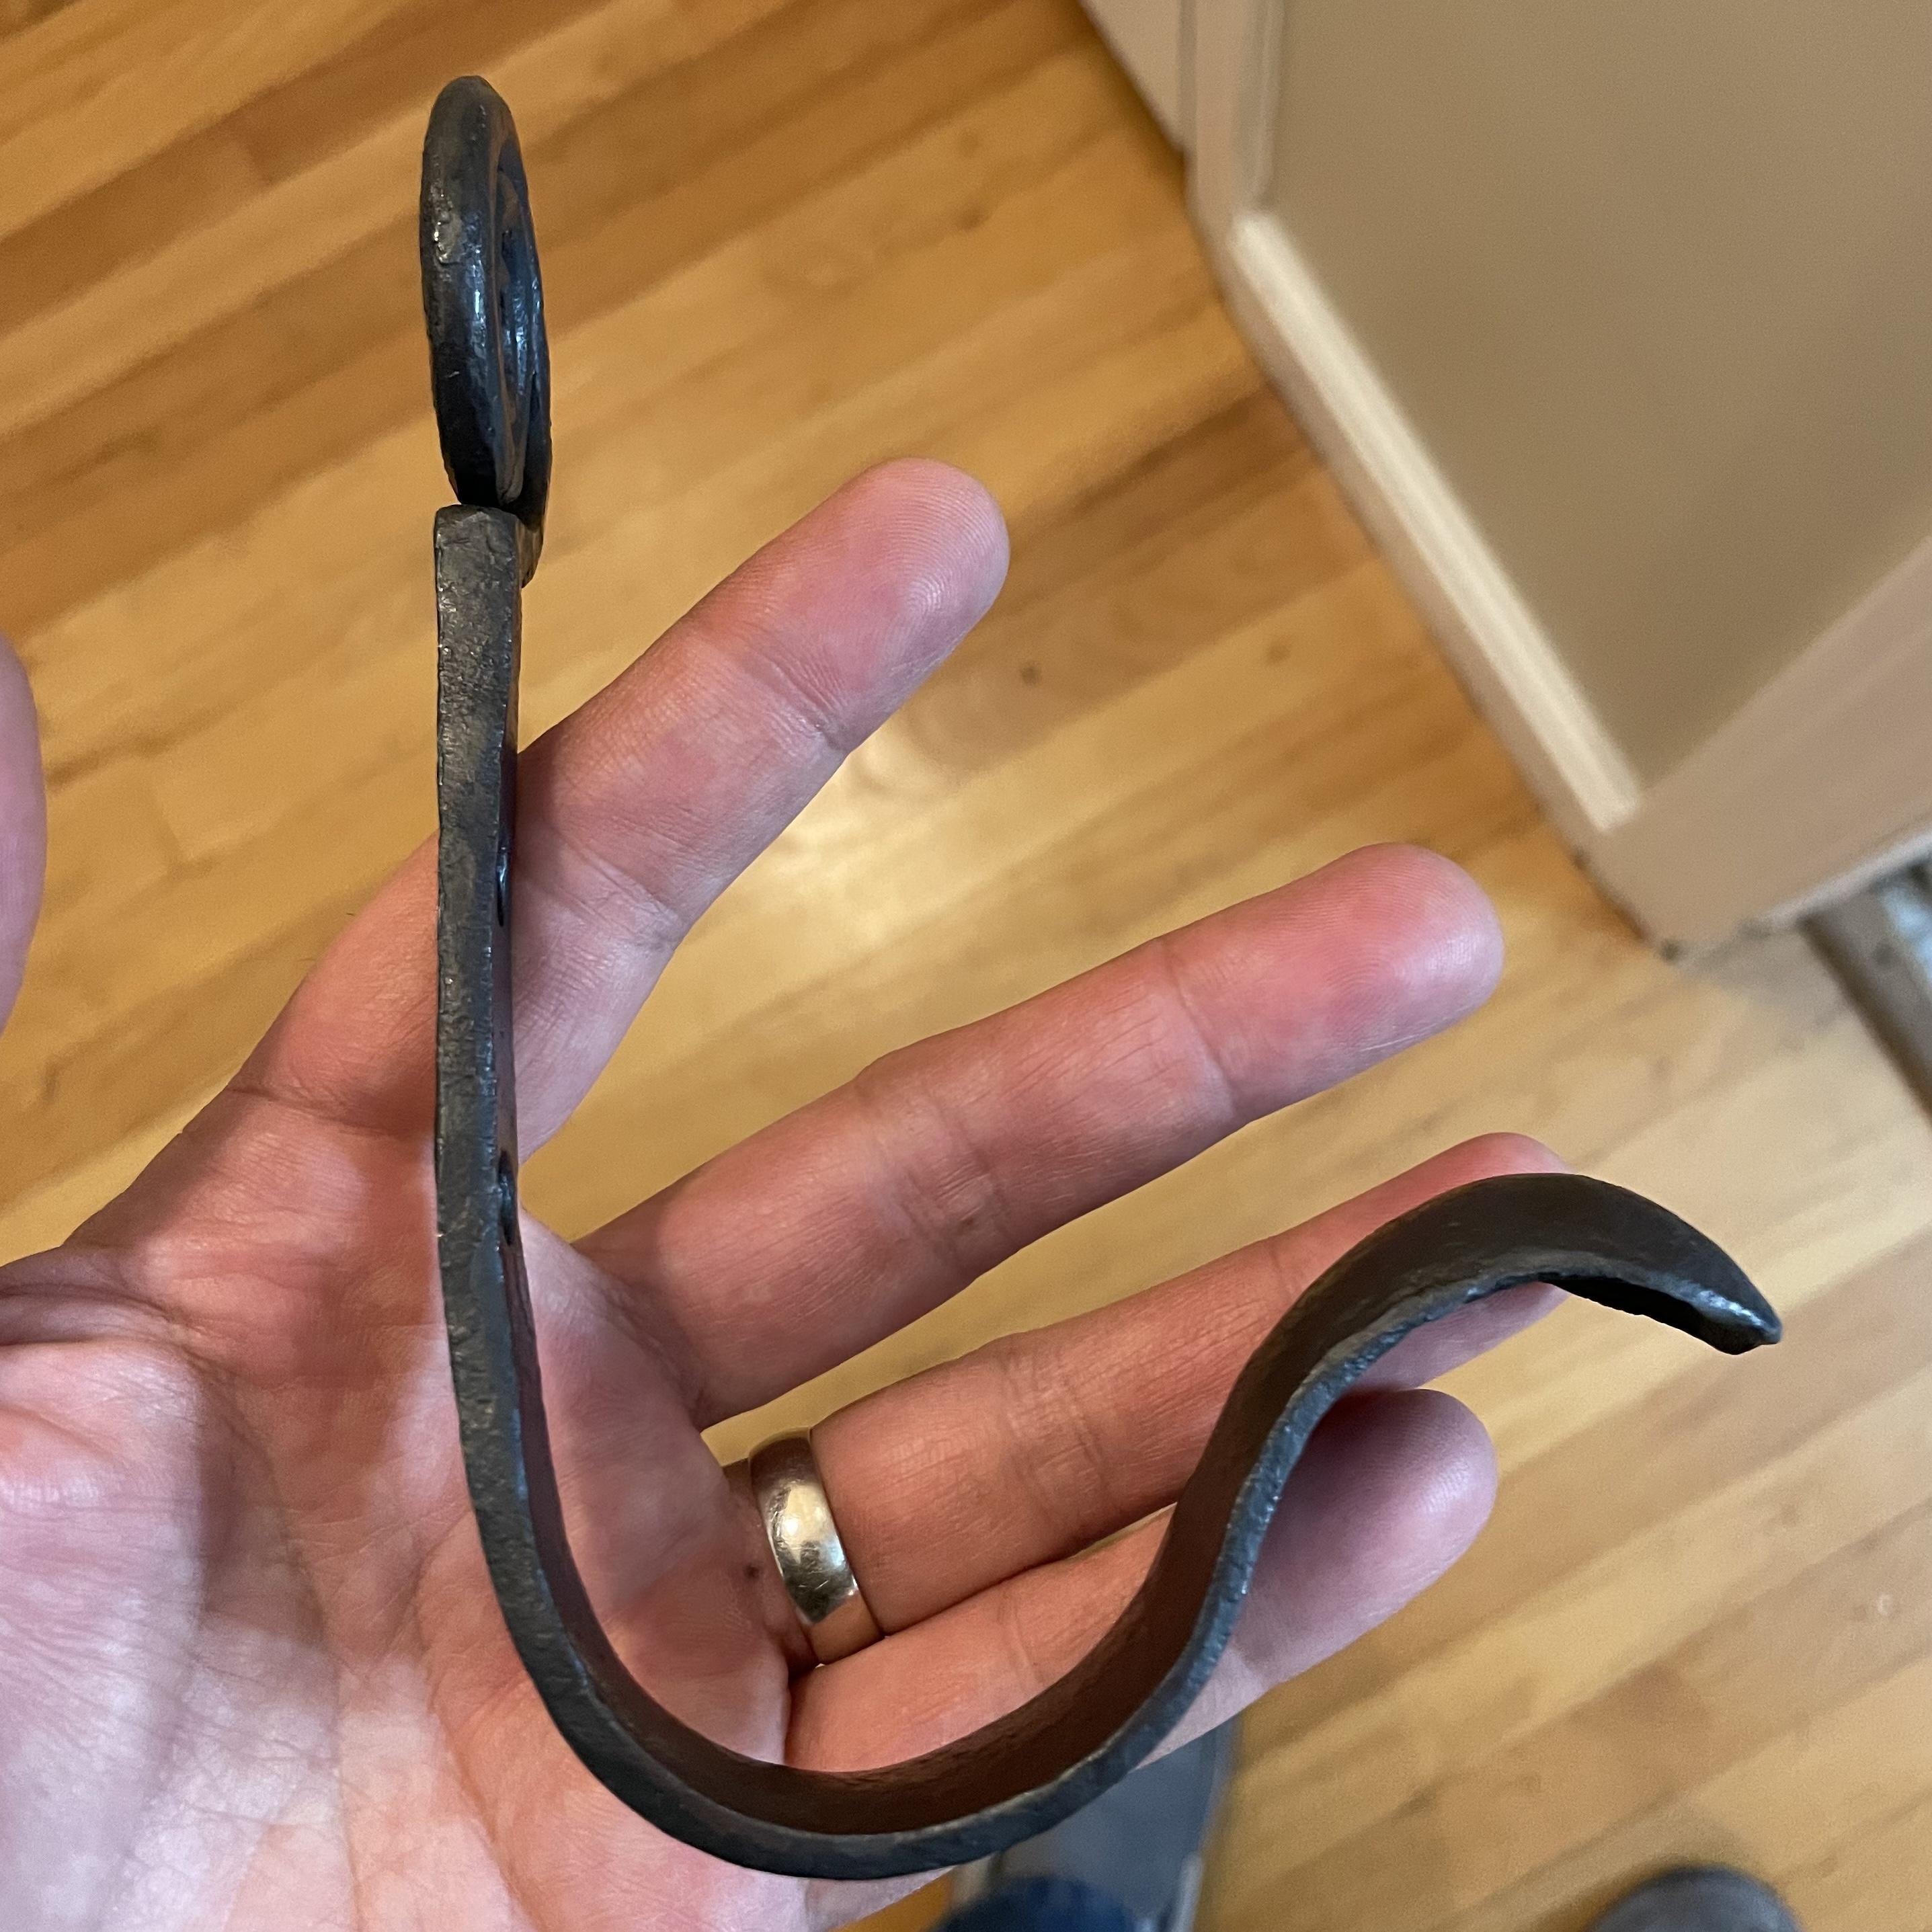
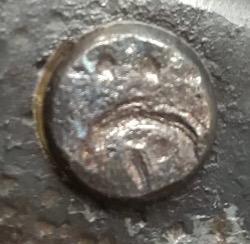
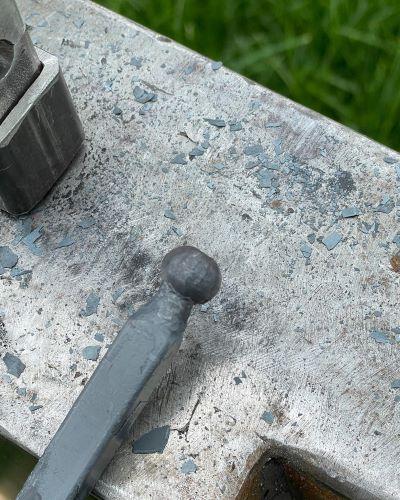
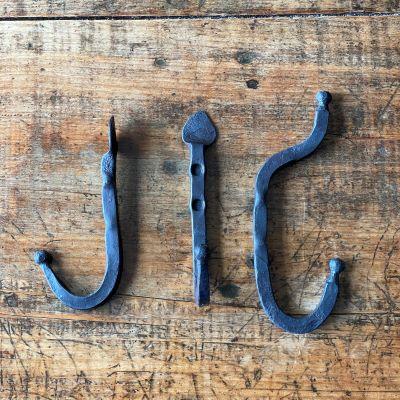
Nice work everyone! It's always inspiring to scroll through this thread! I made a set of ball end dies from 3/4" square to fit my little guillotine tool, and forged a few hooks to try them out.

-
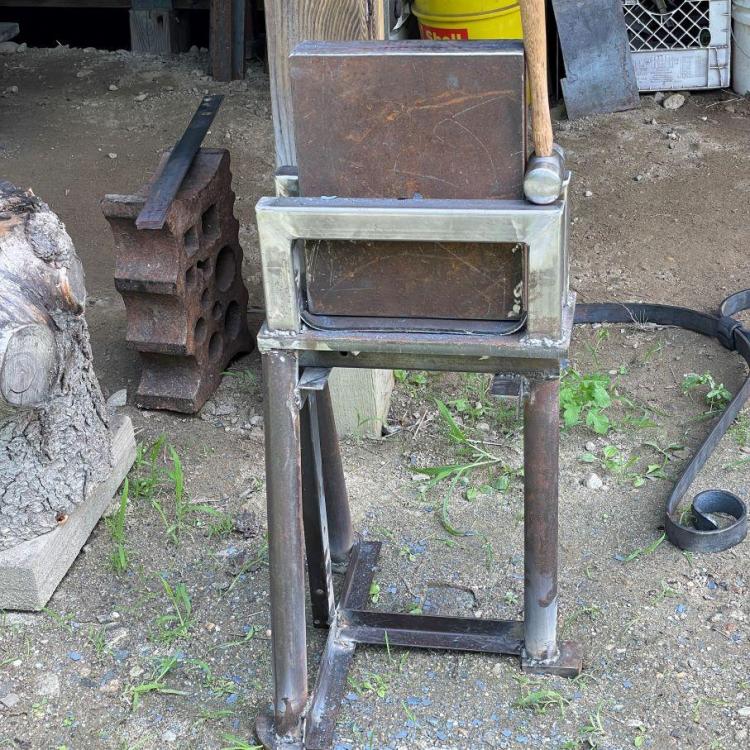
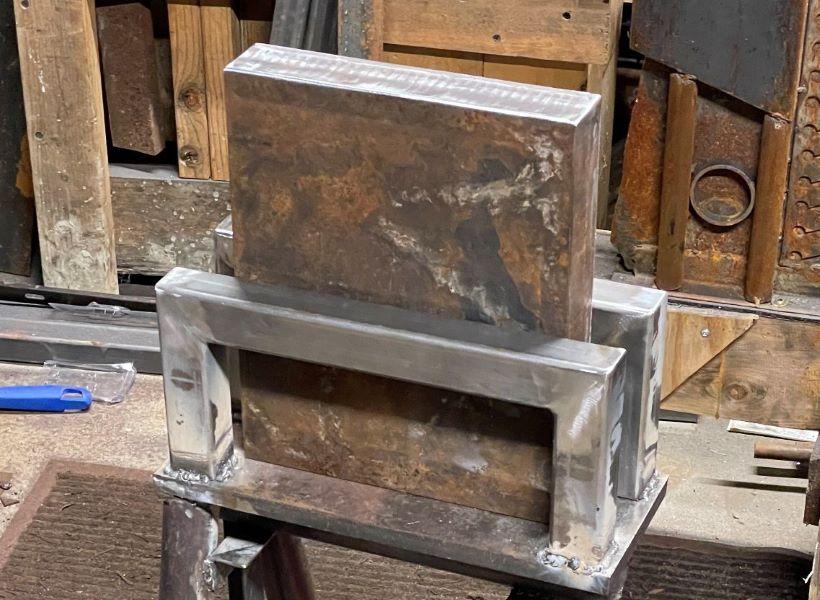
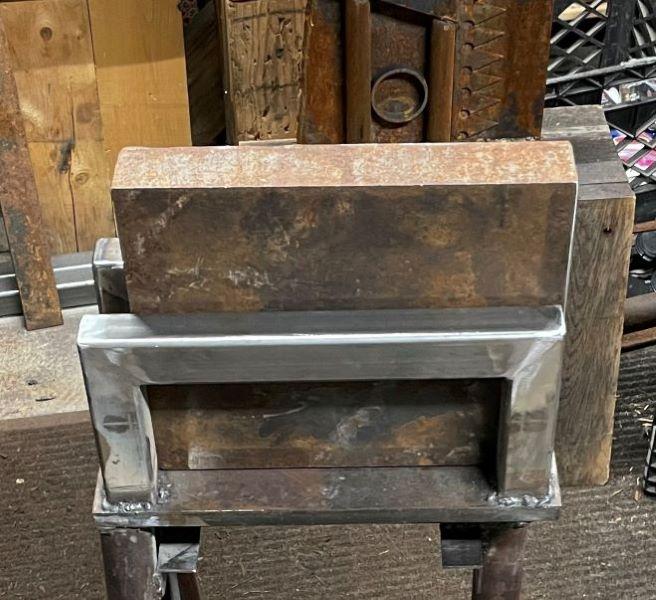
A 10" x 12" piece of 2" plate from the drops section of a local steel supplier, 69 pounds for $59. It will double as a portable anvil and swage block. The stand is mostly drops from the same place and holds the block with any edge up, or flat across the rails. I took it to a friend's house for a few hours of forging and nothing on the stand moved so I can start working on the block next. I'll add a couple of fullers to the top and radius the edges. Then a couple of swages in the side. Eventually some tool holders on the stand for the hammer, tongs, and some punches.
-
Thanks, Frosty. I agree that the tongs would look better with opposing twists. That’s definitely a change I will include the next time I make them. Billy, I also agree with your suggestion about the broom handle. It felt longer than expected after I attached the broom. I’ll let them know I can shorten it later if they find it awkward to use. Very nice sets, Mark. That custom poker is a beast! The triangular handle looks like it will provide the solid grip needed to make good use of the extra leverage. Nice looking brackets, Goods. I’m looking forward to the finished rack. Alexandr, the quality and design of your work is beautiful. The number of such elaborate pieces you produce is astounding!
-
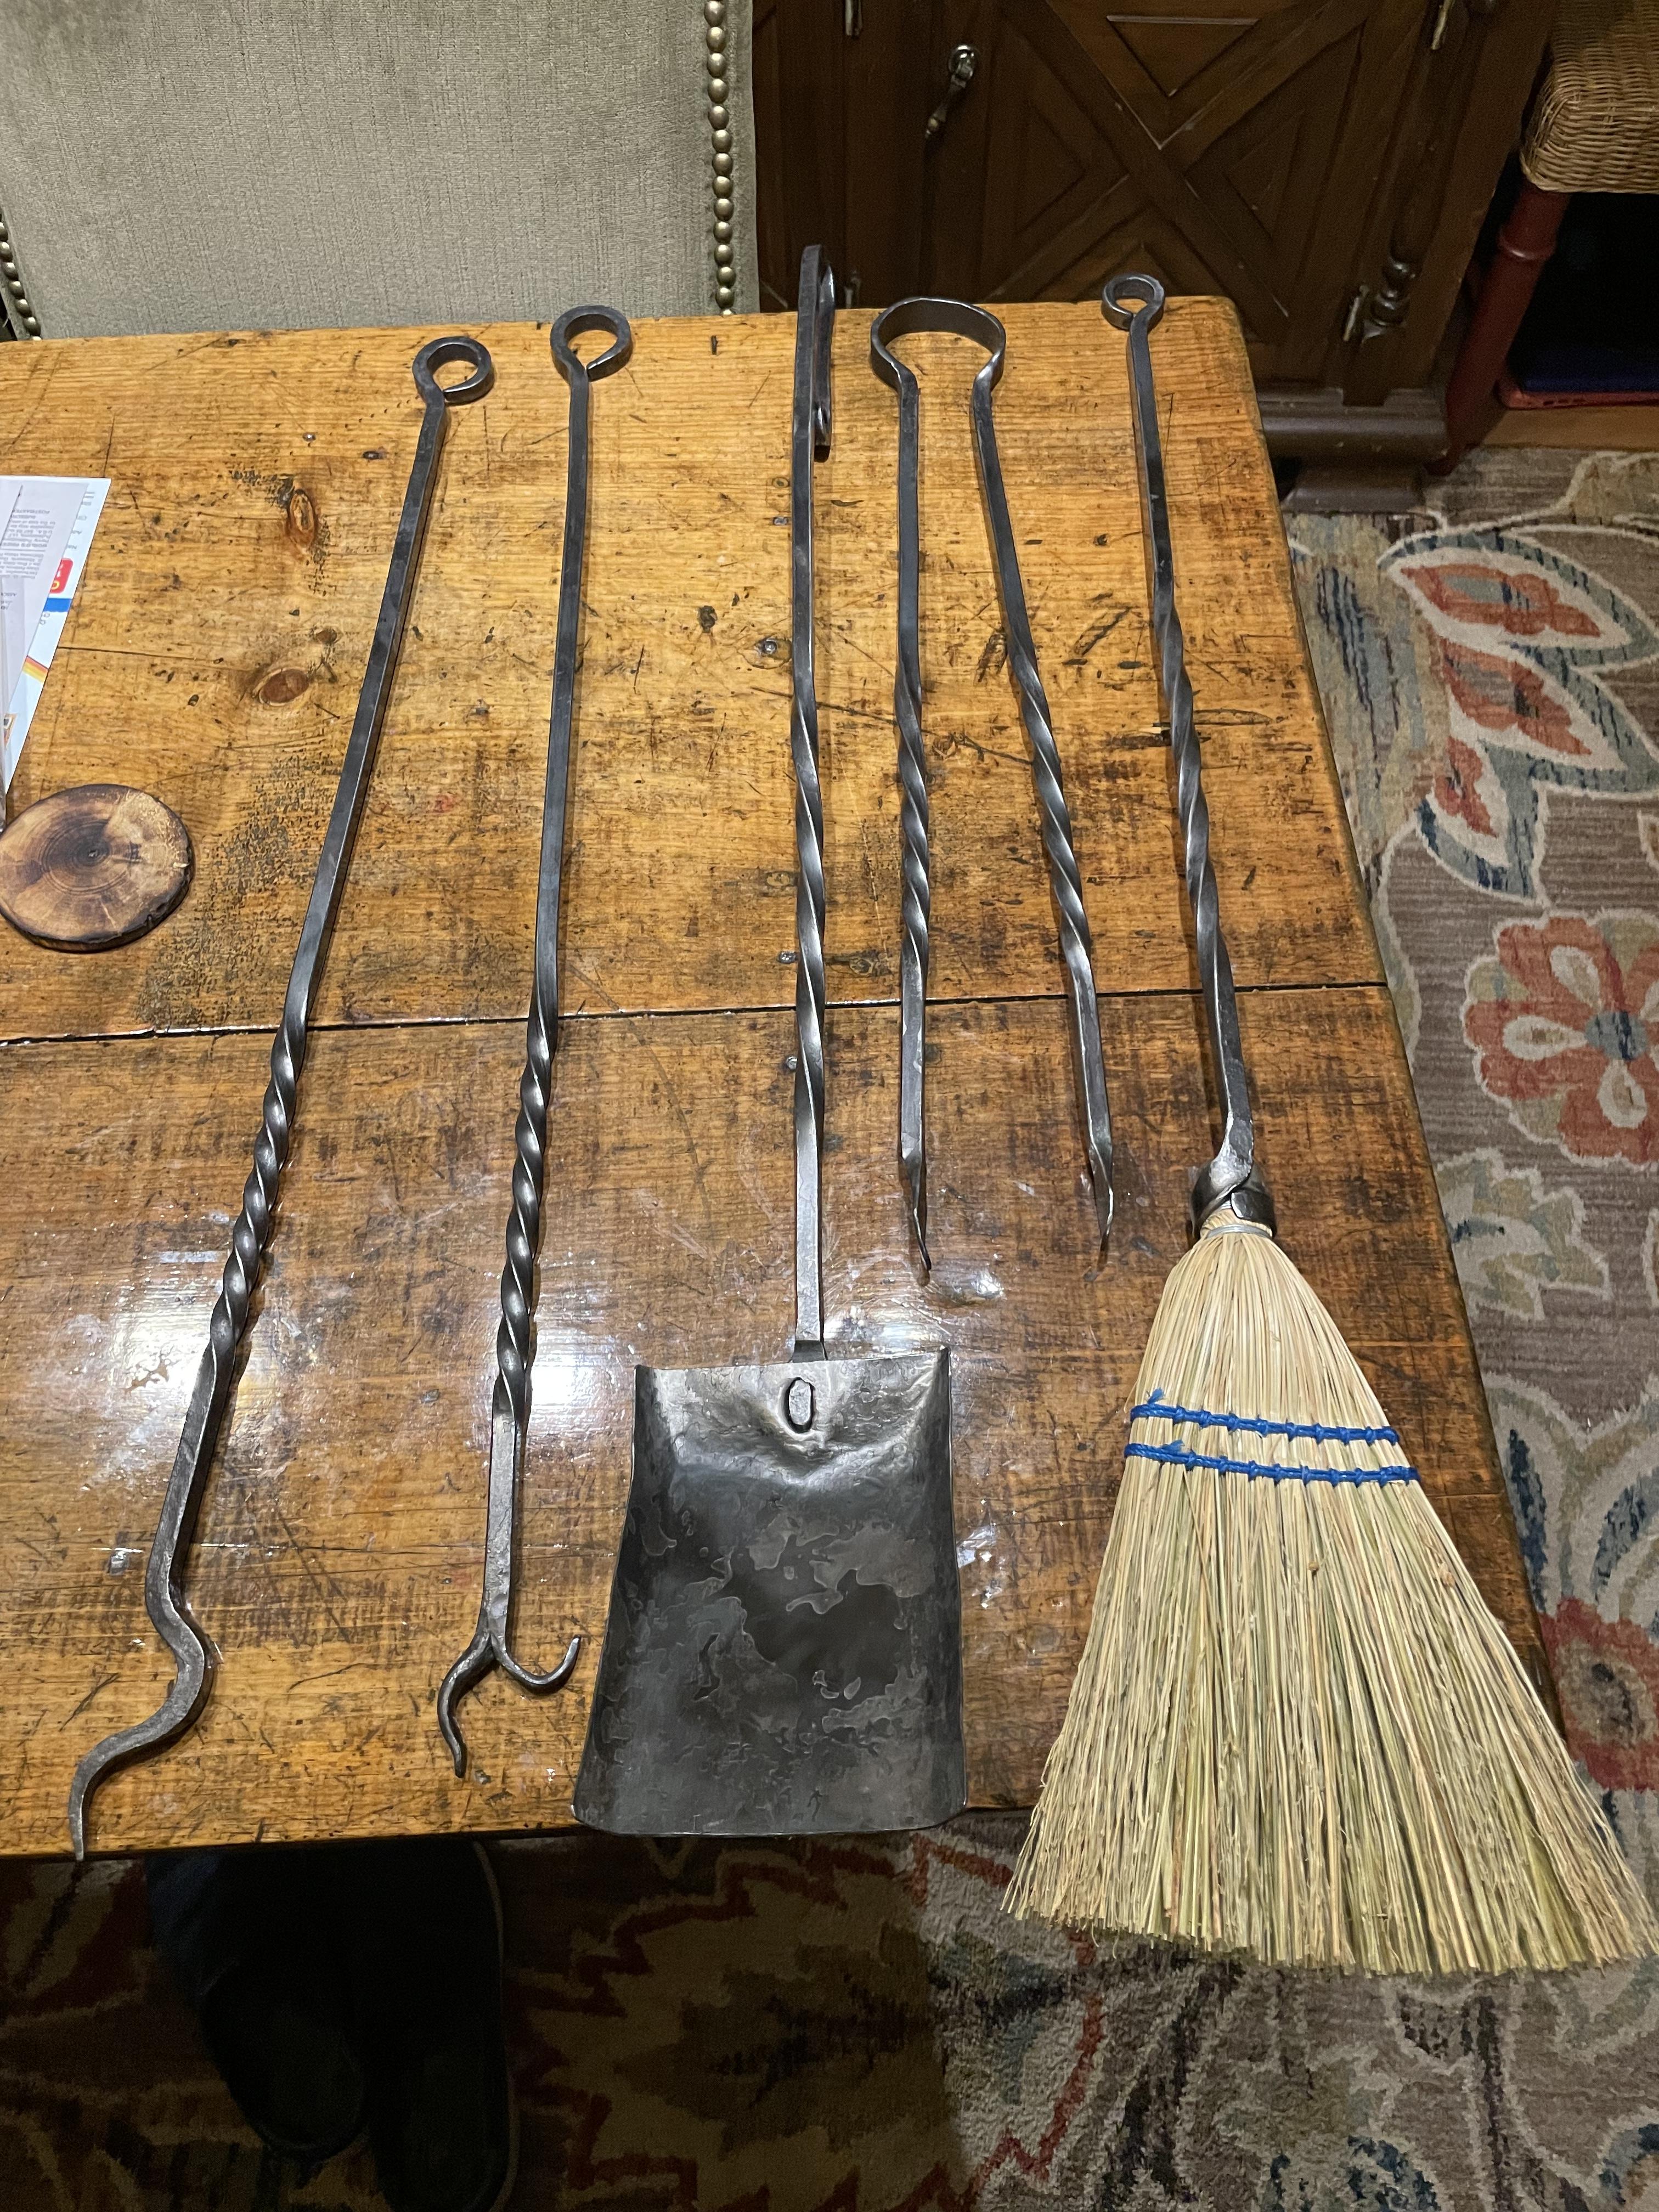
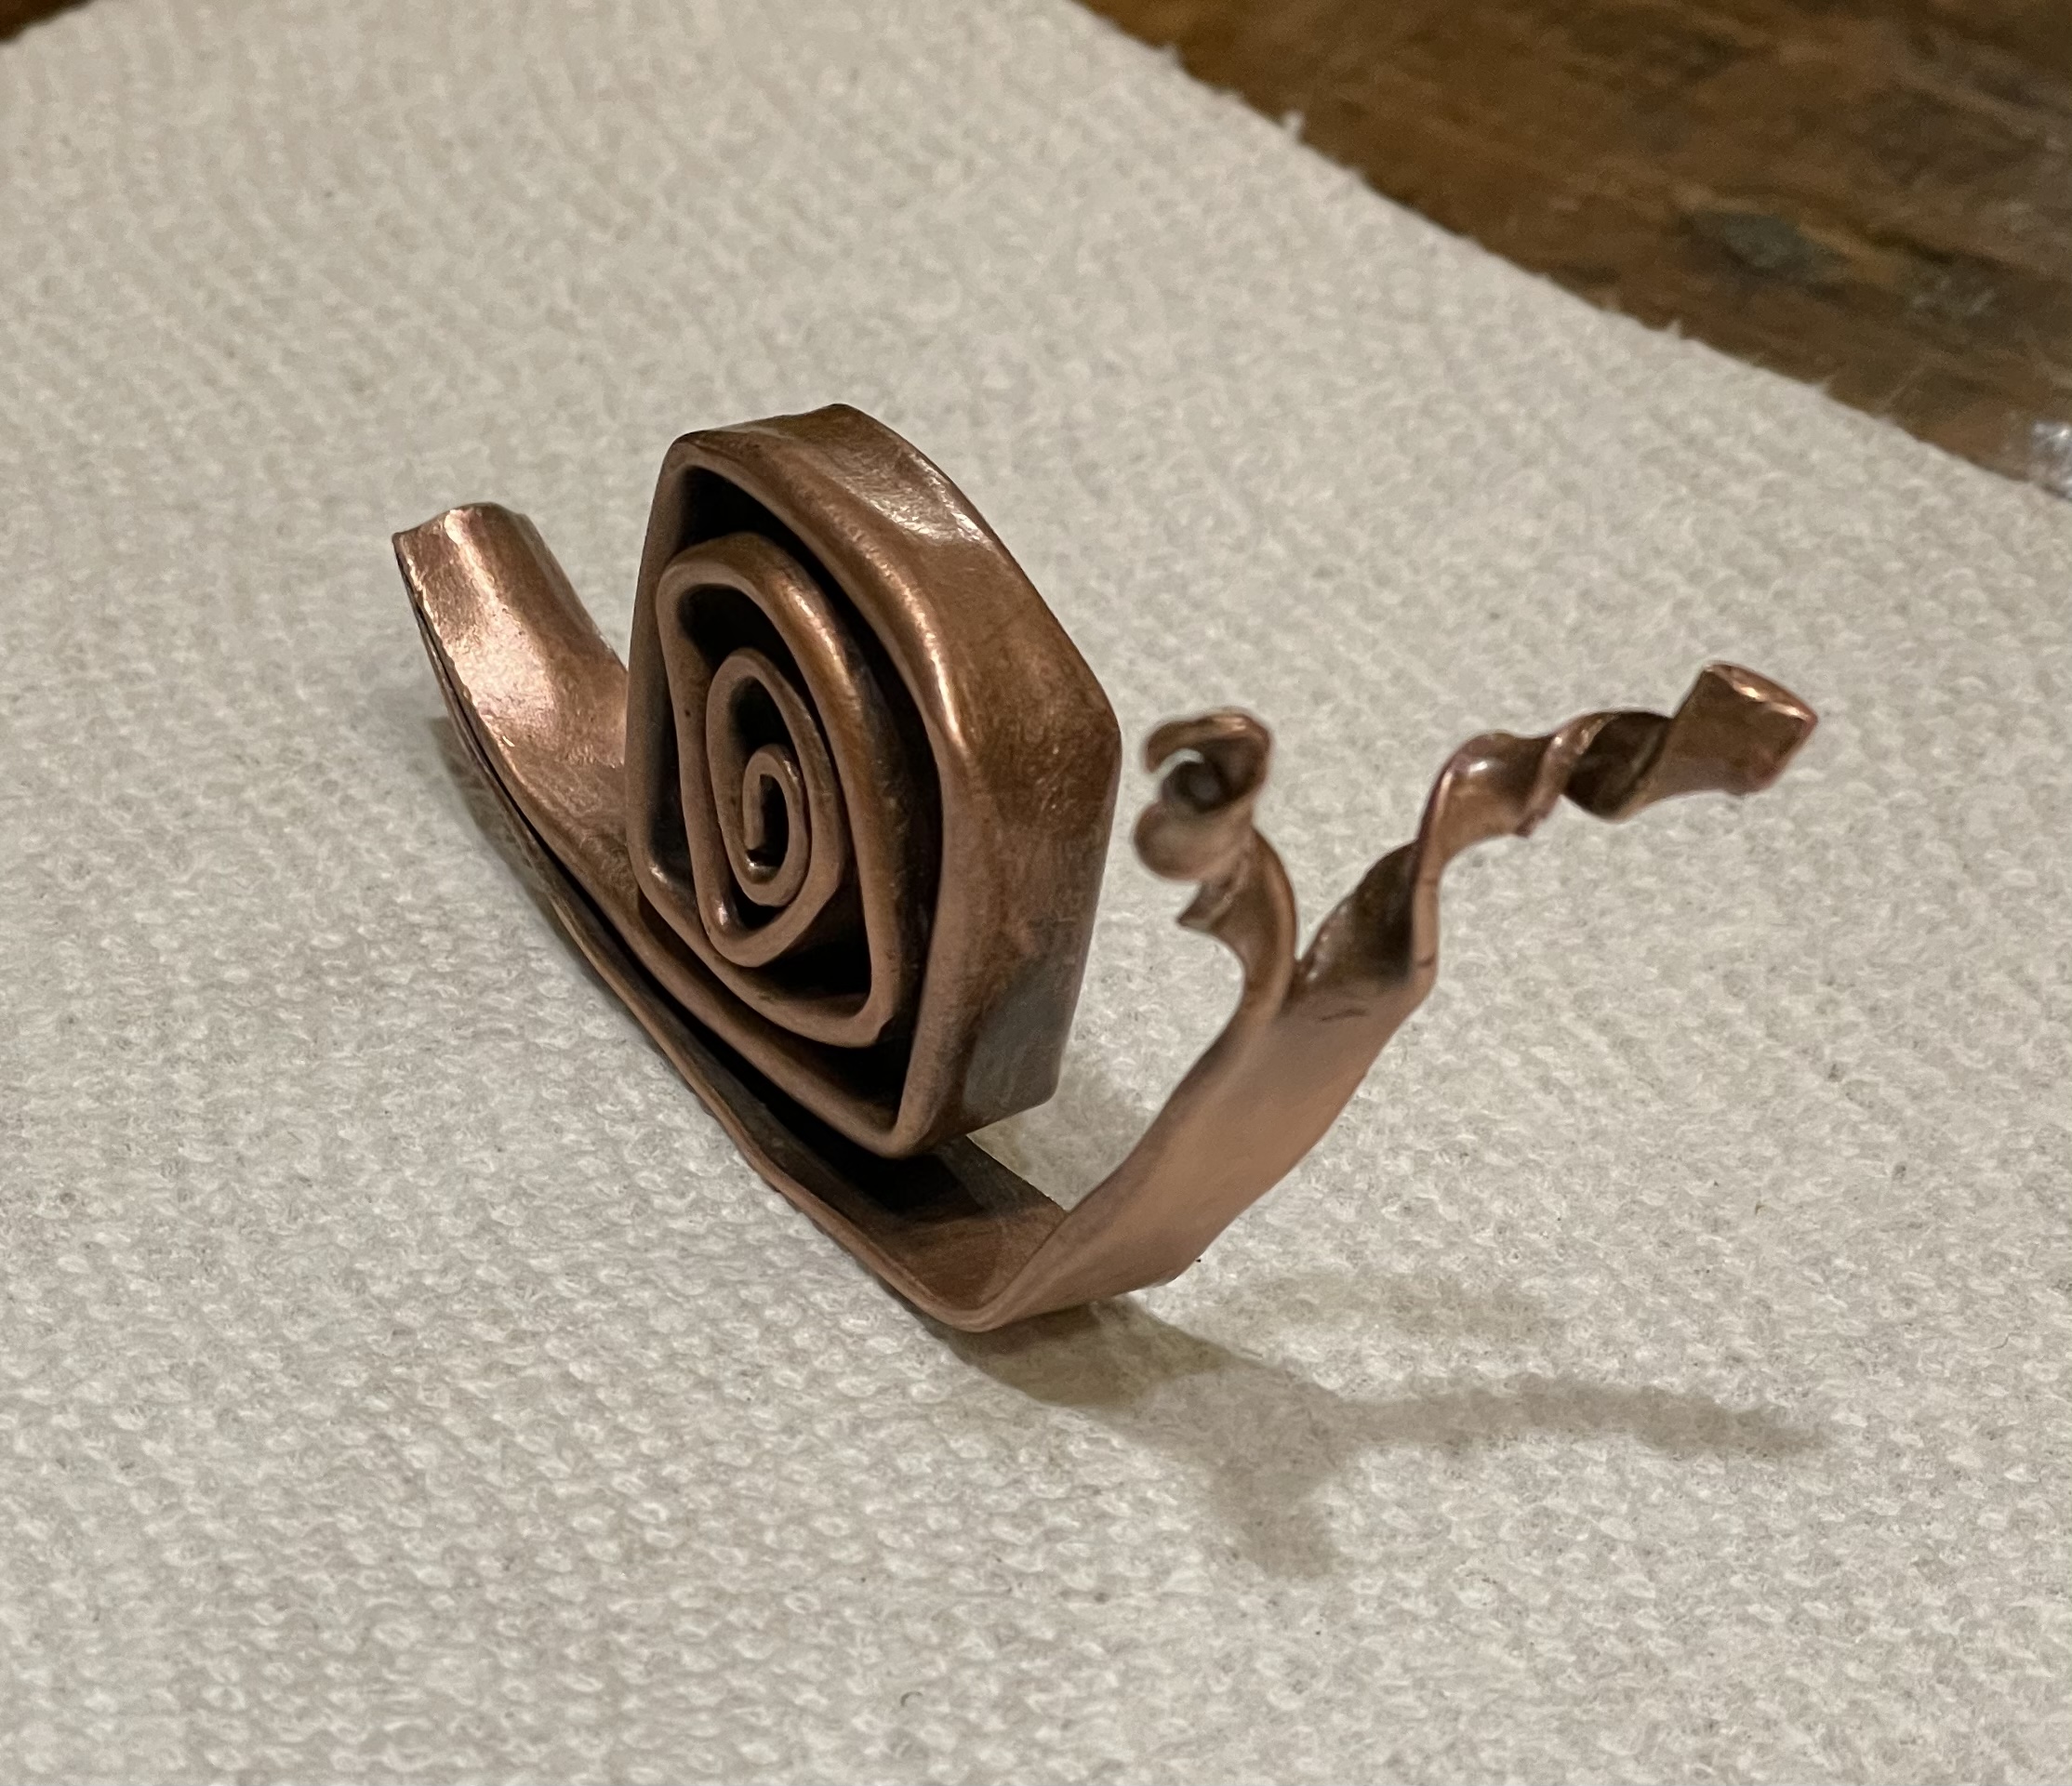
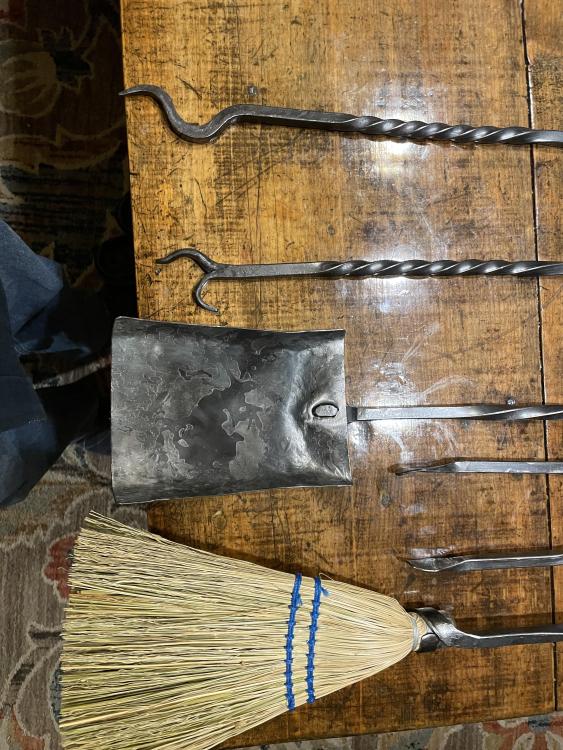
Thomas, I wish you a swift and uneventful recovery! Great work everyone, as always! Here’s a couple of my humble additions that I wrapped up this week. I made a fireplace set for my parents plus a fire poker for a neighbor who’s been inviting us for drinks around his fire pit. These are my first fire tools so I’m pretty happy with them: I also tried working with copper for the first time and made this little snail from 1/4” tubing:


-
Here’s my third improvised anvil, 4.5” square by 5” tall and about 28 pounds: I ground three edges to 1/8” radius, the fourth is 1/4” radius on one end and 1/2” on the other (roughly.) I had a 3/8” plate with two 3/4” holes so I filed one square to hold tools. The stand was cobbled together from cedar fence post off cuts (also 4.5” square) and other scrap wood. It should hold long enough to figure out if I like this arrangement then I’ll build a better one. I haven’t had a chance to forge on it yet but when I tap it with a hammer it is far quieter than my chunk of rail so I might be able to use it without annoying my wife or neighbors…

-
Hey Chimaera, it took me a minute to realize that was your full-tang knife still held in tongs. My brain interpreted it as a whimsically anthropomorphized knife, with a blade for a head and their hands on their hips!
-
Thanks, Frosty! Charles - lots of great content on Anvilfire, are you referring to the article on slab anvils? I've started grinding a radius similar to the left example in that article. I'm also going to try welding on a little horn horn similar to the middle example. I'm sorry to hear that it's creator has passed! It sounds like one of his friends has stepped in to keep the information posted so it should remain available as long as he's around to foot the bill. Maybe someone could get permission to convert all of those articles into a book, it would be excellent content to have handy offline!
-
Thanks, JHCC! Charles, I completely agree with you. My other anvil is a vertical rail with some ideas taken from your thread (thanks for that!) so I'm used to working on a small sweet spot. There's room for a couple more features on the top I just want to use it for a bit before I decide what to add. Plenty of room to cut and or weld features to the sides too
-
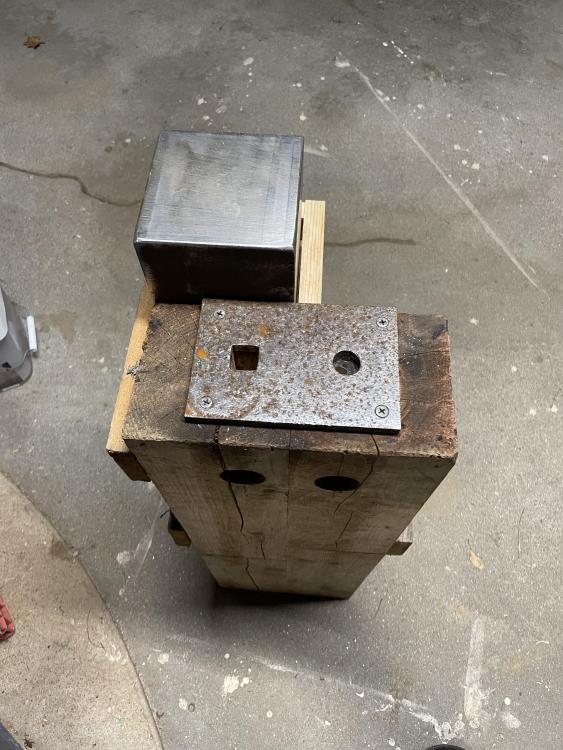
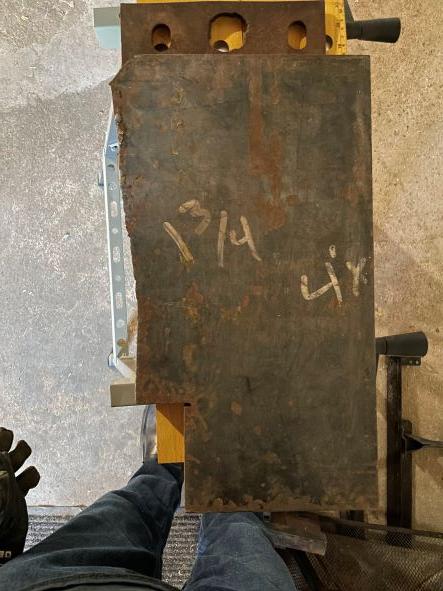
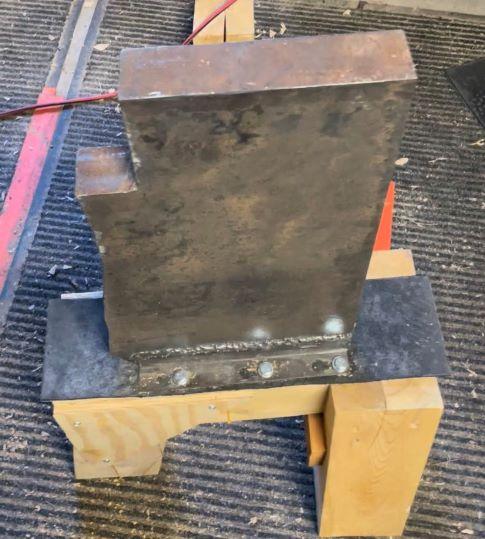
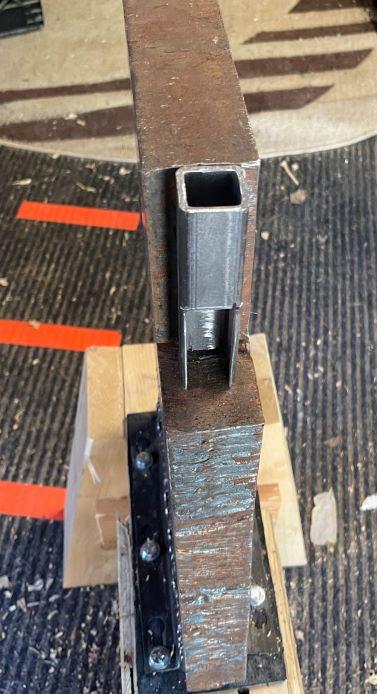
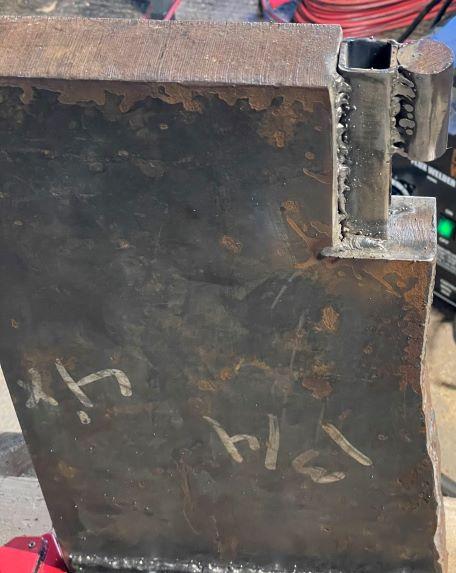
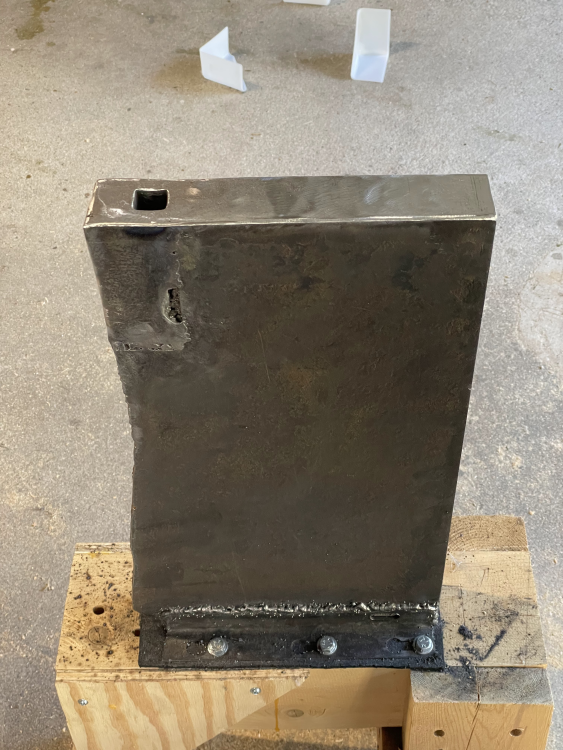
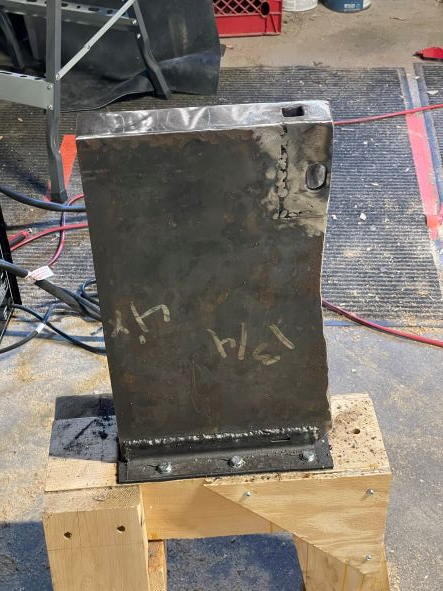
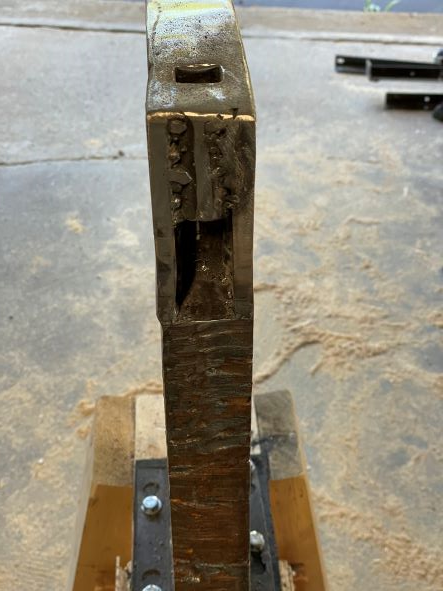
I found this 90 pound piece of 1 3/4" plate in the drops area at the local steel supplier. It's roughly 9" x 18" with a 2" x 4" cutout on one end and some 3/8" plate welded to the other end. I cut off the 3/8" plate and welded on some pieces of bed frame so I could lag it to a stand I made from some 4.5" cedar post scraps. A piece of an old floor mat is sandwiched between the plate and stand to mute the ring. In the cutout I added some 1" tube to create a 3/4" hardy hole and reinforced it with a piece of 1" round bar and pieces of the 3/8" plate that had been welded to the chunk. There's an opening so it won't fill up with scale/slugs and so I can tap out tools from the bottom if they get stuck in the hardy hole. I'm very new to welding so it's not the prettiest, but I tested it with a hammer and it seems solid. If any of the welding gives out I'll just take it as an opportunity for more practice. I like the Brazeal style plate anvils with multiple dies so I'm planning to grind a 1 3/4" diameter fuller on one end for drawing out stock but since I can make tools for the hardy hole I'll stick with mostly flat for now.
-
That cone mandrel looks really handy. If you can find a way to mount those plates so they don't spin they would be great tool holders. Maybe not as important for the cone and some other tools, but it would be a hassle if they moved while you're trying to use a bending fork. Once you figure that out I say mount the both. Then add a bolster plate for punching and drifting and I think you would have a hard time finding a better anvil!
-
Pault17 - Nice collection, Frankanvil looks very versatile! That mounting flange looks like a perfect fit for the sledge hammer head. Do you use anything to hold it in there? TommyVee - You'll inspire some serious improvised anvil envy with that beast! I think I would want it closer to one side of the mount to reduce reaching. But as you said, use it as is and see what feels right. There's plenty of room there to add a plate with a hardy hole too.
-
I've seen that thread before and I really like your design! I'm still pretty rough at tong making though so I wanted something that's easier for me to put together now. I'll probably switch to some nice tongs when I'm better at making them. I got the idea for this from Dereck Glaser at the New England School of Metalwork. I recently took one of his classes and he has holders similar to this (but better made ) in the class shop. Thank you for the angle iron suggestion, I'll try that on the next one.
-
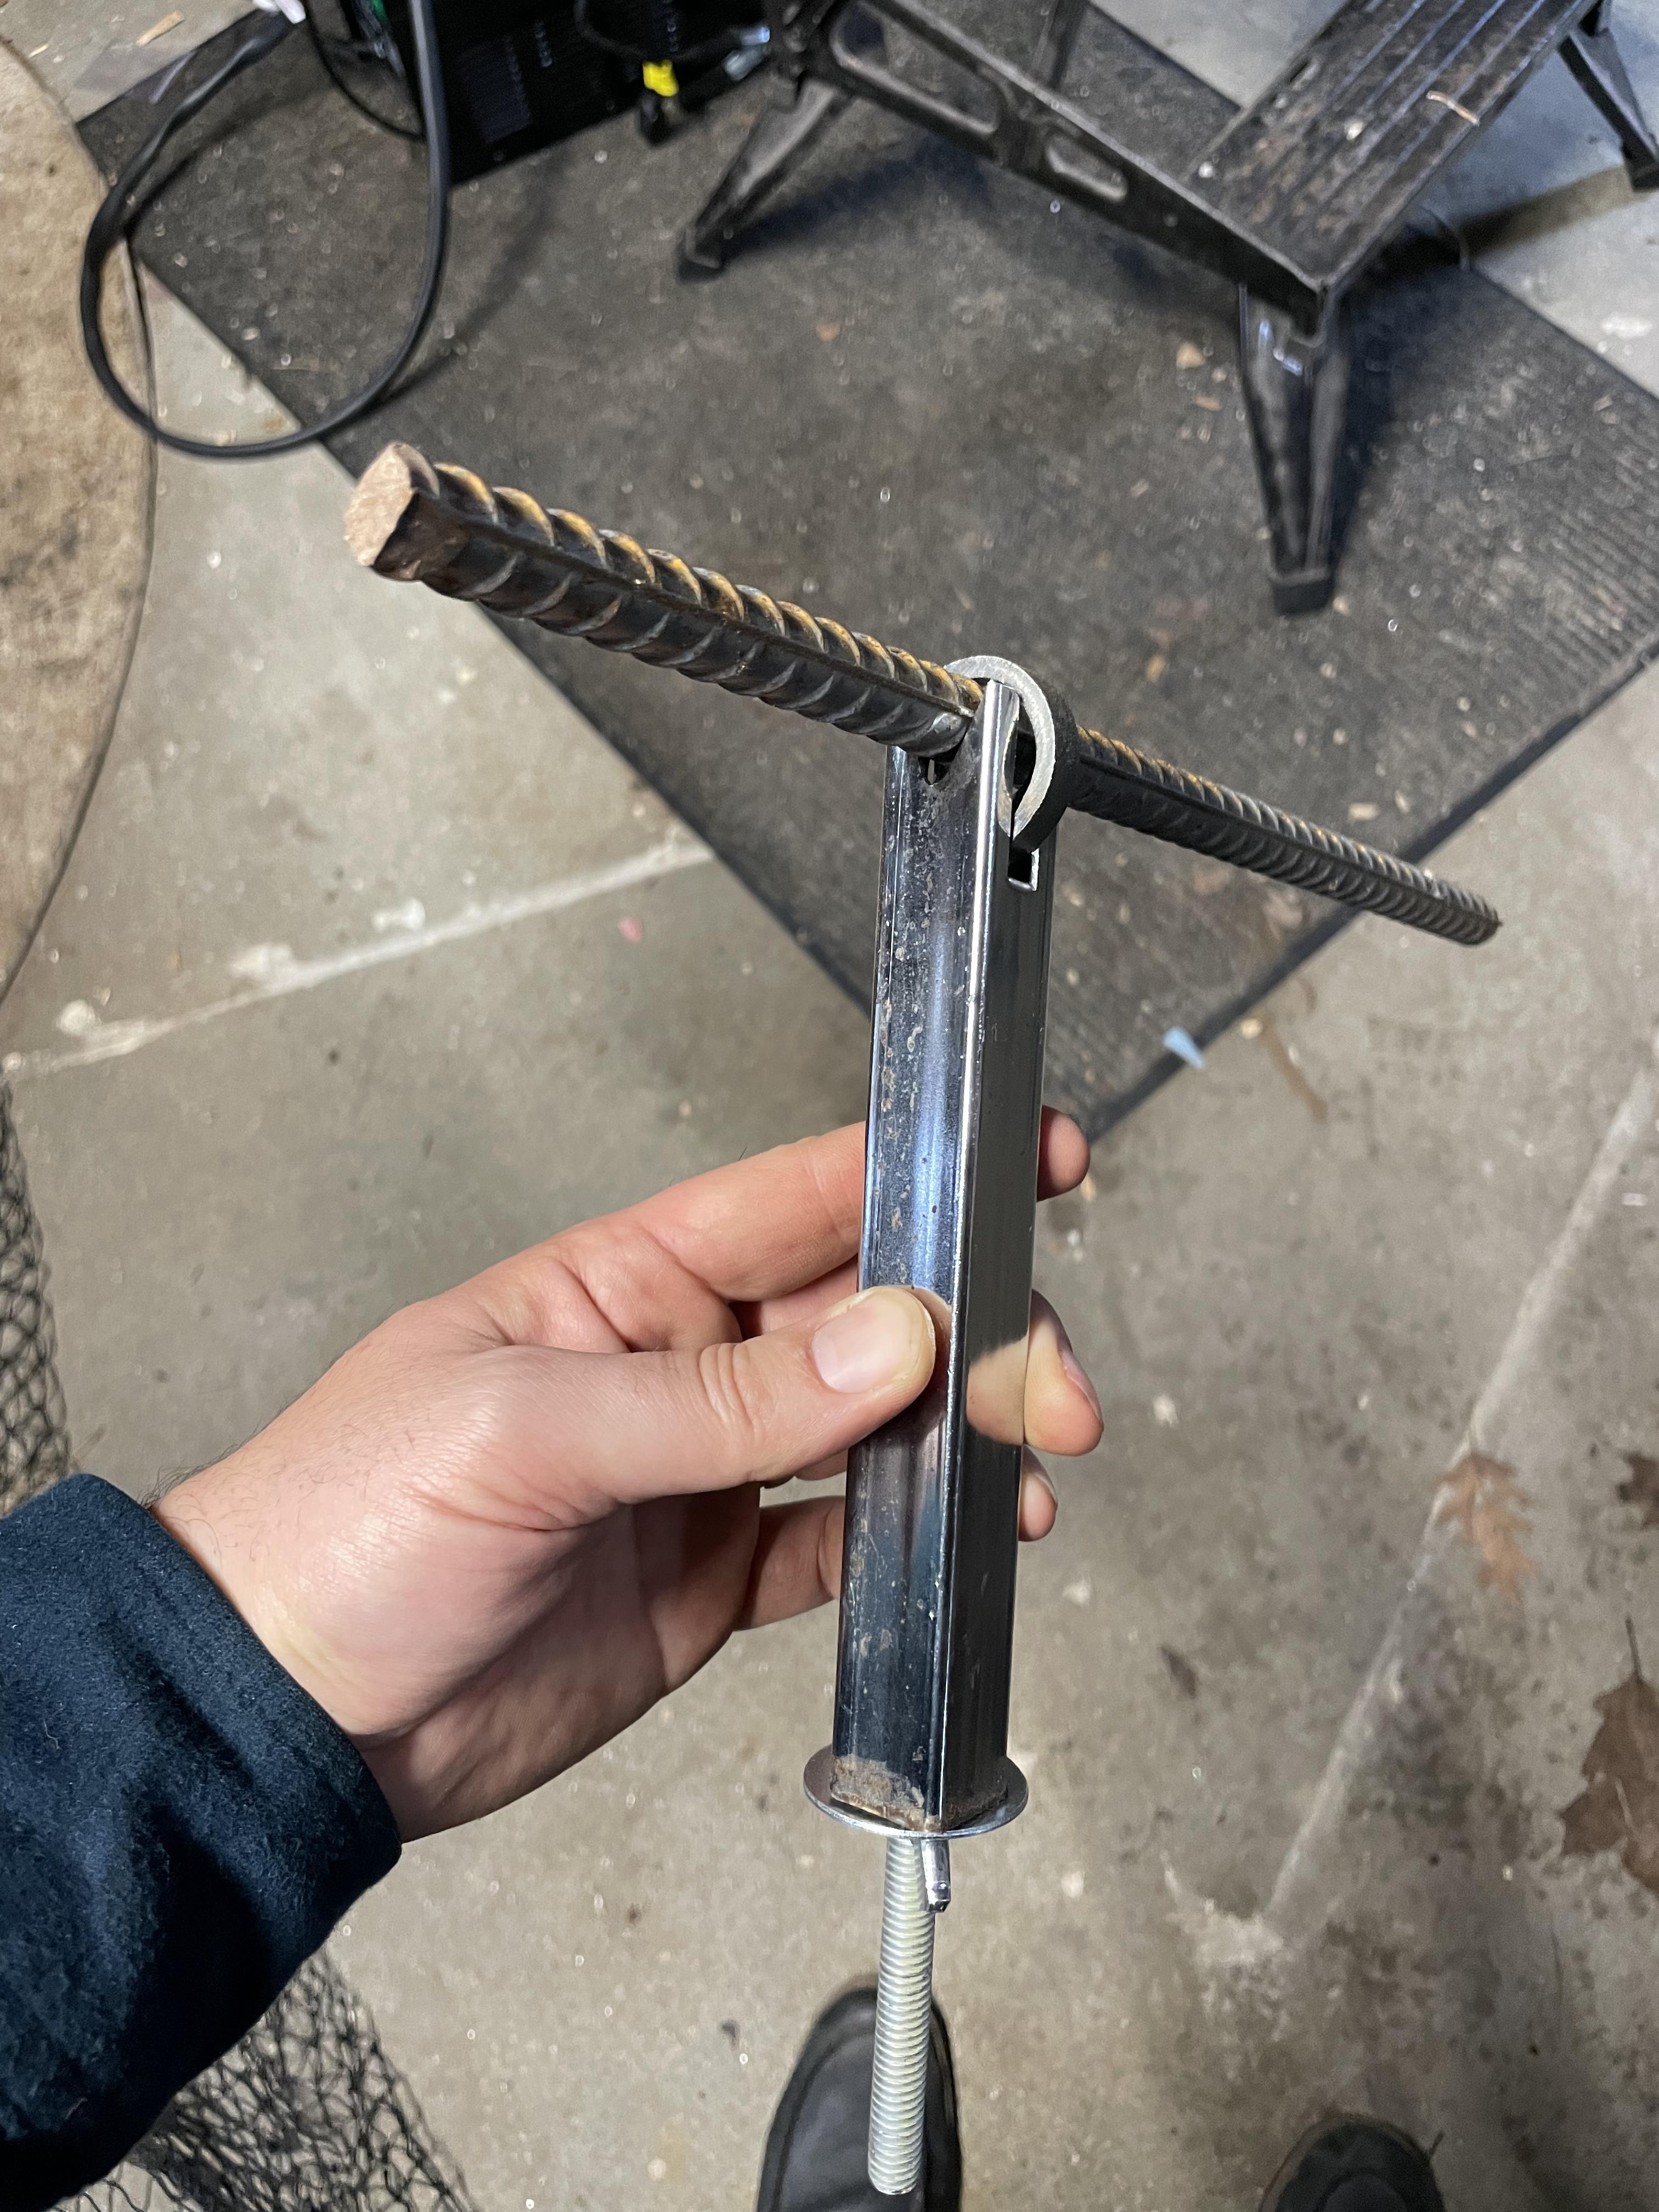
I made a tool holder so o can start making shorter tools. It will hold up to 1” diameter. I’m planning to make a few more so I can have multiple tools ready.

-
Congrats to the winner, and great work everyone! I second TwistedWillow's thanks to Frazer for the challenge!
-
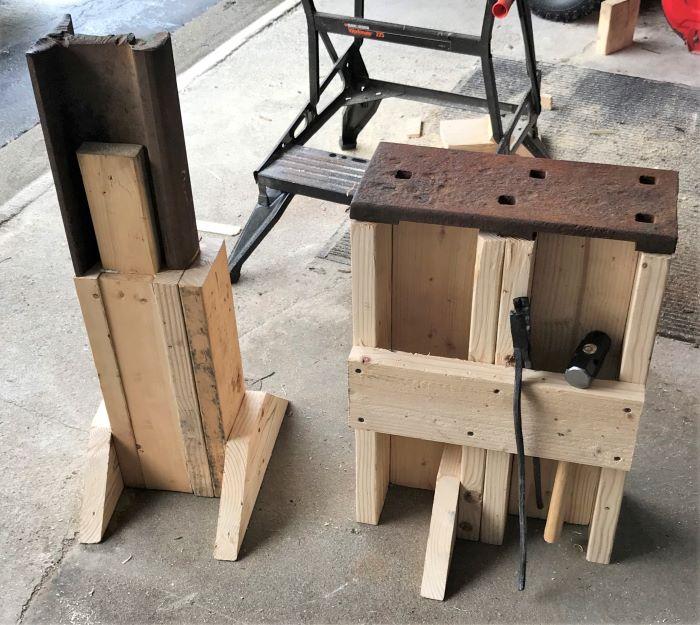
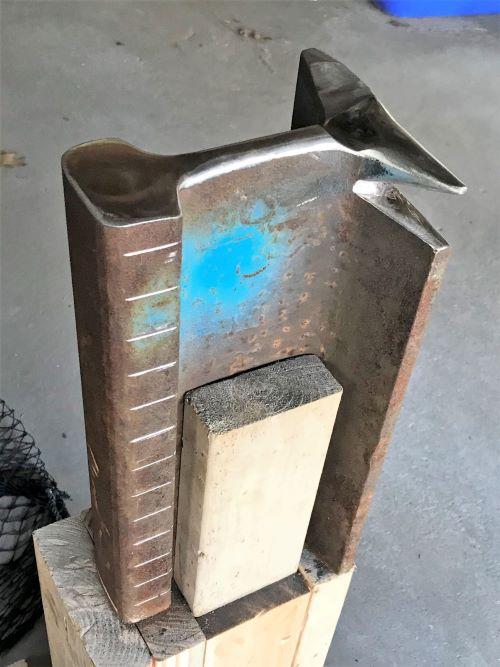
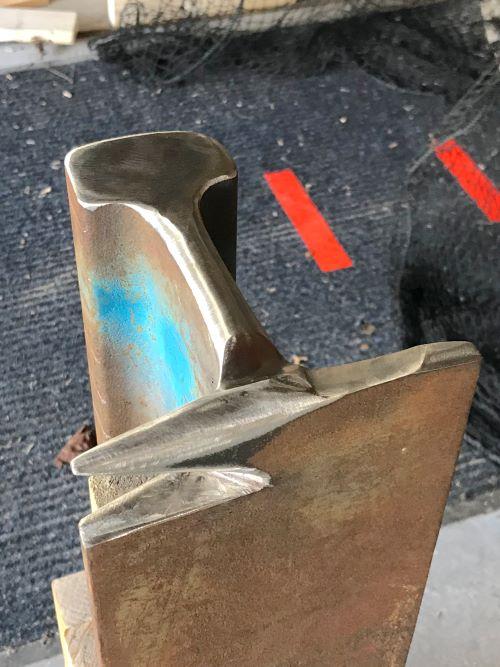
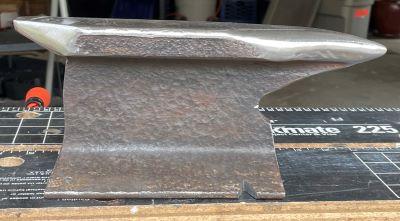
I have a roughly 50 pound length of rail for an anvil and a turnout plate that I'm using as a tool holder. I took some ideas from Charles R. Stevens' thread on rail anvils to build a few tools into mine. One end was unevenly torch cut and I left some of that unevenness in place. The web fuller is a little higher than the flat face and there's funky half round which has been handy. I've since cut away more space under the horn, leaving a catch near the web so I can bend things over the base of the horn. I might eventually grind the web to have a more varied radius, and the bottom is still untouched but for now I'm using it as is until I decide I really need new features. I also have this piece of lighter gage rail that I cut a round and stubby square horn into for when I need something bigger than the mini-horn on the other anvil. This picture is from before I mounted it.
-
Hello all! Long time lurker, first time poster. I guess I should go do an intro post. For now, here’s my entry made from 1/2” round: Great video, Frazer! I’m just starting to try making tongs and detailed videos like yours are very helpful. The chapters in the long version make it easy to go back to re-watch specific steps.