Jephgag
-
Posts
10 -
Joined
-
Last visited
-
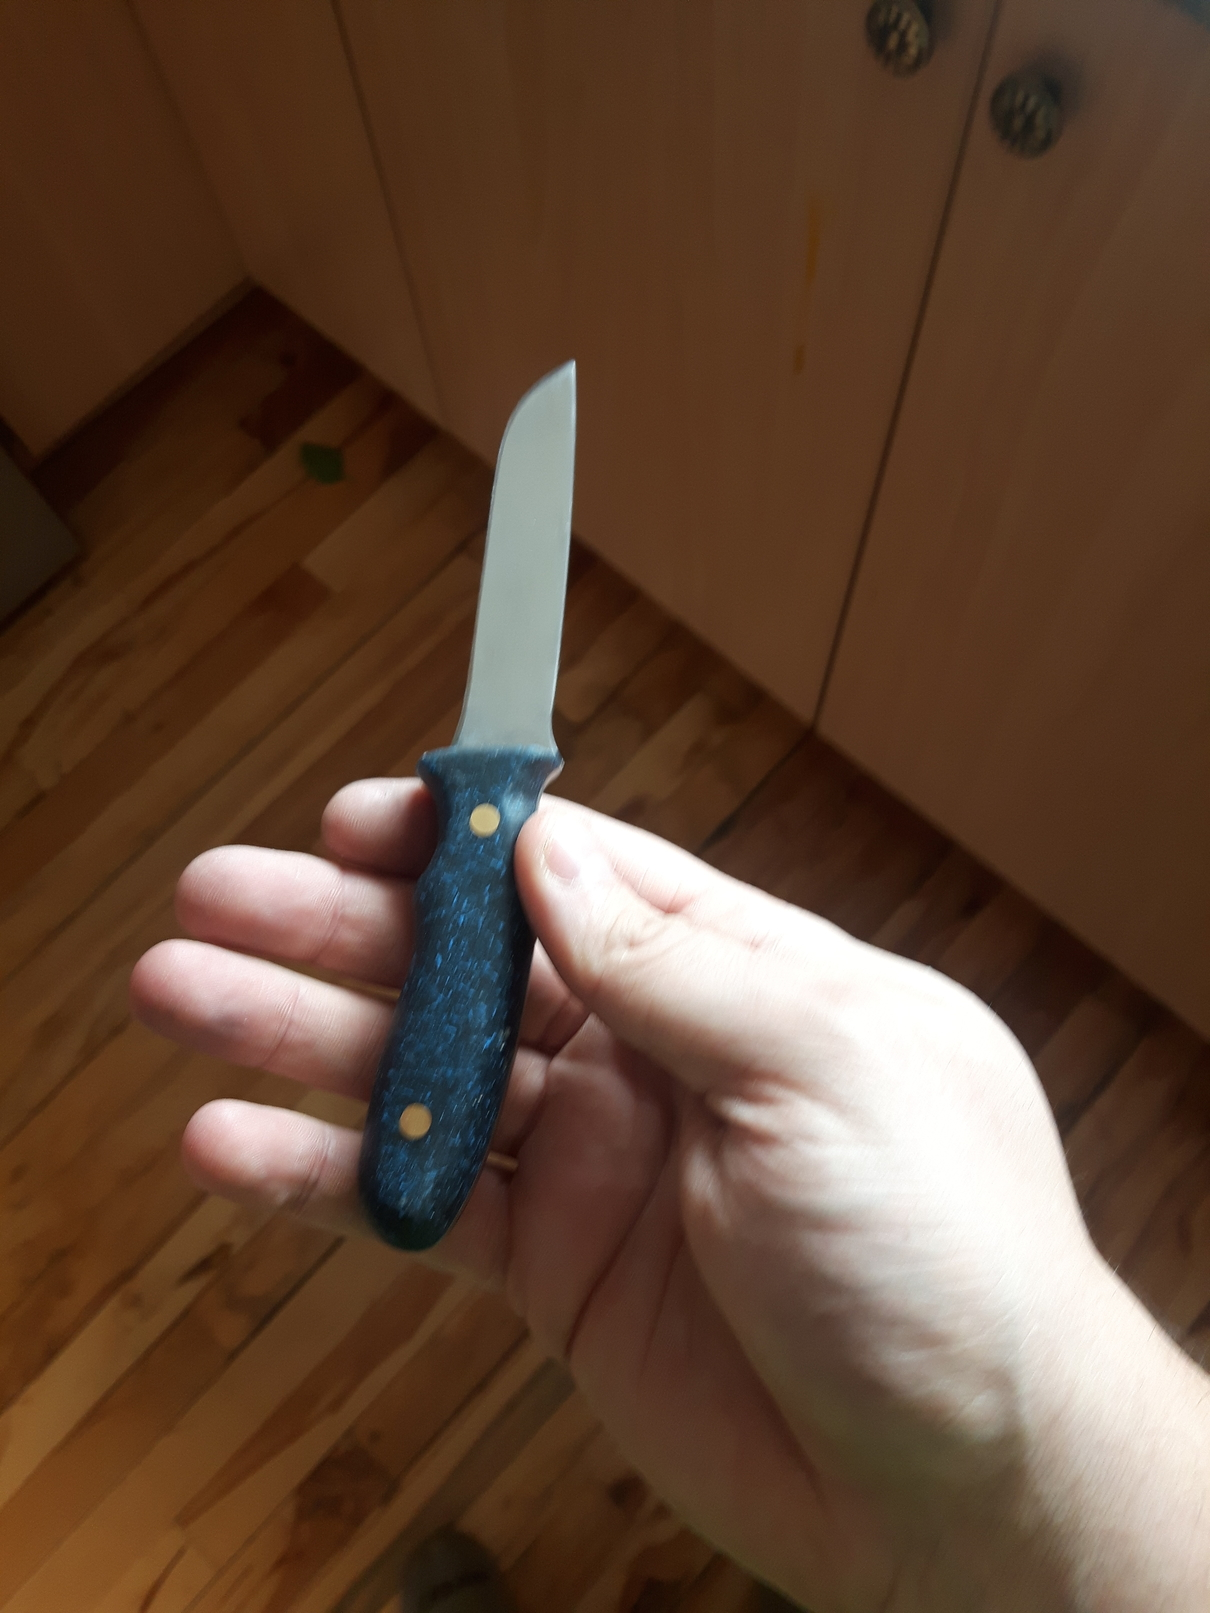
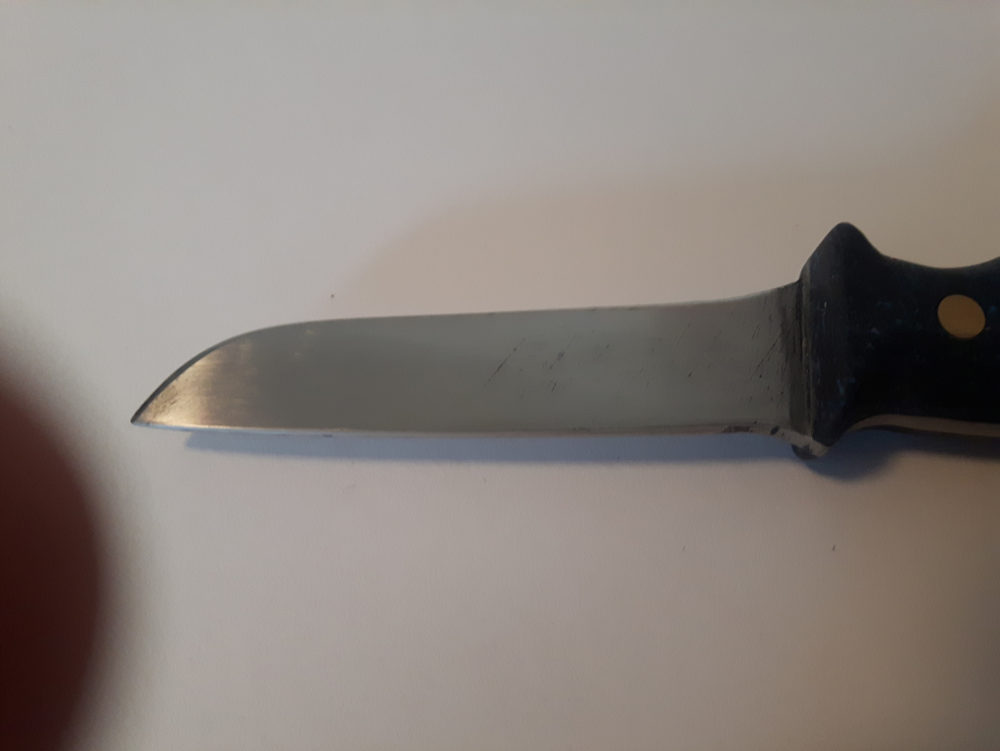
Thomas Powers - Here are 2 photos. 1 showing the marks left and the second showing the knife in it's entirety. I am not sure how I missed it, but the tip of the blade is way too thick compared to the rest of the blade. And the plunge was supposed to be 1/8 longer. I made a few tests with the knife before taking the pictures to see if the knife would hold an edge. I hammered the knife to cut through wood, I cut through old sand paper , i cut through softwood (don't have any hardwood around) and the knife is still cutting great. I will need to work more on the tip though. Overall, i'm pretty satisfied with the outcome. I really like the scotch brite micarta and I will most definitely try to make a better one with different colors and no bubbles. I sanded the handle to 600 grit and gave it a small polish with the polishing compound that came with my dremel. Not the best, but does the job. I already started researching my next project. This first knife was a lot of time and struggle but kept me wanting for more.

-
Thomas Powers - I ran out of sanding paper to finish the handle. I will go grab some tomorrow and hopefully finish it then. It's pretty much the only step left. It does feel like a knife which is pretty exciting. The proportion are a bit off as I tried to make the micarta myself and it was too thick. Next time, i'll definitely buy the micarta or a blank of wood (I have a nice wood shop near where I live) to concentrate on making a better blade. I also have a lot of air bubble in the epoxy as I used scotch brites and didn't properly press out the bubbles. I also didn't wrap the blade properly and epoxy went on the already battered plunge. Frosty - I am not saying that my knife look like crap. I was saying that I wasn't worried too much if it did look like crap or if it had flaws on it. I made sure that my forge was safe first and foremost, and then worked on the blade to the best of my ability. I am pretty happy with the results so far. Even with all the flaws, It does feel like a knife and I will use it in my garage for sure. I'll post pics by this sunday hopefully.
-
When I was growing up, we only had a few classes (2 or 3) to teach us very very basic tool handling (filing wasn't included). So I am picking up things as I go. I am aware of draw filing and I used the technique, but that doesn't mean I'm good at it. My domain is electronics and electricity, so I am discovering the skills I need as I go. This is why I didn't go full on perfectionist mode for that first knife. I already noted area where I need to research more in order to bring my skills to an acceptable level. The only thing I searched extensively is the propane forge as it can be dangerous, but if my knife look like crap, that's not the end of the world.
-
I didn't know those existed, so that's a big no. I was using a paint brush to try and remove debris as much as possible. But the worst offender is definitely the plunge line where I made a big mess as I tried to redo it many times and it left deep scratches.
-
I will post pics later when everything is finished. I made some blue scotch brite micarta with black epoxy that is still curing as we speak (should be good by tonight). I made a lot of mistake though during the blade filing. I made a blade with Gough Customs file guide, but I left a lot of scratching marks on the blade. I messed up the plunge line big time so now it is not placed well (too far back). I wanted to go through the full process of making a knife, even with flaws, just to get a feel of how it goes instead of trying to get everything perfect the first try.
-
Sorry, I am not sure which one is which. I see annealing all the time for knife making, but it seems like this is a mistake? After looking at the definition, it would be tempering then. I want to give back some softness and ductility to my blade. Thanks for the correction.
-
Just an update, I successfully heat treated my first knife, The file skated on the blade. I'm annealing it as we speak. Thanks all for the tips, and I am excited to be part of this community for this journey. I will see you around!
-
Thanks for the reply frosty. Regulations here make it so that I need to be outside for propane. My forge is outside so I am not worried about Co2. I also have a fire extinguisher ready for when I will use the forge and I will keep the propane tank as far as my hose permits it. I am also setup on stone to make sure nothing flammable will be coming my way. I do not have the 1/4 turn ball valve though, so i will grab that tomorrow and add it to my setup. However, my regulator is integrated the hose, so the valve will be between the hose and the burner. Not optimal.
-
Thanks for the replies, 1) I did check the IFI FAQ first before posting my question (I've been lurking for a while now). I will make sure to keep it in mind for the following posts. 2) I used propane rated tape for my connections (Harvey 017065). I tried to make sure that no tape was loose on the thread. Will that tape degrade ? Do you have a link to the Threadlocker gasket seal ? I tried looking online, but I am not sure what I am looking for here. I guess my only fear is the fire going back up the line. So either it will snuff out quietly, or it will poof, just like a BBQ sometimes. Thanks for your help!
-
Hello, I built myself a venturi burner for a small heat treating forge and after many online readings, I was able to make a starter propane forge. I took a lot of precaution to make sure that there is no leak (gasline teflon + soapy water test multiple times) and everything seems good. However, since I am using a highly flammable gas, I want to learn as much of the process before firing the propane burner for a first heat treatment cycle for safety reasons. One subject that I haven't found about is how the burner should normally behave when I cut off the gas. So my question is: when I shut off the gas, what should happen to the flame? As I reduce the psi of the gas output or as I close the main valve on the propane tank, will the flame "burst out" (not sure what the term is)? Also if I reduce the psi to almost 0, what should happen to the flame? will it go back to my nozzle or should it fizz out before that? I hope that I gave enough details to get answers, but if not, let me know. Thanks.