RToons
-
Posts
59 -
Joined
-
Last visited
Content Type
Profiles
Forums
Articles
Gallery
Downloads
Events
Everything posted by RToons
-
Thank you for that positive feedback. It gives me hope to save a lot of cash on thick heavy prefab copper, black pipe or galvanized materials! I was warned by administration to NOT use all caps. My error if anyone is offended. In business the subject is always all caps and I did this out of habit. I attempted to change but cannot find a way to modify the subject.
-
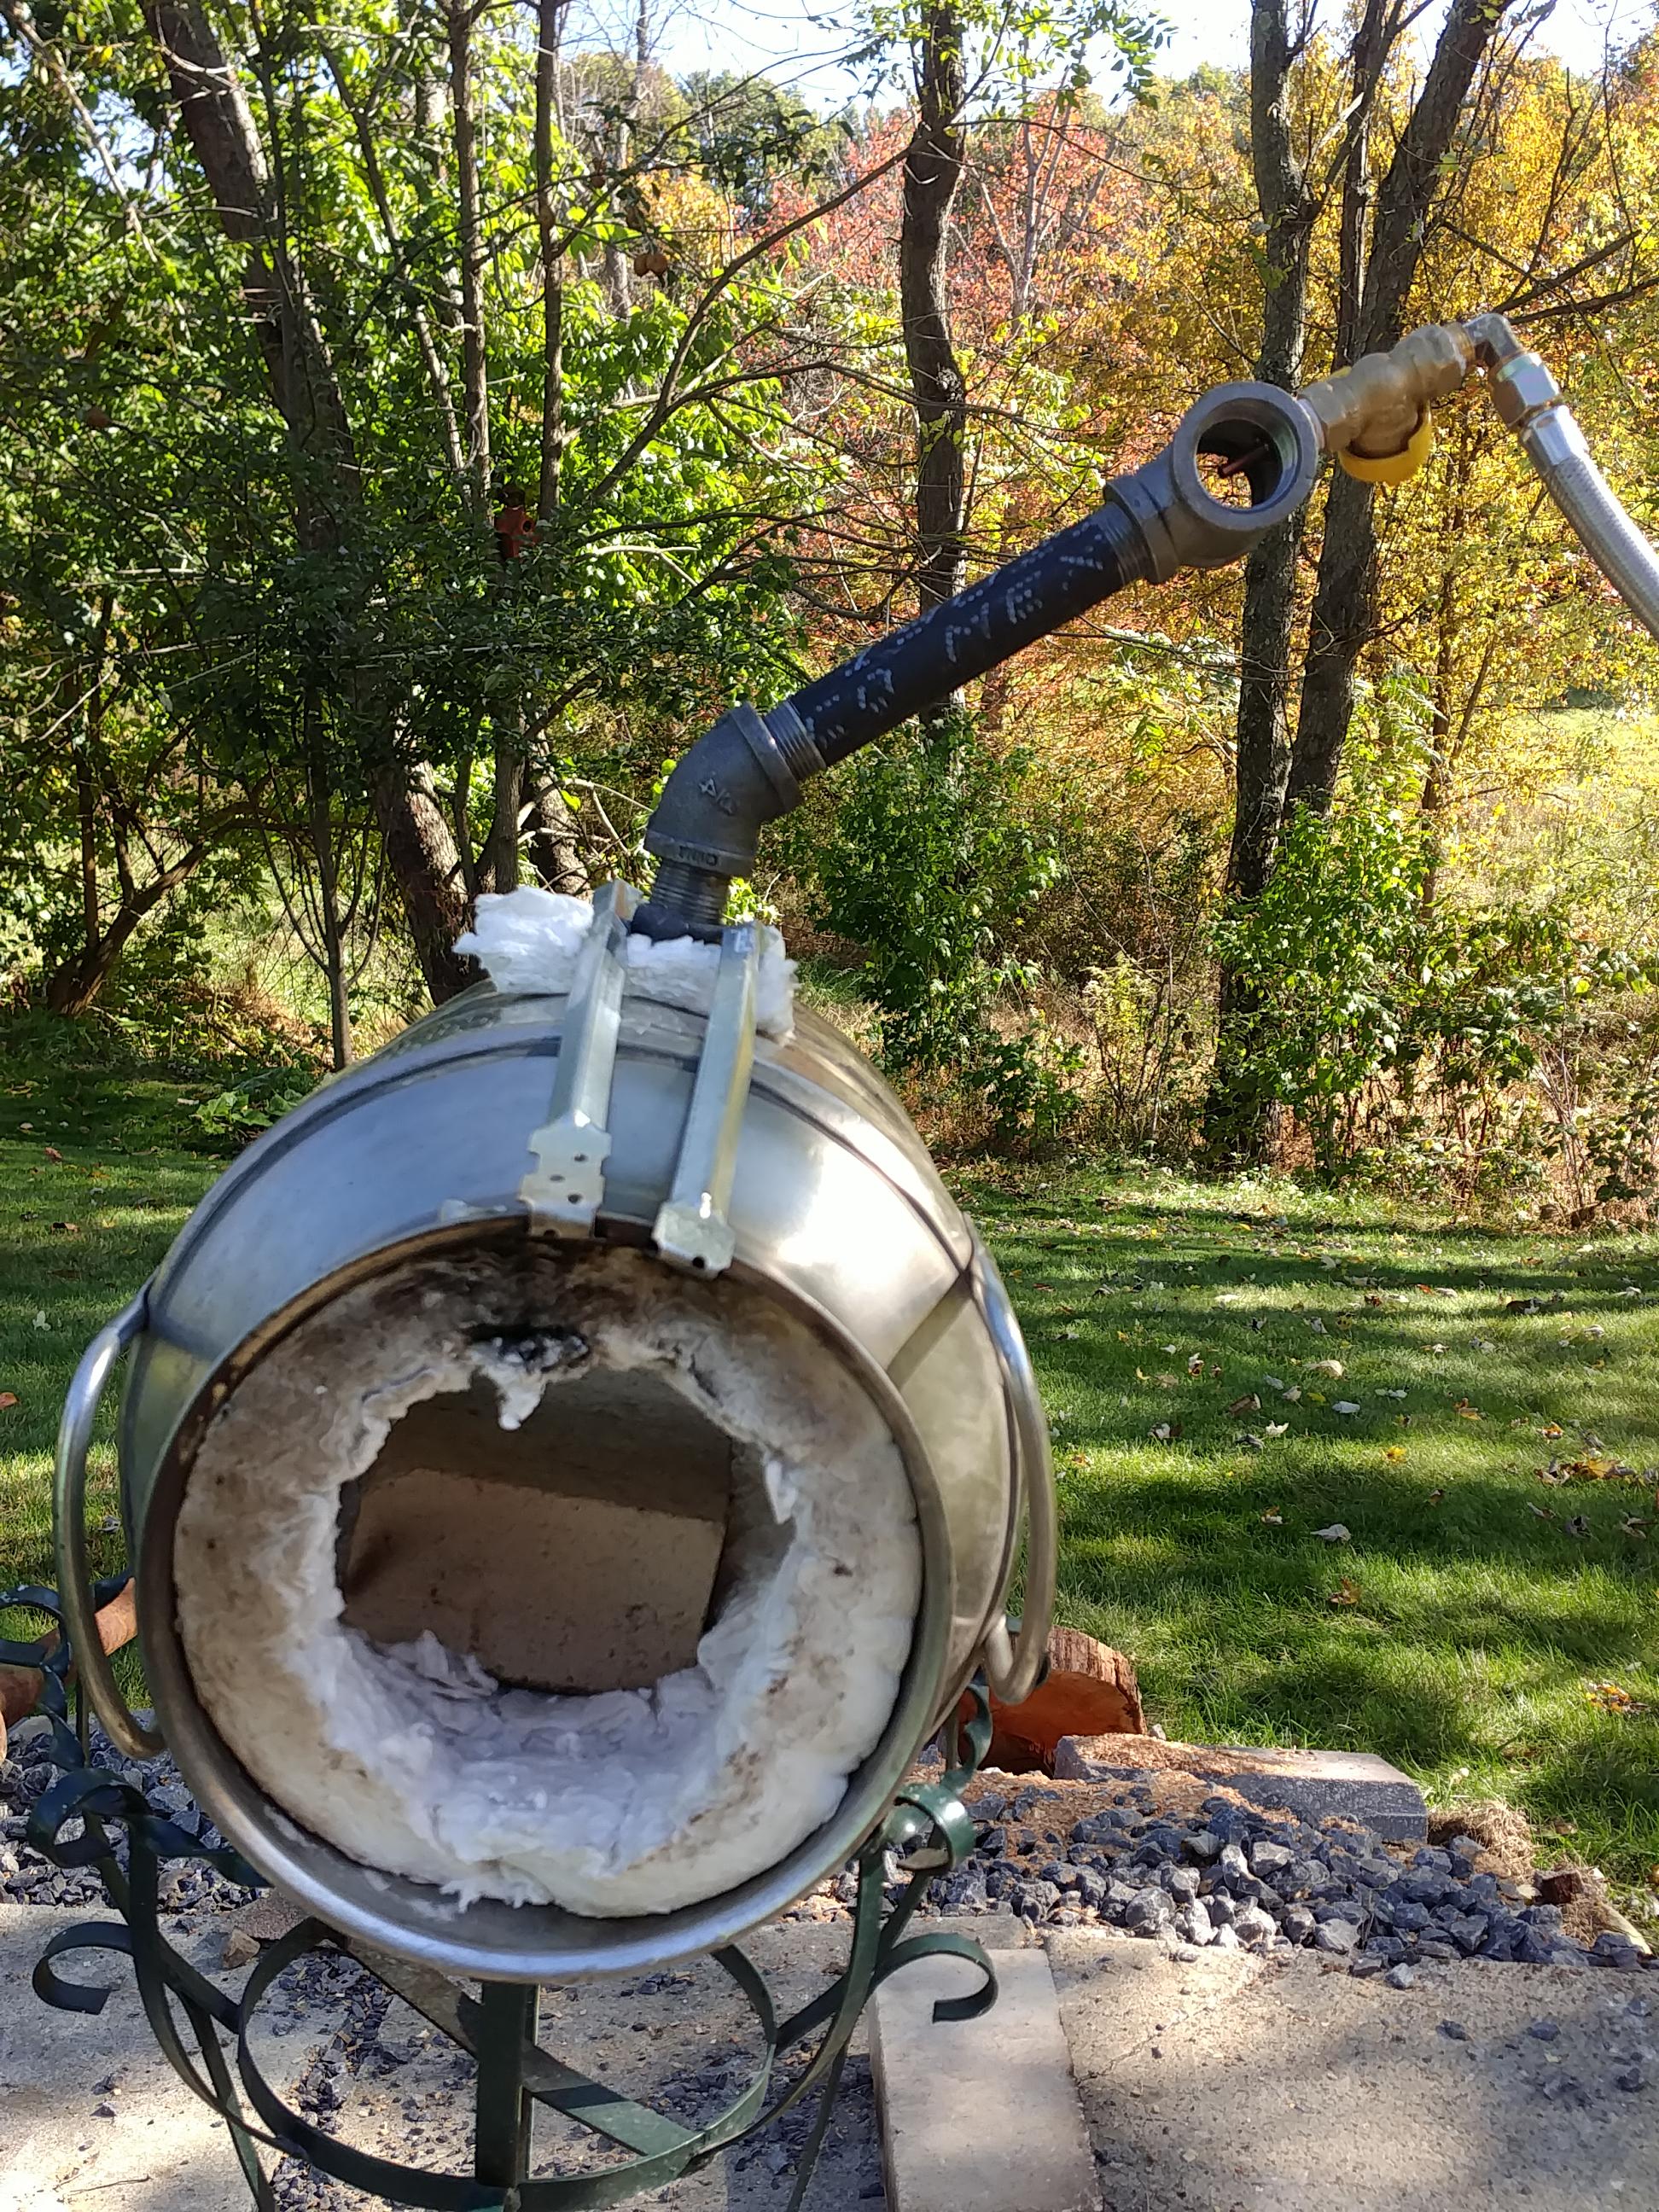
I am building a new 3 torch forge after a year+ of playing around and spending a lot of cash. I ended up with Frosty's T-burner single torch forge using black pipe, floor flange and bell's. It works good but I want better. I have been thinking about the propane delivery system to use and today it entered my decision to use 1/4" or 1/2" copper pipe with copper elbows and needed parts sweated together. I searched to find if copper was a valid material to use and it appears it is a good material and legal in PA to use for a propane delivery run. They use it for the whole house propane tanks mounted outside of home because copper can go around bends very easy and the cost is quite less. The only issue I found was connecting copper to other materials can cause issue with corrosion. This is NOT and issue because copper will only be used for the delivery of the propane. The mig tip is copper that will feed propane into a 1 x 1 1/2 cast iron bell threaded into 1" inch x 6" pipe connected to a 1" x 1/2 bell that will be inserted into forge. I have done quite a bit of home plumbing sweating copper together so I see no issue with BAD sweats. I am posting this concept to get feed back from experienced forgers to see if I am heading down a dark path of a less expensive propane delivery system. Any constructive thoughts would be appreciated.
-
I see what you are saying. I cannot seem to find a way to edit that post to remove the hyperlink? I will remember this next time I cut & paste, sorry
-
Buzzkill I did purchase Rutland Products castable refractory cement . I was not sure if including the product name would violate any policies but my intent is not to recommend a product just to make you aware of the type of refractory cement. It indicates can be used to create fire bricks or floor of firepit. Can handle temps up to 2,200 Degrees F. Given this would adding perlite to expand material be done without harm to heat resistance or structure? So far this refractory cement has worked great in my first messy forge without any breaking issues. I am just disappointed in the construction of forge and want a redo I can be proud of and add a second jet. I attempted to forge 4 pieces of high carbon steel together[cleaned up by grinding to shiny surface]. Given my forge only has 1 jet and it is NOT long enough to hold 8" materials I heated half the steel and hammered together without issue. When I put the second half in hammered it and darn, it failed to stick together. Is that due to not heating & hammering it all at once? I did tac weld together before any forging took place. Any thoughts...
-
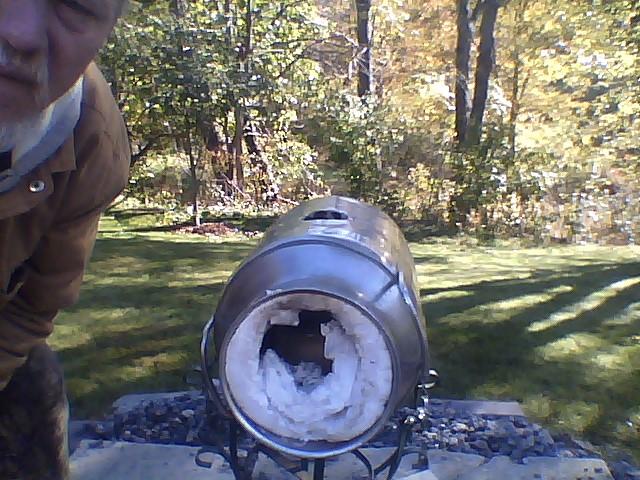
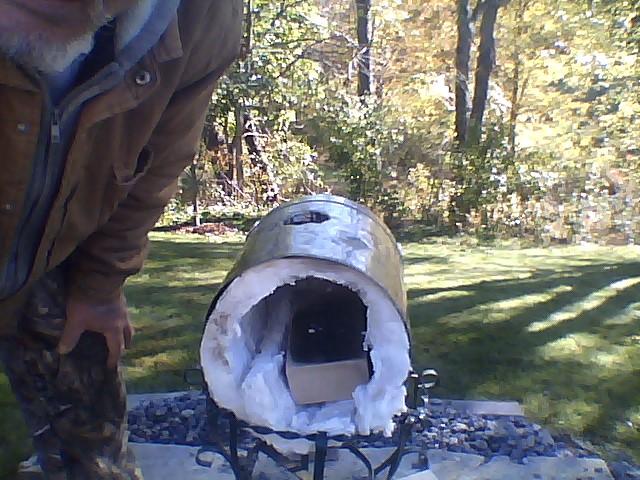
I purchased more of the Castable Refractory Cement and plan to build a new forge from an old large hand carry type tool box. I see my mistakes from the previous build and I have a question as to additive to refractory cement. I saw on TV a man building a forge and he added something to the mix. It was a white substance that looked like the PUNICE the stuff added to soil? Did not make sense to me because it holds water? Is there anything I can add to the cement that is inexpensive to get more from the product without taking from the heat holding & structure? The cement is expensive[$48] & if I can buy an additive for a few bucks I would be happy and have xtra for another forge as needed? The forge I have now has kaowool and after Frosty noted the fibers and suggested refractory cement I made a real mess of it. The forge went from ~7lbs to around ~25lbs and I did a poor job of applying the cement. I know what to do now to get a nice constant thickness of cement[use a Blatter type insert to get thickness I want. Any help would be appreciated!
-
I would think Frosty might have insight into this issue because he lives in Alaska, land of shivers! But to the issue: I use a 15lb propane tank because that is what exchange sites have. I live outside of Pittsburgh PA and I use a Mr Heater 15000 btu propane tank top heater. I put on med and 1/4 way up tank gets covered by frost after a few hours which bothers me! I have a single T-burner of Frosty design running at ~7psi in outside temp's ~17 to 34 degrees and have had no frost build up! A 15ib tank lasts ~5 hours of forging! Propane tanks can freeze at -44 degrees which Frosty might experience but Not most of country. According to local propane company the frost on a tank is nothing to be concerned about and could reduce pressure at worst case but they suggest lowering the rate at which you are taking fuel from tank! No insult to Frosty by using his tag name. He has helped me on several issues from building forge to correcting my mistakes to suggestions on holding a hammer to reduce hand/wrist issues.
-
Yes Thomas you have it correct if I understand what you did. Today I mixed another small batch of refractory, Put in the pieces I formed a few days ago and applied the cement over the pieces I placed in the forge. I did spray the fiber blanket and previously formed pieces with a light spray of cold water. It stuck to the blanket and pieces because I pushed it up the sides a bit. Now my forge is a little over half done with refractory. When I do it again I will create a type of blister inside the forge, spray it with pam, seal both ends and pour the foundry around the blister so I end up with an inch or so of foundry cement around the propane input hole. All I can say is this was an expensive lesson!
-
What a mess I did when applying refractory cement. It would not stick to fiber treated blanket and when I added a bit more h2o it slid to bottom. I let it set a bit & spreader it up sides but it would roll off fiber! Ended up with 1/4 coverage of the round forge. At least I have a thick floor to replace the HEAT SINK brick Frosty suggested I get rid of. Lol! With remainder of mix I made thin brick like parts and plan to place in forge up sides & cover with fresh refractory! May take another week to build up coverage & create keystone to hold it all up? Any thoughts? I think I should have formed small sections outside forge, placed in forge then covered & locked in place with a final coat of refractory. Expensive learning curve.
-
Irondragon: because there is a video I uploaded that is useless and other pictures are mostly duplicates. Mainly to keep things tight & useful.
-
Does anyone know how I can delete video, pictures, discussion I created?
-
Frosty: I plan to purchase the refractory cement to coat the simwool but have question will it Stick to the blanket twice coated with rigidizer? Left msg for Glenn asking that question. The other issue is the brick: thinking about cutting in half[half thickness or 1/3 maybe] and applying refractory cement? Just thick enough kinda like kiln shelf thin? And create door /flap on both ends covered with refractory cement with grill kind vents? What do you think?
-
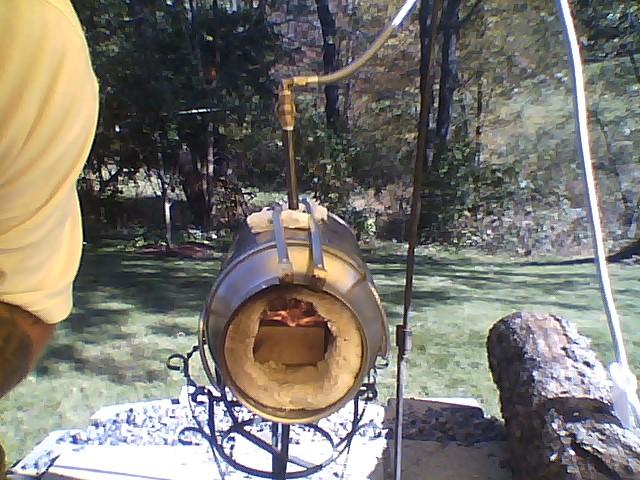
Now just lit forge. At 7psi is video VID_20191025_095905.mp4 VID_20191025_095905.mp4 VID_20191025_095905.mp4 Now just lit forge. At 7psi is video VID_20191025_095905.mp4 VID_20191025_095905.mp4 VID_20191025_095905.mp4 After burning for 5 minutes From side
-
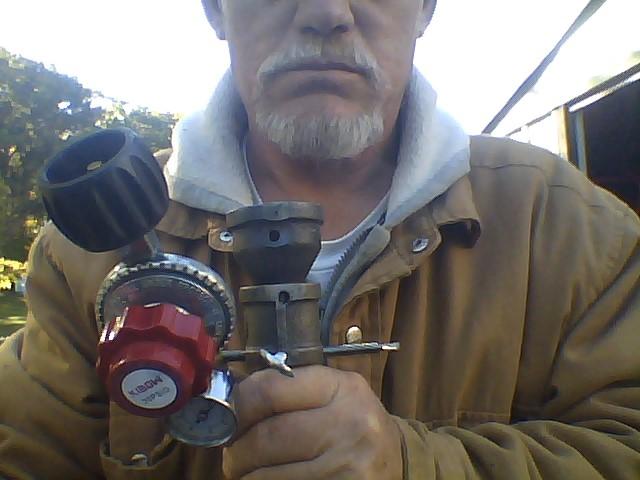
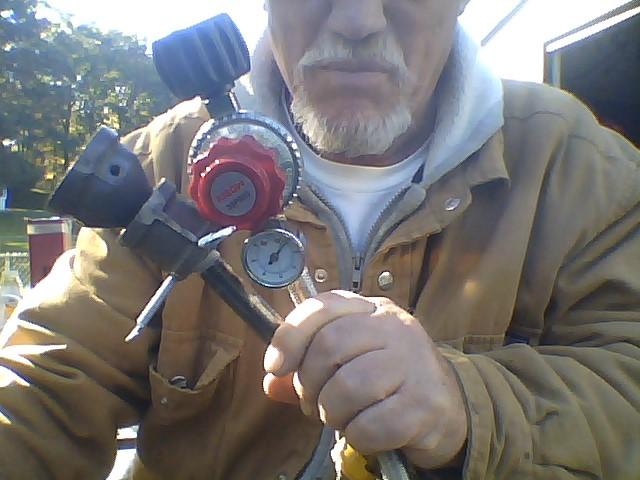
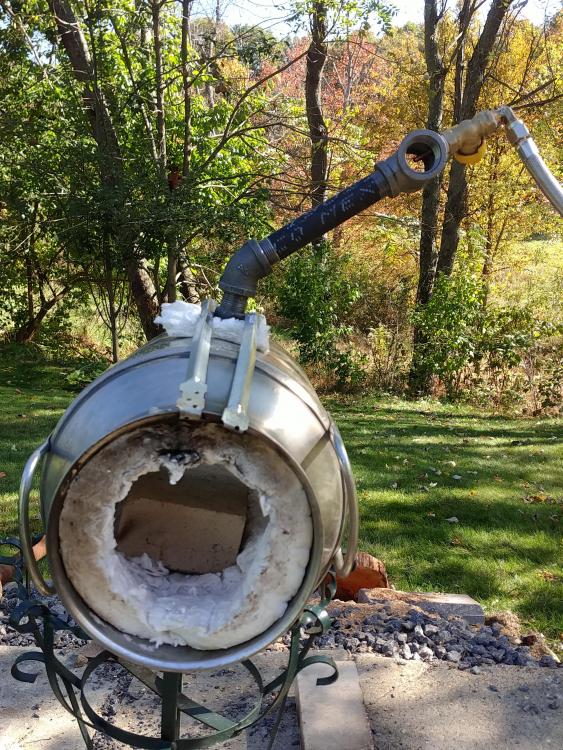
Another FrankenBurner: The mig tip seems aligned to the center when I look at it when firing. Given what you indicated about sucking spent gases I think for now I will leave as is. I was also considering adding a 1/2 inch setup so I would end up with 2 burners but that is only a thought given I purchased that also? As for the fiber blanket I did spray it good with SIMWOOL RIGIDIZER last year when I started this process. Yesterday I sprayed it again on both sides and edges. I am letting it dry for a couple of days. The fire brick was purchased from a local stone company that builds fireplaces, porches, etc… and weighs more the 8oz but well less then 7lbs. I do not have a scale to weigh it but it 1.5"thick. In a couple of days I will light forge and post a video of it operating. I did add sheet metal inside & out and added bolts to make a sturdy platform for the piping. I appreciate the input and looking towards a fun stress releasing productive forging experience. Mike98118: Not sure what you are indicating by regular "T" fitting, instead of a reducing "T". What needs reduced? The sides are 1" and the piping is 3/4" which I guess could be considered reducing from 1" to 3/4". Given I am just starting I do not understand the finer details of a forge or its construction. All input is appreciated!
-
Do you think I should go straight in? I do not understand flow dynamics so I wanted to stay with a known element.
-
Looking at Frosty's PDF and from the photo on page 4 it looks like a 45 and NOT straight in. Not a 90 for sure.
-
Pnut, That is the configuration from Frosty's T burner if I understand it correctly. It burns clean compared to my previous configuration. I heated a 1/2 inch round landscape steel spike in about 2 minutes. It got red/yellow hot and I was able to flatten it with 2 strikes. So it seems to do the heating required but I need to play with the PSI. I had it on 5psi. I saw blue & red flame swirls and seem to remember a video as to what the flame should look like so I will need to go back & find that video. I thought the tip was centered and maybe it looks off center in photo but it looks OK to me- then again? I was thinking about changing the T and all piping from 1"x3/4" to a 1/2" x 1/4" because I purchased both configurations at the hardware store? Your thoughts? I have a lot to learn about heating metals and the various types. I did start to look at links supplied above which has some great videos on that subject and others. Just starting but the replies and links will aid my task.
-
Mikey98118, my error. .035 is the tip. Does this configuration look better?
-
OK, I spent day on YouTube & this site. After getting very tired I went back to the T burner of Frosty"s and decided I will follow these plans. I went to hardware store & got parts to start again. Only issue is the. 033 tip & configure to attach to or work with T. I am failing to understand clearly although I have an idea how to accomplish. Wish me success!
-
Thank you, my Sunday will be reviewing these links.
-
I agree youtube is full of garbage and to find reliable thoughts is a task. I have issue seeing and reading is very difficult so I seek videos, pictures and detailed plans to accomplish my forge task. I am enjoying being able to function at a level where I can do things for the most part. xxxx, trial and error is a brain development tool in any case!
-
The black pipe is 6"long with a cap at the end and the .025 mig tip treaded into it. From there it is held in place as you see by the picture! When you ask about mixing tube are you asking from the propane on/off knob to the forge? If so that is the 6"black pipe? You are correct in indicating I need to learn more and I will try to review burners 101 again. I have serious issues with reading and prefer pictures or videos and that is why I like youtube. There are 1001 thoughts on this issue and narrowing down to productive ones is a task. I have been thinking about a forge for a couple of years. Reading/watching videos for the day I was functional again to start a build. About 8 months ago I finally got my stable mobility back and it comes and goes but it will NOT stop me or force me to give up. I am open to constructive input and direction to help understand and learn to construct a good functional forge. I will go back to burners 101 and refresh my knowledge. I will keep you updated to modifications and will work towards a finished system.
-
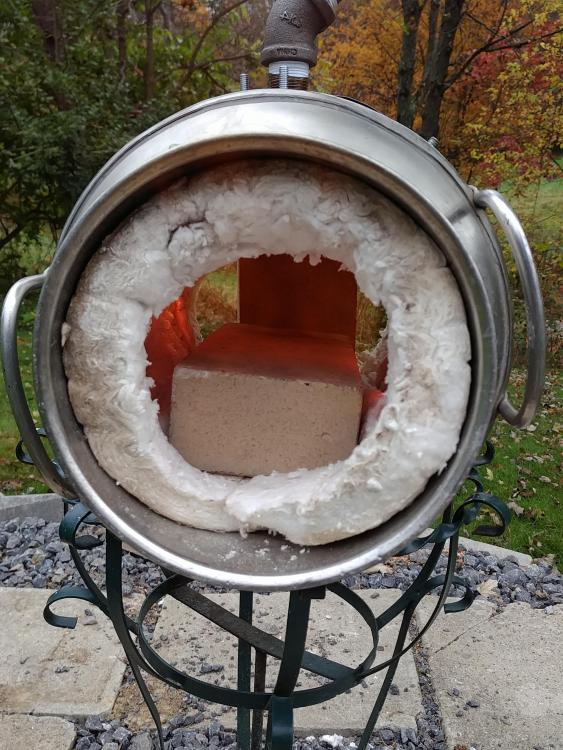
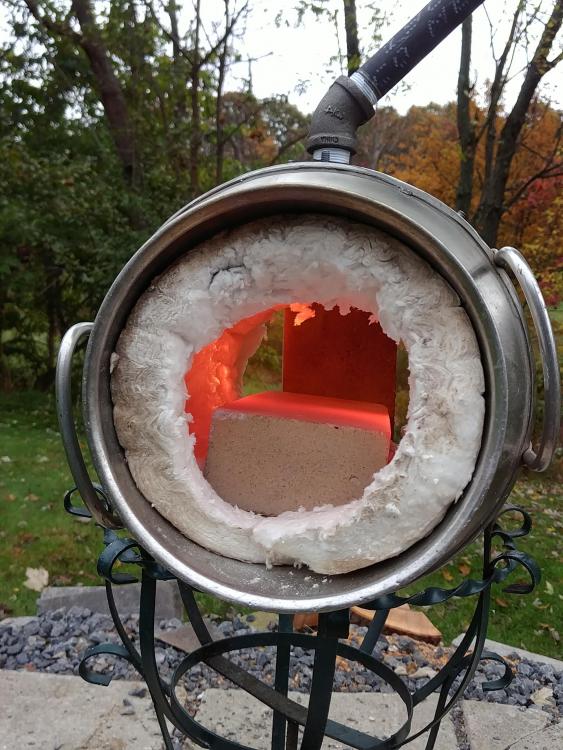
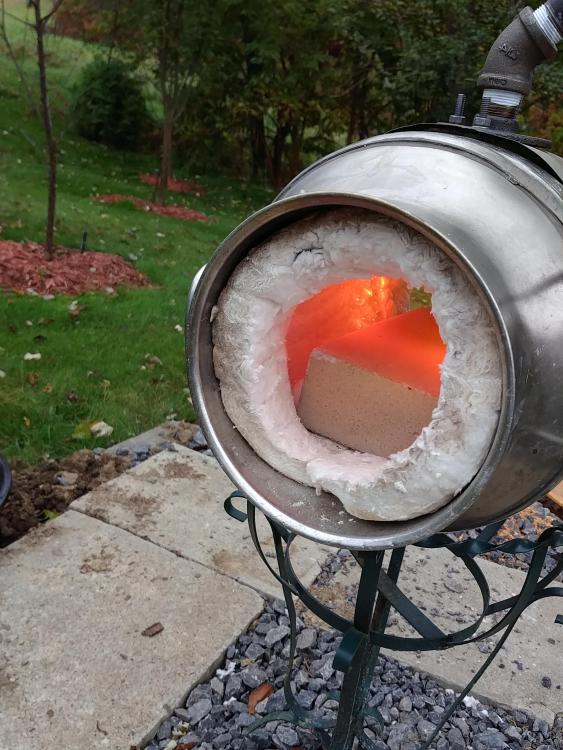
Took out 1/2 bell and it is working good. I now must find a better system to hold in place. For now I have thin metal which will melt! I cut hole for 1/2 bell & have all mounts designed for that. now that I removed bell I must rethink mount system/1 I think getting to much air due to flame red & not much blue. I saw someone cut the bottom of a soda can , oval a bit and use to control air flow. At least I am on a good track now. Any thoughts would be appreciated. I did place fire break in rear to keep in heat.
-
I got design from many months of this site, youtube, & several friends online! I did purchase solution recommended on this site and the ceramic blanket is hard to touch about half way through, I sprayed it months ago. Frosty is correct when he indicates I got idea from many areas but mostly from this site! I will review as suggested and ensure enough air is getting in. Thank You
-
Attached pictures. The .025 wire tip is at the top of the 1/2 bell at narrow end