AngryDaddyBird
Members
-
Joined
-
Last visited
Everything posted by AngryDaddyBird
-
I’ll try to upload pictures of my tongs. I only have tongs I made. Never tried a real set yet.
-
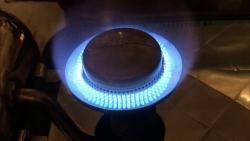
Just an update on my forge build. I made a mount for my burner and played with the air gap from the burner flush with the forge so no air could come in around it and pulled it away up to 2 inches to let in max air mixture. I also played with making different nozzles. I found that a 1/2 to 3/4” gam on MY SETUP works best. I have forgewelded several times already so its hotter than I need it to be. 1 standard BBQ tank Lamar me 12+ hours of forge time making Flint strikers. I have the materials to insulate my forge and will update here when I start the process. If you haven’t seen my forge search MICRINI forge to seethe build. This place has been a wealth of knowledge for me!
-
Sounds good.
-
Just an update on my forge build. I made a mount for my burner and played with the air gap from the burner flush with the forge so no air could come in around it and pulled it away up to 2 inches to let in max air mixture. I also played with making different nozzles. I found that a 1/2 to 3/4” gam on MY SETUP works best. I have forgewelded several times already so its hotter than I need it to be. 1 standard BBQ tank Lamar me 12+ hours of forge time making Flint strikers. I have the materials to insulate my forge and will update here when I start the process. If you haven’t seen my forge search MICRINI forge to seethe build. This place has been a wealth of knowledge for me!
-
That’s pretty interesting. The shell especially. I wonder how hot it it outside the shell?
-
-
Yes I agree. I won’t use it enough to justify buying a top dollar machine when a harbor freight one will do just fine. I will need it and a tap set to do thebuild. That’s the only thing stopping me.
-
I’m reading about these 3/8” burners and looks like I’ll need a drill press. I’ll be buying one soon.
-
I thank you for encouraging words. I’ll do just that. Okay aroundwith coffee can or muffler firges and small burners!
-
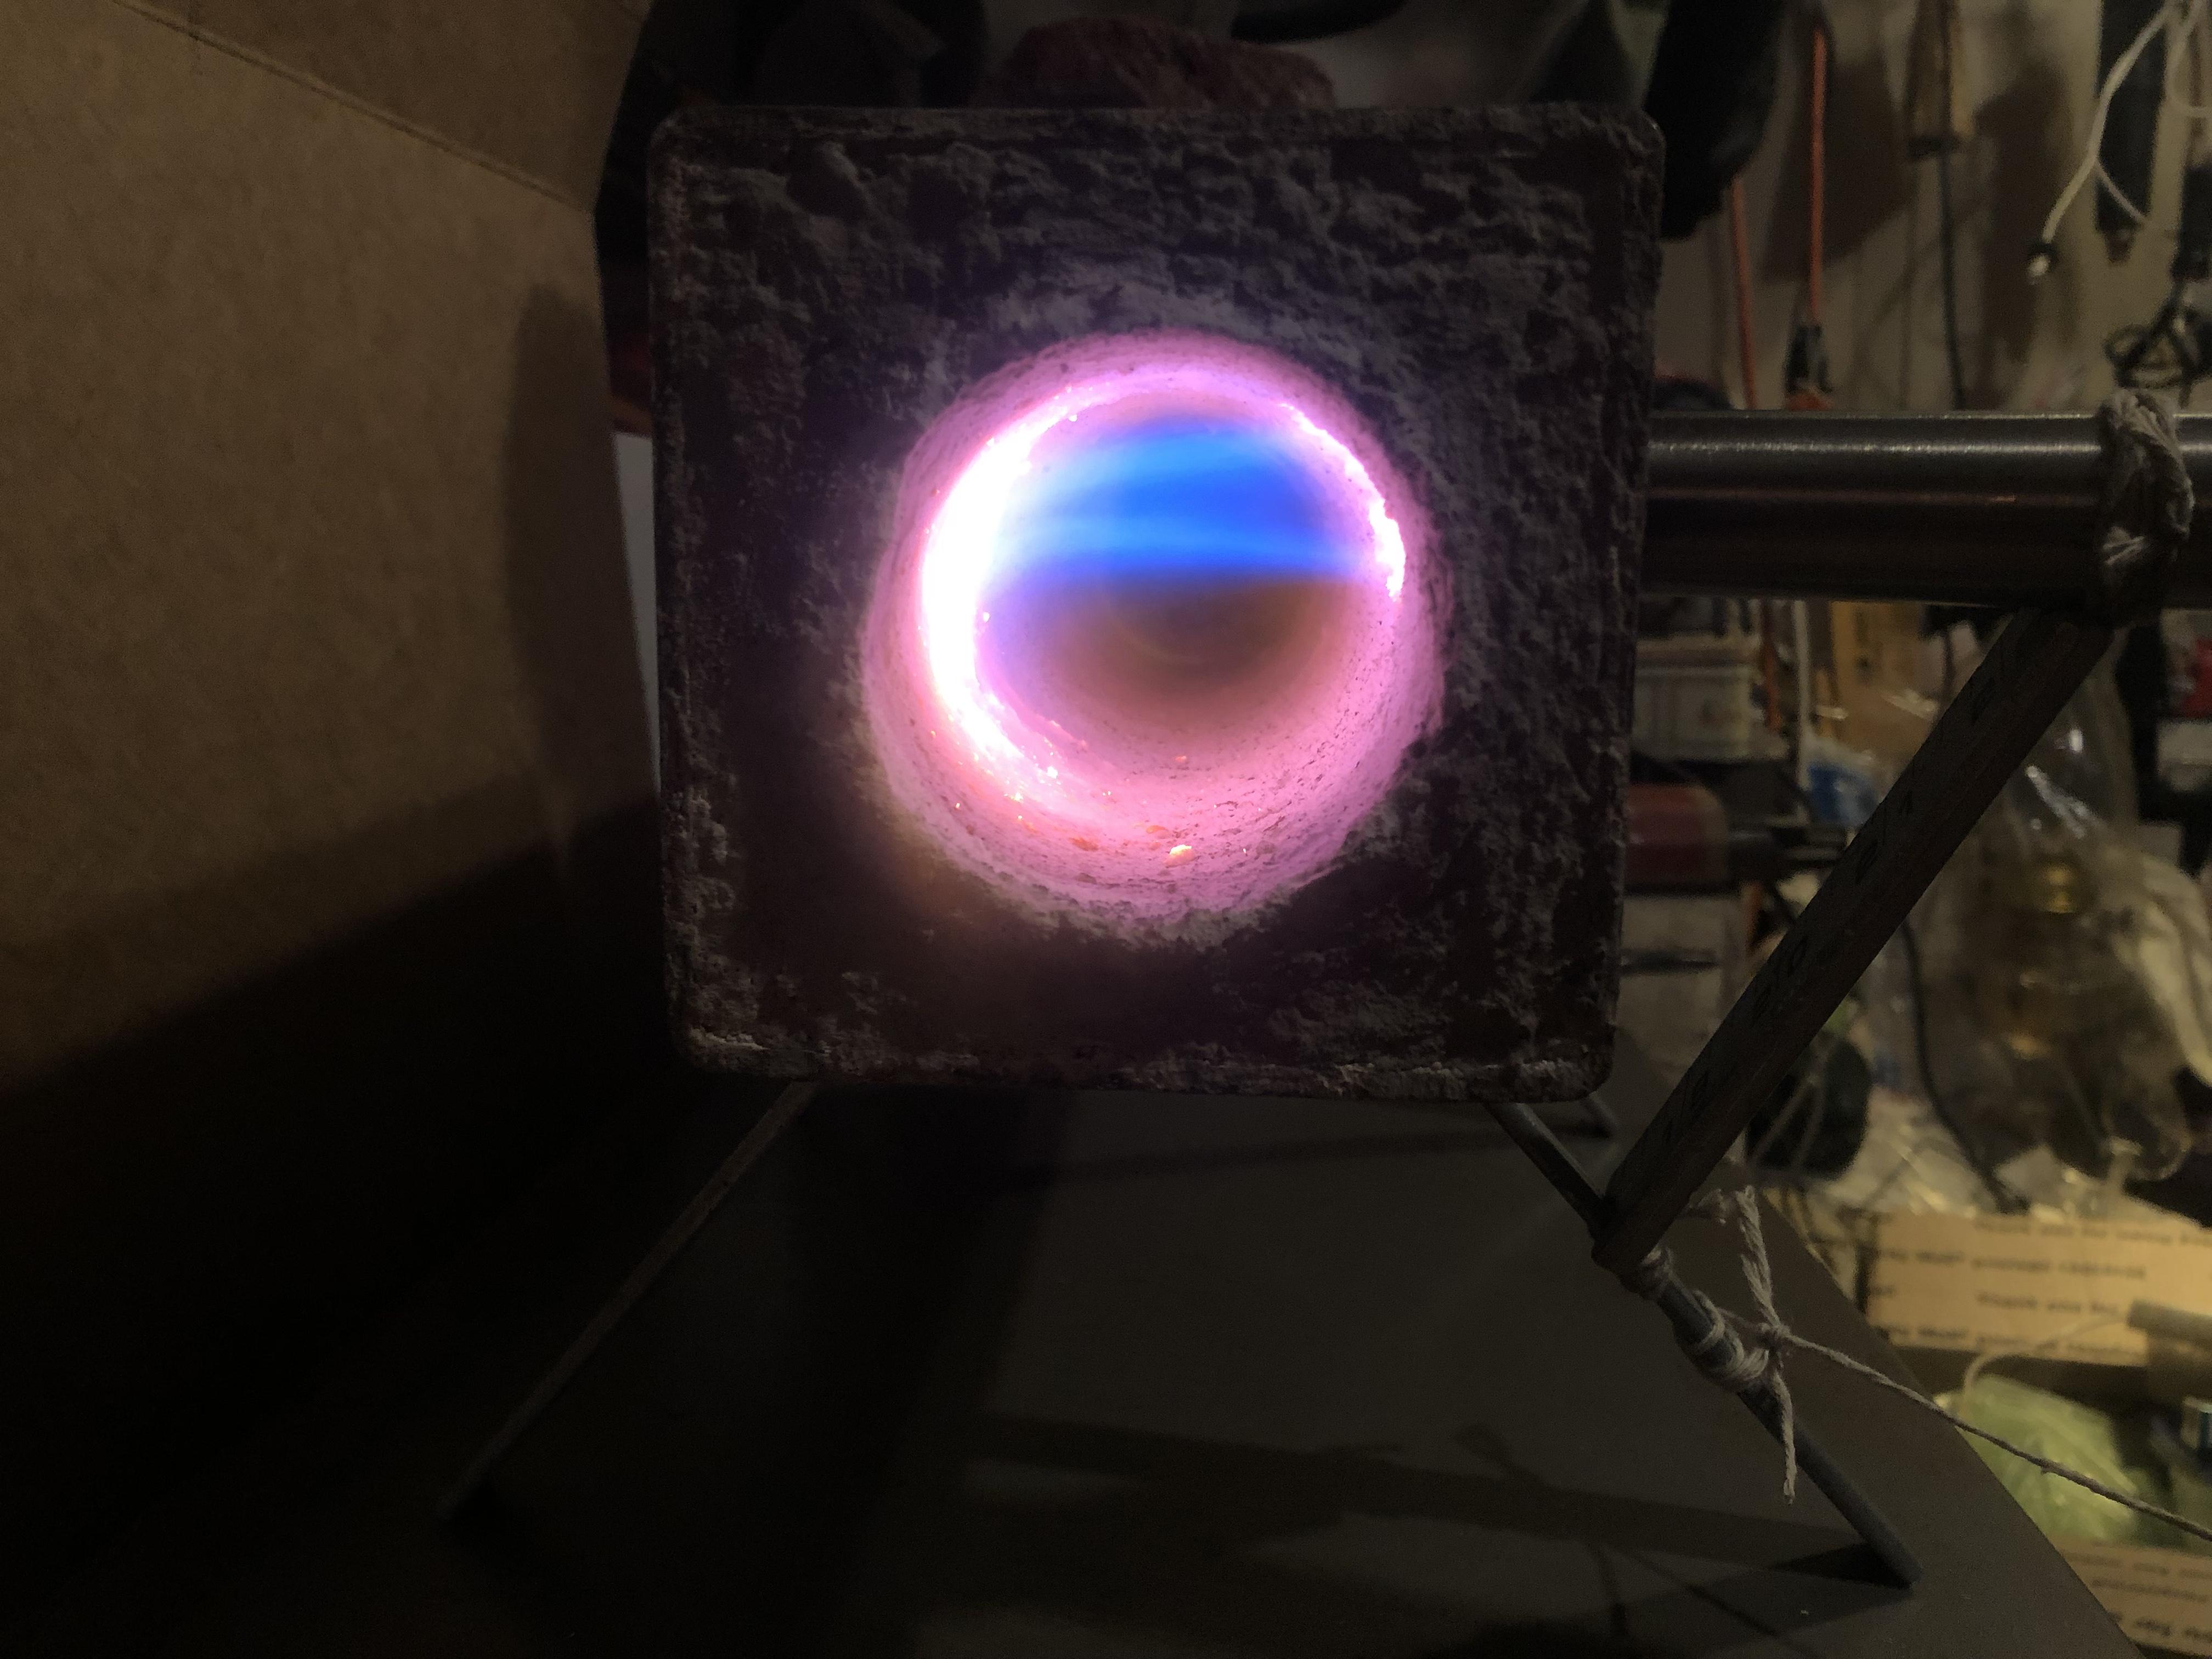
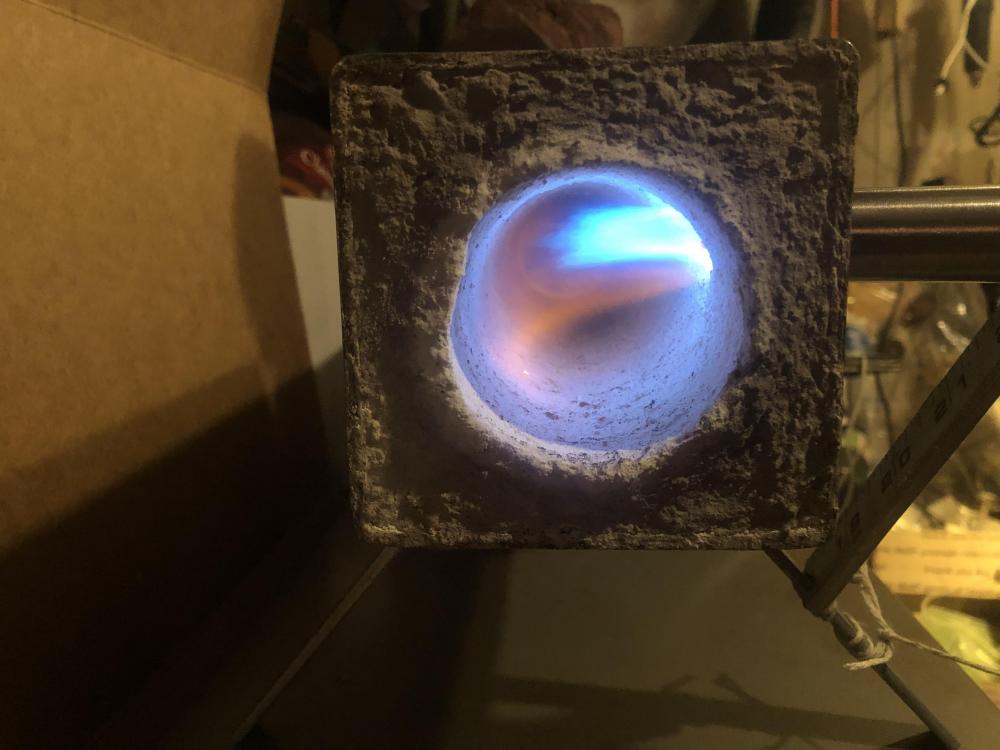
I don’t mind any feedback! Thanks I had the brick 1/4 away from the rear opening. But I also add a lip to keep the rear ending closed a bit more than the front. The flames out the rear and Fron are almost equal in amount. The burner is faced towards the rear but When I angle the burner even more that way flame only comes out the rear. I tried closing the ends withbricks and it seems to hold heat but the way it’s burning now is very hot. I know now what your saying about neutral flame. I can get it to do that when I pul the burner out and leave a gap for air to come in with the flame. But it actually took longer to heat up and when I put anything in the chamber it blowed the flame back out that gap. Likeghechamber is pressurized. Weird. The forge gets hot! I have a 6” square pipe same length as this forge and I think I’ll use it and put this little one in the6” one but first wrap it with Koawool. Maybe that will help it retain some heat? Not that I think it needs it because it gets way hotter than my micro forge!
-
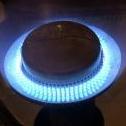
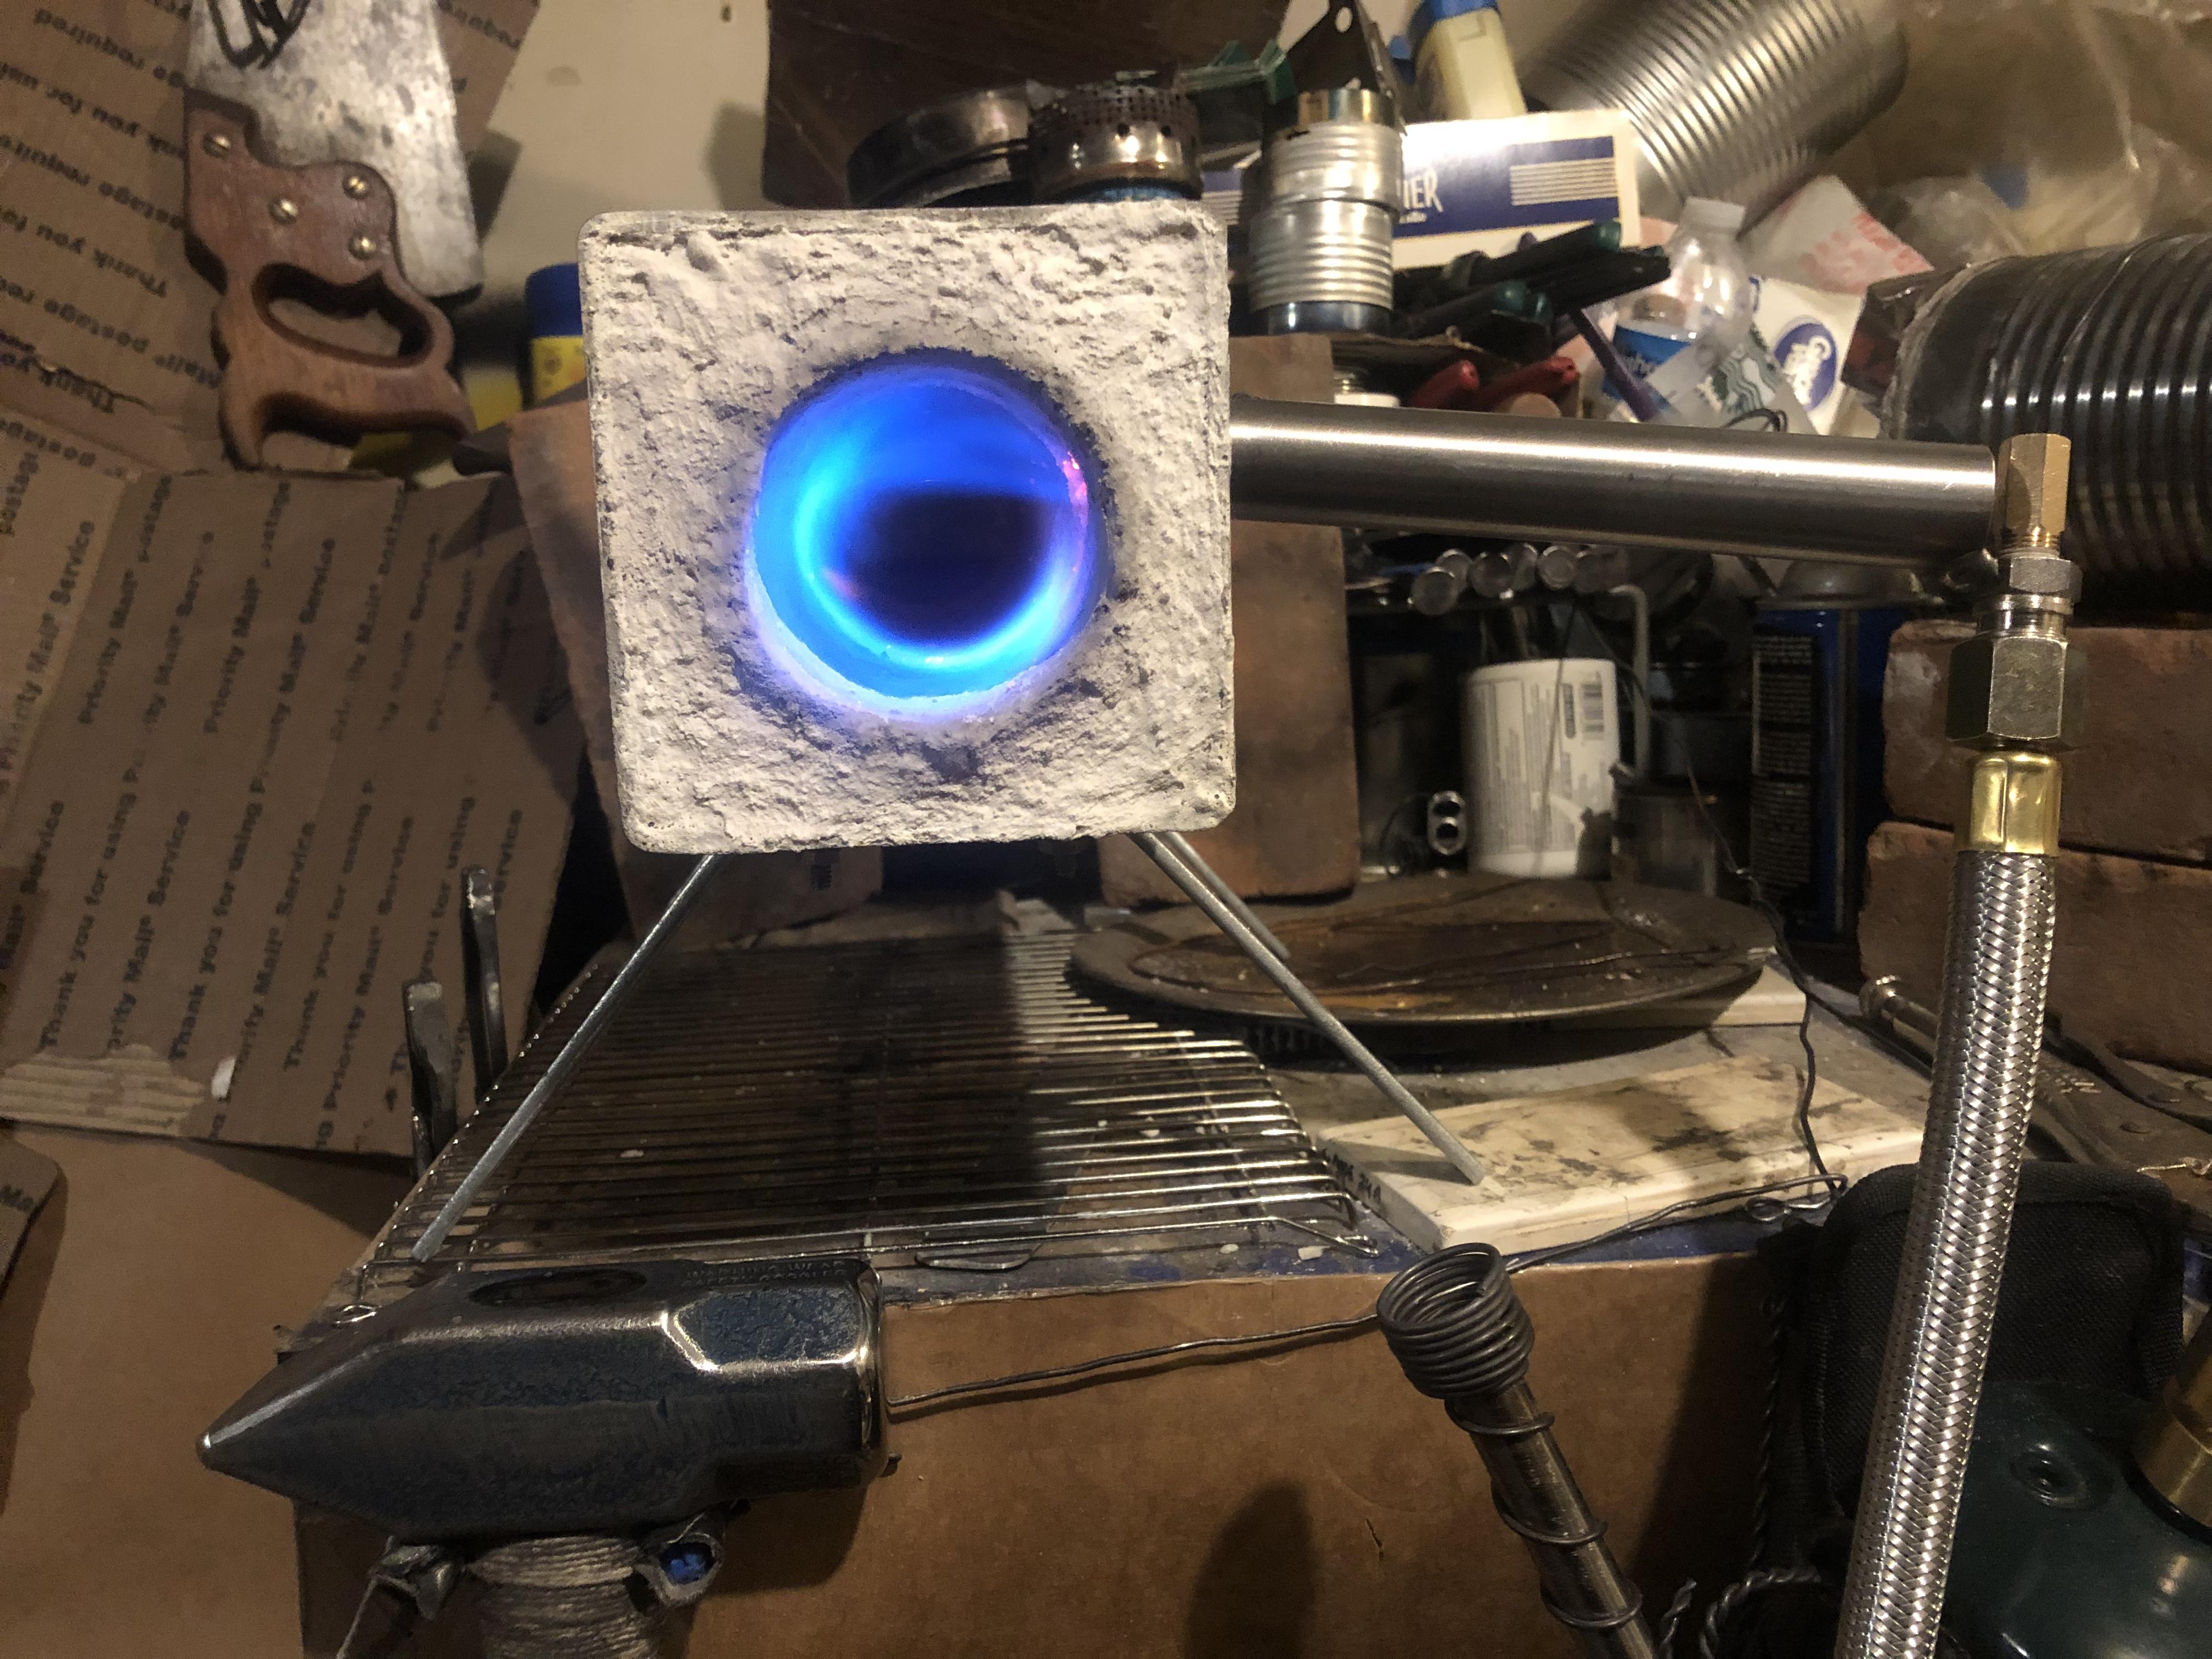
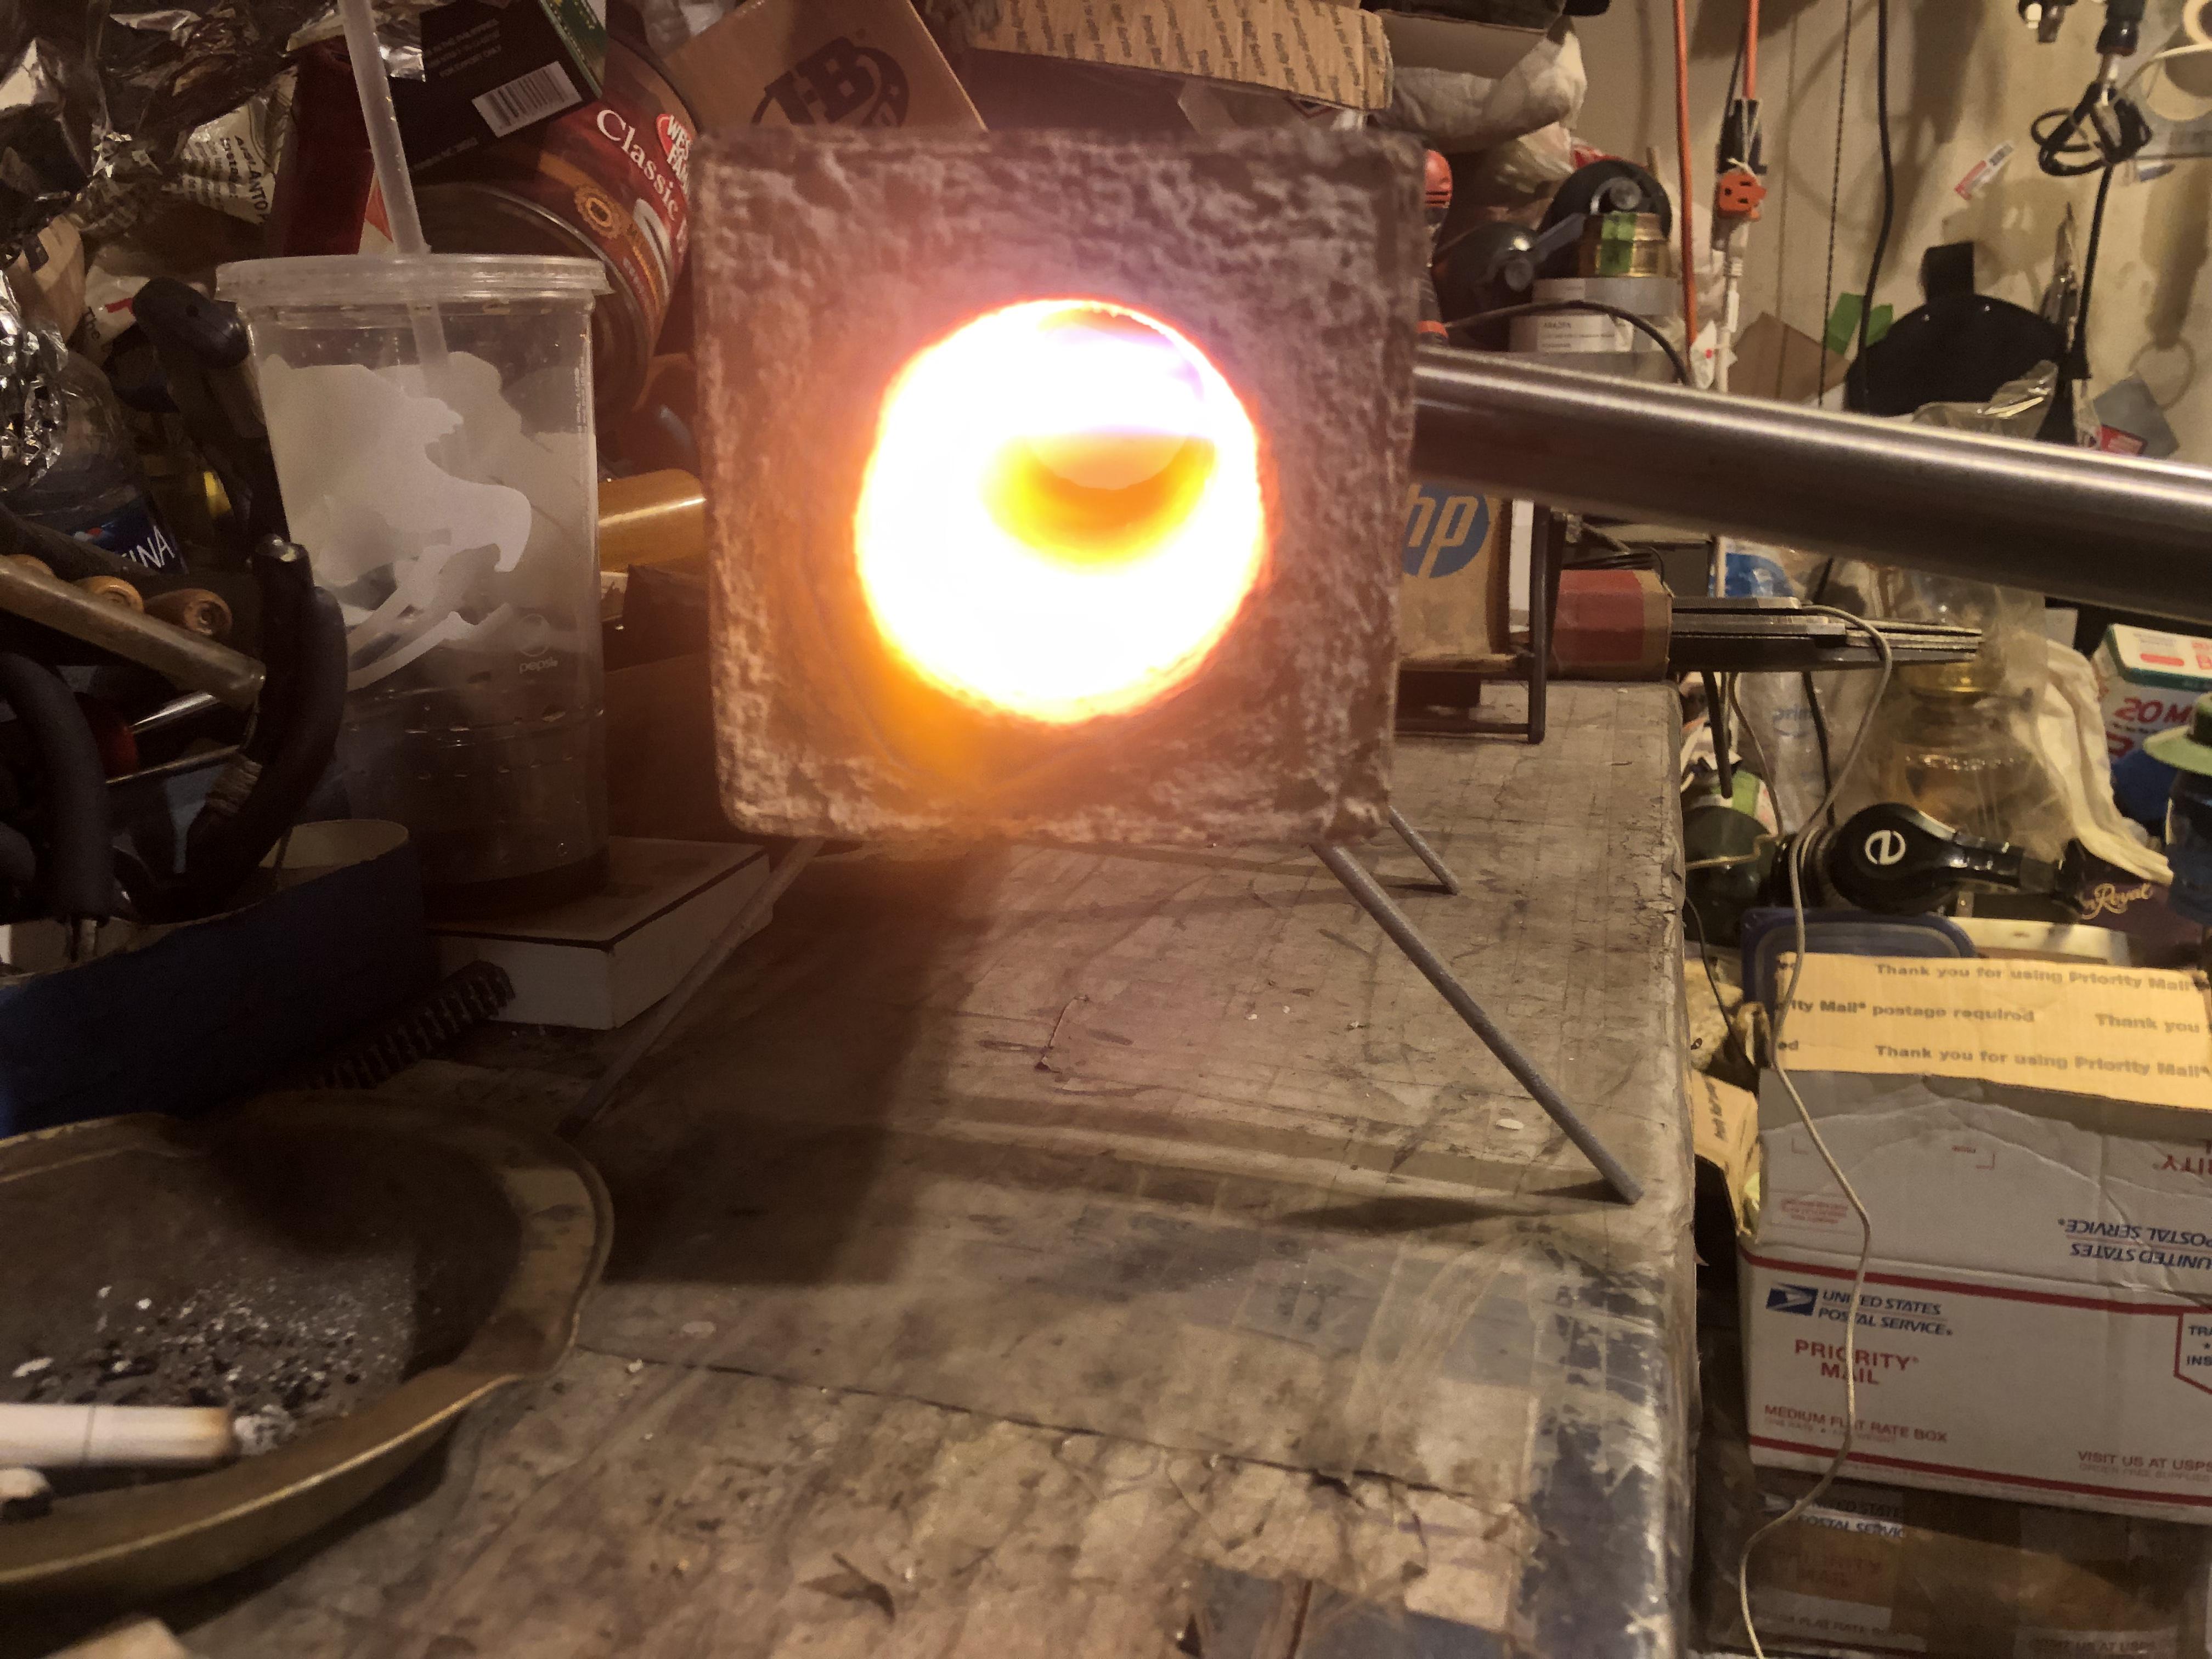
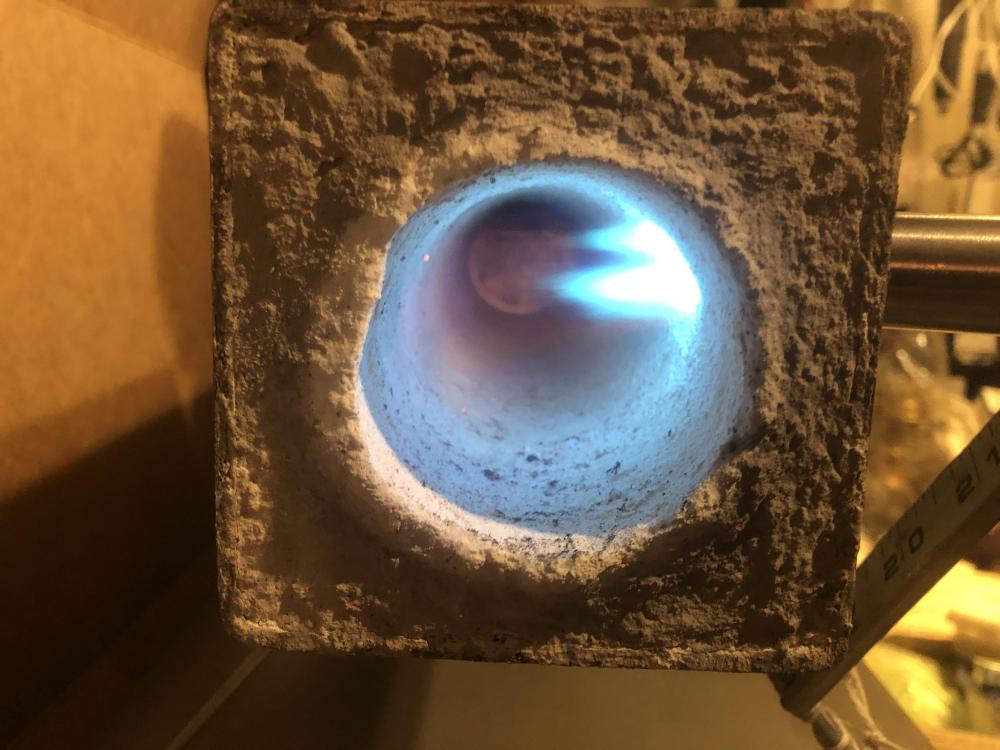
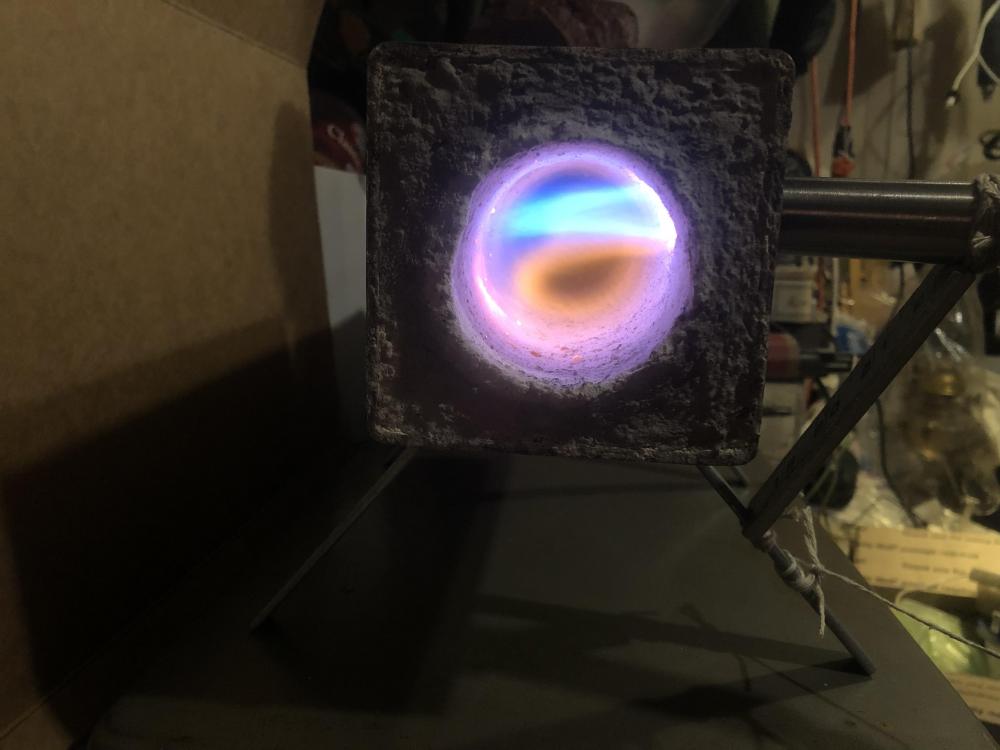
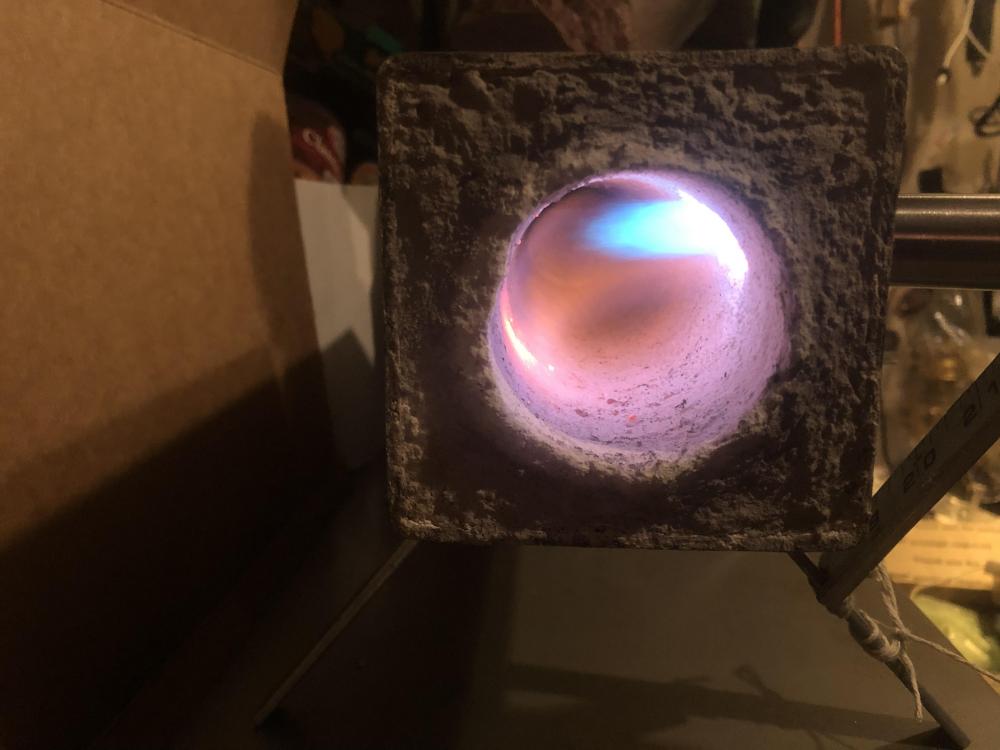
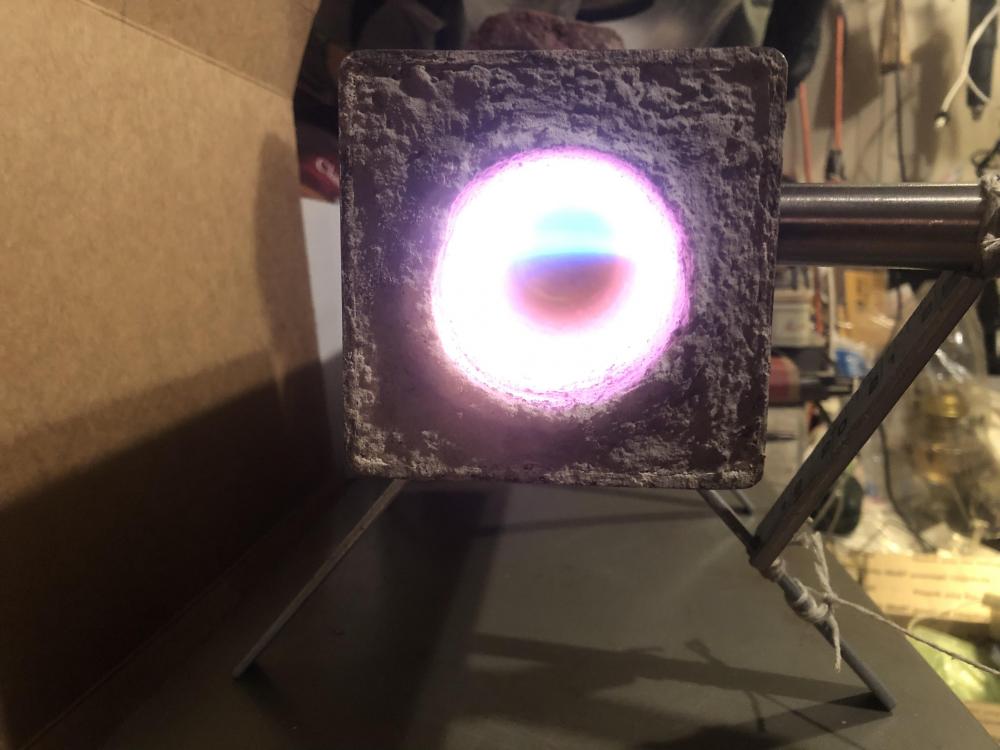
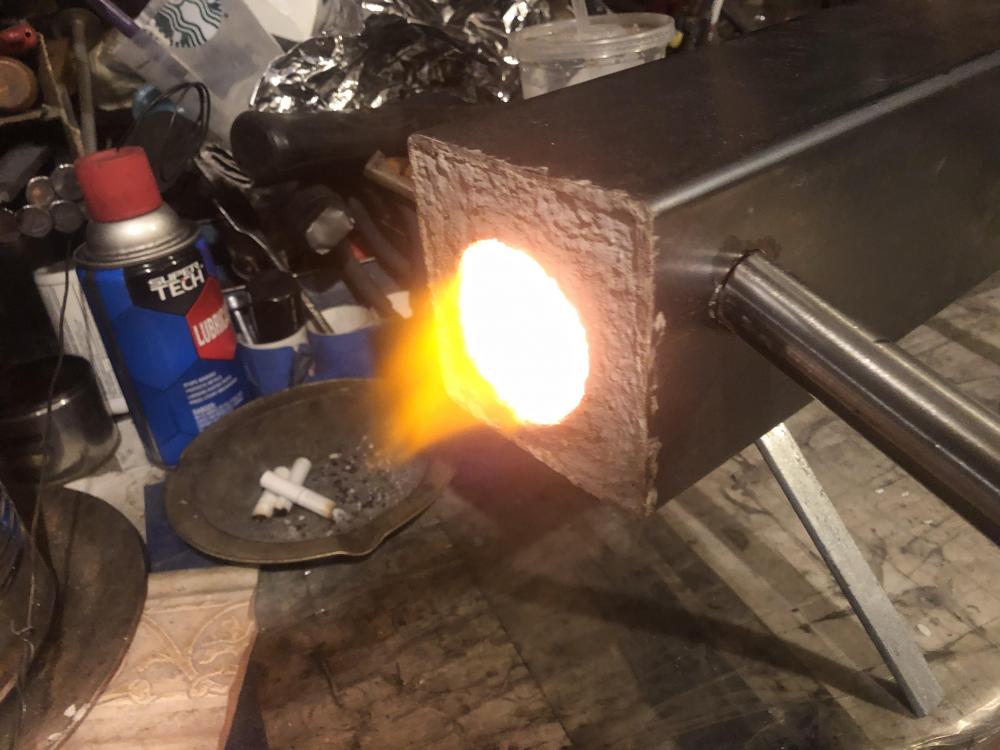
Here’s the flame. Looking better after playing around and adjusting depth ect. It get very hot!! Pictures are from start just out to full power! Also a picture showing flameout the back and front. Is it looking ok?? I never had a production firge so have nothing to compare to?


-
Here’s after playing with the burner depth, air ect! It looks a lot better


-
Yes the flame is you said. I played around a bit with it and got it to burn decent after a good long while. I think I’ll do the 1/2” t burner soon as I find all the parts. Unless... does anyone here have one already built for sale?
-
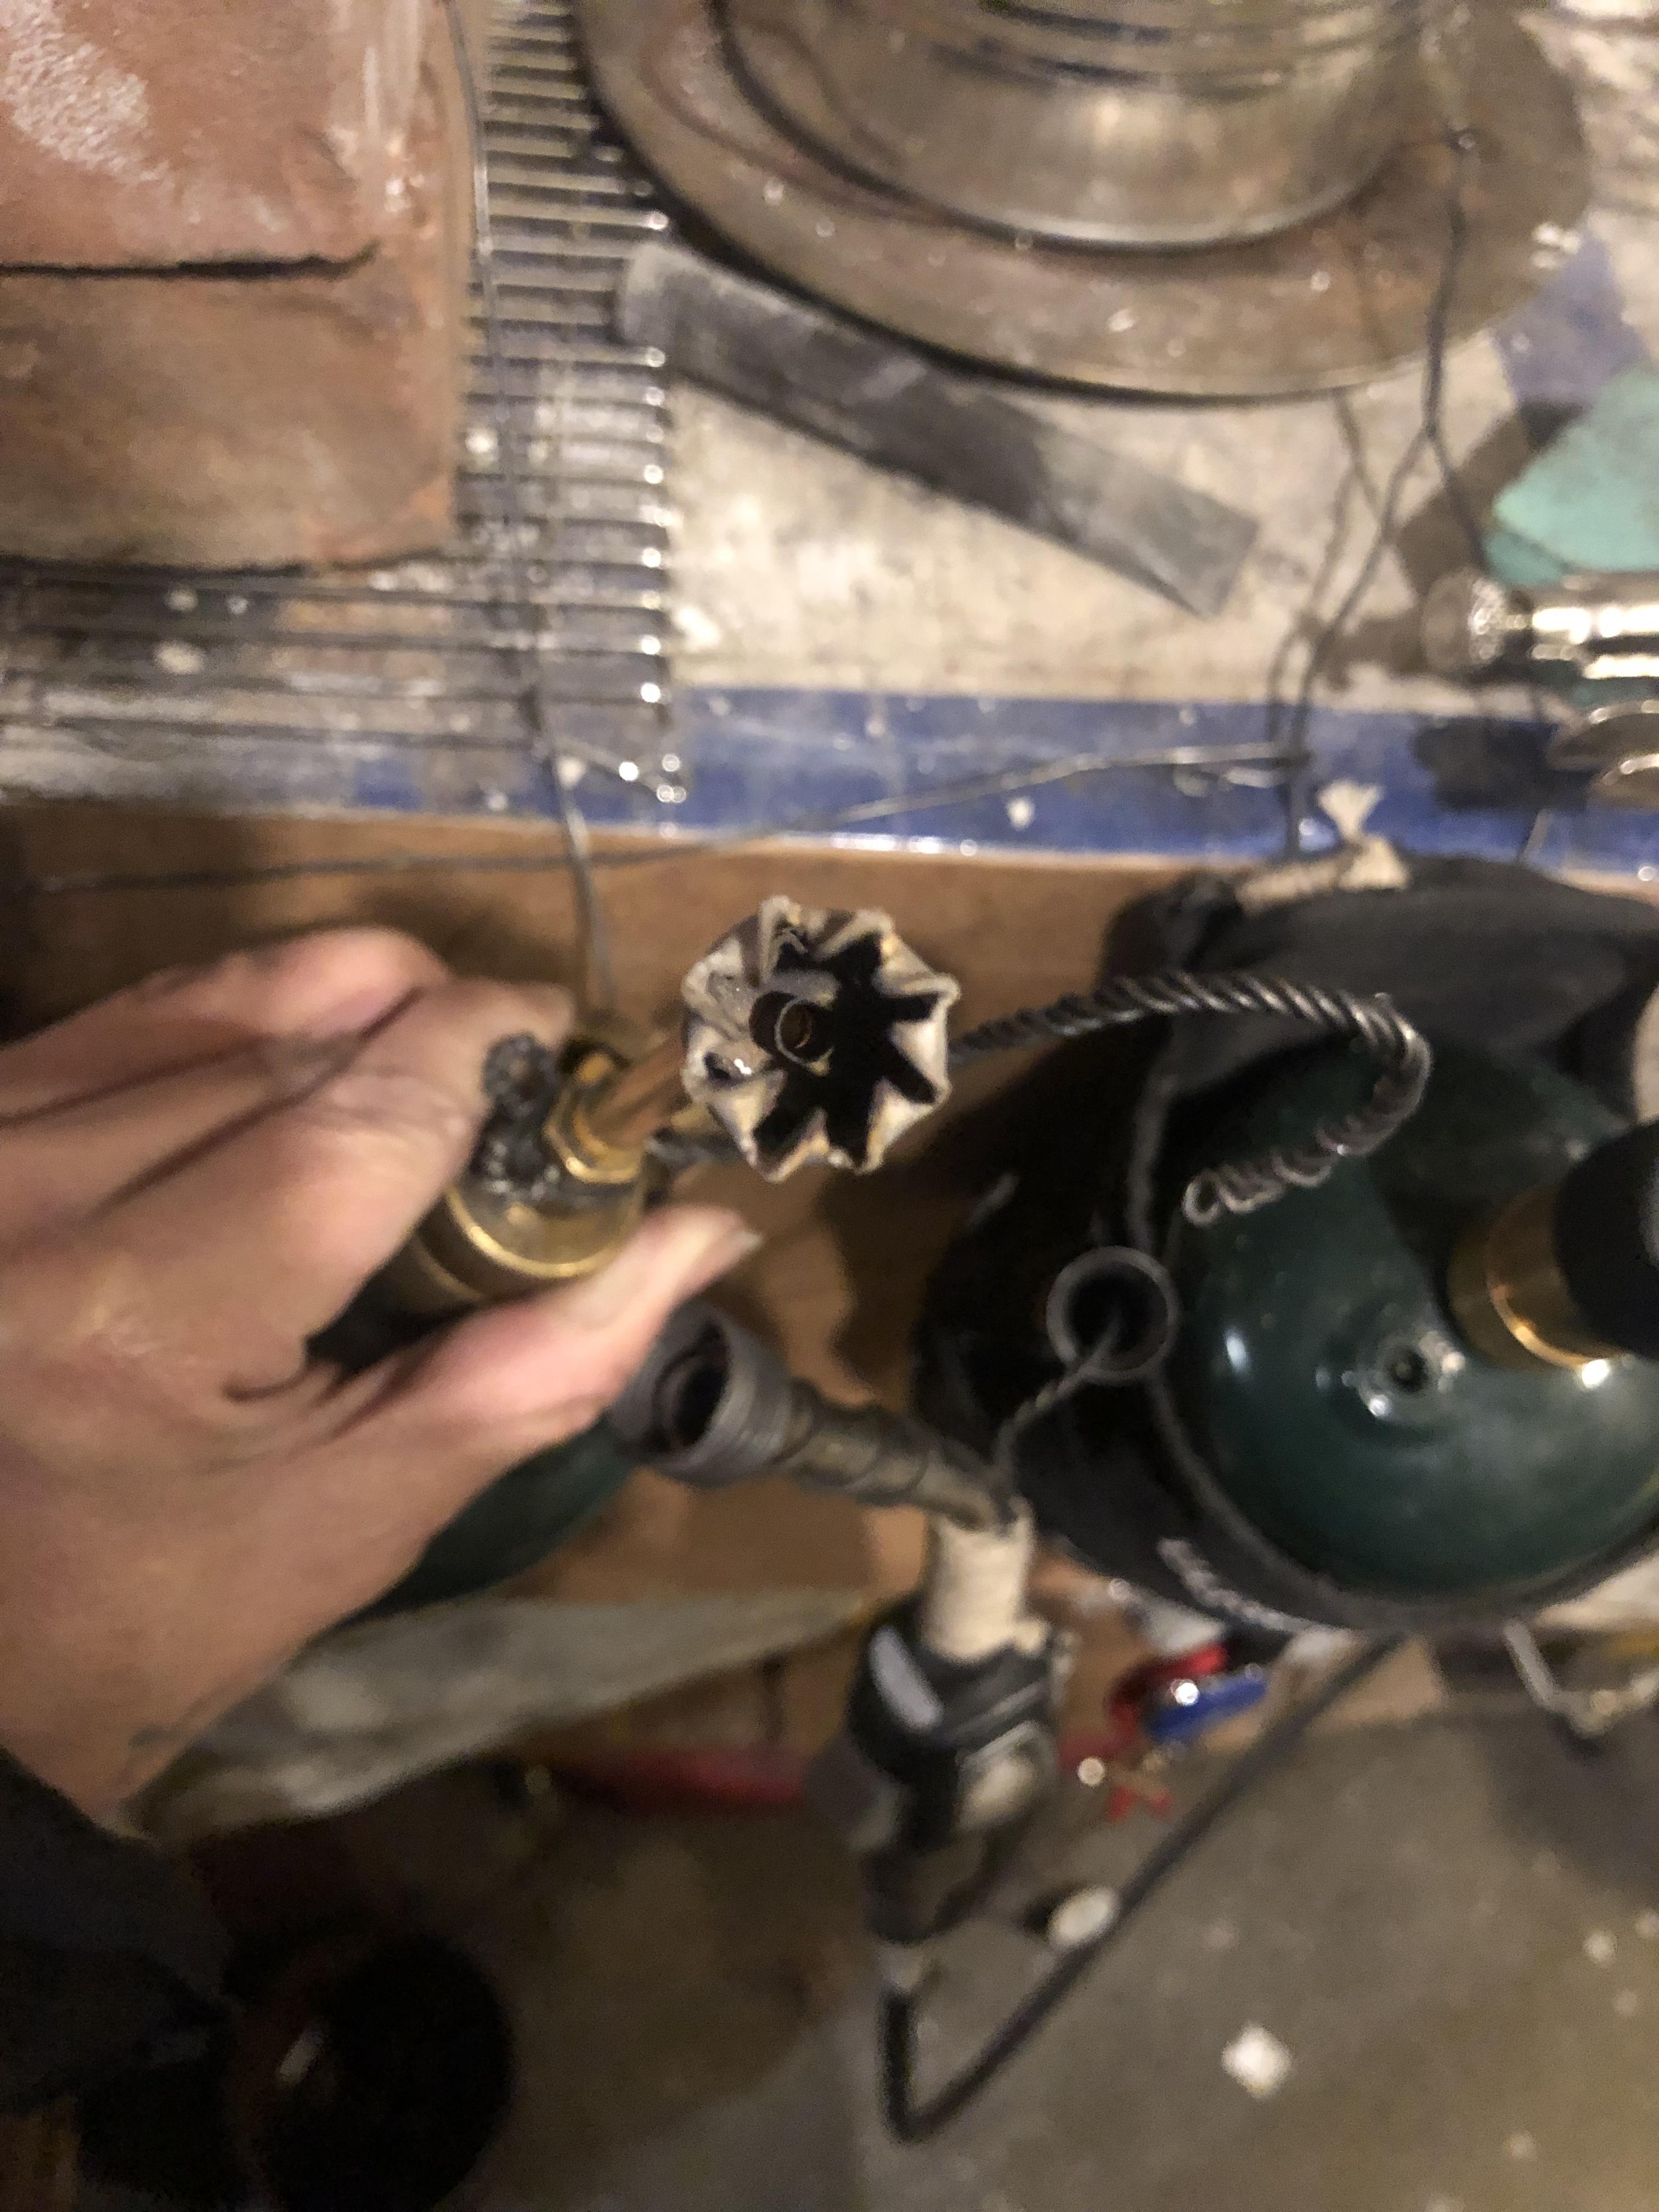
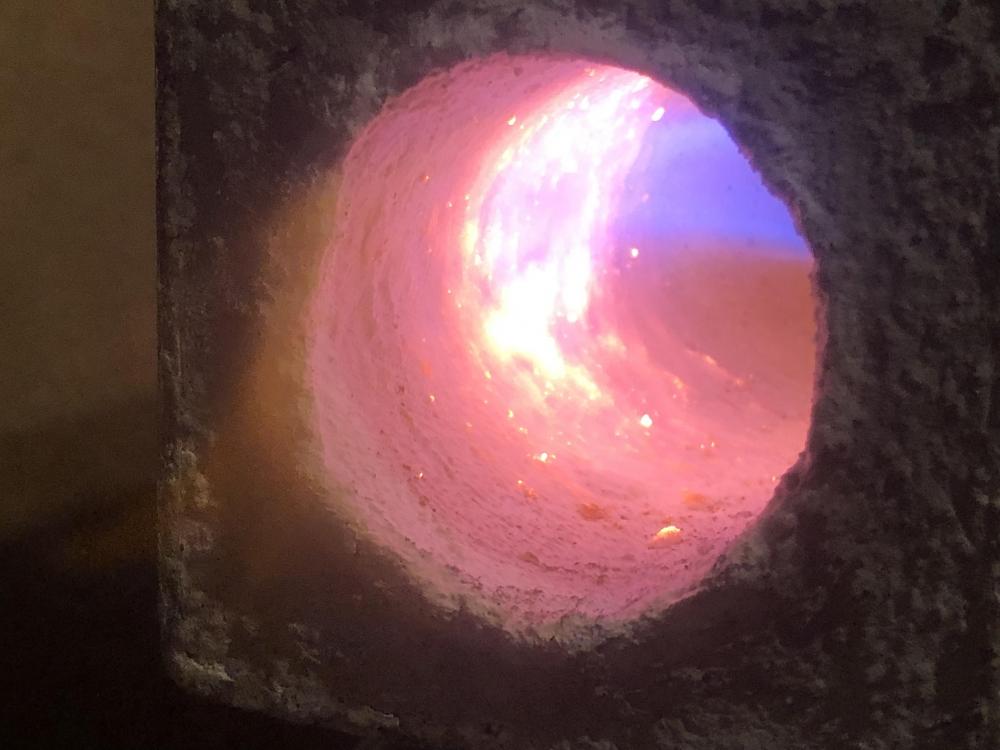
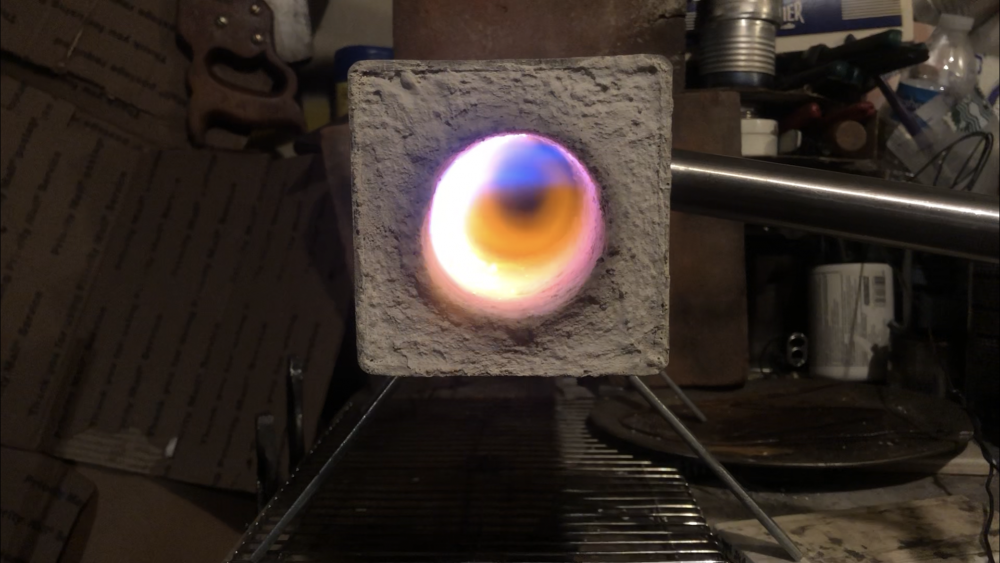
Here’s the first fire! Ran it for 1 minute at just barely on, them about 5 minutes at low medium then after an hour to cool repeated and it’s now at full temp! Swirls great! I’ll play with the different burners but plan on using my torch which I tried and worked good in this forge as well! Inthe pictures you see the atlas 30k burner and atlas 20psi hose. So far it’s been an hour no issues. I’m liking the swirl a lot!

-
Sounds like a plan! I’ll let you know in advance. Won’t be for another month or so.
-
I just drove through Boise almost 3 weeks ago! I do pass through every month or so and I’ll contact you! Good info on the tanks! It sounds like the perfect size for my intended use! I like the chamber of 3.5”-4”x12”-15” and sounds like those tanks are a winner! Sounds easy enough. Better than taking a torch to it!
-
I’ll look into those.
-
I did that with my micro forge and plan to do it with this one. I just hope the Kast-O-Lite stays together and doesn’t crumble into dust when I fireit up. I’ll keep this updated.
-
I was going to use the 1” wool like my micro forge but decided to save it for a bigger forge. I did the The cycle curing with my first forge and plan on doing it again. As for the hot housing I figured it be hot that’s why I made legs. But it was more of a last minute build. I do have the atlas 30k and others to play with in it. I’ll keep this updated. Some good info. I almost covered each end but didn’t because I figured it needed the open end to try and air it out and help expansion. But I obviously don’t know much at all. That’s exactly part of the reason I did that. The other is to try and get the flame/heat to swirl in there like my micro forge does and that one dies it very well! I already got a 6” square pipe and if I can find one I want some kind of round refrigerant tank. But no luck finding one. I may just wait until I can find one or justuse the 6” square?? Either way the next build is being built like my first one. 1” Koawool then kast-o-lite, ect. I do want to try and keep the flame swirling if at all possible. I rather not it boast directly on whatever I put in the forge. I’m not forgewelding(yet) so I’m not after welding temps.
-
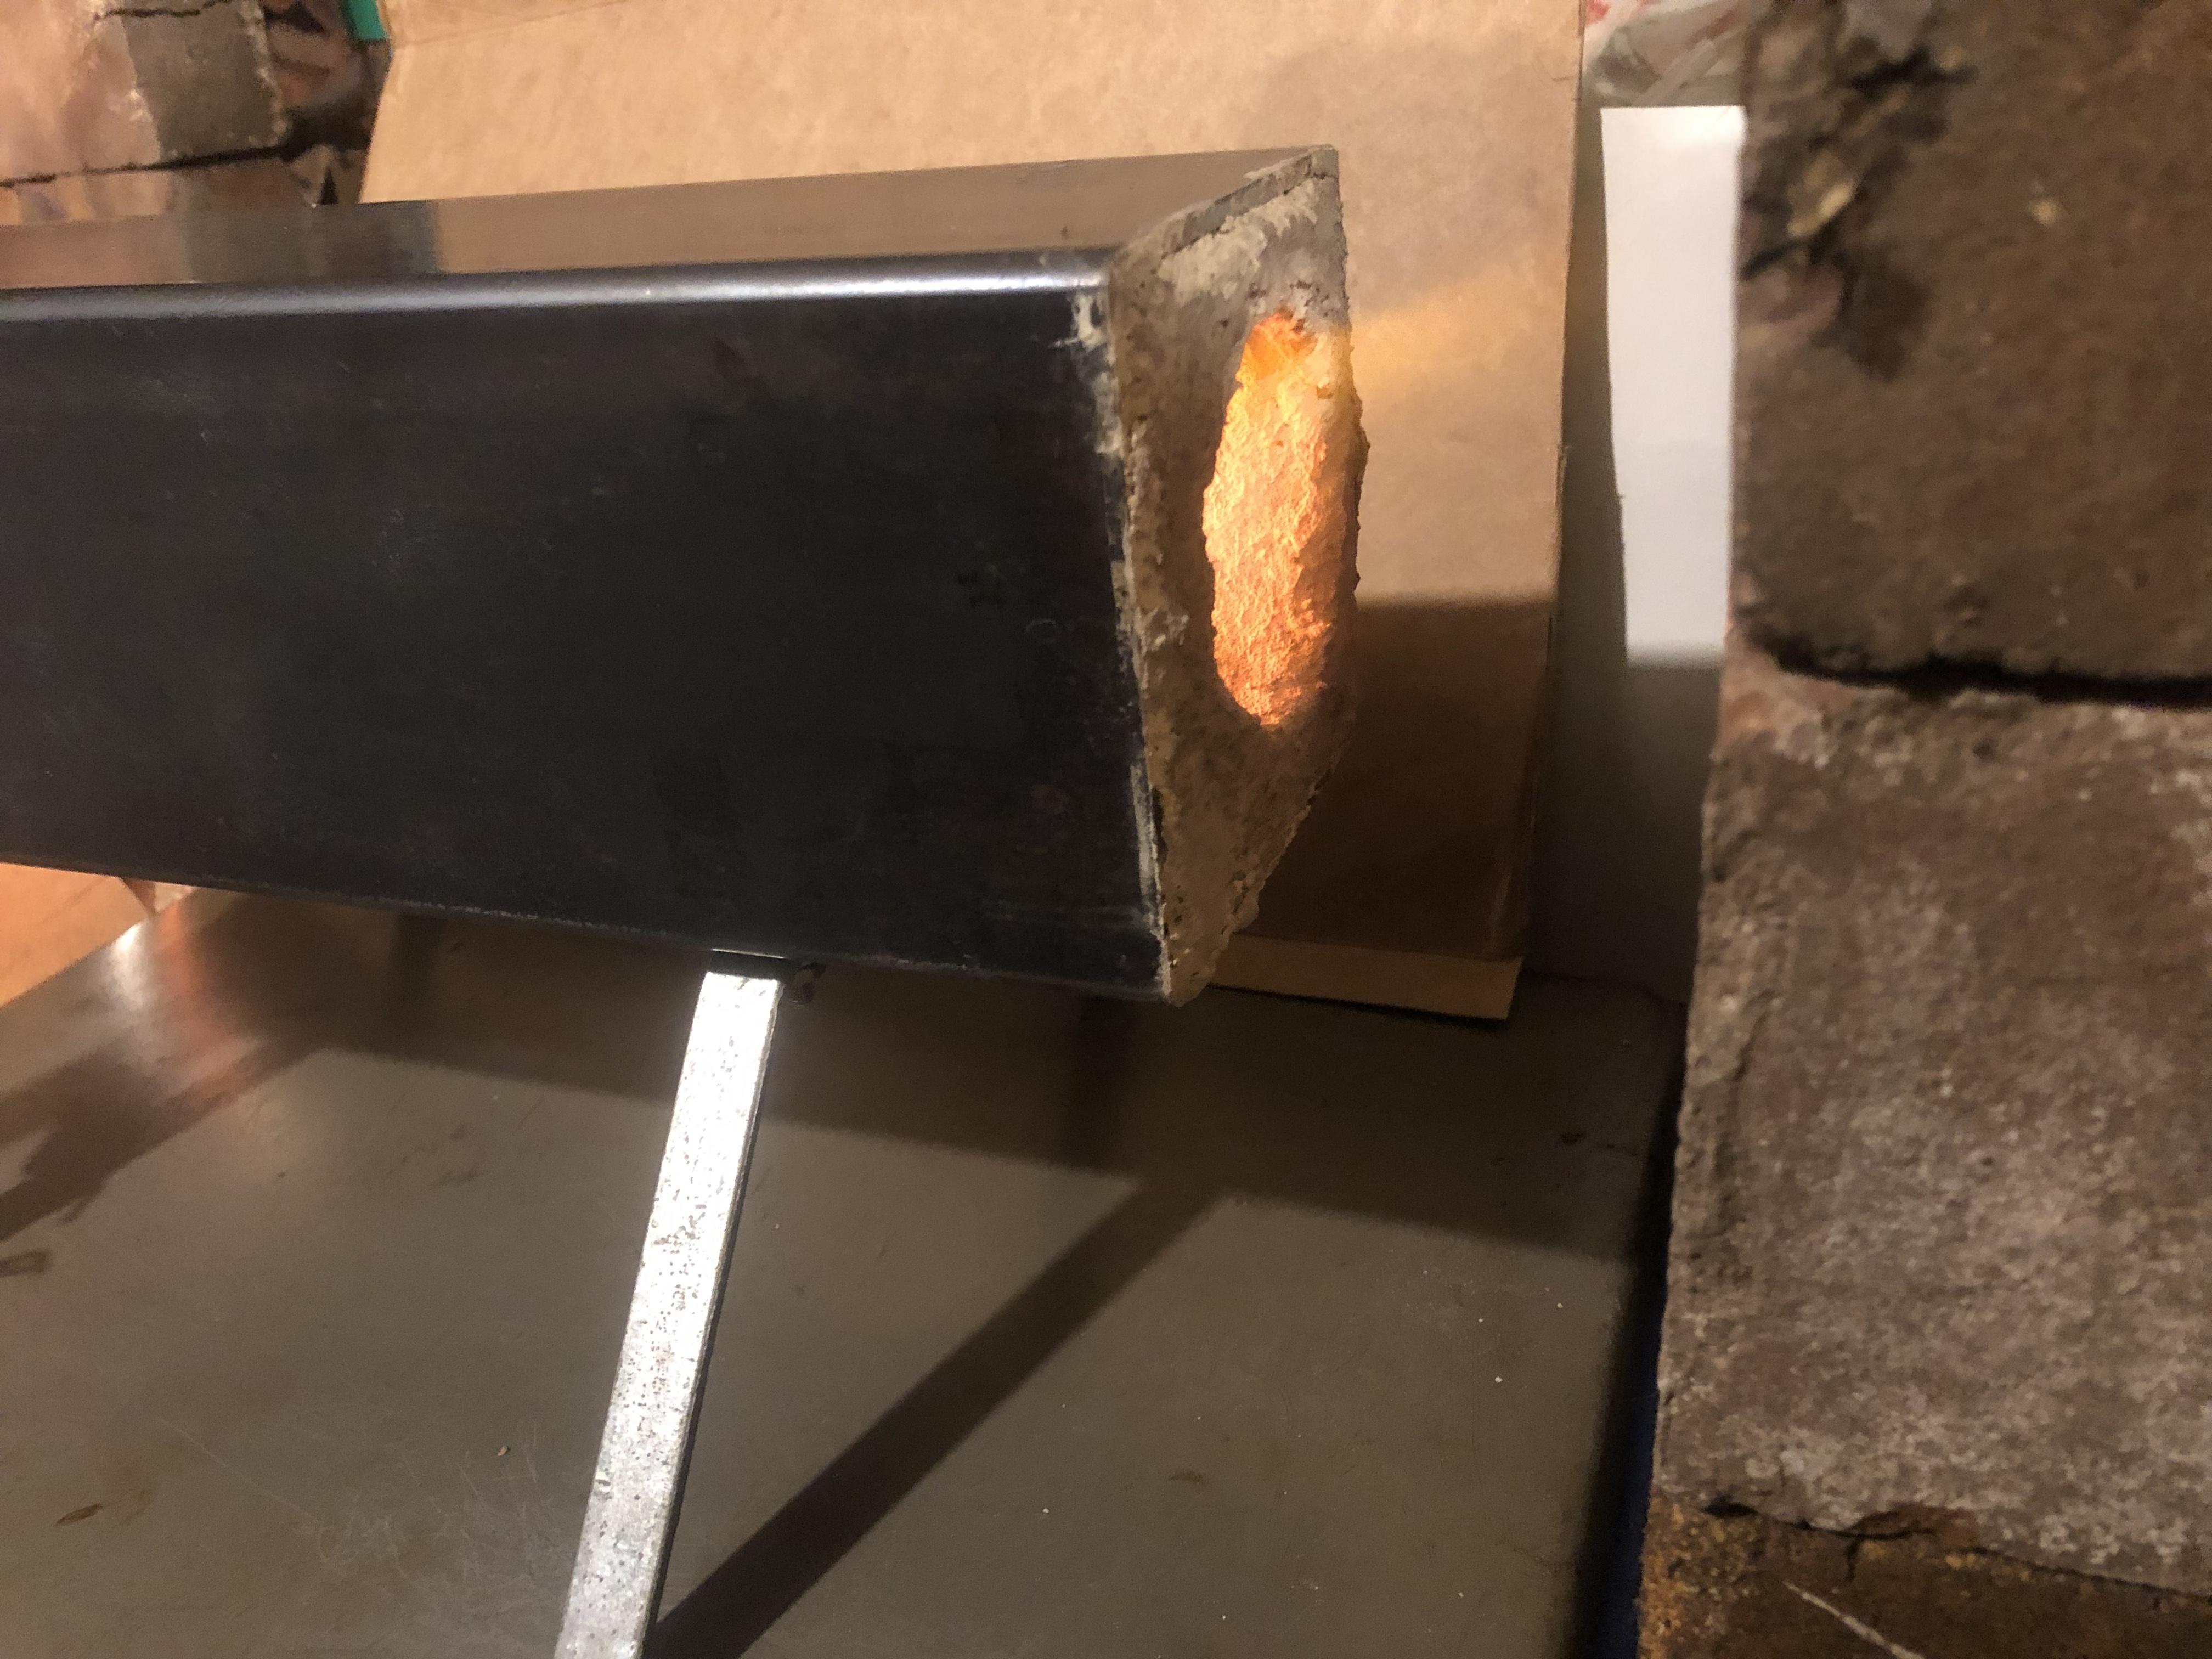
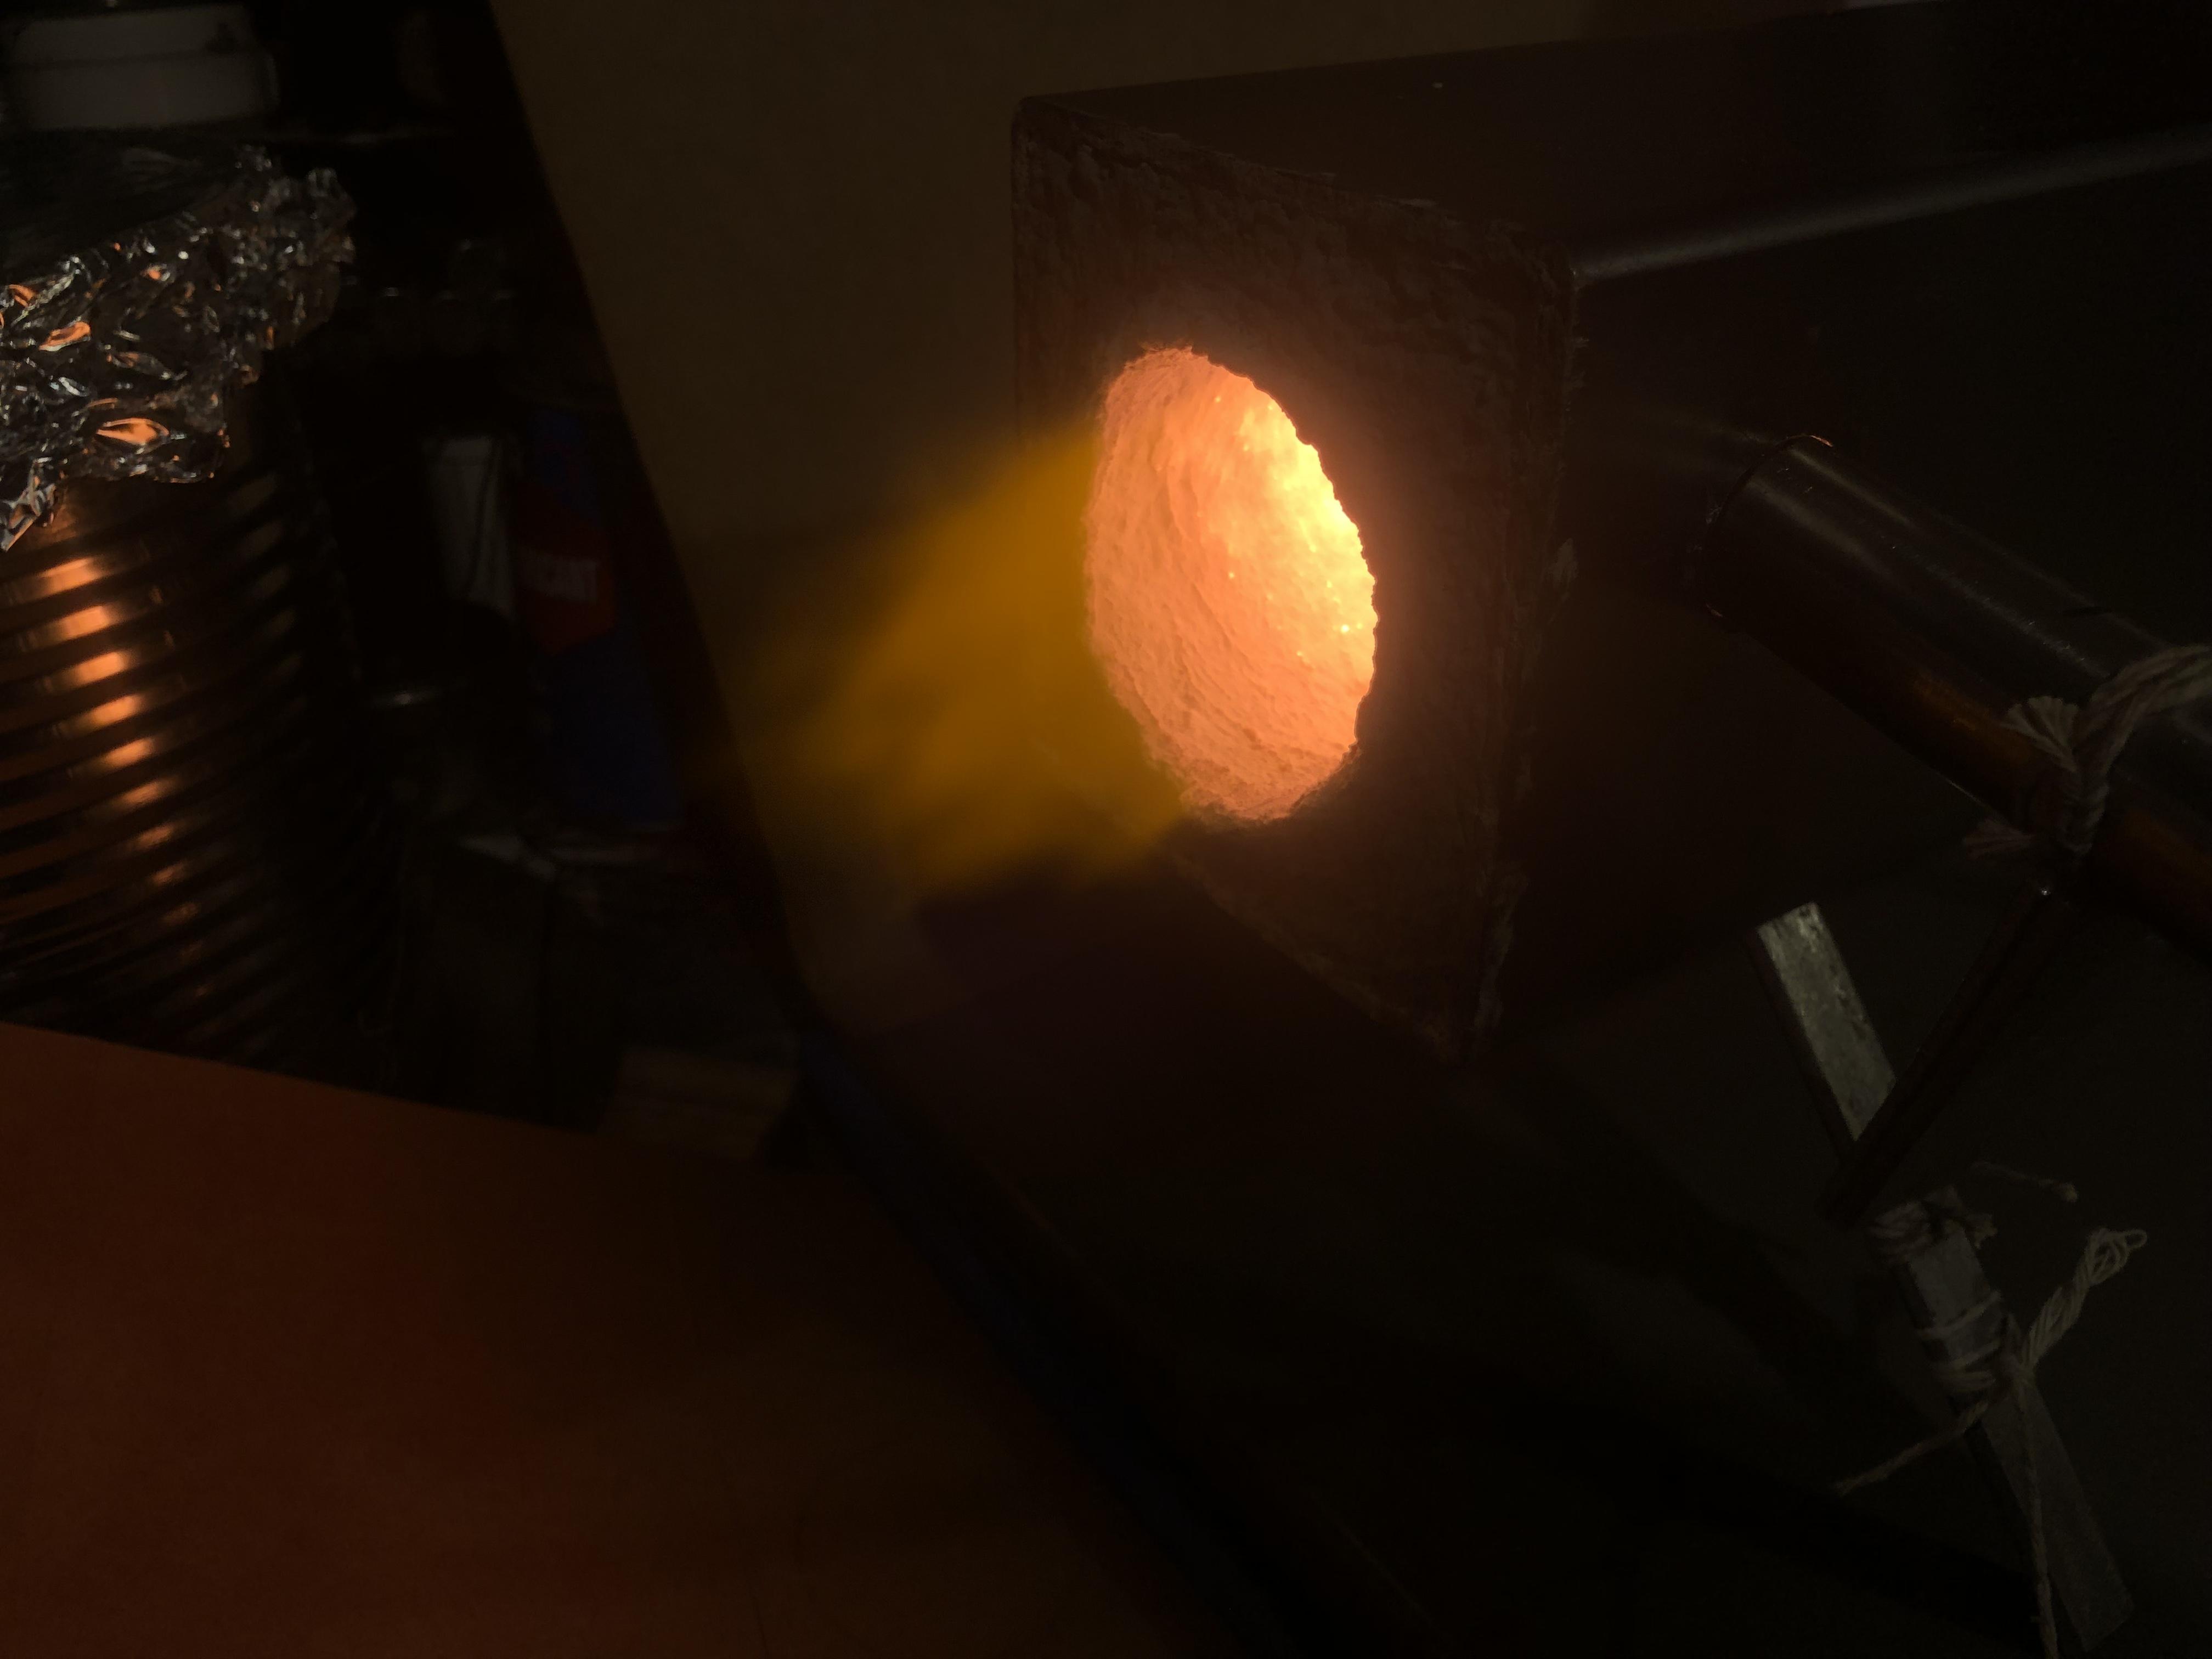
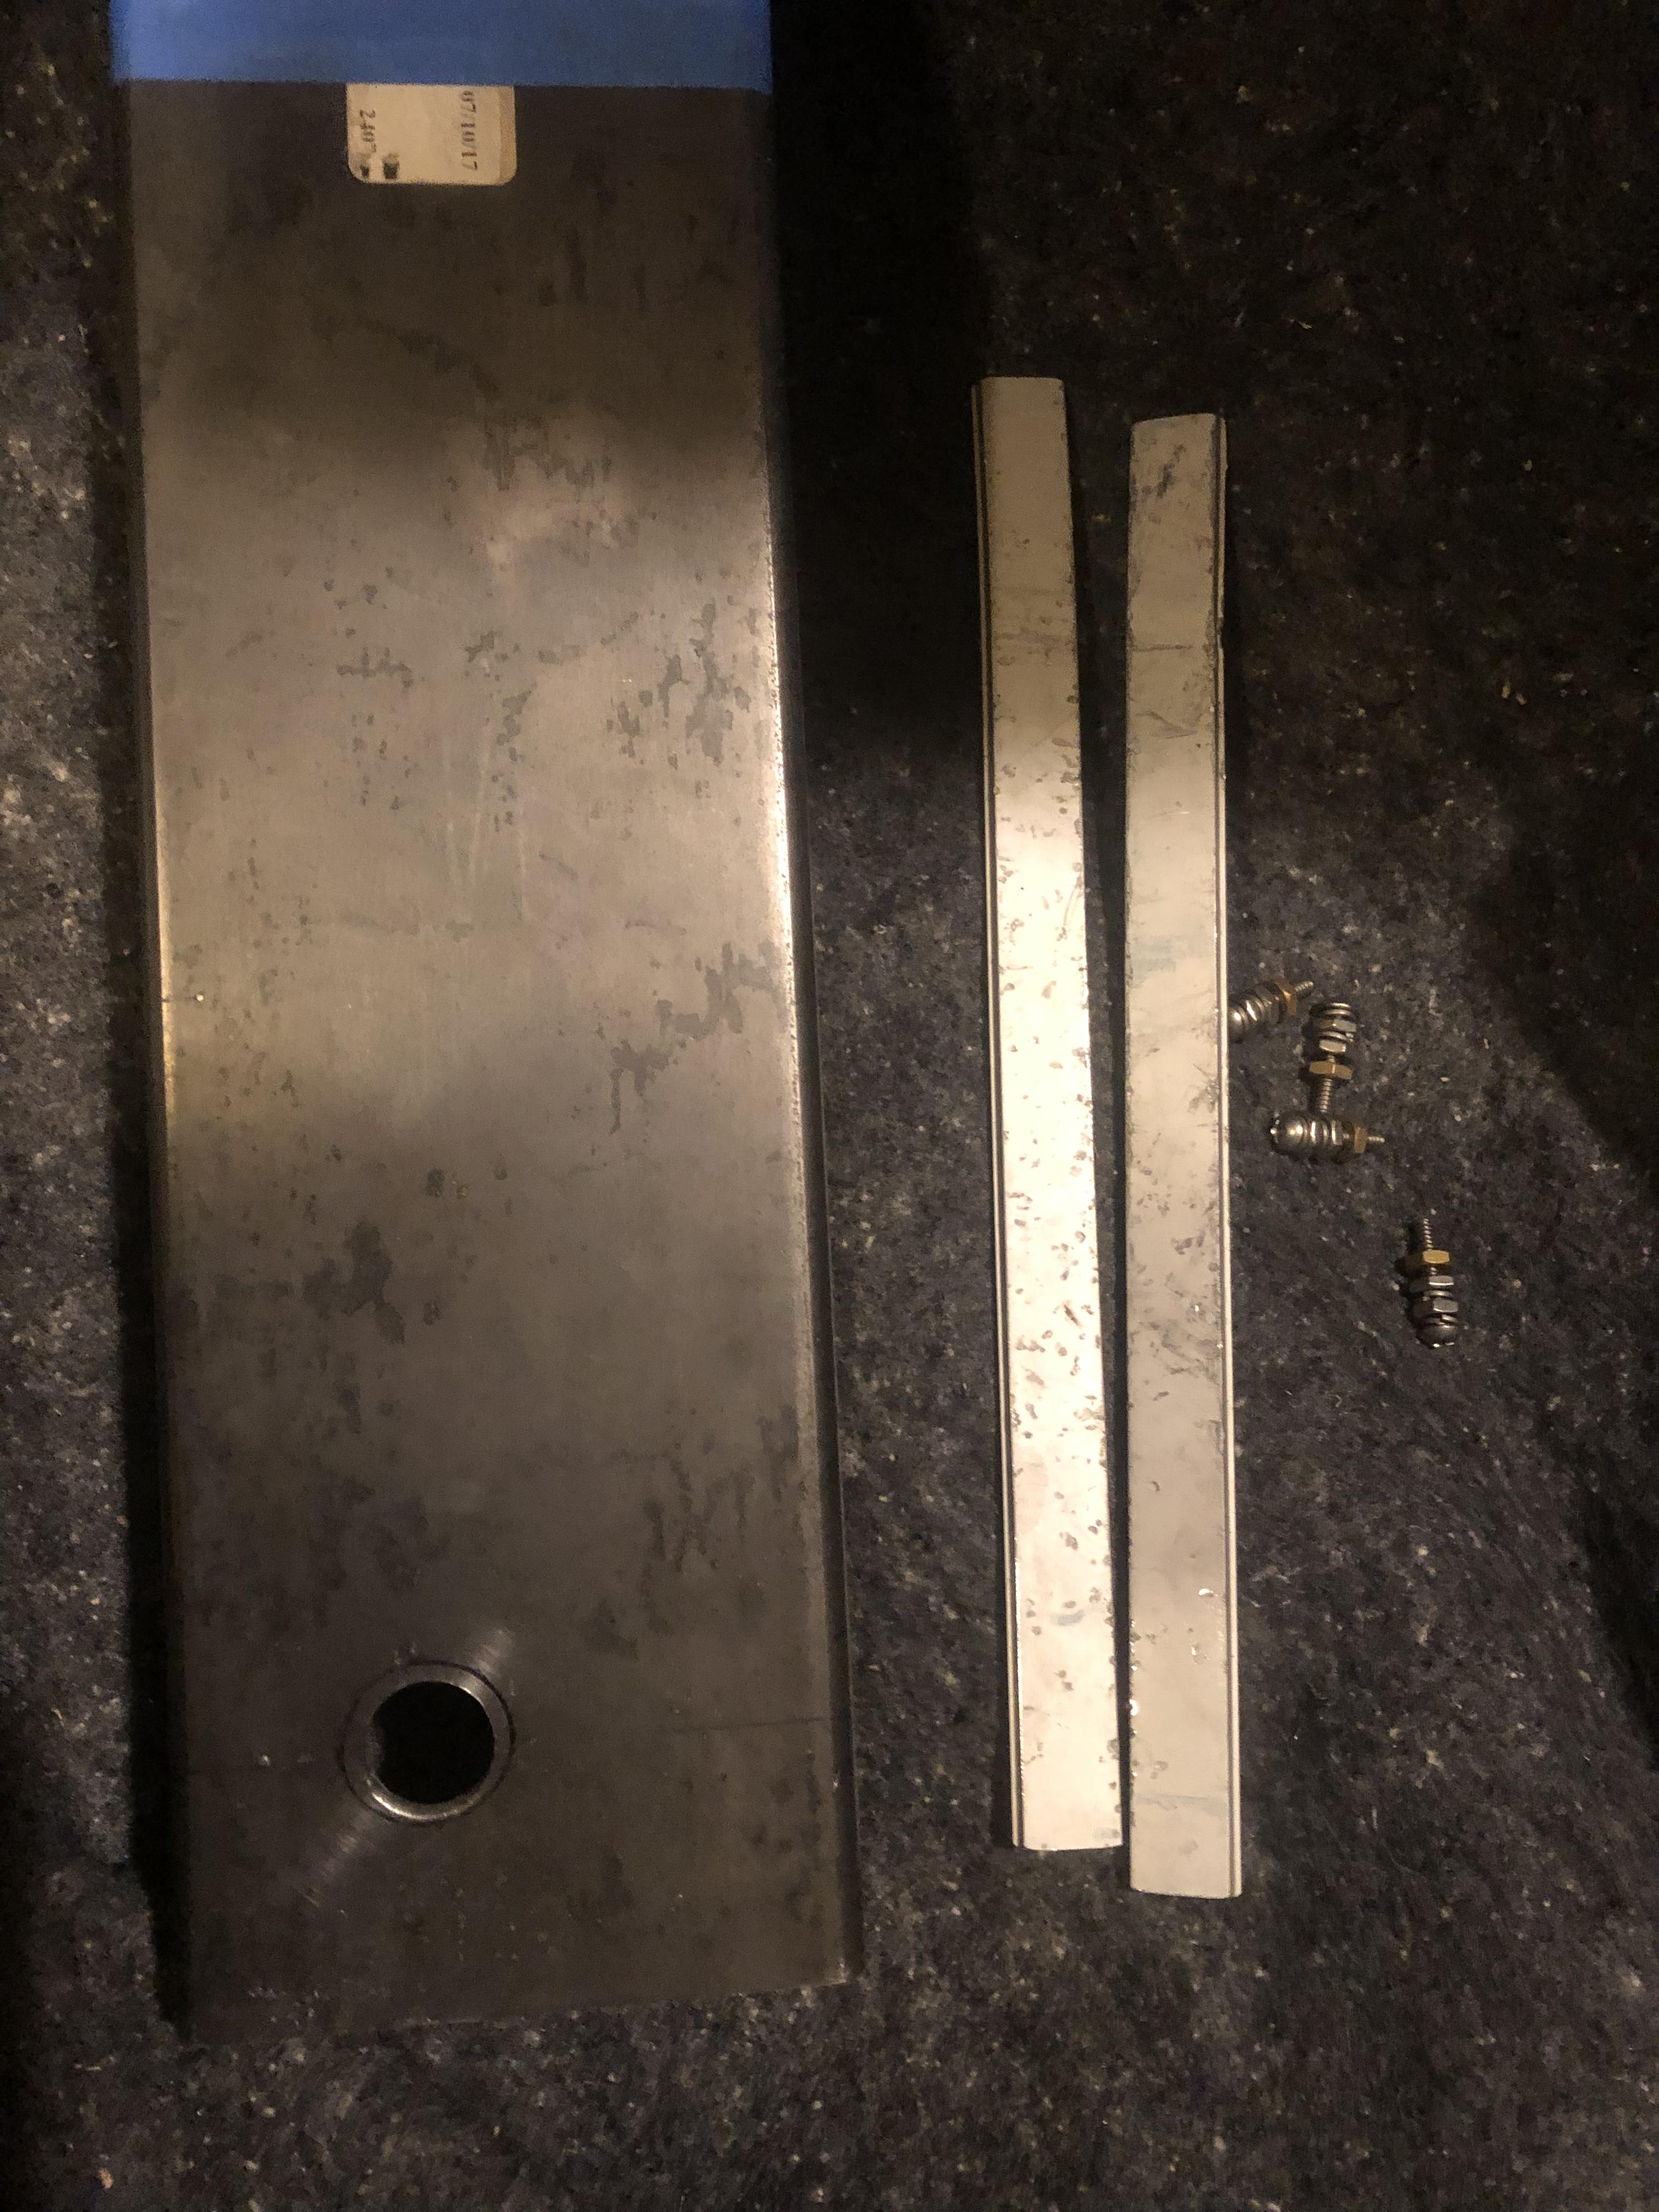
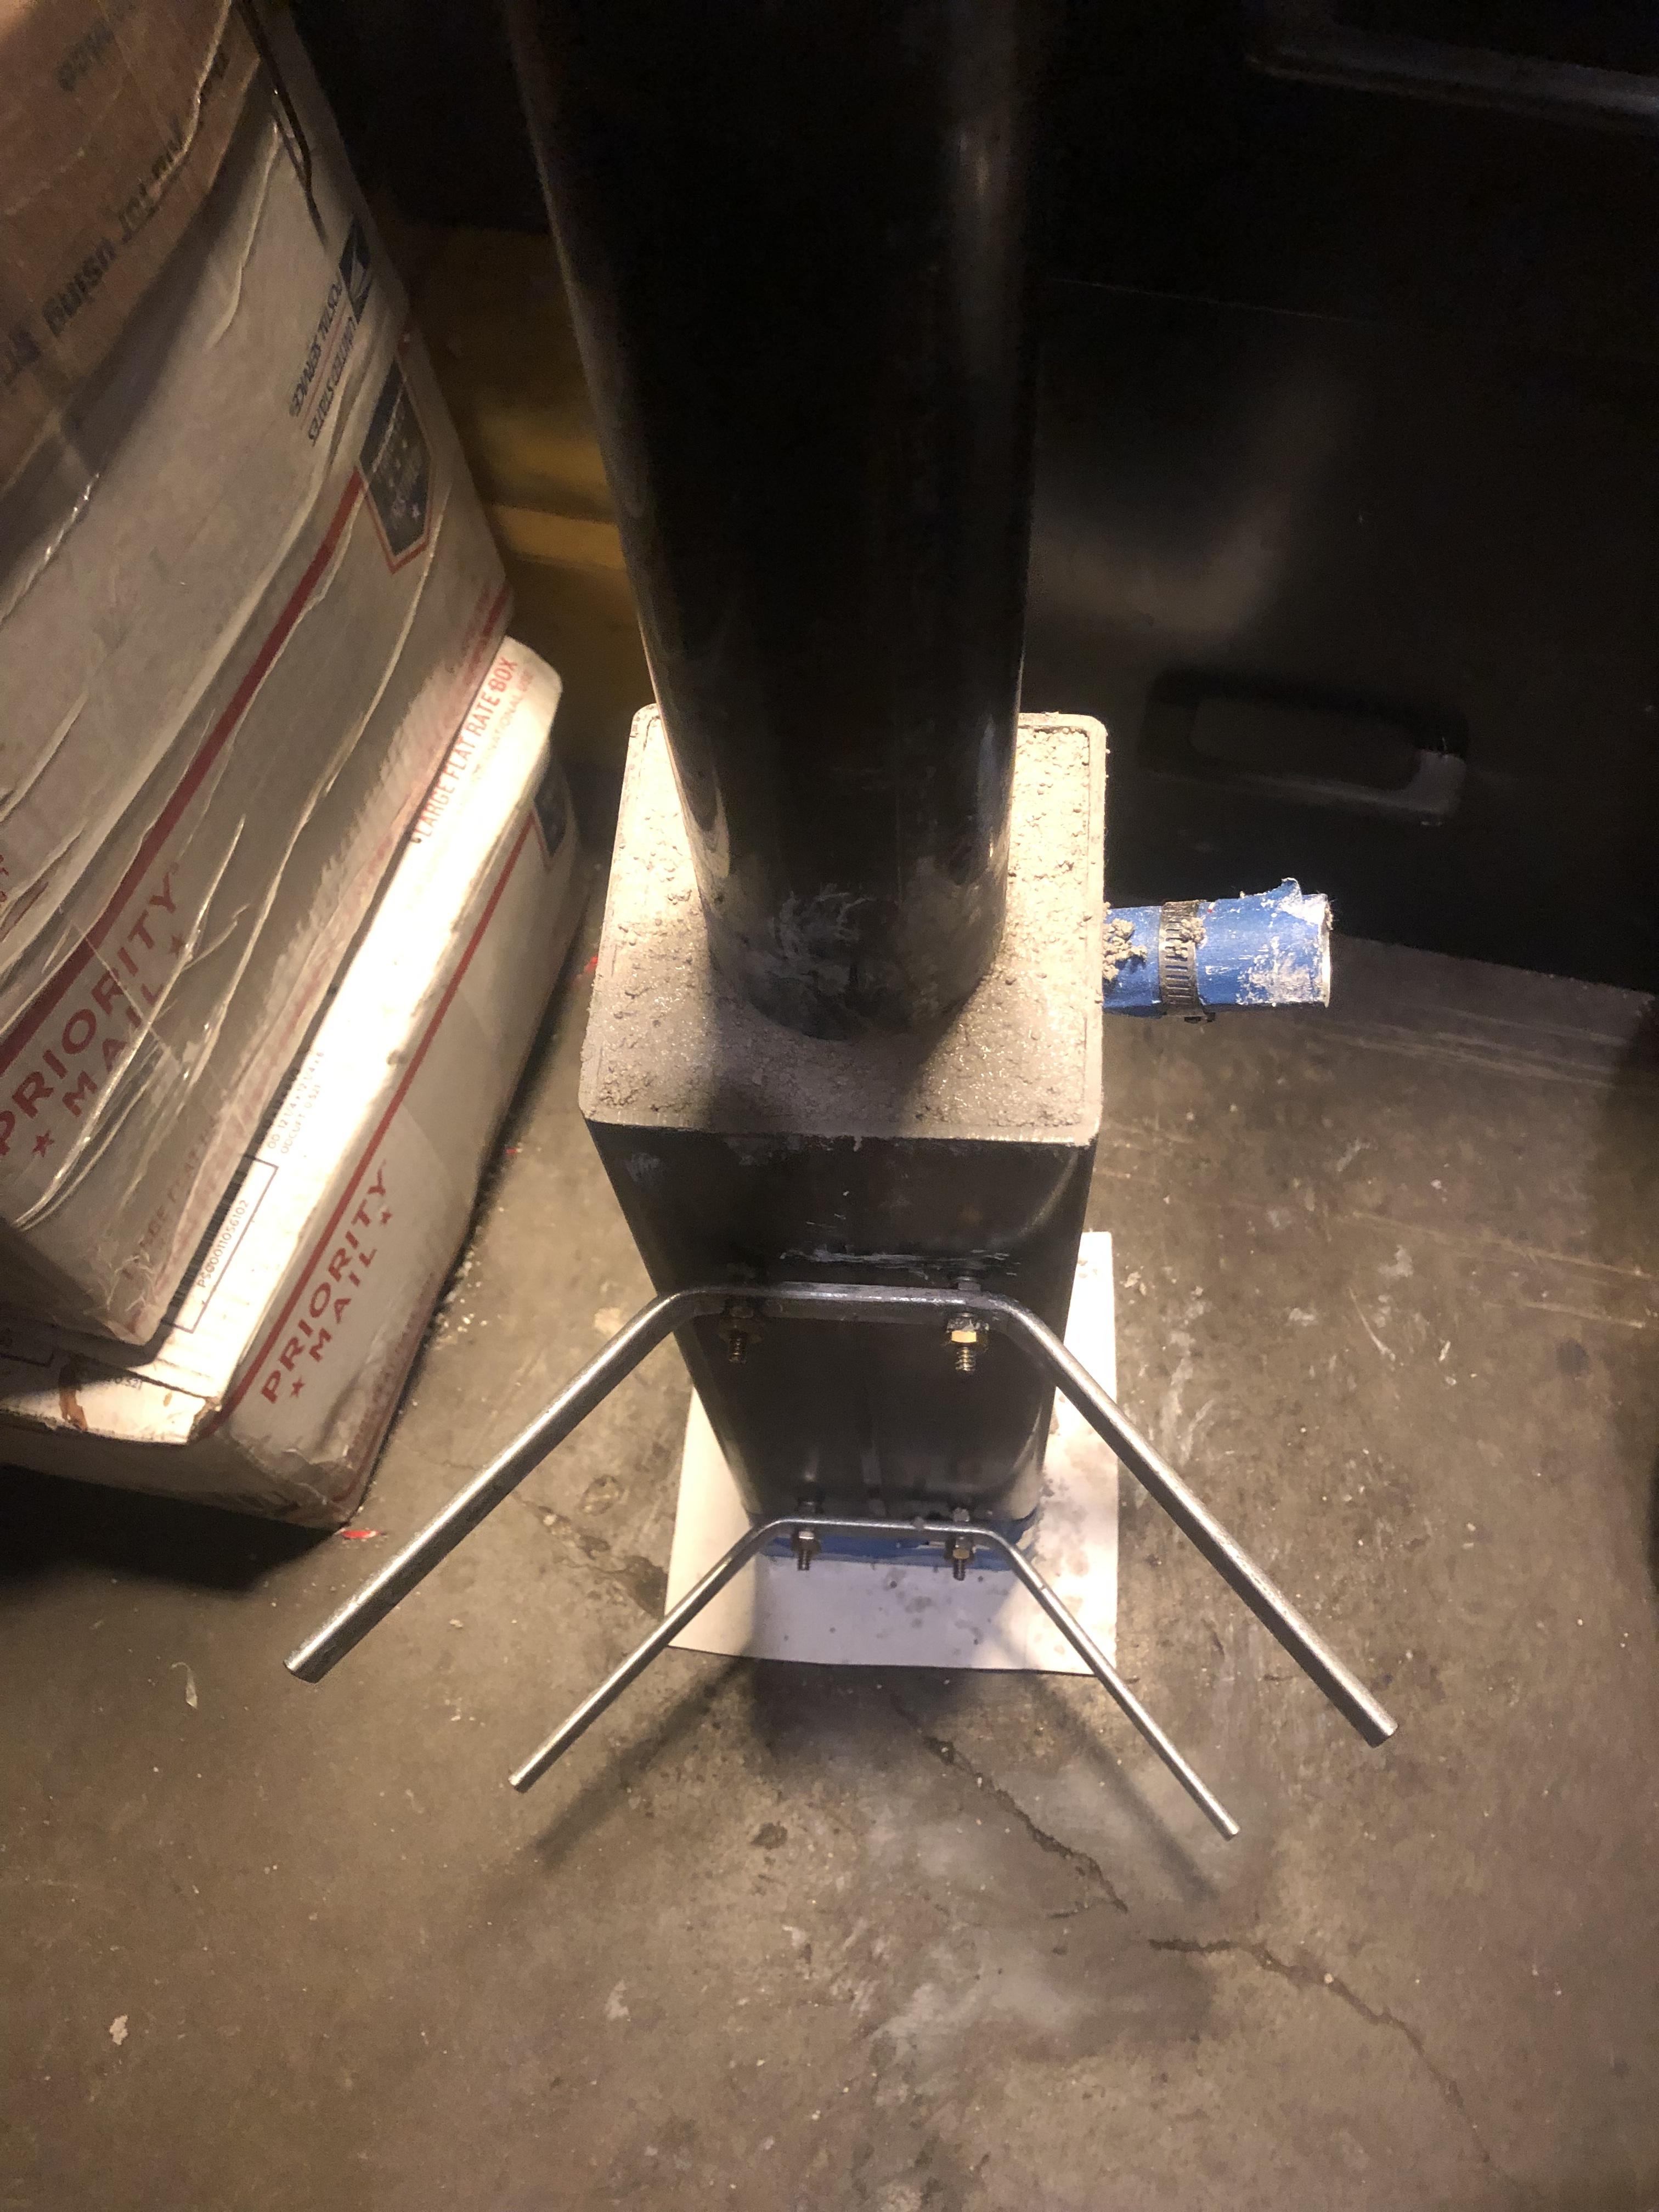
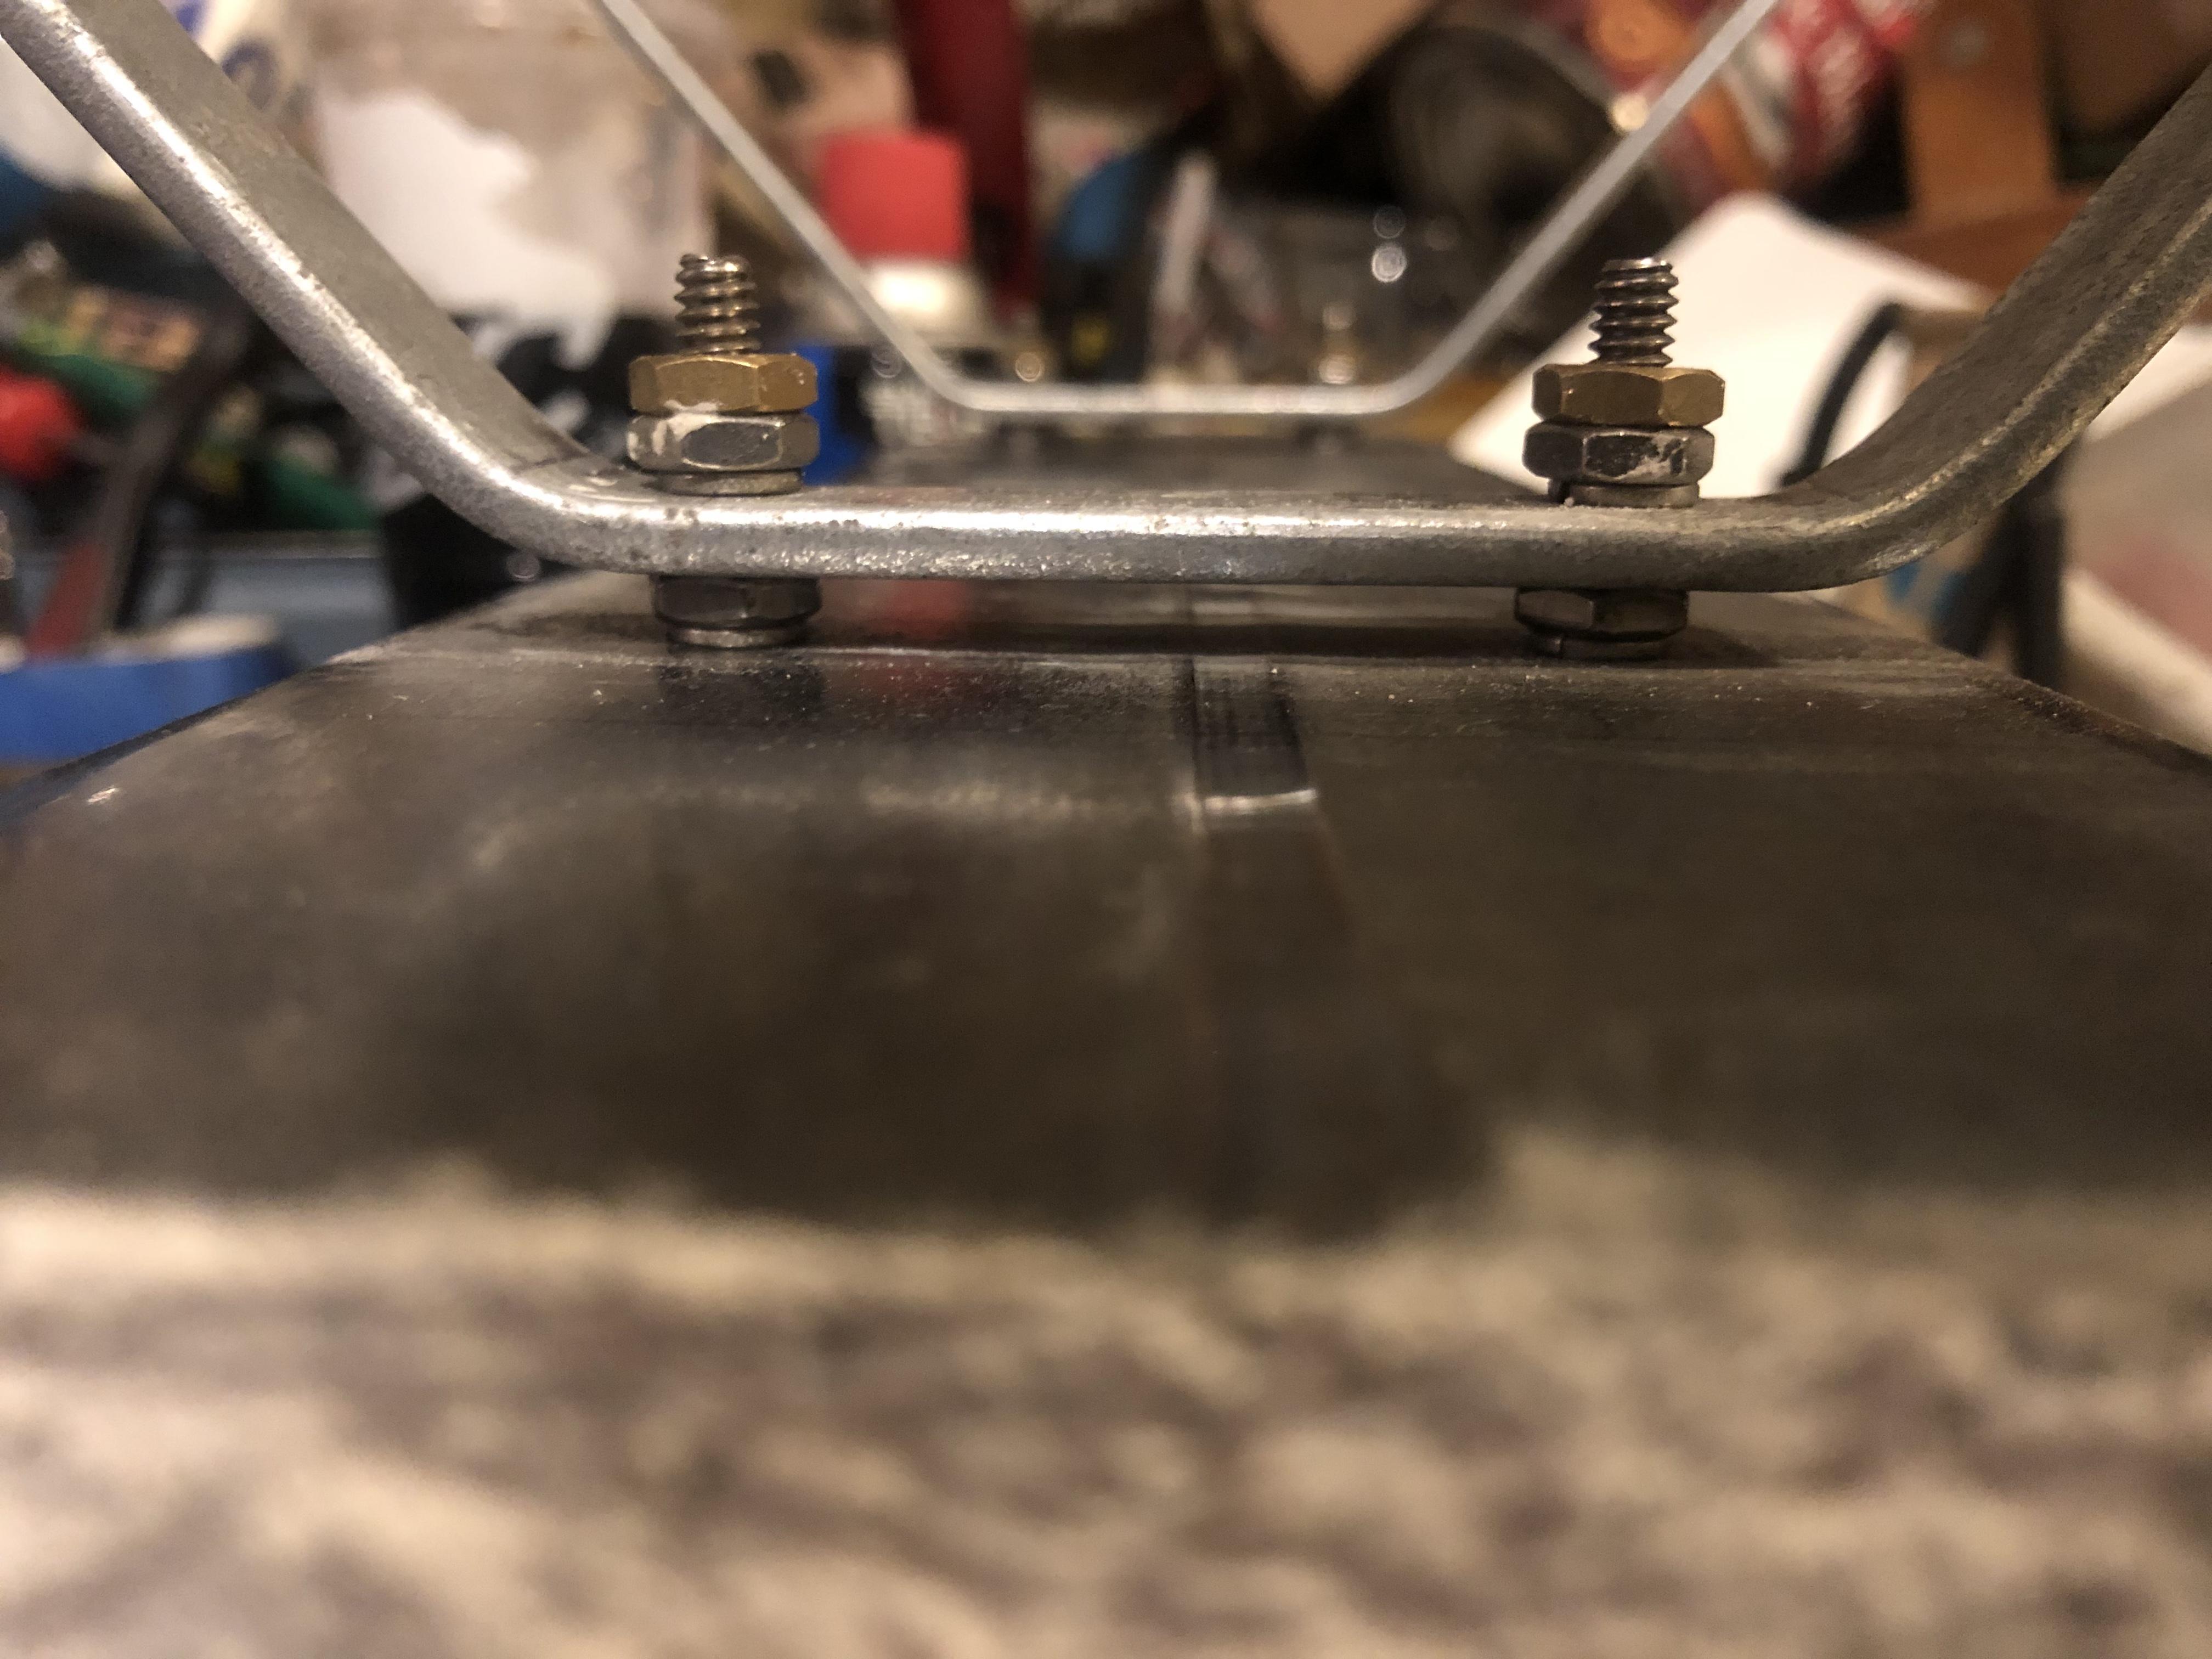
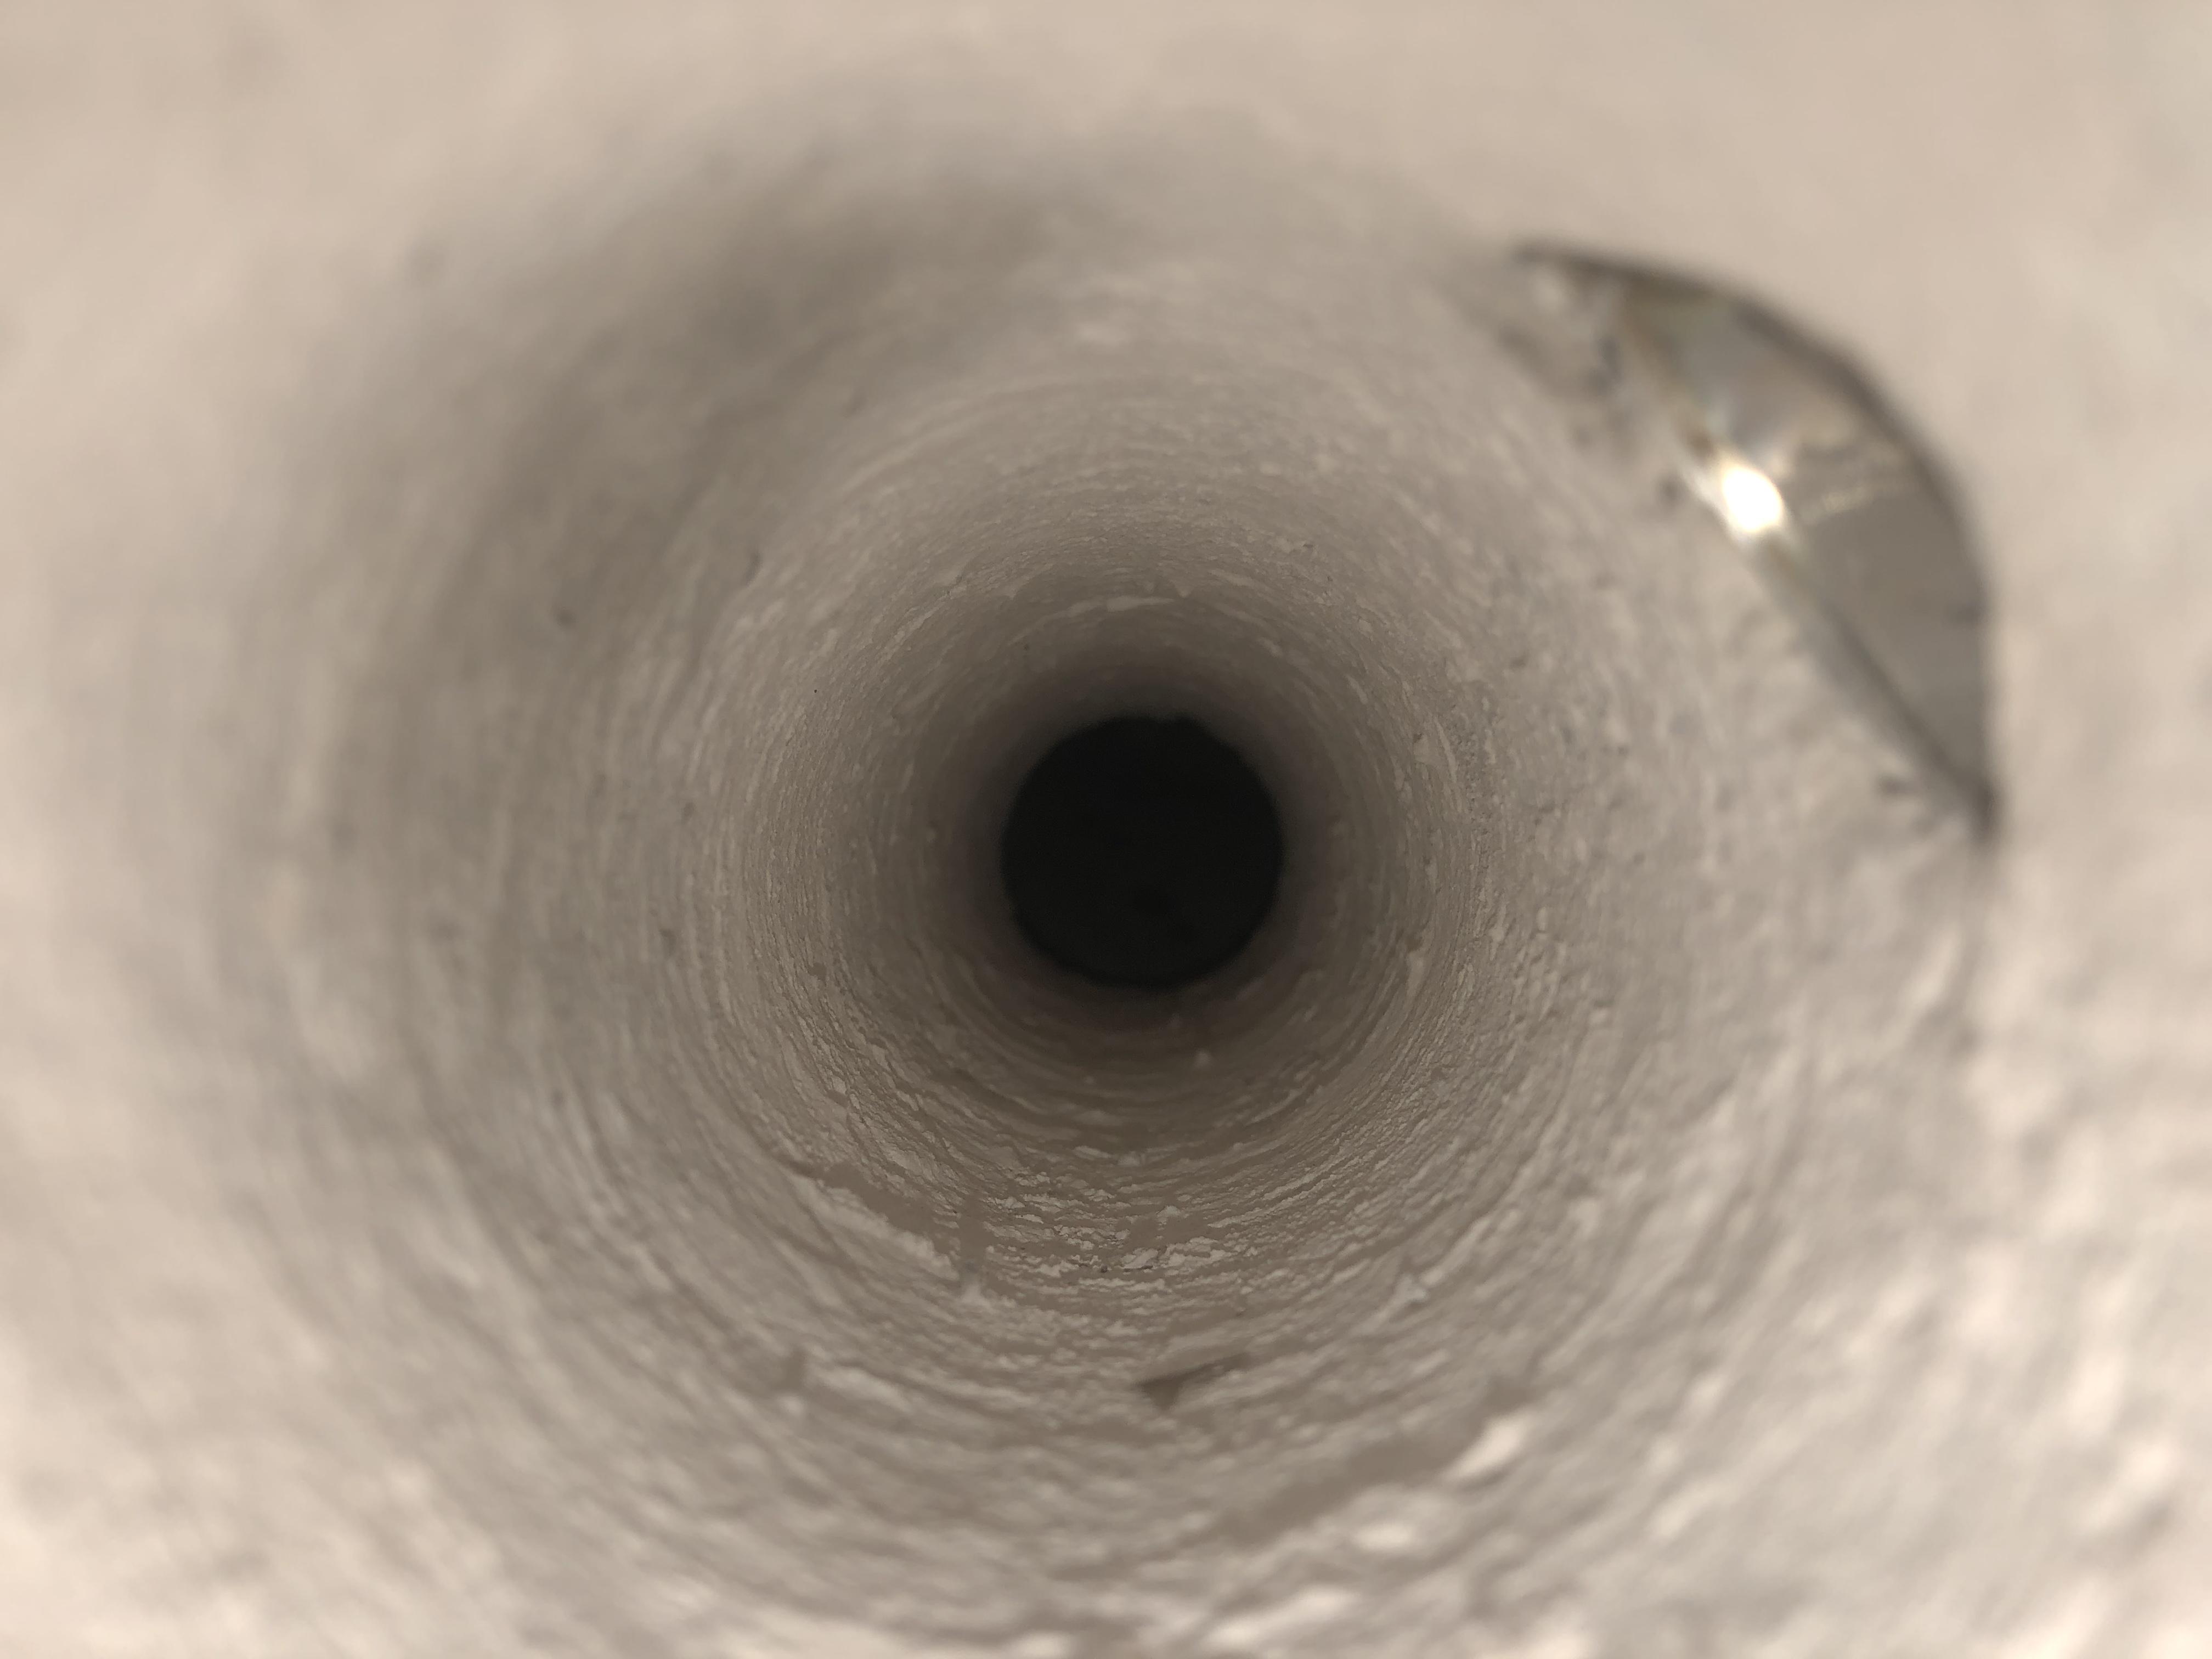
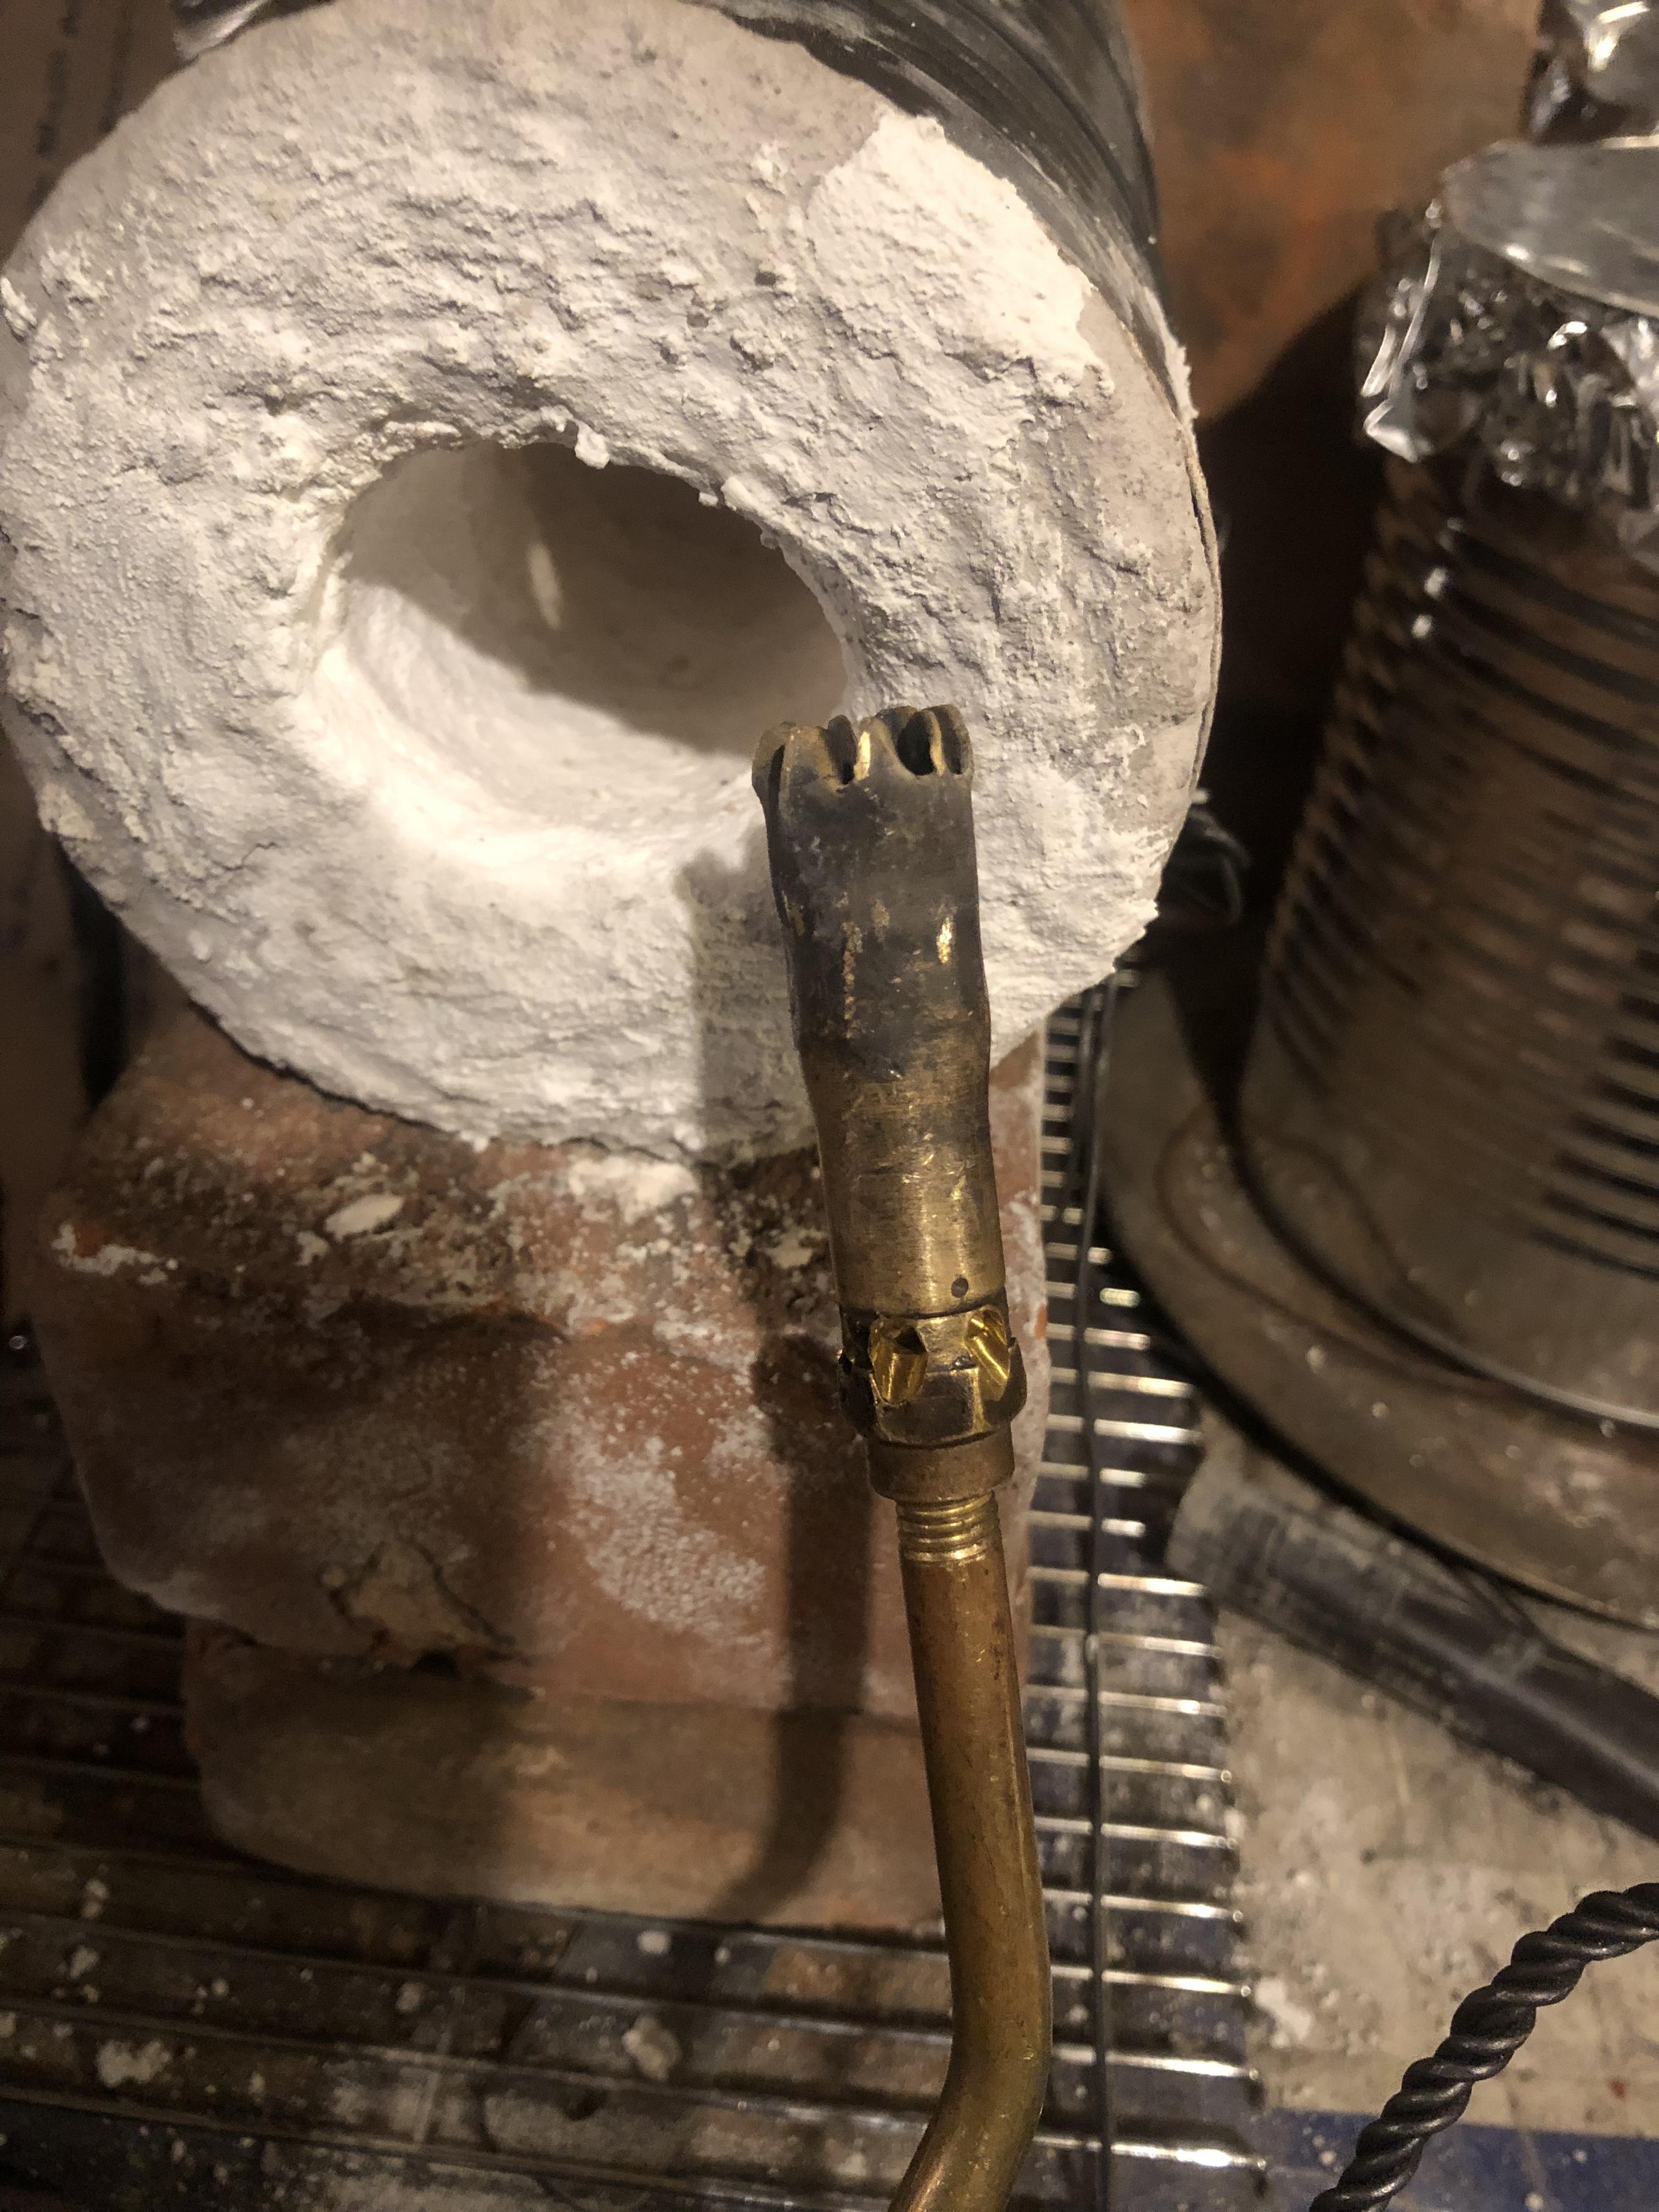
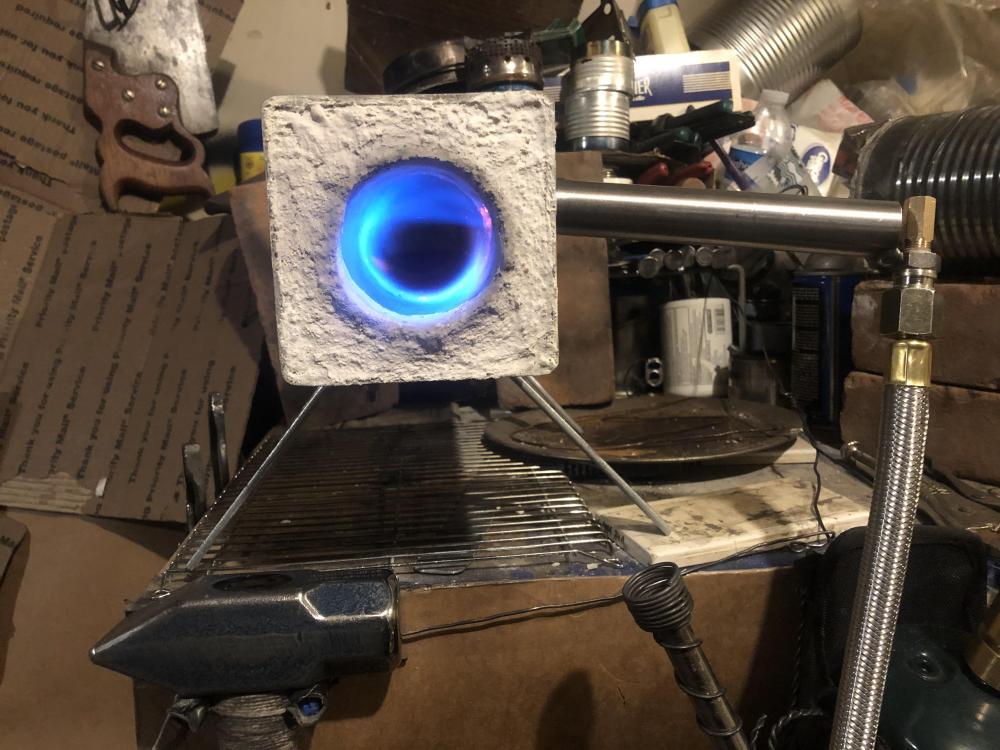
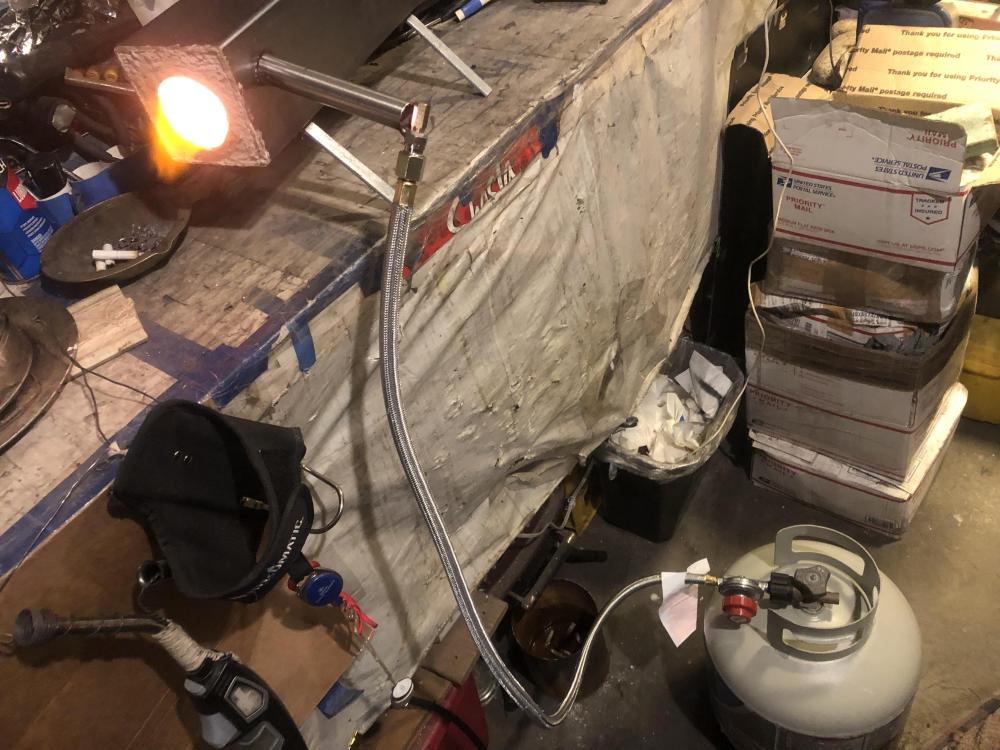
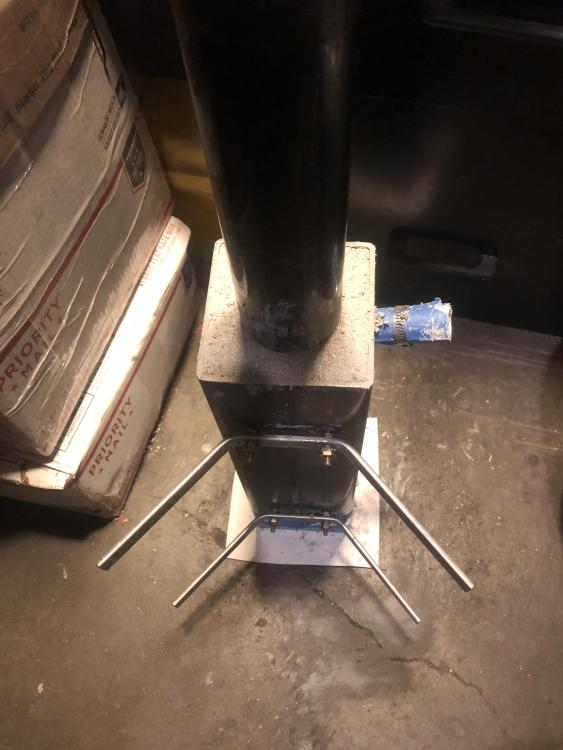
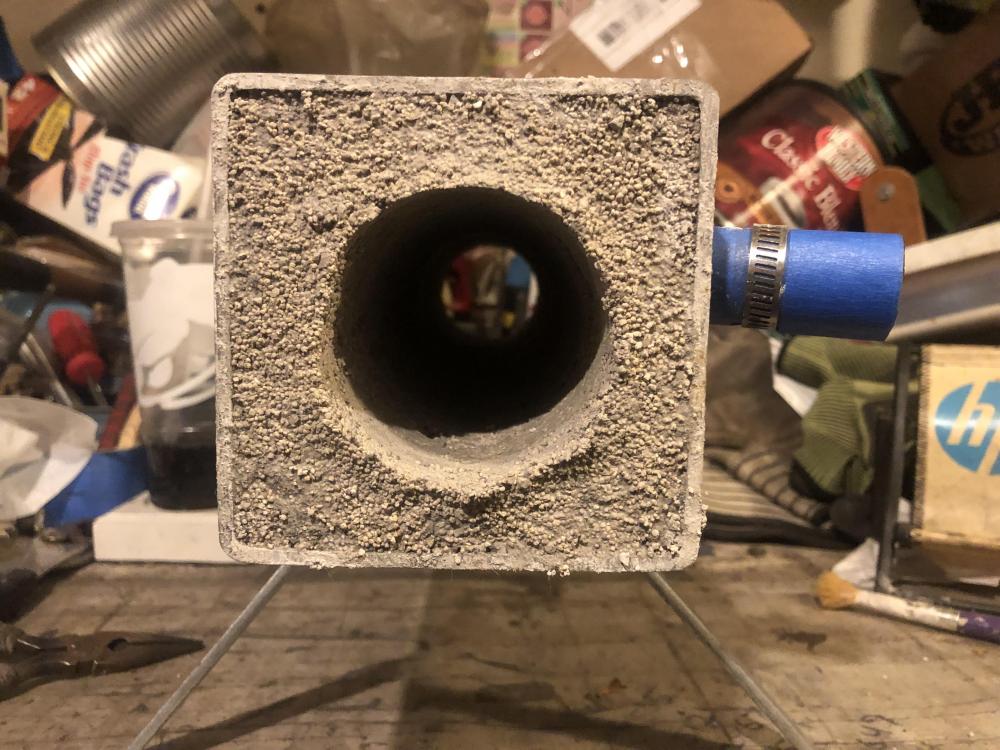
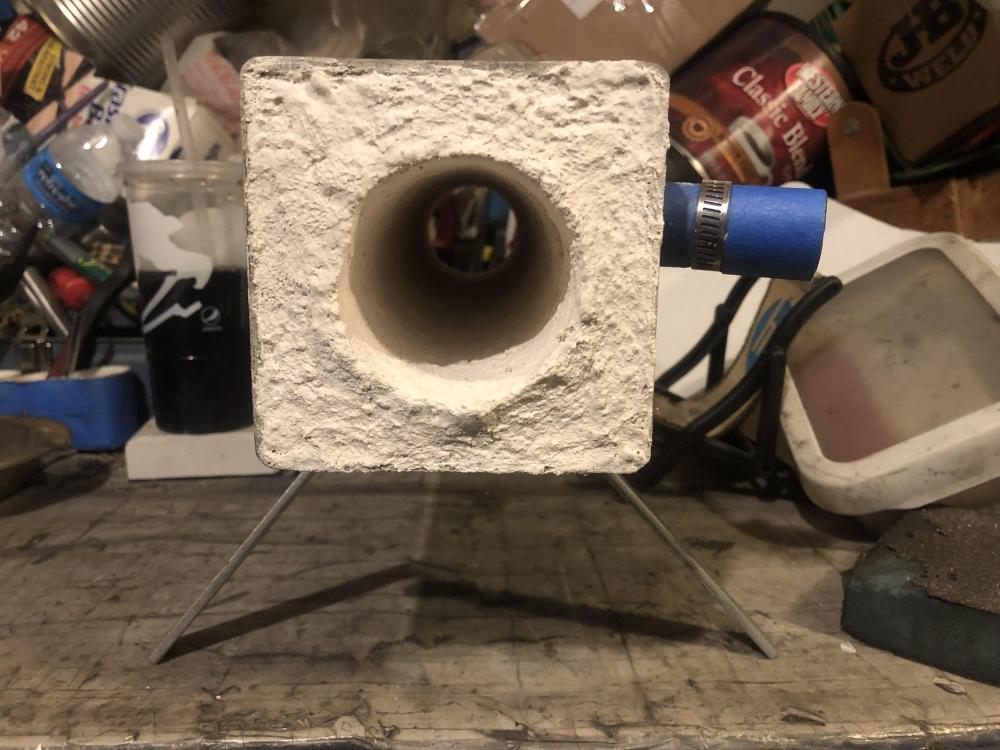
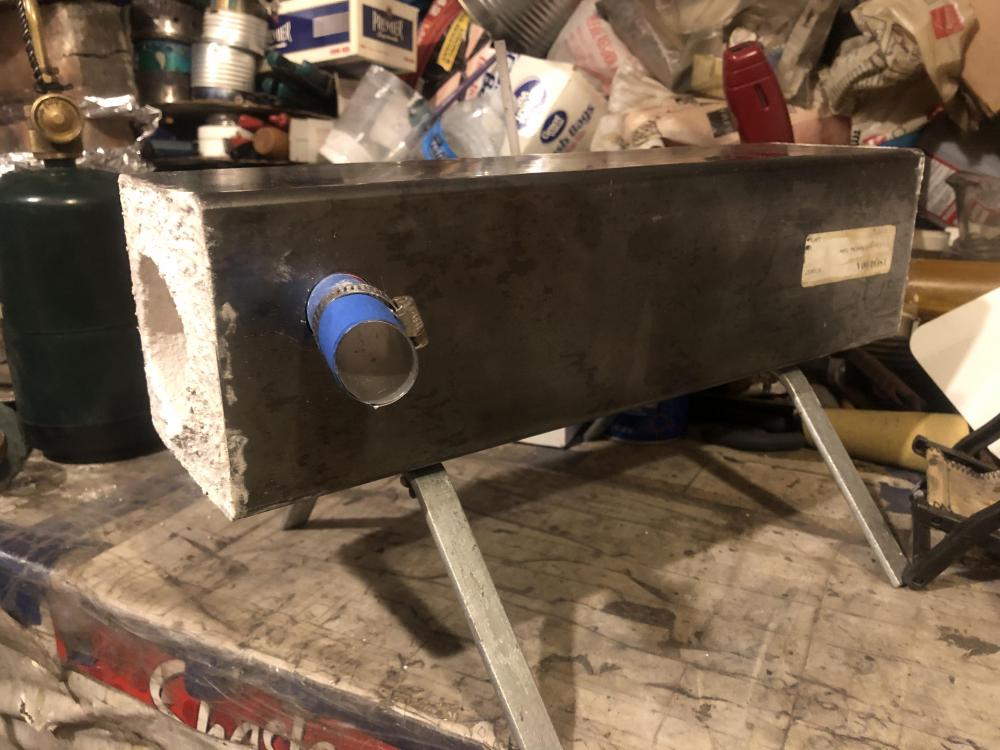
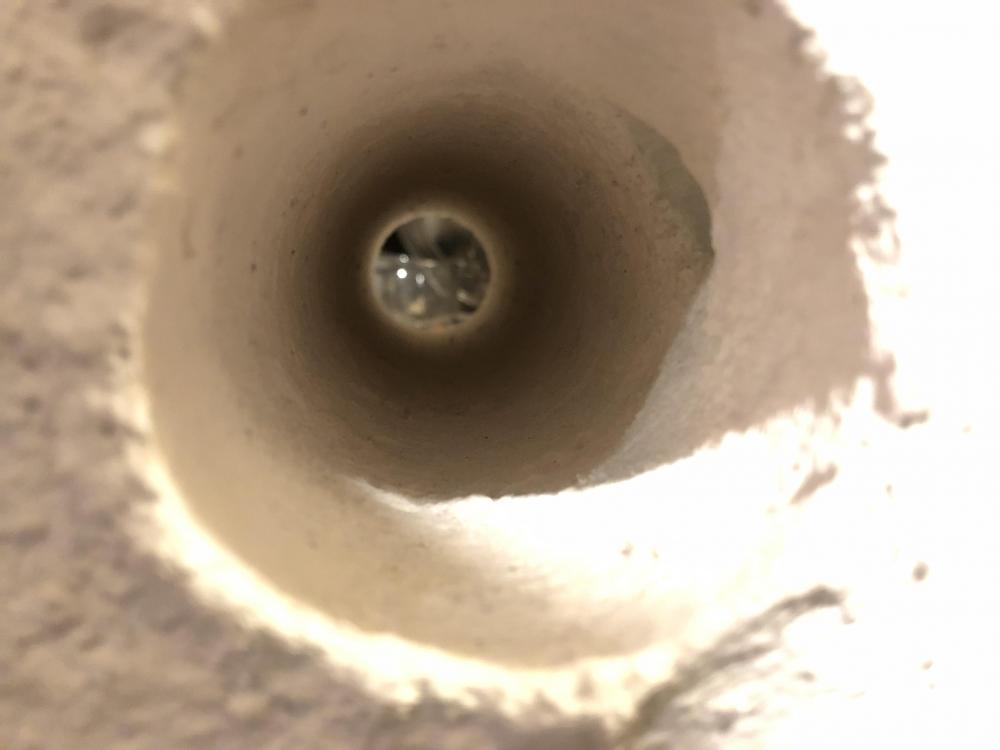
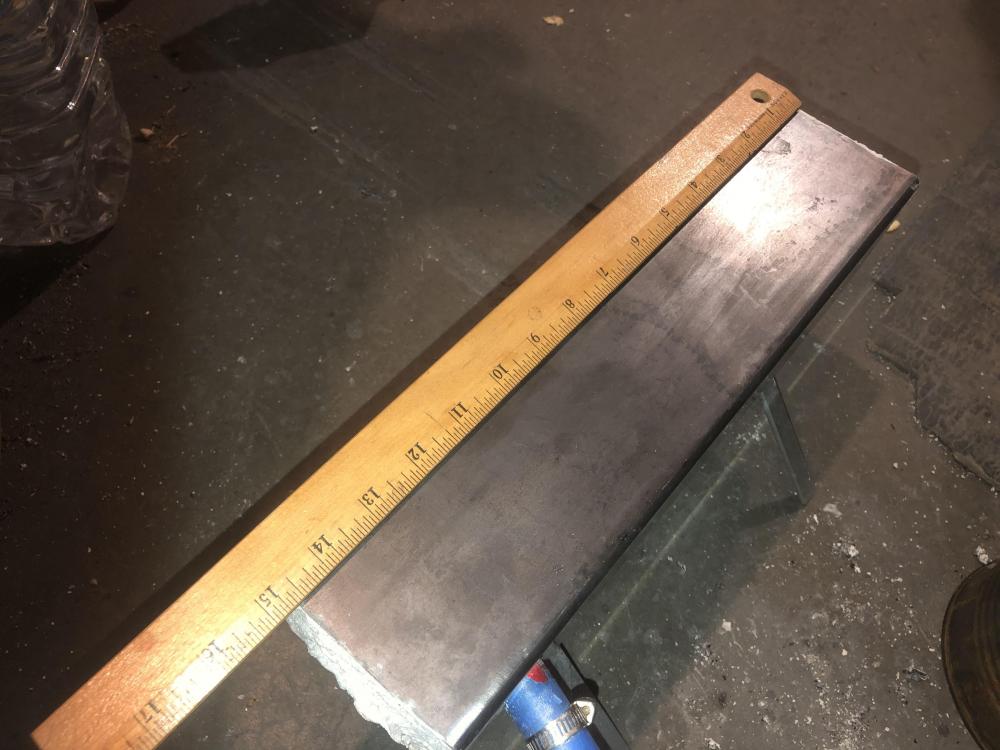
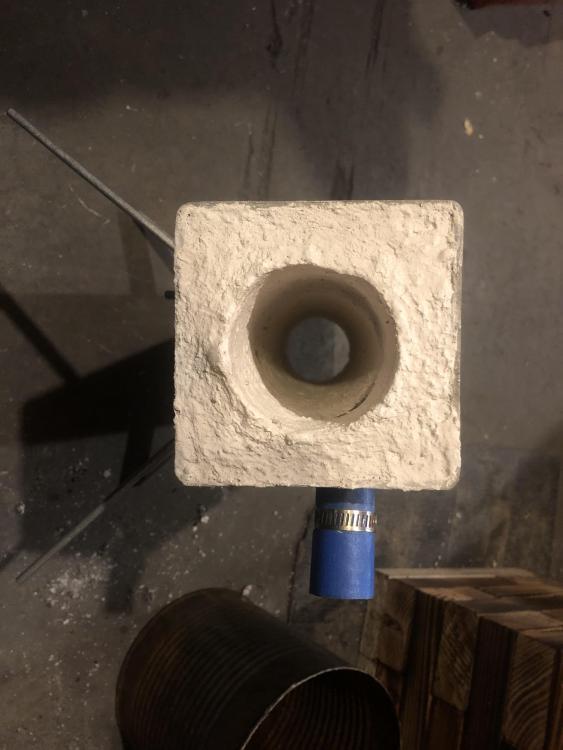
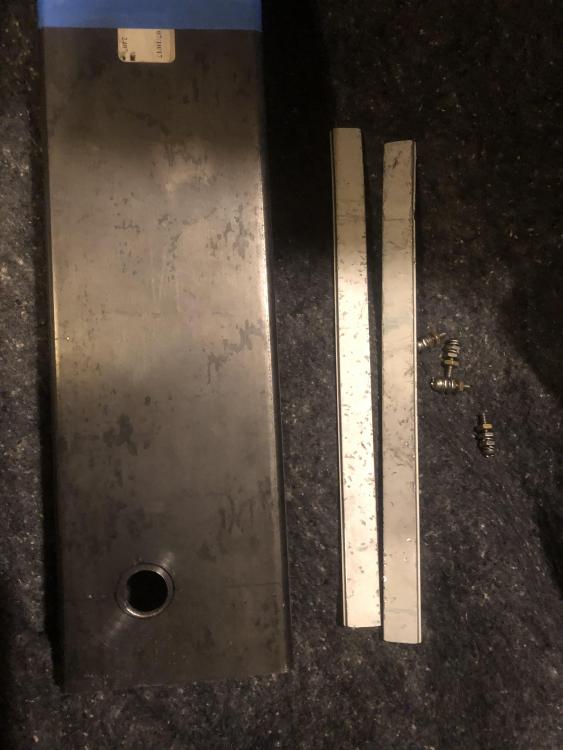
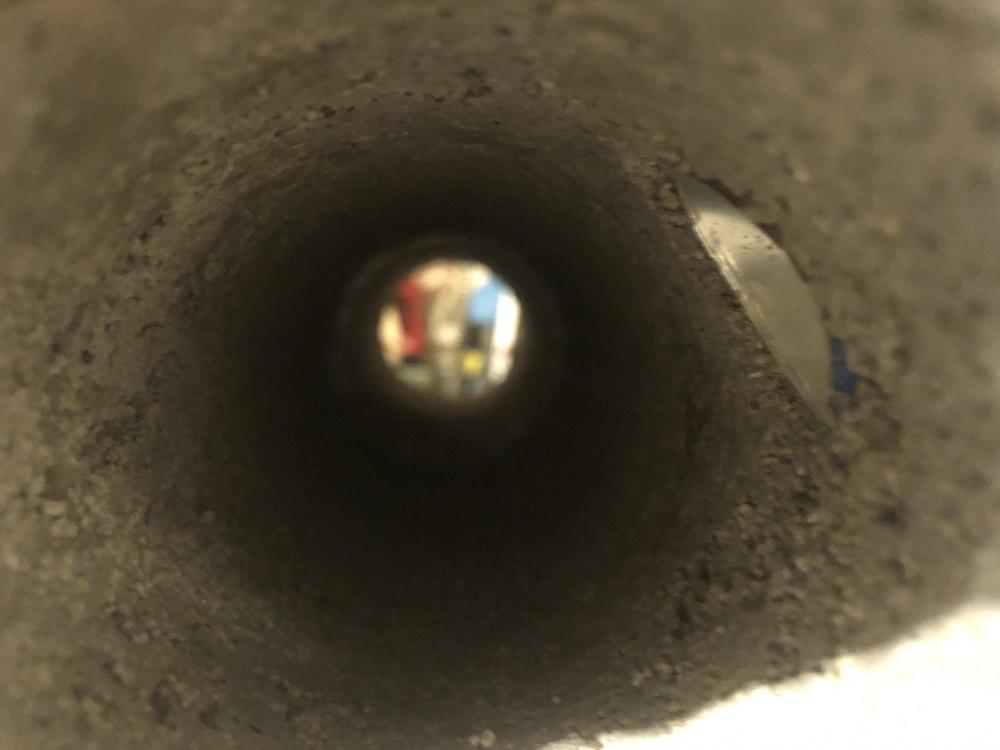
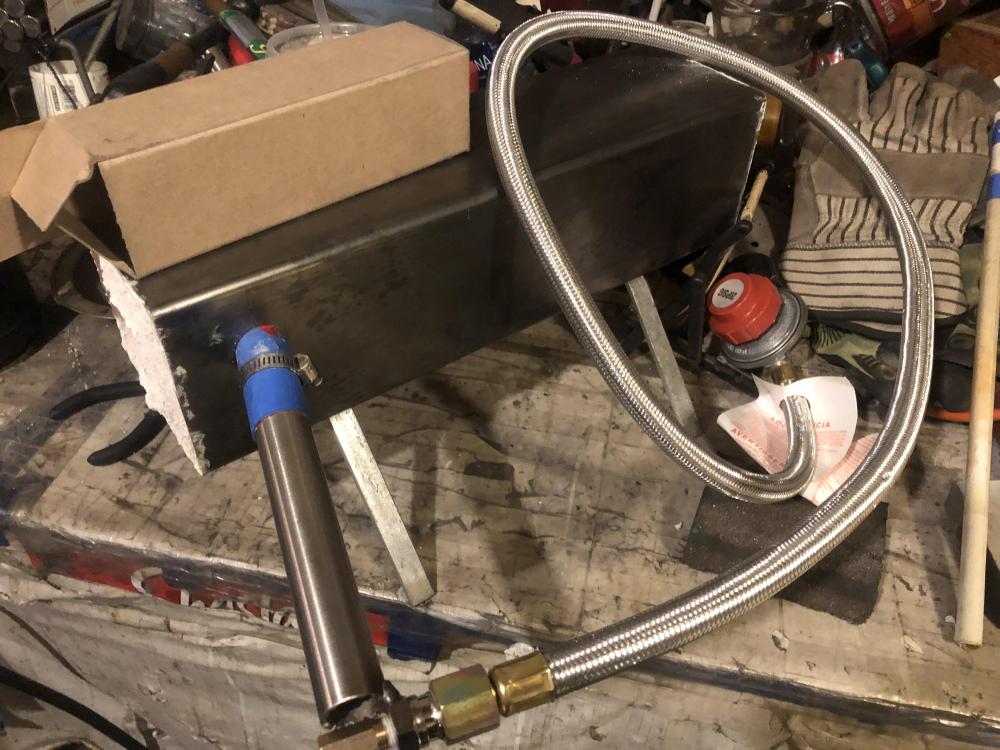
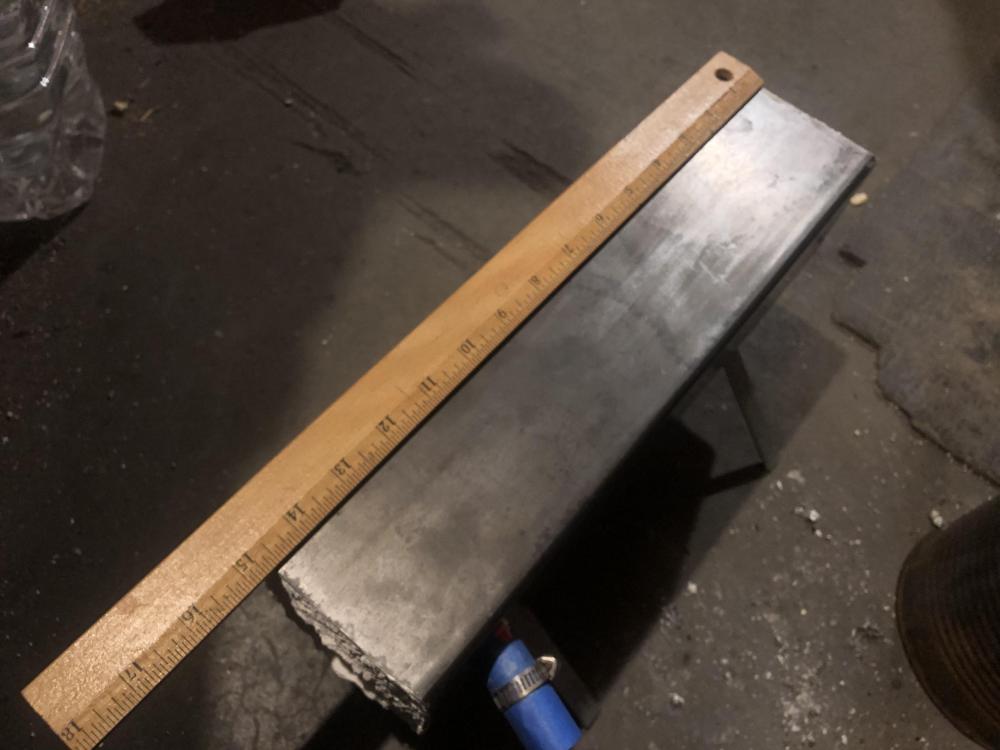
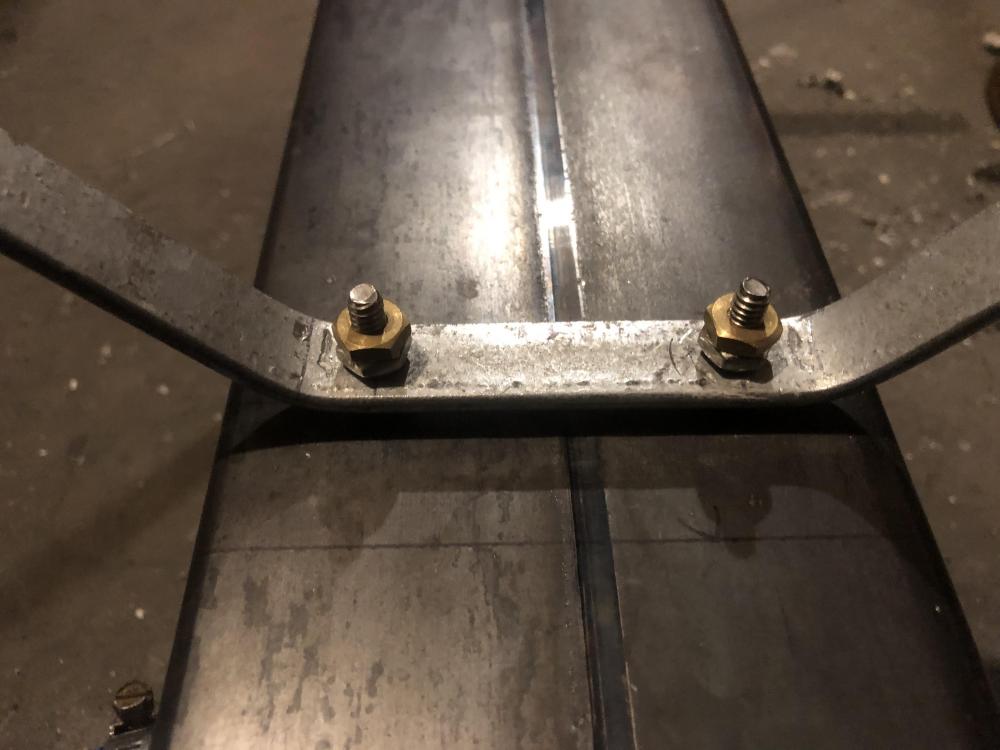
Mods if I’m posting this in the wrong place please let me know or just delete it and I apologize. I posted it in forges 101 also asmy first build was requested I move it to firges 101. Here’s another pretty simple little forge I made after the Micro forge. It’s been drying for 7 days now. I have to put the burner on it and it’s ready. I attached the Atlas 30k with atlas regulator hose but think I’ll try my modified torch first?? I think its ready anyway??? This Build was made with these items: 1) housing (4” steel square tube”) 14.5” long 1/8” wall thickness 2)Kast-O-Lite 3000 3)Metrikote (this was the final chamber coat) 4)2 steel 3/4 bars 12” long and 1/8” thick bent at the 4.5” mark from each end to make legs 5)nuts12), bolts (4)and lock washers(8) to attach legs 6)burner, I haven’t decided what burner to use? I was planning to use my modified torch head but think I might just use my atlas 30k burner assembly? 7)2.5”-2.75” tube( I used a 2.5 outer diameter pipe for the burn chamber The build was easy enough. First cut the square tube to length. Then locate and mark where your leg bolts will be. Then mark your burner location. Drill all holes. Important to do this next 2 steps! Install the bolts for your legs! Either seal or put a tube into the burner port till it reaches the chamber pipe! Ok now seal one side of the housing (square pipe) with blue tape. Now flip the sealed side down and coat your chamber pipe with oil or pan! Now center your chamber pipe in the housing (square pipe) making sure it’s centered on both ends! The pipe needs to be longer than the square tube housing! Mix up Kast-O-Lite 3000 to texture like mortar and start packing it in around the pipe and ever 2/3” be sure to pack it down nice and good! I tamped it with a wooden dowel every 2-3” until ful to the top and level. Leave it a couple hours to set up firm then you’ll be able to move it to a better place to cure. You might want to remove or at least twist the pipe to get it out easier but I left mine in until the next day. After a day I twisted the pipe and it did. So after a day I decided to take the chamber pipe out. It took some time but it came out without damaging the chamber! I mean it TOOK SOME TIME! But hey it’s only my second attemp at a forge! After the pipe was out I peeled off the blue tape from the opposite end and let it dry another day by the heater. After dry I mixed the Metrikote with water until it was like latex paint and coated the burn chamber and both open ends. I let it sit for DAYS Next to my garage heater and today is Day 7! So I think I can try to fire it up starting at low heat for few seconds or minutes eventually bringing it up to forge temps over a few hours time OR I could just wait another few days or a month to be sure it dries haha! Anyhow I still have enough supplies to make yet a third forge. I’ll really think about it before I do. Now when making this one I didn’t think much about heat reaching the outside housing as you can tell by the thin walls haha. If I had to do this build again I’d use 6” diameter square or round pipe to make sure the outside walls wouldn’t get to hot. I’m sure any forge eventually get veryhot but I think this would have helped. So what size is this thing considered? Micro or mini? How about “Micrini” like Me-cree-Knee haha. What burner will I use? Well I might just use my torch but at use my atlas burner instead! It fits right in there perfectly as seen in a picture. But who knows. All I know is it might be full of flaws but thought you’d all enjoy see my mistakes so you don’t make them same ones. I’ll keep you all updated when I fure it up! Enjoy the pictures!


-
I made them yes and finished them in this forge. It’s amini tongs made of 3/8” mild steel and the pin holding the tongs together us just a 3/16” steel pin hammered in both sides. I used a square bar to shake V groves pointing outwards for the jaw. That’s it! Oh it has a loop on the end of so I can loop it and I don’t need to keep squeezing. Sure I’ll explain what you want. Outer housing is a can, it’s lined with Koawool 1” thick. Kast-o-lite over the Koawool but only about 1/8”-3/16” thick and after it dried I coated with Metrikote. Basically that’s it. On the back open end I played with bricks covering it and opening it to see what was better. The torch I play with a bit. Different angles and different depth into the forge out out the forge makes a huge difference in heat output! the jet is bored out on my torch and head modified a bit. Here’s pictures of it.


-
Man you got skills!
-
Mods if I’m posting this in the wrong place please let me know or just delete it and I apologize. Here’s another pretty simple one I made after the Micro forge. It’s been drying for 7 days now. I have to put the burner on it and it’s ready. I attached the Atlas 30k with atlas regulator hose but think I’ll try my modified torch first?? I think its ready anyway??? This Build was made with these items: 1) housing (4” steel square tube”) 14.5” long 1/8” wall thickness 2)Kast-O-Lite 3000 3)Metrikote (this was the final chamber coat) 4)2 steel 3/4 bars 12” long and 1/8” thick bent at the 4.5” mark from each end to make legs 5)nuts12), bolts (4)and lock washers(8) to attach legs 6)burner, I haven’t decided what burner to use? I was planning to use my modified torch head but think I might just use my atlas 30k burner assembly? 7)2.5”-2.75” tube( I used a 2.5 outer diameter pipe for the burn chamber The build was easy enough. Fist cut the square tube to length. Then locate and mark where your leg bolts will be. Then mark your burner location. Drill all holes. Important to do this next 2 steps! Install the bolts for your legs! Either seal or put a tube into the burner port till it reaches the chamber pipe! Ok now seal one side of the housing (square pipe) with blue tape. Now flip the sealed side down and coat your chamber pipe with oil or pan! Now center your chamber pipe in the housing (square pipe) making sure it’s centered on both ends! The pipe needs to be longer than the square tube housing! Mix up Kast-O-Lite 3000 to texture like mortar and start packing it in around the pipe and ever 2/3” be sure to pack it down nice and good! I tamped it with a wooden dowel every 2-3” until ful to the top and level. Leave it a couple hours to set up firm then you’ll be able to move it to a better place to cure. You might want to remove or at least twist the pipe to get it out easier but I left mine in until the next day. After a day I twisted the pipe and it did. So after a day I decided to take the chamber pipe out. It took some time but it came out without damaging the chamber! I mean it TOOK SOME TIME! But hey it’s only my second attemp at a forge! After the pipe was out I peeled off the blue tape from the opposite end and let it dry another day by the heater. After dry I mixed the Metrikote with water until it was like latex paint and coated the burn chamber and both open ends. I let it sit for DAYS Next to my garage heater and today is Day 7! So I think I can try to fire it up starting at low heat for few seconds or minutes eventually bringing it up to forge temps over a few hours time OR I could just wait another few days or a month to be sure it dries haha! Anyhow I still have enough supplies to make yet a third forge. I’ll really think about it before I do. Now when making this one I didn’t think much about heat reaching the outside housing as you can tell by the thin walls haha. If I had to do this build again I’d use 6” diameter square or round pipe to make sure the outside walls wouldn’t get to hot. I’m sure any forge eventually get veryhot but I think this would have helped. So what size is this thing considered? Micro or mini? How about “Micrini” like Mee-Cree-Knee haha. What burner will I use? Well I might just use my torch but at use my atlas burner instead! It fits right in there perfectly as seen in a picture. But who knows. All I know is it might be full of flaws but thought you’d all enjoy see my mistakes so you don’t make them same ones. I’ll keep you all updated when I fure it up! Enjoy the pictures!


-
For my micro forge items needed would be: 1)large family size pork&beans can or similar size can. 2)Kast-O-Lite 3000 3)Koawool 1” thick 4)Metrikote 5) high power propane torch or build yourself a micro burner like the 1/2” T-burner. That’s pretty much itfor this build I did.
-
I’ll take a look at that burner. I do have a few atlas burners I may use.