Killroy1221
Members
-
Joined
-
Last visited
Everything posted by Killroy1221
-
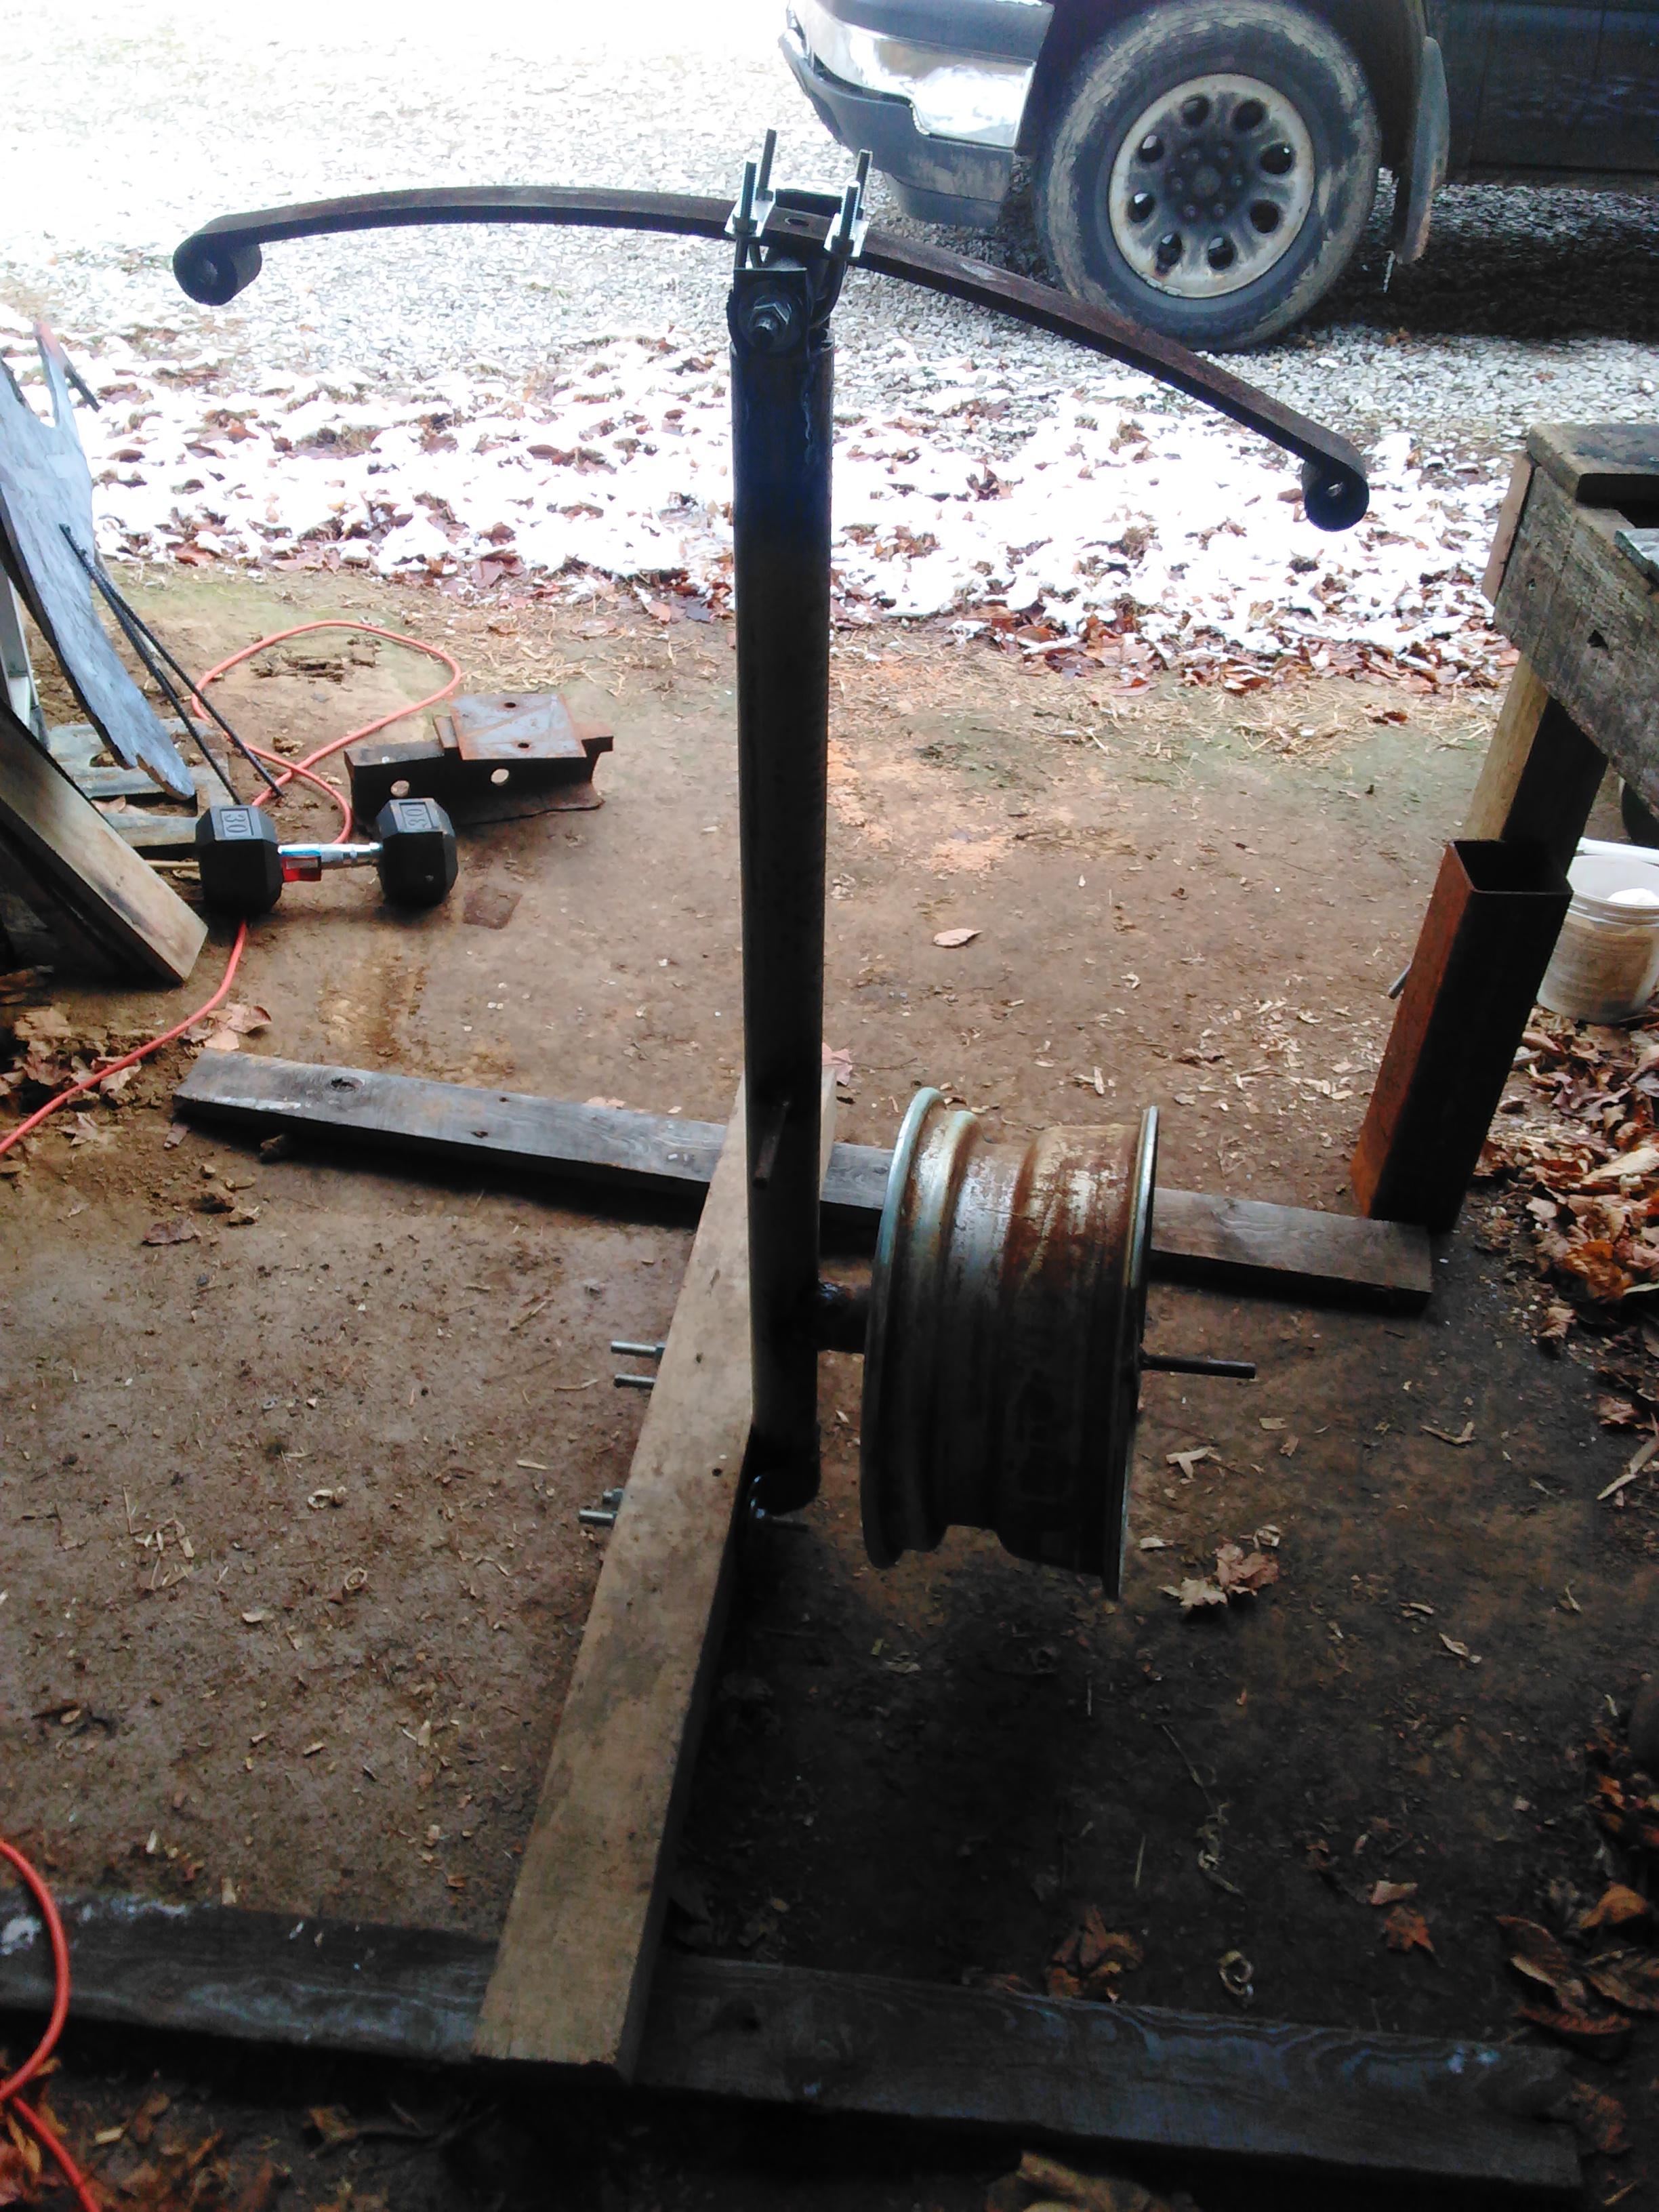
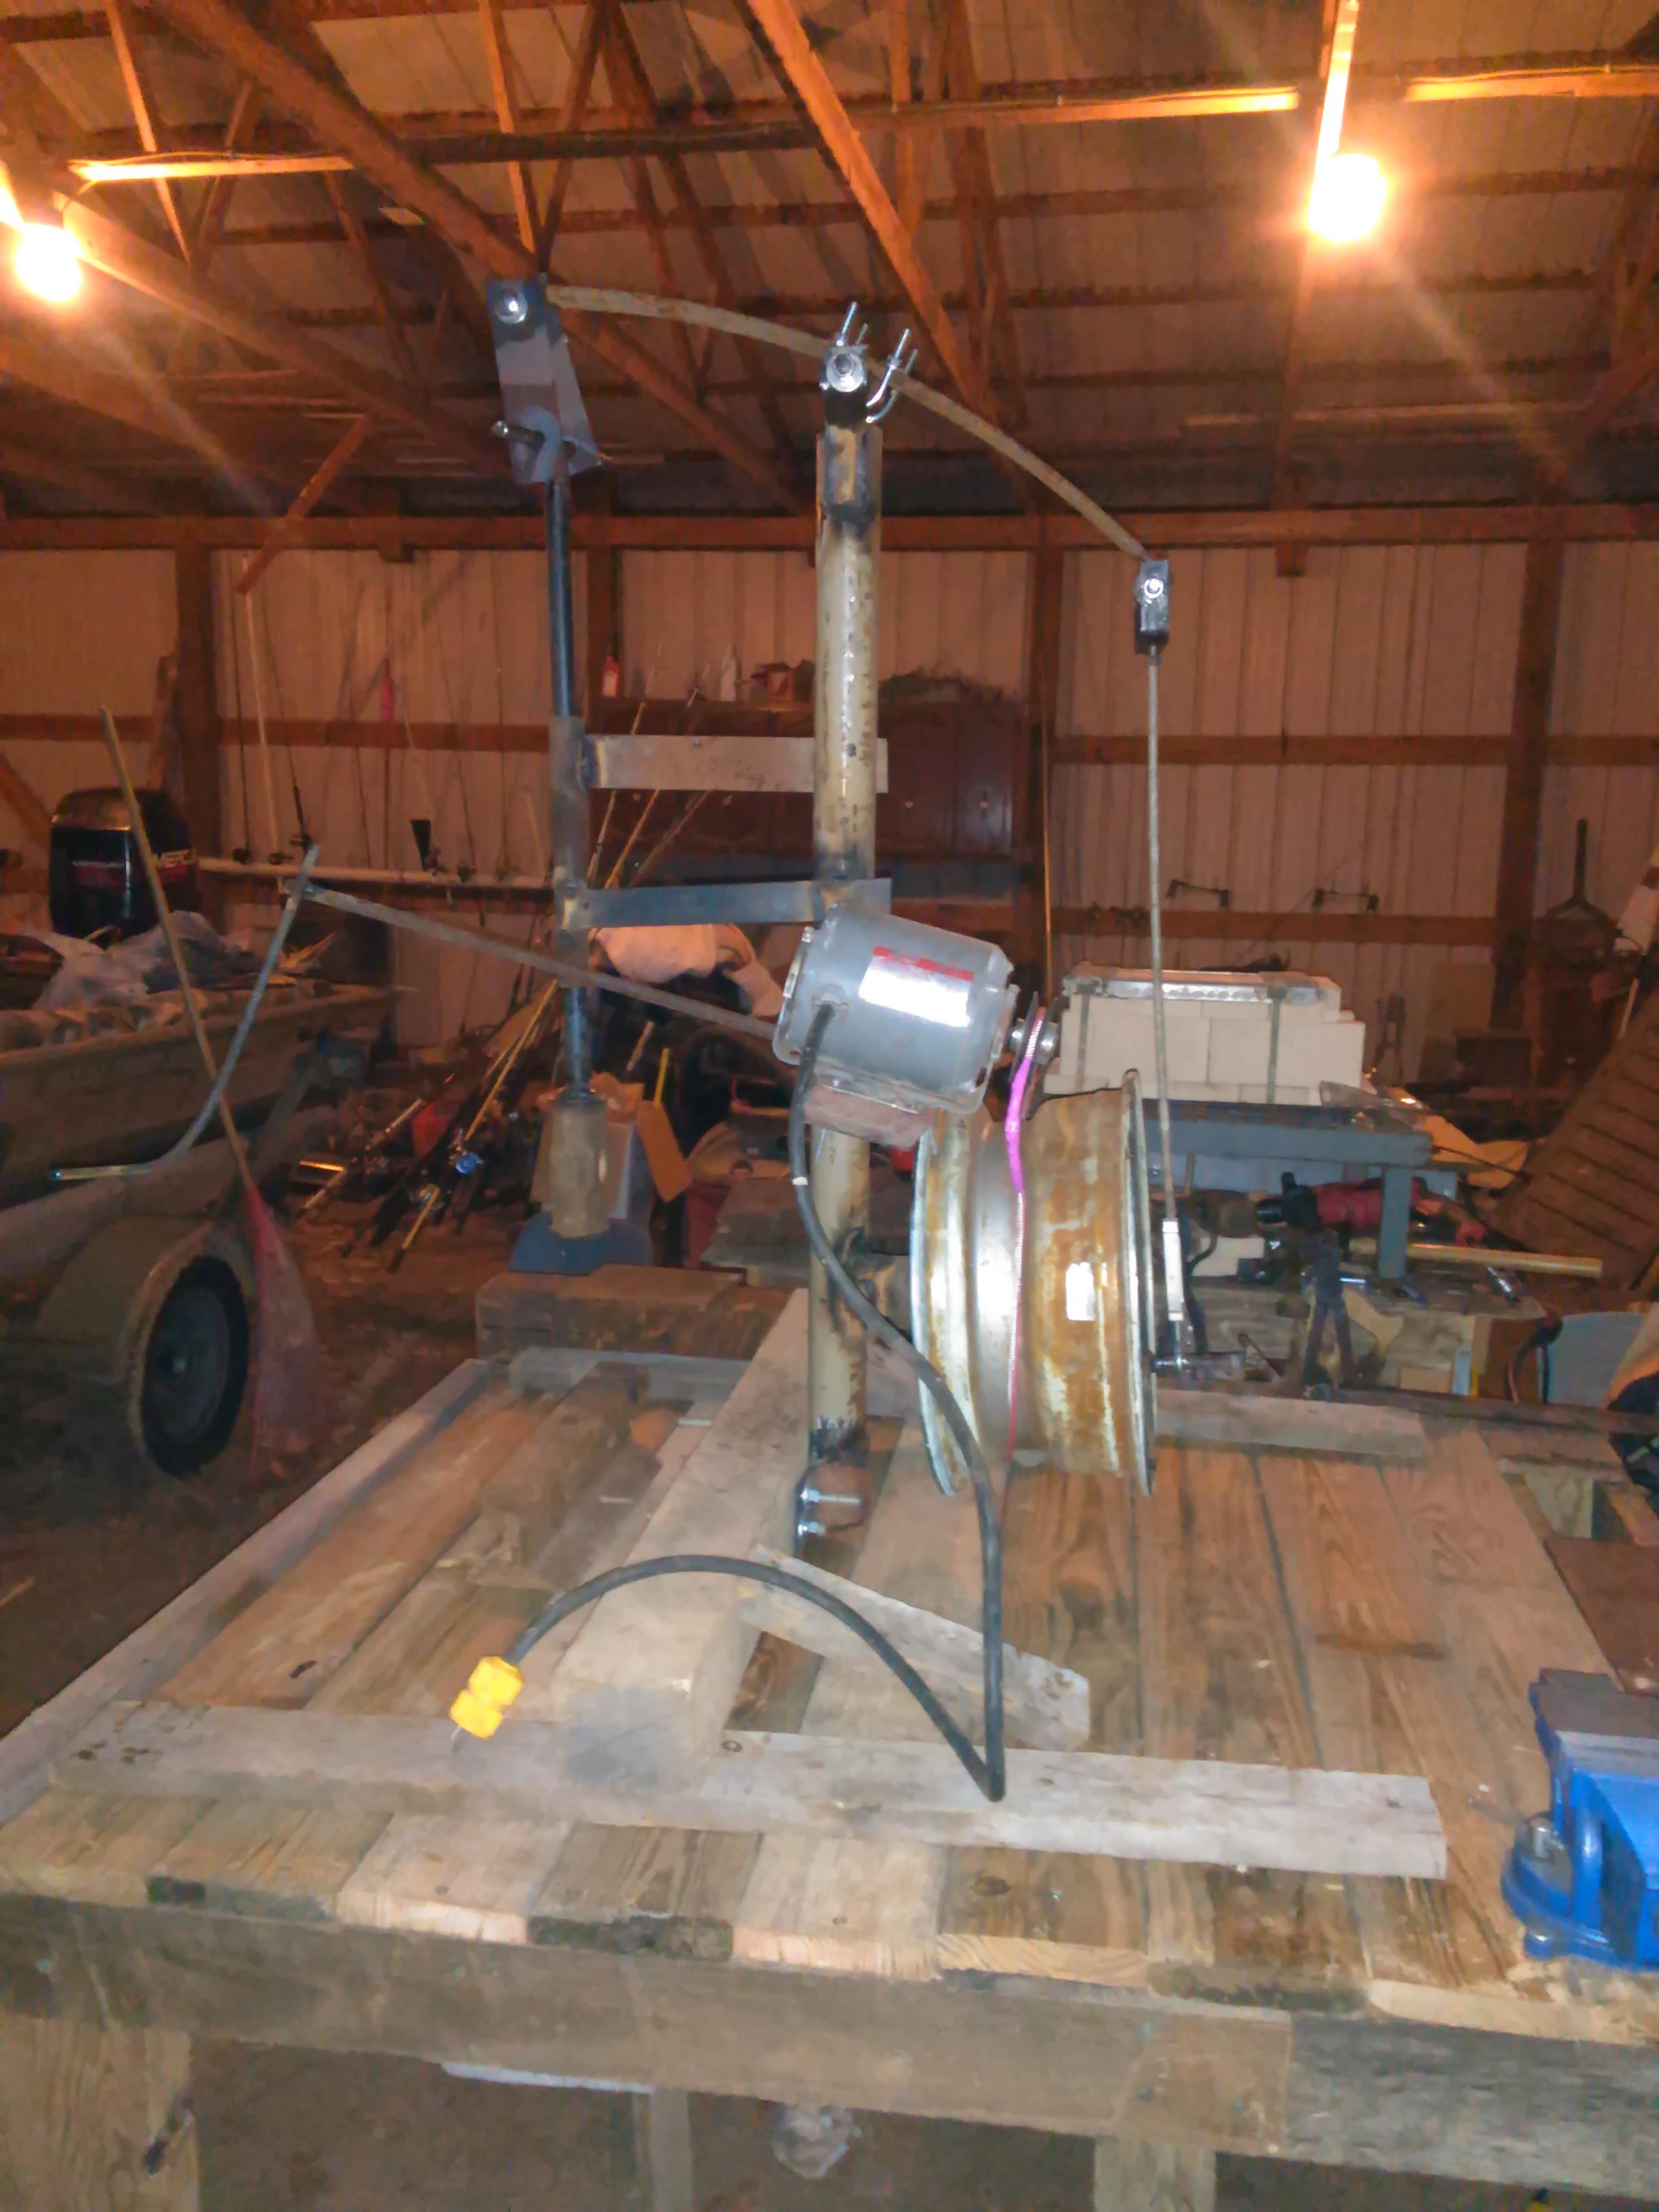
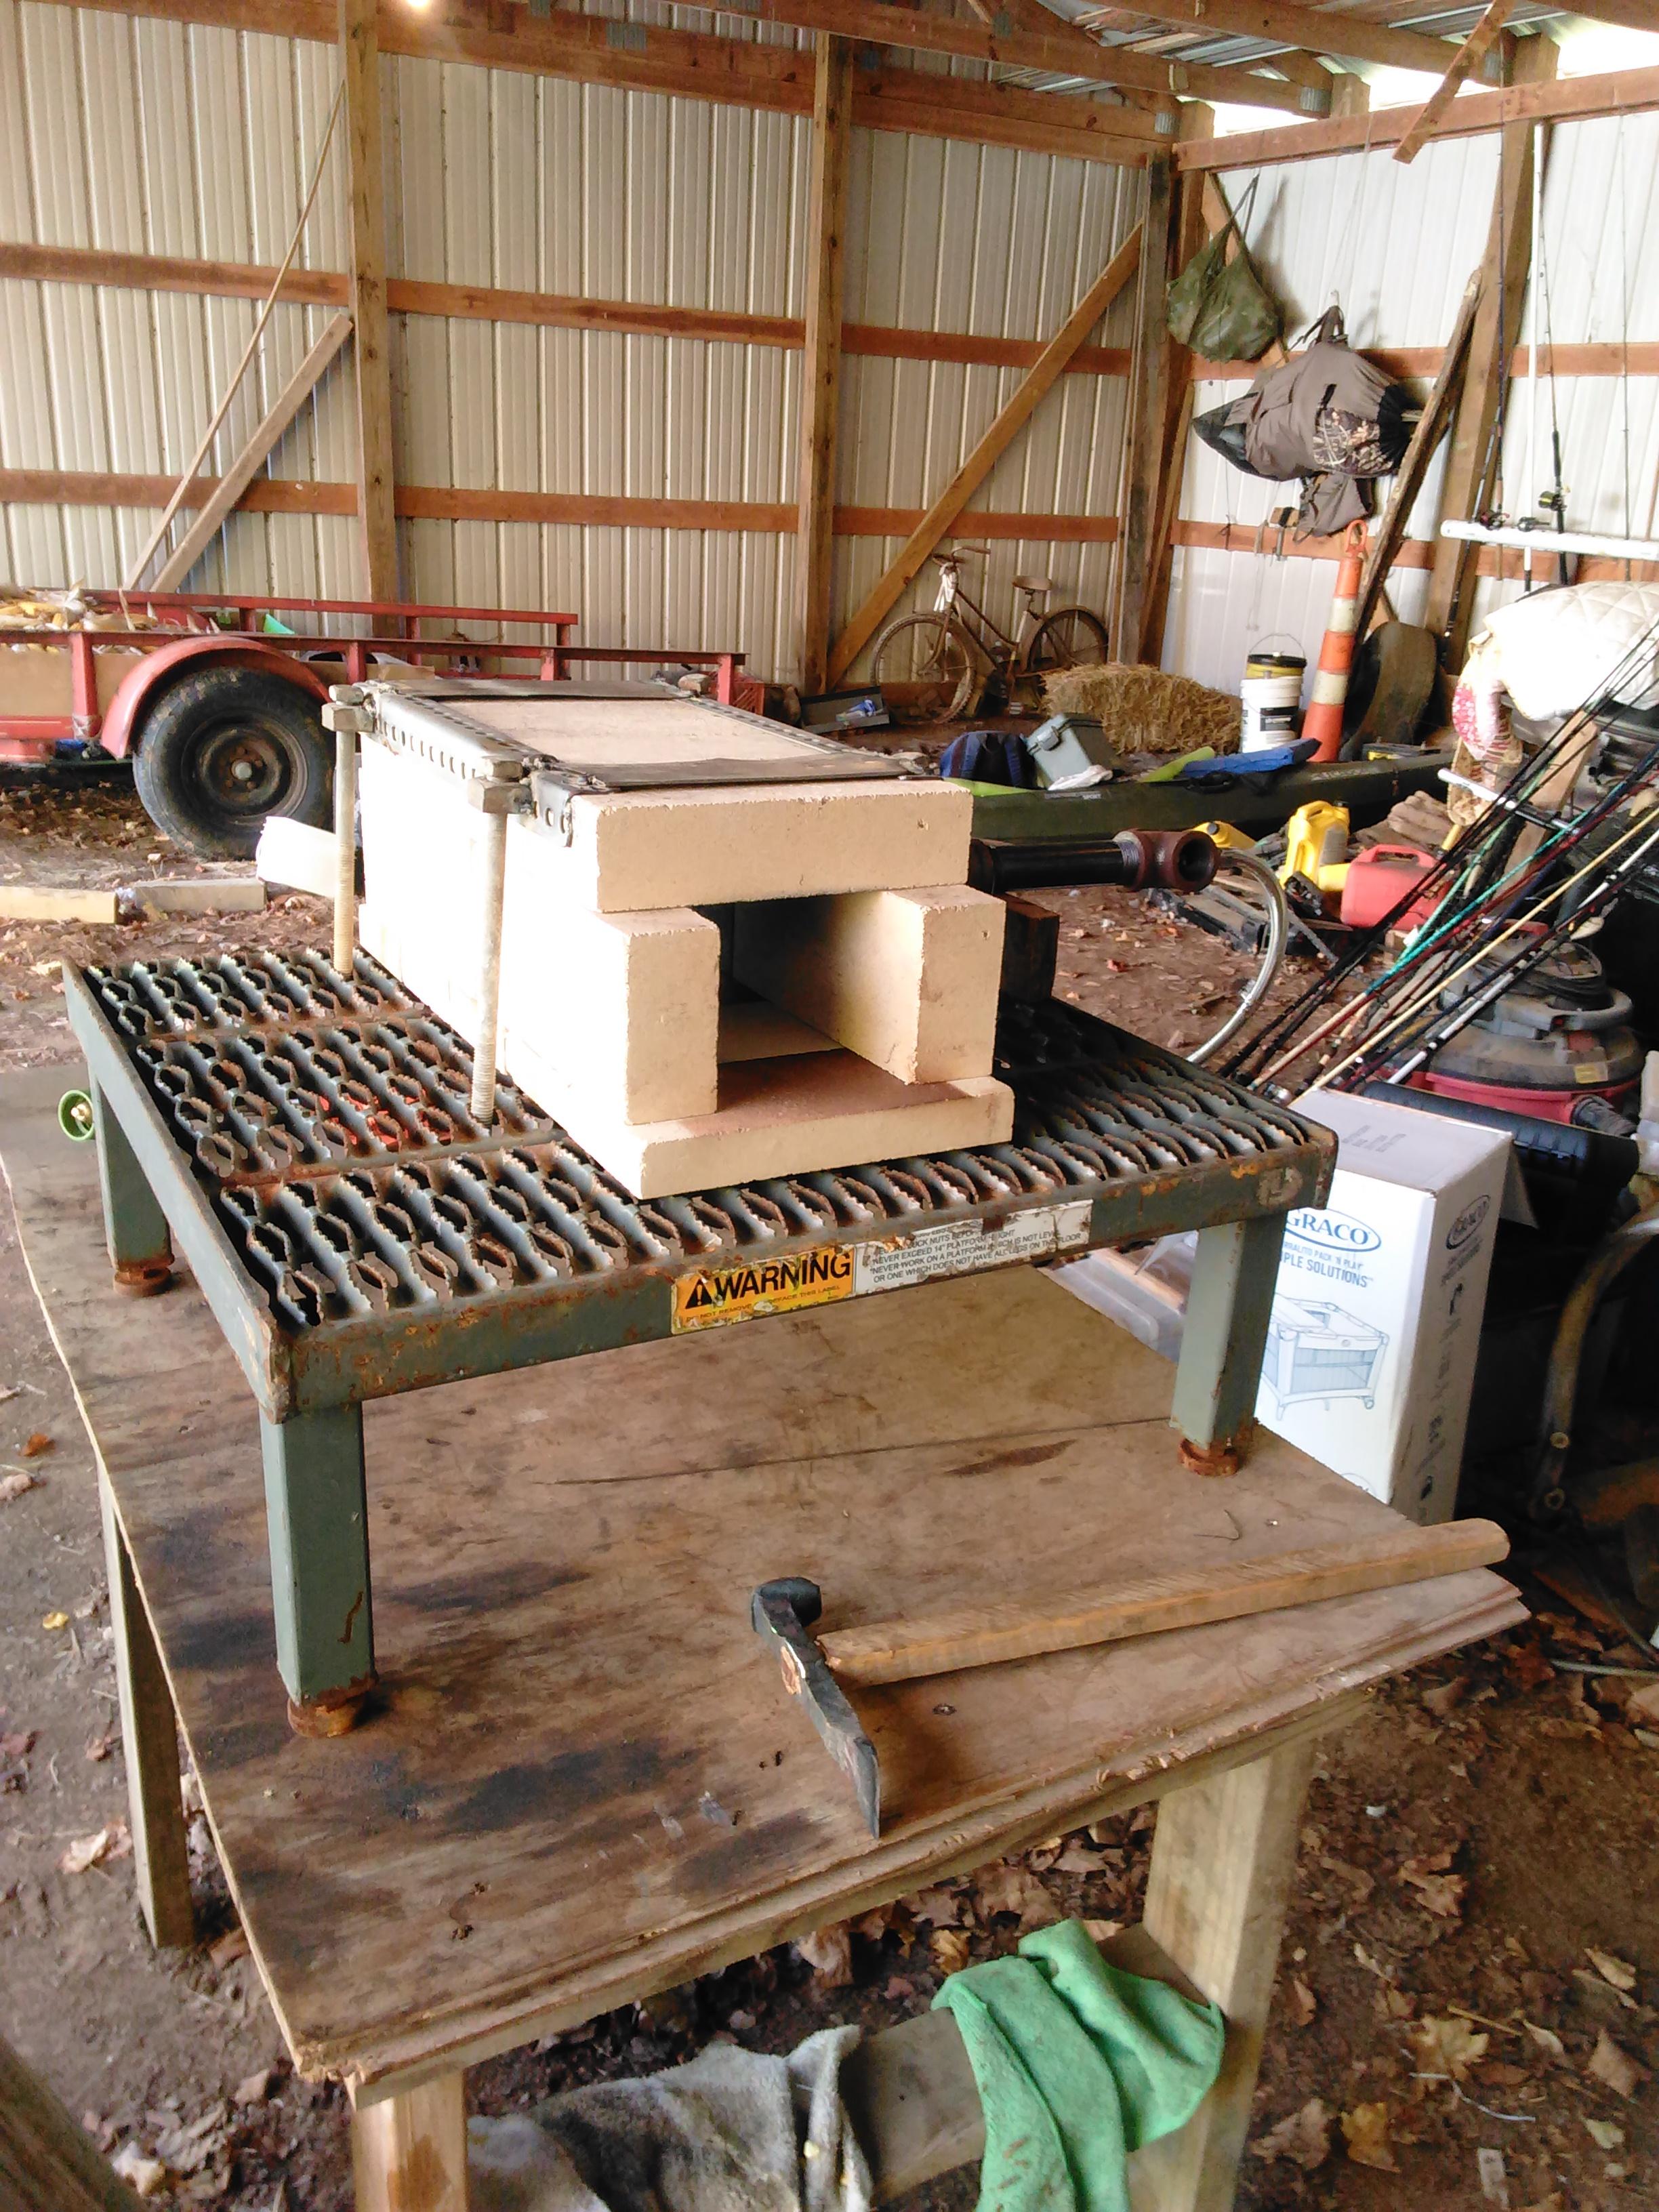
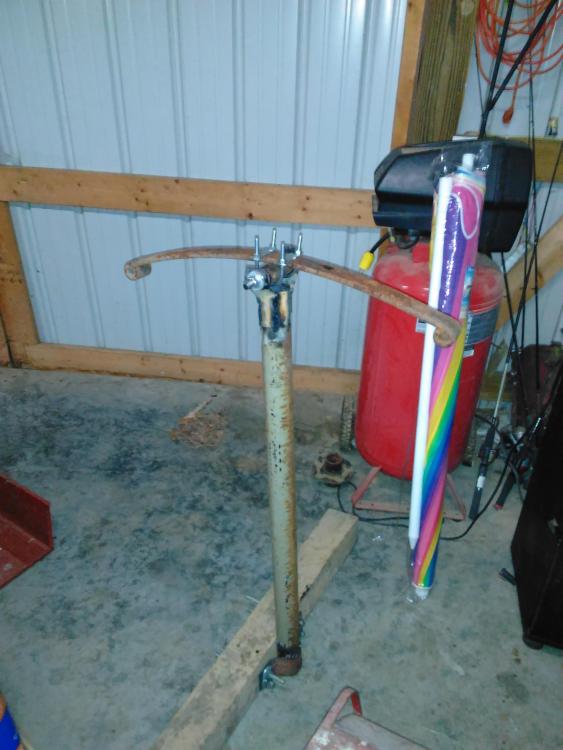
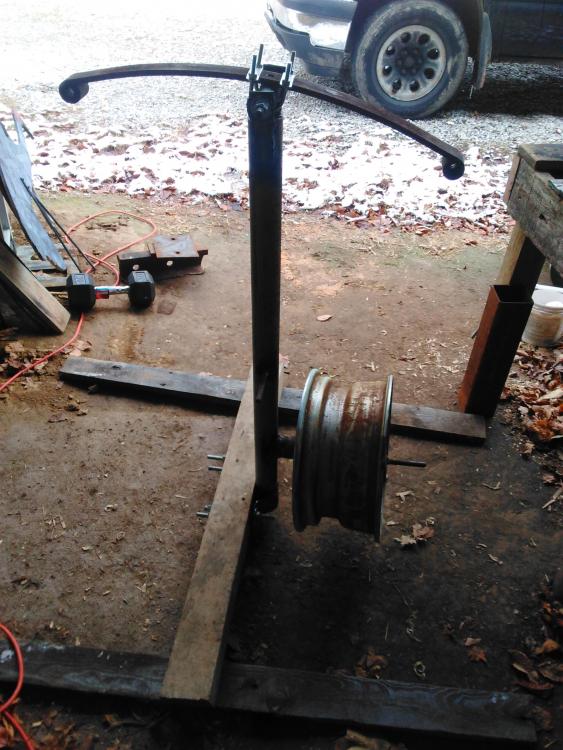
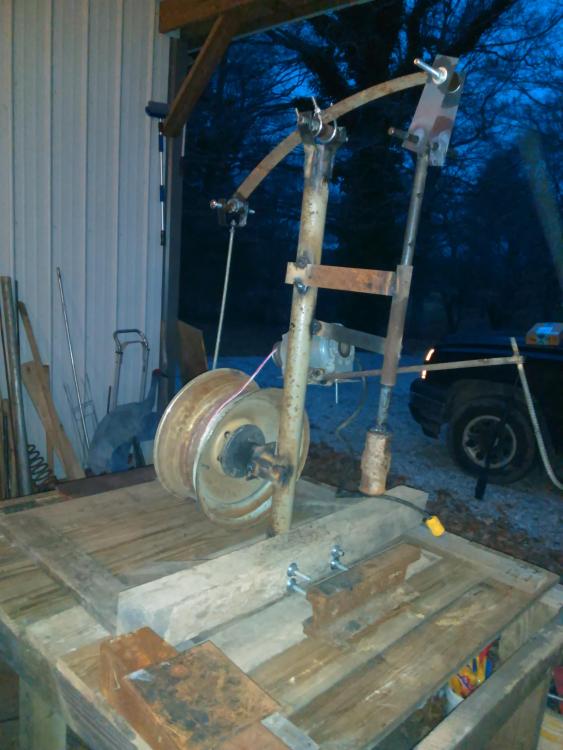
Haha, no offense taken. Sorta how I feel about it at the moment. I have done very little with it but watch it run for a minute or so at a time, and I hit one rr Spike with it just to see if it moved metal. With the experiment (the is it possible on 40$ part) a success I plan to make it useable. I seriously planned to cut it all up when I was done and repurpose it as needed. It would still have been cheaper than taking the family to the movies and a whole lot more entertaining. The key word here being useable. I do not view it as such at the moment. I do need a belt. The twine was just to see if the "experiment" would run. I wasn't going to invest any more time or $ into it if it didn't. The joints will all be rebuilt with sturdier materials before I put it to any serious use. Im in no hurry. I will create those supports I was talking about. They will be anchored halfway up the axle and then into the table frame. Probably bolted to the table and forged to fit the axle and arc welded. I plan for those supports to be the main support, moreso than it's current brace. The welds aren't quite as bad as they look in the pictures. I have not cleaned the slag off of them, yet. some are very pretty underneath with adequate penetration. I use to teach a little welding and was offered a job once based on some of my work. Many are partial welds to see if the "design" ( if you want to call it that) was functional before I put any serious time into it. That being said, it is suprisingly smooth. Especially at slower speeds. I may should have made my original disclaimer longer. It is very difficult to convey the true meaning of a thing in text as opposed to an in person dialogue. All in all, it was pretty fun to build and more entertaining than watching everybody loves Raymond reruns. And that is all I was shooting for. The project will now turn into a more serious endeavor now that I believe it to be possible to build a functioning, and again, USEABLE hammer without a major expenditure of funds. My major expenditure is fishing and ducks. I don't have room for another. I hope, with all of that being said, it presents itself as less of a joke and something more along the lines of how I intended it. The only other forum I frequent is an outdoor forum. I have been a member for a little over a decade and y'all ought to see how they rag on each other. It's a riot. Frosty, the only thing I don't have an answer for is the ram guide you pointed out. I have a plan for everything else mentioned but I do not know what to do for the ram guide. I was looking into the hardened plastics that some people use but don't know where to obtain such a thing our how to use it on a cylindrical ram. It may be that I nix the current ram and guide completely.
-
Now, before I show pics, let me give a disclaimer. I was off for a week with nothing to do and I came across a 1/4 horse motor at a scrap yard for 3.50$. I had a broken axle with one good hub, a rim, a bunch of free electrodes for the welder and threaded rod for bolts. So my goal was not really to build a functioning power hammer but to perform an experiment and see if I could make it work. The experiment will continue and see how well it holds up to use. I made almost all of it replaceable. That being said, it works like a charm. I built the table out of 100 year old, real 2x4, barn lumber from a recent barn demo. The surface is reused deck boards. Held together with an extravagant amount of 4 inch deck screws. 7 table legs. I plan to weld a couple of support legs to the axle and bolt them into the table. It hardly rocks or vibrates. I still need to build a support and rack for my track anvil.

-
Just started a month ago myself. Lots of good reading on here. Make sure to read up on the safety aspects of different forge designs when you decide what to build. I went with firebrick that's easily interchangeable if it cracks and a t-burner. Simple and very effective thus far. I did several years worth of research before I finally decided to take the plunge and am very happy with my setup so far. Only had one concerning moment when I thought the grate might be galvanized but called the manufacturer and I'm ok. The truck axle hammer is easy enough it is just time consuming for the first one. Especially if you drift the eye yourself with a small hand hammer. Slightly off topic but I saw you are interested in fishing. I fish north of you at old hickory quite a bit in the summer for stripers. I am located in Barren county ky.

-
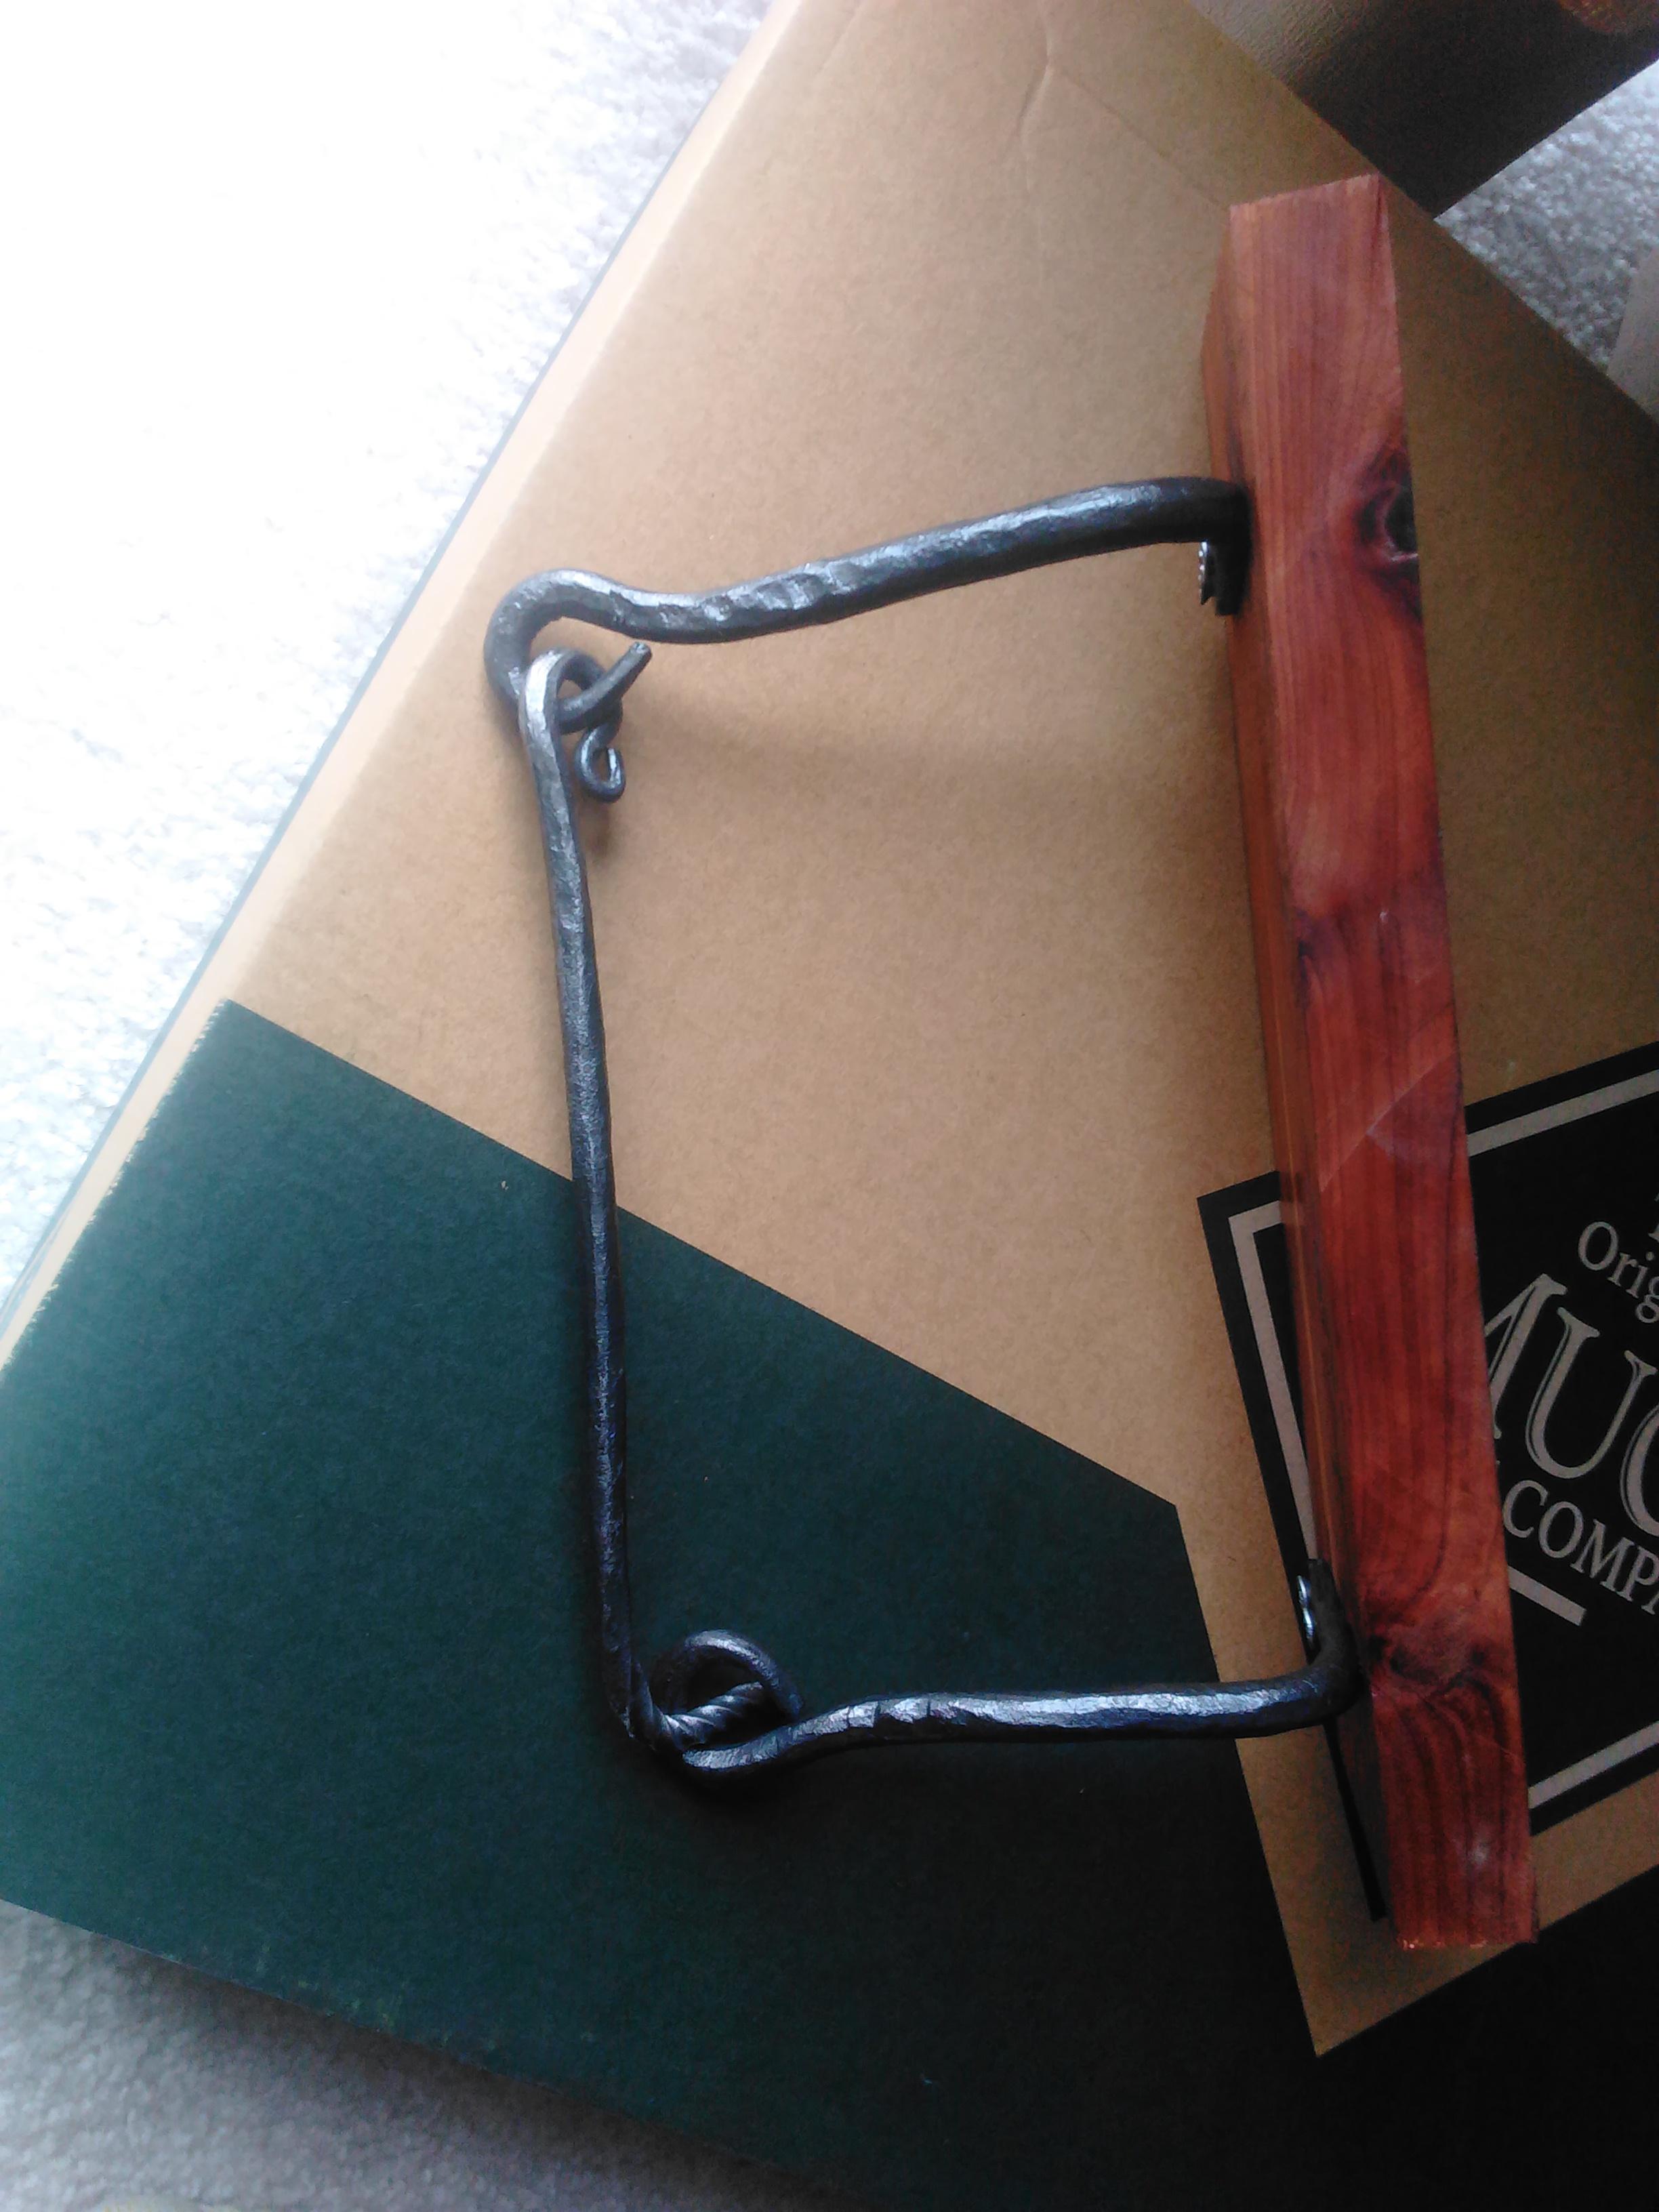
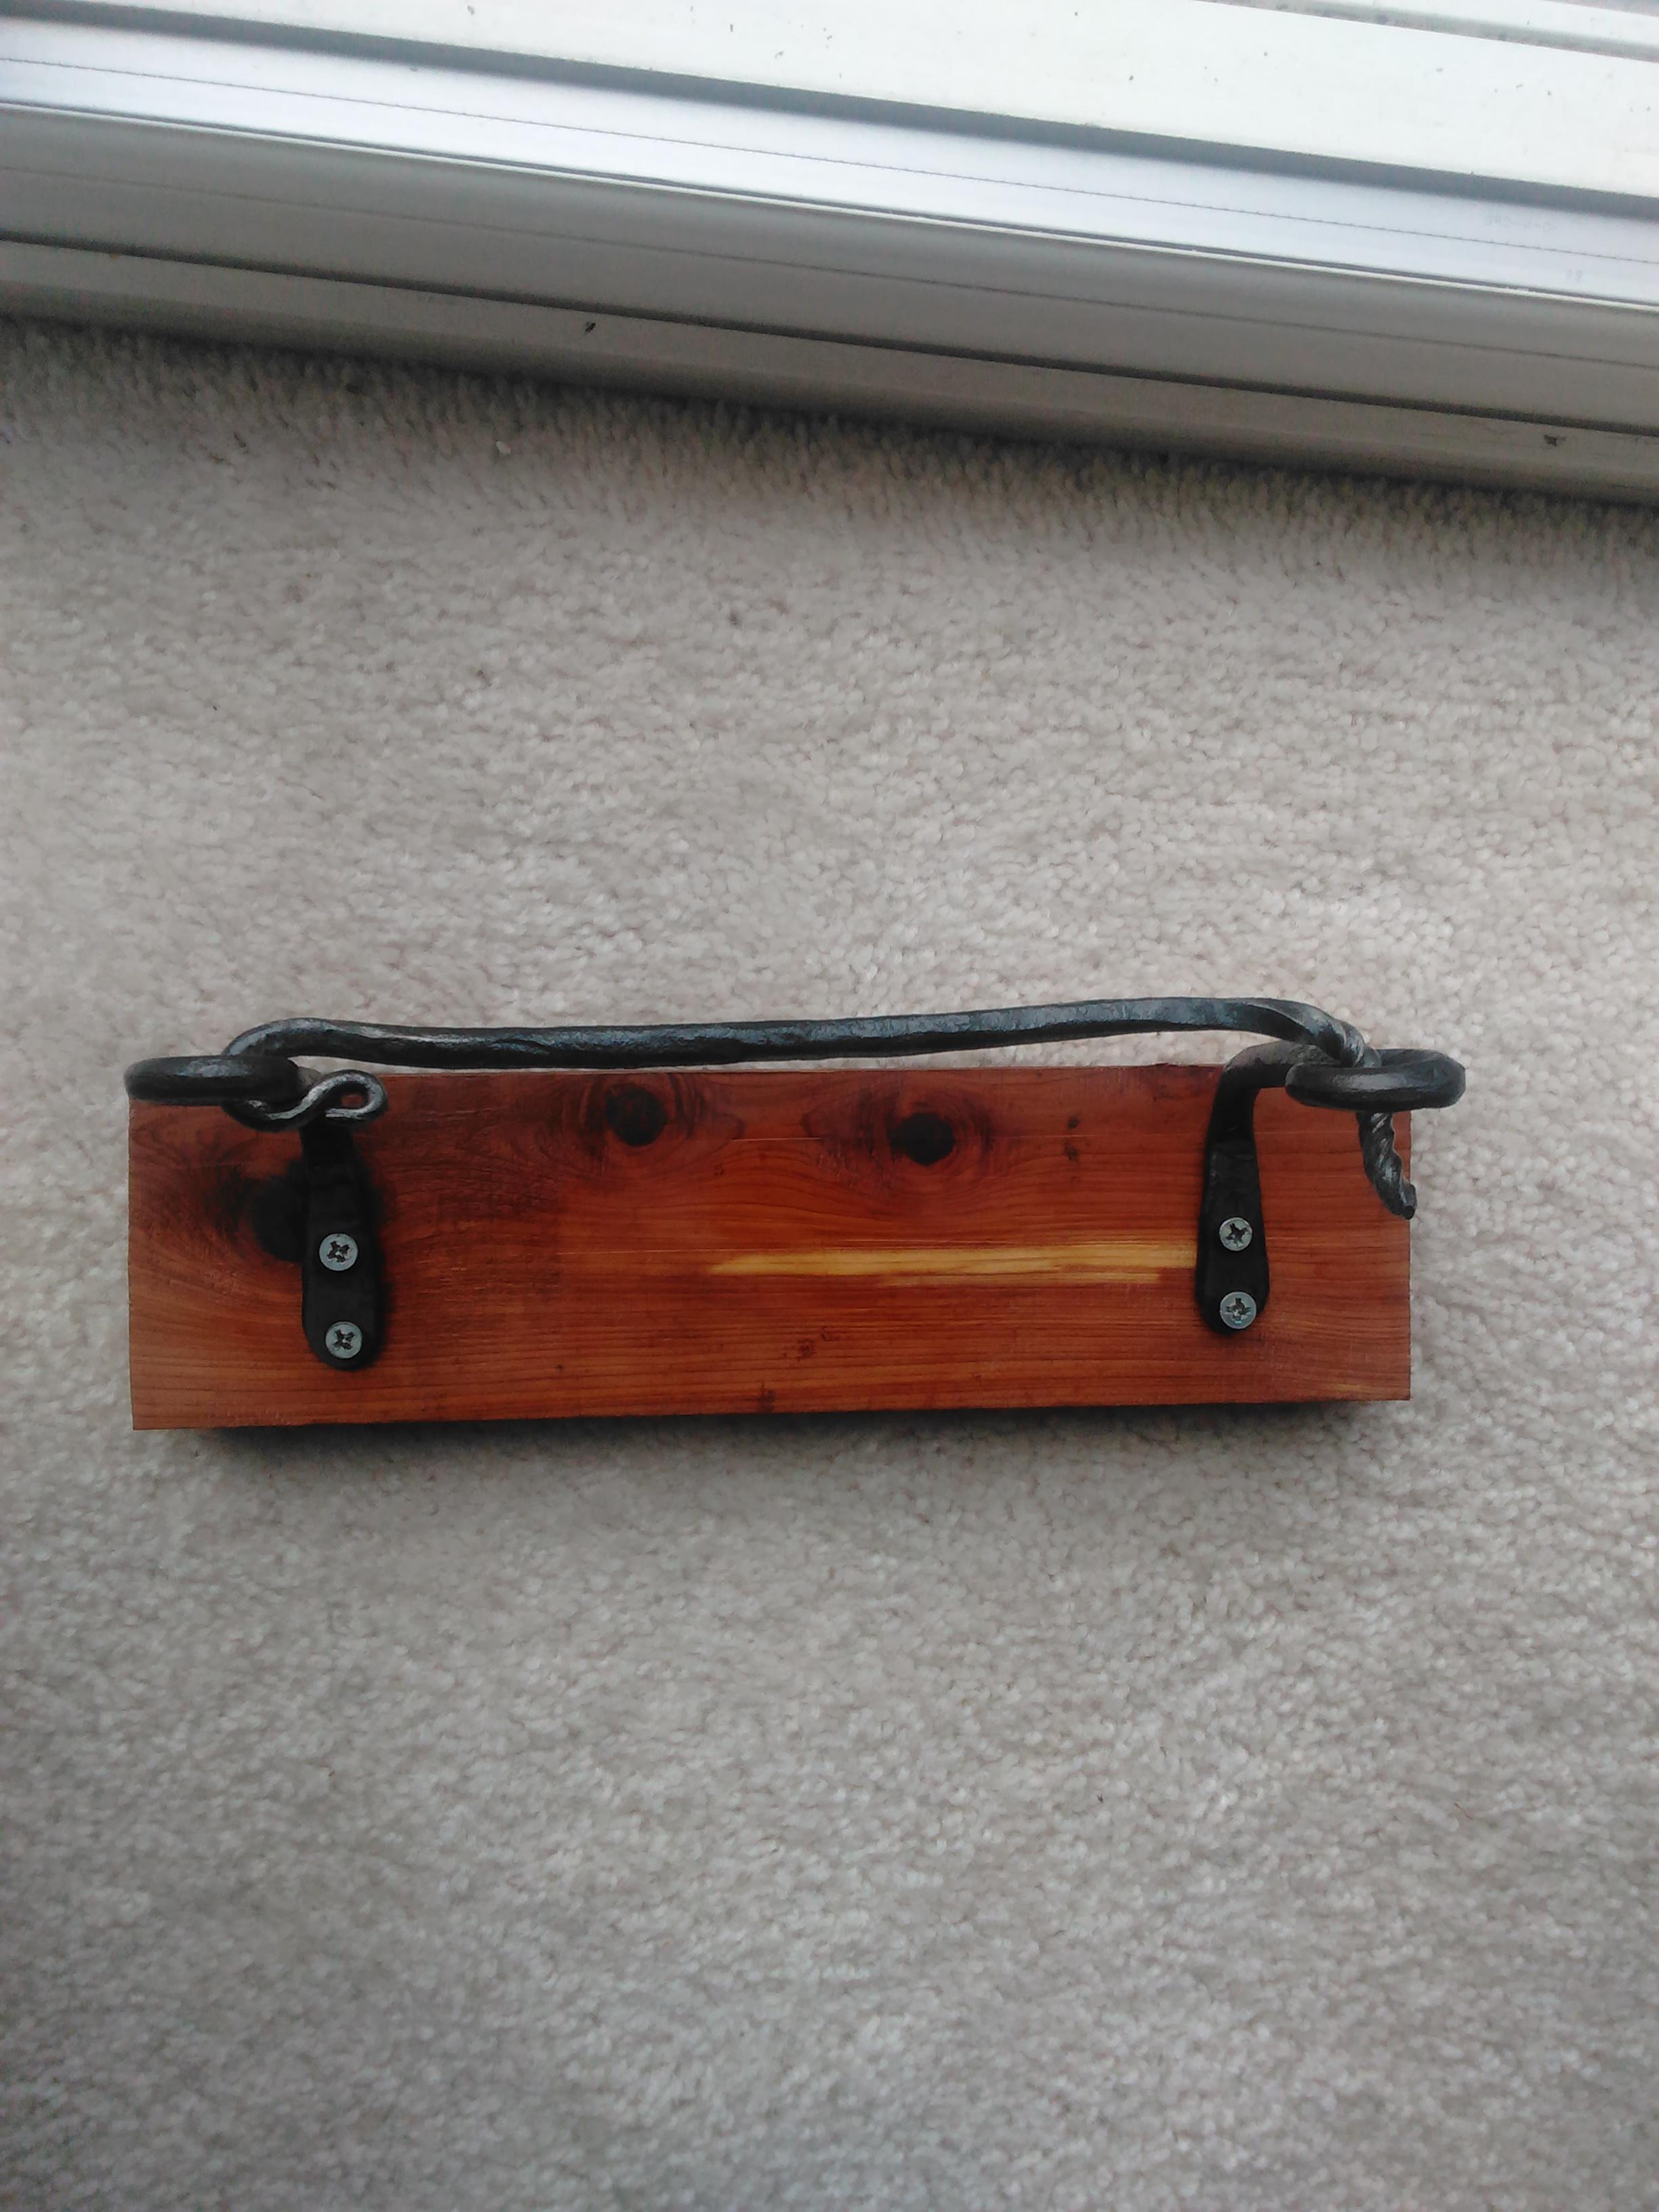
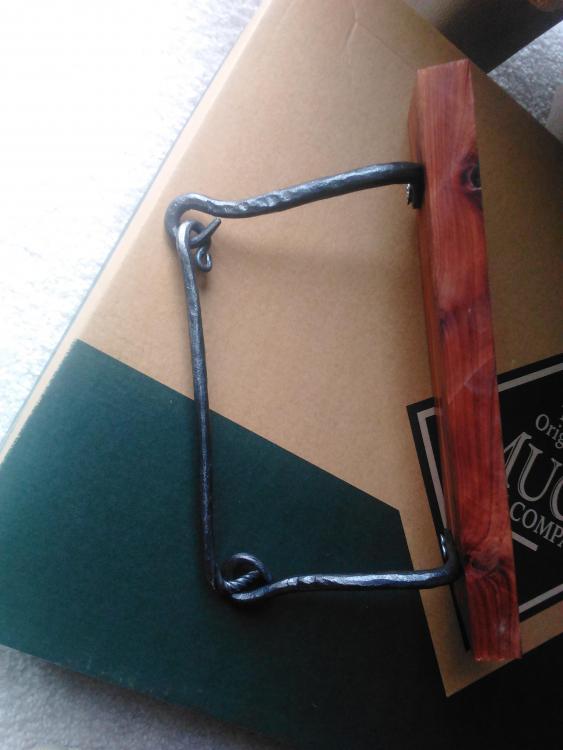
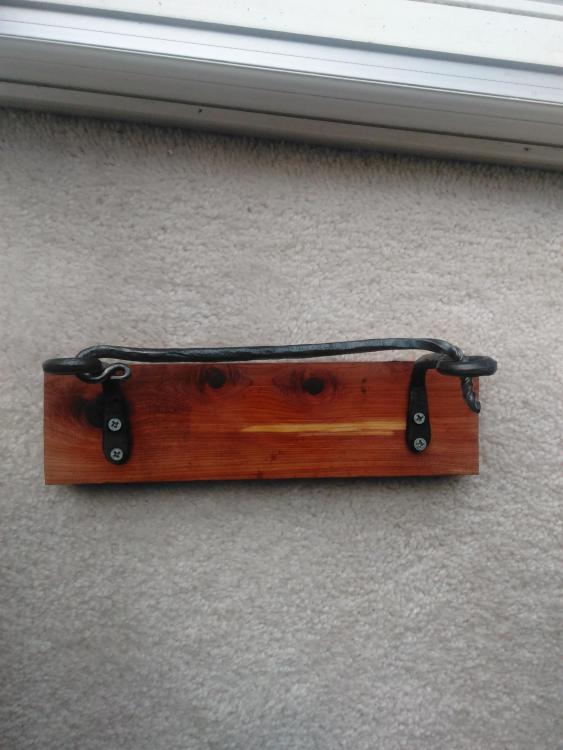
Both really good ideas. I'm glad y'all like it. I might get some black screws, that cedar is really bad about splitting. She was coming over today on her lunch break to see her new grandbaby so I made it in about two hours. I was proud of it. First "inside the house" item I have tried to make. It convinced me that I need a handy pile of smaller stock to play with, so I don't have to draw down a piece of rebar. Top pic.
-
I noticed my mother had broke her tp holder the other day when I visited for Thanksgiving. The cedar board is a leftover I found in her father's shop when he passed a few years ago.
-
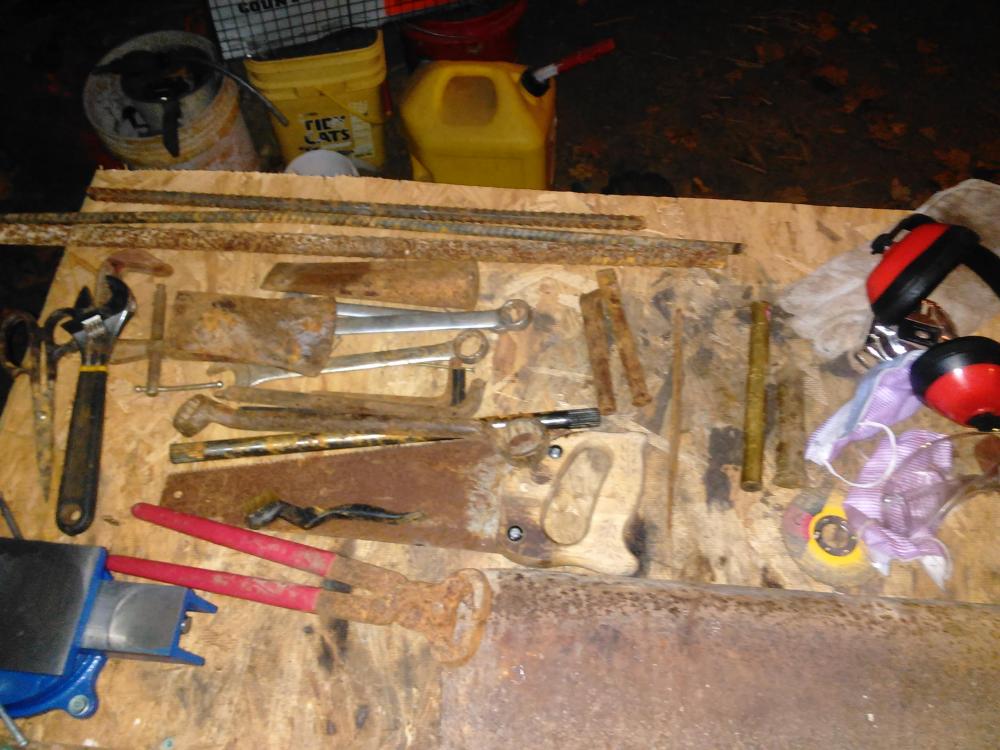
Made a quick trip to the scrap yard and made some pretty good finds. Two little keyhole type files, axe head, splitting wedge, hand saw, hoof nippers (might wind up being tongs), several wrenches, crescent wrench (nicer than the one I had), heavy scissors, two chisels, some rebar, c-clamp, and two pieces of brass on the right I might make small hammers out of. It was 15$ minus the brass and 20$ with it. That scrap yard is better than going to bass pro.
-
I was wondering about that stand. I wasn't sure how to tell if it was galvanized under that ugly paint. The places where the paint is chipped are all rusty. I will also keep that in mind about the firebrick. I used the only source of firebrick around (that I could find, and I called several places). The really good thing is, the bricks are 2$ each and I disassembled and reassembled the other day in just a few minutes. If (when) I start to have a problem I will look into ordering some. I had noticed the top stays really hot. What I've been doing is leaving a piece of hardened steel in the forge when bringing it up to temp and then leaving it on top while working to slowly bring it down to anneal for use next time. I didn't know if that would work but I thought it wouldn't hurt. Updated location to Barren county ky. I had read that thread but it has been a while. Might be worth a reread. I've been slowly making my way through the "it followed me home thread". It has me just as excited to look through the scrap yard as it does to make something! We are back home, the little man is happy and healthy, and I'm off for a month. I look forward to tinkering a little bit every day and learning as I go.
-
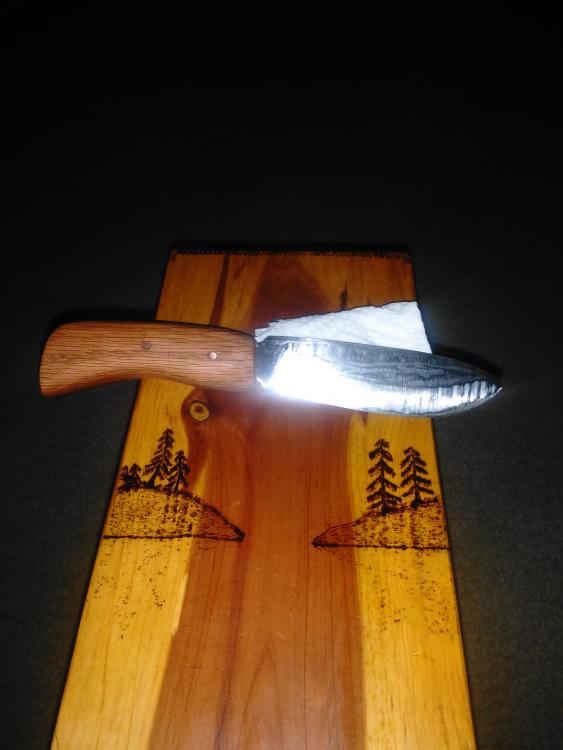
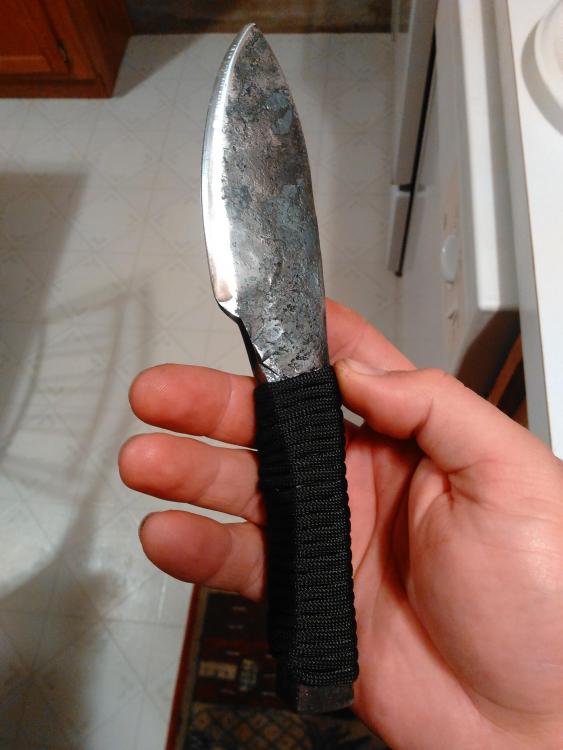
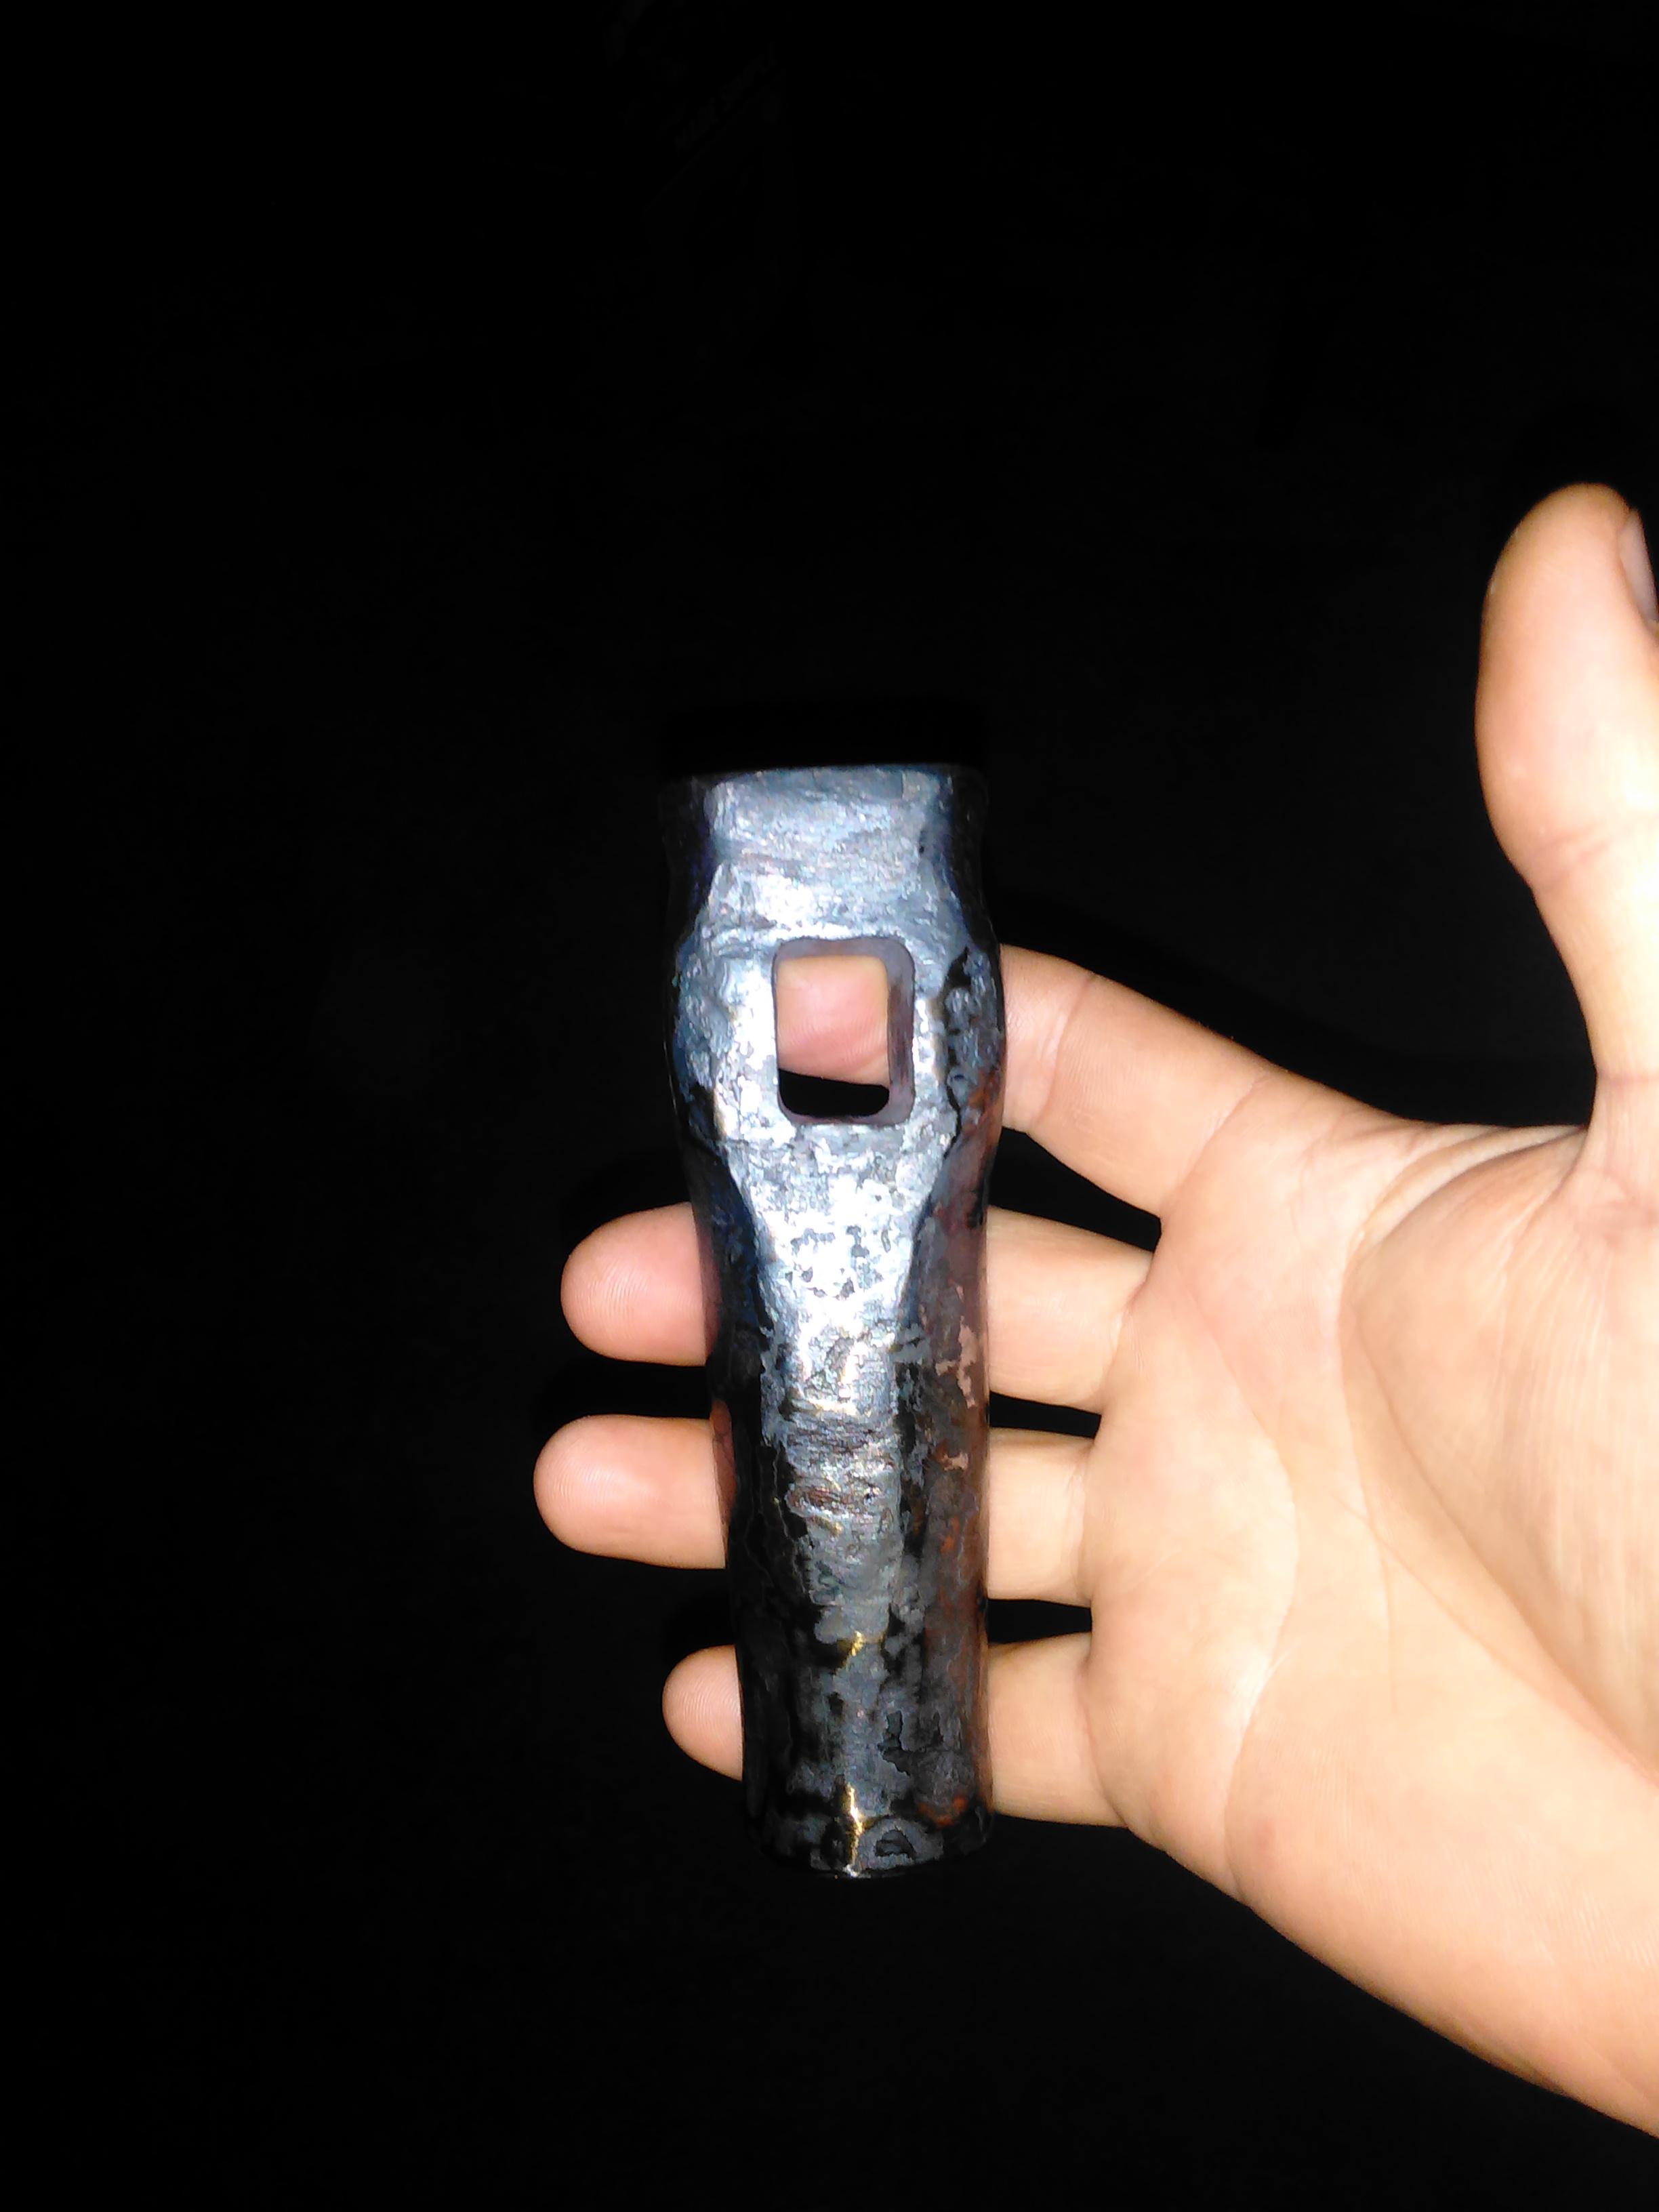
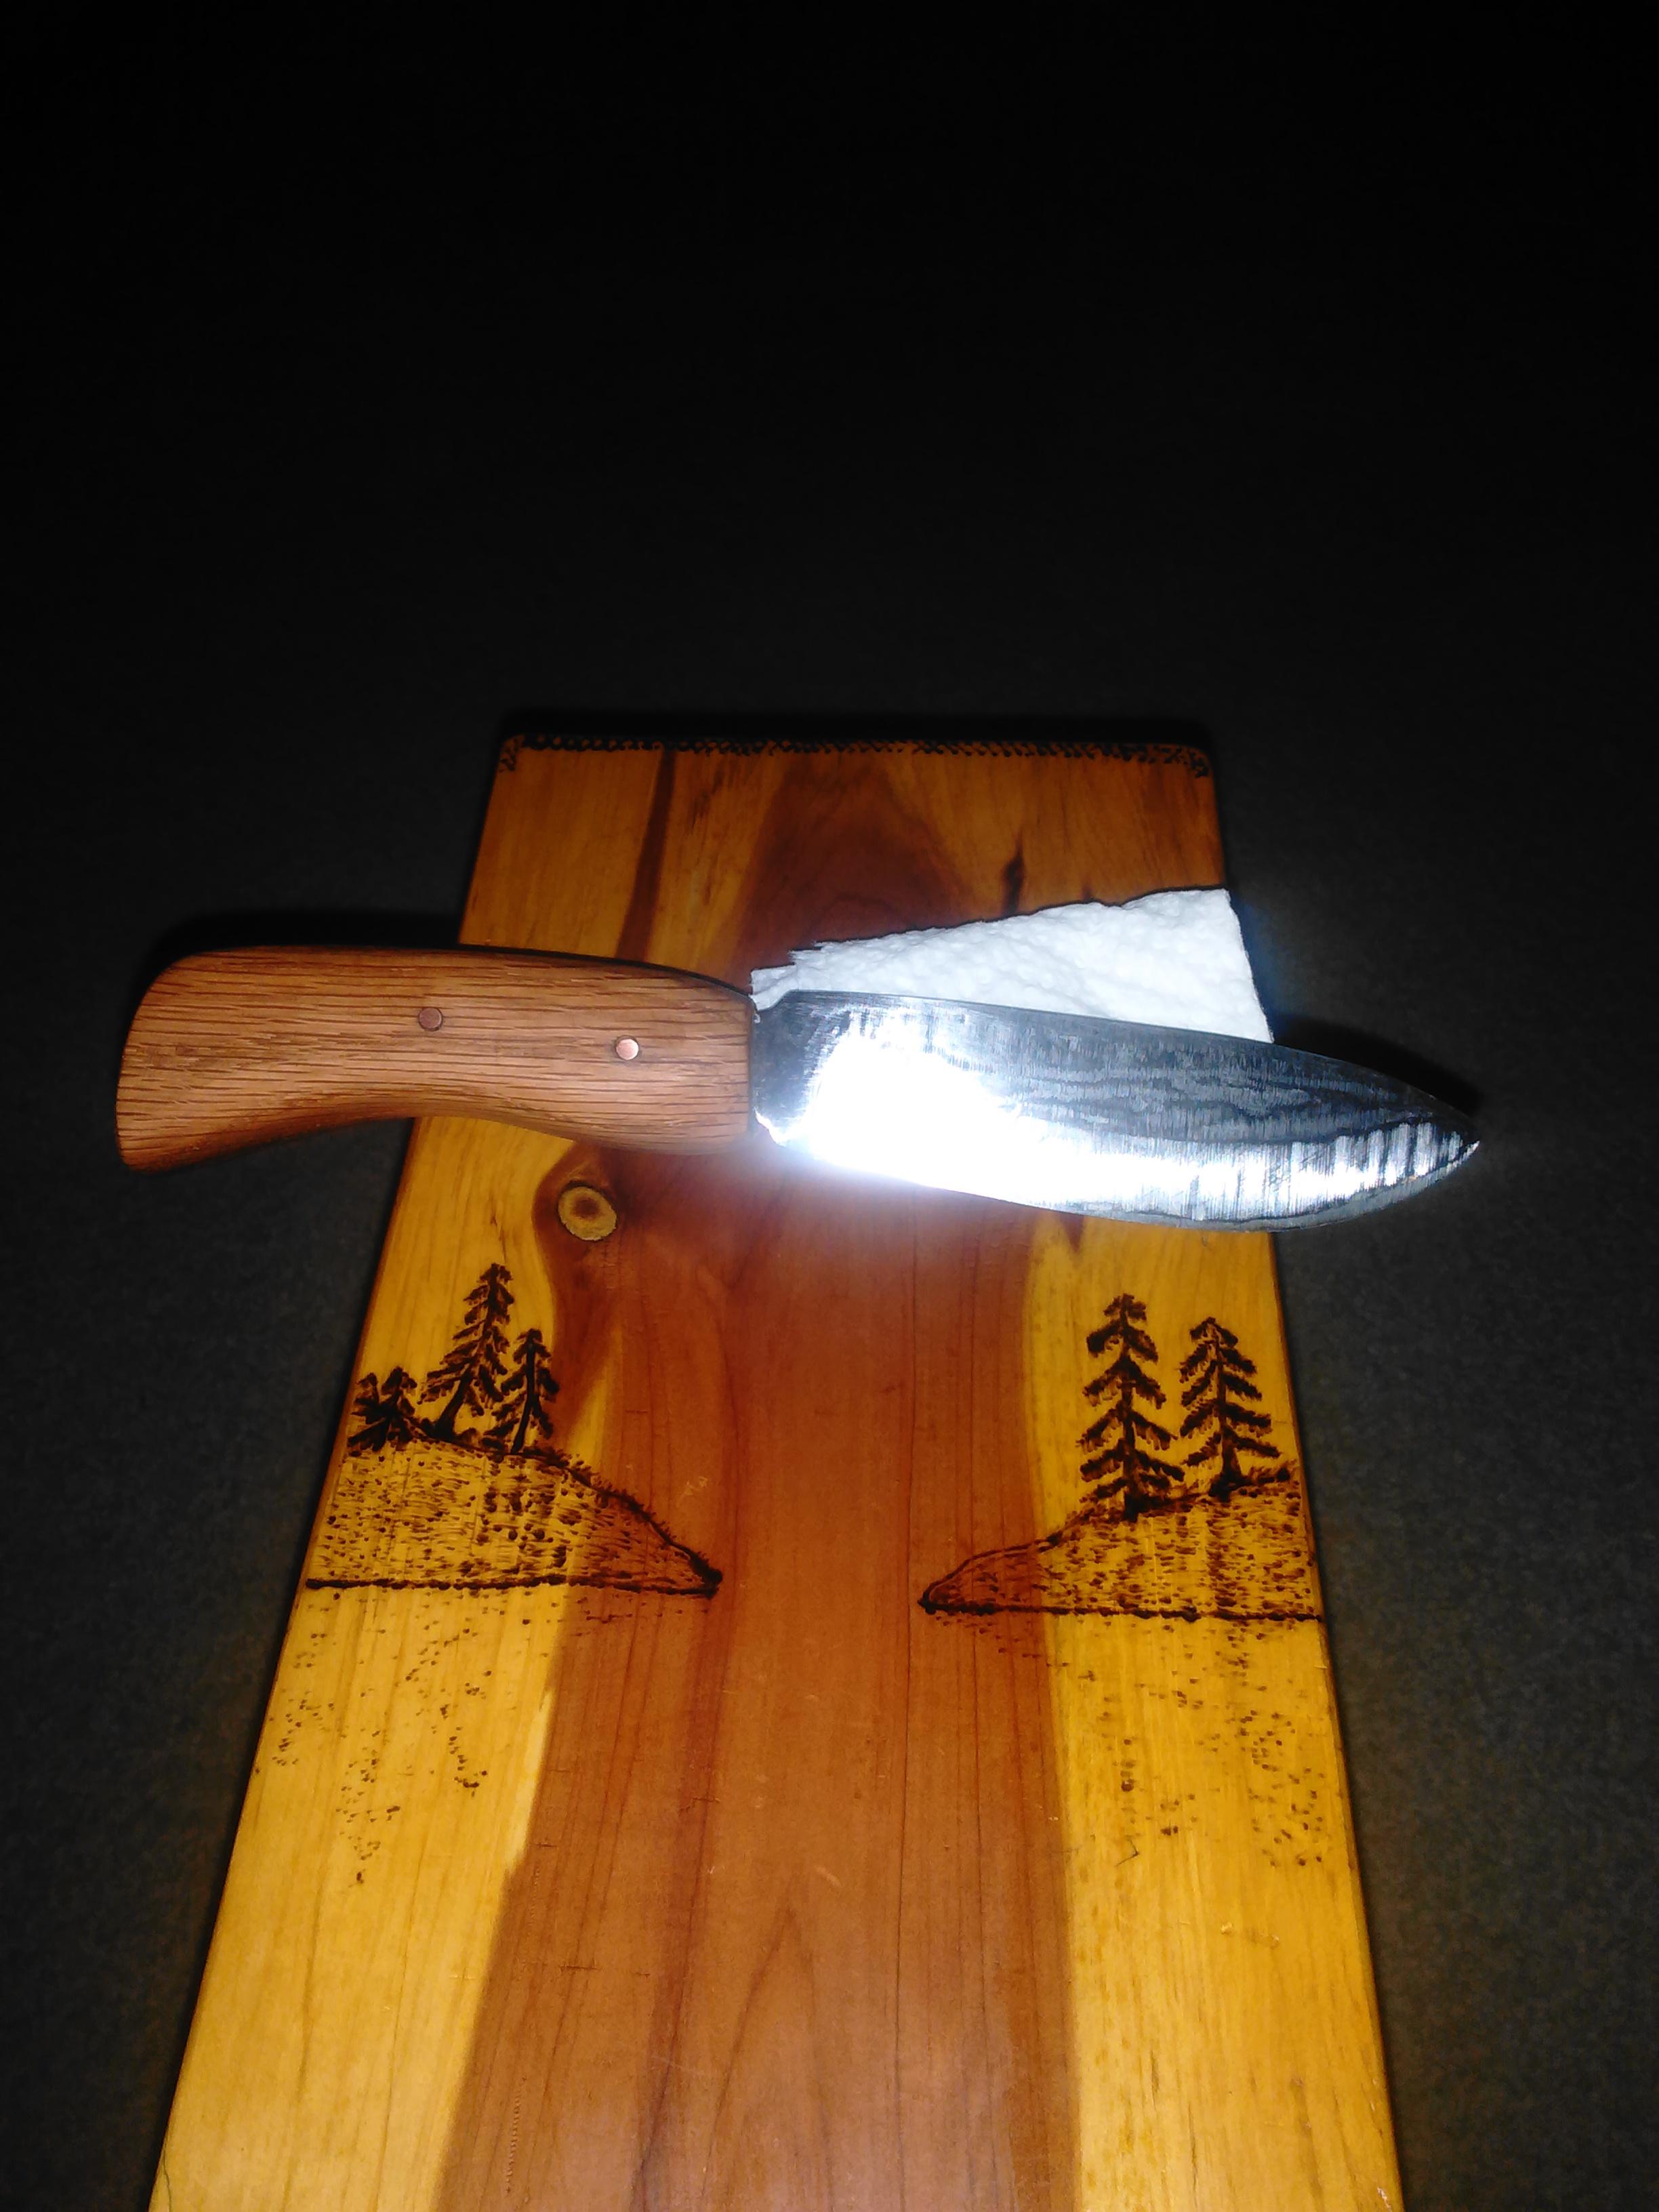
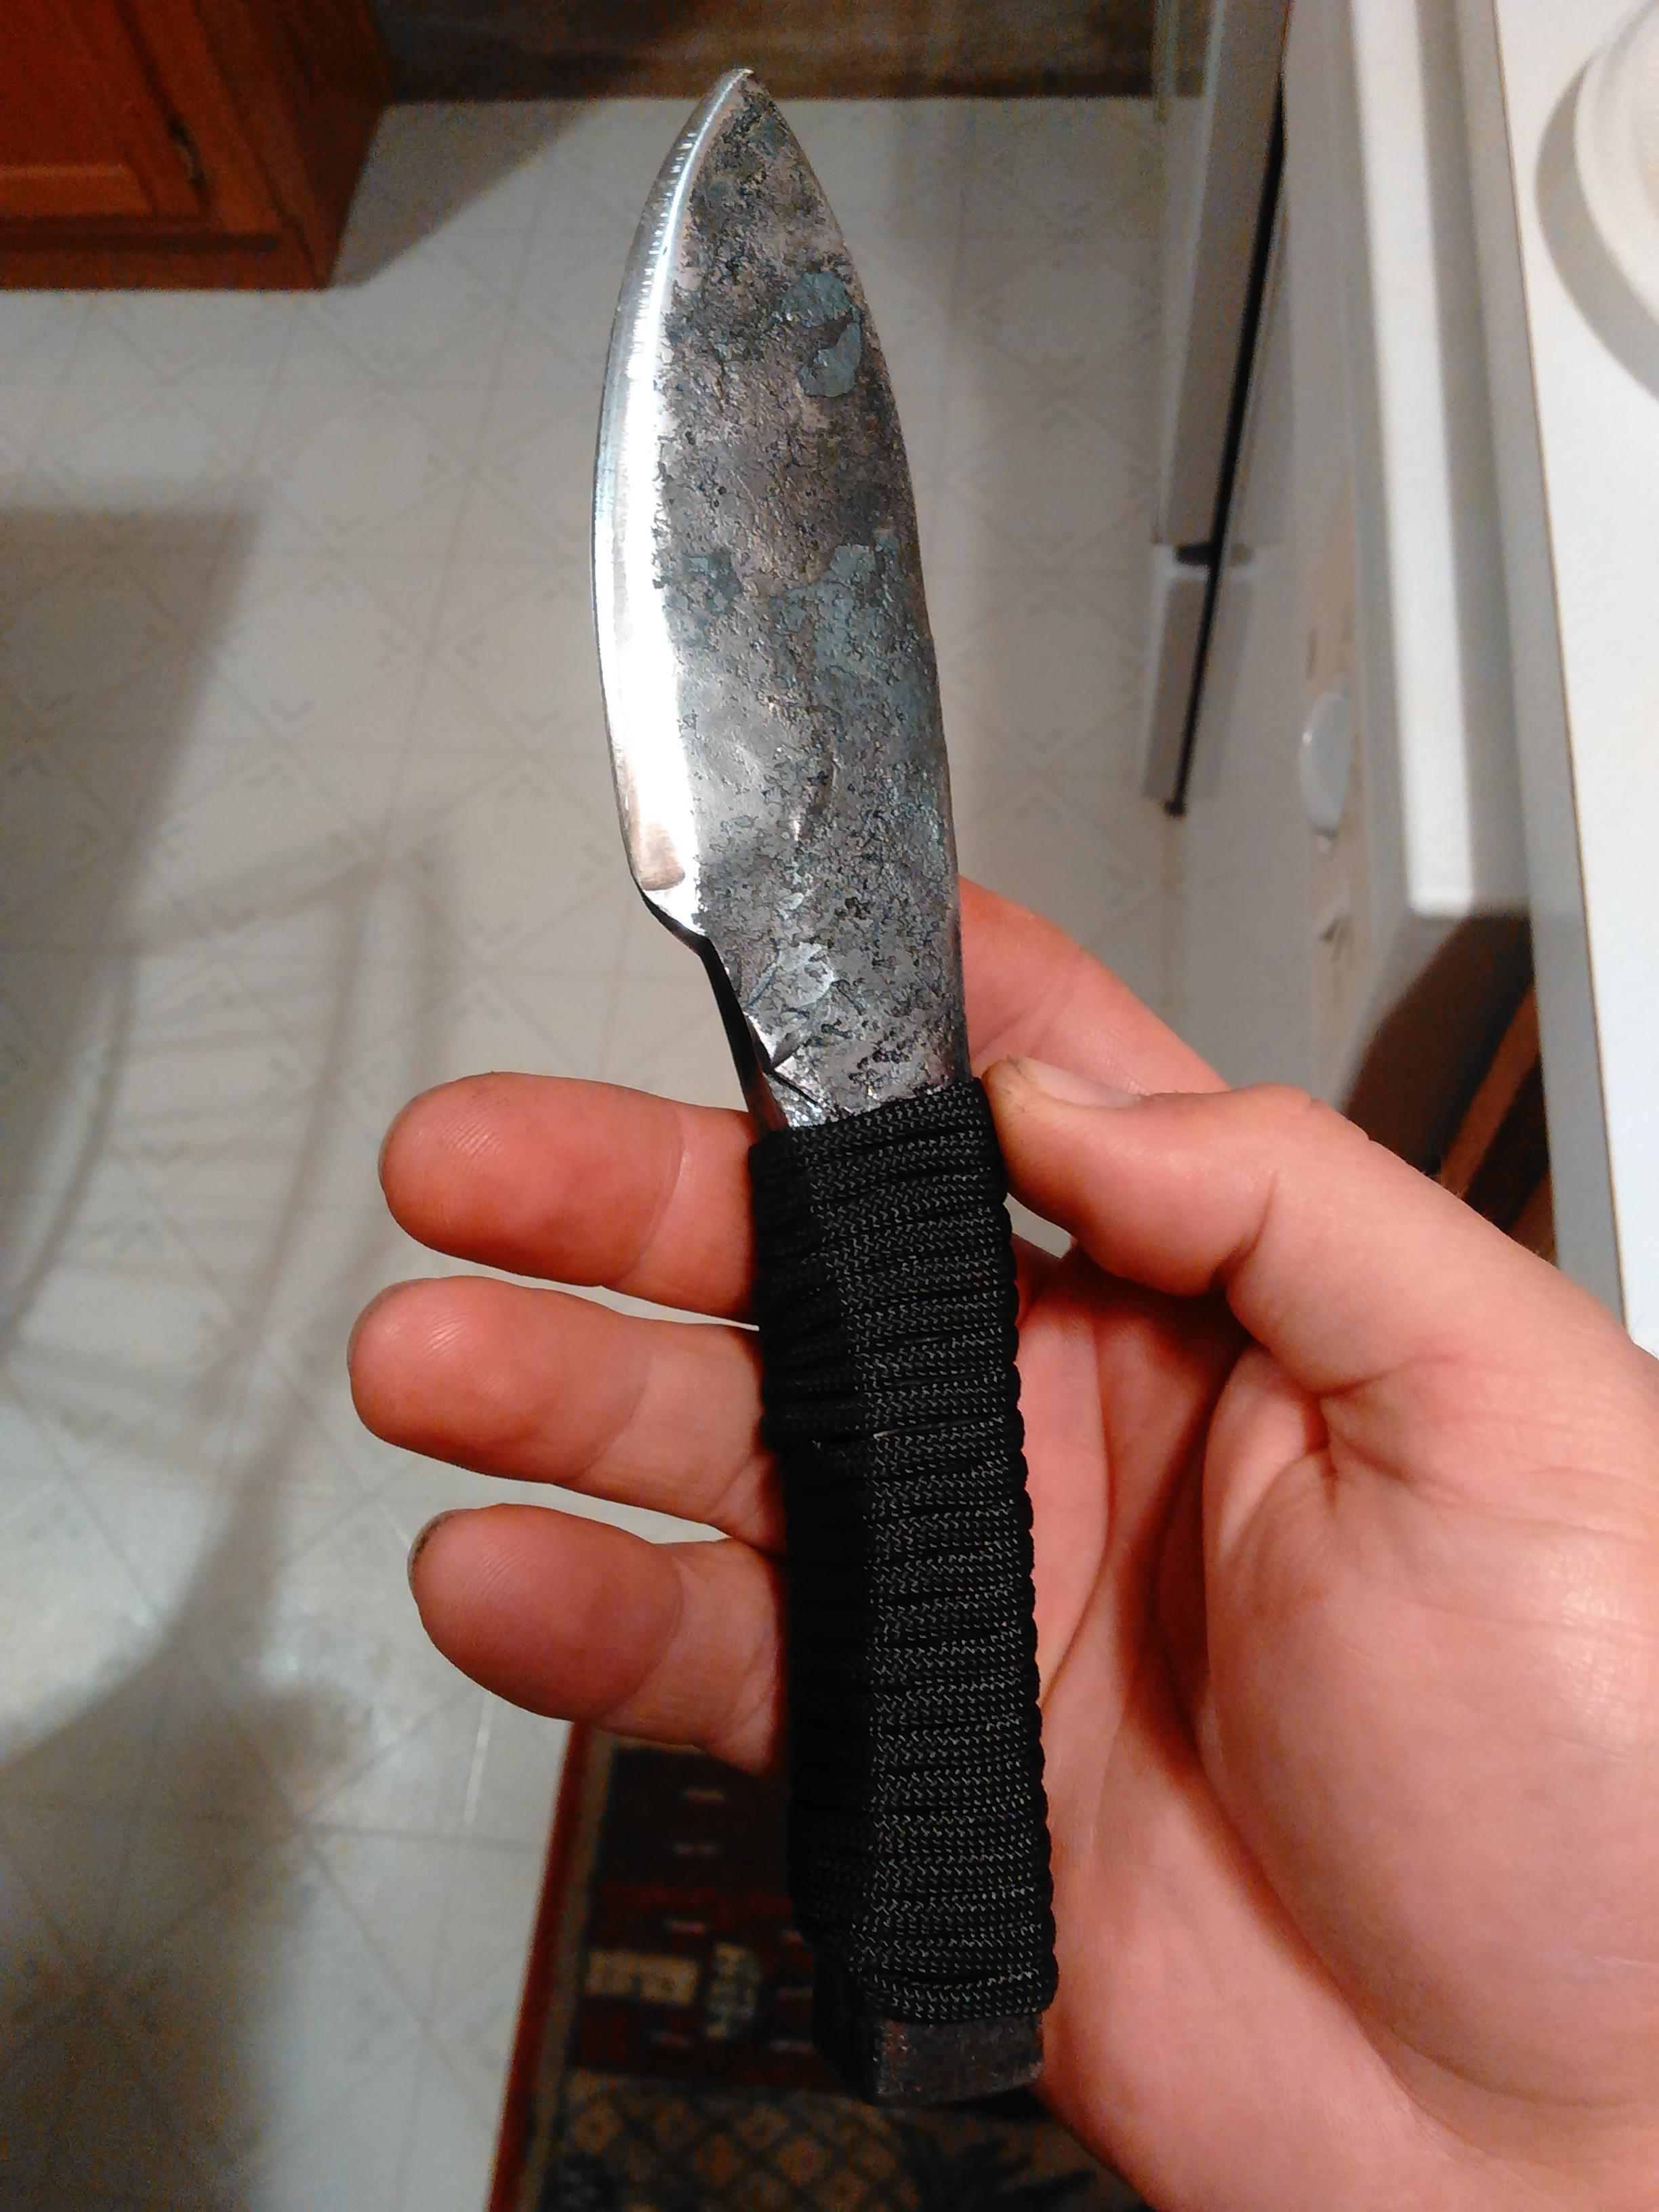
Hi folks! This is my first post here and I wanted to start off with something other than a question. I want to start by saying all the info I have gathered here has been invaluable. I have been reading this forum for the last three weeks (when I started) non-stop. I have given away rr Spike knives to all my friends (yes, I know all about the steel in rr knives but they are a blast to make and they all are given away with a warning that they might skin a deer but need to be sharpened afterwards). I have made a small drift, an adze and a hawk. This is fun. My forge pictured is built out of fire brick with a self made pipe burner. I welded the bracket on top and bolted it to the stand I found at a local yard. I did ten years (very on and off of course) worth of research before I built it and I built it to be easily repaired but built to last and wallet safe. All together I have about 70$ in the forge. Stand came from scrap yard for 30 cents a lbs. No morter but it is very solid with the bracket and giant bolts. I also made a dog's head hammer from a diesel truck axle and quenched in oil. Baked at 475 until the body turned blue and peacock looking. I tried to harden the face first so it kept a little bronze in the center and blue around the edges. I was about to place it on an oak handle but my wife went into labor and six hours later we had a little boy! Oak handle knife for my Father in law made from a disc I found on the side of the road two years ago when I was setting signs for my brother in law's wedding. Oak is salvaged from his barn build. It is heavy as all get out and thick but he is a cattle farmer. I'm from South Central Ky.