toadboy65
Members
-
Joined
-
Last visited
Everything posted by toadboy65
-
Right now, about 30lb. Plus the weight of the top die.
-
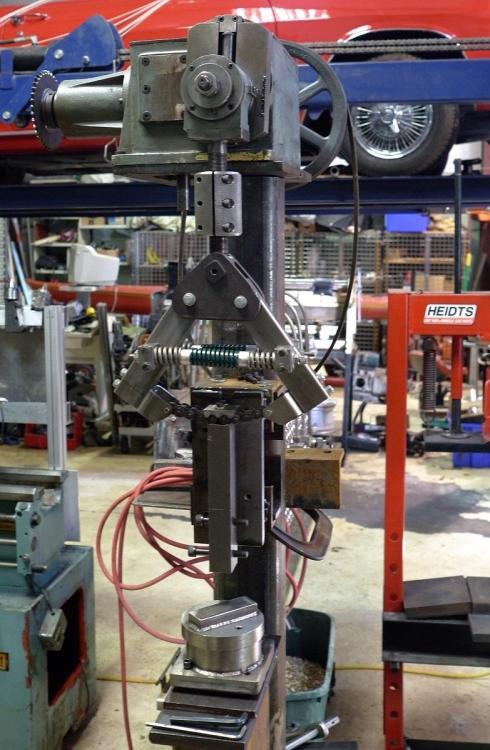
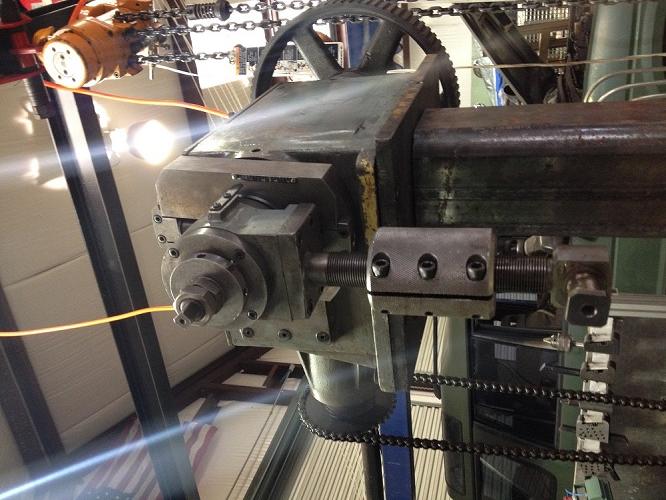
I have been sort of letting this project evolve for some time, but it is starting to come together now. I started with the main gearbox, which came of of some kind of giant, industrial squishing machine. I mounted that on a steel post, and started figuring how to make the rest with scrap in my shop I made a couple of super basic die sets out of 440 stainless- The mechanism allows me to adjust the space between the hammer and anvil on the downstroke from zero to about 2 inches, which can be increased a little more by removing spacers under the anvil. I can also adjust the amplitude of the swing by about the same amount. Today, I temporarily attached a slow speed gearbox and motor to it, and ran it for a couple of hours to tweak things and look for friction. What I have not done yet is design and build the lower drive and clutch. I have a nice big flywheel, and plan to have the motor drive the flywheel on the clutch shaft, and have a dual v-belt system to drive the main gearbox. It would be nice to have a cone clutch or the like, but right now I am planning to use a couple of 440 disks, one of which will have brake lining riveted to it. I have no idea what the optimum striking frequency should be, but I have a pretty good assortment of gears and pulleys, so I can play with that a bit. Advice or criticism always welcomed -T
-
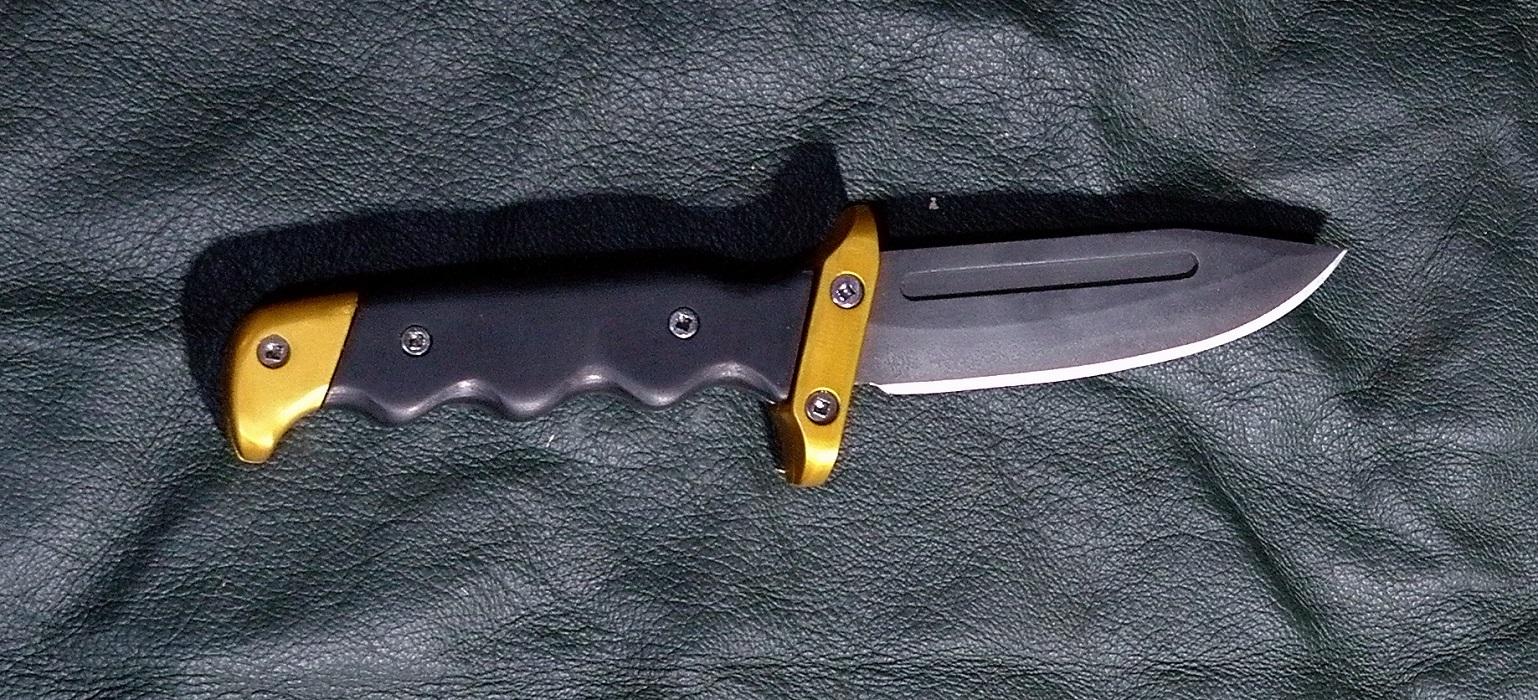
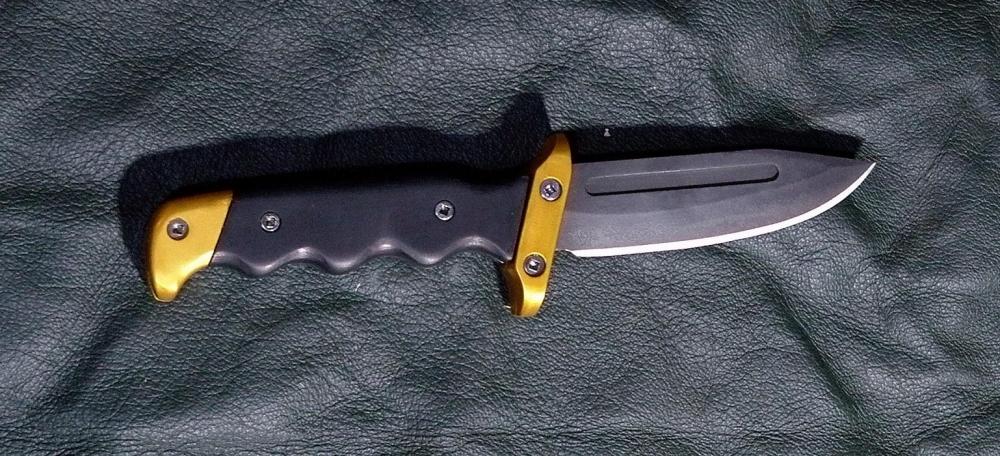
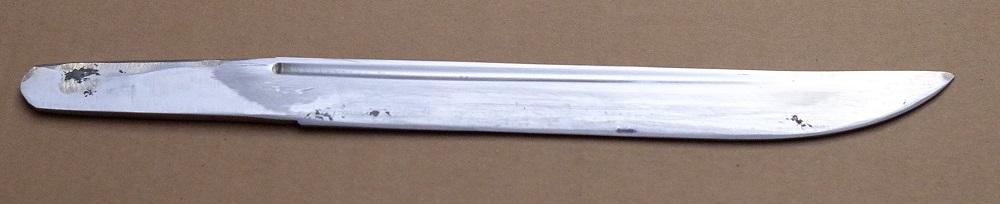
So here is the seventh knife I have produced since I made and started using the forge. Also, my first serious anodizing job. The blade is D2, with a black oxide finish. Scales are micarta, and gold anodized aluminum and stainless hardware. Lots of milling involved on the aluminum, and the fuller is milled as well. I have carved fullers in with a sen on previous knives, but I wanted to give this one a space program feel. :
-
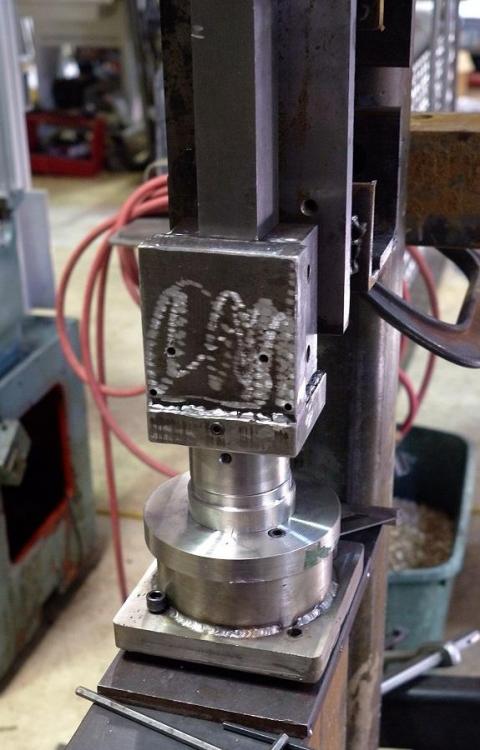
One of the cool things about the gearbox is that you can adjust the amplitude of the hammer swings, while keeping the apogee(?) of the swing at the lower anvil, or wherever you want to set it. There is actually a lot going on in the gearbox, which I have not really fully explored. I have the platform mounted about 2 meters high, attached firmly to an internal sleeve inside the vertical square tube. Once all the problems are solved, I will beef up the supporting structure. I do want to be able to take it apart, as it will be way too heavy for my hoist. My next step is to build up to the bottom die, as well as figuring the spring arrangement out from the junk in my scrap pile. I am not really worried about the drive motor yet, as I have lots of sprockets, chains, and gears on hand. That should be the easy part. So anyway, any die suggestions? ??
-
Here is the gearbox, as it is today: I don't know why the image is sideways.
-
After I learned how hard it is to make good damascus with a hammer , I have started to build a power hammer. Most of it is pretty straightforward, but I would like to build it to accept commercially manufactured dies, if necessary. I would like suggestions on what type of dies I should design for, and the specific dimensions. The hammer is going to be in the 30 lb range, give or take. I am using the gearbox from sort of giant squishing machine I found at the scrapyard, so it is pretty beefy, and it has adjustable stroke. So far I have built the base and height adjustable pedestal, mounted the gearbox, and am working on the striking shaft, which will be three inch hardened steel rod.
-
Finished the blade- I made some mistakes, but hope to do better next time. I am happy with it as first attempt.
-
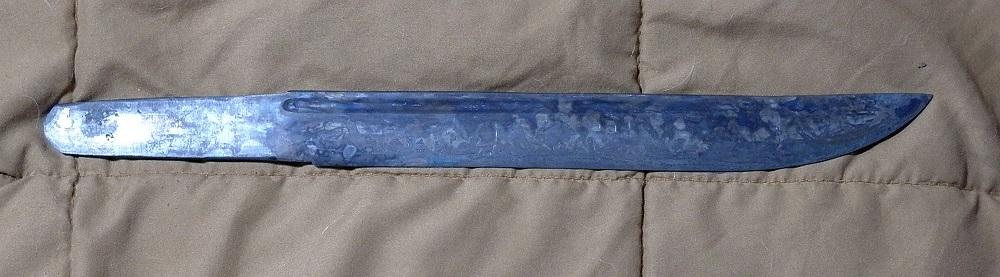
I did it today, using Kevin Cashen's numbers. I may have put the clay on a little thinly, or too thick. There is certainly some hamon activity, but I cannot know what polish will show. If I had been color case hardening, it would be a great success. Lots of color. Here it is just after quench:
-
I have been reading the stickies and watching youtube videos, and the result is that I am confused and have a headache. My normal method would be to make a bunch of test pieces and experiment for a few months to come up with a process, but thought it could not hurt to ask here instead. What I want to do is heat treat the tanto I am making to create and maximize a hamon. But I want to do the process in my kiln, using numbers instead of expert intuitive blacksmithing skills which I do not have yet. What I have is a piece of mostly 1080 damascus , about 5mm thick at the thickest point, and I left about 1mm flat where the edge will be. I have satanite to use for blade clay. I have always used water or motor oil for quenching, but will probably try to get better quenching oil.
-
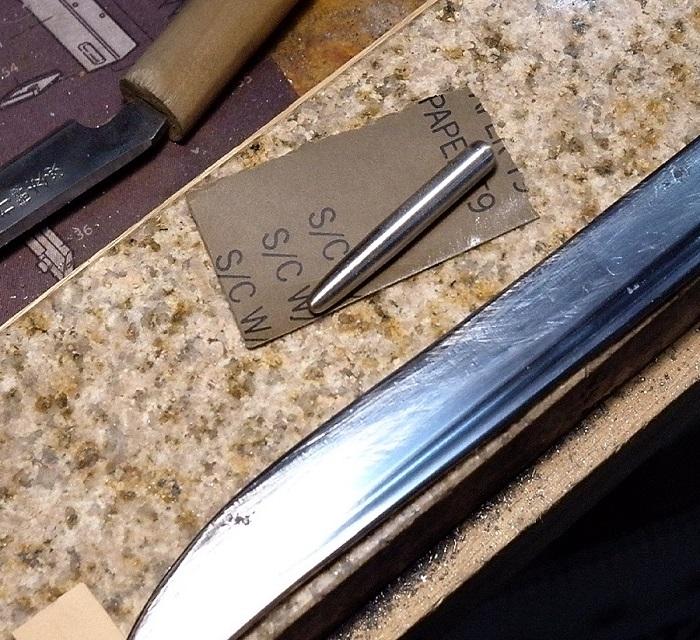
I don't bruise easily, and I can use all the advice I can get. My idea was to cut the grooves, then do final thicknessing of the blade, to leave sharp boundaries on the grooves. I started sanding in some bad spots, but am now burnishing with the steel spike. I have not done any real work near the edge yet. I was afraid that my grooving work was going to be so disastrous that I would have to start over. I did practice grooving on a piece of steel, but it was softer than the blade I am working on. Also, I made the cutting bit out of HSS. I will take the time to make a carbide tipped bit next time. And I probably should gone ahead and put a decent handle on the tool. Thanks for the input.
-
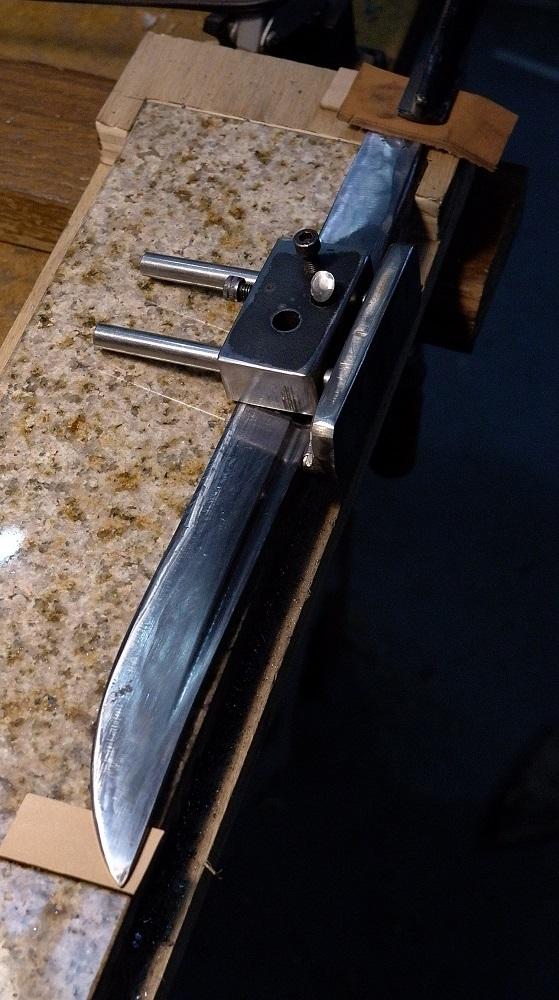
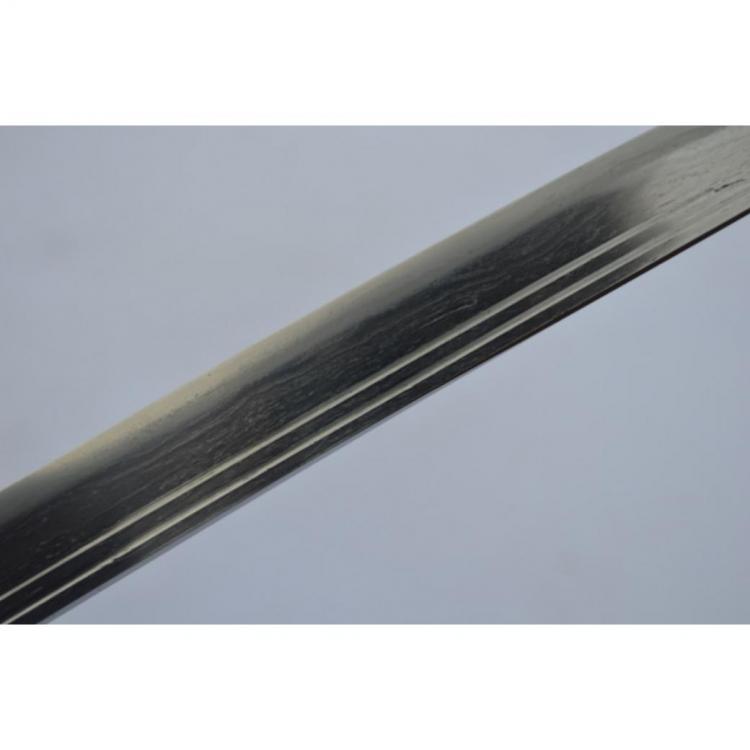
I made a sen, which worked surprisingly well. I also made a little holder with a reground drill bit as a cutting tool. I ended up making some mistakes, so now I am working on one wider groove instead of two. It is disappointing to stray away from accurately following my original goal, but this is my first time making my own steel, and I guess I can use this as practice for my next attempt at accurate historical replication. Here is the grooving tool, mostly made of stainless steel: After roughing out the grooves, I am using this little spike I made to smooth out the grooves: The biggest issue I have is that the bit in the grooving tool tends to skip a little unless it is kept super sharp. I am working from the muni down. My understanding is that I should leave at least 1mm flat on the edge before tempering. I have a pretty good thermostatically controlled kiln for the hardening process, so hopefully i can get the hamon process right without screwing up too badly.

-
Here is the lump as of today: I am still working on basic geometry. It turns out to be not as thick as I had liked after removing hammer marks. The ones closer to the edge should be gone once I finish working that part of the knife. Or so I hope.
-
I am now working on that, thanks. I was about half way to inventing something similar, but with a little carbide "tooth" to cut the grooves.
-
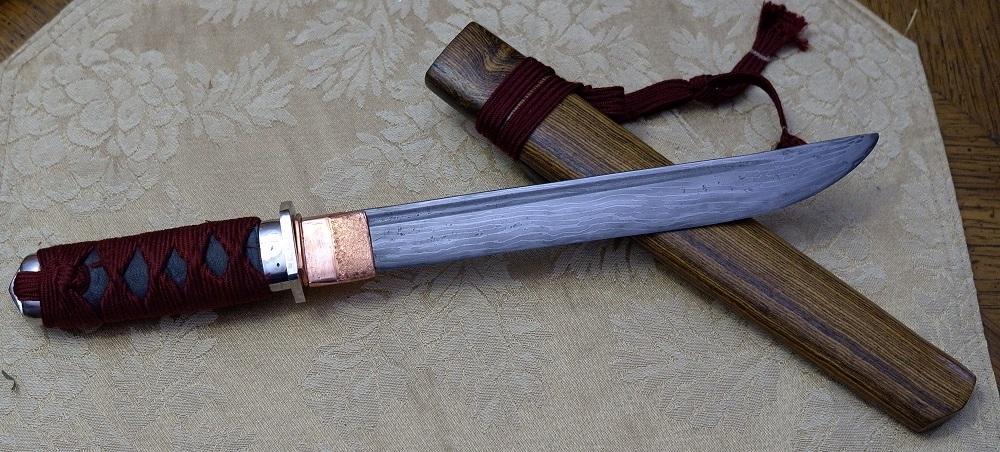
So, I am trying to make a tanto, Kamakura period style. I have made the steel, and am closing in on the desired shape. I would like to put "hi" grooves on the sides, but have no idea whatever how to do this. Any help would be appreciated. Here is what I am trying to achieve:
-
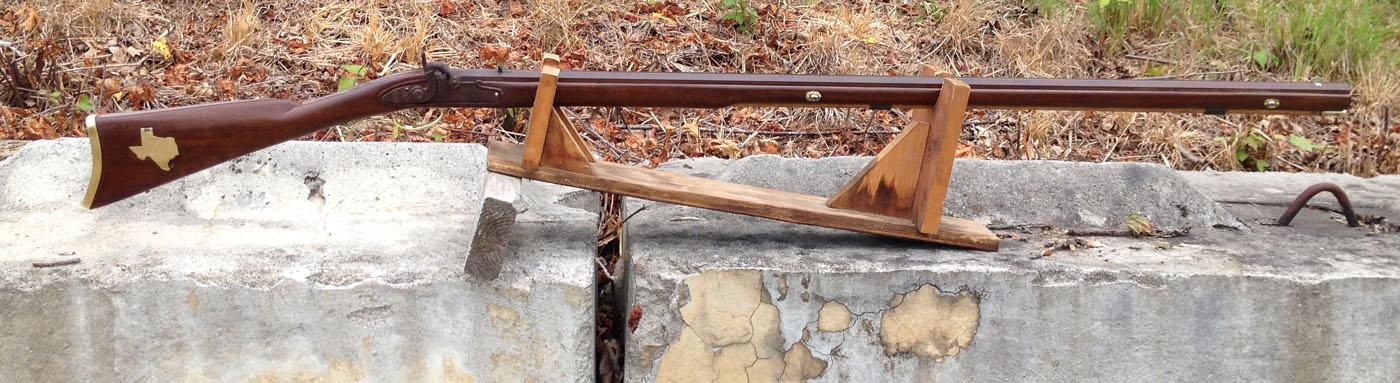
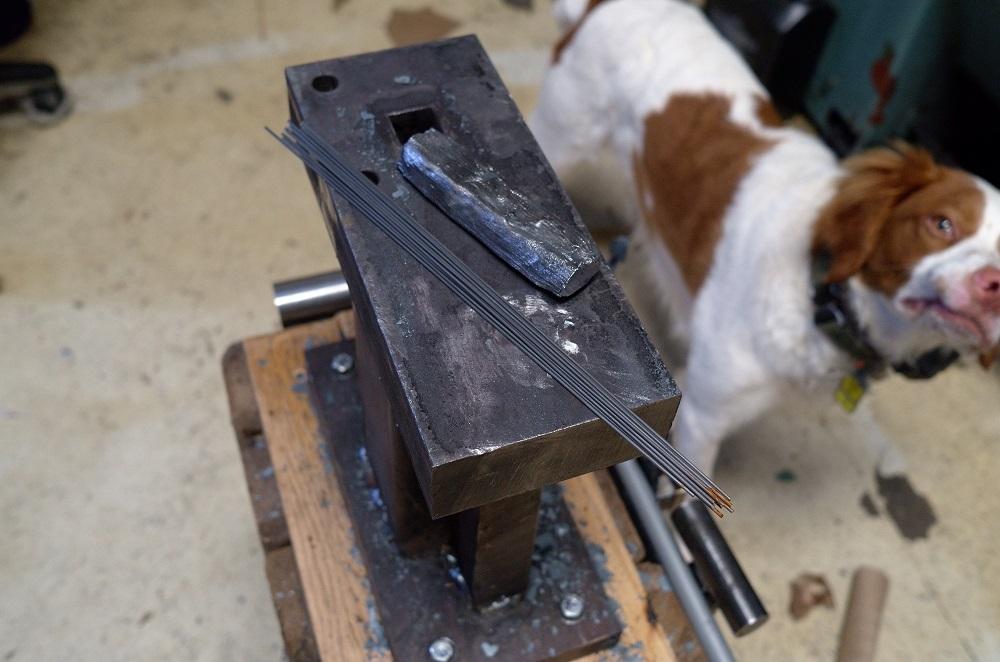
I used a mild steel canister 5cm x 5cm x 10cm or so. Filled it almost completely with the spring steel rods, then added 1080 powder bit by bit, shaking it to settle and fill the voids. I attached a steel rod for a handle, drilled 3mm hole, then immersed the whole thing in used motor oil overnight. Once it had soaked in the forge long enough, I started hammering. I do not have a power hammer, but I do have a shop press. The press is of limited use, because it is too slow to be much help. I did press the billet a couple of times in the early stages, but have mostly hammered by hand since I took the canister off. I used borax after removing the canister, but that was probably unnecessary. As of today, it is about 25cm x 4cm x .5cm. It does not seem to have any voids or delamination, and I can no longer see the "grain" of the original materials. But the amount of hand hammering I have done on this is just crazy. Also, I am sort of winging it as far as technique. I may be missing steps or shortcuts, or doing unnecessary work. I am working solo, and do not have a mentor on this. I tend to set absurd goals for myself, then pursue them with fanatical determination until I succeed. My first real blacksmithing project was when I was in college, and spent a couple of years making a percussion rifle using Foxfire #5, with a small coal forge on the balcony of my dorm. (The fire department eventually got used to me). Here is that rifle, if anyone is interested:

-
So here is my first attempt at making damascus. I used lots of little rods of spring steel, with 1080 powder to fill the voids. I coated the inside of the canister with thinned wood glue mixed with titanium dioxide, which separated well. Probably not a big deal for most here, but a landmark for me. The next stage seems to be forging this into some sort of knife shape, which should prove a challenge. My assistant (shown in the image) approves of the progress so far.
-
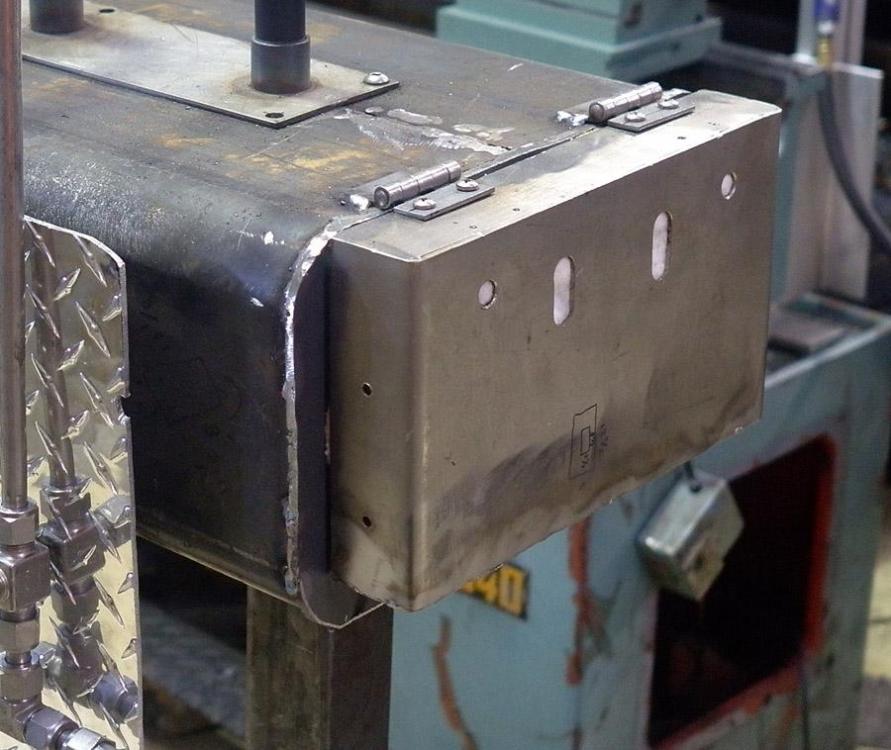
Thanks for the input. I am planning now on using rigidizer. I used stainless because I already had quite a bit of it in the shop. I have never used a gas forge before, so I was concerned about heat affecting the plumbing. The swage-lock fittings are 100% stainless, so no o-rings or anything else to be compromised. My first plan was to weld all the joints, but that would make re configuring difficult. I assumed changes would be required, as I am a novice. I bent the stainless tubing on an Enerpac bending system, although I had to make a die for the small tubing. The heat shield is spaced from the forge body with a piece of square tubing mounted sideways to minimize heat transfer. I don't know it that is necessary or not. The gas input at the bottom is a quick release fitting, so I can wheel the forge around to where I want it. I also have some glassworking equipment that uses the same propane source. I have not really figured out where the forge is going to be in the shop, either. I probably could have fabricated the burners, but it seemed prudent to start with premade ones, until I got some experience. I made the mounts for the burners based on the maker's published dimensions, and found that the burner bodies were not made to as tight a tolerance as I had expected. I turned the mounts out of SS, and welded them to the removable plate on top of the forge. Set screws hold the burners to allow for depth adjustment. I don't like the idea of just having the burners firing through a hole I cut in the insulation. They are mounted halfway through the two inch ceramic wool. It seems like I should be able to make a rigid nozzle out of titanium or some kind of ceramic. I made a three burner forge for potential large future projects. I assume I can use only one burner, if I build a firebrick wall to enclose smaller space in the forge, and remove or plug the non-firing burners so they are not killed by exhaust gas.
-
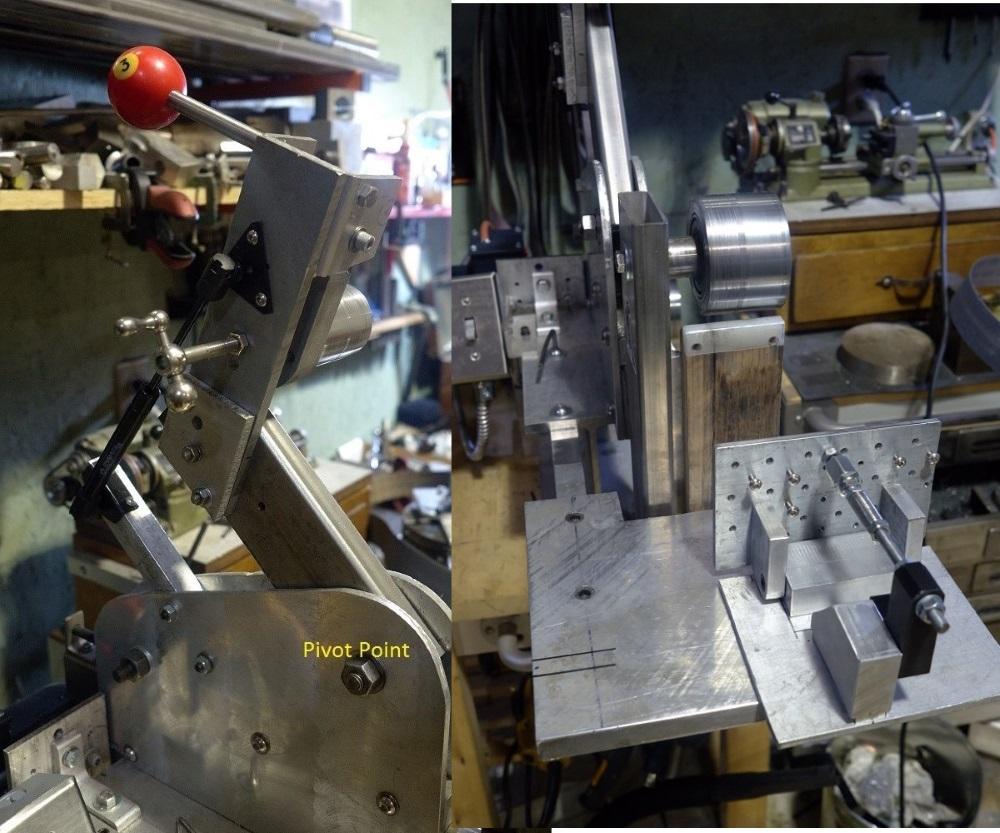
Here are new images. The first one better illustrates the pivot point. The second shows the new table, which has yet to have the slot milled, and the bevel fixture I am working on.

-
I appreciate the info on the danger of ceramic wool. I will try to figure out the next step using the resources at this forum. As far as the valves go, I disassembled all the valves and rebuilt the pipe connectors, and I am pretty confident that my plumbing system will hold up. Almost everything seems to be stainless steel. I was mostly worried about heat affecting the connections and valves, and I suppose the heat shield is overkill. But it is all a learning process.
-
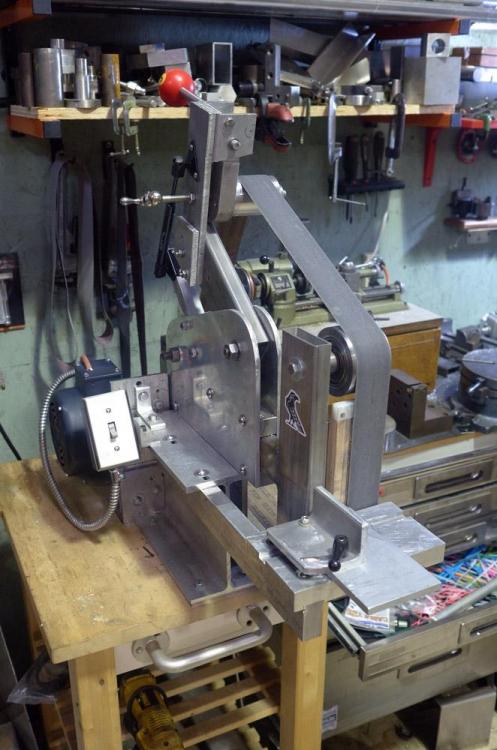
The little gas cylinder is pushing the tracking arm up. I tried several methods, and this one seems to work. The tracking arm rotates on the big bolt in the main chassis. The angle above that on the tracking arm is there to keep the tracking wheel 90 degrees from the drive wheel and the first "working" wheel. It seems to track best that way. Oh, the wheels are stainless steel except for the tracking wheel. About half of the sander is stainless. It is way heavier than it looks. Great catch the motor. I will stick a filter on the back The plan for hollow grinding is to replace the backing plate with a centered working wheel, and back the platen off via an adjustment screw. But I have not made that assembly yet. I am sort of thinking about the best radius to build for what I want to do.
-
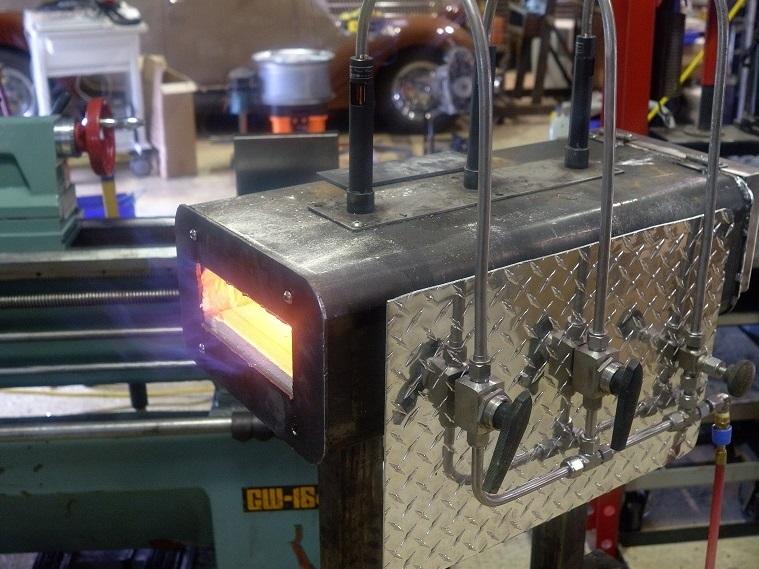
The "expert" is someone who builds commercial kilns. It is entirely likely that the problems faced by a single smith in a normal shop are different than those faced by industry. I have had it running, although I have not measured temperatures yet. The burners are from Dempsy's Forge. Here is an early test: I think that was 15 psi. It roars pretty good at 20.
-
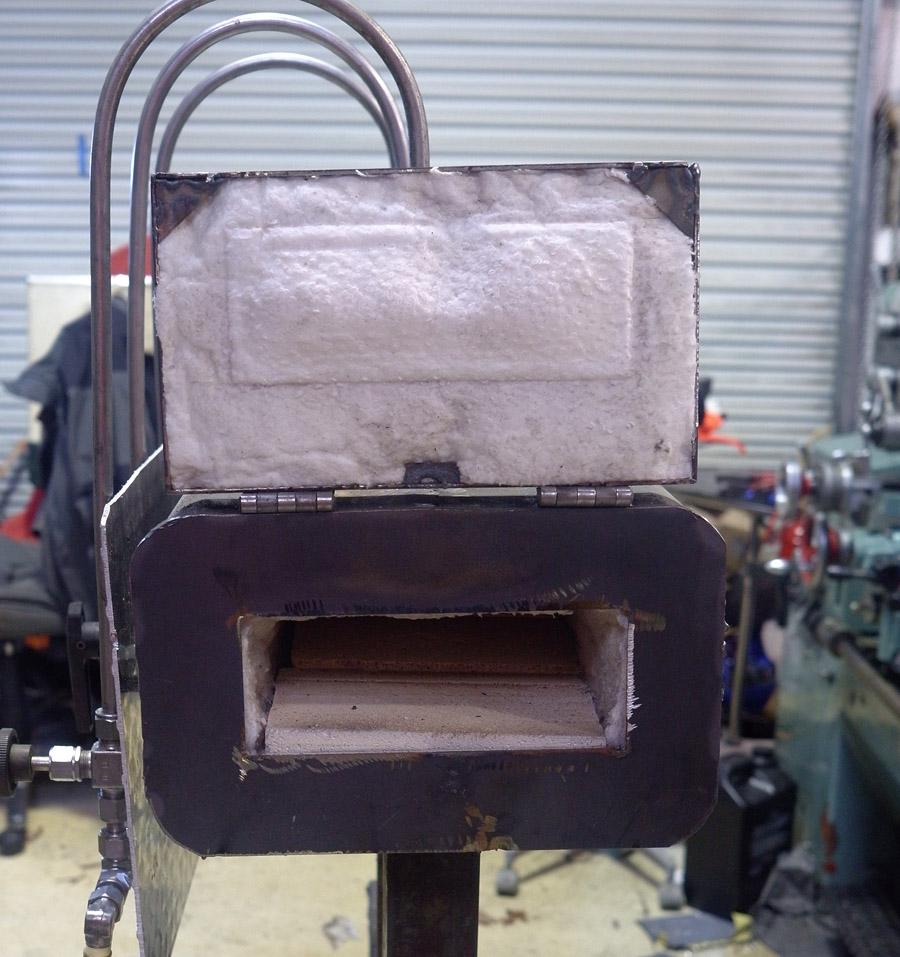
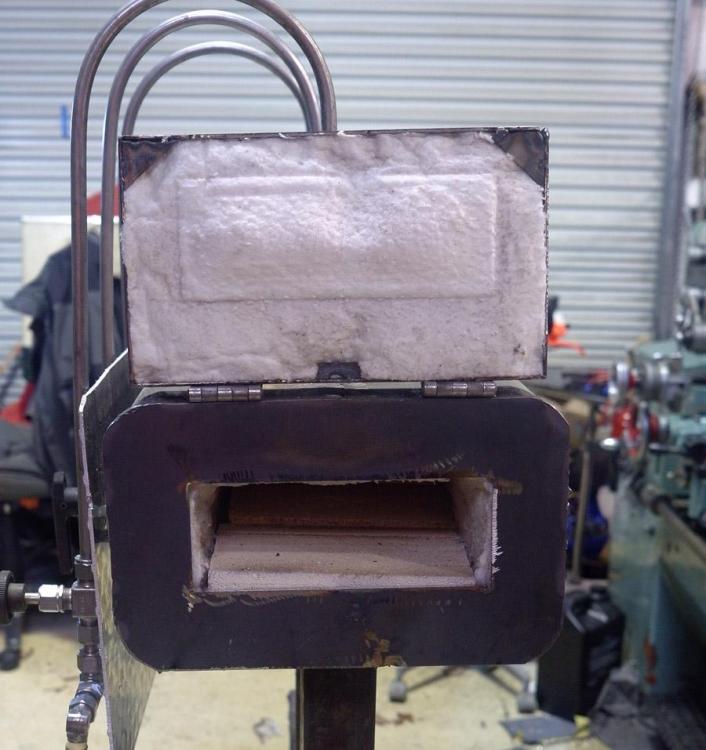
I have done nothing to the wool. One of the experts I talked to discouraged me from using any coatings or rigidizer. I am skeptical of that, but it is beyond my expertise to have an opinion. I have made a handle for the stainless door, but have not attached it yet. I actually made two doors, but the temporary sliding brick thing seems to be working so far. I have only done a little test work, and the forge is definitely an evolving project. I have a thermocouple to install as well, although I am not sure how useful it will be. My previous experience is with an old coal forge, which I have used infrequently. Although I have managed to complete some projects successfully, I am still a novice at forging. So design criticism is welcomed.
-
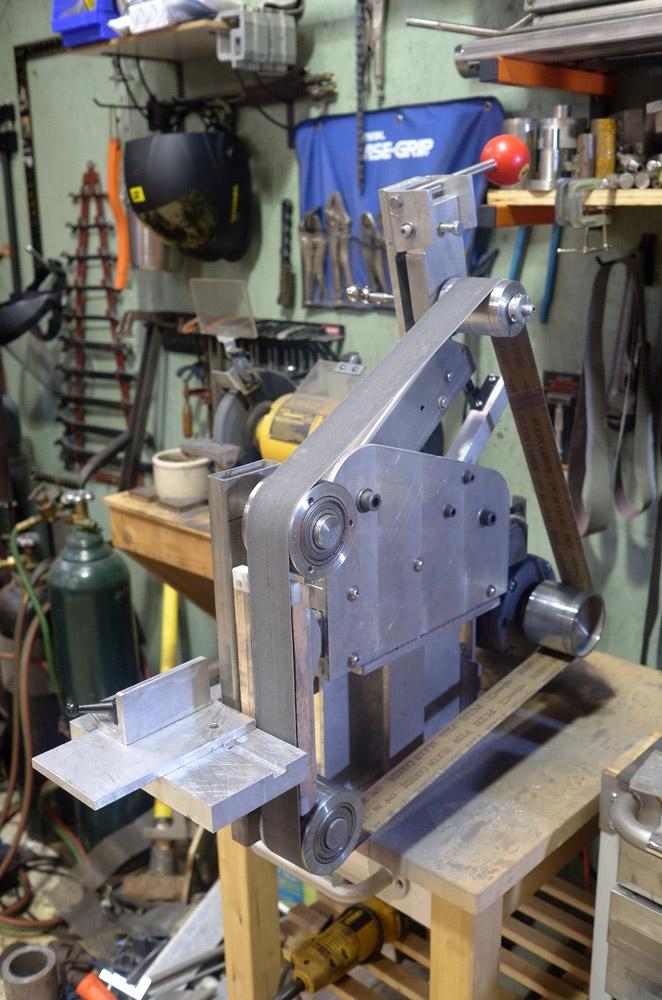
I made the wheels on my 16x40 lathe. I milled the slot, but have since replaced that table with a larger one. The slot was too close to the belt, and things were getting jammed.
-
I made it out of fairly heavy materials, because that is what I had on hand. The chamber is 3/4" steel. I purchased the burners, and made everything else. The burners are on a removable stainless plate for ease of re configuring. All the stainless tubing and valves are industrial hydraulic components. I have two inch ceramic blanket everywhere but the bottom, where there is one inch and an inch of firebrick. Criticism or suggestions requested C

-
Made this with my son to do larger work with our new gas forge. Most of what is here was made from scrap I had on hand. The wheels were turned on the lathe, and it has a few changes since the images were taken, but it seems to run true Anyway, helpful suggestions or clever insults requested.