Jclick45
Members
-
Joined
-
Last visited
-
Yes I am a long way from the ocean haha, although the "drag behind the boat" idea is great! As long as something didn't come loose that would be more expensive and heartbreaking than just paying to have it treated!
-
Excellent replies all, thank you! You guys are way more sensible than the FB folk lol. I have talked to the heat treat company I use and getting some ideas. I even considered an air hardening steel and HT myself but if I'm going to have that much invested, I want it to work REALLY well, not just spend hours shaping steel and then having a really big ASO. Cost of steel alone is about 1800 bucks, so it's getting up there with buying a nice big anvil all said and done. If steel wasn't so darn expensive...... I could get a block that size for almost nothing in mild steel, but then I'm right back to the troubles of home-made anvils, welded top, hard face etc. As someone mentioned, casting I think is the way to go! I know a guy that did that and it was an awesome anvil. I suppose that's the best way to go if you want custom......I could do all the machine work to shape and finish a cast anvil, so possibly a route to go. But, may be just as expensive as buying! Thanks forged in fire, for jacking up the prices of all the tools .....
-
Before anyone asks "why"?? The answer is just because I can and like building things. I want a 300lb anvil for my heavy work. I have read and seen many homemade anvils but I have yet to see one done as I'm thinking, and I'm not sure why! I have a full machine shop, so my idea is to take block of solid tool steel, run out my anvil design on the shaper and mill, then send it out for heat treating. Most I've seen are welded up chunks, or mild steel with hardfacing, or steel with a tool top arc welded on. Machining one from solid seems like the simplest way and the only way to get the performance of a quality manufactured anvil. Is there a reason this isn't done that I'm not thinking of? And last, any advice on steel or how to request the heat treat done? Doesn't need to be fully through hardened just the top or would there be benefit to through hardening? I will as thinking of maybe a 4140 tool
-
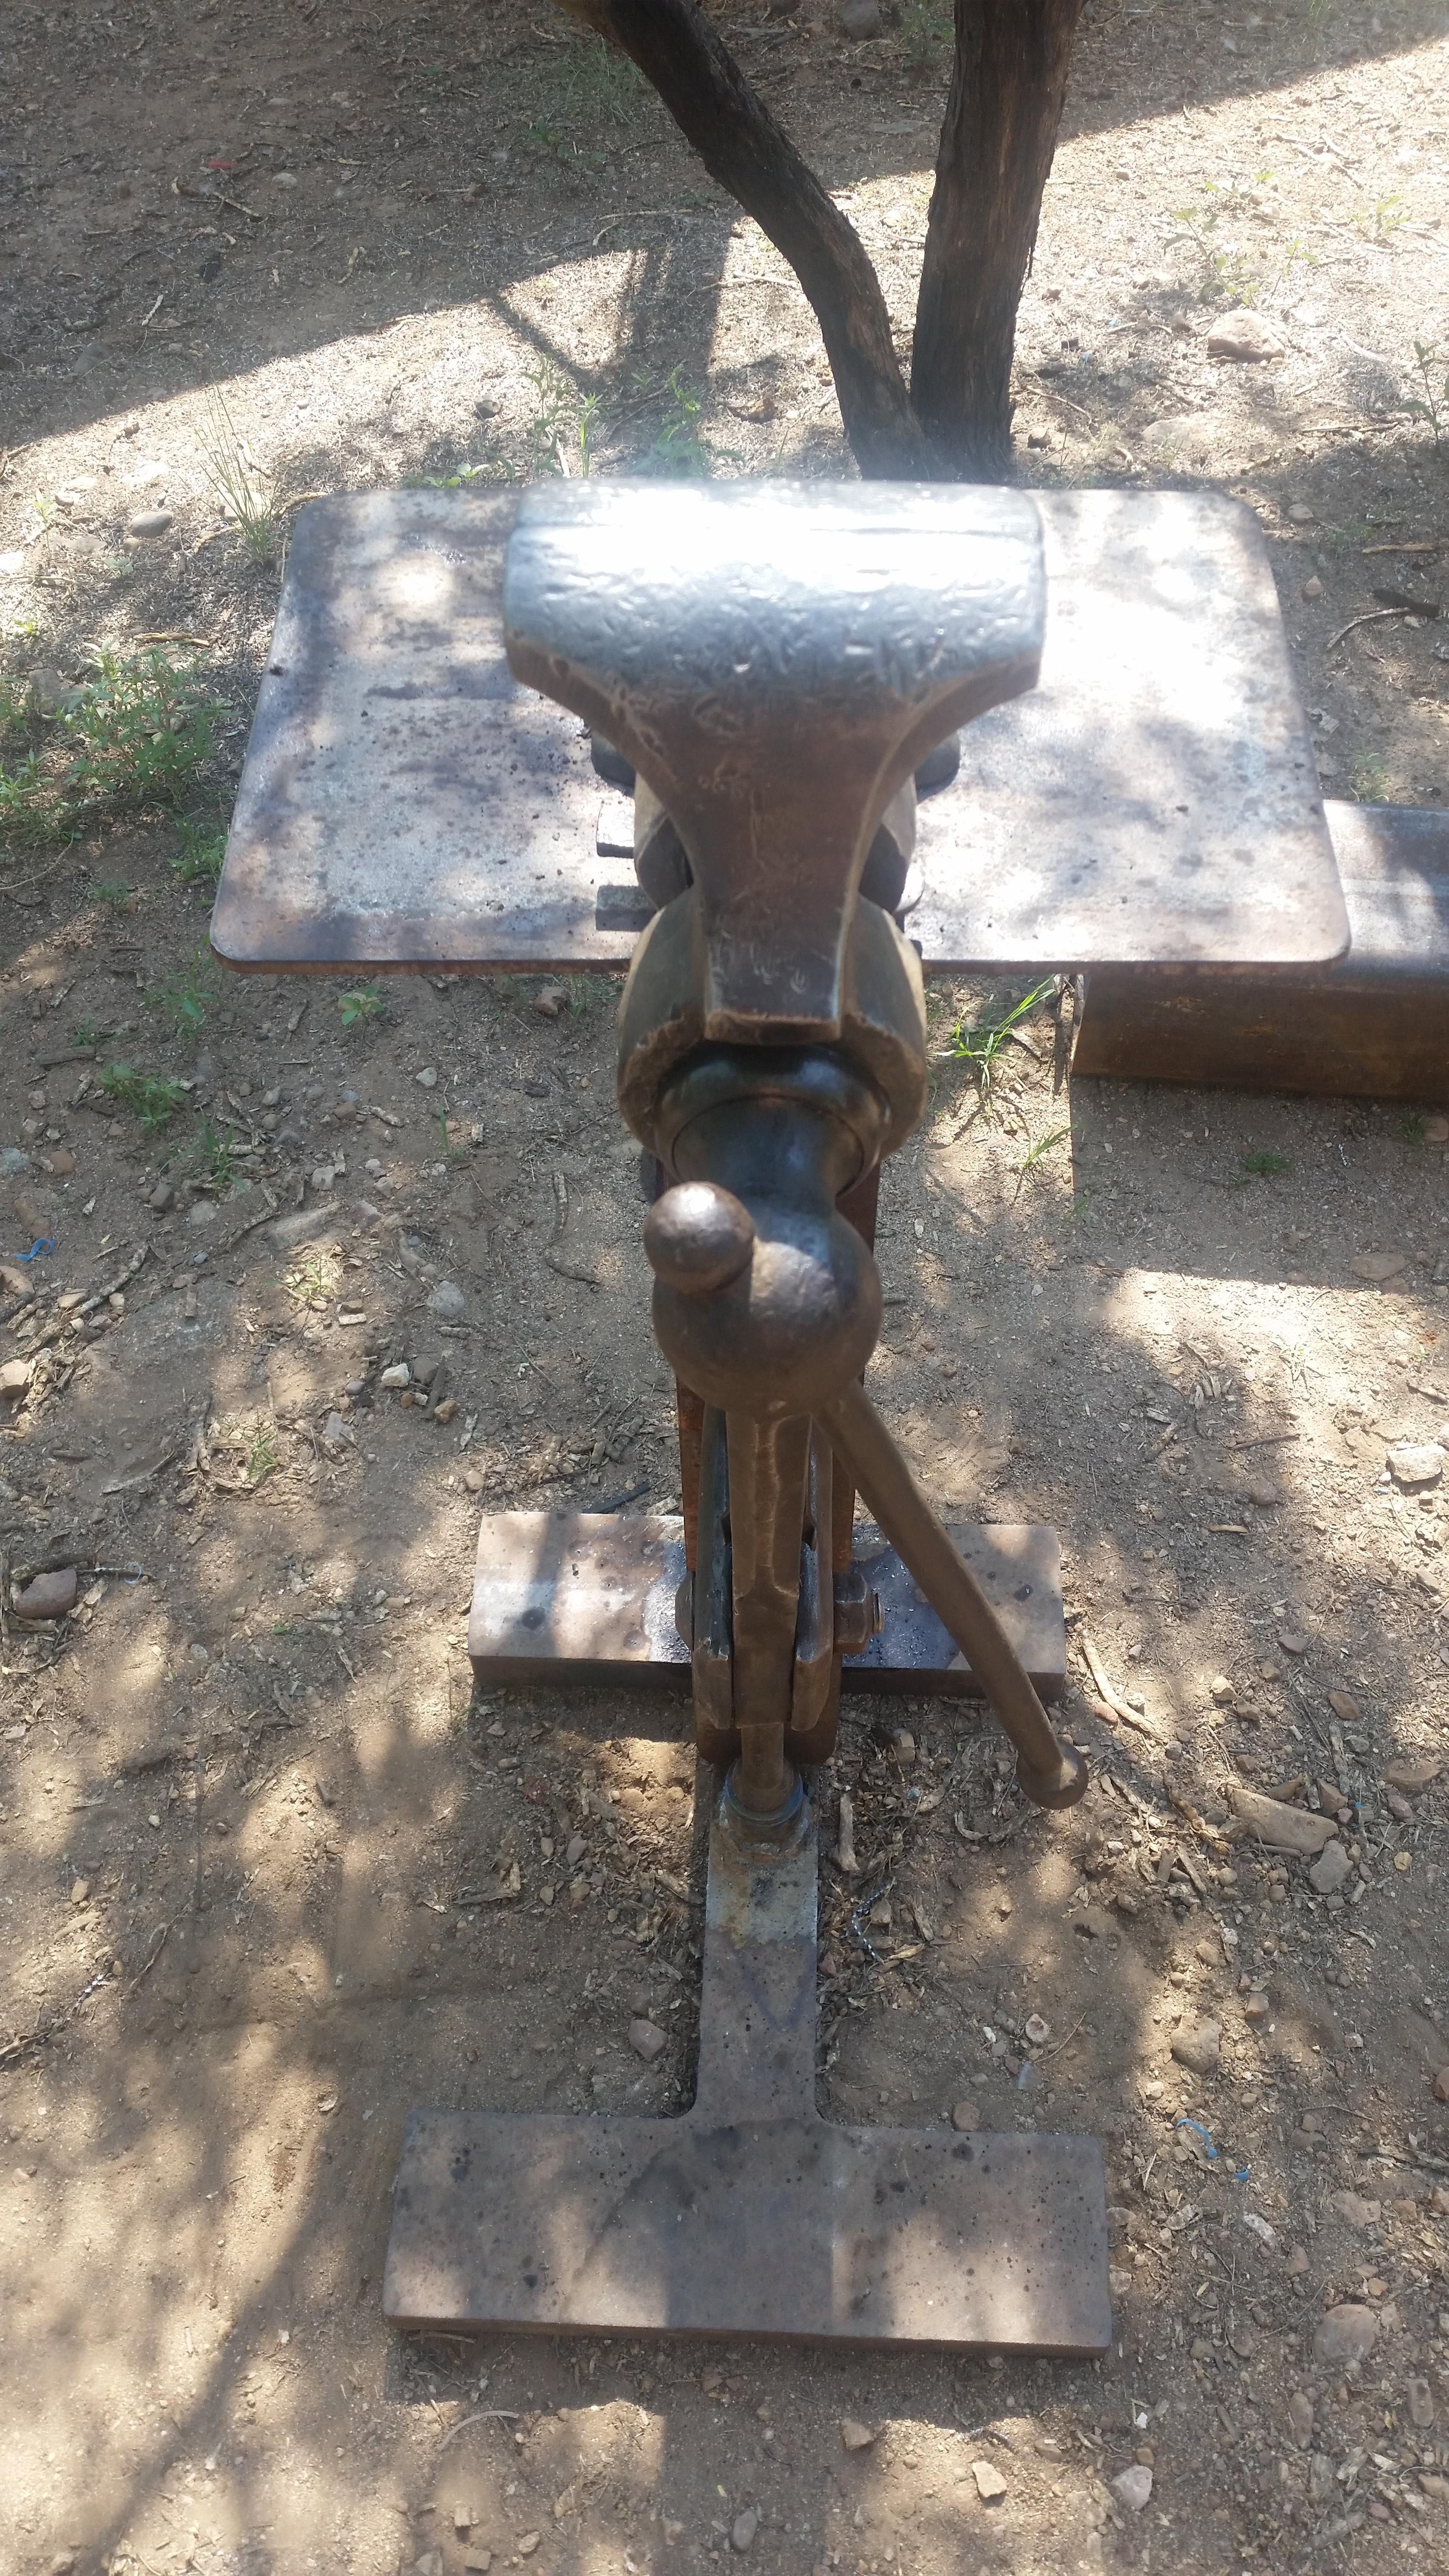
Charles are you just clamping these in a vice?
-
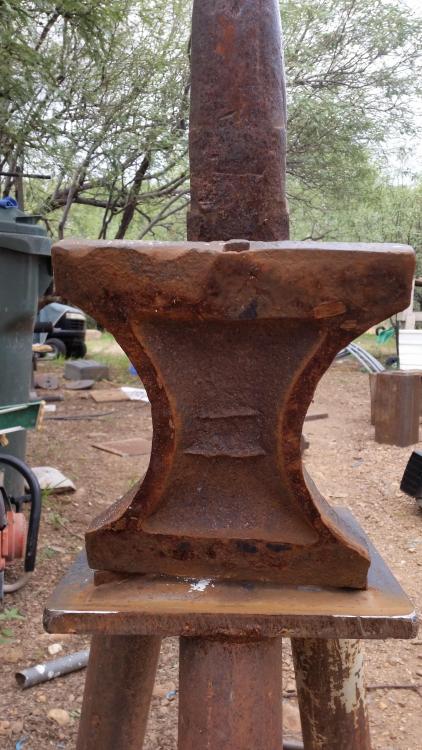
Thanks for the great ideas! I am definitely tempted to make a big beast as I just always default to "bigger is better". However in this case i am trying to remember my purpose, small for small jobs. Frosty It is imperative for me to at least have a flat section, say 4-6" long. I think I will lightly mill a small flat, and leave the rest untouched. This is very old rail and is very hard and has great rebound on the original surface! ThomasPowers i did find a well worn and old piece which will require no more than 1/8th to flatten. Thinking of hinging the bottom of the rail/anvil to a very stout base so that I can tip it up on end and also be able to make use of the end of the rail, creating a fuller from the web, hot cut from bottom flange, etc as Stevens did. Again, small work primarily copper, brass etc for this little guy. Time to start torching!
-
Thats a great thread, I have quite a bit of track i may do a "conventional " but definitely will be making use of an end anvil as you have!
-
Hello all! Question for y'all about the best way to build a RR track anvil. I know these aren't the greatest, but I don't need the greatest, I have big anvils. I need a small one for small jobs. I plan on creating a double horn style. Here's my questions. I have a machine shop and can mill the track top and sides nicely square, but if I do that will I loose all the hardened surface? If I simply create a flat as wide or nearly as wide as the track itself I'd be loosing about 1/4" of material up top. Again, this won't be a heavy use anvil but I also don't want to loose what little rebound is there. I could weld a tool steel top but that's getting out of hand I think. Possibly leave the hardened top as the top rounded portion of the horn, and mill the rest flat? Open to ideas! Overall I want about 12-16" long, and will have a sharp horn and long taper for small intricate work. I'll post progress once I get a plan and get started! JC
-
-
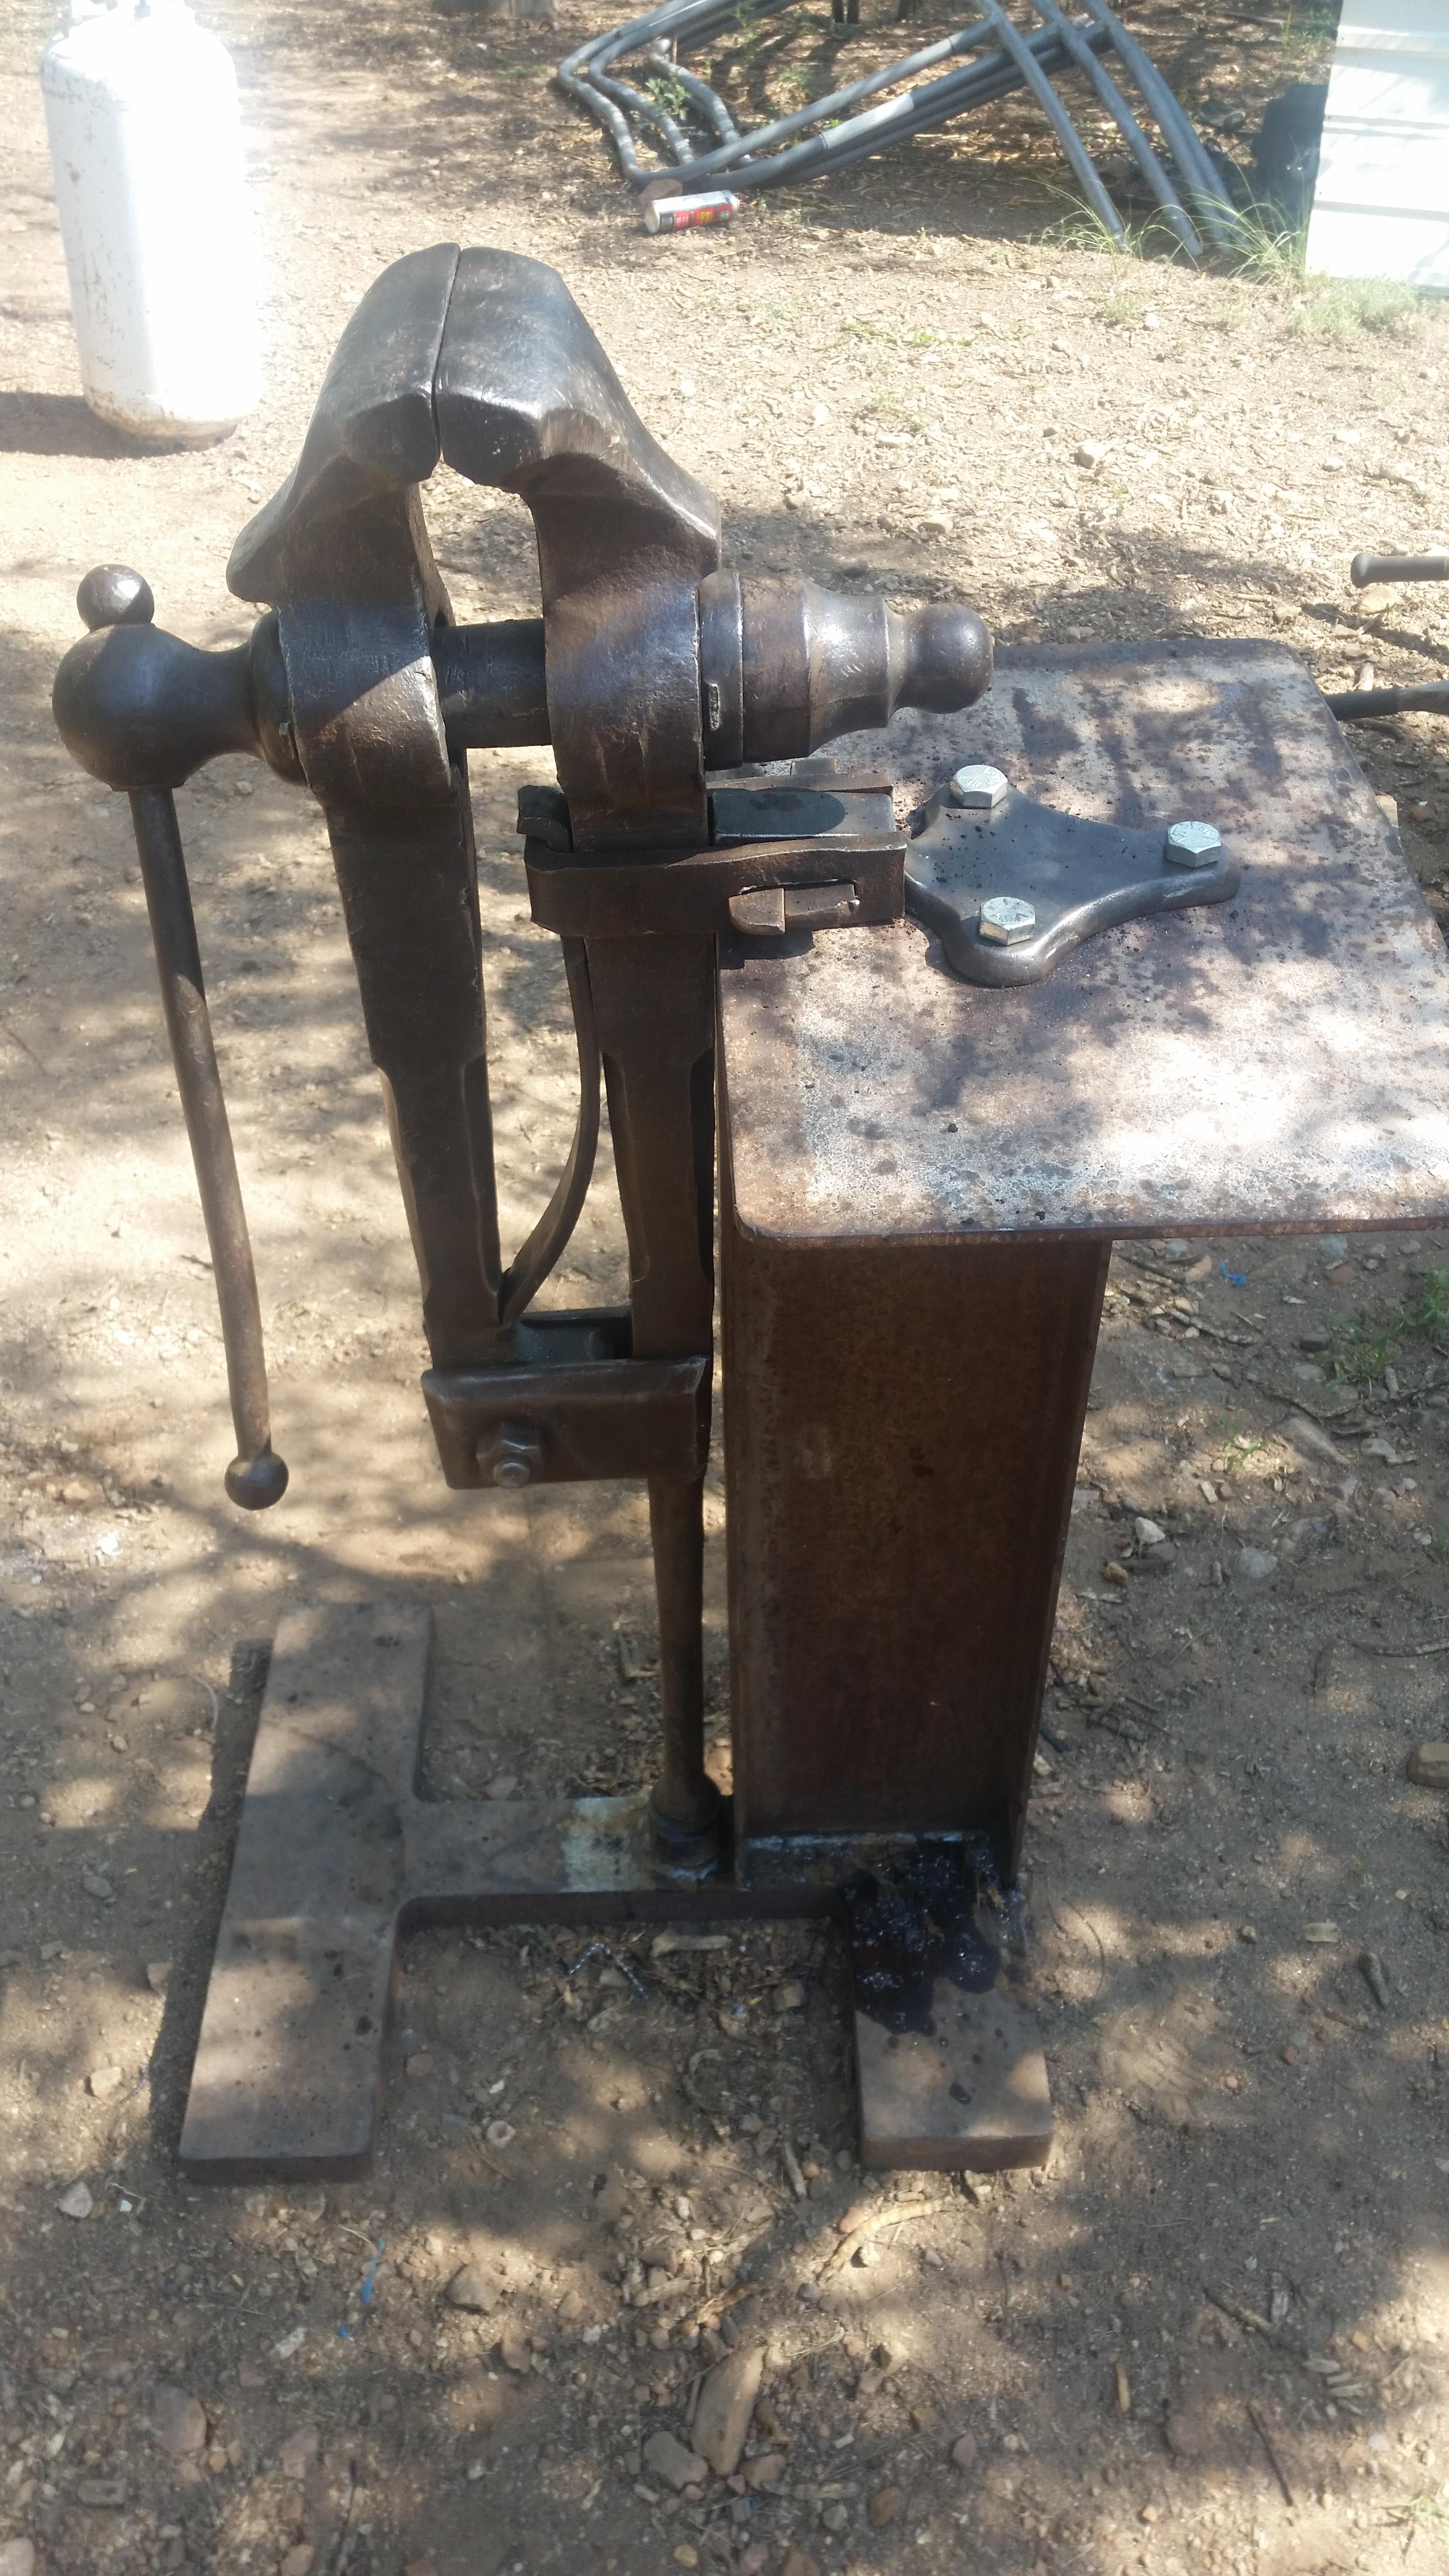
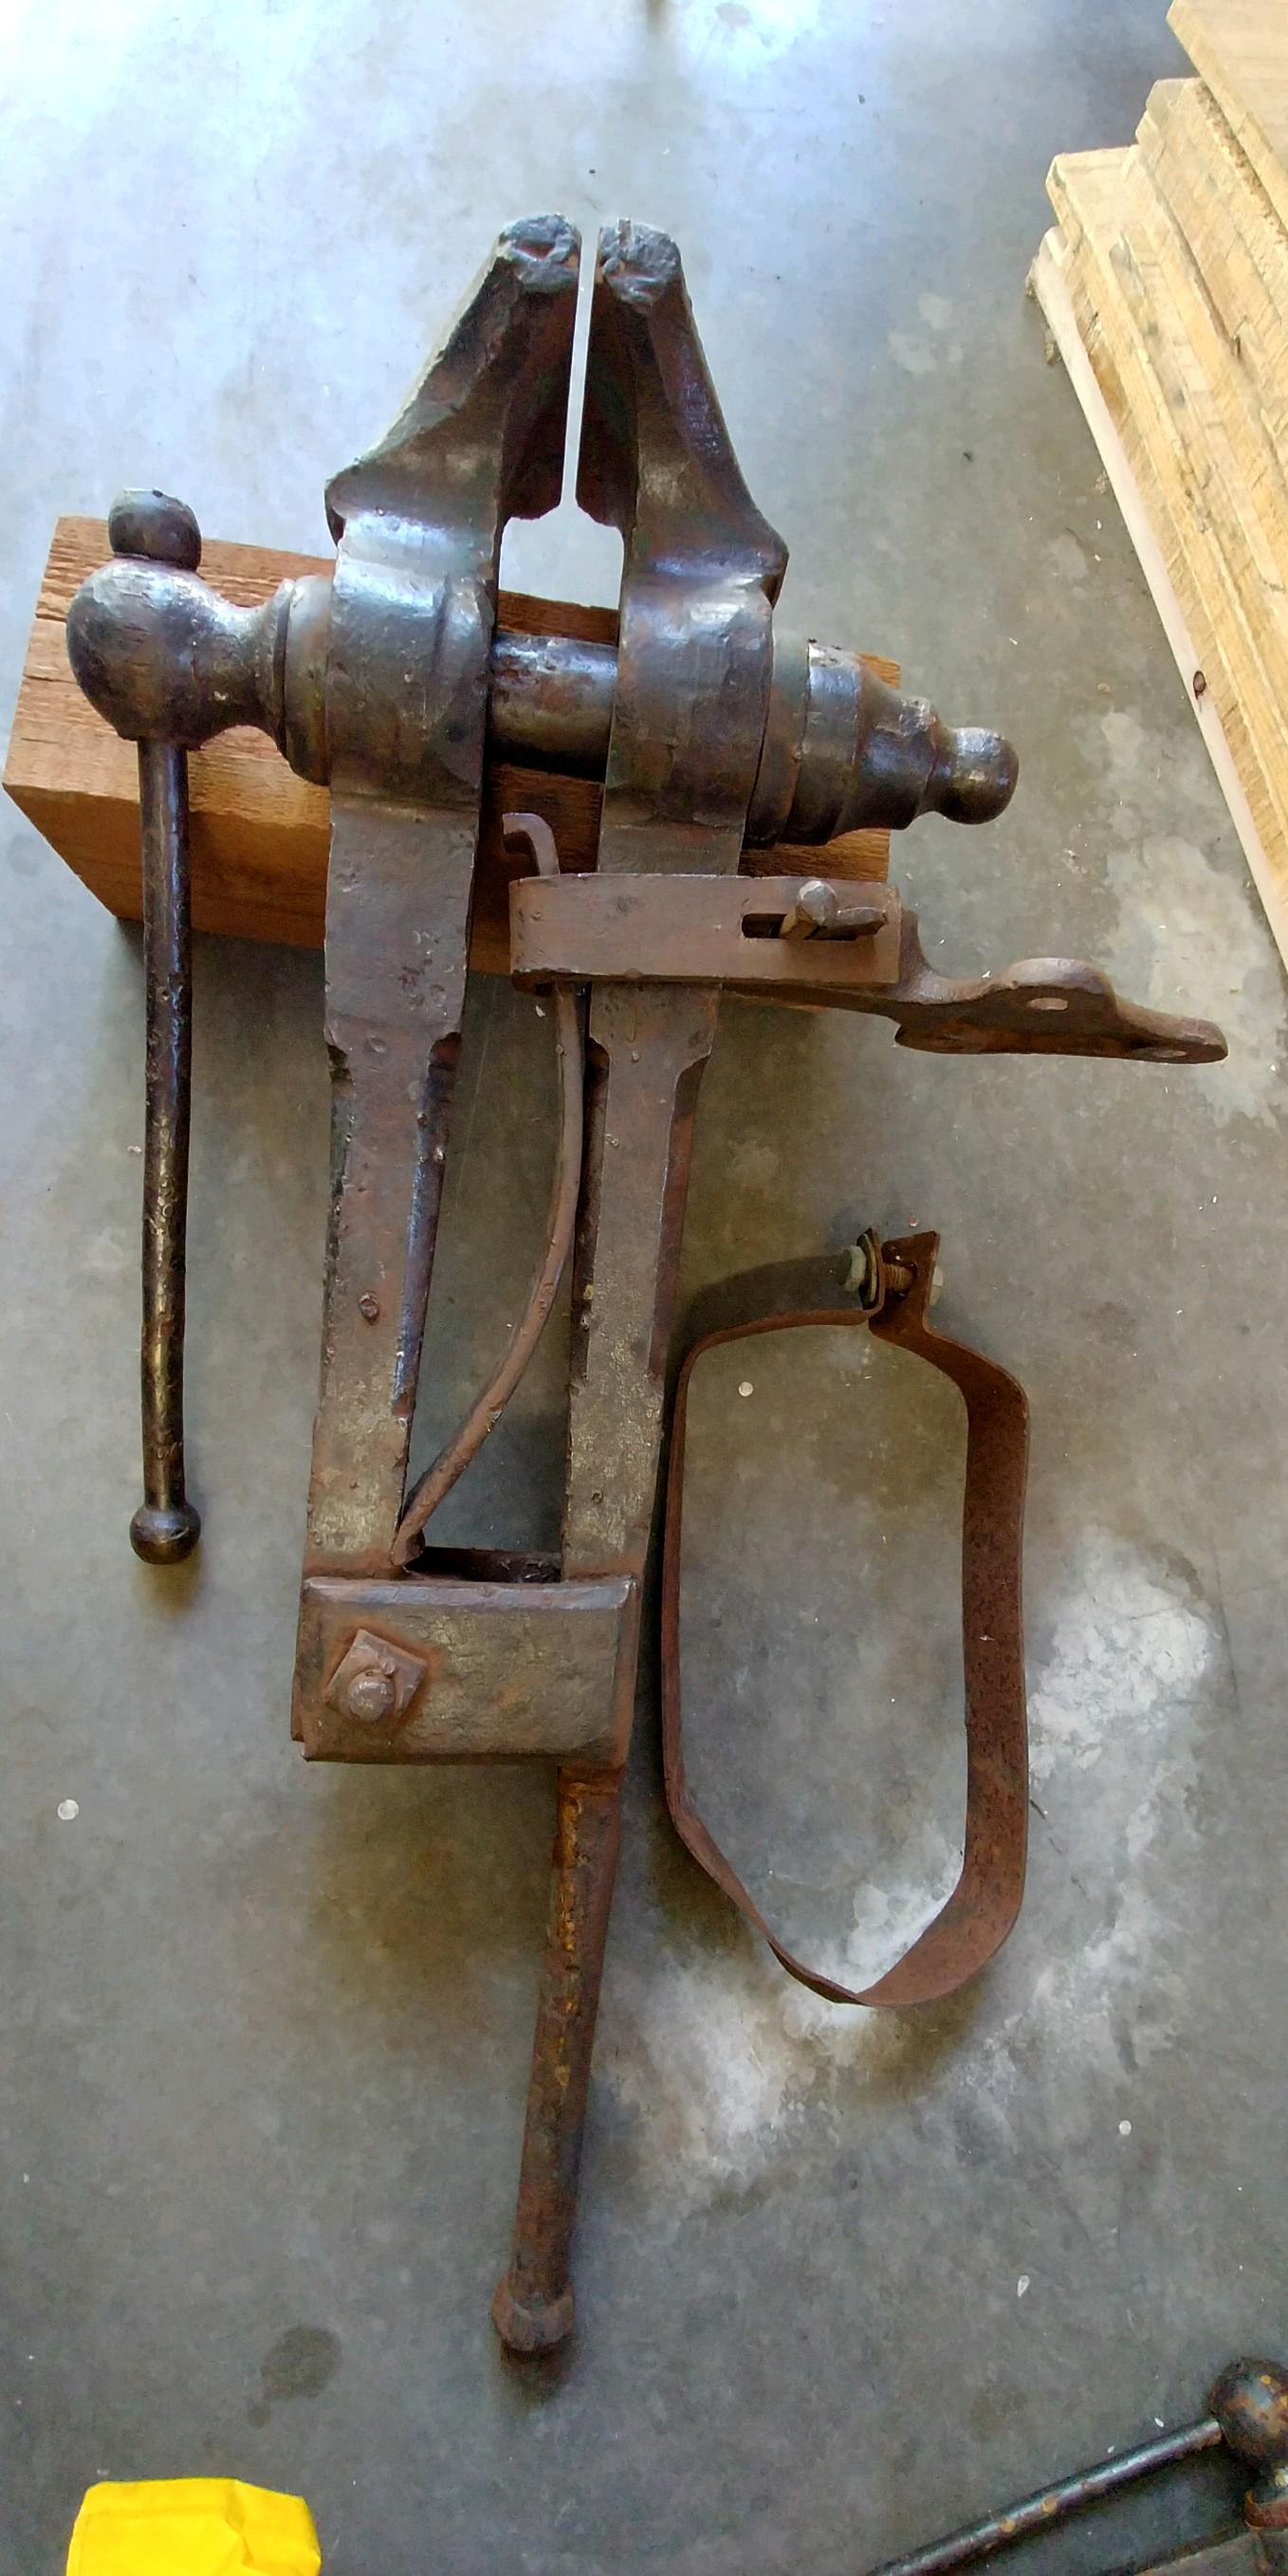
Well she's all done. After a good cleaning, a few little tweaks and adjustments and a good oiling the jaws line up very parallel and even. Just the slightest bit off. It functions very solidly and smoothly. I think she is a beautiful old girl, and she's ready to work now. After a good wire wheeling I can see clearly that the stamping says COL F&I CO. Thanks for all the input guys!


-
Yes Thomas I'm with you there, I don't mean to do much to it, just flatten it out a bit. It rocks slightly anyway so it needs some base work. I may lay a little rod on it while its already preheated for the face finishing, just have to see how I feel after 5-10 lbs of 1105 have been burned! John M that is too funny tho, I never thought about the scale! You have a good point there!
-
Lol I agree with you completely frosty, been welding and fabricating for about 30 years now. Thanks for the replies! The face is already half done, the 2110 is already on and the 1105 is waiting to be burned. My question was more directed towards the base of the anvil, the lean drives me crazy and forces me to work with the horn on my left (hope I don't start a war there haha). I was going to build up the base on the low side and mill it flat, so the face would sit level. I have been using 6013 for the wrought repairs, like where they beat the cutting shelf to death. It has held up well, I will probably do my base build up with that. And I might just grind out some of that crack and fill it too, just for asthetics. I feel like she's solid it just bothers me to look at. And Anvil thank you for the cross reference on the rod, I wasn't able to find anything with my supplier, and as Frosty said the stoody is pretty hard to get
-
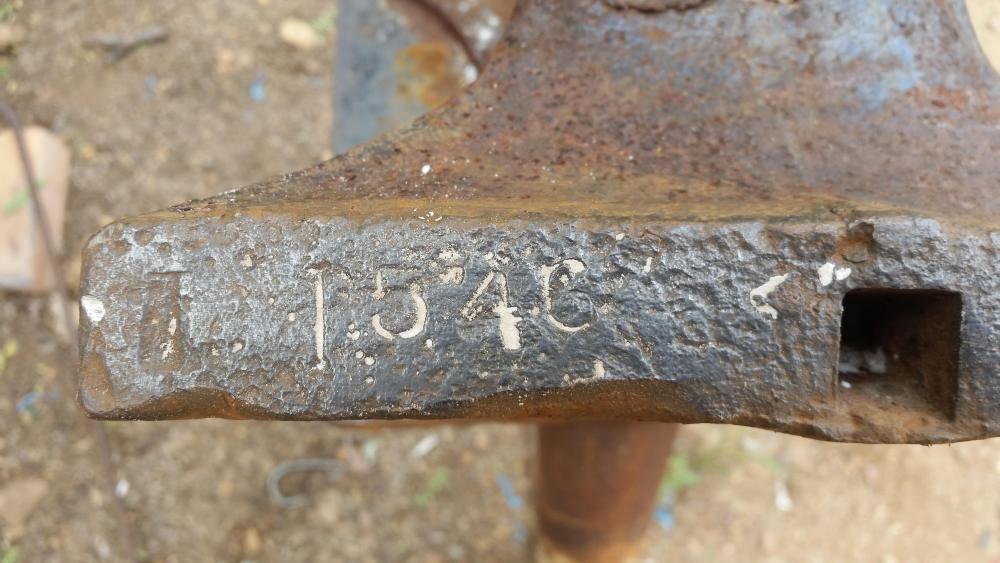
No one?? A friend has "anvils in america" he said it was a 1900, which is earlier than I thought! I will hopefully heat it up and finish the face repair soon, and figure I will build up the low side of the base a little. Would love some recommendations on rod if anyone has any!
-
That is very interesting with the hex nut, It's something to watch for I wonder how many have that. As for the screw box, yes it may not be a definitive identifier, but you are saying that it matches your IC, and it matches perfectly with a friend's IC. I'm sure that parts could be replaced, but also I'm sure that many went out the door with differences from one to another, it's just the way manufacturing was, you used what you had sometimes, even if it was for an "older model" or such. Here is an Indian chief that matches mine exactly, the spring, arms, leg, screw box, everything is exact. EXCEPT the nut, it's square! Go figure haha. Like I said, I don't think that you can say that any one thing is definitive, except the name itself.

-
TBI, haha maybe that's why I like to beat on hot metal, thanks frosty you figured it out! take a look at your I C when you can, I really think that's what it is from searching around, but it's labeled as a COL I&F, which seems pretty cool! I don't know if that makes it newer or older, cant find anything on that. Daswulf I keep hoping that all the people who want to be a blacksmith will get bored and sell off all the iron they bought, but it hasn't happened yet! I think these tv shows drive it, like you said. But I know from my own friends, it's just something cool that fades away quickly and the equipment is left to sit alone.
-
It was indeed a tool steel top, harder than heck! This is all that's on the front except the 81. It had been used for years after the top came off, it was in really bad shape. It'll be nice when it's done it's great now.