saltlifeyamez
-
Posts
8 -
Joined
-
Last visited
Content Type
Profiles
Forums
Articles
Gallery
Downloads
Events
Everything posted by saltlifeyamez
-
Thank you to those who helped me get to where I am today. The help overcoming loss during Irma, led to starting this hobby where I can thank those here who have helped me whether they know it or not.
-
With that in mind, Santa, I will cancel all nefarious plans. Although clinker is useful... kinda. "Whats a guy gotta do to get some coke around here?!"
-
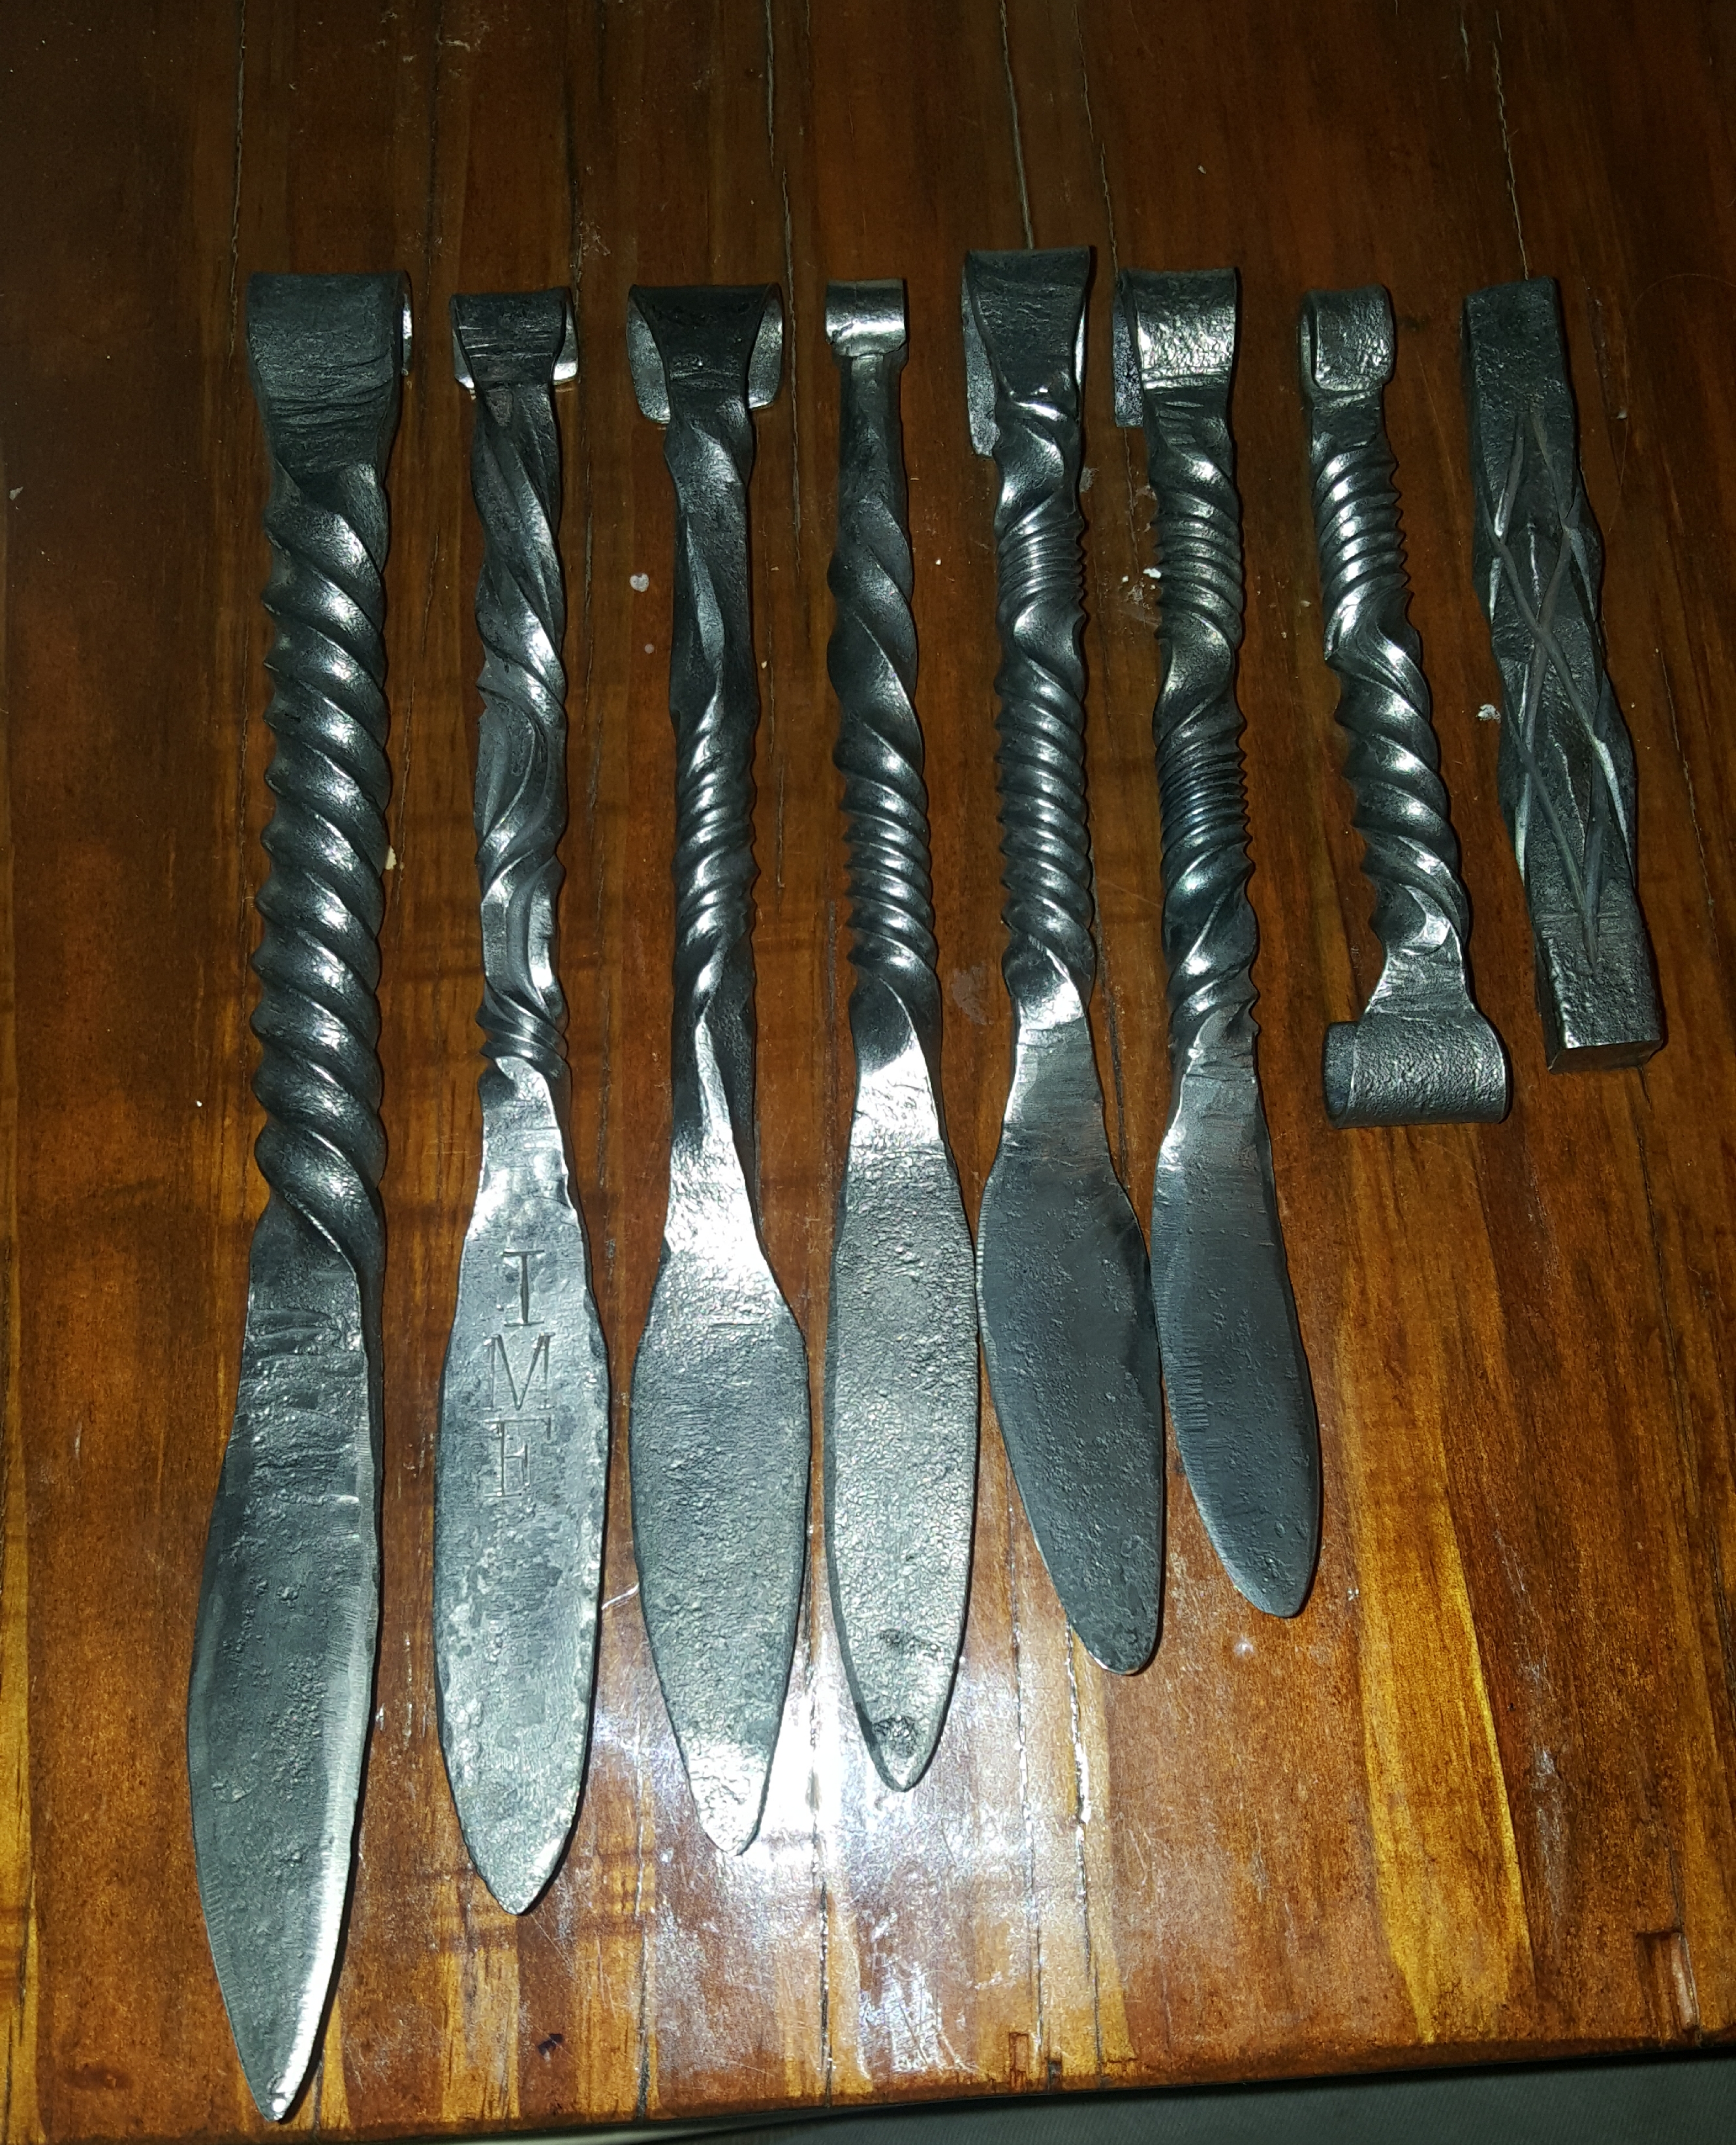
Sorry to re-kindle an old thread, but ive been having fun with twists lately. I use a wet rag to cool the finished twist before reversing. That or a dip in the slack bucket.

-
Y'all are awesome! I am going to gather supplies (adobe/refractory cement, kiln bricks, ect) and work on some improvements. I may first improve on and test my original design and post a video before i completely re-work the forge. When i do that i will make a new thread in the proper place here. Thank you all for your advice.
-
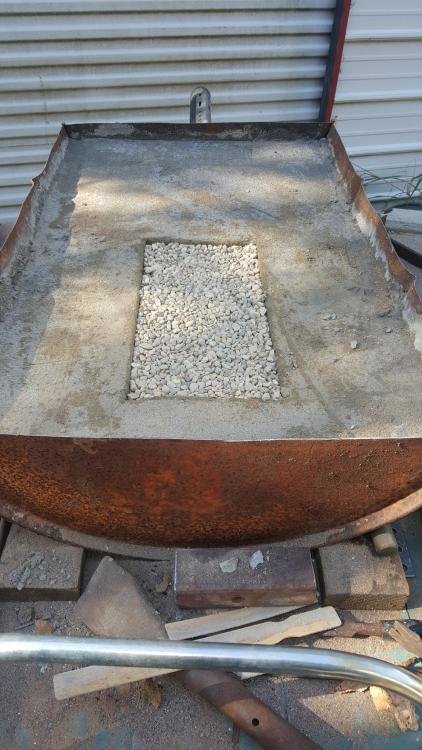
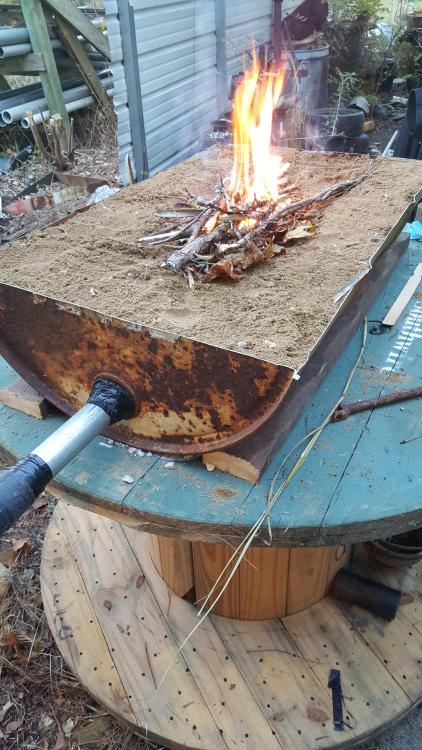
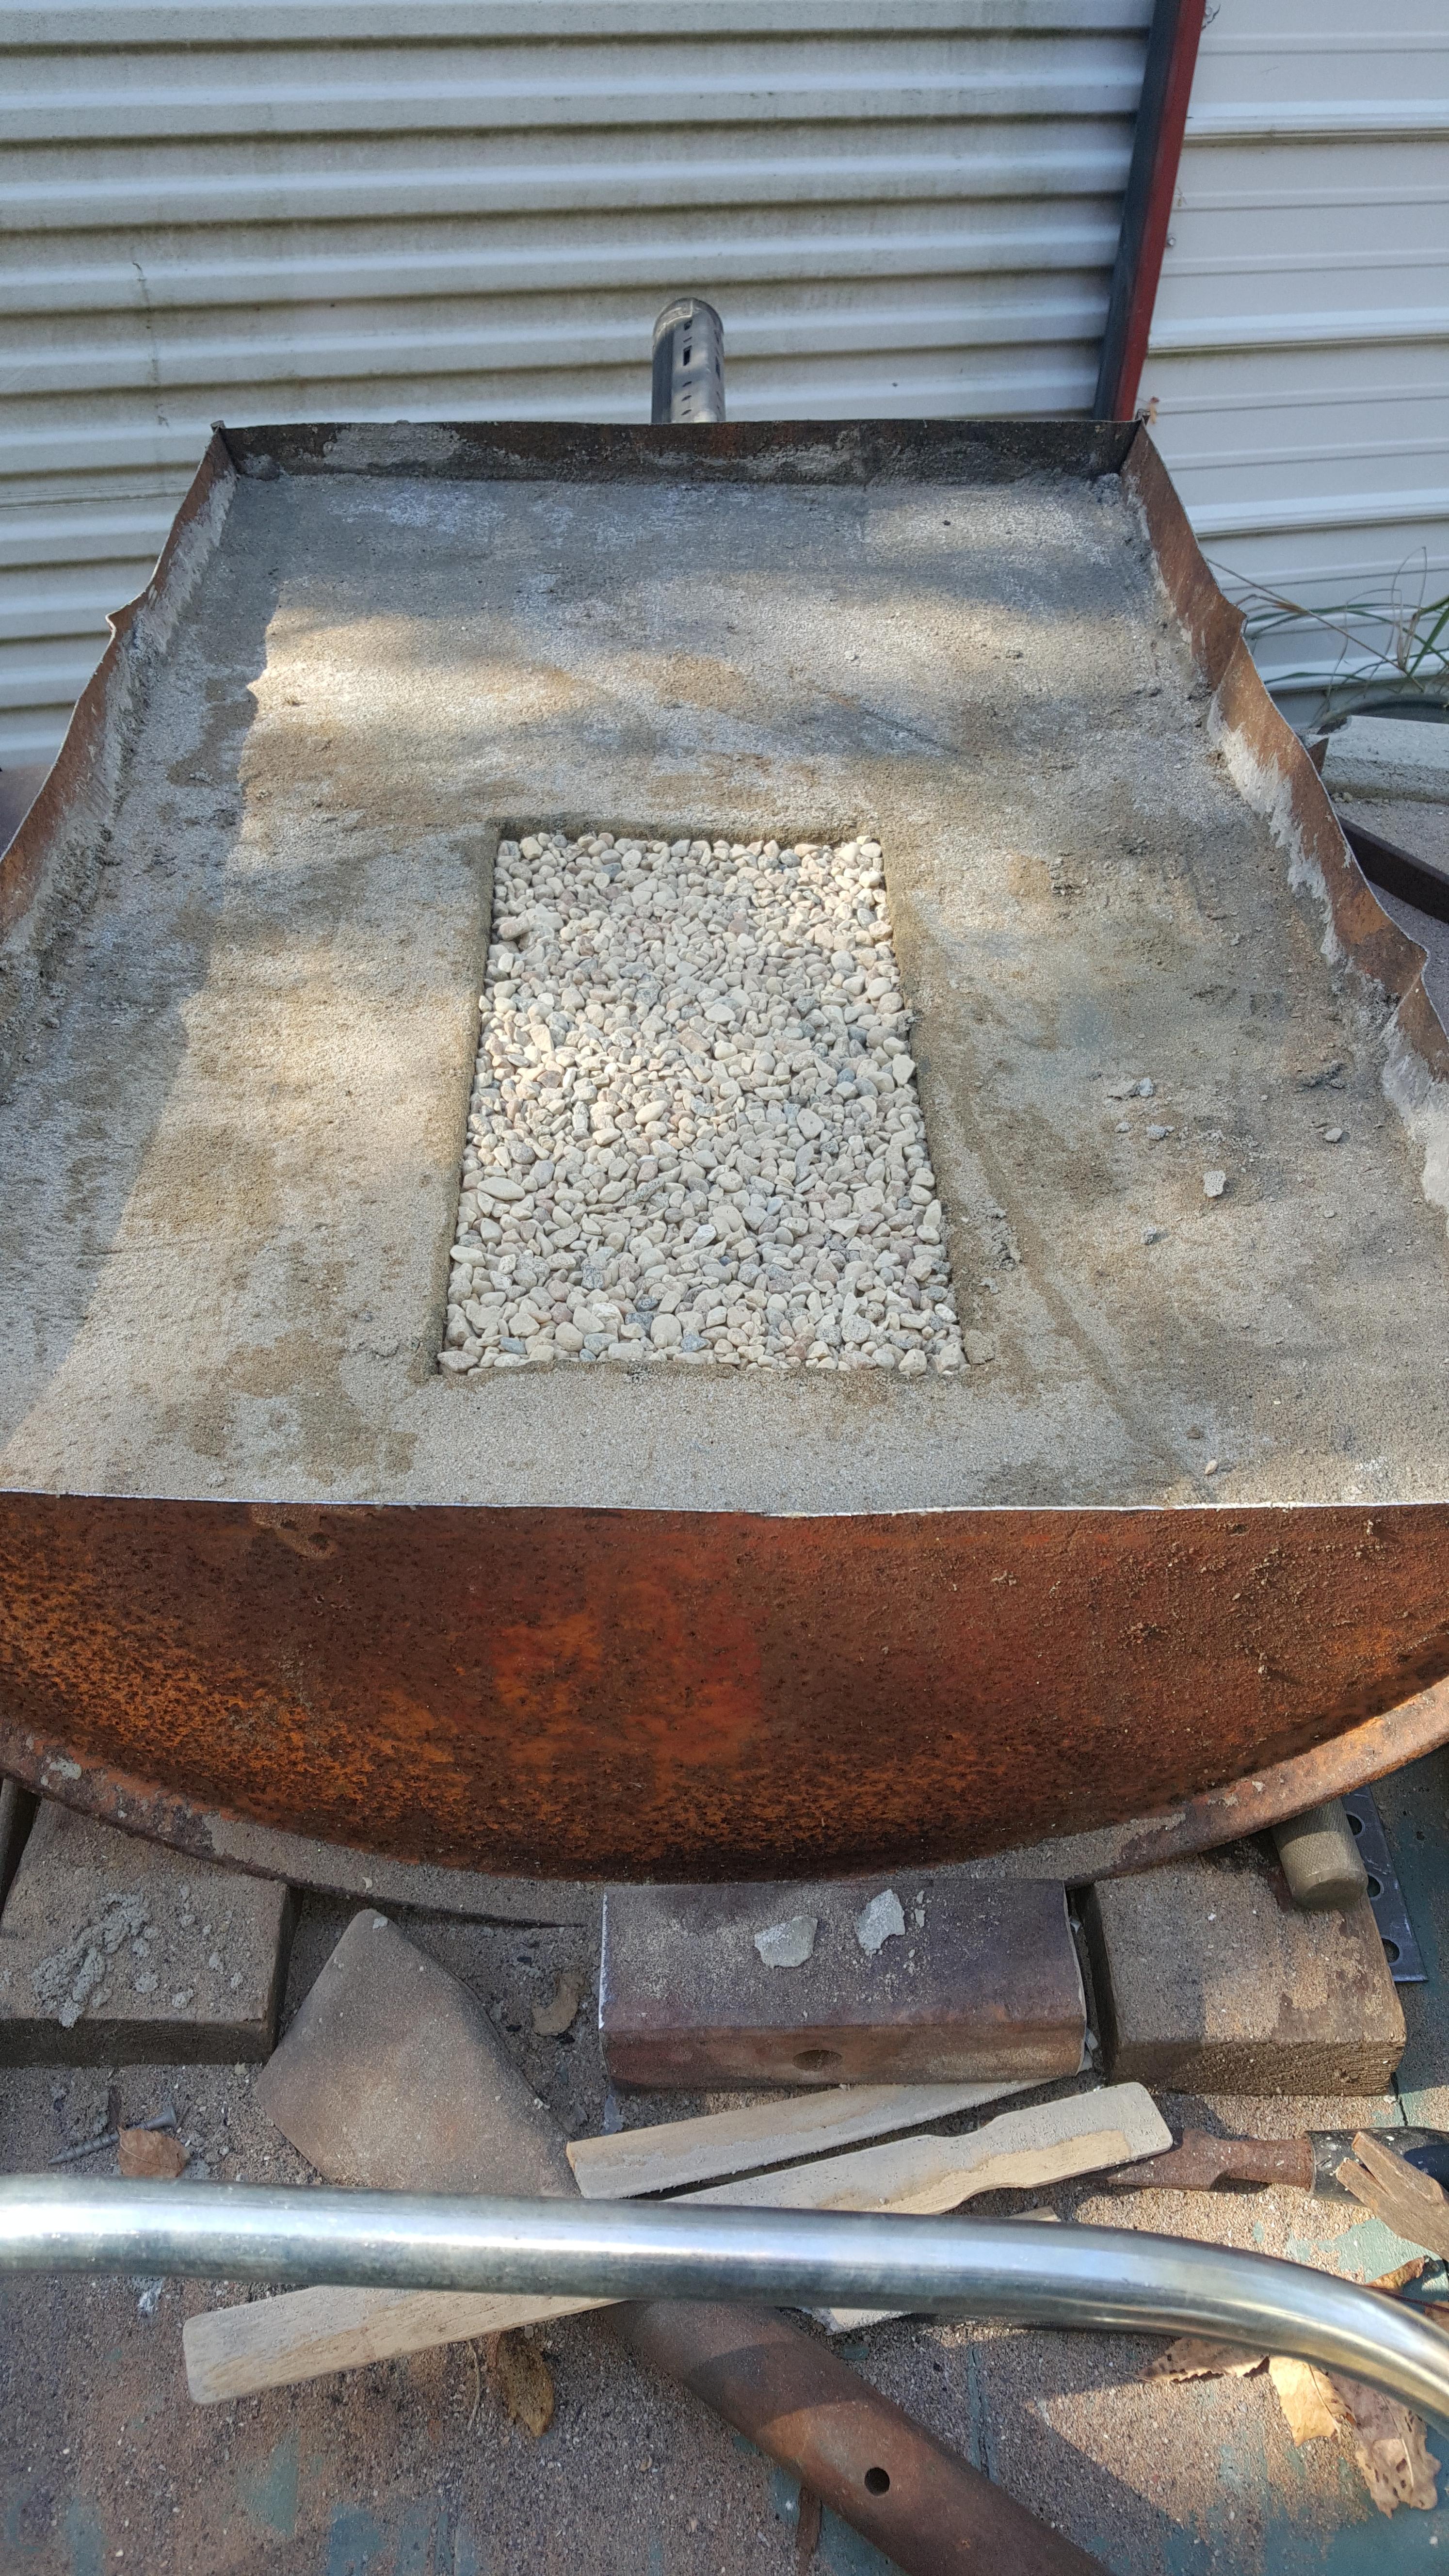
Thank you for the heads up on the spalling issue. I have some kiln bricks i just found in the attic to add around the burn area, the sand in the forge is gone and the concrete pad is just to seal the large unused area. The idea is to build an oven so to speak around the gravel spot, which will be the floor. I pile up fuel on top of the gravel and use the walls of kiln brick to keep it off the concrete. Air flows through the gravel and after forging i clean out the ash. I re wrote that as best i could without a video example at the moment because i felt there was a bit of miscommunication as to how i have it planned. I will try later to upload and link a video showing my forge so far. And when i do, i will copy and paste this thread into the forge section so that it is thread appropriate. thanks again! As for dirt around here i am coastal so its pretty much all sand,
-
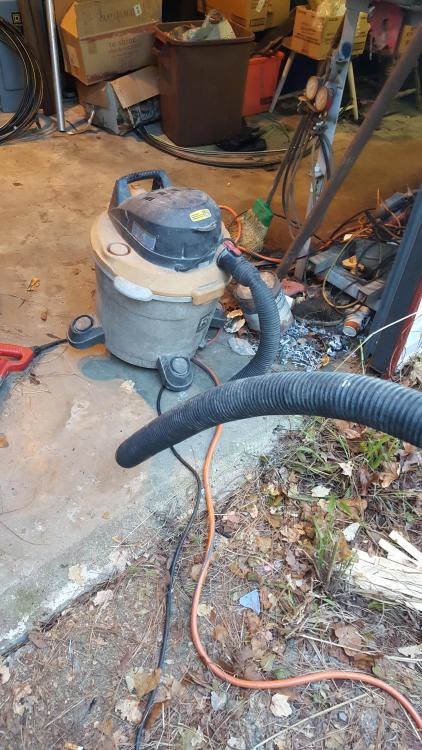
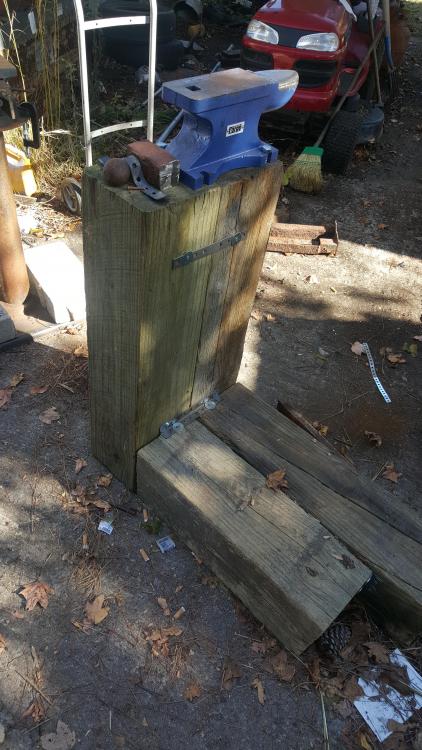
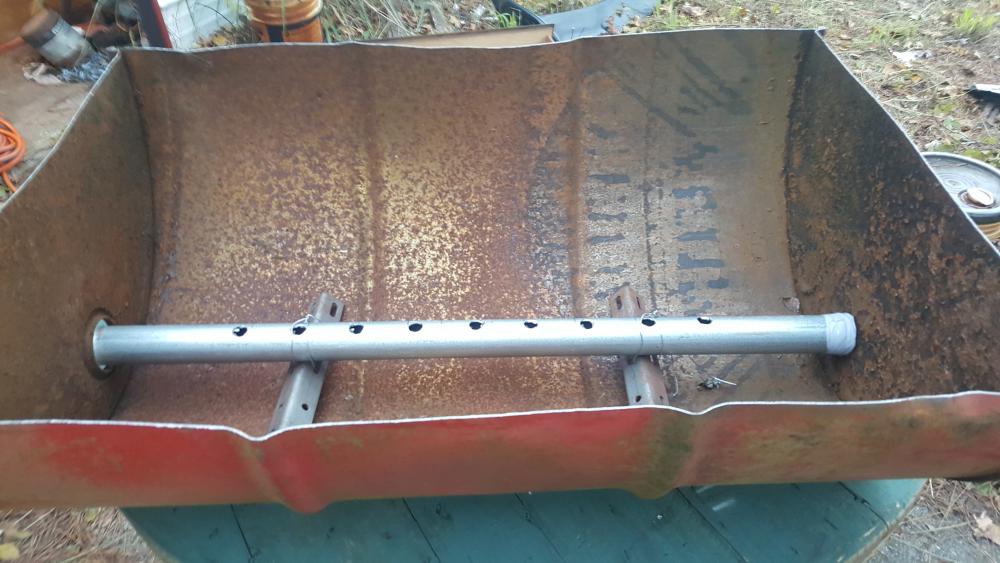
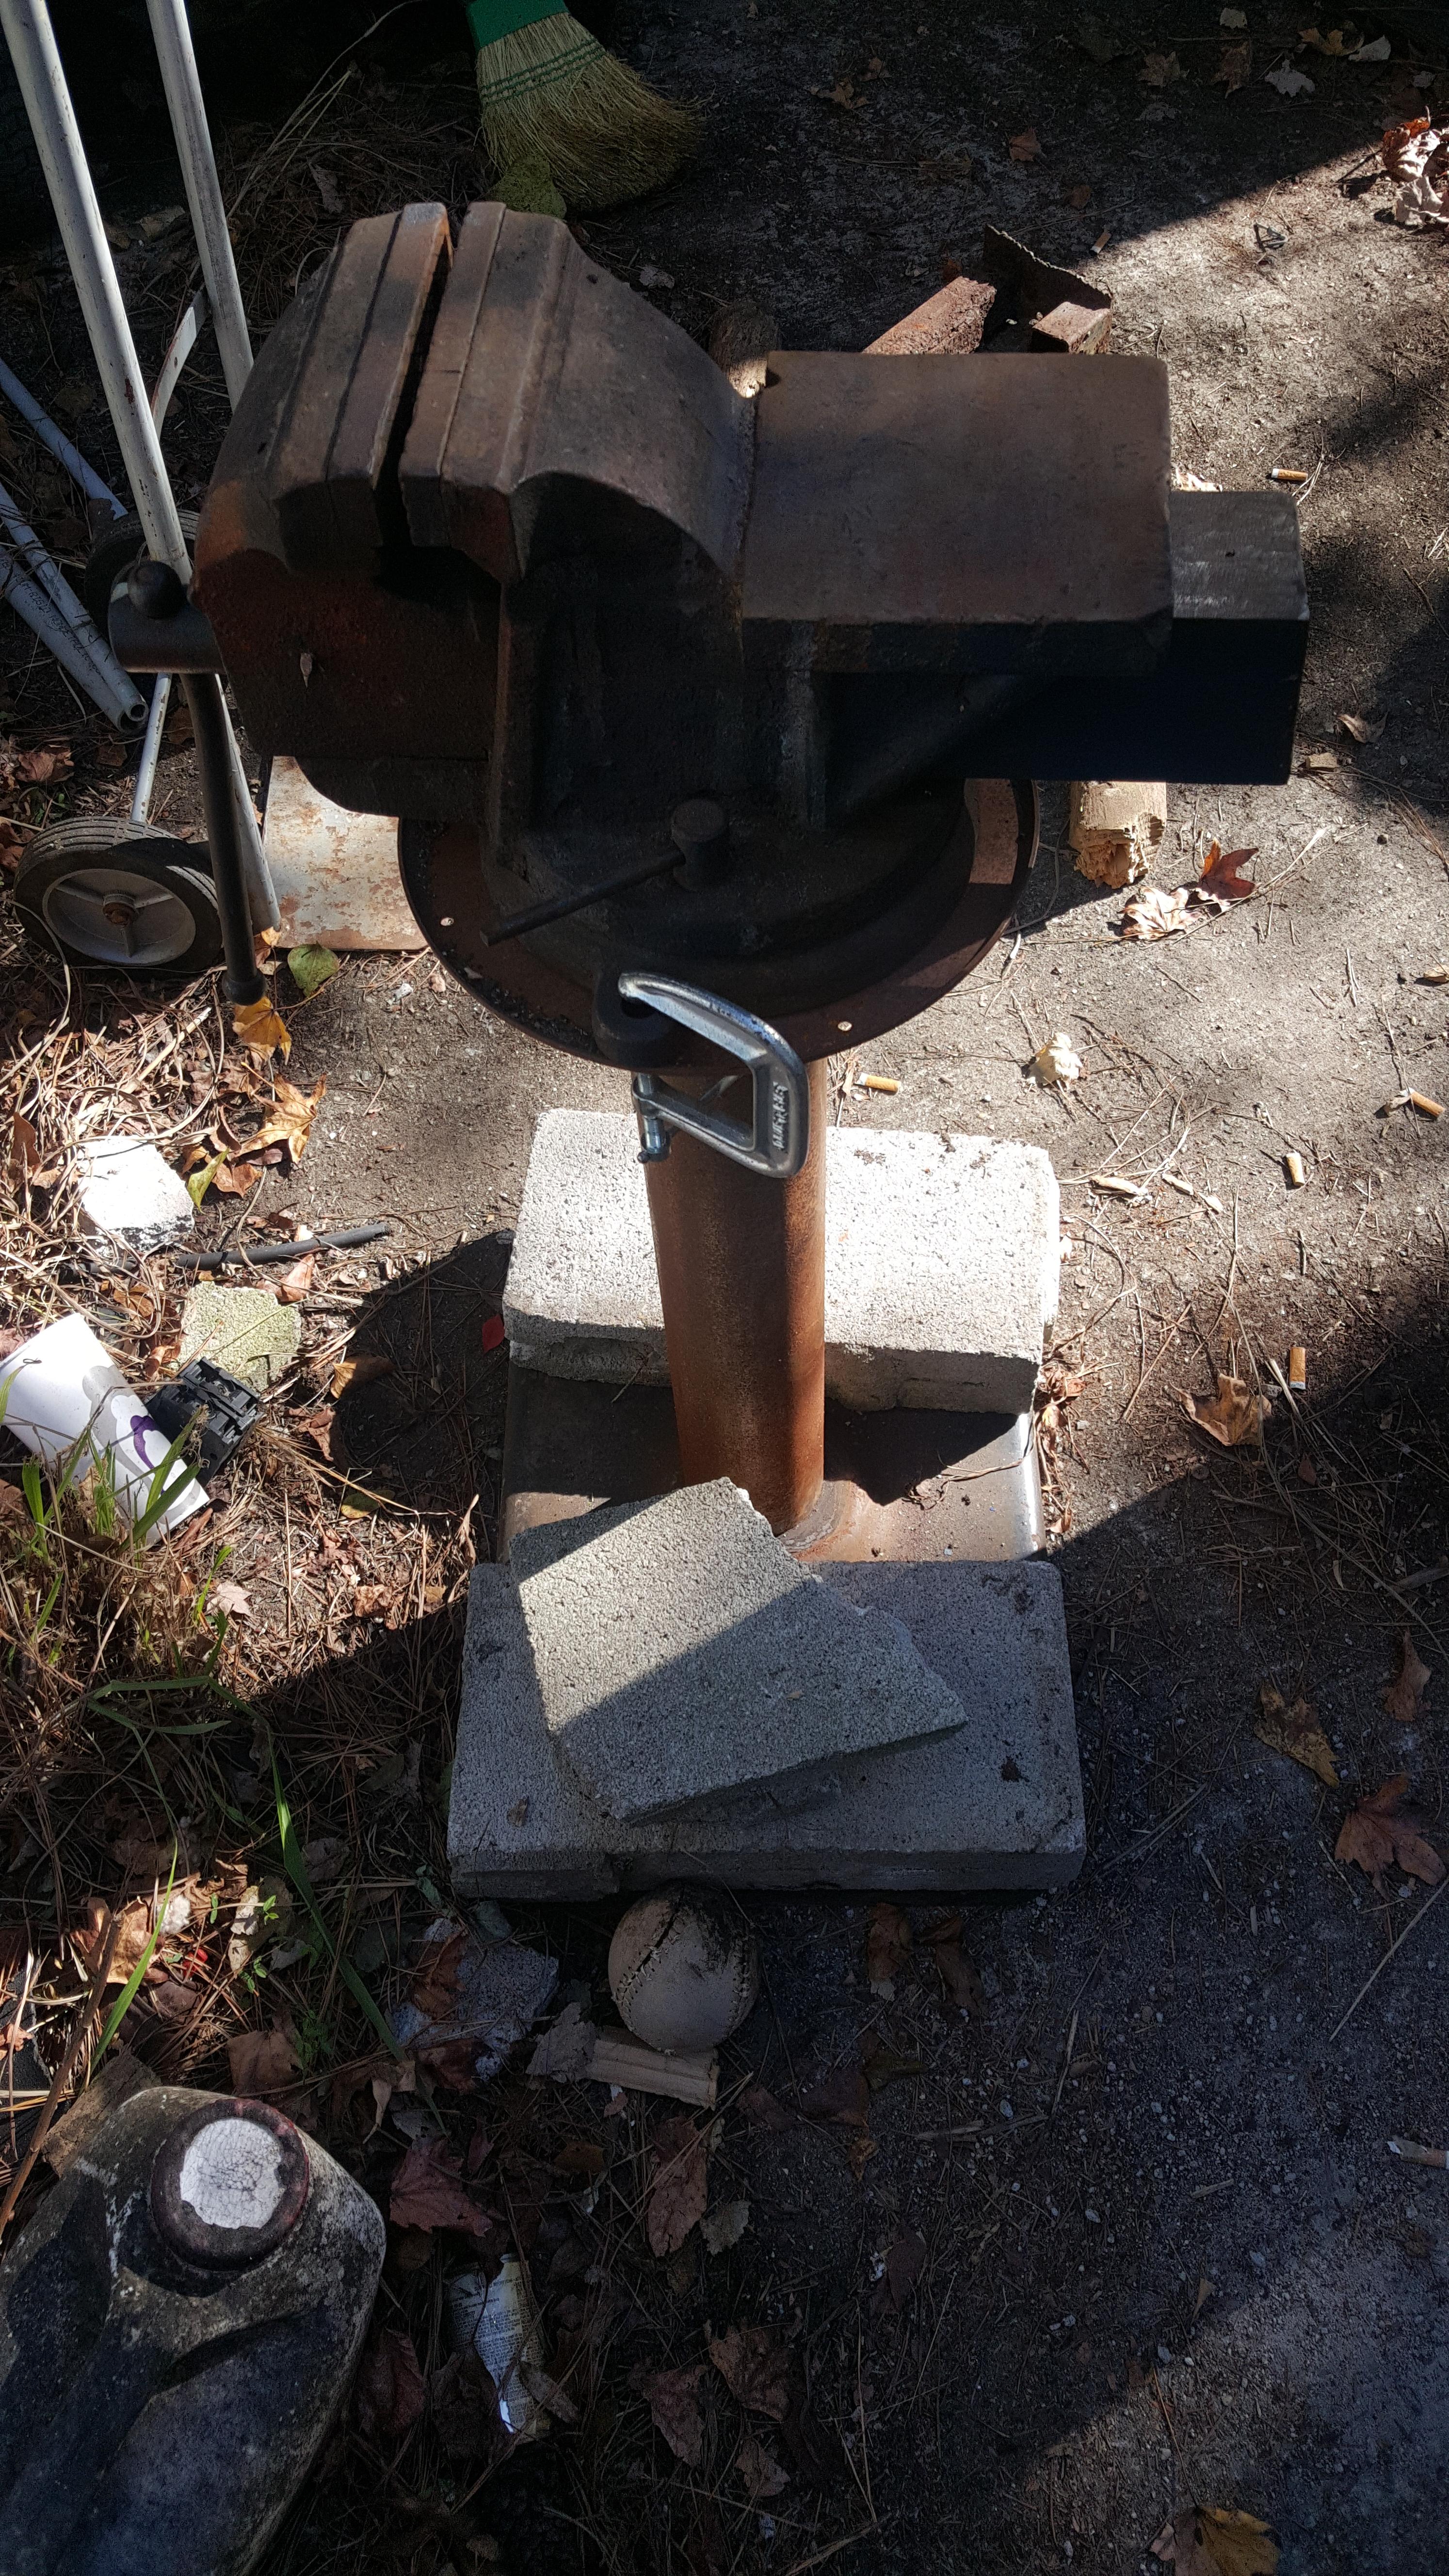
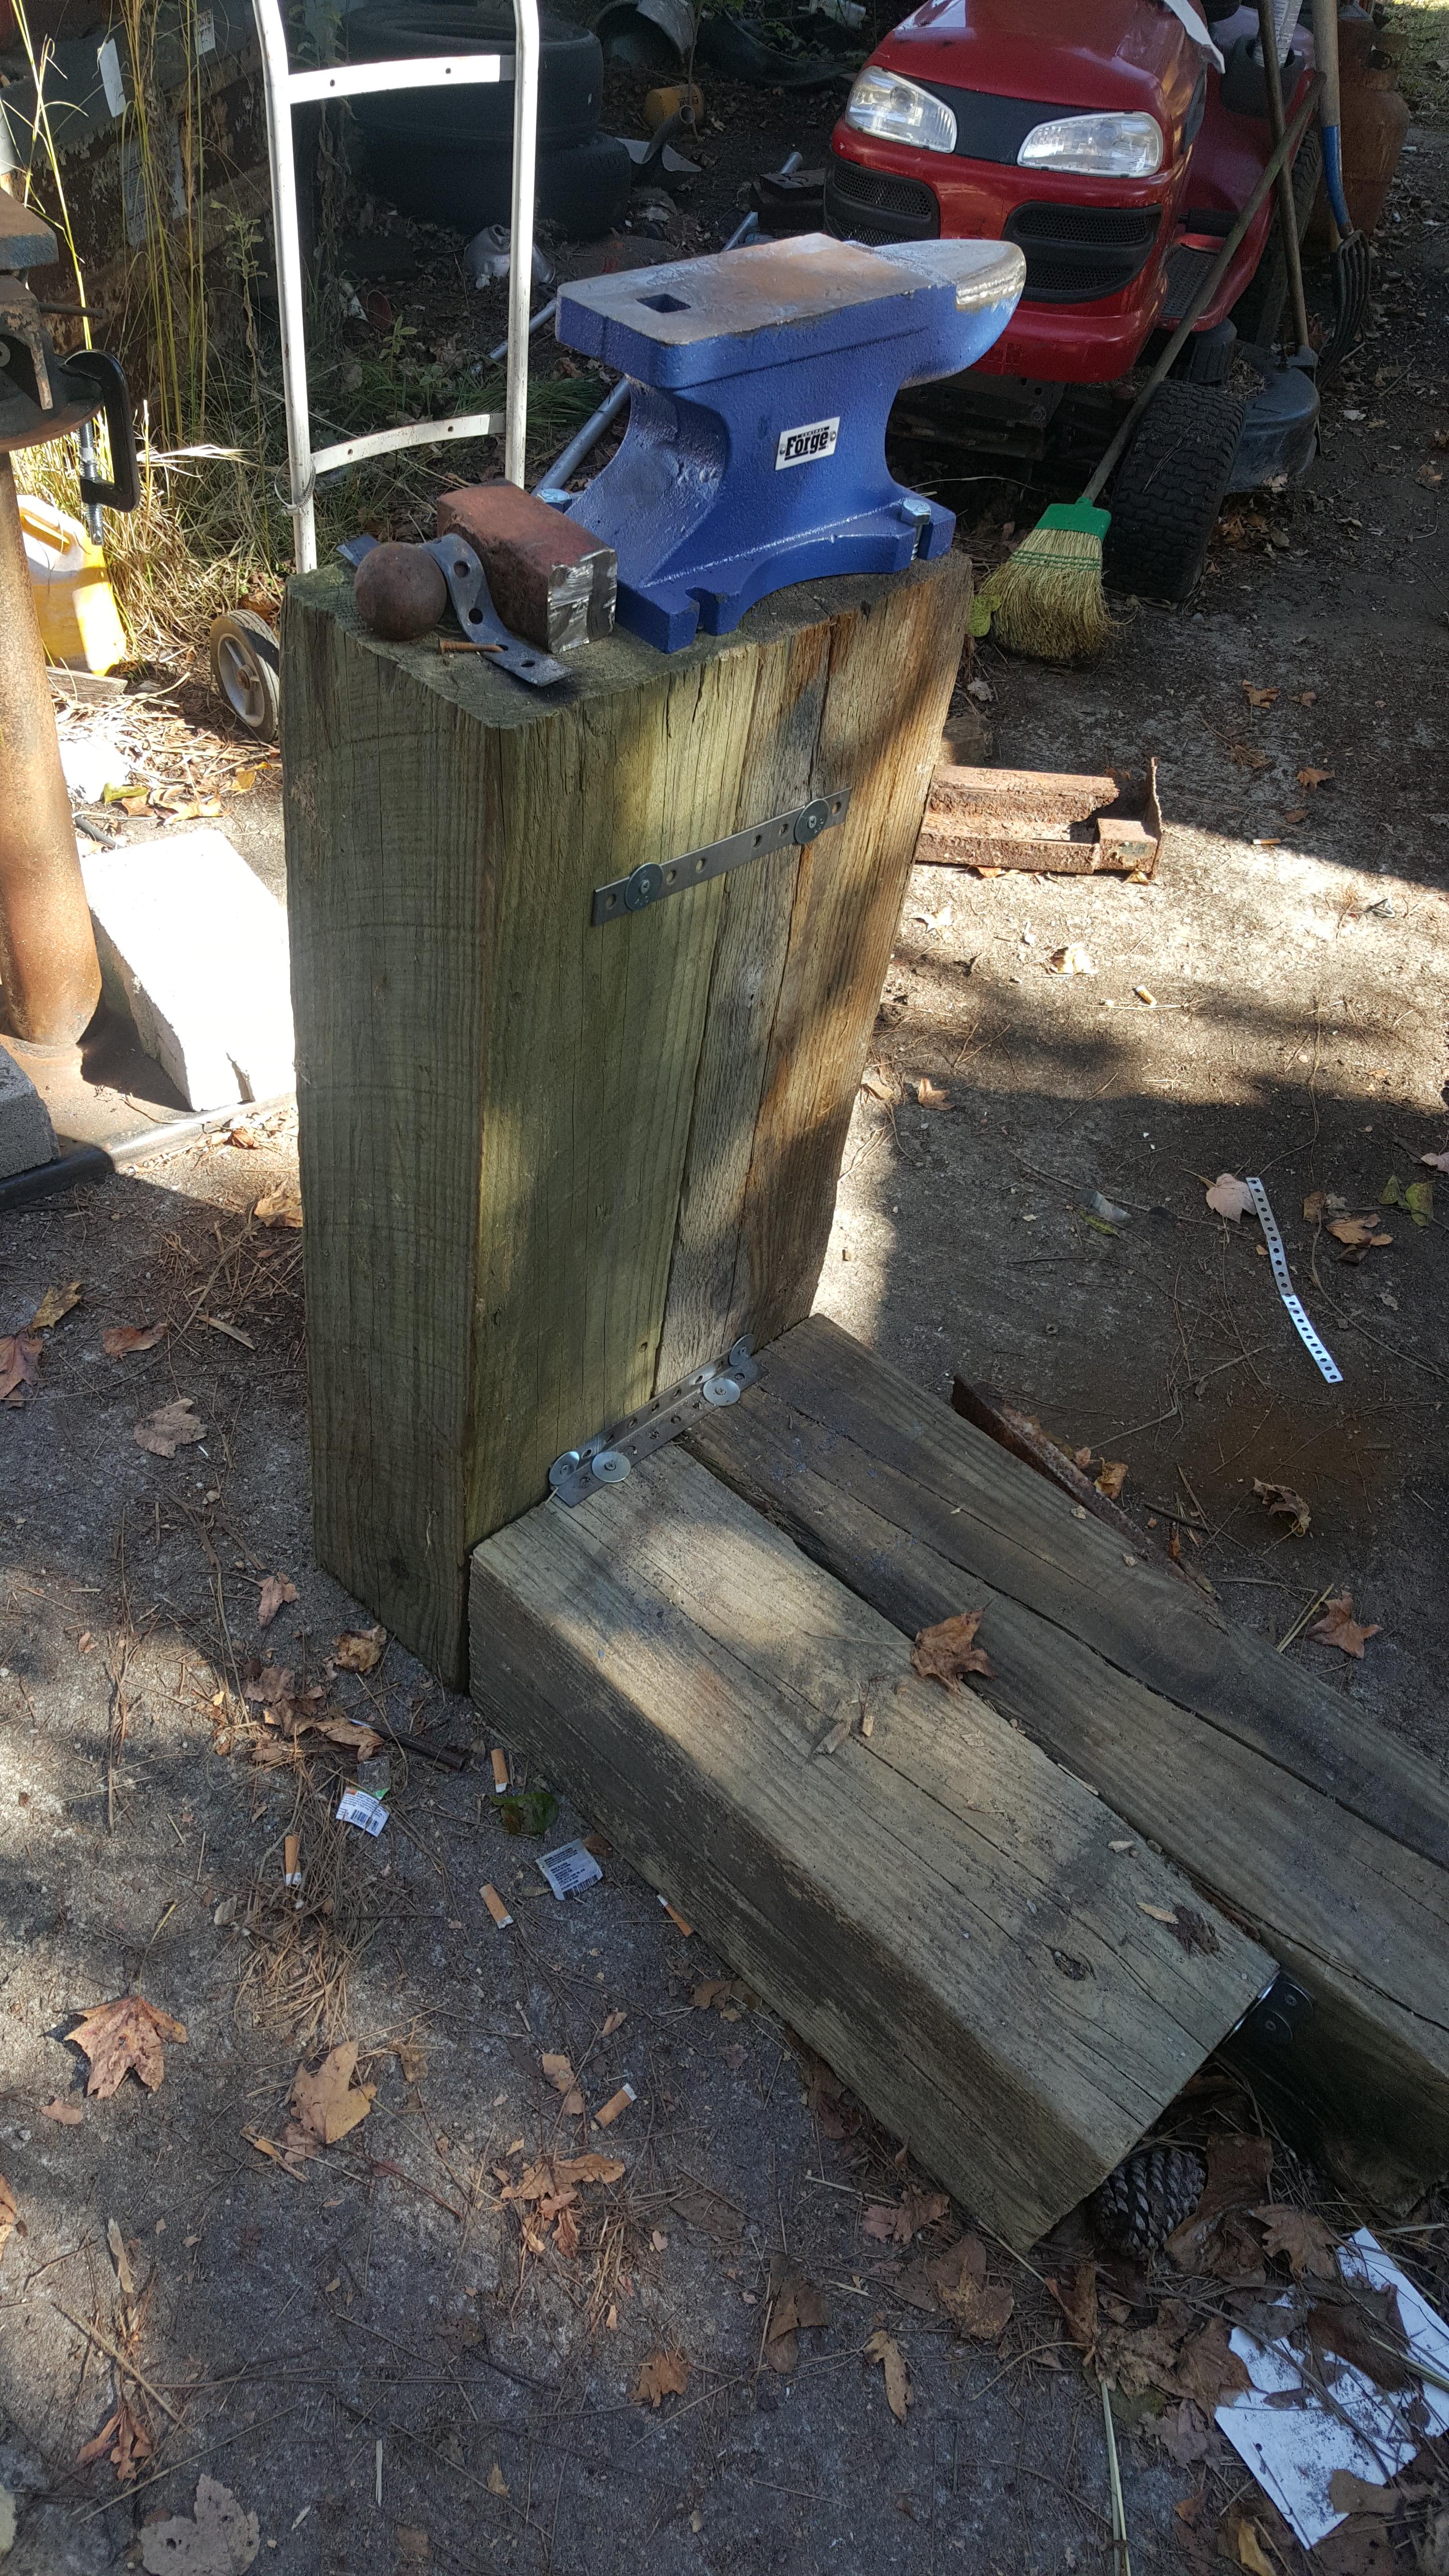
I used quicrete concrete, The build is intended for future growth and my first forge It is a barrel half with a piece of conduit for air flow from a shopvac. It is filled with rarge gravel for insulation then a layer of smaller gravel followed by a few inches of sand, was thinking along the lines of insulation and air flow. The sand made a masive mess and was tough to control the air so i removed it and replaced it with concrete. It is about one inch thick because thats all i had and was intending to get more. (I will look into adobe) its really more of an air shield, not a burn surface. The gravel is where the airflow comes from. Its actually pretty efficient as far a i can tell. I have the vaccum blower on a fan controlled switch. Always planing on improvements. The anvil is cast iron 55lb (on the lookout for a better option) Trailer hitches make for a sort of pien fuller i suppose. Ive mostly been experimenting.
-
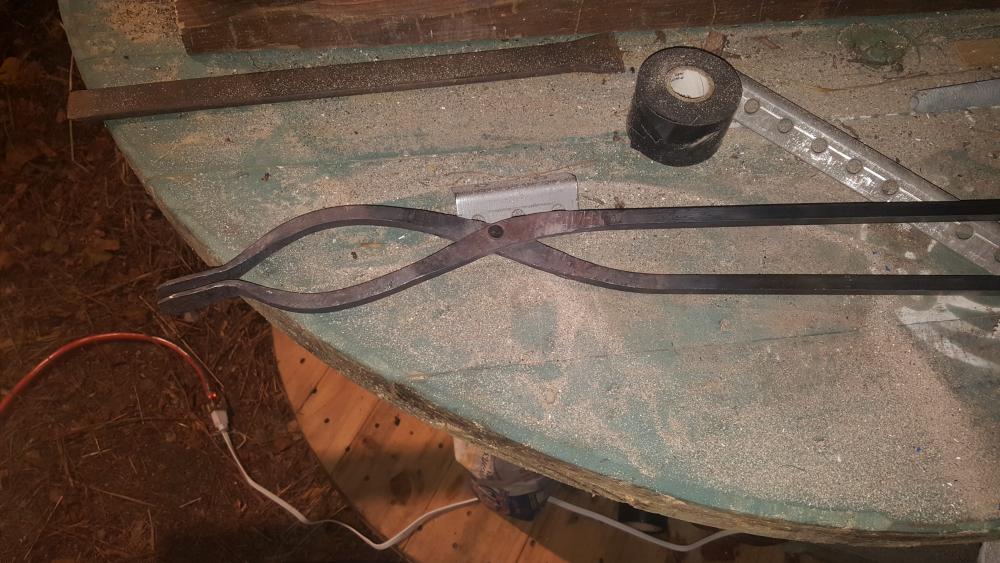
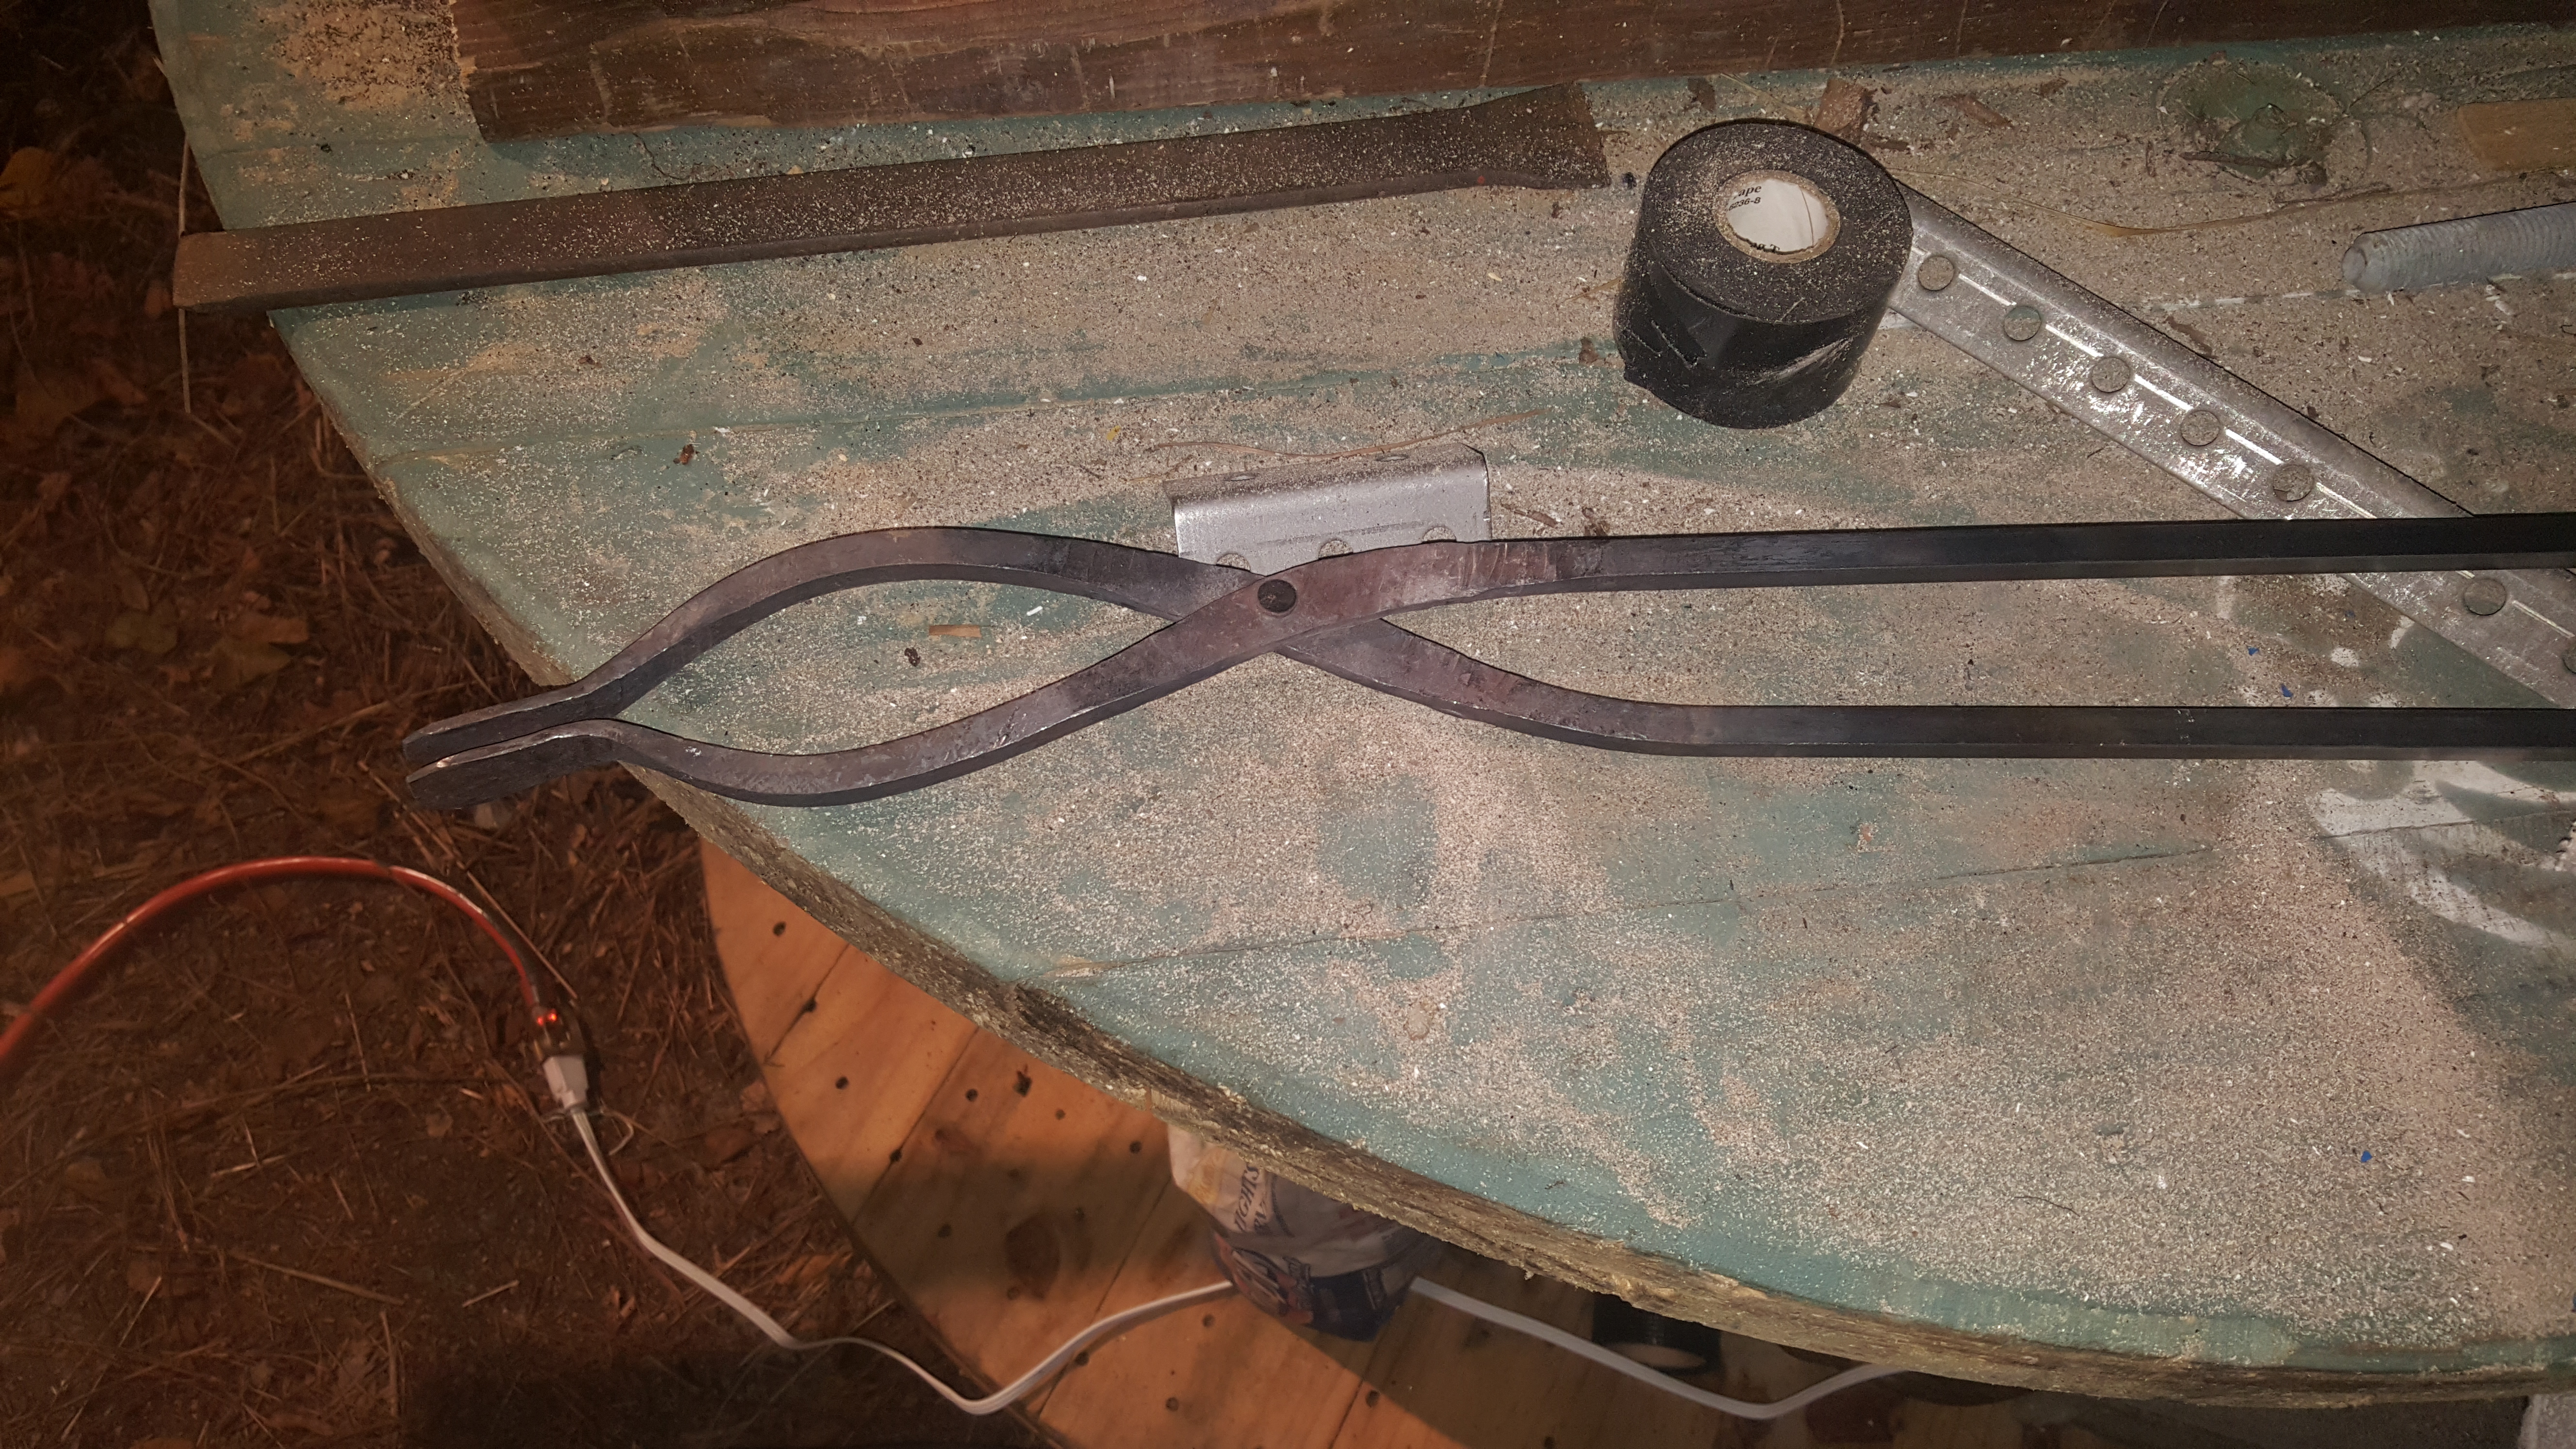
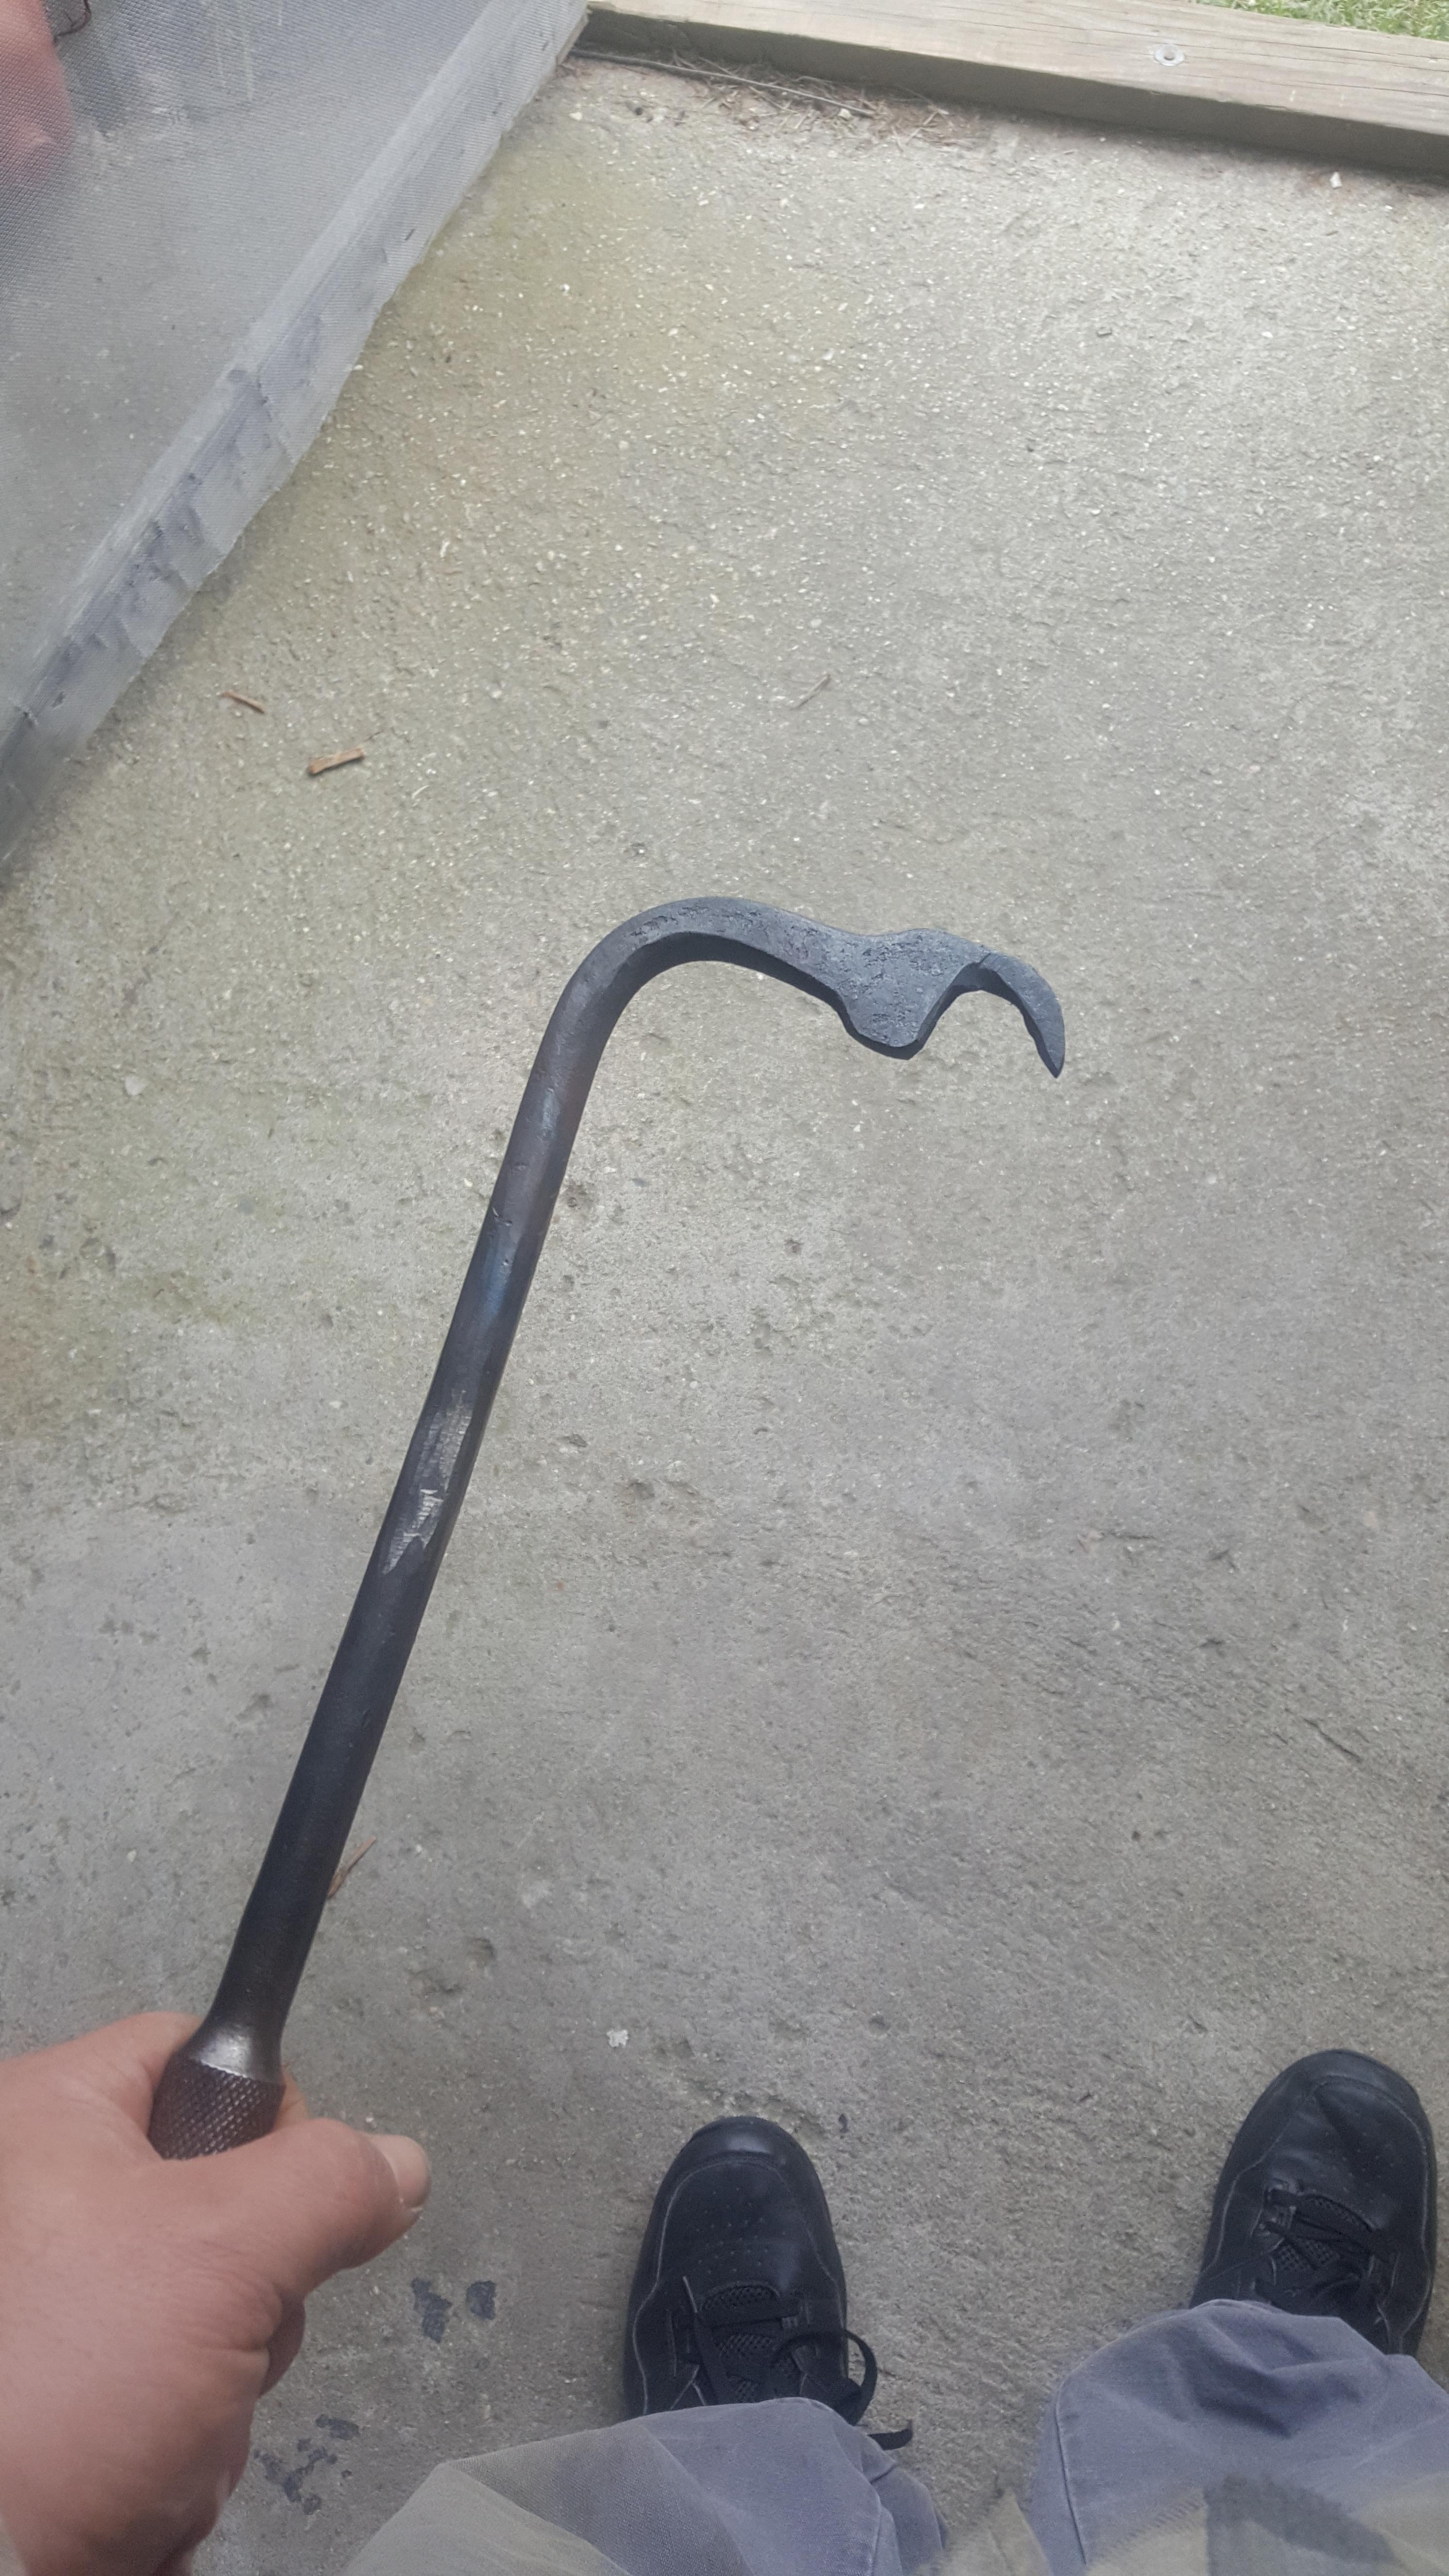
Heya! Just found this forum and i figured I'd join up. My name is Yamez (its a nickname) and i have always been interested in working with metal. I recently was forced to move to a new area and the upside is that i am now in a location where it makes it easier to build a forge. So I did! I've always learned by doing, i built a forge out of half (longways) of a 55 gal drum. It's been up for about a week now and I've only so far made a pair of tongs and a fire poker. But in doing so i have been making tweaks to my forge and area based on what i feel makes it more efficient. Ive uploaded a few pics of it and my first creations and hope to learn to forge on and increase my knowledge and skills. I am aware of the quality of my current anvil and on the lookout for a different one Thank you for reading. I will and have done some research and look forward to checking back in