ronwend523
Members
-
Joined
-
Last visited
Everything posted by ronwend523
-
I'm off to a start on my Freon tank forge build. I'm using Wayne Coes design for the build. I have everything cut and put together as far as I'm able before the refractory and sealer stuff get here. I ordered materials from Wayne as has all the materials available at a reasonable price. He is also very helpful answering questions. I'm anxious to get it made to see how it works. I'll post some pics of it later.
-
Thanks guys. I will take your advise.
-
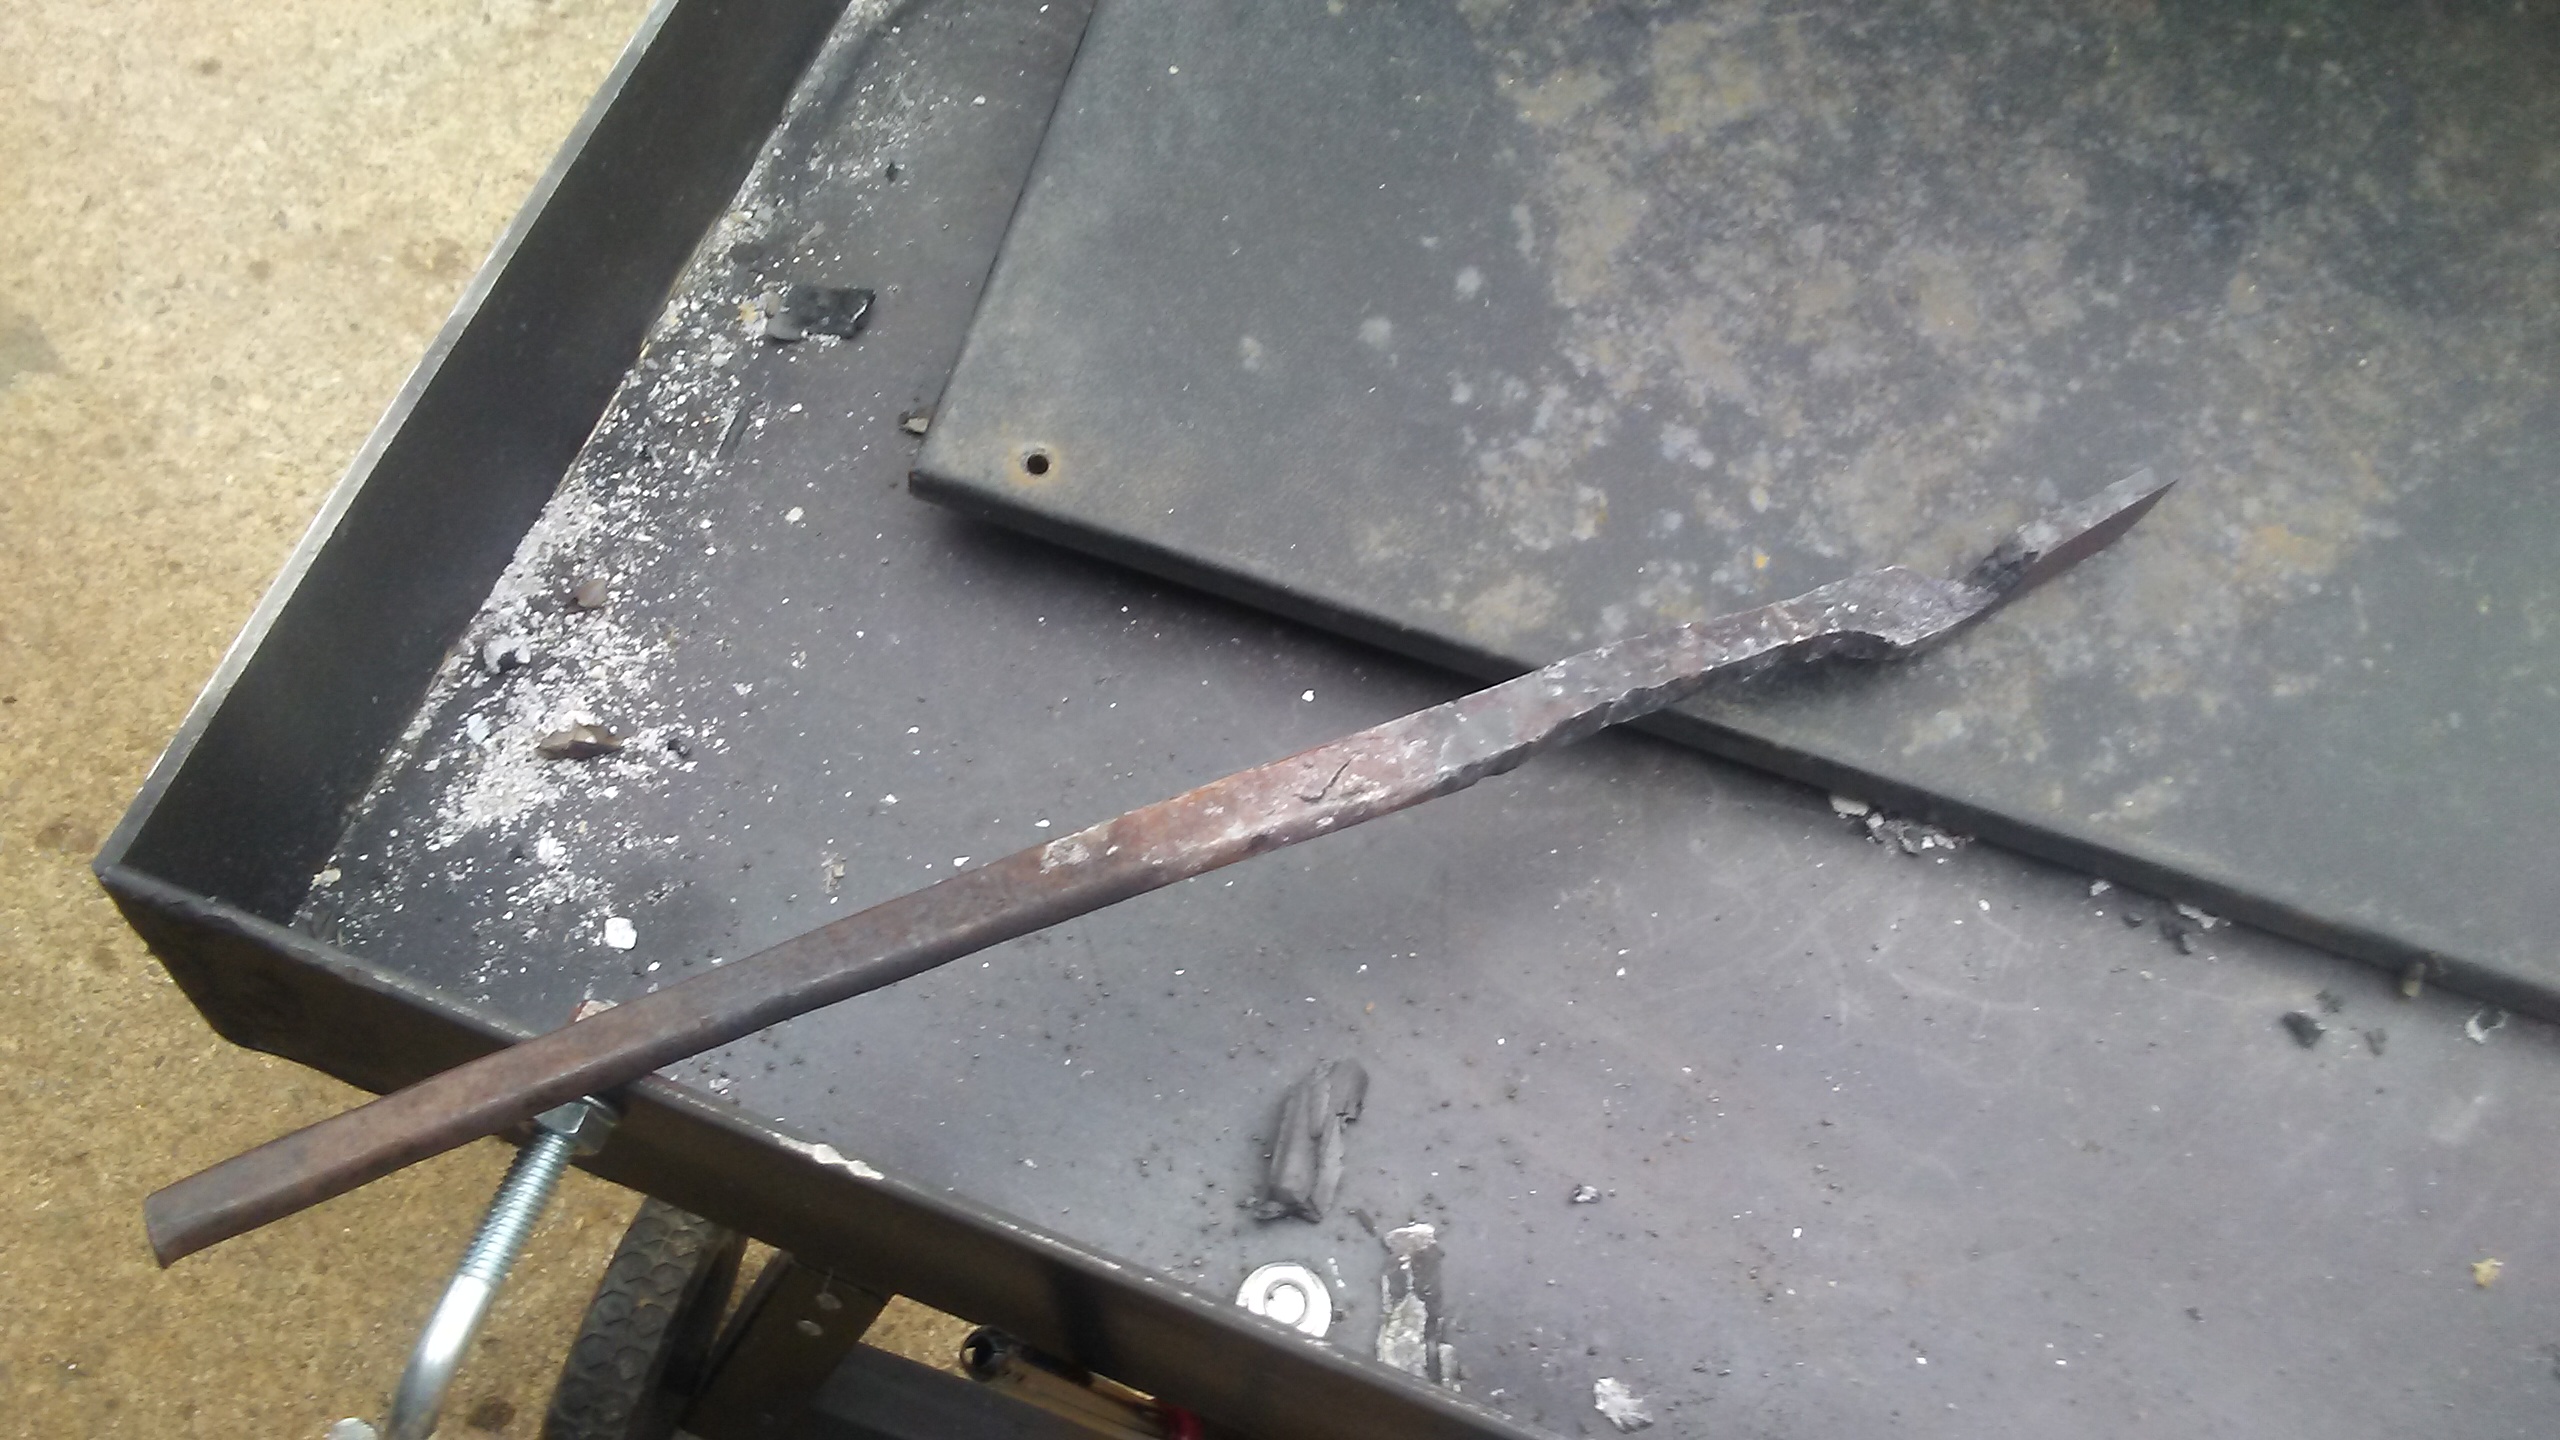
I would imagine this has been asked so many times but I'm not seeing my questions I need answered. I am contemplating building a small gas forge and have a Freon tank as my shell. I have made a 3/4" burner using 1 1/4" to 3/4" reducer as my inlet end and a 1" to 3/4" reducer as my nozzle . In testing it throws a nice flame. What should I line this tank with that will stand up for some time? I have made some liquid glass and sand mixture for refectory in a char coal burner, would this work? I see some use the wool stuff but I have no experience with it. How thick would I have to line this thing? I have watched some YouTube videos for ideas for the outside design but the inside I'm at a standstill. Thank you Guys
-
I'm contemplating a power hammer build and have an idea for one that will occupy a small space. My question or thought is, how big of a hammer is minimal for a unit that relies on gravity? What weight would one need to equal the power of a hand held hammer beating on an anvil? The addition of some springs would increase the power but by itself. for a hobby type set up, to ease the torcher on ones arm, what would be minimum?
-
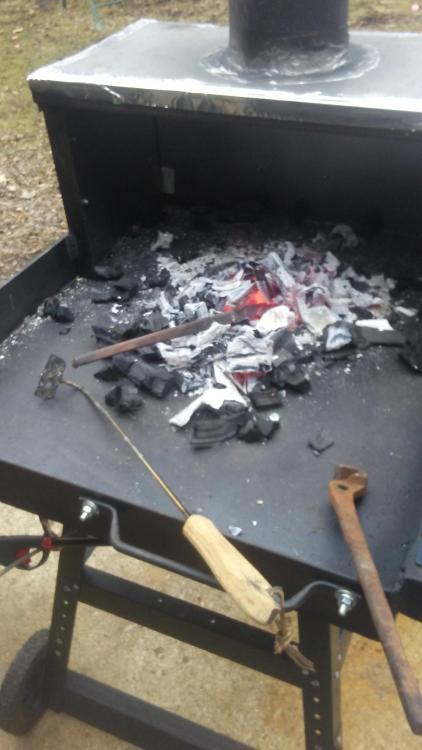
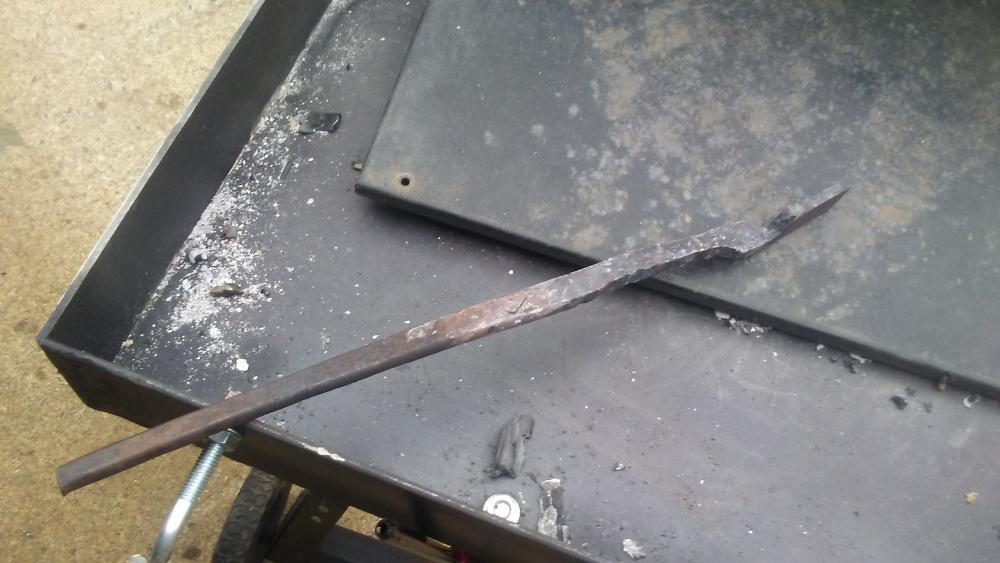
I started the new forge up with some charcoal today. I wanted to see how it went. I had a pair of nippers I wanted to try fashion into tongs so I gave it a go. OH MY GOSH how fun it is to hammer that red iron. It's like beating hard clay into shapes. It feels so soft till the heat goes out. I'm loven it. Here's a couple pics. The tongs just got a start and I need to review videos.
-
-
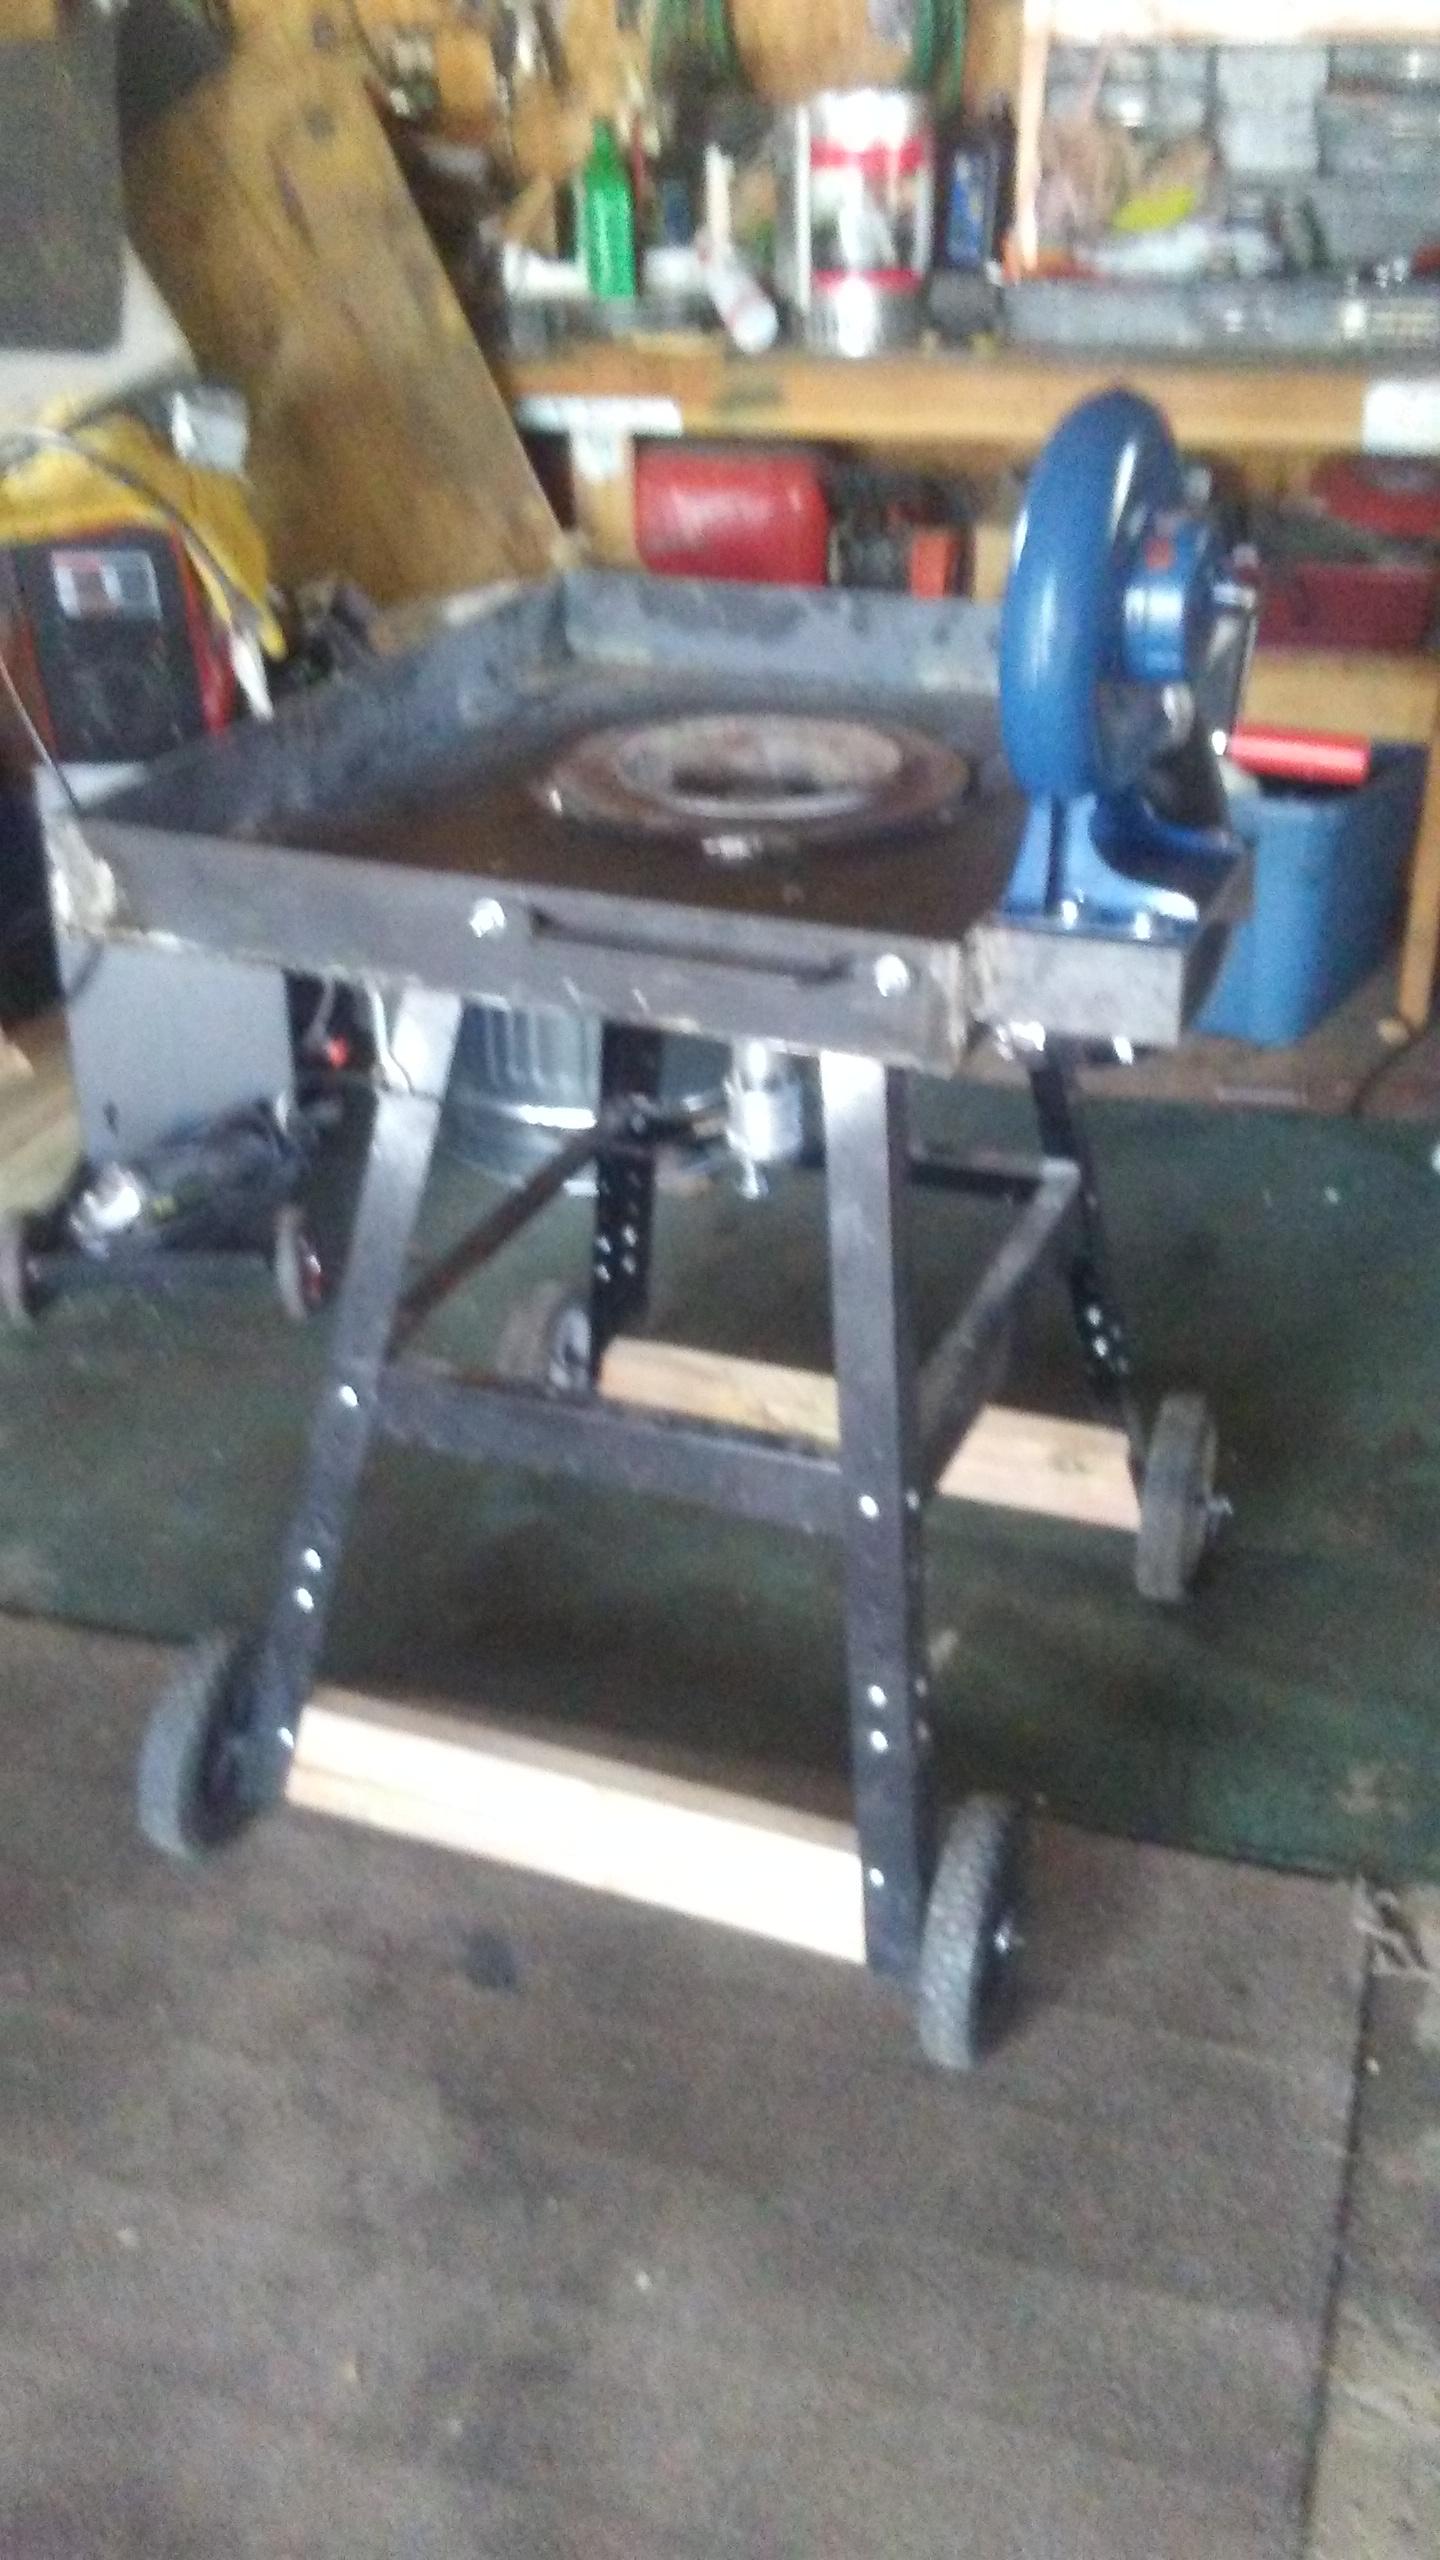
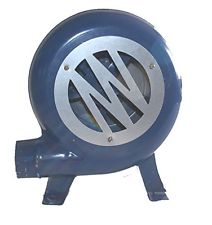
The blower was on E-bay for $72 free ship. I say cheap cause its made in China and sheet metal casing but has steel gears and cast casing. It works really nice.
-
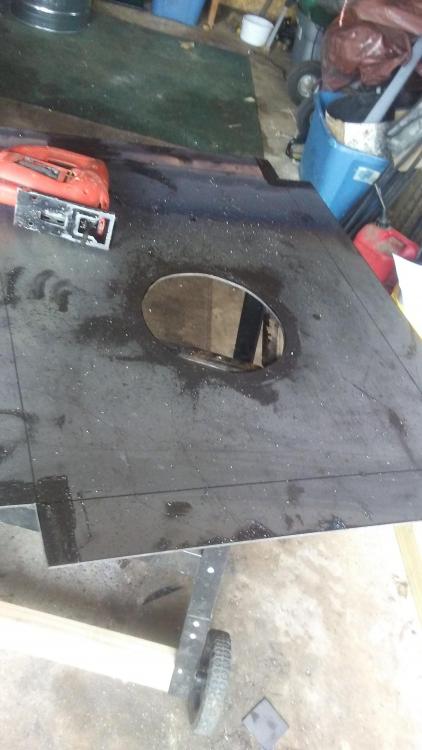
I should have mentioned that the table was upside down. Here's a pic with more of it together. I'm impressed with that cheap blower. It works great. I need to get some angle iron and make my hood, next.

-
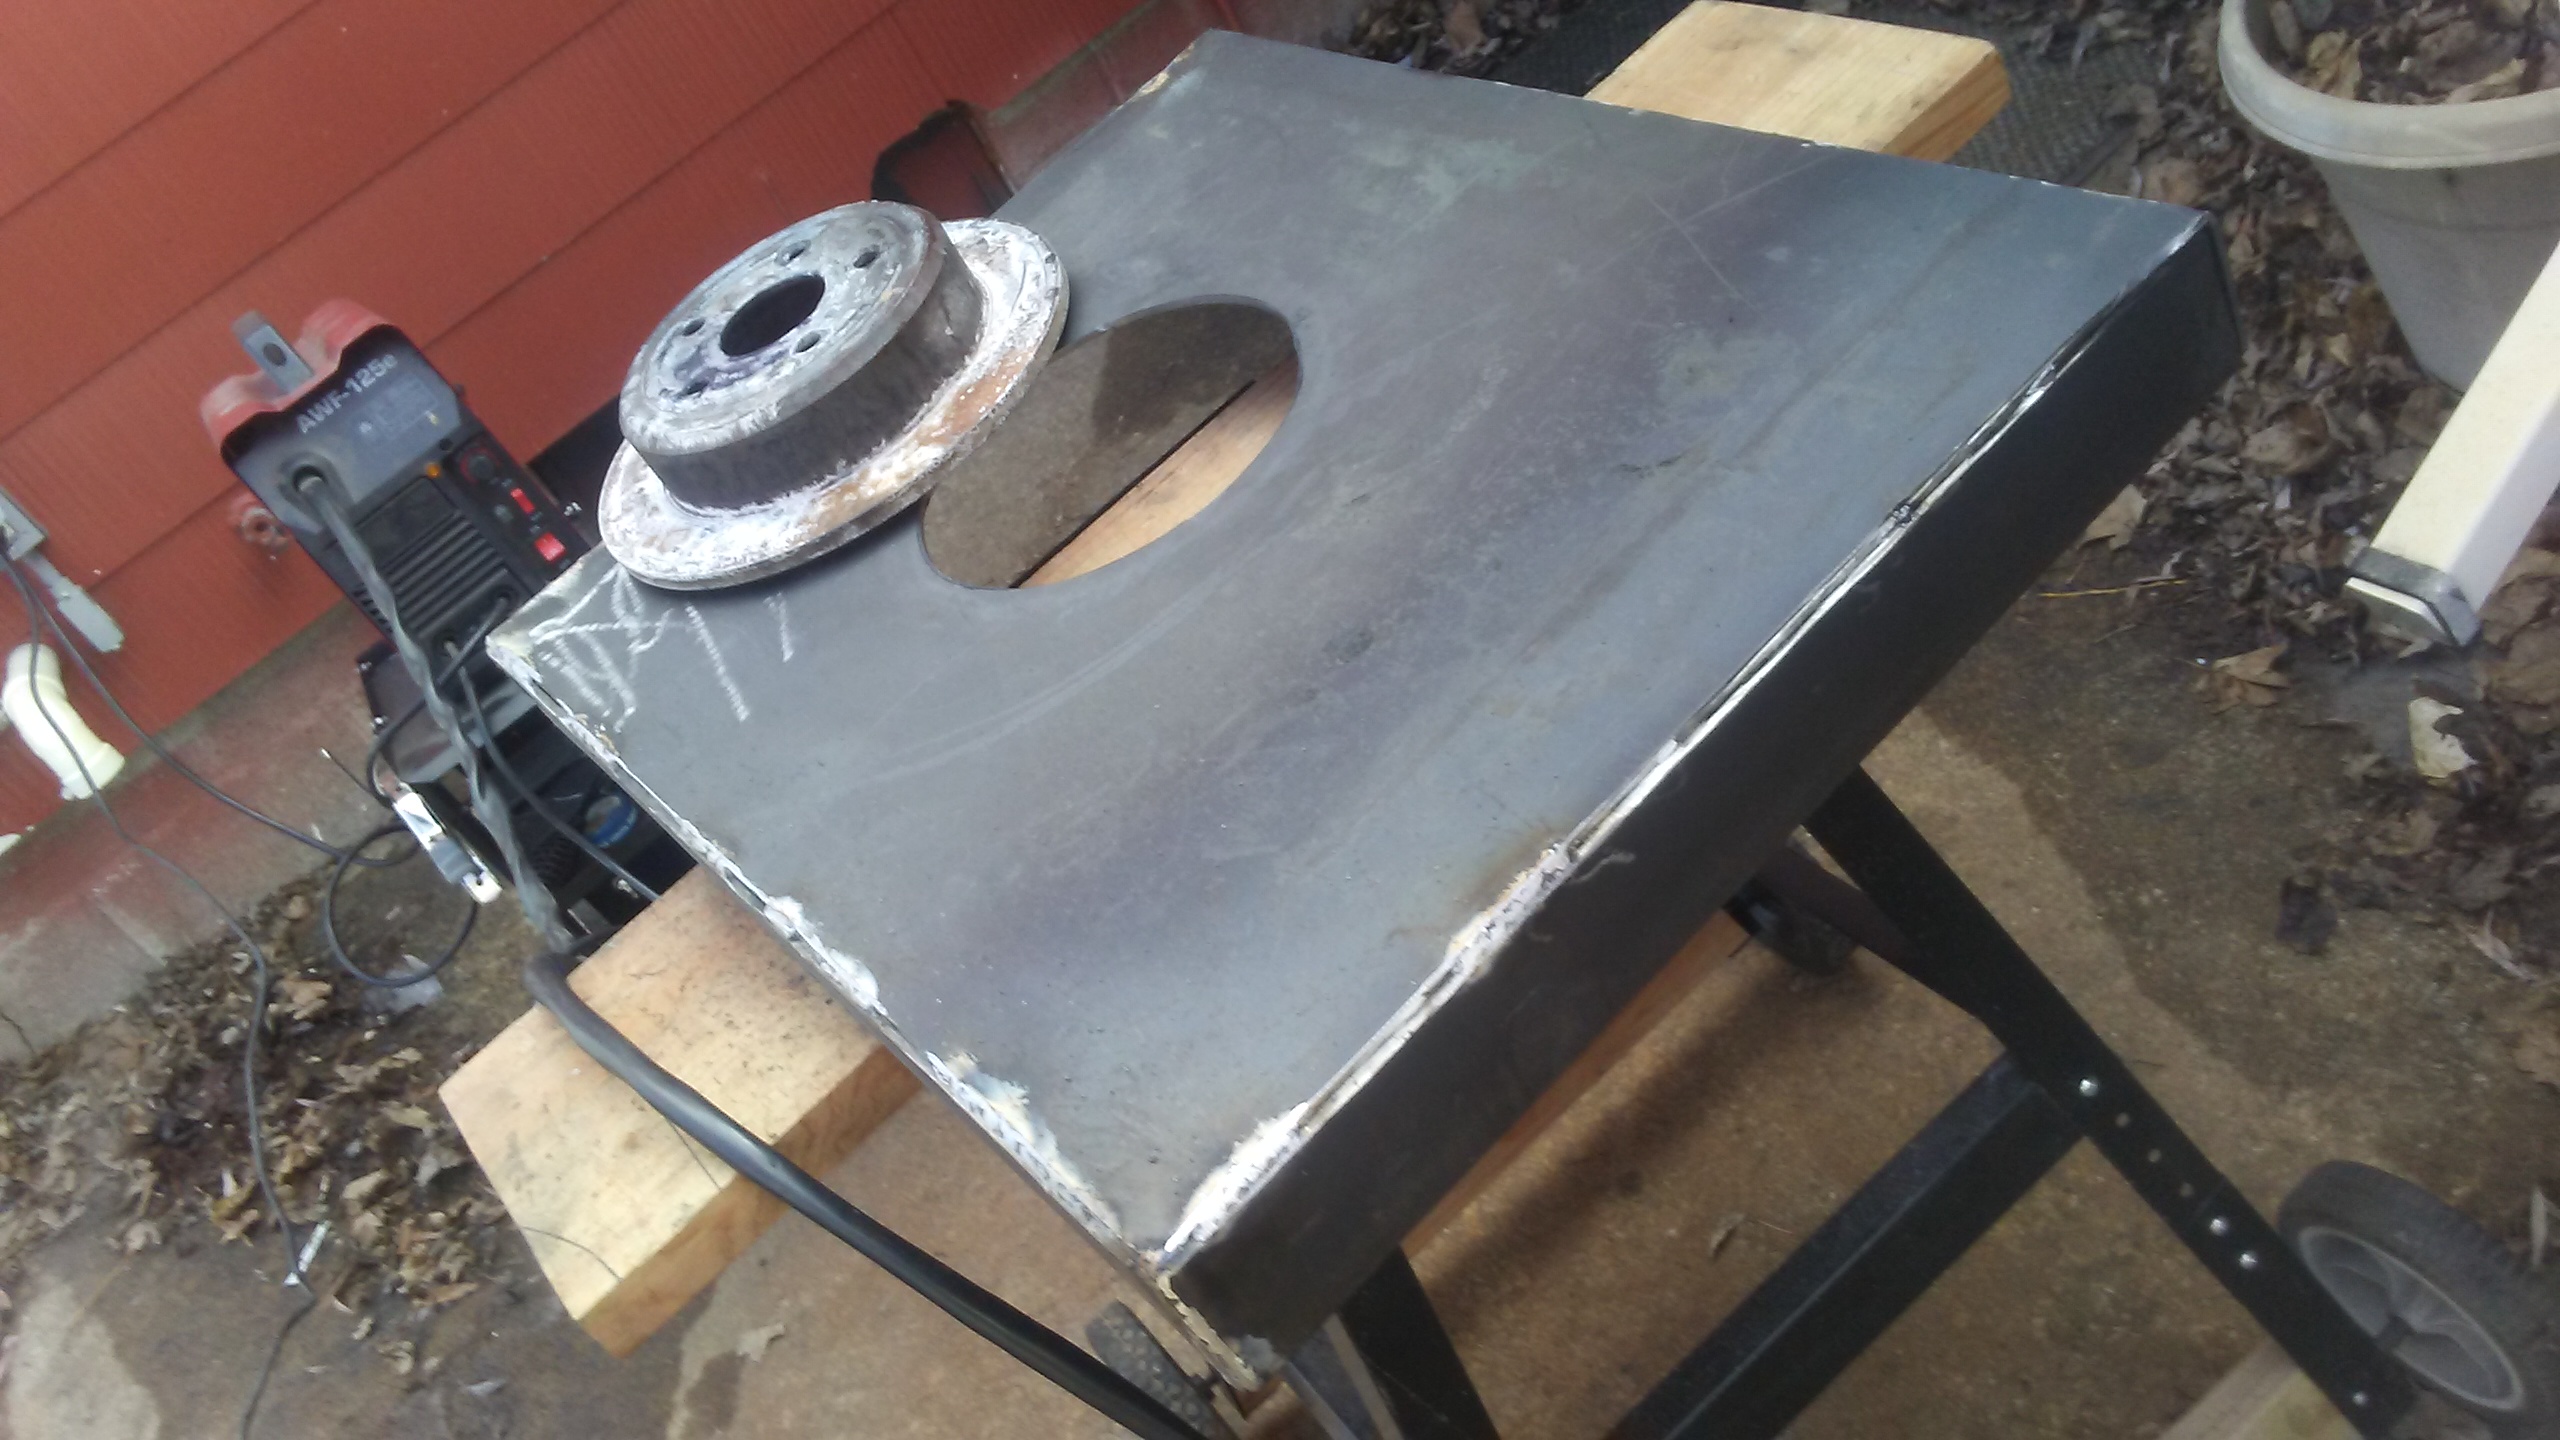
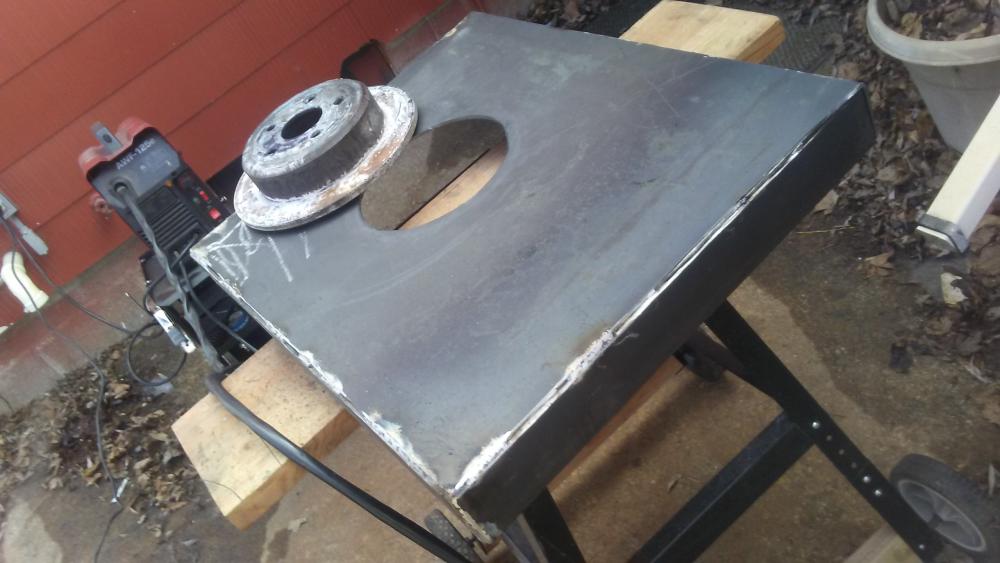
Here's a couple pics of my start on the new forge. I was in to Home Depot and got the makings for the tuyere and blower attachment. I'm lamenting on the stand that shows bellow the tray in the pic. If I should put heavier legs on this or use the stand. It's not heavy duty but rolls around nice. I guess I can see and change later. The tray is 24"x30" with 3" sides. I think I will make a hood over the firepot end to gather smoke up and away. I'm putting some time into this so it will look good and be functional for quite some time.
-
90% of my family lives up there so I need to go see them anyway. I have a new granddaughter up there, I haven't met yet.
-
I was working on my forge rebuild and got a call from my brother-in-law asking if I needed a blower for the forge. He said he had one I could have. It's a Western Chief and in working order. Sounds like it's a big thing and from pics on the internet it was mounted to a stand. I'm excited to get it. I have to travel to Northern MN to pick it up. 8 hour drive.
-
This will be a bottom blast. I just have lots of enjoyment building. I get teased all the time that I never use what I build. Oh keeps me out of the bars. LOL
-
I decided that I was not content with the forge I built and the durability of it was questionable. I started getting materials to do a better long lasting job of it. Before I venture into making the tuyere I should get a suggestion as to the size I should go with, using a hand crank blower. I'm thinking 1 1/2" for the sake that less effort is needed to get good pressure. I will be using charcoal only for fuel. This will be a tinkering around forge and not production of any kind.
-
I just picked up a bucket of R R Spikes at a crossing that was taken out last fall. The R.R is abandoned and they bpiled up the scrap on the side. There are many more that I left because of my carry capacity. Are these spike a hot item? I'm not sure what I will do with them but I see lots of projects with them.
-
Are these kind of a piece of junk?
-
You guys are going to get sick of me asking questions on here. I am so excited about building and using things for this new venture. My question is about the air valves in a bellows. I had a piece of rubber roofing that I thought would make good valve material. It's lighter than normal rubber roofing and quite pliable. I glued a piece to some 1/8 plywood and when dried the plywood had warped. My question is how heavy can these valves be and still work properly. It's evident the thin plywood won't get a seal. What have you guys that have made bellows used? Thank you fellas for your wisdom .
-
Looking at an inexpensive solution to bellows material. What are the thoughts about this 600 denier waterproof canvas . I saw a post on YouTube a guy used a vinyl back canvas for his bellows and it worked well. I would be more pliable and not stiff to inflate.
-
I'm going to add to this post. I read that one should make the top lung bigger than the bottom to have more volume going to the forge and if I am correct in thinking the bottom lung is just for pumping up the top one and maintain pressure. Is this correct? The sizing of the nozzle in comparison to the incoming vents is also a factor as to stay ahead of what's going out ? I read that one member had planned on upgrading to a 2" nozzle from the 1 1/2" and was glad he hadn't cause it would have let to much out and pumping would have been a chore.
-
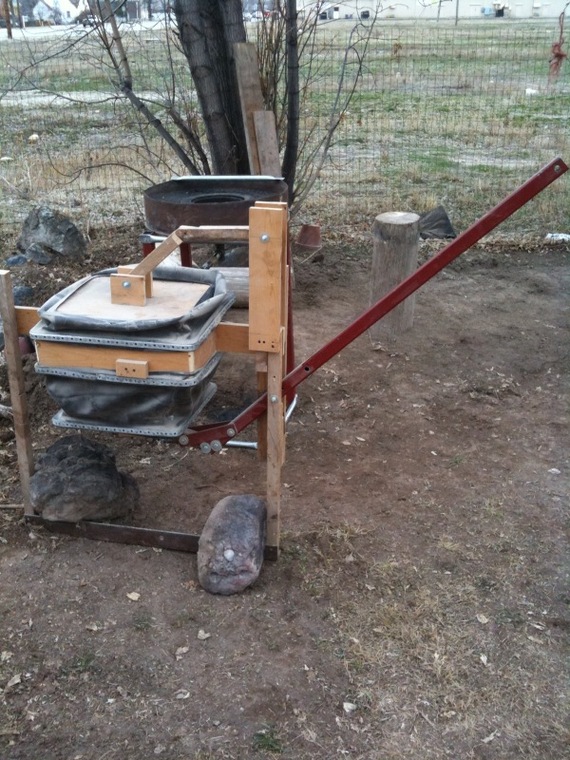
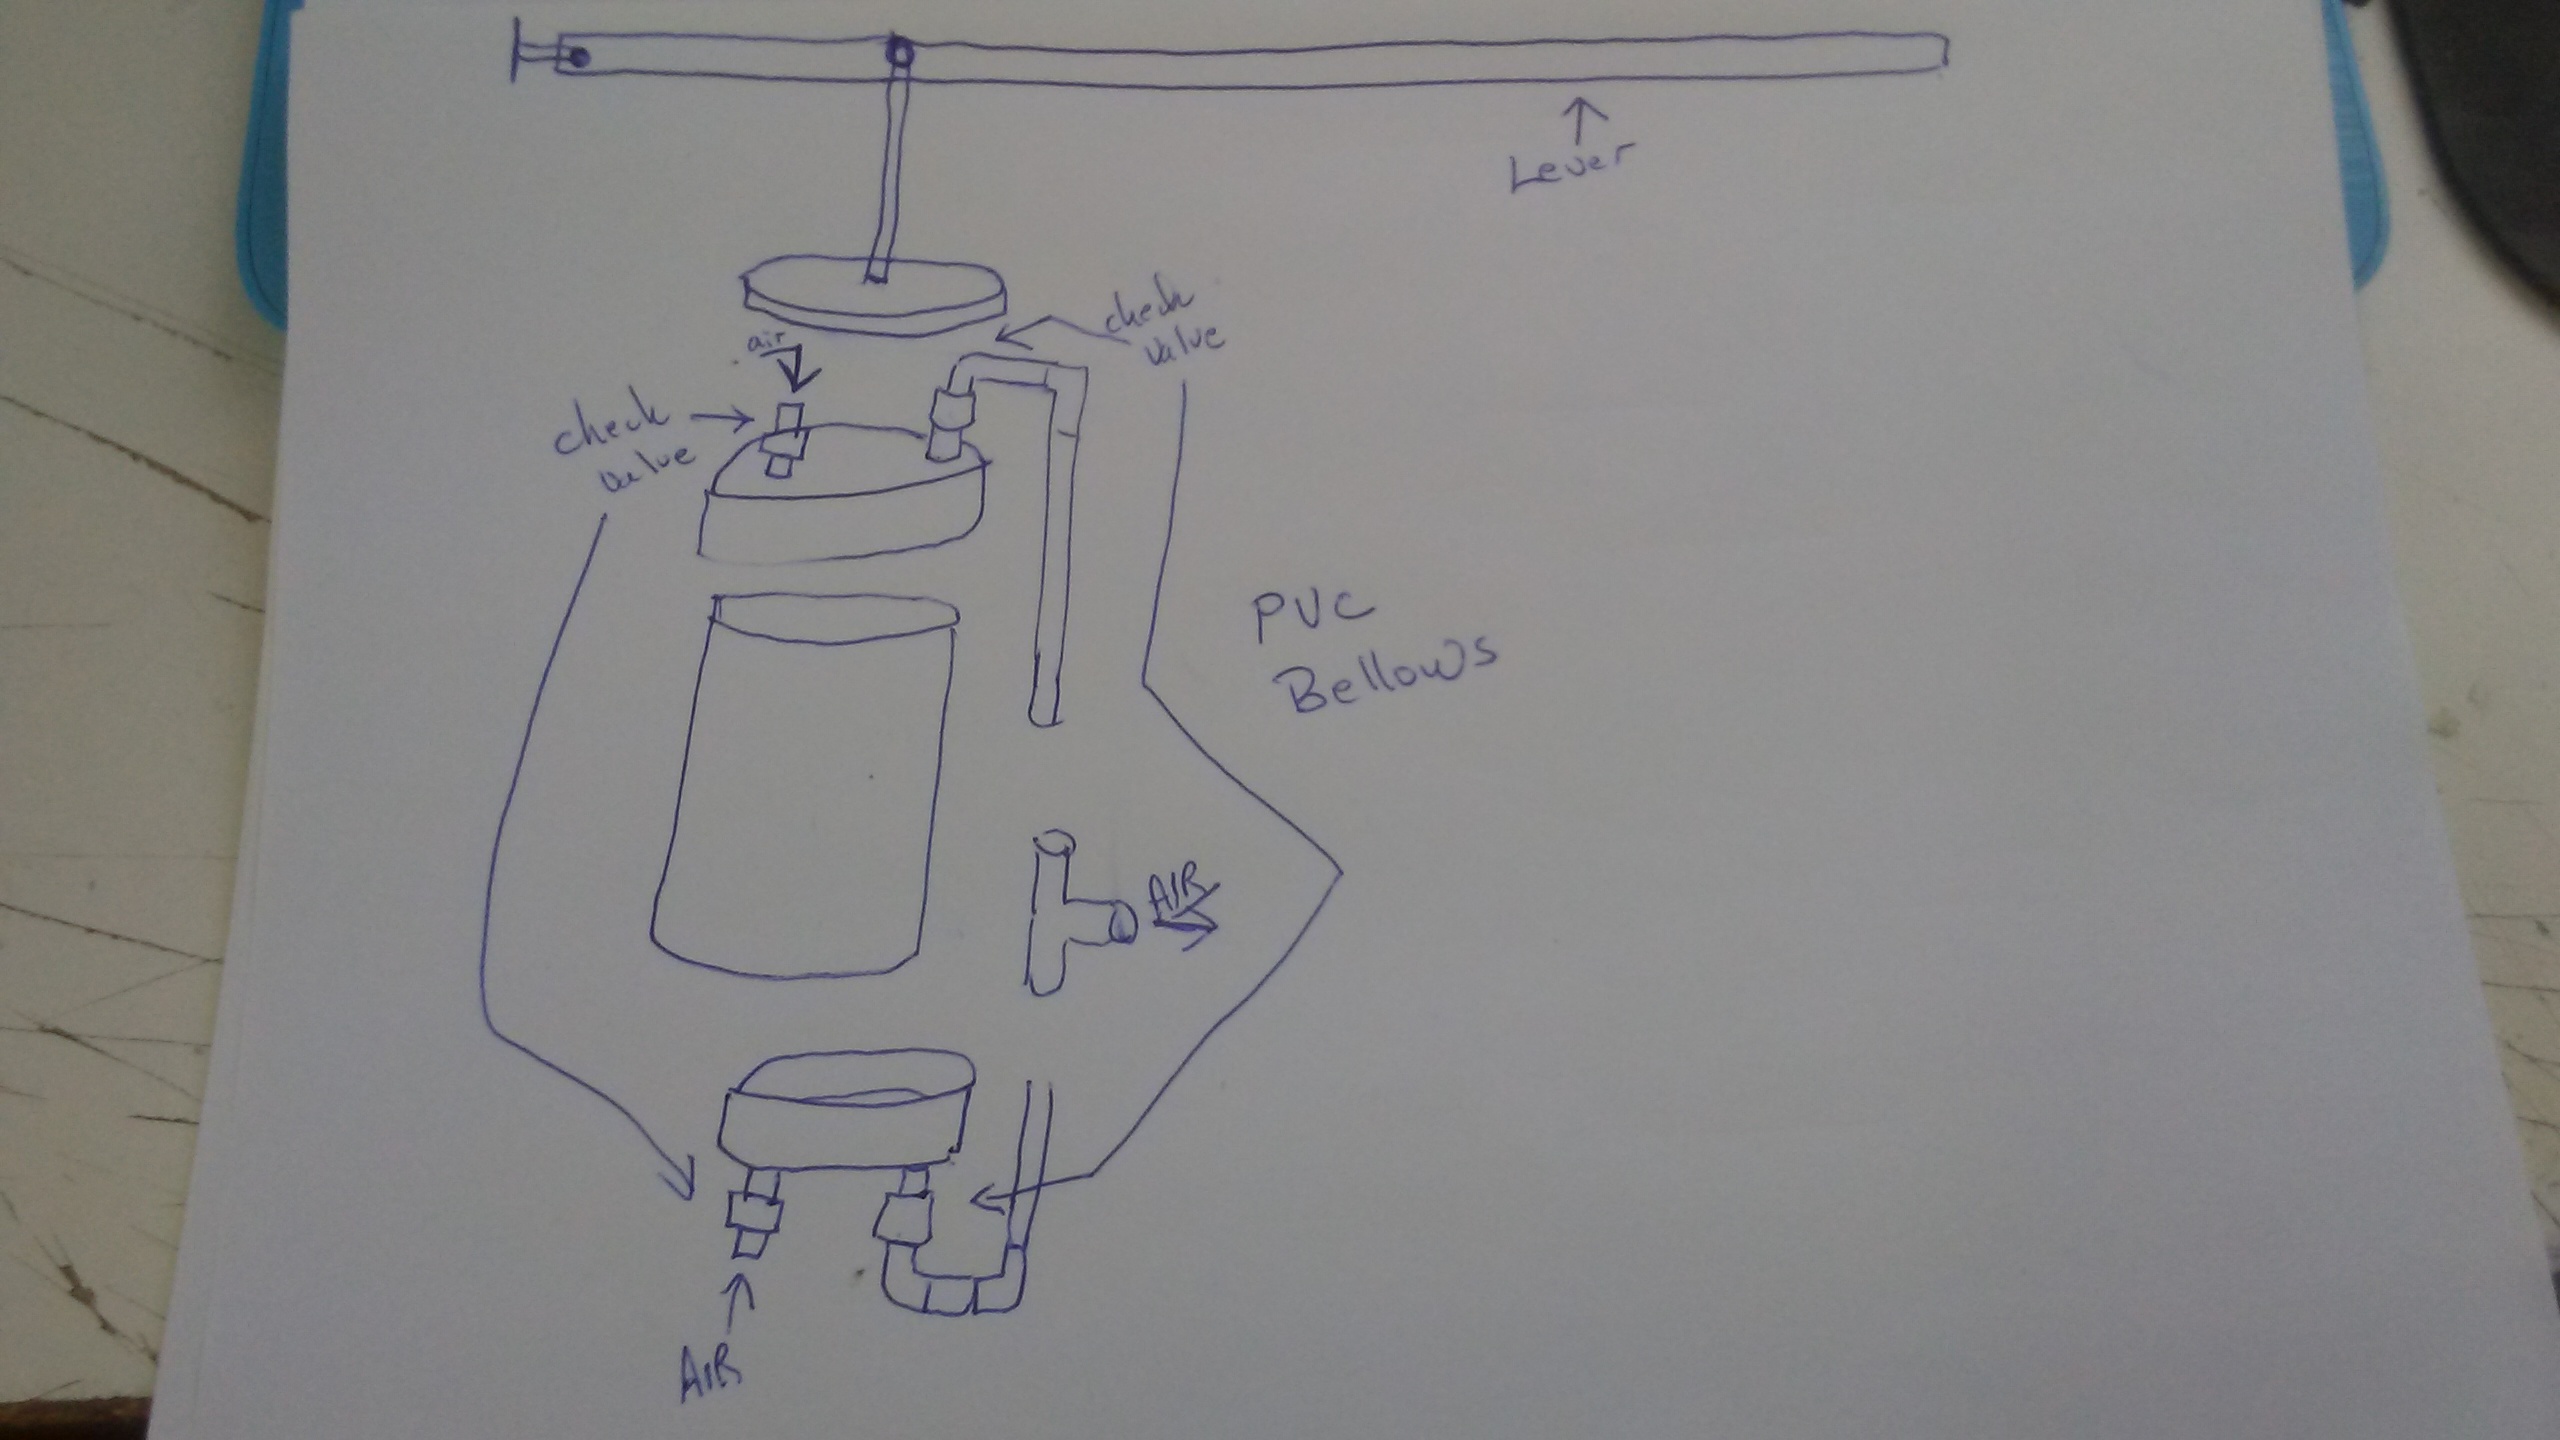
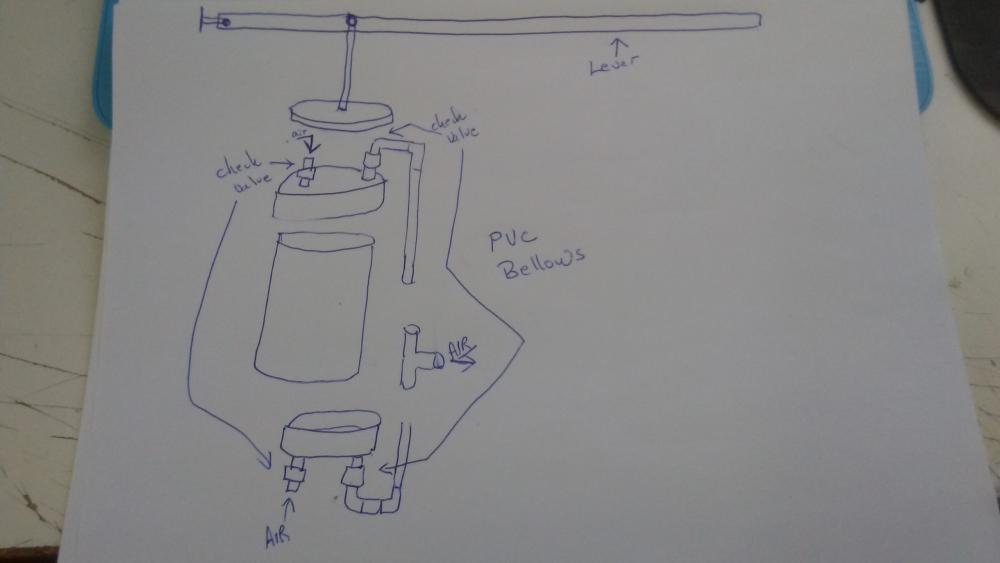
I have been searching for a bellows design that I would like to build. I have search all that I can find on this site as well as others. I found a design that was posted on this forum some time ago that has caught my eye and wonder if anyone has built it or knows about it. I have a small charcoal forge I built that is somewhat portable. I want to go with a none electric use air supply without going to the hand crank style. My work area is small and this pic of this bellows would be perfect if it is efficient and ease of use. If this all makes any sense. Here's the pic.Any thoughts or advise?

-
Tom I have looked at the different pics of what are available on this sight and all I can find on YouTube. It's to bad the older posts were lost in the switch. My Char Maker is the same as so many I've seen and I don't claim any credit for any design. I built mine to be simple and economical to make. They all are just a container that holds the material to be charred and a container or pit to have a good fire to heat up the container. I enjoy researching information and illustrations of everything pertaining to the forging of metal. It is so enjoyable to recreate what our forefathers did as a way of life back in the day. I'm a very newbie to this part of metal working and I look up to all of you that have been doing it and educating others about it. Thank you all.
-
I made a quick drawing of my last design thoughts.
-
JHCC you may have something there, by golly. I went shopping or should I say looking for a cylinder type air chamber. My thoughts are on the steam locomotive piston and cylinder set up. I looked at chimney pipe, 8" and then thought of PVC pipe, 10" or 12". Have both ends capped. On each capped end make a check valve for incoming air, out of some fittings and a ping pong ball. Make the same for out going and tie the two ends together with say 1 1/2" PVC to a T fitting that goes to the forge feed. I hope I'm giving enough info to paint a picture for you. LOL I'm a dreamer Engineer. LOL. Go with that idea if you will. My end result would be to have a bellows that I can pull on a cord above the forge and make the bellows work. Also save room in the work area.
-
I plan on making some apple or oak char for the BBQ. It will be much better than using the brickets that are made of who knows what. I have a gas grill but that's not like the good ol wood fire. I may tinker with the inside container to improve on the design. right now it has 3 legs that it sits on and they inhibit loading the fire material. I'm always tinkering.
-
Frosty, now you got me thinking. Great idea there. The old timers with the big hour glass bellows had pulley systems to work the bellows up and down. I'll have to do some dreaming on that.
-
Very Good points Tom