

HP500
-
Posts
95 -
Joined
-
Last visited
Content Type
Profiles
Forums
Articles
Gallery
Downloads
Events
Posts posted by HP500
-
-
Can anyone help? I did a Google search for a parts diagram/schematic but struck out.

-
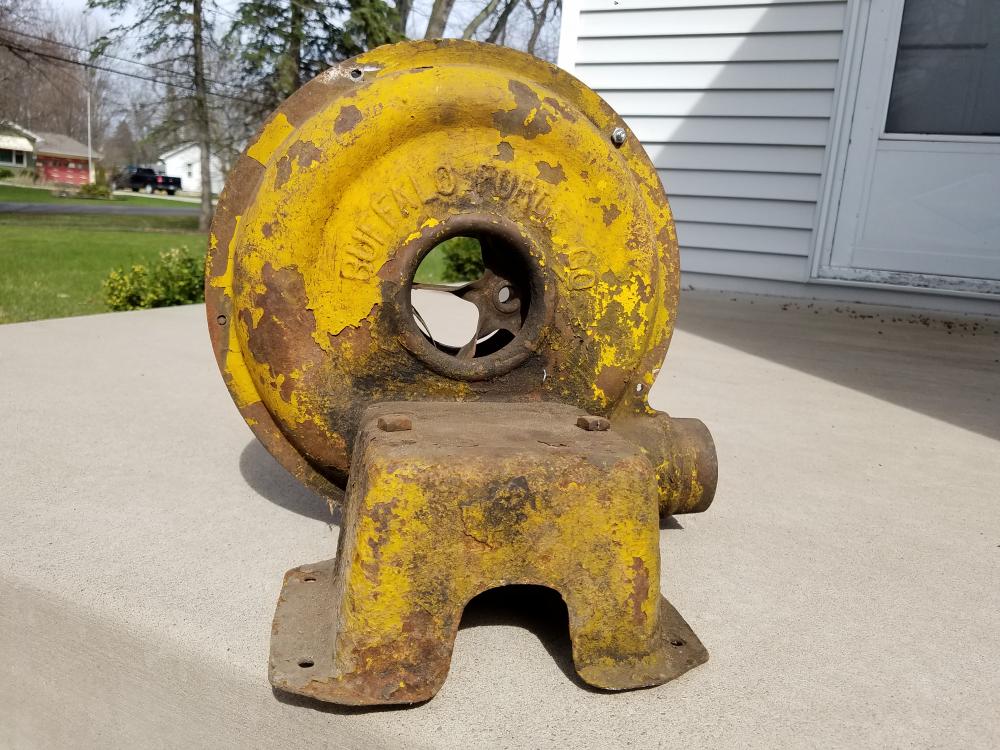
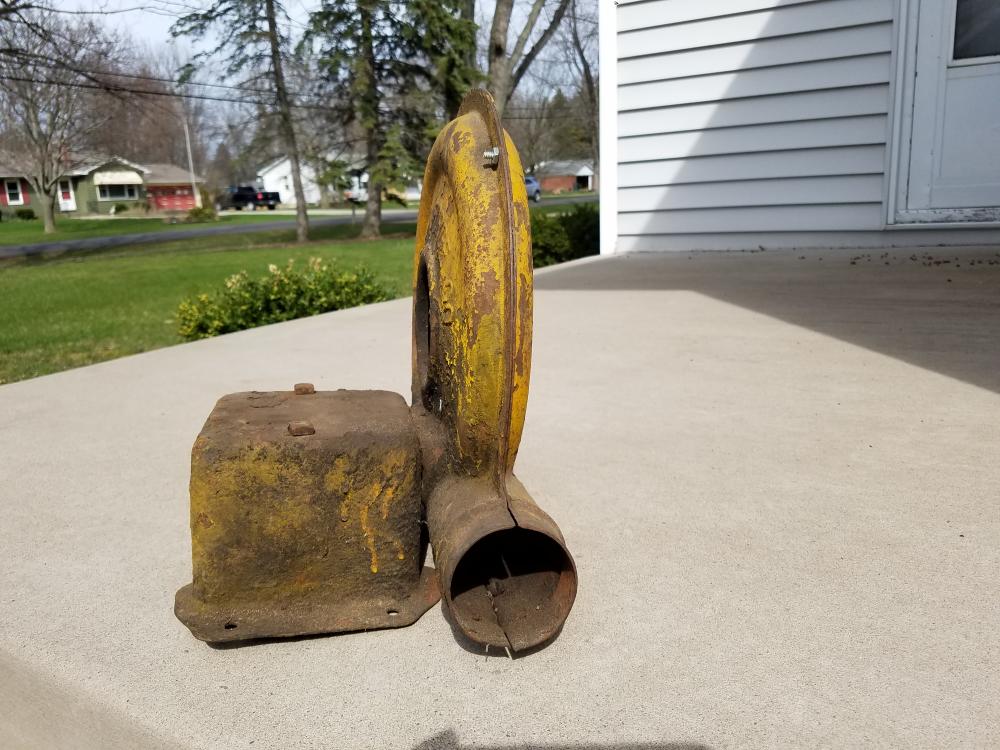
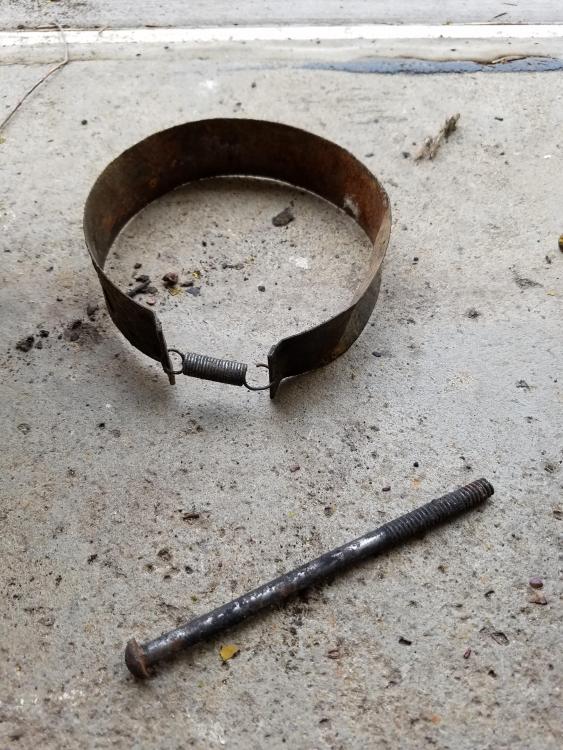
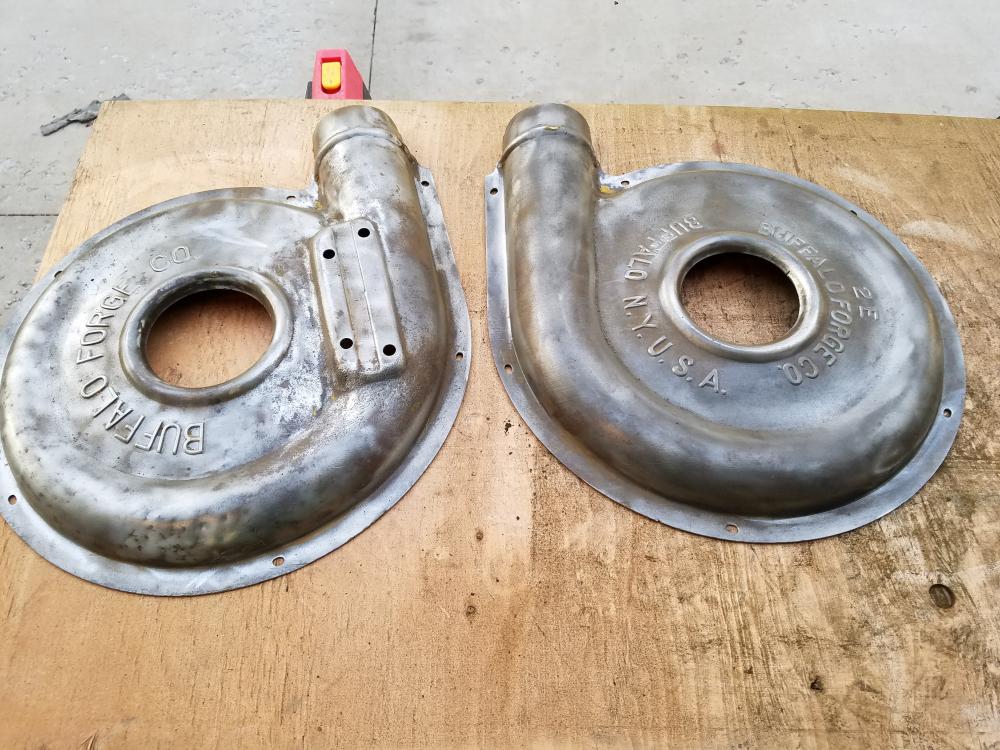
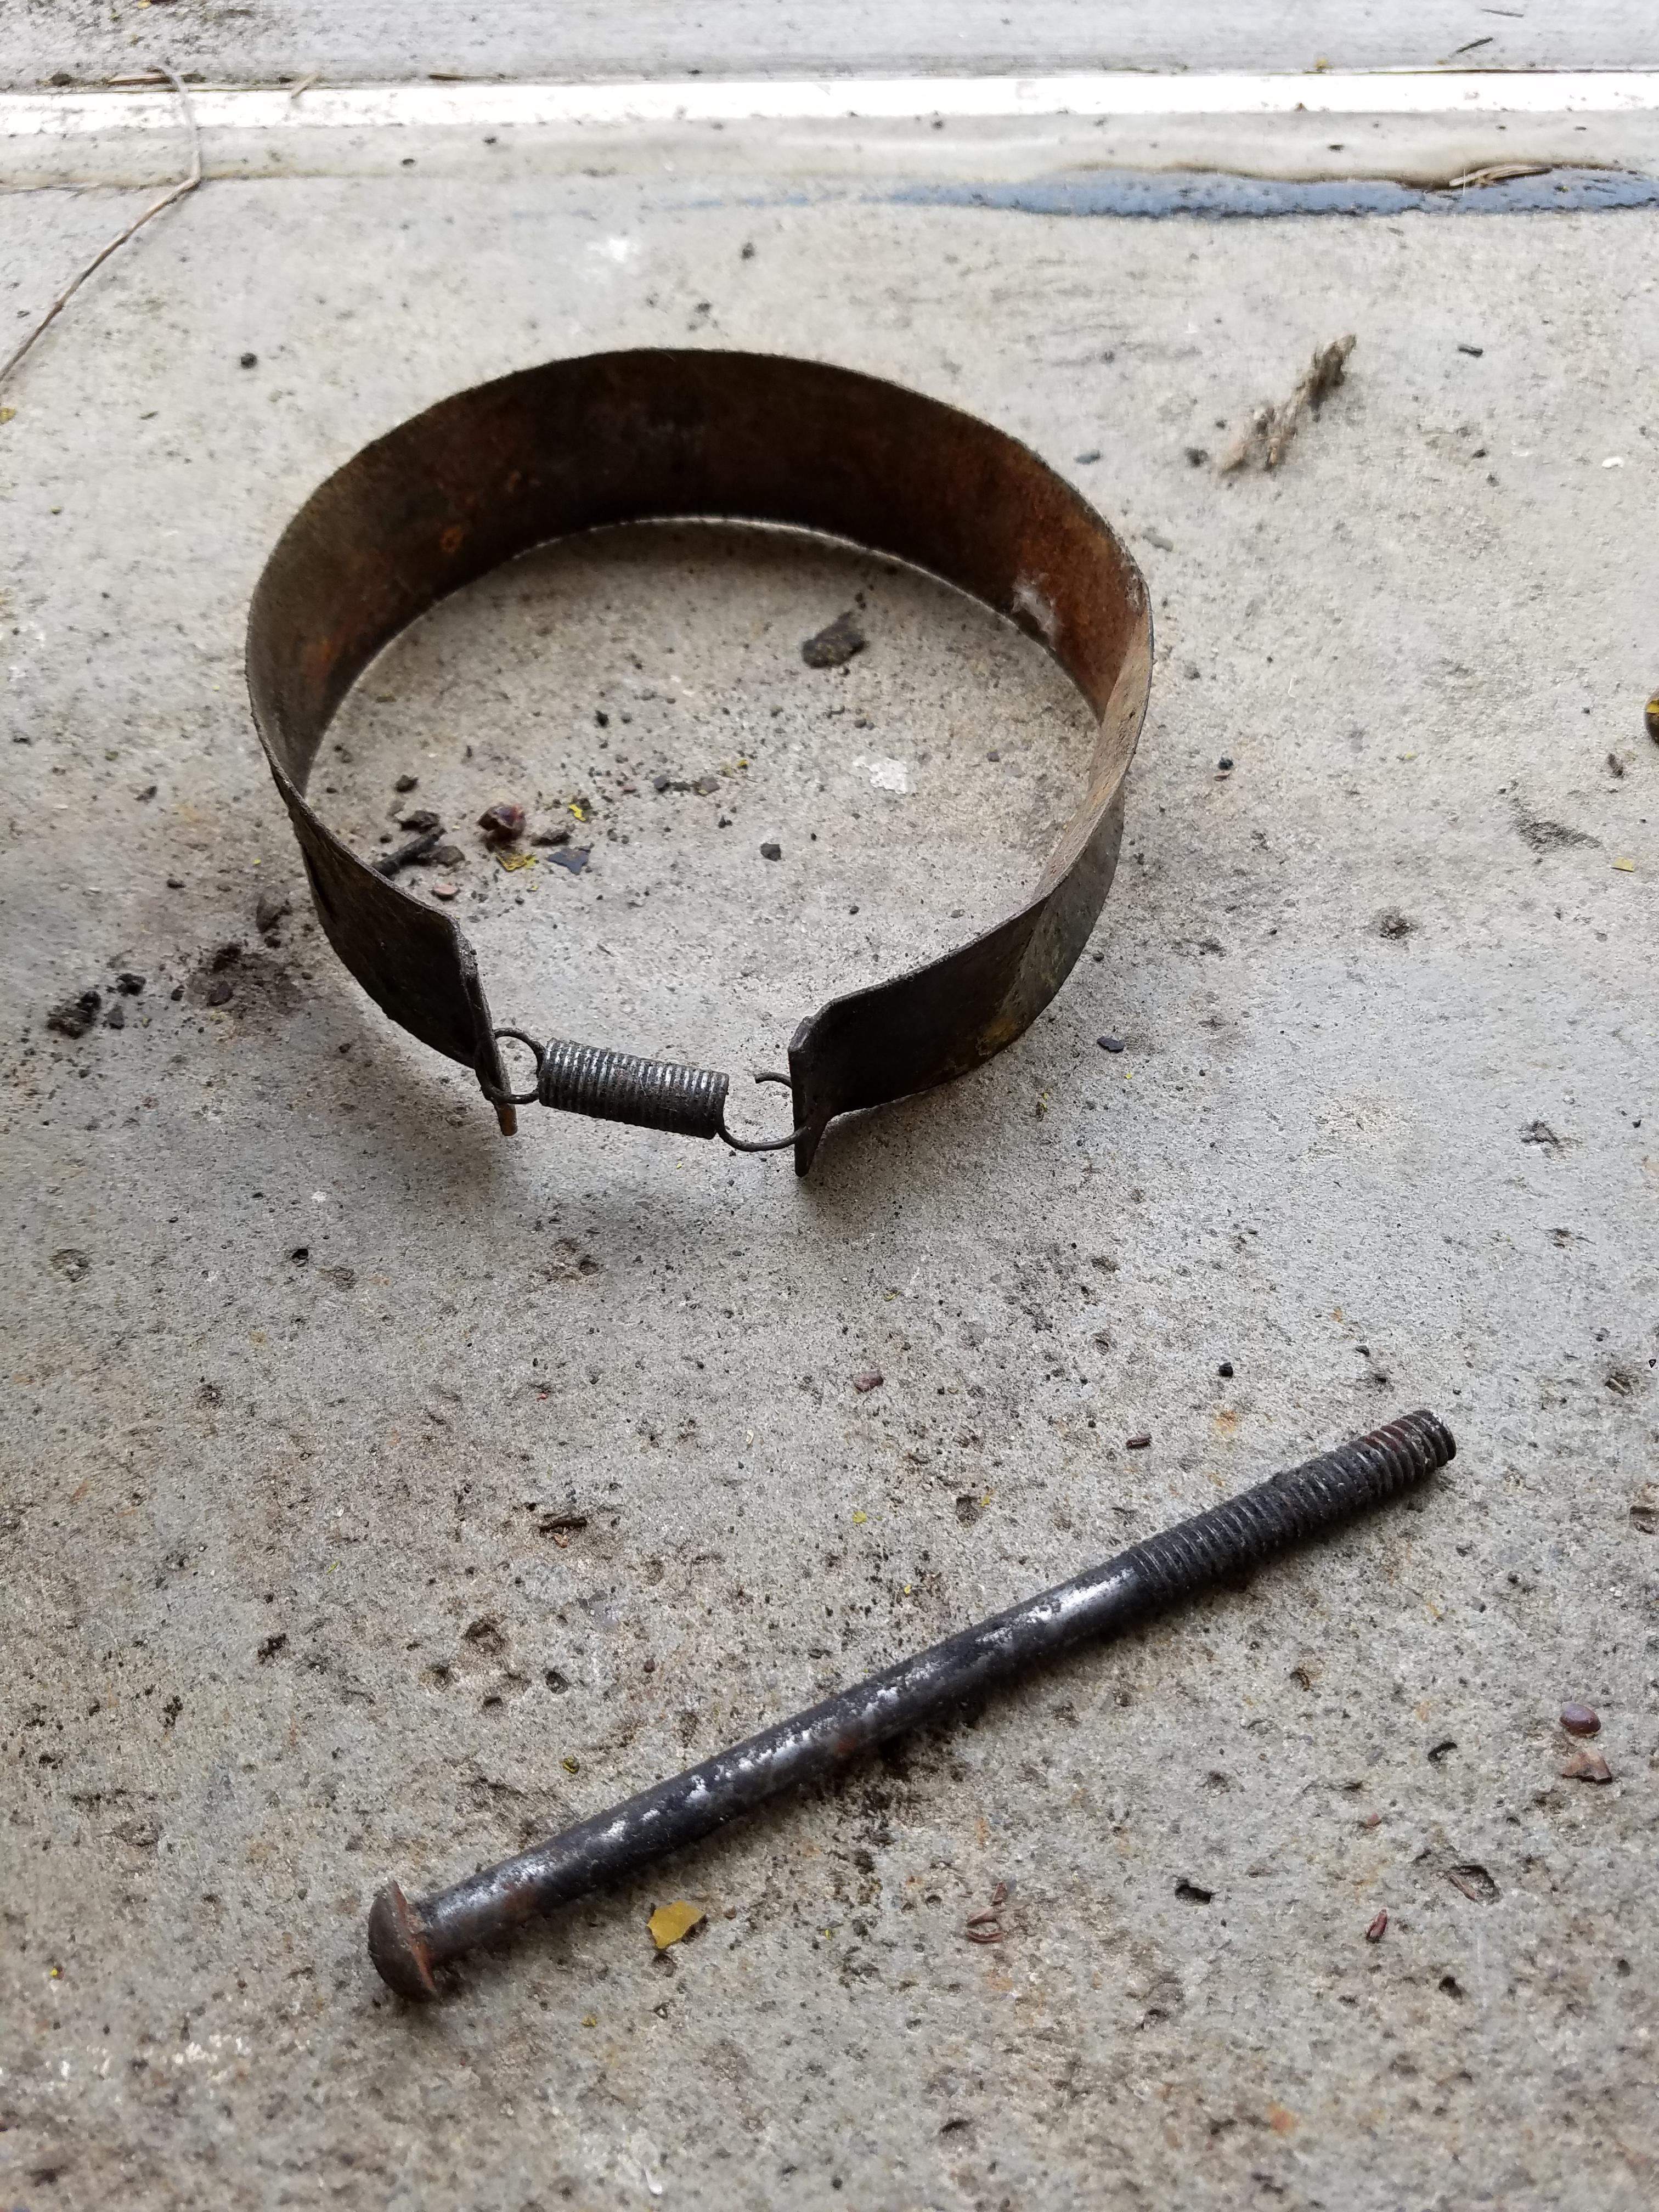
I just picked up an old Buffalo Forge 2E blower that is missing a motor. I am in the process of reconditioning it. When I took it apart, two pieces fell out and I can't figure out what they would be for. One is what looks like some type of collar with a spring on it. The other is a long bolt. Can any one tell me what they are for? Also, If you have any motor recommendations for this blower, I would greatly appreciate it. Thanks!
-
OK, thanks Charles.
-
My original plan was to build a brake drum forge, but after taking my first blacksmithing class recently, I decided to copy the design of the class room forges. Unfortunately, I didn't get a chance to measure the firepot during the class and it will be a while before I can get back for another class. From what I can remember, the firepots looked similar to one of these design mock-ups:
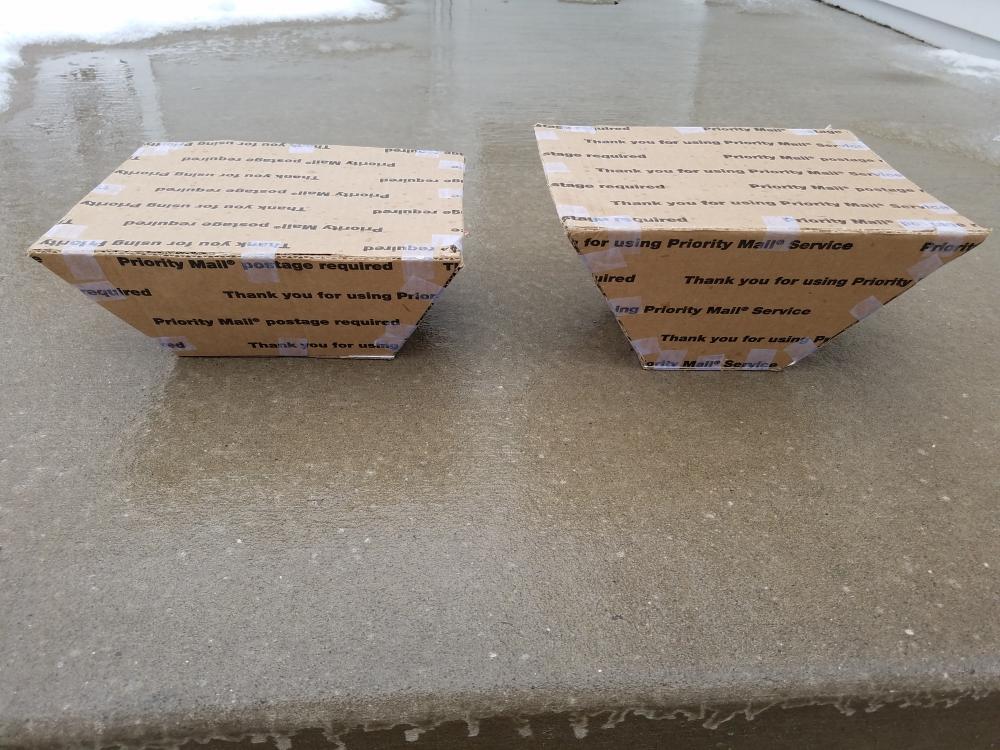
They are both 8"x10" at the top opening. The one on the left is 4" deep and has a 4"x6" bottom. The one on the right is 5" deep and has a 4"x4" bottom. Are there any advantages or disadvantages to either design? My goal is to build something versatile so I can forge small diameter pieces as well as pieces up to 1.5" or 2". I will be using the same good quality smithing coal we used in class from the same source. I will be welding the firepot together myself, so I can make any adjustments as required. Comments or criticism welcome. Thanks!
-
I was finally able to attend a local class yesterday. As a total beginner who never hammered metal before , I'm glad I took this route. I'm sure I saved many hours of trying to learn on my own by trial and error.
We started out with safety instructions, followed by how to build a proper fire. Next came hammering techniques, doing some tapers and making some curls. I even managed to do some forge welding (with some help). My first project was a coal rake. It wasn't pretty, but it was usable. My last project was a fireplace poker. It will never end up on display at a museum, but I learn a lot making it.
There were a great bunch of guys who were willing to help out. I'm definitely looking forward to going back again!
-
Very helpful info, thanks!
-
Sounds good, thanks for the info!
-
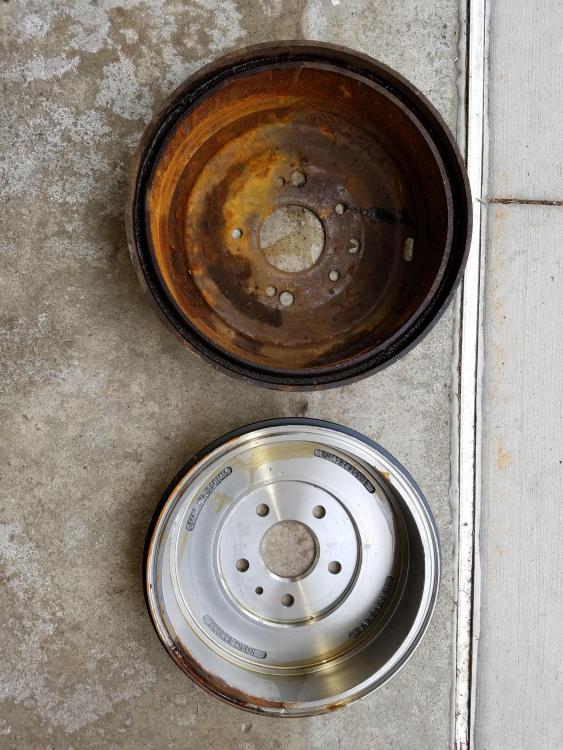
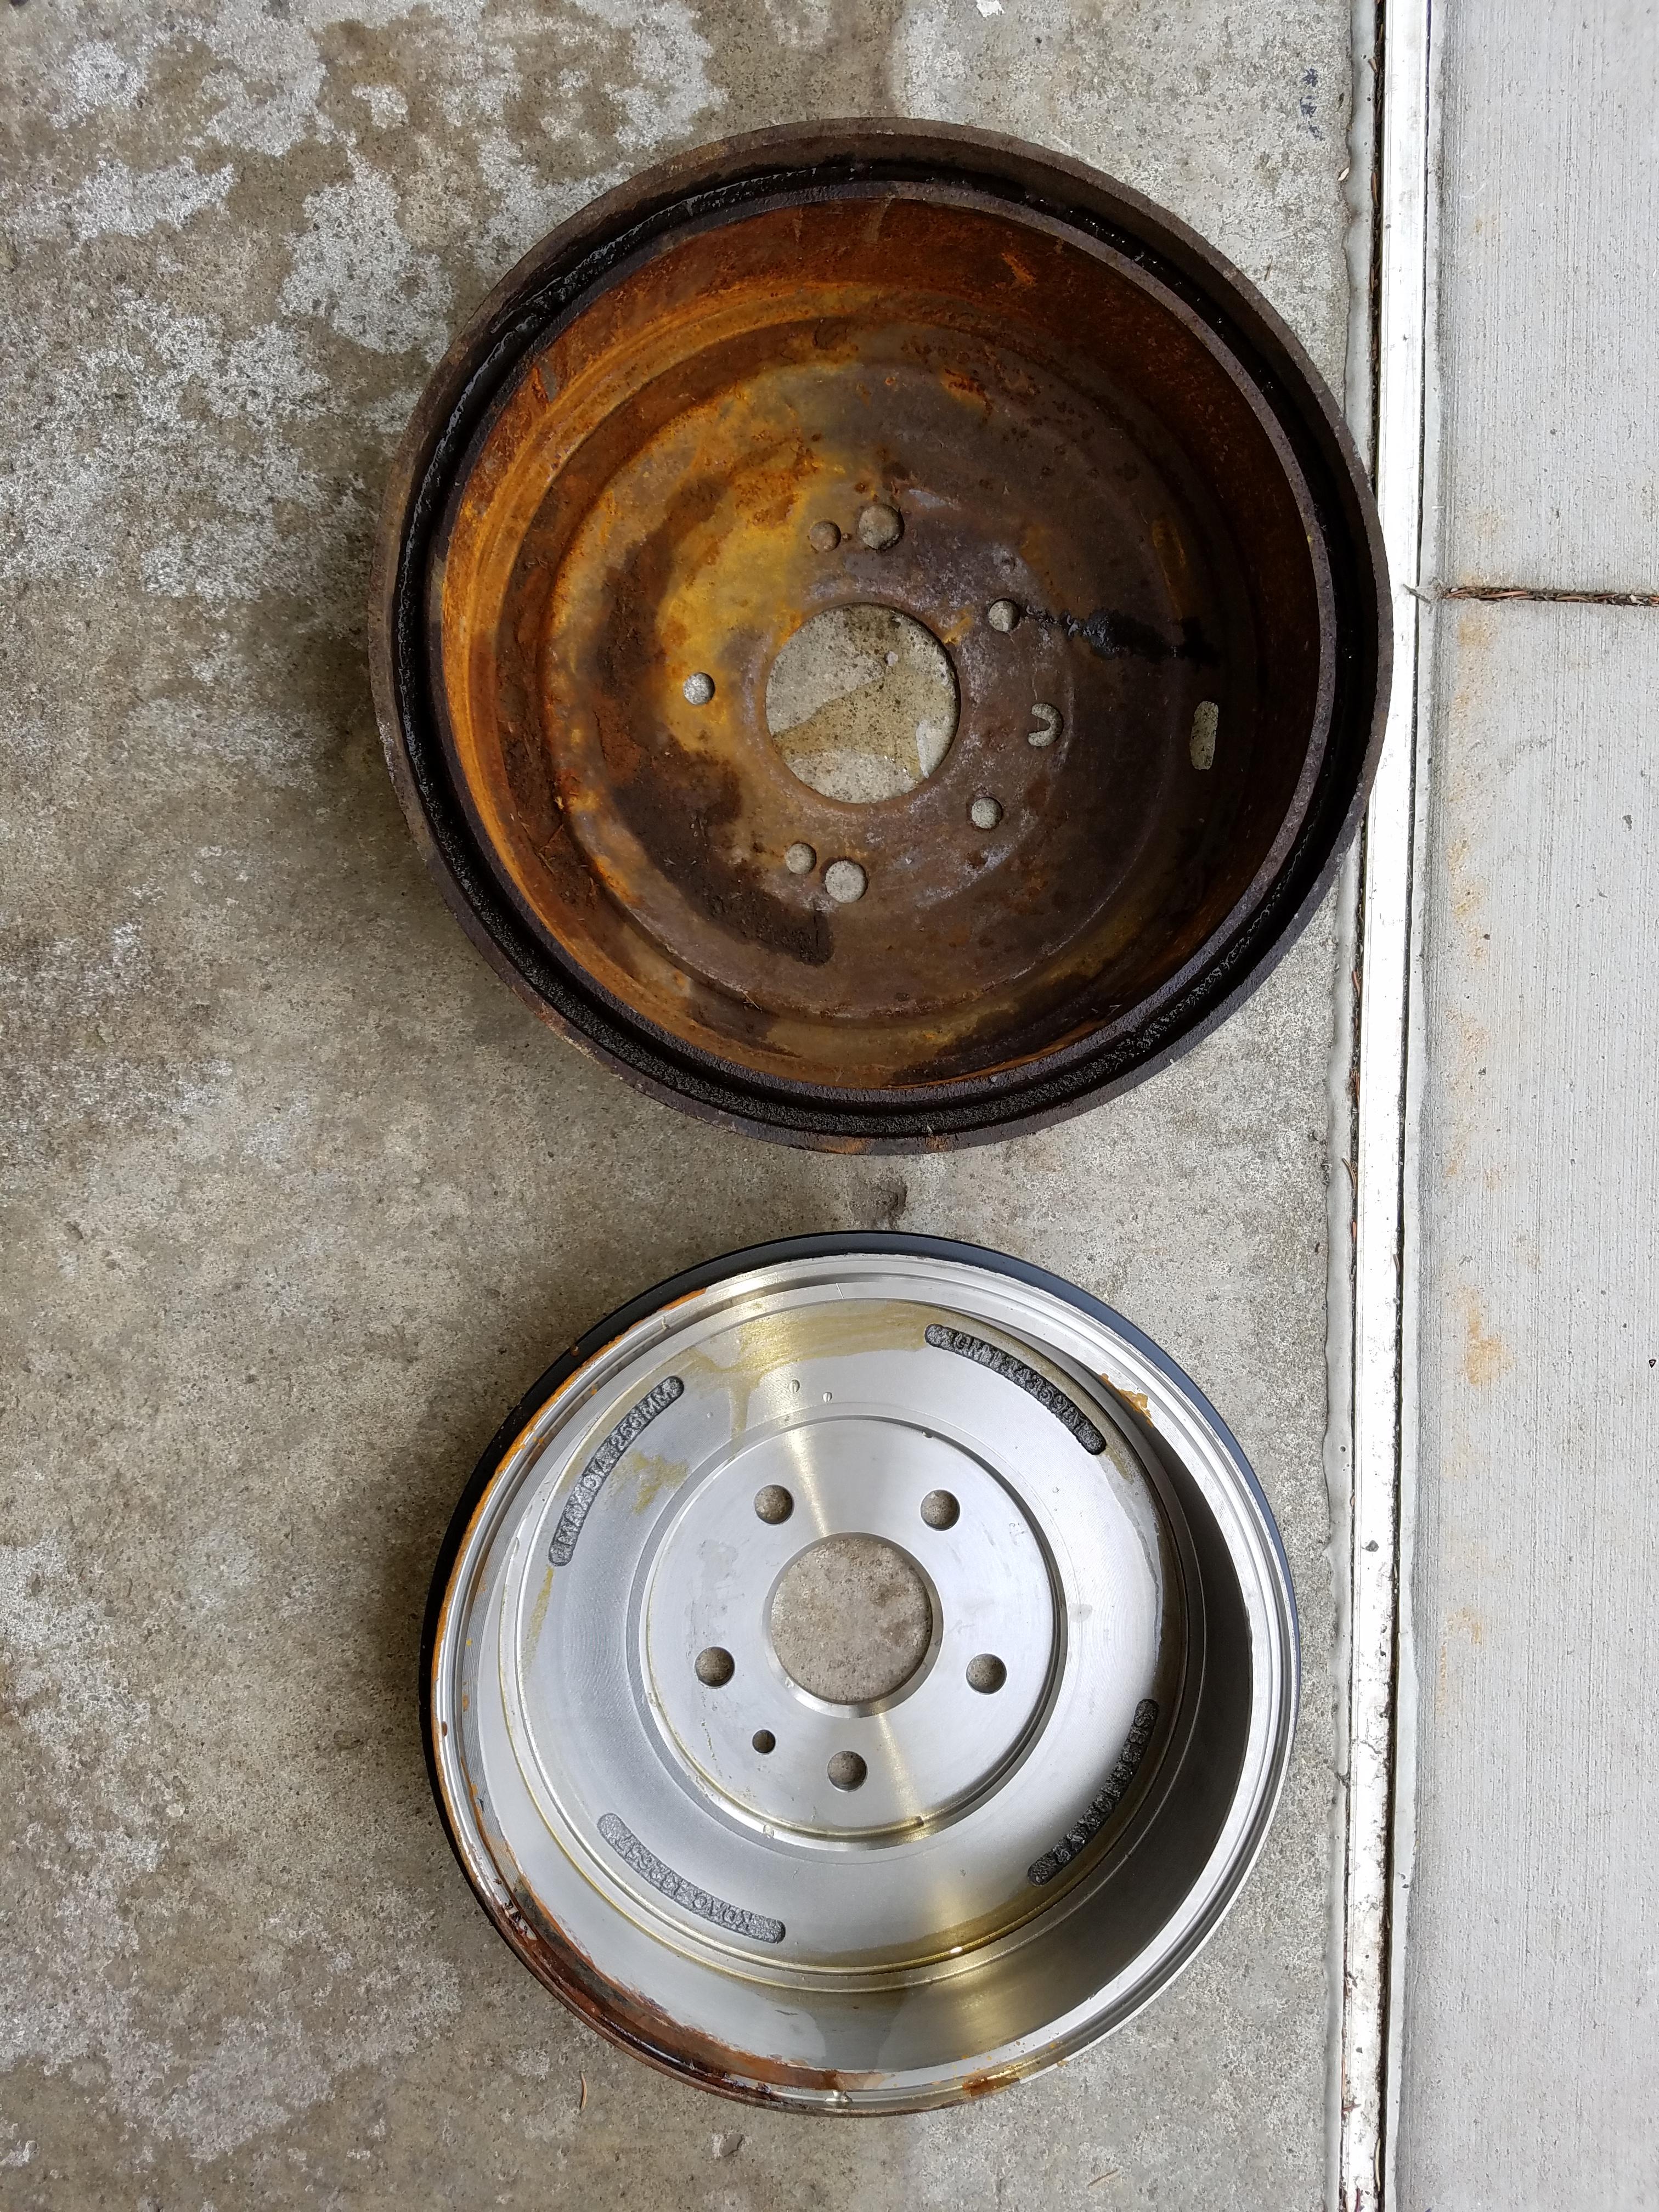
I forgot to add that the new looking drum is 2" deep and the large old one is 3" deep. I'm leaning towards burning coal from TCS.
-
I did a search but couldn't find anything that addressed the wall thickness question. I scored these two brake drums for free today. The top one is 11" ID with a 1/8" floor plate thickness. The new looking bottom one is 10" ID but 1/4" floor plate thickness. I'm guessing the thicker one would be the way to go, but is it more important to have a slightly larger diameter?
-
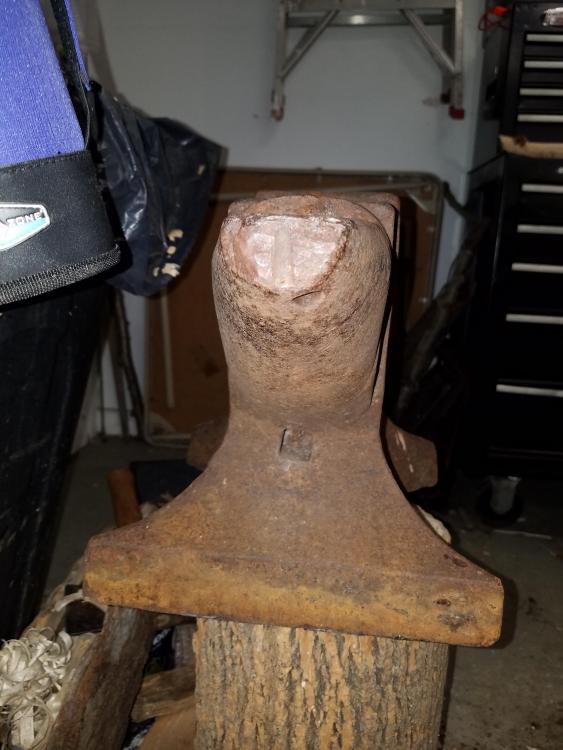
On 1/10/2017 at 7:57 PM, BIGGUNDOCTOR said:
If you need a better edge you can make a tool that drops in the hardy hole.
Thanks!
On 1/11/2017 at 2:29 PM, ThomasPowers said:I was working on some chilies forged from black pipe last weekend and really enjoying how the rounded edge of the anvil made a perfect fuller to touch up the stem/body area with my favorite crosspeen. Delicate work as I was using very small pipe, less than 1/2" OD, never a problem "cutting" the stems off.
Do you have any pictures of these?
-
Thanks everyone. I'm looking forward to starting the journey!
-
That makes sense. Thanks guys!
-
UPDATE:
I was able to work out a pretty good deal. The anvil is actually owned by one of my neighbors. He is in the US Army and will be out of town for quite a while. He graciously offered to let me "look after" his anvil while he is gone. So, I'll have the use of something while I continue to search for an anvil in better condition.
That leads me to a question: I've never used an anvil before, so please forgive me if this is a stupid question. If I attempted to make something like a flint and steel striker or a knife of some sort, what difference would a high quality anvil make on my success versus using the beat up one I have access to? I sure there will be a difference but I'm not knowledgeable enough yet to figure it out on my own. Thanks!
-
Good info thanks everyone
-
2 hours ago, j.morse said:
HP500, where are you from?
Western NY
-
Thanks for the info, this is very helpful.
-
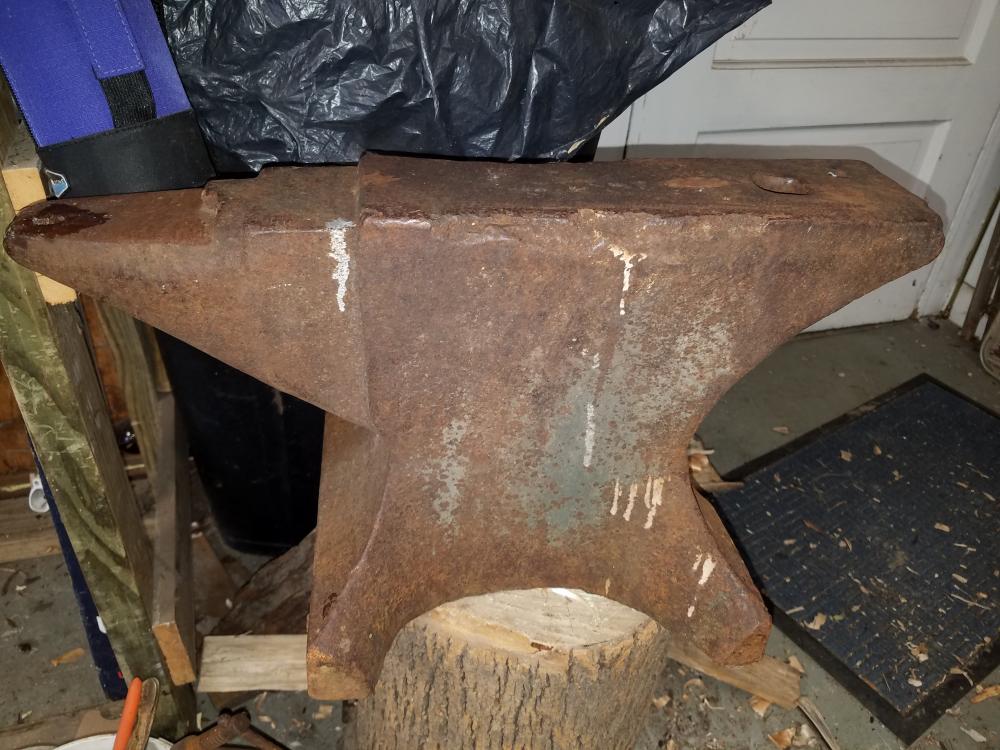
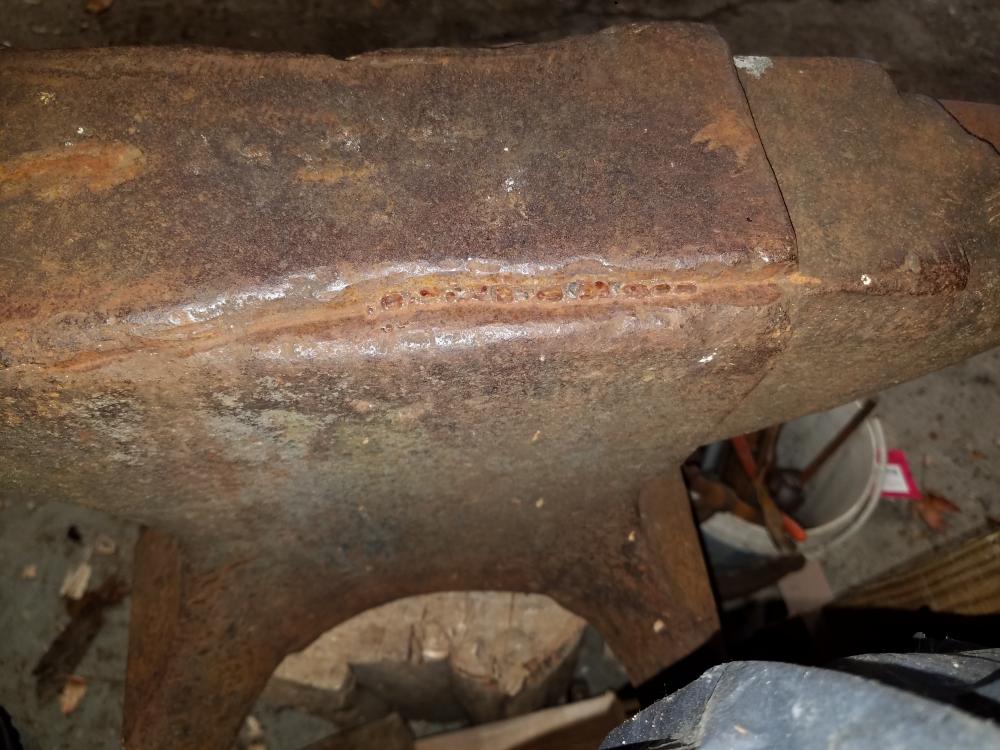
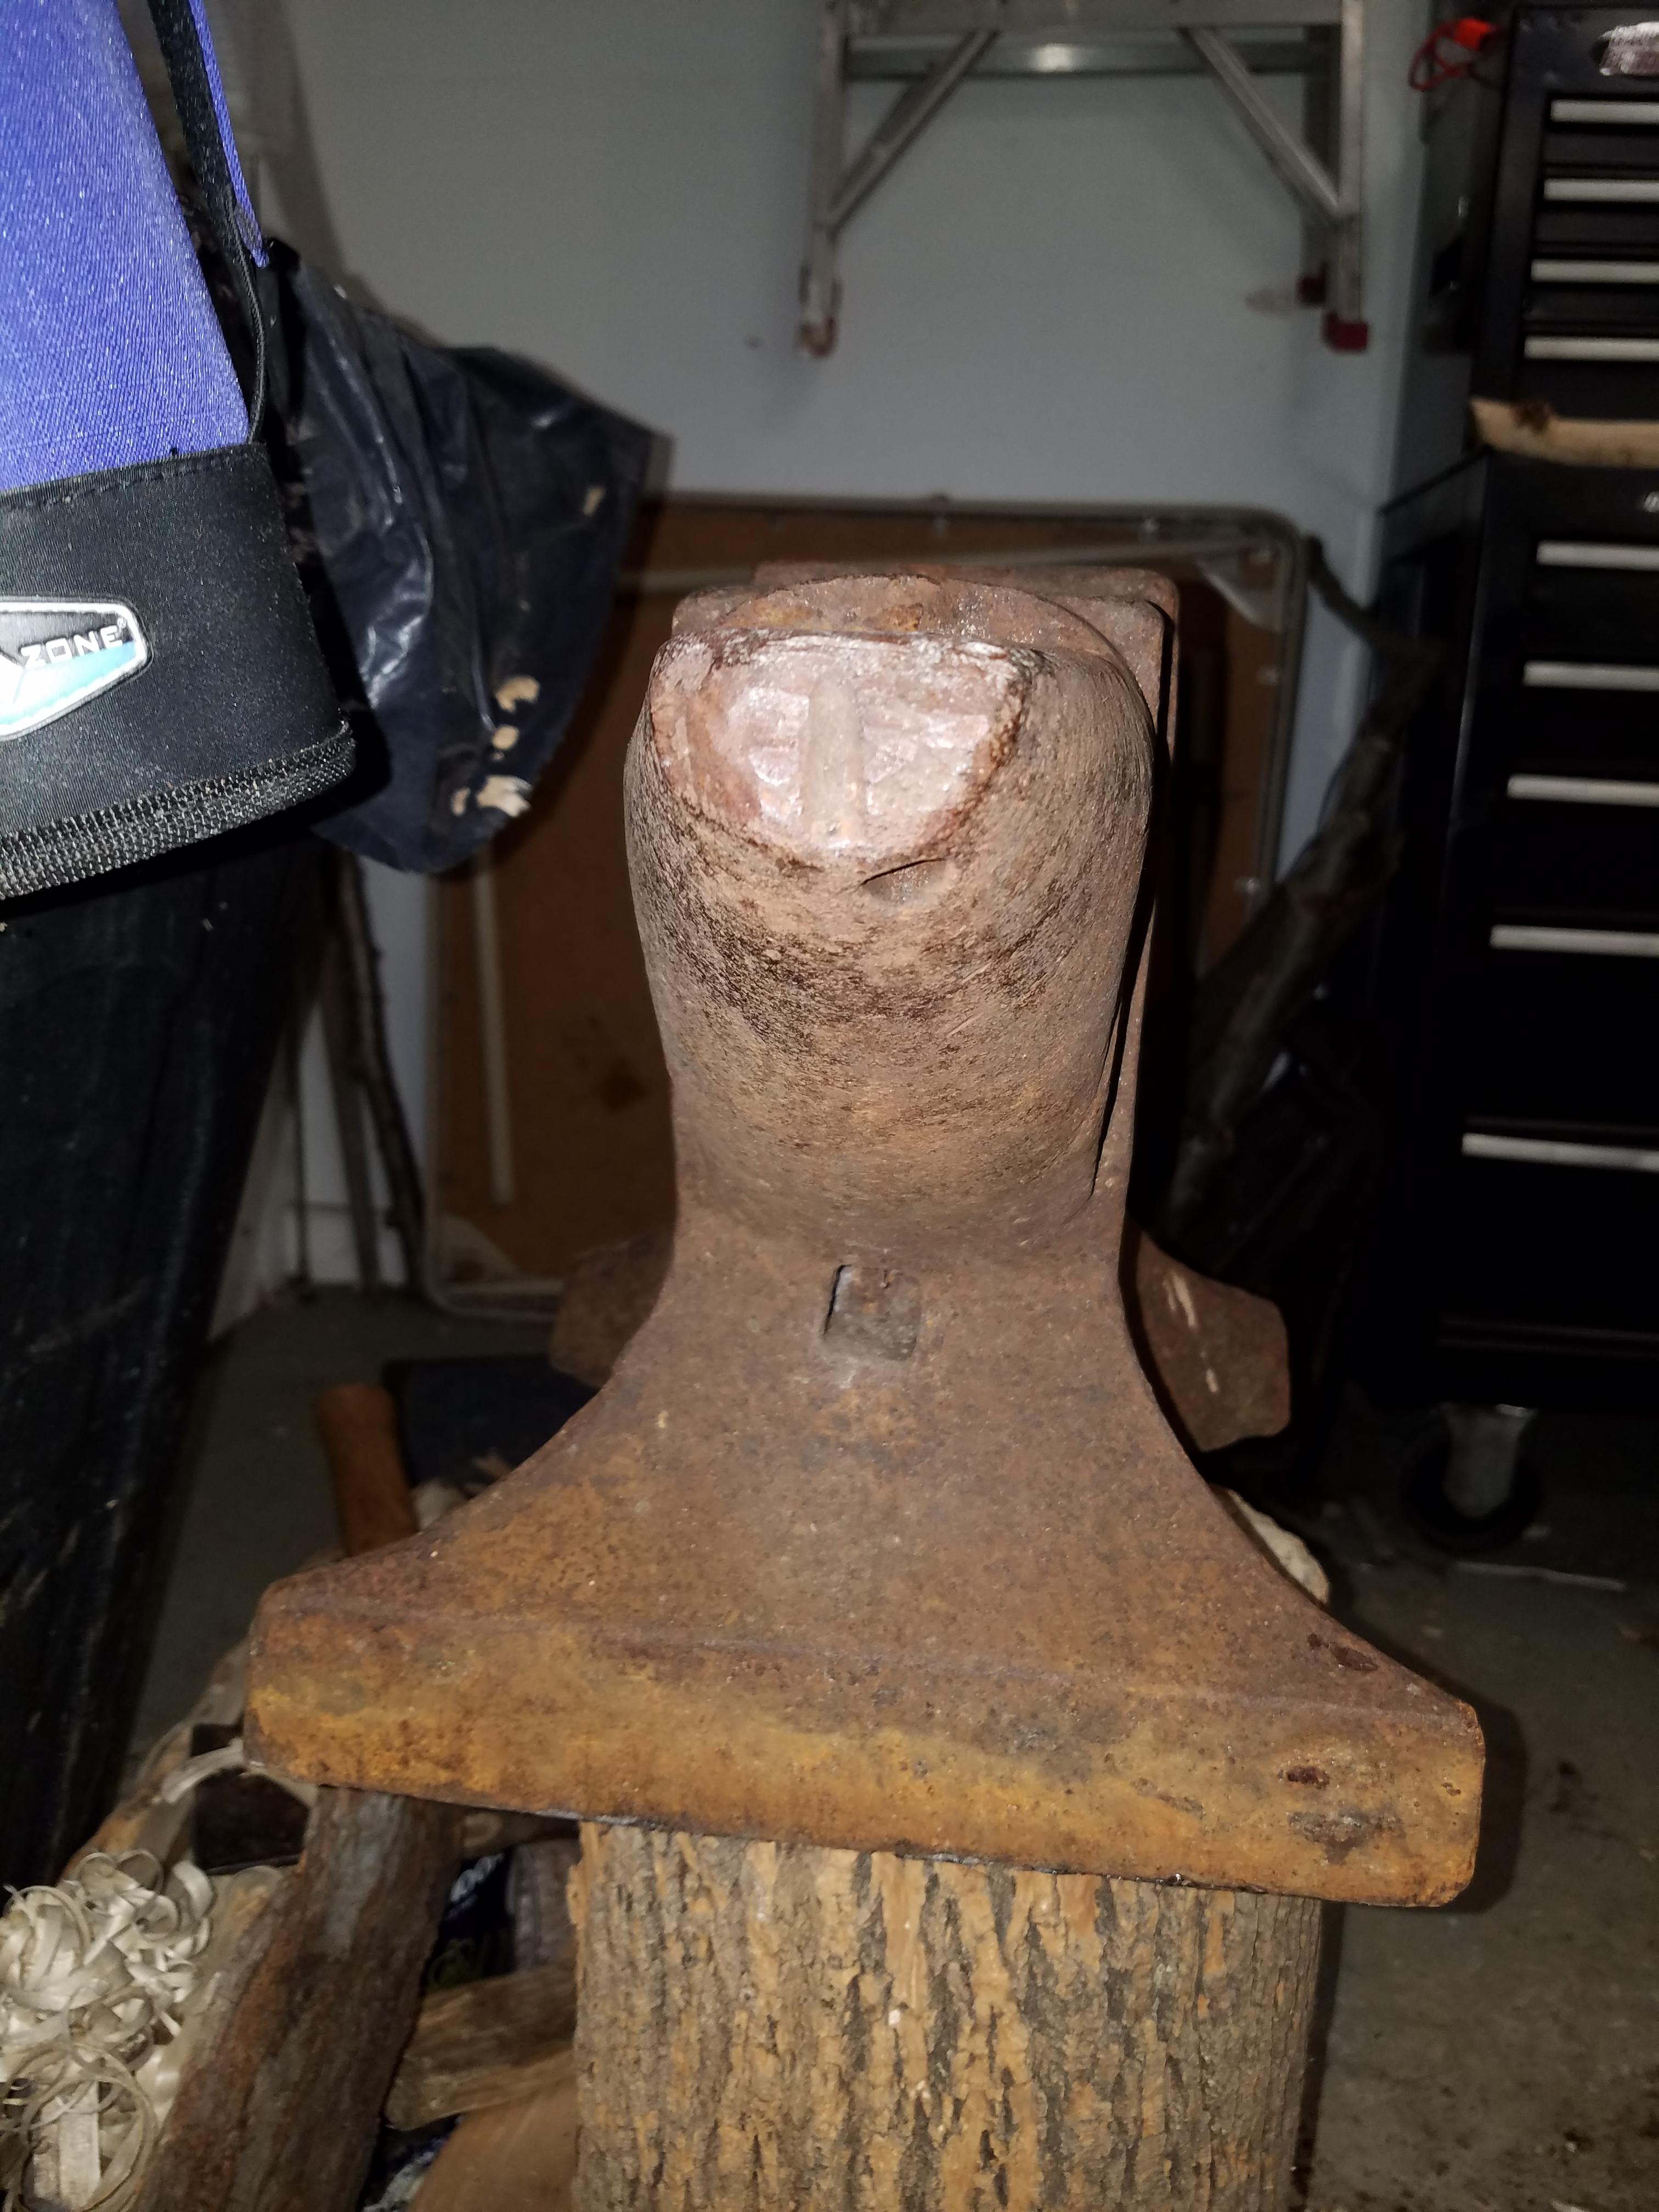
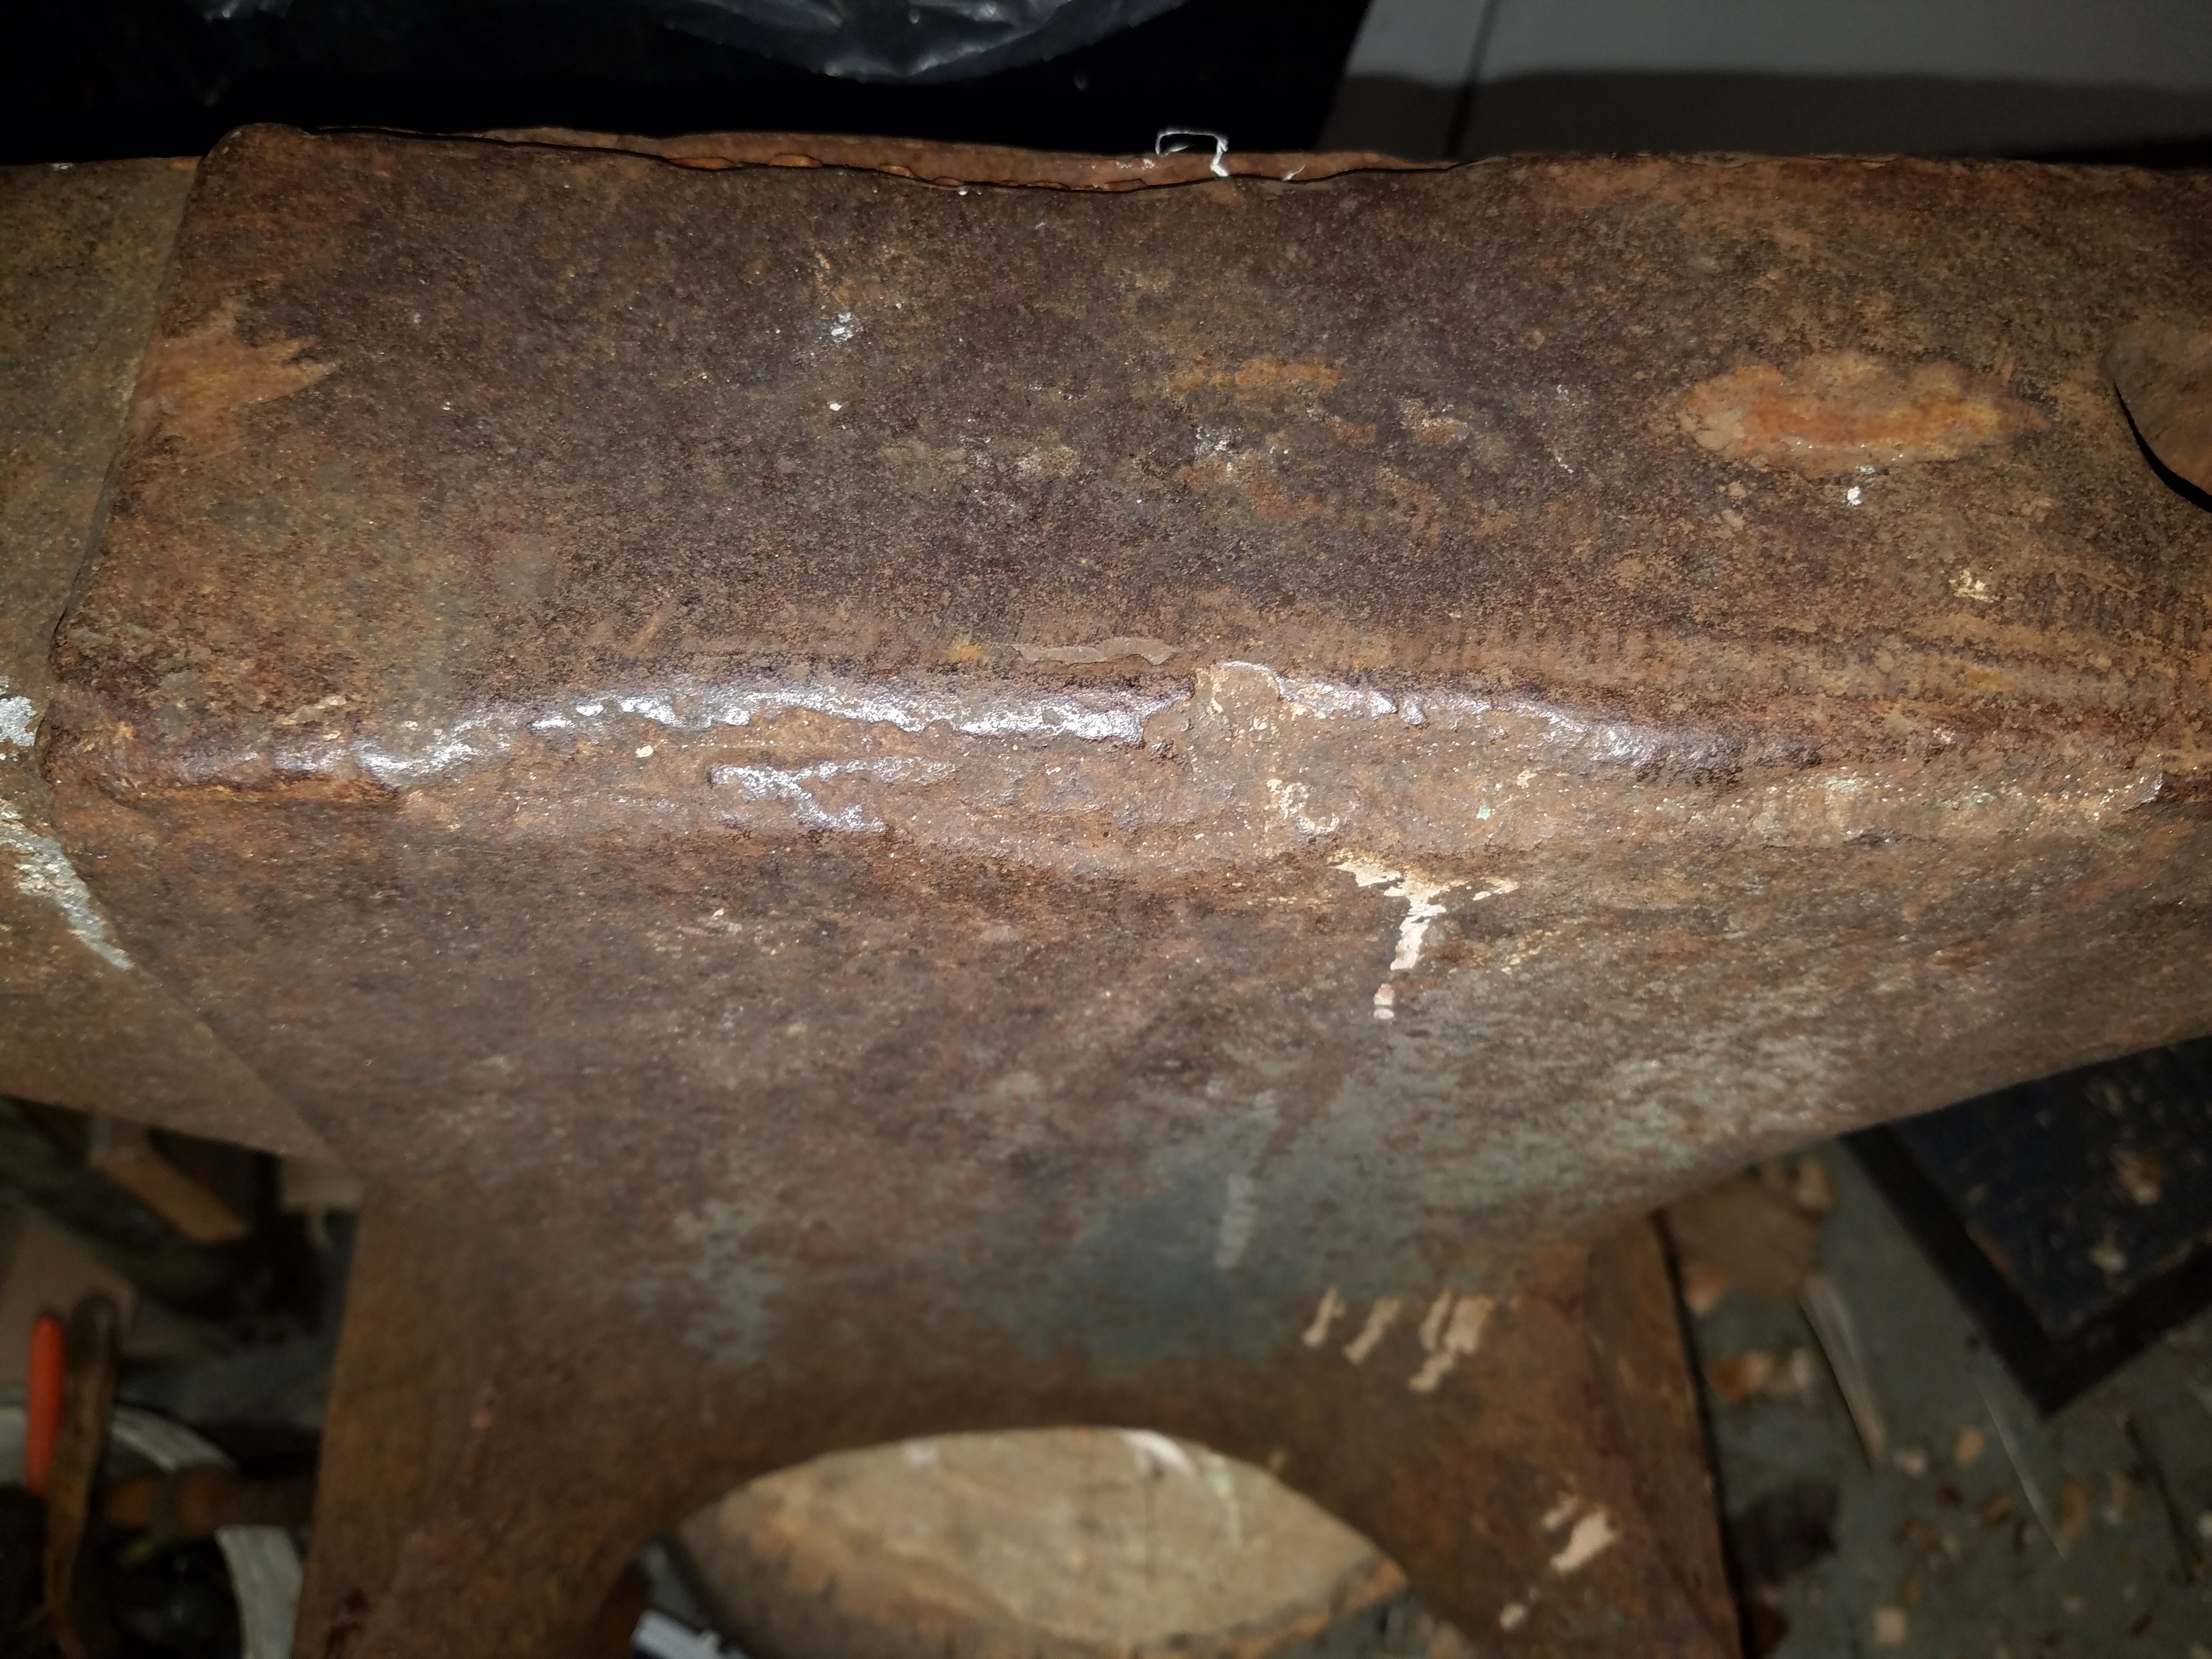
Thanks for the quick reply. That would be US$. Here are a few more pictures. The face is almost completely flat, with maybe 1/16" gap on a small section of it. It seems to have a good bounce when I let a hammer fall on it (I don't have a ball bearing yet)


-
Hello everyone, first post. After spending the last couple of years looking for an affordable anvil without any luck, I finally came across one within my price range. However, I don't know what brand it is or how old it is. I cannot find any markings on it. It also has some damage on the edges of the face. The anvil weighs exactly 160# and has been sitting outside for years. If I want it, I can purchase it for $160 USD. Here are a few pictures. I can post more if needed. If anyone can tell me what brand it is and if it is worth the price, I would greatly appreciate it. Thanks!


Buffalo Forge - what are these parts?
in Bellows, Blowers
Posted
Thanks guys. The exhaust port is 3" in diameter and the clamp is 4.5" in diameter. Finding them both inside the fan shroud with the impeller is what threw me, since I have zero experience with any type of blower and didn't know what to expect when I took it apart. As long as I know those two pieces do not belong inside the shroud, I'll just continue my search for a motor and try to get the blower up and running.