Nathan Stanford
Members
-
Joined
-
Last visited
Everything posted by Nathan Stanford
-
Lol. My mom had me tested and horse wasn't one of those. Just didn't know if was too hard of a wood for a mallet.
-
I now this is not about a regular hammer, but I'm making a wooden mallet for fine tuning my work. This is to avoid scaring from metal hammers. Is walnut an okay material for this use? It's what I have laying around and seems to have decent weight to it. Any feedback is welcome and appreciated. Thanks, Nathan
-
Frosty, I wanted to thank you for this reply. It prompted me to seriously look for a blacksmithing group in my area. Tomorrow I'm going to my first hammer-in. Having educated myself thru YouTube, forums like this, as well as trial by fire (pun intended), I'm excited to actually meet other blacksmiths!!
-
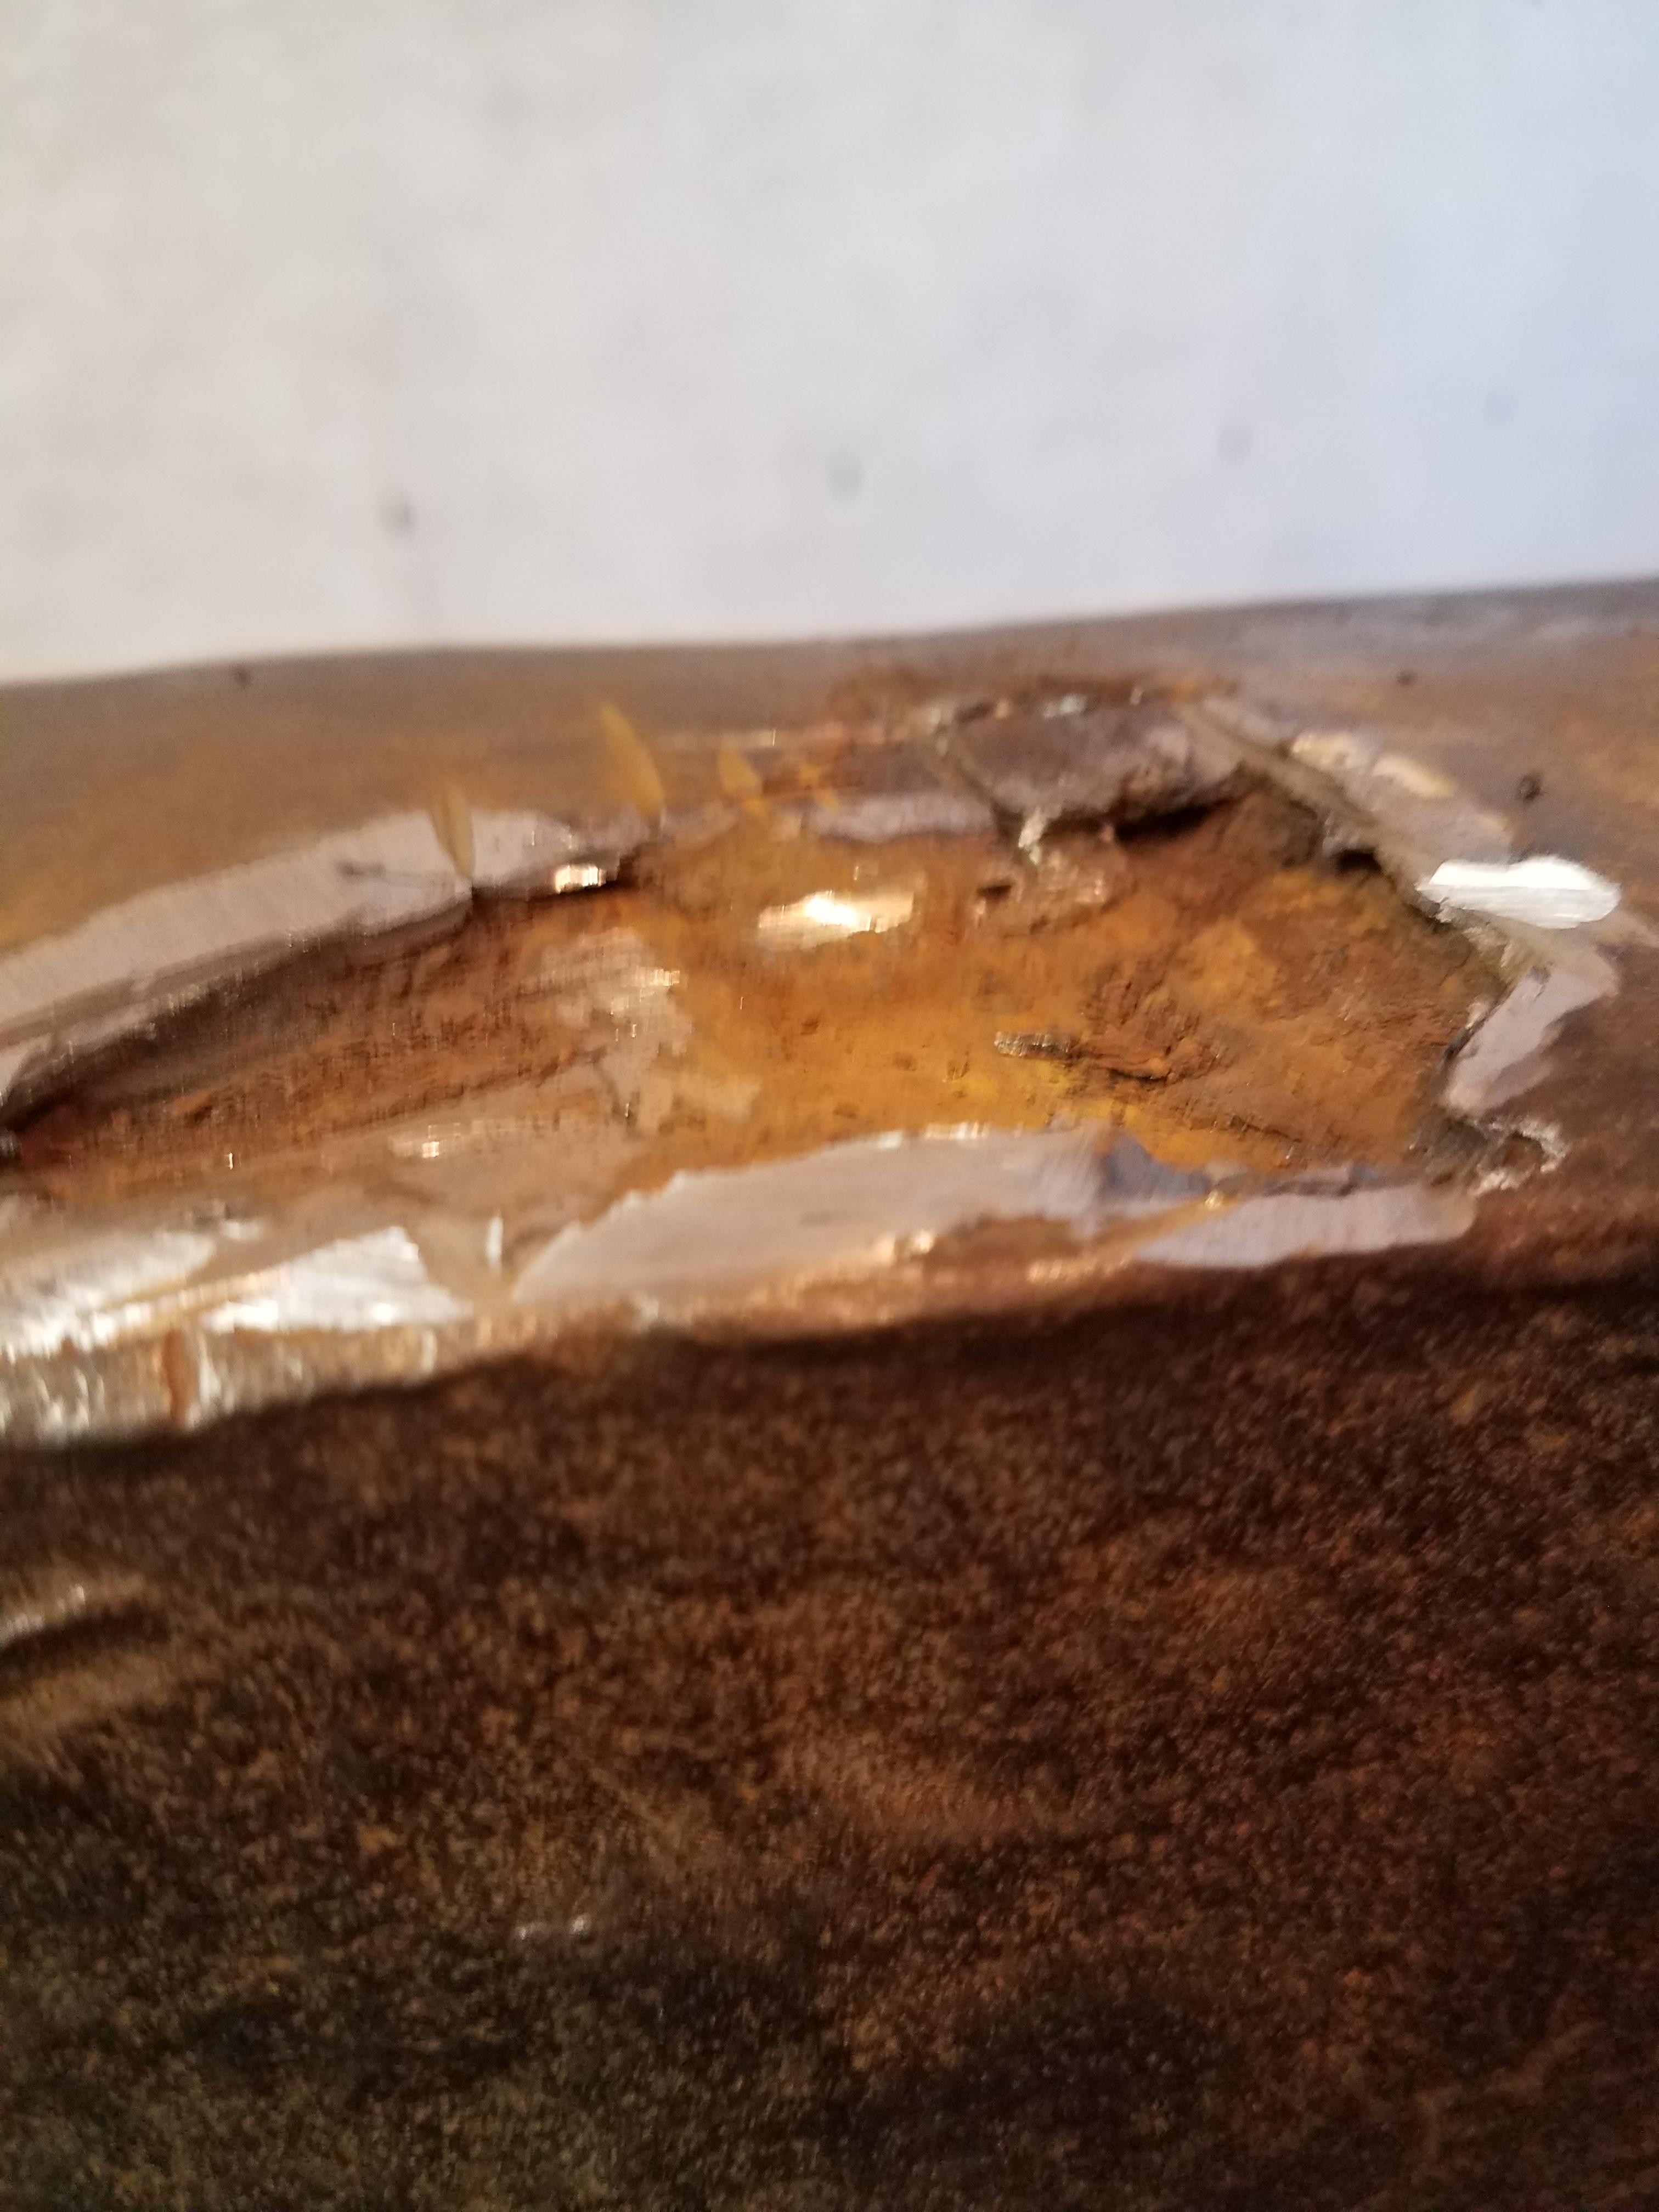
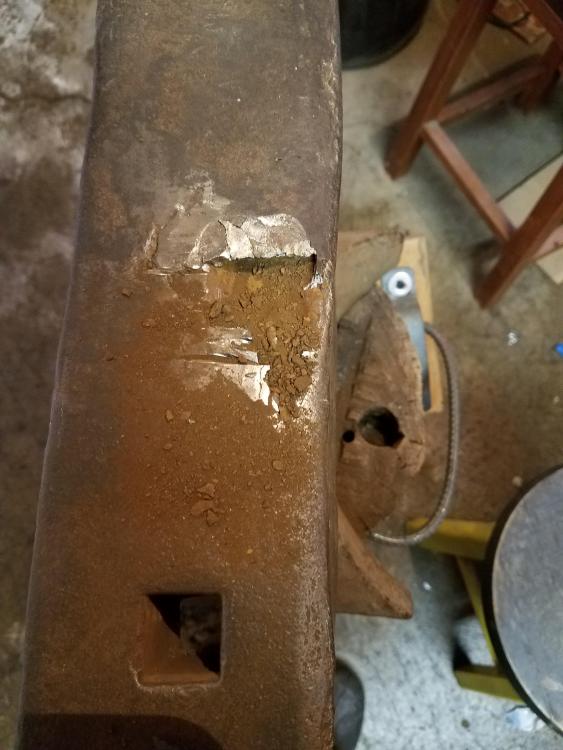
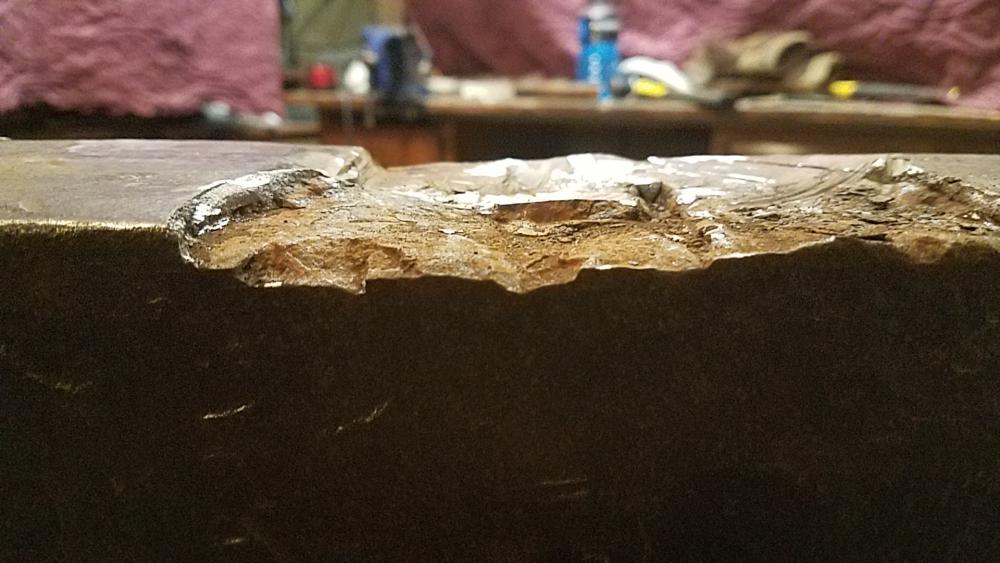
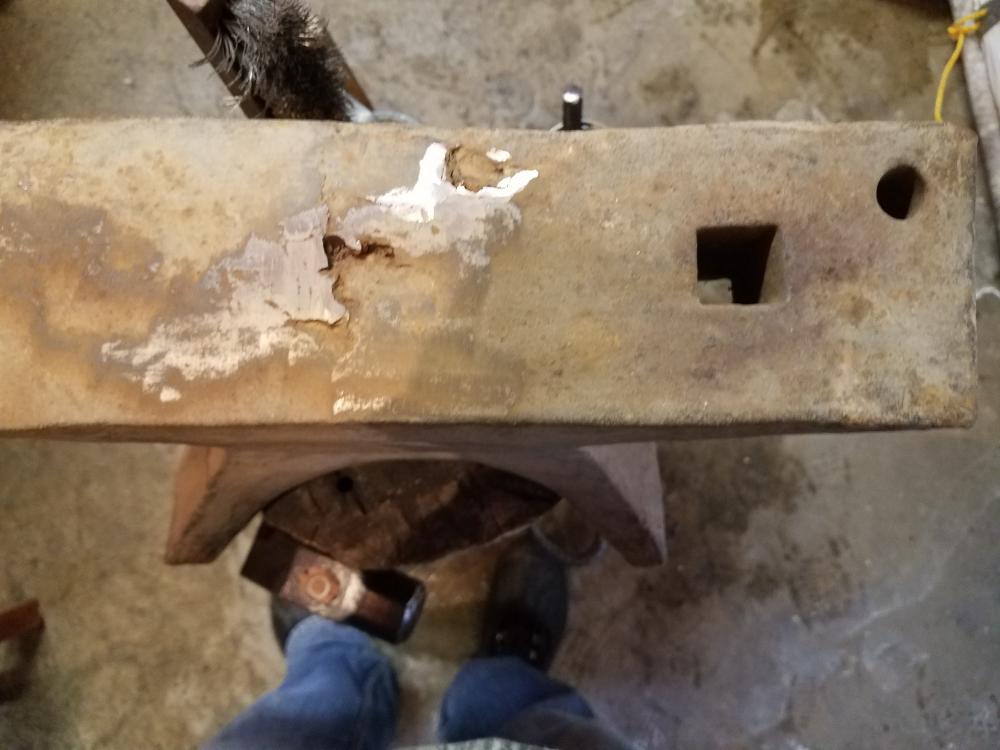
There has been weld slapped on top of most of the stamp (which makes me sick). The weld doesn't look to 'sunk' in all that far. Any ideas on how to 'peel' it off? I'm afraid to try an chisel it away bc I don't want to do that not be successful and come to find out there's a good way to do it Do you know where to find the history of this forge? I'm very interested in learning more about Mousehole
-
This railroad track with coil spring "horn" is what I used for 2 years.
-
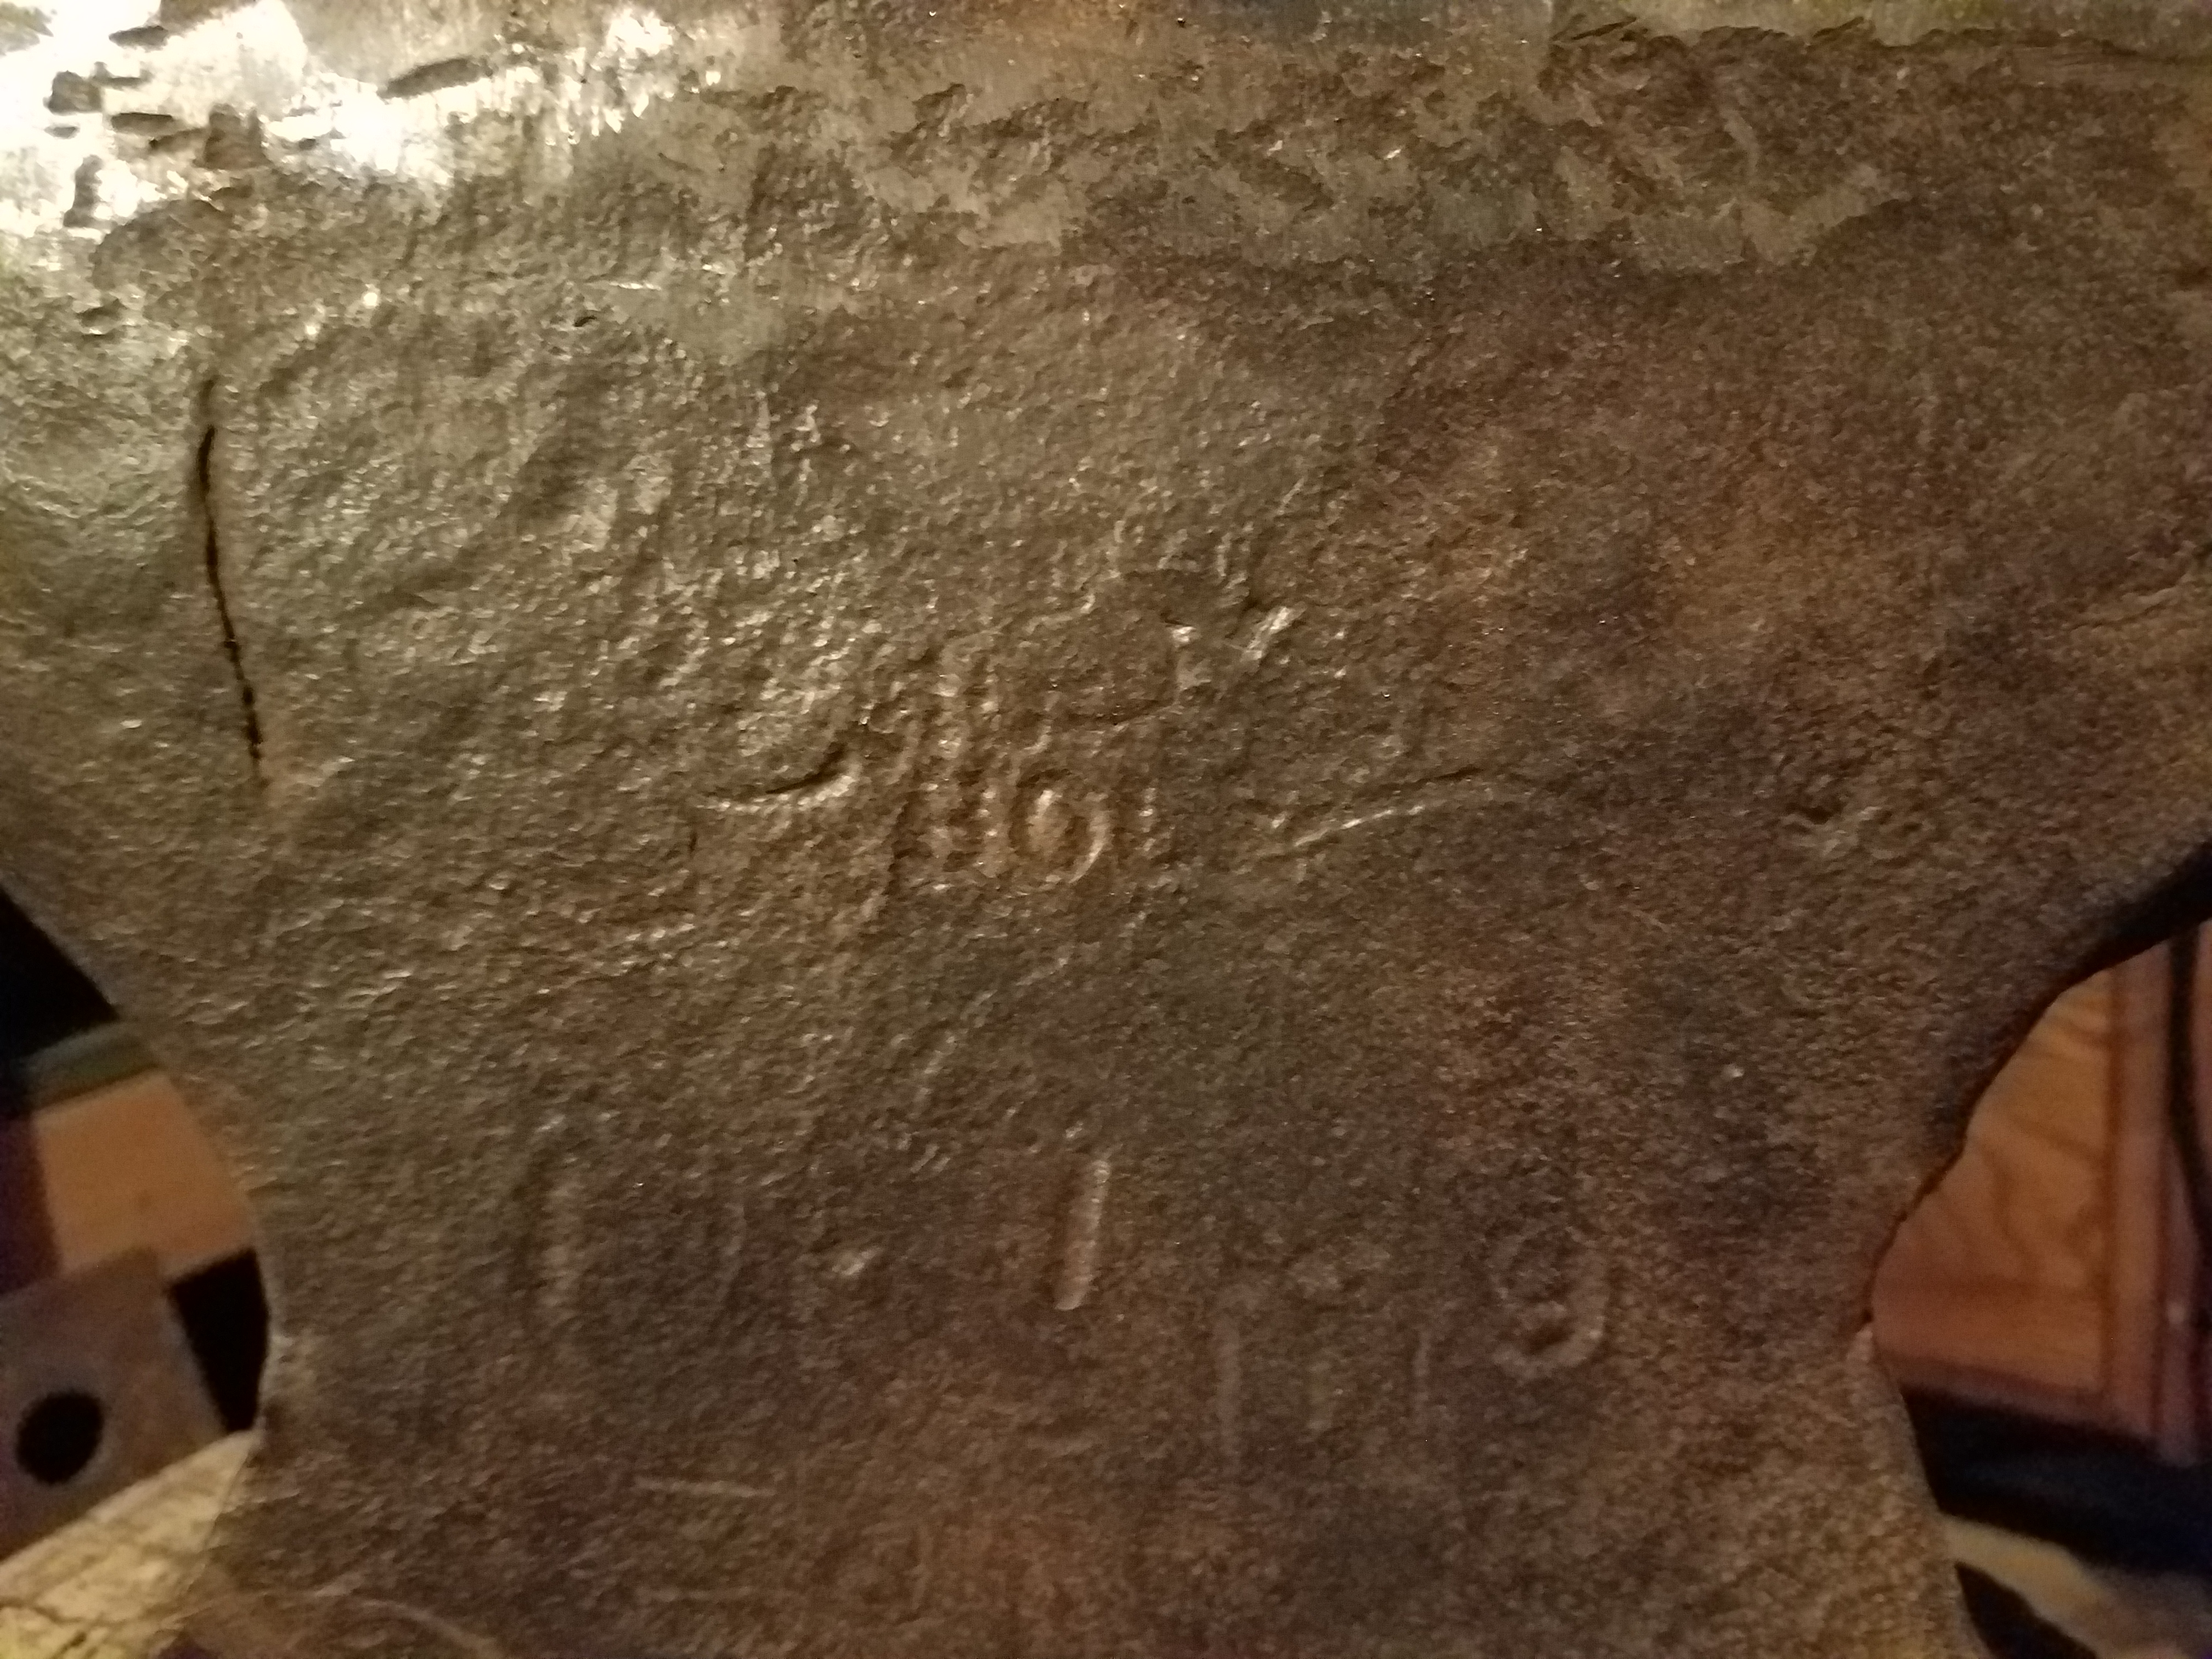
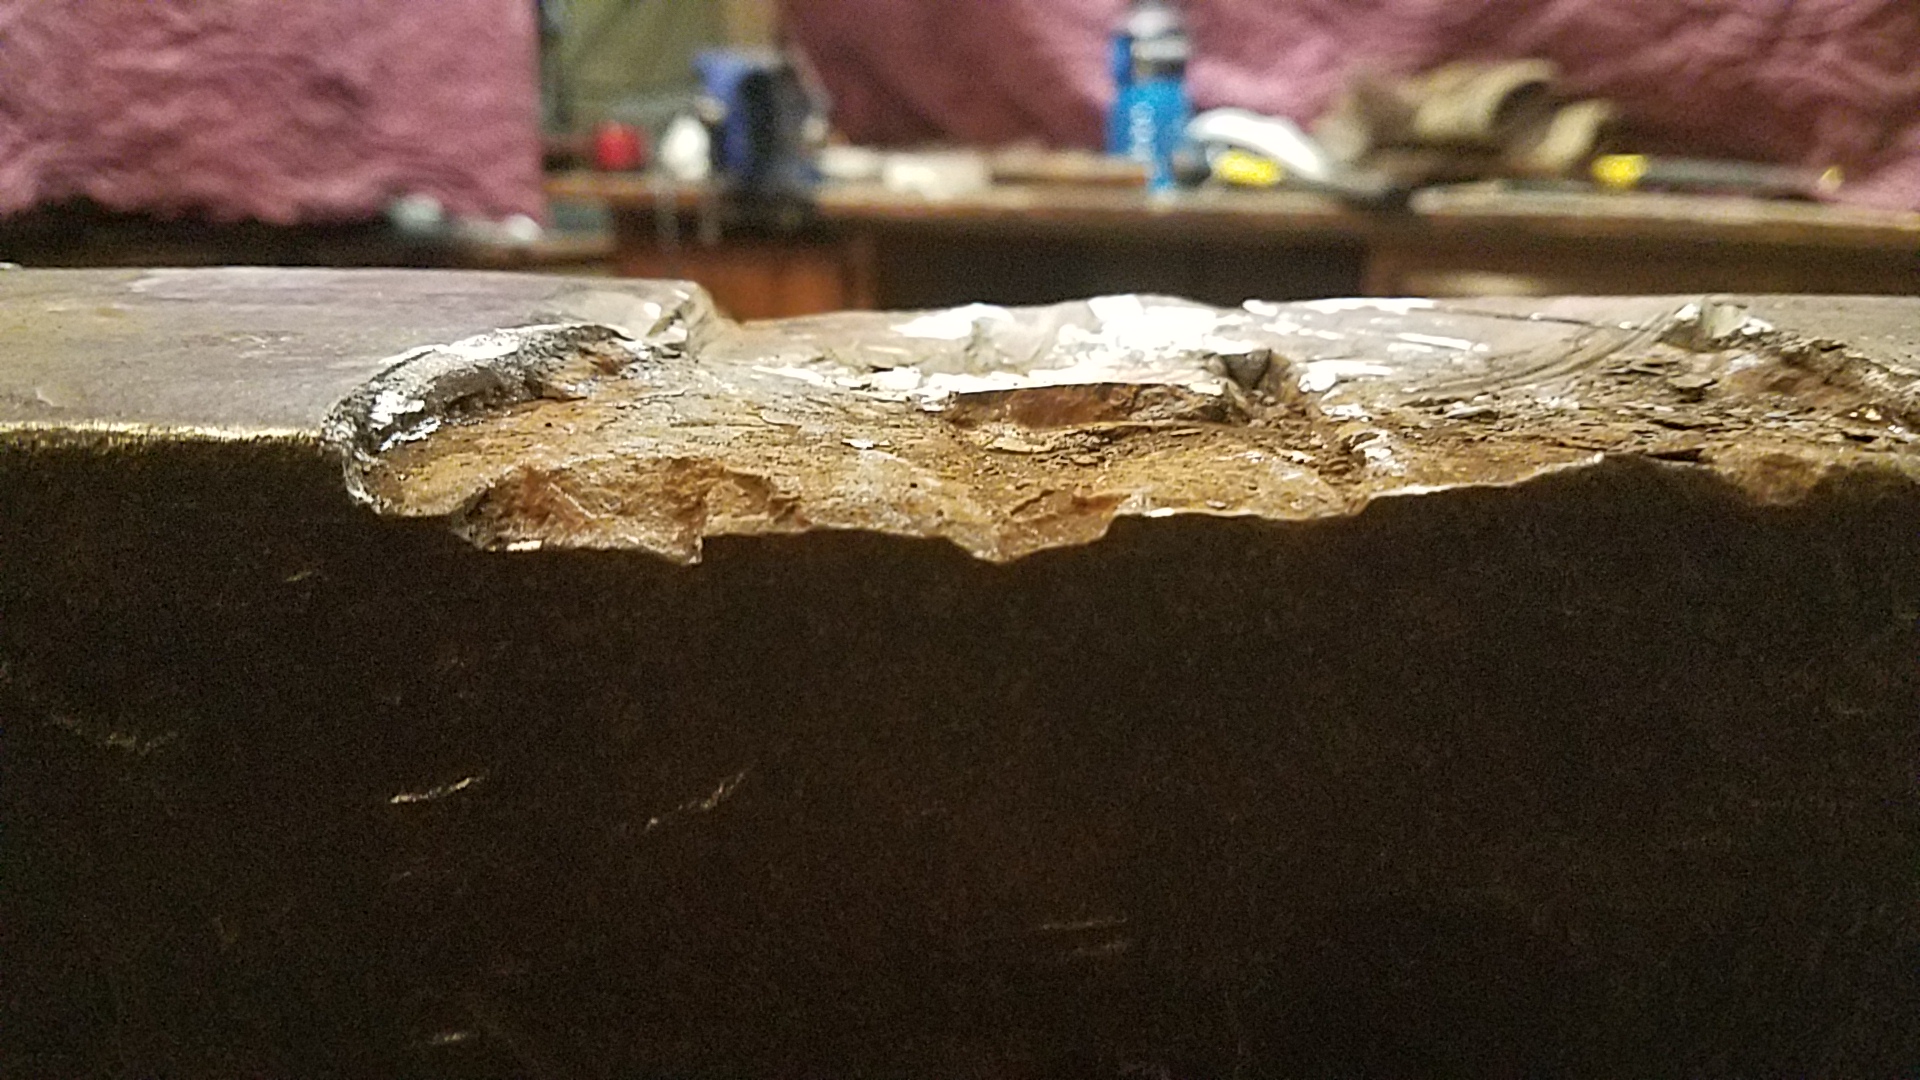
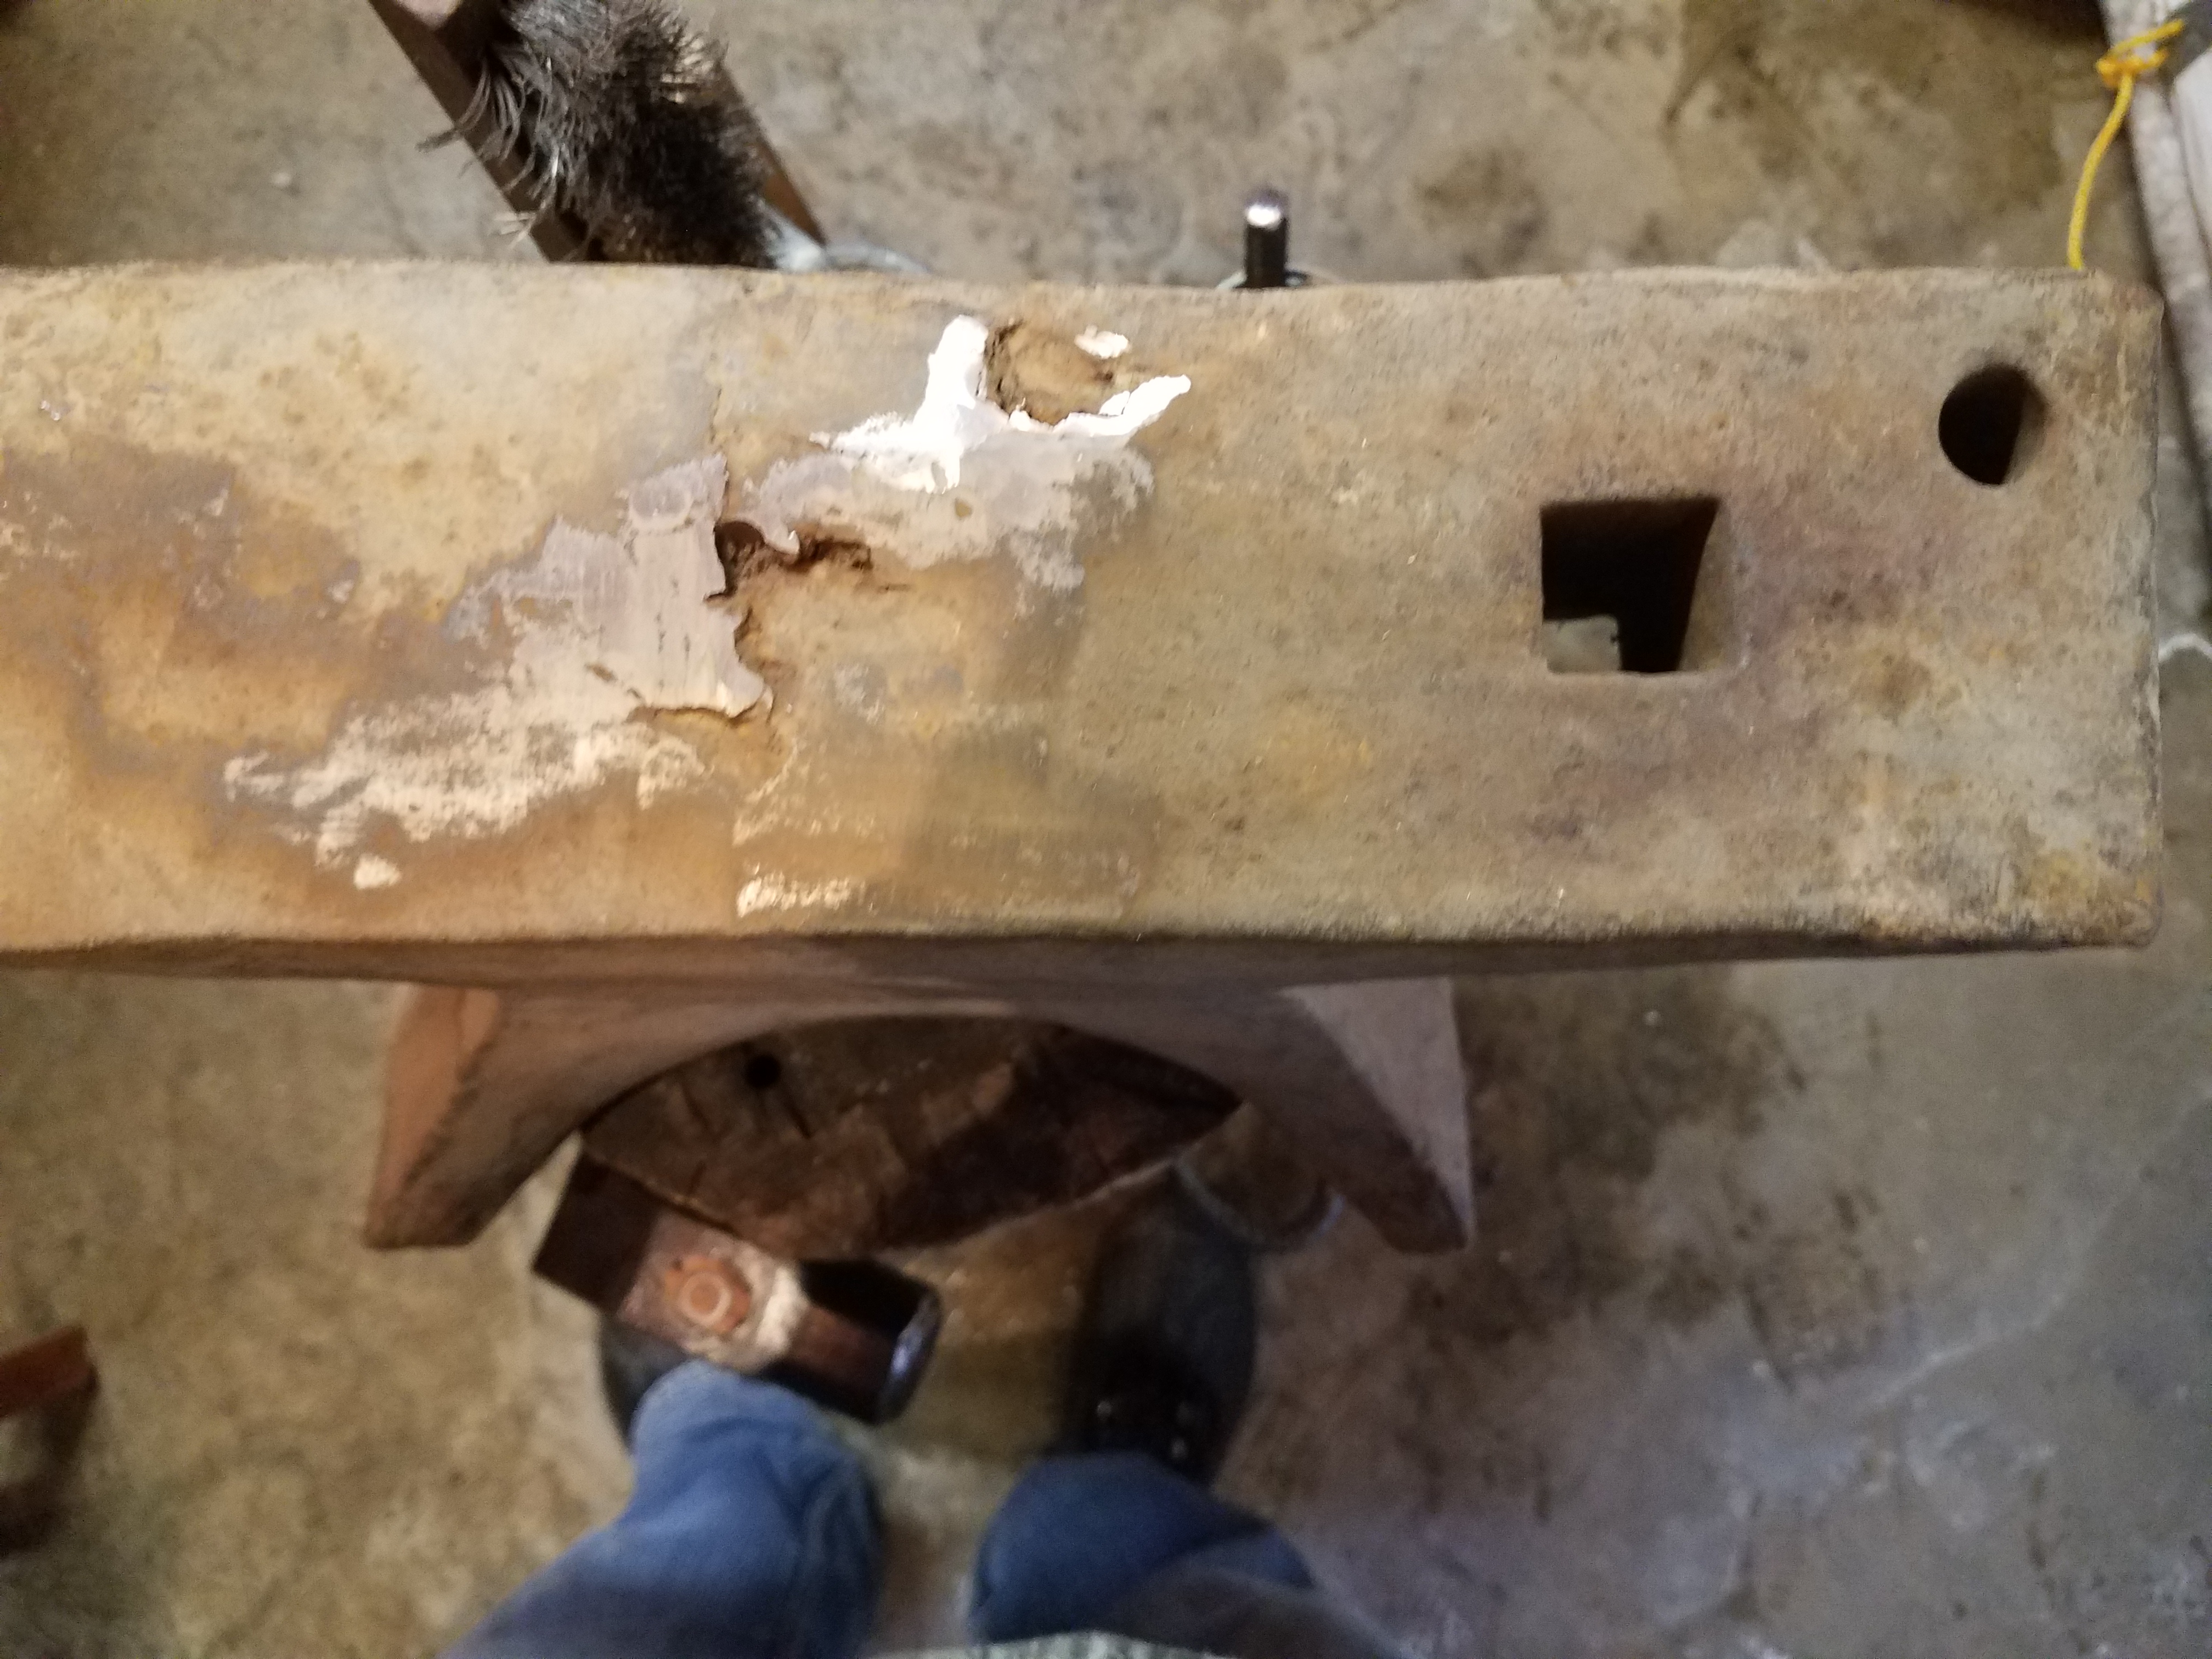
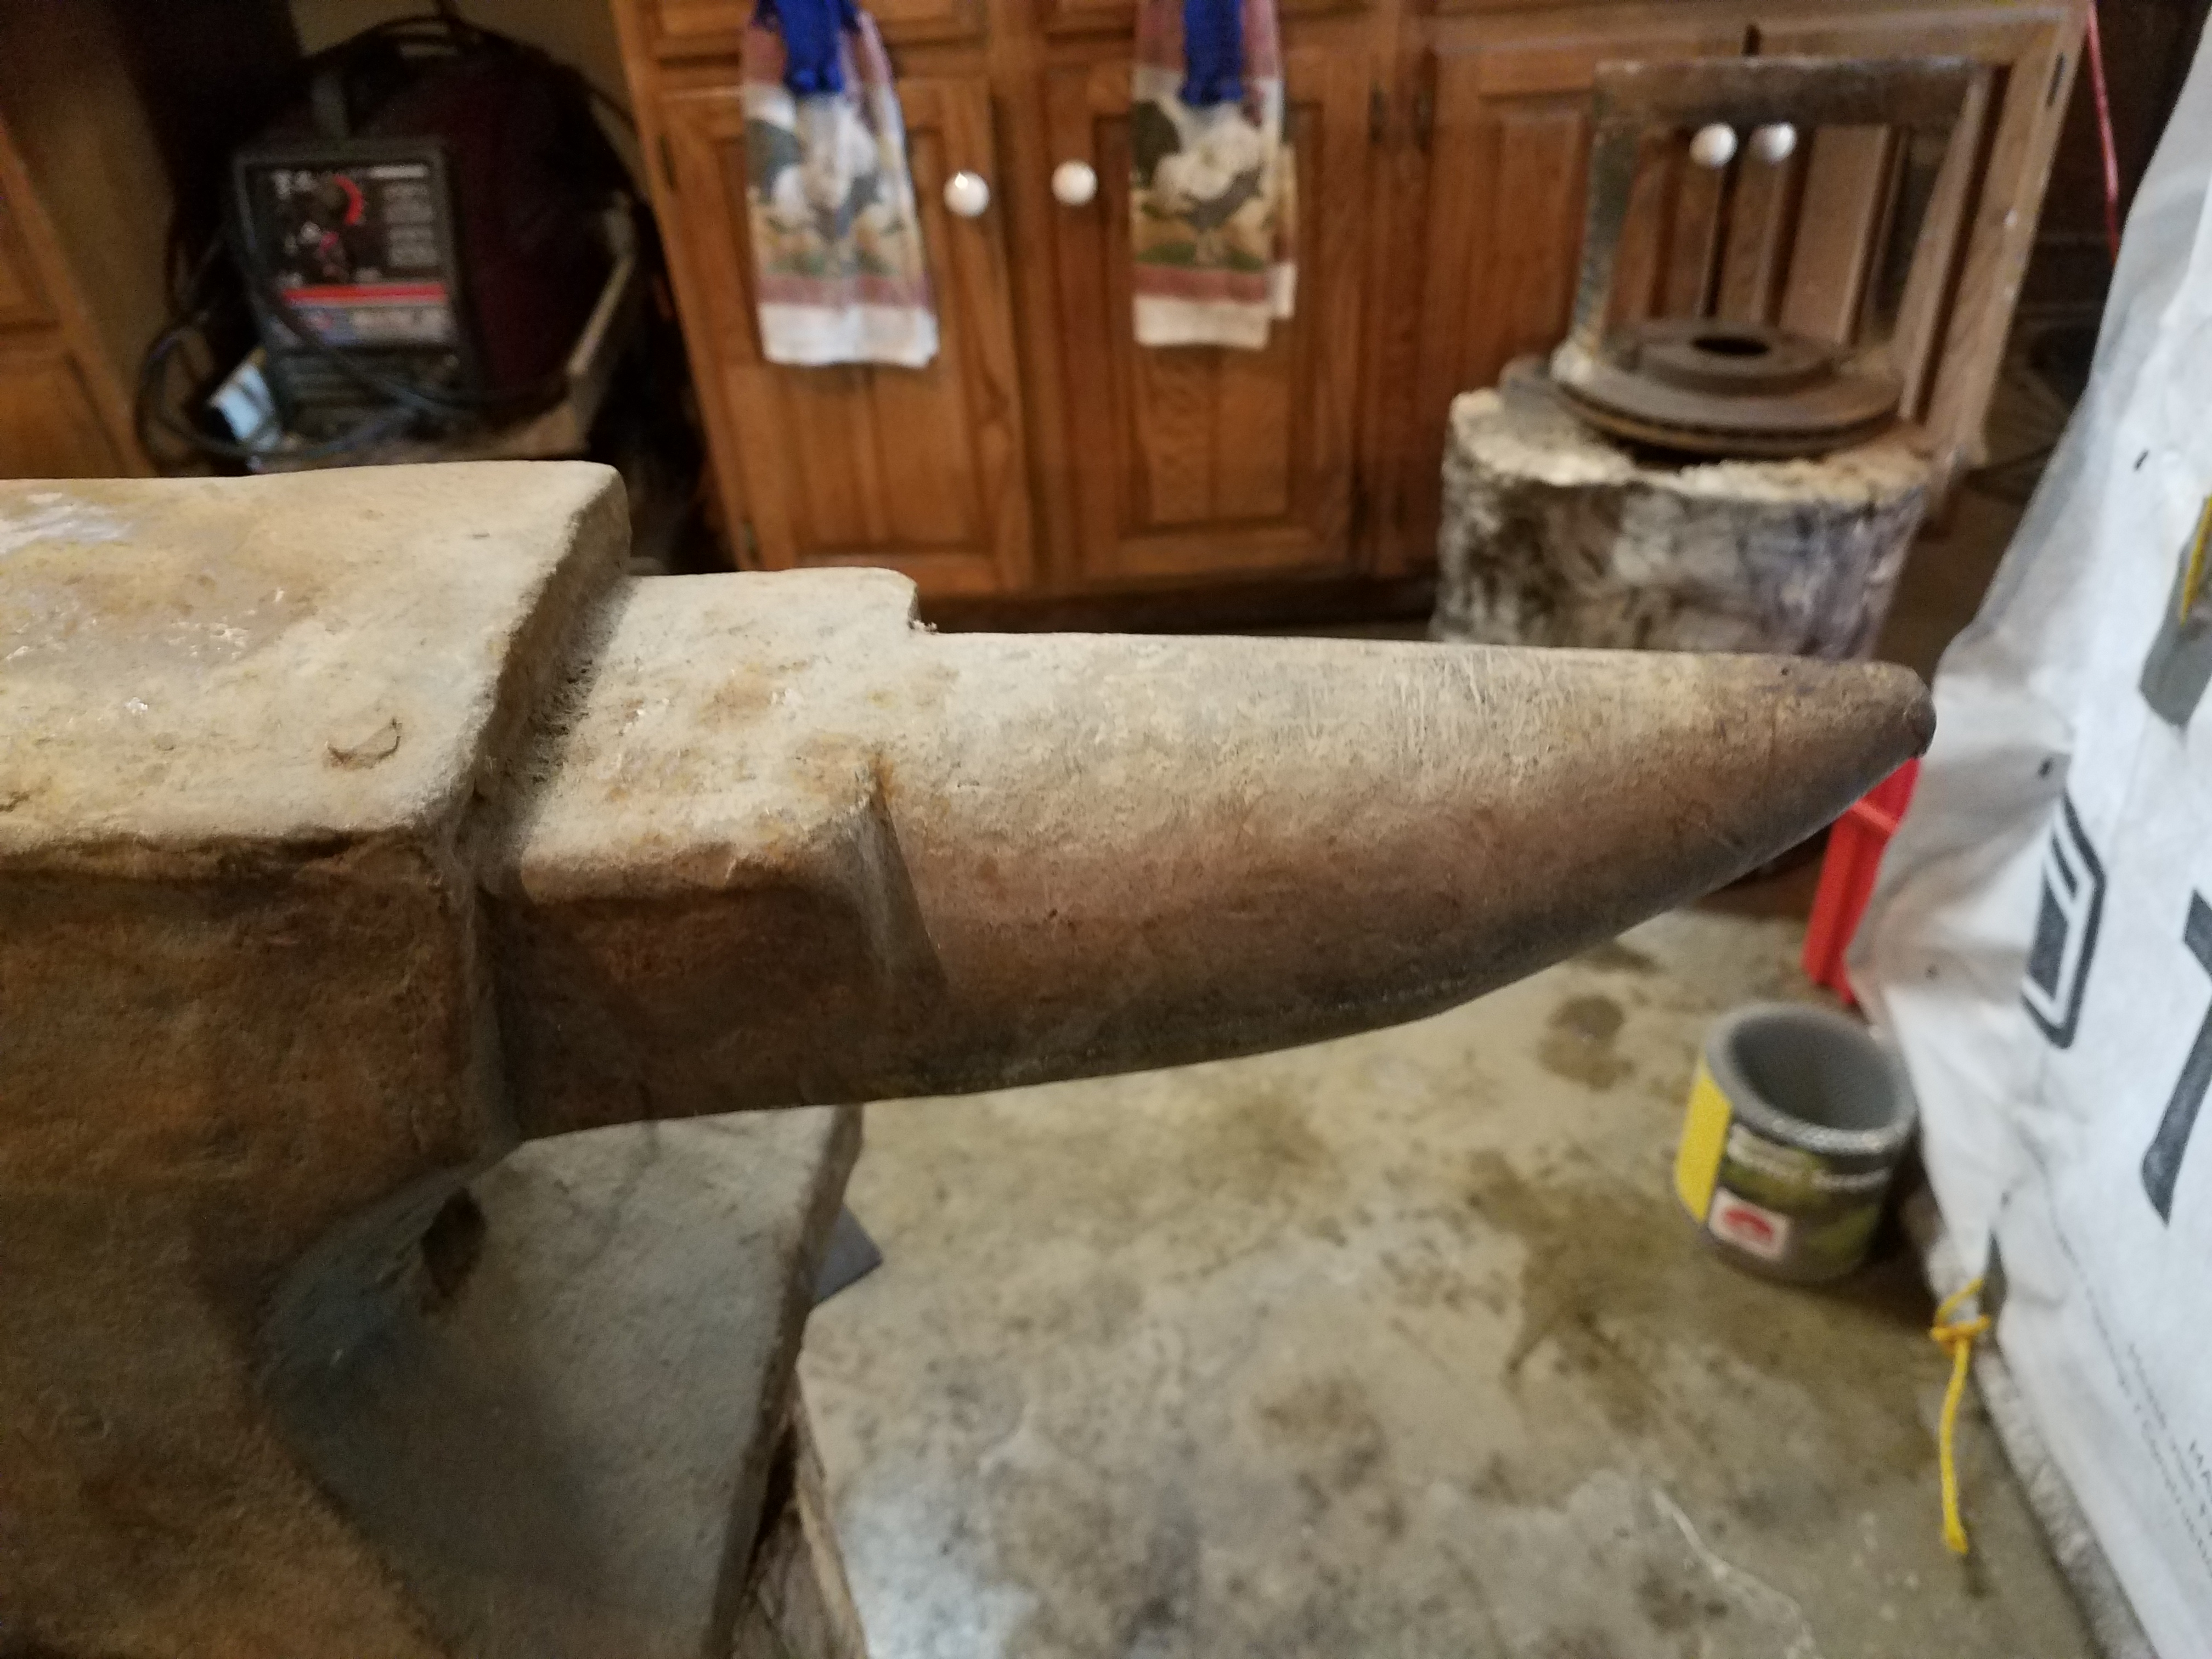
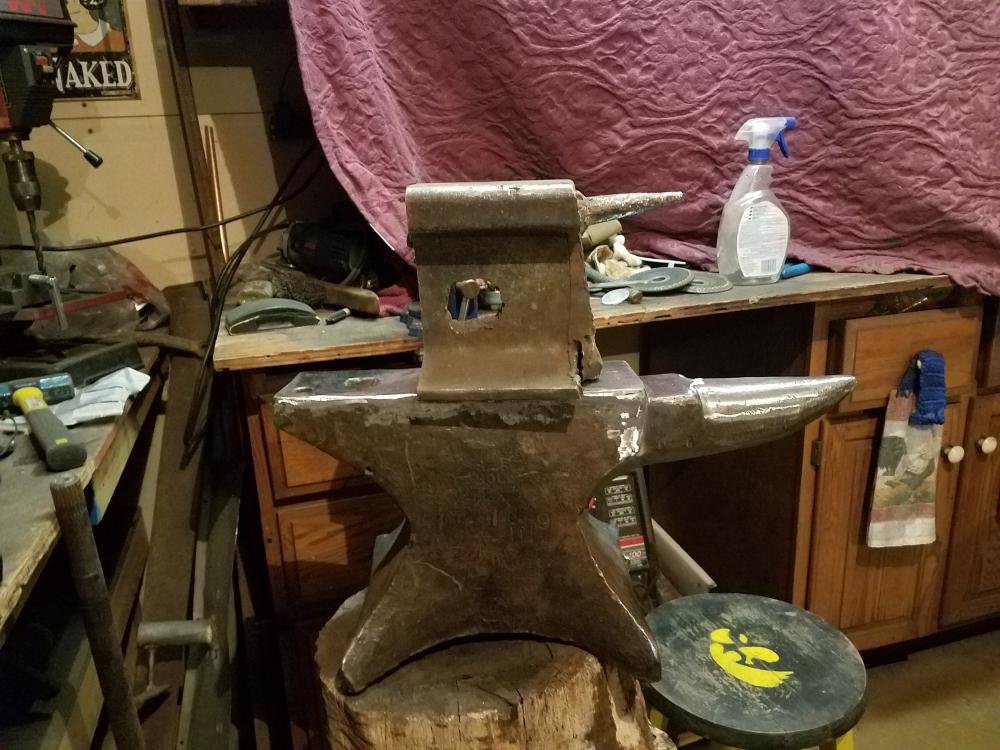
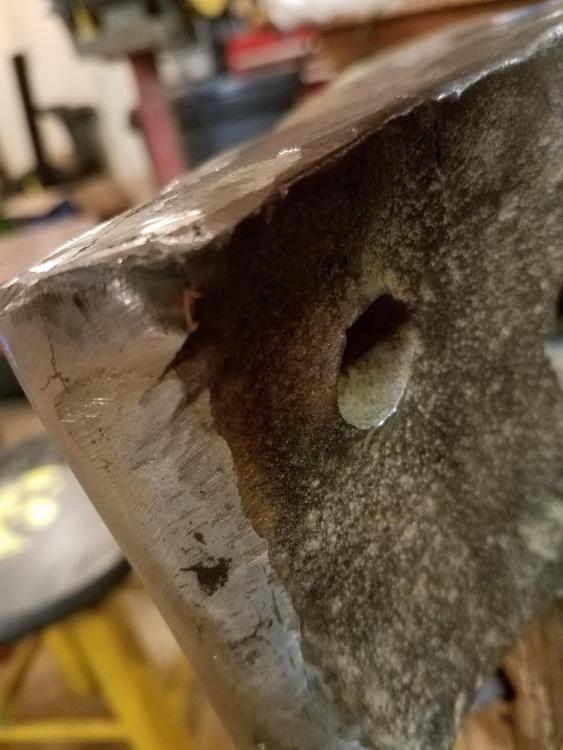
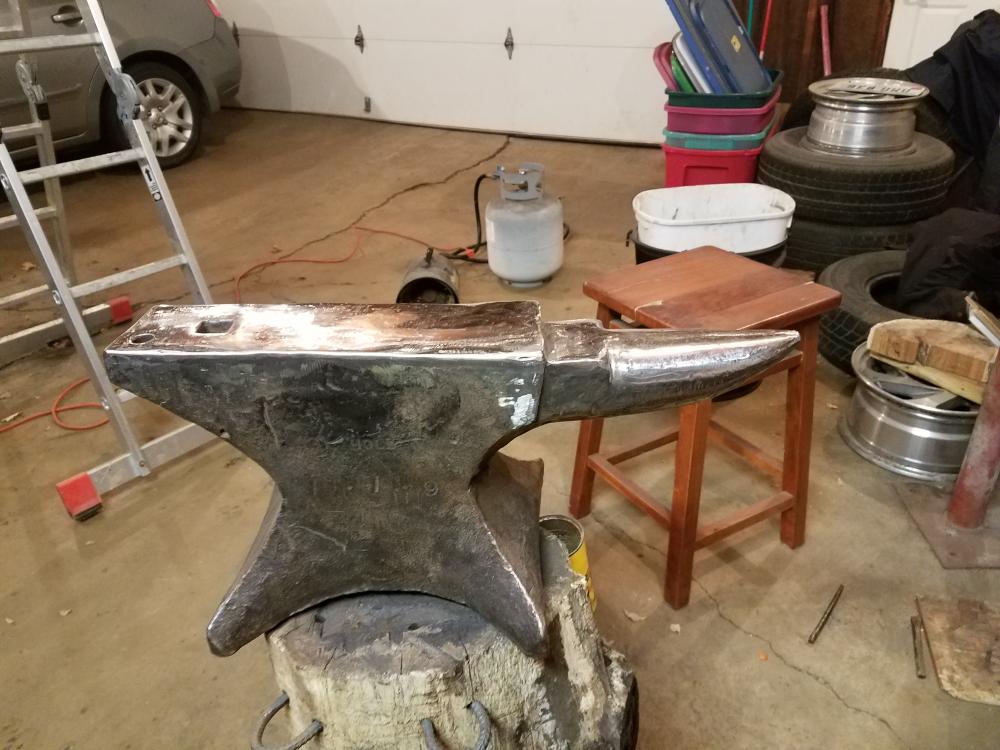
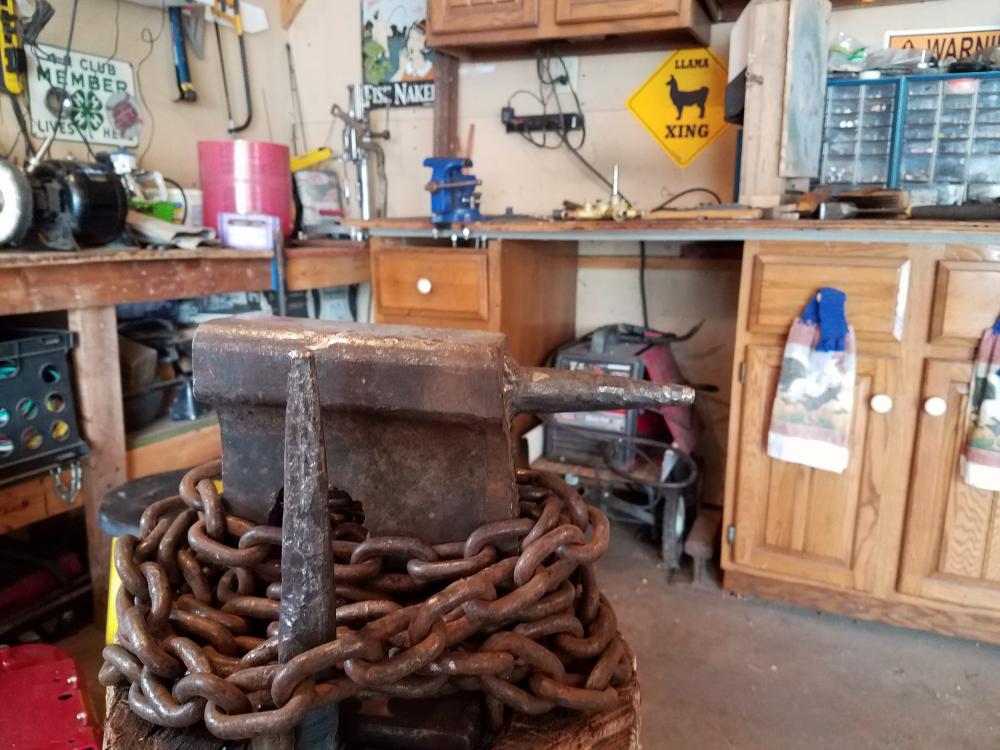
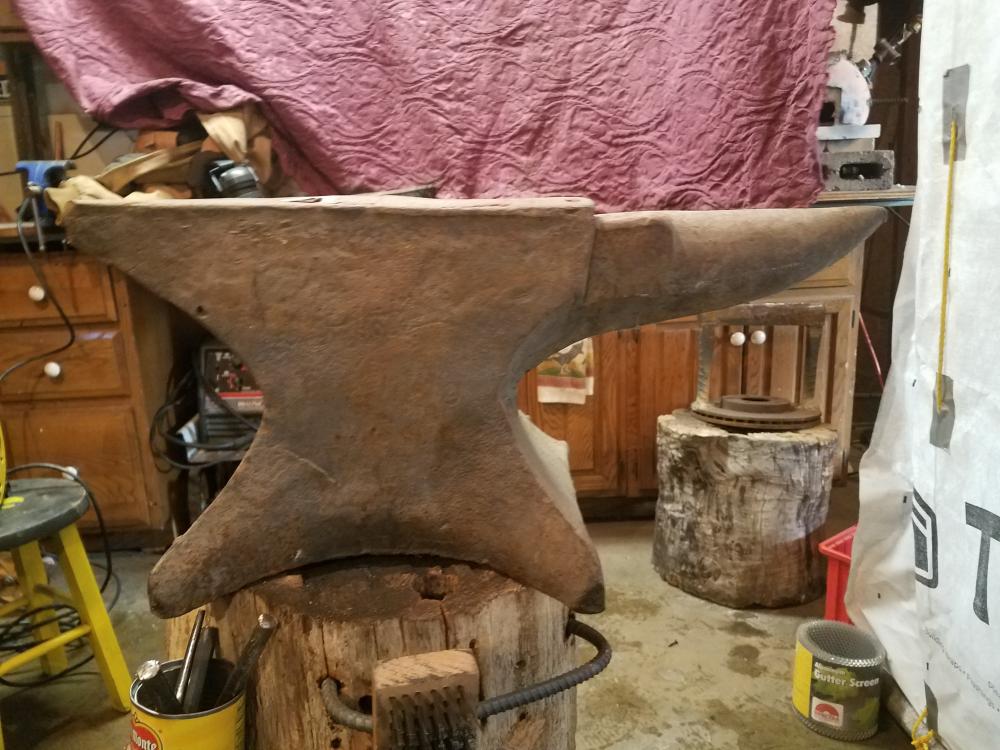
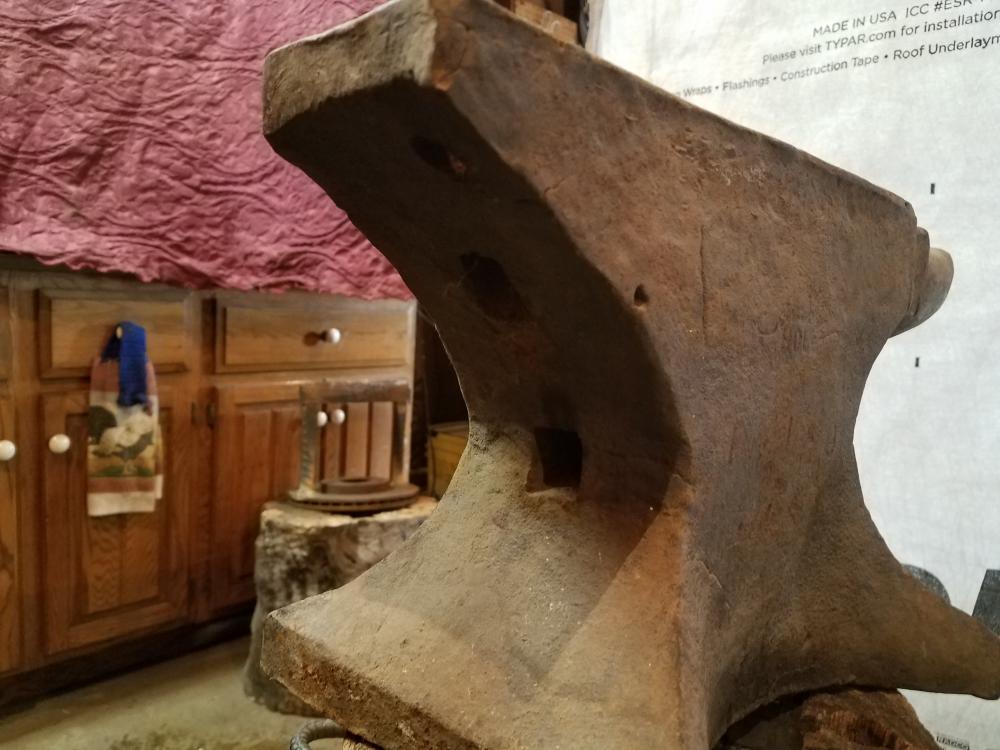
So as I was reading up on Mouse Hole anvils I came across the pre 1835 anvils were made without a pritchel hole. Later some had pritchel holes punched in them. I was looking at the bottom of this pritchel hole and it seems to be flared. I added a picture of this as best ad I can. Does it look like this is an after market hole to anyone?? Also, a picture of the completed anvil. Not the prettiest thing, rebound is only about 85%, but its functional. Thanks to all who have given me input an tips bc it put the importance of being serious about the details and not just laying down beads.
-
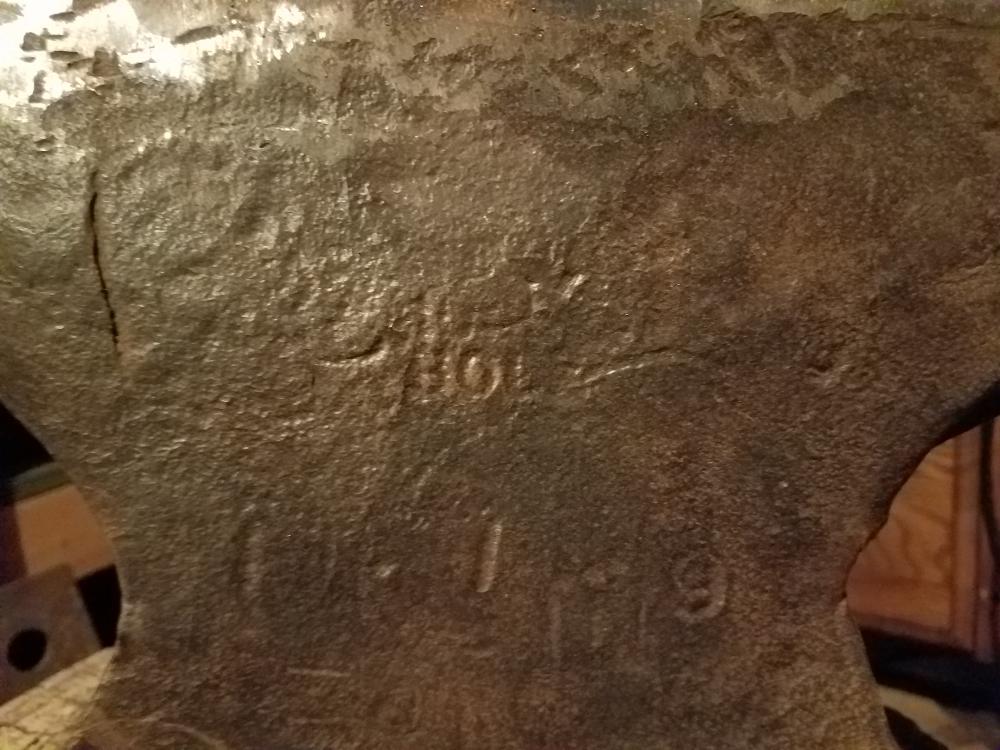
I know it was made after 1835 bc it has a pritchel hole. I'm just intrigued as to its history. Apparently Mousehole has a storied past. I just can't find a way to date it. Lol
-
It seems consistent with the Mousehole made anvils as it has punch marks between the numbers. (I did a little reading online) What do you think? Any idea on approximate age?
-
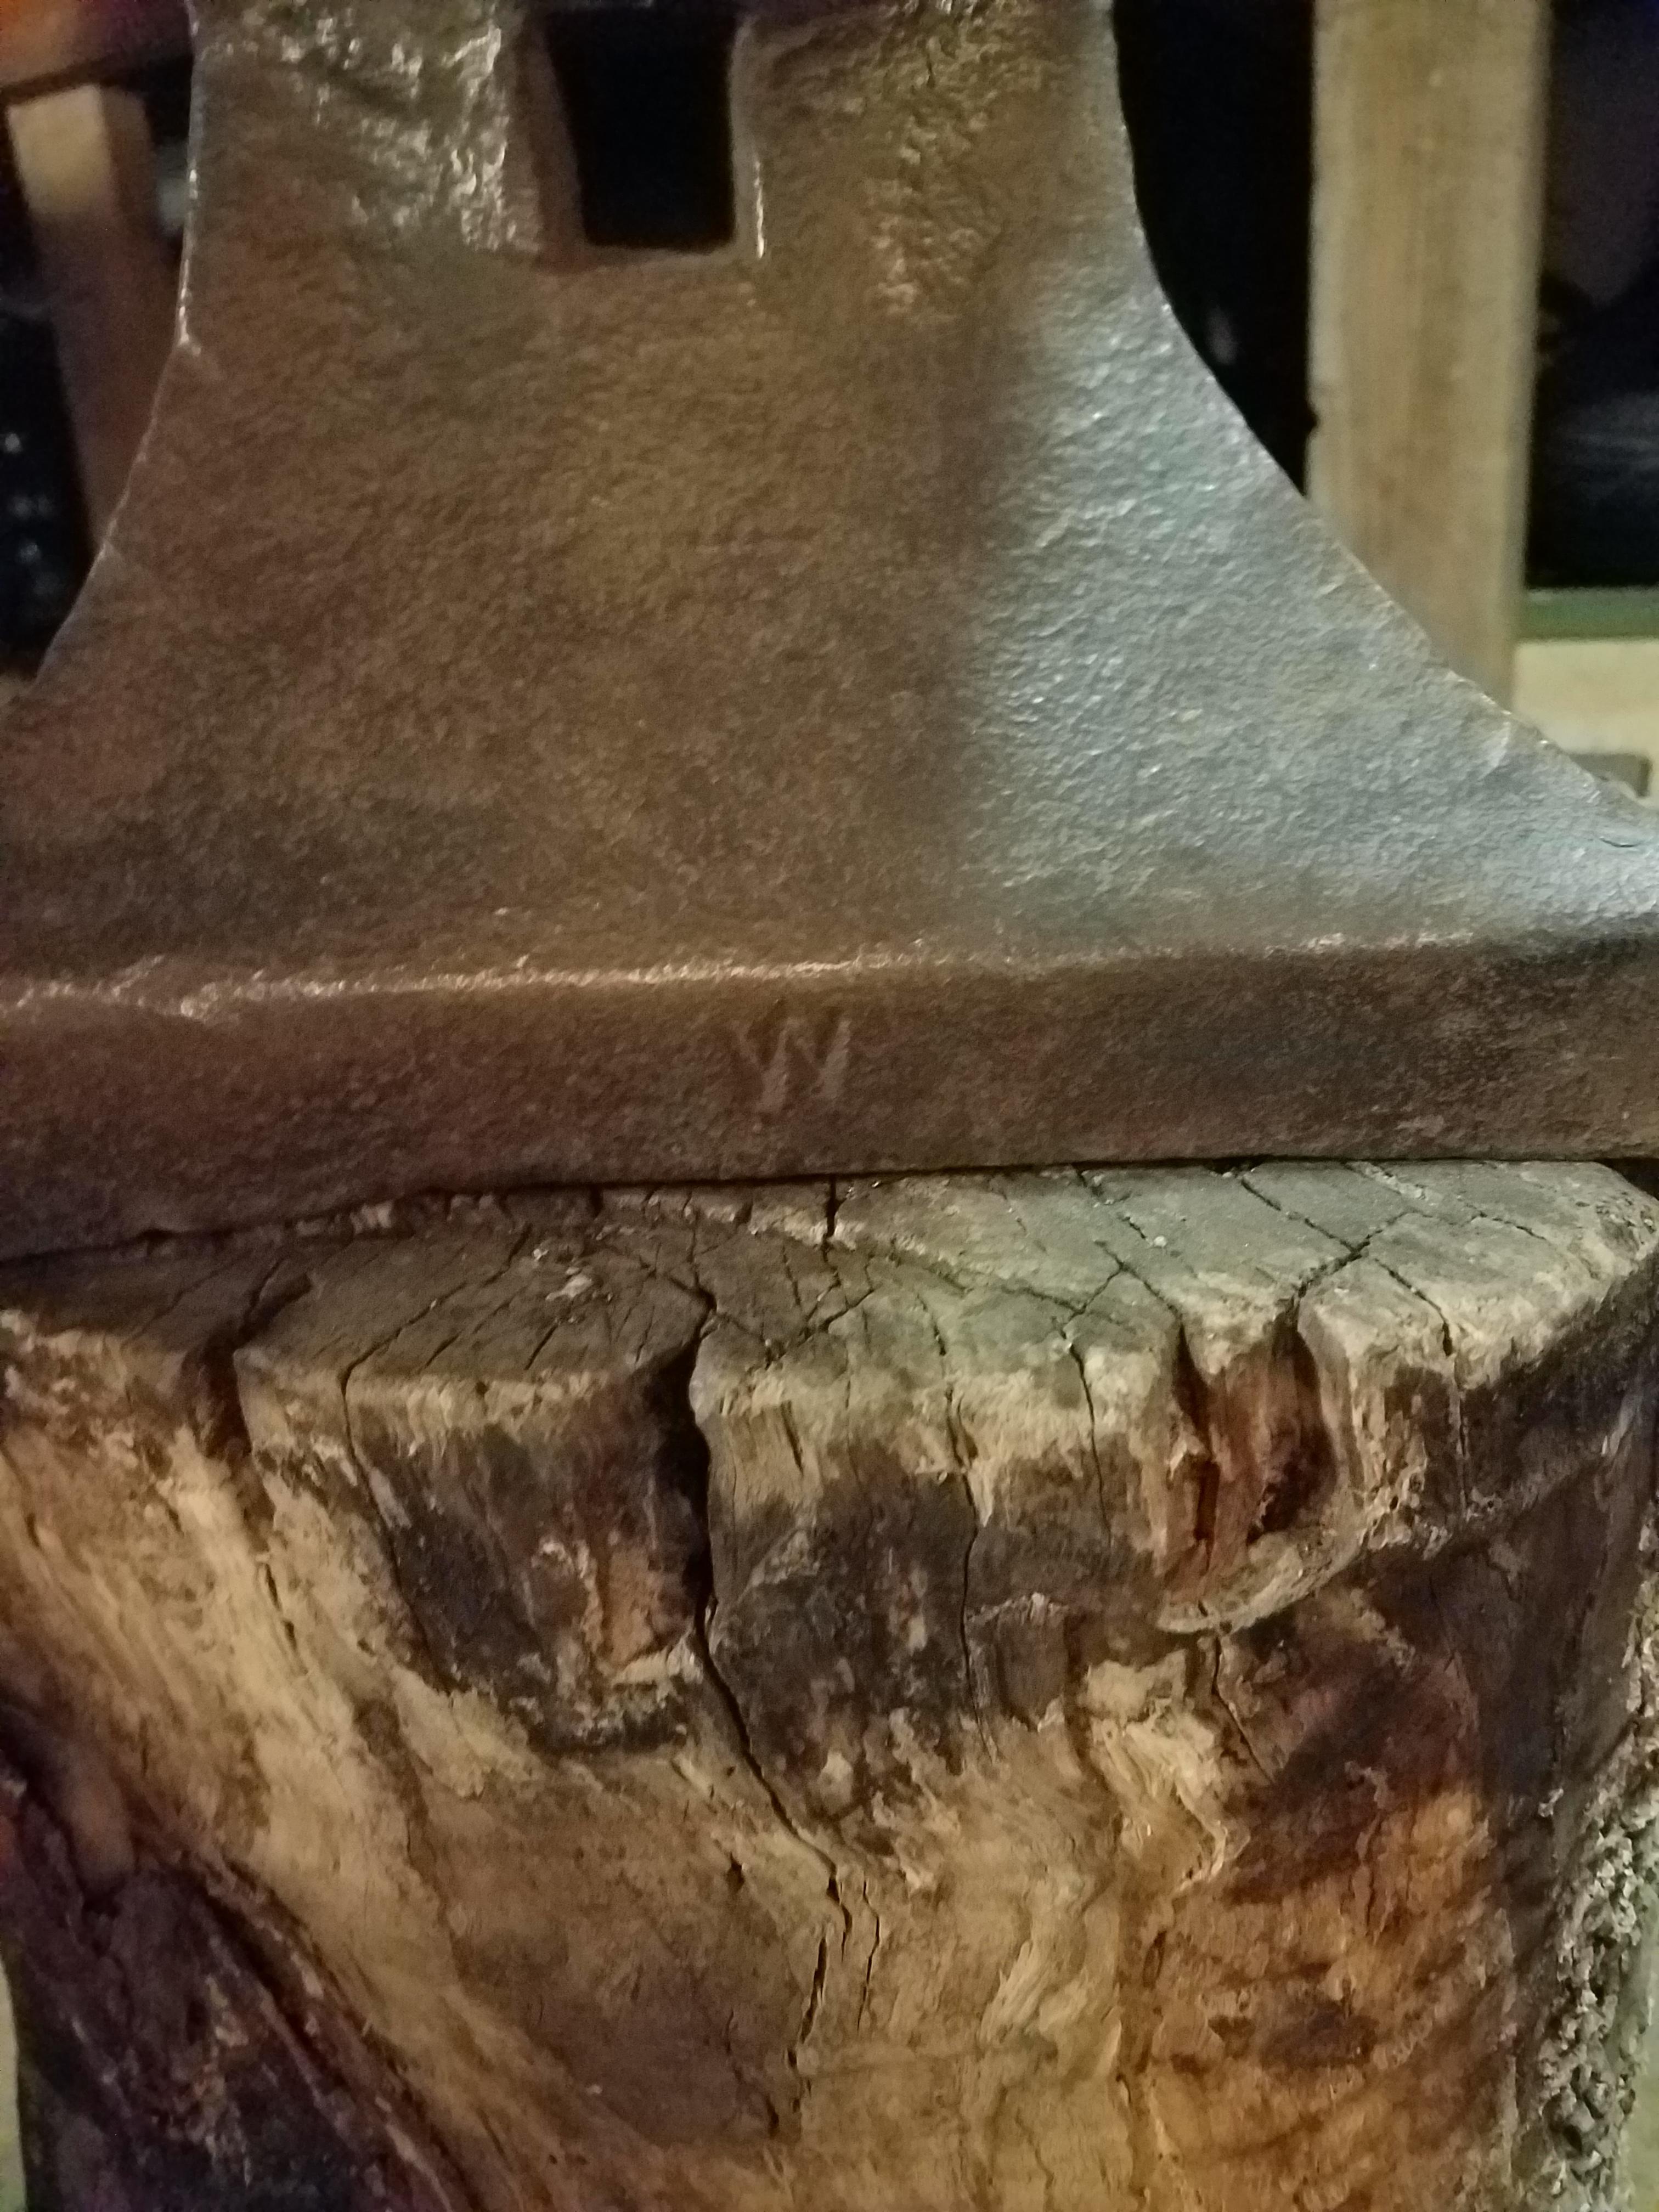
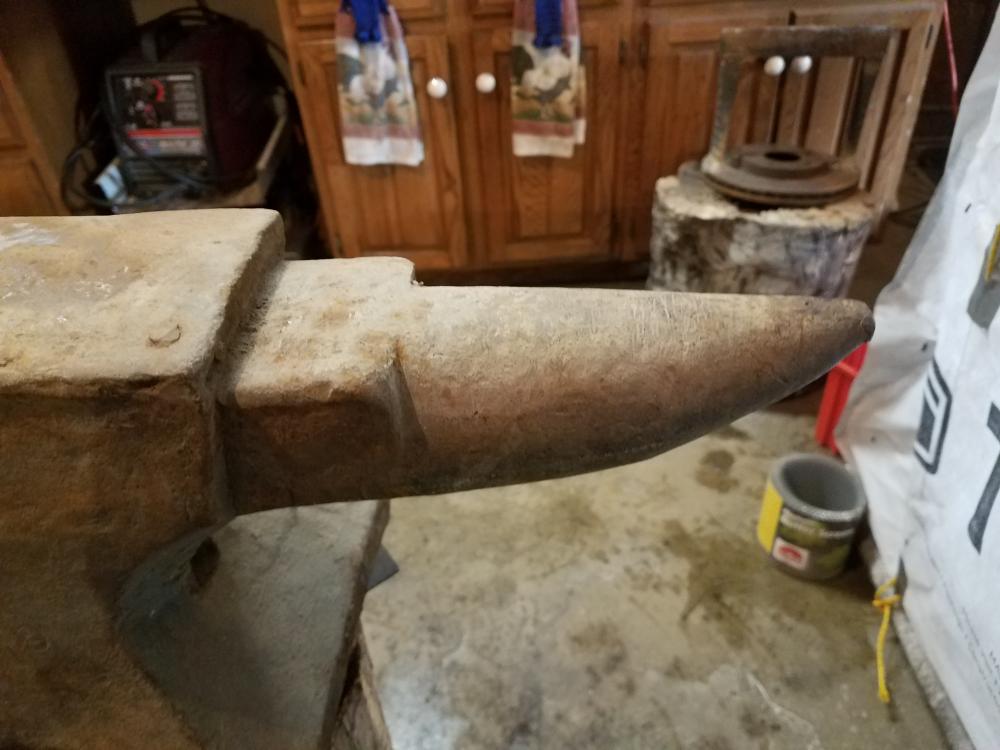
The beast part was about the look of the terrifying project in front of me. It's funny how you said no one is picking on me. I was just telling my coworker that the most brutally honest group of people are those in the blacksmithing community. I wouldn't post on here if I didn't think your honesty is with good intentions. Going back to the repair. If it was to get ruined, I probably already did. I heated up the anvil to around 400 like Gunther said to do and started welding. I'm going to finish up anyway and if I can't get a workable surface then I think there's a club down the road. Toward the horn is some weld that looks like it hasn't failed (I can just tell its weld vs hardened steel). I did a bit of a ball peen test before digging into it. Either side of the delaminated area has good rebound, hence why I left it alone. I did grow up welding which is why I'm not cocky to consider myself a pro. I tried doing a rubbing on the side and wasn't real successful. Then again my eye is probably not as well trained as others. I will post a pic when I get home from work later. Any idea about that w? I can't find anything on its significance. Thank you for the advice and keep it coming bc I have avoided many mistakes from this awesome forum. Helps when you are Forged in Fire and YouTube "self-taught". Here is a pic of my anvil that I have used for a year and a half and made some decent creations with. The mandrel sticking up there was for a project. Lol I was hoping this new anvil was going to be rather turn key with minor issues, but it was essentially free!!
-
I am limited on experience. I have read up on Gunther and am doing my amateur best to follow it to a T. I can't find anything on what the w in the pic below means. It's the only clear marking on this beast. When I weighed the anvil it is 140# if that helps in identifying the anvil.

-
Someone at some point welded the surface back on I'm guessing and the weld cracked and it looks like rust spread underneath the weld. It has a strange look in the top picture bc I had done some grinding to see what I was dealing with. I have actually removed about an eighth of an inch of steel from the face of the anvil and am working on resurfacing it myself. I don't plan on it being perfect but I am just a hobby blacksmith at this point so anything works better than an anvil with a big chunk of missing out of it. It was my payment for cutting a couple loads of wood for my grandfather.


-
Any insight into what kind of anvil this is? Has some faint indentations that were letters. It does have a 'W' stamped in the base at the back. Just got it from my grandpa and working on resurfacing and repairing it. Just curious what I've got. Any input is appreciated.
-
The nice thing is that my garage is not attached to my house. I only spend 3-4 hrs in my garage at a time and I exit it several times during that time. I was scared there for a minute that I was spending too much time in my poorly ventilated garage. Looks like my forge will be around 275 cubic inches maybe a little smaller. I'm just looking to build a cheap, efficient burner to be able to eventually get hot enough to forgeweld and do little projects as well. Wayne, I love the hinge set up that you use on your forges. I am going to adopt this design. From what I have gathered I should be okay making a burner like what Frosty has posted prior and putting it at an angle on the side of the forge.
-
Oh gotcha...Yeah when I start running this larger forge I will be more aware of ventilation. My garage is about the same size as your work area. I dont have big huge doors like yours just 2 car garage door. So if i get a CO meter then i just open the door when it gets to a high level? You are right opening the doors in the dead of winter in Iowa is not real condusive to wanting to work metal. lol I open the walk in door from time to time but with the small forge I dont have any problem with the ventilation.
-
The front of the forge being the ventilation? And do you think that Frosty's burner would be a good choice for a forge like this one? My plan is to coat the ceramic insulation with about 1/2" of refractory and then put a hinged door on the front with a hole for viewing/stock. From what I have read, it seems that about 4"x4" opening would be ideal for this size forge.
-
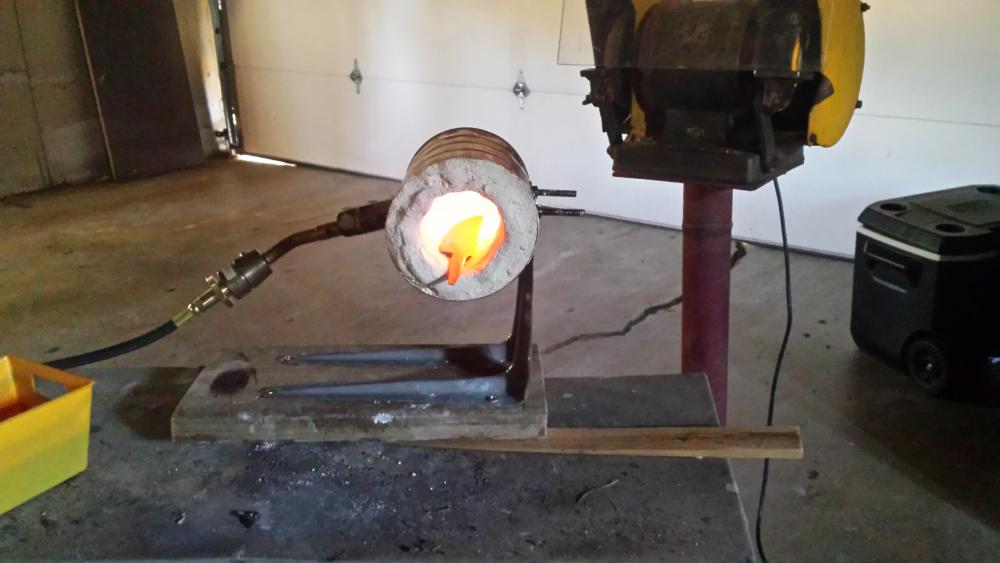
No the volume of my first forge was about 2" diameter by about 5 in deep. Lol. I wanted to make sure that I was going to actually take it up. (I did not forsee the level of 'obsession' as my wife calls it. Lol). I have been looking at burner builds for it. I am seriously considering building the burner that Frosty has posted. Seems to be a relatively simple burner to build. I'm just not that good with the tap set and I am also not good at doing all that math to figure out what I need. I'm sure I can manage the fabrication though. What is the reason one would bring the burner in at an angle or straight down from the top? I plan on making this my forge going forward so I want to make sure that I have all of the logistics figured out before going any further. This is the best place that I have found to get advice so I hope I am not annoying anyone with questions that are possibly elementary. Any assistance on the build is greatly appreciated. Forge will just be used for small to medium sized knives and possibly some decorative projects. I would really like to be able to forge weld and make damascus in the future with it as well. Here are pictures of my first set up First Forge
-
Looks nice. Seems like will hold lots of heat!!
-
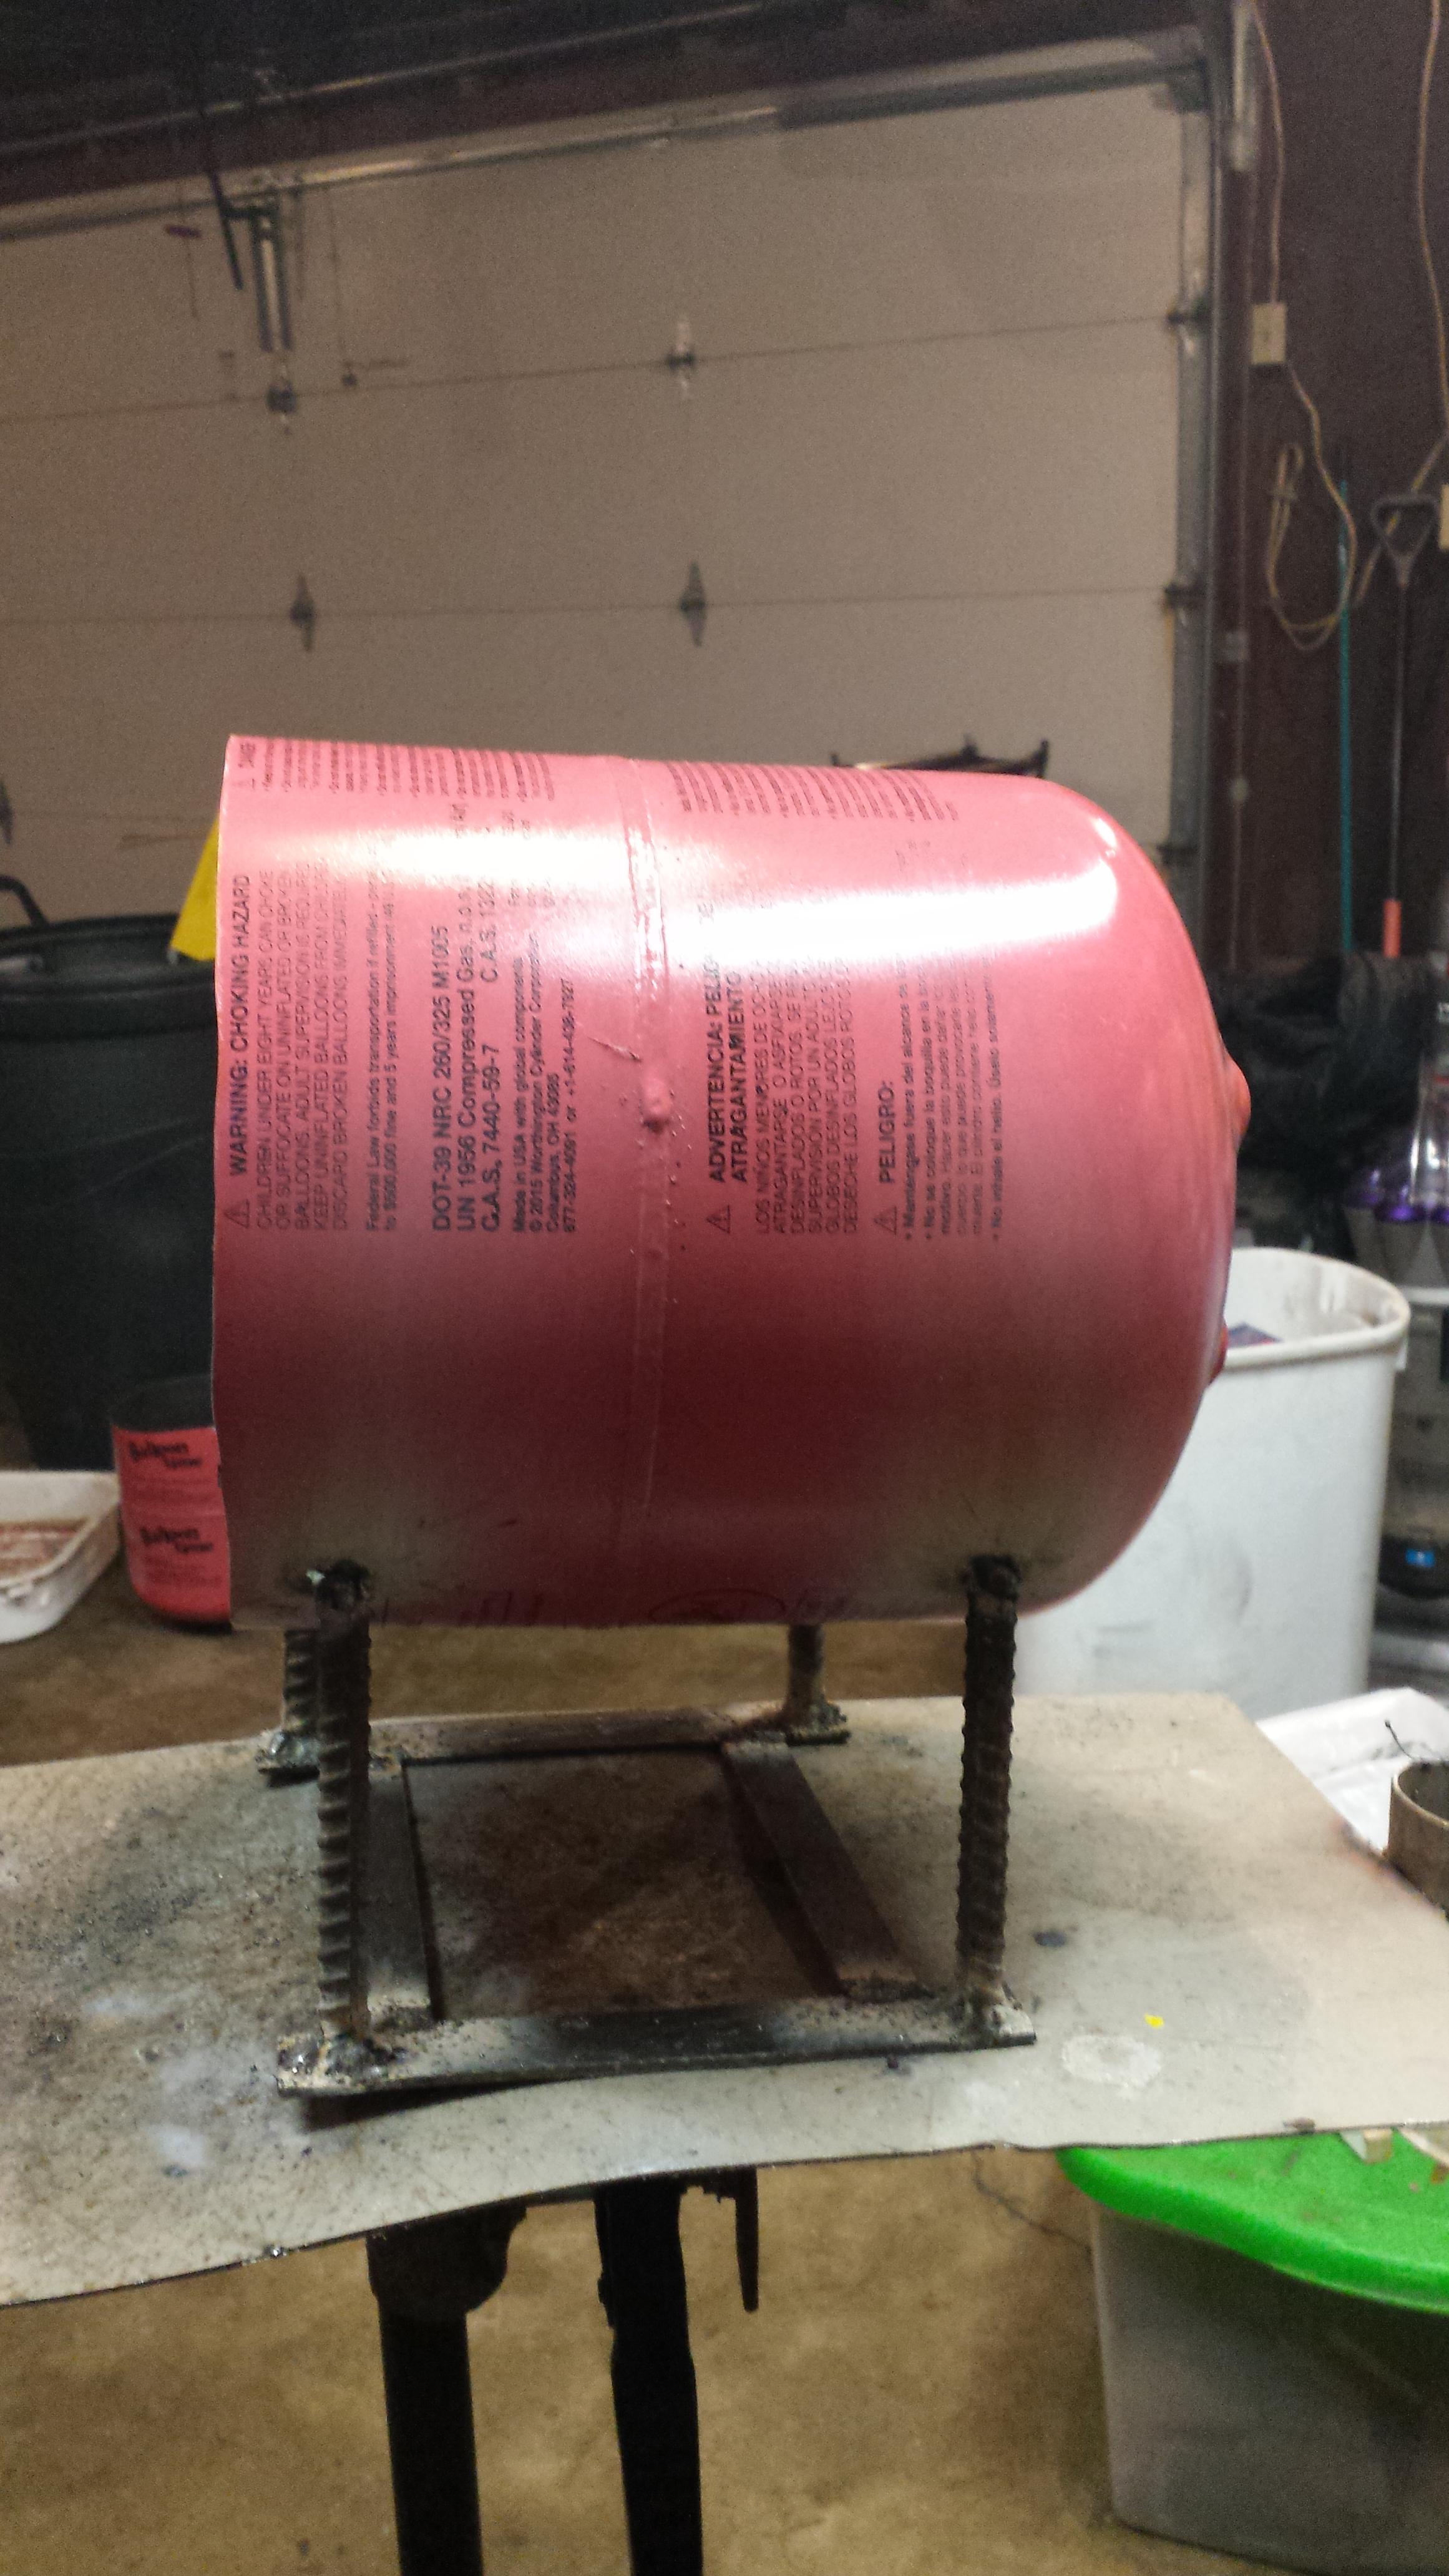
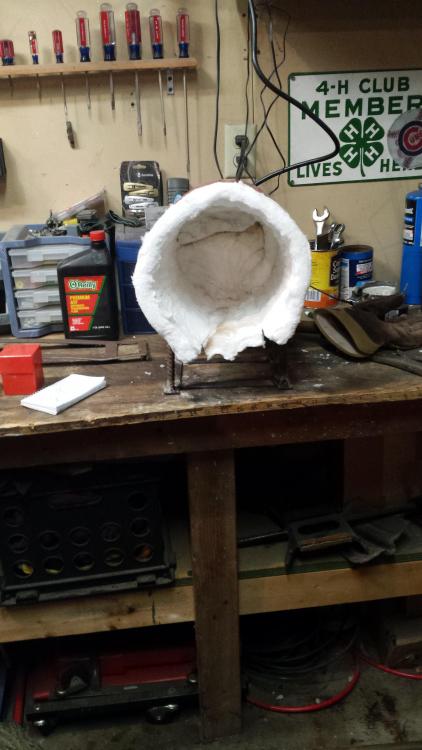
I started smithing with a small coffee can forge (plaster and sand refractory) using a swirl tip blow torch tip. I have decided to build a forge out of a helium tank and Kaowool. My question is should I build my own burner or will my blow torch work. I use it connected to a grill size propane tank. Here is a picture of it so far. Will be putting a door on the front. Also should I line with refractory of some sort?

-
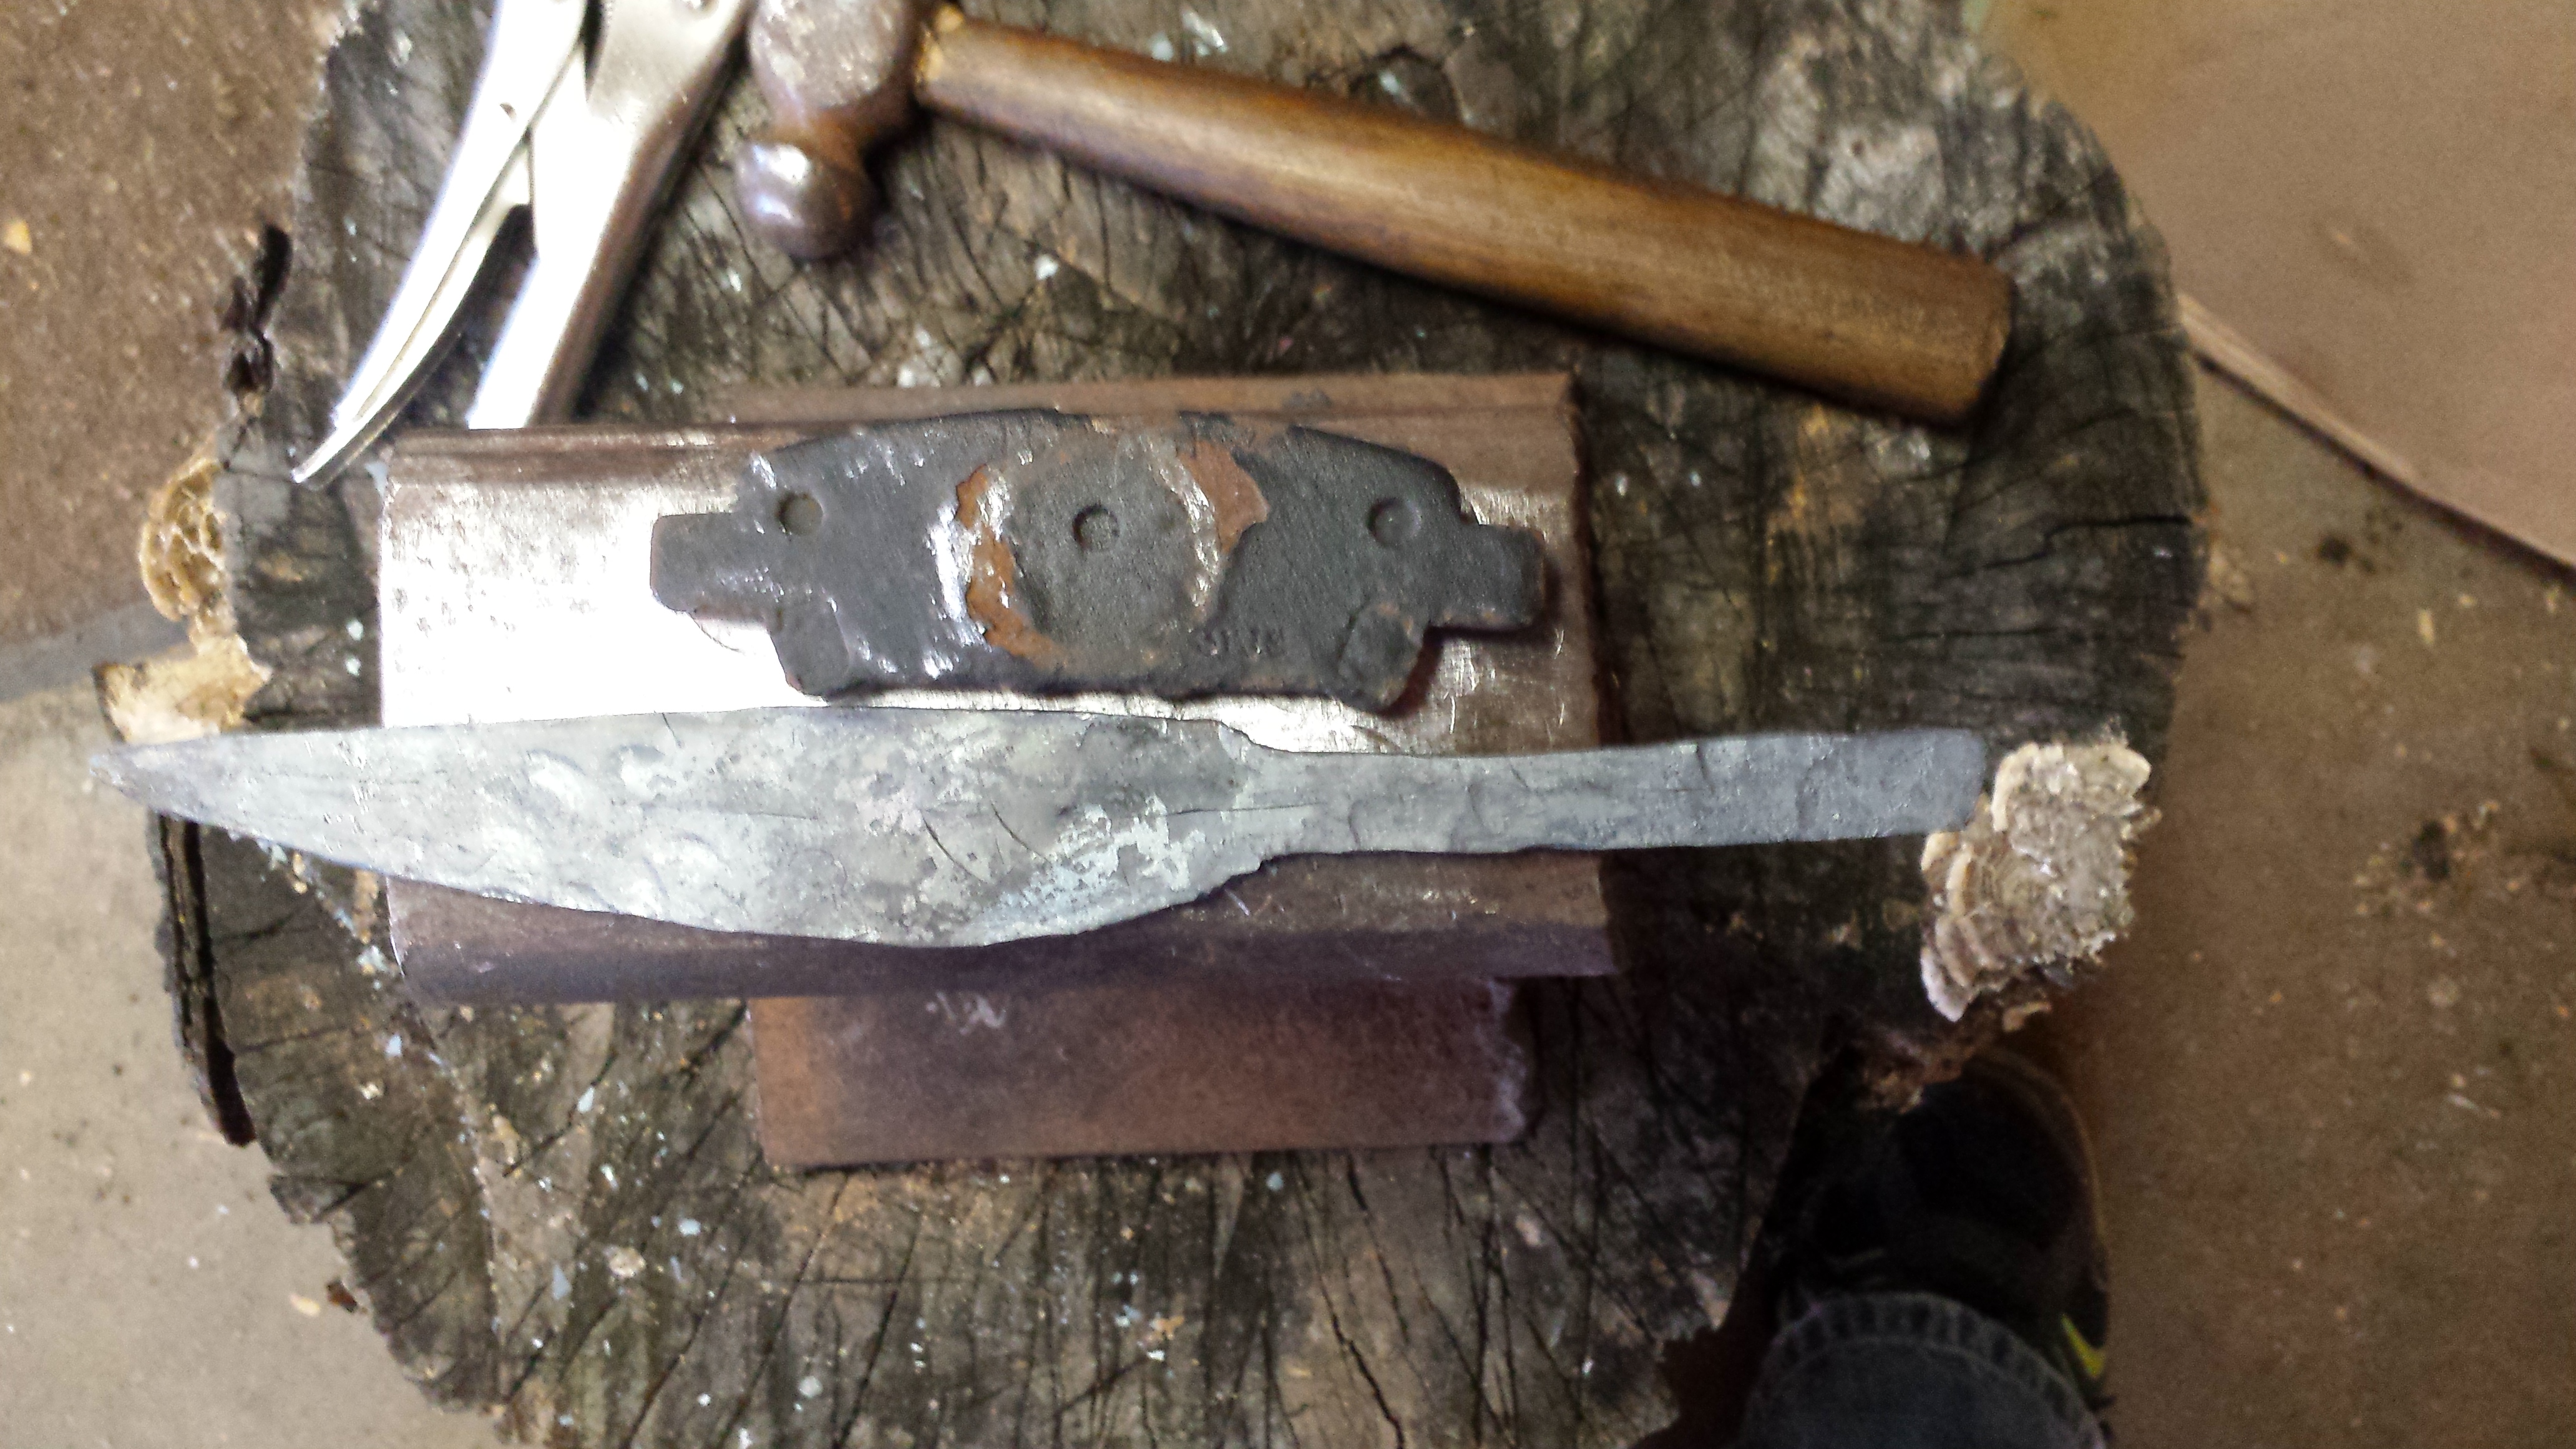
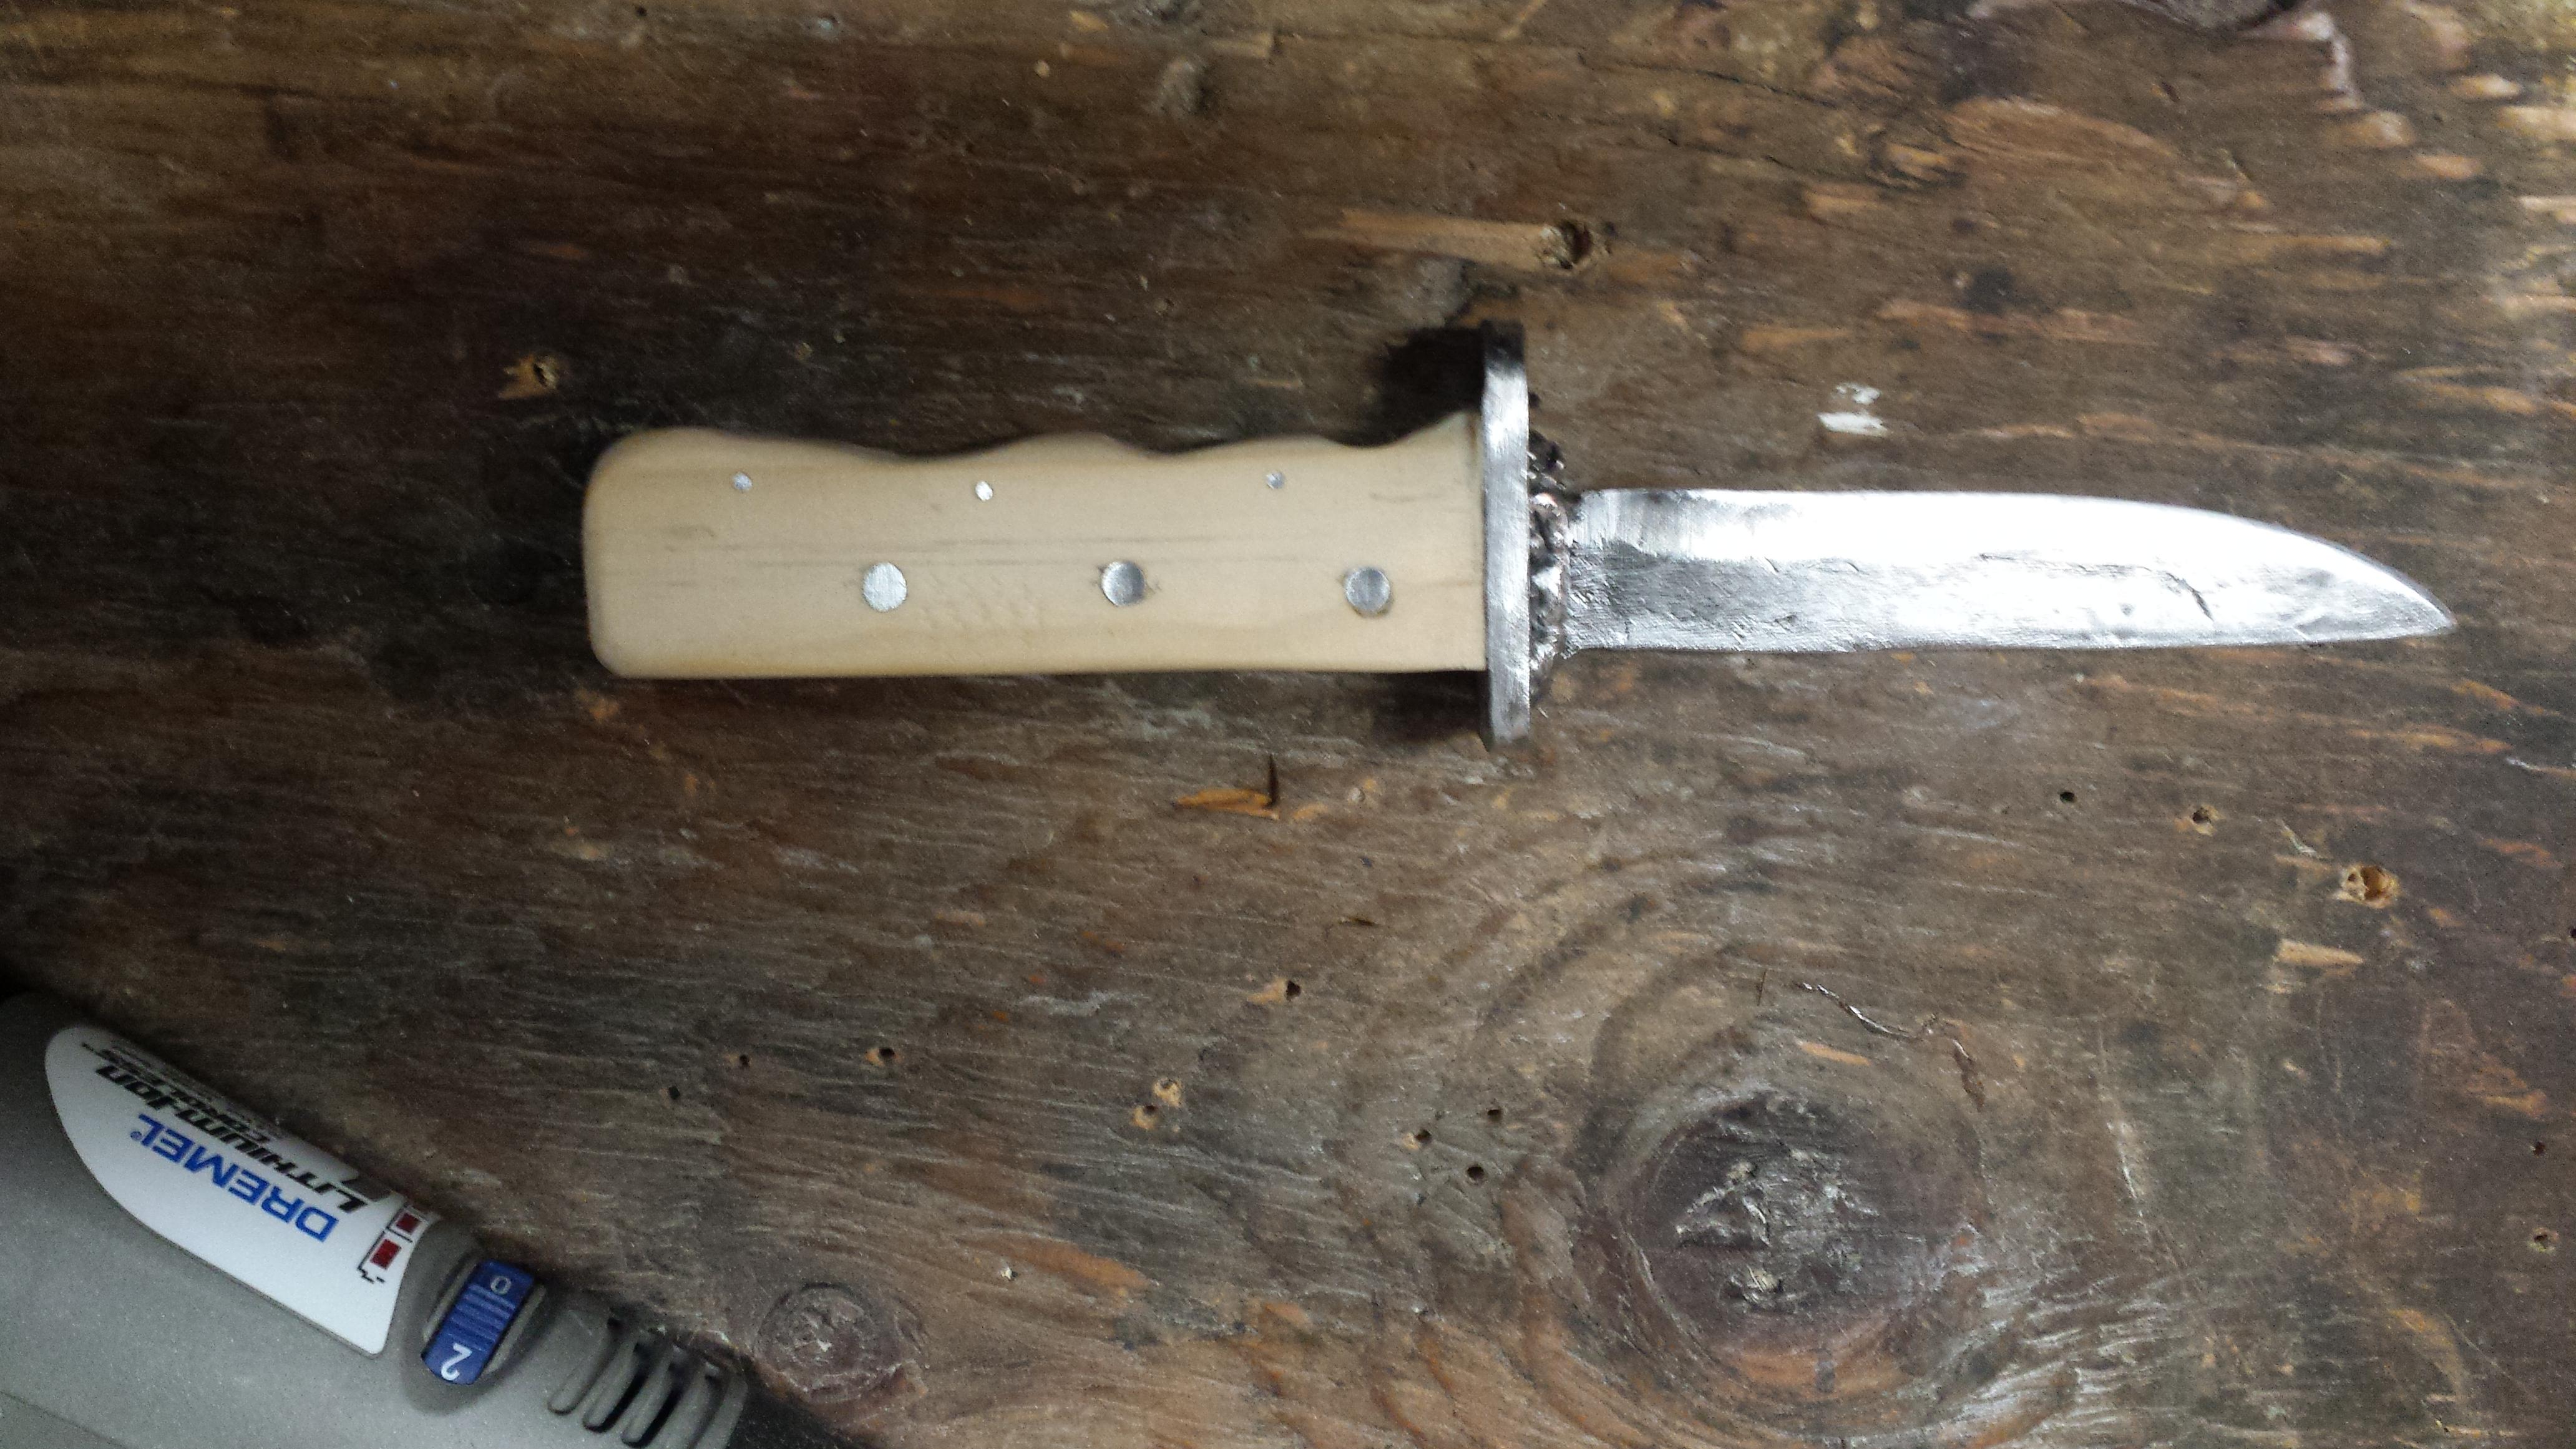
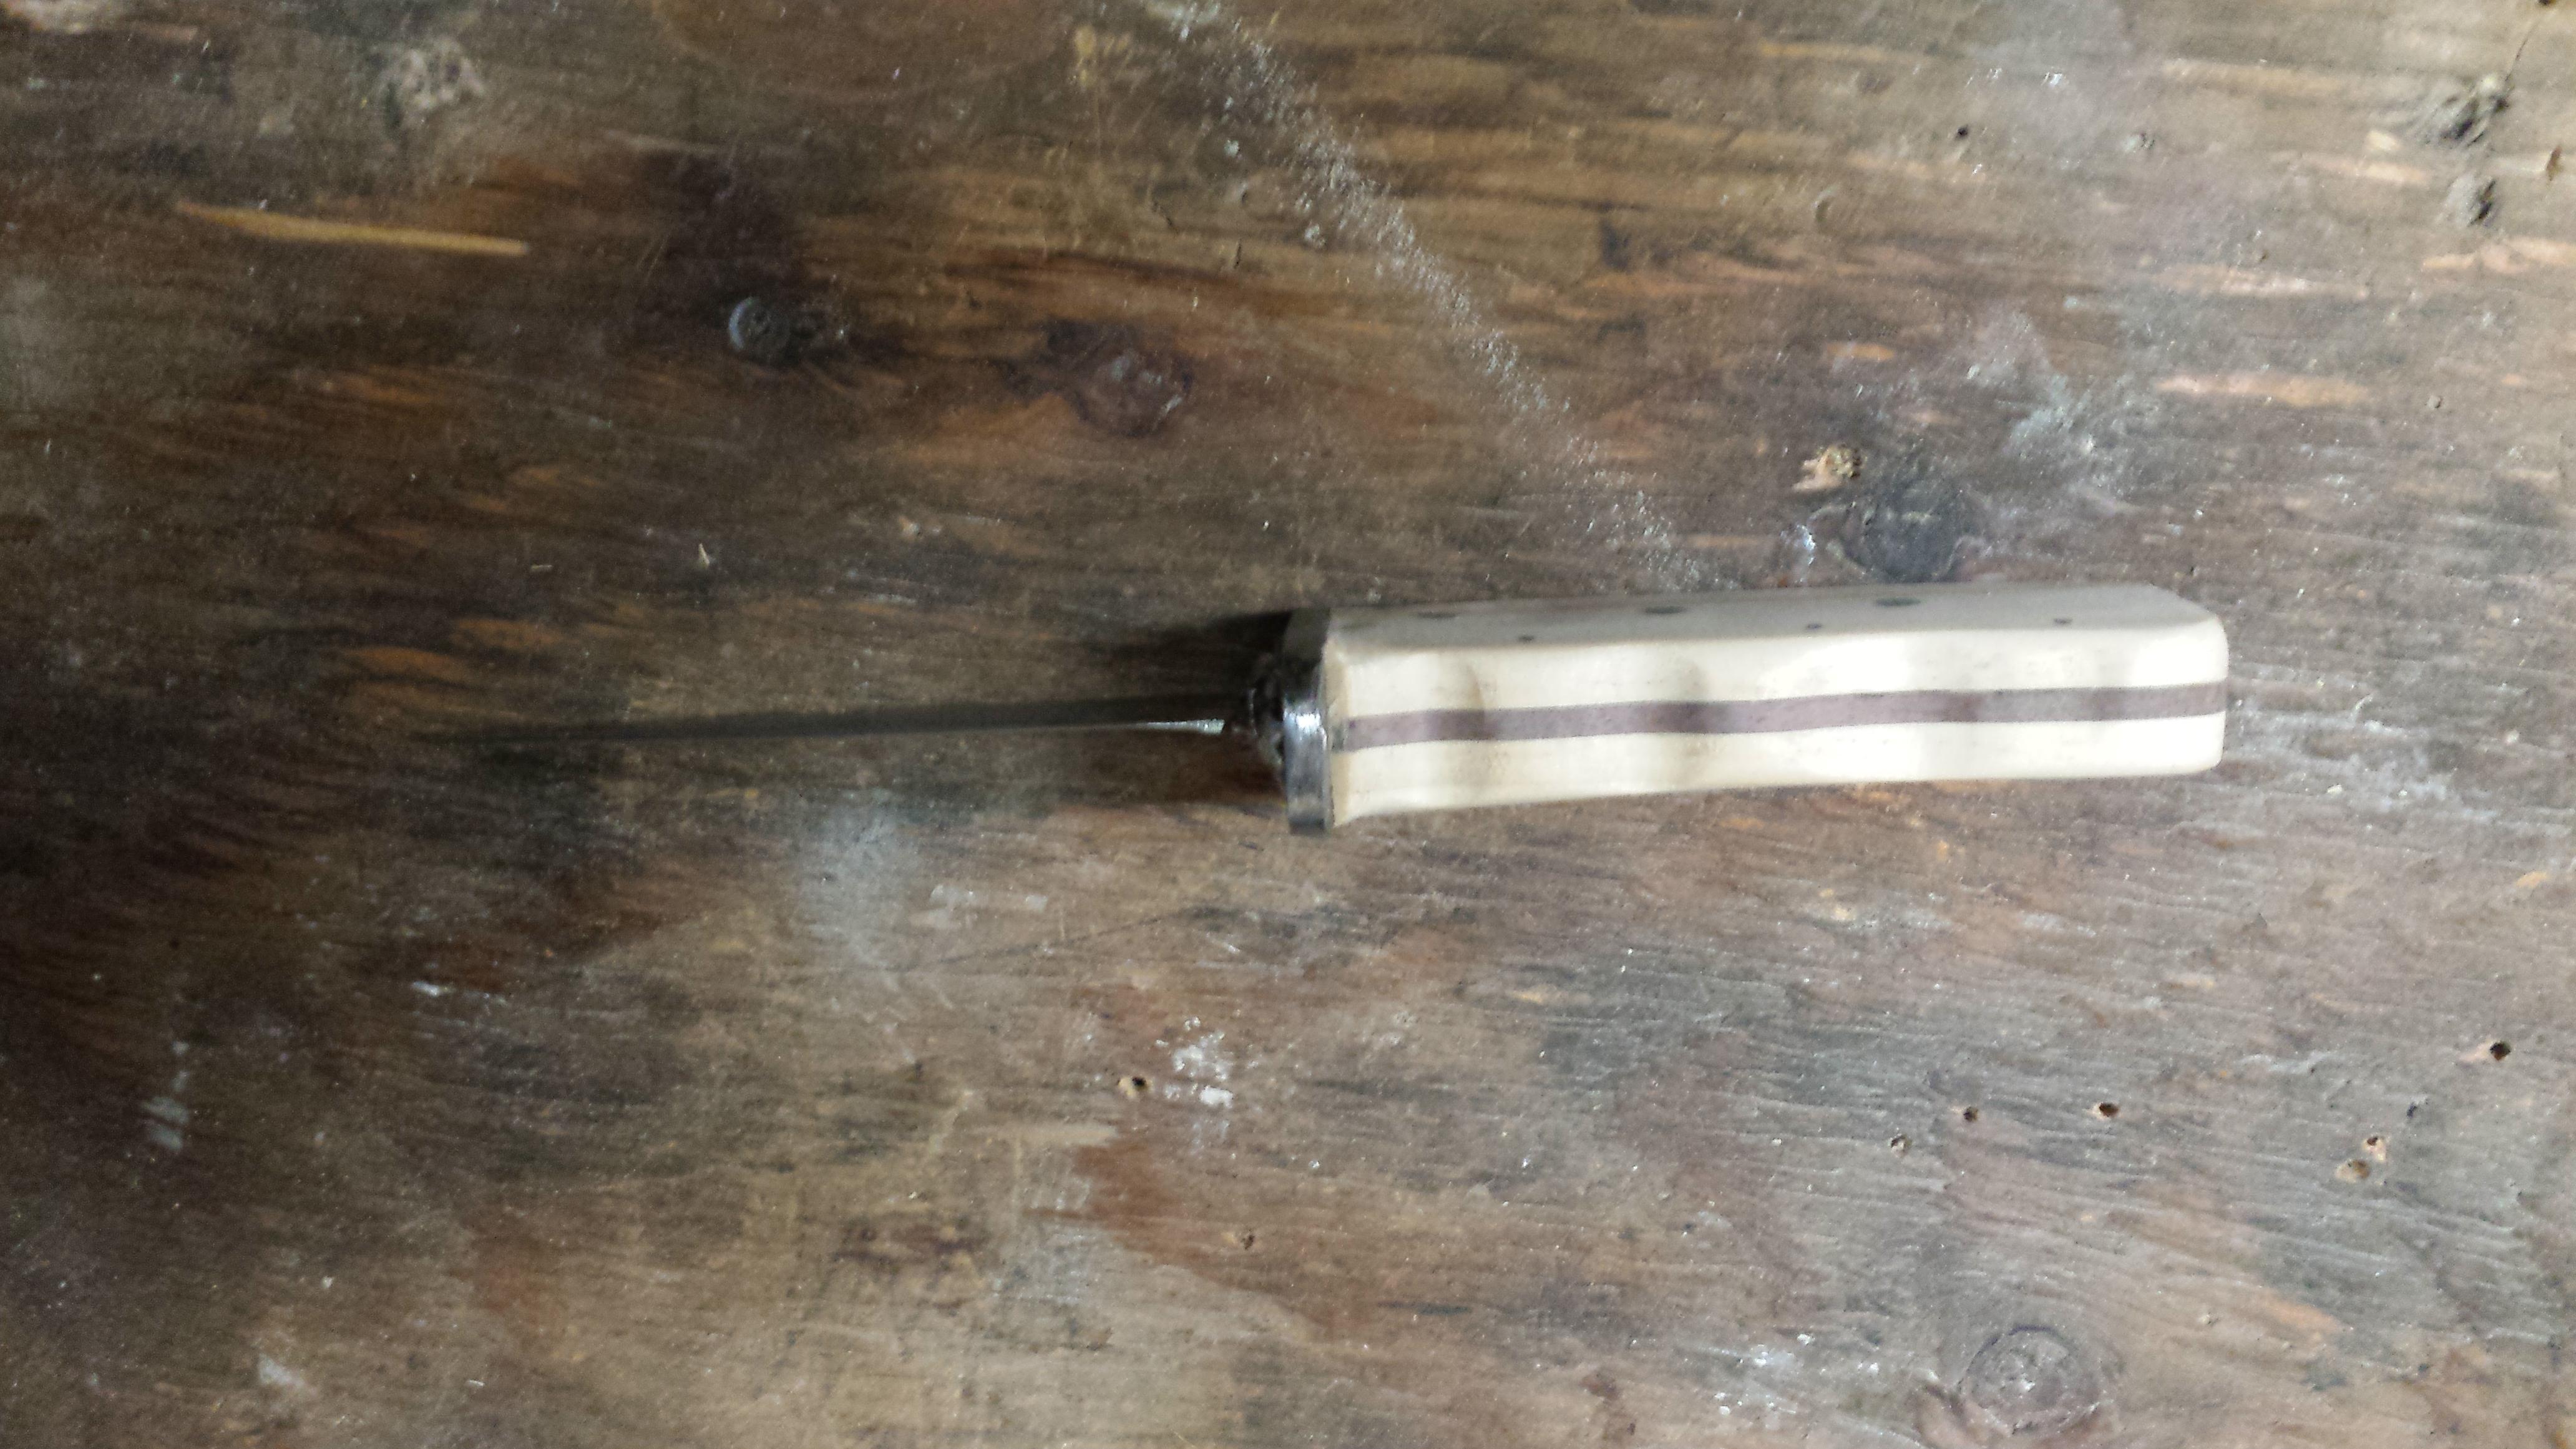
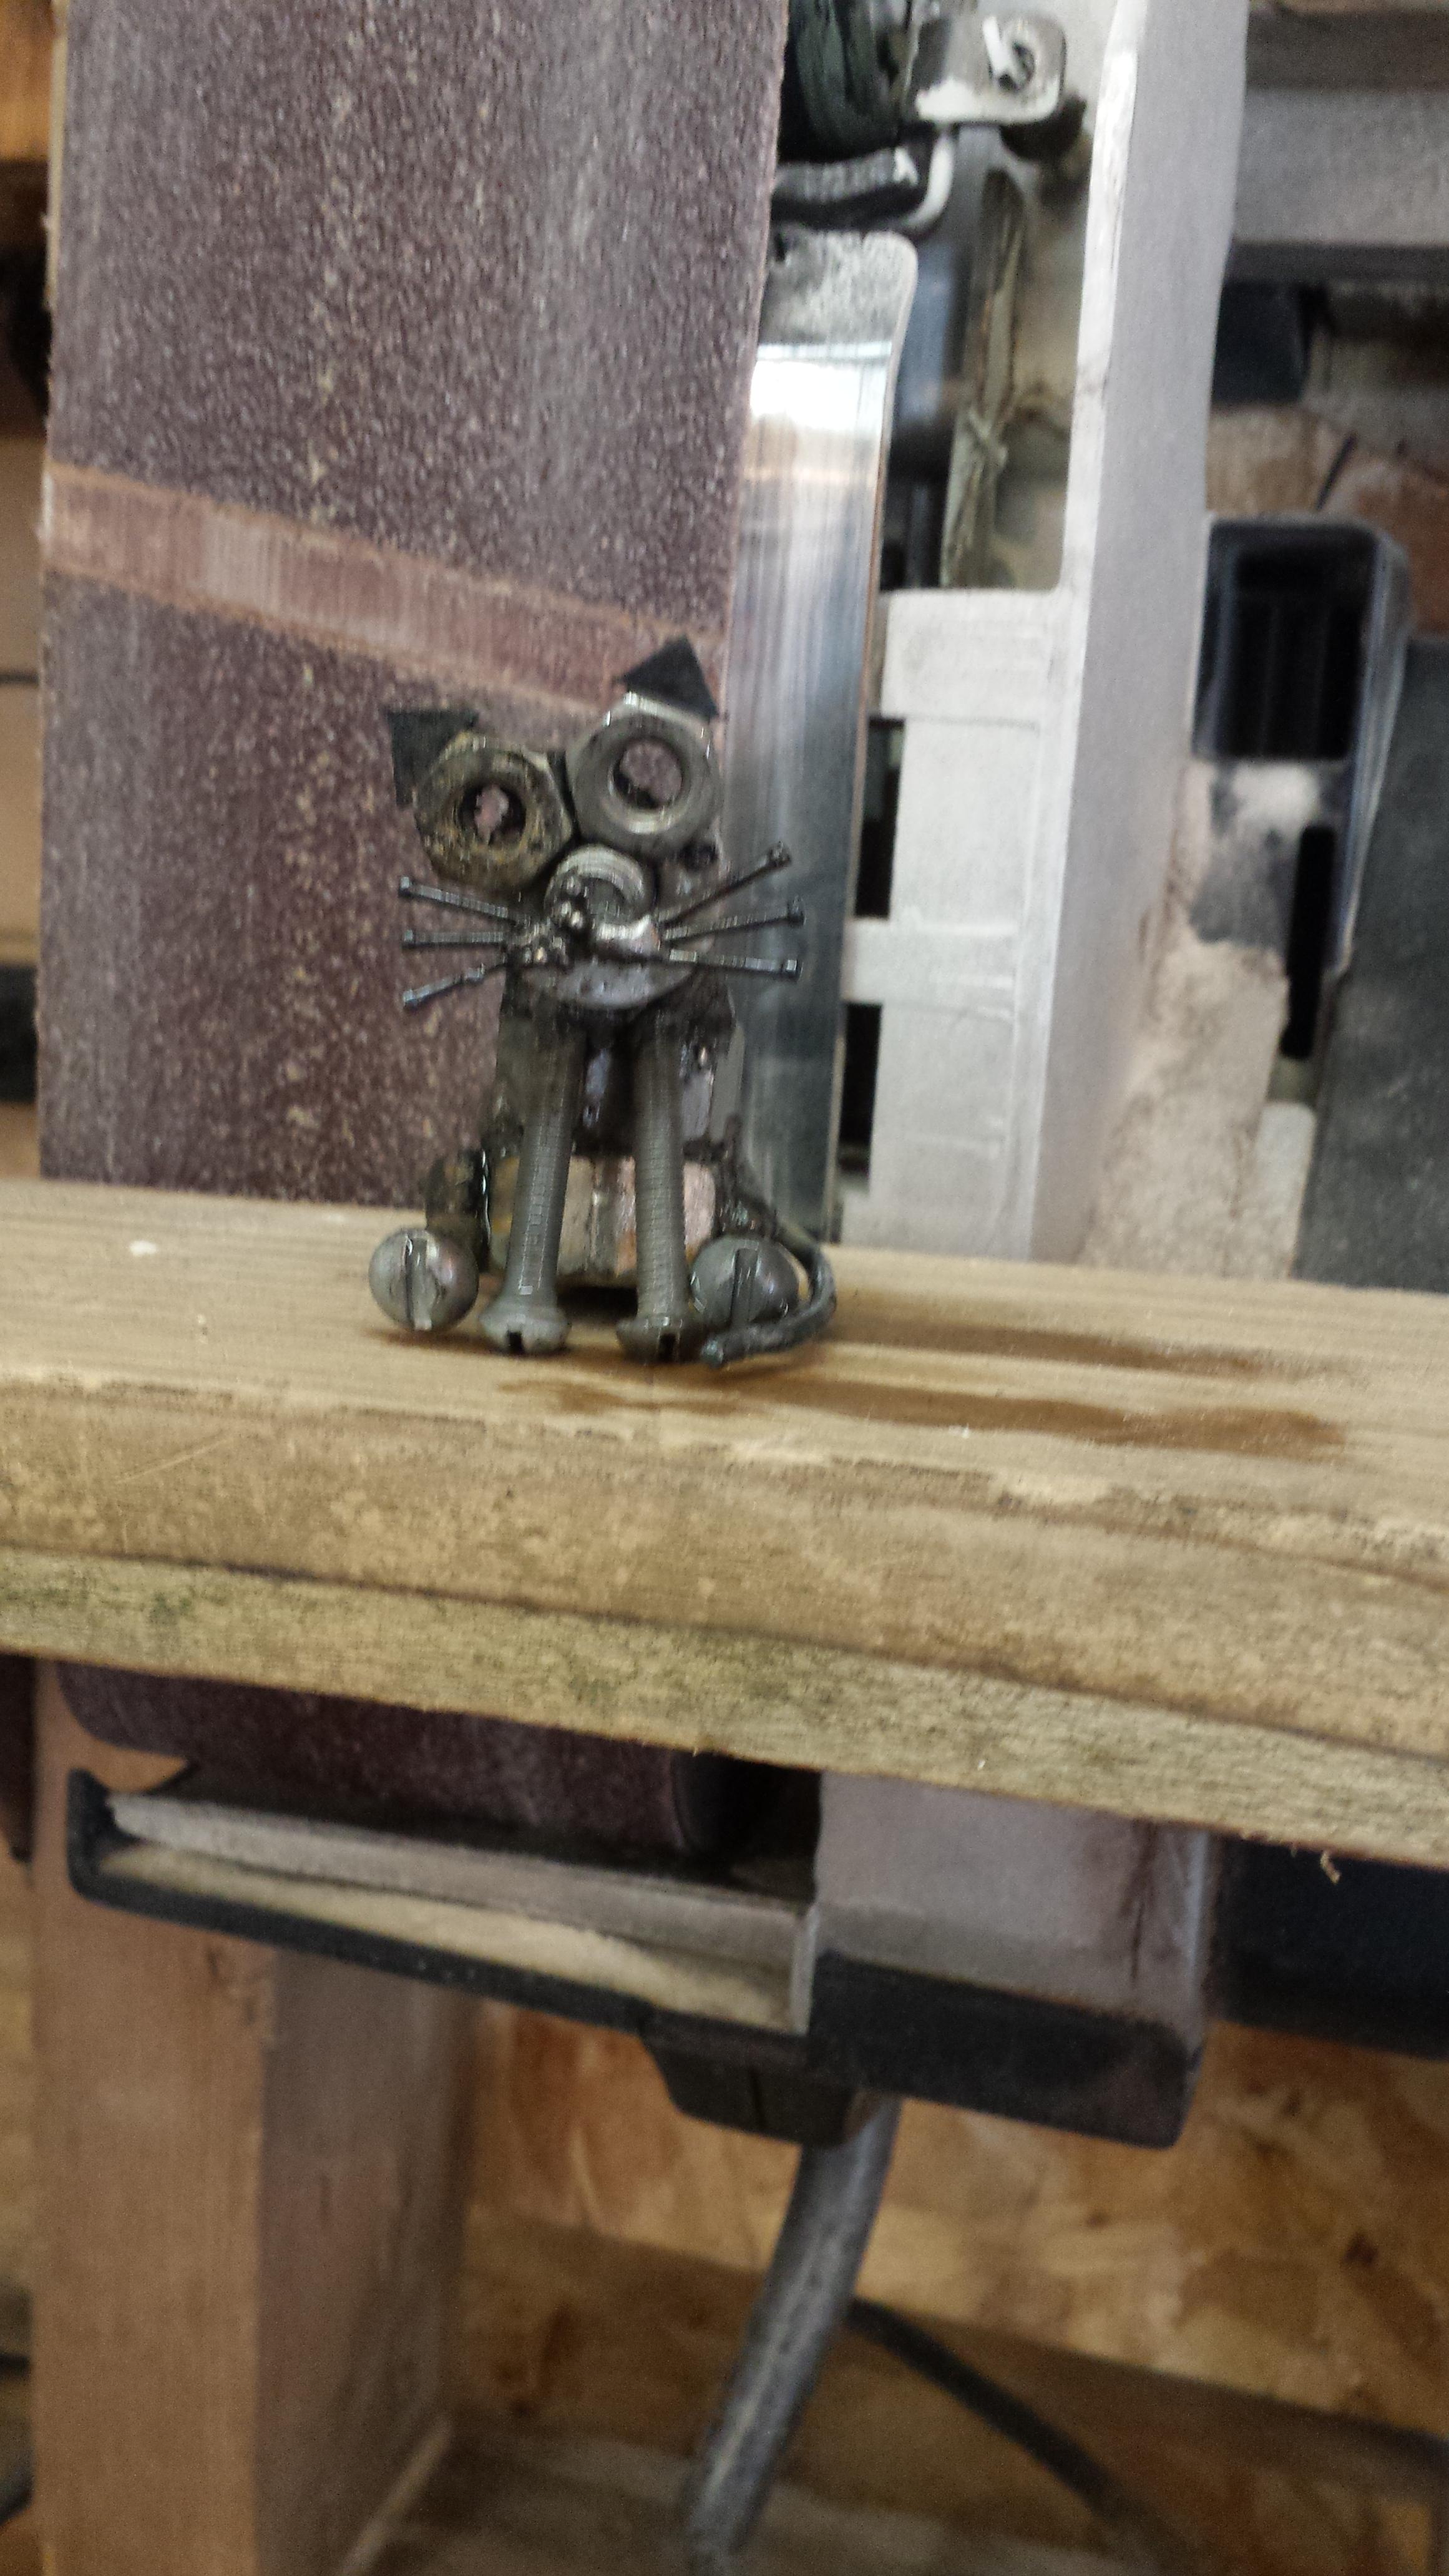
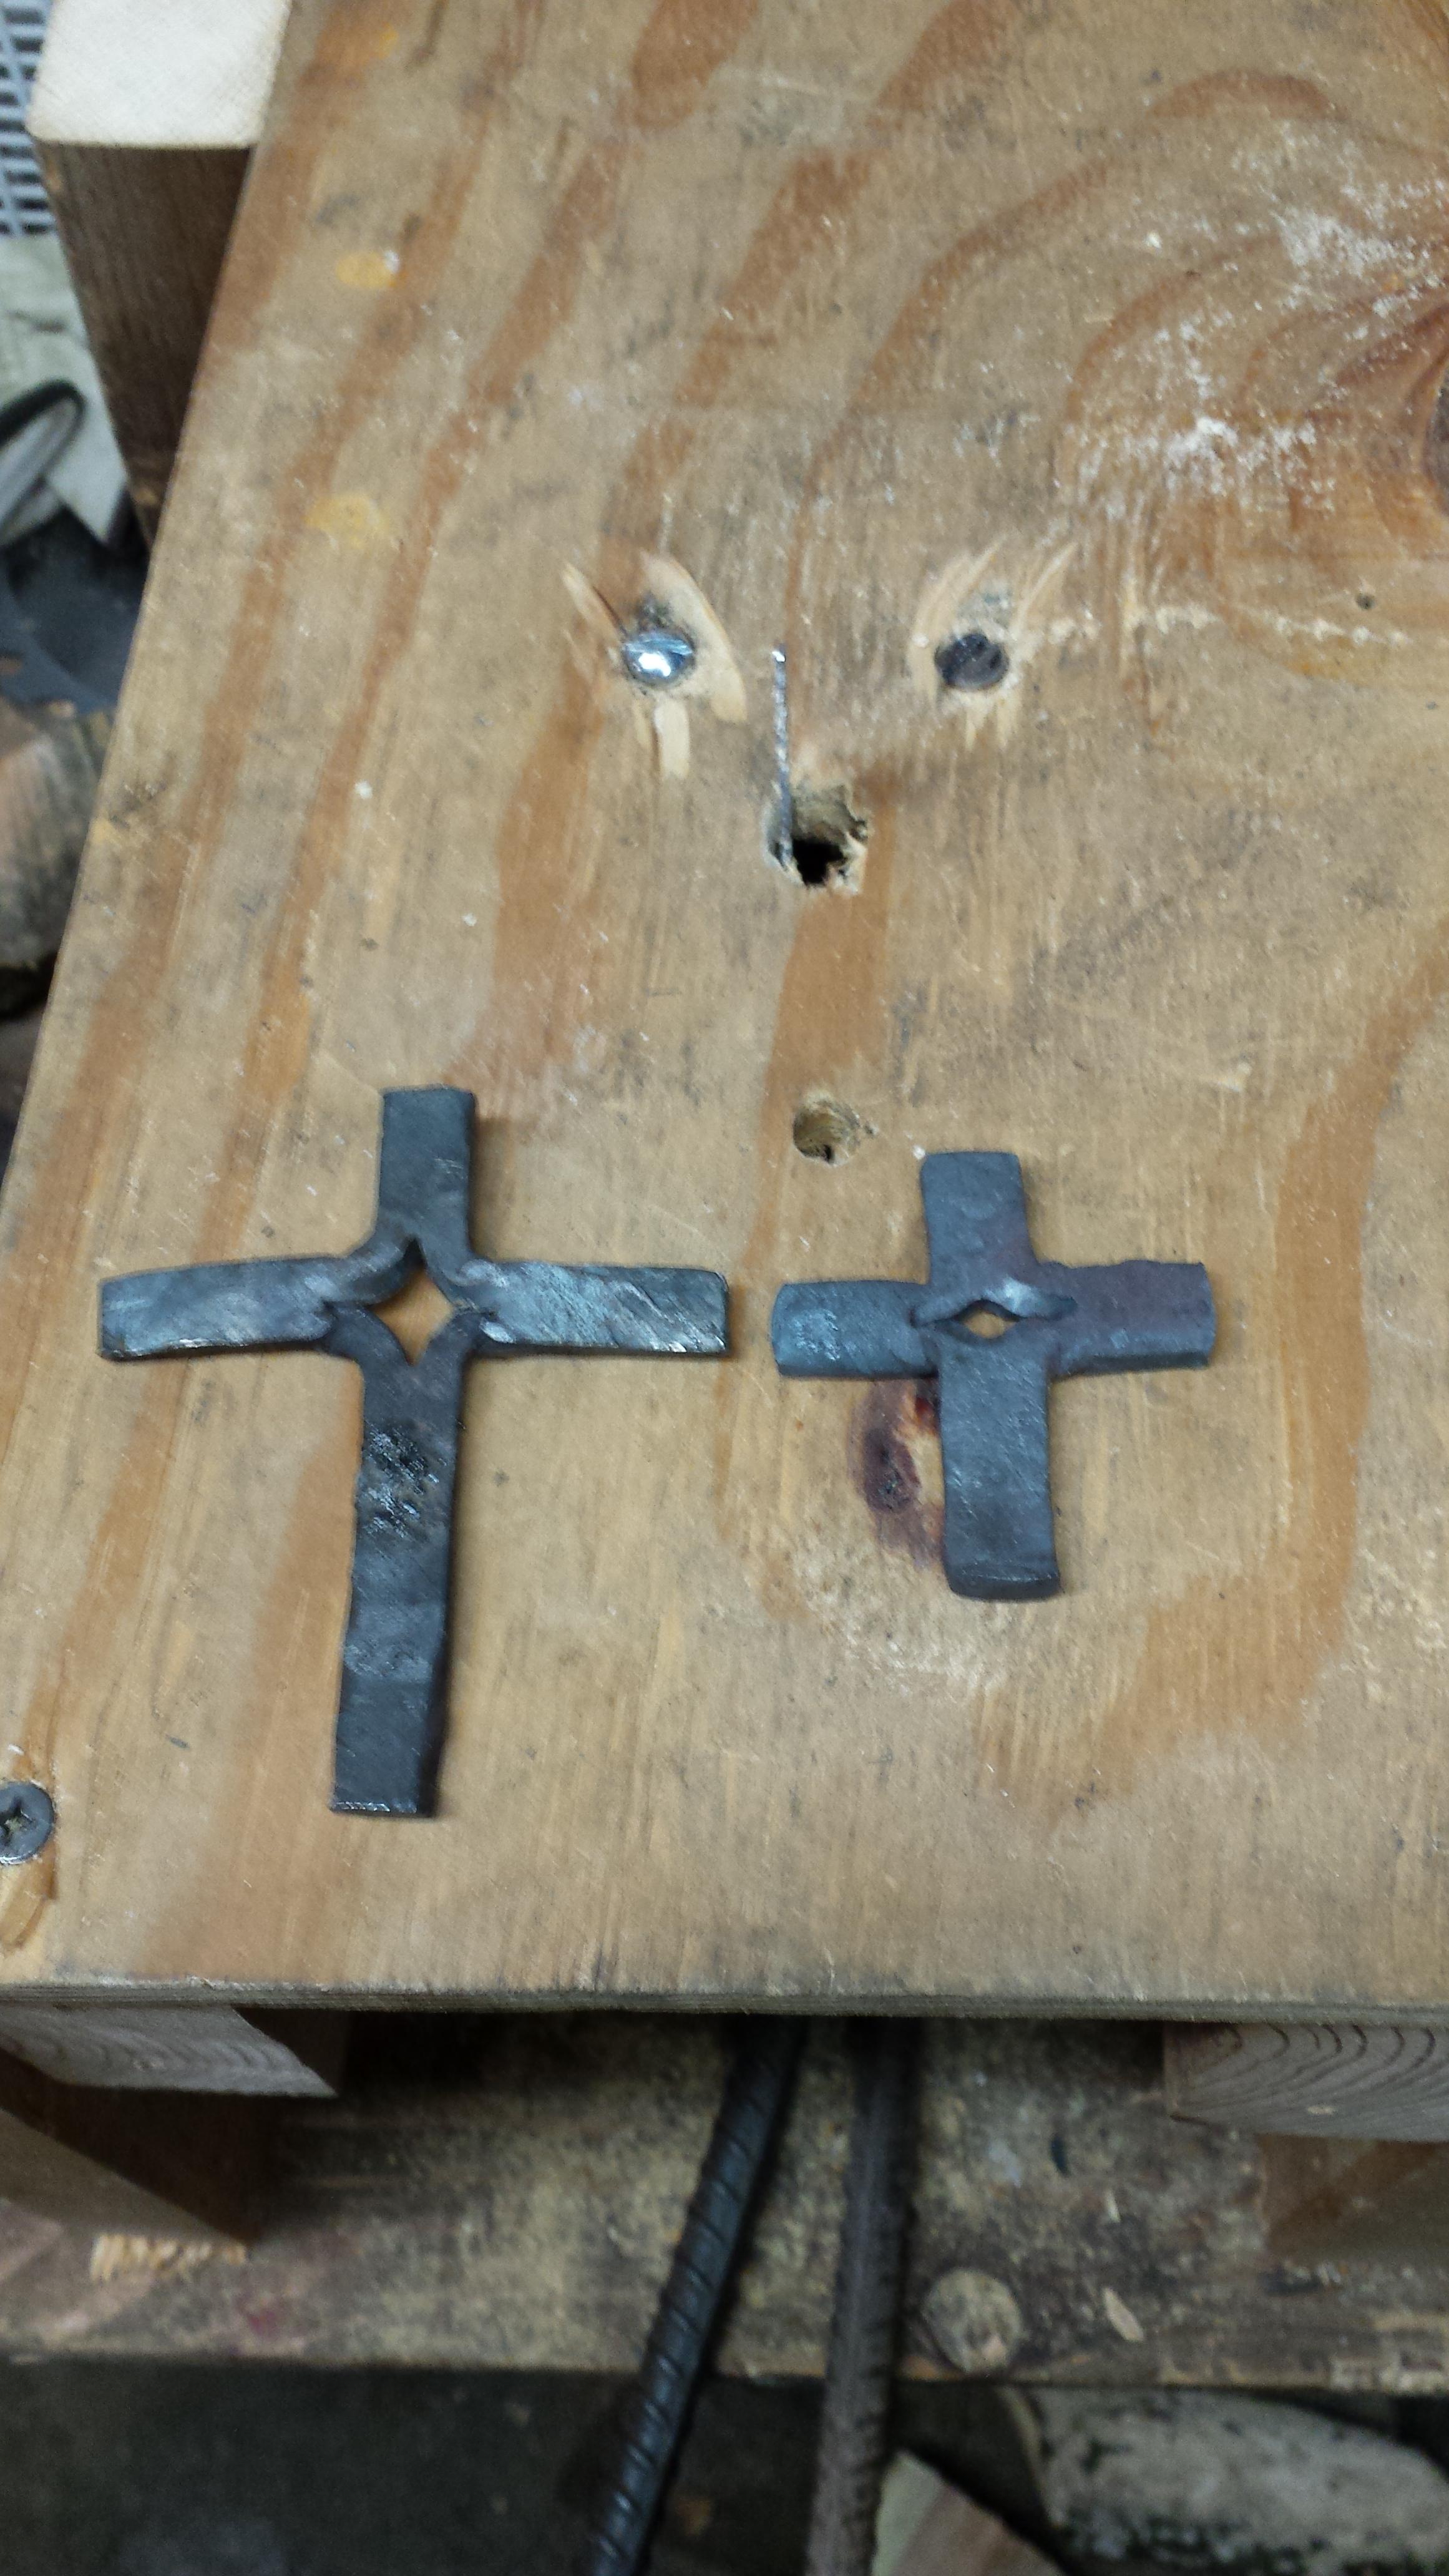
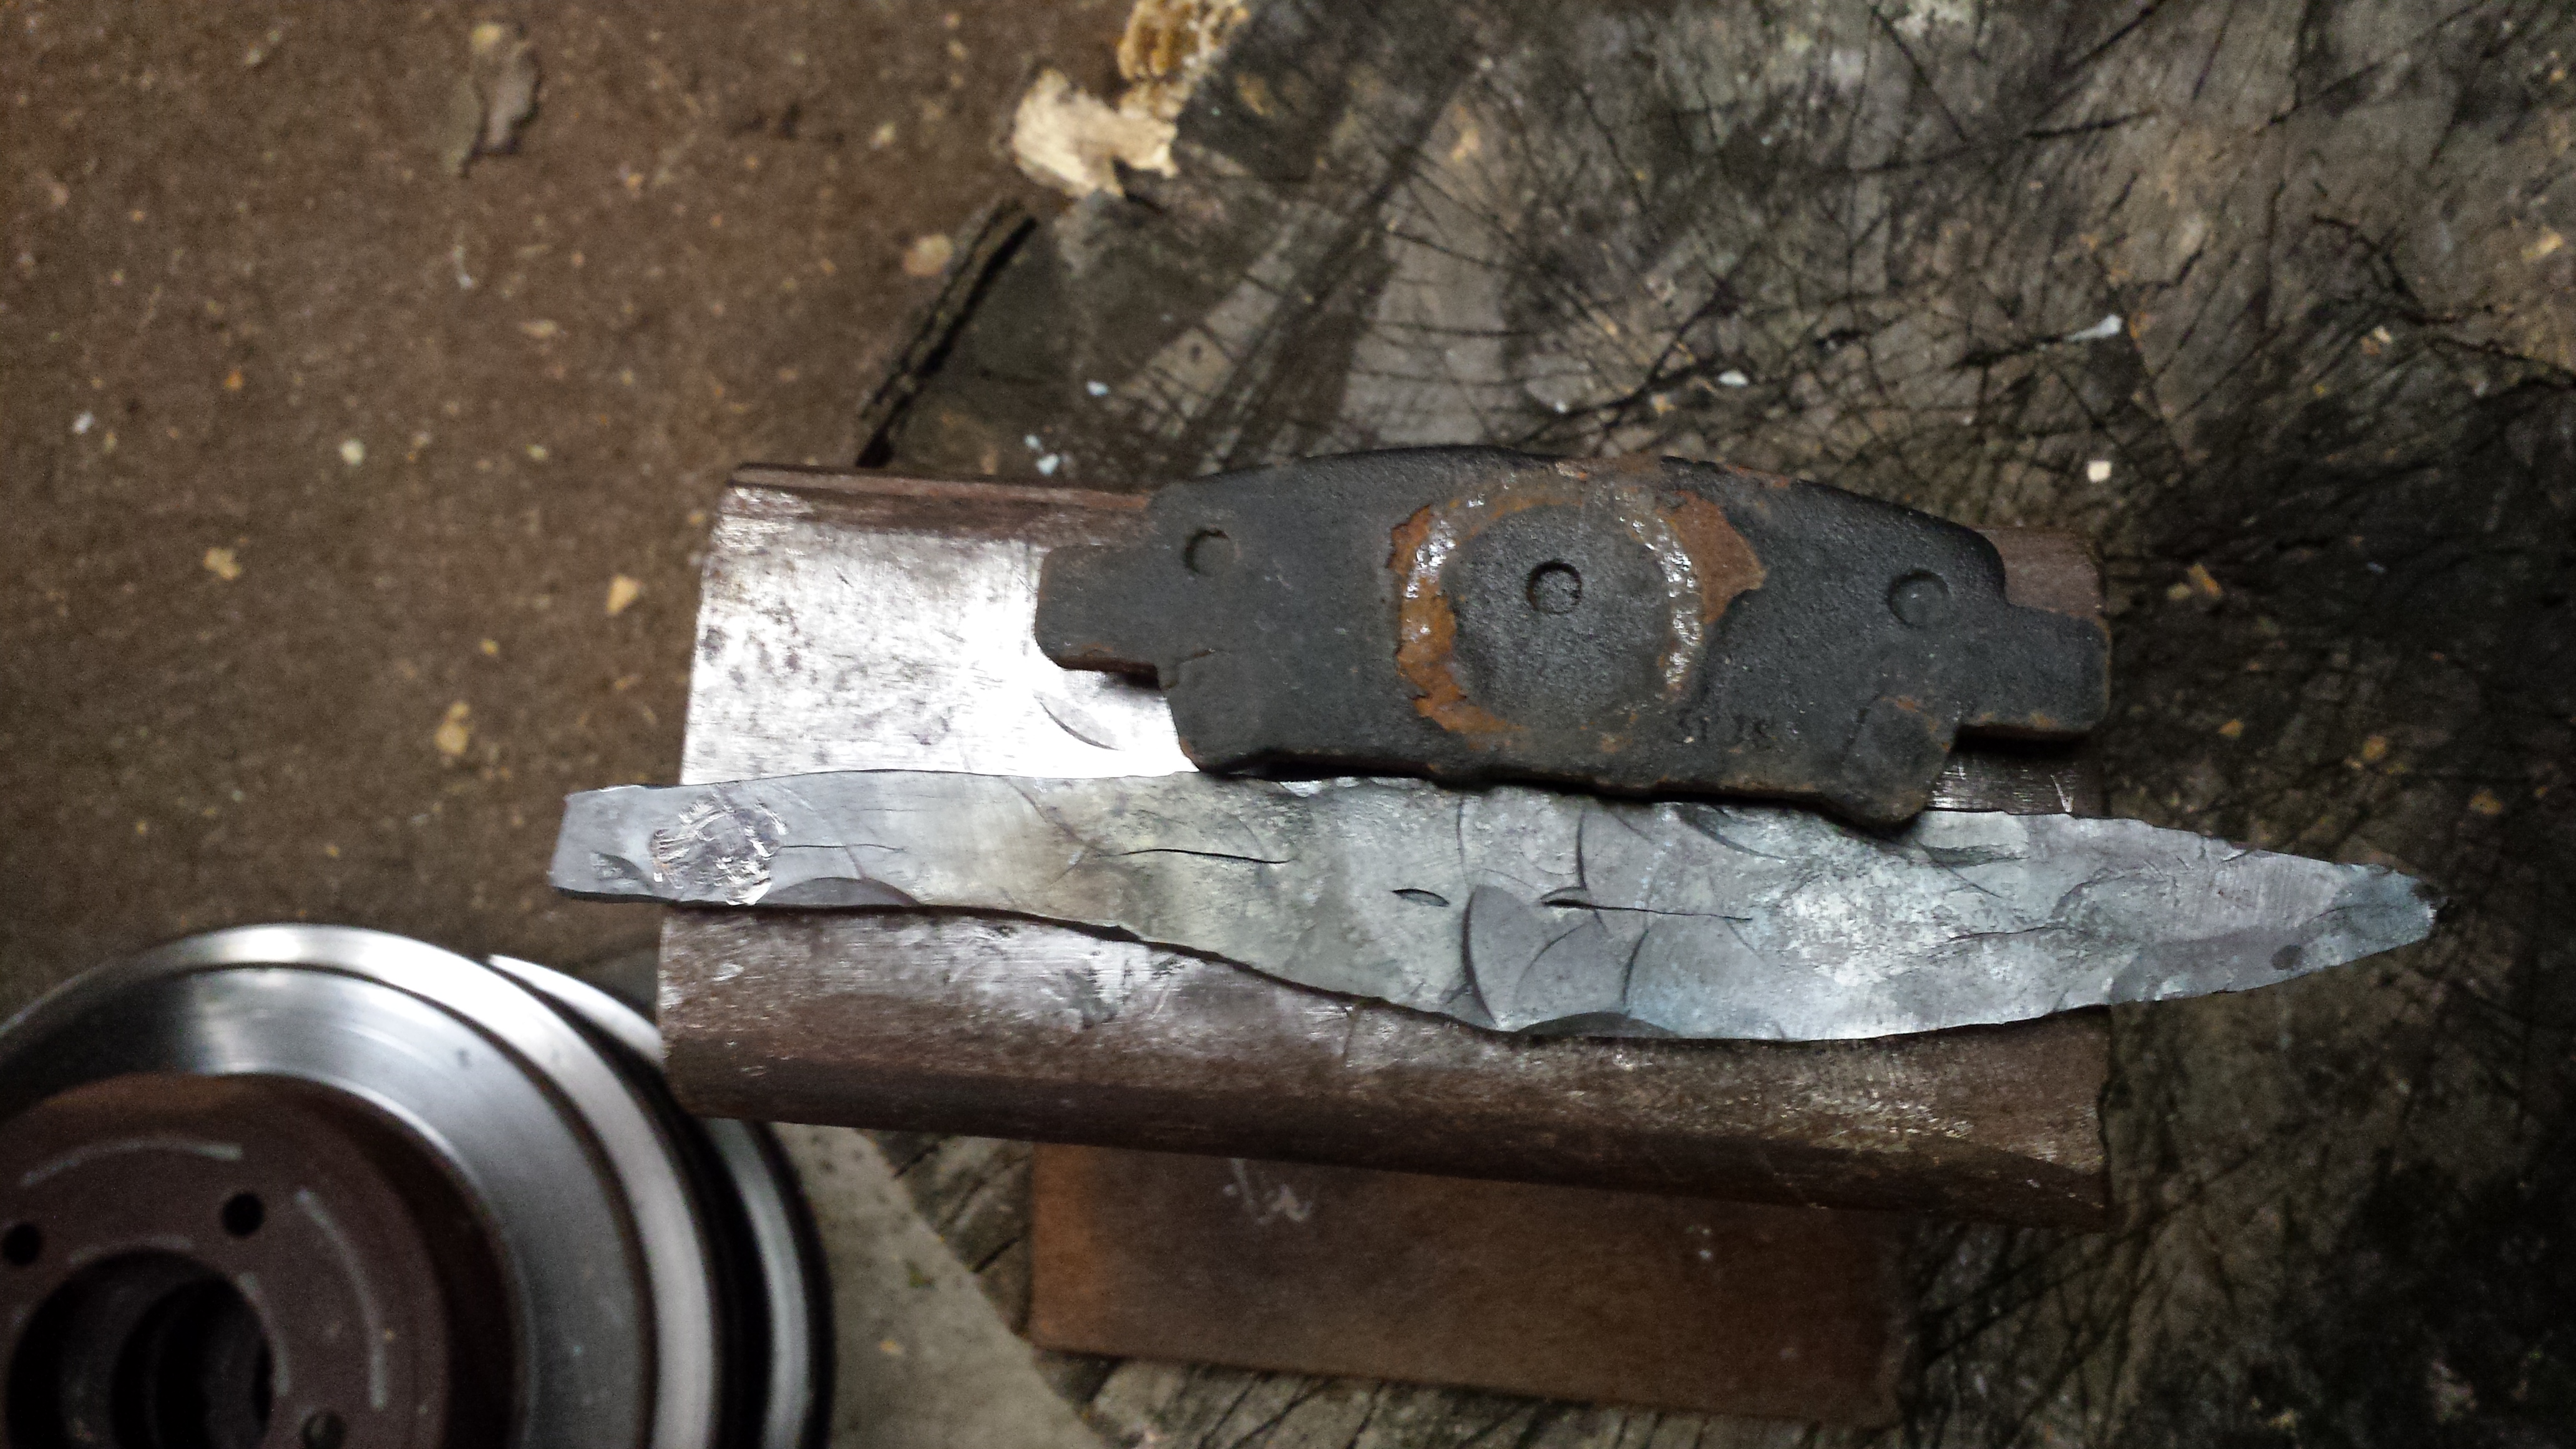
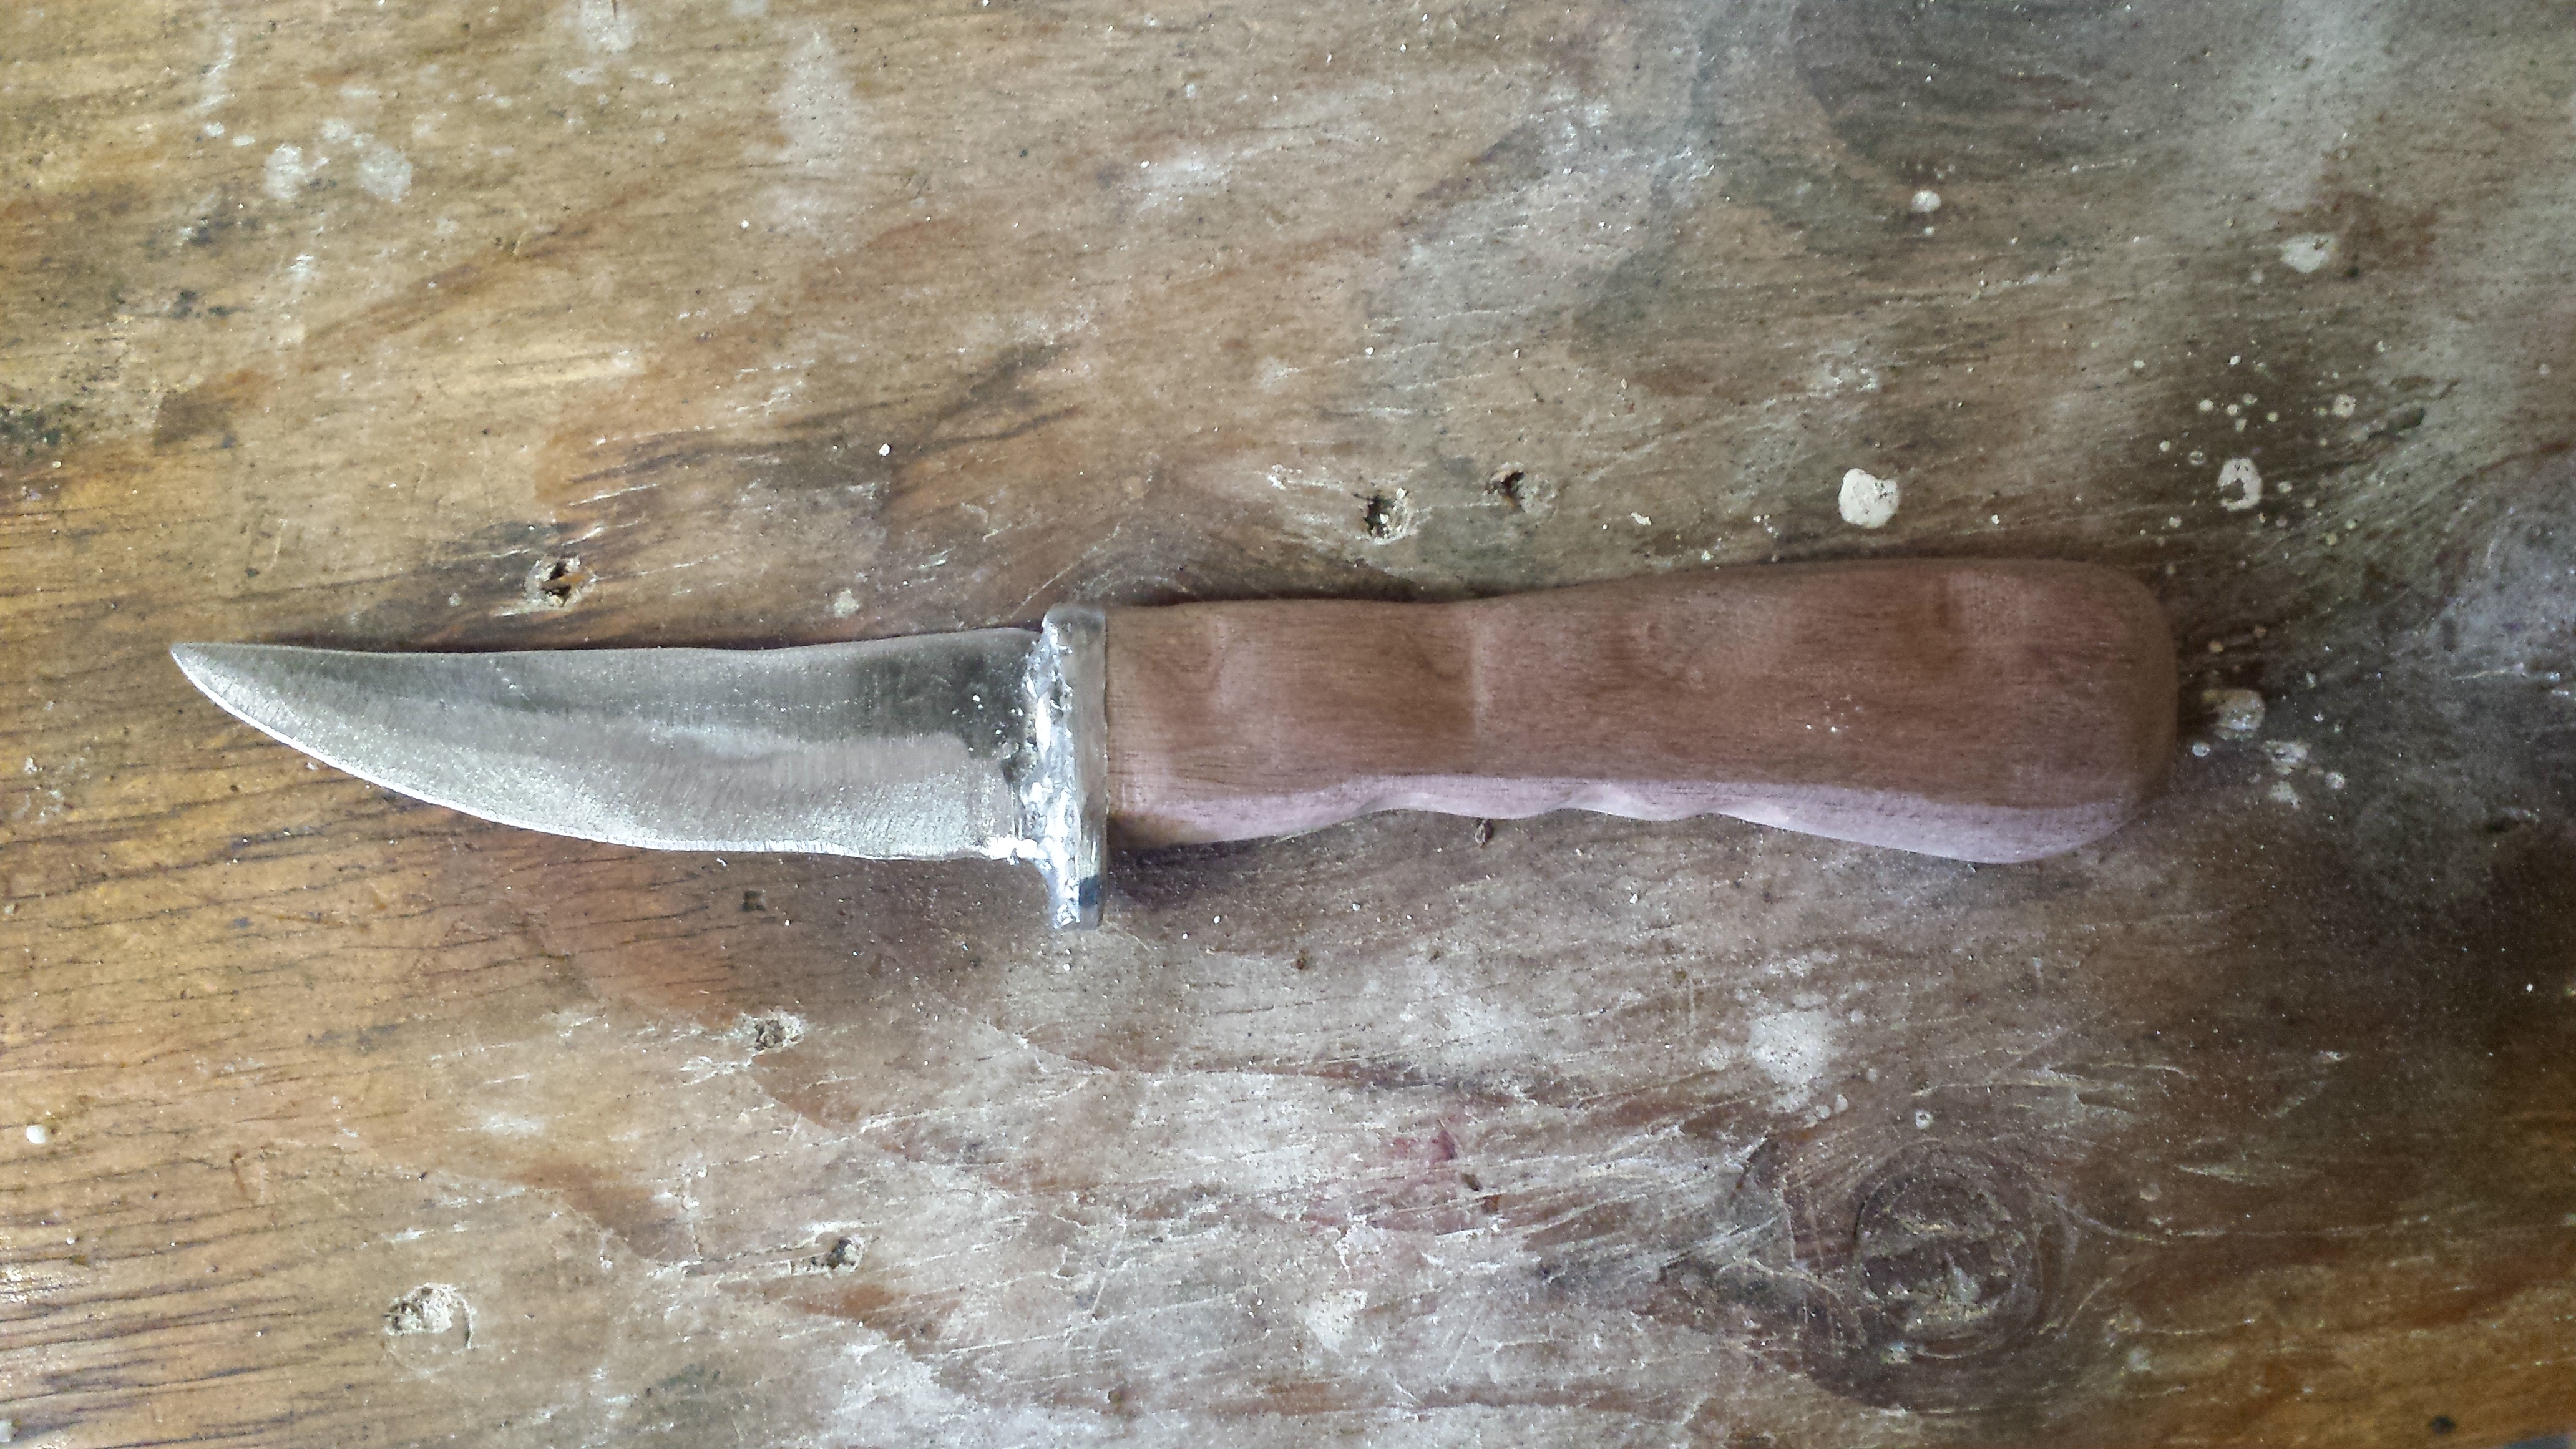
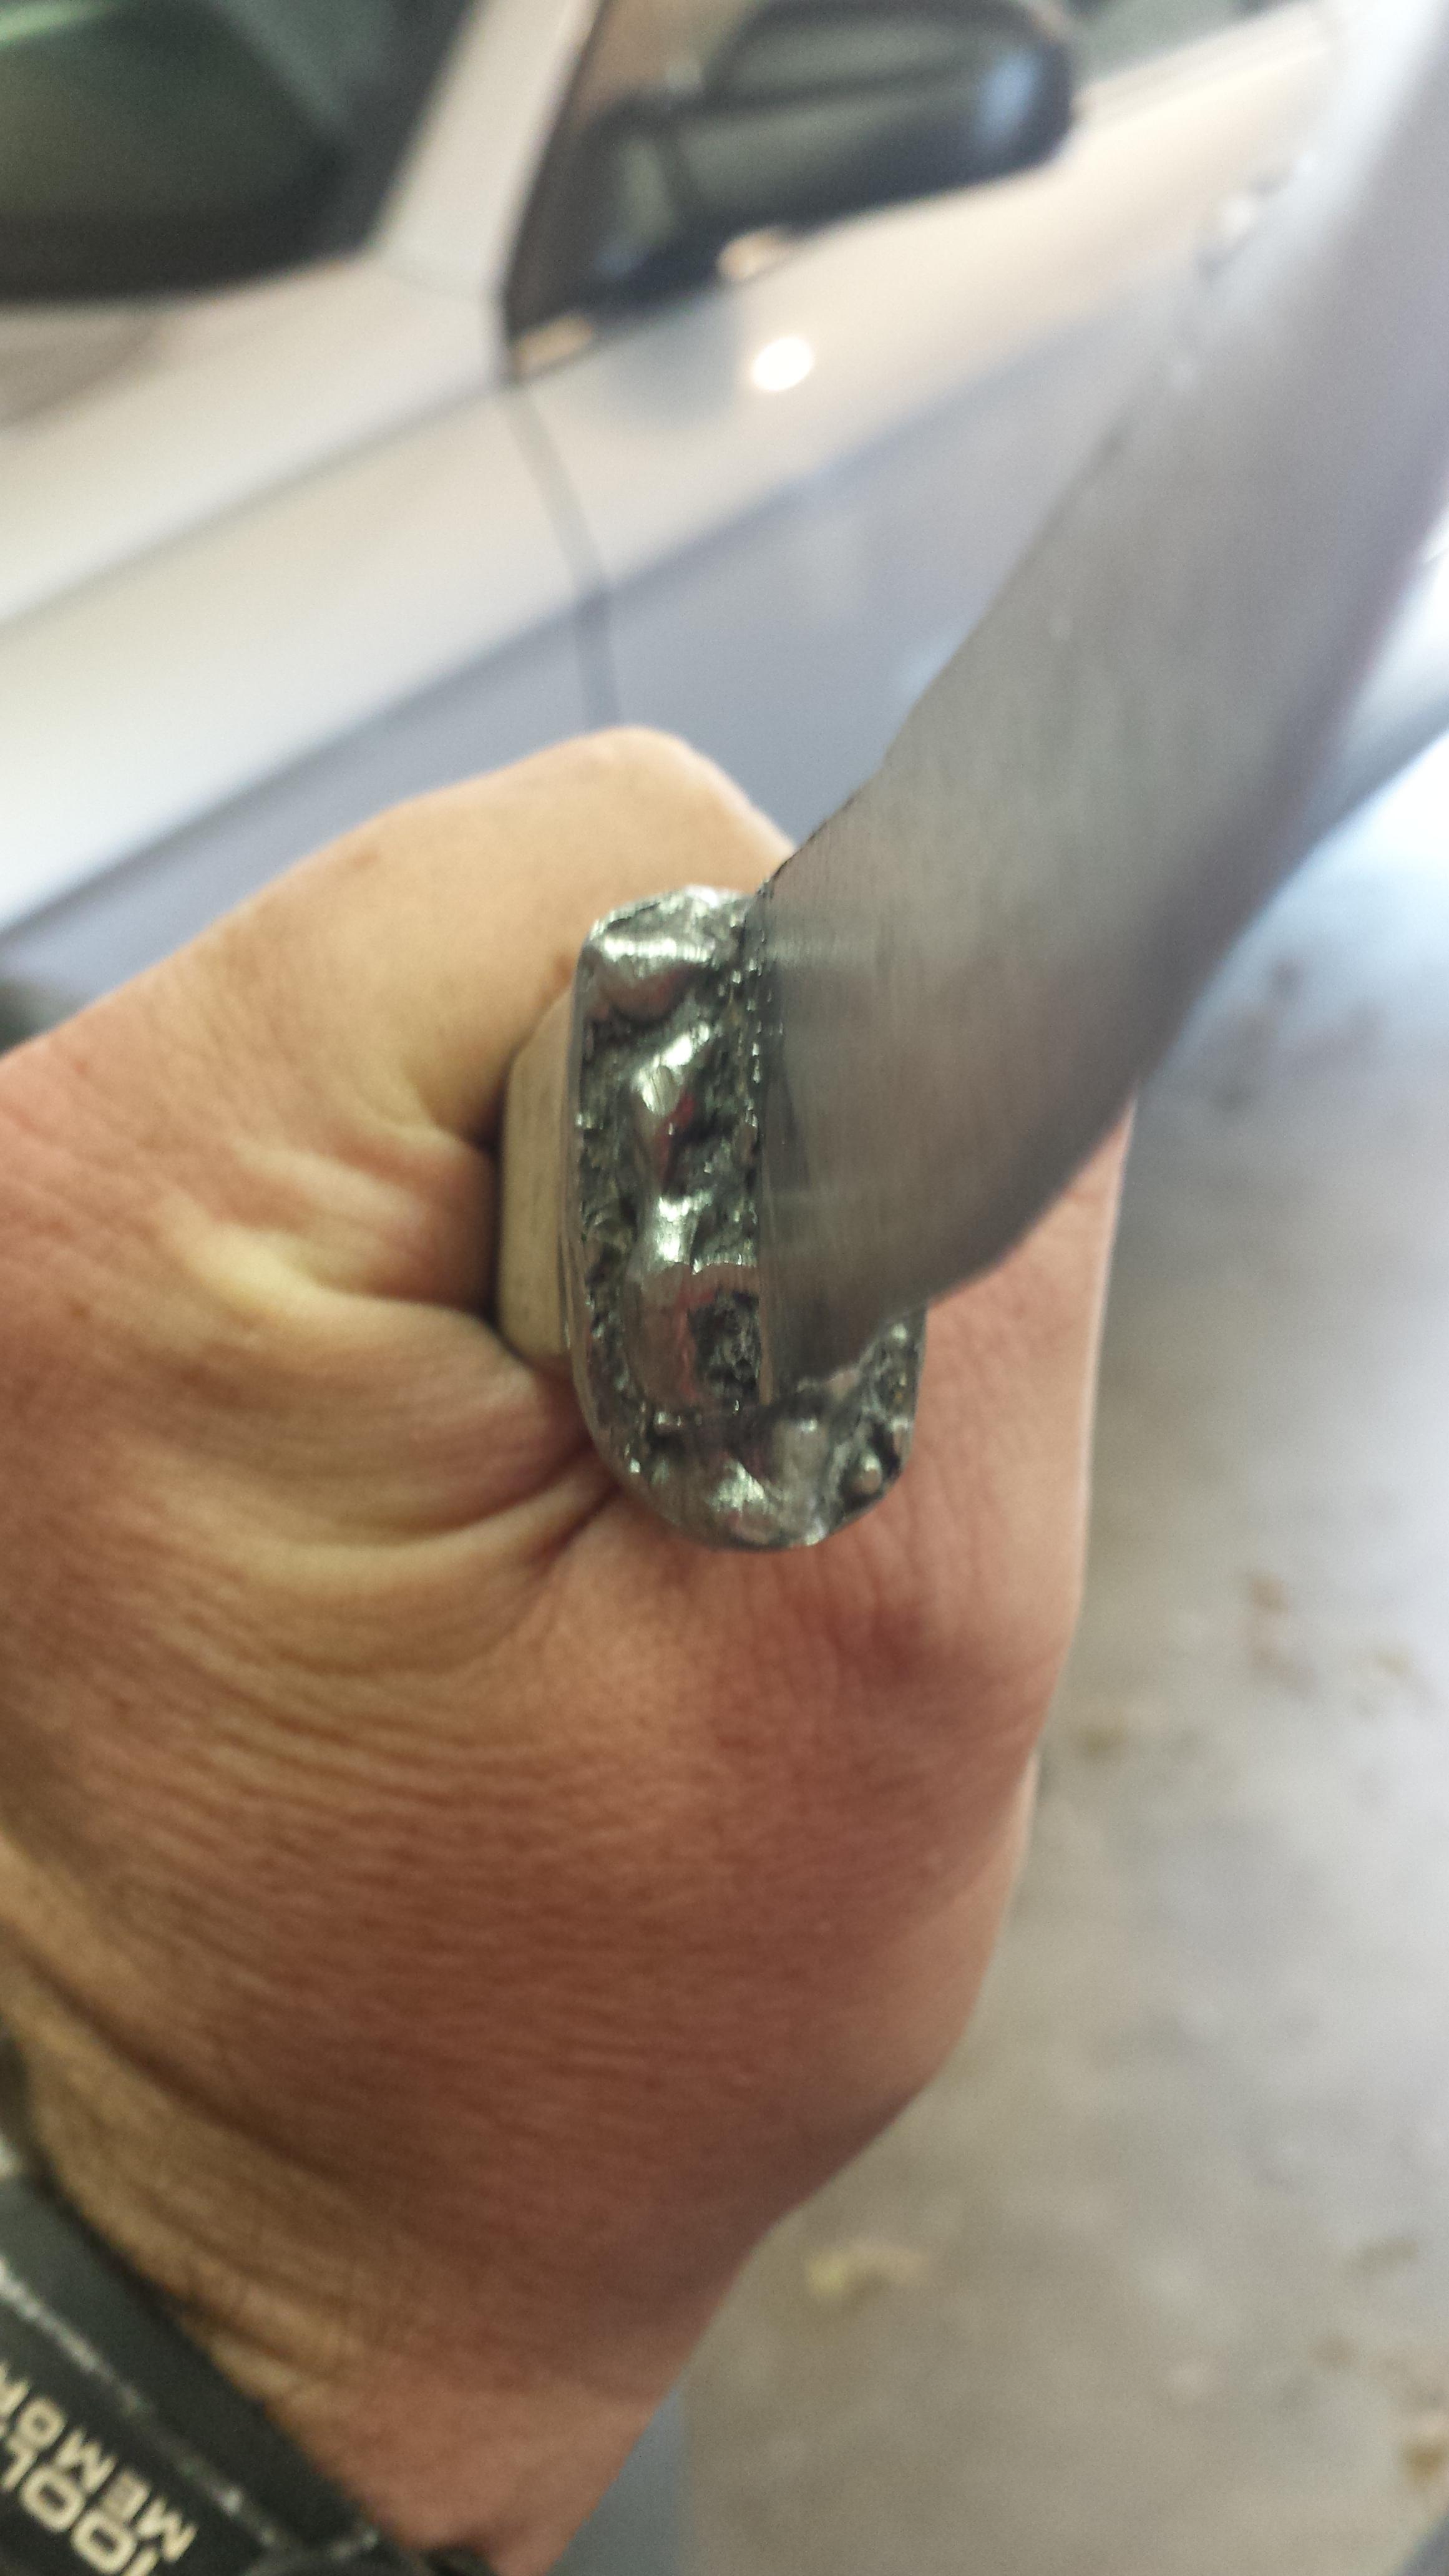
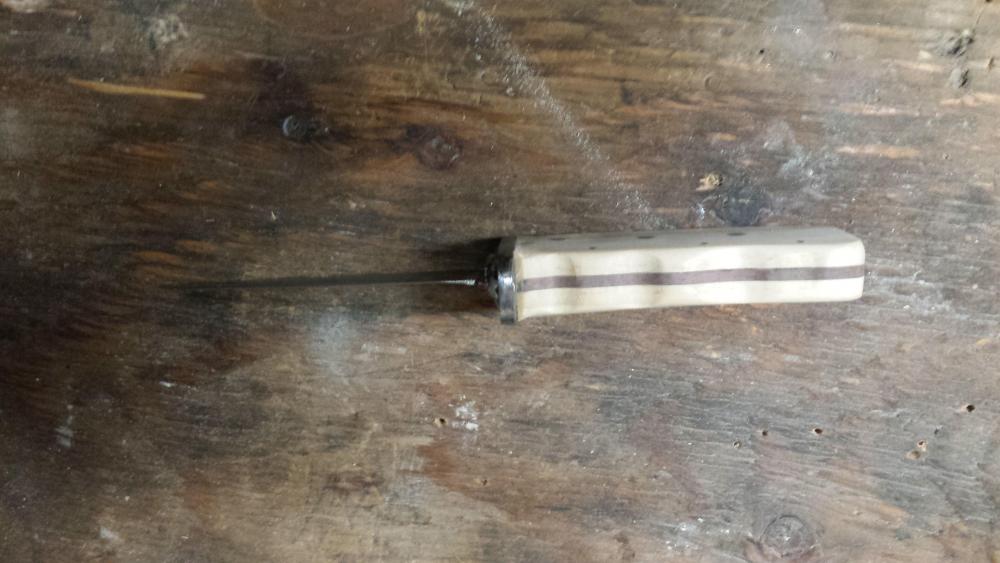
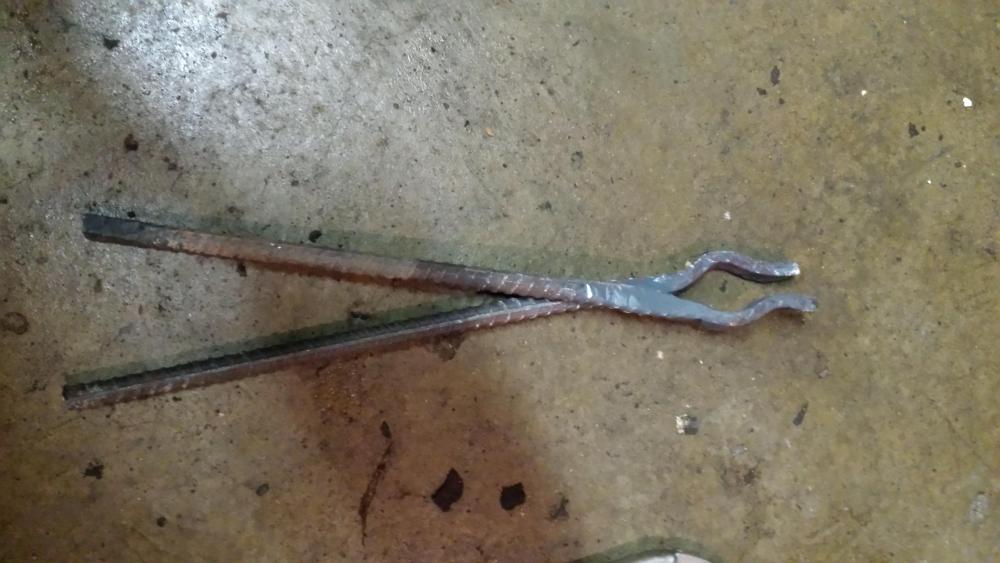
Here's my second knife. I use scrap got my projects bc I am just learning. Story on this one is that I forged it out of the steel backing on a brake pad. I had just changed brakes on a friend's car, knocked the pad material off of it. Then said wth and the it into my forge. Seems fairly successful. Holds an edge. Handle is walnut sandwiched between pine. First attempt at pinning as well. Here are some random projects too. Couple of split crosses, a cat I welded for my wife, my own tongs, another picture of my brake knife in the making.


-
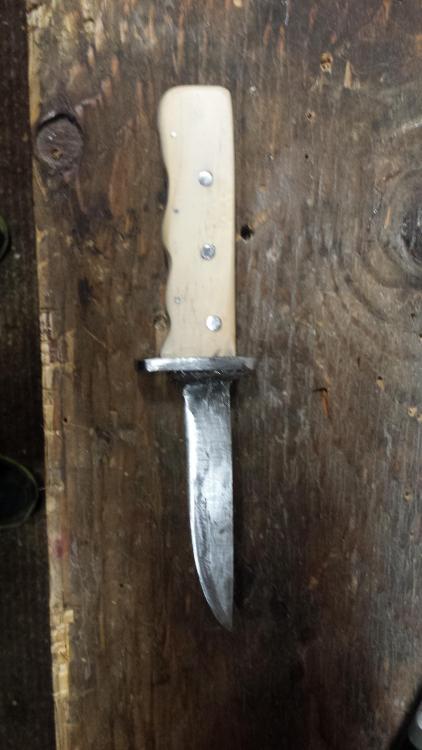
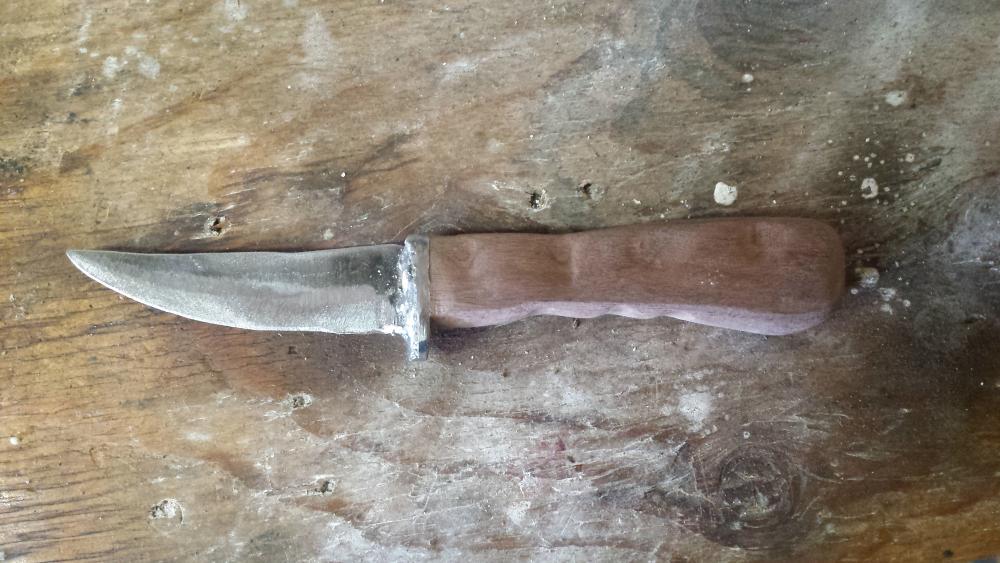
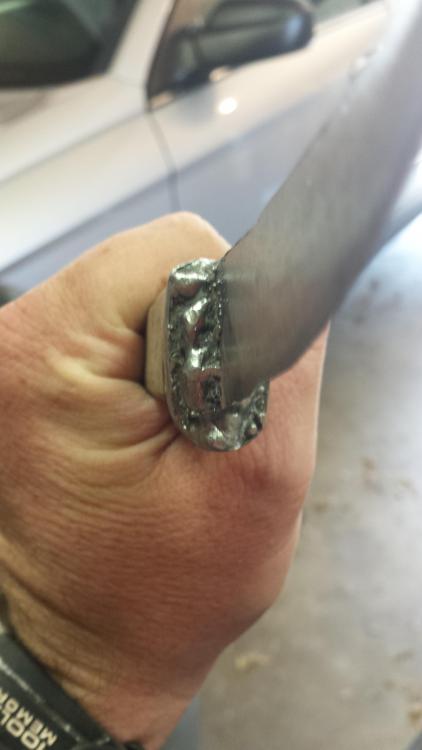
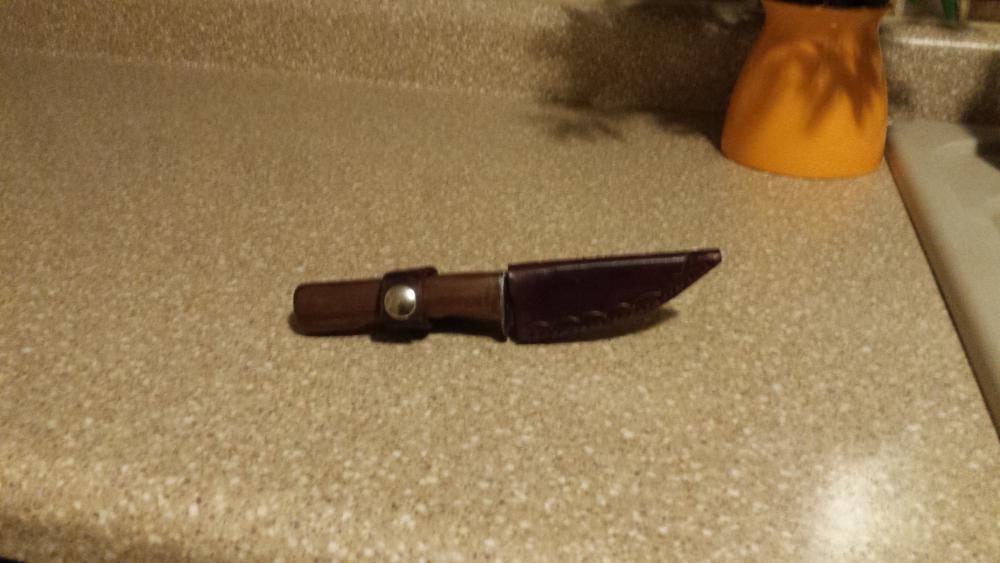
Well like I said I'm a noob but here is a picture of the first knife I made. The steel is from a really old ladder (the straps that prevent over extension) it is ground not forged hidden tang (walnut). I learned that hidden tangs are a bit tricky for a beginner. The welded guard is just decor covering my failed attempt at fitting a guard correctly. Lol the sheath was done for me by my wife's grandpa. Will post a few more on my next break.
-
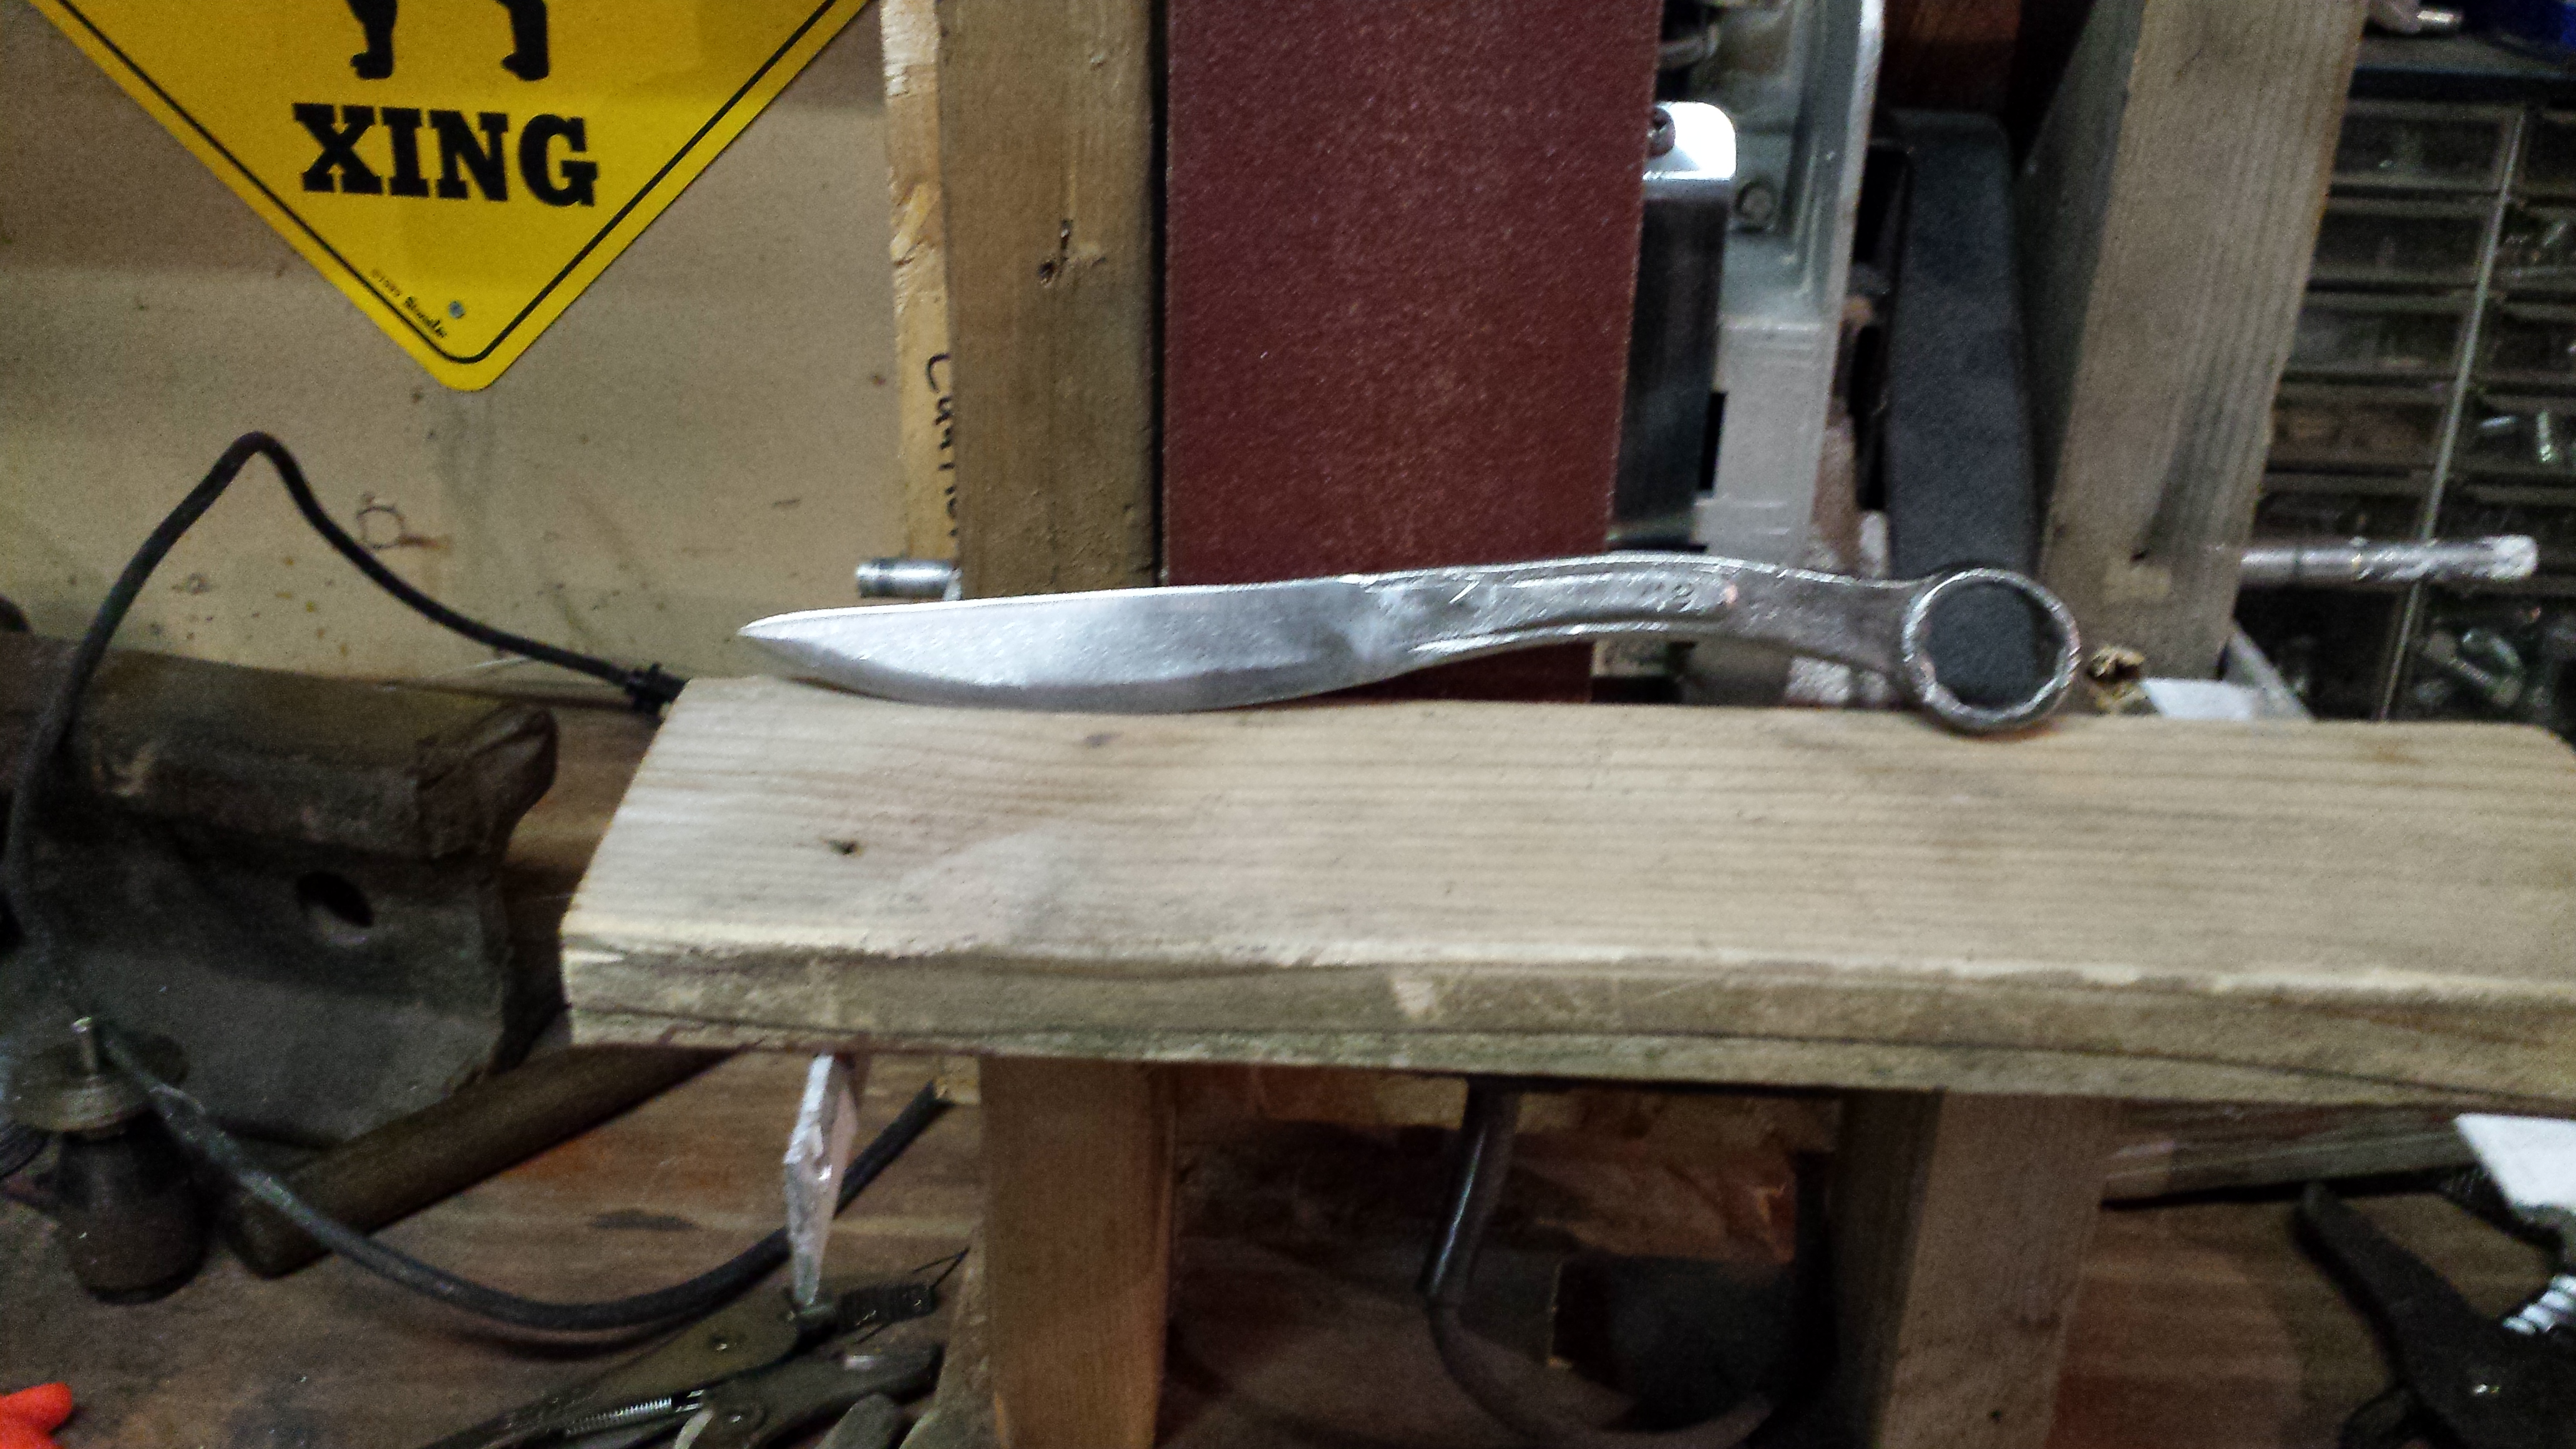
Thanks for the compliment and I am going to keep the nut guard (pun intended) in mind for future wrench knives.
-
Just an update after the 24 hr vinegar bath. Thank you for the advice. I'm happy with the initial color change at this stage of the project.

-
Just added my location to my profile. It was not chrome plated. Not messing around with that. Lol. I have been trying some other stuff with my forge than just the knives. Made some split crosses, stuff from nails, necklace for my wife with forks, and just recently made my own tongs. I was thinking about this the other day and was looking online for ideas to step back and find some small projects where I can focus on moving the steel in different ways. I have found a kind of zen working with metal. I'm not out to make swords, just things that others cannot. I'm really glad that I joined this site bc everyone seems so knowledgeable and ready to assist others.
-
I found that it heats really fast but does not hold the heat long. Would it be worth having it lined with some refractory? I at this point use a swirl tip blow torch for heat (i have it attached to a grill sized propane tank).
-
I only heated the handle to straighten the little bend that is at the end of all box end wrenches. It most definitely won't get quenched. I have not gotten any books on how to make knives. I'm sure many people on this forum will not like to hear that most all of the info i have gotten has been off of the net (youtube videos, forums, pinterest). I dont have a lot of money so this is my best resource. I will look into this book as I am starting to get a bit serious about this little hobby (hence joining a forging site). I recently went from a plaster of paris/sand mix refractory in a coffee can forge to a bit larger can with ceramic insulation thank goodness for Christmas bc that insulation is not cheap. Lol