

bobasaurus
-
Posts
170 -
Joined
-
Last visited
Content Type
Profiles
Forums
Articles
Gallery
Downloads
Events
Posts posted by bobasaurus
-
-
On 3/3/2017 at 7:45 AM, BOB T said:
I just used Folgers coffee to etch the blade ,no cream or sugar..lol Nothing special ,the way I drink it .I have a Keurig that I used to make the coffee . I really didn't keep track of the time I etch the blade, probably around 90 minutes there about ???
bobasaurus....The only heat I used was the hot coffee , just hot coffee from the coffee maker ,no extra heating ..All I did was clean the blade and put an wax/ oil on it.
Ah, I must be seeing the reflected light. Looks great, I'm impressed at the results.
-
1 hour ago, Benton Frisse said:
Awesome chisels! How did you grind that bevel like that? I recently tried my hand at a bowl adze and grinding that bevel inside of the curve was so tough... luckily it fit my contact wheel on my old 1x30 just perfect.
I don't have a lot of grinding equipment, so I mostly used a 3/4" dia sanding drum on my flex shaft grinder. I honed it with a dowel in my wood lathe coated in green chromium oxide compound.
-
On 3/17/2017 at 11:47 AM, rockstar.esq said:
Weyger's three-book set includes a section on making an upsetting tool for the anvil that can be used to forge a bolster.
That's interesting, I'll have to finish reading the set. The washer idea is clever, I just made an integral bolster knife where this trick would have been useful.
-
19 minutes ago, Frosty said:
IMNHO the handle didn't take away from the tool's appeal one itty bit. I want to see the jeweler's bench with a full set of those on the rack!
Frosty The Lucky.
Thanks. I'm not super happy with the shape, but the fit is tight and it works well. My father used it for anticlastic raising last weekend and it worked well.
-
1 minute ago, lanternnate said:
That's one bold pattern. I like it. What size stock and layer count?
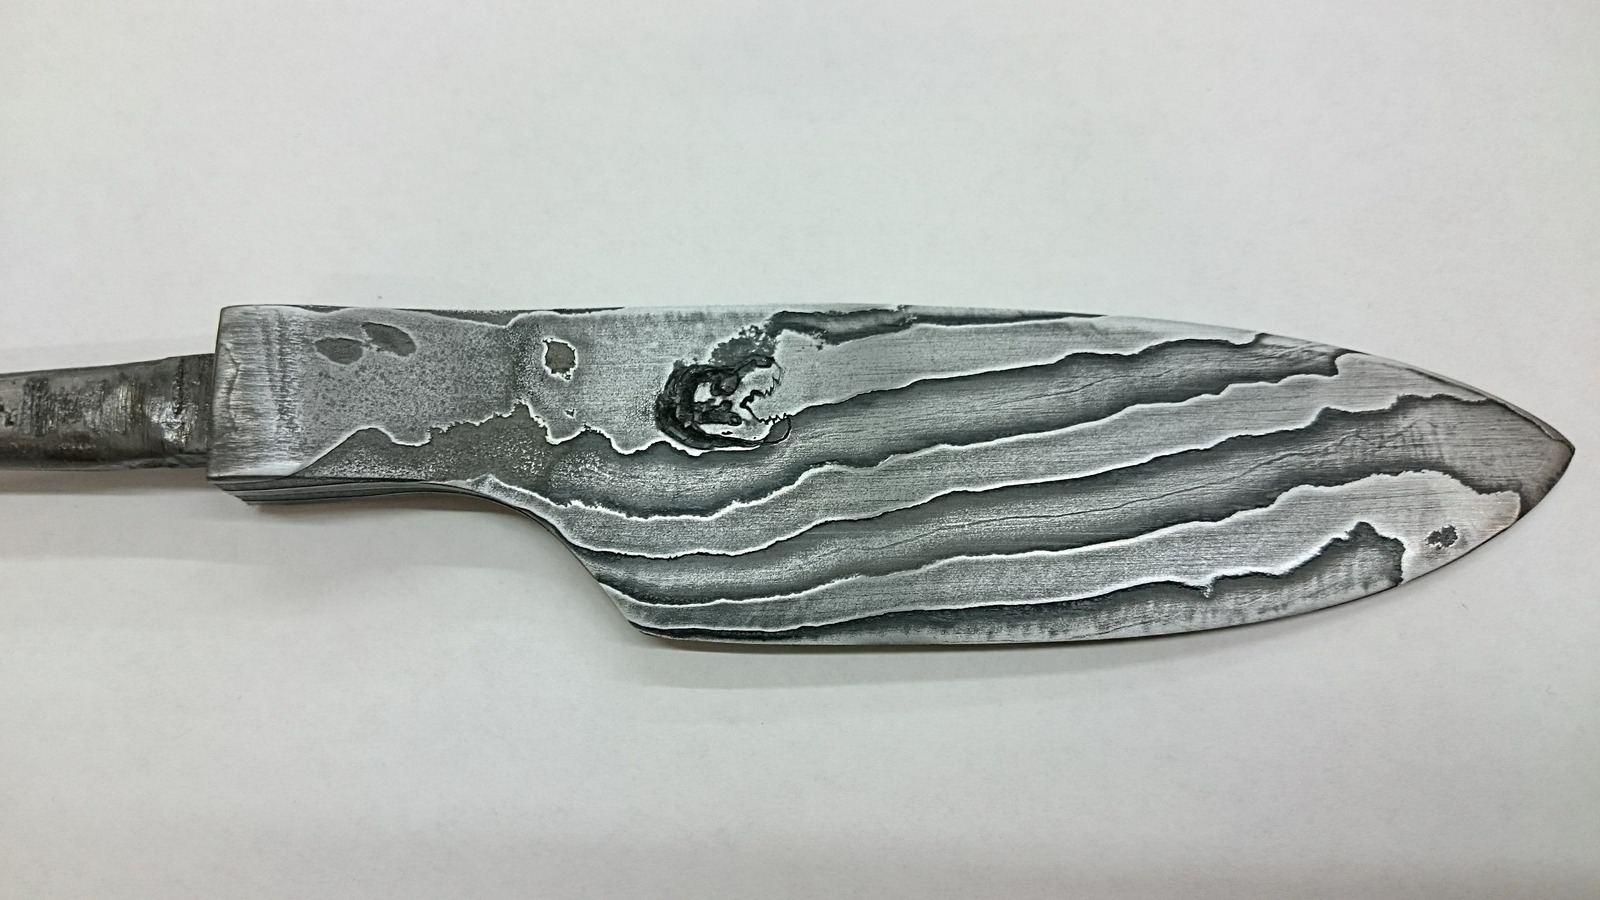
Thanks. It was 4 layers each of 1080 and 15n20. The 1080 was 1/8" thick, the 15n20 a bit thinner. I ended up with about a square cross section after forge welding.
-
Here is a small integral bolster chef knife I made from the remainder of my low layer count damascus billet. Still needs a handle.


-
1 minute ago, C-1ToolSteel said:
Very nice. I'd say that handle definitely does the head justice.
Thanks. The handle ended up a little small, I might wrap it with something on the grip area.
-
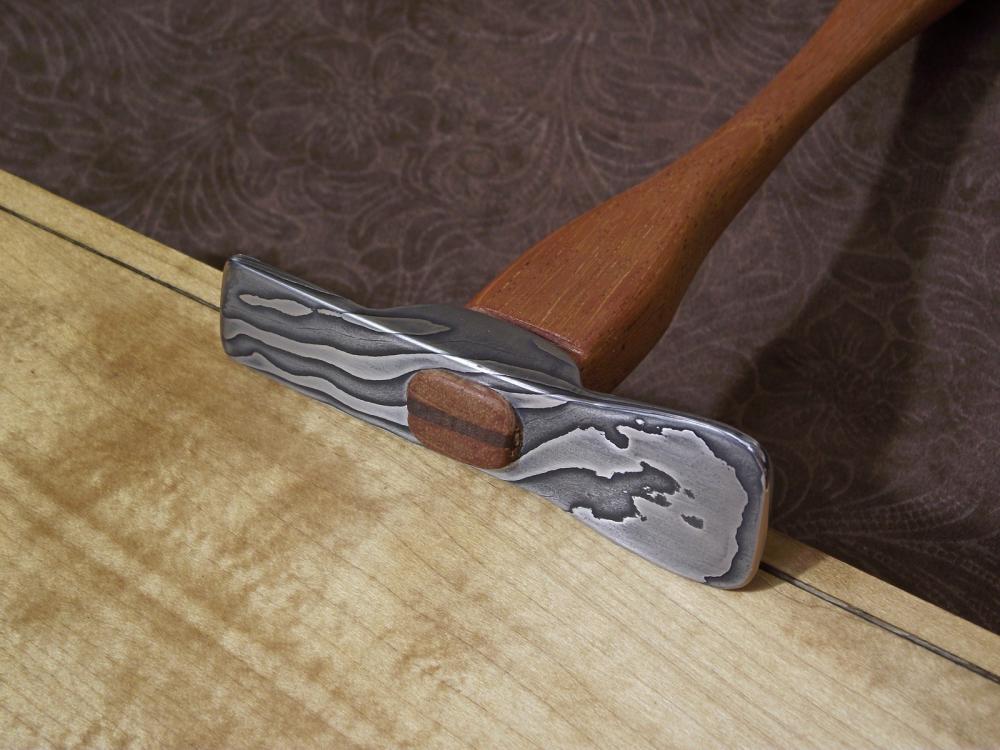
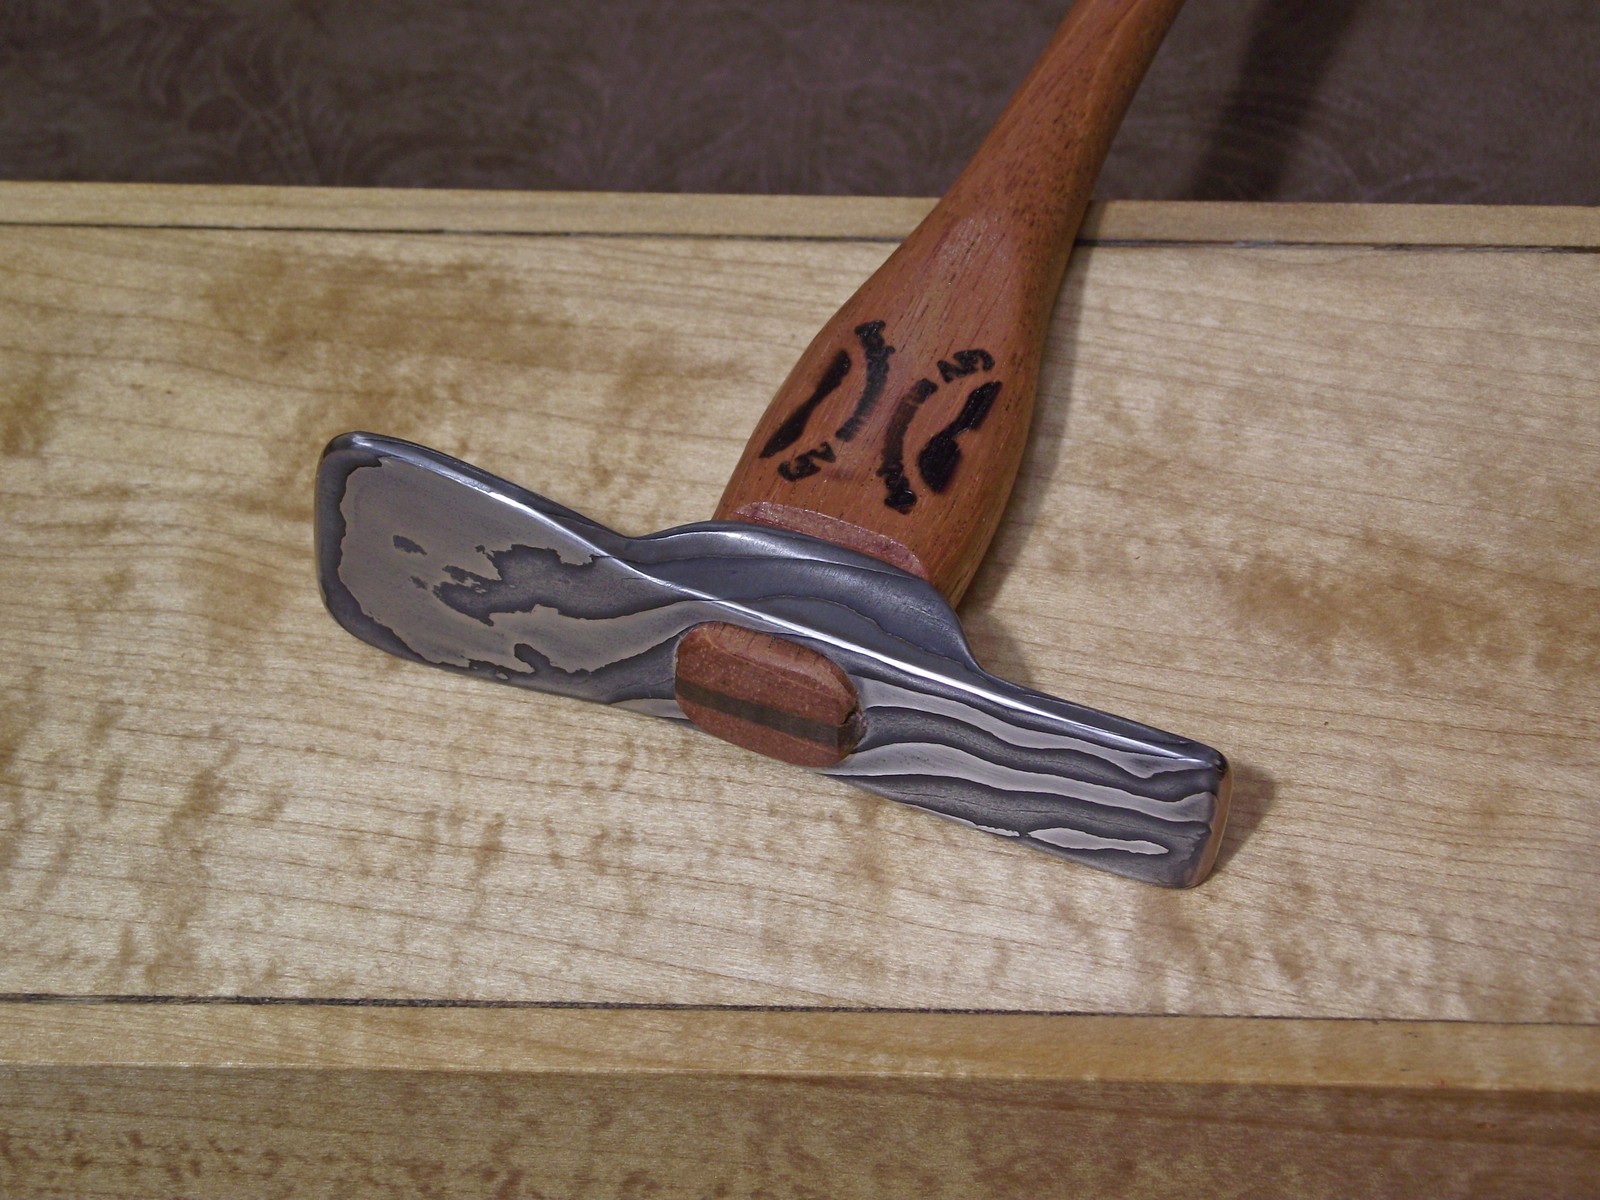
I finished it up today with a mahogany handle. Came out a bit small on the gripping end, might have to wrap it with something.
More pics:


-
Looks great, love the wavy lines. Do you grind hollows on the bevels?
-
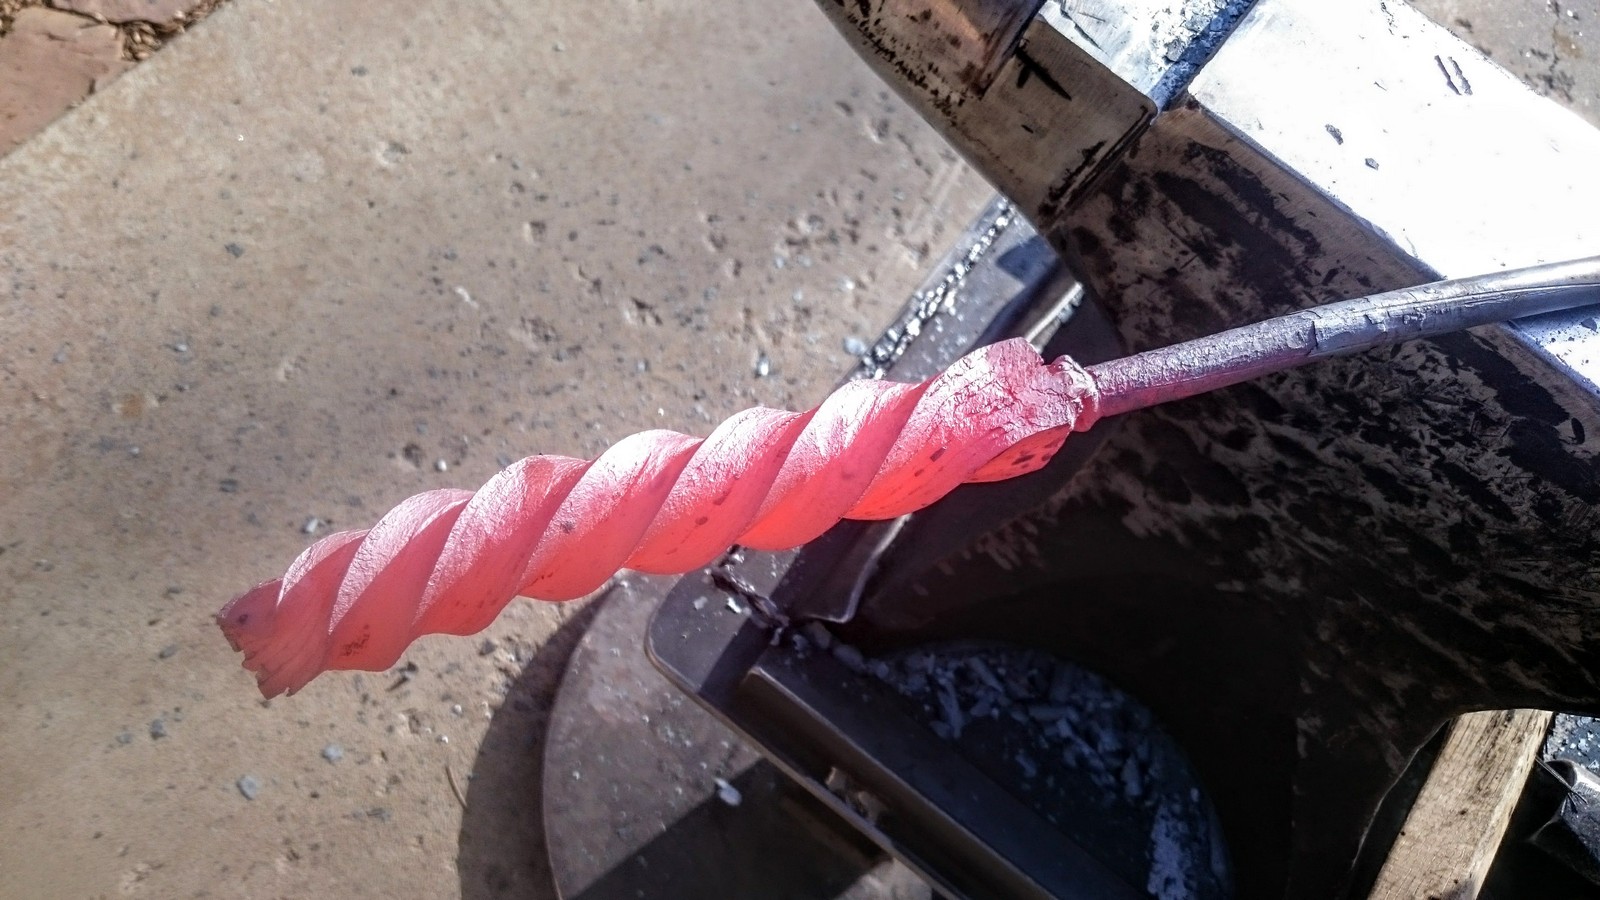
Those really look great, I'm impressed that you can make such even spirals down the handles.
-
Looks awesome, neat to see a coffee etch look so good. I like the heat coloring.
-
That's so clean and nice.
-
Looks awesome. I just did my first real damascus and it was a chore. I etched in 50/50 ferric chloride + vinegar mix, and it turned the entire thing pitch black so I had to sand back some. I think a ferric and water mix would work better next time, or maybe vinegar and water like your mix.
-
I have a garage full of interesting woods to try. I think one with too much figure would clash. Wish my redheart was dry, but it needs a few more months at least... it's my favorite wood. Maybe walnut.
-
On 2/26/2017 at 3:01 PM, Frosty said:
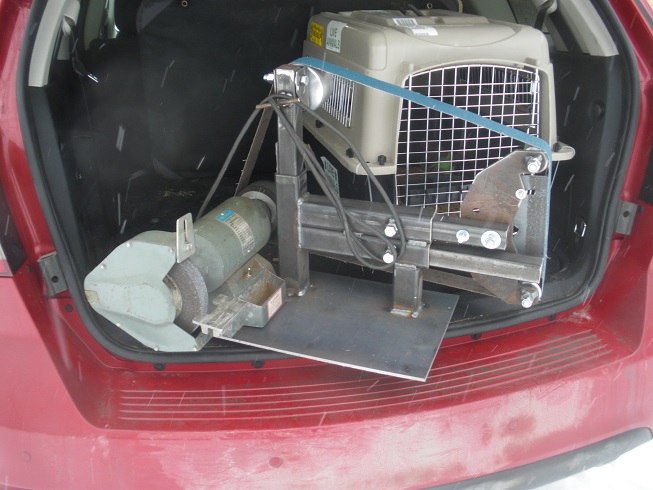
This is what Pat and I did Saturday. This is #4 of the Association of Alaskan Blacksmiths grinder build. I jokingly call it my Zombie Grinder because it started life as a Rockwell 2" x 48" belt grinder. I thought it'd be good for making knives but anything longer than about 6" hits the guard on the wheel on the other end of the motor. Yeah boys and girls I started buying tools and equipment without knowing what I needed. Anyway this is it's resurrected self, underpowered by bladesmith standards but I'm not a bladesmith guy, I need good access to the belt and here it is.
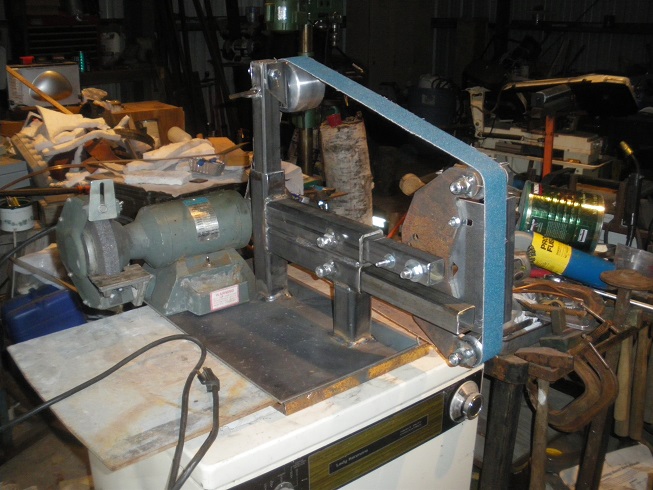
It's only maybe 90% finished even if it does make sparks now, it needs a tool rest, trimming, sharp edges and corners cleaned up and a proper paint job in Frosty's shop colors. I still haven't decided where to put my Zombie lovely she's sitting out of the weather and Deb's SUV. Pic #1 is in the car and pic #2 is resting on a freebie washing machine Deb plans on using . . . someday but I have this great big shop so what's the harm eh?

Anywho, that's what Frosty and Pat did Saturday.
Frosty The Lucky.
That's a sweet grinder, wish I had one like it. I like the double tool arm setup.
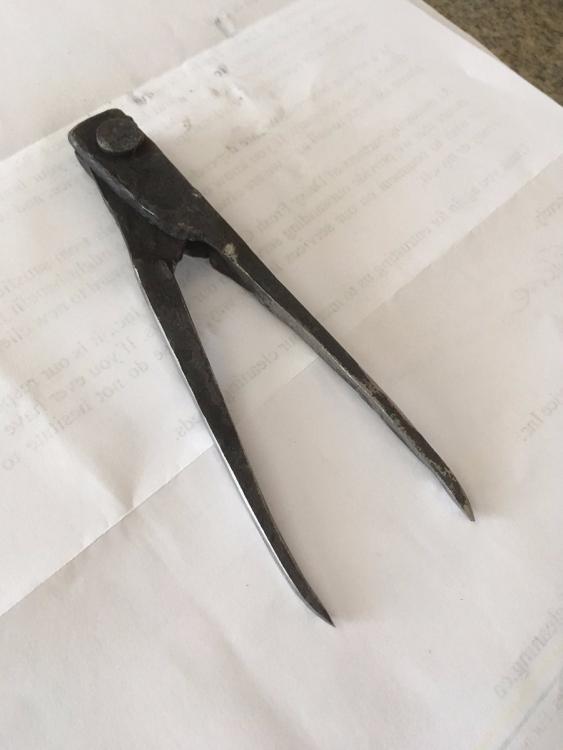
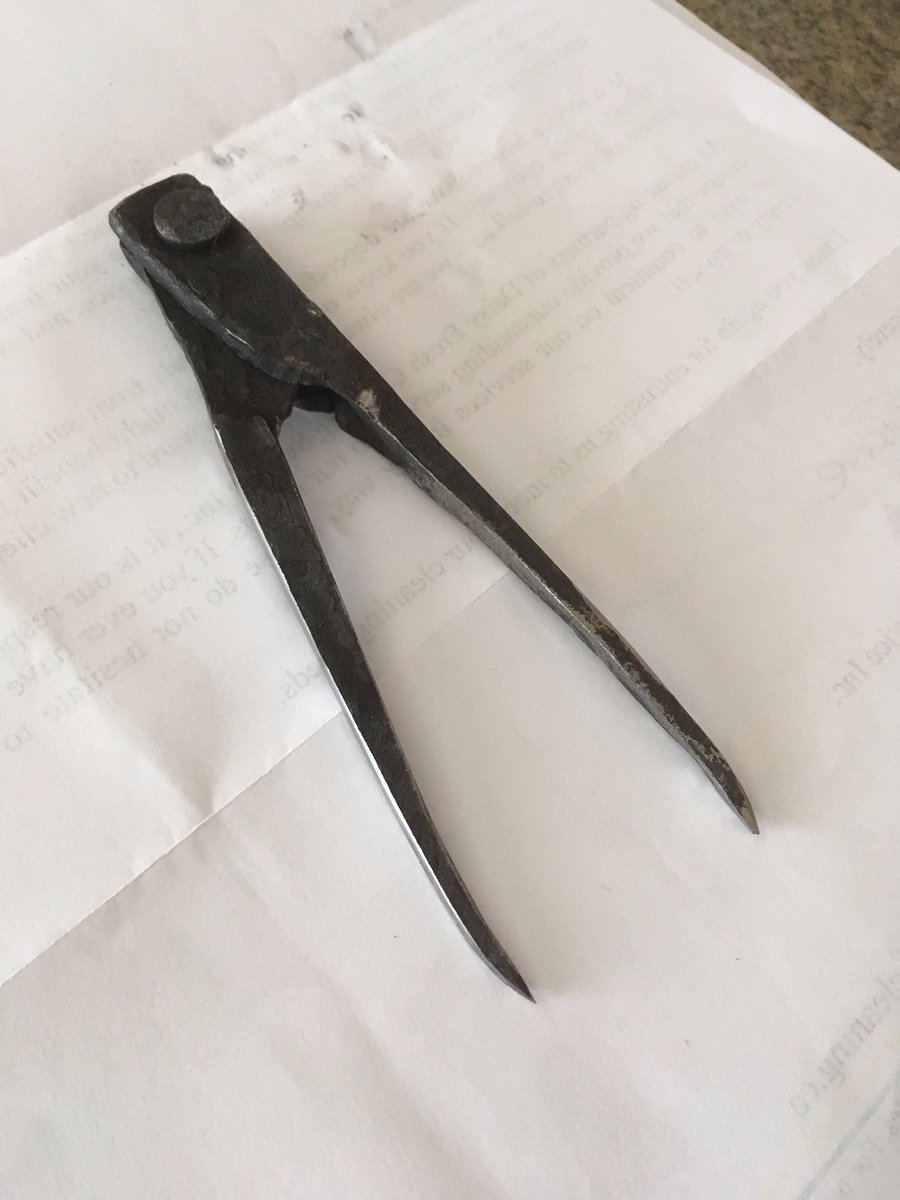
8 hours ago, flux_lalonde said:Tried to make another pair of these dividers.
I think I now understand why Peter Ross cuts the folded portion off the bar before welding - on both my attempts the leaf adjacent the bar wound up too beefy, throwing the hinge off-kilter. I also mis-guestimated the center when I folded, and had to thin one of the leaves too much to match up - compromising how much stock I had left after welding. Next time I'll measure. Plus the weld didn't go as smoothly - probably because the section was thinner than my last pair.
I didn't bother finishing them; I'll try again tomorrow. In all, these are a great way to wind down for an hour after work.
Is there a project logs section on this site? Oh, this looks like it. I'll start myself a thread ;-)
Flux.
Nice job. I bought that dvd a while back but haven't gotten to watch it yet. I did make a socket chisel from one of his other videos, though.
-
John, it sounds like maybe the D gain of your PID controller is a bit high... over-reacting to the slope of the temperature rise?
I want to build one of these myself someday. Where did you get the insulated firebrick?
-
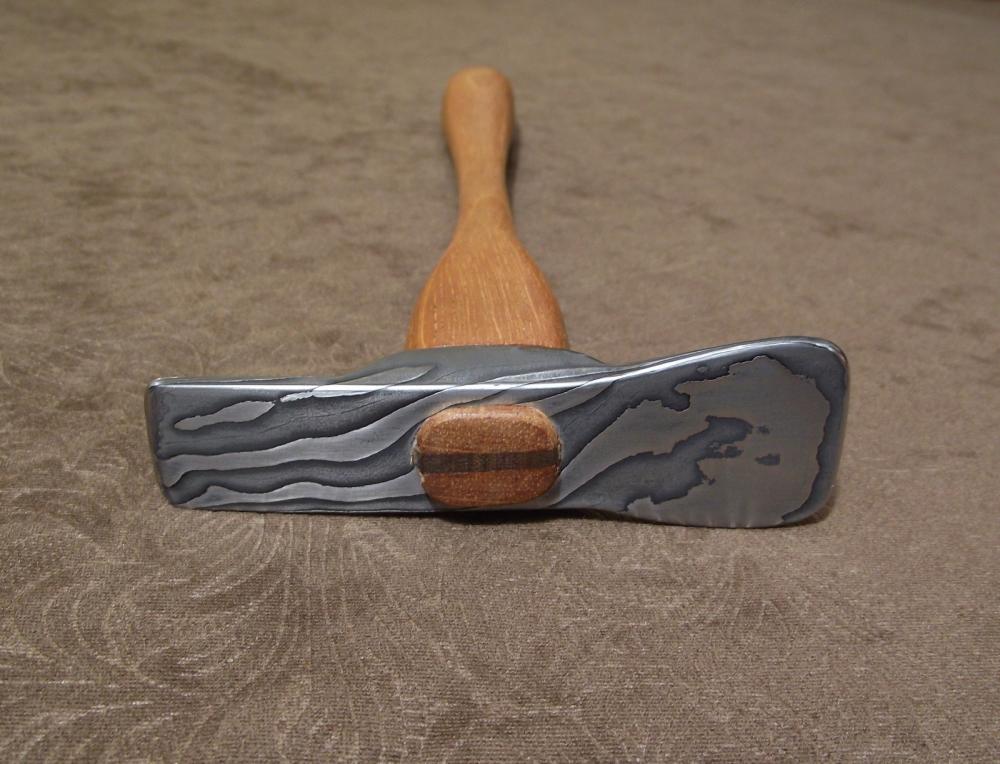
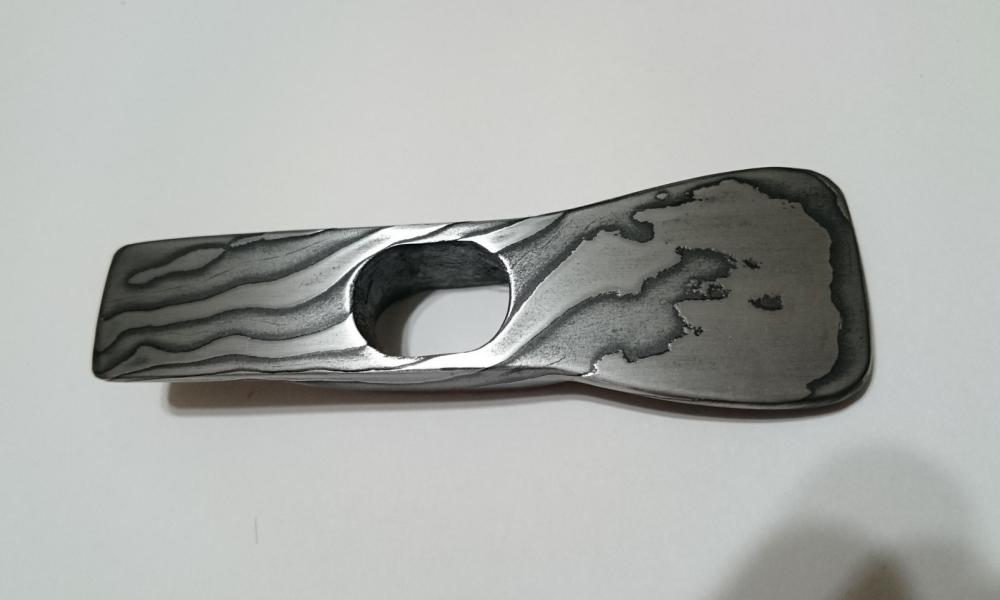
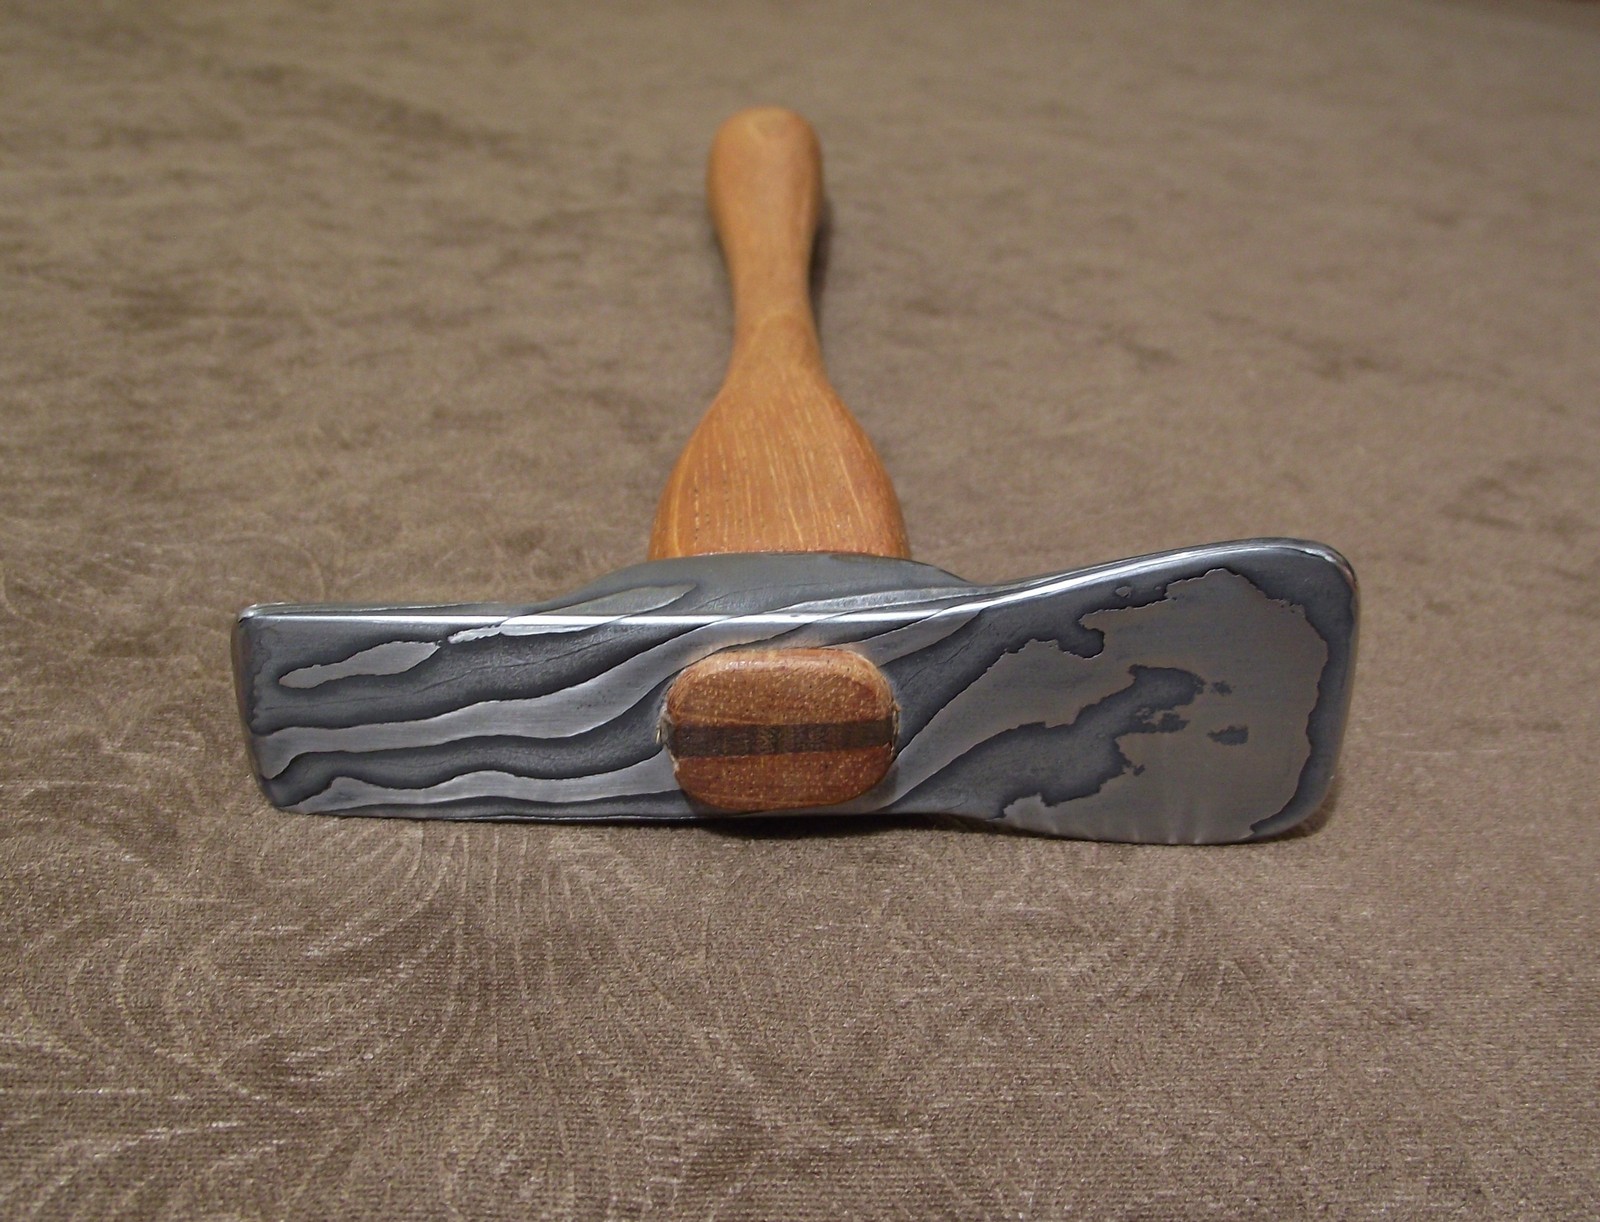
I made this little jewelers raising hammer as a test project out of my first damascus billet. It has a very low layer count (about 8... maybe 7 after grinding), but I think the pattern is neat. The layers were 1080 and 15n20. Etched in a 50/50 mix of ferric chloride and white vinegar then sanded back at 600 grit. I still need to fit a handle.

-
On 2/9/2017 at 7:07 PM, SLAG said:
Bob,
Check out Alexander Weygers book The Complete Modern Blacksmith.
It has great instructions on making that kind of tool.
He was a professional wood sculptor and made his own tools, especially gouges.
What sweep are those gouges? (London Pattern number).
SLAG.
I picked up that book, it's a good read. Thanks for the recommendation. It's interesting how he prefers stock removal to forging in the early chapters.
-
4 hours ago, Alan Evans said:
@ Bobasurus and Stockmaker...Provided you keep the work piece hot, mild steel tools do fine for most things...even when forging tool steels and stainless...and are safe. Most of my power hammer tools...swages fullers and taper blocks are mild steel...some of the fullers are from Progen but they are left normalised. The mild steel ones stand up fine, are easy to make and repair if they wear.
Punches, I oil quench Progen and blue temper it. I would rather any tool bend than break, even if it means I have to dress it true every now and then.
Springs for spring tools are all from mild steel flats, wide to maintain alignment and thin to be flexible without work hardening...you do not need them to do anything other than maintain the top tool in position. they do not need to spring up or down. The workpiece holds them up and the hammer or press brings them down.
@ Stockmaker Your problem with alignment can be easily over come by welding the blocks after bending the spring...I usually butt weld the ends of the spring to the end of the tool blocks rather than lapping them over the top and bottom, so that I am striking the tool rather than the spring.
The other way of making swages (especially when you have access to power hammer or press) is to forge them...this is very fast and automatically provides you with a soft lead-in which means you do not have to grind or sand the sharp edges off as you do with a drilled hole. No nips or cold shuts along the length of your tenons with out trying! Alignment is taken care of also obviously... plain blocks are welded to the spring and heated, the appropriate rod is held between and rotated whilst the blocks are driven together.
The welding problems you both seem to be having appear to be that you are not able to actually see where the weld metal is being deposited. The fillet is going to one side of the joint and you are not correcting it. With the mig try using both hands to control the torch...right handed, use your right hand to operate the trigger and your left to steady the torch with your little finger resting on the bench or on a block...obviously opposite if left handed. Make sure that you start with the torch to your right and are pushing the torch nozzle towards you...so that you can see up the end of the nozzle and that the shroud does not obscure your view of the weld pool. If the weld requires you to drag the torch...again drag it away from you but still with the nozzle toward you...so you can see what the weld pool is doing. I usually do a dry run to make sure I am in a position to see the weld pool for the entire length of the bead...it is so easy to be caught out by bringing the torch across in front of you and so lose sight of the weld pool part way along the weld.
You might find it an advantage to tack weld the assembly and then to prop it up so that the joint is vertically below the torch...if the torch was distributing mayonnaise it would flow into the joint Vee with a horizontal top. i.e. let gravity help.
Alan
What is Progen? Google isn't helping me here.
Thanks for the welding tips. That was maybe the third thing I'd ever welded. My helmet is so dark I can't see for crap before starting, and even during the weld it's really dim. I'm still getting used to the setup and settings on the welder. I have a Millermatic 141, and I'm pushing it past the max rated thickness for sure.
-
Just now, JHCC said:
Just as long as no-one got hurt.
That's why I wear a face shield.
-
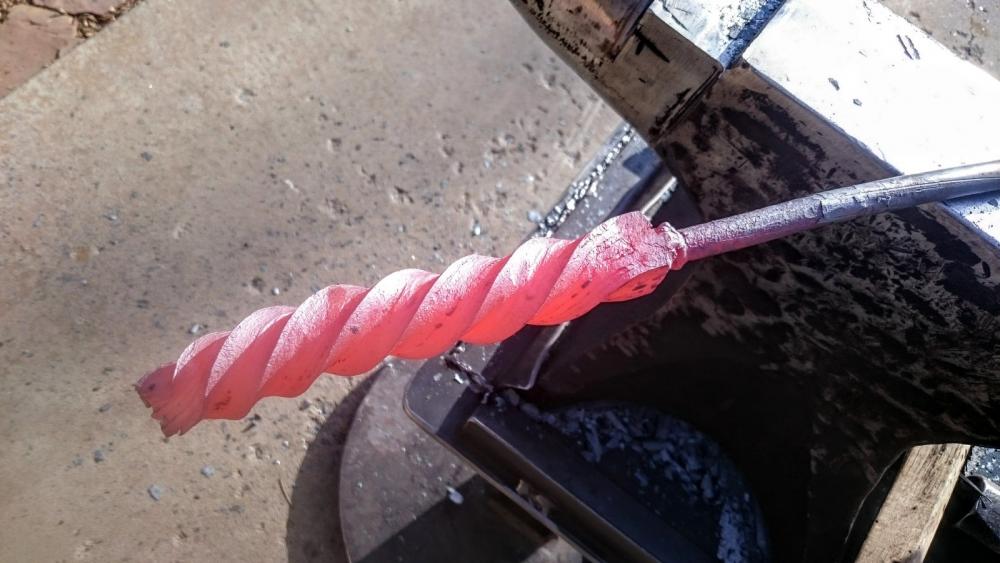
Well, you all can say told you so, it snapped like a twig on first use. It then snapped again when I continued using the stub. Hard tempered shank is not the way to go here. I made another, this time tempering much softer (well past blue).
-
18 minutes ago, SJS said:
You can normalize a regular double faced engineer hammer or a drilling hammer. Just get the head hot past non magnetic, then set it aside next to the forge and allow to cool slowly, most hammers won't air harden and will normalize nicely. You can use a copper or brass hammer, which i use for tools made out of fancy air hardening tool steels. But on the downside I find I chew through them pretty quickly;-) Getting a slightly softer drilling hammer would be quite ideal, nice shape that focuses your blow.... You could also temper the spring fuller back to 500 in the oven and see if it doesn't help out too... It's all fun and games until something spalls and someone looses an eye...
I ground it a bit thinner and tempered the spring section softer. Seems to have helped some. I do need a sacrificial soft-faced hammer. I'll use a cheap chinese 4 lb sledge for now and see how it goes. I just dressed all my hammer faces, don't want to ding them up again.
-
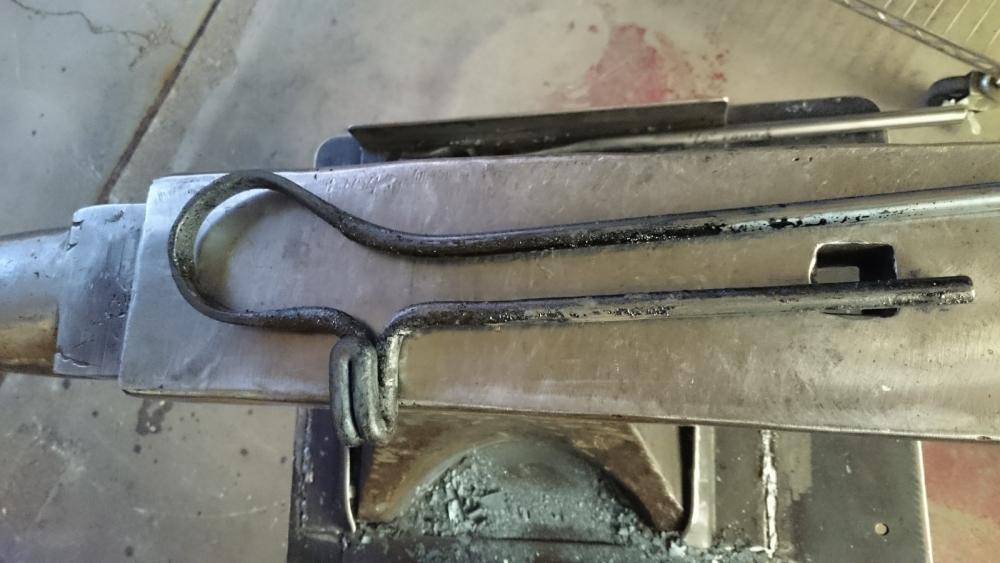
stockmaker, that's a nice looking spring setup.
I had some O1 laying around so I used it... I don't have access to coil springs, and ordering more traditional spring steel stock online doesn't cost any less than O1 drill rod. At least it'll hold up. Downside is it dents my hammer face when using it. Maybe I'll soften up the top bar at least.
-
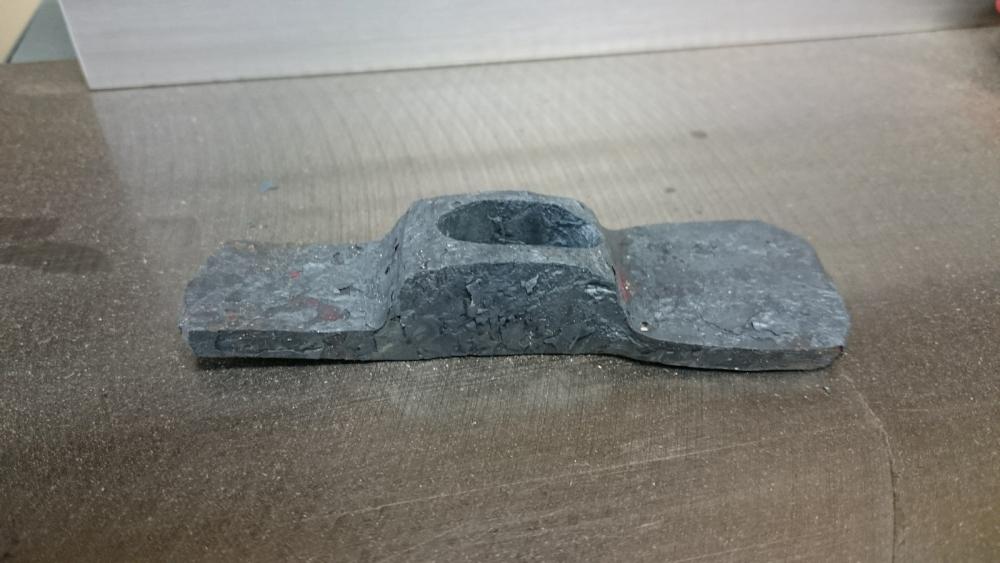
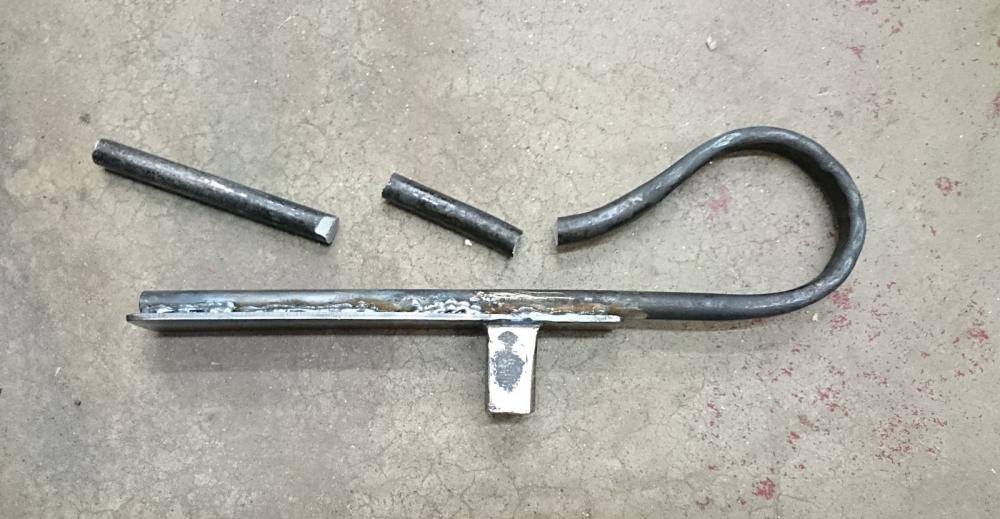
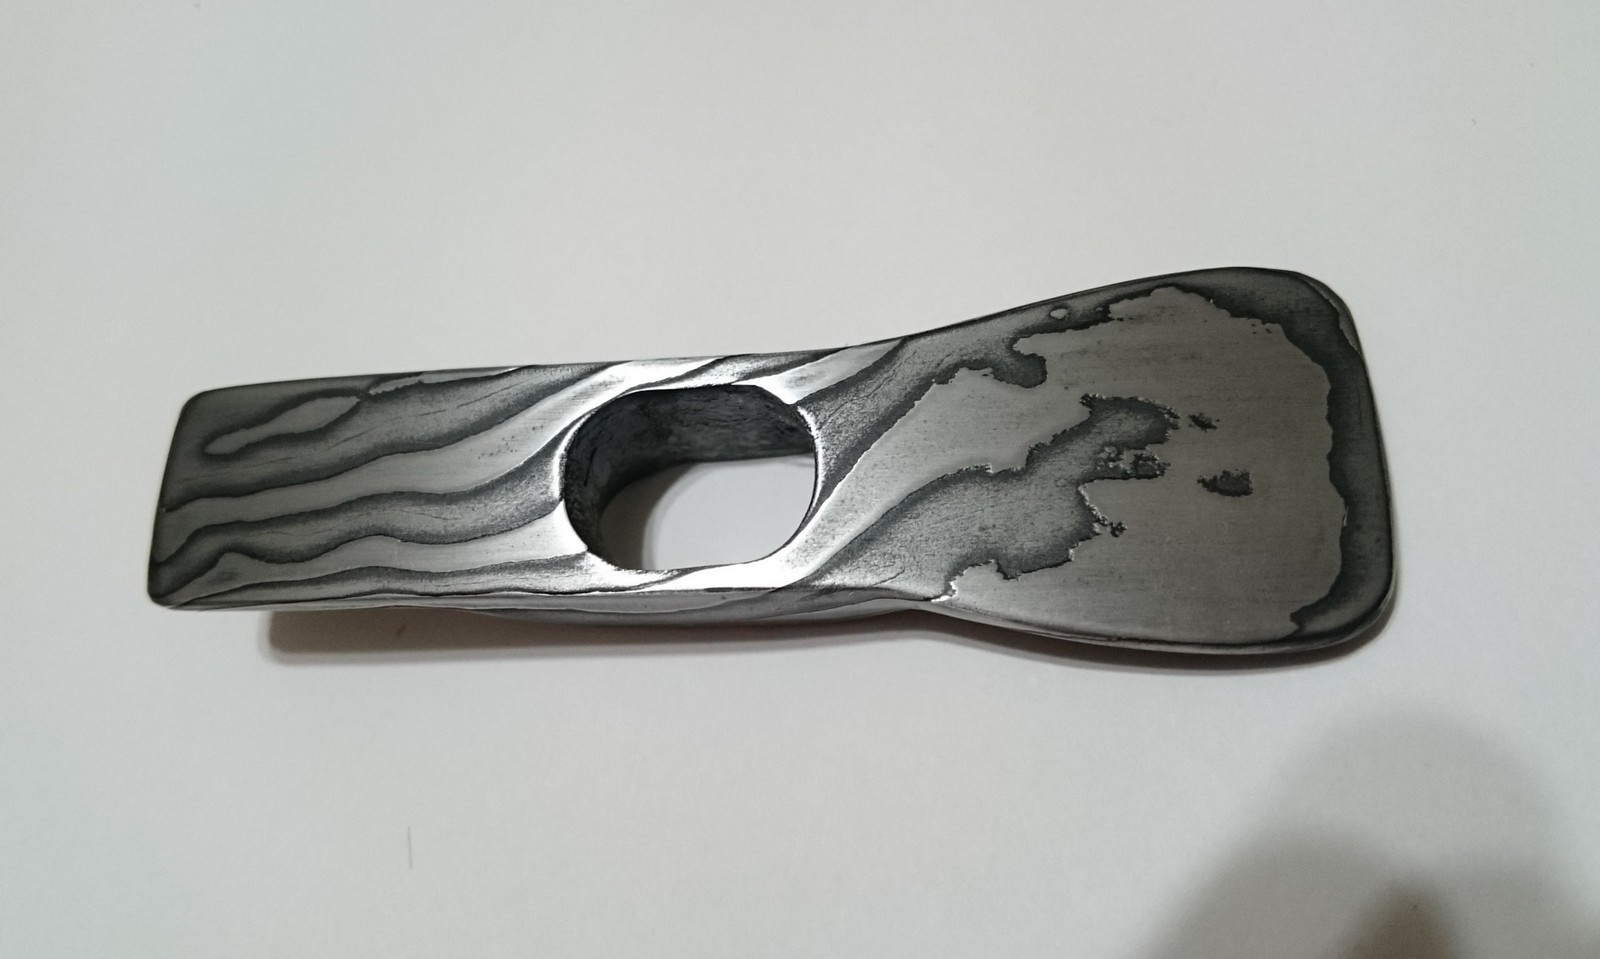
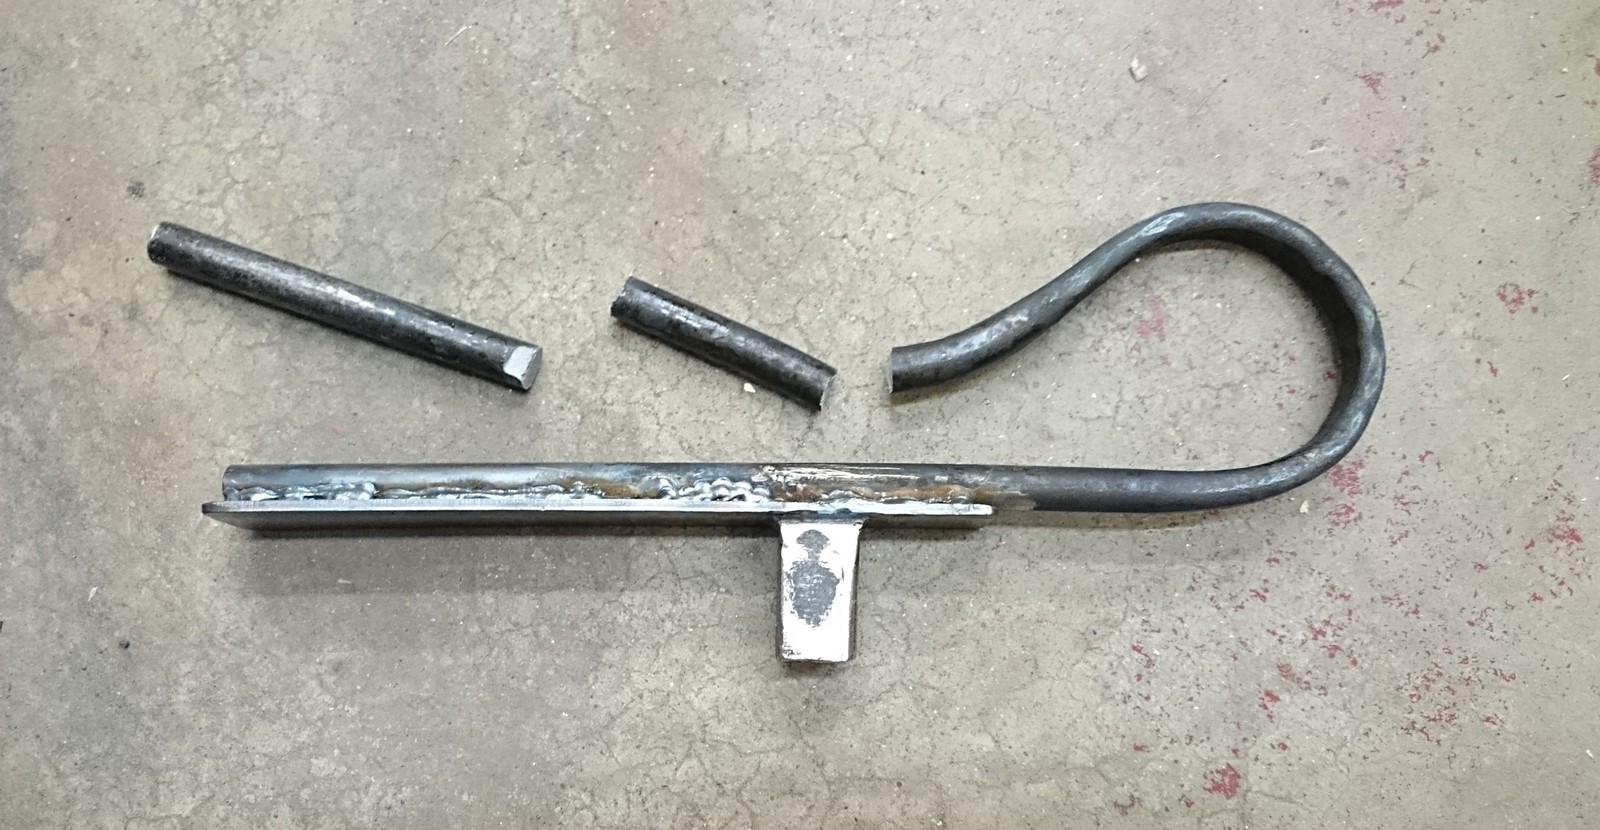
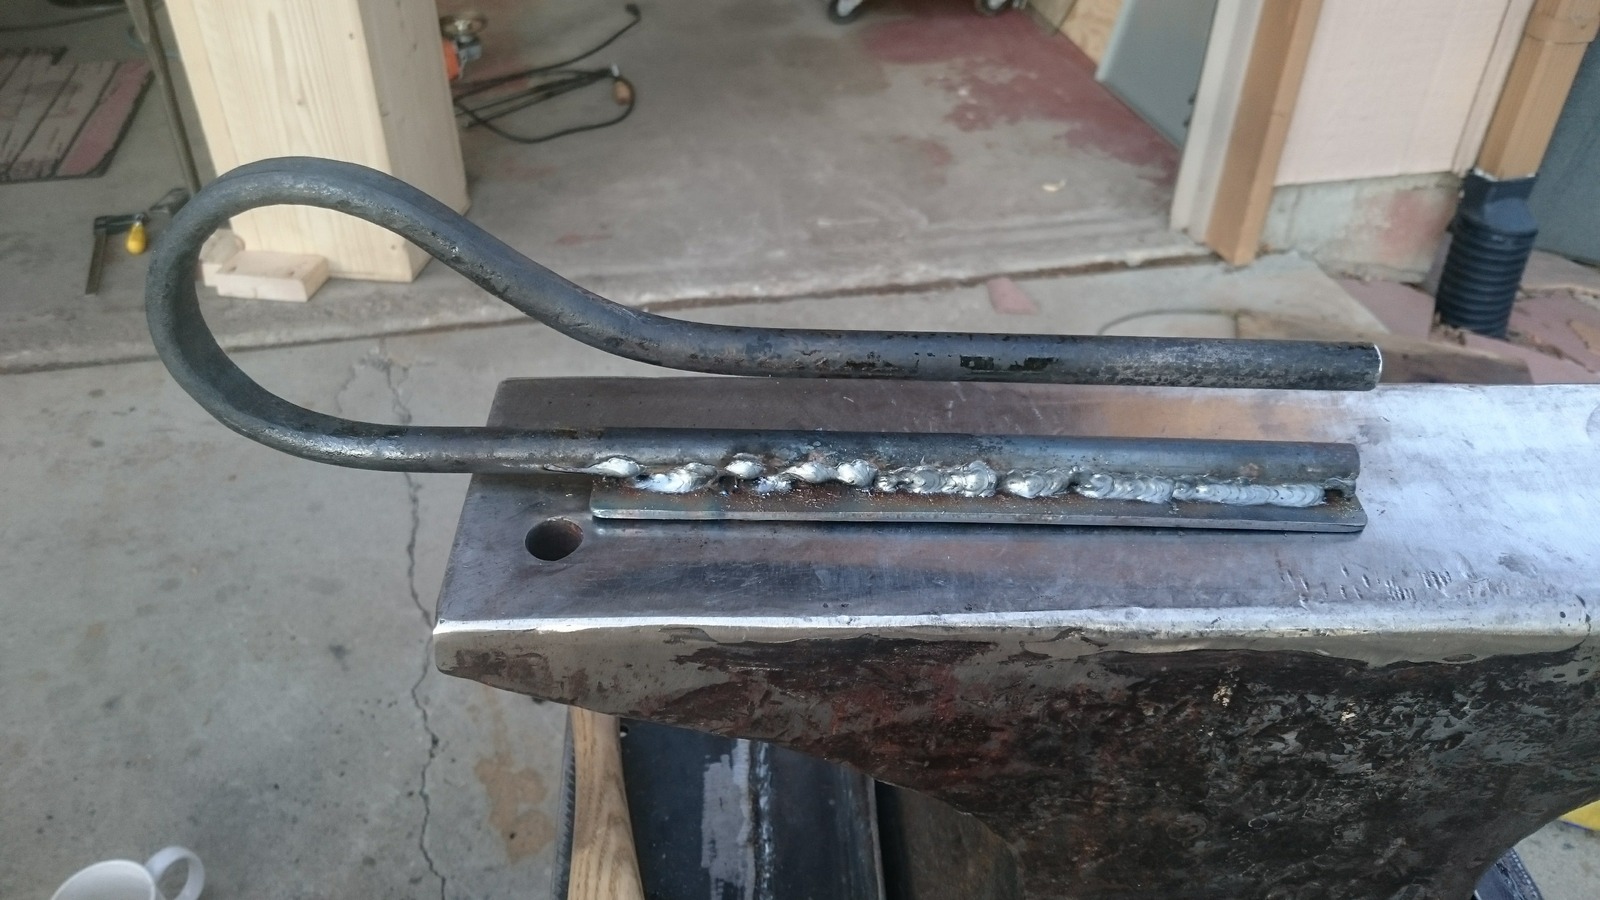
I made my first spring fuller today from 1/2" O1 rod, a base plate, and some angle iron welded into a hardy shank (not pictured). After shaping, I hardened the whole rod then tempered it to about 425 deg F, then later drew a softer temper on the spring section. The shape turned out okay, though the spring is on the strong side. Next time I'll try to draw out the spring area thinner. I am a very amateur welder, so my weld line looks terrible but should hold. Wish I was better with the mig.

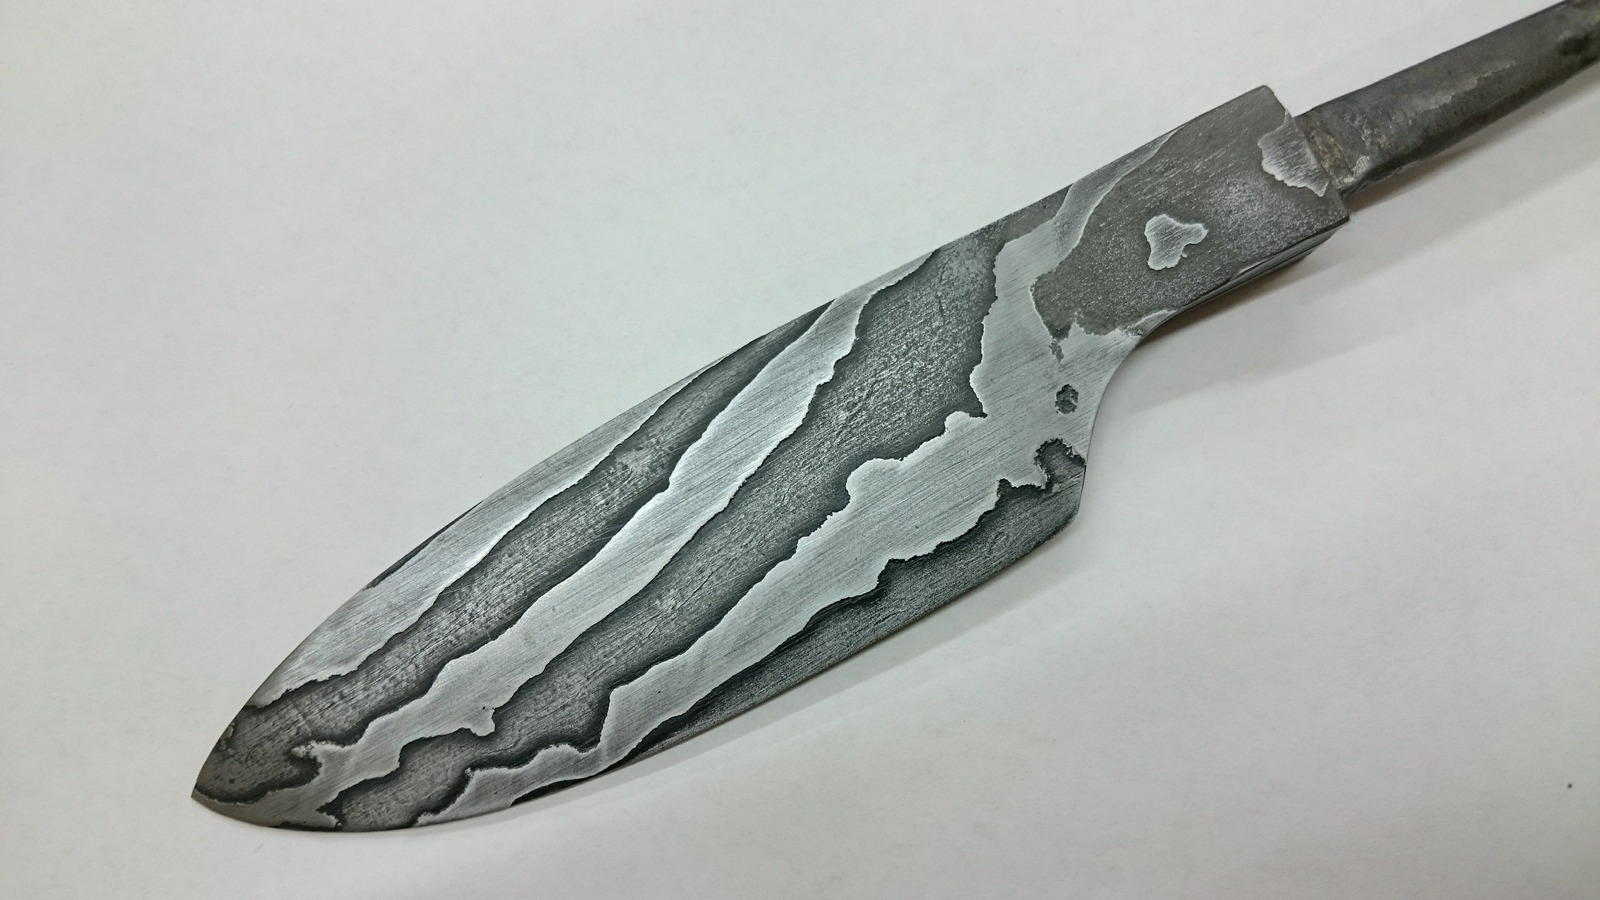


integral bolster zebra knife
in Knife Making
Posted
I just finished this damascus integral bolster chef knife. I forged the low-layer damascus billet out of 1080 and 15n20, then shaped the knife. The handle is padauk, with a brass and silver spacer.
More pics here: http://imgur.com/a/VkkLQ