mcb
-
Posts
48 -
Joined
-
Last visited
Content Type
Profiles
Forums
Articles
Gallery
Downloads
Events
Everything posted by mcb
-
The heat treat is probably OK. Heated to orange hot in the forge and quench in preheated canola oil. Then with it quench down to a temperature I could just barely touch it with my hands (~150F) I put it in the oven for 2-hours at 425F. After letting it cool almost to room temp I soaked it again at 425F for 2 hours a second time. It's a relatively small knife only a 3-1/8 inch blade and will be used for field dressing deer and similar work. No impact in the use I expect for it. I do need to get some material to make a sheath for it though. I annealed a much larger file when I did that one and I am going to make a larger knife from it. With that I am going to grind all the file teeth off it to make it smooth and will actually forge it to rough shape.
-
I think I fix my second post.
-
Did this work?
-
Thank you, it was a lot of fun and I learned a lot making this one. Next one will be larger.
-
My second knife I have made from scratch. This one started life as a medium size cross-cut flat file. It was not forged but I did use my forge to anneal the file so I could shape it then used my forge to heat if for quench. Temper was done in the oven. The rough shape was done with my angle grinder and a cut off wheel. Final shape was then done on a 1-inch belt sander and some file work. Blade bevel was done on a home made file fixture. The bevel was then sanded by hand and polished with a wheel. Sharpened with a diamond sharpener and angle guide. The handles are maple that have been stabilized with wood hardener and finishes with a dark walnut danish oil. The stain did not get as dark as I had hoped likely do to the hardener I used. Pins are simple 3/16 brass rod and the handles are epoxied on.
-
This thread has come completely off the tracks. I believe you might be referring to General George B McClellan. He was way too cautious and ultimately relieved by President Lincoln.
-
I agree Frosty there is a lot of crap out there on the internet. But I knew the bucket forge was not going to last when I built it. It was really cheap to make, the materials where locally available and I knew when I made it, it was a short term forge. It let me try forging some small stuff to see if I liked it without a large outlay of cash. And I have been surprised it has lasted as long as it has. But with all the issues I have worked through, to get it working as well as I have been able to, is part of the reason I want to buy a forge rather than build one. I have modified my burner twice two get a hotter more consistent flame, the lid cracked and needed fixed, etc. I have no doubt I have learned a lot from it and my next forge would be better (even if built without welding) but I would expect a forge purchased from a reputable fabricator would work well right out of the box. I am torn on this. My current burner is pretty good now. Might even get to welding temps if it was in a better insulated forge. What are some good reliable sources of refractory materials, kaowool, ridgidizer and firebricks? I can't fine anything locally so I would have to order much of it online. I also worry just a little bit about safely working with the kaowool. I also agree on buying good material. The RR spikes where cheap and are for screwing around and learning how to move metal. When I get serious about a project I will order better know materials so I can heat treat them properly. I still have a lot to learn.
-
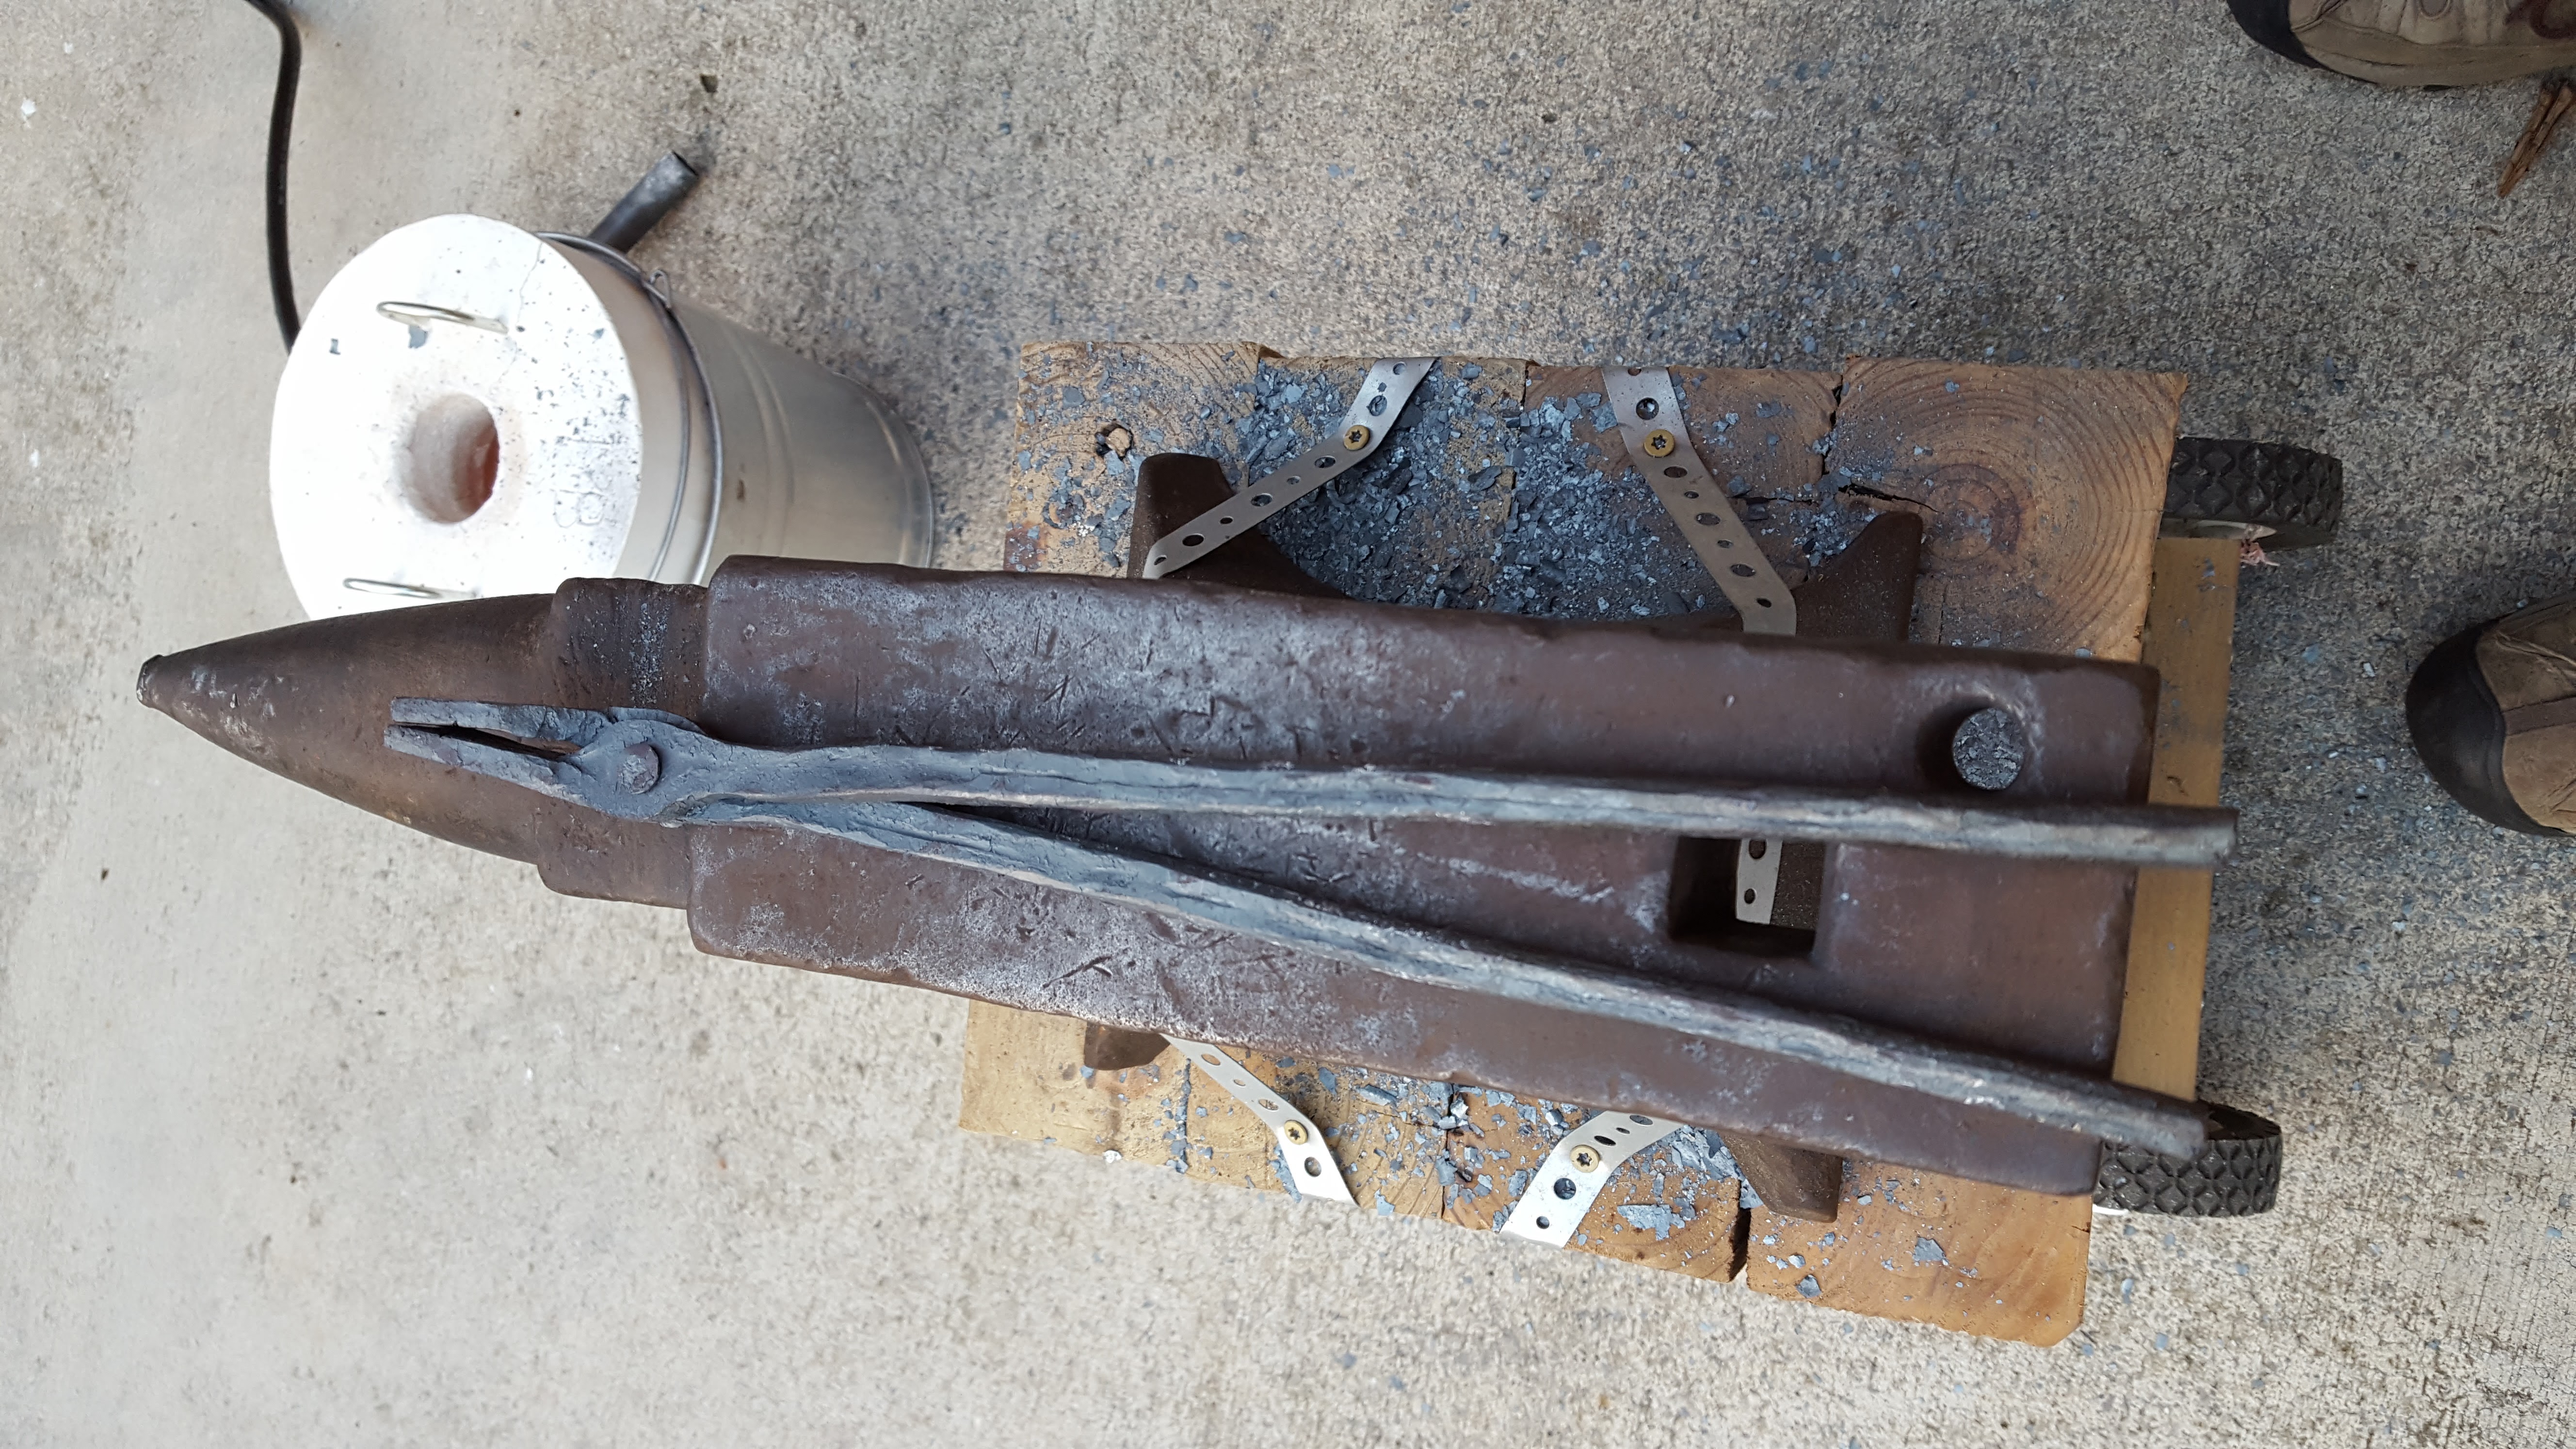
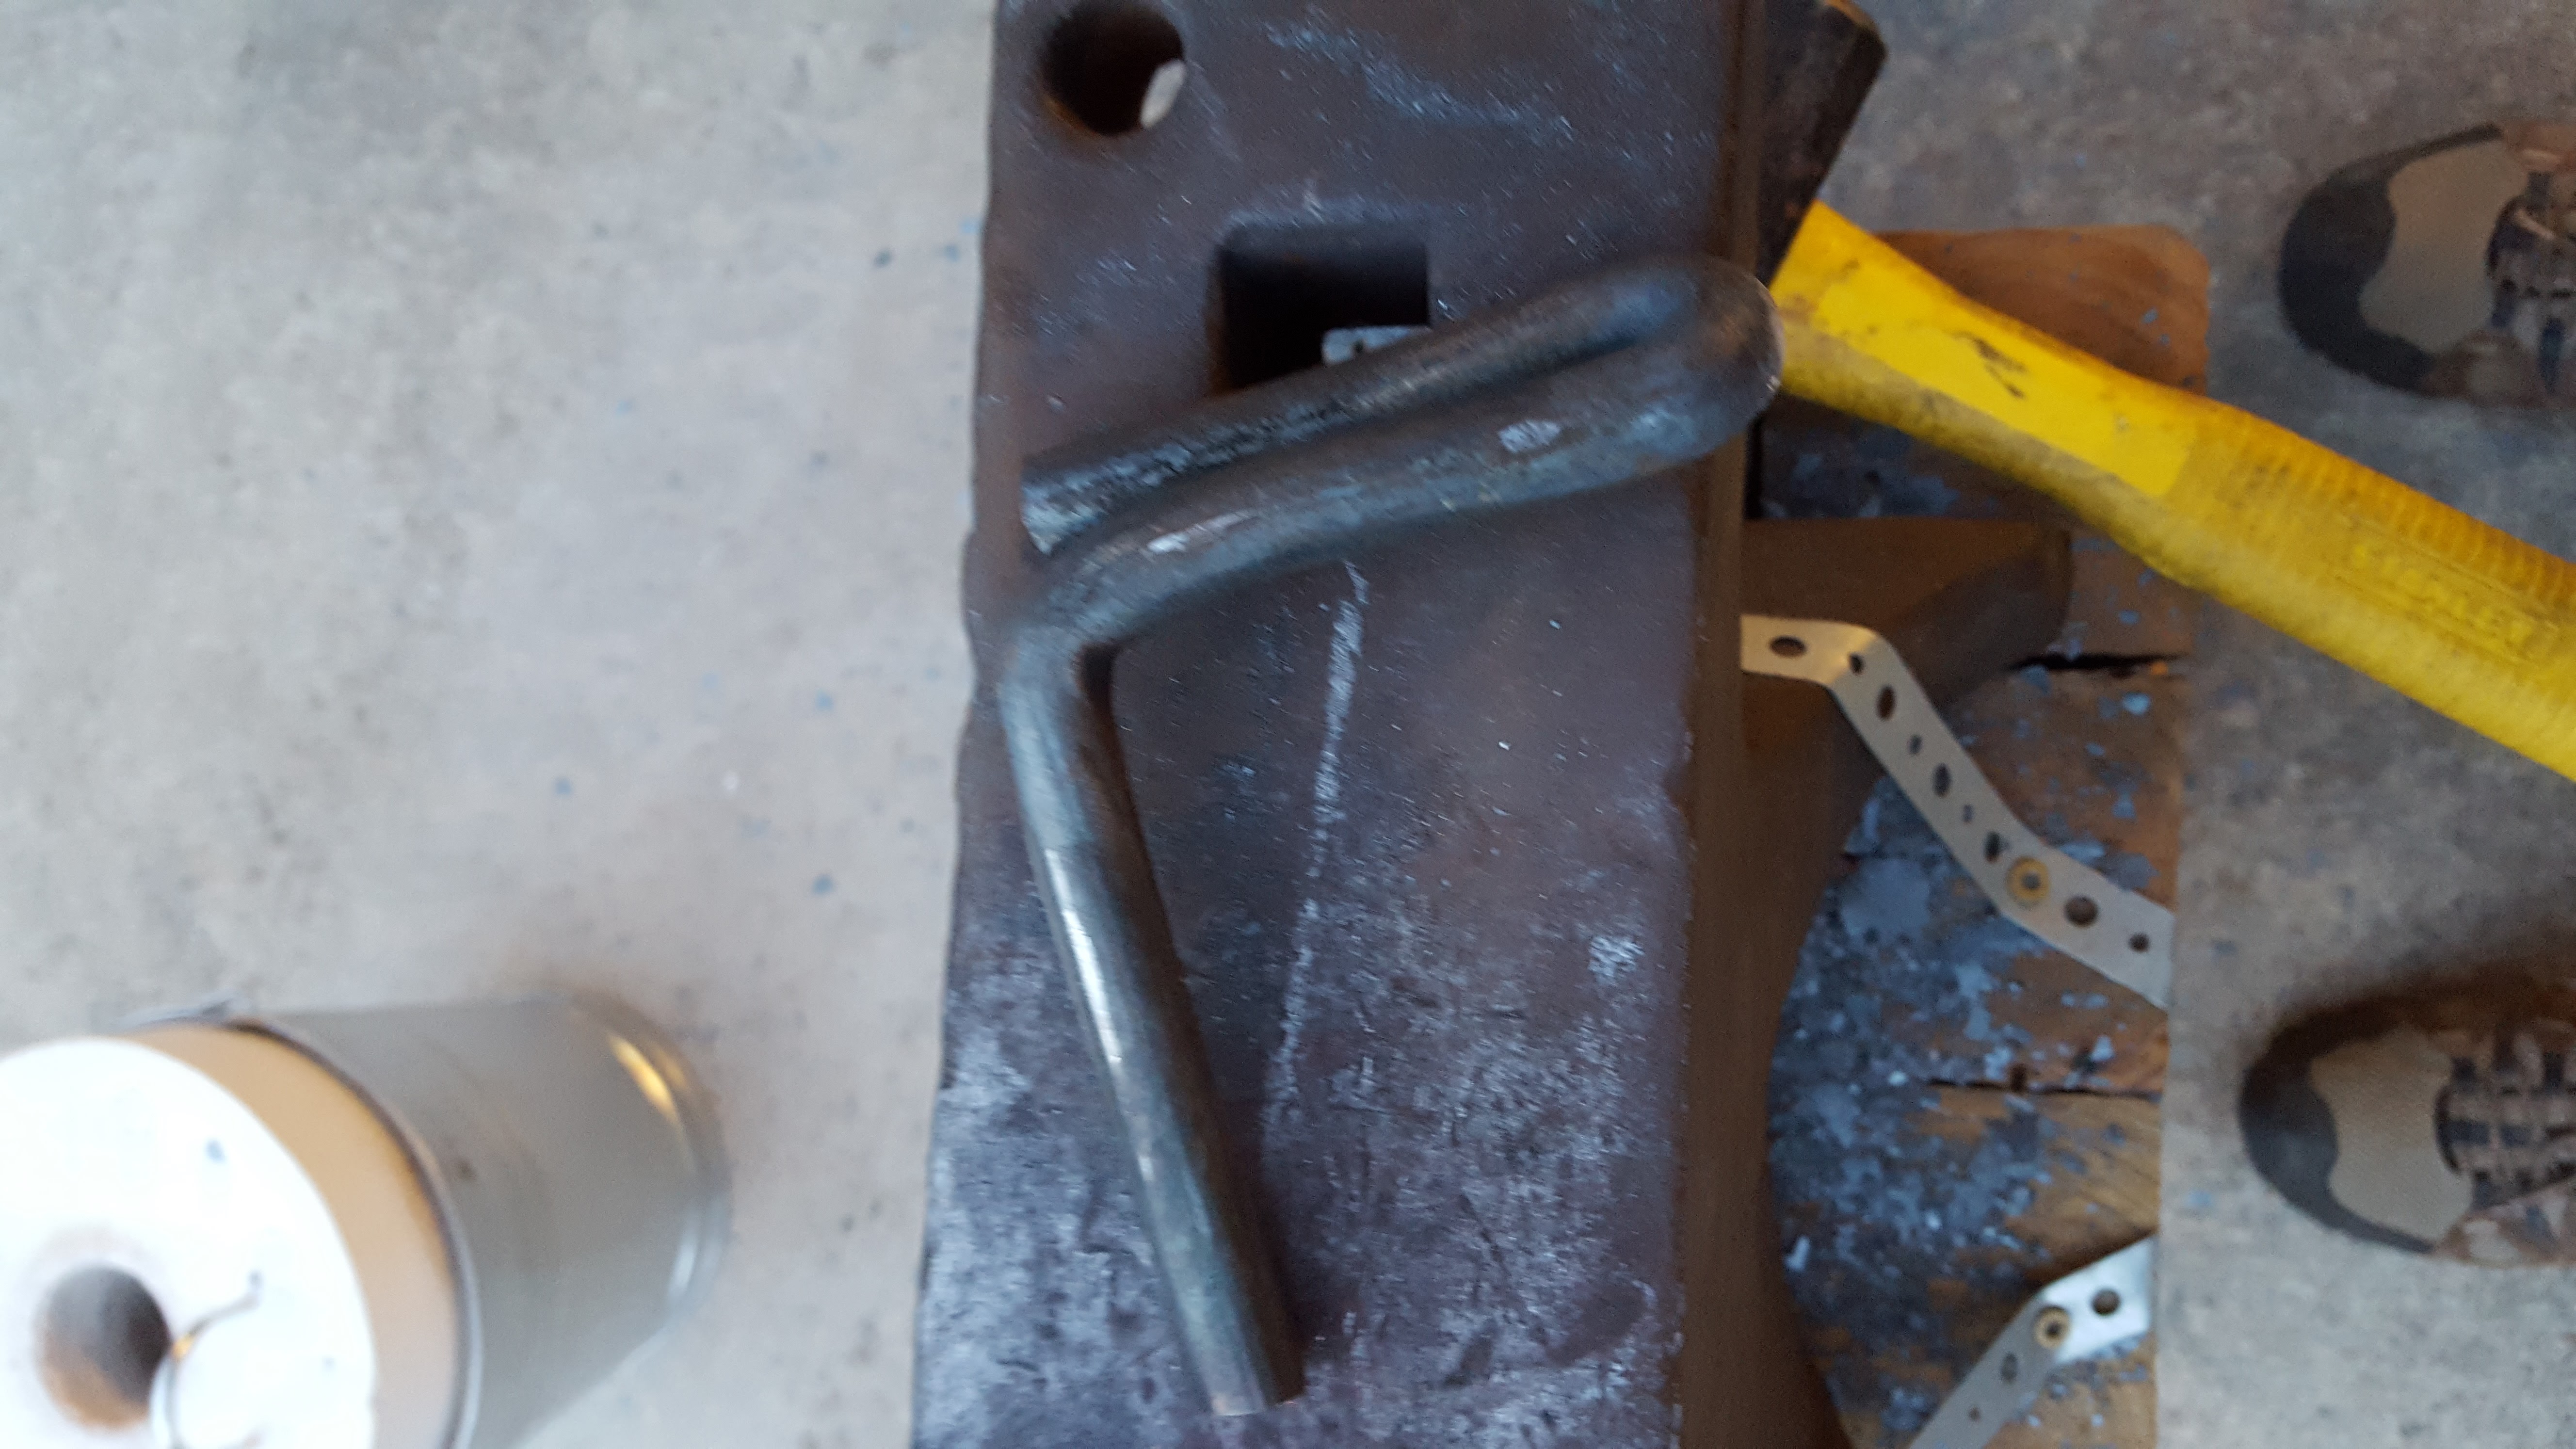
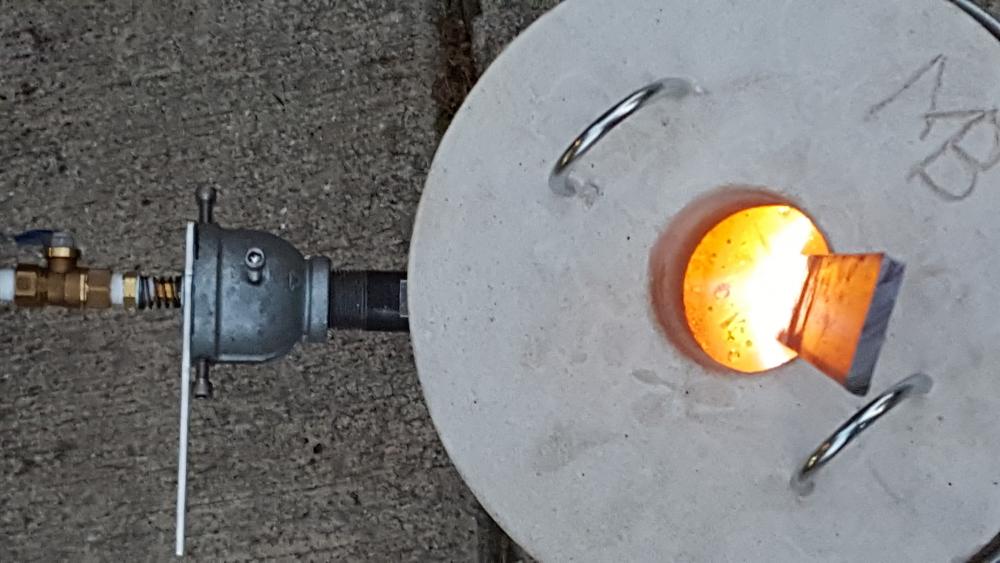
So the old plaster and sand lined bucket-forge (far right in the picture below) I made is lasting longer than I ever thought it would but it is still getting pretty sad inside and will need replaced or at least relined soon. As I do more projects I am also realizing its a bit too small and since the metal goes in the top it gets the whole piece too hot to hold and is really hard to get the heat where I want/need it. I started a pair of V-bit tongs to hold the box of railroad spikes I bought (no I am not going to make knifes out of them ) and after drawing out the jaws I am have trouble getting the heat where I need it at the base of the reins. So I am thinking of buying a forge rather than making another one. Mostly because I don't have a welder to make the body of the forge right and I would rather be forging than building a forge. Although I could use the same money to buy an arc welder and make a forge... I am I moderately experience welder just don't presently own one. Anyway what do you guys think of Majestic Forges. The 2 Burner Farrier Economy Forge seems like it would fit my budget and anticipated project sizes very nicely. (I am working my way up to making a felling ax head but I have a lot of learning before I am ready for that.) Have any of you use that particular Majestic forge or Majestic forges in general? Would you recommend a different brand of forges? Should I just man-up and buy the welder and make my own forge?
-
Thanks swedefiddle. I will have to think about a twist-top design that I can forge. Would be an interesting challenge.
-
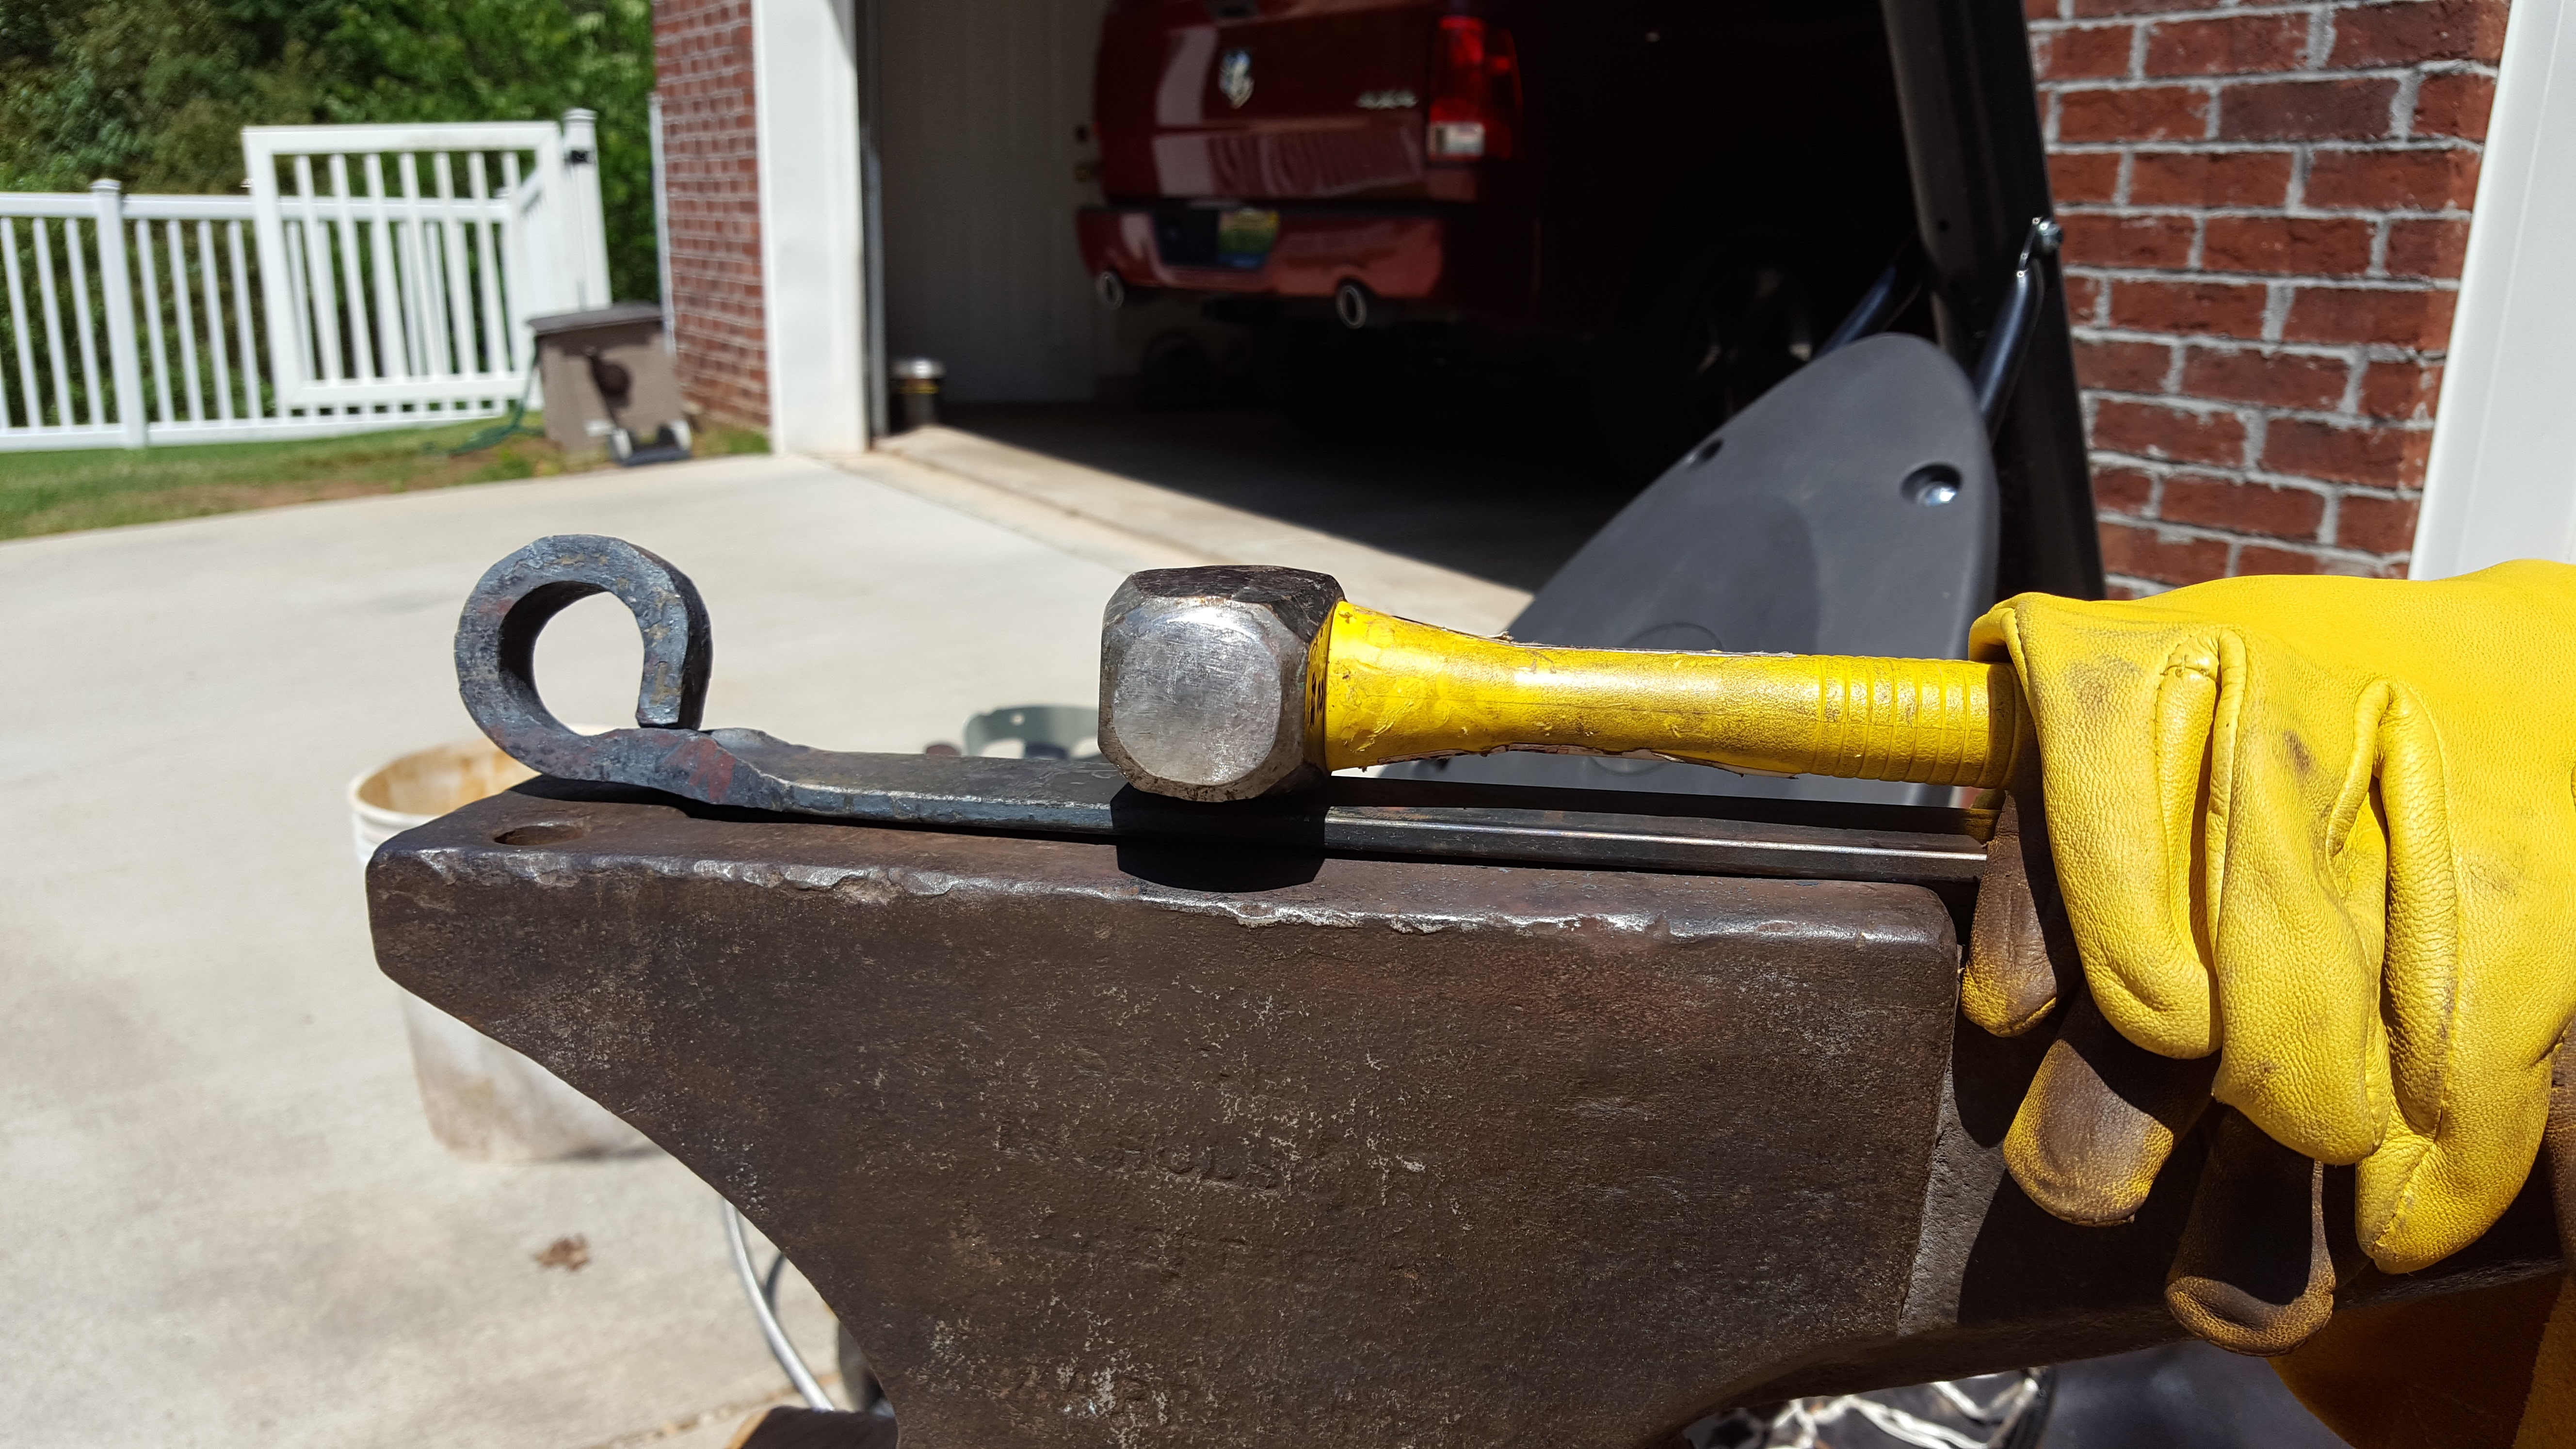
Been awful hot here in North Alabama but I couldn't wait any longer so last Thursday I got the forge and anvil out to messed around. I am very new to this, so far I have made a pair simple tongs and a few piece of scrap just pounding iron to see what I could do with it and used my forge to hardened a simple knife blade. Thursday I had a cold drink on my mind given the 95 degree heat, so I forge myself something to open a cold drink with. It's simple but was fun making. I really do enjoy punching a hole in steel and having that slug pop out when I do it right. I then worked that hole over the horn of my anvil and forged it out into a larger loop. Its all hammer and punch work as seen the only cold work was a little file work on the end of the handle where I hot cut it off with a chisels. Next one will be prettier but this one got the job done. It worked.
-
My attempts to get started at forging iron
mcb replied to mcb's topic in Blacksmithing, General Discussion
Thanks Alan, I am curious about filing steel hot. I have used a lot of files in my time for a variety of jobs but I have never been tempted to file steel hot. What is the advantage/reasons for doing it hot as opposed to cleaning up the handles with a file while cold? Thanks -
My attempts to get started at forging iron
mcb replied to mcb's topic in Blacksmithing, General Discussion
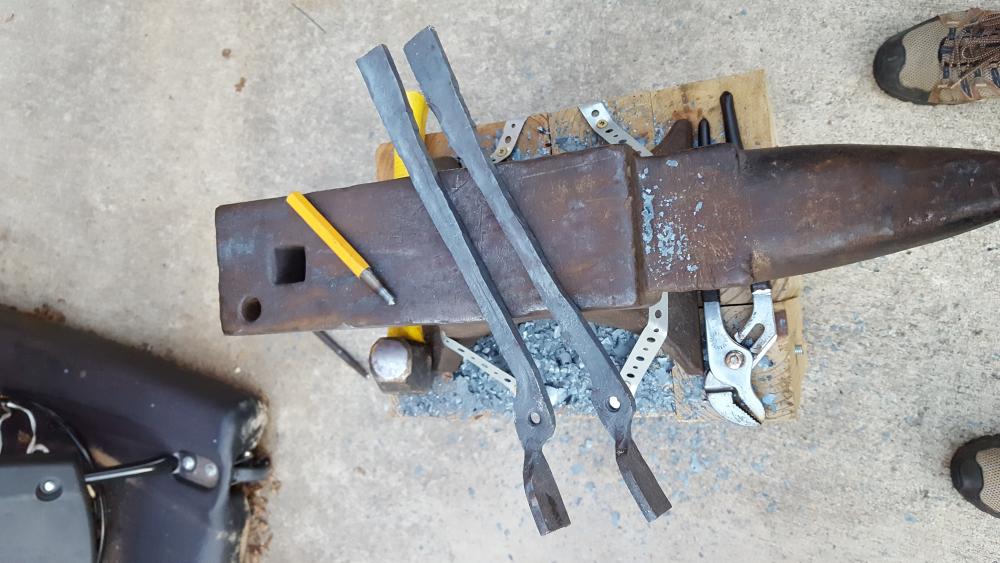
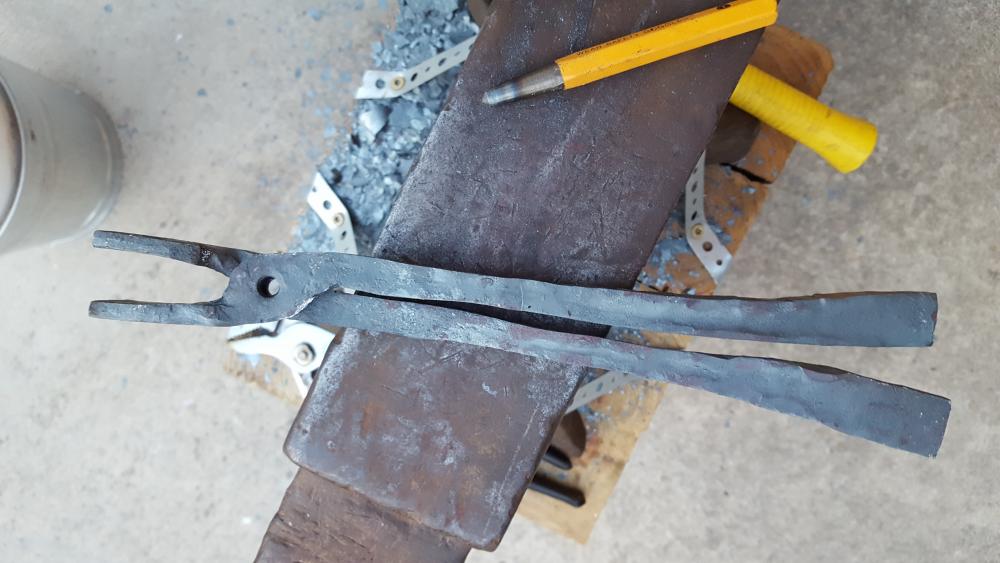
I was able to get some free time last night after work to finish my first pair of tongs. Far from perfect but they should work well enough to be used on my next few projects. Started out as 9-in bars and I was able to draw them out to a touch over 14 inches.
-
My attempts to get started at forging iron
mcb replied to mcb's topic in Blacksmithing, General Discussion
Another good thought. I had two long pieces I could have used. Still a lot to learn. Thanks guys! The one intimidating part of building my own forge is working with and then sealing the Koalwool. Both from handling it safely (I have read the fibers are bad for your lungs) and then getting it seal and coated correctly so it will last in use. At present I do not own a welder but I can get, with a little driving, access to one. I liked the plans Wayne Coe shared, the idea of cutting the bottle in half and and lining it with the wool and putting it back together with hinges. I could probably even do that without welding. -
My attempts to get started at forging iron
mcb replied to mcb's topic in Blacksmithing, General Discussion
Thanks Alan, not sure my forge is getting hot enough to forge weld. Even if it is I have never forge welded but its something I intend to learn. But I should have though of leaving both bars attached to each other and forge both ends and cut it in half. Last night as I cut the stock to length I was thinking that if I was using two pieces I could have one in the forge heating while I worked the other. -
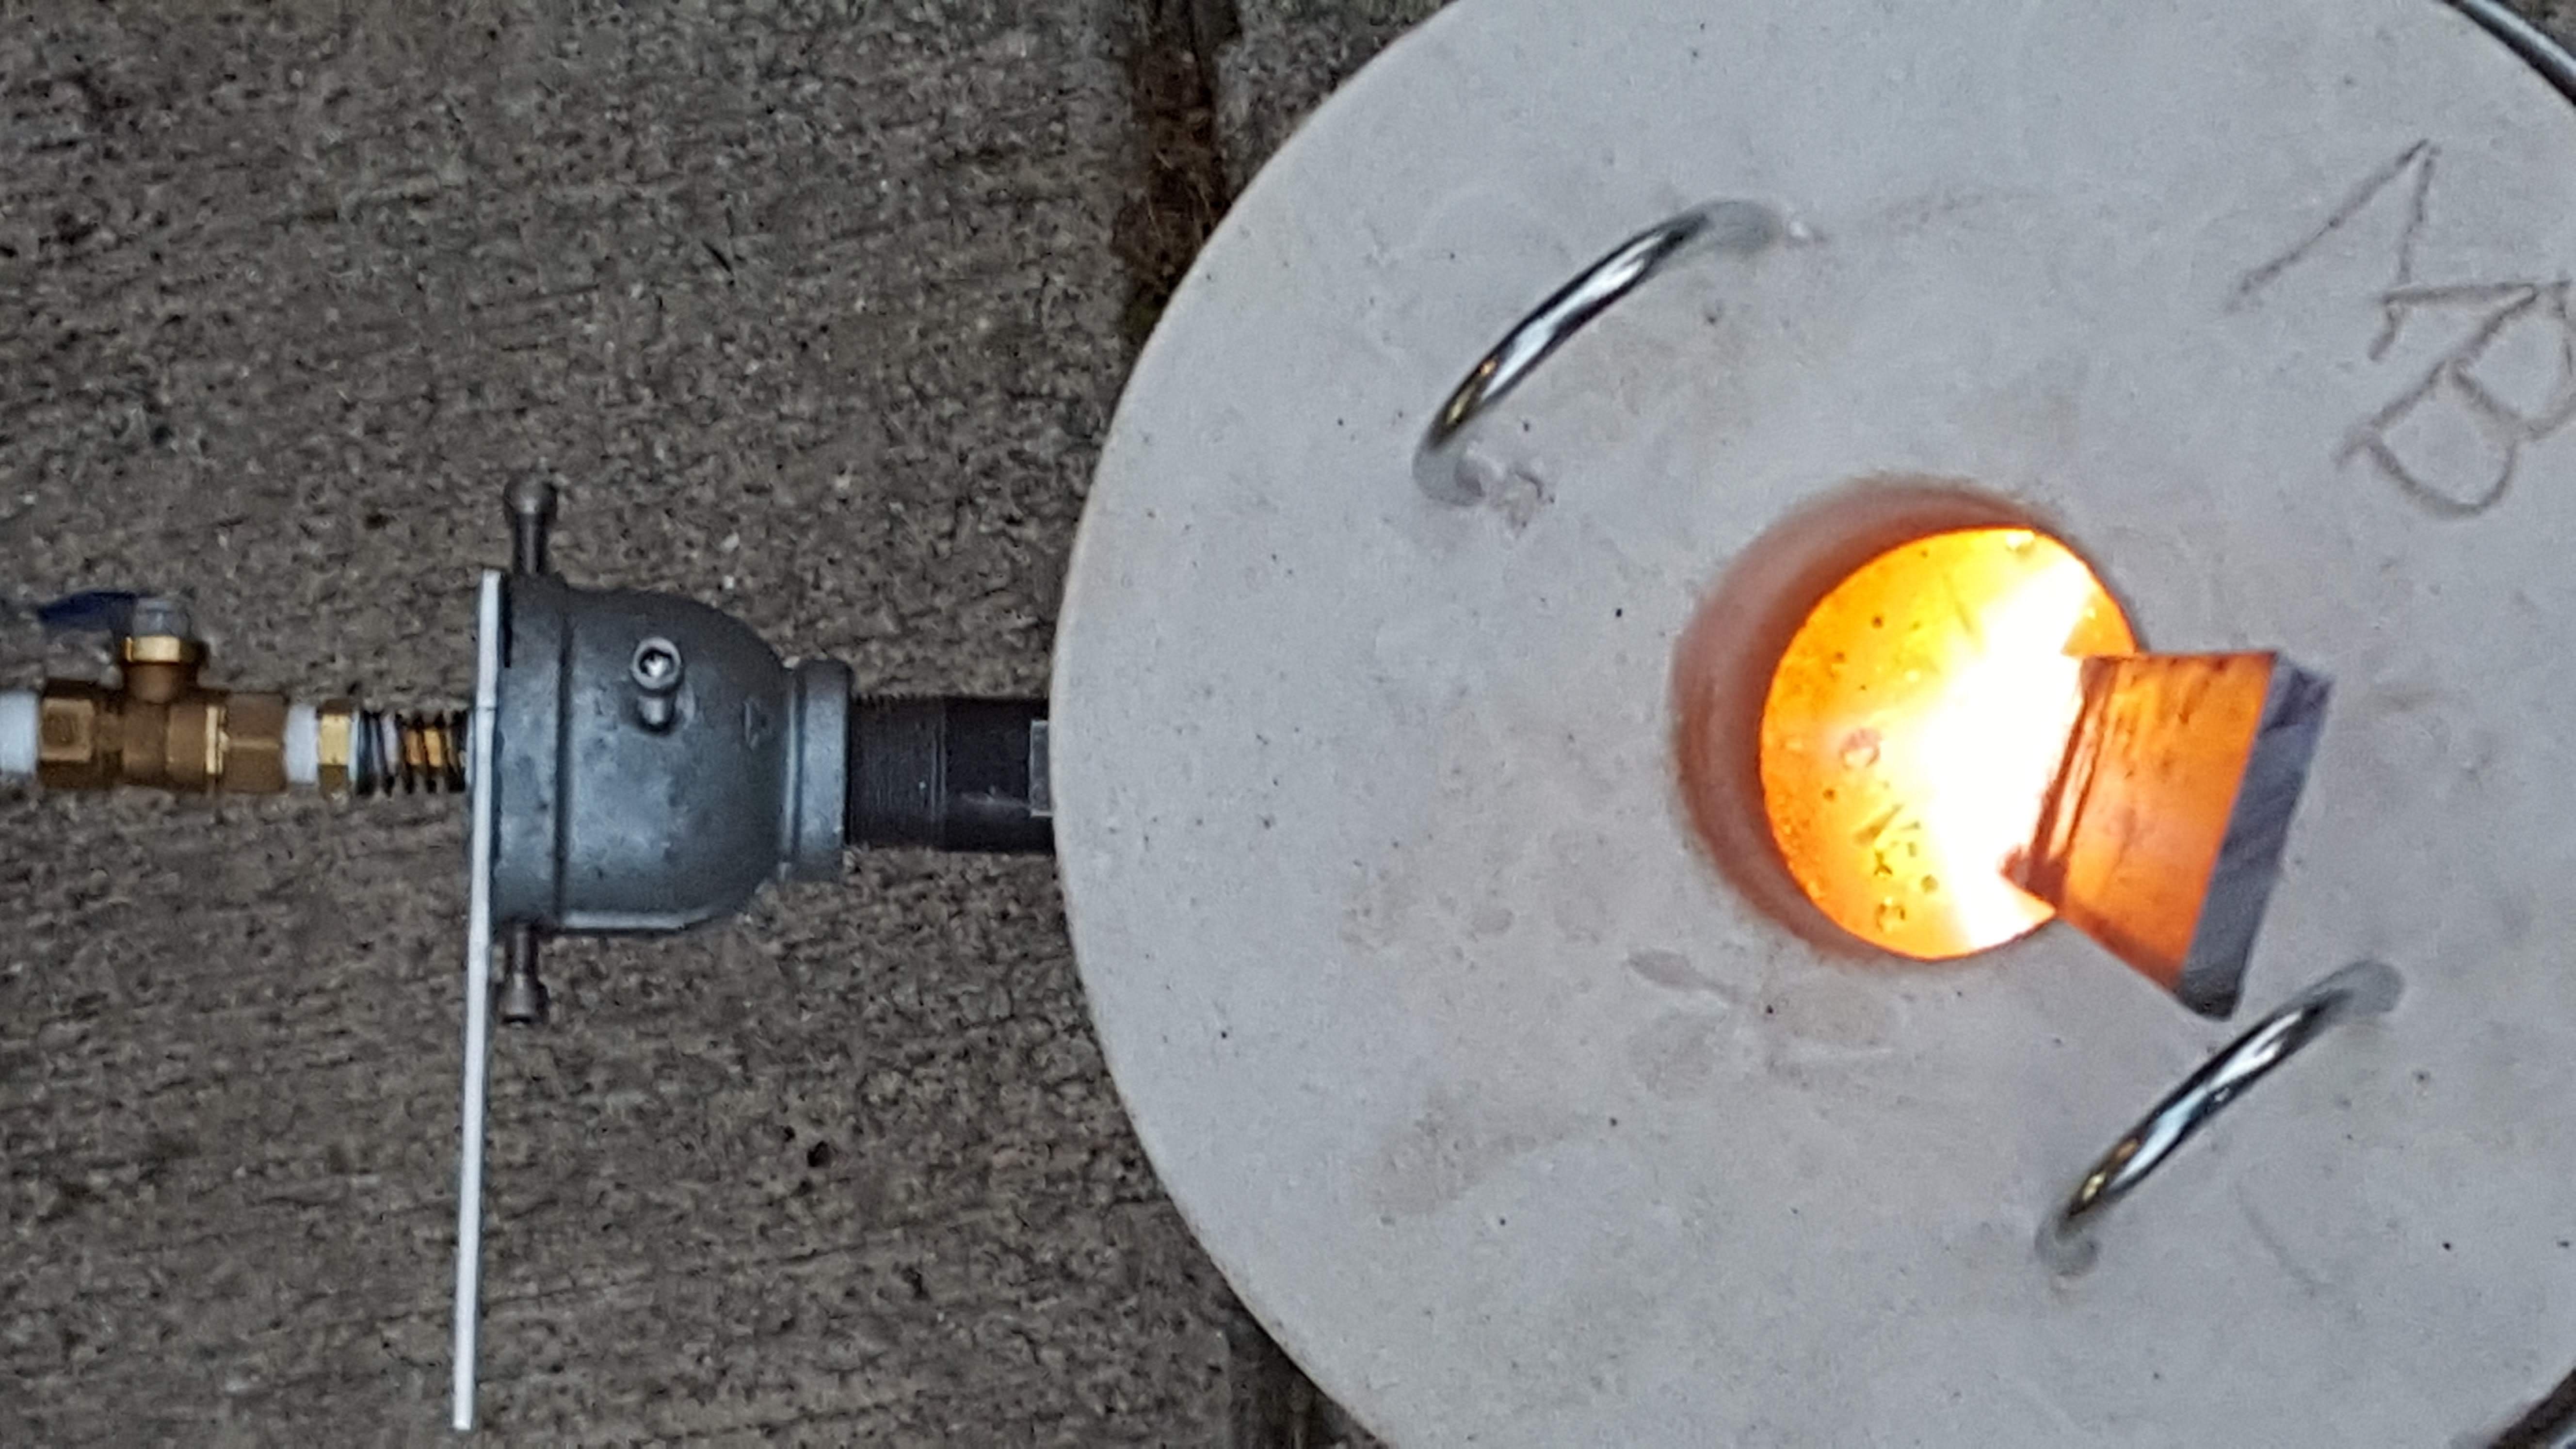
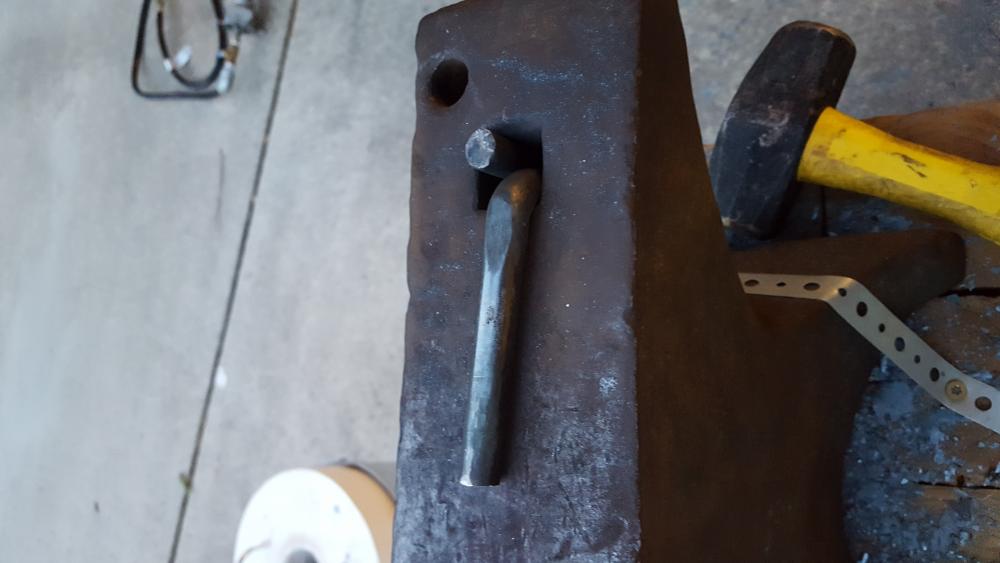
So a few months ago you guys help me gather some information on my Anvil. Thanks for that. In the interim my desire to have a go at doing some blacksmith projects has peeked. I have done a lot of reading both here and elsewhere and learned a lot. I built a super cheap and simple forge (you may make fun of it if you like) and have just started playing around. My forge will need replaced soon. After two sessions its showing signs of deterioration. I did not expect it to last but it let me get started on small projects while I feel this hobby out. I will have to buy or build something a bit more robust if I keep at this. I would love to hear your feed back and suggestion on what I have done so far. First my simple forge firing in earnest for the first time The results of my first session at the anvil pounding on a simple piece of 1/4 x 2 inch mild steel. Just messing around and see how hard or easy the steel would move when hot and to see what I could do. So last night I got slightly serious and set out to make a simple pair of tongs. Seemed like a good simple first project. I found plans and watch a few videos of making tongs from flat stock and this seem something I could do. First I wanted to make a bottom fuller but did not have a big enough piece of steel or tongs to get down in the forge to make a proper one so I made a quick and dirty one. Just some 1/2 rod bent to drop into the hardy and let forge some 1/2" notches in the bar stock. Using a pair of old channel locks as tongs (not very good tongs for sure) I started on my tongs. I started with two piece of 1/4" x 1" mild steel cut to 9" long. The fuller work well for the initial notches above and below the pivot boss on my simple tongs. Let me tell you after watching a bunch of YouTube video and then trying it myself, it was humbling. Those guys made it look fast and easy with little physical effort. The results below took me over an hour of hard work. I watched guys punch the holes in one heating. It took me at least three times to get the slugs to punch out correctly. I still have a lot of work to do to draw out the reigns and get them straight and smooth. I also need to do a bit more work finishing and adjusting the jaws. But I am pleased with my start. Any comments or feed back would be appreciated. While finishing these tongs I am also researching forges. My burner works pretty good I had the steel to bright orange last night so building a new forge body using better materials is an option but part of me wants to just buy a ready made small forge so I can spend my time forging rather than building a forge. Time vs money... Thanks for reading mcb


-
I could see either origin being very plausible. Hopefully some more information will come to light to sway us one way or the other. Either way It is still likely to have been made in the mid to late 1800's and that is pretty cool in and of itself. I think it may be one of the oldest things I currently own. I popped it off its base tonight and took a picture of the bottom. I was hoping to find more clues but there was no writing on anything else that jumped out at me.
-
Interesting, that makes some sense as the anvil was bought by my uncle at a flee market outside East Liverpool Ohio. Pittsburgh is only about 40 miles away. I can only find one reference to Singer, Nicholson & Co in the following link: http://www.mygenealogyhound.com/pennsylvania-biographies/pennsylvania-allegheny-county-biographies/john-f-jennings-genealogy-allegheny-county-pennsylvania-pittsburgh.html#
-
The evidence and the info you guys have shared with me so far has me fairly convinced it is English but if not I would love to hear evidence and reasoning supporting another origin. Knowing a little history on where my anvil came from is what I am after.
-
It was hard to get a good picture that showed the ridge under the horn but this one does it OK.
-
Thanks again guys. I might have to pick up a copy of the Mousehole Forge book. I believe the horn does have a ridge on the bottom back near the base although that fads away as you move out the horn. You can sort of see it in the last image I posted. I will try to get a better picture under the horn this evening and post it.
-
Thanks for the information. It was bough at a small auction/flee market near East Liverpool Ohio. I would not have guessed it was made in England. Couple more pictures: It still rings pretty good especially when struck on the heel and horn. The center seems a touch softer. I am curious what the horizontal rectangular holes at the waist are for? They are blind and do not go all the way through. I haven't found any other writing or numbers on it yet. The bottom is flat but has a rectangular hole in the middle of the bottom. I have a chunk of aluminum bar mortised into the top of the wood stand to engage that rectangular hole. Between that and the straps its pretty solidly mounted.
-
Are the 3 pictures I put in my original post not showing?
-
New guy here. I did my best to look back through old Anvil ID threads hoping I would see a similar anvil to mine to save you guys another ID anvil thread. I failed. My fathers idea of Christmas present a few years ago was to get my brother and I each anvils. I am presently not forging on it but I do use it around the shop anytime I need something hard to pound something on. I am starting to use it more with recent projects and earlier today I notice some writing on it. That got me curious and after messing around a bit with a wire brush and some wax I partial decipher some of the rusted and worn writing. Then after a lot of Googling with little answers I ended up here. So here is what I have, any info on it would be greatly appreciated. I don't have an exact weight but its somewhere a bit over 80lbs base on its measurements. About 19 inches long, 8.5 inches tall and 3.5 inch wide at the heel. The writing as best as I can make out says: First Line: SINGE... maybe SINGEN... Second Line: NICHOLSON.. Maybe an S on that Third Line: SHEFFIELD Forth Line: WARRANTED Thanks again. I would love to know something about where and when it is from. If any other pictures of it would help with the ID let me know.