
1215
Members
-
Joined
-
Last visited
Everything posted by 1215
-
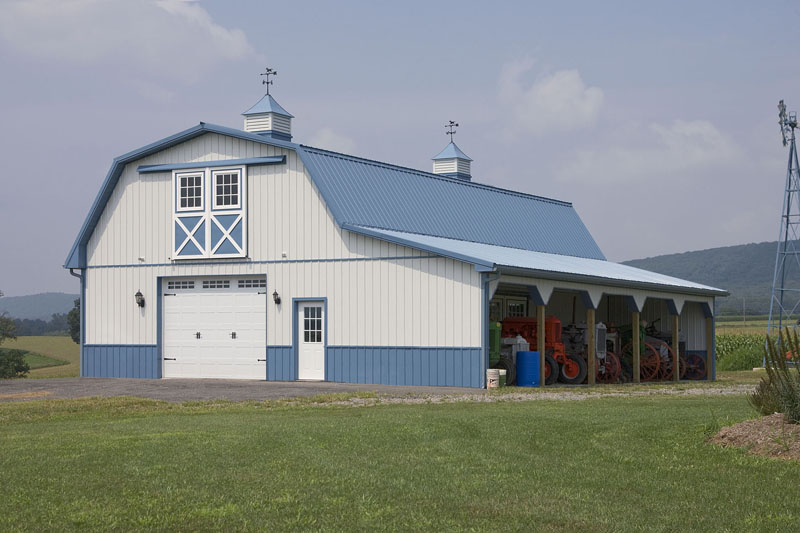
Yes you are correct about the odd sizes. It was originally built in 1926 as an old horse stable. The building has had two major renovations/remodels/additions since then, one in 1965 and one in 1993 --and its about to undergo a third reno. The original building/structure was built in 1926 as what I think might have been a 30' wide by 50' deep post-and-beam horse stable with fieldstone footings/bases and I believe dirt floors with wood planks over gravel or sand in the stalls. It looks to have been an 8-stall, center isle, building with four stalls in the front, four stalls in the back and whatever you do for horse stables (tack & wash rooms maybe) on each side in the middle. I believe the original ground-floor ceilings were 10-12 feet tall with a gable style roof above. I believe that the original exterior walls (running the 50' length of the building) were 12'-15' high with a gabled barn roof on top of that. In 1965 the building was expanded and the size more than doubled. The original horse stables stayed in the same place and it was as if they built a new, giant 35' wide by 50' deep barn right next to the stable building, sharing a common wall. The best way I can describe it is with the photo attached (pulled from Google, not my barn). They kept the original stables (where the lean to is in the photo) and added a giant barn next to it, tore off the roof from the stables and just added a flat, almost level (barely a slope because it was 30' wide whereas the roof in the photo is 12' wide) roof over the horse stable portion of the barn. In 1993 the prior owner wanted to use the space to work on and restore his cars (a very big part of why we bought this property). Referencing the attached photo, he raised the roof about 10' at the thin blue line between the first and second floor. At the same time he slightly extended/raised the walls over the lean to (horse stable) section of the barn, proportionately re sloped the roof on that side and added four dormer windows in the second floor over the stables so it could be converted into a guest house/in-law/au-pair apartment. The horse stables were ripped out, cement footings were poured where the fieldstone footings were, metal beams were added to strengthen the building however the post and beam style was kept for the look and feel; and a cement slab floor (with radiant heat) was added on the first floor of the entire building. It looks a lot like the attached photo but taller and with with two sets of 2x2 dormer style windows above the lean-to and a steeper roof. Almost like the front of this barn but opposite, there is a single-bay garage door (like the standard size on a house) on the rear wall where the lean-to is, and an 8'x36" single door closer to the center of the back. There are two sets of stairs to get up to the second floor, the stairs in the front only go to the apartment upstairs and the stairs in the back lead up to the open second floor. Just as pictured in the attached photo, there are sliding doors on the front of the barn that open up pretty big. There is a 2-ton rated I-Beam that runs the length of the roof line and a set of trap /folding doors below a hoist in the second floor --so if you needed to move something heavy (an engine block) into the back of the second floor you could hoist it from outside or inside through the trap doors and slide it all the way to the rear of the second floor. I'm planning on breaking out the apartment into three sections, an office (I work from home), a CLEAN/nice/finished bathroom and small kitchenette combo and an IT/server closet/room. On the first floor I'd like to add a slop sink or farmer's sink somewhere out exposed to the shop and put in a urinal (already own one, pulled it from a church, ready to go) somewhere, could be similar (but cleaner) than the attached photo. I'd like to use the upstairs over the main part of the barn for a woodshop and for parts storage. There is a wall with a couple giant sliding doors between the main/bigger barn and the section that used to be the horse stables. There are also two doors between the two sides that have no doors but those plastic strips you often see between walk-in refrigerators and warm rooms, etc. I think I want to use that area for clean/finished/restored car & motorcycle storage. If I do what I think I want in terms of layout so far, that leaves a space of approximately 35' wide by 50' deep (with about 18' ceilings) for a general workshop area. I just don't know what to put where, or how to organize/compartmentalize things. I'd like a dedicated section for metal work --mostly for welding and car restoration. I'd also like a clean-er section that I can use/dedicate to engine building and finish work (interior work, engines, carburetors, etc.) I'd also like to consider an area for paint. Currently it is gutted and looks like an old post and beam barn with no lights and very out of date electrical. The previous owner stored his cars in there but did no work on them. I don't think anyone has functionally lived or used the apartment since it was built in 1993. Hopefully this helps a little for some creative minds to suggest what to put where. I'll email myself the photos on my phone of the space and post them up for a better idea but the attached photo is very close/similar to the layout. Thanks.

-
Thanks for the replies! I NEED one fairly quickly and eventually I'd like a few, one medium sized vice on a stand and one small/medium sized on the bench in the wood shop, one medium/large on a stand for my metal fab area and one medium sized to bolt to the "general" workbench. Yes this is New England so I'll look around for estate auctions and going out of business sales, etc. I see that there are a lot of vises around for sale however they seem to get scooped up quickly by "pickers" and resold for a lot of $$. I'm trying to avoid another "new" vise as I bought a 5" blue Irwin brand vise at Lowes and broke it the first time I went to use it (one of the jaws cracked off). I'd ideally like to get a top quality used/vintage vise as they seem to be made with better metal/quality. Thanks again!
-
There is a Parker 973B on Craigslist for $125. Has not sold in a few weeks. Seller keeps relisting it at same price. Is that a good vise and what is it worth? I don't want junk. I'll use it a lot and take care of it. The last thing I need is to get hurt while working on something held in a junk vise. How do i find out about machine shop auctions? Thanks!
-
sorry. New England, USA. Bench vise.
-
I'm looking for a vise. I'd like it to be at least 4". This will be mounted on a workbench (I will eventually get another on a stand). Where should I look to get a good quality vise without paying an arm and a leg? What should I expect to pay, what should I look for (in terms of condition) and what brands are good or what brands should I avoid? Seems like everything here on Craigslist or similar are all either very over priced or in terrible condition (lots of play, does not close square, etc.). Thanks.
-
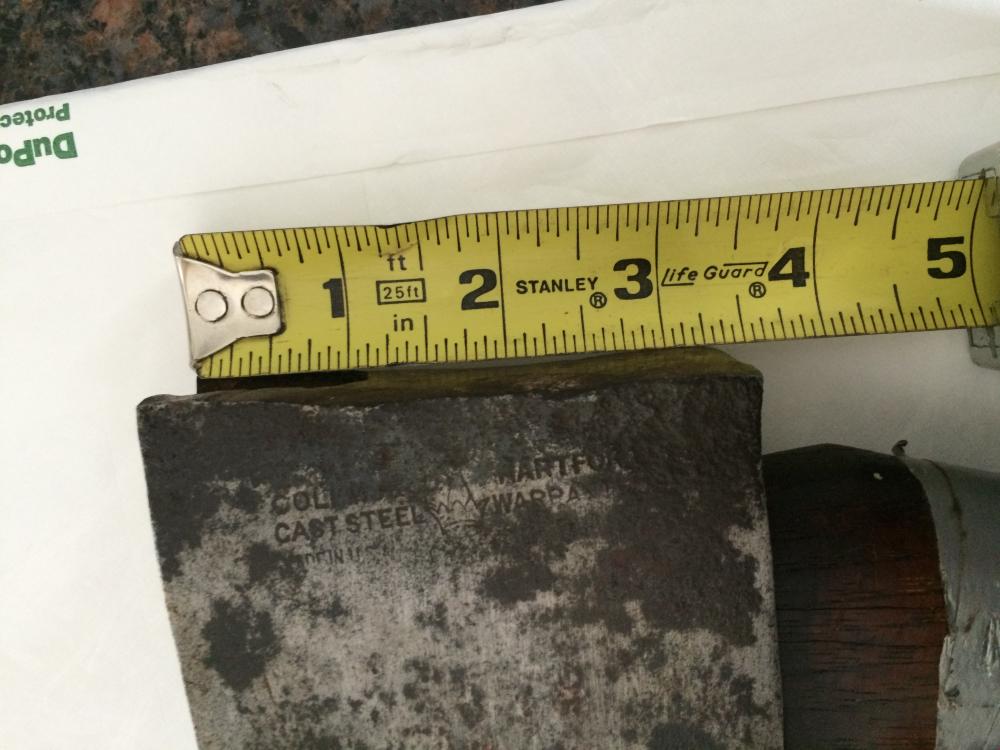
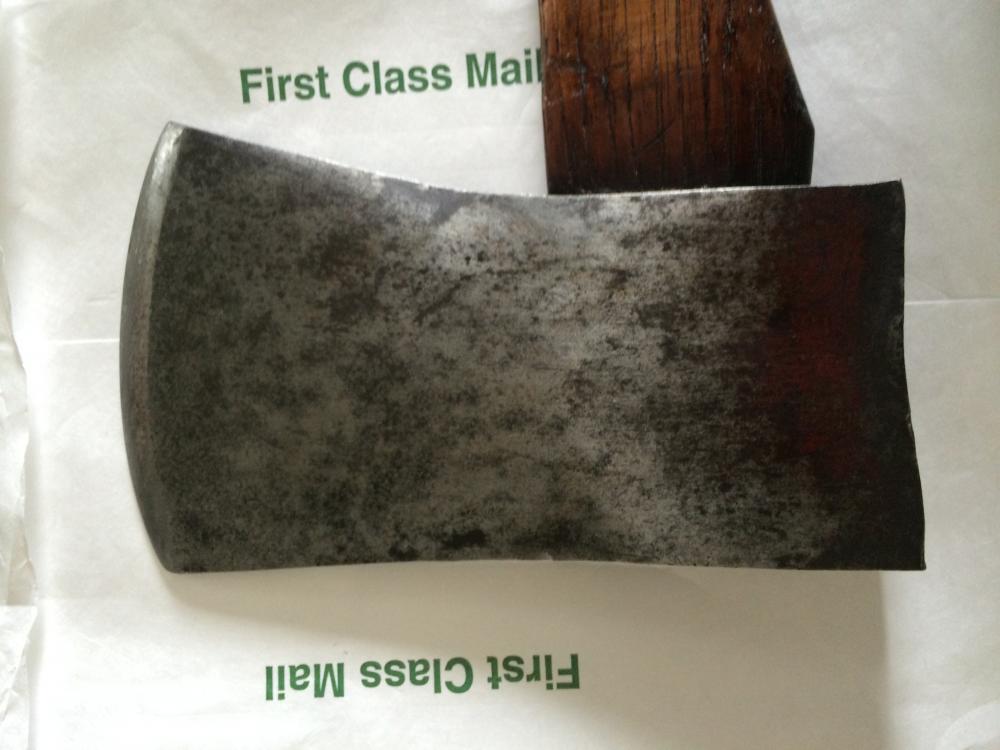
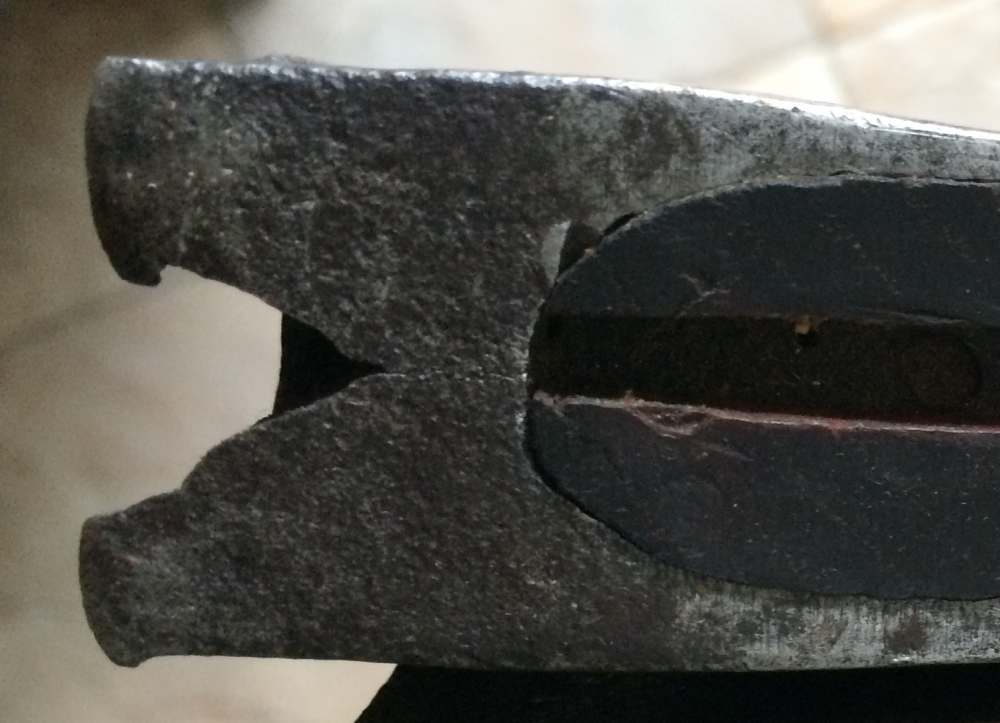
Not exactly sure if this is the right place to put this so feel free to tell me where to go if I'm in the wrong place. I have an older (Pre-1966, made in Collinsville, CT) five pound Collins Legitimus axe that needs help. I'm told that the five pound Legitimus axe heads are fairly hard to come by so I'd like to try and restore it (or have it restored). This was her grandfather's axe and there are a lot of family stories that come with this axe --and he is now 89 and his health is up & down depending on the day so our goal is for him to see it fixed and restored while he still has his wits about him (that means sooner rather than later). The axe has been abused and hammered on pretty badly over the years. The poll/butt has mushroomed out and there is a chunk of metal missing from the axe head (from hammering). The hammering, and the missing chunk of metal has also caused a crack to develop at the back of the eye (the fat part) going down into the eye about 1/4"-3/8". I came here or posted here because I'm wondering about fixing the mushroomed poll/butt. I know it needs to be heated (I think) but I know nothing about working with metal like this and because I believe it may need to be hammered, I want to both preserve the strength of the steel as well as not ruin the stamped logo, if at all possible. My plan to address the crack is the same as I would address any other cracked piece of metal; drill a hole at the base of the crack, grind it out and weld it up. I have a MIG and a TIG and I'm still researching the metal & carbon composition of the axe so I can try and match it with the best combination of heat, gas and filler/wire, etc. This complicates things because I think I need to fix the mushroomed poll/butt first and then weld? I just don't know where to start and I don't want to make it worse or ruin it. You guys know a whole lot more about this type of metal work than I do so I would welcome any thoughts. I don't have an oven, forge or kiln so I'm happy to send the axe head out somewhere to either address just the mushrooming or do the whole thing. Thanks for reading.
-
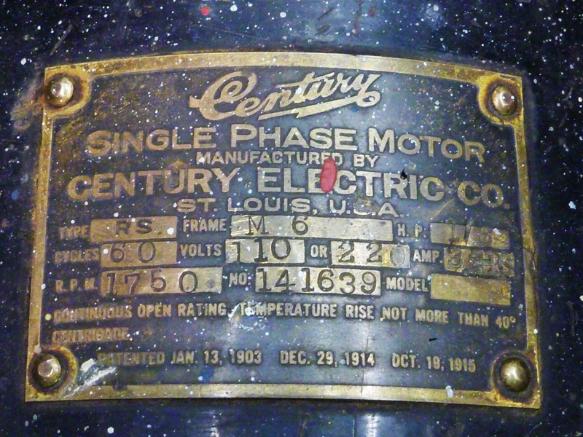
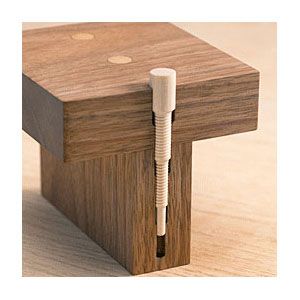
Thanks. I'd be nervous putting this on a stand or in a place where it could ever tip over. It's probably a regular old run of the mill electric motor with a wheel on it but its sentimental enough that I wouldn't want to risk it falling over. I don't know much about it other than it has a plate almost exactly like the one below (and another that says "Kleen Heet"). This one will stay on the bench and I'll find a newer double wheel grinder to put on a stand eventually... The bench it mounts on is built a little overkill which complicated things for me. I lag bolted two 2x4's horizontally to the studs/wall and then used joist hangars to run 2x6'es out from the wall as support for the bench top. Because of the 2x6'es and the spacing of the holes of the grinder base, I ended up using threaded rod because I couldn't find 1/4" bolts long enough and 5/16 was too thick to fit into the grinder mounts when dropped from the top-down (I didn't want to put them in bottom-up). I re-used the old holes so this ended up going exactly where it was when this bench was my dad's --except that the addition of the 2x6'es changed the support structure. The front two holes went down (the long way) through the middle of the front 2x6 going across the front of the bench and the rear two holes are spaced one on each side of a 2x6. I countersunk the front two holes and plan to use wooden bungs with a T-shoulder (see photo below) to backfill them so the 2x6 would be seamless, equally as strong, and so I wouldn't catch the holes in the future with a C-clamp or the like. For the back two holes I used threaded rod as well but I did something a little different/creative. If I were able to find the right length 1/4" U-bolt, I would have slightly notched the 2x6 it was going around and then put it in from the bottom with the threads sticking up and affix it similar to the front holes. Because I couldn't find 9-10" long 1/4" U-bolts at my hardware store (2x6 + 3/4" plywood + 2x6" riser for grinder + 3/8" thick grinder base), I had to get creative. I used my Fein oscillating cutter to cut a 1/8" thick, 1" x 1" upside-down V-notch (apex at the top), about 2" up the 2x6. This allowed me to slide a piece of angle iron (from an old bed frame) through the notch and use that to bolt the threaded rod into. Because I have a case of slightly crazy garage/shop OCD, I then welded (MIG) two 1/2" long pieces of 90* triangle bar stock inside the protruding ends of the angle-iron. This gave me a flat surface to put a bolt & washer against. I went through all of that effort with the back holes for three main reasons: First, I wanted to curse and swear at myself a bunch for not drilling holes in the angle-iron & bar stock before I welded everything into the table... Second, for safety reasons; I already have enough cuts/scars on the back of my head and I have a feeling I'll be climbing around under there trying to fetch something I drop. For some reason the angle of my foot/shoe seems to be perfect so that when I drop a nut/washer between the bench and my waist, it tends to land squarely on my shoe laces and kick forward all the way to the back of the bench. Third reason is because my parts washer slides perfectly under the bench with about 1/8" to spare and if anything hangs down I would lose that storage space. On the top of the threaded rod sections (on top of the bench) I threaded lock nuts (metal nuts with integrated nylon washer) down about 1/2-3/4". I then capped off the top of the threaded rod by putting acorn nuts on pretty tight with red locktite and let it sit overnight so it could get good and hard. The acorn nuts are solely for safety (so the threads aren't sharp). I then spun the locknuts up to the acorn nuts, leaving almost a thread between the two nuts. My thought was this would give me the ability to finely tighten/loosen the grinder in the future. I was worried about the vibration of the grinder and the metal-on-metal bolting the grinder to the bench. I may be paranoid but this was my grandfather's grinder and I'd like to see my kids use it someday. Because of my worries about cracking the grinder's casting/frame with vibrations I made some changes and took everything back apart. I am using a 6.5" piece of 2x6 as the spacer between the bench and the grinder. I put a piece of 1/16" x 6.5" x 5.5" synthetic cork (auto gasket material) between the 2x6 and the workbench as well as a piece of 1/16" real cork between the grinder's base and the 2x6 riser platform. After that I took two sections of 3" long garden hose and put it between the grinder base and the flat washer on top. It worked out really well to absorb some of the vibrations and to isolate the fasteners from the metal grinder base. Once its been in use for 3-4 months (sometime this spring) I'll take some closed-cell foam (comes in blocks just cut to form) and put it over & around the angle iron below the bench so that nothing bumps or hangs on the bottom rear bolts. At the same time I'll fill in the front bolt holes with the wooden bungs. All of the lower fasteners are nylock nuts with blue locktite. Happy to post pics if anyone is interested.
-
Why do you say that? Yes I am using wire wheels and buffs. This bench I am used to a vice and anvil on the left and the grinder bolted to the right hand corner. Without bolting a stand to the floor, I wouldn't even know how to begin making a stand (1-1.5" thick steel plate??) that is mobile.
-
I have a bench grinder that I'm trying to mount/bolt to the right-front corner of my workbench. The bolt pattern is a 2 1/4" wide x 5" deep/long rectangle. Due to the diameter of the wire wheels, cotton buffers, stones, etc. they don't all fit --or some just barely fit. I'd like to raise the grinder up the width of a 2x4 or 2x6. (Raise it up 1.5".) This thing has been in the family a long time so I want to preserve it as well as use it. What is the best way to raise it up off the deck of the workbench? Should I buy longer bolts and use a spacer or should I bolt the grinder (using counter sunk T-nuts or lag screws) to an 8" section of 2x6 and then bolt that piece of wood to the bench? Previously the grinder was being held in place by 4x bent pieces of coat hanger ware. Do I need any insulation (rubber buffer) between the bench and the wheel? What is the best way to mount one of these things? This is a Century Electric Co. grinding wheel. Thanks.
-
Does anyone know how to rebuild or replace the brushes and bushings/bearings on a Century Electric Co. "Kleen Heet" bench grinder? Not so much "how to" but where to get parts and manuals/torque specs? Thanks.
-
This is a new to us property. It used to be a horse barn with a hay loft which was converted over to a dirt-floor farm shop, and then in the early 1990's a cement slab and beam footings were poured so that iron load-bearing beams could be added. Right now I'm trying to get the place cleaned out and insulated before it snows. The front is 50' wide and it is 65' deep/long. There are two 10' x 20' sliding barn doors on the front. These are your traditional, non-insulated, very unsecure, barn doors. As you are facing the front of the barn there is a 36" x 80" door on the front right side and a door of the same size, on the back left side, next to the stairs to go upstairs. On the back right side of the barn there is a single overhead garage door that is 10' x 20'. The top (second) floor is one giant open space with support beams running lengthwise dividing the space into three long sections. Downstairs ceiling is about 20' tall and upstairs is about 20' at the roofline and 10-12' on the sides. Where can I get ideas to do a design for this space? I don't know what to put upstairs/downstairs and what to arrange where. Is this the type of thing I should be talking to a builder about? Thanks.
-
I am in the process of insulating both a 2-car attached garage and a 50x65 2-story barn/shed that will soon become a big workshop. I would recommend insulating anything you can. In the garage attached to the house, for the walls I chose to use faced R-13 insulation as my price-per-roll was far better than a 16" on center faced insulation with a higher R value (R-15). I then put 4x8 sheets of plywood along the bottom 4' of the walls and 4x8 sheets of pegboard along the top 4' of the walls. I'm about half way complete with the walls and have not addressed the roof yet and we can already notice a difference. I tend to be a little OCD so if it were me (this is not cheap) I'd either buy a fire-retardant primer or use something like a cement backer board on the walls. You may want to consider cement/rock board (check your town's zoning rules for burn time) at least on the walls behind/near the forge. In my old garage I had a smudge pot that would burn pretty much anything, mostly used motor oil. It was great and would easily warm a 25x25 garage without insulation when it was 10* F outside (New England). I built a duct system with 4" flexible metal dryer hose to pipe fresh air from outside into the garage for air circulation, etc. It is a little hard to explain without photos but I turned the side gable vent off the garage into an intake duct using an aluminum turkey oven pan and some 1x2 fairing strips. I then plugged the 4" dryer hose into the pan, ran it about 5' down the roof then wound it down the chimney of the smudge pot. I just left the 4" hose laying on the floor next to the base of the smudge pot. It worked so well I had to tape off almost 1/2 of the 4" pipe to restrict air. By the time the air got down to the floor it felt warm on your hands. Even though hot air rises, it will pull down. If you built a similar intake system and put a CO detector in the space it would probably work well. Usually you can do all of this stuff on the cheap if you have the time to look for deals. Do you have a roofline or ridgeline vent in the garage roof? If you start insulating walls & ceilings/roofs then you may run into ice damming. Start looking into soffit vents and the like. Last thing you want is to be putting on a new roof in the spring. Good luck!
-
Thanks for the replies! I'll edit my profile ASAP with location. I'm in New England if that helps. To answer some questions, some things are sentimental so yes, I will fix them and hope that my grandchildren get to use them someday --those are all hand tools. Most of the others, such as the Hobart, Colemans, Ingersol Rand, etc. are just things that were here when we bought the house. I've tinkered with them enough to somewhat figure out what I've got --but ideally I'd like to figure out what I really need and then either fix/use what I have, or fix and sell (or just sell) what I don't need or will never use. I have a small media blasting cabinet and would love to get a media blasting gun (but that is complicated as you need a dedicated space as well as a LOT of media) however for the price, when I'm restoring a car I can probably hire someone else for much cheaper than acquiring a setup of my own. Anything else I'd run requiring air will be standard pneumatic tools for mostly auto and metal fab applications. I'll probably never operate a jackhammer unless its on the front of a Bobcat (which also came with the house). I've been working on a post in the "design my workspace" section for a couple days now. I need to finish that because it may also answer a lot of questions as to what I'm trying to ultimately do... that four-letter word called WORK keeps getting in the way. Thanks again for the replies.
-
Hello. I was referred to this forum from the Axe, Tomahawk & Hatchet section of BladeForums. I'm generally looking for some info, help, answers and advice with my tools. My parents recently downsized and sold their home. About that same time I bought a house so I took my father's workbench and a TON of tools that were owned by my dad or grandfather. Expecting my dad to take his tools to his grave, whenever a decent quality tool presented itself over the past many years, I had started to build my own set, consisting mostly of metric tools specific to cars. In addition, I recently bought two milk crates of tools at an estate sale (hammer heads, axe, sledge & maul heads, screwdrivers, straight edges & T-squares, scribes & punches, etc.). Because dad kept all the good stuff (vice, anvil, press, taps/dies/extractors, levels, clamps, saws & more) I now have a workbench in a ~50x50 2-story garage/shop that is in need of a few things. I'm not sure if I should try and purchase exact replacements (so all the holes line up) or where/how to look for good quality items that match my needs vs. what he had. Additionally, I now have a few new-to-me items such as two Coleman Powermate 5000 generators that run but the power heads don't make power, an old Hobart welder/generator combo on a trailer (don't think engine runs on that) as well as some giant thing with "Ingersoll Rand 125" on the side --that has a dead battery and flat tires. I'm looking for help to figure out exactly what I have so that depending on the intended use of these items, I can decide if I should keep or sell them as some of them may be orders of magnitude of overkill for what I need/use. Additionally, I'd like to figure out what would be my best option for a new (probably vintage new to me) vice, anvil, drill press, 10-20 ton screw or hydraulic press (for things like wheel bearings and auto parts), band saw and a bunch of other odds & ends. Last and one of the higher items on my to-do list is learning about and doing a refurb on my grandfather's bench grinder, which is an old Century Electric Co. "Kleen-Heet" unit that I know nothing about. I'd like to find out about its age, servicing it, when it will need brushes, etc. I hope this is an appropriate forum to be asking these types of questions. If it isn't, I'd welcome any suggestions of better places to go. Thanks.


