

GoodThing Factory
-
Posts
65 -
Joined
-
Last visited
Content Type
Profiles
Forums
Articles
Gallery
Downloads
Events
Posts posted by GoodThing Factory
-
-
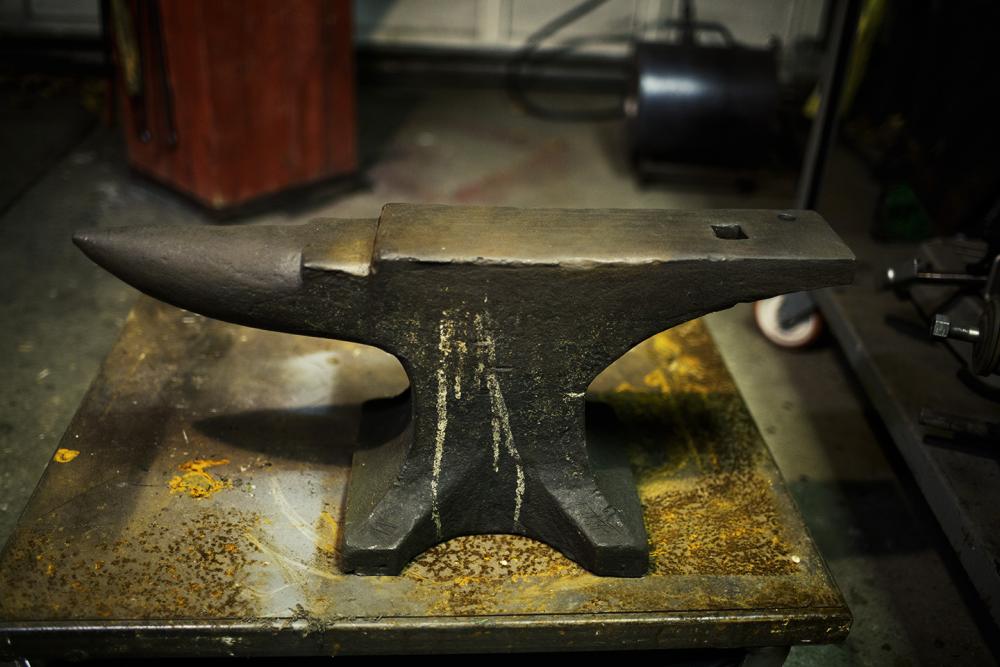
nope, i've also seen some w markings on the back foot but nothing there either.
does seem like this had been sitting for a long time - the rust formed a thick even patina
-
I got lucky and got a great deal on this 176# HB ... I'm curious if there's any way to determine date since just about all the markings have warn off. Any thoughts?
Thanks

-
i'm also very new to smithing having been at it for a little over a year. like artfist said ... I've found the best way to learn is by making the tools you'll need to make other things... tongs, punches, drifts, hardies like cut offs and bottom swages, chisels (he mentioned hammers but i'm in the midst of forging my first 3.5lb rounding hammer and it's a pretty big undertaking esp w/o a power hammer) ... aside from getting a good foundation in the basics you'll end up with a set of tools that would have cost a small fortune to buy.
Going through the ABANA controlled hand forging series has also been useful https://www.abana.org/resources/chf.shtml the link is text lessons but there's plenty of videos on youtube.
have fun
-
looks fantastic - nice work
-
point taken on steel for bottom tools - definitely helps to know what you're working with but 1045 is so xxxx expensive, around me anyway, just bought 3ft of 2" round 1045 for 90 bucks.
and thanks ...i've seen weygers book mentioned a bunch of times so ordered it last week.
-
as always there's tons of conflicting info out there. i'm making a square edge hardy tool mainly for tenons and lap joints from a piece of track. since there's really no way of knowing what the steel is for sure any thoughts on how to heat treat. after the time it's taking to forge a 4" section into what i need it would really suck if the thing cracks from being too brittle.
any suggestions or a link would be great ...thanks
-
nice find ... i'm actually about to sell my smaller version having switched to oxy / ace. the only piece of advice i can give you is related to the compressor ... regardless of the size of the tank make sure it will push the proper scfm, mine required 5.2@ 80psi. i found there's lots of compressors out that that have large tanks with high psi but only push out about 4.5, without adequate pressure you wont get max performance. that said, you're already cutting rail track so you prob have it figured out.
off topic, but since i'm about to list mine ... if you dont mind and its not impolite to ask ... how much did you pay for yours?
and if there's anyone near my area in the market (westchester county, ny) i'm selling a plasma cutter ... hypermax 30 in good condition - doesn't look out of the box works well.
-
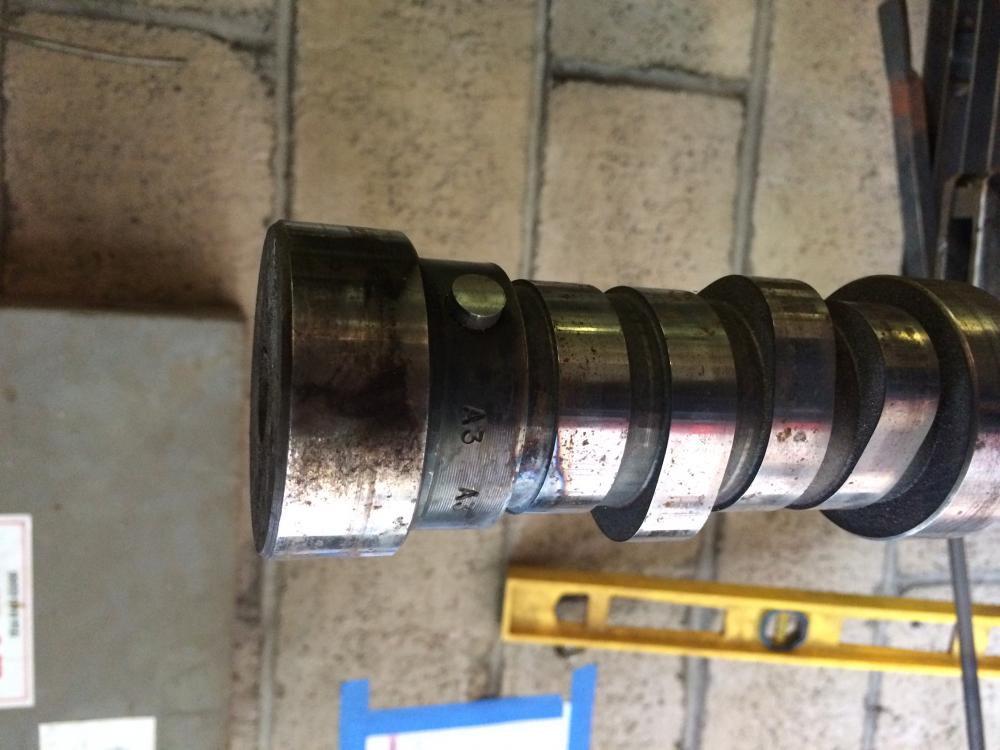
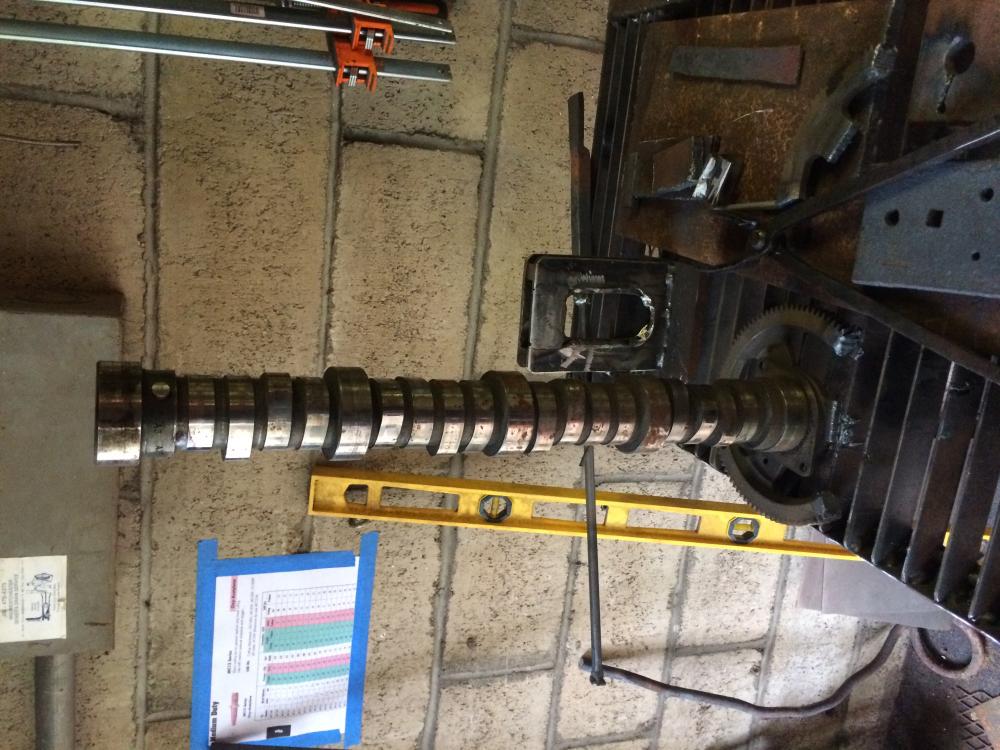
picked up a camshaft a while back and its stamped "A3" - anyone know if that means it's A3 steel? a couple of pics for reference ... thanks
-
thanks, yea, that's what i thought. i already have propane tanks for my forge so it probably make sense.
-
I'm new to using a oxy fuel . I bought a MIller Smith medium duty kit with a 120lb oxy and 80lb Ace tank. based on the 1/7 rule I'm good cutting with smith tips for up to 5" which is more than I'll prob ever need. But I'd really like to use the heating attachments which according to Smith even the smallest draws 28 SCFH meaning i'd need 200lb ace tank to use even the smallest tip - anything bigger and you're manifolding tanks which is expensive and a bit more than i bargained for.
question - what happens if were to draw gas at more than the recommended rate - is it dangerous?
-
I've had a lincoln 140c for maybe 10 years and weld 3/8 & 1/2" plate to use for jigs which take a pretty good beating all the time - if you prep the joint and give it a 2nd pass the machine will perform well above spec.
i think the kit cost about 800 back then. i think you'd be pressed to find the quality for less money
-
On 7/6/2016 at 9:44 PM, Frosty said:
Oh NO, not another batch of those ball bearings Fred MacMurray invented in the '60s! You have to use a different method to perform the "REALLYbound" test using a Flubbearing ball (Yes this a precision test so we distinguish between a "Flubbearing ball" a single ball from a bearing assembly and "ball Flubberings." the friction negating assembly)
To perform a REALLY bounding test. Plant your feet a little more than shoulder width apart on either side of the anvil maintain a straight back bend at the waist until you can sight between your thumb and finger directly down to the anvil's surface. Grasp one moderate diameter, NOT larger than0.625" dia. Flubbearing ball between thumb and forefiinger held NO more than 4" above the anvil's face. Slowly tilt your head back until you can just see the Flubbearing ball past your lip and breathing deeply through your nose release the Flubbearing ball.
Carefully count each bounce until the Flubbearing ball lodges in your nostril. The fewer the REALLYbounds the higher the quality the anvil. 1, REALLYbound and BUY IT, it's OBVIOUSLY a Soderfors! 2, REALLYbounds and it's a high quality anvil well worth owning. 3 REALLYbounds is a moderate quality anvil but still useful especially for beginners or those on a budget. 4 or more REALLYbounds and it's an ASHOO (Anvil Shaped Hardly Ownable Object) Blow it off, wipe your hands of it immediately.
Seriously it's NOT bouncing 120%. Use a ruler and drop from less height. A rebound pushing more than 95% LOOKS like a LOT more if you drop it from more than a few inches.
Frosty The Lucky.
huh, i thought you're supposed to bounce the anvil off the ball bearing?
-
i wear my oddness as a badge of honor ...
-
in addition to having an anvil and a few hammers i'm also and primarily an executive recruiter (headhunter) - have been for more than 25 years. i'm not going to give you an opinion - mine is no more valid than the ones shared above - but i have a story ...
about 15 years ago i got a call from a young man who was probably no more than 18 looking for a job as a software developer for an internet company. he actually had some experience with what at the time was a "hot" internet company - he was one of these kids who started programming in middle school. i listened to him for a few minutes ... to be candid, he was obnoxious, had an incredibly high opinion of himself and virtually no self - awareness. When he stopped talking I asked if he wanted my opinion - he said sure. i told him to go back to school, that while he may find another job with an interesting company in the short term he needed to think about five years from now when he'd be some guy with a bit of experience and no degree who had worked for a bunch of failed companies. going to college was the prudent choice and this idea of finding some company where he'd make life changing money was a fantasy with the same probability as winning the lottery. we hung up and i didn't give the call a second thought - while it was a unique conversation in some ways, i talk to 1000's of people a year so this one just faded into the background.
by now you know there's an interesting end to the story ... which, of course, there is. turned out that kid who i told to be "smart" and go back to college was one of the first 10 people hired at facebook ... he's worth billions. yes, billions with a B.
i'm not suggesting you'll become the facebook of blacksmithing or that you give up your day job but there's a lesson in there. this young man was convinced he was going to be successful and he was passionate about what he wanted to do - all the logic in the work wasn't going to deter him. if there's anything i've learned in my years as a recruiter it's that successful people are doing what they love. no, doing what you love doesn't guarantee success but i can't think of a successful person who isn't passionate about what they do.
if you know in your heart smithing is it for you then you already know you're off to sweden. that said, it's a tough road and a big risk so if you've got some doubts maybe best not push all your chips in the pot on one hand.
-
8 minutes ago, Frosty said:
Truth is all you need is dirt a few rocks and a sack of some sort to start forging. If you have a prevailing wind you don't need the sack. Scoop out a trench, arrange rocks to make a tunnel for the air blast, seal it with dirt and attach your bellows or wind funnel.
If you have a reasonably steep slope and flat stones you can make a hill furnace and not need bellows or breeze to provide draft. I really like a hill furnace for a field expedient forge, you can feed wood in the top and let it cook to charcoal before you rake it to the forge (hearth?) zone.
If you luck into clay that will vitrify you can make all your "necessary" pieces from clay and fire it. Twigs bound in a cylindrical bundle and packed in clay makes a perfect pipe mold. Making a cylinder for a "feather" bellows is a little trickier but not really more difficult.
I don't know if I have the link but there's a great series of videos from a young man in England who builds and stays in all kinds of structures, makes tools and such entirely with what's there. All he takes with him besides the cameras is his pants.
Frosty The Lucky.
i would actually love to do something like and years ago when i first got the thought of biulding a forge the only type you'd see on the net were in ground which for me isnt possible since i'm in a pretty densely populated suburb just north of nyc. as it is i'm a bit of oddity to my neighbors, if i built a fire pit in the backyard i think the cops would show up in about 10 minutes
7 minutes ago, Charles R. Stevens said:Look at Glenn's 55 side blast or my Box of dirt post, another guy built one and had sand for his...
I haven't been able to post links for a week or two, and today is mule castration, so I will get back with you
thanks - will do
-
12 hours ago, Frosty said:
The wash tub forge was designed by a bladesmith for making blades. He keeps his minimized to a really short section of the air pipe until it's time to heat treat. I'm not sure of his name but Tim Lively keeps coming to mind. Someone here will know and chime in I'm sure.
A simple side blast is easier to build and more useful for 99% of most blacksmithing.
Frosty The Lucky.
got it, thanks - should have listened to you a year ago when you warned me off a bottom blast w 2" black for charcoal
-
6 minutes ago, Charles R. Stevens said:
I prefer a classical side blast, one can remodel the fire hole with the use of a manifold to make a long trench or a larger fire ball the side blast can be put to gether for less than $50 if you buy all new material (including blower), much less if you scrounge. No need to drill the pipe, ect.
thanks charles - any chance you can point me to a picture of classical side blast. i've seen lots of washtubs but not so many of what you describe as "classical" - appreciate it if you have a minute,
-
thanks john
-
the first forge I made was a bottom blast brake drum ... 2" black pipe, truck brake drum with a hair dryer. to make a long story short there's lots of things I want to improve on it now that i know just a little something but I'm thinking I'd be better off just starting from scratch. my understanding is a side blast is better for charcoal ... this could be one of those stupid questions but here goes ...
having looked at "tub" forges the pipe comes in from the side but the holes are positioned so the air still blows up into the fire pot- is this considered "side blast" or does side blast mean the air from the blower is coming in horizontally from the side of the fire pot?
sorry, in advance if this topic has been covered in the past ... there was one thread that looked like it might have the answer but the image links were broken.
appreciate the help.
-
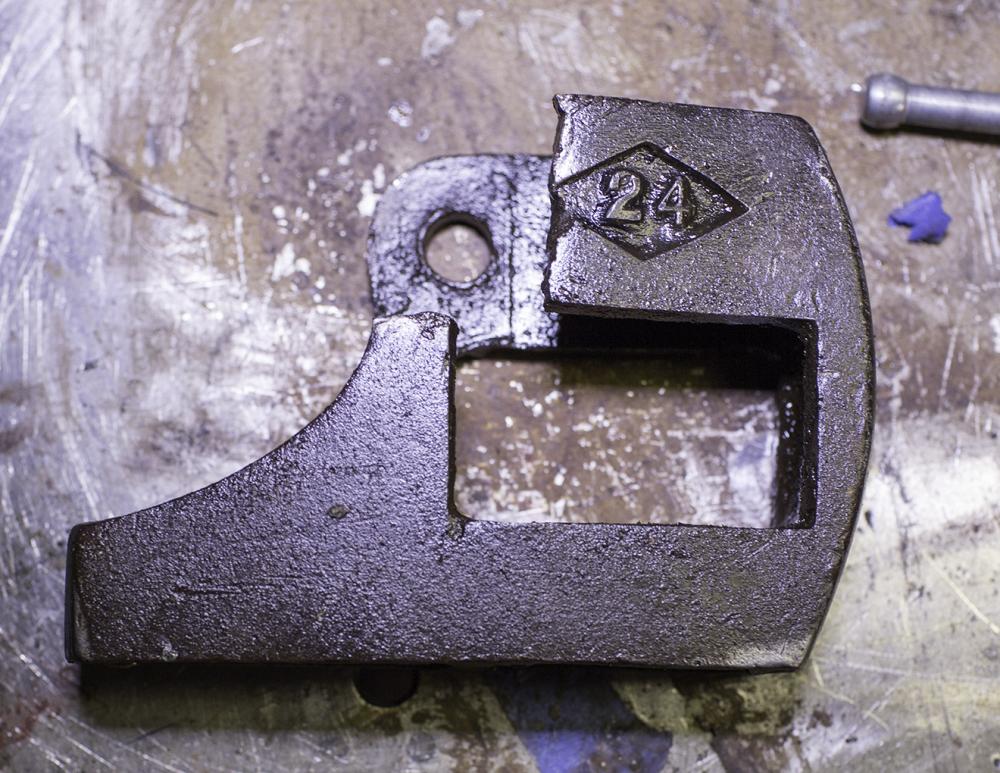
well ... for those of you who like to know the end of a story ... turns out whatever this wrench was made from is the hardest metal i've run into - when i tried to drill into it i barely made a scratch and i'm using a floor drill press with a decent set of chicago latrobe bits which easily cuts through spring steel.
so after all of your helpful comments i ended having to spot weld the spring onto the neck ... let it cool and then tempered the welded spot. so far so good but who knows it could def crack after a some use.
that said, i paid $2 for a nice 24" wrench that i'll def get some use out of and i learned about drive bits.
thanks all
-
15 hours ago, Jim Coke said:
Greetings Good Thing,
Look up drive rivet on EB or the net . I am sure it will solve your problem.
Forge on and make beautiful things
Jim
8 hours ago, forgemaster said:As JC said drive rivets, or tap the hole and screw in a bolt tight with some thread locker on it. Once the thread locker has gone off, cut the bolt off with only about 1/4 to 5/16" left sticking out, then cold rivet the bolt left sticking out onto the spring to hold it.
38 minutes ago, BIGGUNDOCTOR said:JC has it. Drive rivets have a series of helical ribs on the outside that bite into the walls of the hole as they are driven in. Some nails are also made in a similar manner, usually used in pallets. The helical ribs besides causing a swaged fit also make it so the rivet cannot simply pull straight out, it has to twist making it that much more difficult to come out.
A small screw would also be a way to go if you have a tap, and proper size tap drill.
thanks guys ... sounds like drive rivets is the way to go. i've got the right size tap and die so should be pretty easy to make something from a small piece of round stock that'll do the trick. much appreciated.
-
1 hour ago, Frosty said:
There's too much meat to spot weld that. Is there a clear hole? If so there are a couple possibilities, Heat up the wrench to 400-500f and drive a length of rivet stock SLIGHTLY larger in dia. into the hole and allow it to cool. This is called an "interference fit." Fit the spring and saw off the pin with 1 1/2x it's diameter above the spring. Sawn is better than snipping, the straighter the end the nicer the rivet head will turn out when peined. Once cut, pein it cold or heat it with a SMALL torch flame and pein it hot.
If you can't do an interference fit on the pin silver solder or braze it in. Just remember if you do ANY hot techniques on the pin you must let it cool or it'll run the temper out of the spring and turn it into a flappy thing.
Frosty The Lucky.
thanks ... there's no hole now, i did dril about 1/4 in hole before welding since i figured the trying to spot weld onto the surface of the wrench was just going to incinerate the spring. the weld help fine but the spring was about as flexible as glass at least near the weld.
so the concept is heat the wrench so it expands a bit, set the rivet and then when the wrench cools the hole shrinks to secure the rivet?
any reason i cant just drill a new hole to place the rivet? and, i assume the rivet is cold when i set into the wrench?
-
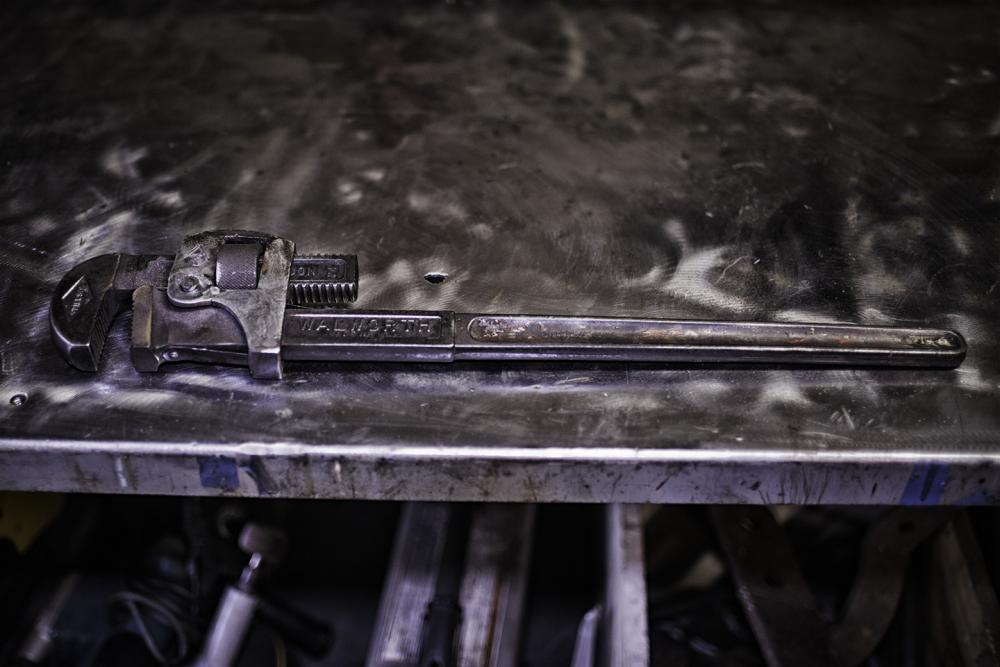
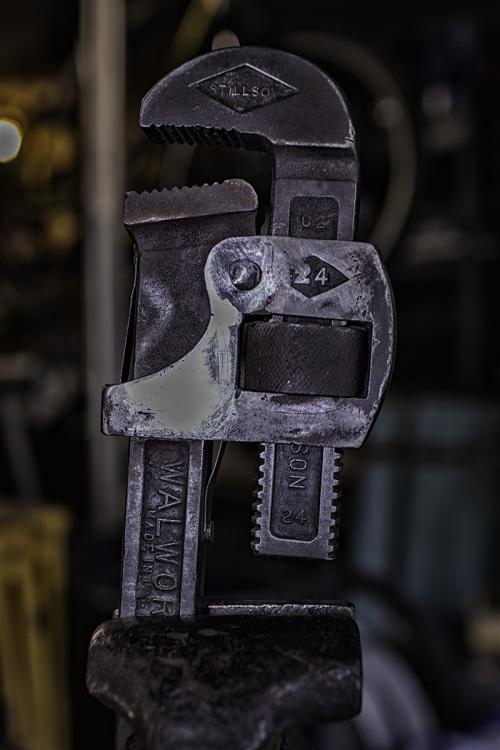
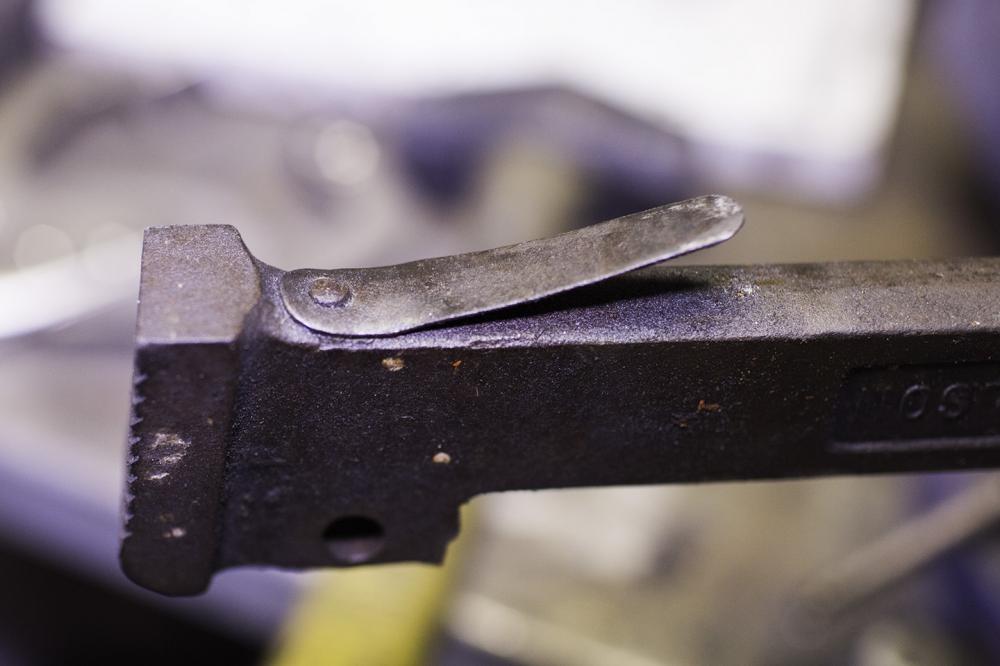
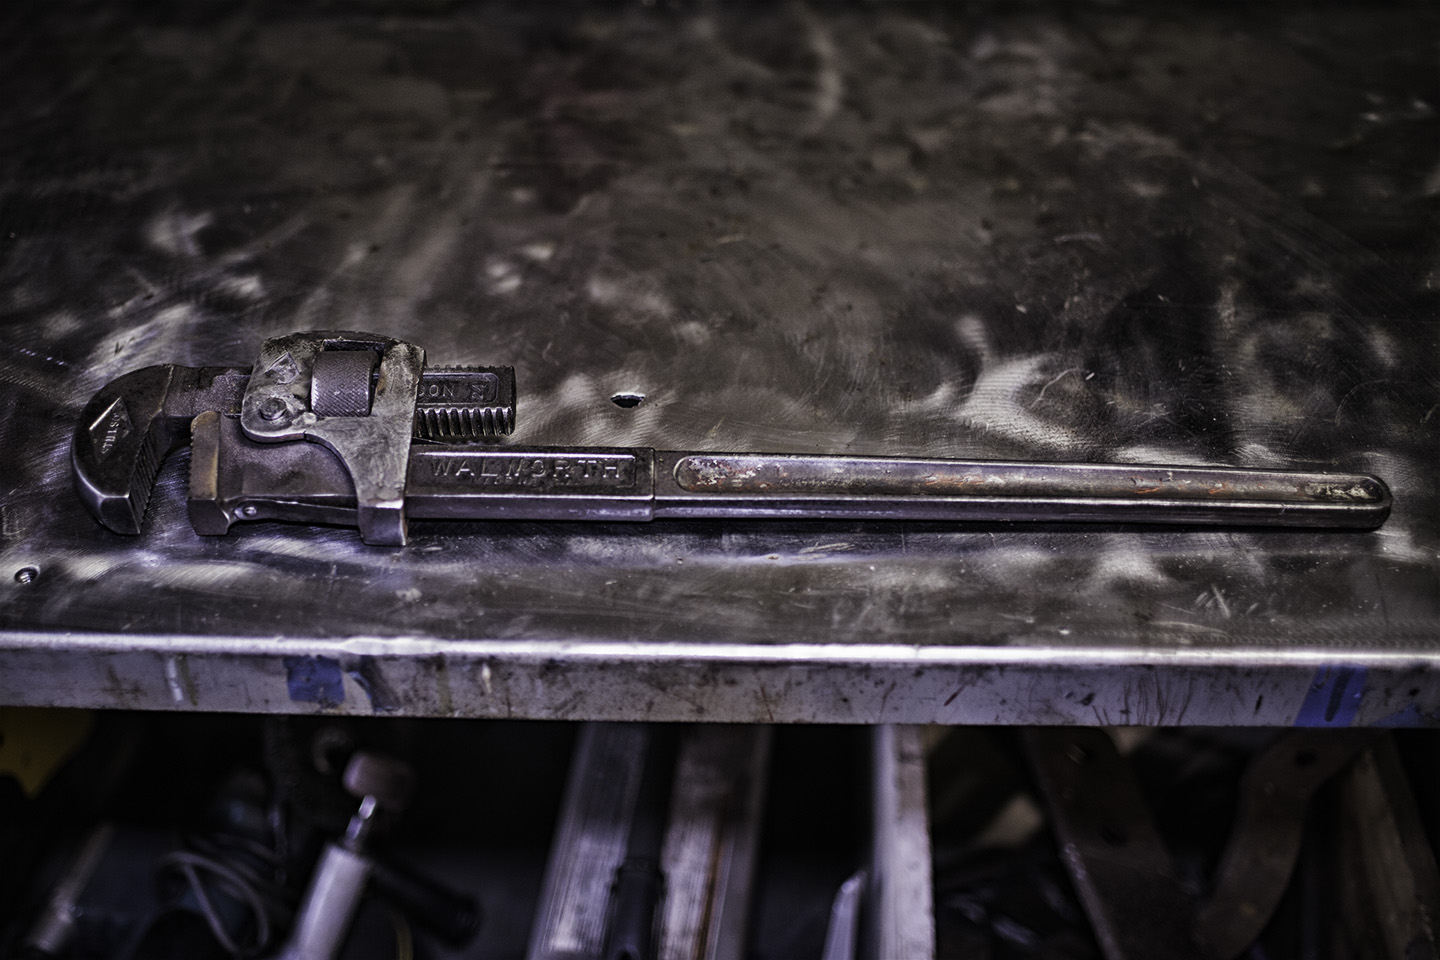
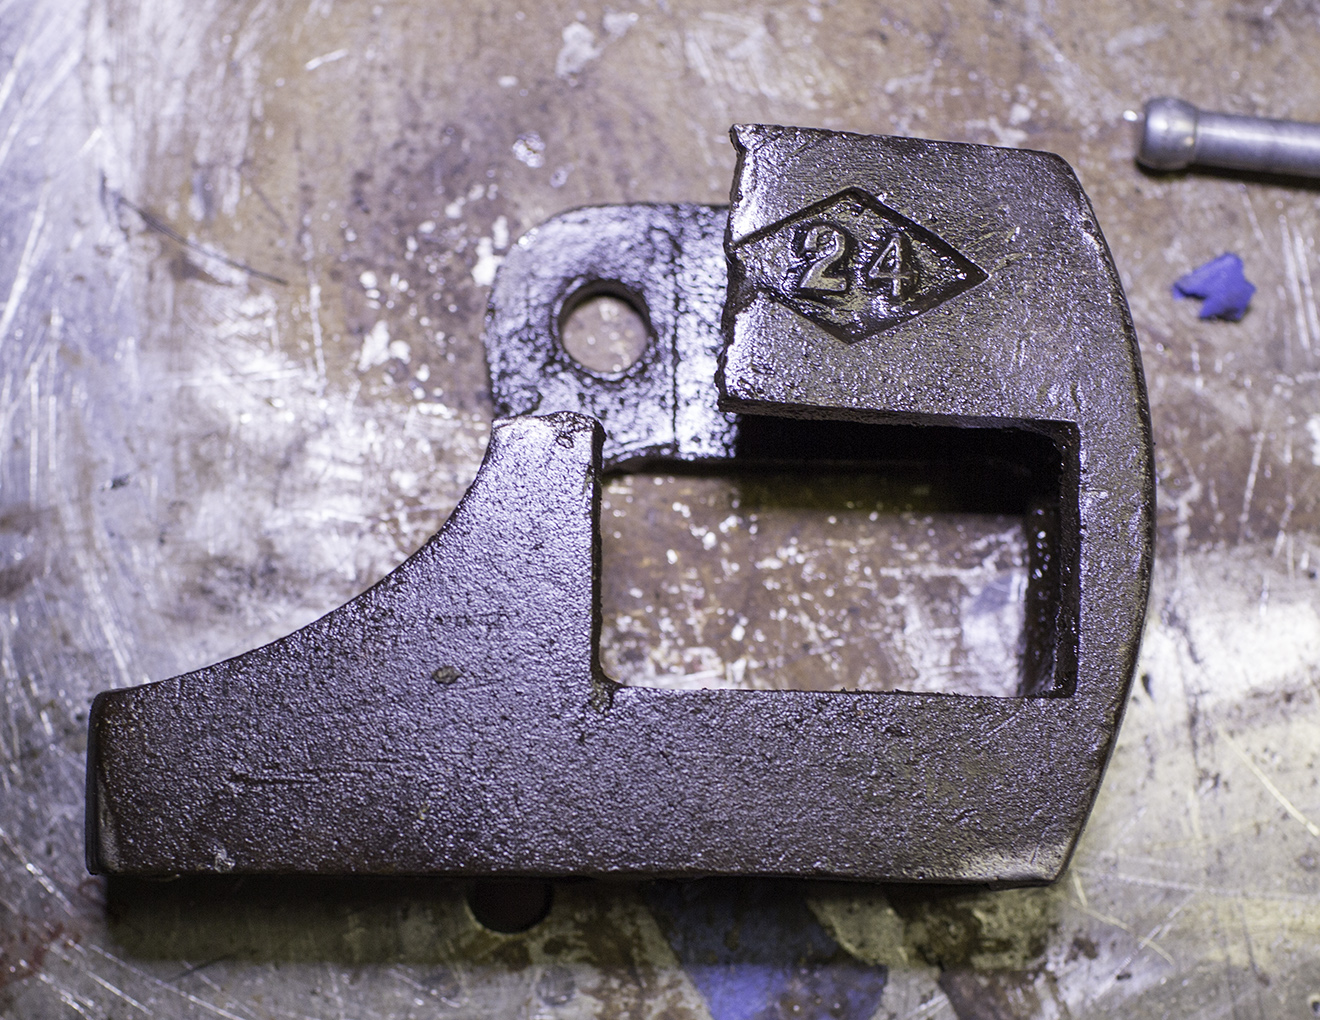
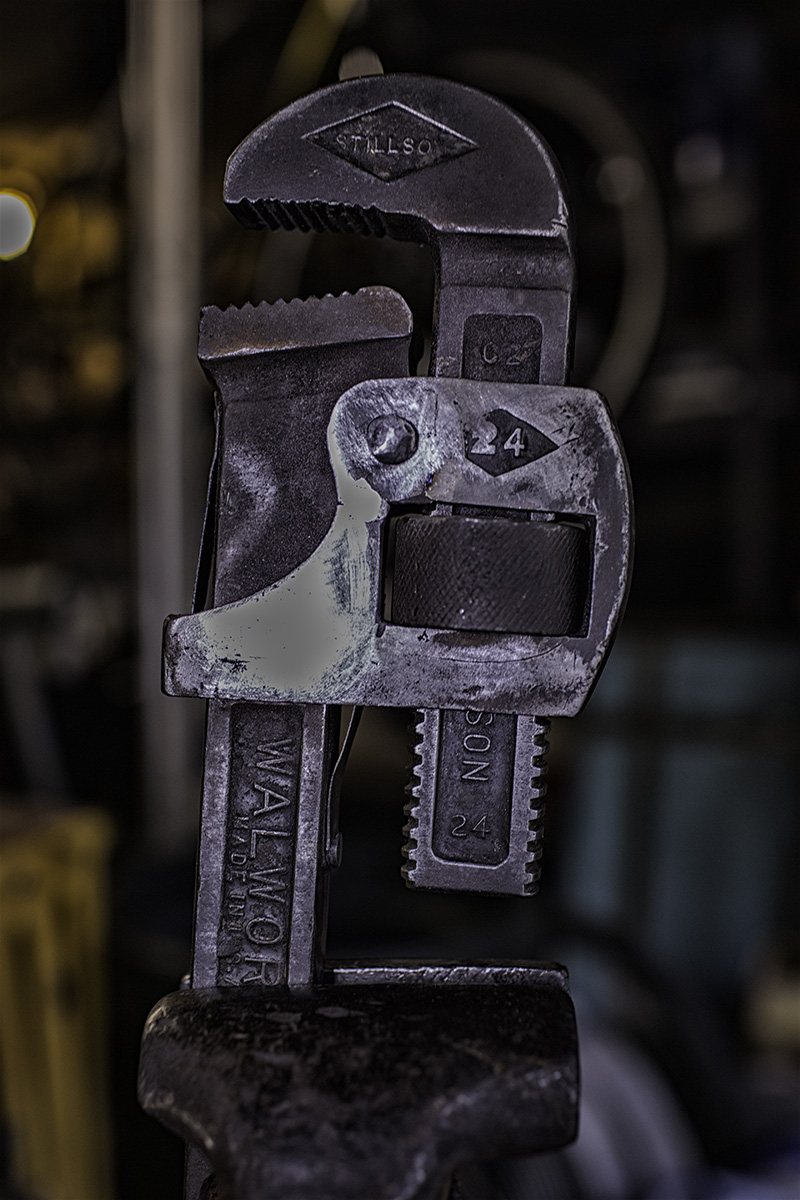
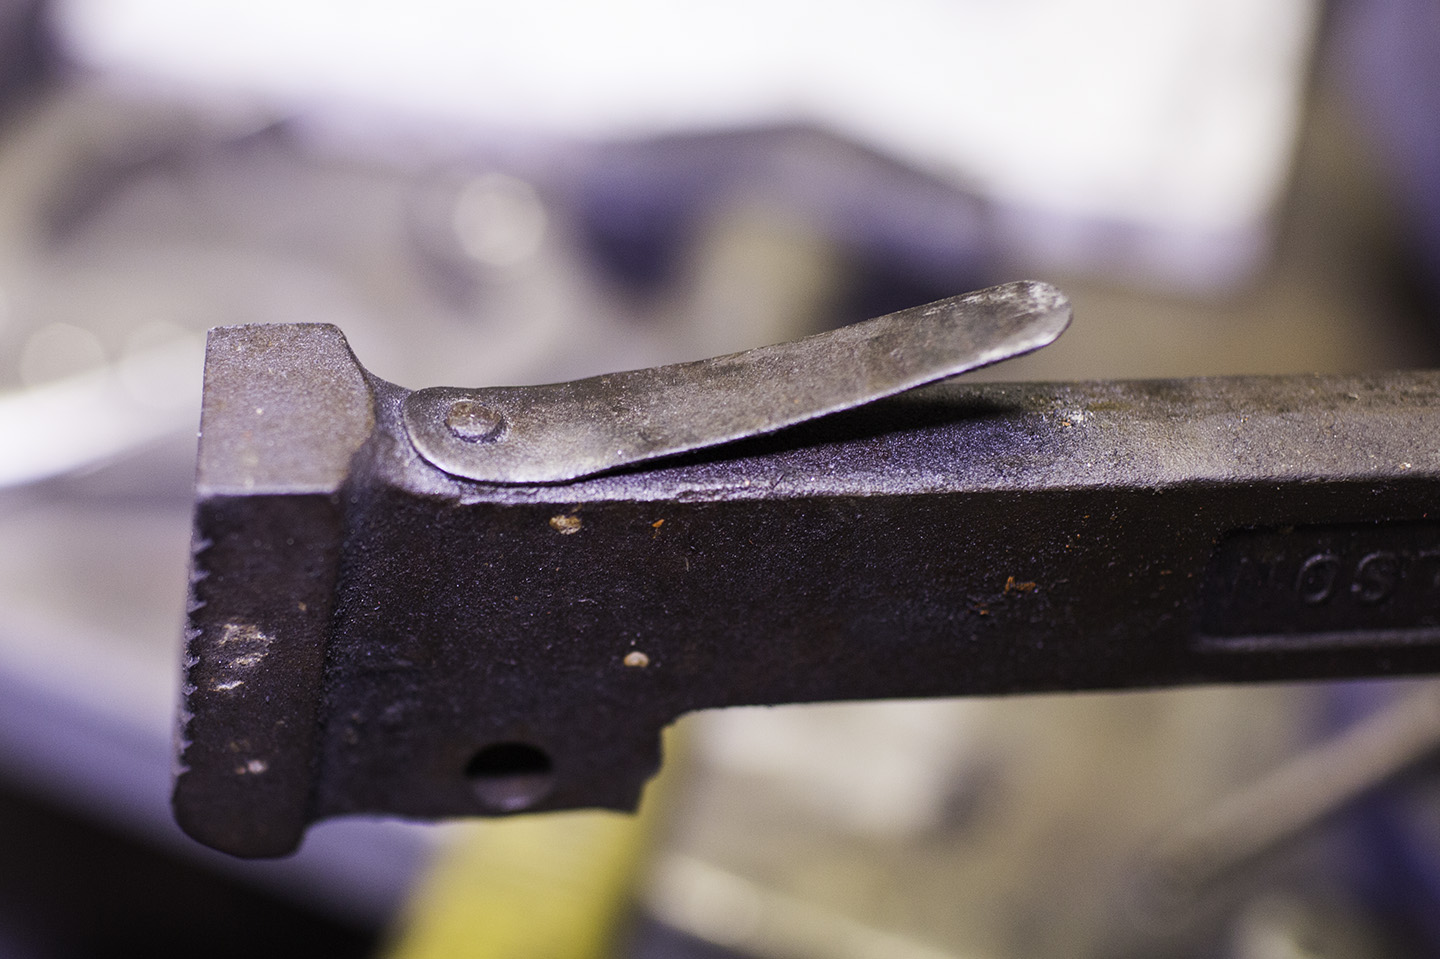
I picked up an old Walworth 24" wrench that needs some rehab - it's a great piece that cost me just about nothing so worth some time. One of the tension springs is missing I've forged and tempered a piece of spring steel to the right size but I can't figure out how to attach to the neck of the wrench - looks like the intact original side was riveted but I'm at a loss as to how to place a rivet that will hold in solid steel. Seems that w nothing to grab onto in the hole the rivet will fall out.
I've tried spot welding but 2 tries have cracked the spring since the heat of the weld loses the temper and cracks right above the weld after just a bit of flexing.
I'm sure there's a pretty simple solution but havent been able to find an answer
Image of the intact side below.
Thanks
-
19 hours ago, ThomasPowers said:
Old time tools were often "steeled" on cutting edges; example axes and chisels and adzes And of course anvils were made with a high carbon face and wrought iron body back when, Jail cell bars were often hardened on the outside to prevent cutting and left soft inside to prevent breaking, Large bearing races were case hardened....
19 hours ago, John B said:I assume this is a cutting disc machine you are using as opposed to a cut off saw
You may be using too much pressure on the workpiece, let the tool do the work, or as Dwarf mentions the edge will get shiny, this is due to excess friction and overloading the wheels matrix causing the "bluntness" which rubs not cuts, be patient, maybe ease off a little and if it is a hand held machine, try a little sawing type motion.
A similar phenomon also occurs in static mounted machines when discs are worn, and optimum cutting angles with disc's periphery become distorted on approach and during cutting.
I have come across inclusions too in recycled metals, the worst example seemed to be a carbide tip in an otherwise piece of mild steel.
thanks for the ideas ... i suspect, based on feedback and an image search, these pieces were used as counterweights not subject to any stress so likely recycled and no one really cared what composition of the metal.
i've made a couple of bottom fullers from them and so far so good but i guess forging a hammer from this stuff isnt a good idea.

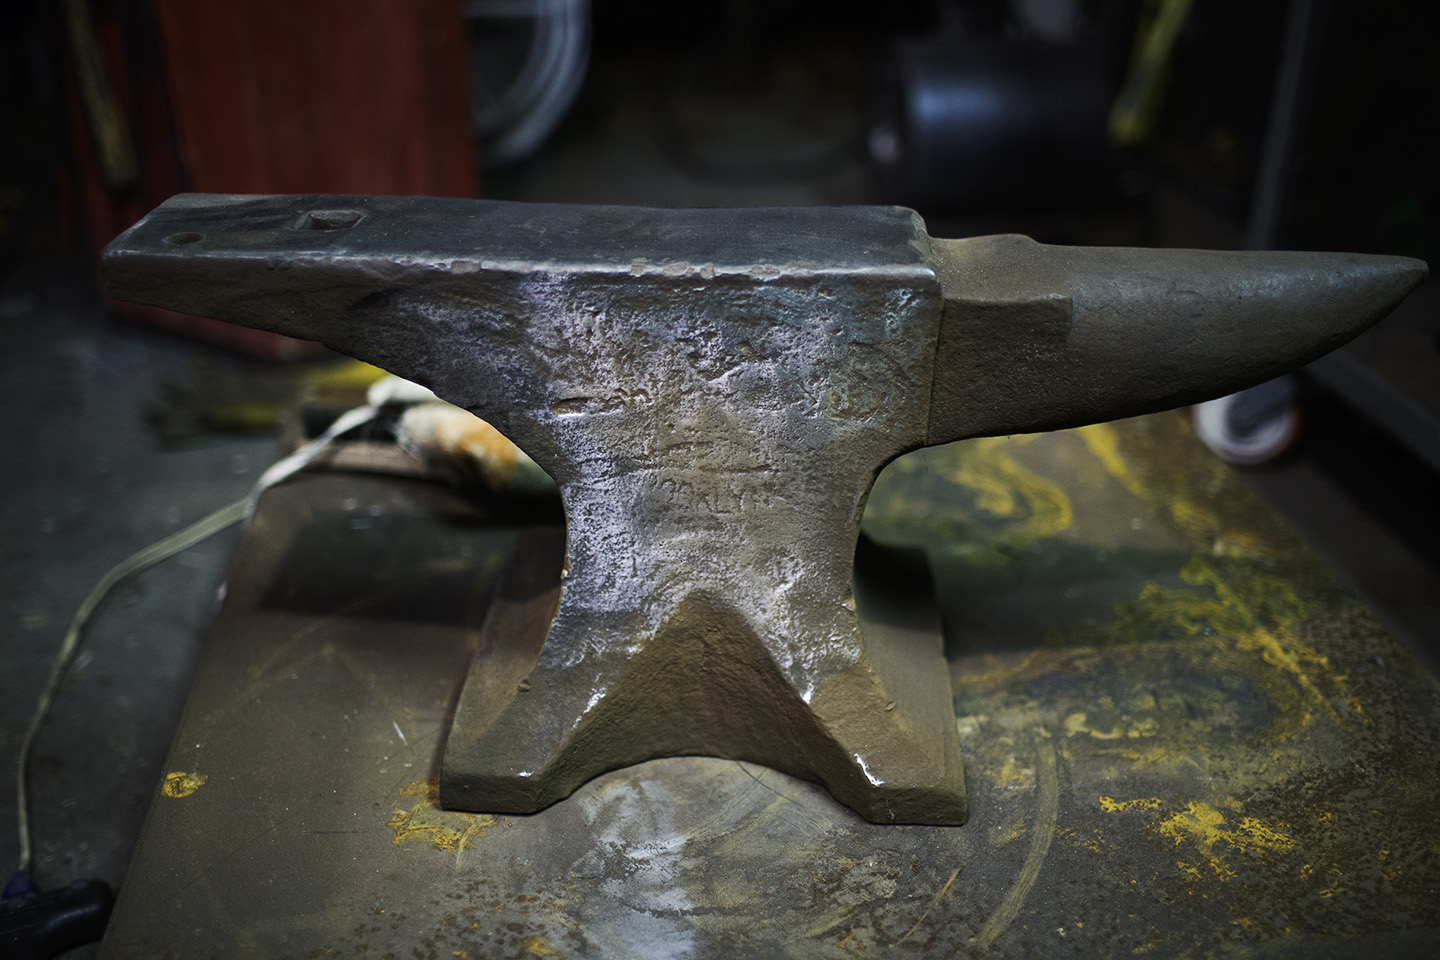


Hay Budden Date?
in Anvils, Swage Blocks, and Mandrels
Posted
400 ... not the best deal on the planet but a fair price. i found it on bidspotter - it's an auction site for commercial industrial liquidations. anvils rarely come up for auction it's mostly heavy industrial equipment so you're not competing w a lot of people like you are on ebay. i just set up an alert for anvils and one close to me came up so i went for it. that said, removal / shipping can be really expensive - they'll get you for rigging fees and commercial shipping which adds up fast. and once you win the auction that's that ... if shipping adds another 500 it's your problem so research before you bid.
thanks for mentioning.