hanzosbm
Members
-
Joined
-
Last visited
Everything posted by hanzosbm
-
Thank you, I really appreciate the insight. Refflinghaus is definitely at the top of my list, I'm just trying to get an idea of what else is out there. I've heard complaints that Refflinghaus anvils can be loud. What were your thoughts?
-
I know a lot of it boils down to preference, but if money was no object, what NEW anvil would you consider the best?
-
Thank you very much! I think I understand now. So, besides simply the carbon content, it sounds like one of the defining aspects of wrought iron are the silicates, which, if I'm understanding correctly, would essentially be considered an impurity by today's steel standards. And, because of those silicates, the behavior and therefore methods of working wrought iron is different. Assuming that I've understood it correctly (albeit on a very novice level), I appreciate that!
-
Hi Thomas, could you clarify this a bit? Personally, when I hear wrought iron, I think of very low amounts of carbon (like, less than .1%). Obviously, Europeans were working with much higher carbon content ferrous metals (what I could call steel) during the middle ages and before. So, I'm thinking that there is more to the term 'wrought iron' than I am aware of and I'd like to get my nomenclature right.
-
I'm a little confused by this. Certainly, annealing would be ideal. I just honestly don't know how I'd go about keeping the material at those temps for hours on end in a coal forge, at least not without it turning into something akin to watching paint drying. Also, you mentioned that when the working end reaches the color you want, you put it in a can of water to maintain the temper. I'm assuming that this is after the quench, so you're basically halting the temper in the working end, but allowing the struck end to continue the temper? And you mention it as the poor man's normalizing, but if this is being done AFTER the quench, and basically during the temper, I'm confused how this would normalize it. Sorry, I'm still somewhat new to this.
-
Wow, looks like a lot of activity on this. To settle one issue, I am a student at the museum, certainly not an instructor. Regarding quenching oils, I would 100% agree that something purpose built for the task would be ideal. The reason I originally brought up the idea of vegetable oil was for a few reasons. First, at the moment, the only items I need to heat treat are the occasional tool, so, assuming the darn things quit breaking, it'd probably only need 3 or 4 over the next year or so. Sourcing and spending the money for proper heat treating oil, which I assume would come in pretty large quantities, and storing it in my one cramped 1 bedroom apartment with a wife would probably wouldn't be thrilled about it, just to see if that is in fact the problem I'm having with the tools I have wasn't the ideal scenario. That doesn't mean that it's not the 'right' way to do it; it is, but my hope was not to go 'all out' right away if it wasn't necessary. I looked up the cost of quenching oils, and, yeah...they ain't cheap. Granted, they'll last a long time, but for the few things I'm doing right now, it would be cheaper to just buy the tools. I'm sure the day will come when I'll be able to have my own shop and at that time, I'll spend the money, but for now, vegetable oil is about as far as I'm willing to go. On that note, the method we were taught (in water) was to just quench the tip and then allow the body of the tool to temper to the desired level with the residual heat. Would it be possible to just quench the tip, leave the tip in the oil while the body air cooled, then pop the whole thing in the oven to temper the tip? I was having a hard time getting a good look at the temper colors in the tip and then constantly going back in the quench to keep it from over tempering, so I was thinking the method I described might be easier, but I didn't know if that would cause too much stress right at the point where tool transitioned from being oil quenched and air quenched.
-
That's another good idea. I'll check with the museum first to make sure there's not a reason they don't already have it, but after that, I'd be happy to donate it.
-
Okay, that's good to know about some particular alloys. I've certainly been guilty of burning my steel before, (I quickly learned that the crank on the blower shall not be in motion unless I am actively watching the fire. Chatting and cranking do not mix) so I'm at least familiar with the cottage cheese/sparking in the fire you're talking about. My concern was about forging below that temp, but above critical, which it sounds like can be an issue with some alloys. Of course, not knowing exactly what these springs are made of means I can't say for certain. I guess to be safe, I could just forge them cooler. It'll mean more whacky whacky, but taking 10 heats for a tool that'll last a lifetime is better than 3 heats each time for a tool that has to be remade every few months.
-
Well, transferring a gallon of oil with me to the forge isn't very practical, but you bring up a good point about a BBQ grill. I recently moved, and even though the apartment complex says no grills on the balcony...I do it anyway. That being said, your point about flare ups are a concern while standing on a wooden balcony 4 feet from the building. I'll have to give that some thought. That's what the instructor mentioned, but honestly, I wasn't sure if he was just saying that because they only have water or if he was being honest. I guess I can keep trying. In a perfect world, I'd have my own forge, get new stock to make the tools from, and use the exact quenchant, but that's not the situation. It's just frustrating to spend the time to forge it and go through the whole heat treating cycle only to have it break after a few uses. Hmmm, okay, that's good to know. I can definitely get a magnet to test, but as a follow on question; is too hot an issue only during the quench? In other words, if I'm forging it to shape under very hot conditions, is that also a concern? I generally try to forge as hot as possible (without burning the material of course) to make the work easier, but if it's causing problems, I can back off and apply more elbow grease.
-
I actually prefer that aspect as it gives my hammer arm a rest. I essentially do everything with my left arm EXCEPT swing a hammer, which includes cranking the blower and manipulating the stock. Not only does it help me preserve some strength, it helps to even out the workload so I don't end up looking like Popeye on one side and Olive Oyl on the other.
-
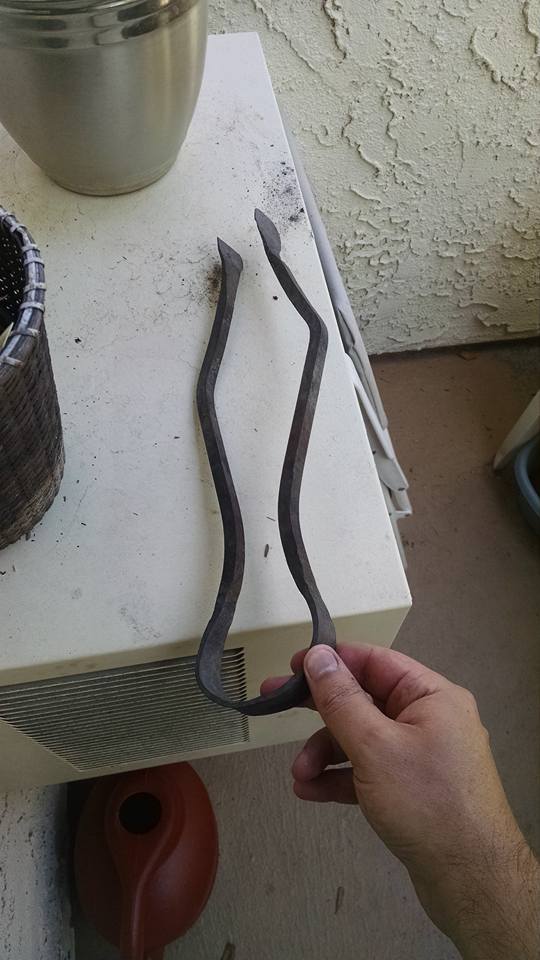
I do all of my forging at a museum that teaches large numbers of students at a time. One of the classes was on tool making (punches, chisels, whatever, it was basically teaching heat treating) and at the time, I made a chisel. After a few days of use, it broke about halfway up the blade. Okay, so, I'll make another. Same thing happened. The material used was old coil springs, and the method was very basic; straighten it, taper it, shape it, go through a single normalizing cycle, quench the tip in water, allow the heat in the handle to temper the tip. I think this method was being taught as the most basic way of going through the process, and many other students used this method and seem to have tools that survived (although, I didn't go around and ask them all). The school doesn't have quenching oil, and the coils, while spring steel, are of an unknown alloy. My thinking is that water is too fast of a quenching agent and it's causing a stress crack. So, first of all, does my theory sound likely? Secondly, since the school doesn't have quenching oil, and I don't have the ability to get the tool to a critical heat at home, I was thinking of bringing a small jar of canola oil with me to the forge. Obviously, I'm guessing a bit at what the right type of quenching medium to use is, and canola is not ideal, but I'm getting tired of remaking tools after a few days of use and I'd rather not have to buy them all.
-
Cross peen hammer, set of flat tongs, pair of wolf jaw tongs, wire brush, punch, chisel, soapstone, metal ruler, file, rasp, welding gloves, apron, eye pro, lighter.
-
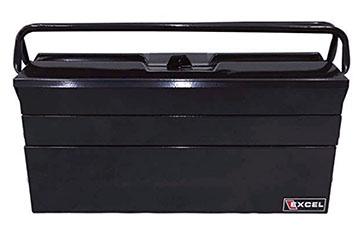
I really like the kitty litter bucket idea! We go through them fairly often, so even if I burned a hole in one, I could replace it. And for the record, when I burn my current gym bag, it's not from putting hot tools in it. There's no place to set my bag except on the ground, and there's very little space, so it usually ends up near the base of the anvil or post vice to keep from tripping over it. And, well, as we all know, sometimes the hot stuff doesn't always stay in our tongs. I also didn't realize that tool box was 12lbs empty. That really stinks. I liked the idea of being able to separate things, but I don't know if that'll be possible. I'm starting to think that I need to focus on some sort of smaller boxes to keep the more fragile things in, like soap stone and calipers. So, while I'd still have to dig through everything to get what I need, at least it'll keep it safe(ish).
-
I just came across this, and I'm thinking it might fit the bill. I'll have to wait till I get home to measure my tongs and such, but, hammer(s) and tongs in the bottom, files, rasps, etc in the upper portions. Plus, it's made of metal, so hopefully I won't have to keep buying $10 gym bags at WallyWorld every time something gets too hot near my tools.
-
You've got that right. The instructor tends to pull up with his pick up and 5 or 6 construction buckets in the back filled with tools. I definitely look forward to the day when I can build my own forge and begin hording tools. The good news is, the school gives a list for each project and which tools are needed in advance, so I can leave the rest at home. The bad news is, even for a single project, the number of tools can be considerable. The apron idea isn't a bad one, I hadn't considered that. Its a little more work to remember to wrap them up carefully and watch out for them when I unwrap them, but it's a workable solution. I was also considering the tool box I mentioned above, but simply carrying my hammer and tongs in hand. Right now, that would be doable (one hammer, two sets of tongs) but I have a feeling a second hammer is in my near future.
-
Hello all, It's been quite awhile since I've posted here, primarily because I had moved for awhile without access to a forge, but I am back to smithing again. The school I go to meets once a month for a particular project. You walk in, grab the first station (forge, anvil, quench tank, post vice) you see, and get to work. Over the years, I've slowly been adding to my tools (Obviously a hammer, 2 sets of tongs, a rasp, a file, soap stone, ruler, hold down tool, hot cut, center punch, wire brush, calipers, borax, lighter). Previously, I had been using an old gym bag to transport everything, but as my collection of tools grows in number, and some of them (soap stone and calipers) are somewhat delicate, I'm realizing I need a better method. I thought about a 5 gallon bucket with a tool organizer, but I'm not sure if that would prevent my calipers from being damaged. I thought about a portable metal tool box as the drawers would easily hold the more delicate items, but not my hammer(s) and tongs. I'm trying to keep it to one thing to carry in with me if possible. I wasn't sure if others here had a similar predicament and/or might be able to offer some suggestions.
-
A friend has asked me to forge a small axe for him. I blacksmith as a hobby and didn't really want to buy a large amount of stock for the one project. However, I have a lot of 3/8" square stock, so I was thinking of just stacking 4 or 5 of them and forge welding them to make my stock. I don't have any need for a pattern, but IF I'm going to get one, I might as well put in the effort to make it interesting. I know the different layers won't oxidize at different rates, but will the welds themselves show up?
-
Great info, thank you. I honestly didn't think quality was an issue with these, so I'm glad I asked.
-
I like that idea even more. Free, and I get to hit a piece of metal with another piece of metal while it's resting on a big piece of metal. Sounds like fun!
-
I'm very new to blacksmithing and am fortunate enough to be able to do all my forging at a local museum. However, my time there is limited so I make use of it by forging. My intention is to do all finishing work at home. So, while I know that a machinist vice won't hold up to hammer blows, all I need it for is to hold material while I file it. With that being said, is there any benefit to getting something good versus something from harbor freight? What features should I be looking for? Size seems obvious, but anything else? Because of how new I am, I want to keep it relatively general. (In other words, I'm not looking for a vice specifically made for bladesmiths since I don't know if I'll be interested in that) Thanks in advance.
-
Agreed Frosty, but at the time, the only tools available to me were that one piece of steel, the Forge, the anvil, and my hammer. Thomas, you make a good point, a center punch might be a good thing to pick up as well.
-
Smoggy, thank you for the kind words. I view these early projects as methods of learning certain techniques. Overall, I was pretty happy with the tongs, though now, I certainly see room for improvement, but that's the idea. Frosty, you're right, it isn't a terribly difficult project to get done, but the devil is in the details. For instance, keep in mind that I had no soap stone, so while drawing out the center, the point of balance constantly changed. And trying to balance it while hot isn't easy and constantly quenching to check was a time suck. The bigger problem, however, were the arms. Knowing how far down to make the first and second bends as well as to what angle to make them to ensure that they were symmetrical purely by eye wasn't easy. I would've liked to have been able to at least mark the metal at arbitrary, equal point for bends. Even drawing an outline on the anvil to try to match would've been nice. I understand that the concepts being taught don't require the finished result to be perfect, but like my grandfather used to say, 'if it's worth doing, it's worth doing right'.
-
My apologies, I don't think I originally understood your suggestion. Yes, I could definitely do that. In fact, I think that might be the best way to start off since I'm getting a bit lost looking at all these different hook rules. As I need to stay fairly mobile with all of this stuff, I can just toss a tape measure in my bag, mark out lengths that I'll need for that day on the anvil, and then use those marks to lay out my work. It's technically one small additional step, but it's free, easy to transport, and is a good first step while I get a better feeling for what I really want. Regarding calipers, dividers, and scribes, I'd LOVE to get a good set of all of the above. That might be round 2 of my purchases. At this point, I'm not sure that my skill is high enough to warrant checking those small figures. But, when I get better and/or start doing more finish work with either files or a grinder, they will be absolutely necessary. I might also want something that will allow me to measure given angles. For the time being with simple measurements I can go all Pythagorean on it, but later, it'd be nice to know if two pieces had the same angle bend. A lot of this came out of my very first project making a set of BBQ tongs. The necessity of getting both sides perfectly even but without any kind of measuring or marking instruments was frustrating. I have an engineering background, so my little OCD mind was going nuts knowing how I COULD make them better if I had the tools I wanted. They turned out okay in the end, but they could've been better.

-
Yep, got all of that stuff.
-
Gentlemen, thank you all for the suggestions. A few points of clarification here that might help things make more sense. The school I'm at has 15-20 different anvils and students of various classes come in at different times and it's a bit of a musical chairs as far as which one you're working with that day, so knowing the measurements of 'my' anvil or marking out measurements on one doesn't really work in this situation, unfortunately. In regards to the school telling me which tools I'll need and instructions on how to make them, they will indeed do all of that. So things like hardy tools, punches, etc I'm not too worried about here. However, as we are not typically allotted the time for finishing work, I have been giving some thought to a bench vice and some files to clean up my work at home. But that's a thread for another day. Finally, in regards to what kind of work I'll be doing, that is an excellent question, and at this point, I don't have an answer. I'd love to get into bladesmithing, but given that I live in a small apartment, the amount of tools and supplies necessary for working on the handles would likely take up more room than I have making it prohibitive at this time. At this point, I think I'll pick up a hook rule, some soap stone or silver pencil, and a butcher block brush. I figure anything else I might need down the road will become obvious. I just wasn't sure if there was some glaring oversight that I might as well get now.