

clenceo
-
Posts
45 -
Joined
-
Last visited
Content Type
Profiles
Forums
Articles
Gallery
Downloads
Events
Posts posted by clenceo
-
-
9 hours ago, ThomasPowers said:
Can you give some specifics for "holding up well" . We've had folks telling us that their gas forge worked well when it didn't; they just didn't know it.
As for "holding up well"
I've had this forge running about 2 hours at a time until I ran out of propane (20lb) The brick is not cracked, nor showing sign of degradation as of yet. The original poster acquired brick, was wondering about cracking.
Please explain how other folks didn't know their gas forge wasn't working well and what to look for. That would help me a lot.
-
I've been using hard brick for base and walls and soft brick for the roof. It's easier for me to bore out a hole for burner flare.
Check out my build... I made a frame for the soft brick. It's snug, but holding up well.
-
You can check out my rectangle brick forge design.
-
Finished up my forge a few days ago. My idea was to create a simple forced air forge that can be broken down, easily serviceable and that can be easily duplicated if needed, and maybe manipulated for different types of materials I may be adding into it.
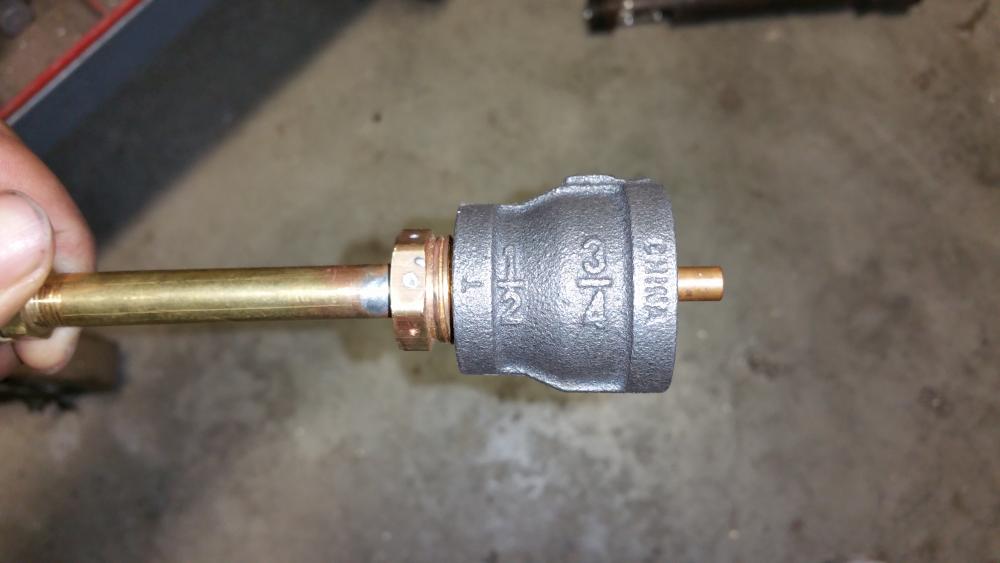
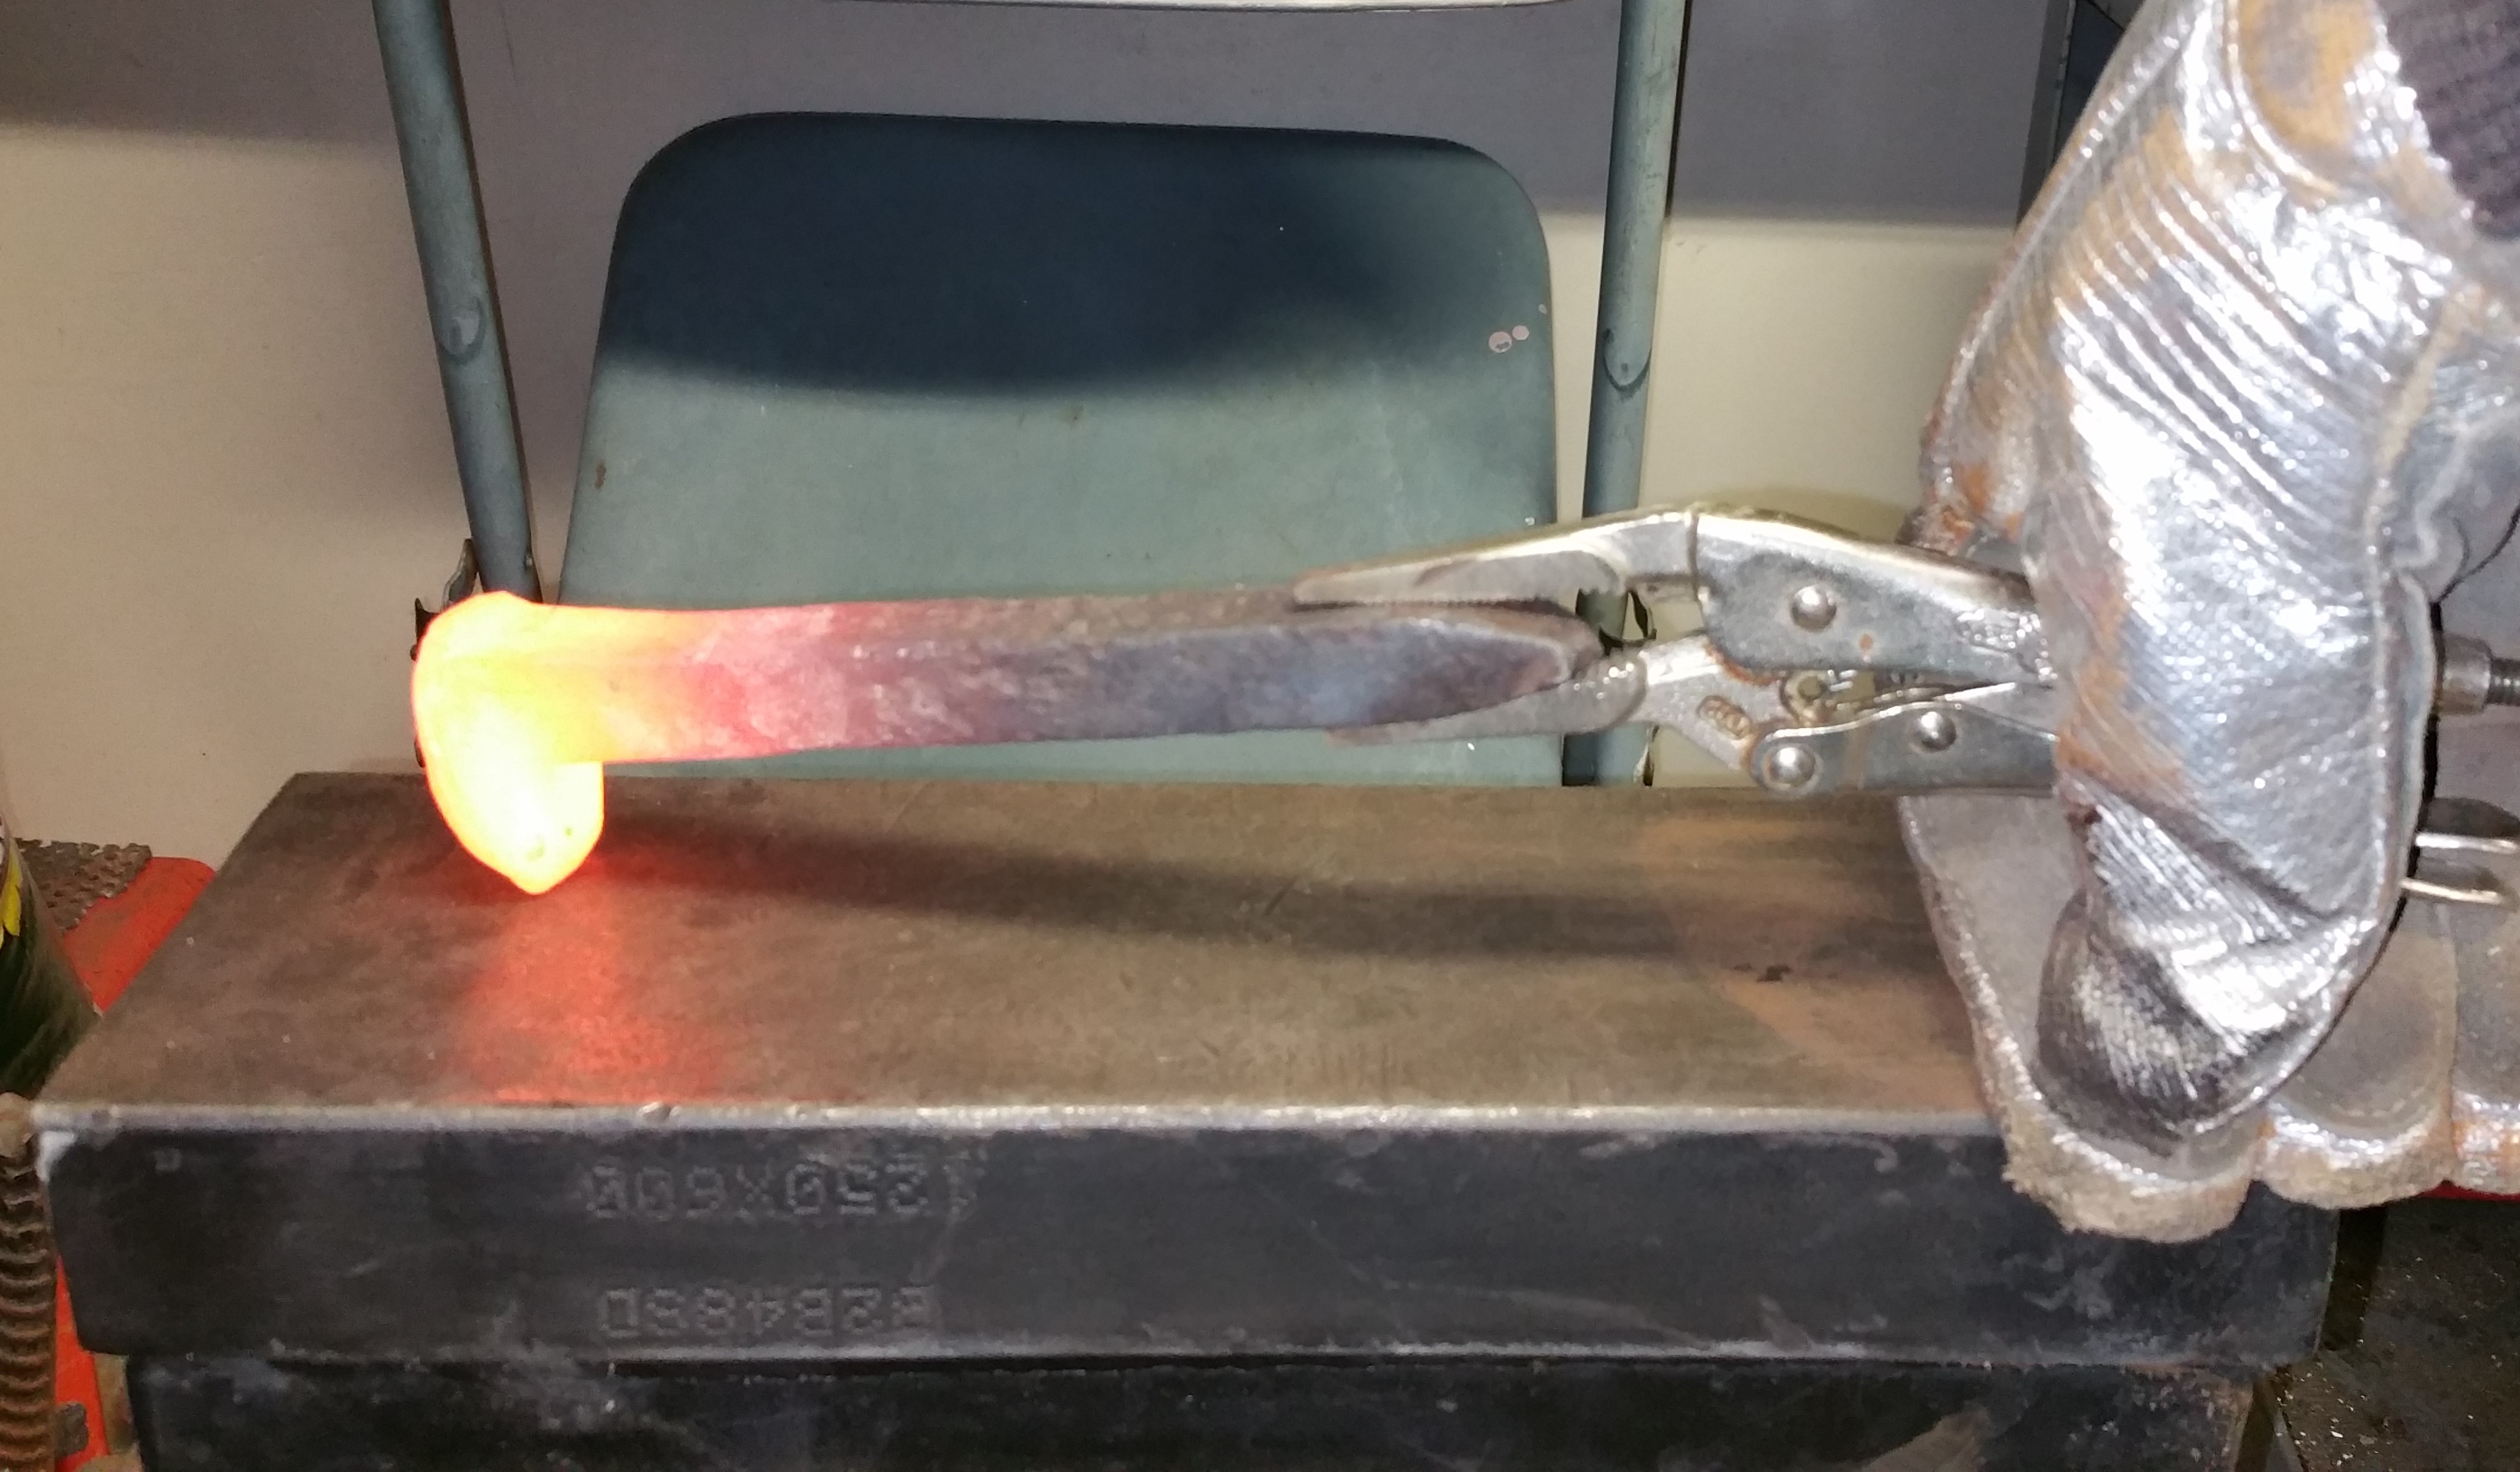
Some things that I was able to do at my place of employment was TIG weld some stainless steel nozzles. Although I'm no expert in welding, I have been allowed full access to weld since apparently I have a steady hand. You will see my first attempts to TIG weld stainless steel below. I hope my photos are self explanatory, but if you do have questions....Please ask. I'll do my best to answer any questions. I also numbered the pictures in order....for some reason the file host does not organize them in order.
I'm learning here, so please do not take offense if I can not offer a reasonable explanation.
Click on the link below to see pictures!
-
Hello All!!
Finished up my forge a few days ago. My idea was to create a simple forced air forge that can be broken down, easily serviceable and that can be easily duplicated if needed, and maybe manipulated for different types of materials I may be adding into it.
Some things that I was able to do at my place of employment was TIG weld some stainless steel nozzles. Although I'm no expert in welding, I have been allowed full access to weld since apparently I have a steady hand. You will see my first attempts to TIG weld stainless steel below. I hope my photos are self explanatory, but if you do have questions....Please ask. I'll do my best to answer any questions. I also numbered the pictures in order....for some reason the file host does not organize them in order.
I'm learning here, so please do not take offense if I can not offer a reasonable explanation.
-
Good evening Mikey! Thank you for taking a look at my forge. I have tons of photographs on my build. I recently used fire cement rated at 2700 degrees, and it started blistering!
I would love to post my forge on the Forges 101 thread, but I'm uncertain of the permissions nor do I want to step on toes. I'm a novice in the forge arena. I think what I will do is create another thread describing my build and maybe a moderator can move it to the Forges 101 section?
Once again, thank you!
-
Hello All!!
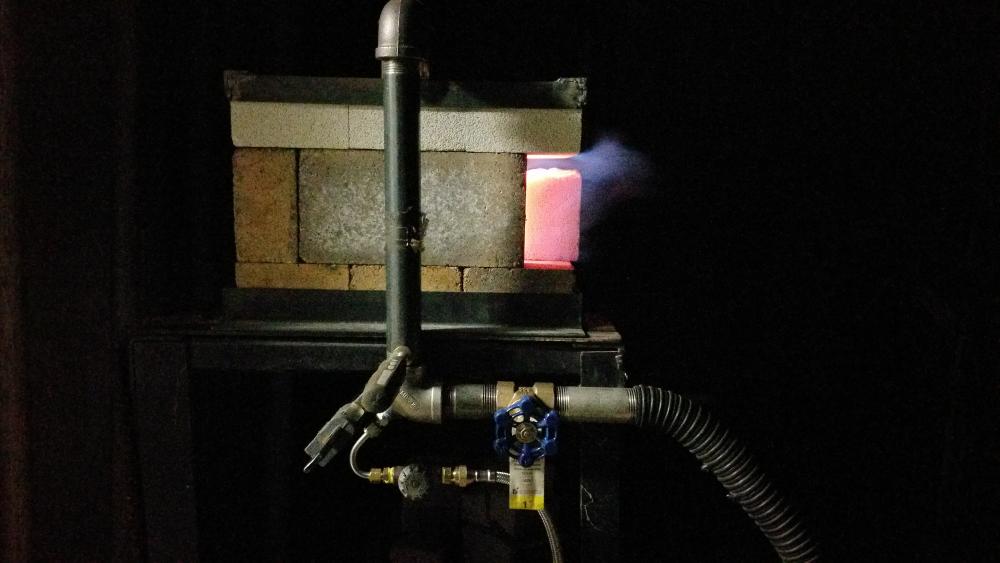
Had a chance to fire up my new forced air forge.
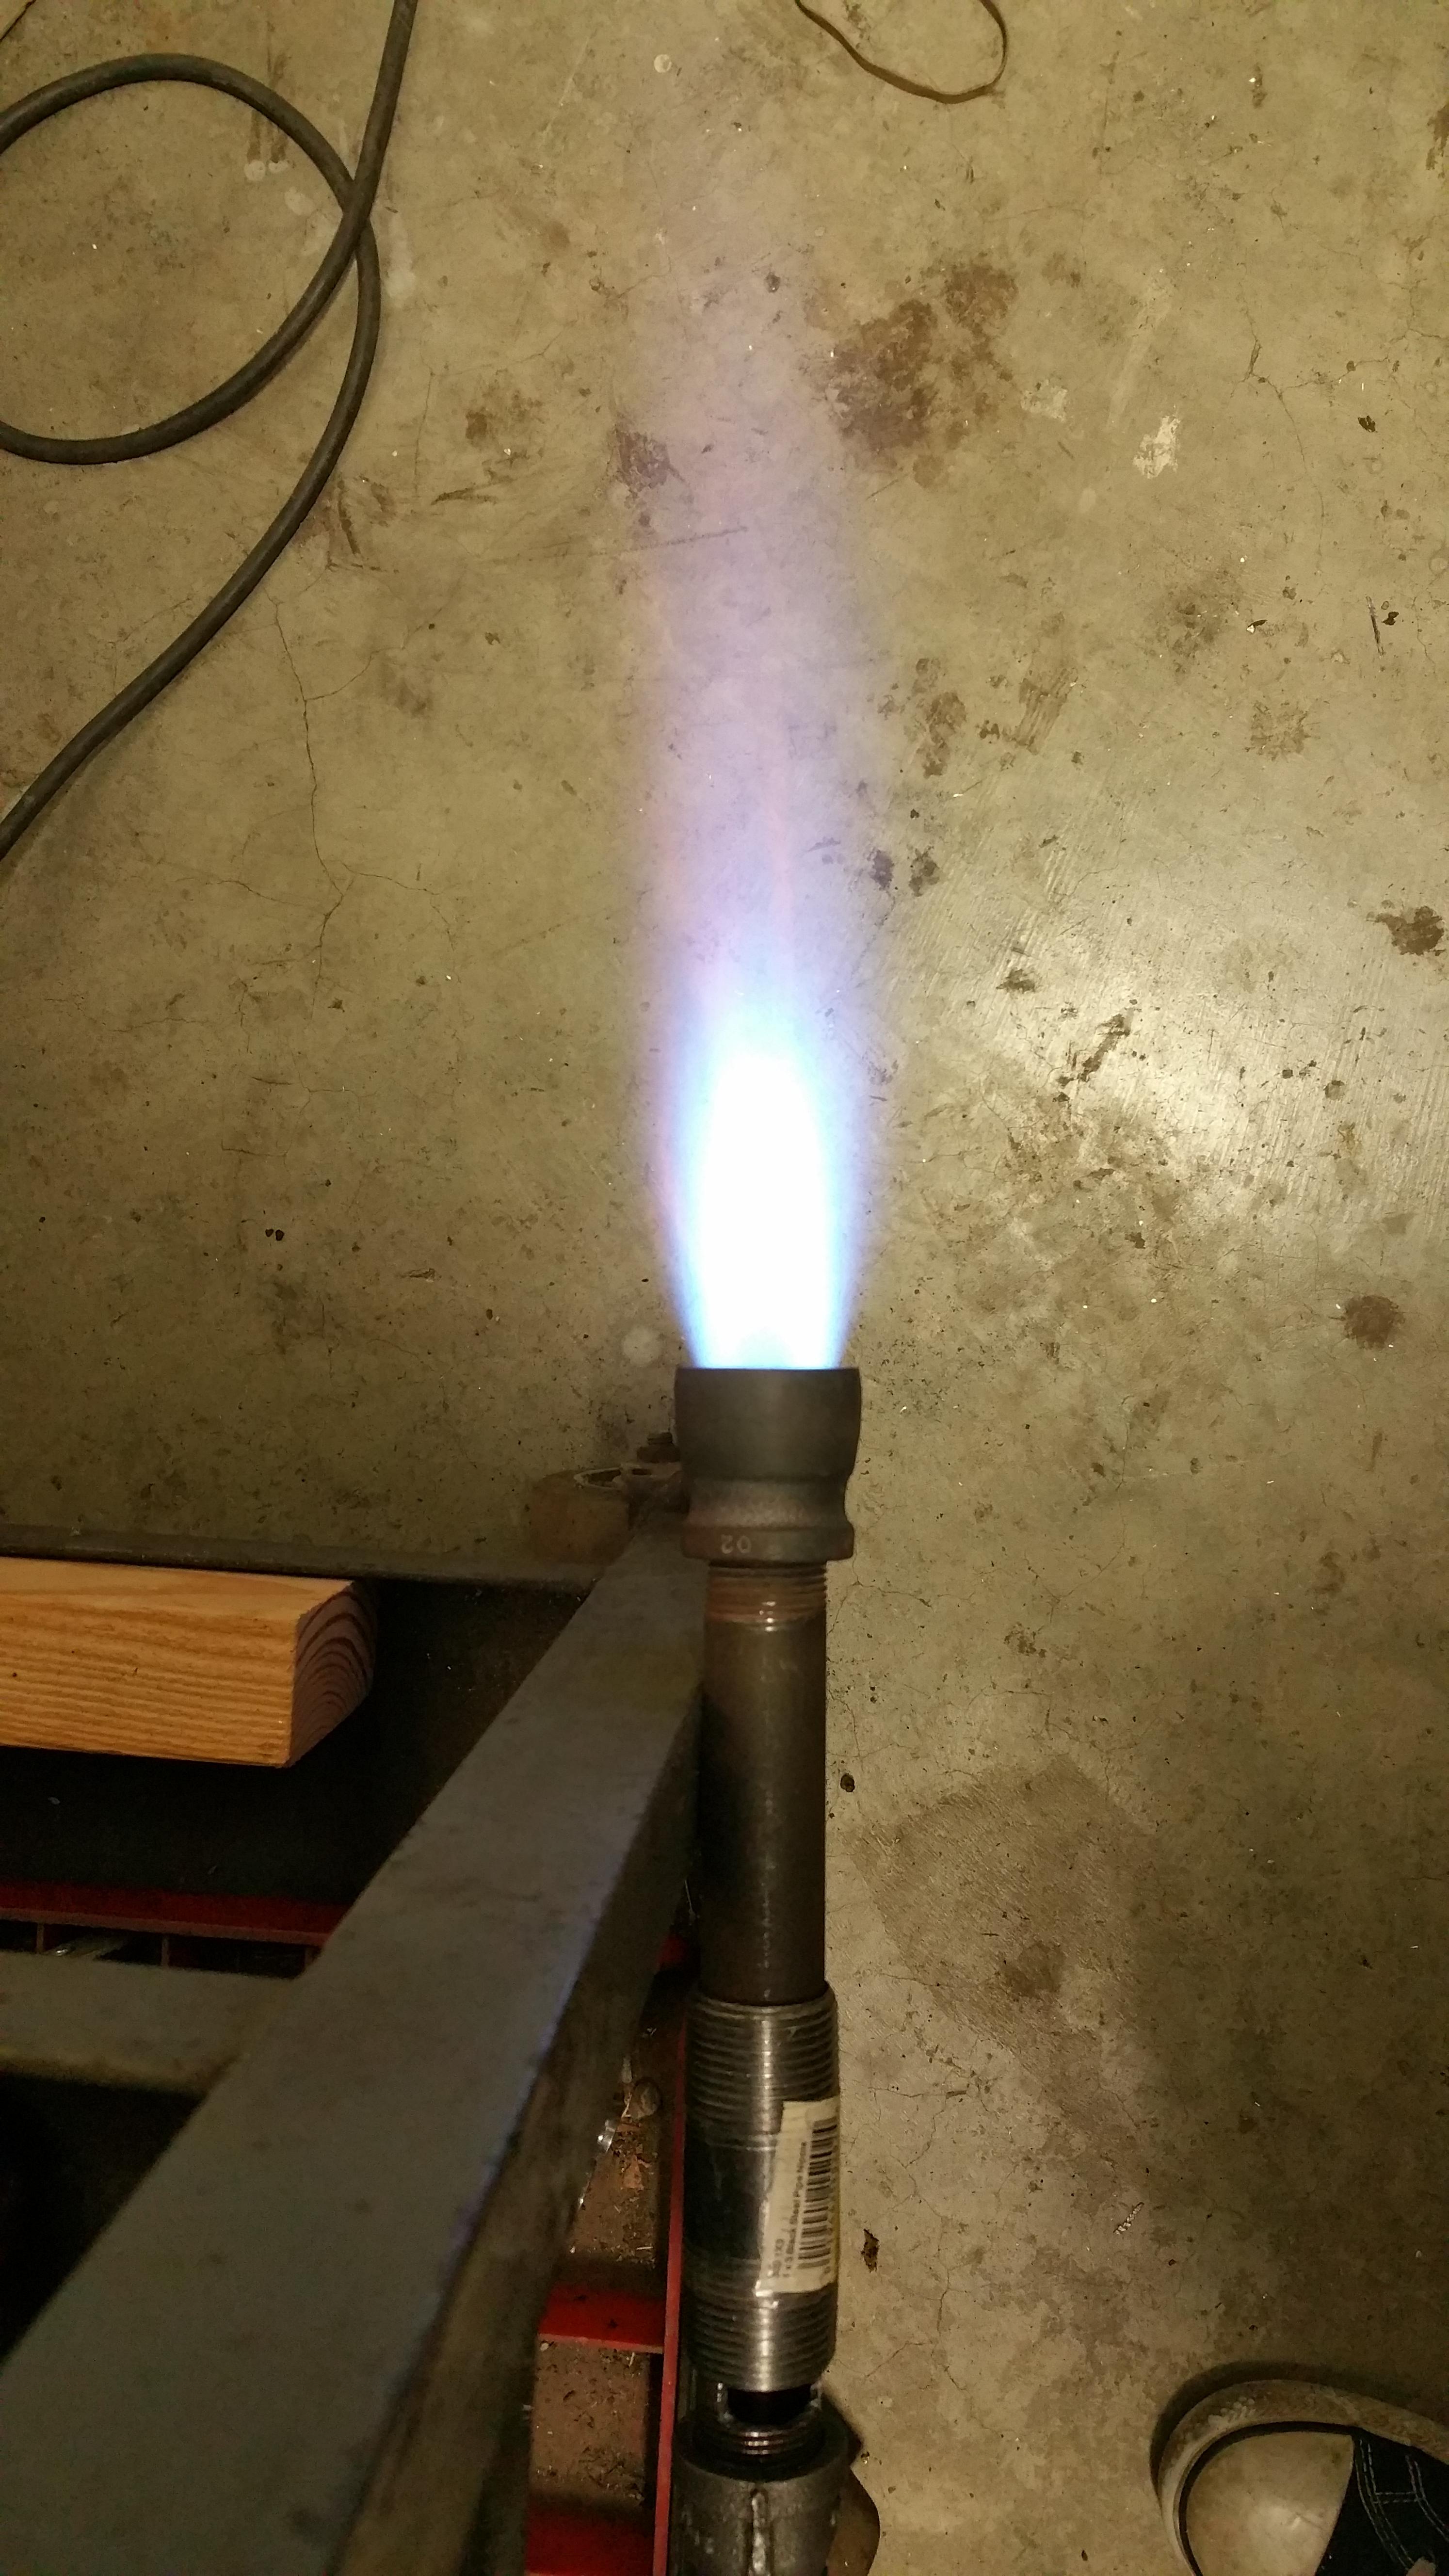
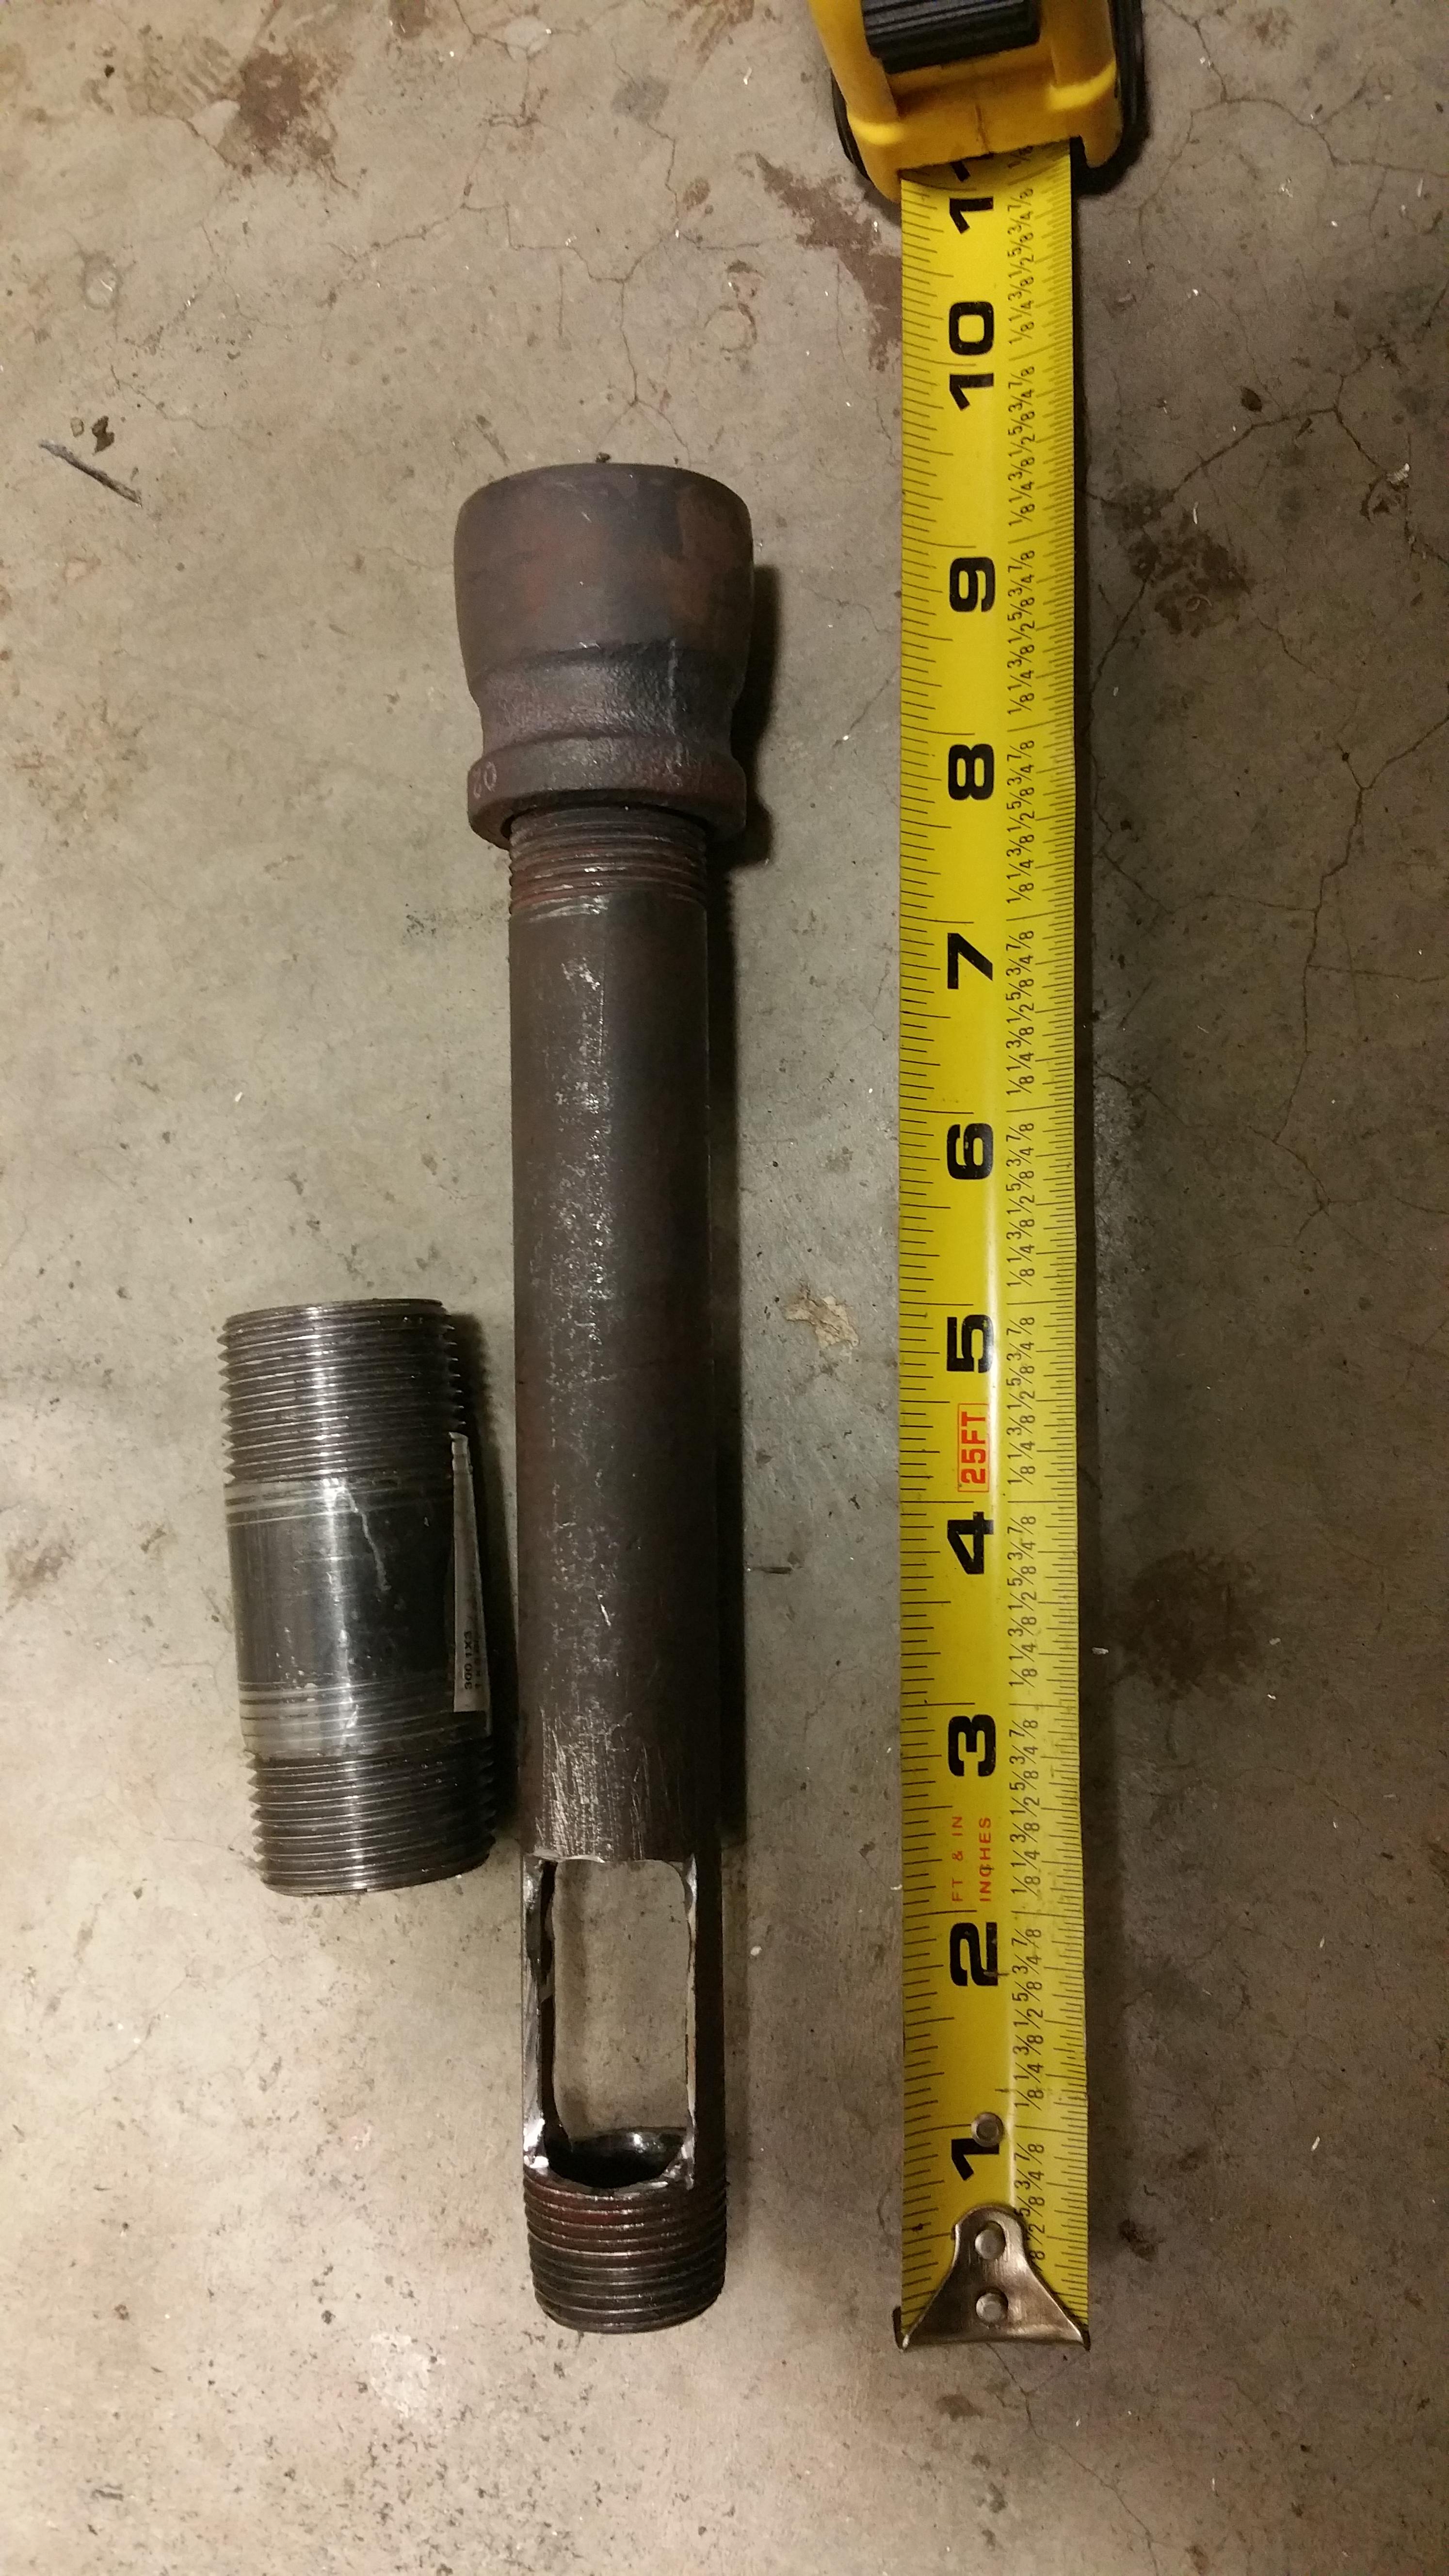
I used 1" black steel piping and a stainless steel flare that I TIG welded.
Fuel pressure set to around 4-5 psi and used a shop vac for now. Seems to running well to me.
Any suggestions/criticism is welcomed!
Thanks!
-
Hello everyone...
I have access to these pump bearings. I tried looking into the type of bearing steel it is and whether its case hardened or not. I had bearing material that wouldn't harden before, not even in water. I came to the conclusion that particular bearing may be case hardened.
I know there's better steels out there, but I like to understand what I have.
The make of this current bearing is from: SKF 7315 EXPLORER.
I cut the race off, the balls are about 1" in diameter. I then cut a piece off the race, hammered to about 1/8" thick. I quenched in water and it broke in half pretty easy.
I am curious about the grain structure...its very coarse. To those with experience, does it have significance?
If I wanted to make a blade with the race, would it be usable?
Thanks for any input!
I think I may have found my answer.
The grain structure very much looks like the one pictured in this link:
http://reidonline.org/bladesmithing/intro/normalizing.htm
I'll continue to experiment and have fun!
If there's additional input...feel free.
Thanks
-
Awesome!! Are we the only two???

-
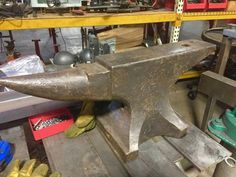
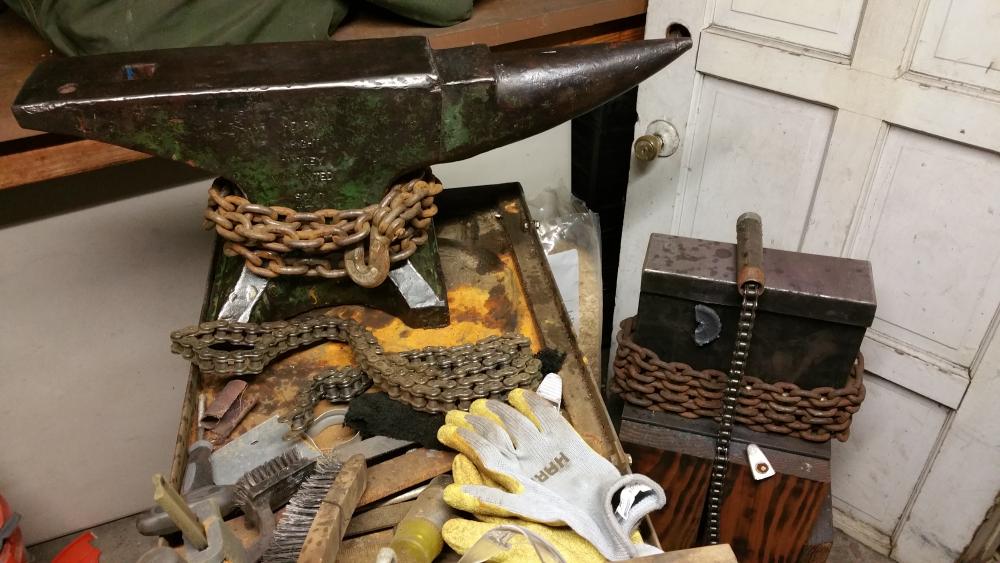
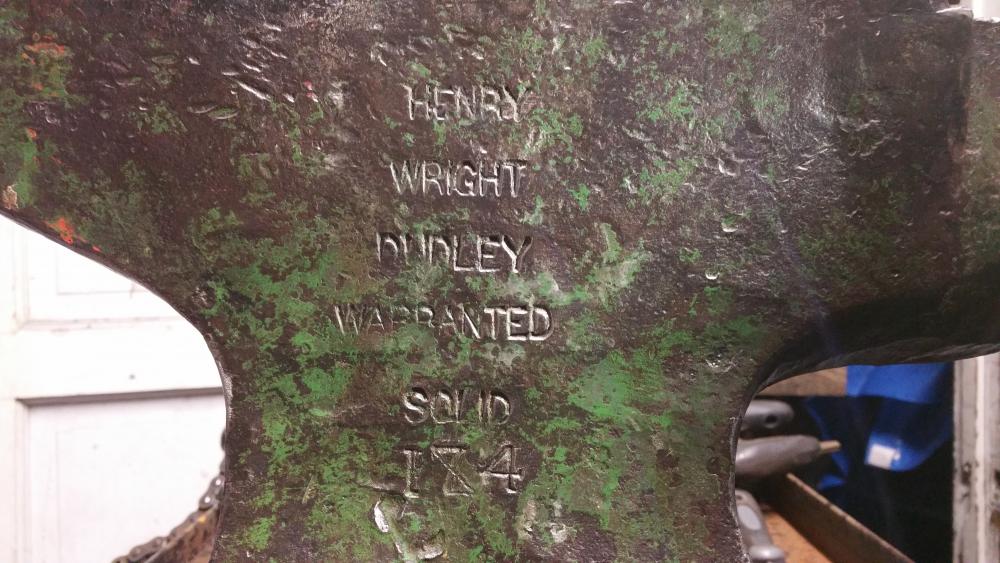
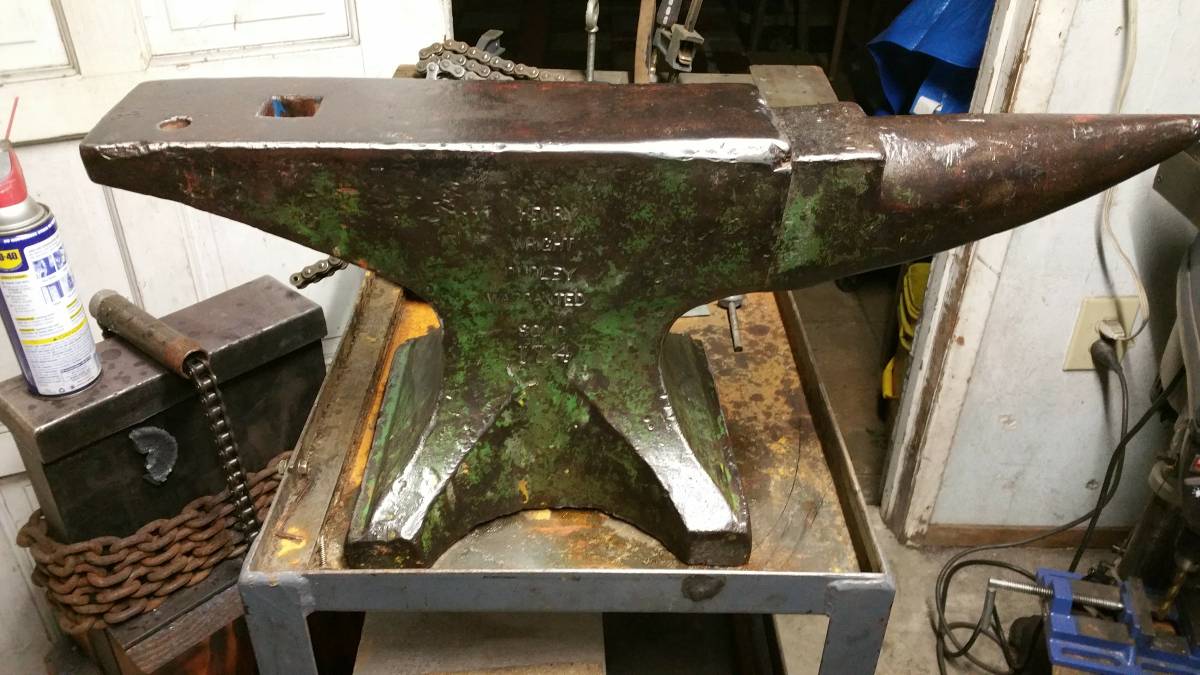
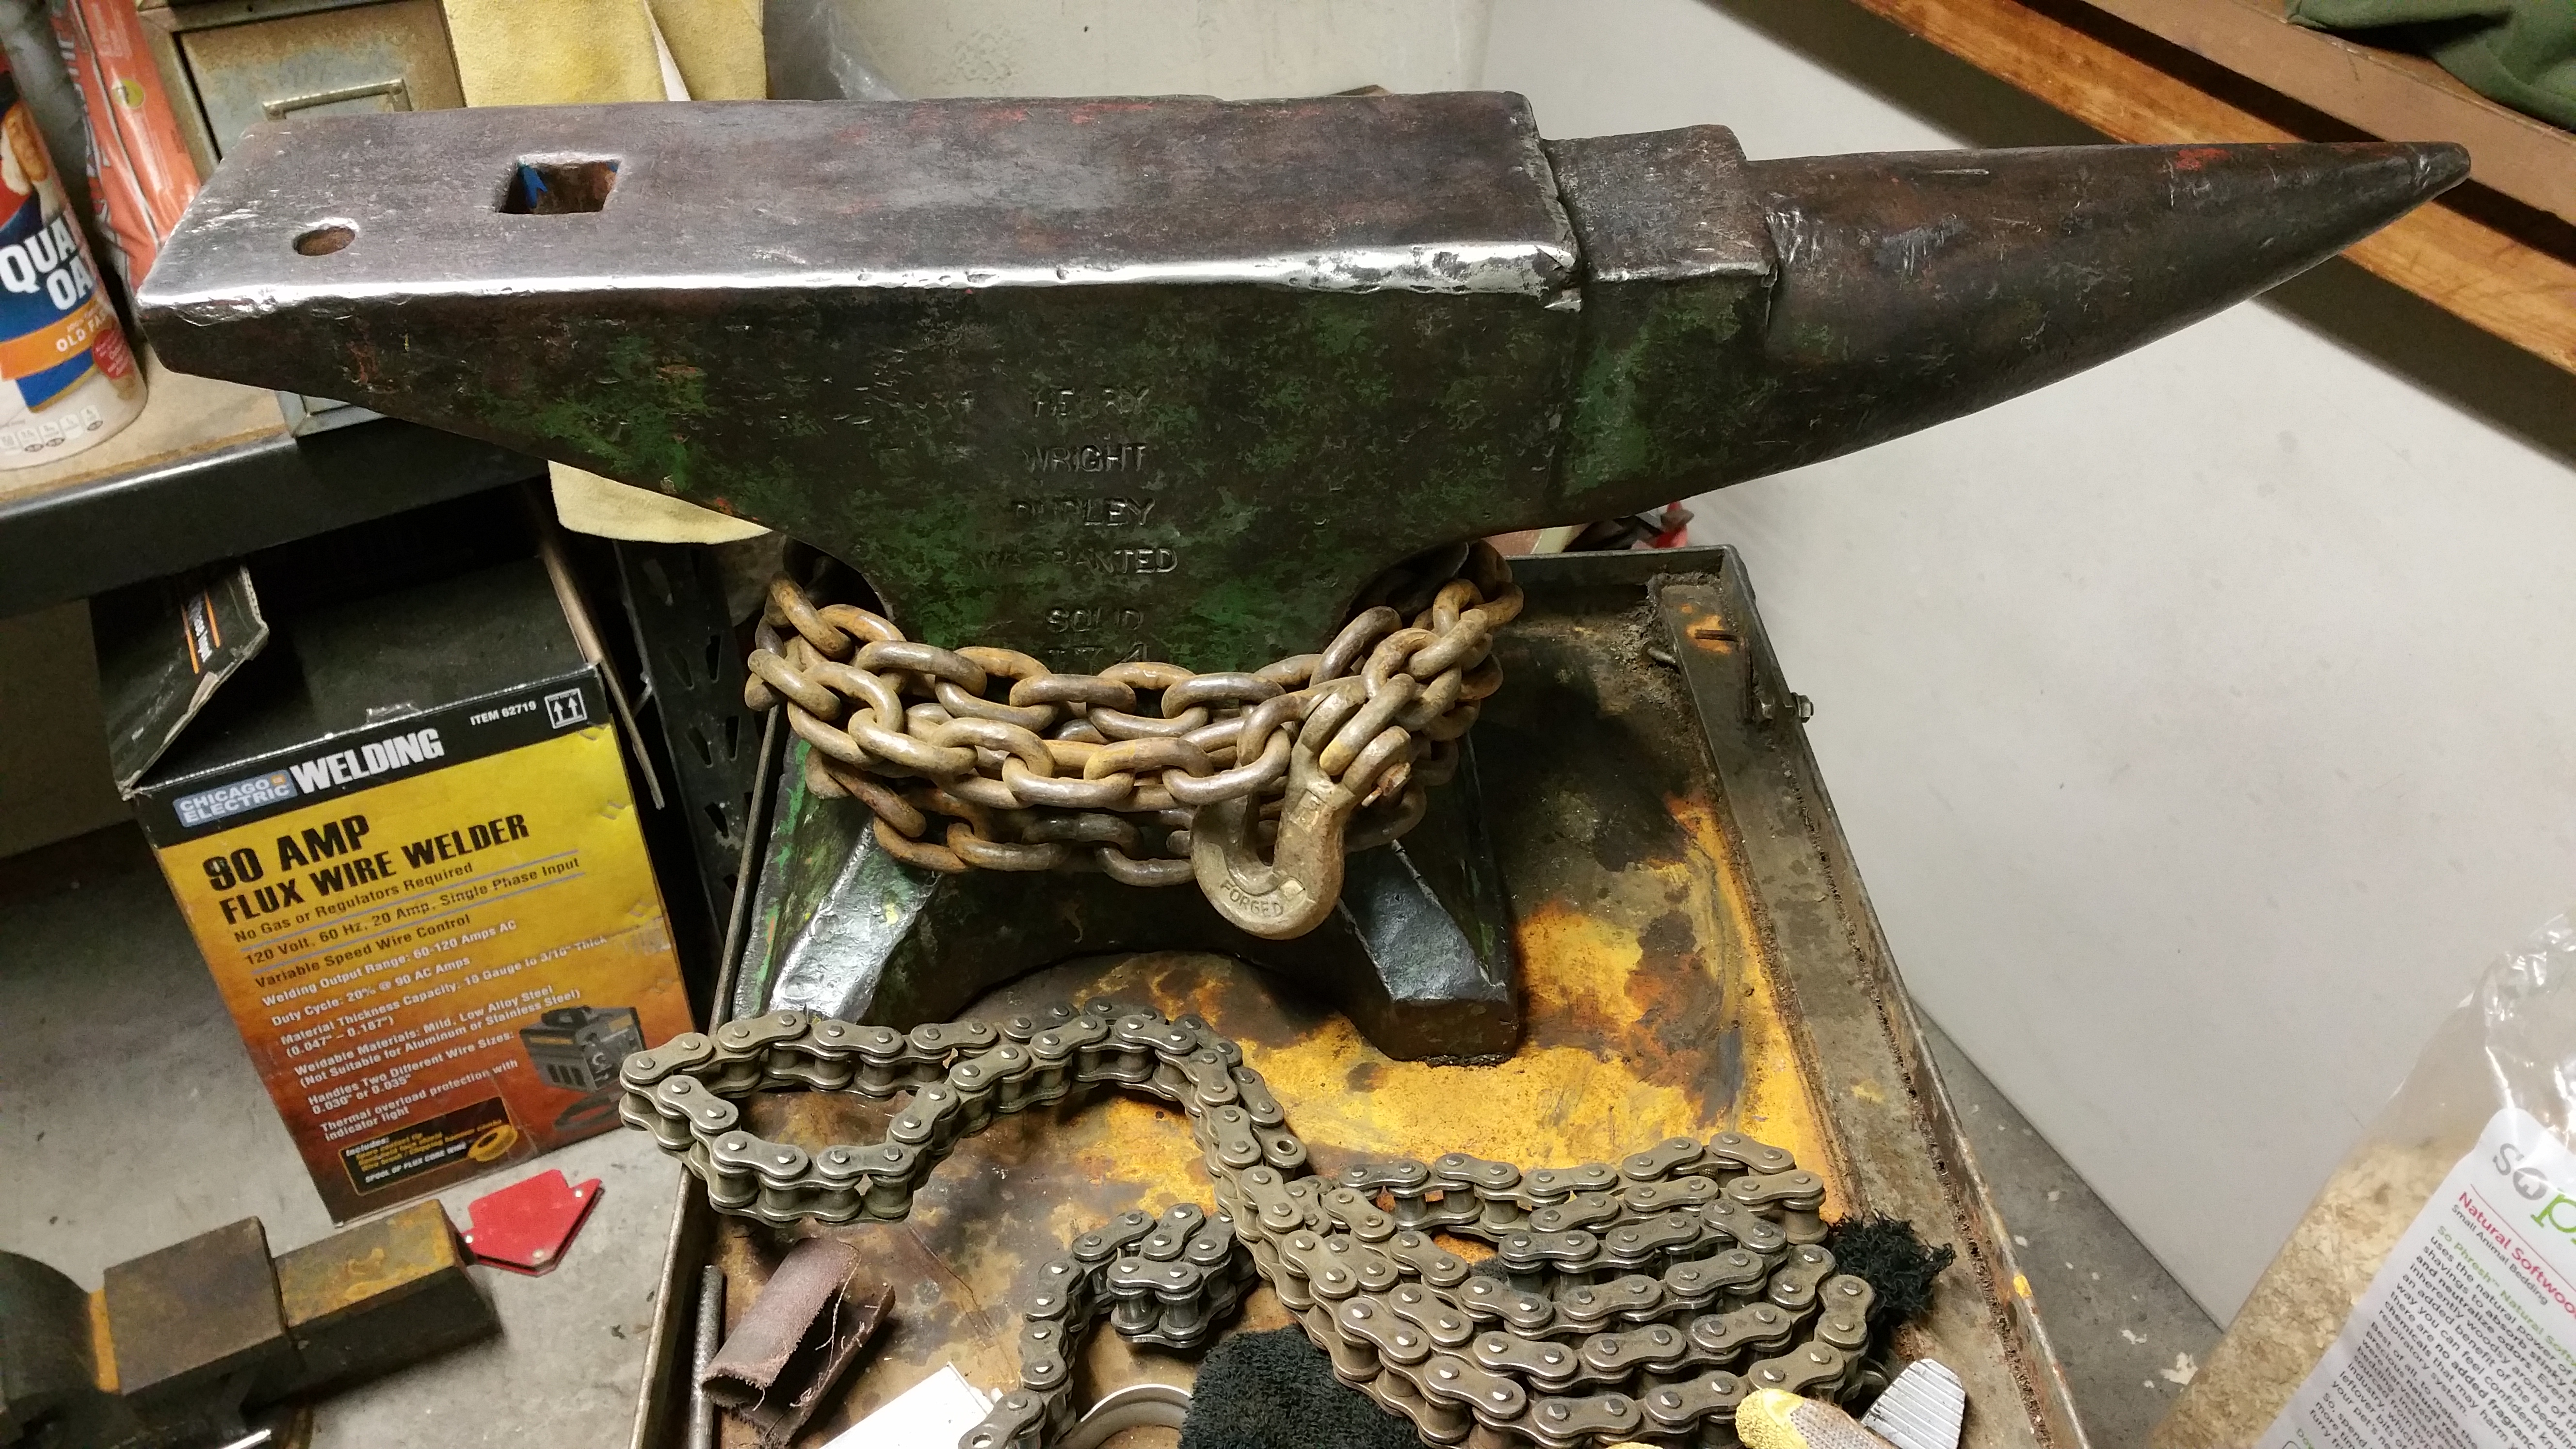
I recently acquired 2 Henry Wright Anvils. The green one is 175lbs. The owner stated it was his grandfathers. After his grandfather passed away, his father inherited it. After his father passed, he started cleaning out the farm and came across the anvil in the field. Now, he's in his mid 60's & has no use for it. I took it off his hands, cleaned up the grime and I think it's lovely.
The second Henry Wright is 235lbs. The owner didn't know where his buddy acquired it from, but did a trade. He never used it and decided to sell it. I picked it up!! I like it!!!

-
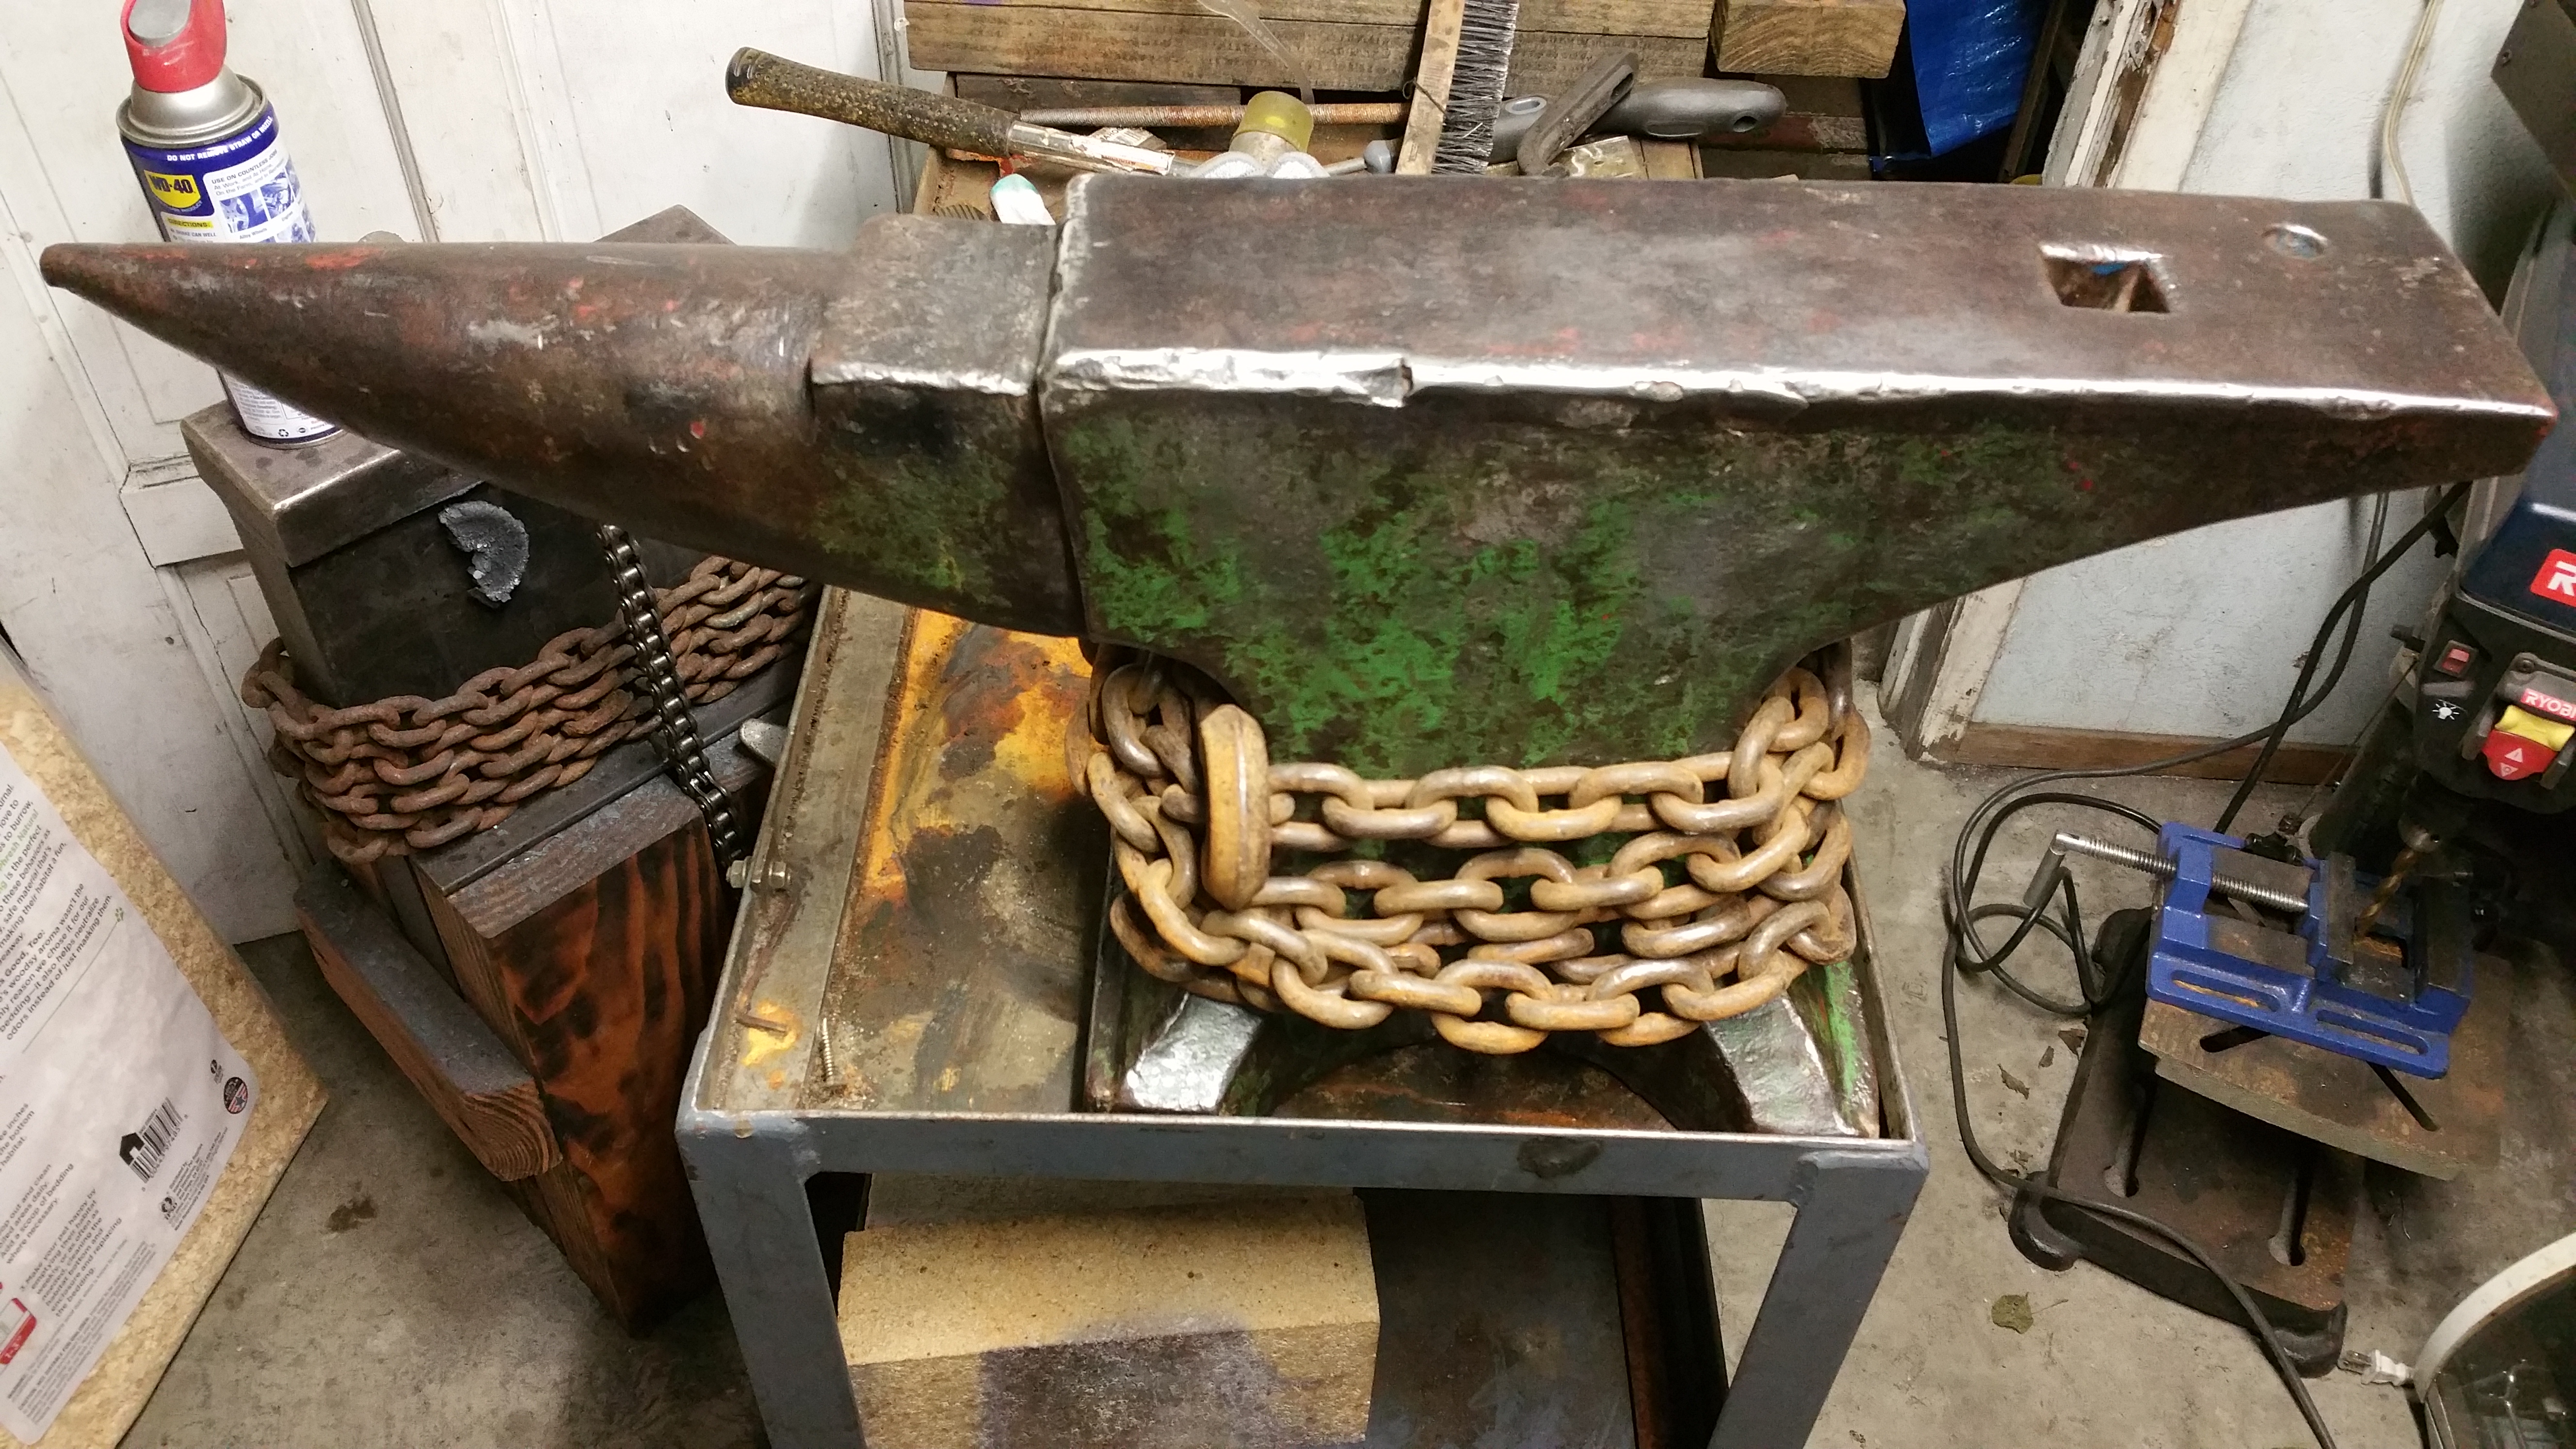
Thank you for your reply. I'm a novice, but finding my self searching for anvils every day. I feel an emotional attachment to each one I come across and curious about the history. This one I picked up belonged to the gentleman's father that passed away several years ago. I found it laying in the field, but remembered his father using it.
My intentions with this anvil are not for heavy usage/abuse. I have my forklift fork anvil that I made for heavy fun stuff. I just want to insure that I can dress the edges of the anvil, and prevent any of the cracks from walking.
-
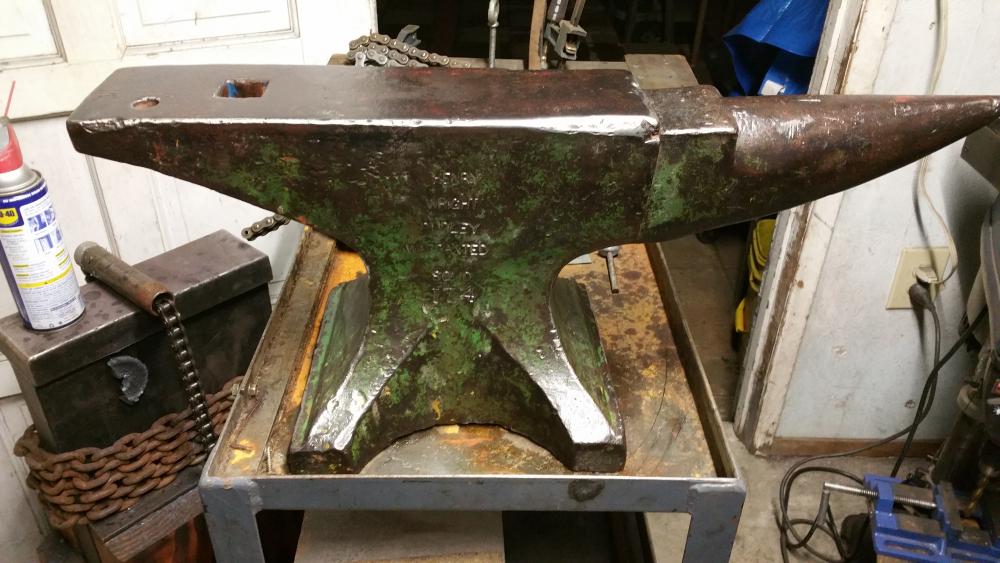
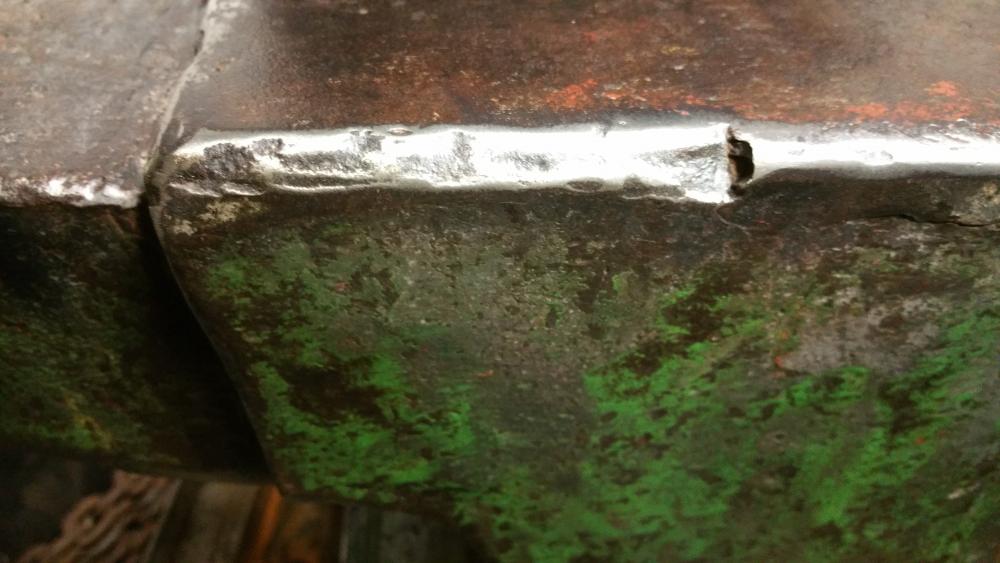
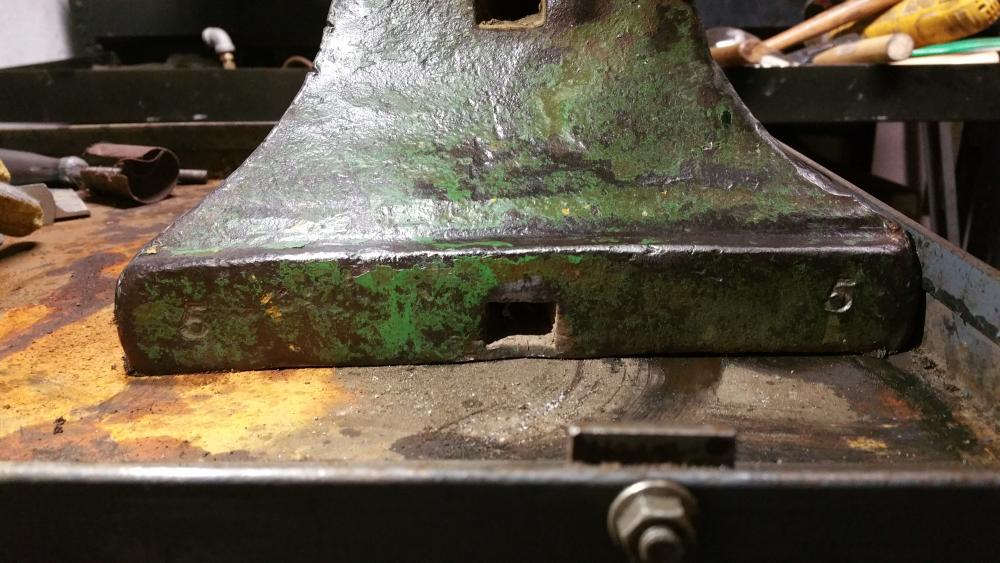
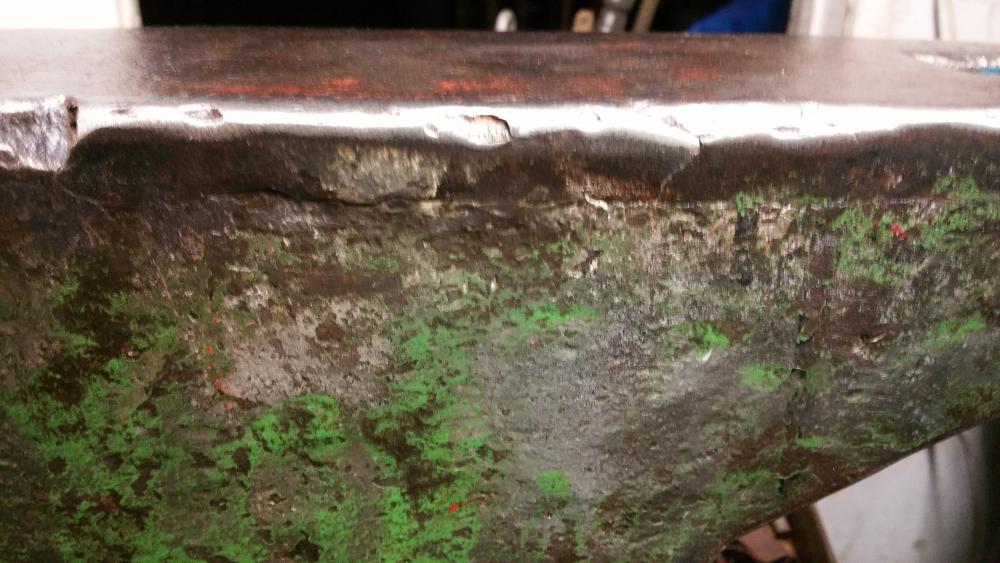
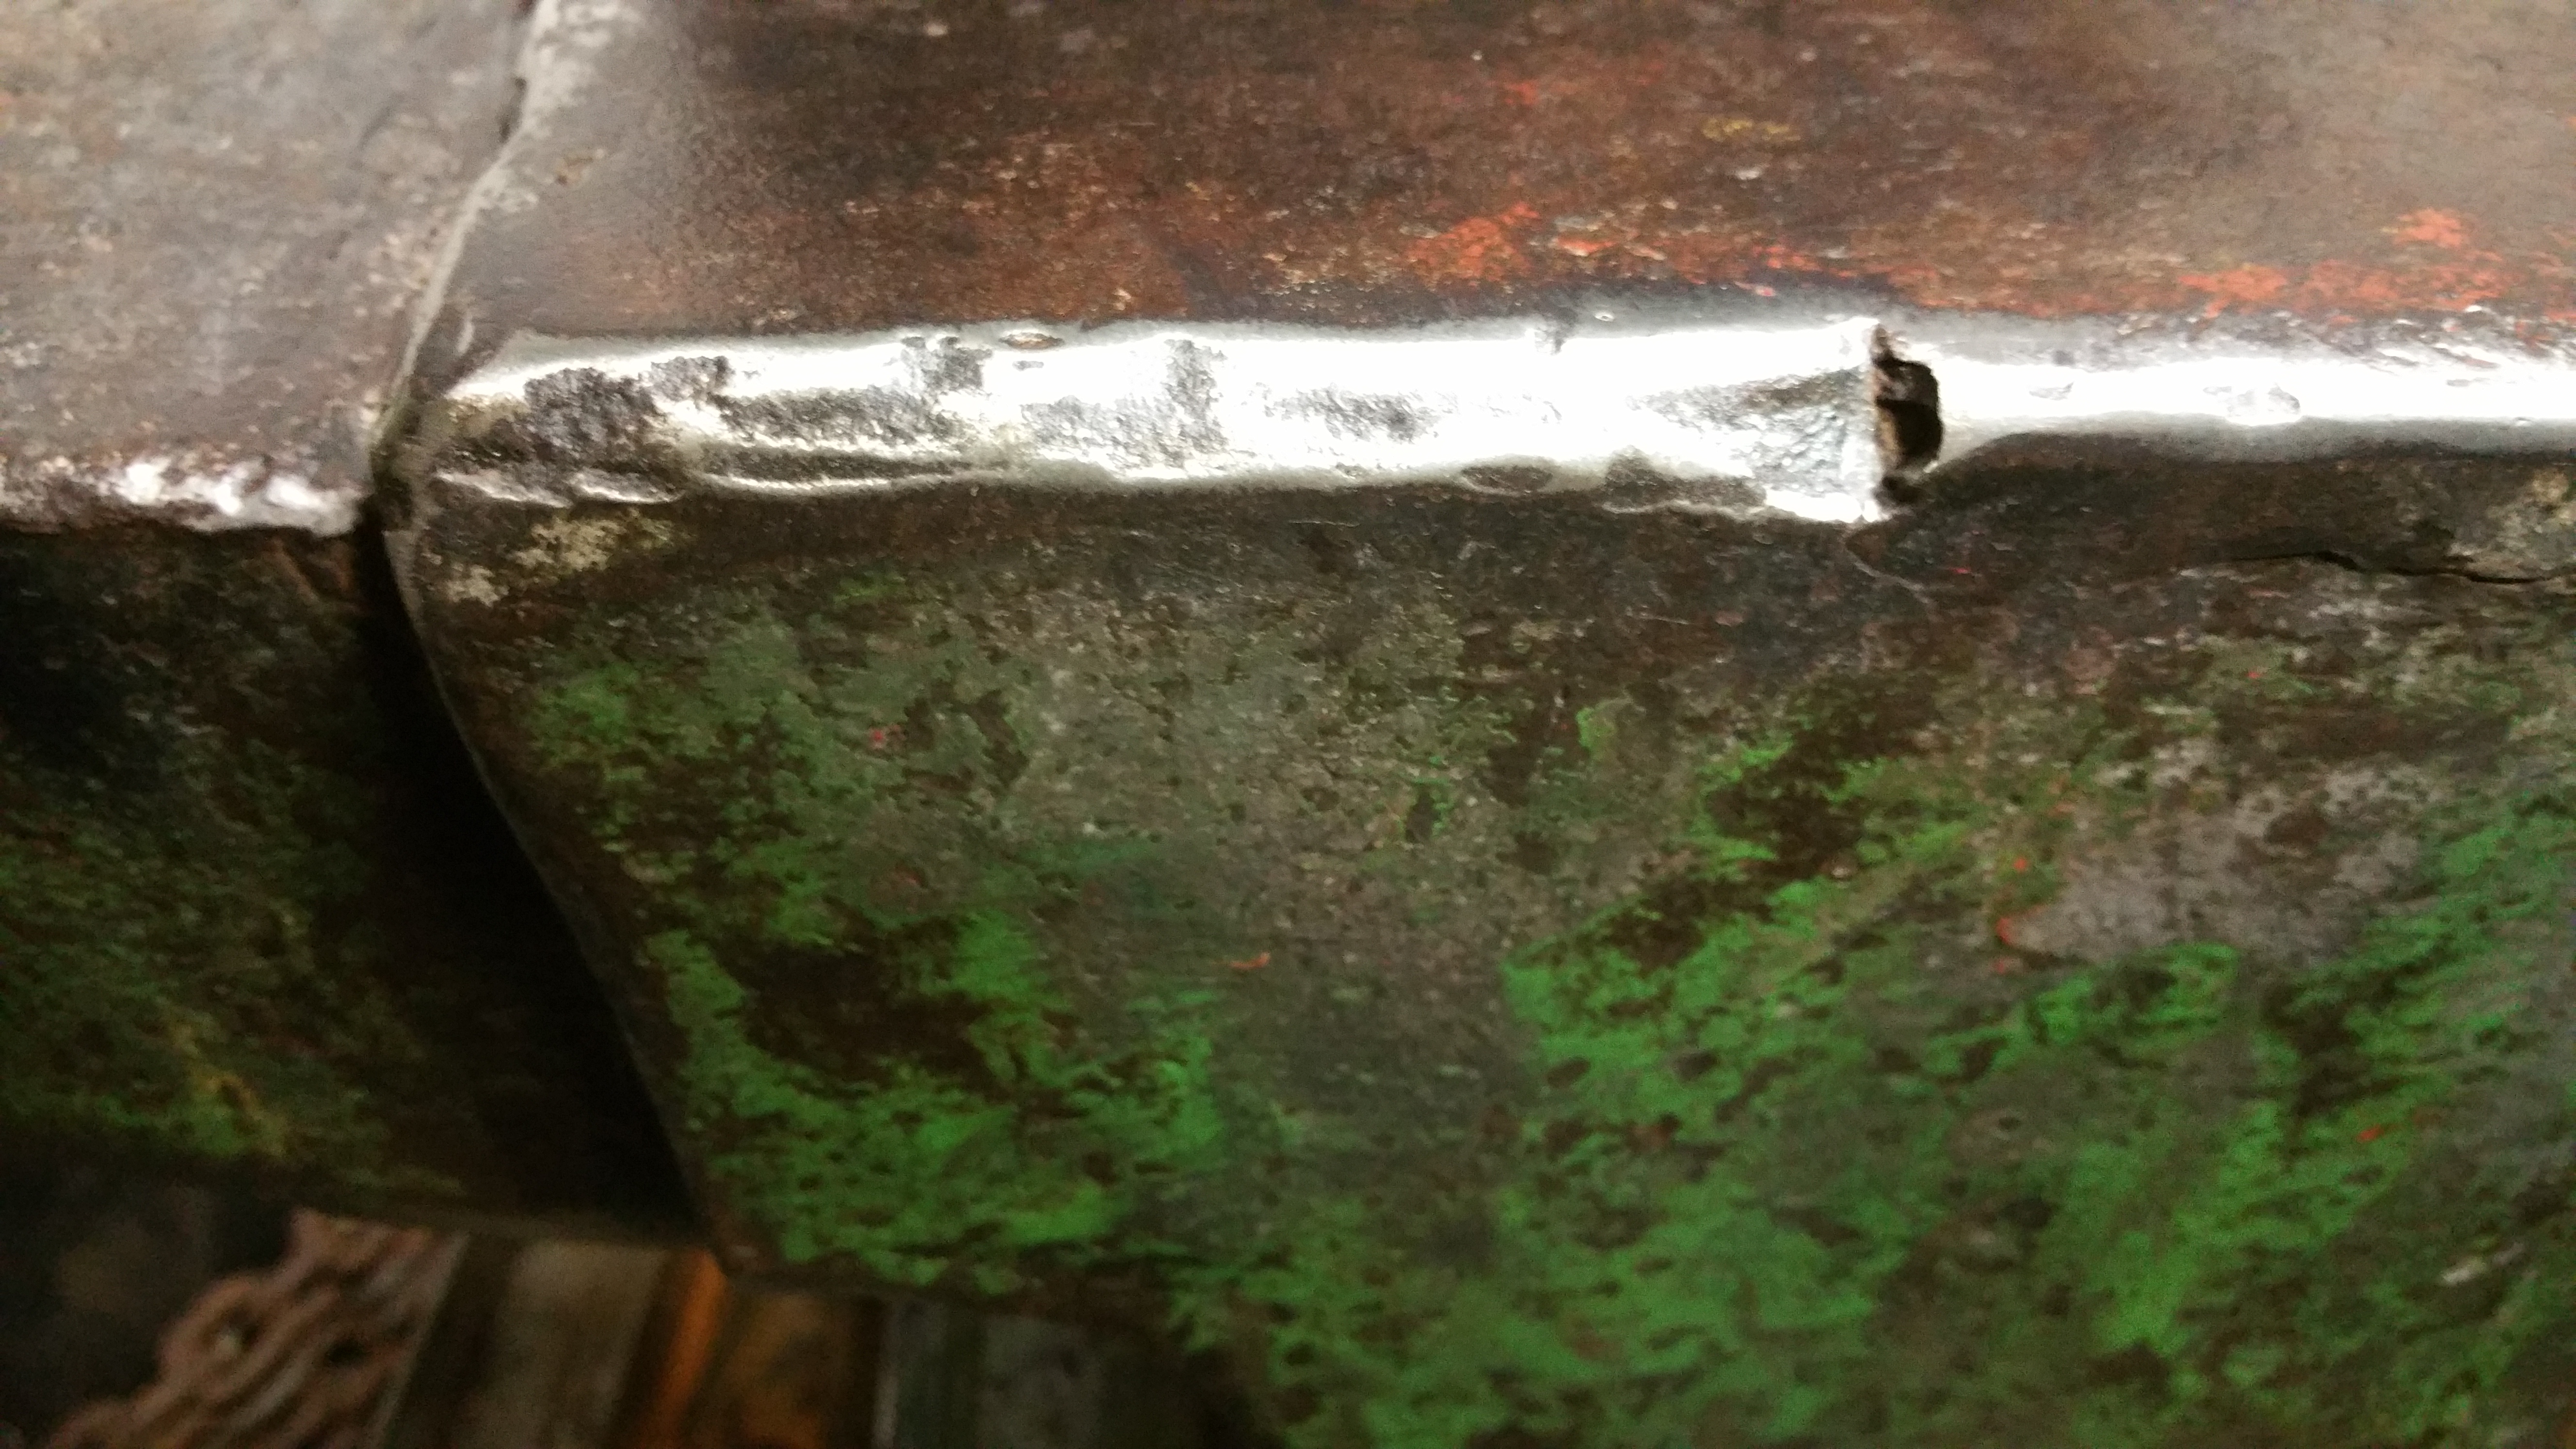
I picked up this Henry Wright Dudley anvil a few days ago.
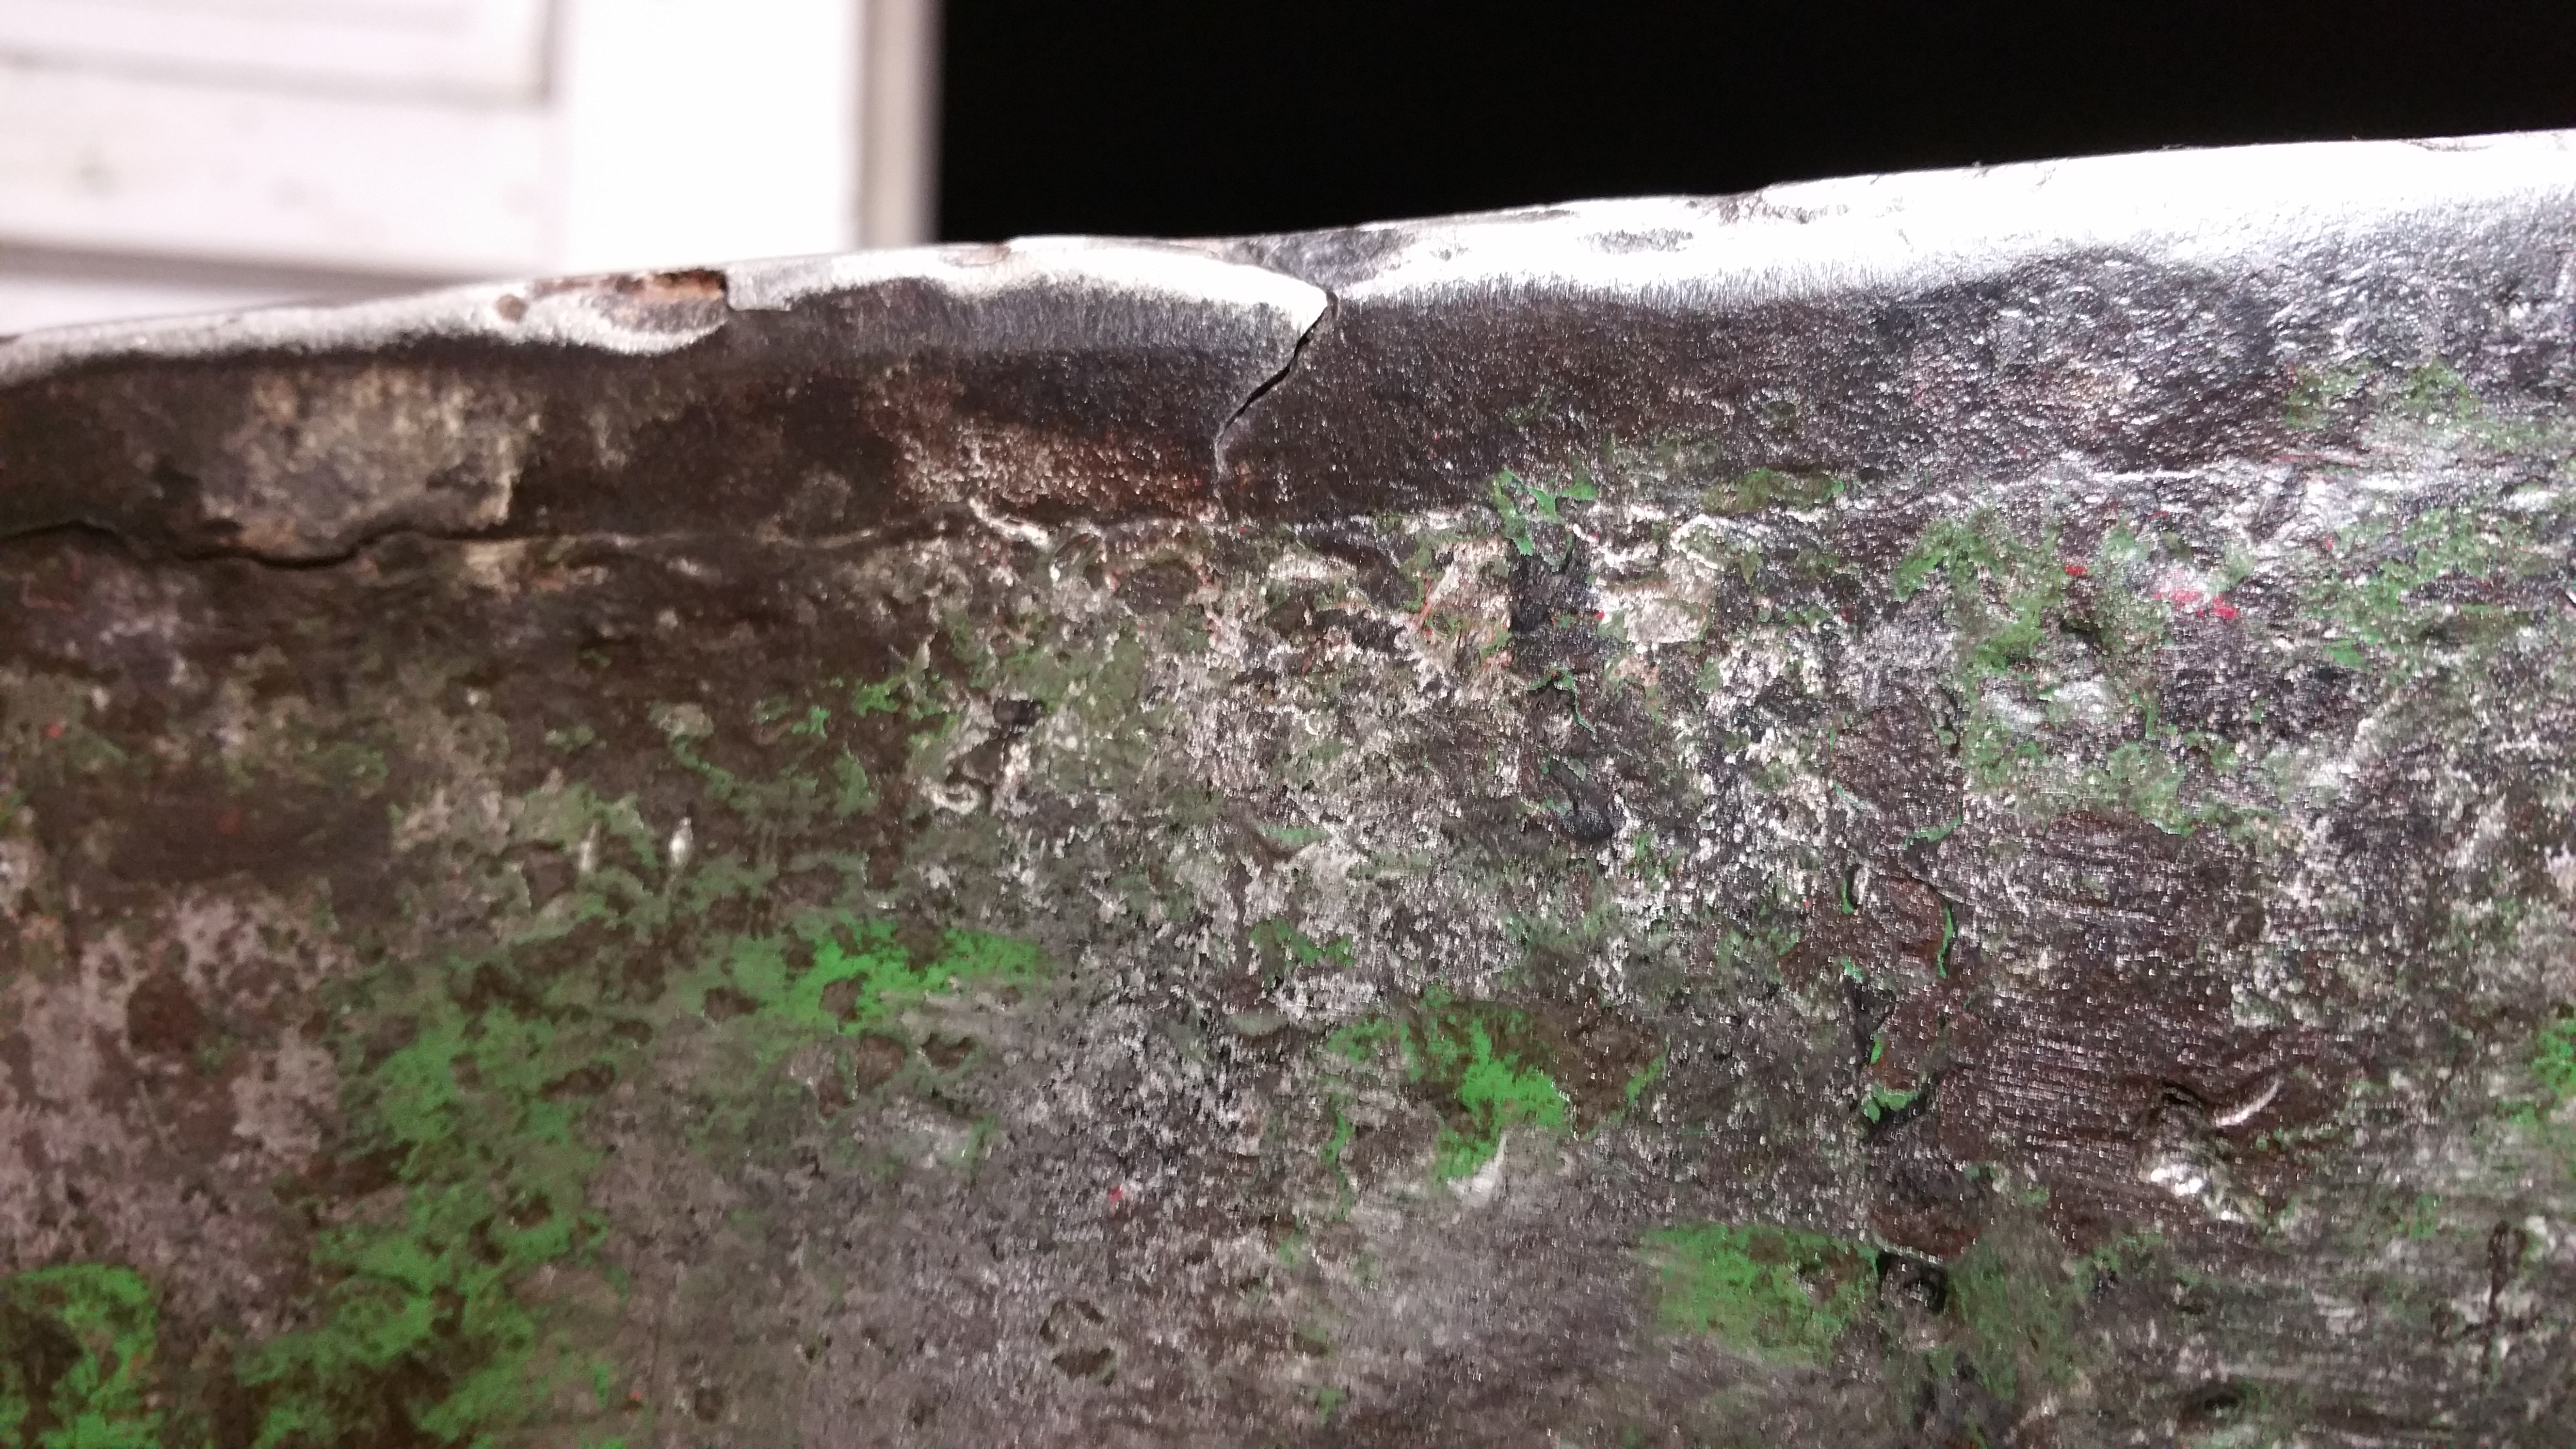
I used a wire wheel to clean it up. A few questions.... at the base, there's the #5 stamped on the corners. Any significance?
Also, I'm concerned about de-lamination. I lightly smoothed the edges to remove any sharp corners. But, there is one area that looks cracked. I don't want to blindly grind away without consulting more opinions. Overall, I think it's a very well preserved anvil.
Thanks for looking!


-
Hello everyone...need some anvil expertise.
I located an anvil about an hour away from me. The gentleman indicated it's a Henry Wright- OAL: 28" Face Width: 4.5" Height: 11" with the numbers 174 stamped on it.
My guess is 174lbs. But, I have come across information that Henry Wrights also used the English Hundredthweight System.
Can someone please verify.
Thanks!
-
Ah yes! Cold tank..thank you! I didn't think about that. Im in California @ sea level. Today 54 deg. F with a light breeze (68% humidity)
After I bumped up the pressure a bit, it seemed ok. I'll try again tomorrow with some water surrounding the propane tank.
Thanks again!
-
Hello again...I'd like to add some issues/solutions that I'm having with my forge. Hopefully video will give you and idea what I'm talking about. I was running my forge at around 5 psi, after about 20 min or so, it started making a sputtering sound. I'm not sure if I'm creating too much back pressure, if its sucking in heat and starving itself, or too low of pressure. My question is...do burner/forge have a "personality"
After some tinkering, I bumped up the pressure and went at it for another 20 min or so. I got too tired and shut down for the day.
-
Thank you all for your input on my forge build. I get caught up focusing on design, and forget about having fun. Although building this forge was fun and challenging! I will be definitely be taking what I learned & apply to a new forge. Now that it's complete and portable, I'm having loads of fun....can't stop thinking about banging some hot steel.
As for construction, here in California we have smog stations everywhere. I went around and asked for what I believe is a Carbon Dioxide cylinder (its a yellow cylinder) Its roughly the size, maybe slightly bigger than a R134a freon tank. I lined the inside with 2" of Kaowool, and added a layer of refractory mortar.
I will be adding a coat of ITC100 in the future. The forge heats up nicely and I get to play around with my new regulator. Since then, I've finished my first project in this forge...I'm still new, but I love it!
-
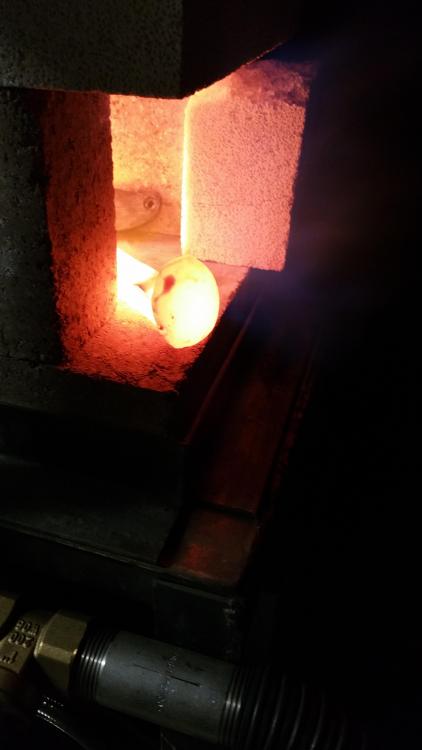
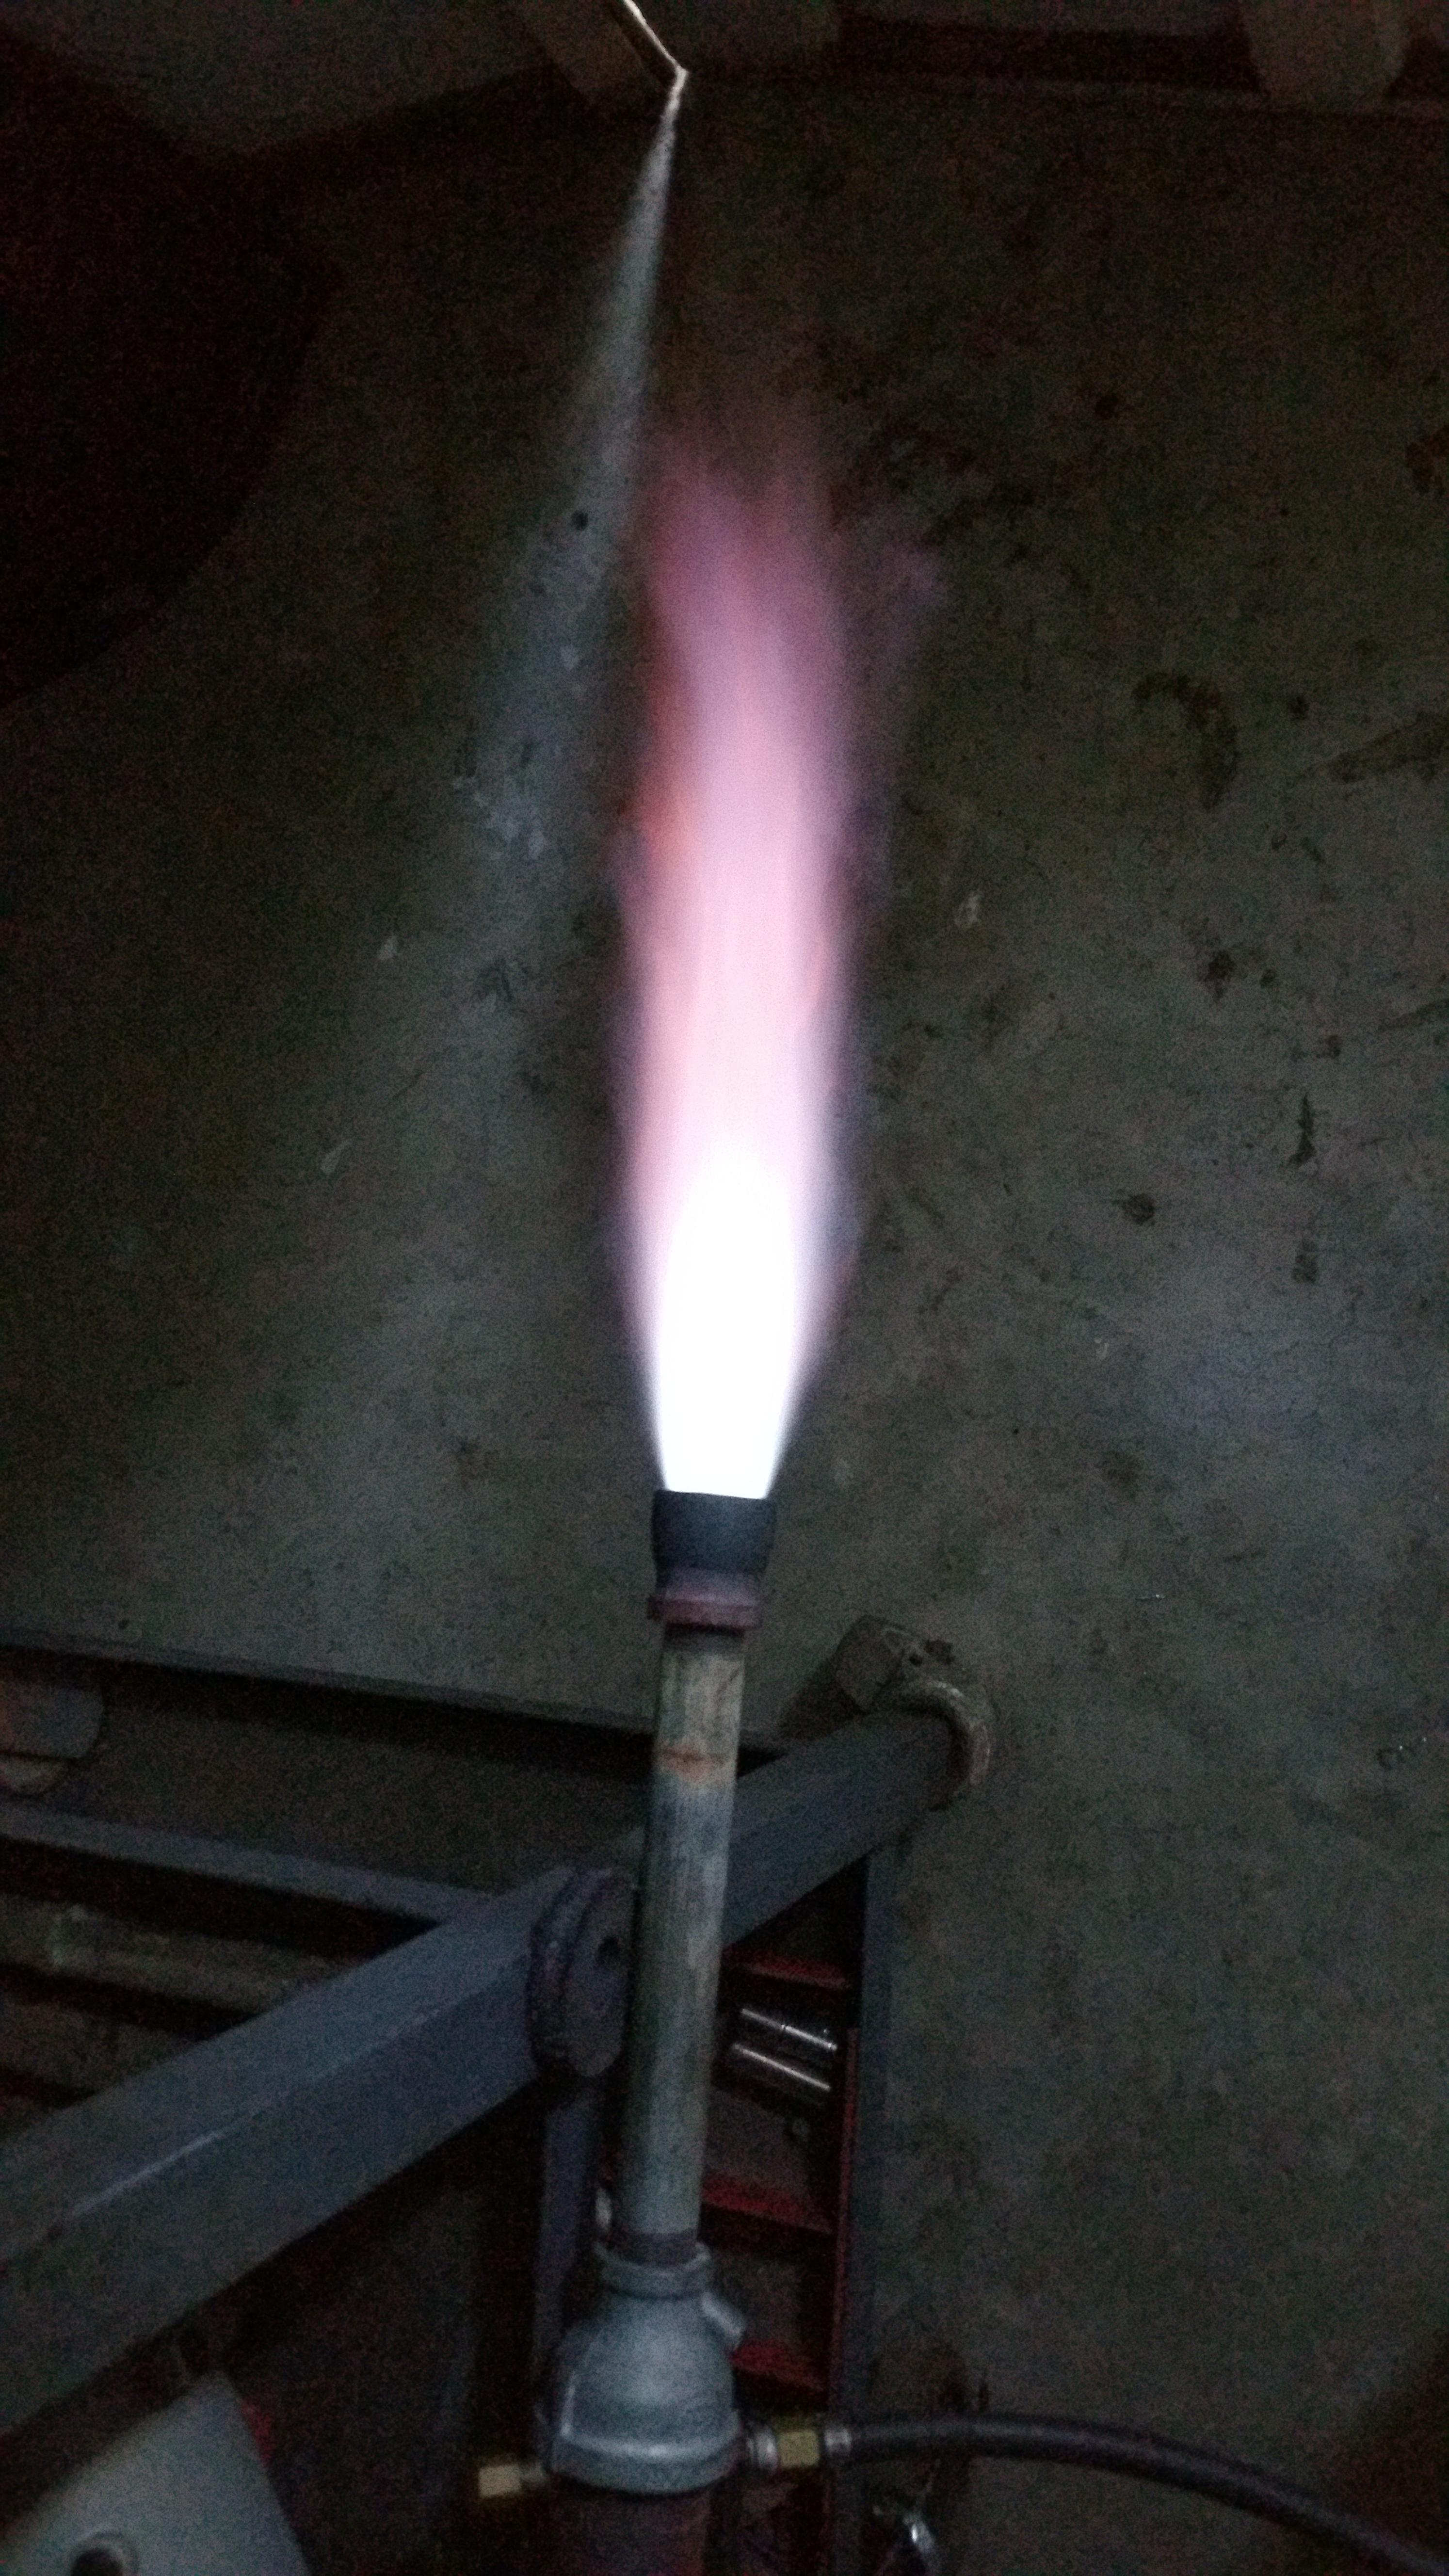
I'M BACK!!
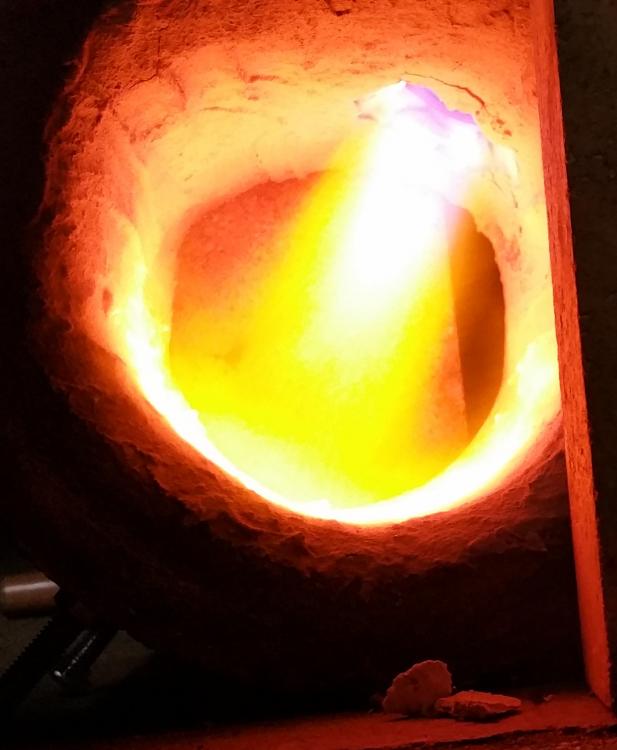
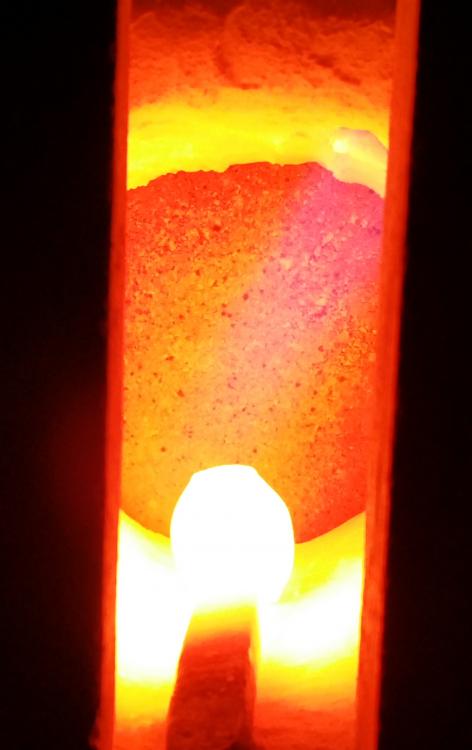
I got around to firing up my new little forge that I made from a freon tank. Using the burner (as mentioned above in my past post) I fired her up. I noticed an orange tinge to the flame. I attribute it to the angle of the burner. Maybe the flame is deflecting??
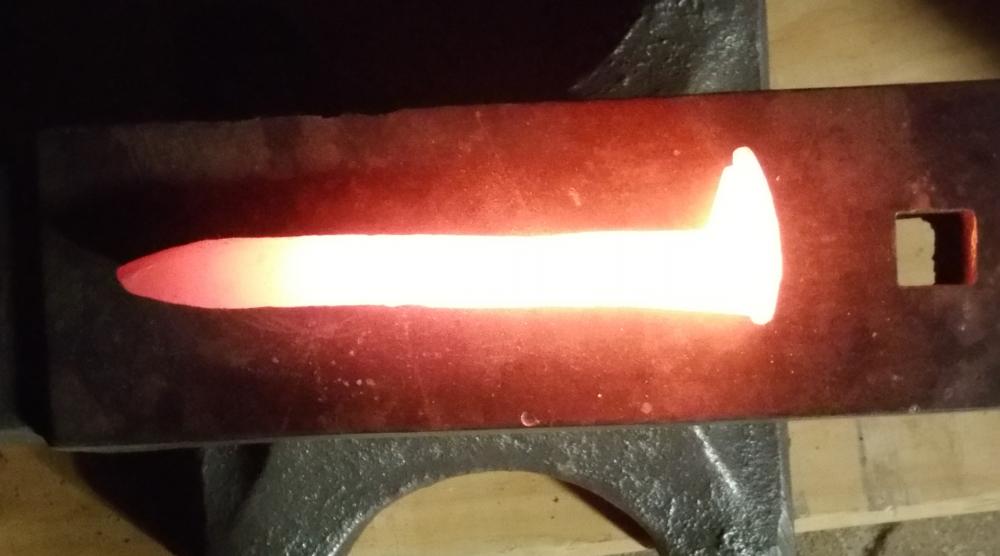
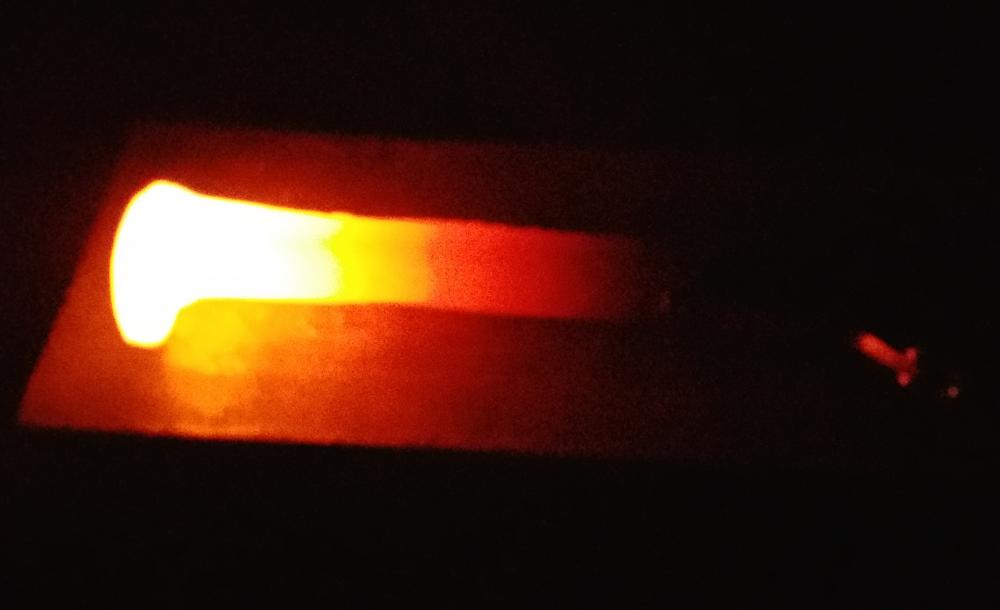
Anyway, I through in a railroad spike. After 7 minutes or so, that thing was glowing & the flame was barely visible...hmmm. I set the spike on my anvil & admired it.
I allowed the forge to cool and after adjusting the burner angle, I fired her up again. I was quite happy, but would love more opinions. Second picture after is about 3 minutes in, and lastly...I think its about 8 minutes in.
A regulator is on order...BTW
Thanks you for looking!!
-
Hmm...not a Mikey burner? I guess it's a knock off? I have limited tools, so I try to simplify and use what I have. Today, I opened up the sides of the pipe. Still need to clean it up to make it pretty and functional. Stacked some bricks, lit the temporary forge and let it run for about 5 minutes or so. I threw in a railroad spike just to see how long it would take to get it to glow. At 6 minutes, I took out the spike and set it on the anvil. Here are some pics of my build. I am using a .025 mig tip.
My apologies...I tried uploading more pictures, but I kept getting a failure to upload message..
The burner tube is 3/4x8in black pipe.


-
14 hours ago, Michael Cochran said:
Why are you not using a regulator?
I currently do not have one. Will be obtaining a regulator soon
-
Good evening everyone!!
I came to a point now where I'd like to refine my forge. Soft bricks started cracking and seems like a good time to build an smaller forge to suit my needs.
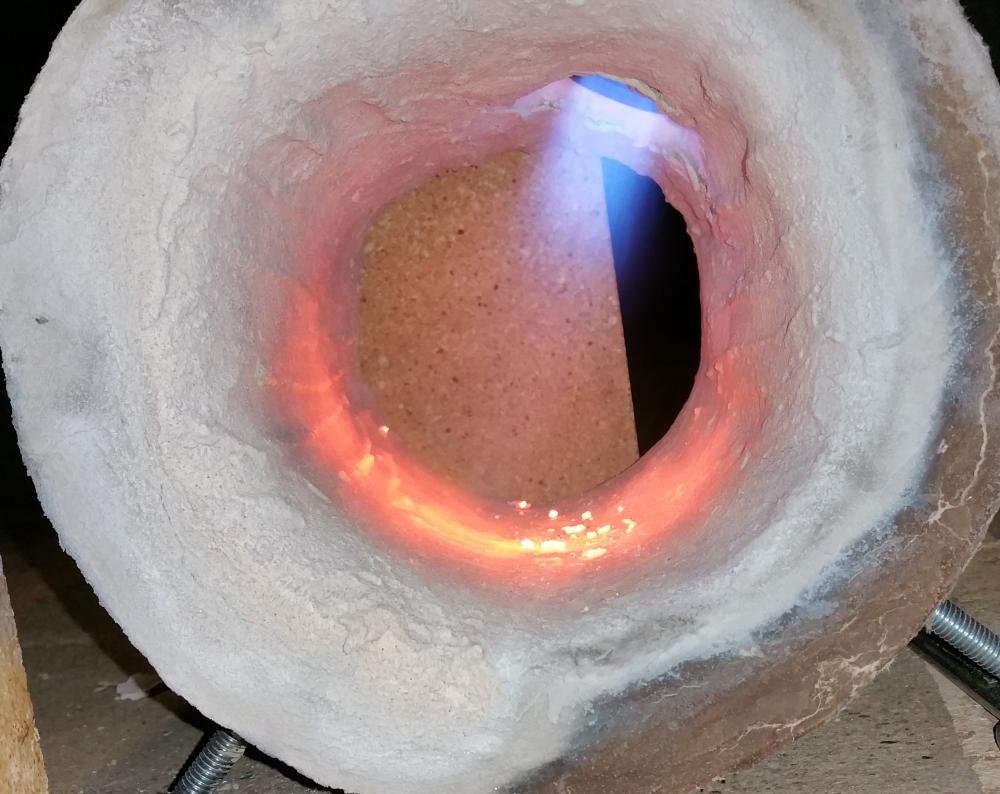
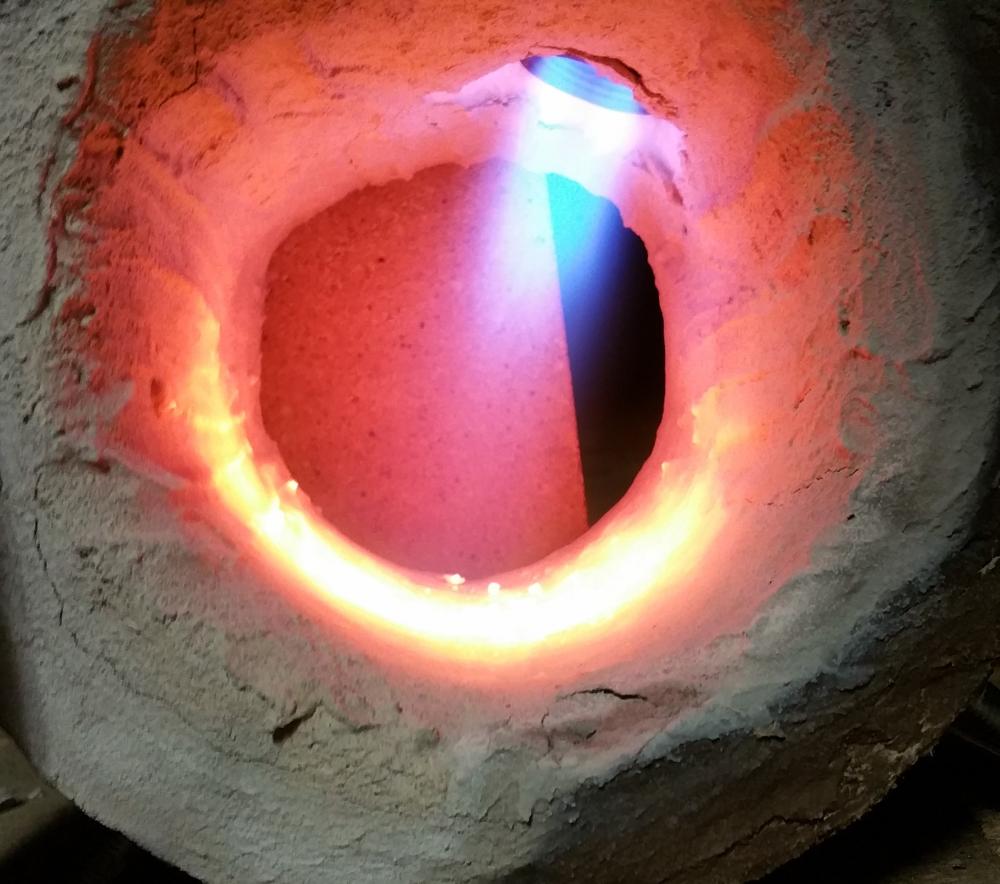
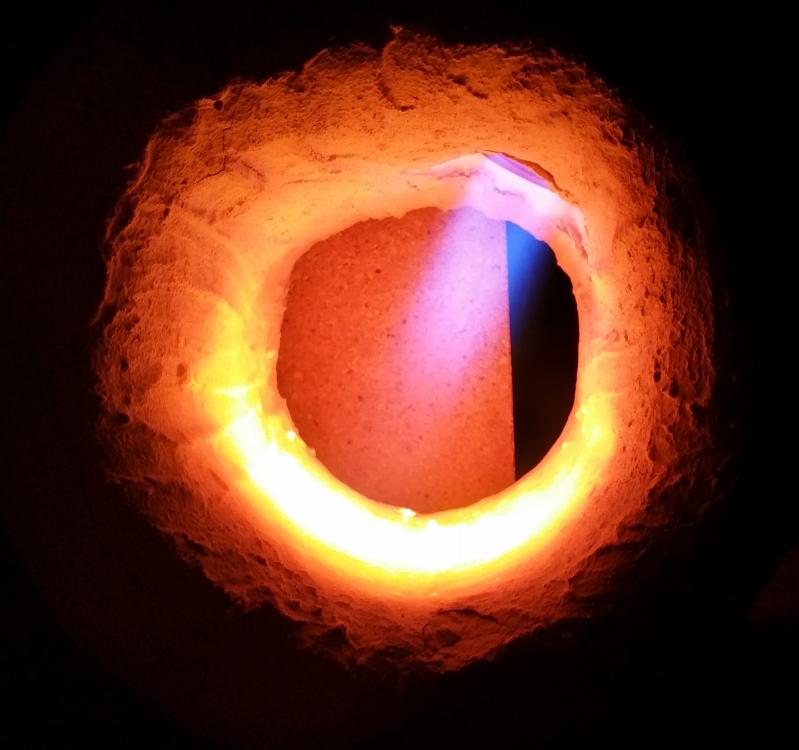
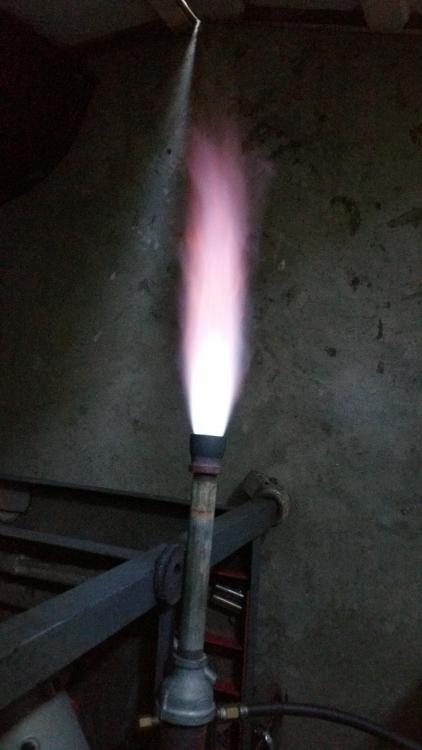
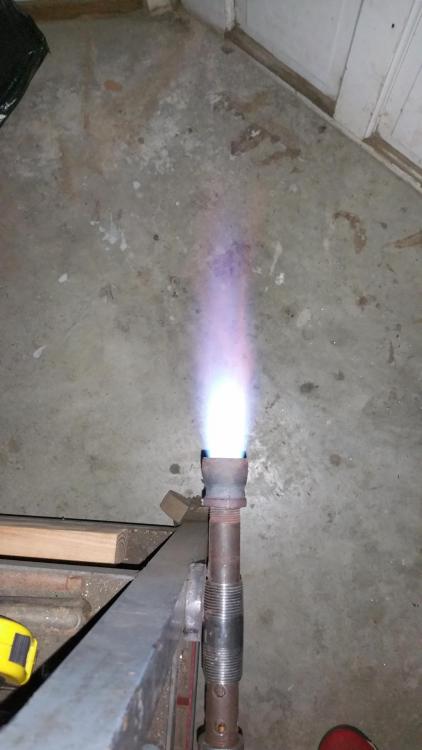
My first burner that I put together is a Ron Reil design. I used a #57 orifice for the jet. I like how it came out and believe the flame is desirable. However, I was never able to reproduce another burner build. Holes drilled always came out crooked.
I then came across the Mikey Burner. Its sleek and looks like I can reproduce it quickly and easily.
As you can see in the pictures, the flames are different. Well to me they are. I'm not running a regulator, just a needle valve.
Are the flames from either acceptable? Or any thing I can do to improve on the build achieve a more efficient burn.
My new forge will be a single burner and would love to attempt to forge weld.
-
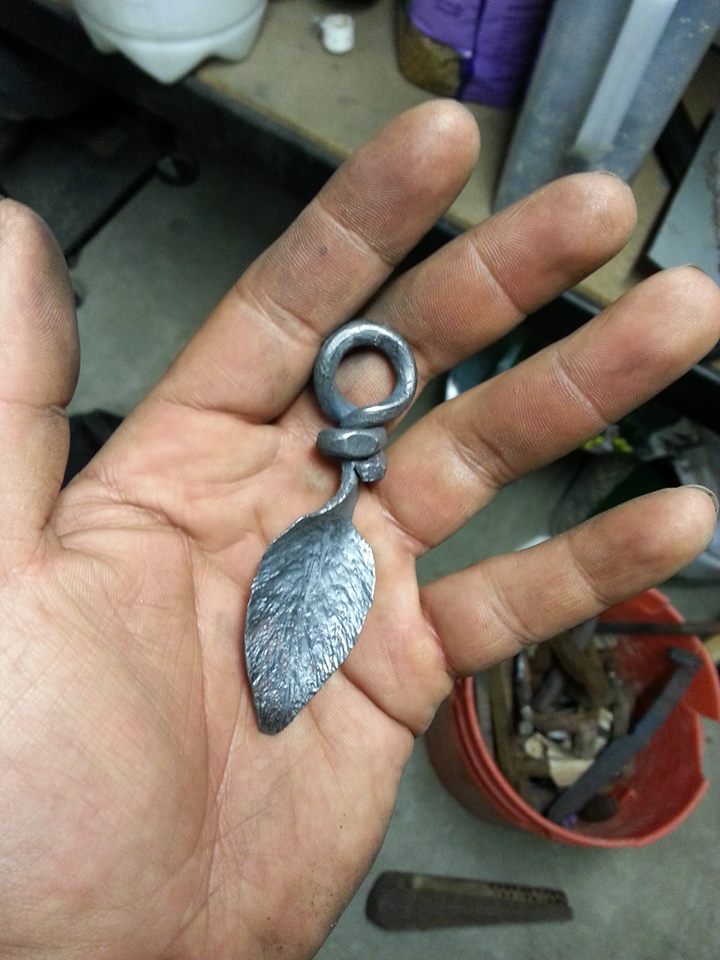
4 hours ago, tdaleh said:
Great texture on that leaf. Nice to see how you made your anvil . Thanks for sharing.
Thanks! There's a video on YouTube: "Jesse James Blacksmith part 2"
He goes to Israel and works with Blacksmith Yuri Hofi, Yuri states he still learns by making these leaves. If it works for him...means I can learn a lot.
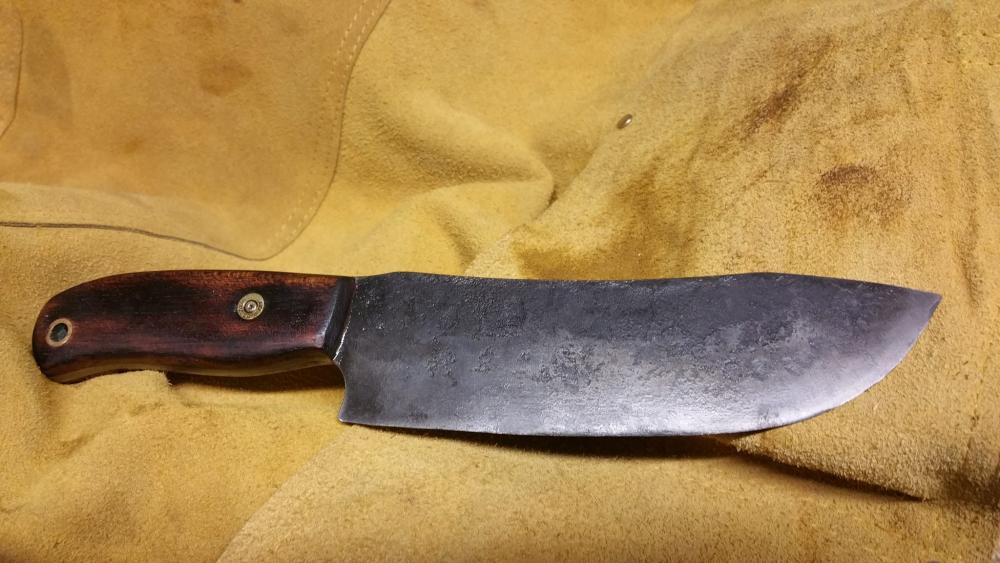
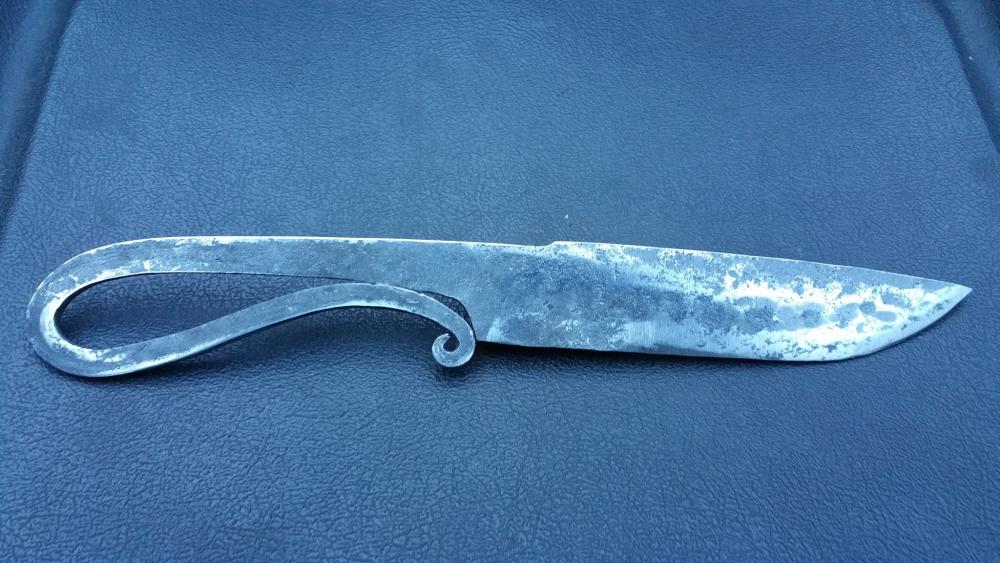
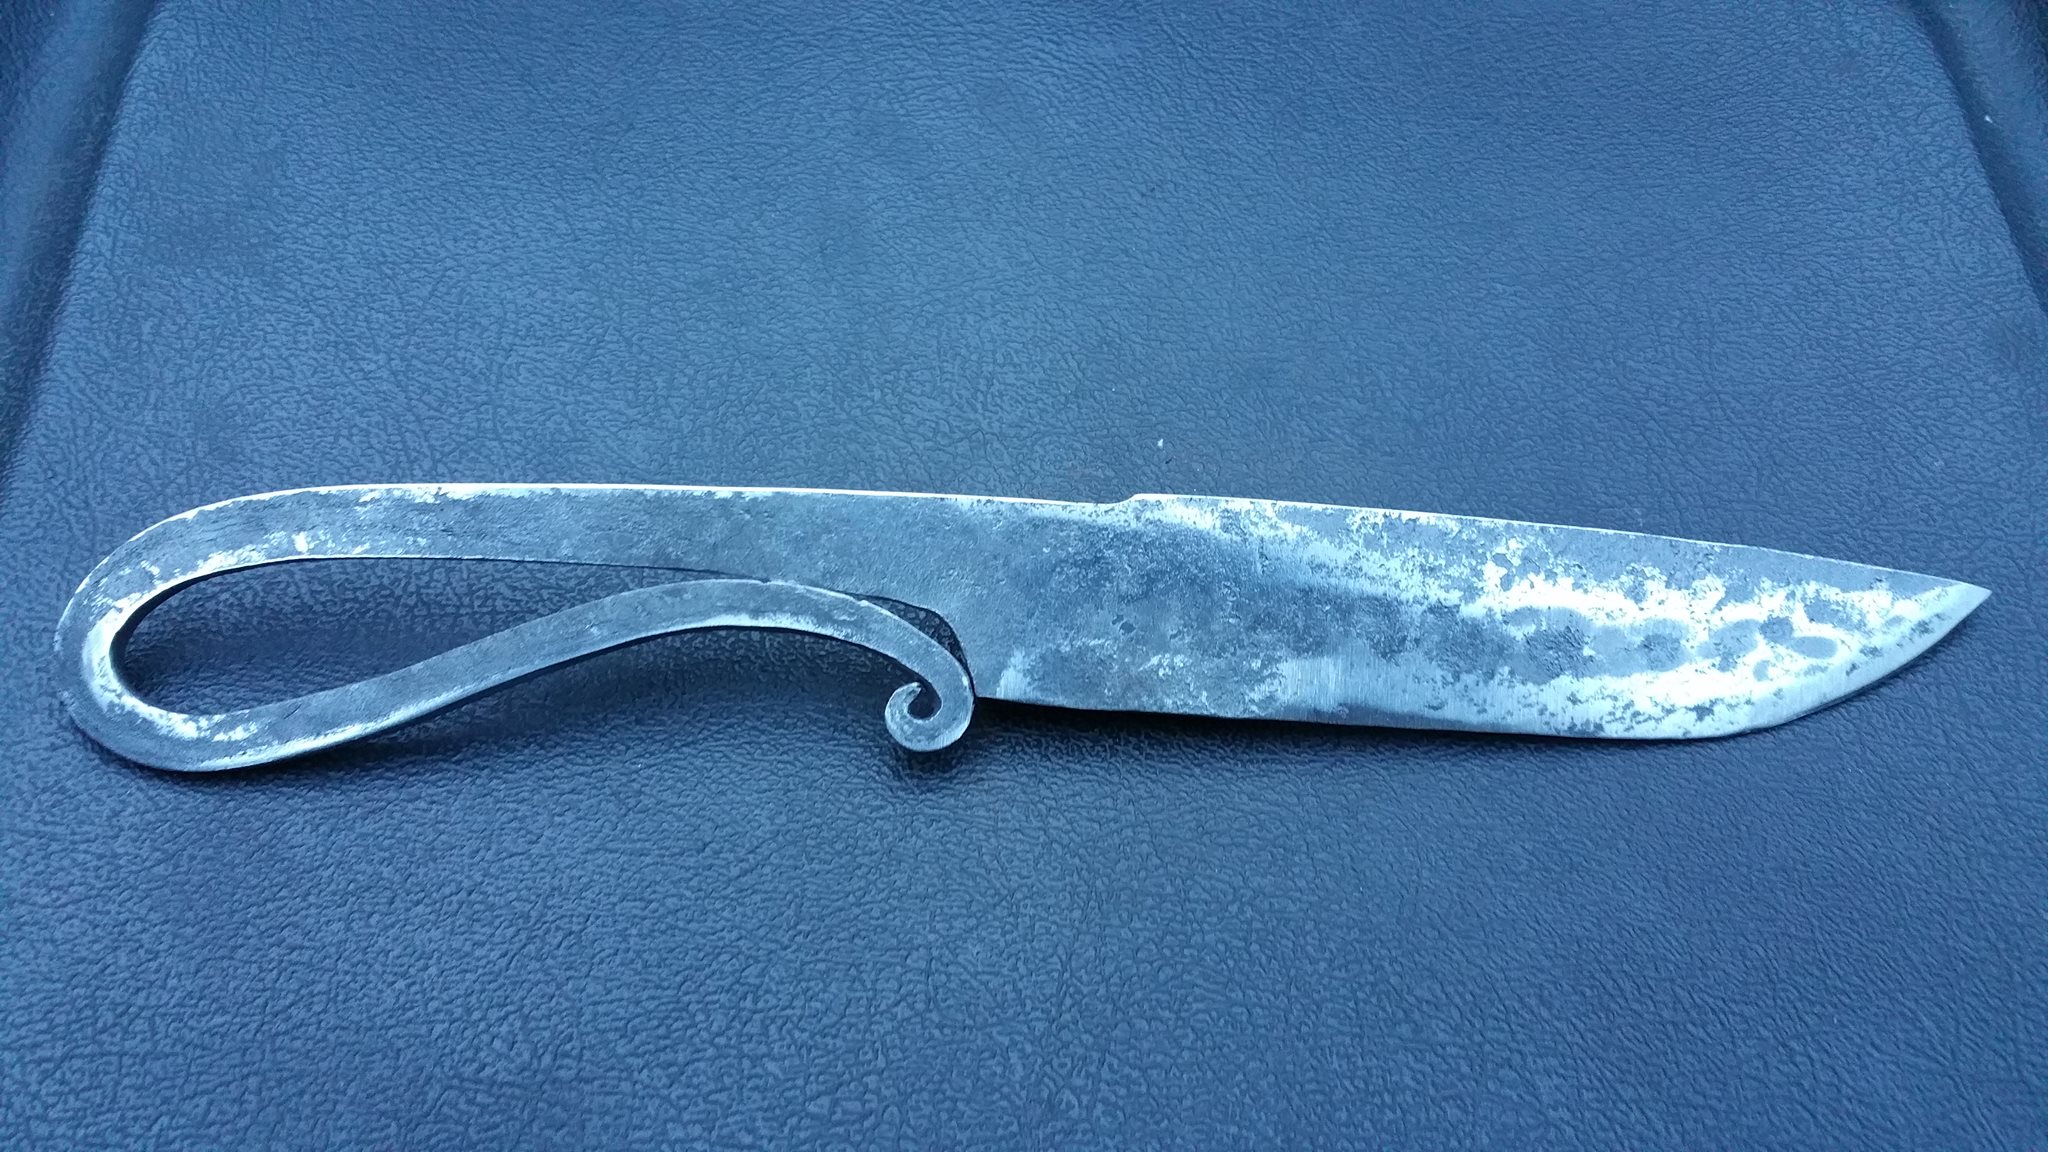
1 hour ago, Michael Cochran said:I've yet to make a leaf in the few years I've been doing this lol. What kind of steel did you use to make the knife?
I used the obligatory leaf spring...LOL. Can't wait to finish it! Still need to quench the blade and leather wrap the handle.
-
5 hours ago, Michael Cochran said:
That looks pretty stout and nothing like what I thought I saw. It looks like you have an anvil, now let's see what you can make.
")
Thanks! Took me a while to make a leaf and this knife. My arm was pretty tired! But I had a lot of fun with these two projects!

-
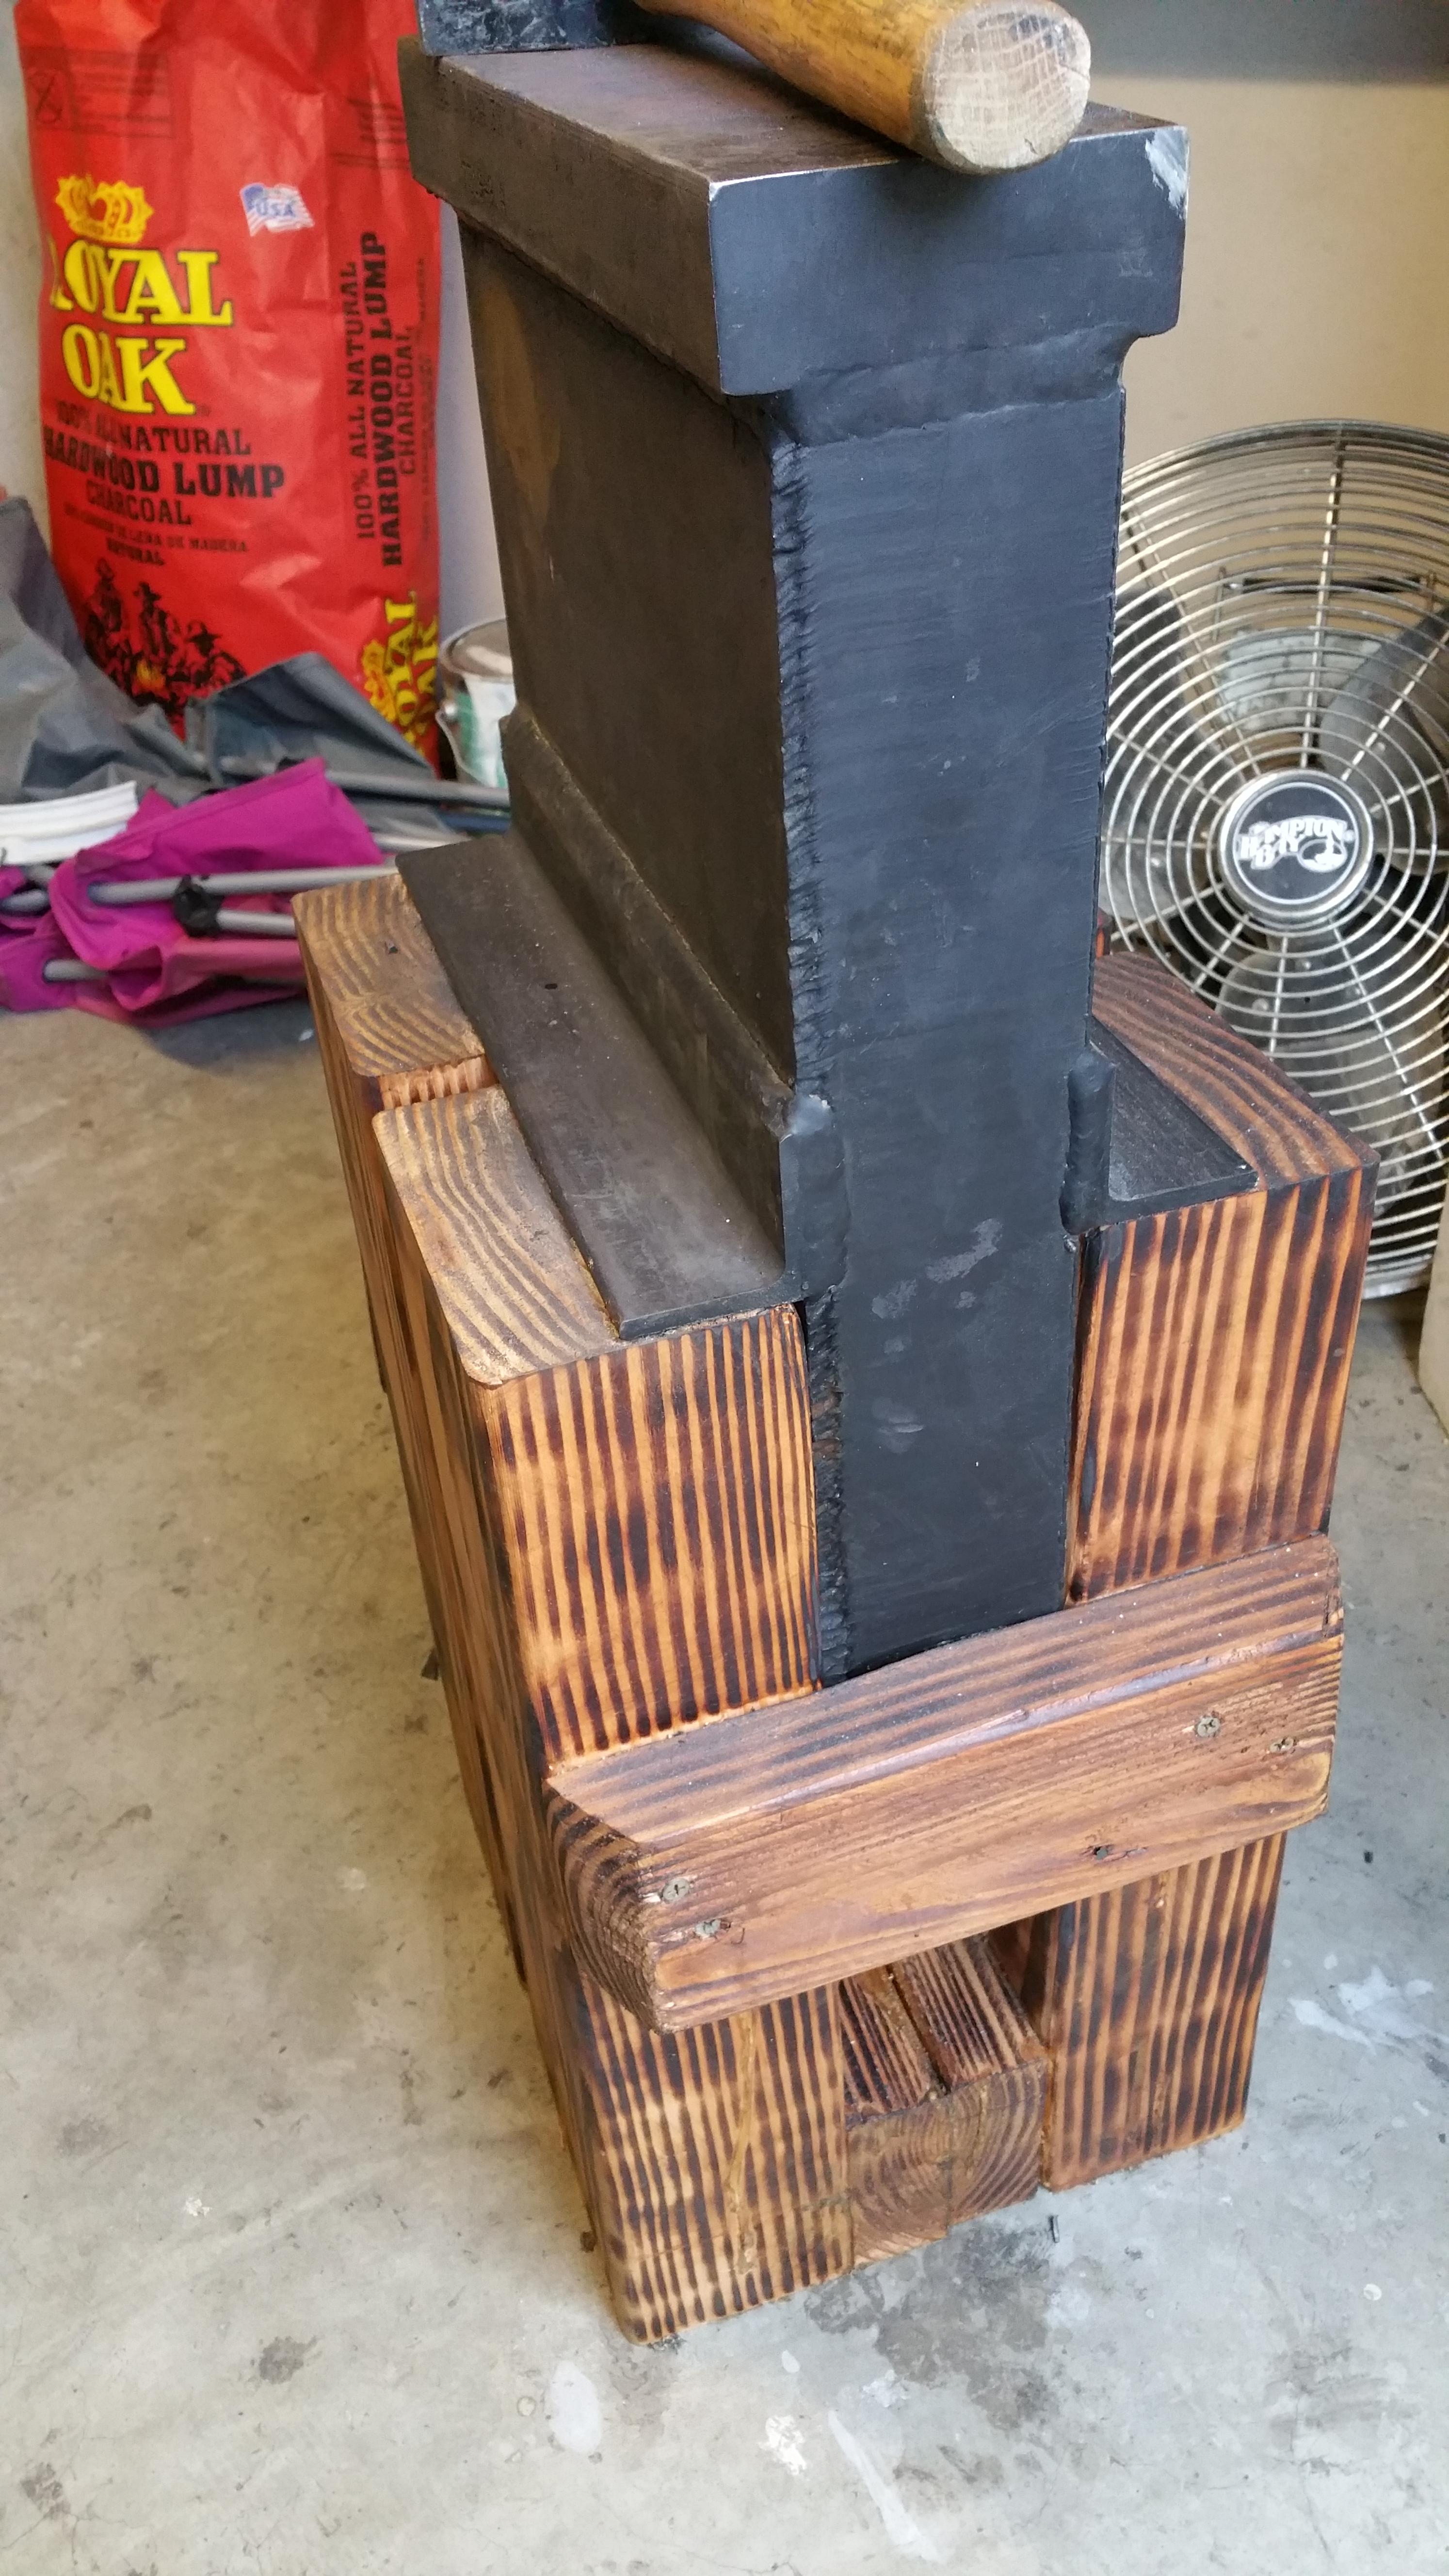
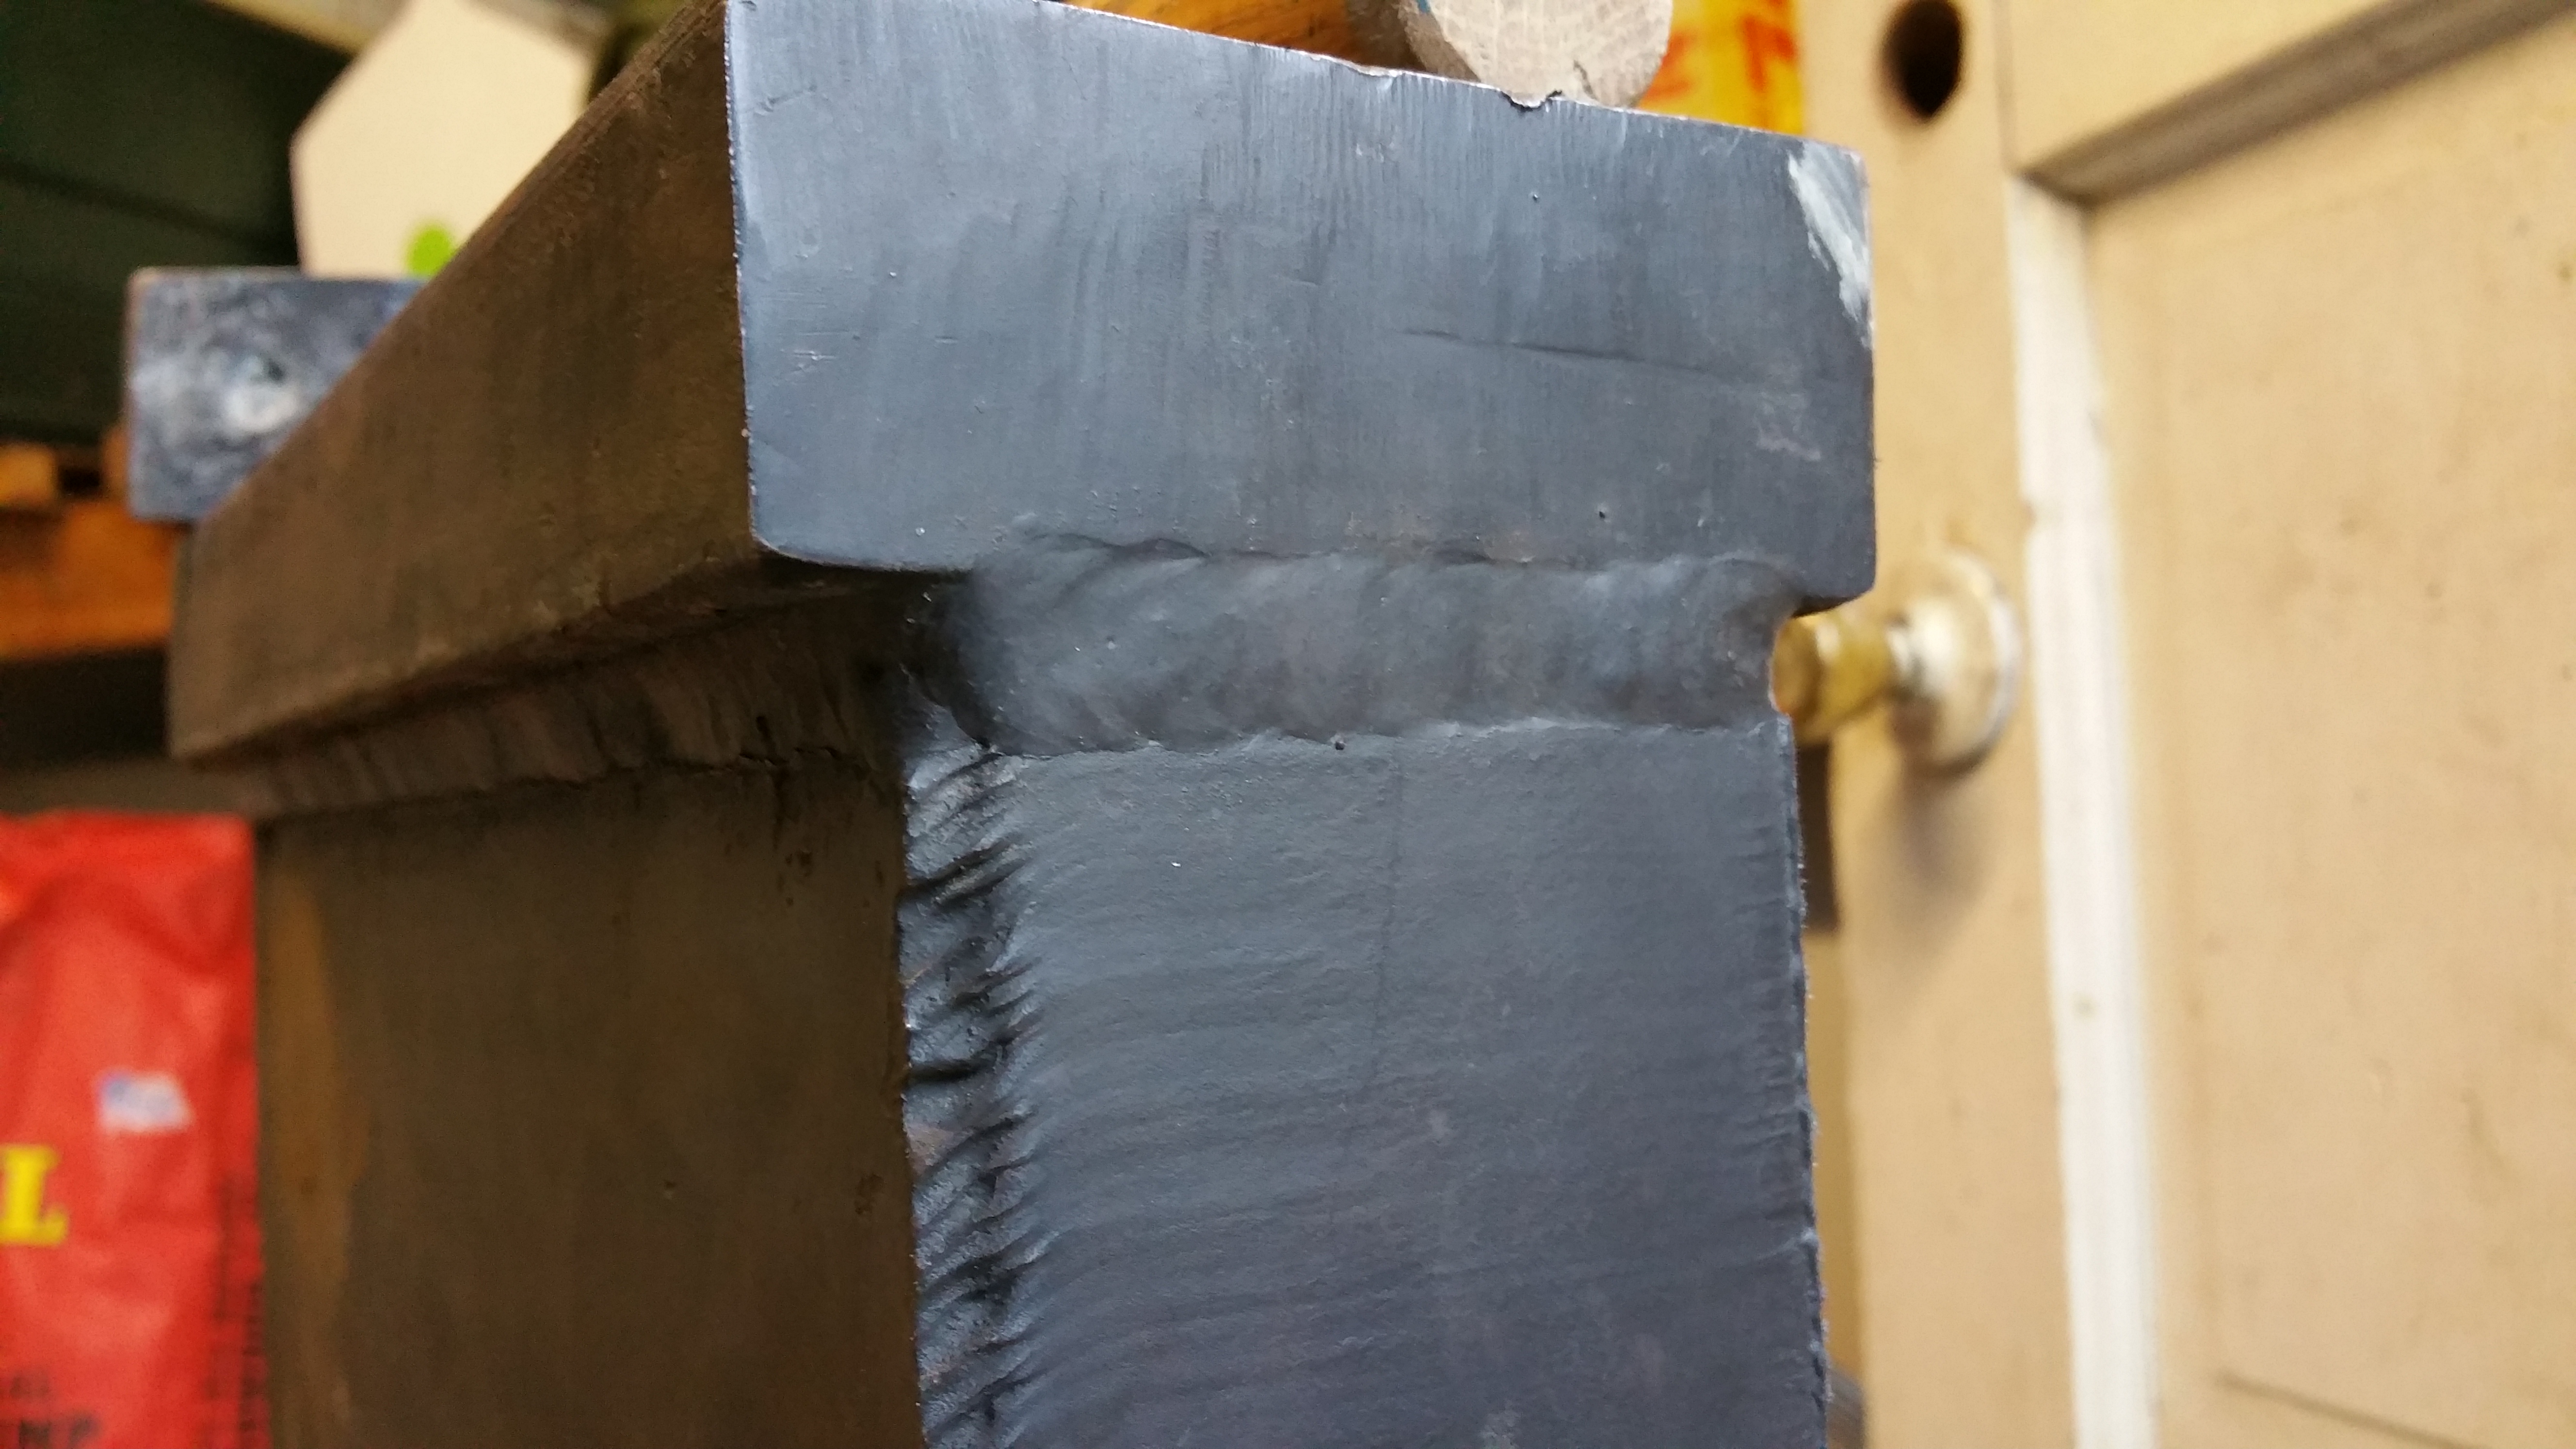
On 10/19/2016 at 6:20 PM, Michael Cochran said:
Can you show some pictures from different angles? I don't really want to comment on what I see because it might be a trick because of the angle of the picture.
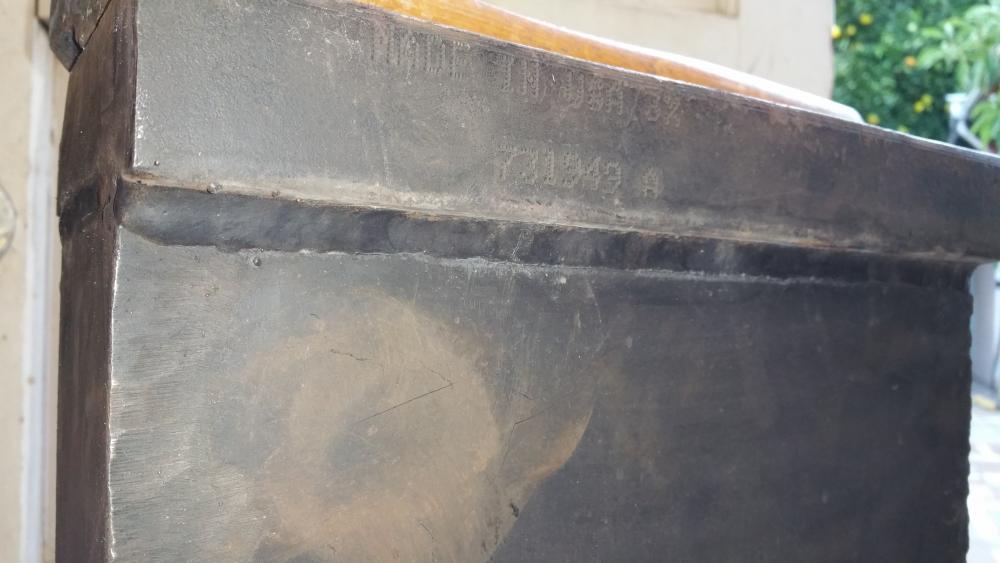
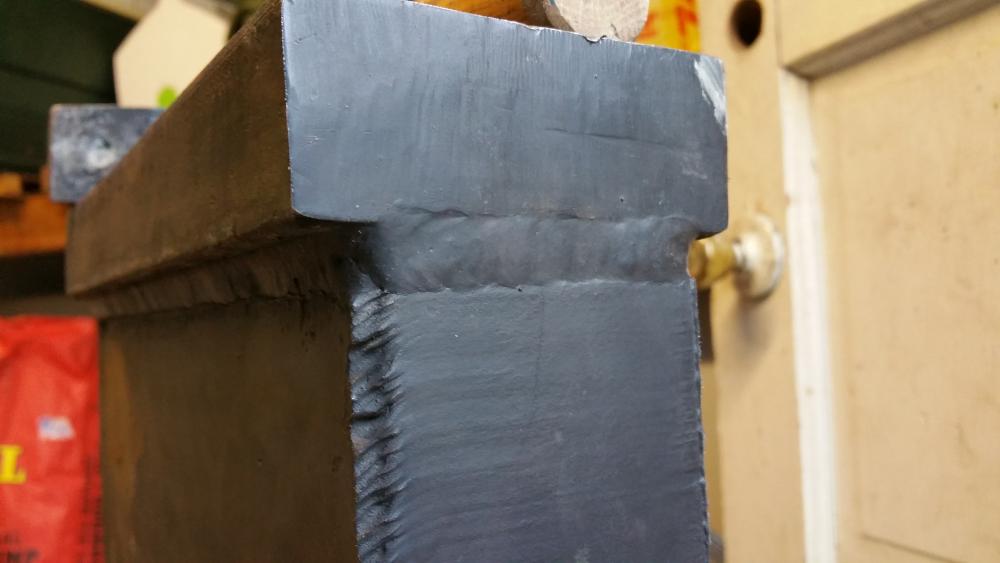
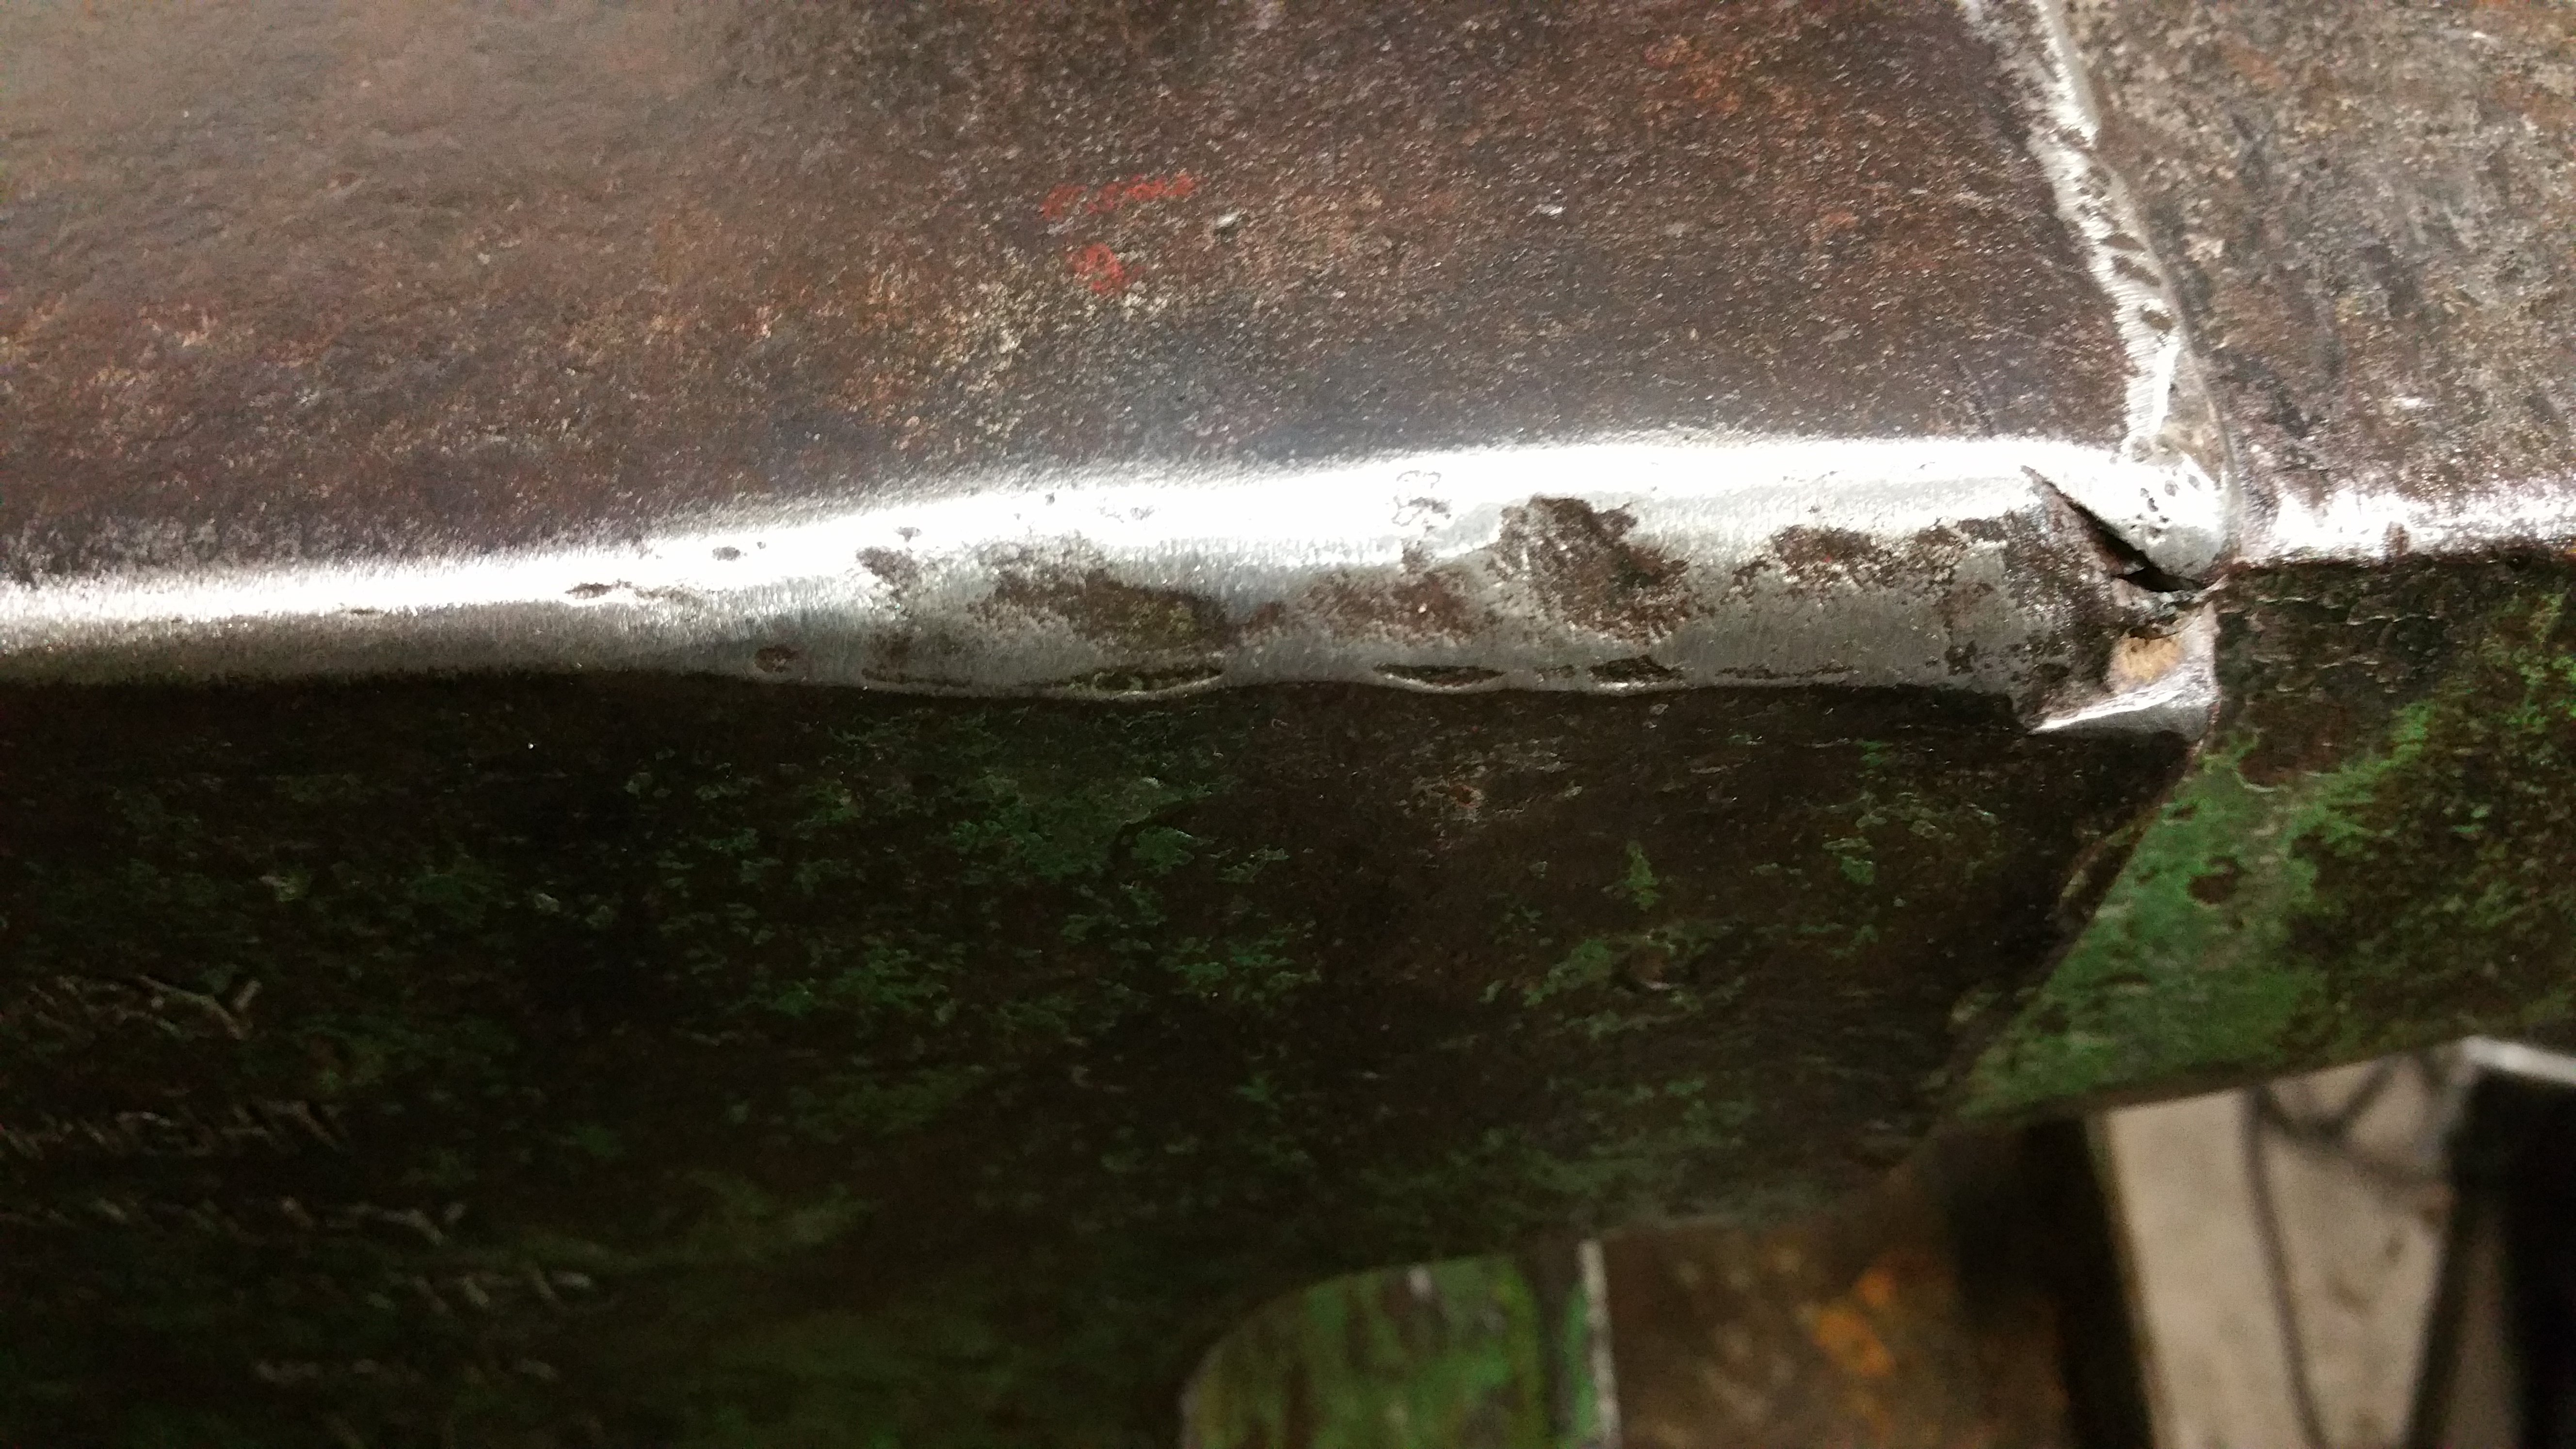
My apologies for late reply... Here are some more pictures. I'm not sure if they are full penetrating welds. But the shop I took it too, told me he used some high impact resistance rod. He gave me a number, but cant remember.

 On 10/20/2016 at 3:26 AM, Ridgewayforge said:
I think he means from different camera angles, in order to see the anvil more fully, making sure some aspects aren't just a trick of the light.
I'd like to see more of it too- How are the welds? Are they full penetration? Did you harden and temper after welding? How's rebound?
Here's a video clip of rebound. It's not too bad I guess..
-
Finally finished up my anvil stand and had some good fun.
Started out by turning a round bar stock, into a square then into a leaf. Dang its tiring!!


coating soft fire brick outside with fire clay slip
in Insulation and Refractories
Posted
At some point in time will you share your vast experience and help the original poster with his question?