mariom2
Members
-
Joined
-
Last visited
Everything posted by mariom2
-
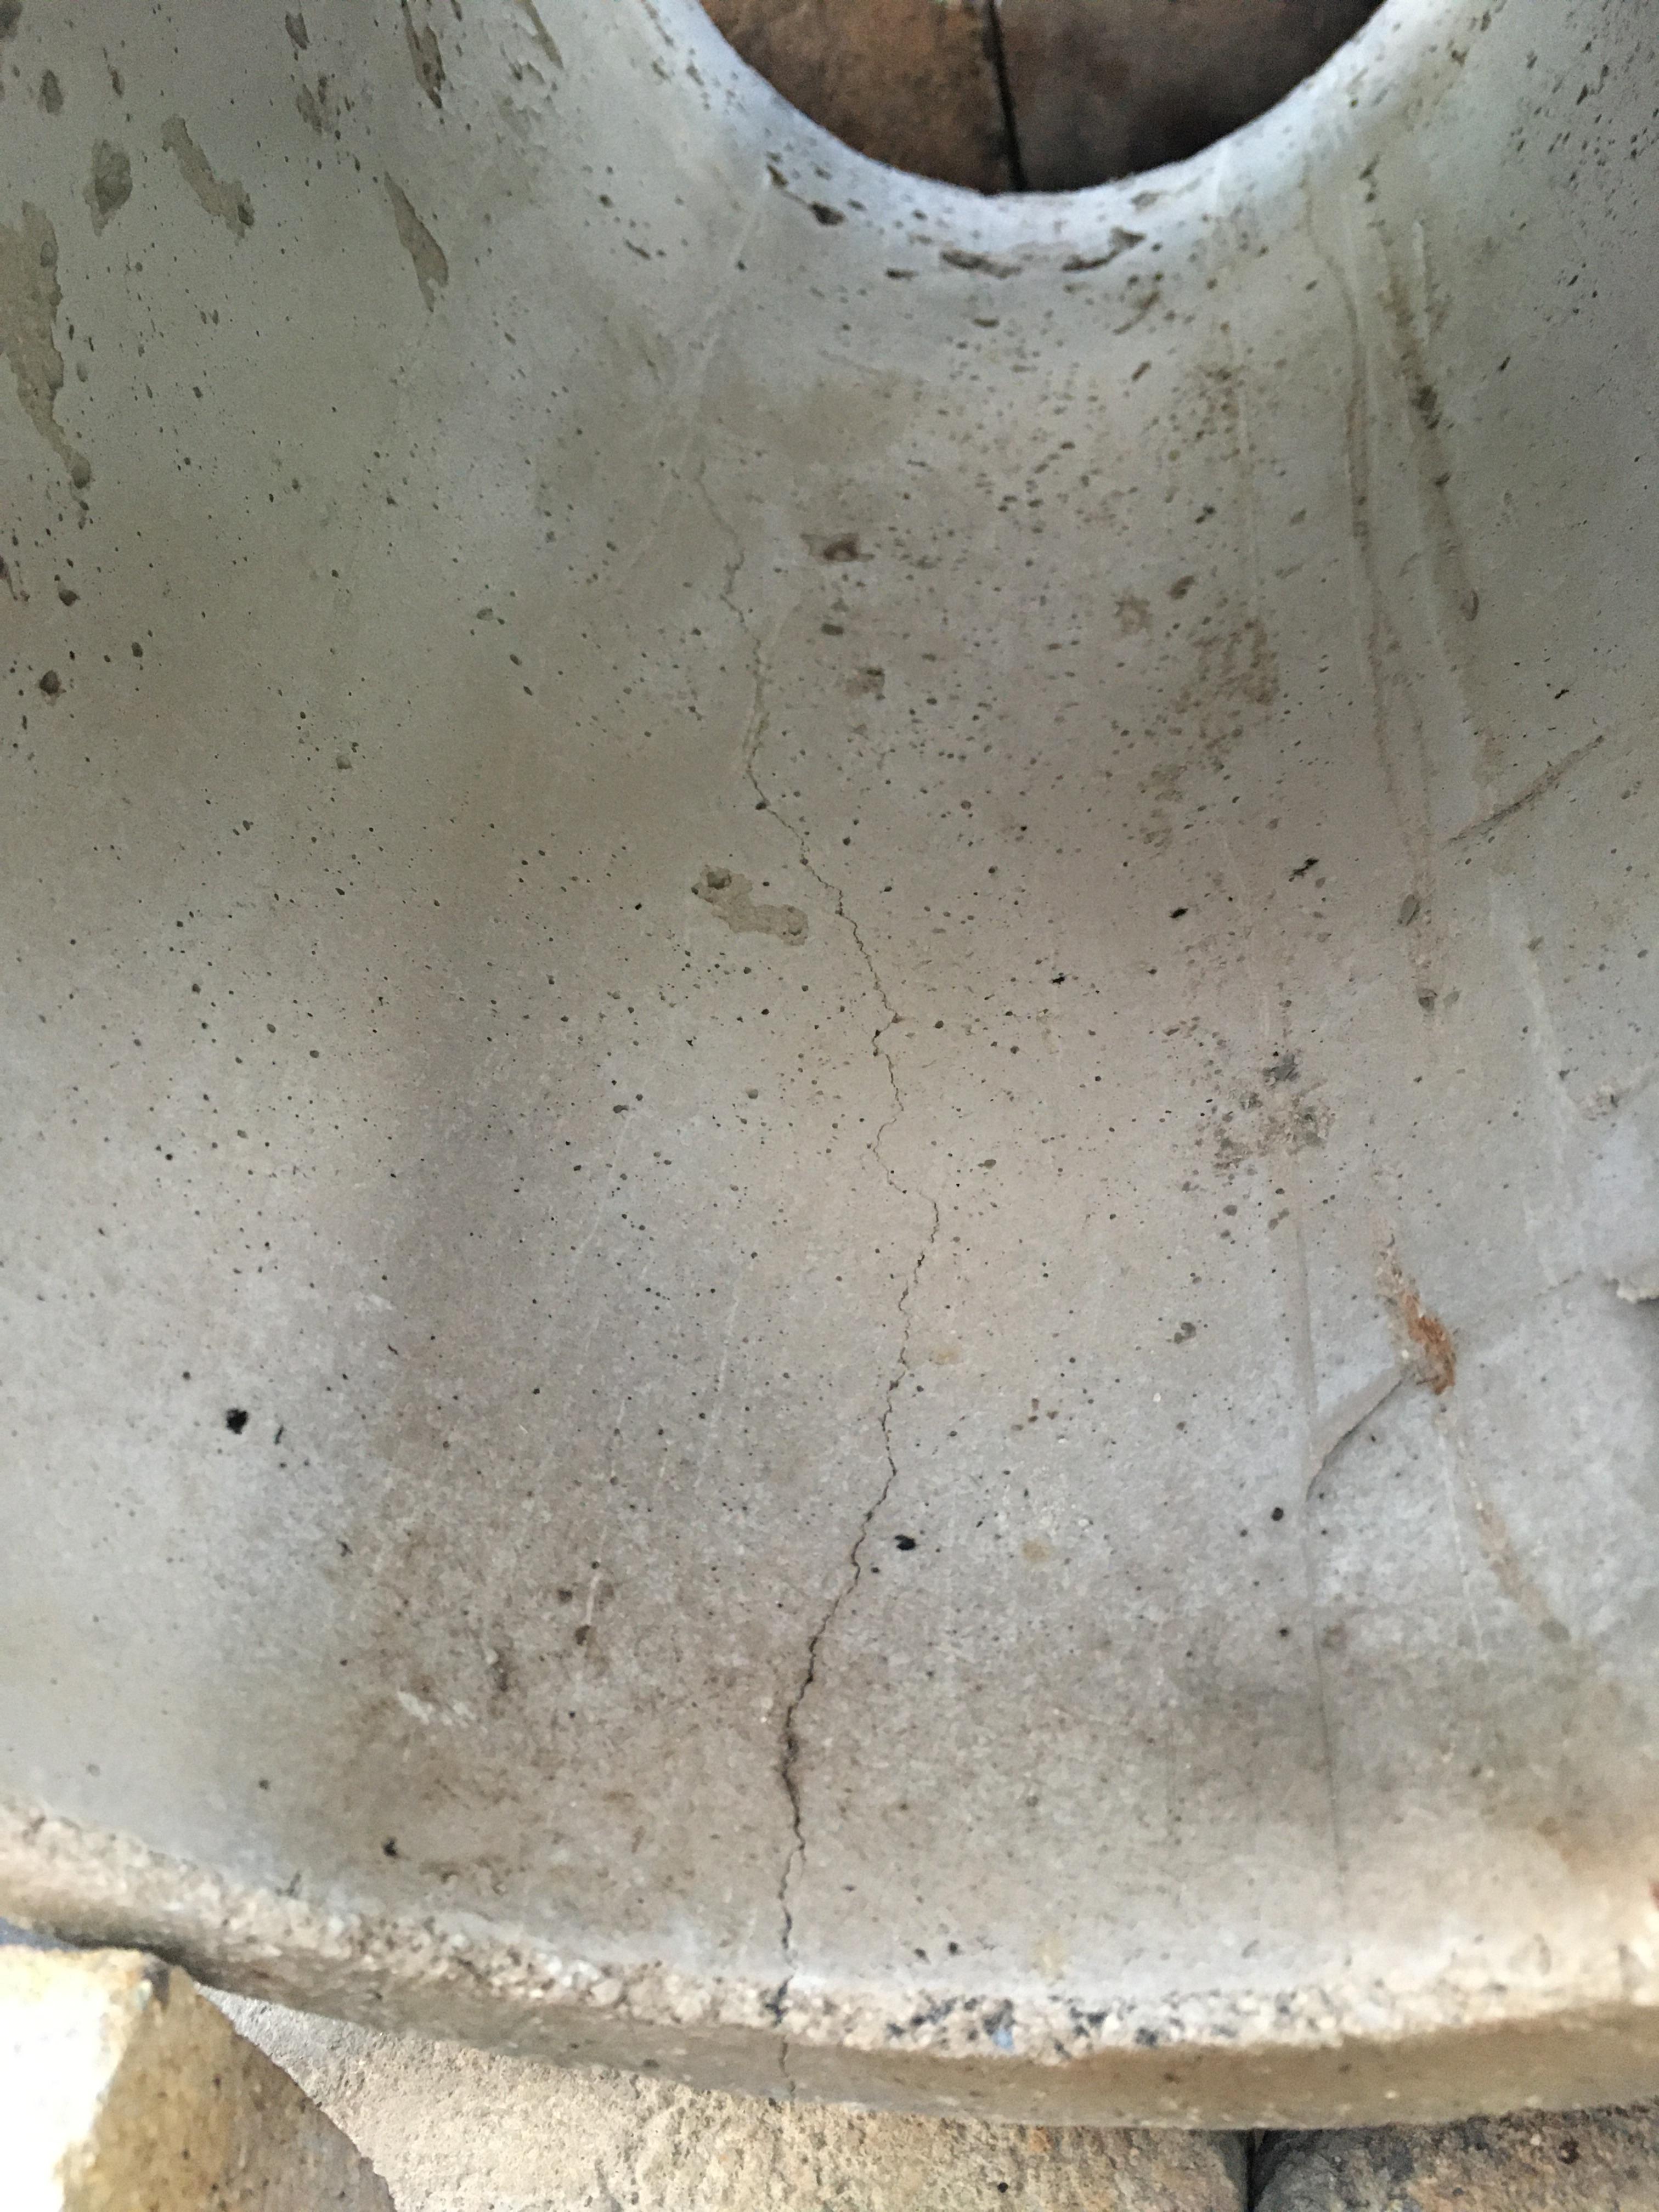
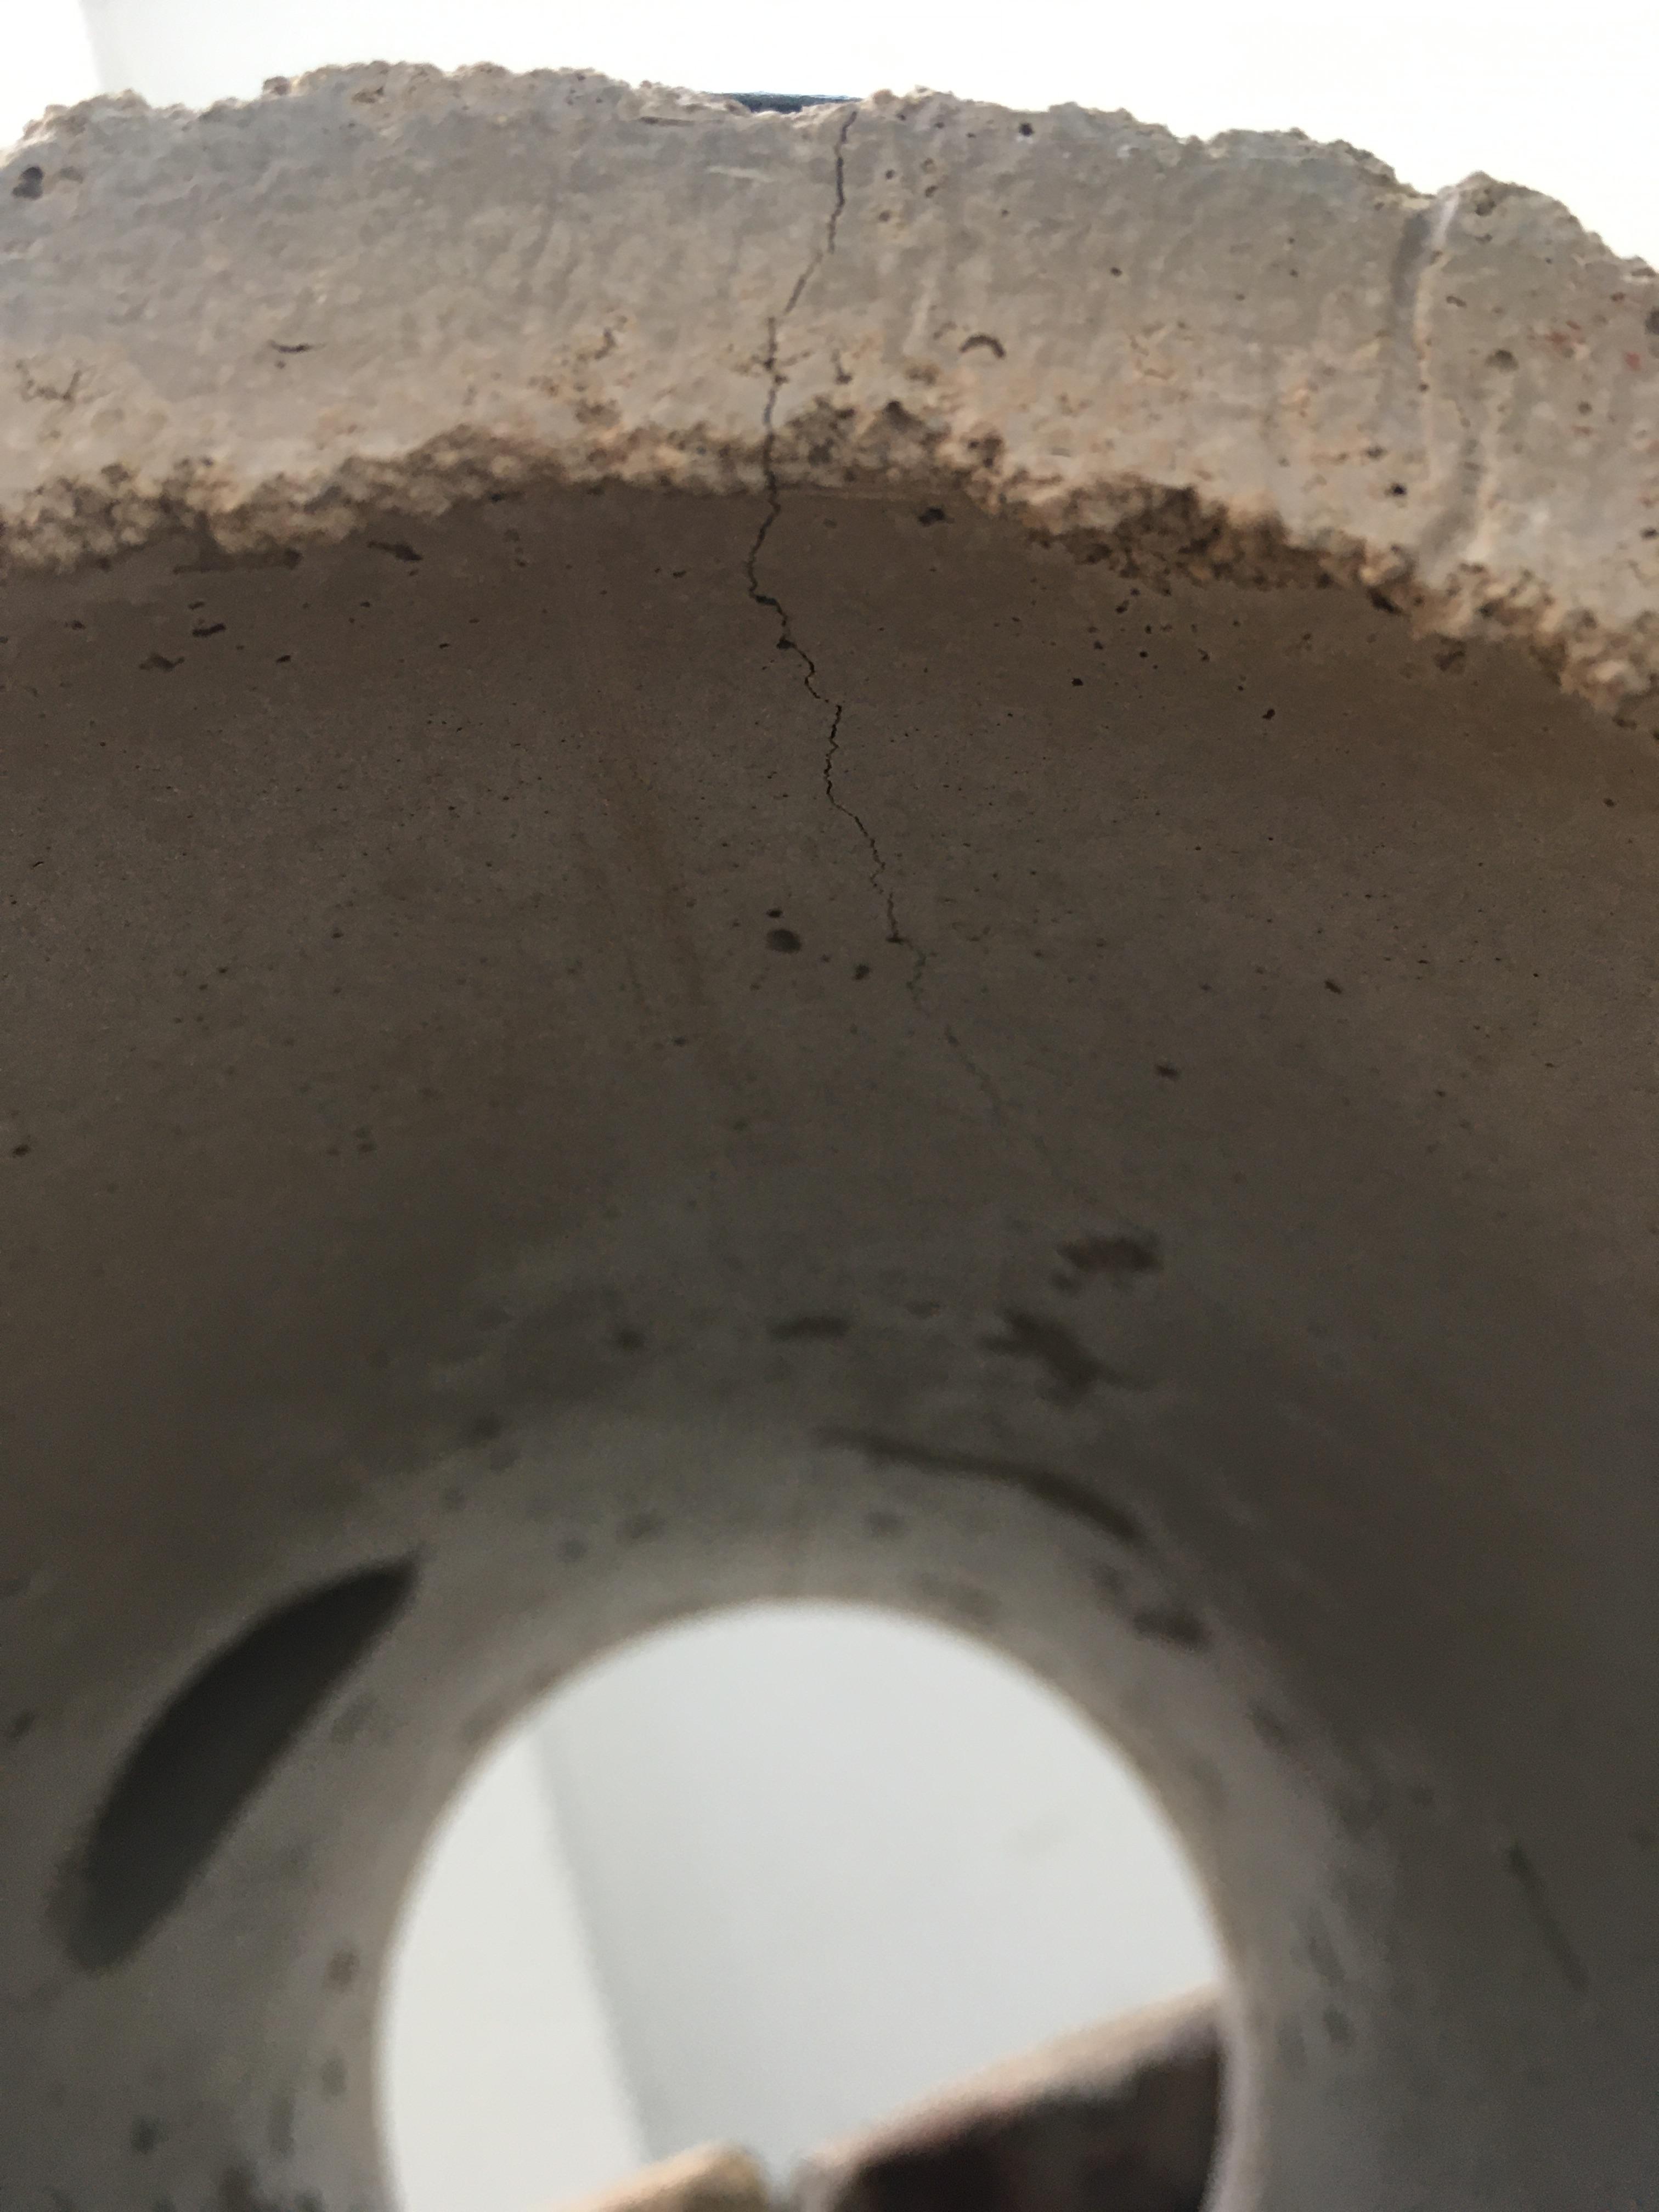
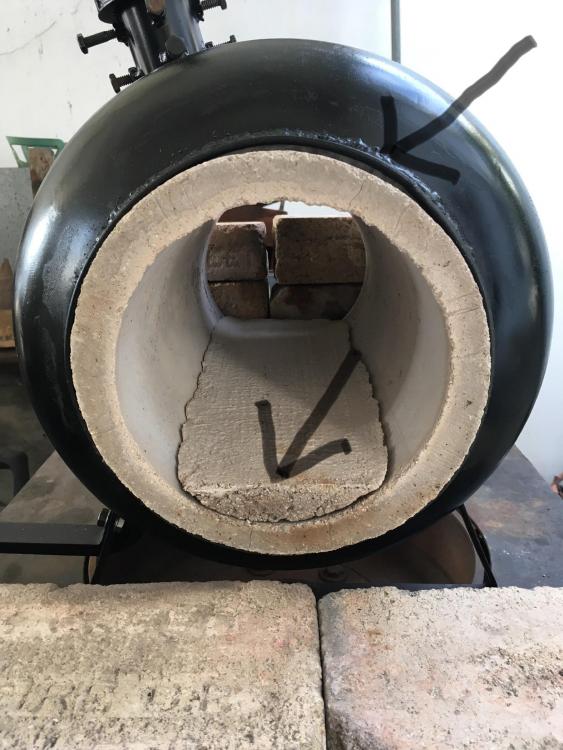
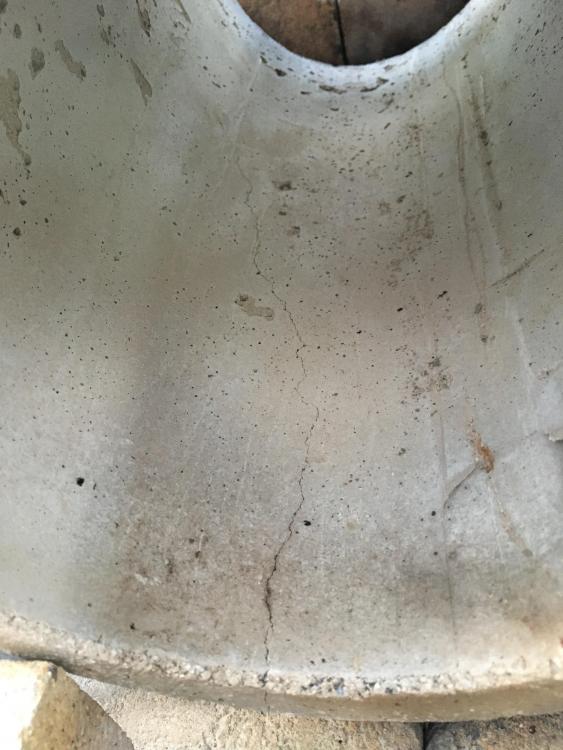
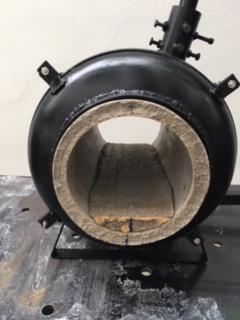
Floor is a separate cast on the same kastolite. One crack is under the floor and the other on top. They have gone worst, very thin but almost all the way to the back, if this happens I will eventually have two separate pieces!!
-
Thank you for the replies. Yes, it is insulated. 2 inches of ceramic blanket.
-
It happened during the firing. Tried to be gently, 5 minutes, cool for a while, 10 minutes cool half hour, 15 minutes, cool.........cracks!! Too hot, too soon!!....I do not know. Guess now it needs fixing. Read in another post to butter it and use the same Kast o lite??. Any comments. No metrikote, no plastic, no ITC100 around here.

-
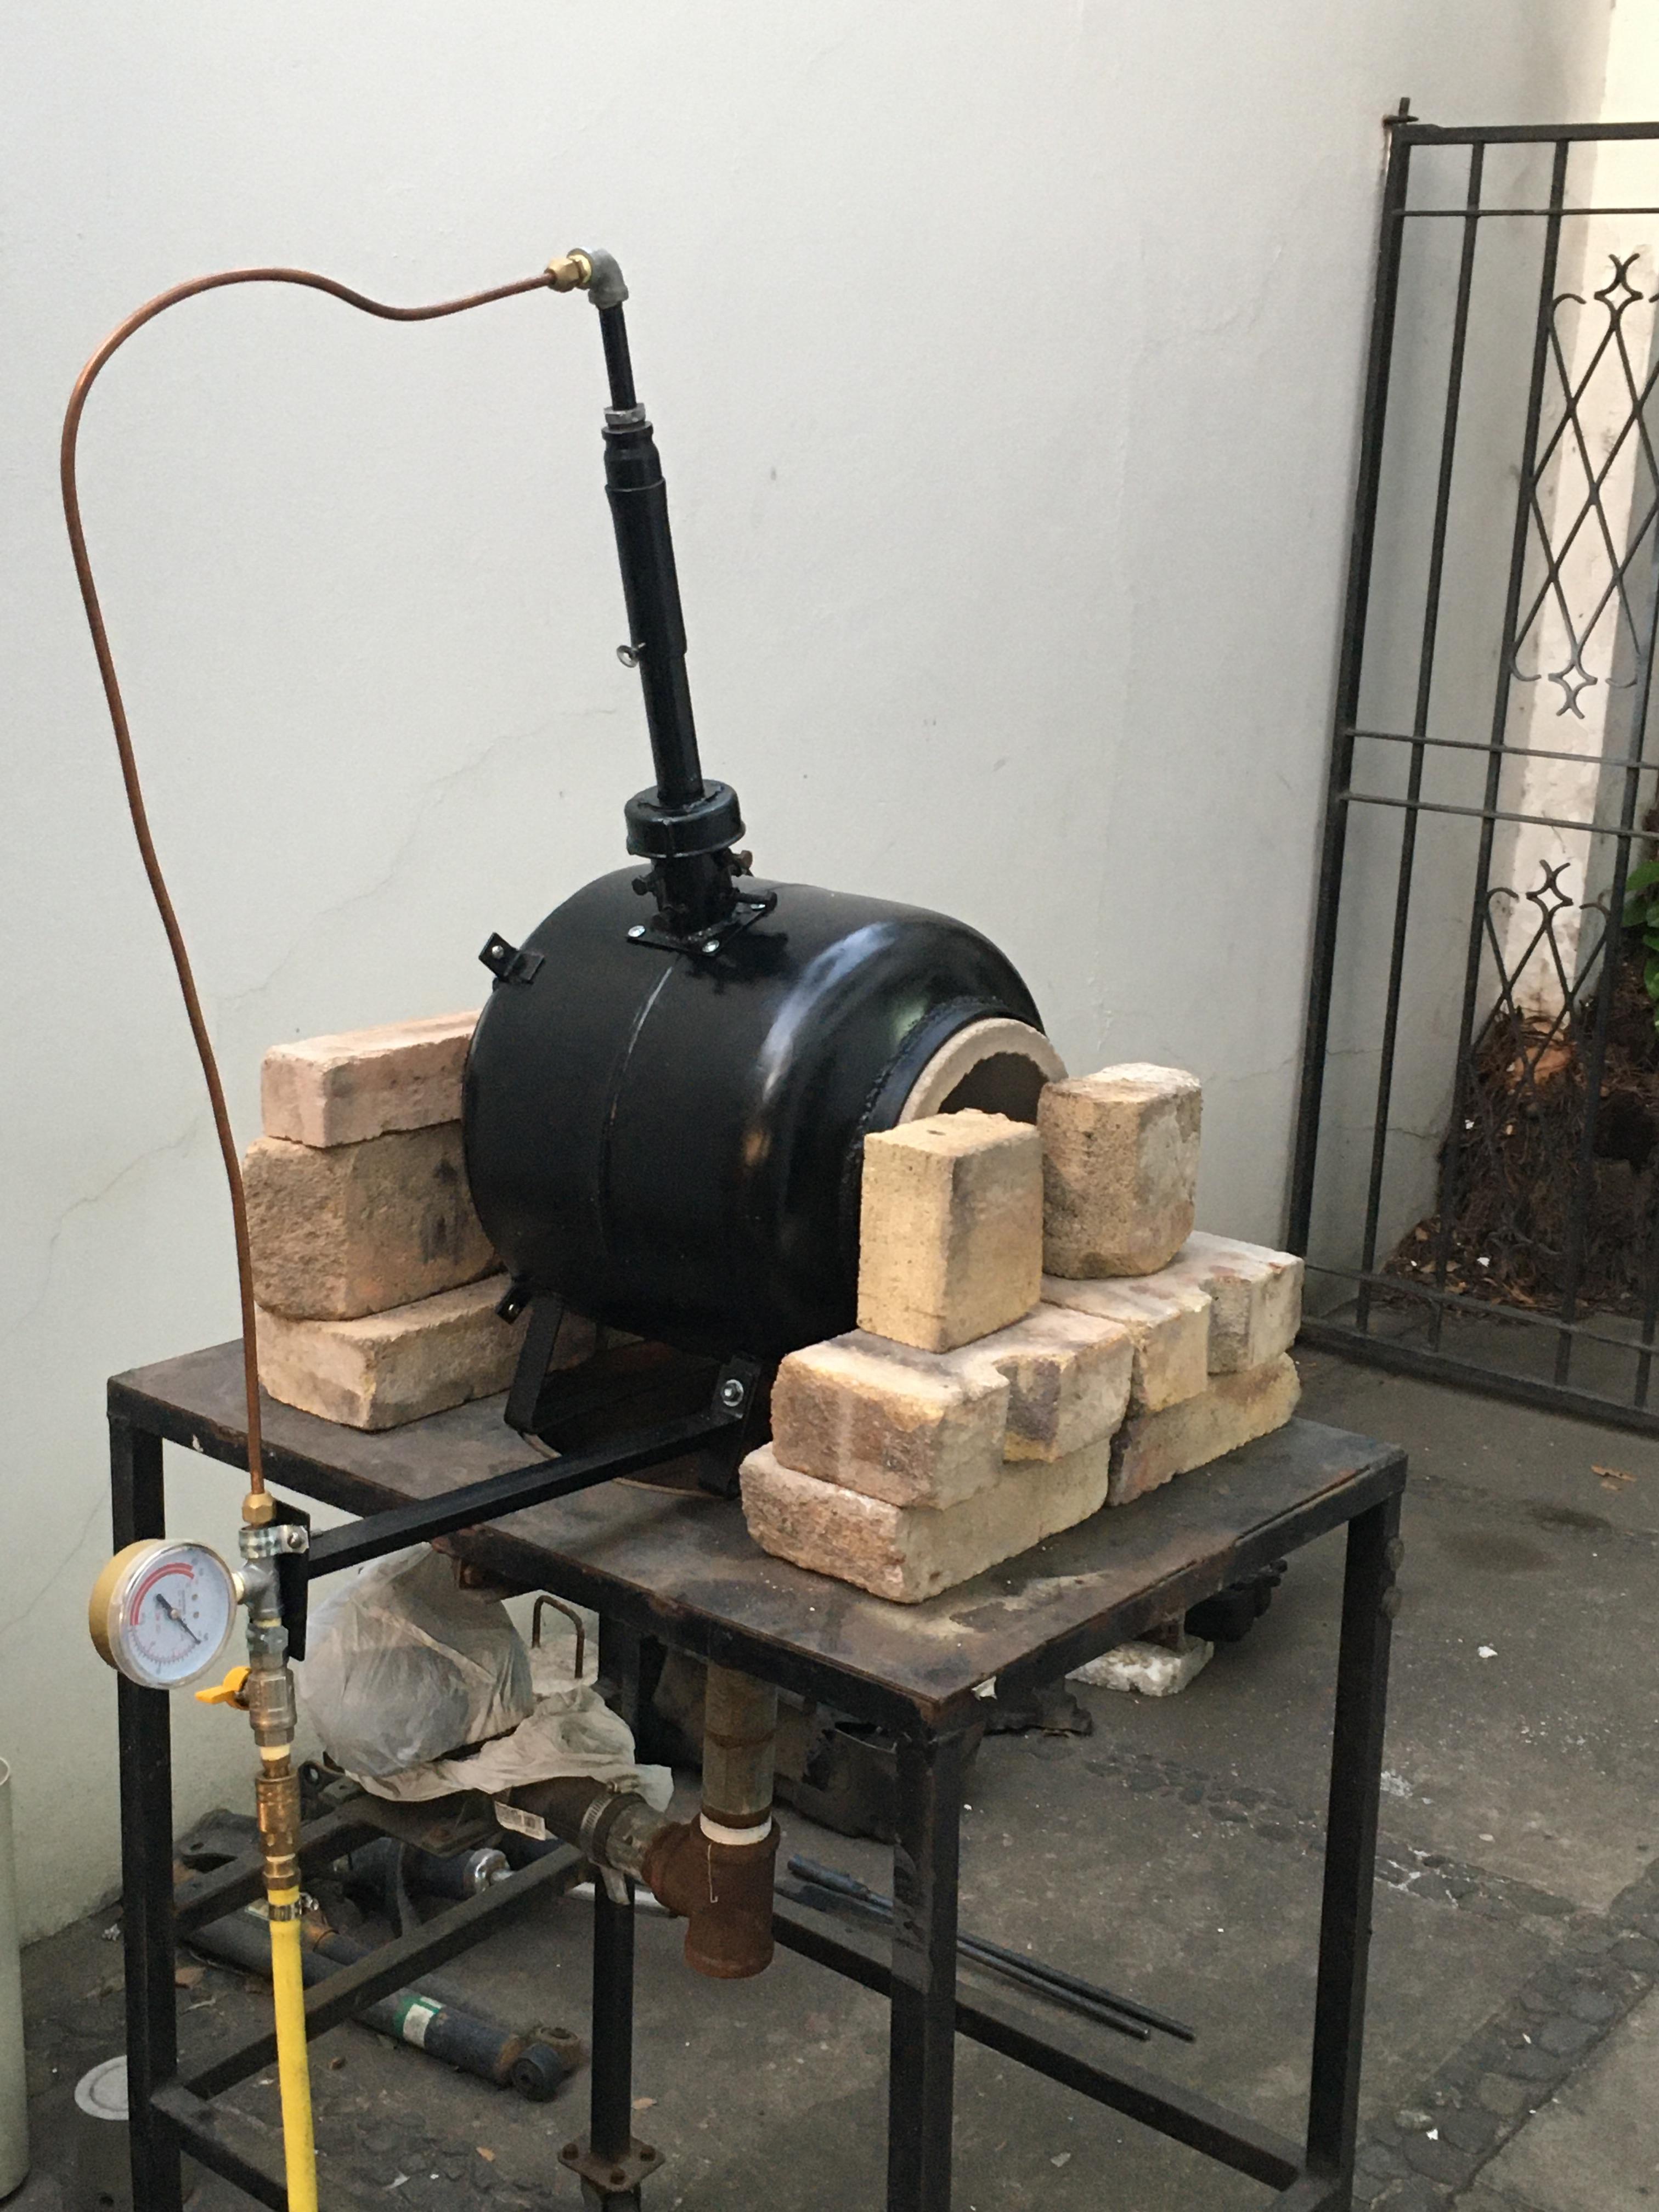
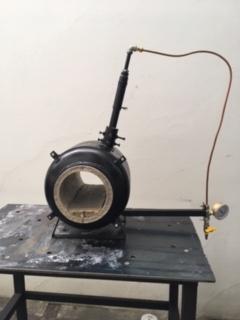
Life has been very busy these past months, very little shop time, some delay but project keeps going. It now needs to be fired. There is no loose Kaowool except for the burner port. I do not want to have loose fibers of ceramic blanket so I need to rigidize and plaster it with the same Kastolite. It should work ok. I also need to think on some type of doors for the openings.


-
Yes this is the idea, I guess the should bond together. What makes me think and have to decide is the size and position in reference to the burner hole.
-
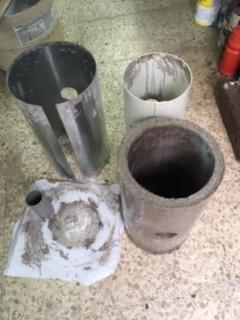
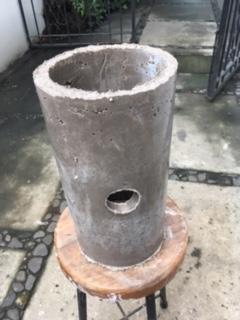
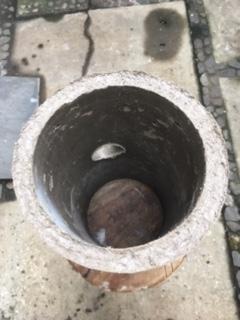
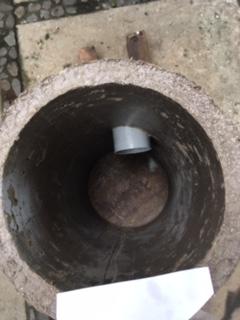
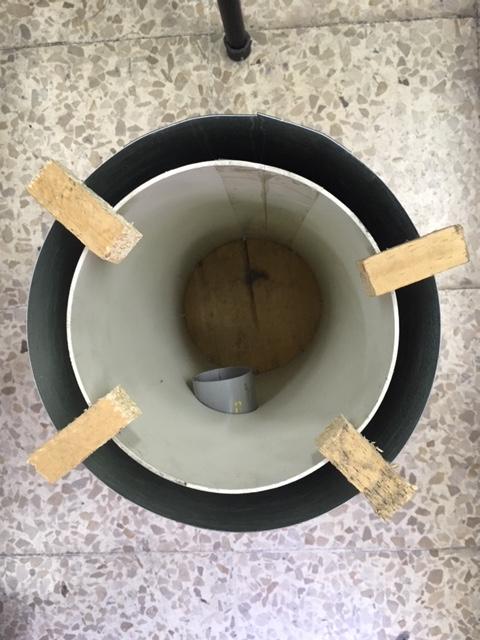
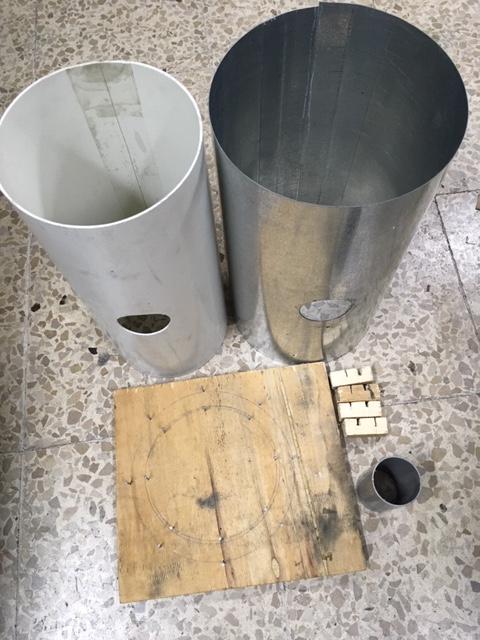
Here the cast!!. Actually it came out better than I thought for a first timer The molds are still reusable. If I have to do it again would try to use some type of funnel to pour the cast, as it was not easy. First I calculated the volume and add about 10% more, then got the weight. As per the instructions measured 2.75 oz of water /pound and got ready to use 3oz just in case. After mixing with 2.75 and then 3.00 oz realized it was way to hard to pour it in that shape, so I add a little bit more and got it better. Guess I was l lucky the amount of mix was just enough to complete it. Next time will put 15% more instead of 10%. I used car wax on the outside and the burner tube as release agent but did not put nothing in the inside. To my surprise it came out very easy, being opened on one side. I am planing to cast a small flat portion at the bottom to use it as a kiln, but I am not sure if it is a good idea. Suggestions??
-
Actually yes, I misunderstood. I have not bought the roll yet. Will call a couple of friends and ask just in case. Appreciate your help. Looking forward to try making a decent job with the cast.
-
This is what I was thinking about and use the same cast o lite. Let see what happens with the cast first.
-
Frosty, Thank you for your comments. Regarding the blanket, I doubt there is a kind of law like this here, they probably use it until it falls to pieces!! Will try anyway otherwise purchase new. I was planing to use a release agent. A friend toll me he always uses car wax with good results in regular concrete. I wonder how good it is with cast o lite. Have you ever heard about? Mikey, Kiln shelves are difficult to find around here. I found ceramic fiber board. Can you leave the ceramic board exposed to air, no bad dust?. Just now my worries are making a good cast, will decide later if everything goes the way it should. If the cast finishes up too long and needs to be cut, can you do it with a normal masonry grinder disk?
-
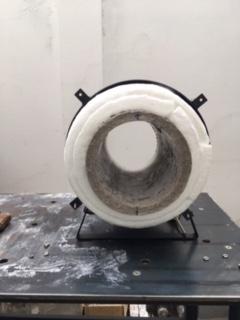
Yes, I already cut one side of the forge shell, otherwise there is no way to insert the cast with the blanket, but I do not want to cut the other side. As I mentioned I might cut a round hole the size of the cast so all will be concentric. Guess I use bricks as doors. After reading all the information regarding the danger of ceramic blanket dust, I do not want to leave any ceramic exposed. If I leave the other side of the shell will need to be thermally insulated and that means to cast the bottom. Actually I have been thinking about this, maybe to much. Will see how the casting goes first, my first time. The molds are reusable as they are cut on one side. 55 pounds of cast o lite is a lot, if it does not come right will do another one.
-
some delay but project keeps going...... Ready for casting, guess it should work. Will try to cast this week. Once the cast is finished I plan to put a little flat on the bottom. The burner position in the mold looks right to me. Any comments welcome.

-
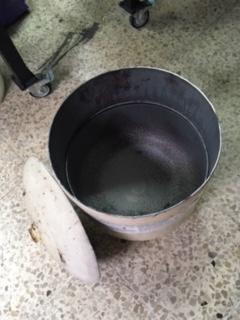
Hi Mikey, Thank you for the follow up. Very slow. Been busy with other things, and the holidays. Opened up one side of the gas tank and I am working on the casting molds. The plastic pipe is perfect for the inside but I will have to make the outside. No sonotubes around here, I will roll a very thin (.5mm) piece of galvanized plate to the size. Will see how it goes. I think will leave the other side of the tank, cut a round hole the size of the cast and pass it trough, in this way the ceramic blanket will not be exposed. Will have to decide if I do the same in the opened side and use it as a cap or a door. Will post the progress. Mario
-
After some searching I found 1" ceramic blanket, ceramic board, soft bricks, kast-o-lite 26, mizzou, super kast set and a 20# propane tank that came with a BBK but was not able to use as we have different valves. No kast-o-lite 30, only 26. I have a piece of plastic pipe 6" diameter that could be used to cast the interior 3/4" layer with kast-o-lite 26 plus 2" layer of ceramic blanket. This will make about the 12" of the tank diameter. Will have to be adjusted with final measurements once the tank is open. As far as I have read kast-o-lite 26 is better than mizzou??. Refractory cover like ITC cement, not available. What I found is Max pumpable in 2# tube but I guess this has different use. Regarding size, it will be within the 300-350 cubic inch recommended for the 3/4" burner. Any comments on materials and size welcome.
-
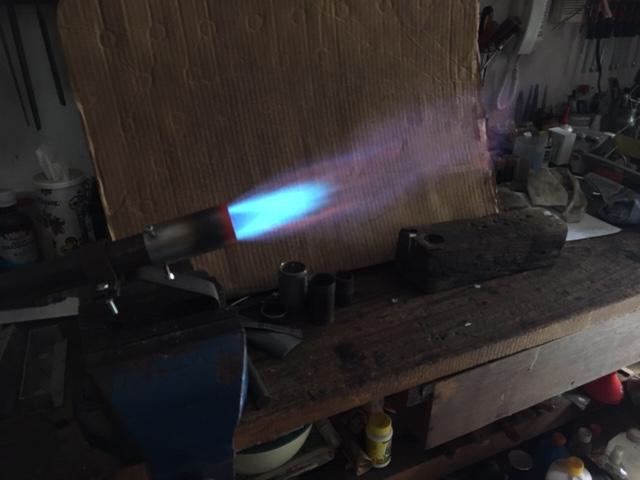
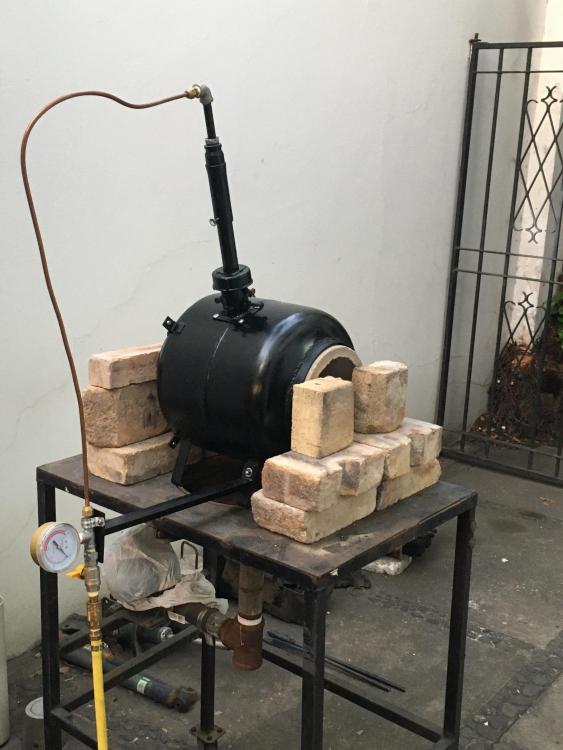
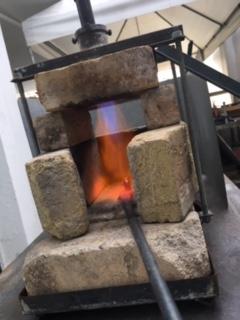
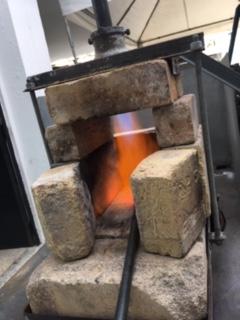
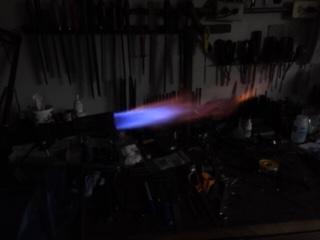
With all the information found here and having a good burner I believe it does not make sense to build a poor forge, but circumstances are not the same for everybody. I found a few vendors offering refractory products, they all sell 25 kg of castable and complete coils of ceramic blanket minimum quantities. It is reasonable with the castable but not the blanket. I will keep inquiring and searching to see if I can find a small piece. Anyway, in the meantime with the burner working OK in open air I feel the need to keep learning and going, and this meant finding how it behaves withing a forge, so I decided to make a forge, any forge just now to try the burner until I can build a proper one, so I made a quick job with some old discarded hard bricks that were rescued from going to junk and finished up with a classic brick pike box experimenting forge. The burner worked well, and I am very happy with it but have no idea about the flame. Here some pictures. Any comments are welcome.

-
Have you ever published a picture of your first gas forge here at IFI?
-
Mikey, Thank you very much for your time and help. I am glad did not disappointed you. Actually I did not want a green flame, but I thought the burner was going to react in a different way with the choke movements. The flame was taken with the choke about mid position and it has a lot of different tones of blue until opened completely. Now comes the forge ....What do I want the forge for?....not having any basically I want to start learning, making some tools like tongs and eventually forge some small knifes. Trying to make a forge with your standards will be difficult not having all the refractories you have on hand, so I will have to use what is available and just try to make a decent one for the purpose. I have been searching locally and found a few vendors of refractory materials that probably could be used but let see if the sell them in small quantities. Before I start contacting them could you please check the following link to see what could be used: http://www.jjmedina.com.ec/ Please check in "Productos: materiales refractarios and fibra ceramica" They have each product information in pdf. Thank you in advance, Mario
-
Any tip for taking flame pictures?
-
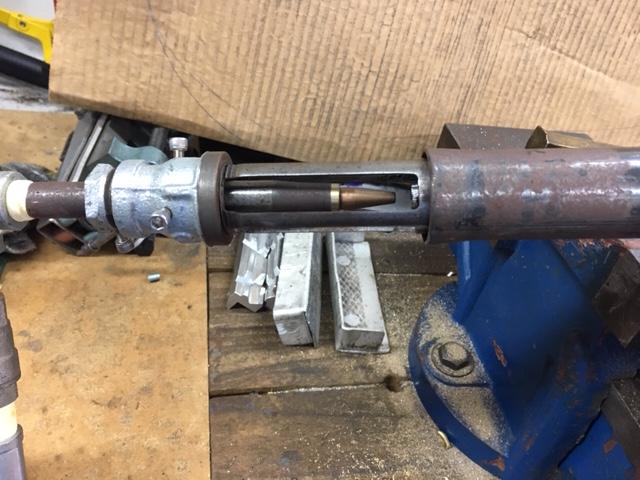
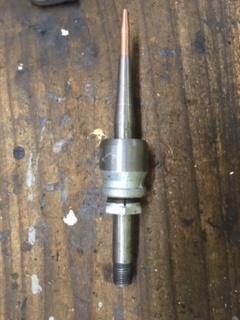
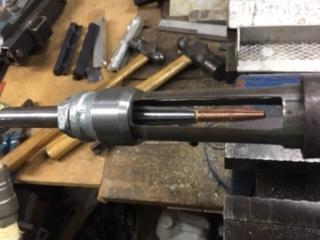
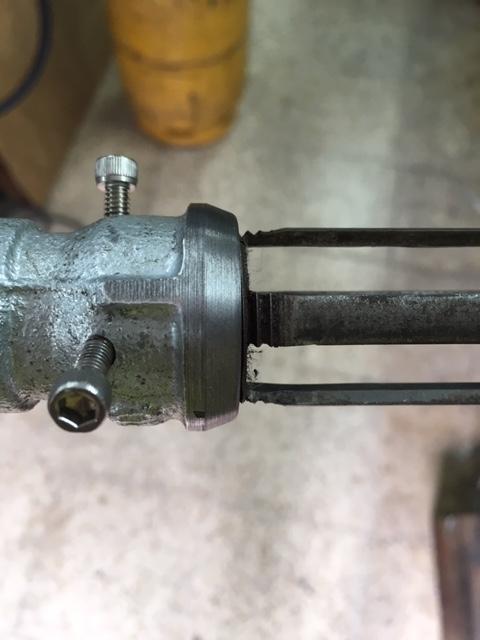
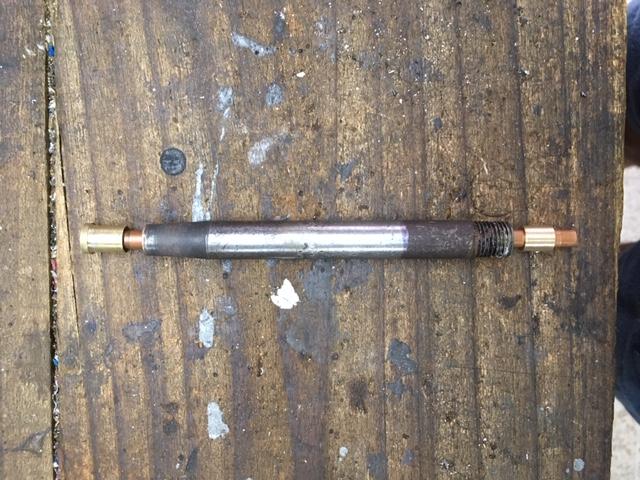
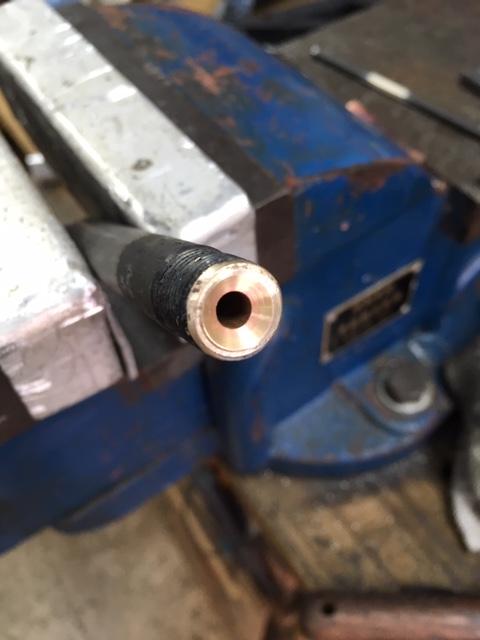
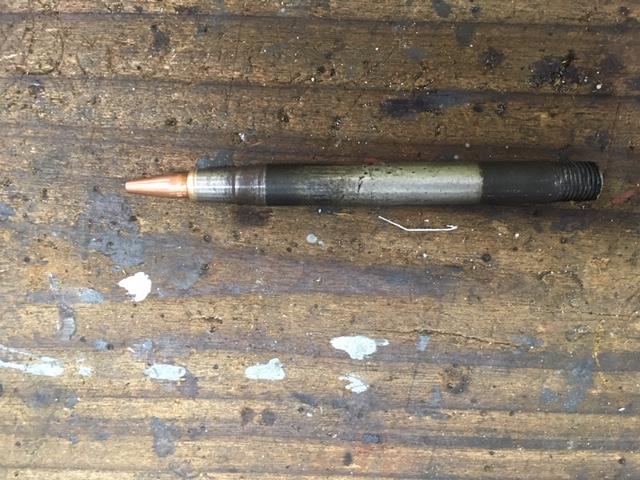
Back to do some work. Made a new gas pipe. I like the idea of a threaded tip better than brazed as you can disassemble it if you need. Inserted a steel piece a shaped more aerodynamical. This time it is a long mig .030 tip and the insert of cooper tube is all the way through. Got rid of the pipe reducer lip and the three adjusting screws. Here some pictures. The flame picture does not seem to good. The burner worked ok but to get a green flame you have to close the choke almost al the way. Will try to get better pictures tomorrow.


-
Mikey, Thank you for your followup. I got the long .030 mig tip but it has a different thread, so I have to make a new gas pipe. Past week was busy, and the weekend was fishing time so I hope will continue as soon as I get some shop time. Will keep you informed.
-
Frosty and Mikey, thank you very much for your replies. Learning is not easy and it is even more difficult if you work on trial and error. The reason for posting here at IFI was to get your experience on the matter and I do appreciate all your comments and advise. They are very welcome. I am not only learning about burner and forges, I am also learning English as I have to read your posts again and again to understand them with my limited knowledge of the language ....... as you see it is all about learning!!. As far as I understand T burners and Mikey jet burners do not behave the same so I guess the wiser will be to follow the nine diameter rule of thumb for now. I also thought on using torch files to bore out a few thousands of an inch, but the ones I have are so poor in quality that will not make it possible. They bend very easy. I will try to search locally for a .030" tip but probably if they do not sell the wire then they will not have the tip. Will see what I find. Just now I will follow Mikey advise to "slow down and take a deep breath" and will read the posts again to realize if I finally understood the meaning of "uncontaminated continuing, or perhaps ongoing, explosions? " Mario
-
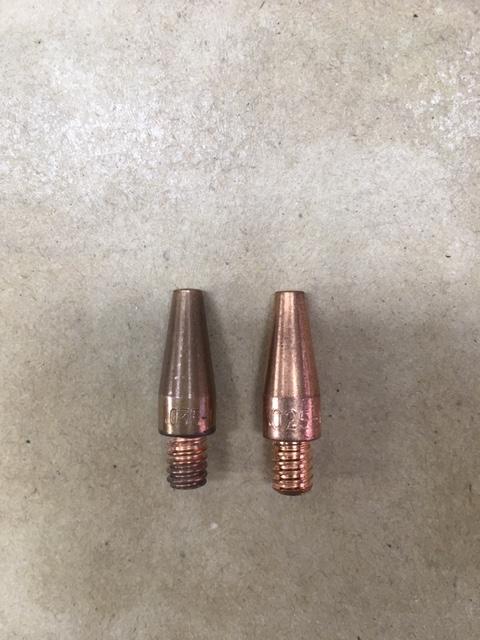
It is worst. Very frustrating. Now I can't keep it burning, and is continually burning back. Have been changing choke position, tip distance, nozzle overhand but It seems as it just does not like the .025 tip at all. Checked again, no leaks. Put 1/4" cooper tube as liner in the gas tube, that makes about 3/16" inside diameter. Maybe the mixing tube size is not correct. It is 7/8" inside diameter and 8 7/8" from front of air openings to forward cut off end. Chart in page 22 tells you 6 3/4" and your rule of thumb 8 x diameter. What should be the proper length?. Maybe what I need is a MIG tip between .035 and .025.
-
Today got some free time and did some work. Got rid of reducer´s lip. New gas pipe. 1/4" cooper pipe inserted with a cone in the intake. All silver brazed. Put some teflon in the tip and tested for leaks. New MIG tip is 0.025. Tried a quick test but had trouble firing it. It backfired 4 times!! I stopped for the time and will try later or tomorrow. Any reason for backfiring?
-
Thanks again. Will see what comes up with the gas pipe. The MIG tips I have are regular 1" tips from Lincoln Welders, .025 and .035. I will try with .025 next time. I did not explain well. You got it, the flame was burning around the outside of the MIG tip.....you were right there was quite a leak between the MIG and the gas tube. My mistake. Will fix it.
-
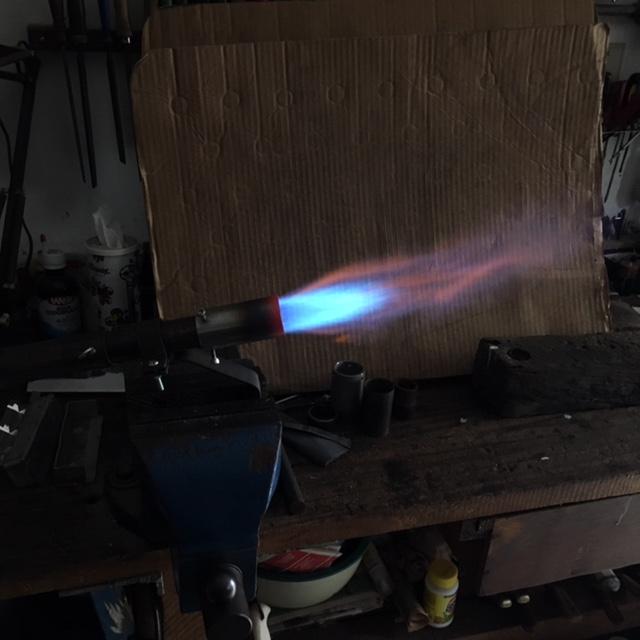
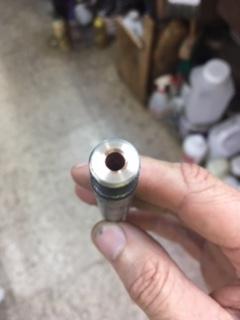
Mikey, Thank you for your reply. No problem with the burden I think can handle it. Before I proceed with the changes want to be sure I am getting your ideas clear. Numerals 1-2 very clear. 3.) 1/8" pipe is hard to find around here, reason why I used 1/4". I guess only have two alternatives: insert a 1/4" copper pipe sleeve inside to reduce the diameter and try to make a more streamline match or, making the advanced accelerator from page 49. Do you think it will work OK just inserting the sleeve? Regarding the MIG tip too large, it is a bit confusing. The chart in page 22 calls for a .023" or .030" tip but in the list of materials asks for .030" -.035" and in the notes just .030" but you always mention a 1 1/2 inch tip, and in this case it is a short tip. What size is you suggestion?. 4.) The area beyond the MIG tip is clear, it is just an illusion from the picture, what you see is the other side of the pipe. 5.) Flame retention nozzle is not tapered. It is a stepped version, inside diameter 1.260" One extra question, a couple of times when firing the burner and warming it up, the flame got out on the outside up to the tip and really scared me. It happened when I made some modifications with the nozzle overhand. Any special reason for the burner to do this? Mario Hi Mikey, yes I am. Sorry if sometimes I do not get quick answers. I am not retired yet and some weeks are very busy, just enough energy to go to bed.
-
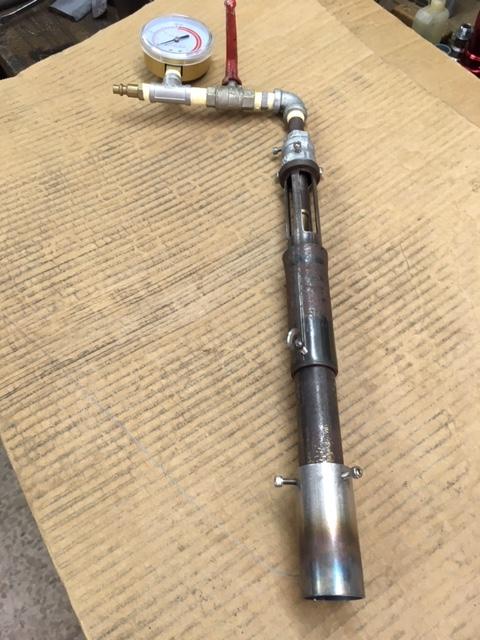
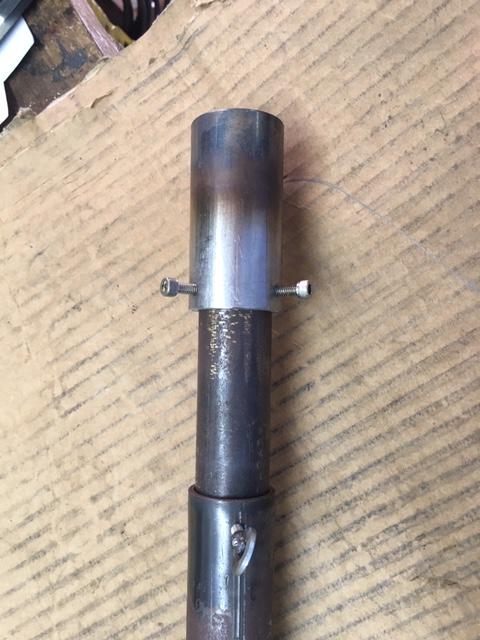
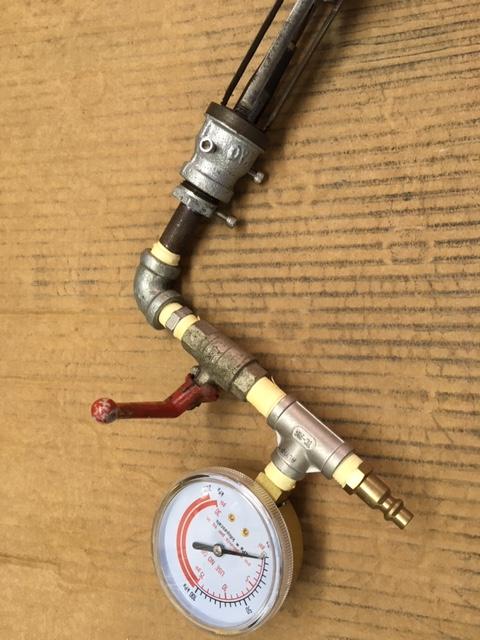
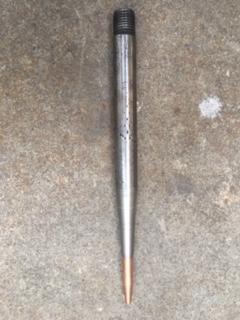
Hi Mikey and everyone at IFI, I am new to blacksmithing and first time posting. Would like to have a gas forge to start with and begin learning. I live in Ecuador and all refractory materials you use on the forges are difficult to get and will have to use what is available. First thing I need is the burner, but with so much information on the internet, I did not know where to start so I bought your book from Amazon and decided to make one of your burners, trying to save time and guessing using your experience. The burner is the ¾ inch and it was made as close as possible to the book measurements and description. Once the burner was ready it was time to tune it and here I might need some help. Here some pictures of the burner and the flame at 8 psi with a 0.035 mig tip. Accelerator tip ¼ inch from the fully open choke, choke fully open. Straight nozzle with 1 inch overhand. I would like your opinion. Is the flame good enough or it could be improved? These pictures are difficult to take. Many experienced people here on IFI any comments are welcome. Sorry if my English is a bit poor. Mario