

David R.
-
Posts
90 -
Joined
-
Last visited
Content Type
Profiles
Forums
Articles
Gallery
Downloads
Events
Posts posted by David R.
-
-
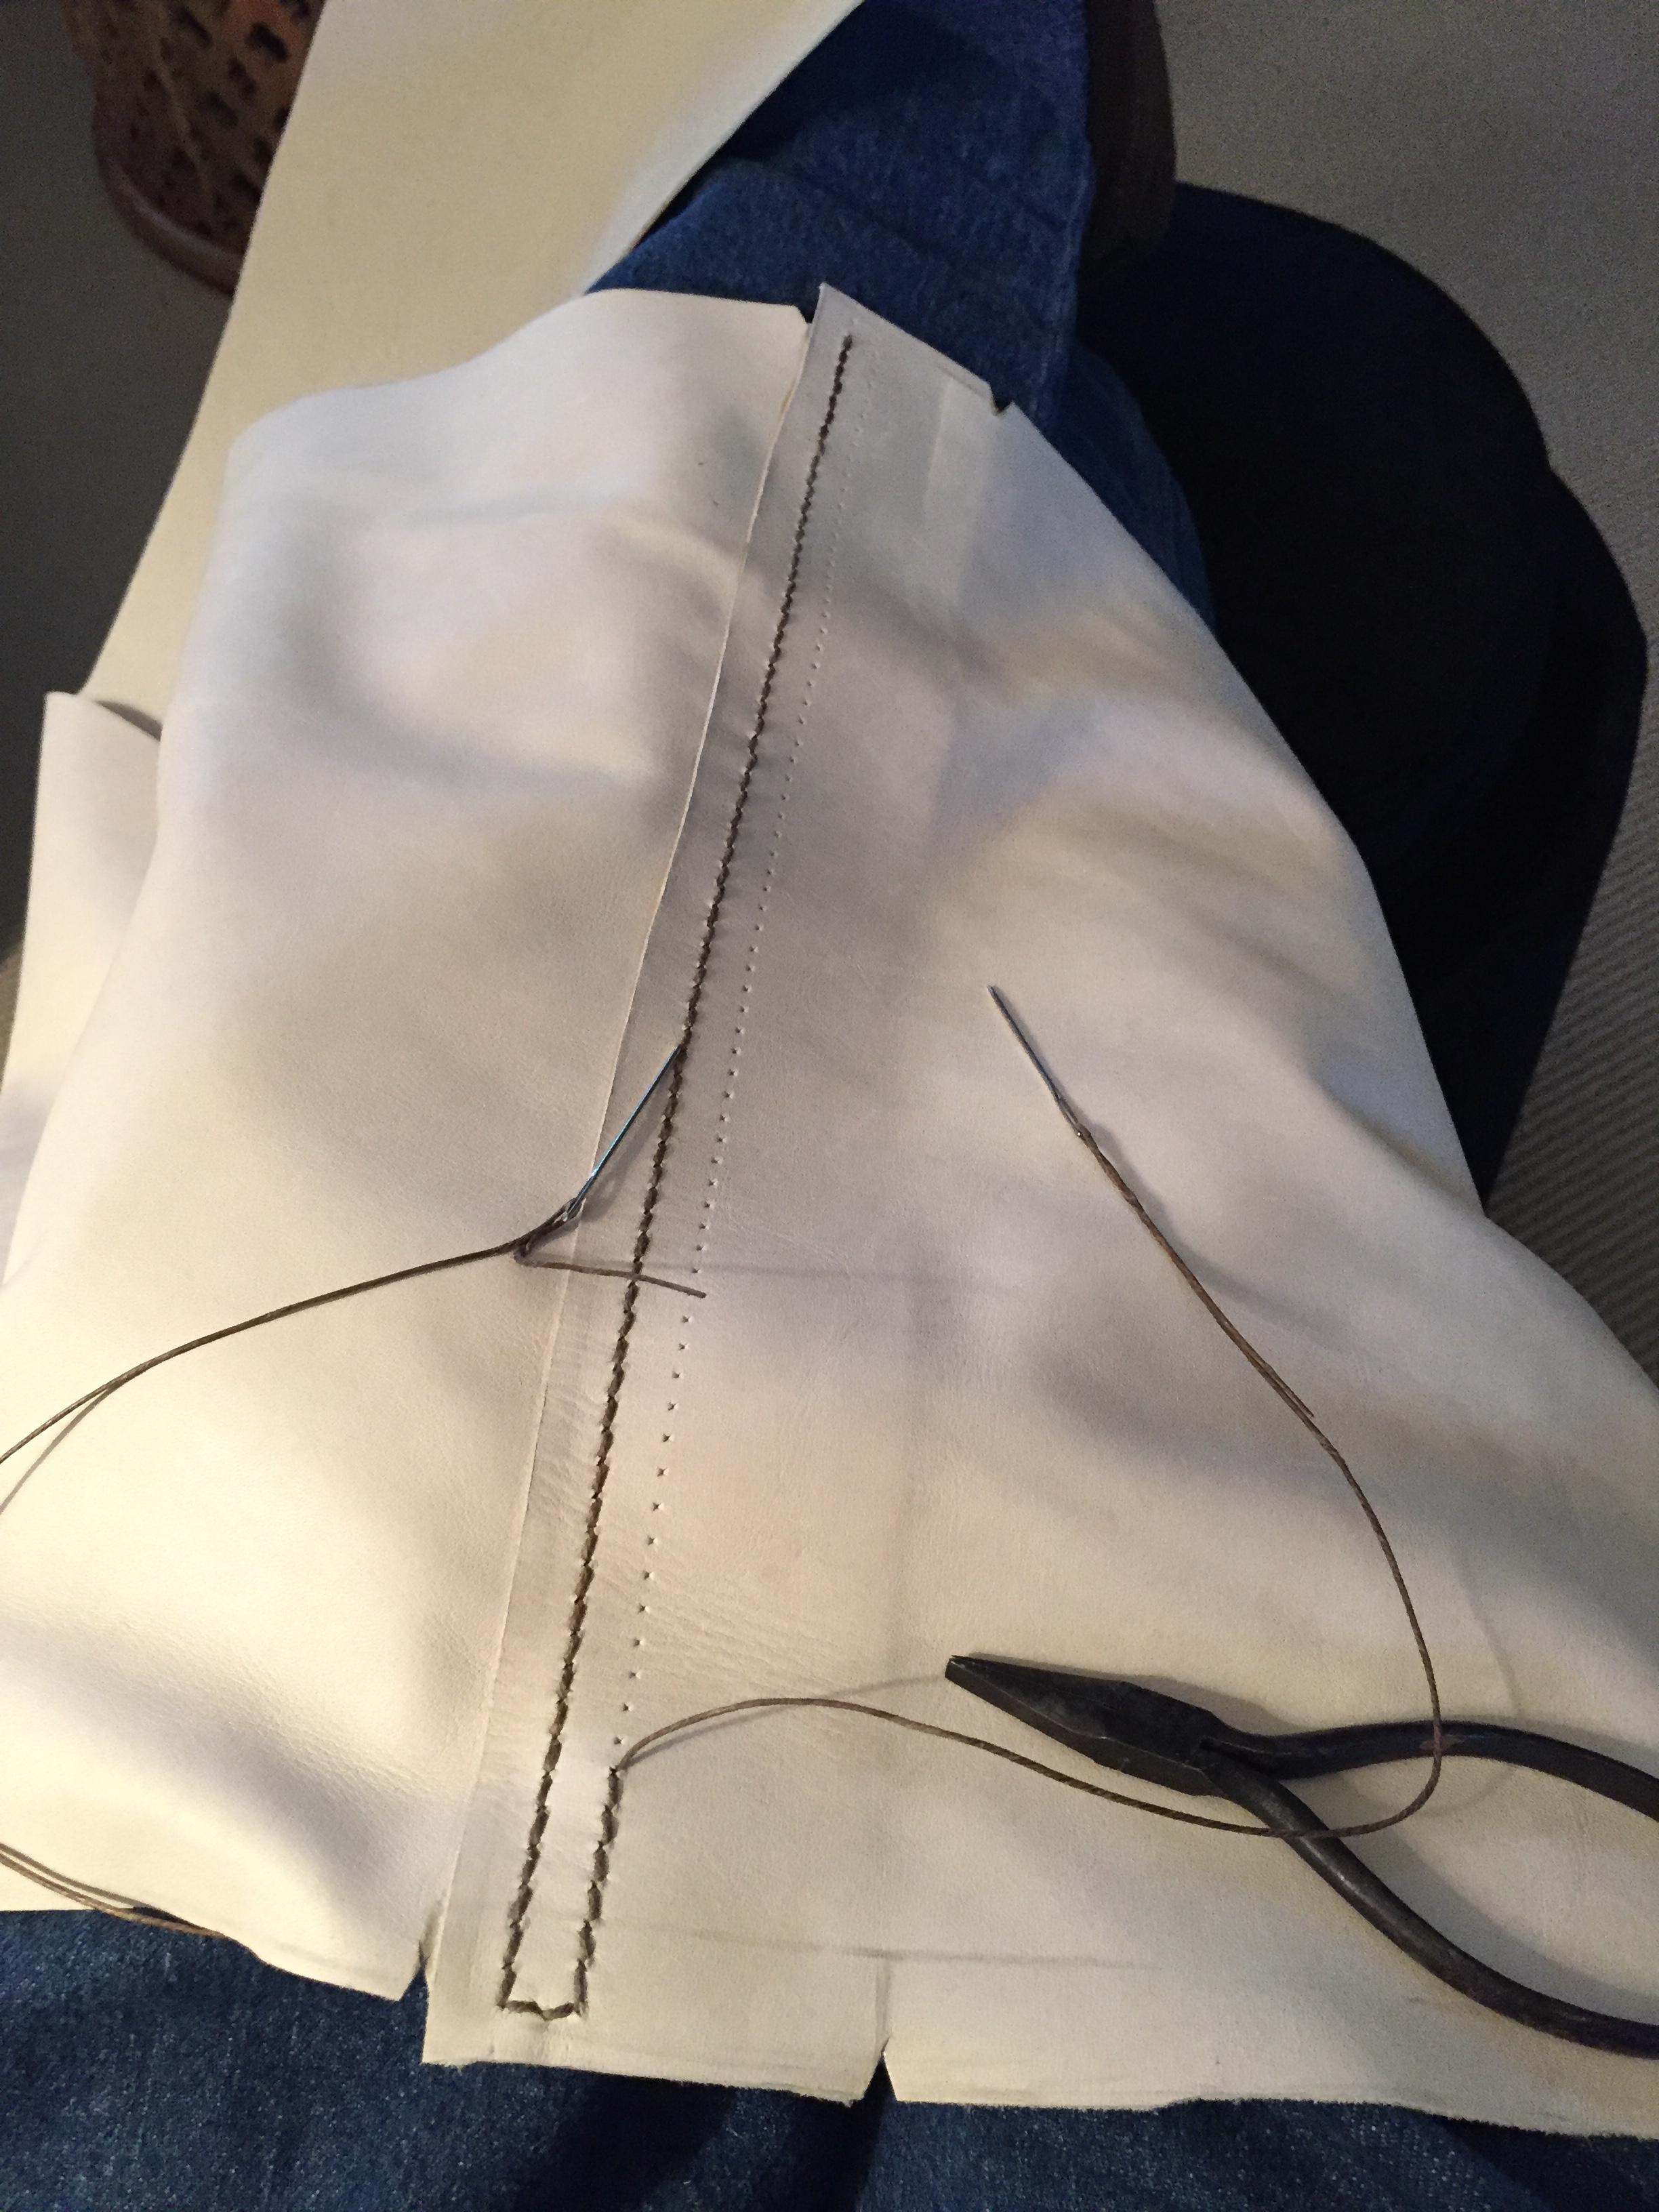
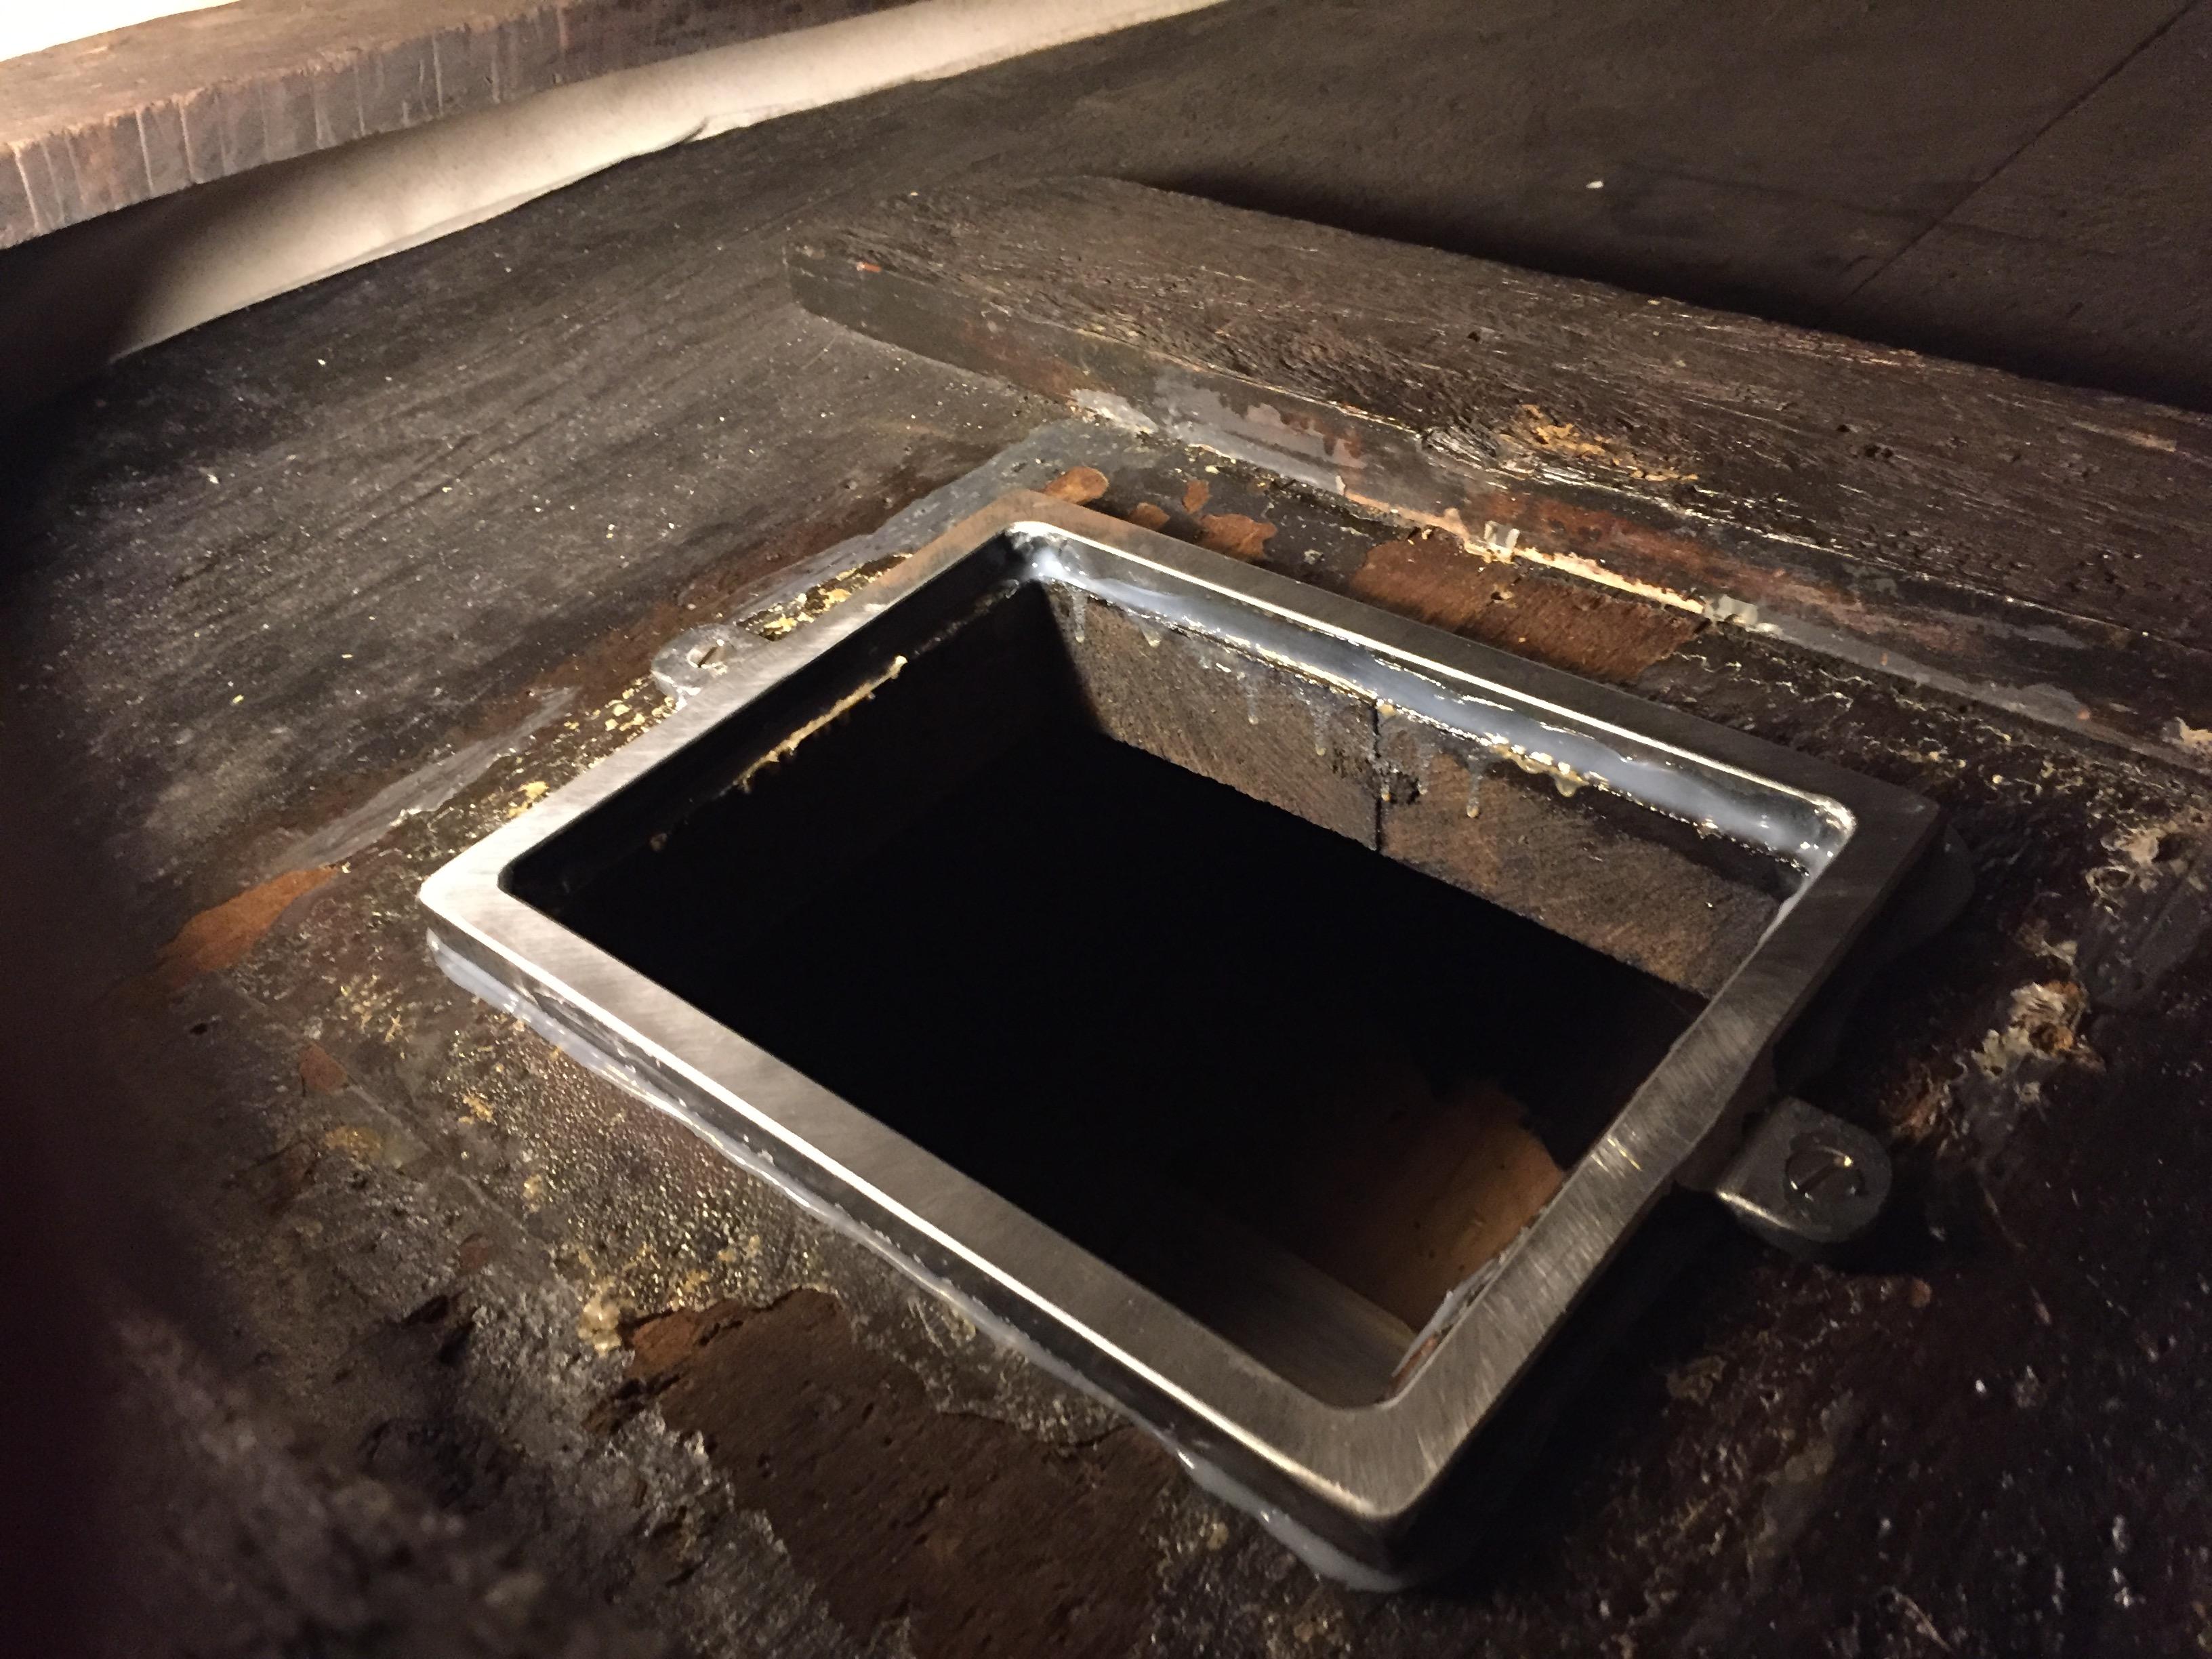
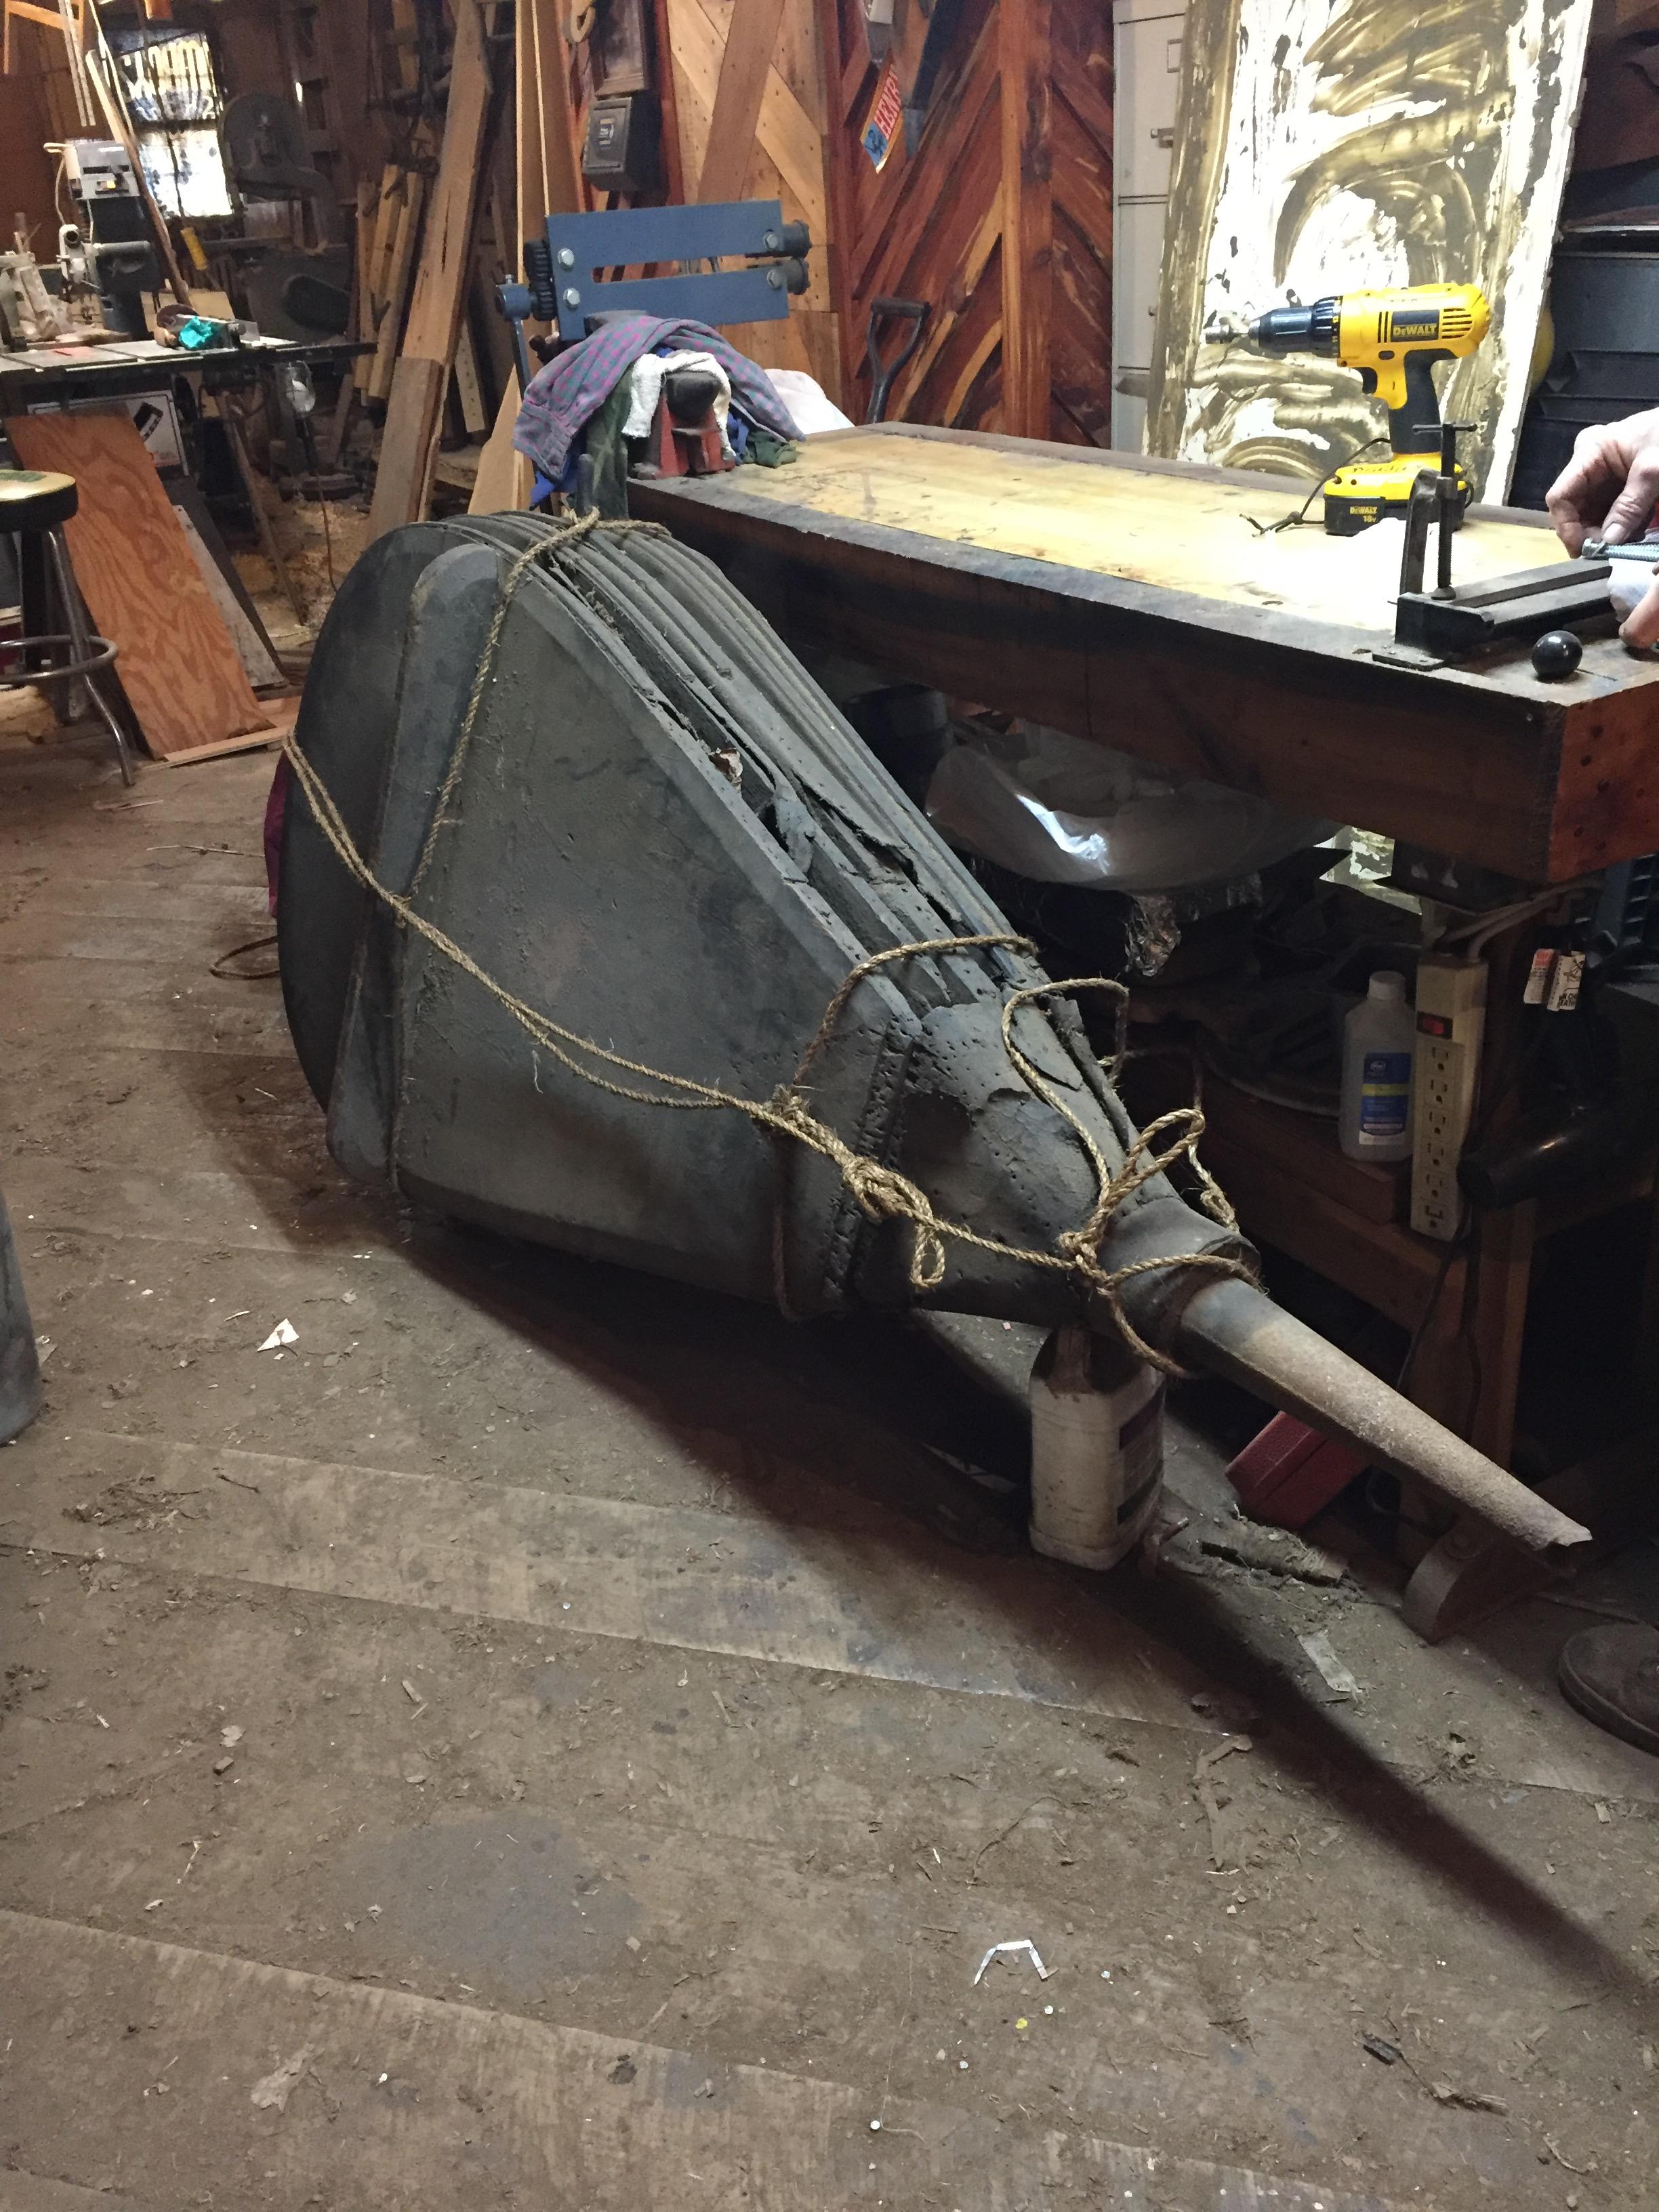
It may have been easier to make a new bellows. The center board and bottom paddle had succumbed to gravity over the years and bowed a bit under their own weight. I ended up making a metal ring I sealed to the center board so I could get a good level valve seal. The bottom board I planed level on valve surface. The leather on the old bellows was really heavy. I used a lot lighter weight leather on rebuild.
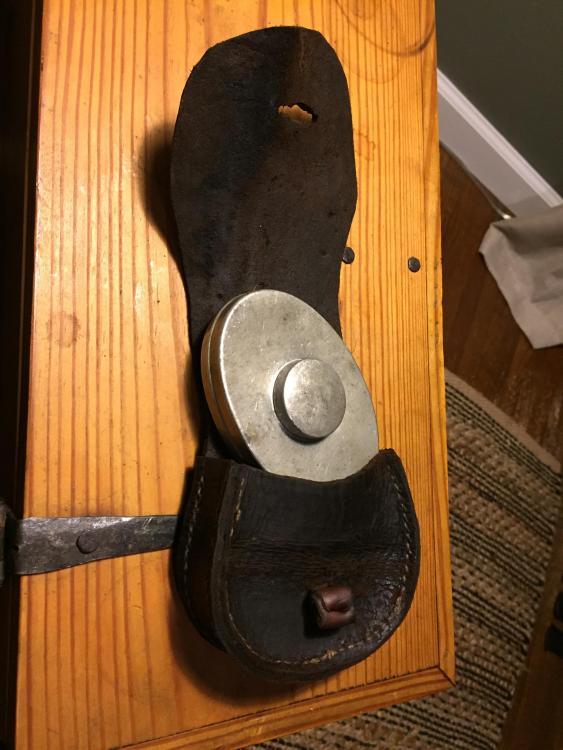
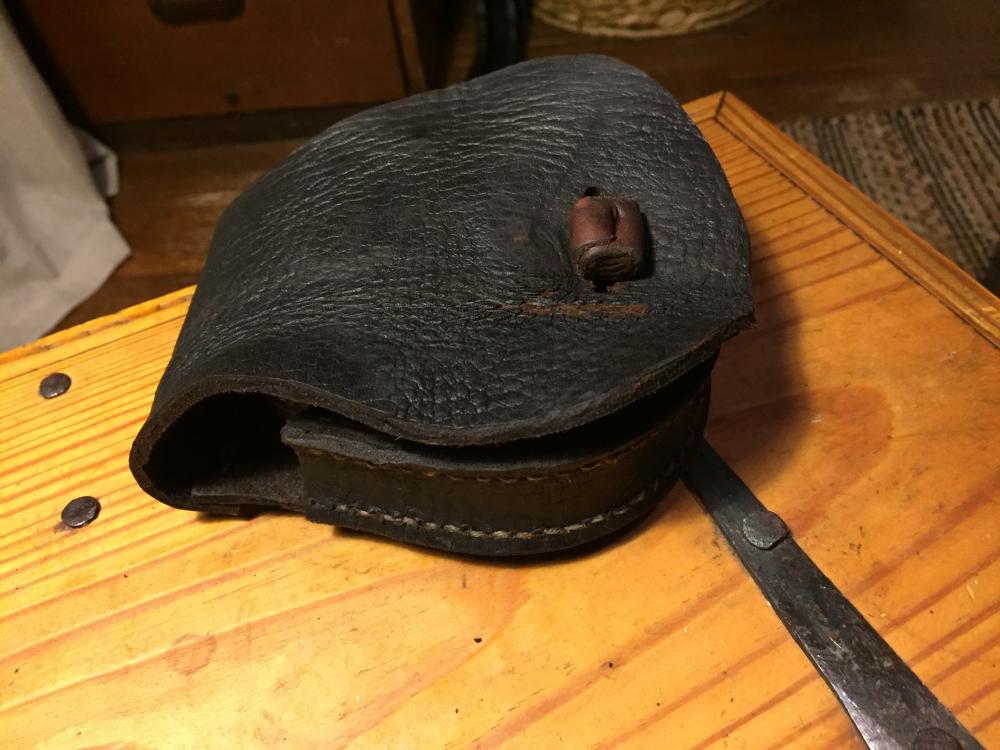
I took a piece of the old leather and gave it several good scrubbings with saddle soap. After drying, I saturated it with neatsfoot oil and made a little belt pouch out of some of it.
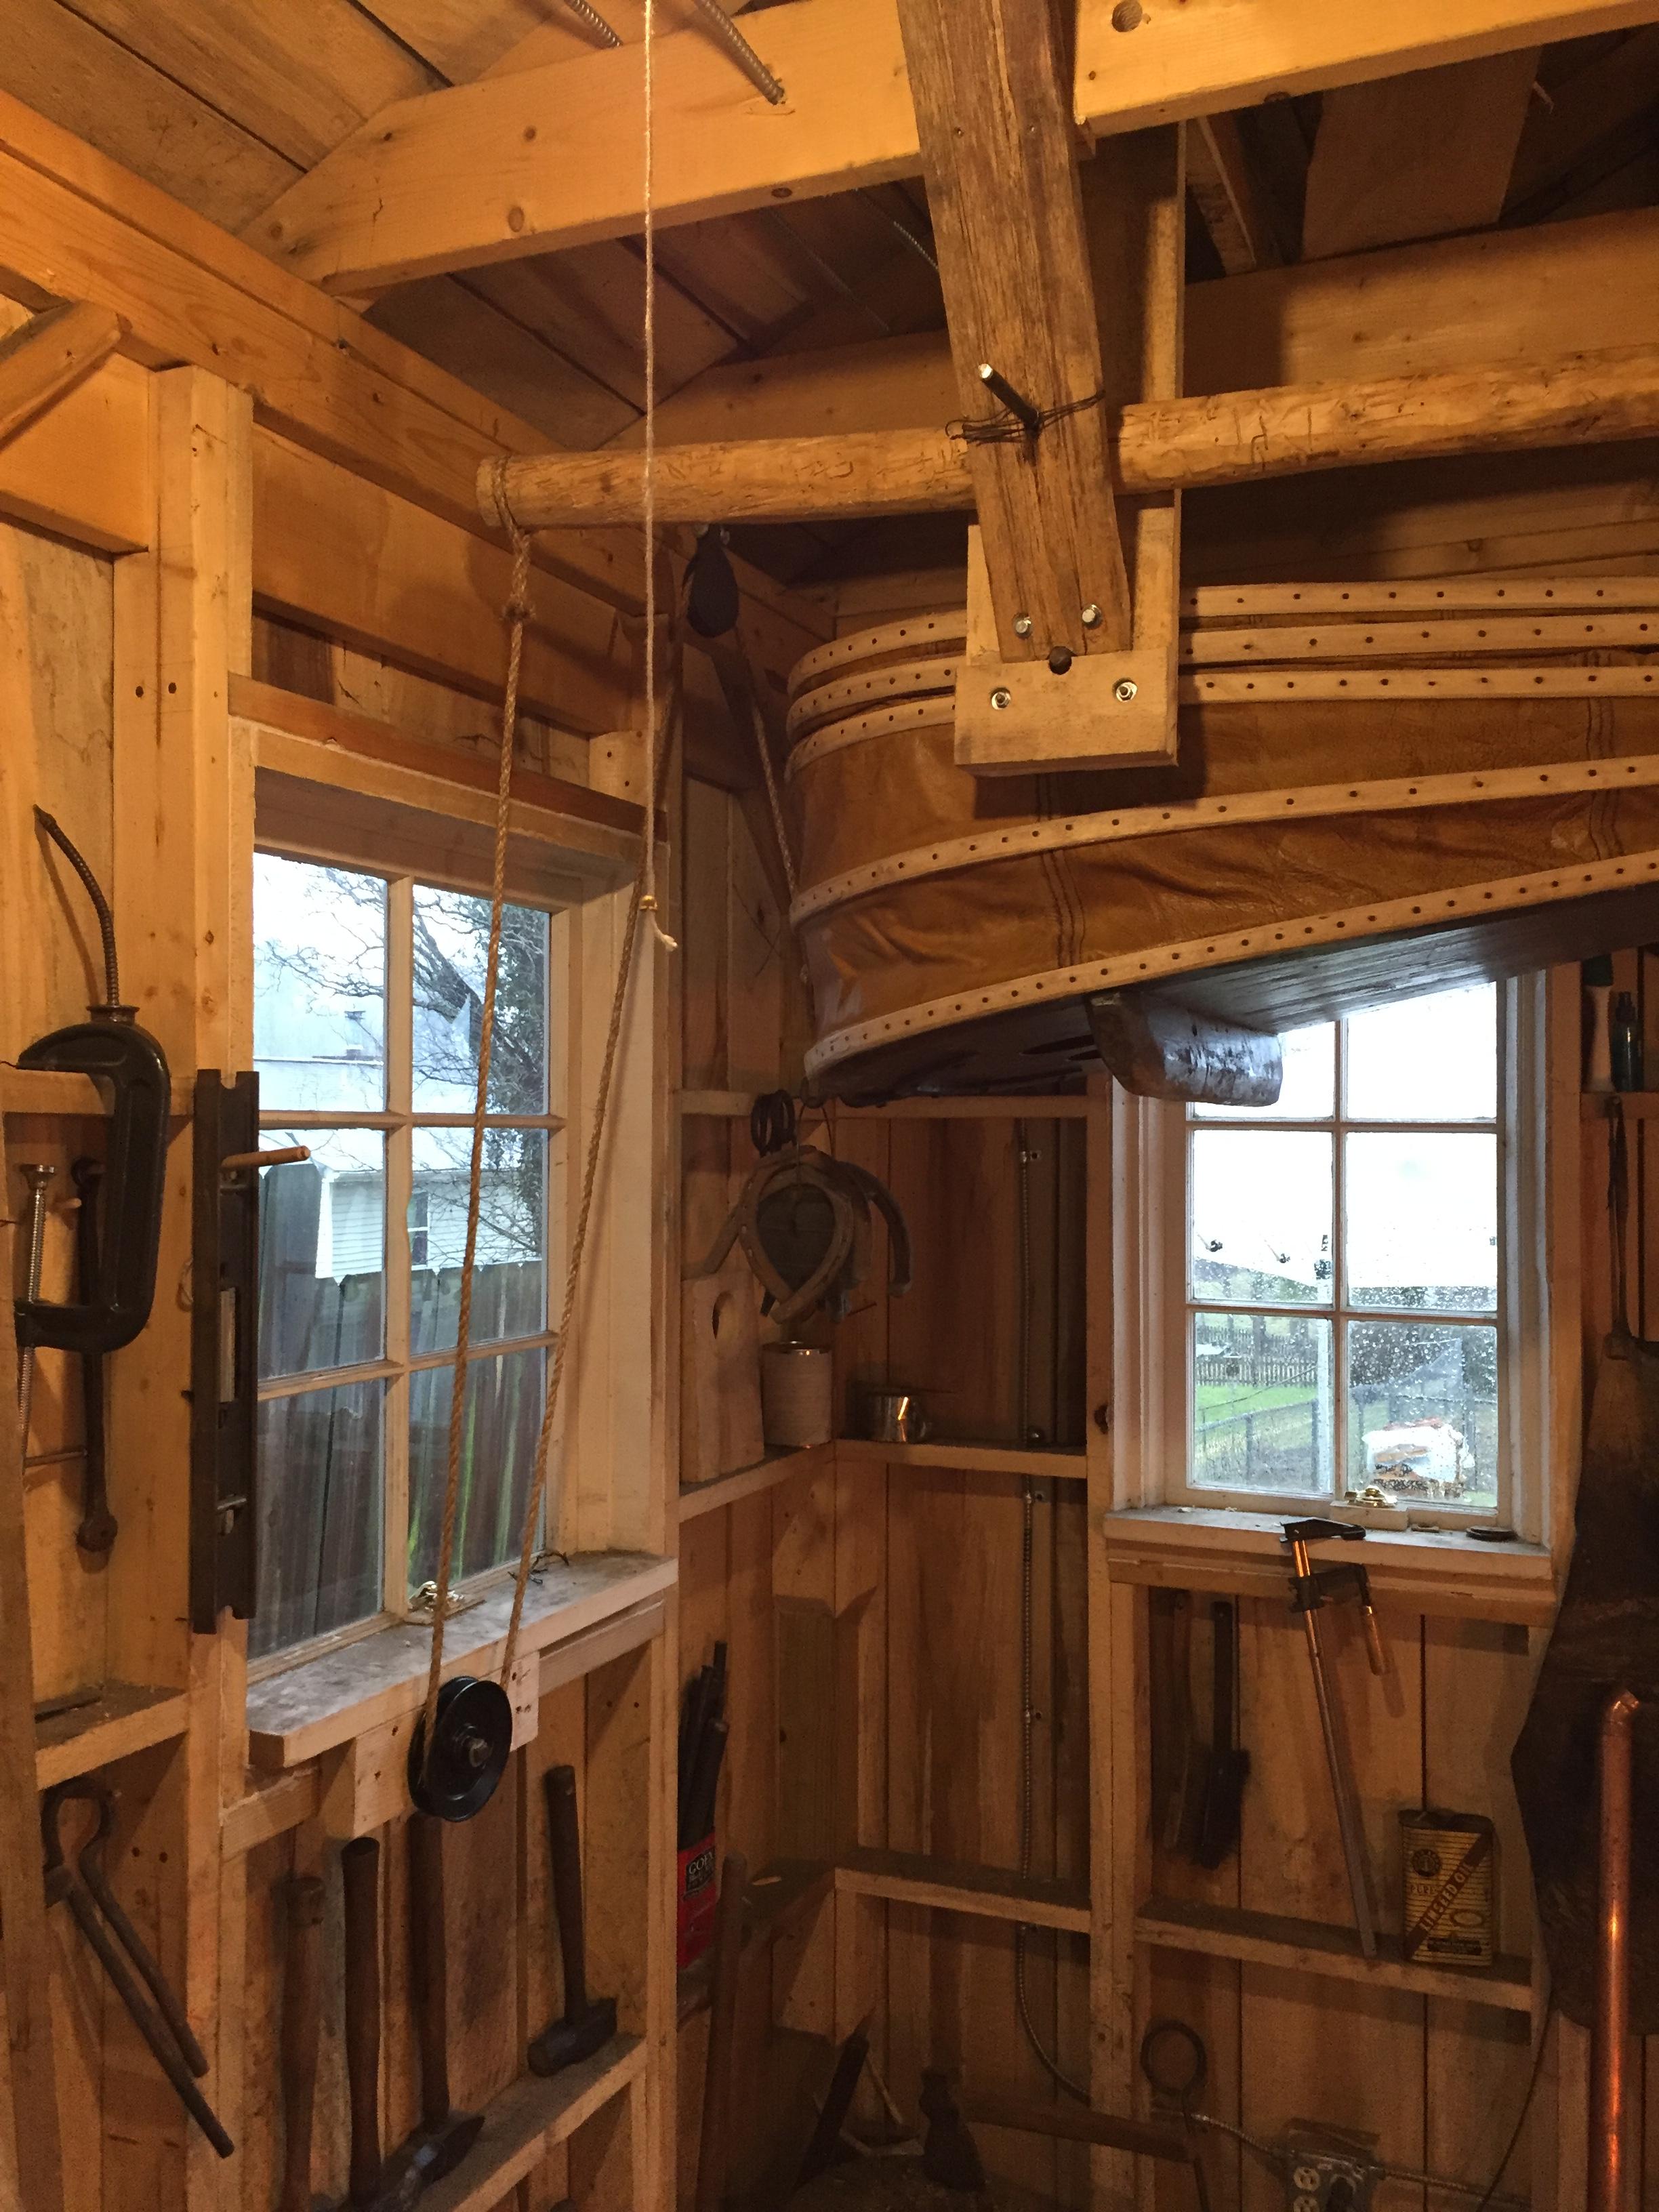
The bellows really works well. I can easily get welding heats. You also get some free run time as top paddle settles down after you pull. Gives you time to get tongs and hammer in hand. I also added a safety valve at outlet pipe. I made a box with a check valve so no gas could migrate back into bellows. Took a little figuring to get geometry right on my lever, as I had to mount bellows overhead to save floor space in my small shop. Cow horn makes a perfect handle on lever rope
-
Finally got back. Bellows completed and after some tweaking on valves, working great.
Link removed as it needs access to your computer


-
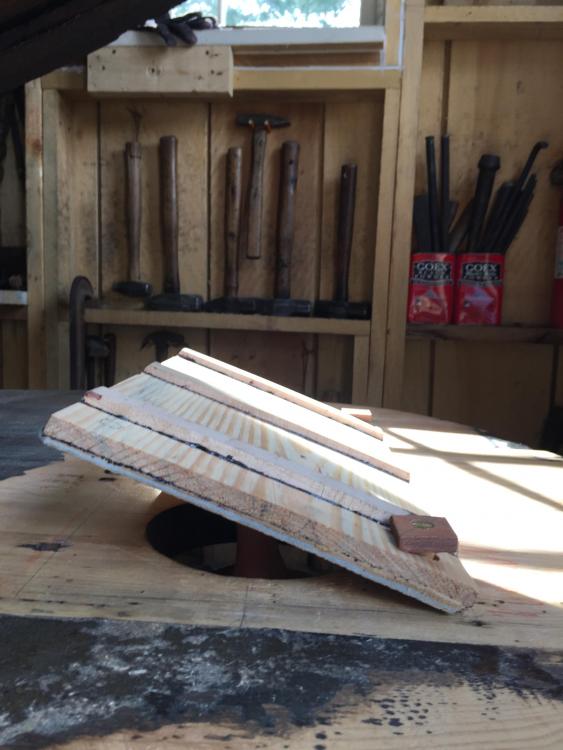
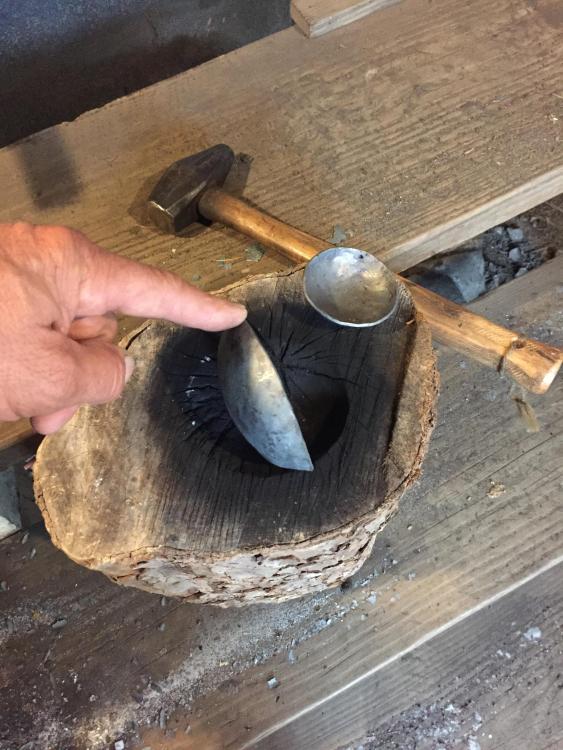
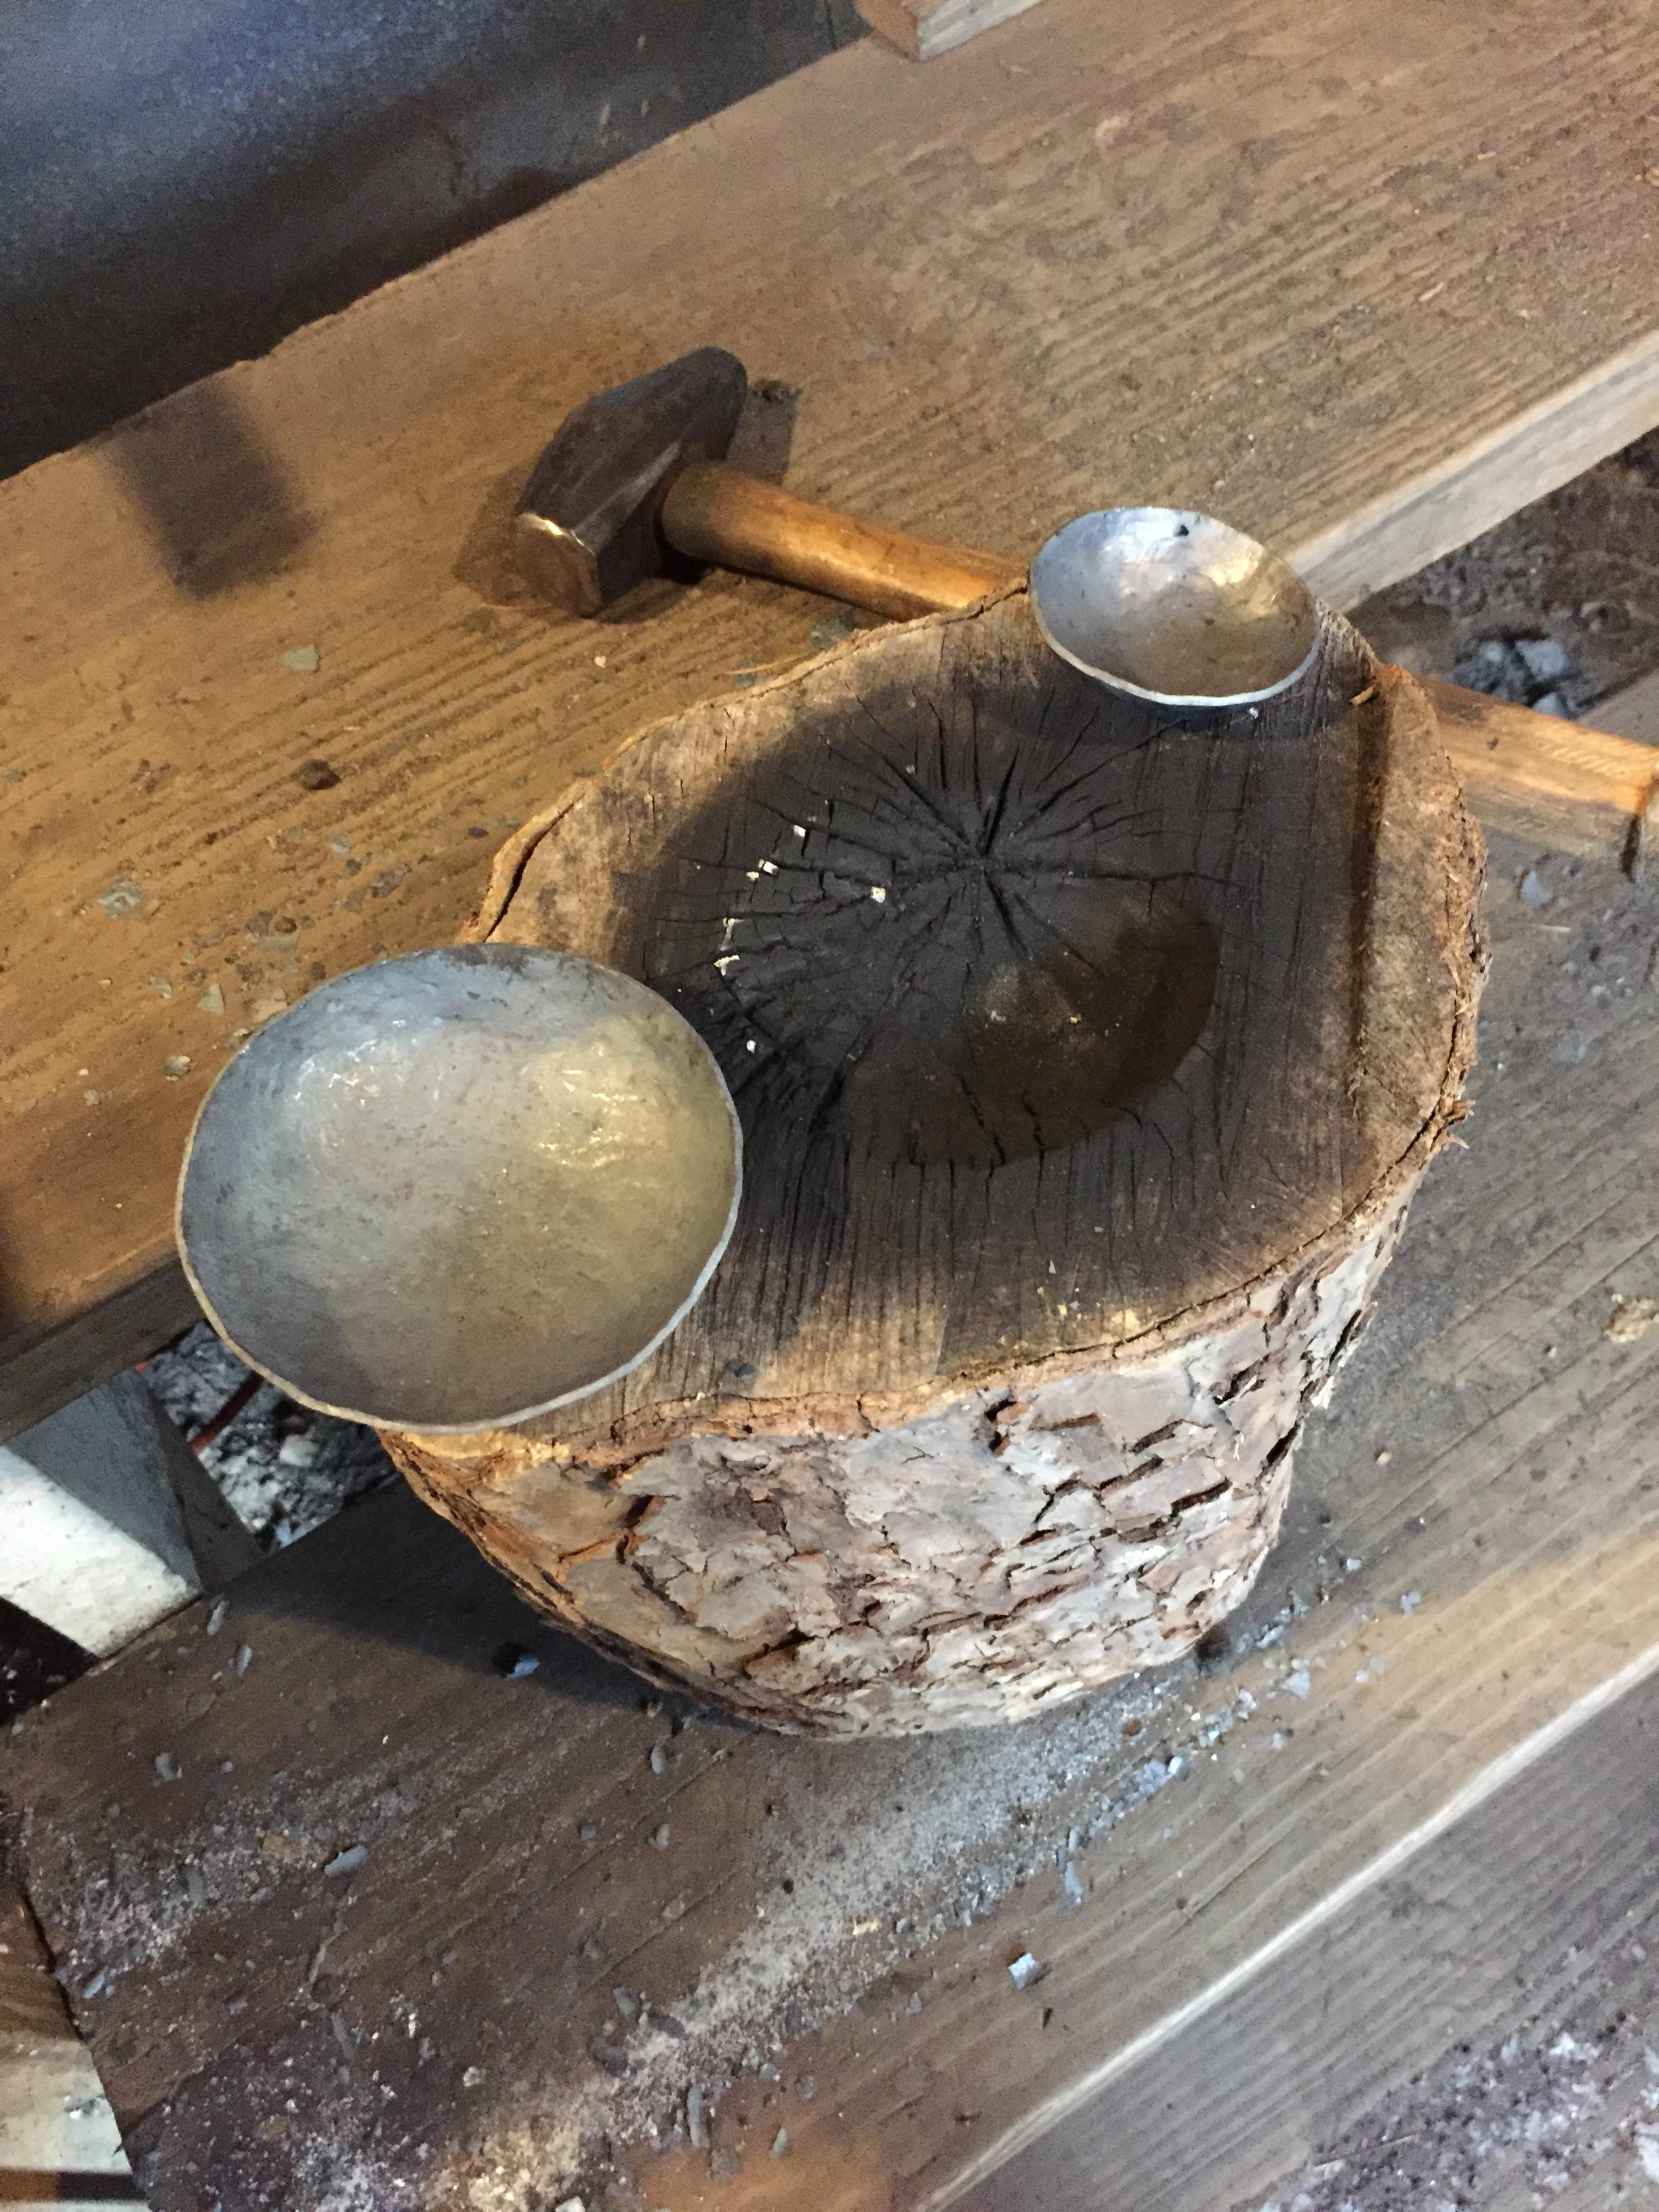
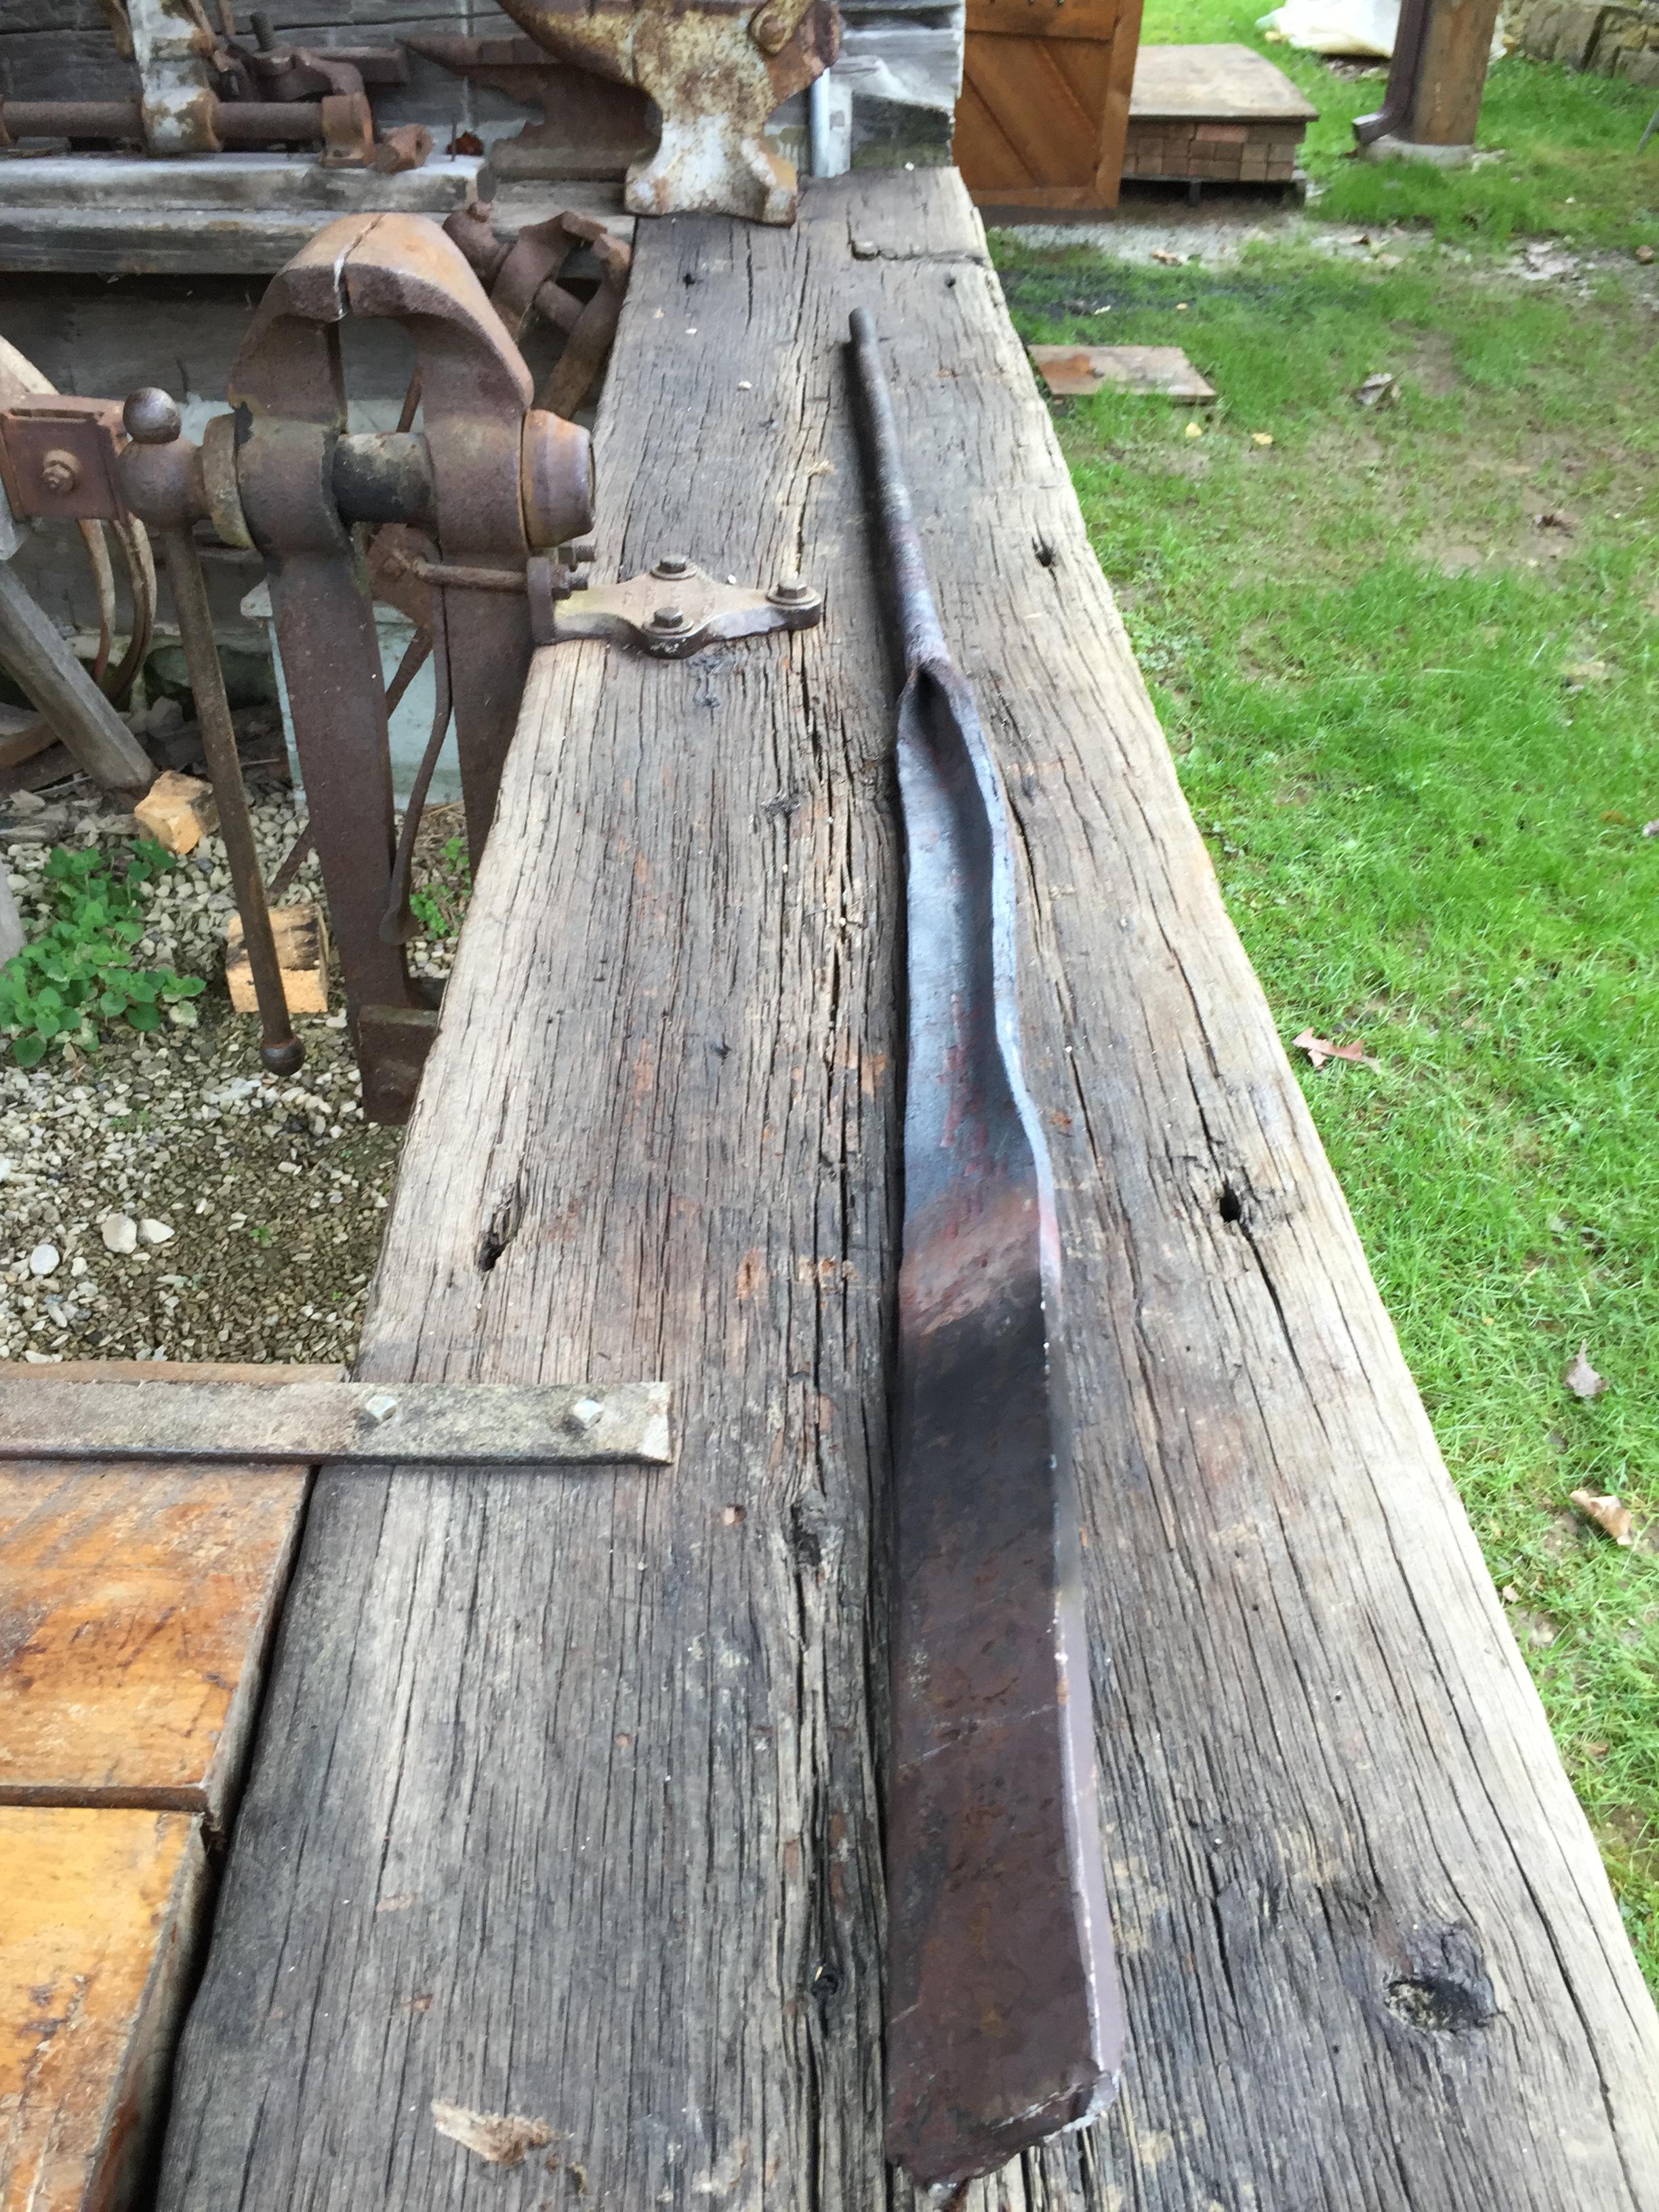
Here is a technique I often use to form convex shapes when a proper swage block isn’t available. It is pretty effective albeit a little smoky. I wouldn’t recommend pine at all, wild cherry works well, (what glass blowers use for molds). This is apple because it’s what I had handy. I use the same technique for flintlock fowler style butt plates. You needn’t worry with prepping the surface, simply heat the metal and start pounding on the wood. It burns it’s own way in to get whatever shape you need. These are a couple of ladle bowls.

-
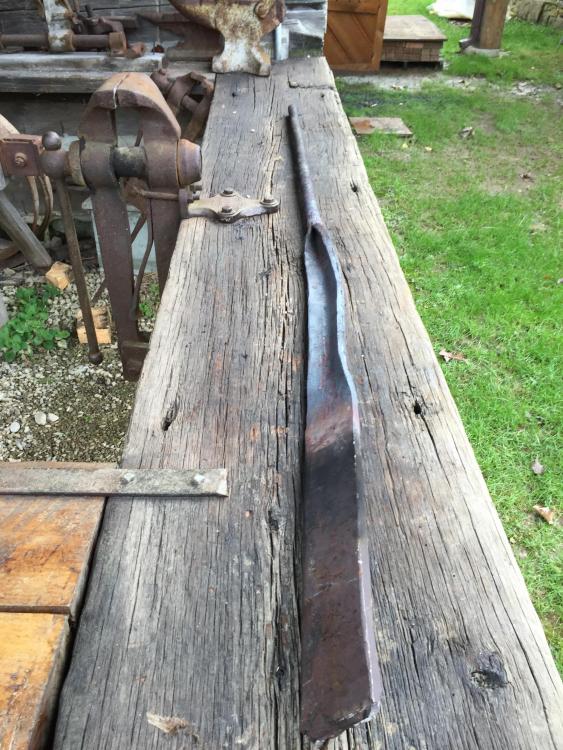
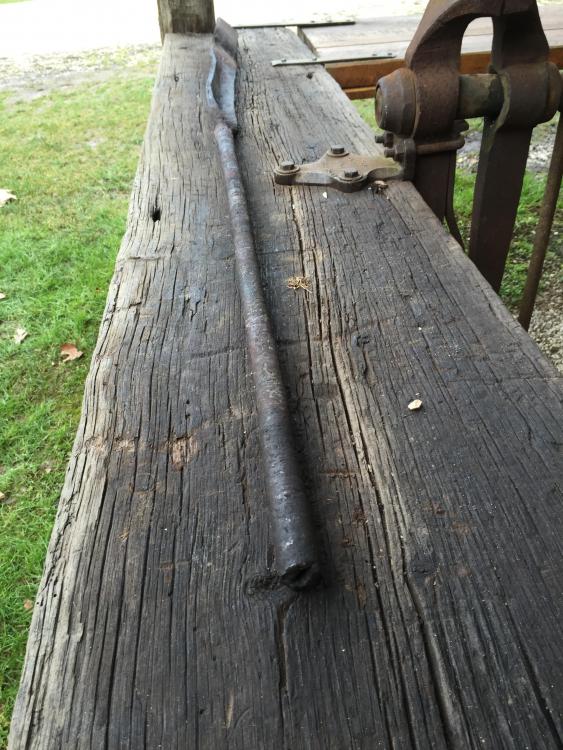
And the fact that it is much easier to forge weld than mild steel. Have to get used to working at higher heat, and there are different grades. Some strings apart like spaghetti and you have to continually weld up loose ends as you forge.
Pictured is a gun barrel for flintlock rifle welded up from double layer of buggy tire. This iron wanted to weld and the two pieces would stick together in the fire while heating
-
I have found some really good ones (horse drawn hay teeth) and some that weren't consistent, even in the length of the same piece. One end hardened beautifully in oil and the other end of the same rod would hardly harden in water?
-
I have the same issues. My shop has a dirt floor and no heat except for the forge. When it warms up that cold anvil will be dripping wet sometimes. I might try running the fan some.
-
4 hours ago, Irondragon Forge & Clay said:
Great restoration, I would love to have a bellows like that but don't have the room. sigh
my shop is only 10 x 12
-
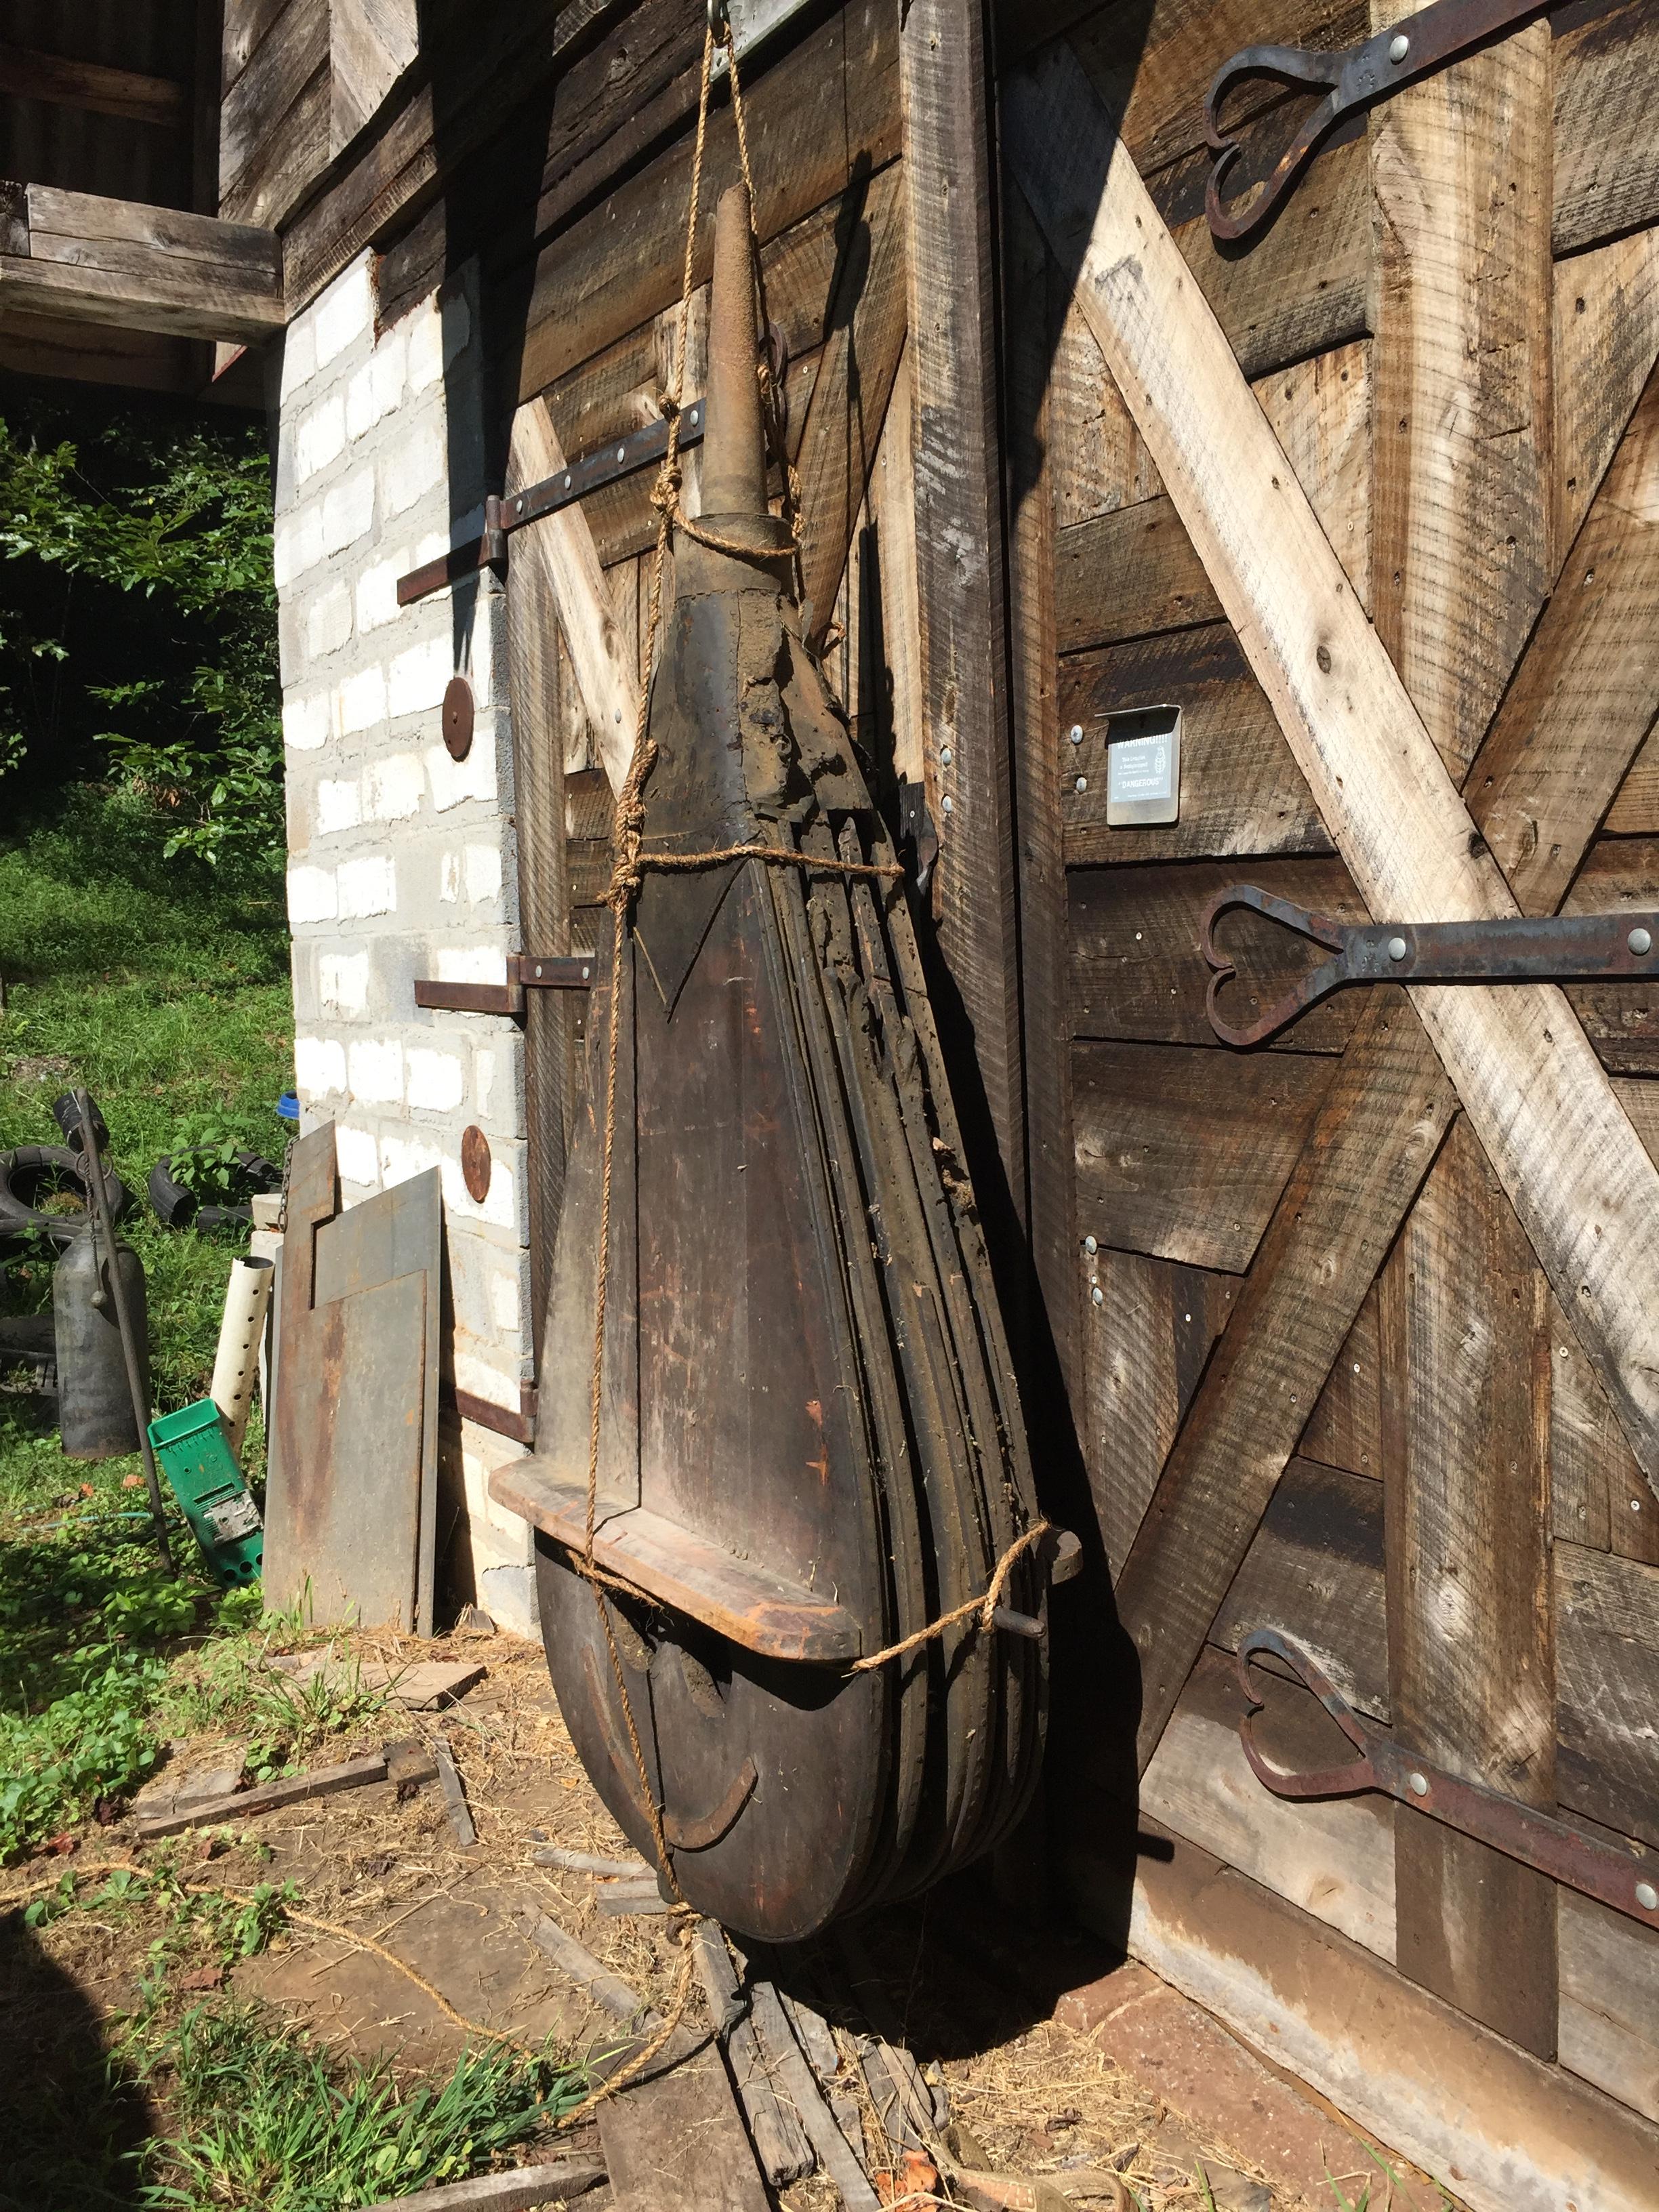
Bellows as they went in my friends shop over a year ago and as they came out yesterday.


As they are mounted overhead in my shop ready for use


-
Coal use will depend a lot on type of forging done. Heavy welding heats obviously uses more fuel than light forging.Type of coal is important also. I am not sure what they mine in your area but I always heard western coal was high sulpher. Metilurgical coal is best. Here we were getting some really great sewell and pocahantas coal. Our best 'cadillac' coal source dried up, mine closed. Rumor is the mine is scheduled to reopen under new owners. We were able to pick up truckloads at the mine.
I would suggest looking for other smiths in your area and networking to get coal in bulk. You can't beat versatility of coal forge but don't overlook an adequate flue to carry off the smoke and gasses.
-
(See my other post on restoring bellows) I am partial to forging with a bellows. I have worked forges with hand cranked blowers, electric blowers and traditional bellows. I prefer a good bellows over them all.
I feel like the rythmic sound of the soft clack of the valves is sort of soothing. I like the smooth even blast and the lack of the blower noise. Seems more natural to me. It is also harder for me to burn up my steel with a bellows. Can't wait to get mine up and running. I also think pulling on the bellows lever is less taxing ergonomically than turning a crank.
Like Thomas said, the capacity is adjustable by adding wait on the top paddle. A couple hammers or a few horse shoes laid up there if we are pulling welding heats.
Yours looks to be in fairly good condition. Mine measures about 86 cm x 193 cm
-
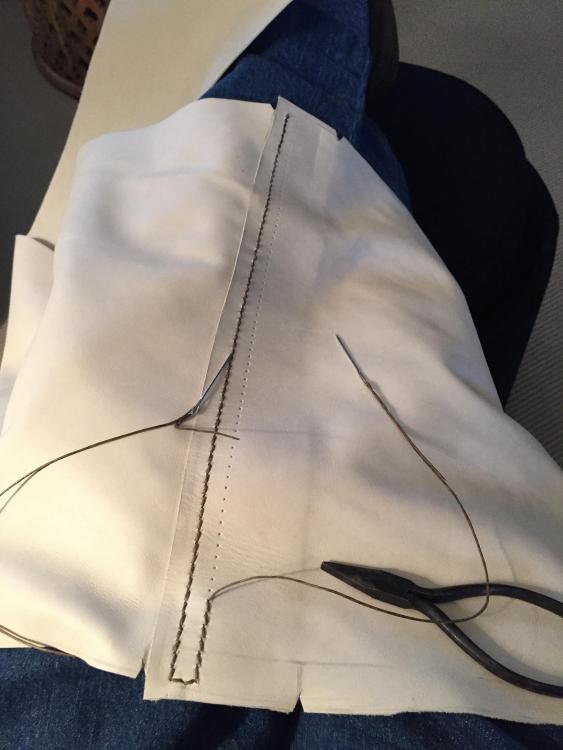
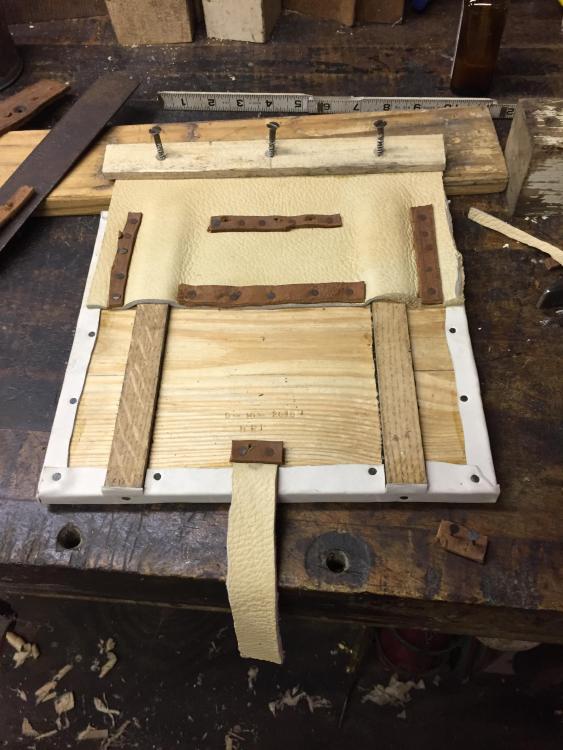
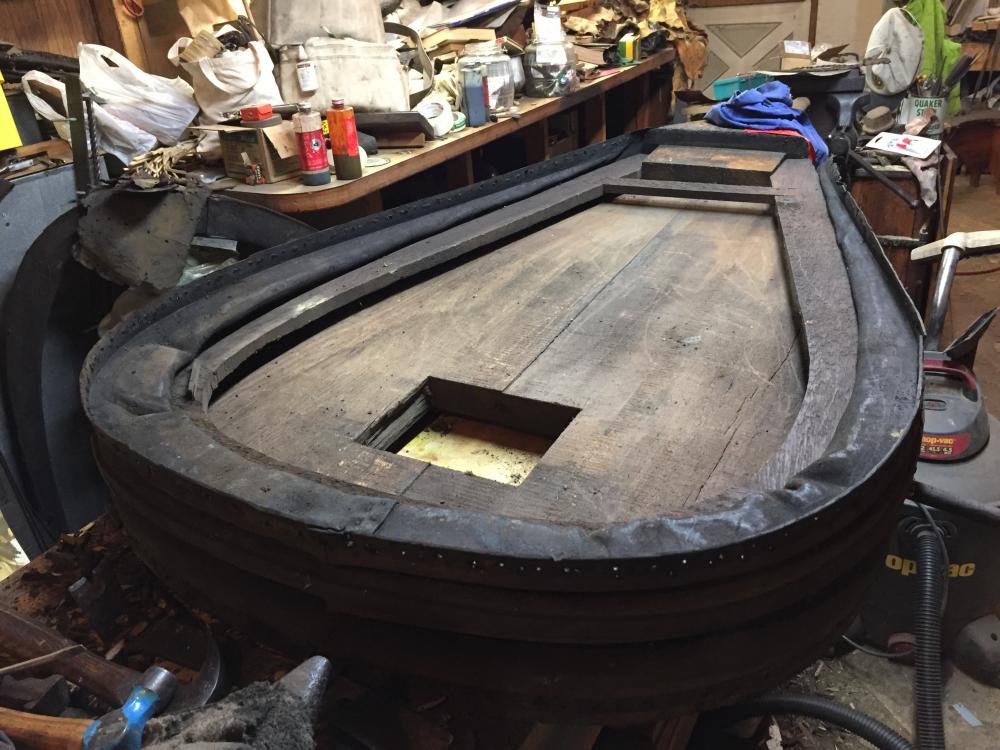
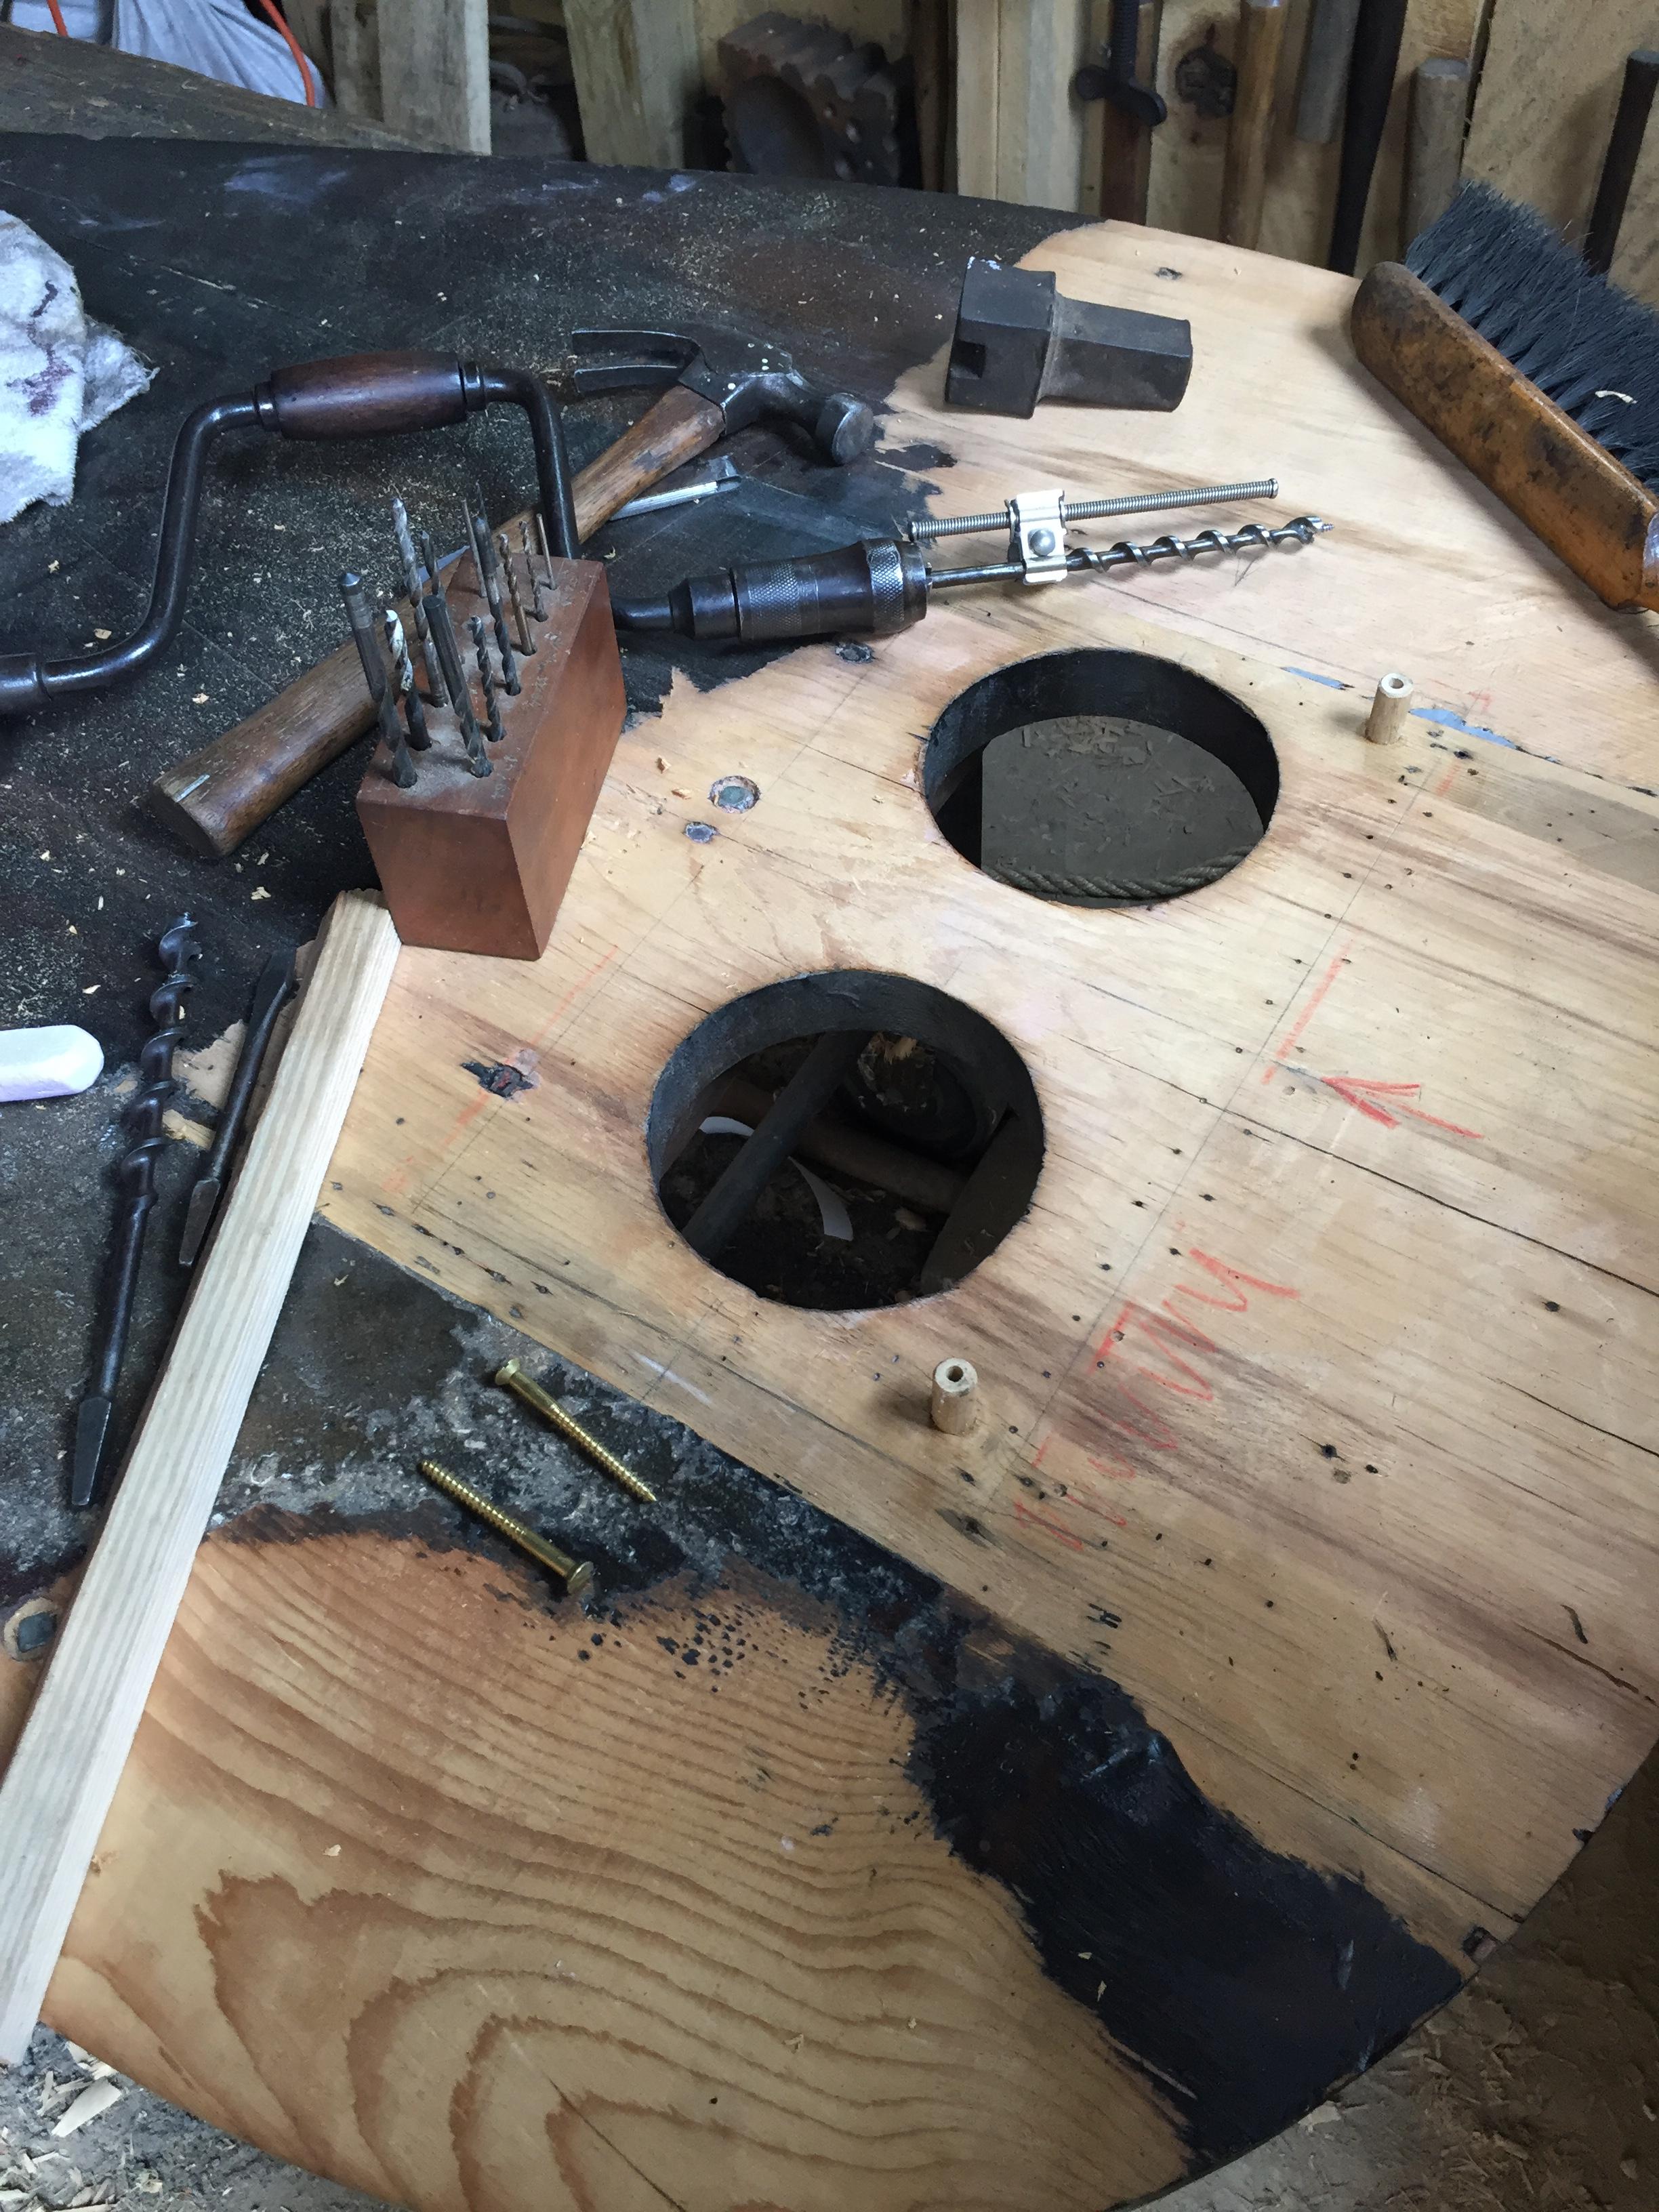
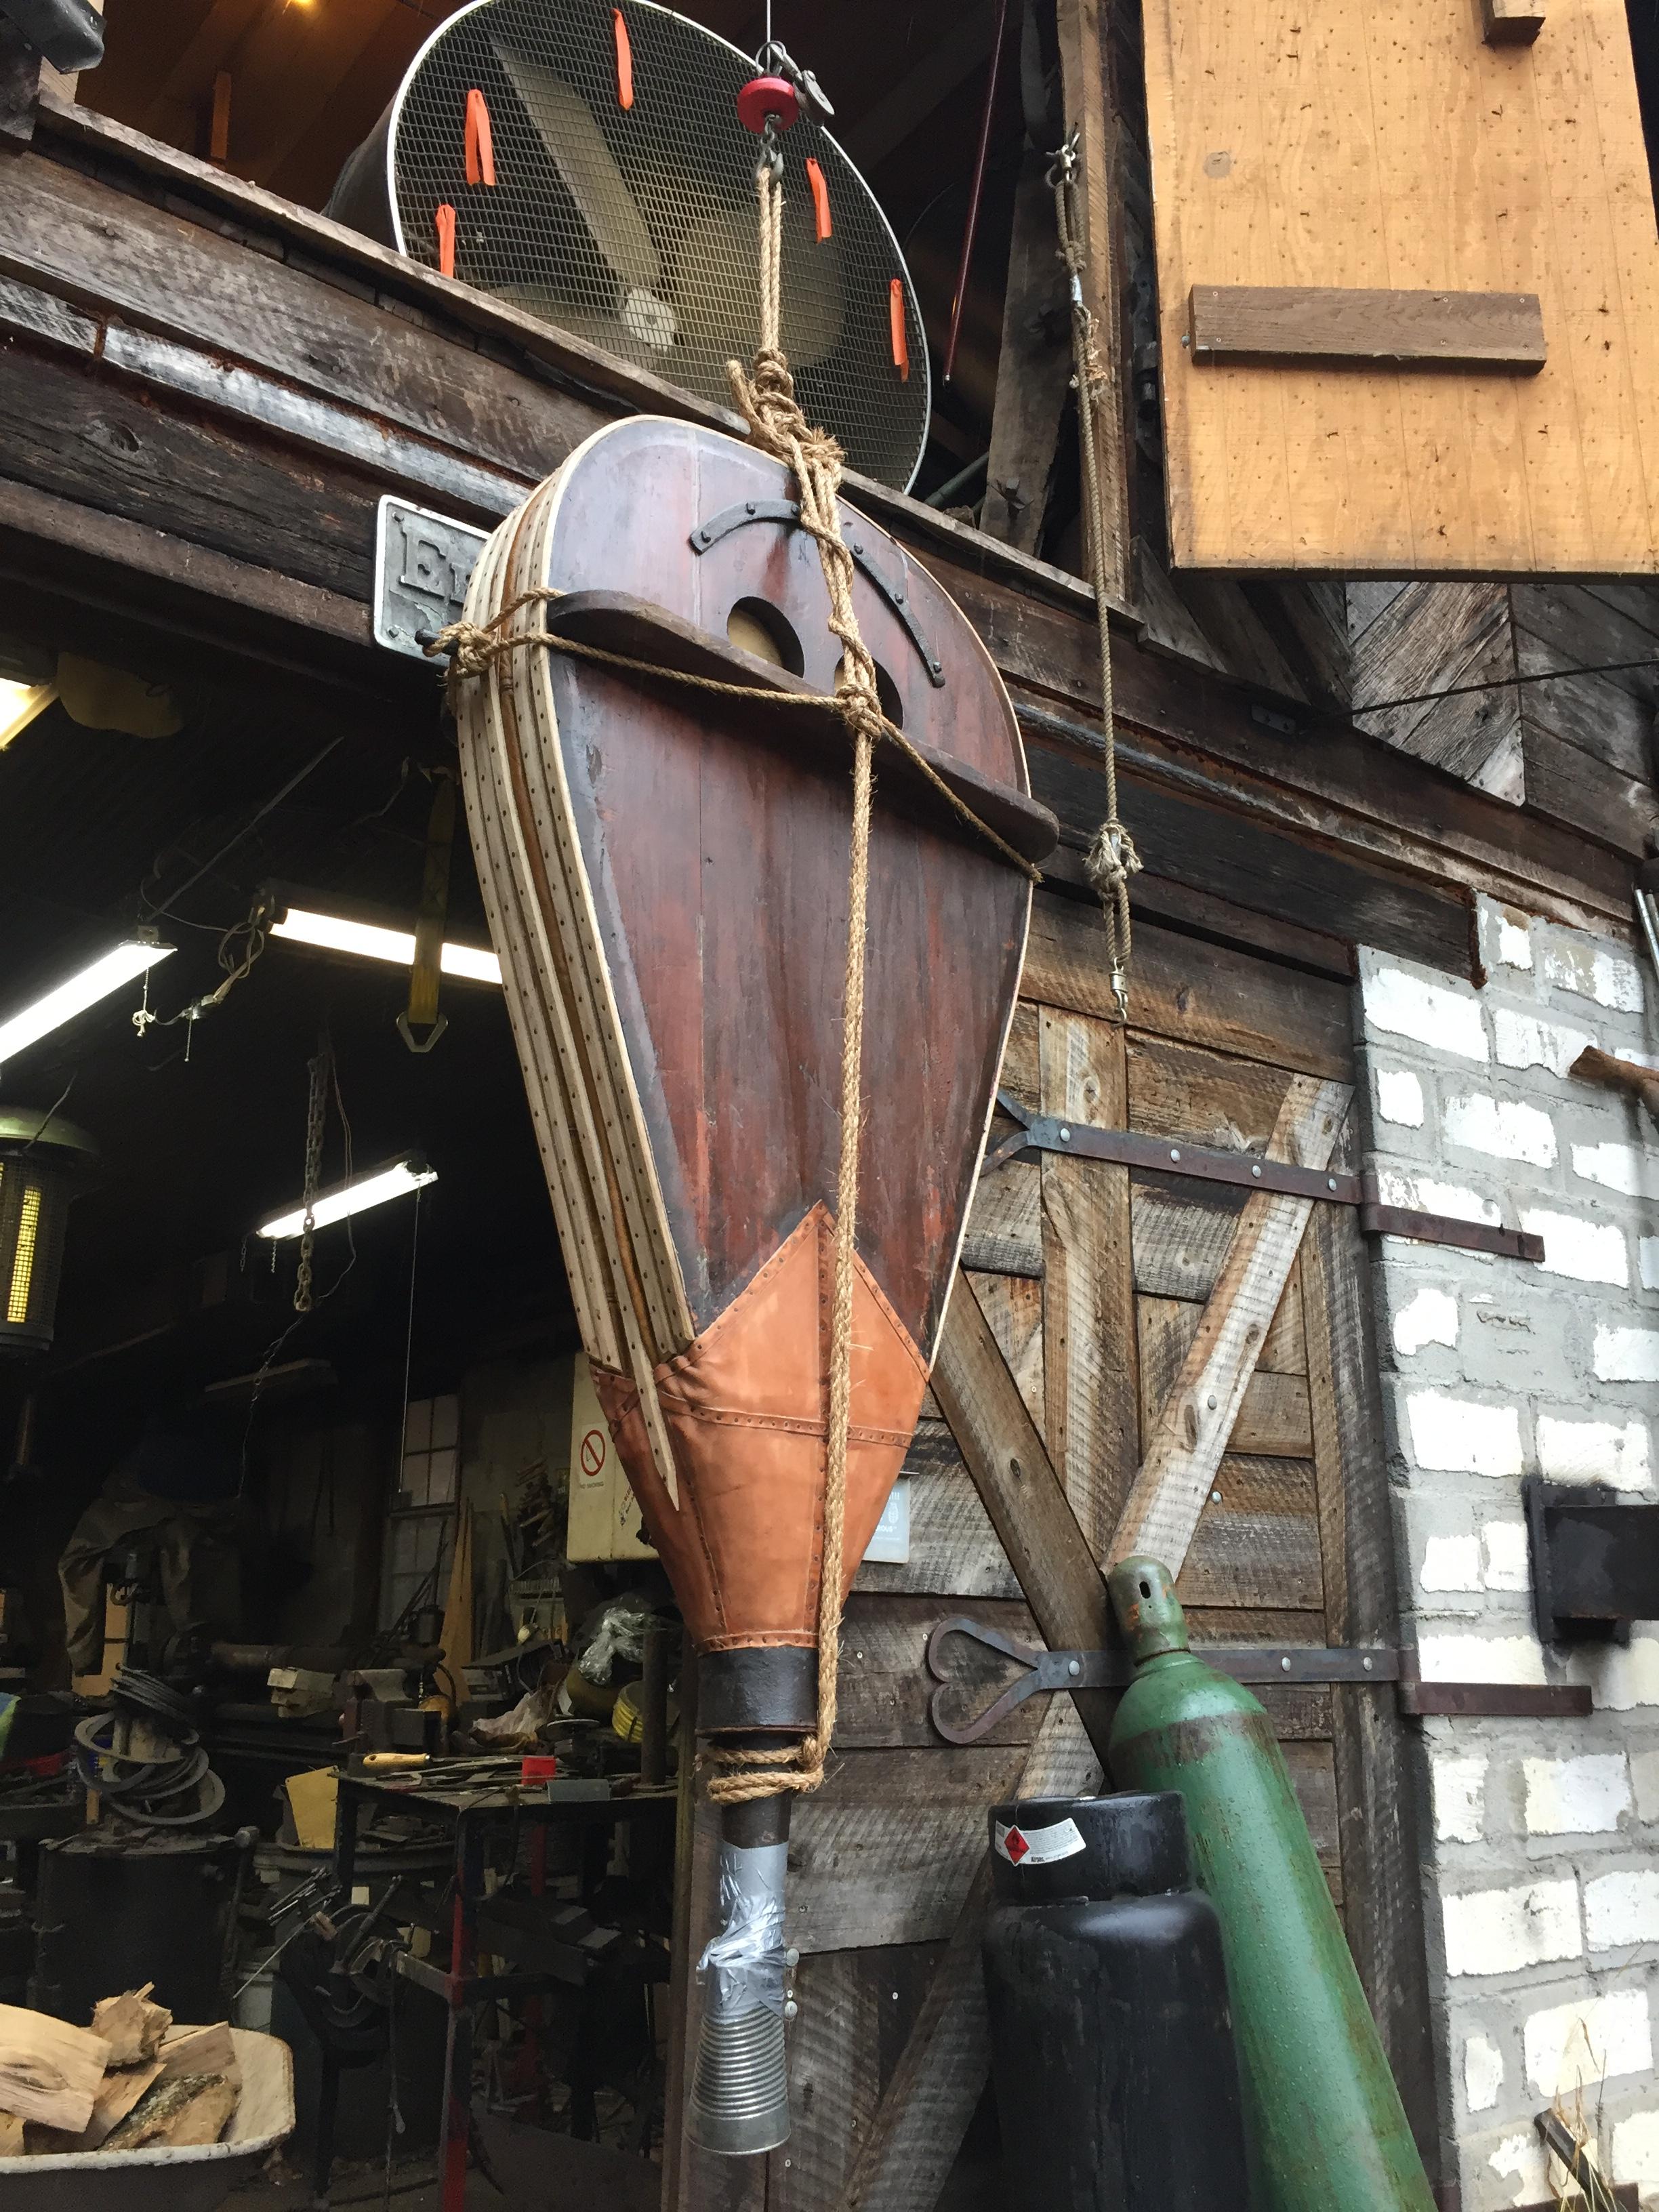
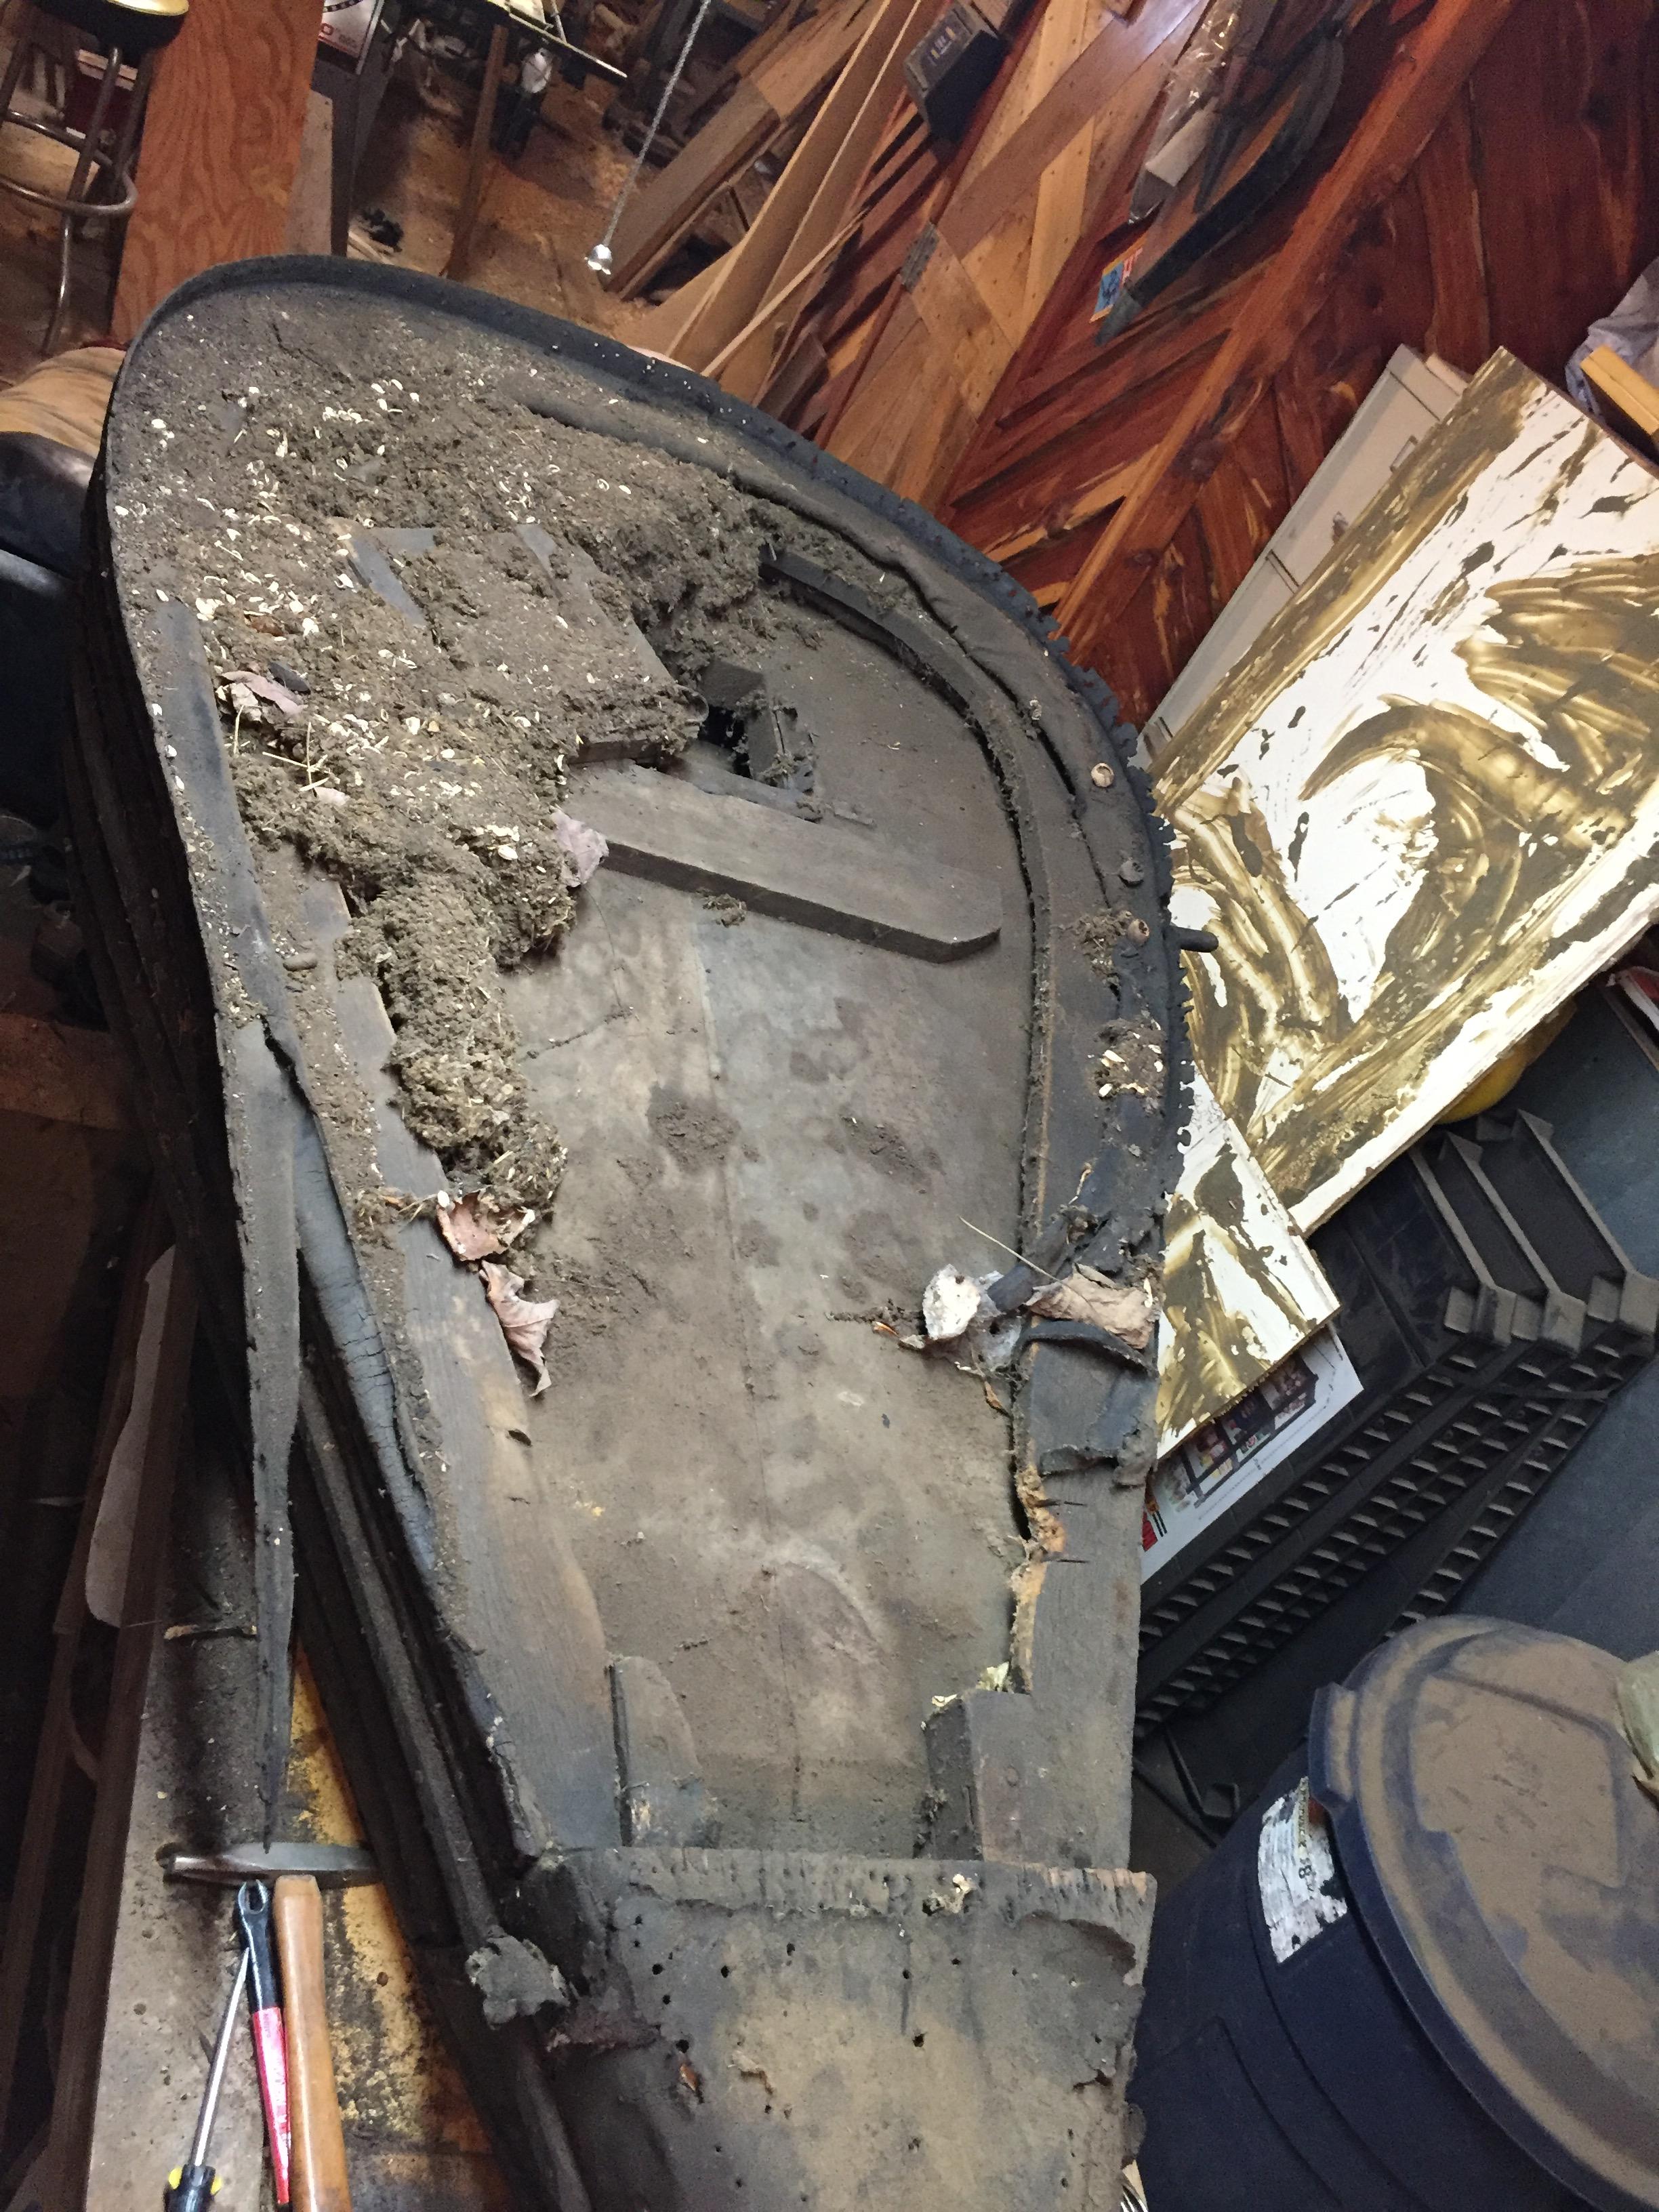
Plugging nail holes and gluing up a few small cracks etc.,. in preparation for new leather


-
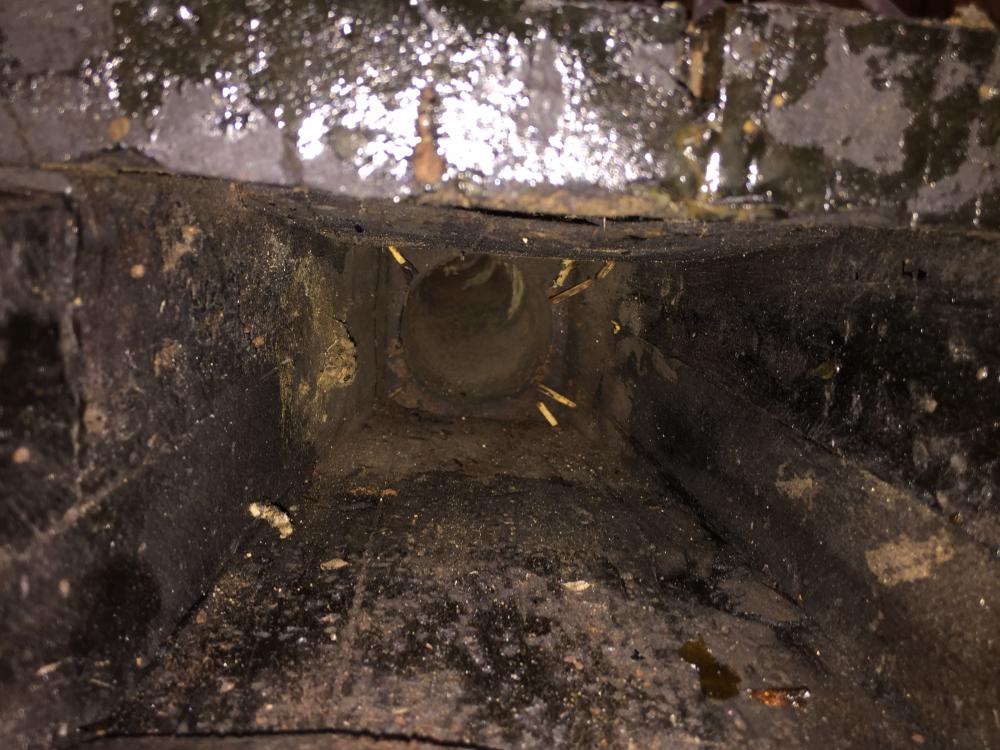
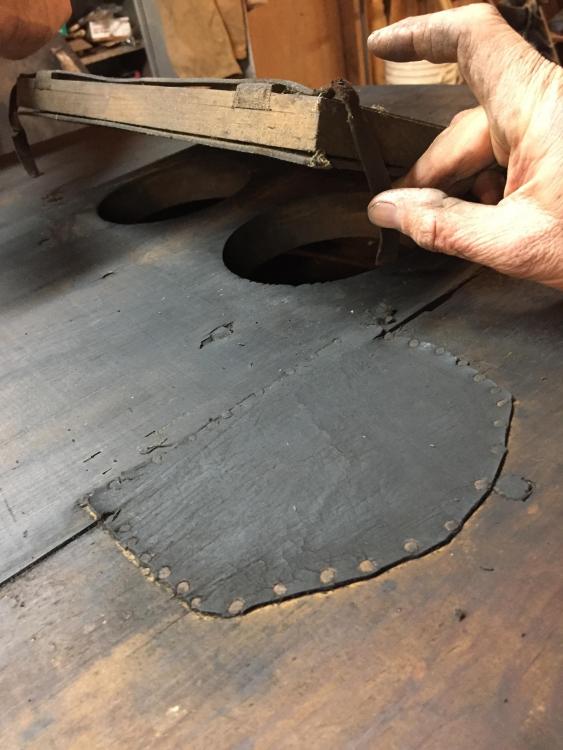
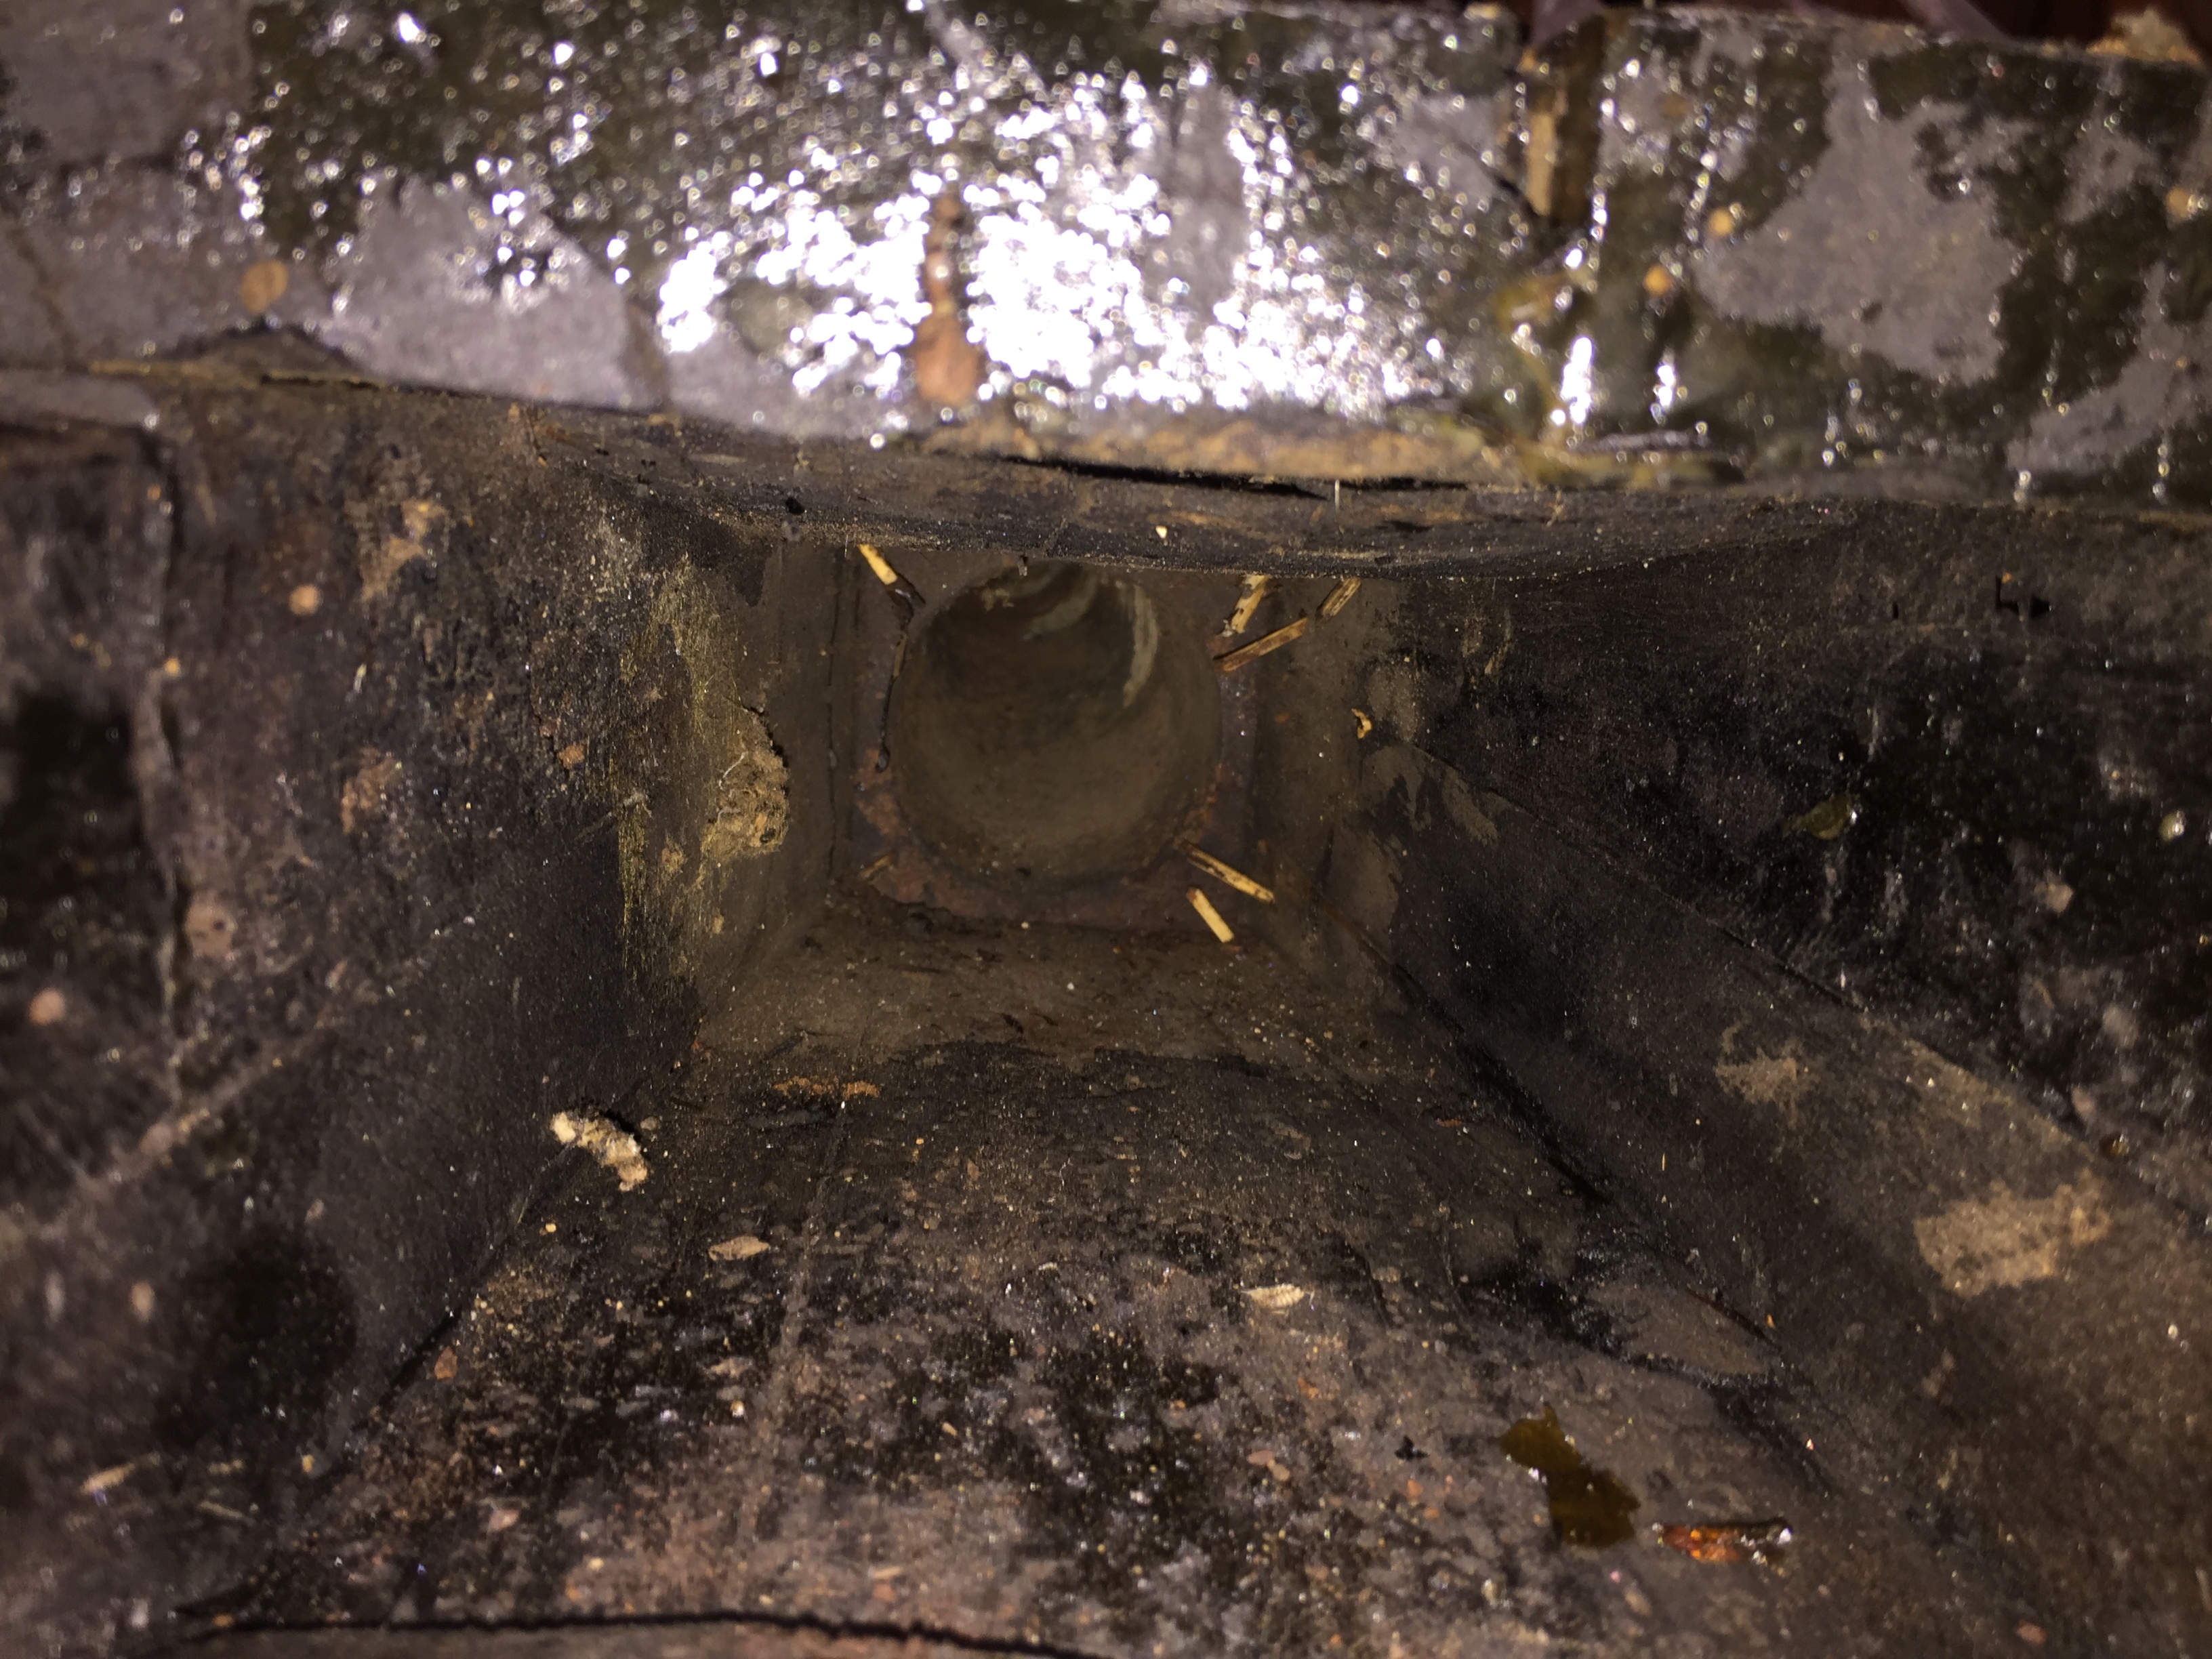
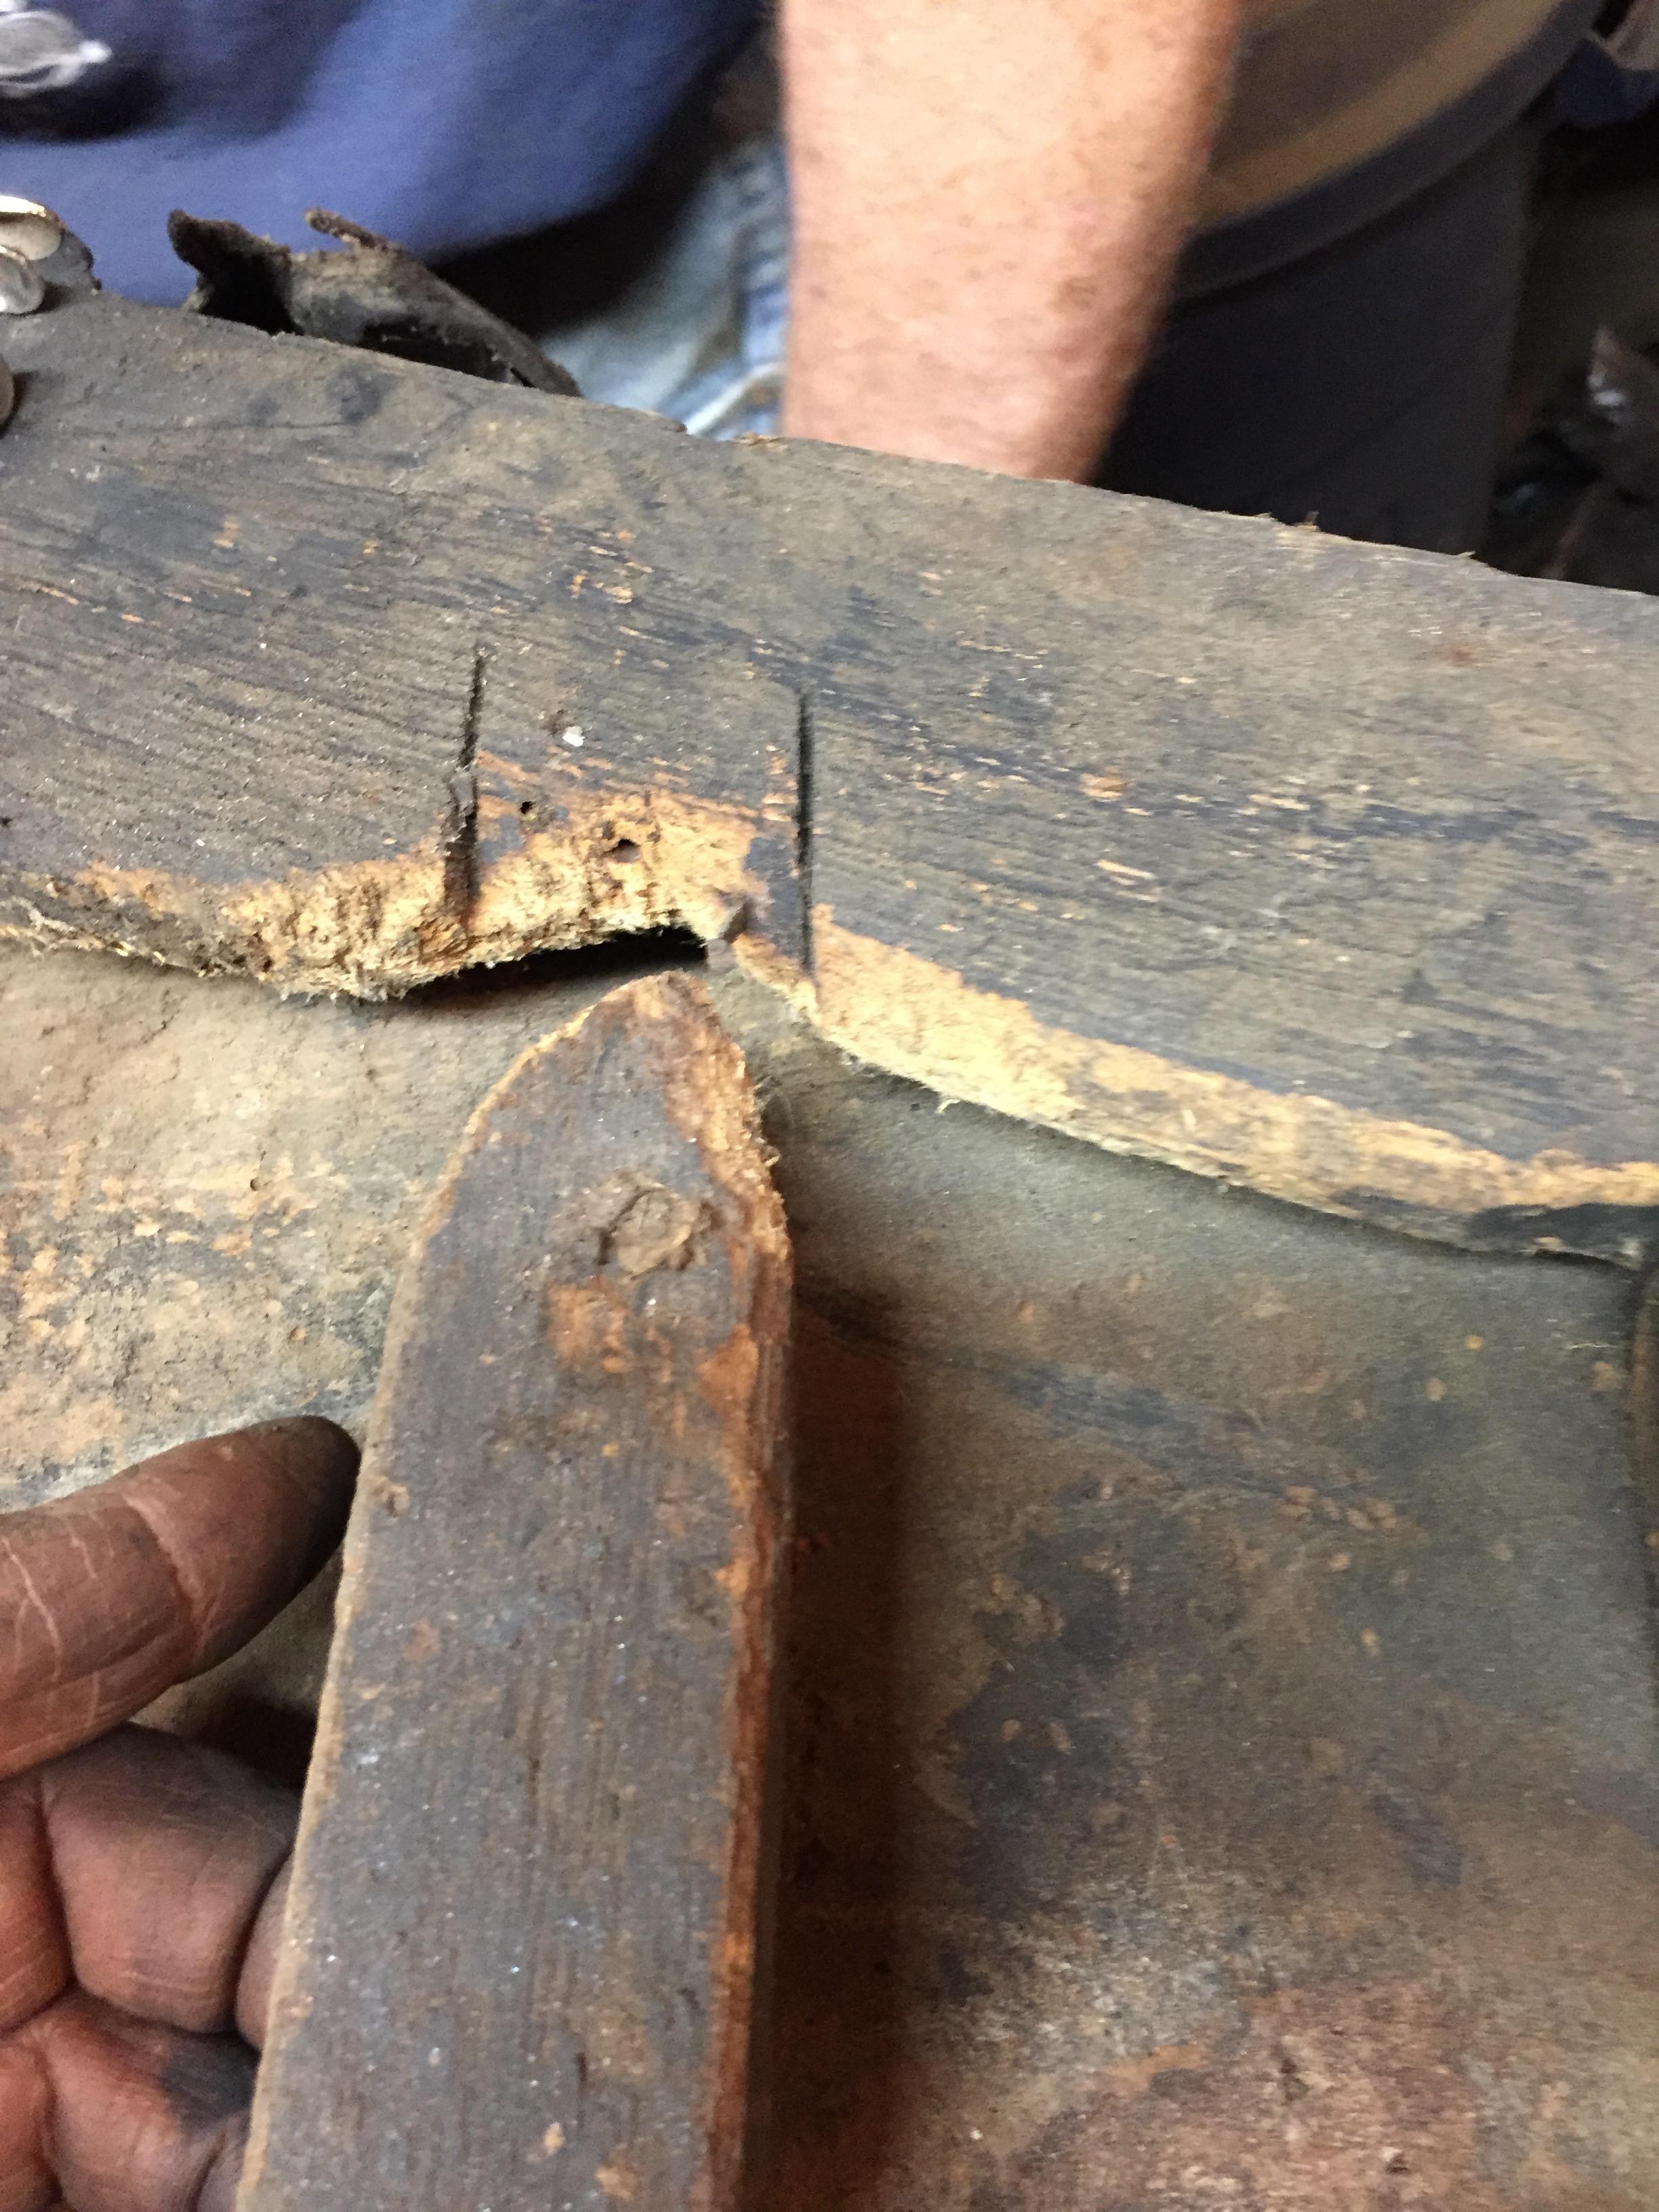
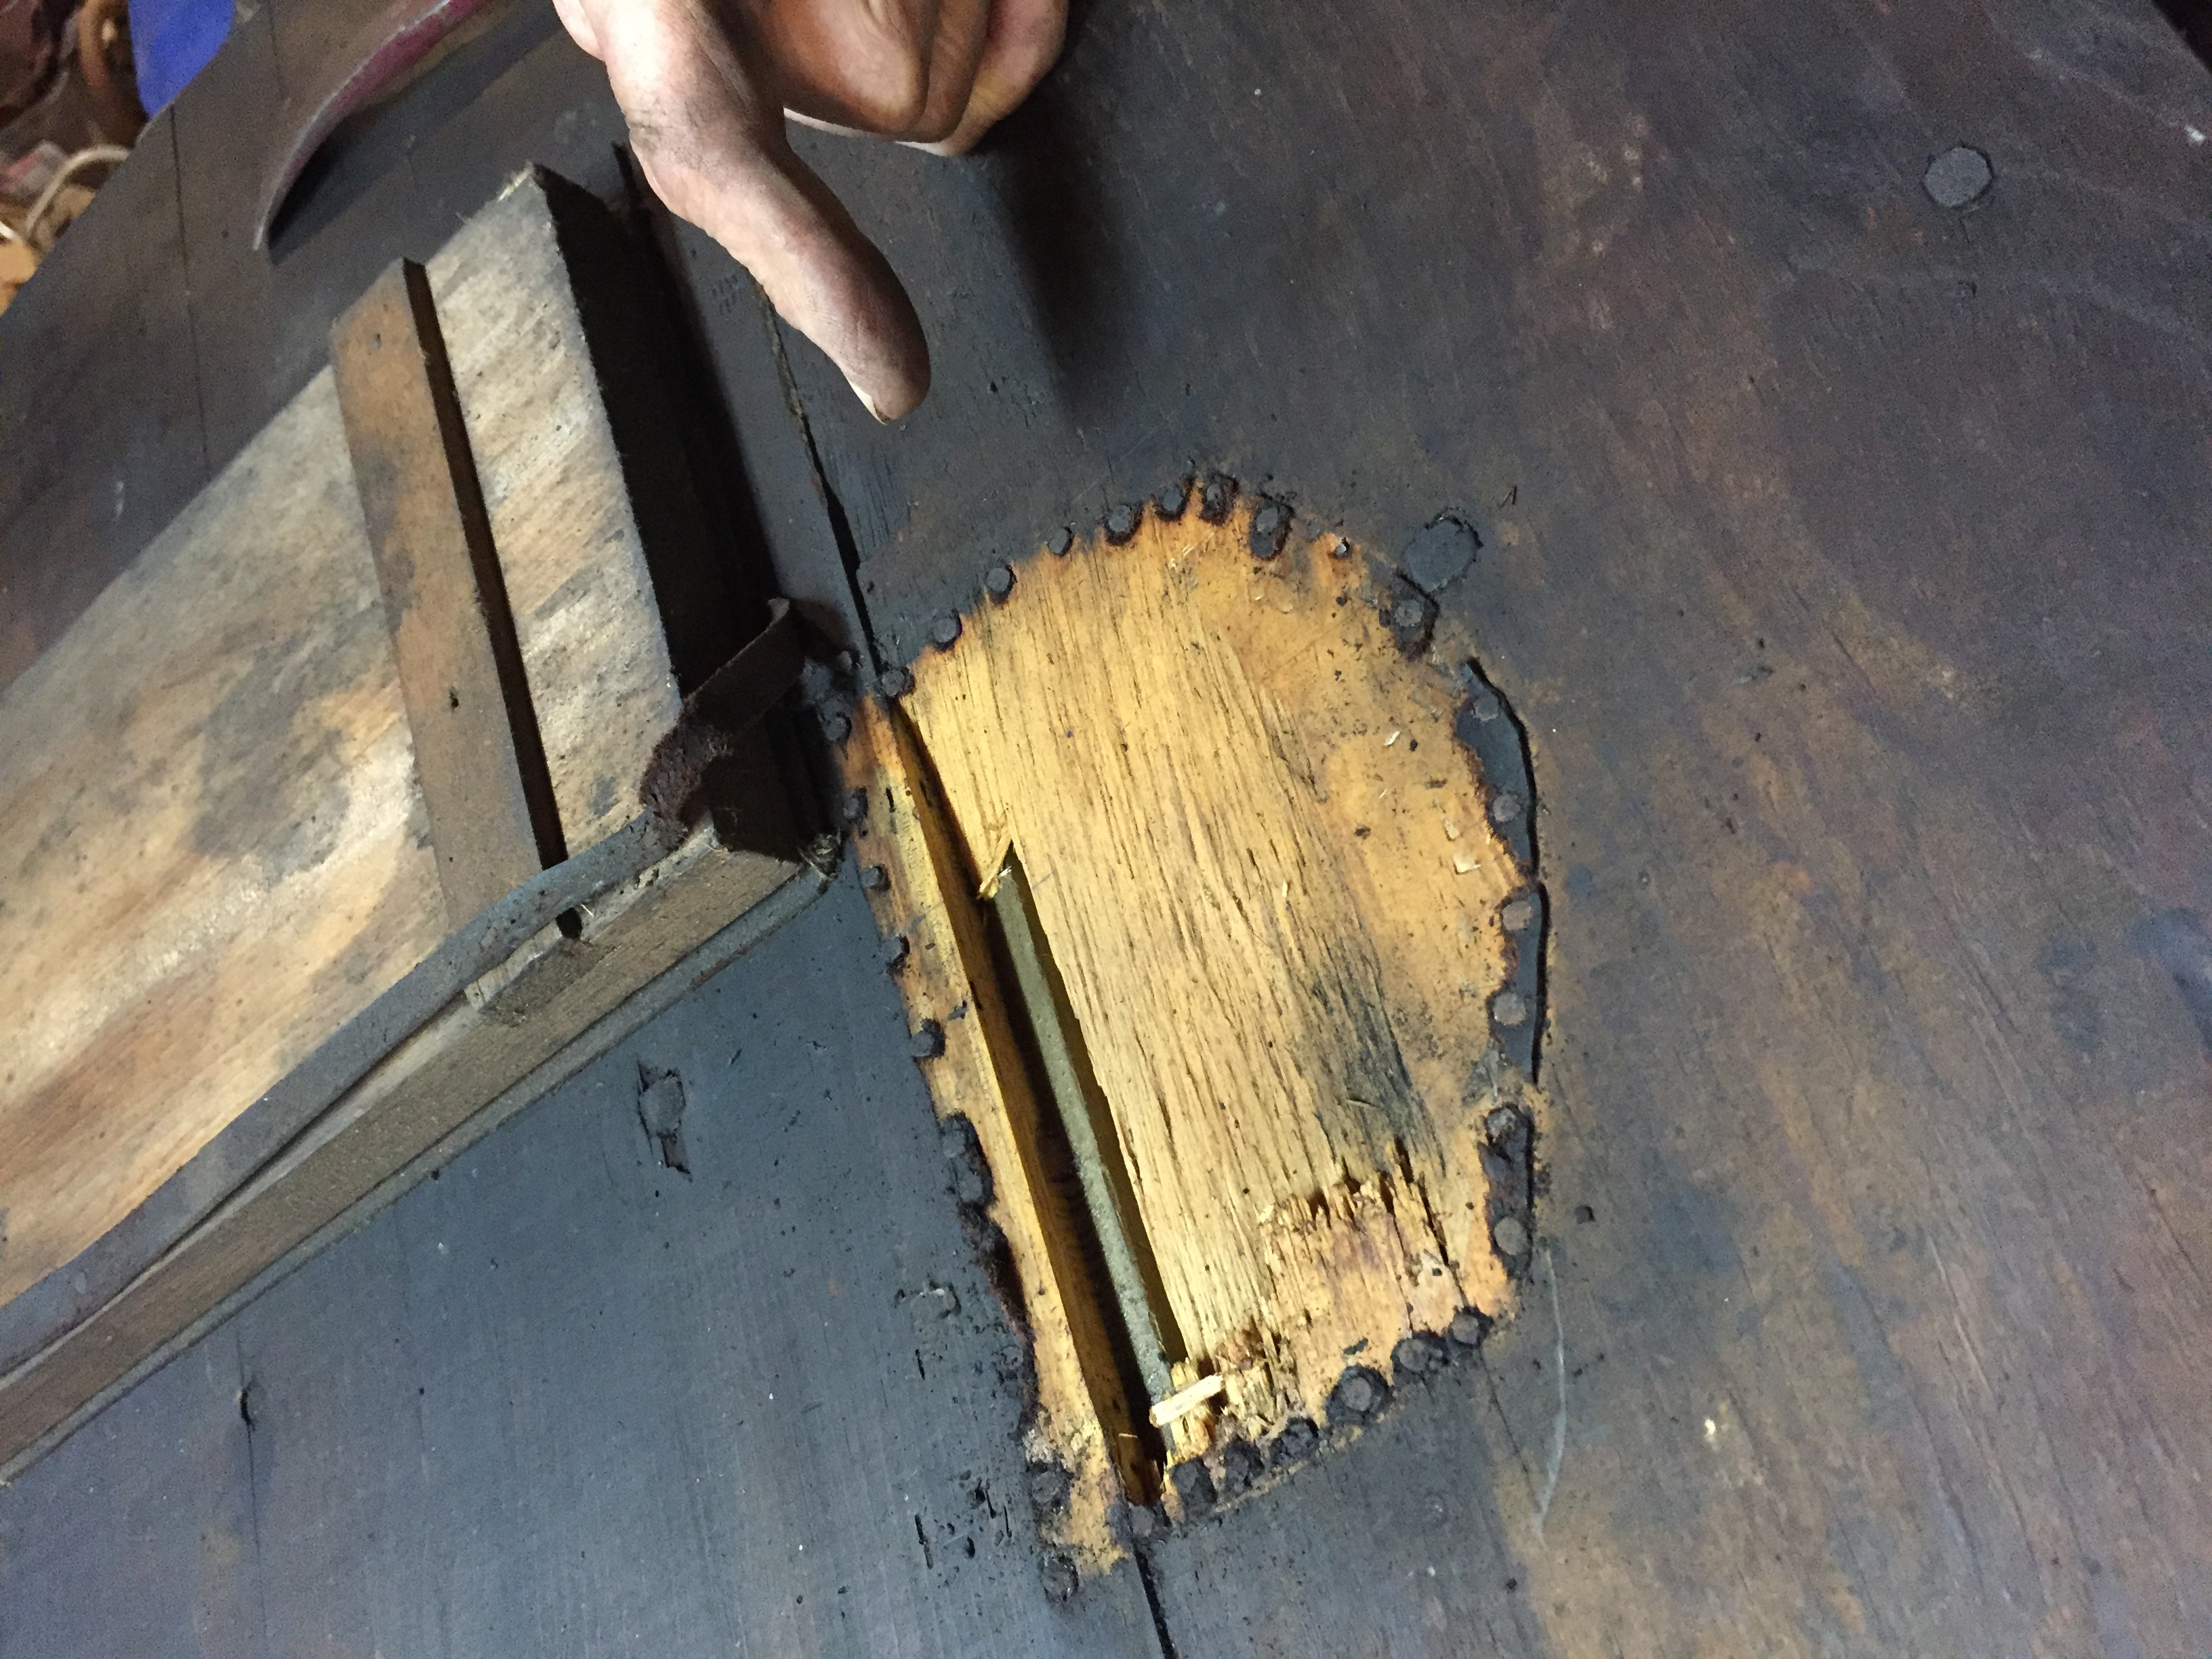
It has been interesting to get into it. It is in original condition and could find no evidence of previous repairs except for the 'factory' leather patch shown in the fourth photo that covered a place where a piece of the wood tore out on assembly revealing part of the feather that fit in the grooves holding them in alignment. You can see the original hide glue in the joints that is still sound in most places. Light cleaning reveals the outside was painted with a red paint of some kind.
I had intended to give it plenty of linseed oil but a friend suggests using thinned out spar varnish particularly on the inside to give it some fireproofing. There was evidence of hot embers being drawn back in and burning some spots near the throat.
The valves don't need replaced, just relined with new leather. One rib brace chewn through by mice will have to be replaced. The ribs look like oak, the center board and bottom yellow poplar.The top looks like pine and maybe chestnut?
Hundreds and hundreds of cut nails and tacks pulled out!
I don't know how you date one of these but my guess would be it is 100-150 years old. The spout is cast but the other iron work is all hand forged.
-
Finally got this project started. Disassembled and cleaning with some preliminary repairs. Fairly good condition but of course needs all new leather.


-
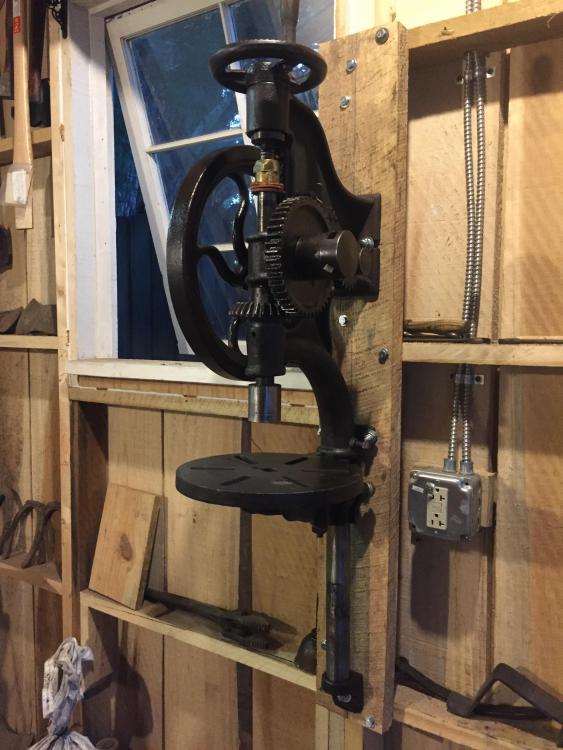
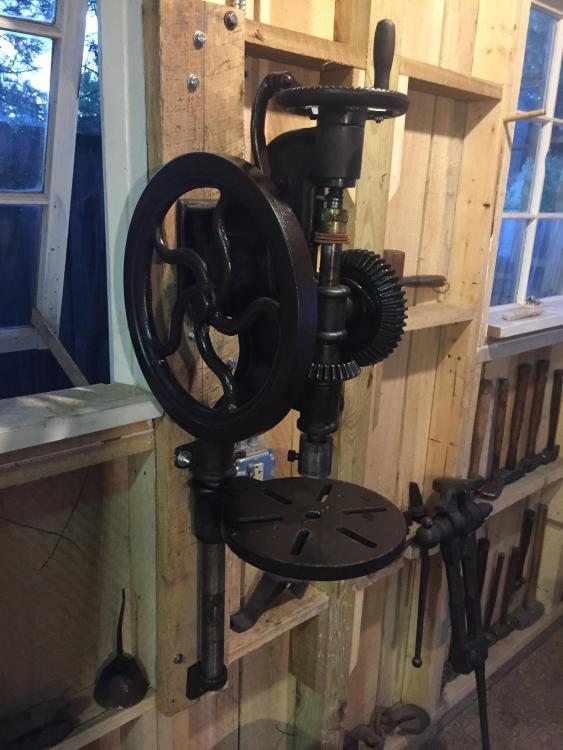
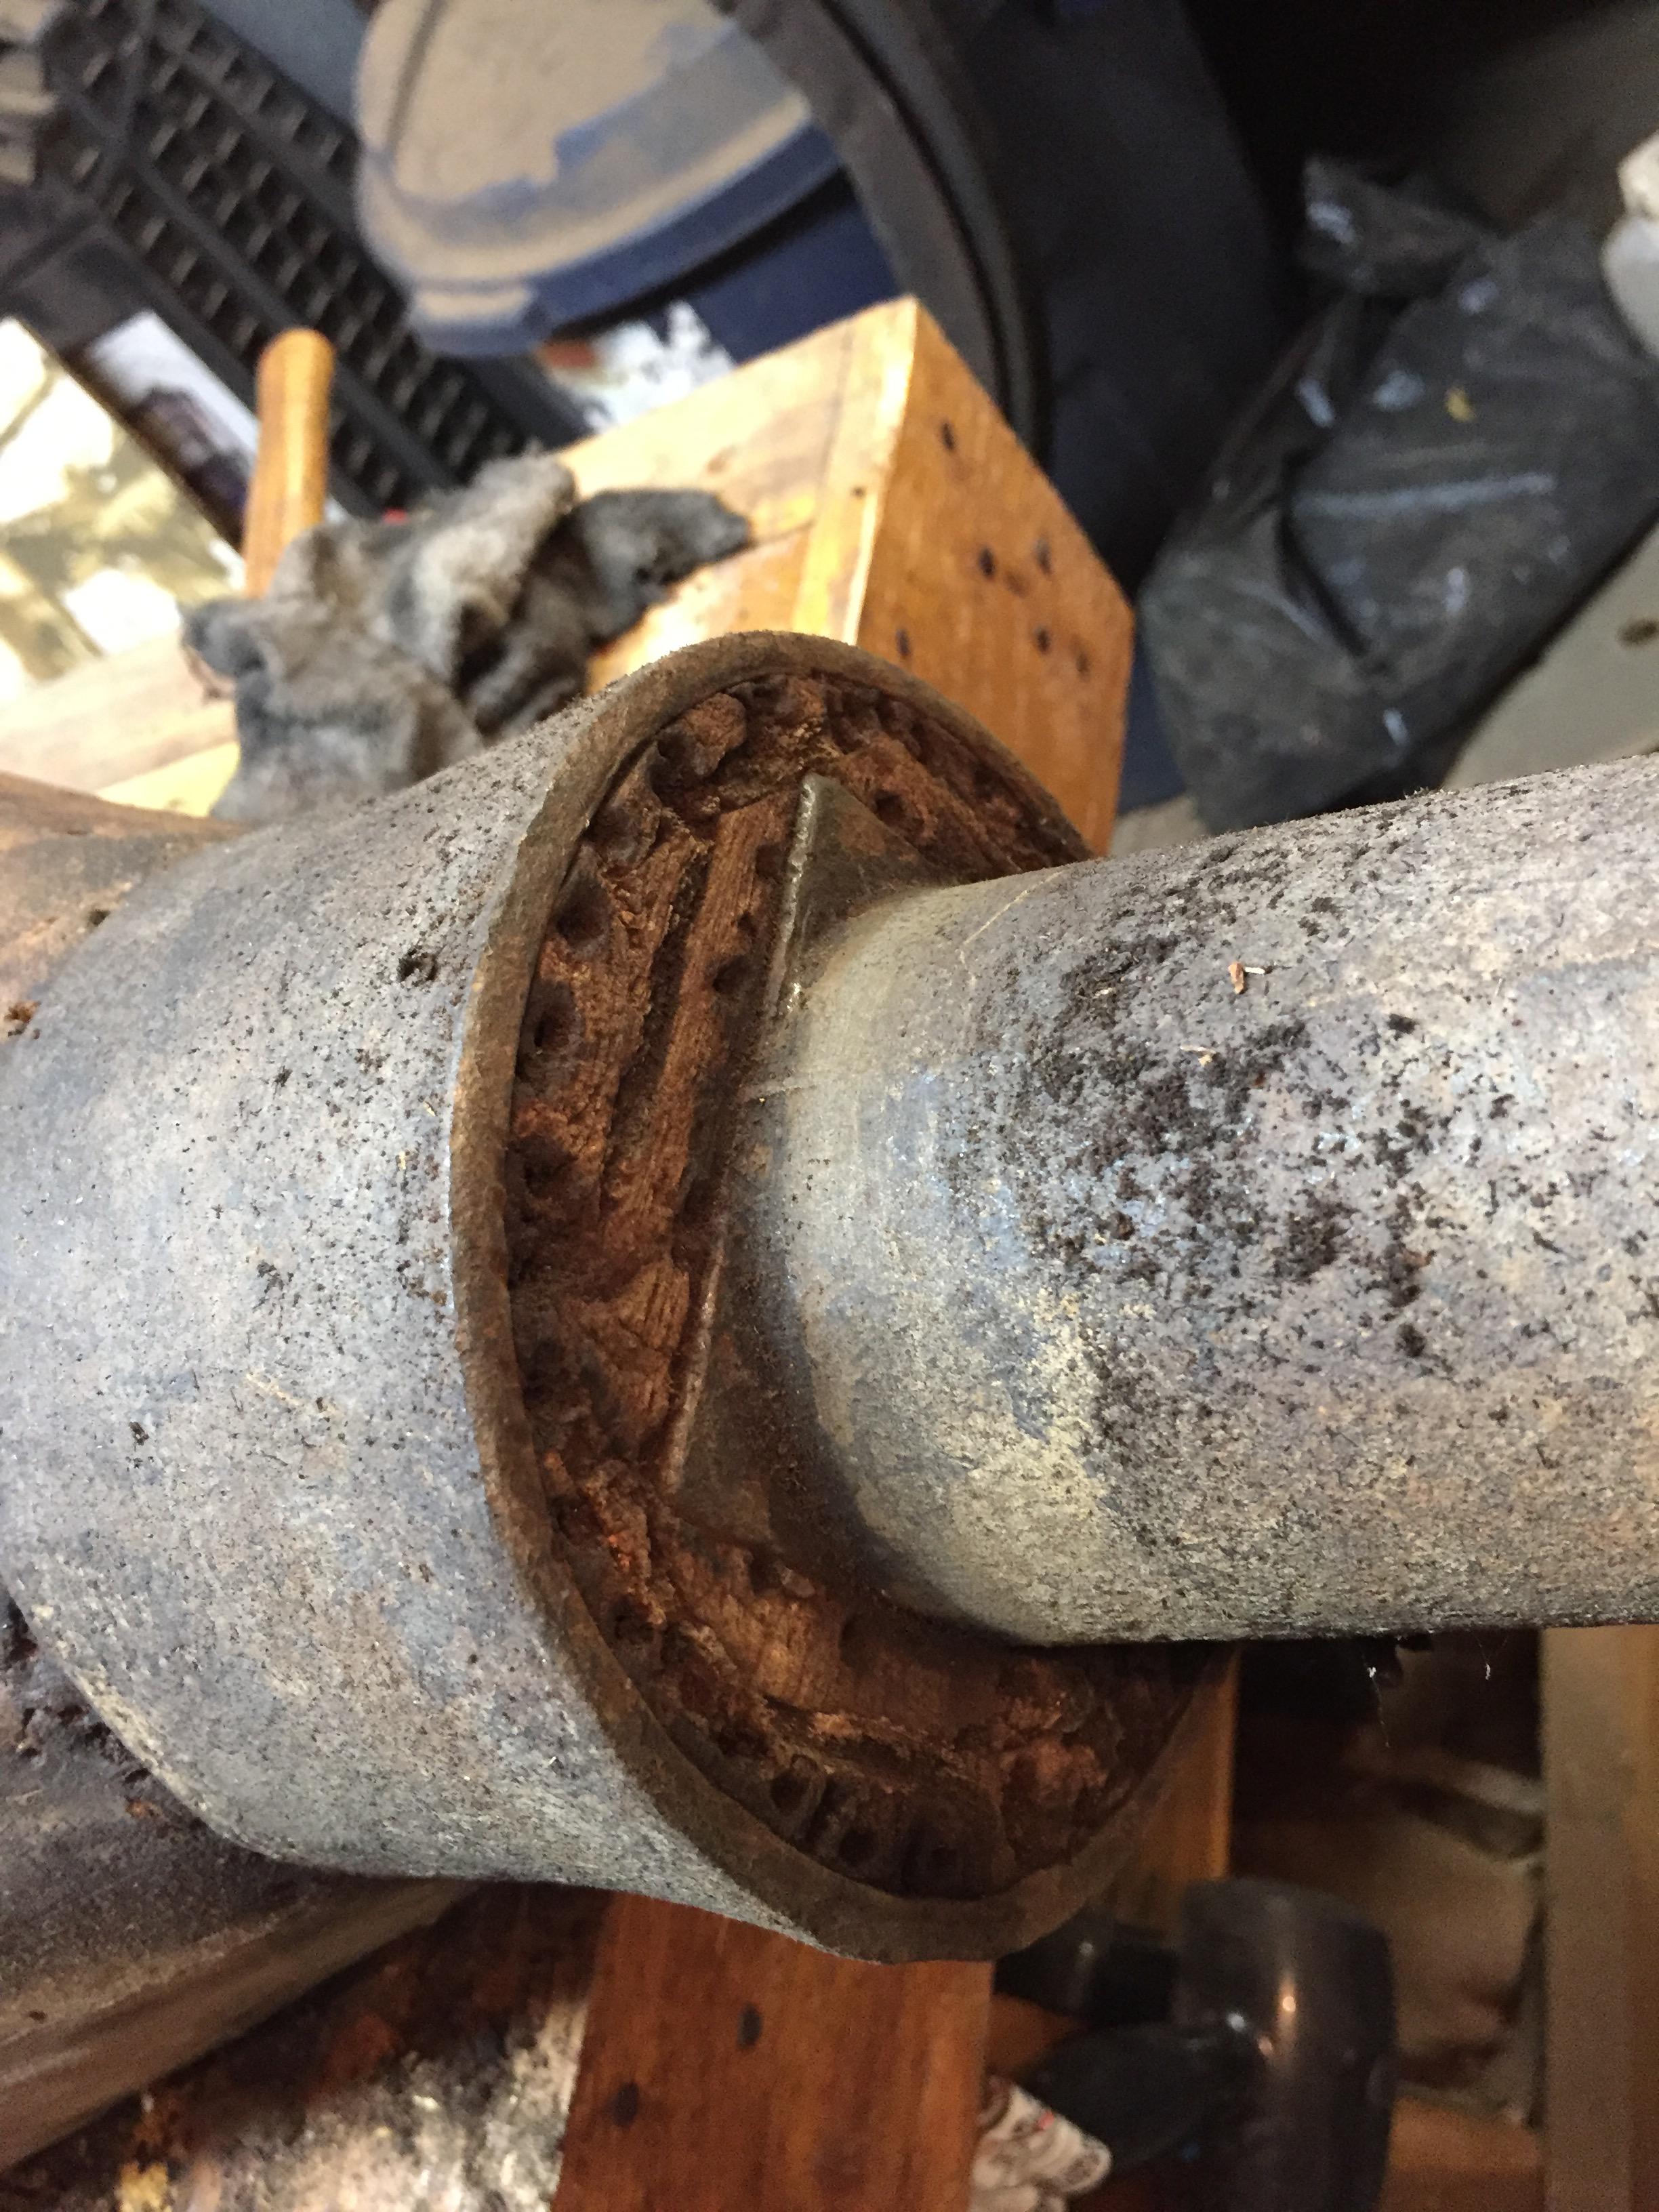
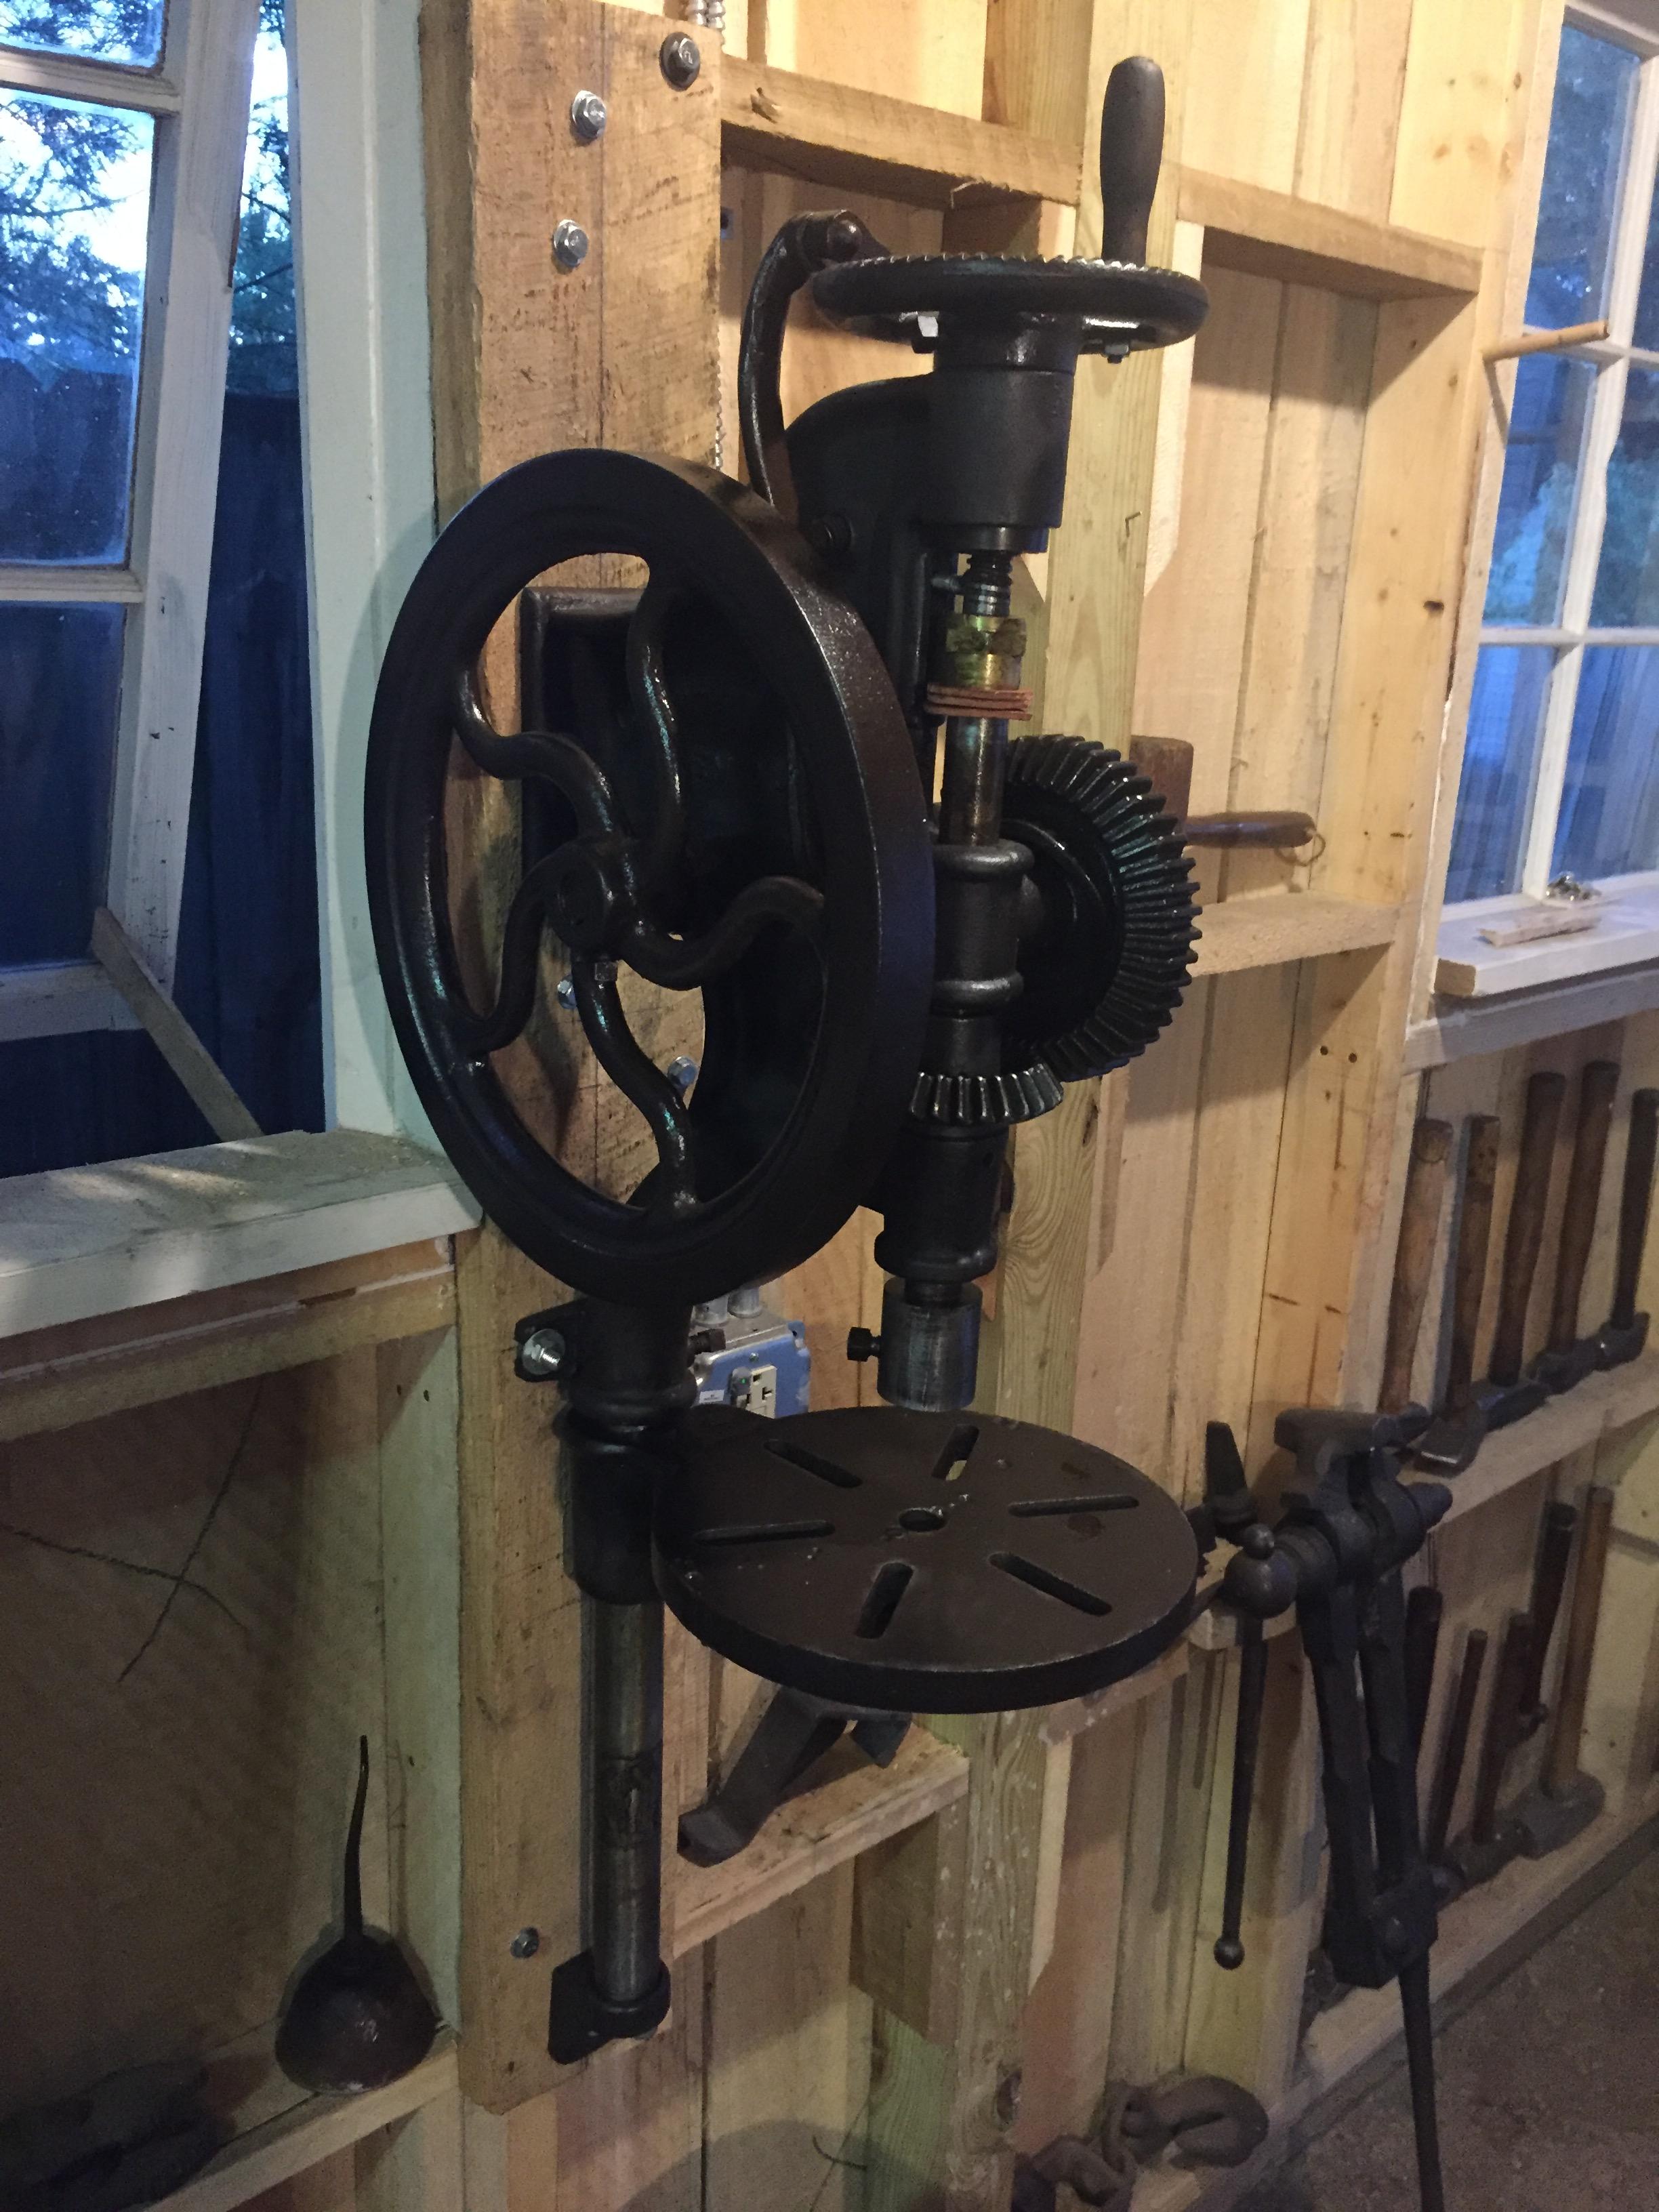
I have a silver I recently reassembled. It was pretty rough with spindle frozen. After months of penetrating oil baptisms, some heat and gentle persuasion, I got it apart. Only thing missing is bar stock for crank handle.
-
-
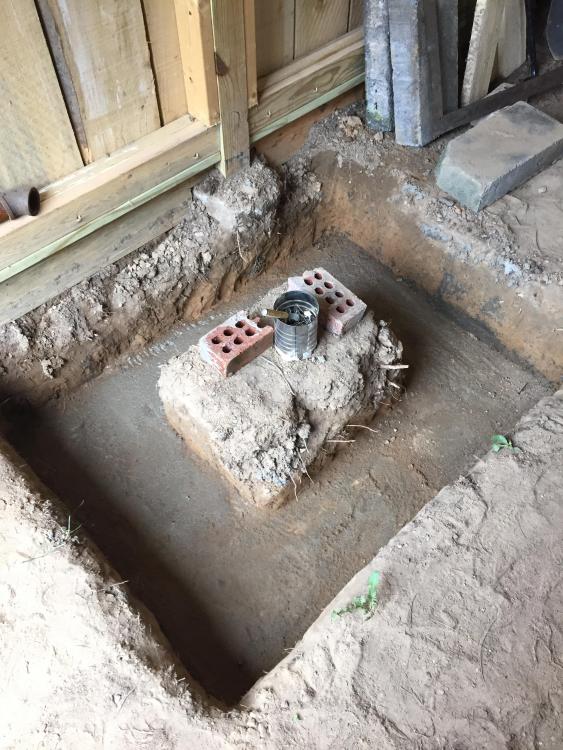
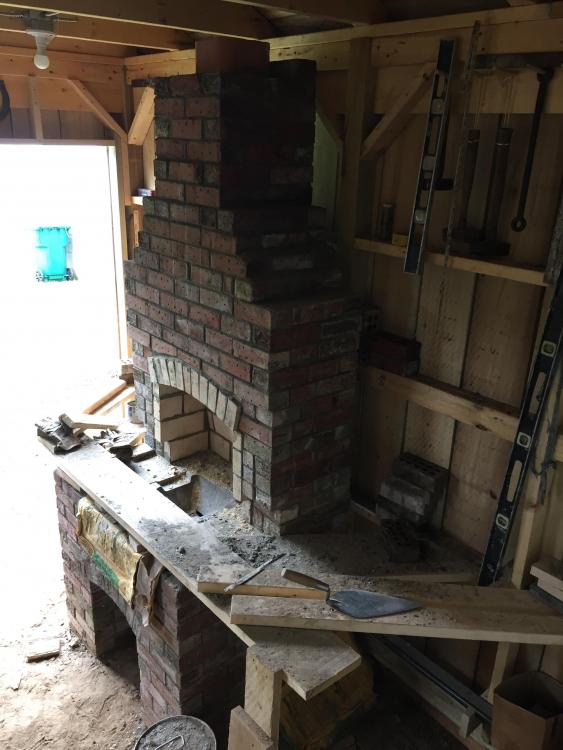
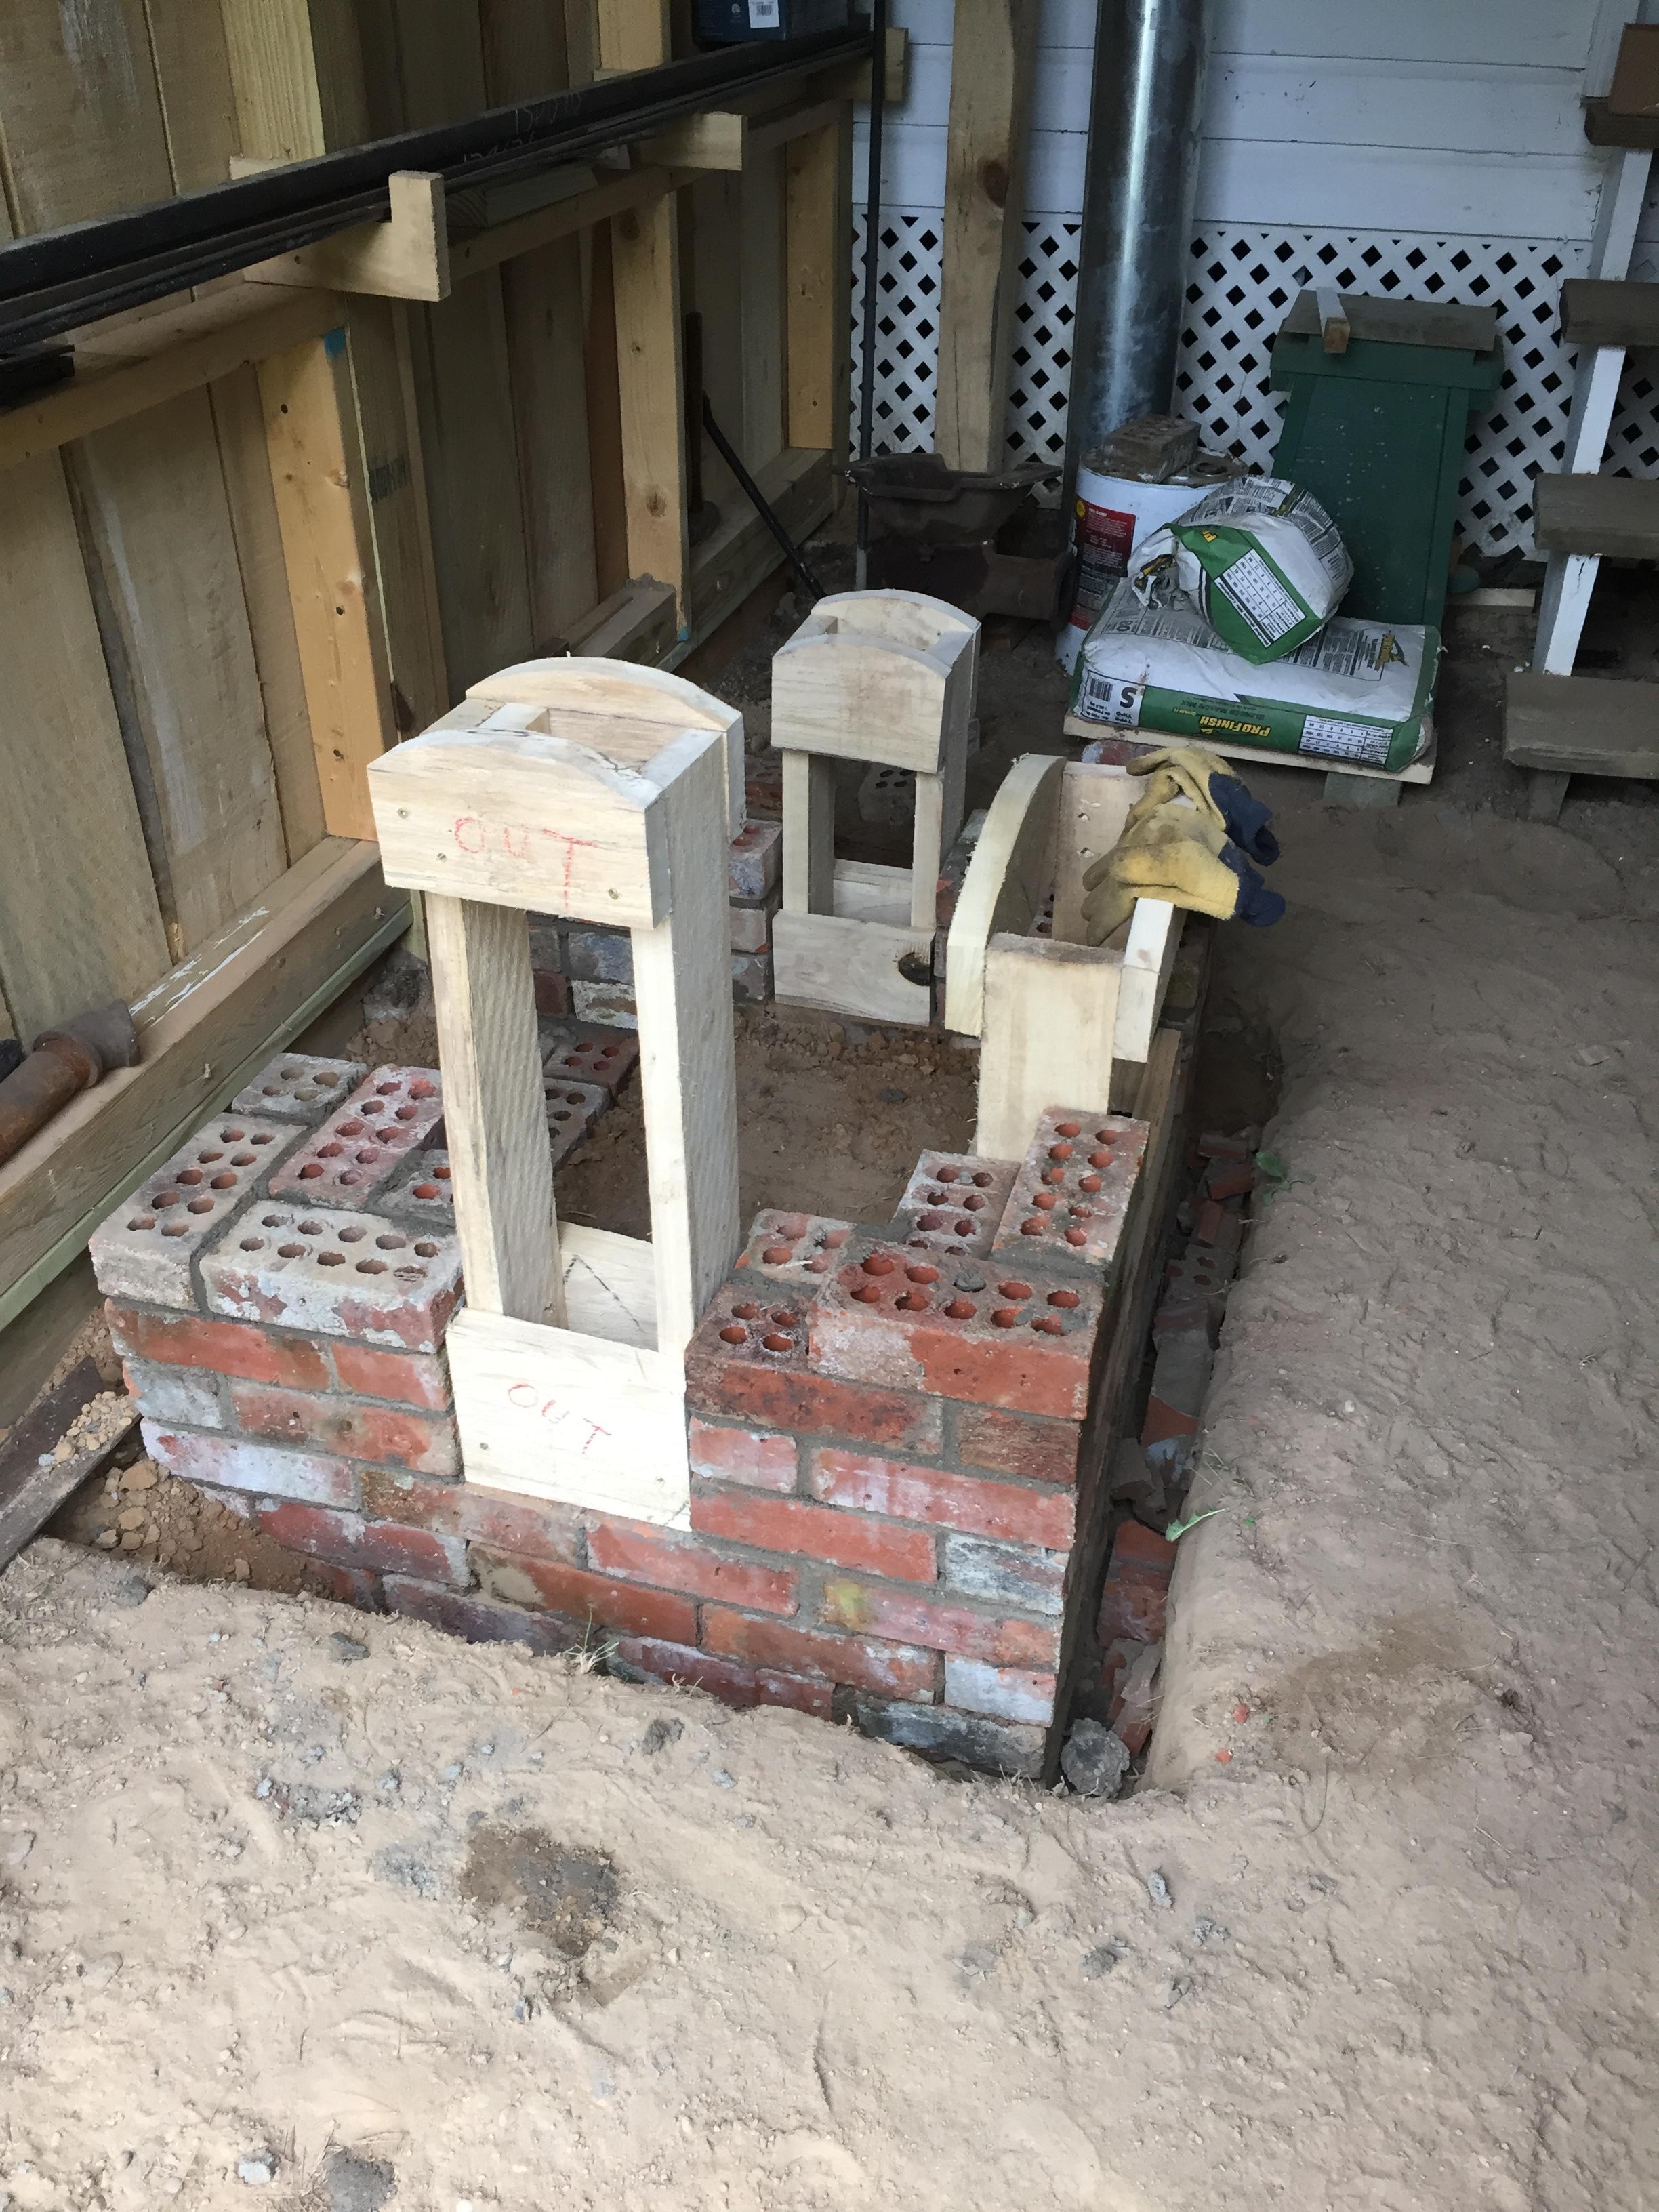
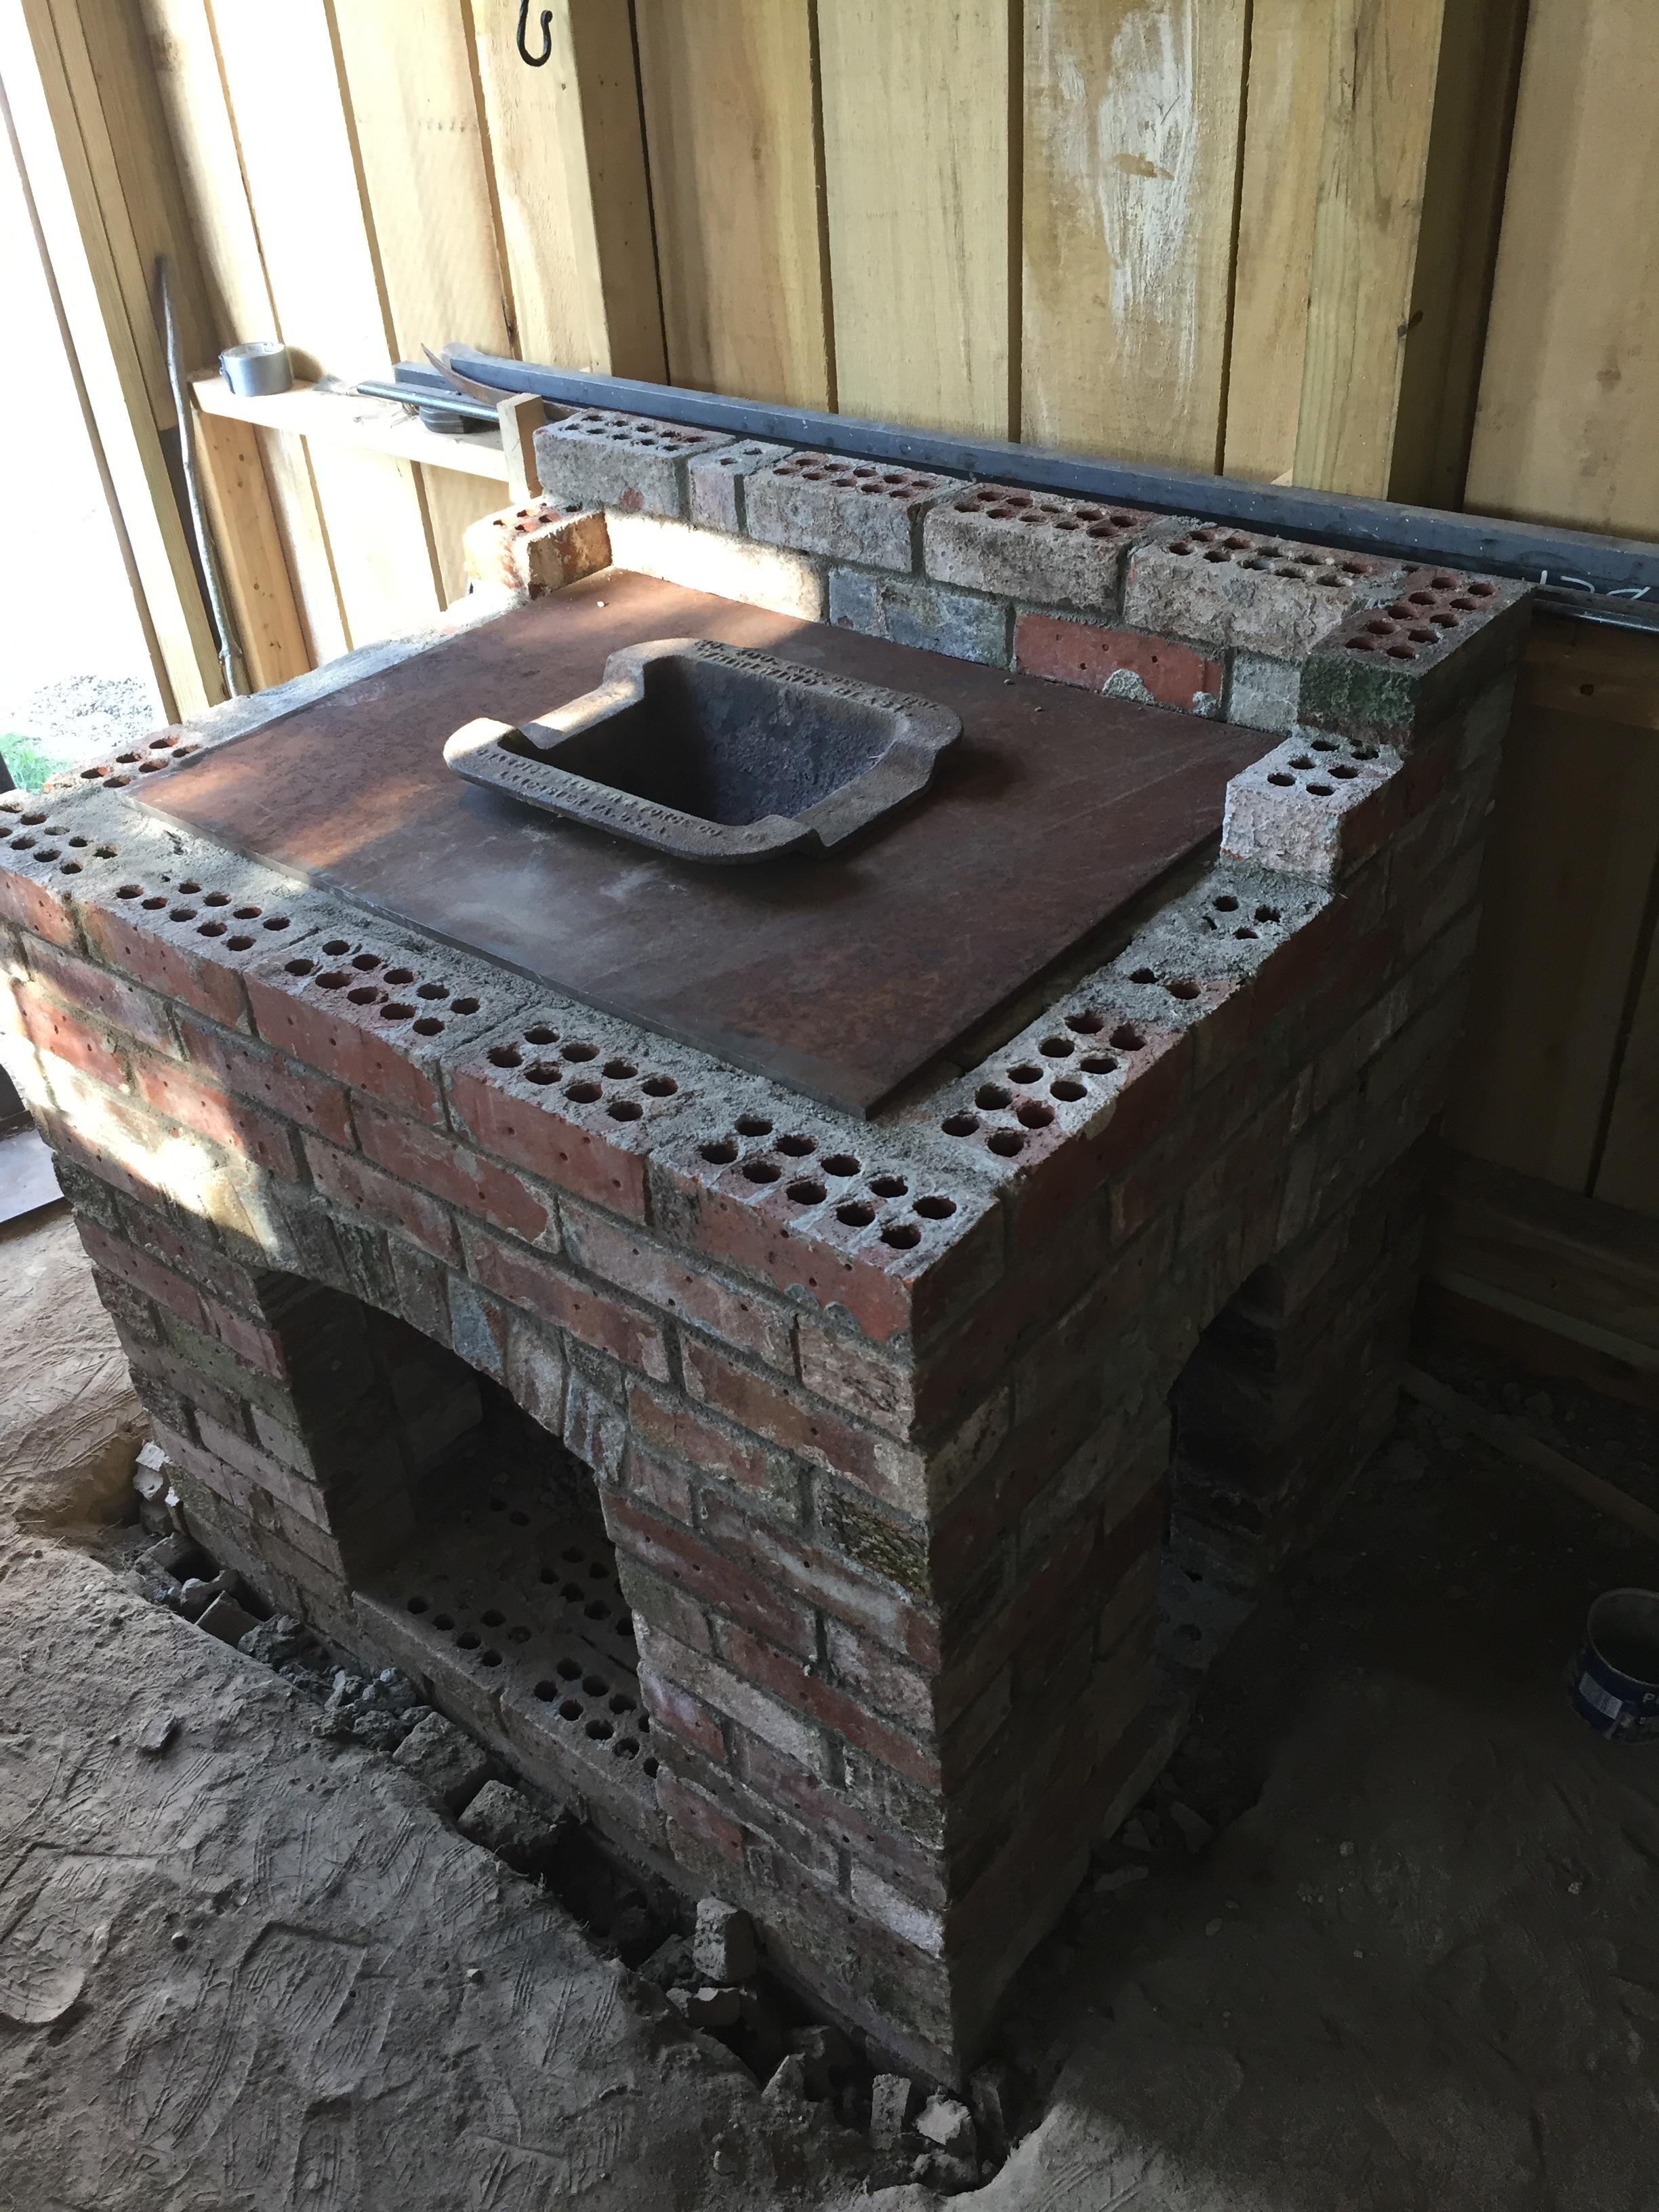
Brickwork done on the forge. Have not had a fire yet but lit a couple empty mortar sacks and looks like it will draw pretty good. Now to rebuild the bellows.

-
My best vise was laying in the mud by one of my dealer's back sheds. I took it apart, cleaned and wire brushed and oiled as I reassembled. Use it nearly everyday. I picked up another rough one the other day because it was cheap. Have not cleaned it up yet.
-
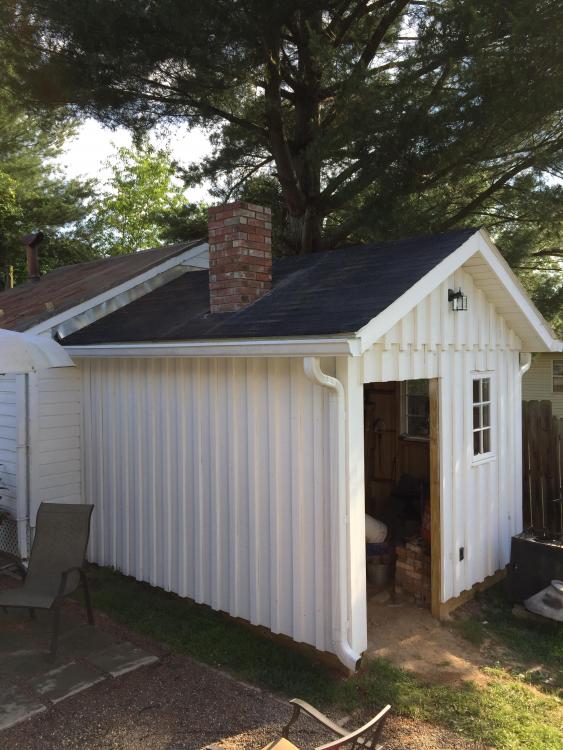
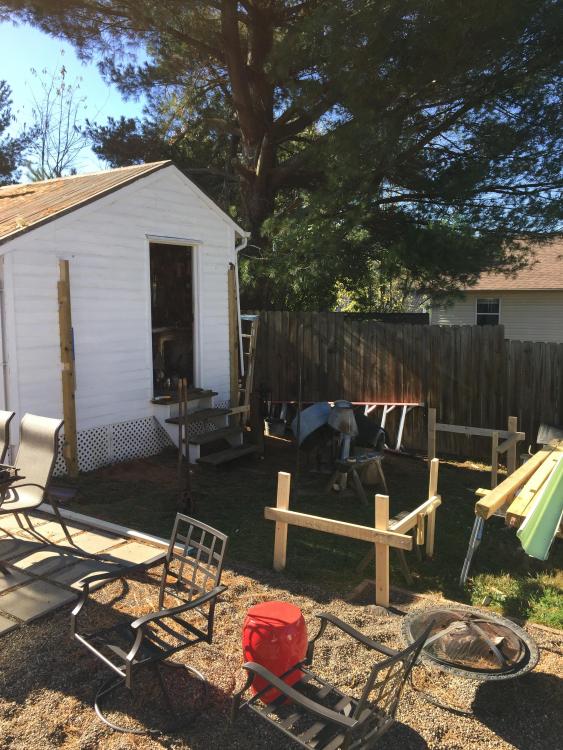
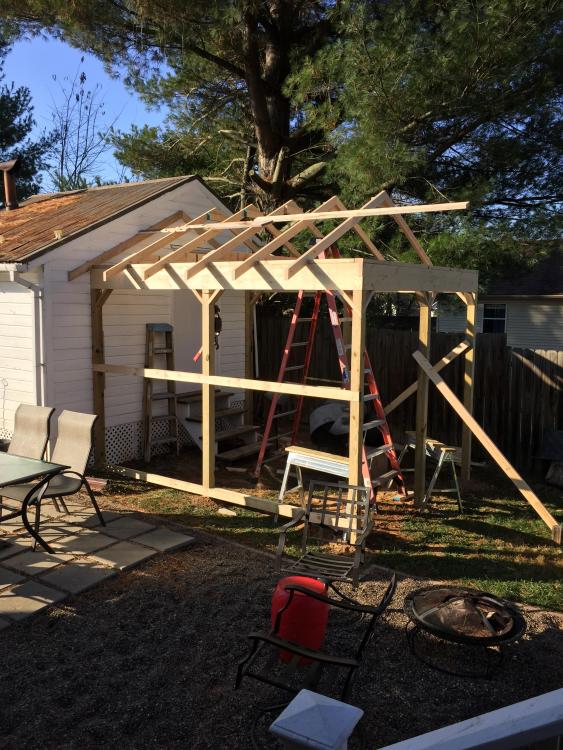
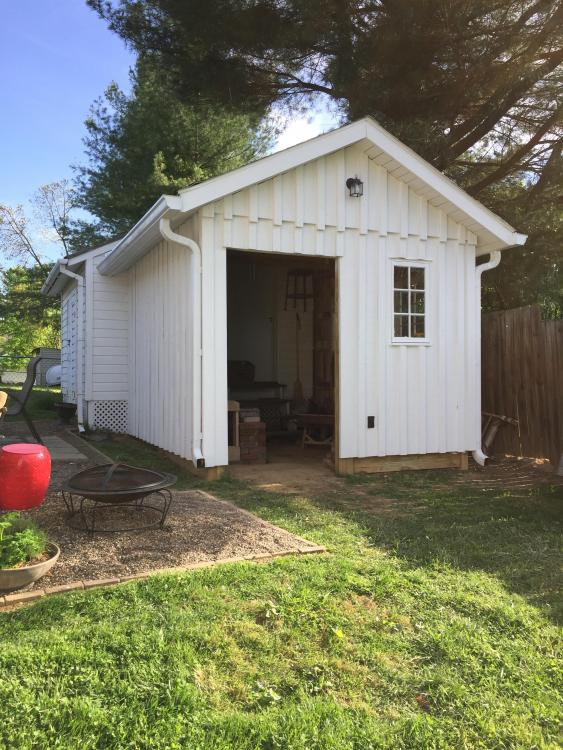
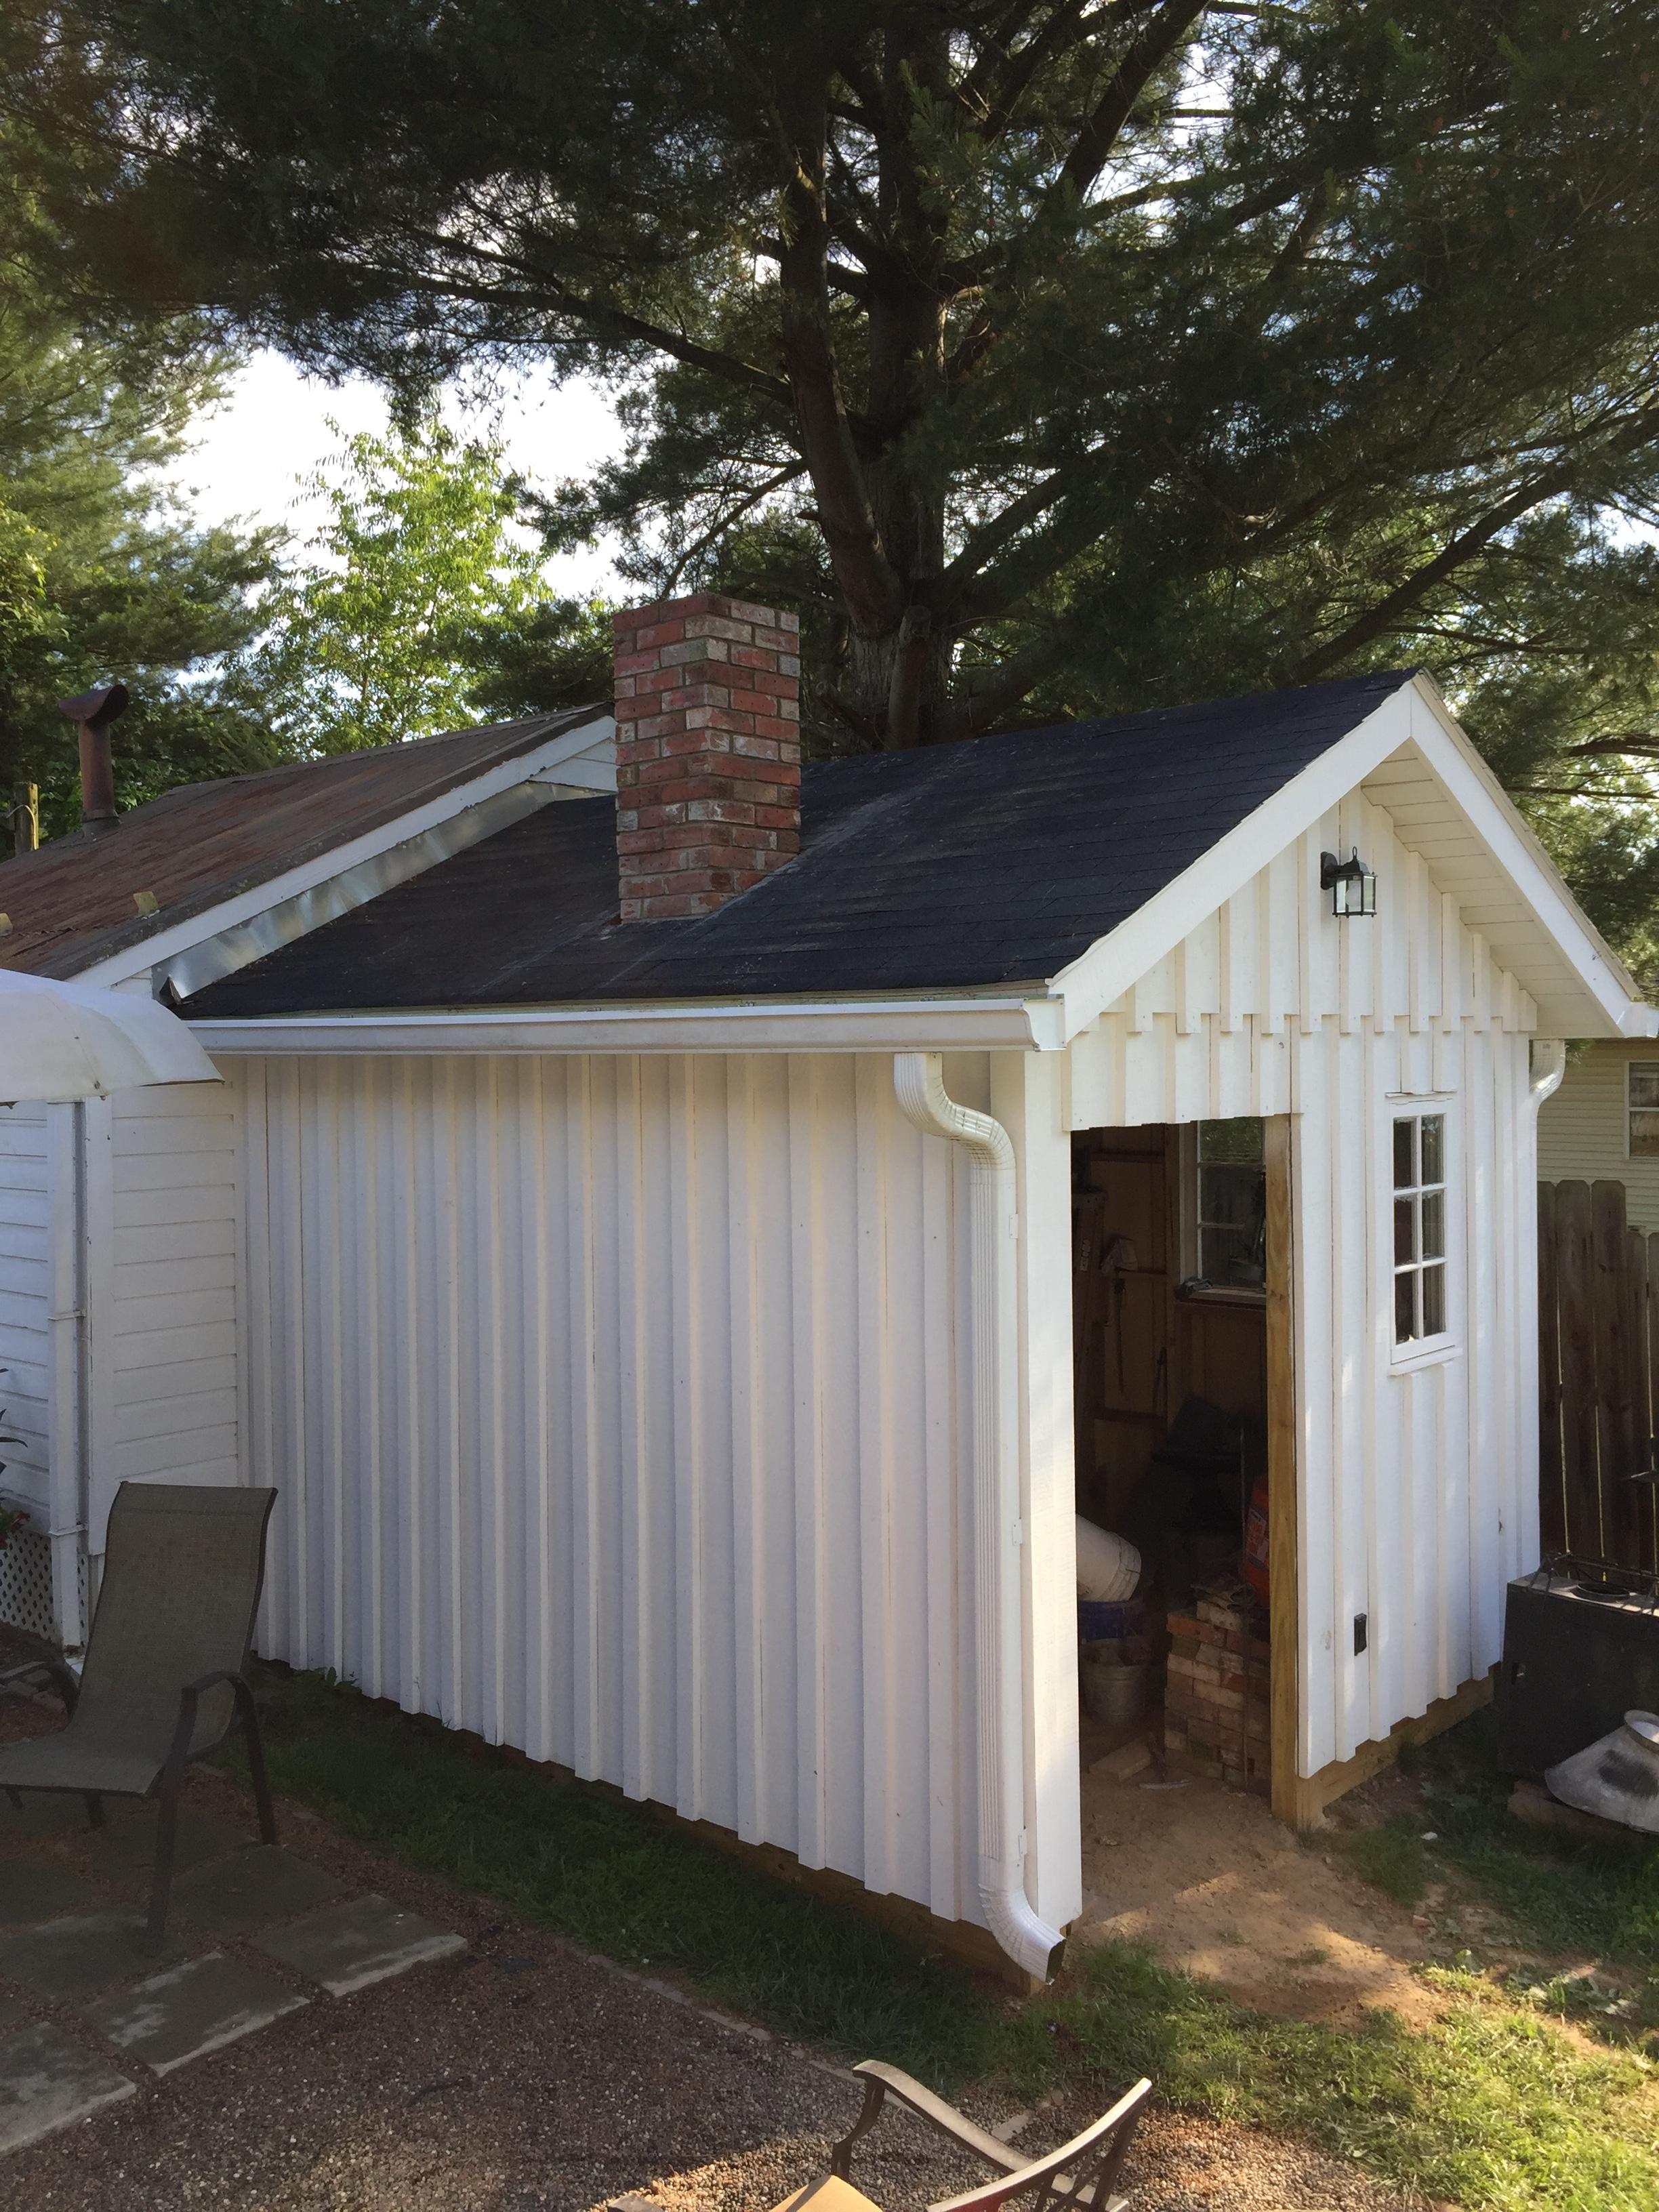
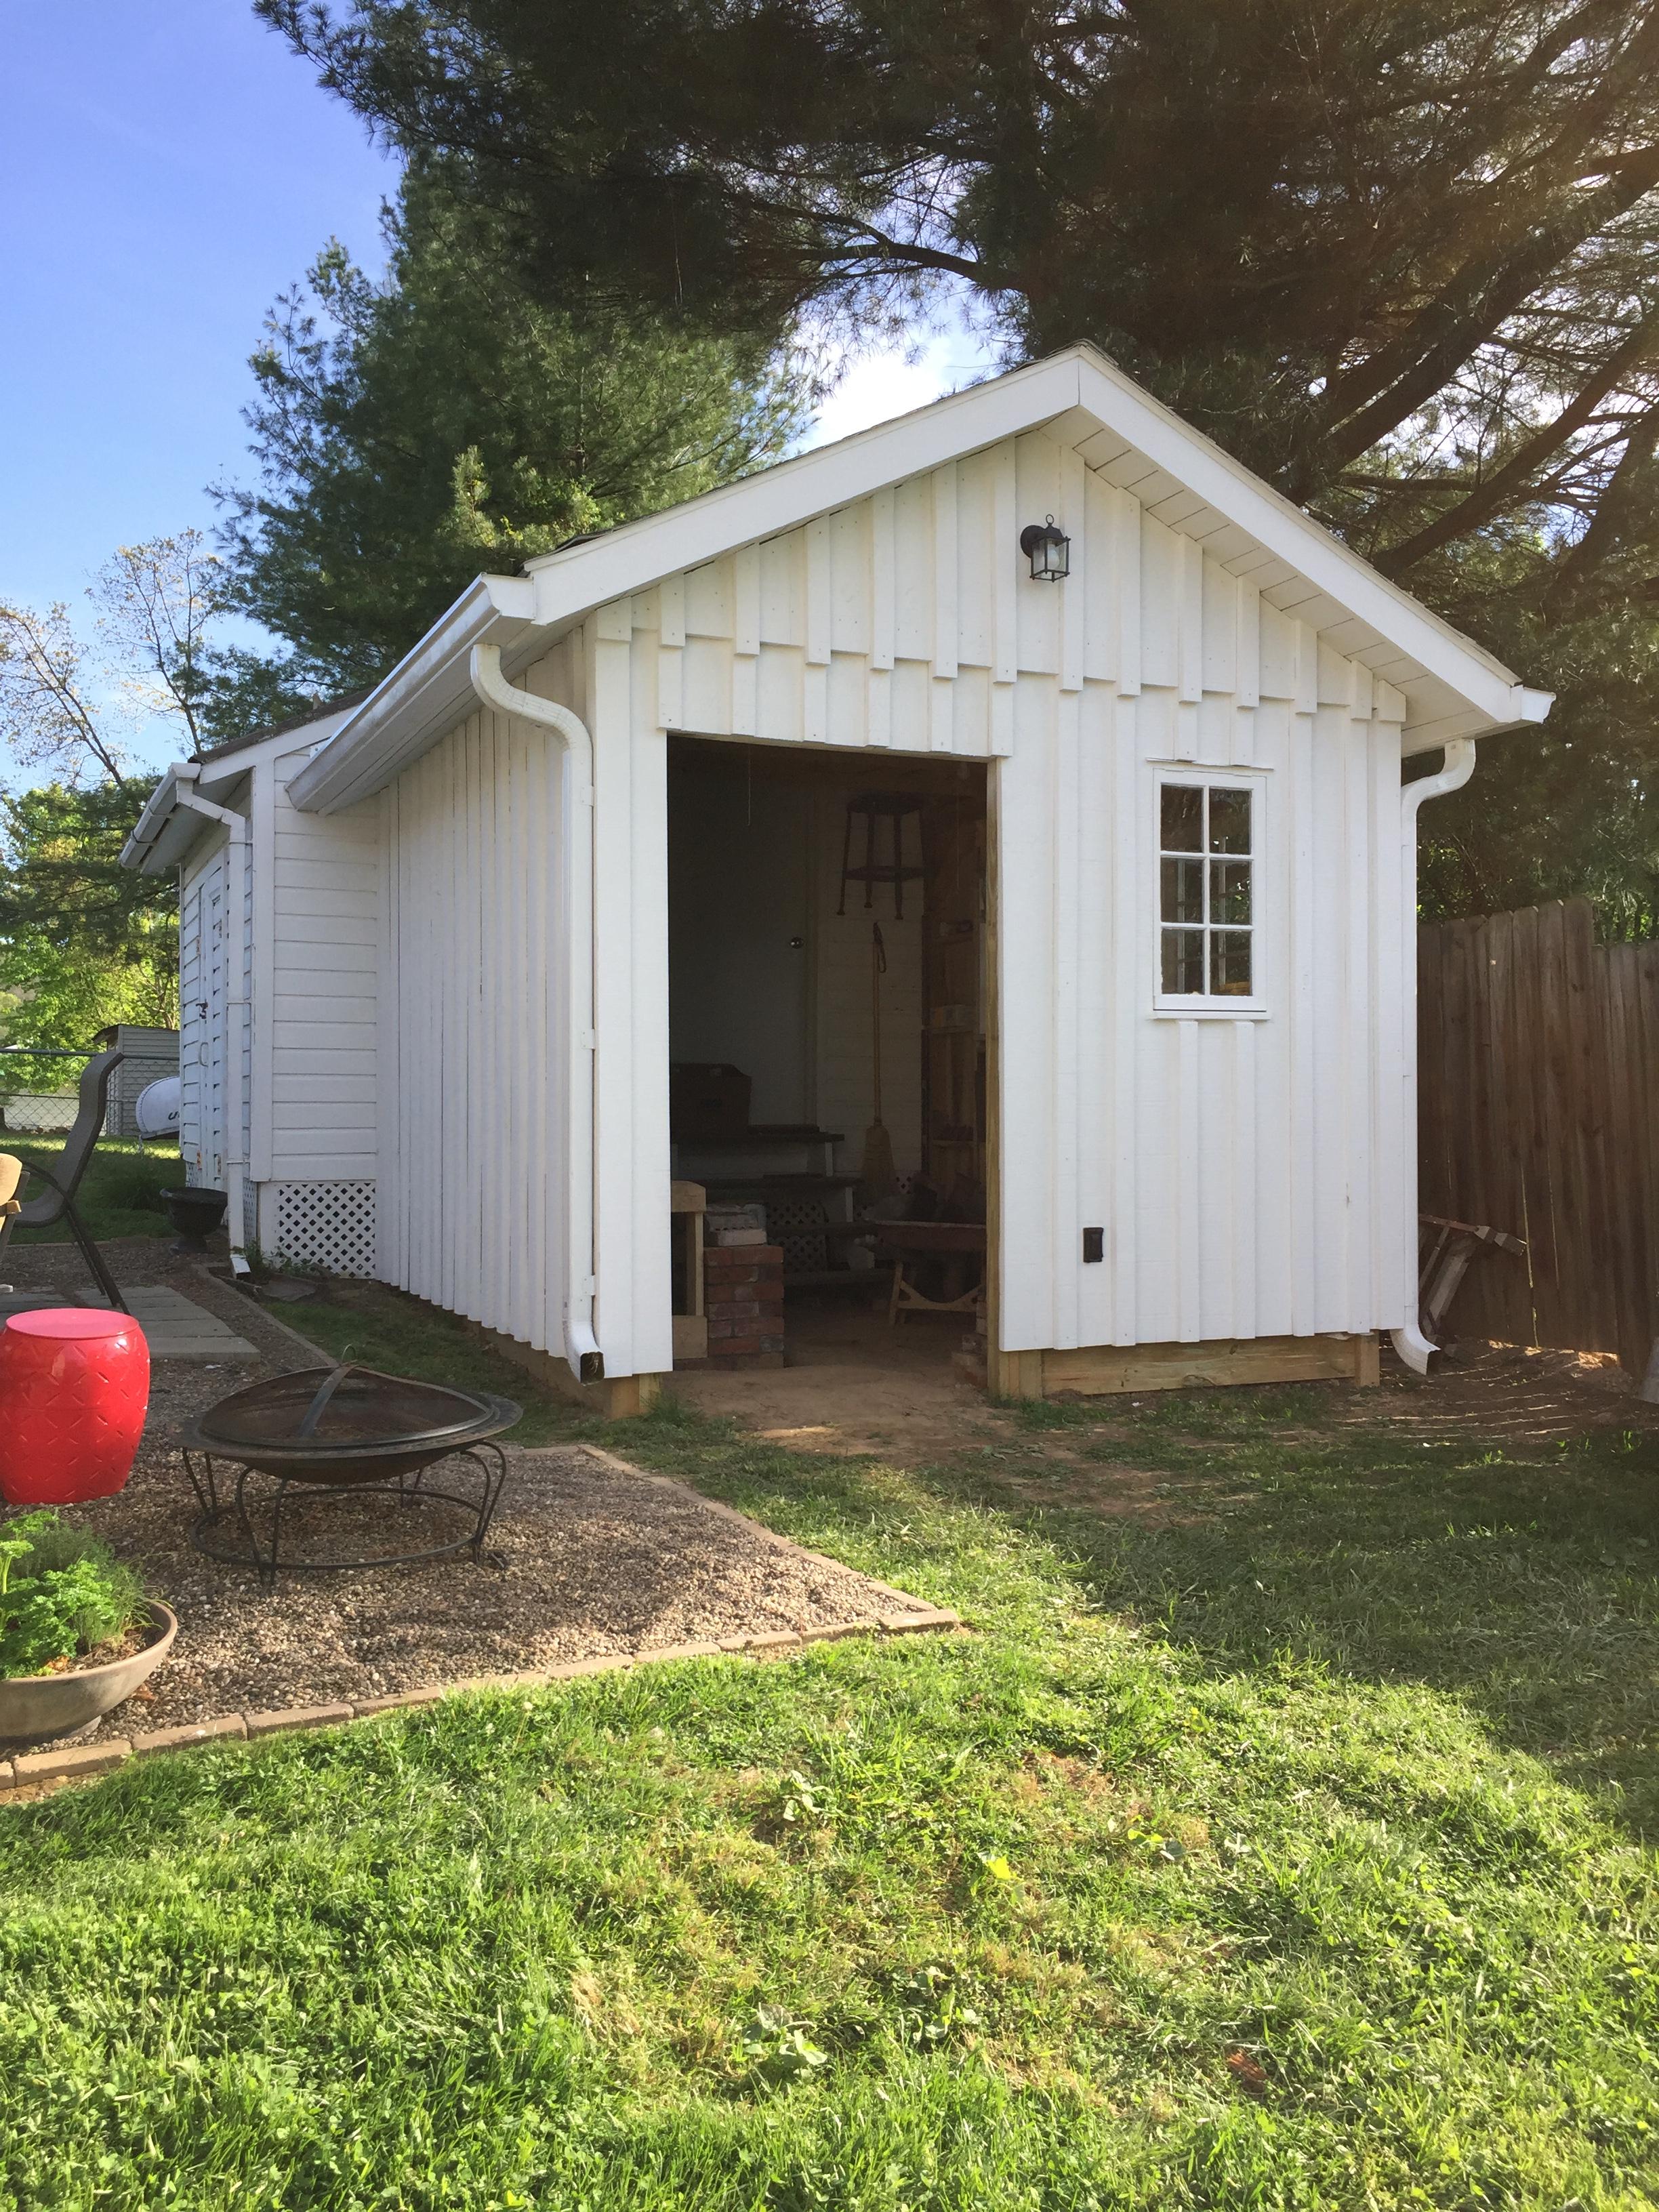
Here is the progress on my new shop. I already wish it was larger, but an improvement over the shade tree.


-
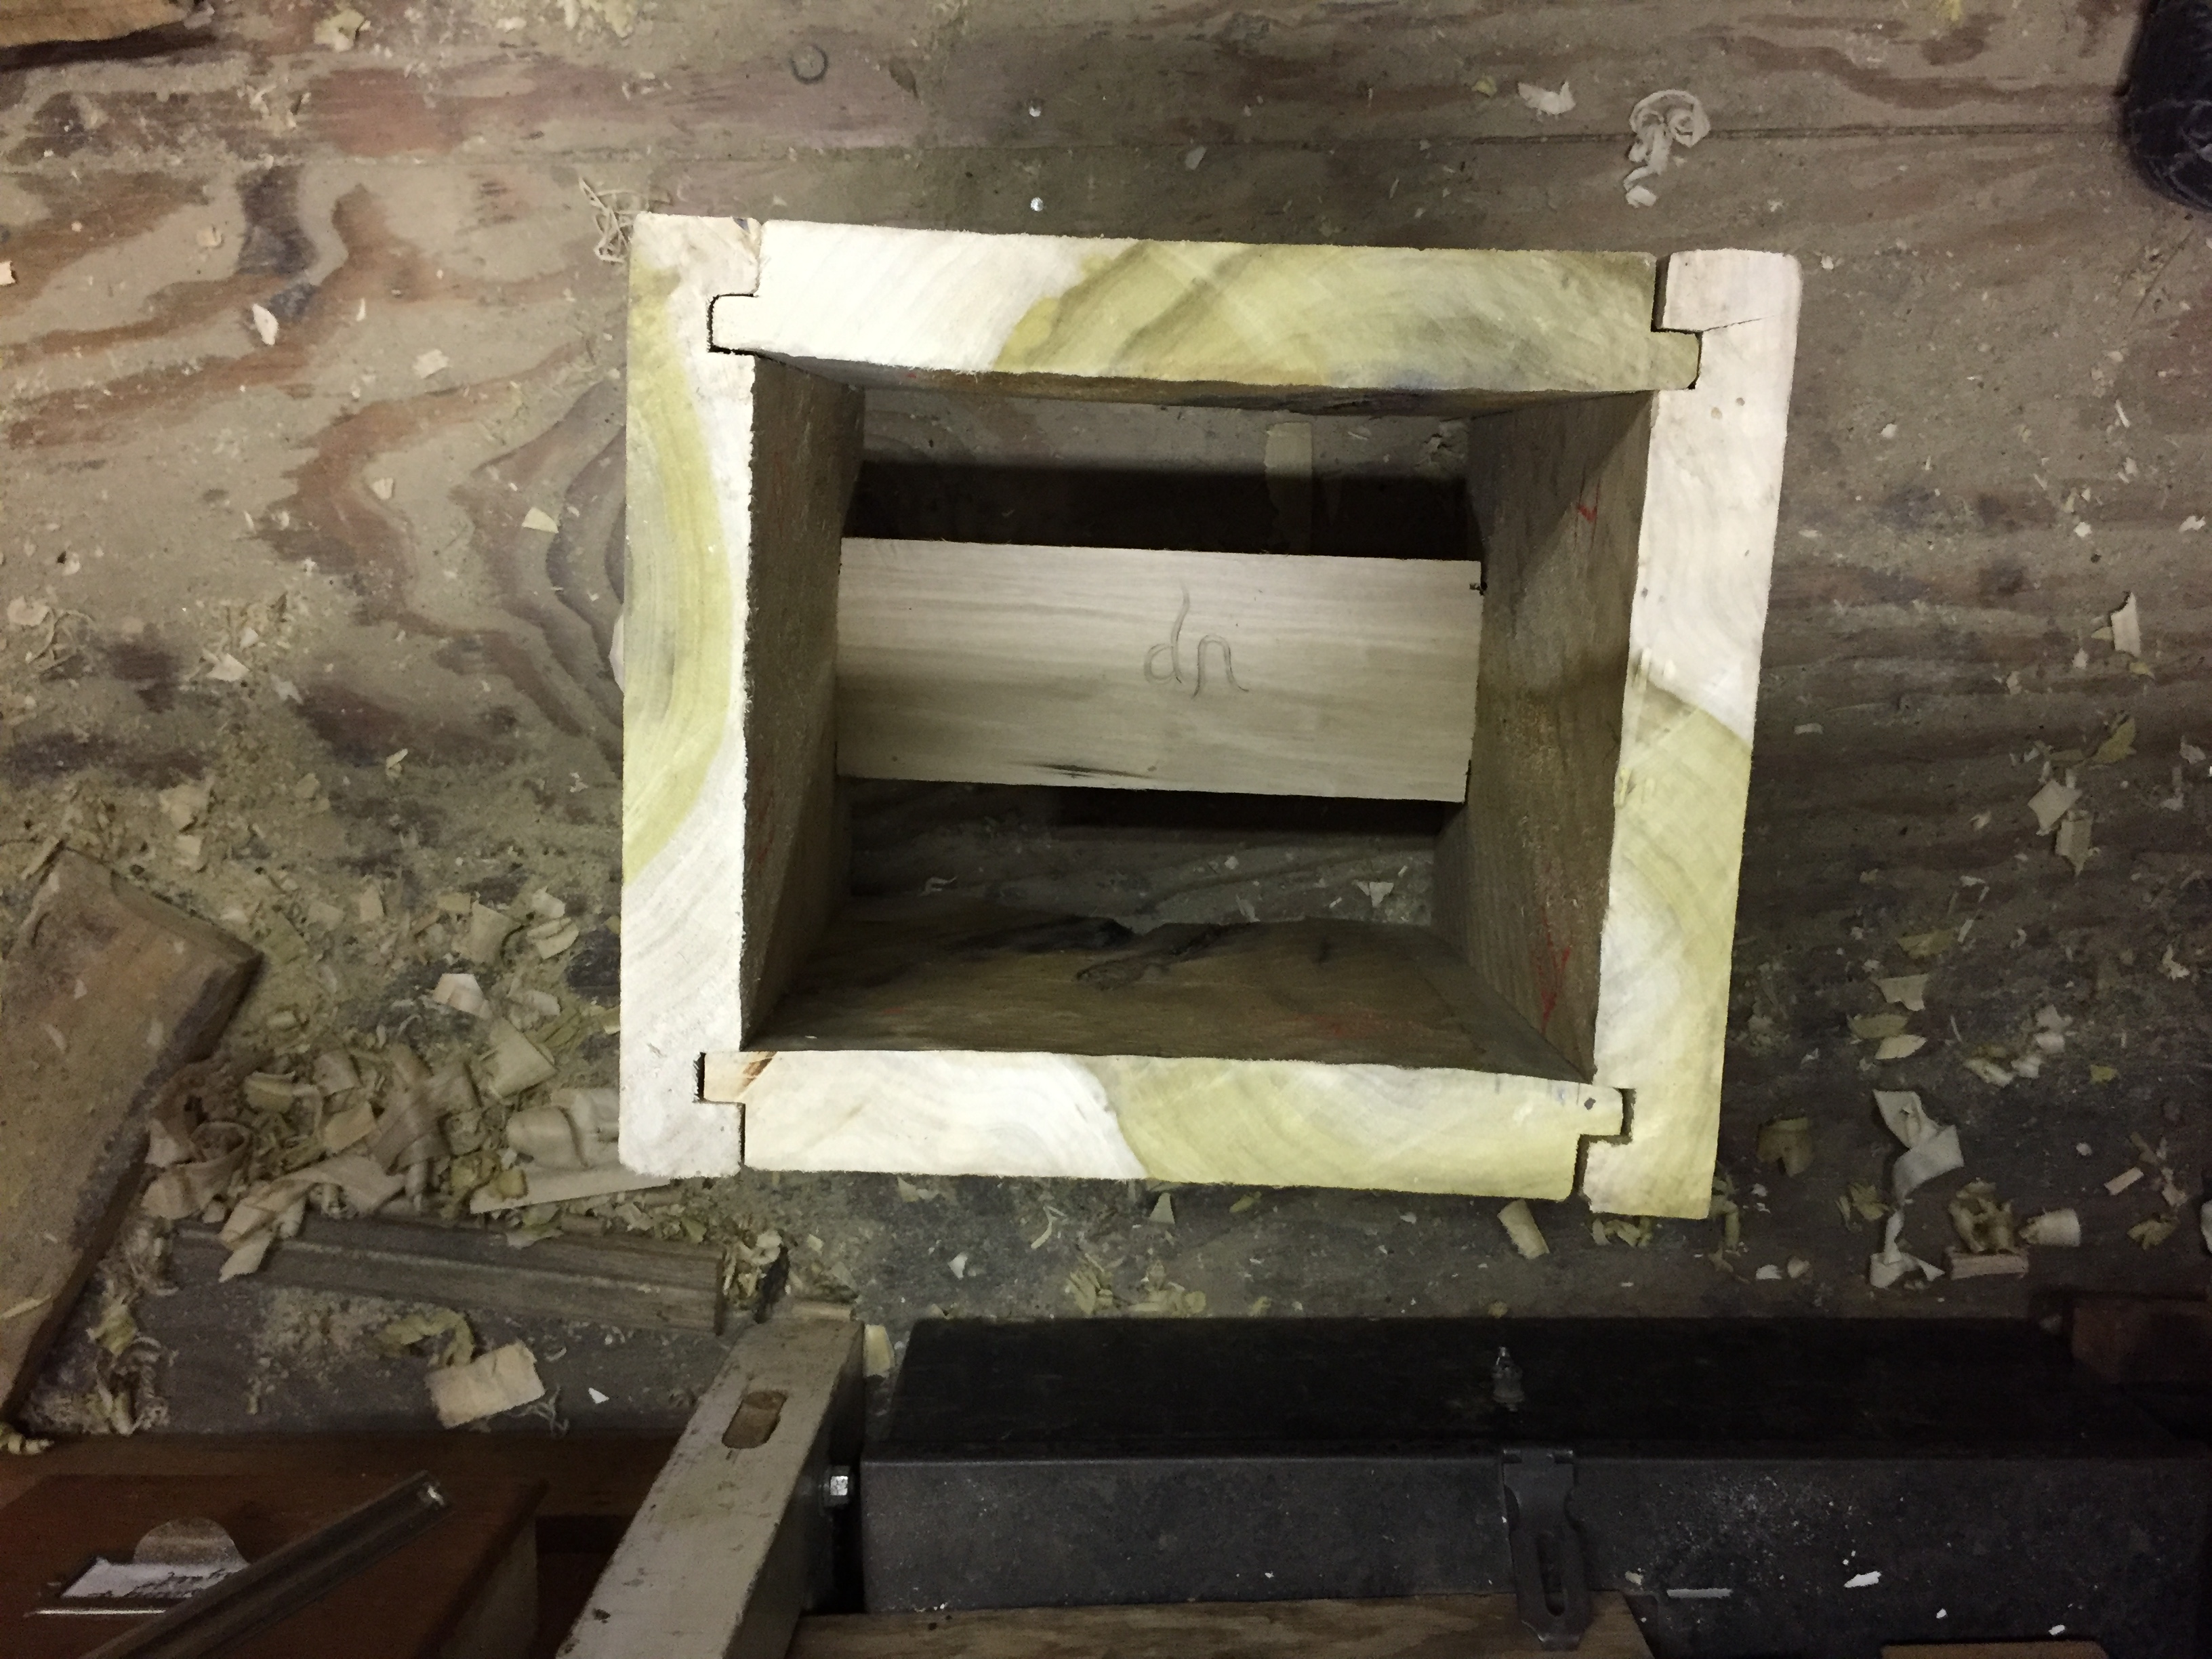
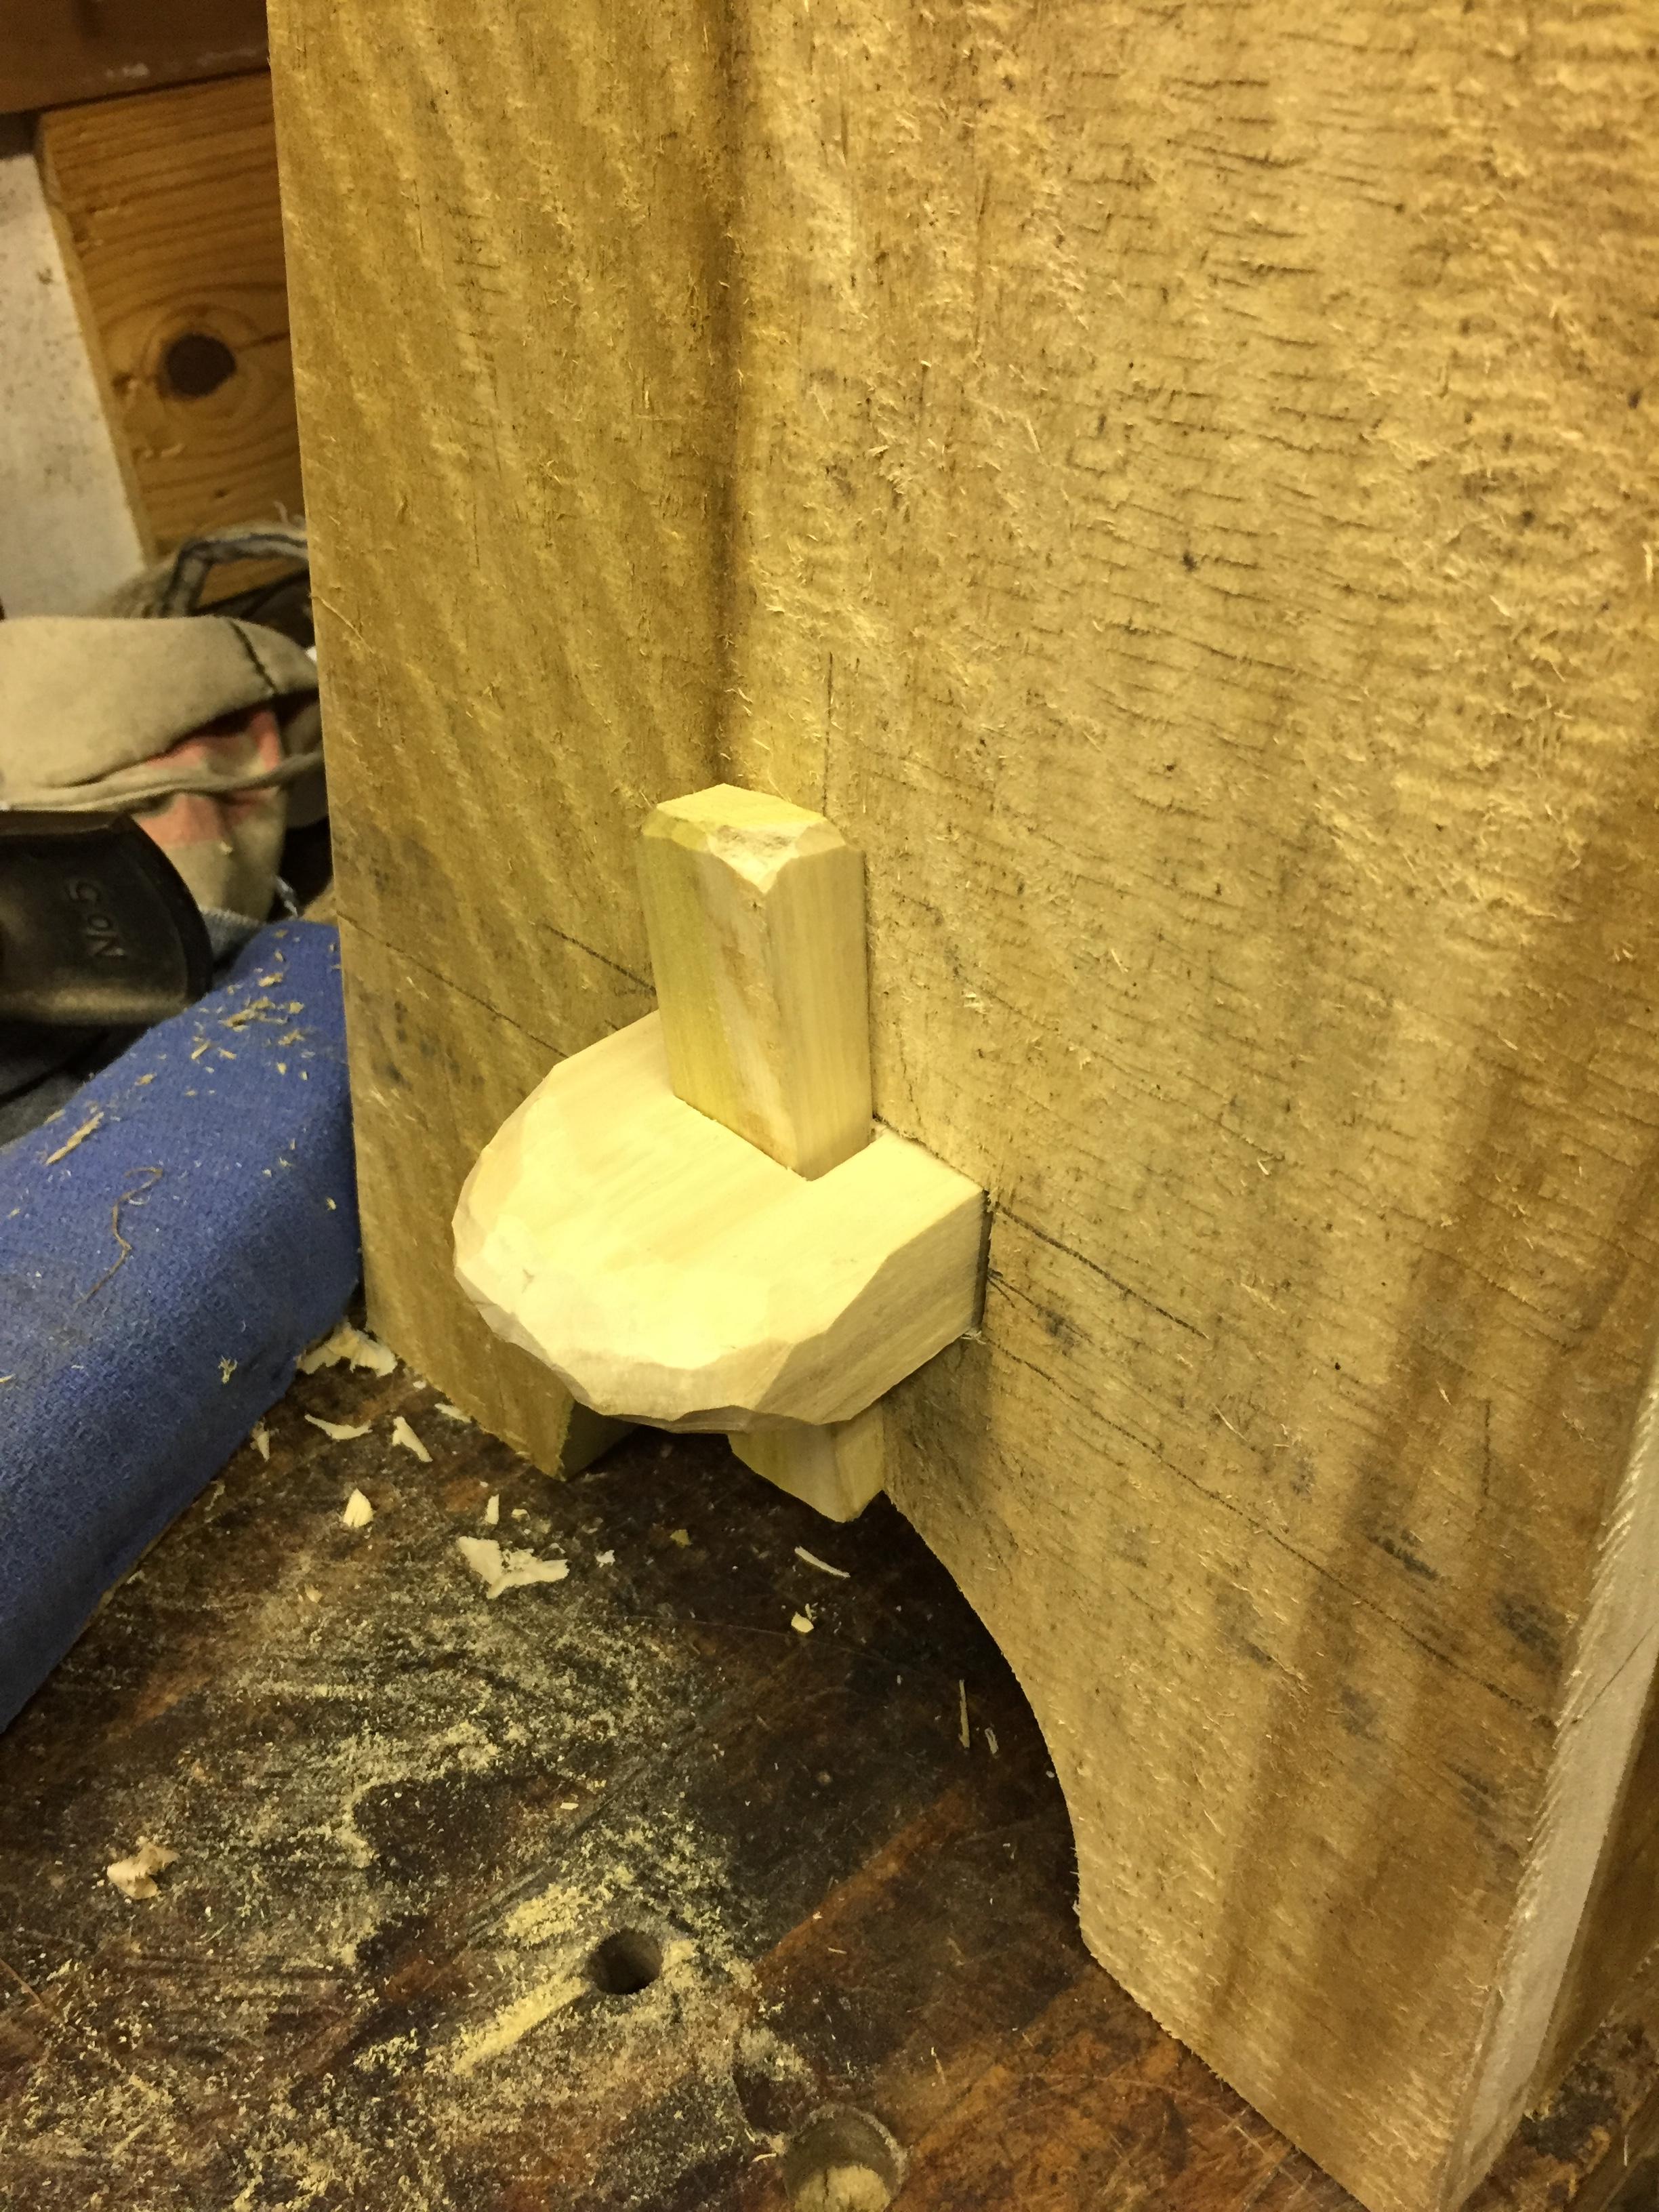
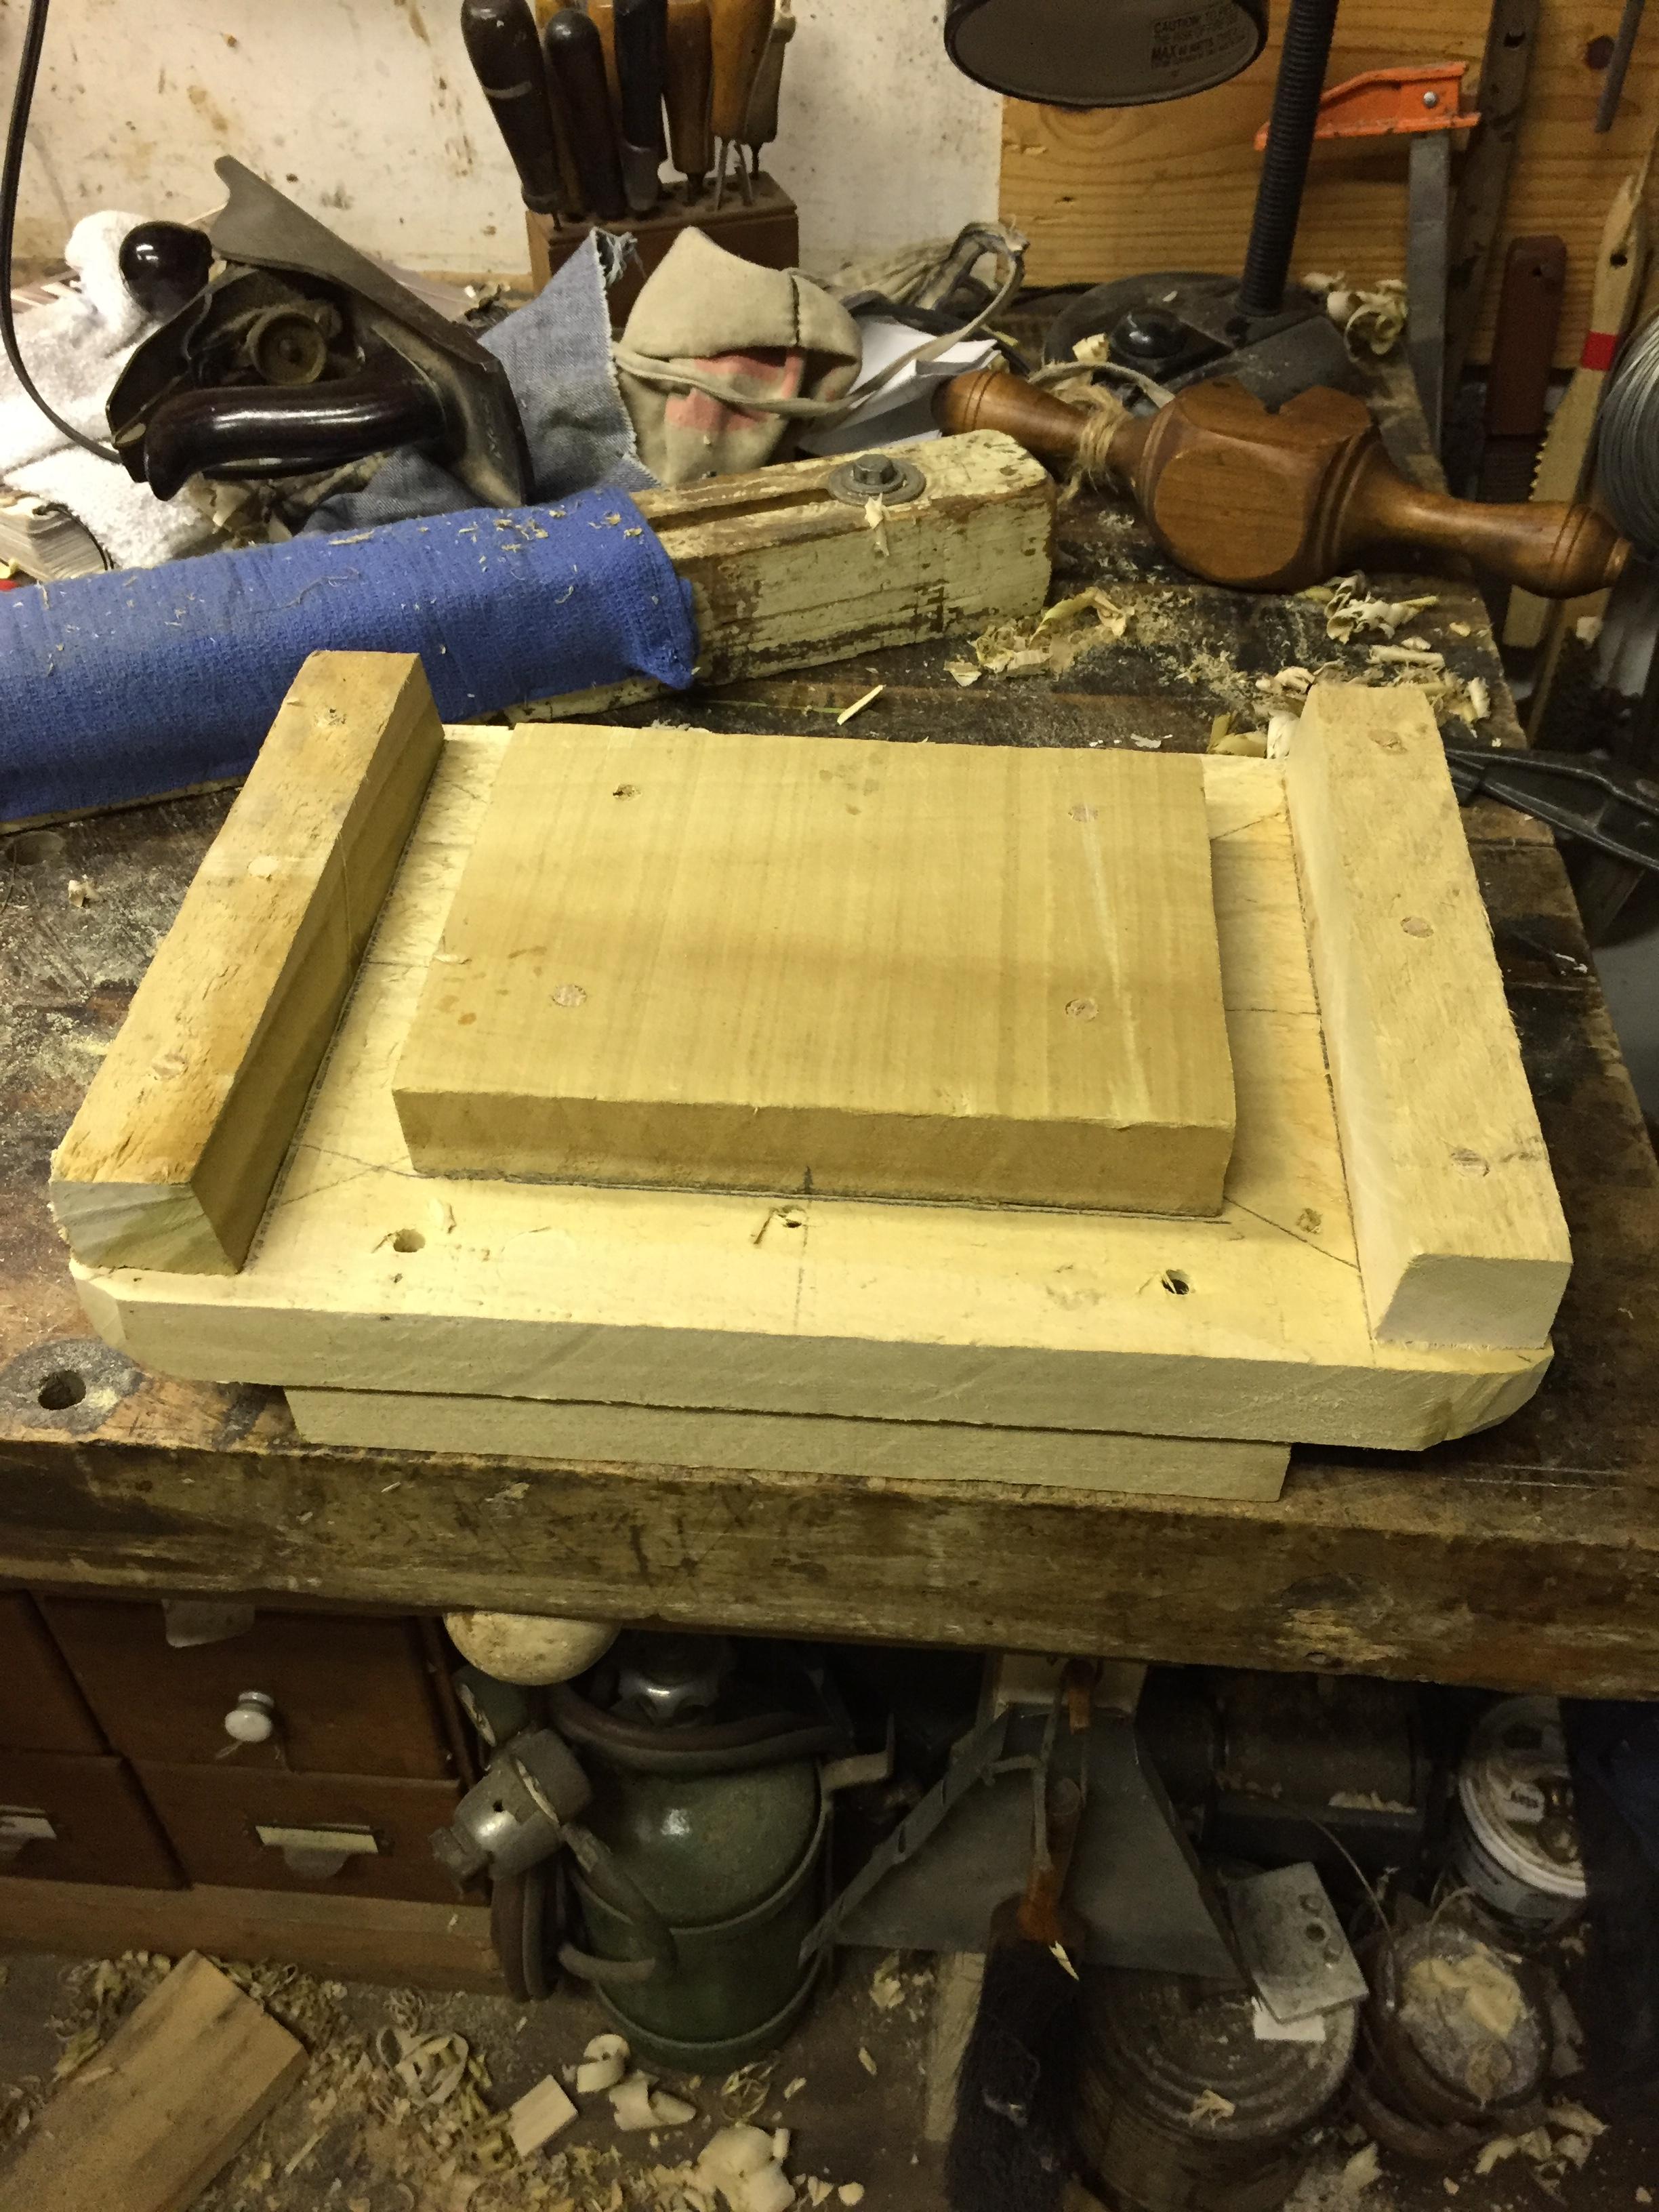
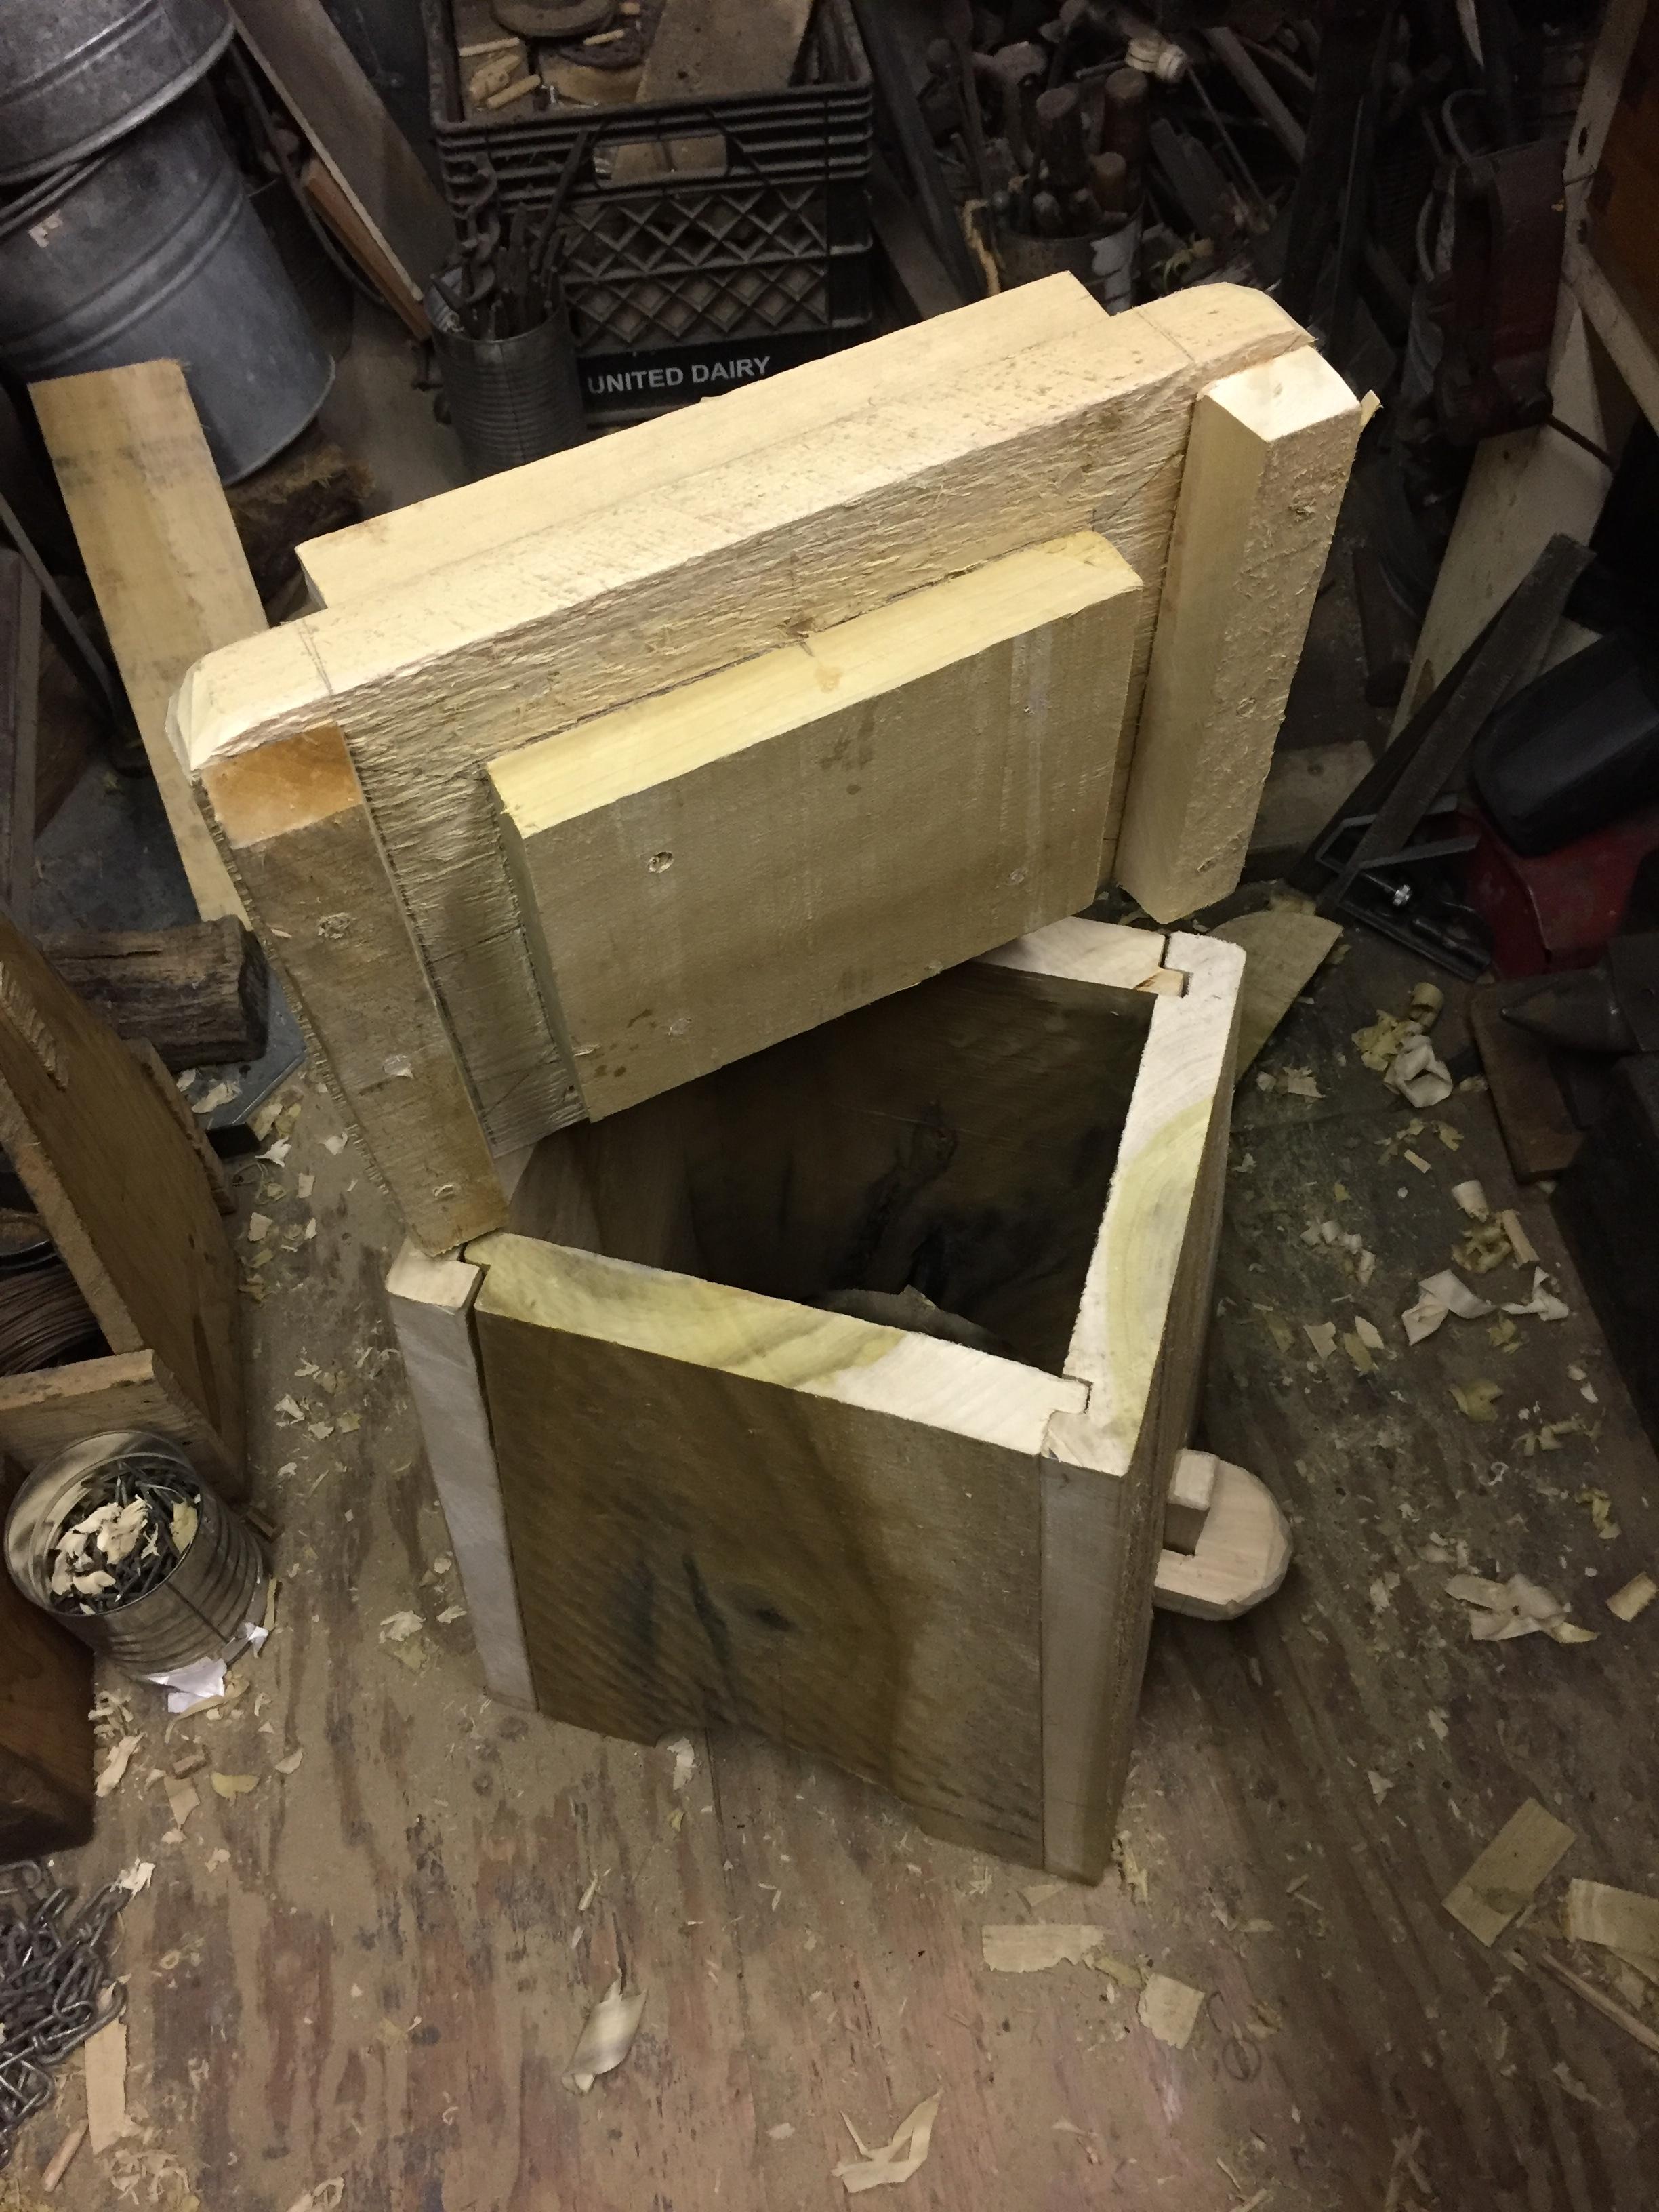
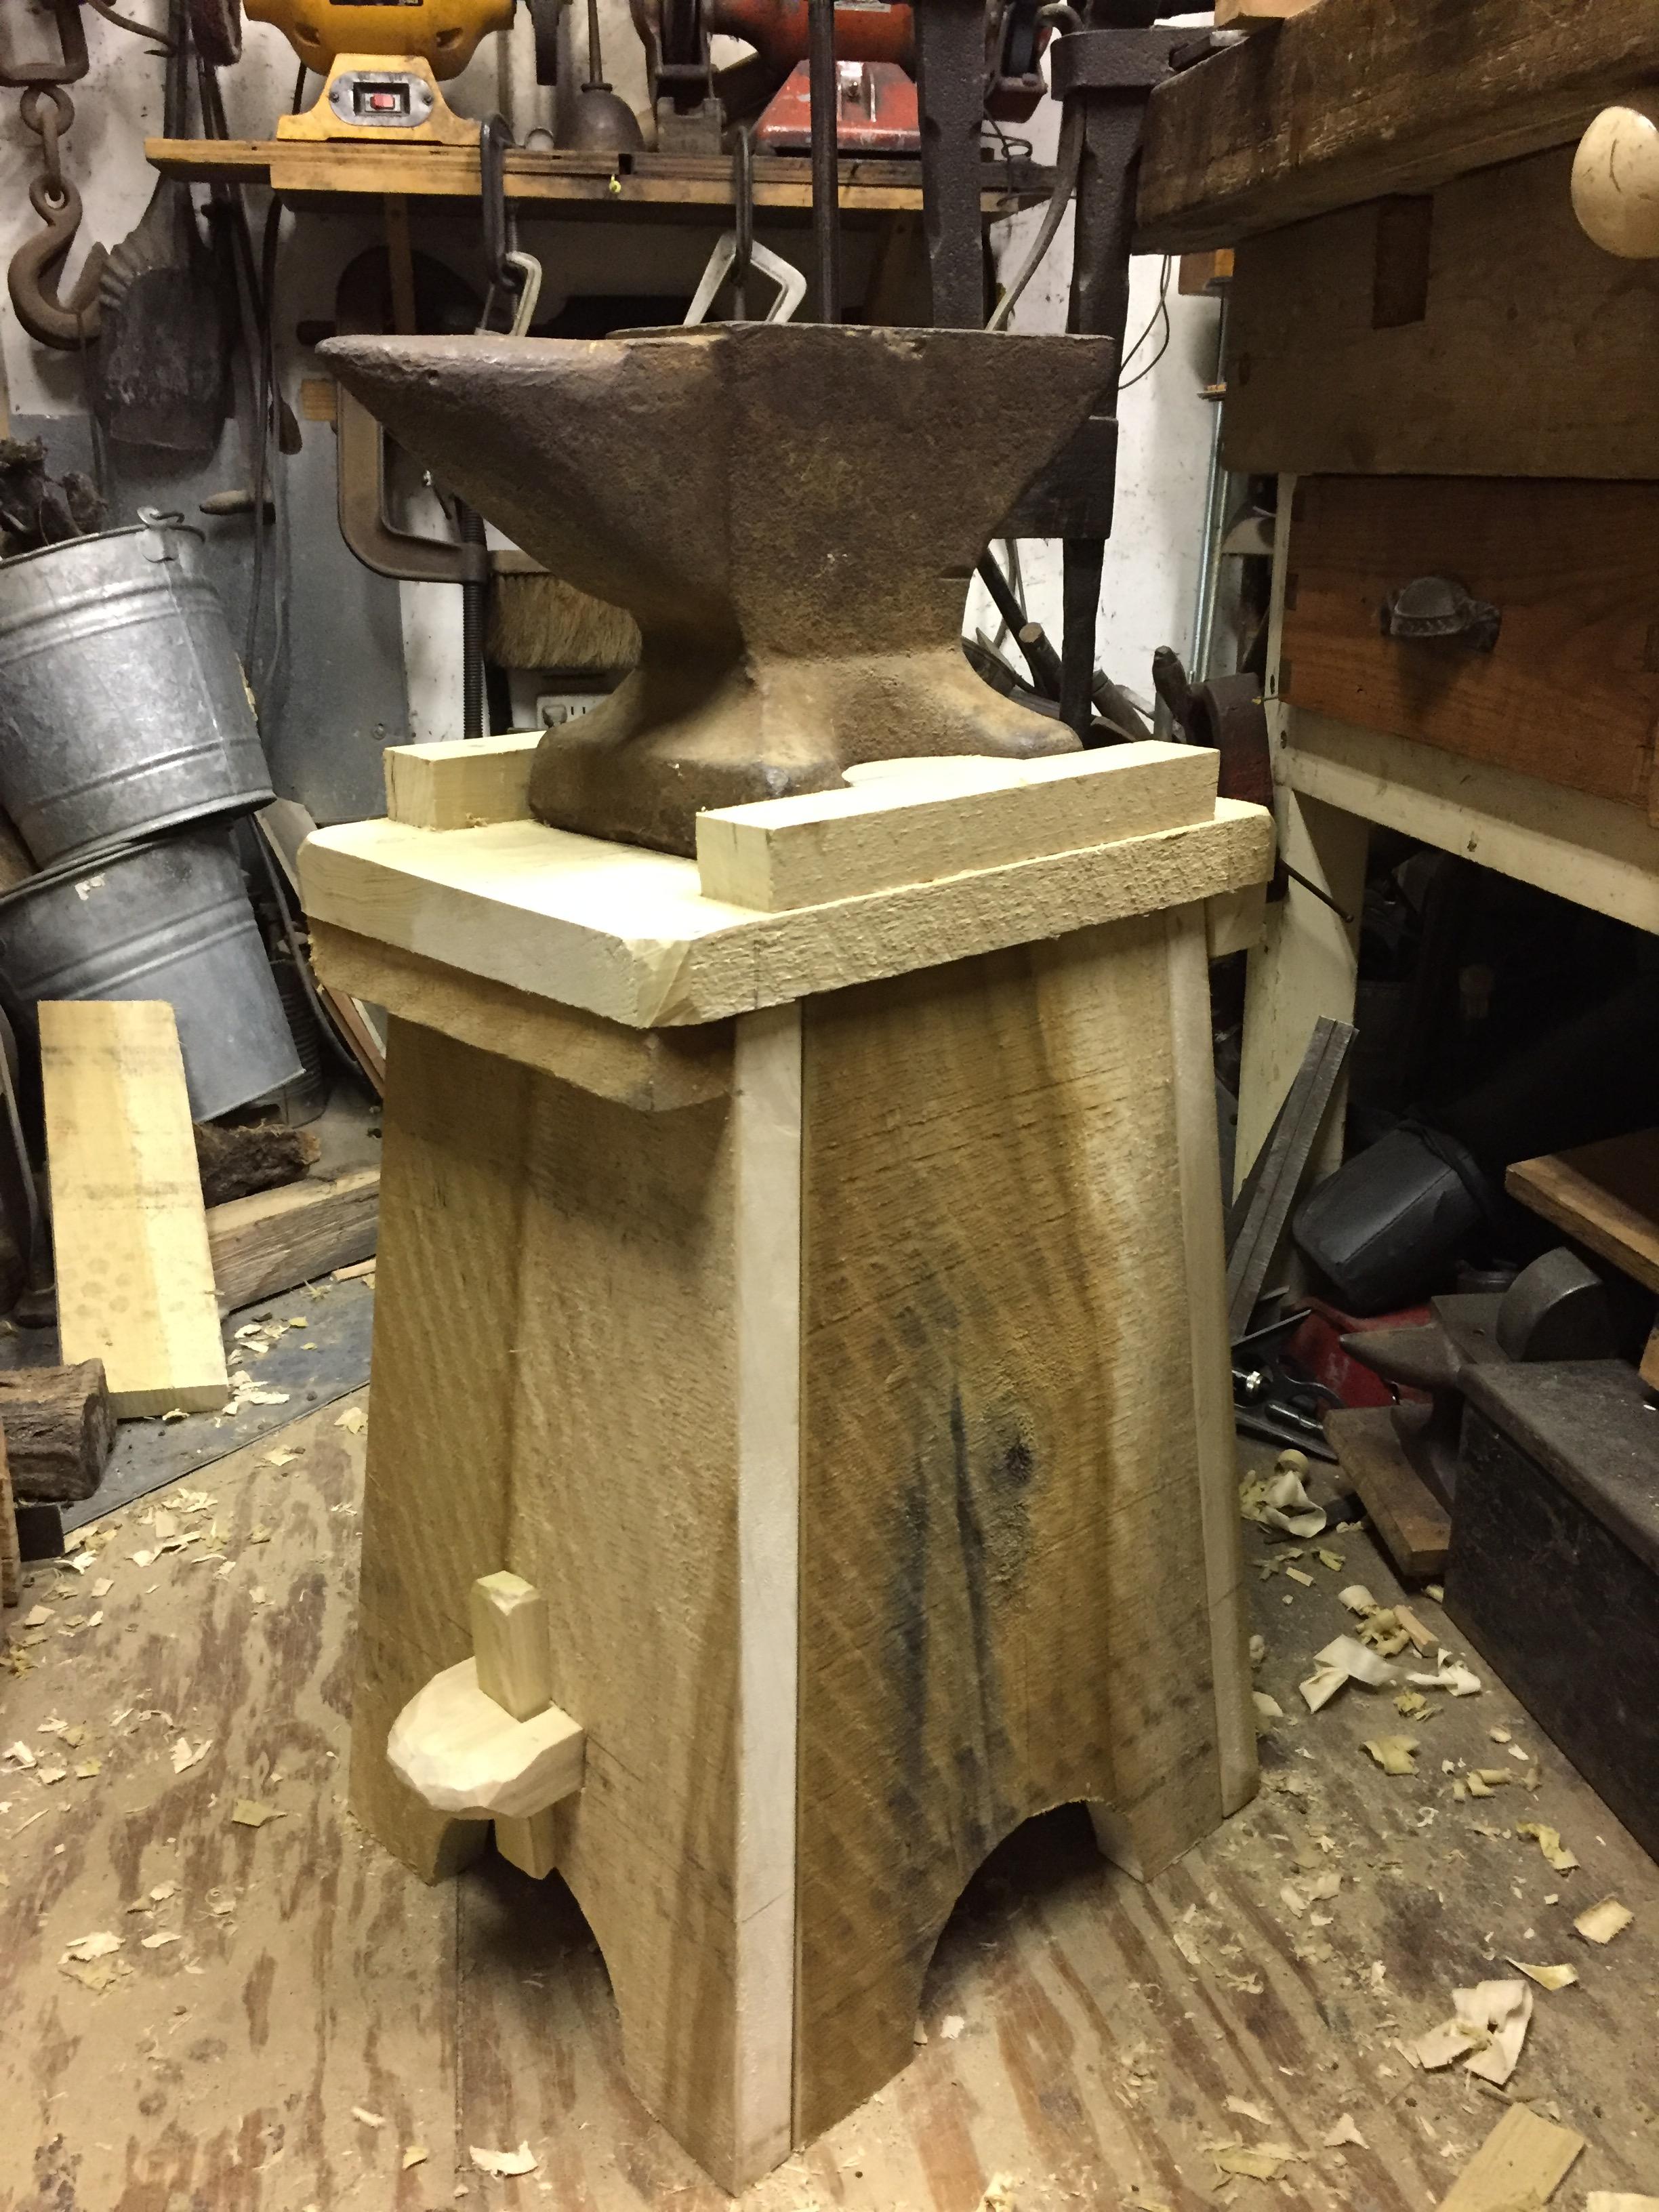
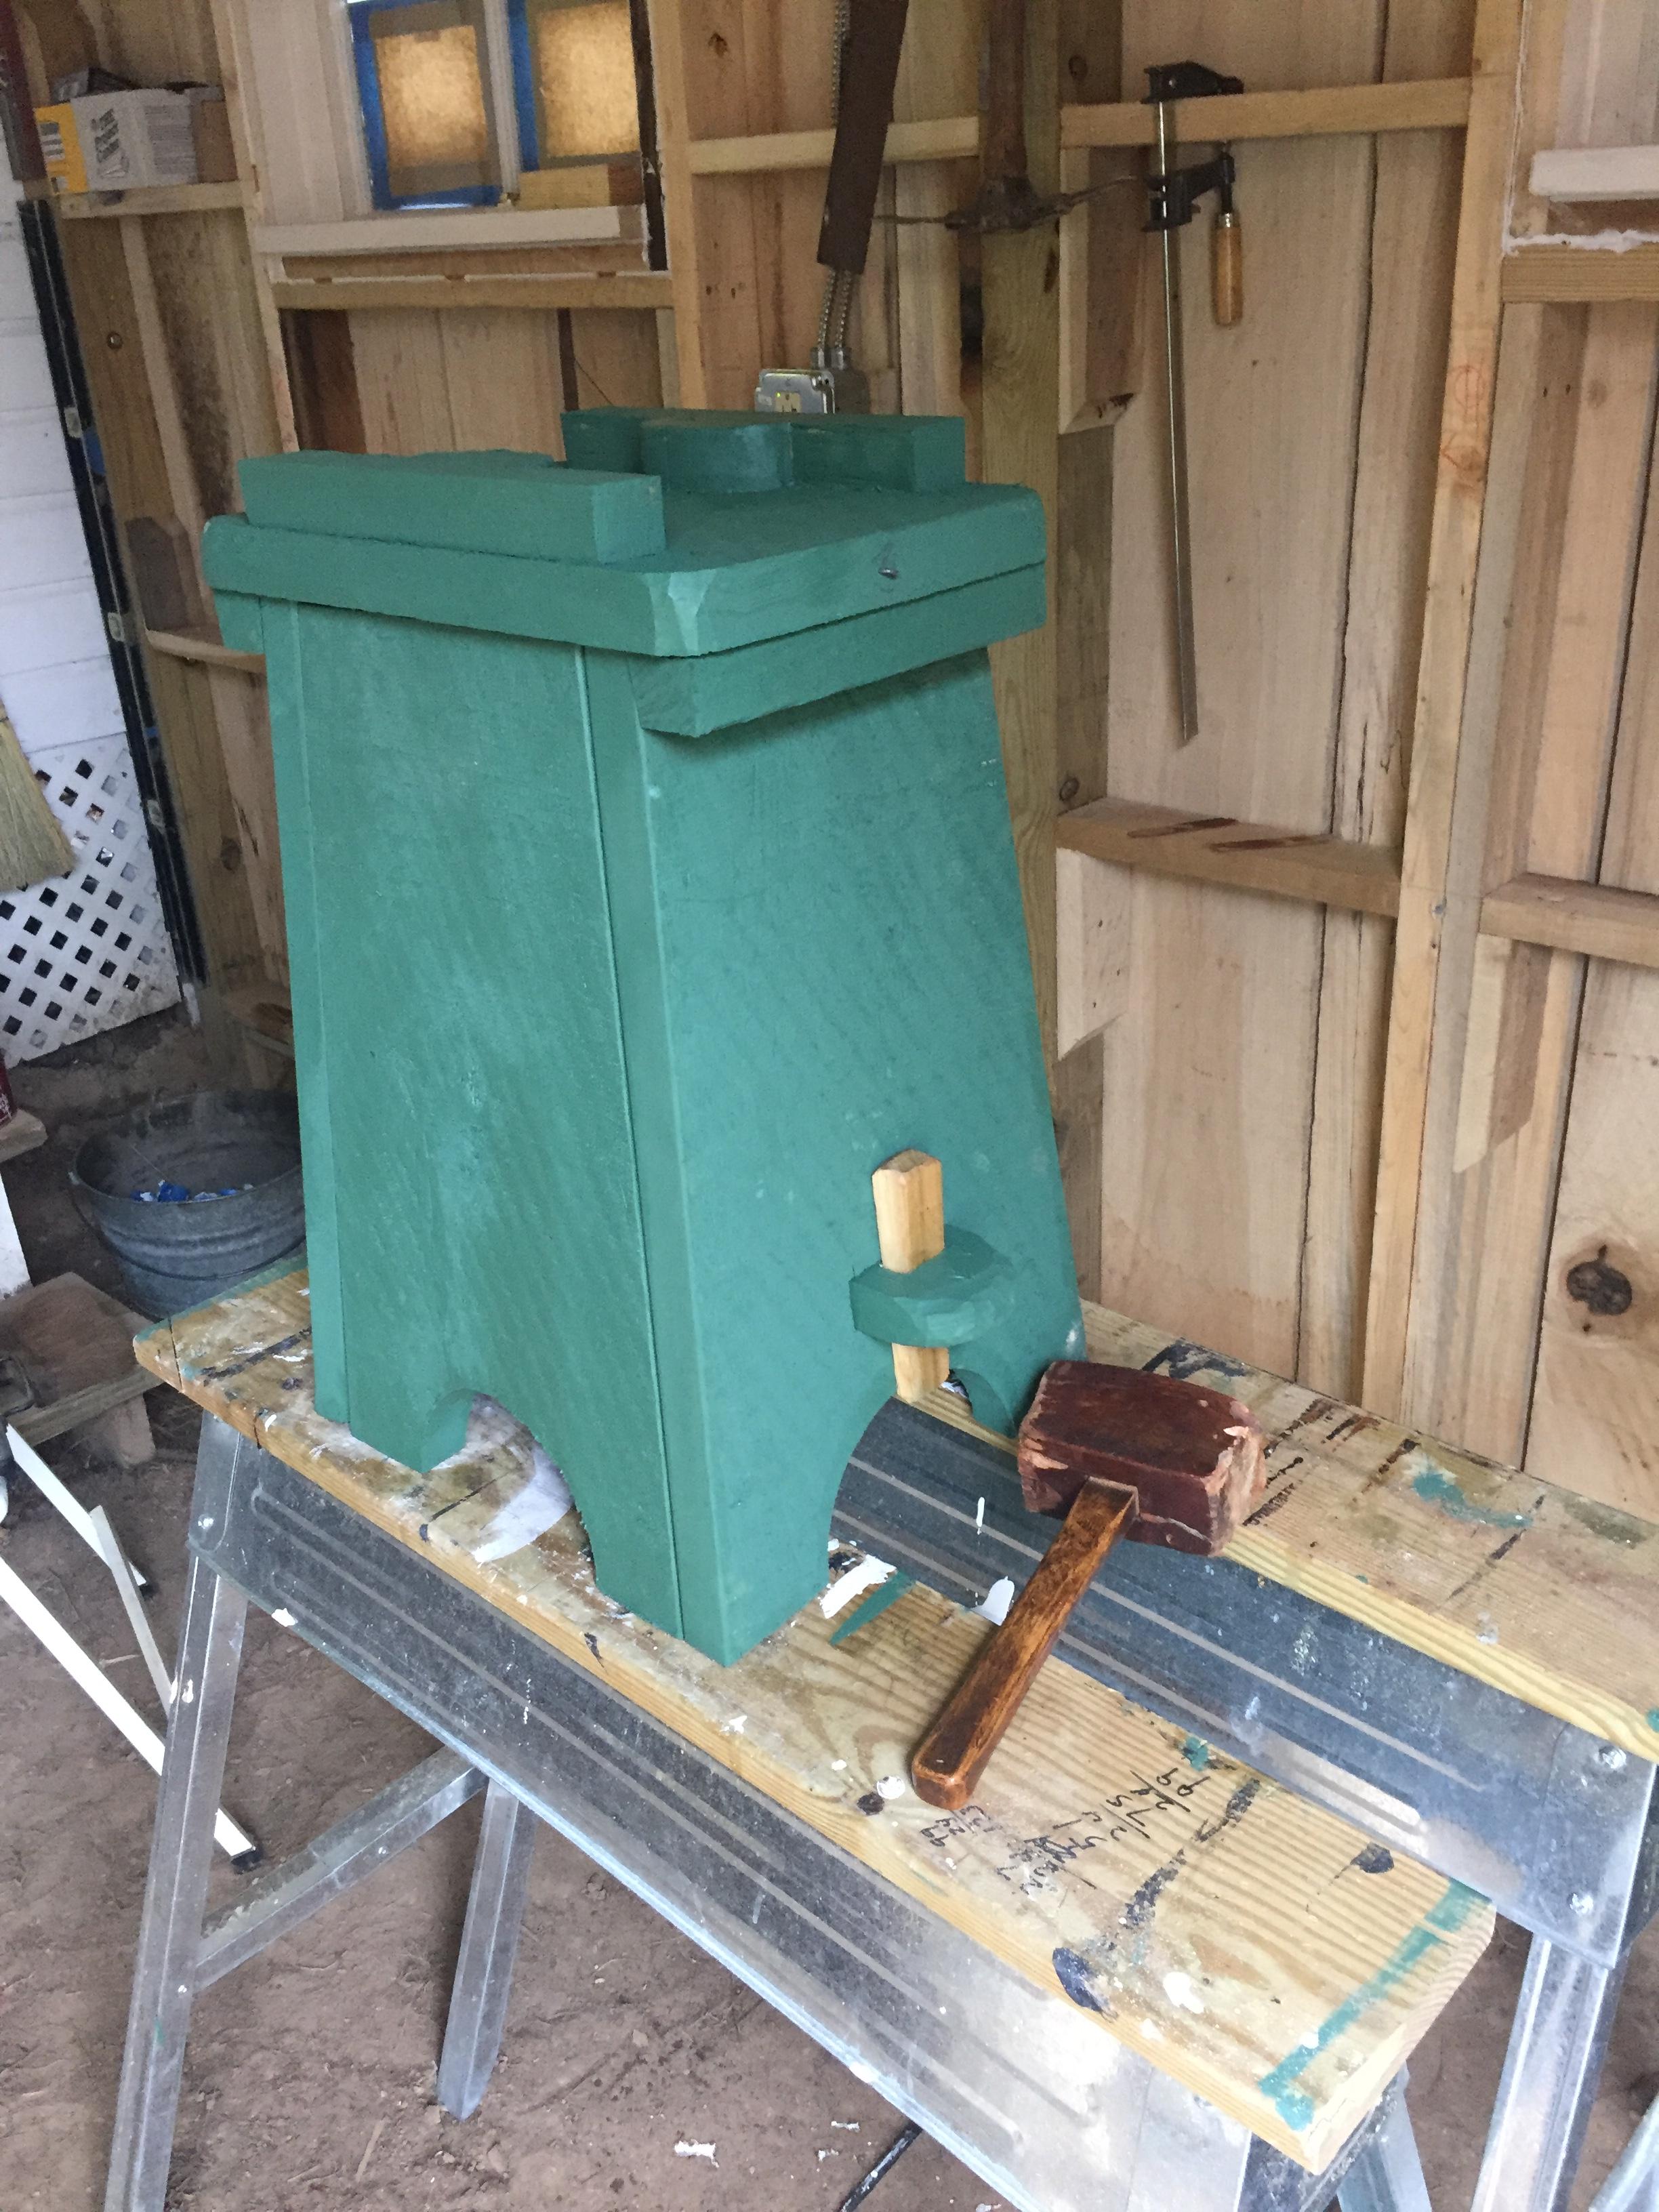
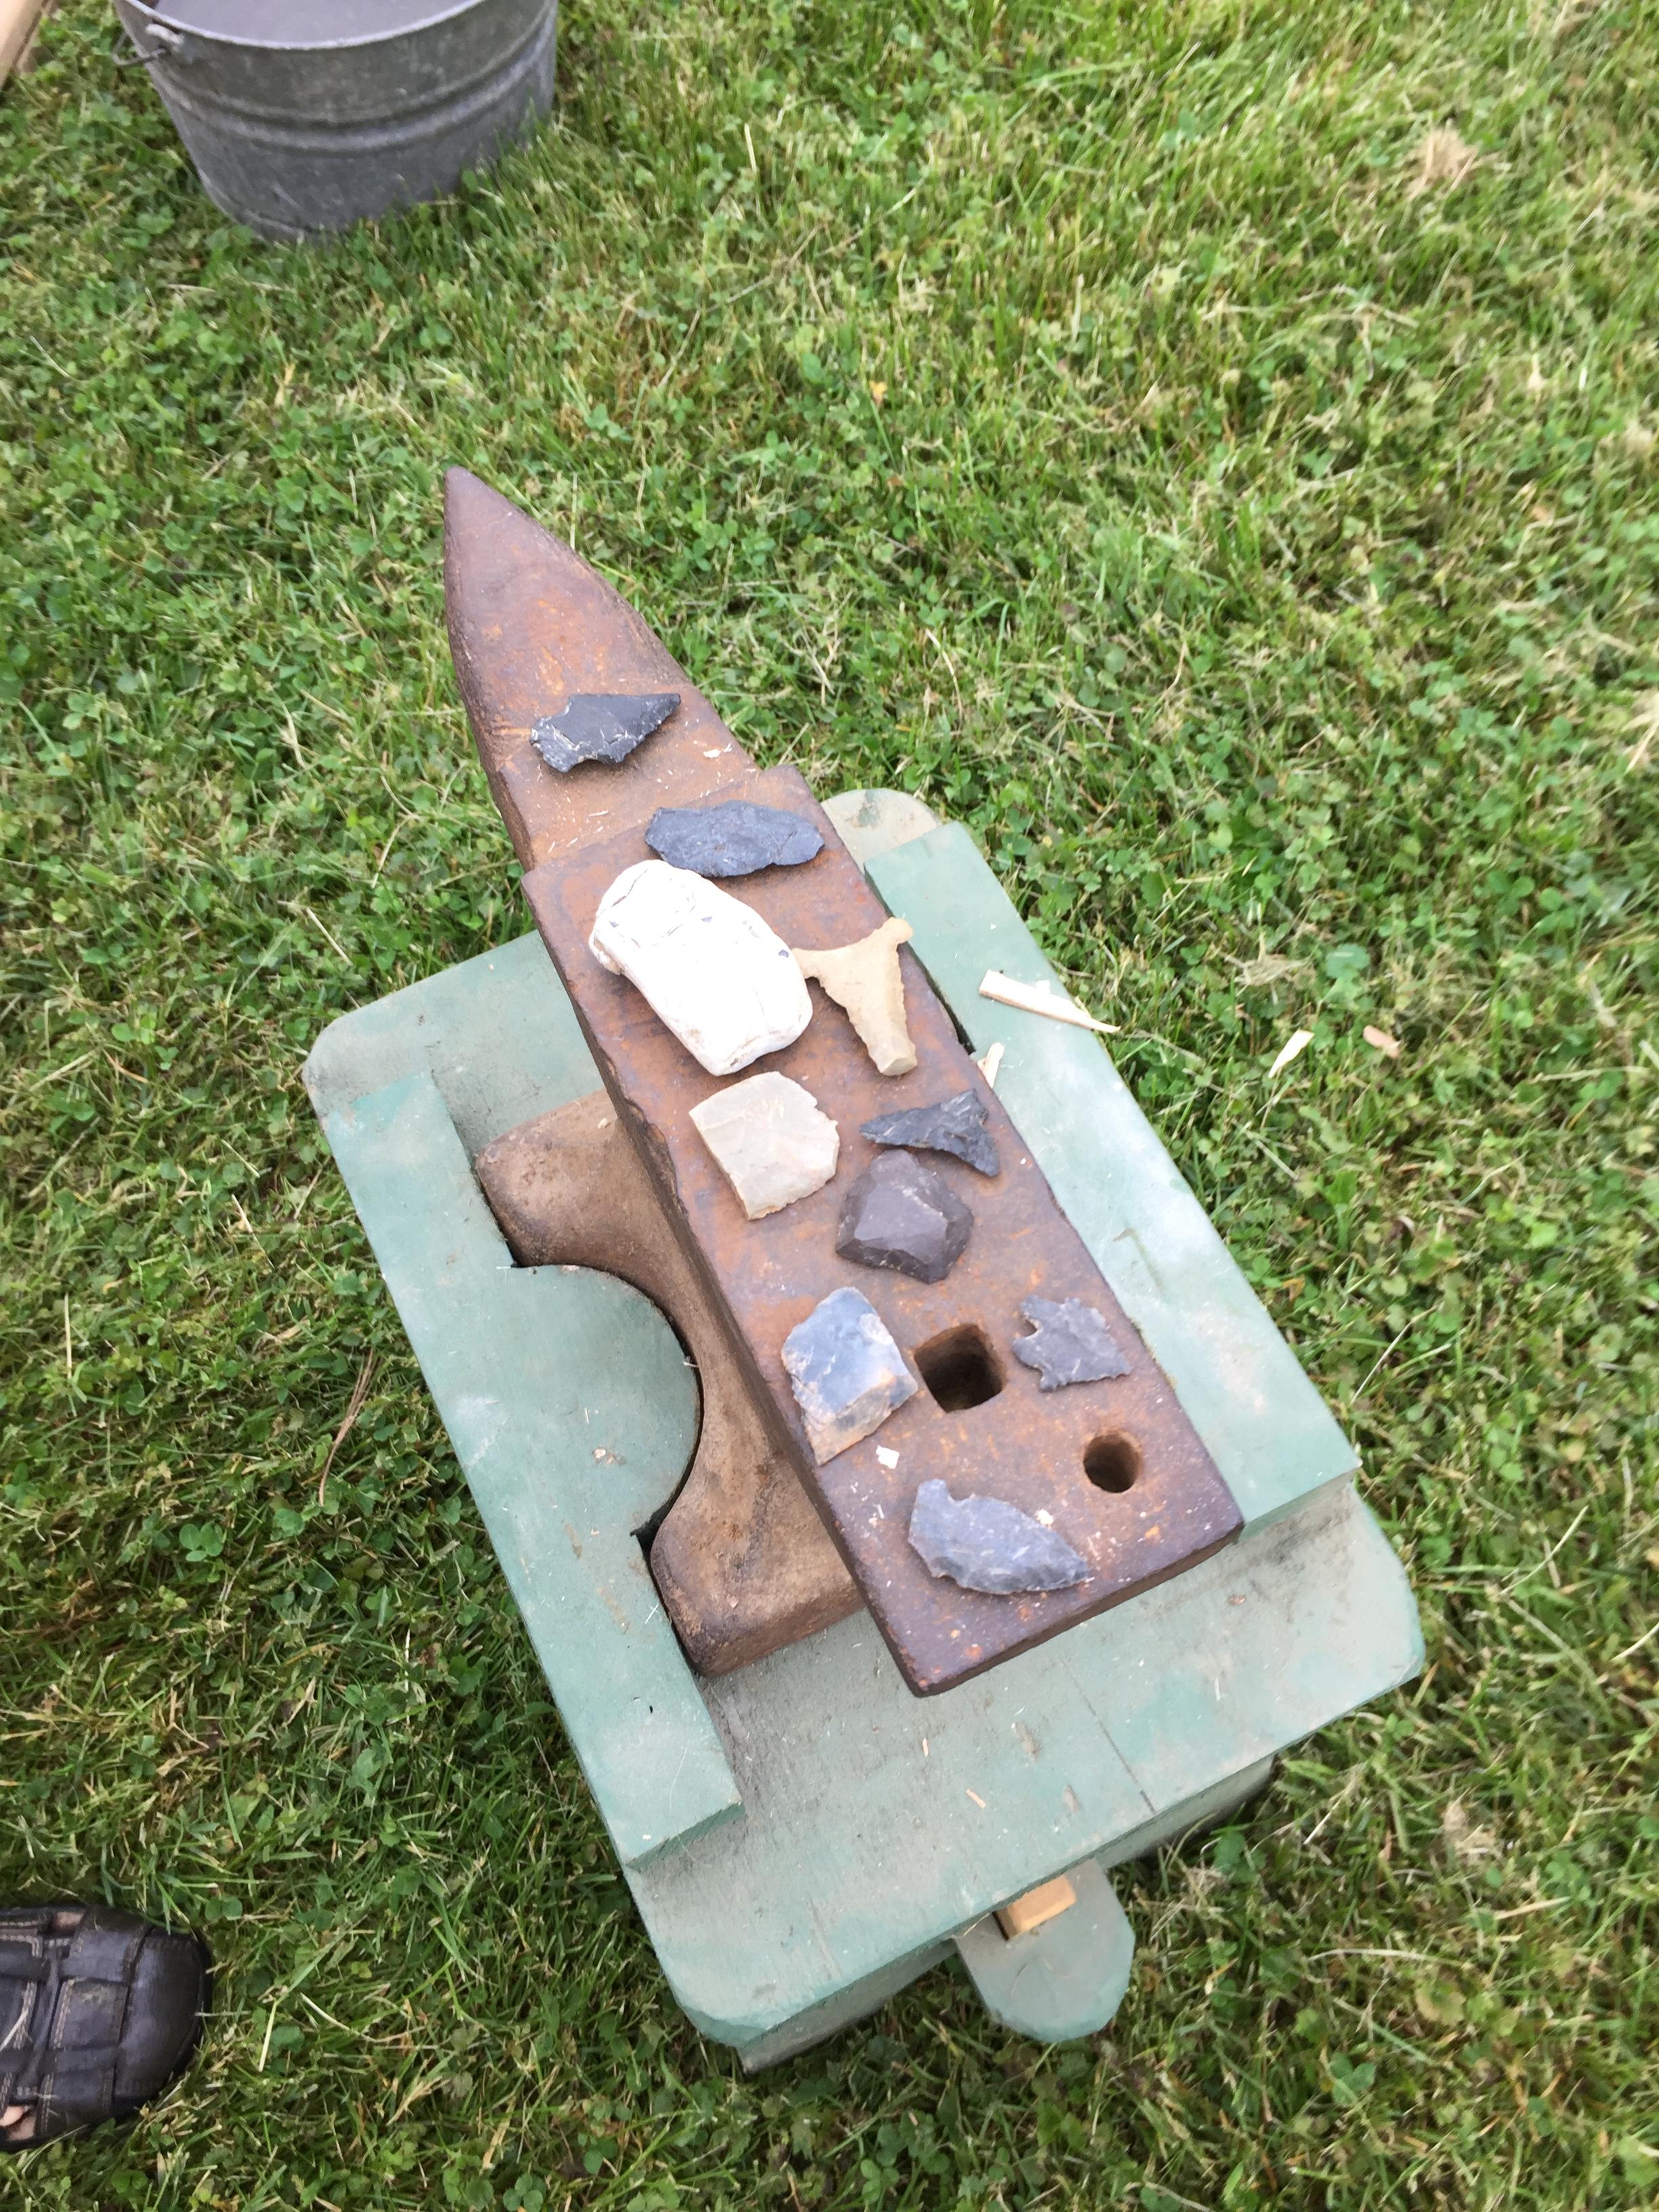
Portable anvil stand. Got tired of dragging 150 pound anvils around for demos. Got this little Vulcan in a trade and decided to make a stand for it. No nails or fasteners. Gravity and the two wooden keys lock it all together. Made out of one wide poplar plank.
-
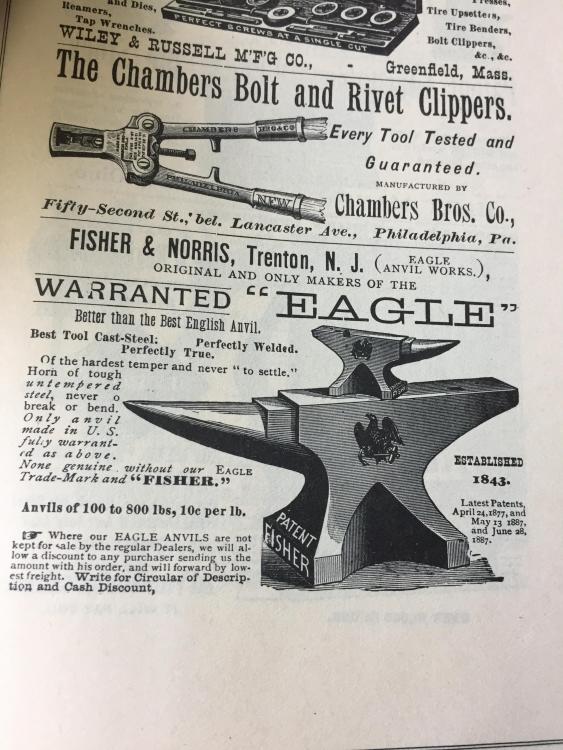
A friend loaned me an old well worn Peter Wright (if my research is accurate made just before civil war) when he heard me complaining about the dead cast ALO I was using. Even with all it's dips and sways and rounding edges it is a joy to use. I have since acquired a nice Hey Budden in much better condition but still find myself going back to the old PW. She is like an old friend, I've grown quite fond of her and have learned to use some of her imperfections to advantage. He has rejected all my offers to buy her but says use her as long as you like. I'm always afraid he might call her home one day.
-
With the rivet forge I used it would be 19th century. I haven't gone back as far as vikings yet.
-
Very nice stand. Mine was designed to be light and portable, storable, (I can knock it down and store flat), and fit with historic periods. I tried it out at a demo for school classes last Friday. Look what one of the other presenters brought by, things he dug up in his yard. The largest white object is a bar of lead with what appears to be the English broad arrow impressed on it. Also of note is the black English musket flint just above the hardy hole.

-
My Hey Budden and even old Peter Wright still sing out pretty loud despite anchoring.
-
Interesting...., I could see the obvious advantage being reduction in distortion of the pieces as well as the additional advantage of the wood being an insulator.
End grain stump works amazingly well as swedge for dishing etc. so I will have to give it a try.
Is this done with a wood block on anvil or a seperate block? What is the set up?


Sand used as a flux?
in Fluxes used in blacksmithing
Posted
I use borax most of the time. I had always heard about the mud dauber nest flux. Doing historical blacksmith demonstrations I decided to try it. Works pretty good.