
Zanshin
-
Posts
126 -
Joined
-
Last visited
Content Type
Profiles
Forums
Articles
Gallery
Downloads
Events
Posts posted by Zanshin
-
-
Cool! I didn't have the time to properly navigate the forum! Thanks, i will go and find!!!
-
Thank you, Steve!!
-
So, today I started polishing the blade... The f.....g b.....d is soooooooo hard....

-
Totally agree with Frosty: I am one of those! I am a luthier and I started making carving knives and gauges and chiesels cor a need and then I got addicted!!!You'd be amazed at how many blacksmiths started out wood workers wanting that special plane knife, chisel, etc. and got themselves addicted to hot iron.
Welcome to the addiction, no cure and nobody here cares.
Frosty the Lucky
Beautiful adze. I need to make one really big and double handed to carve double basses!! -
I don't have your phone number...
-
Thanks a lot. I will go maybe today, after driving my wife to work. Hoping that they are open on saturday...
-
Thank you Sam, I thought to modify the shape of the traditional japanese handle, which is often hexagonal or octagonal, and it cam ot lime this. It fits pretty good in my hand and it doesn't move, the corners provide a good grip...
Yesterday I filed the second bevel, now I just need a little polishing and HT. I need to find a place to have it HTed since it's Inox and I don't have a kiln... -
My shop is full full of unfinished prodjects and I'm 100% mutt. Then again I might just have a little Roman coming out. <_< Can't wait to see the finished blade.
Me too!! Thanks!!! -
Hi FrostyI really like the way a santoku works in the kitchen. I'm looking forward to seeing how yours works out.
Frosty The Lucky.
I like the geometry of santoku knives, they work gently and precisely. I cannot wait to take the first slice... -
Thanks, Hyper!
-
Thank you for sharing and many compliments for your work. I love them. Look like 1300/1400 medieval german battle axes. Very coooooool
-
There are some kind of twisted/ braided wires that are ususally intended to be outside and they are even giod looking. They are generally tissue coated and Usually they are fixed with pins in the middle of the braid/twist. Maybe it could be an option...
Francesco -
Incredible job!!!! Amazing
-
Sam has it right. I have been making practice swords for full contact fighters for some years and I have to say that it is impossible to make some tecniques especially from german sword fighting between 1400 - 1500 without an hardened tang. Some kind of movements make your tang bend exactly under the hilt if it is not hardened (the tang). Although, the HT has to be softer right after the ricasso shoulders or it will break there. Plus, remember to have no sharp corner between the tang and the blade because that will cause a crack.Harden and extra temper the tang up and slightly past the ricasso shoulders.
Francesco -
Thank you guys for looking! And for all the comps!!! :)
-
Hi everybody,
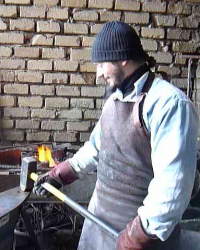
My wife always use to say that the Romans left a great number of unfinished projects, when she look at the ruins of the Roman Empire. She is funny. But I am starting to think that she is right: another WIP (and I haven't finished the other one yet!)... Anyways, in the meanwhile that I find some material to finish the other one, I keep my hands occupied making a kitchen knife since the ones I have here are horrible!
The steel is Inox MA5M and the handle material is Zebu horn, flattened to the shape desired and then worked with rasp and file. Bone bolster and butt cap. The handle is almost finished, the blade is just "file ground" only on one side. A lot of sweat!!! Next side next days.
Here it is:


-
You can do 2 things: learn how to do a sheath and learn how to do a folder. No, you have another option: make a flip and then a sheath to keep it closed in your pocket/at your belt, so you will work on 2 projects in one. If you send me a PM with your email I can explain both...
Anyways, if your hands made that beautiful tiny knife by hammer, you will have no problem in making a sheath or a folder!!! -
Beautifully executed. Not being a stringently a "knifemaker", can somoen enlighten me on why the term "sub hilt" is used?
Hi, the term "sub hilt" is used on those knives which have two hilts. The first one is the main hilt, the second (the sub hilt) is used to grip the knife better. -
Thanks to everyone. I am glad that you like it!!!
-
Hallo to all of you,
This is a knife I made to test my skills a couple of years ago. Yes, I wasn't be able to forge yet so I'd like to share my old knives... Knifemakers always say that the most difficult fixed blade to build is a sub hilt, so, I tried making one even if I totally dislike those type of knives as they are intended as "fighters" (bleah).
I want to make clear that knives, to me, are tools, the most ancient ones and I have a lot of respect for these "friends" that take us company until the first man was born.
Said that, the knife: 16 cm, 6 mm thick, 5 bars composite damascus. Handle: hilt, sub hil, and butt cap twisted damascus 1070+iron, mirror polished, vulcanized fiber spacers, erica arborea handle (the wood used to make pipes), pommel wrought Iron. OAL 28 cm
The difficult part was that the whole knife had to be finished before assembling because otherwise I wouldn't be able to etch the damascus without ruining the wood...
I hope youl'' enjoy it!!


-
That was funny!!!
-
Did you make it from the spheres or from the rims? I love ball bearing steel because it's abrasion resistant and it keeps the edge sharp for long time. The downside is that is more difficult to finish. You did very good, I like the deer handle!!!
-
Really cool. I don't understand if it is san mai damascus or the pattern on the blade are the hammering marks/brut the forge.
Excellent work, anyways!!! -
Ferric is probably the most effective method I tried. And I made a lot of experiments. A pretty good solution, if you want to deep etch and then buff to mirror finish, is to use nitric acid. Use a solution of 1/3 acid and 2/3 distilled water and keep stirring using the damascus as stirring tool. In this way you won't have bubbles forming. Once in a while take it out and use a brush to gentle remove eventual bubbles and put it back. A couple of minutes can etch really deeply. Then sand with a 1200 paper on a little block of wood, gently. If you want you can buff.


Sub Hilt Composite Damascus
in Knife Making
Posted
Thanks a lot. I am very glad to see so much appreciation!!!