

confederatemule
-
Posts
63 -
Joined
-
Last visited
Content Type
Profiles
Forums
Articles
Gallery
Downloads
Events
Posts posted by confederatemule
-
-
Go here to see pictures. I guess I have bought it.
Mule -
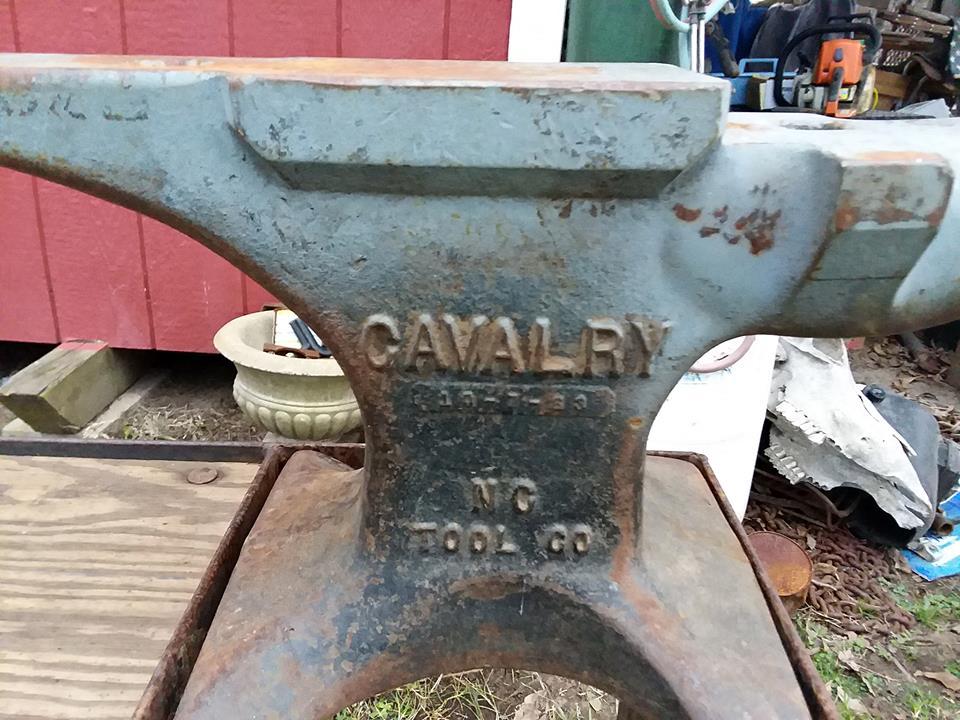
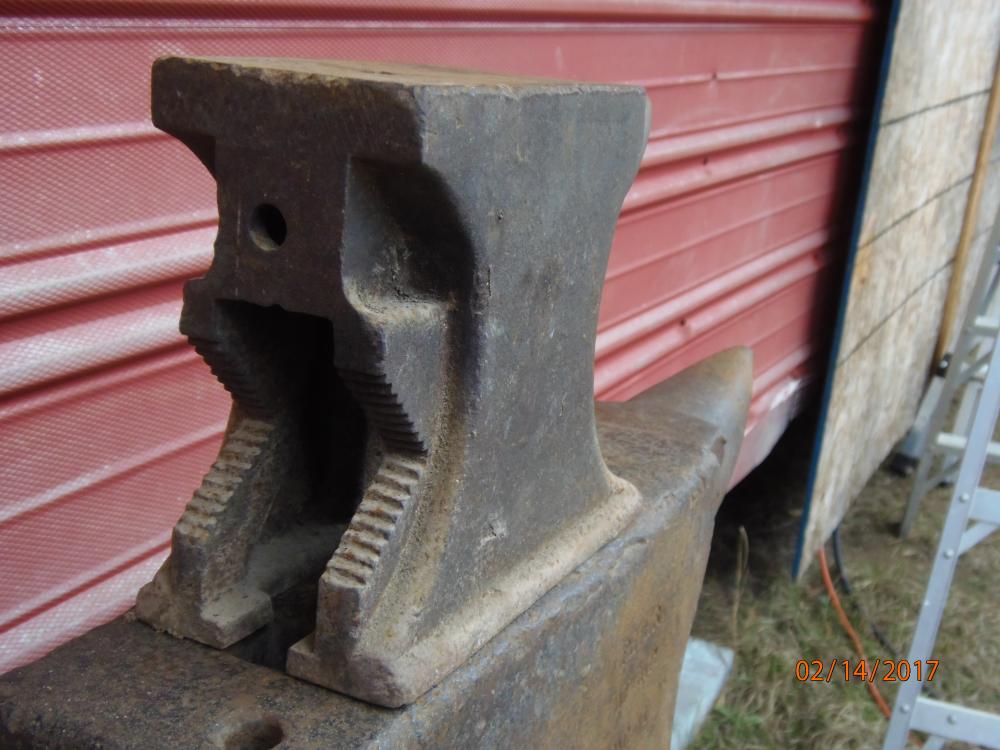
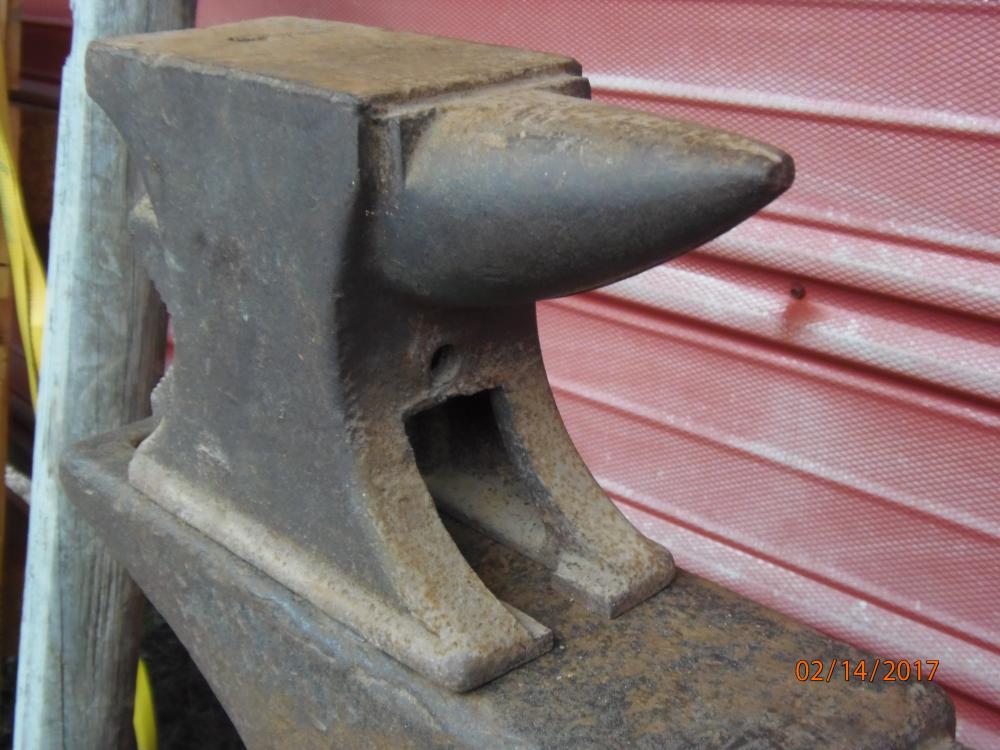
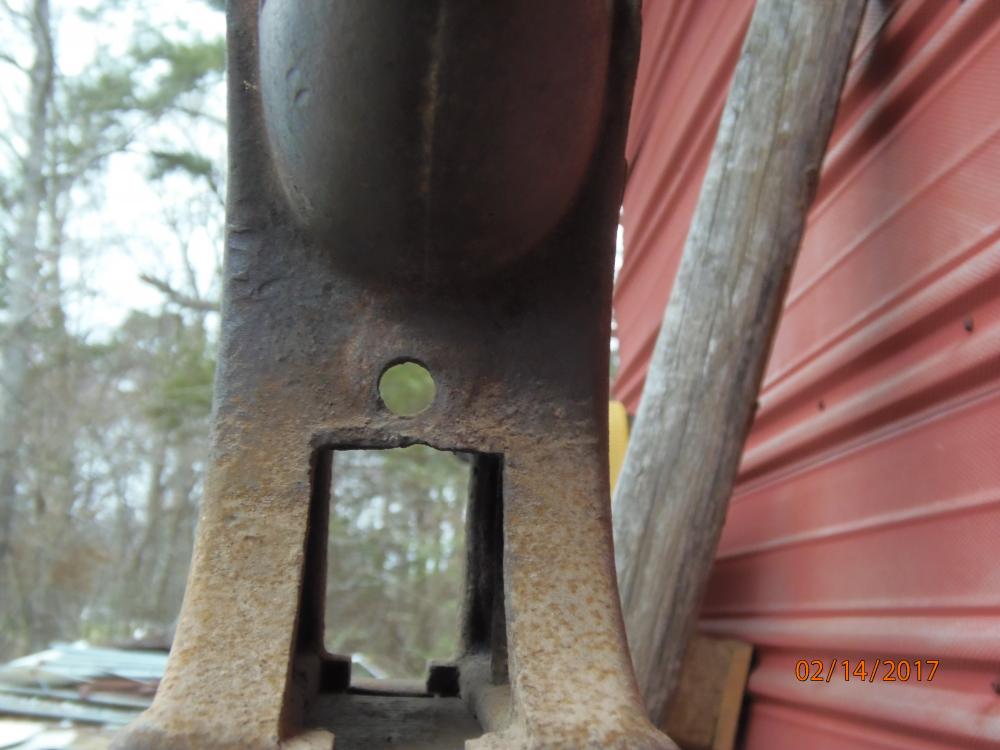
What do y'all think of the Cavalry Anvil by NC Tool co.?
Mule
-
Thanks y'all. When I started this thread I had no idea I was going to be using this as a reference to pull clips. I have decided to make at least one heart shaped trivet out of a horseshoe. I pondered on it till I had it planned out in my mind except for the three little feet to keep it off of the cabinet. I got this notification of a new post and that was it. I'll pull three clips and then use a file to make them good and smooth so as to not scratch the cabinet.
THANKS.
-
Thanks, y'all. I now have more suggestions than I can handle.
Mule
-
I would like to make a small ladle to use over an open fire to melt lead and pour into a tong type single ball mold.
I do not have a swage block with round dished impressions.
Do y'all have any suggestions for forming the ladle?
What I am after is in this video https://www.youtube.com/watch?v=Ng7hArHEiVM&t=1s starting at 1.06. I have 2 ball molds of this type.
My thought is to use a rounding hammer over the desired ladle size pipe.Thanks fer any help
Mule -
I've seen many clips made, but not by using the clip horn. This was a first for me. Thanks, George, for the video.
Mule
-
Thanks to Frosty and Frank Turley.
I am sorry but at this point, I wish I had never posted.
I did not ask, nor do I care, who made the first one.
Mule
-
What is the purpose of a clip horn?
How does it work?
Does anyone have a link to the clip horn being used? I've searched and searched but can't find a video. I can find several videos on forming a clip, bt none using the clip horn.
Thanks
Mule
-
2 hours ago, ThomasPowers said:
What did you find when you searched the US patents for that date? Always step 1 when given a patent date!
Step two would probably be looking at the Sears and Roebuck catalogs from around then.
I've never dreamed of searching in U.S. Patents. Never thought of Sears and Roebuck either.
I thought of "I Forge Iron".
I received my copy of "Anvils in America" yesterdy so I did look in it.
1 hour ago, Kozzy said:https://patents.google.com/patent/US574764A/en is what I believe to be the patent
Doesn't list an assignee so can't say if the patent holder sold it to someone else or if they branded it themselves. Since the drawing is darned close to the example you have, I'd guess they kept the patent and produced it themselves--sending it off to another maker tends to introduce some modifications.
It sure looks like mine.
Thanks, Y'all.
Mule
-
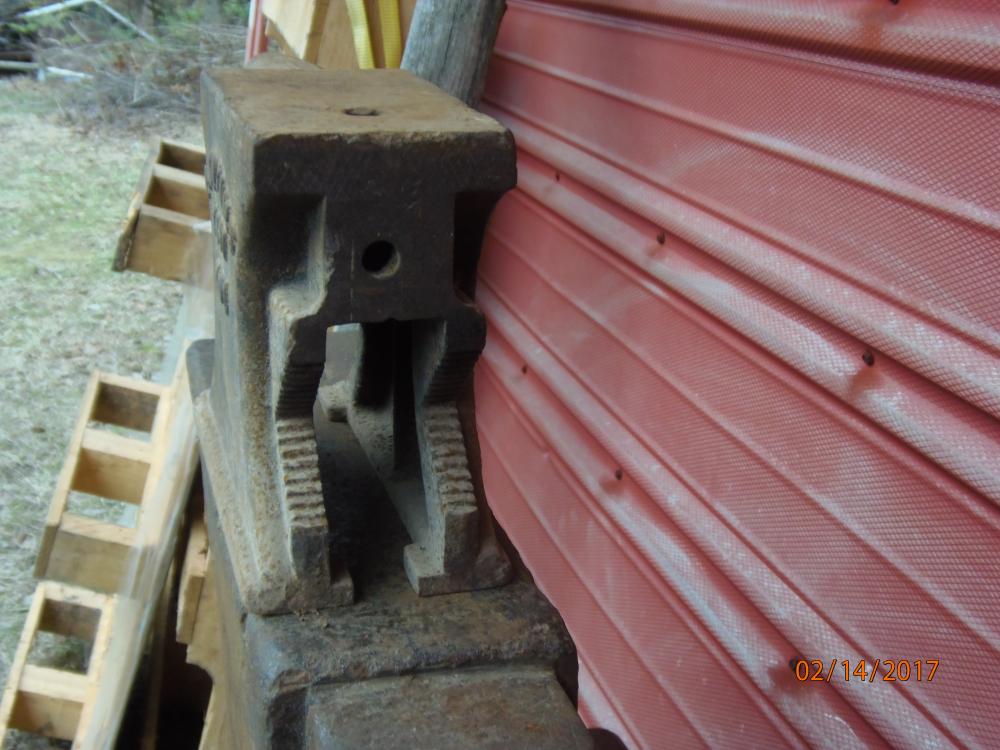
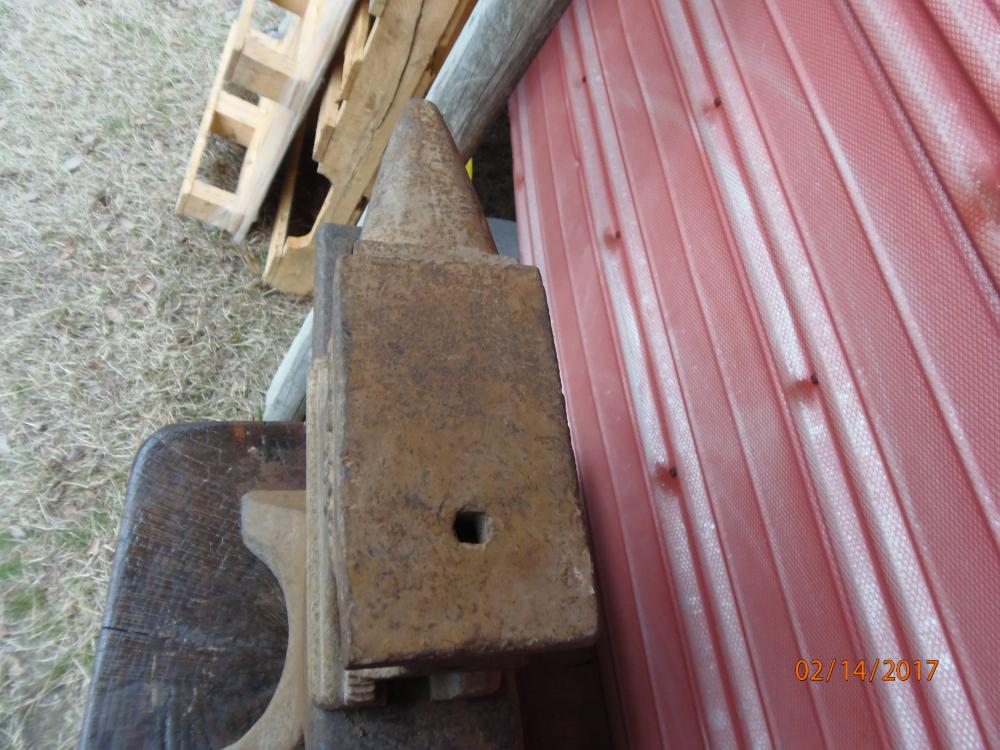
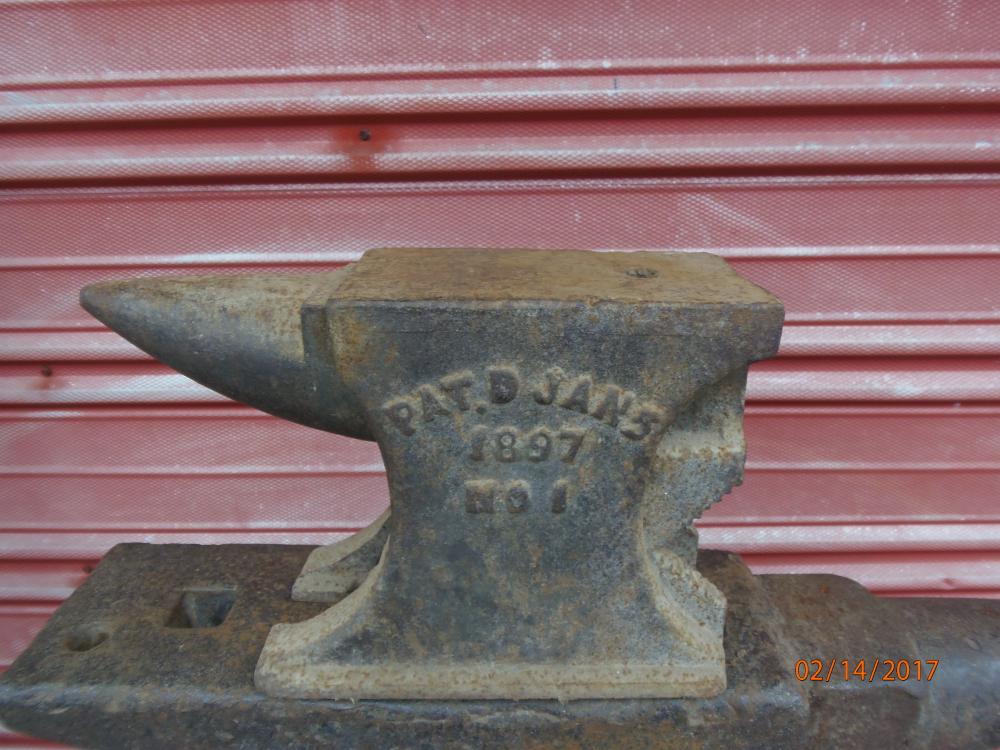
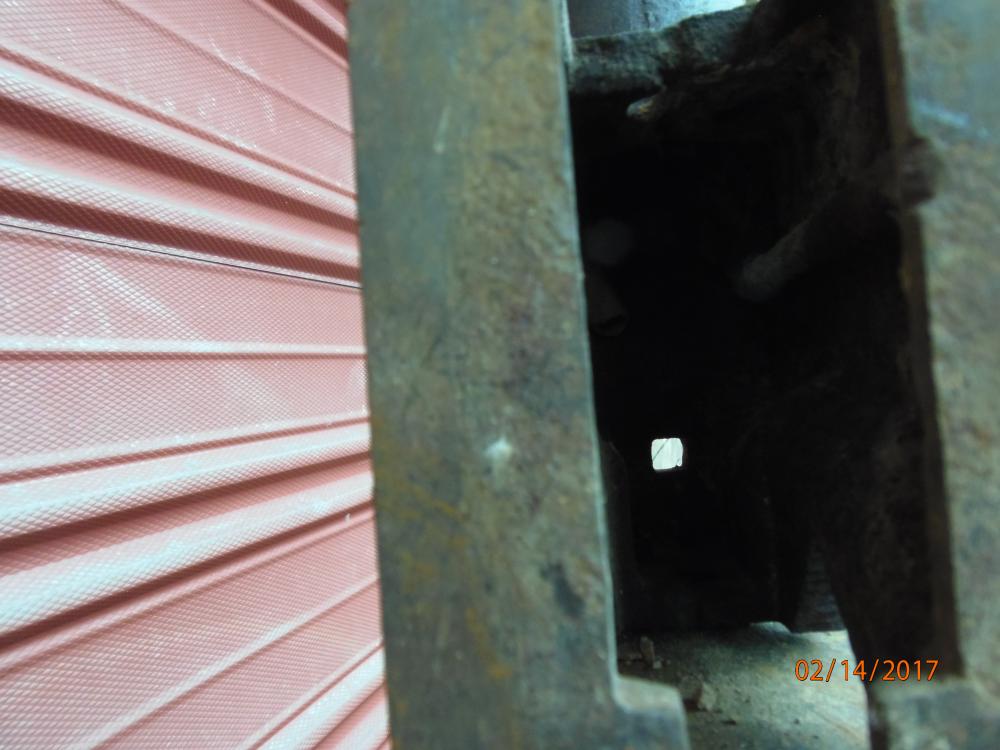
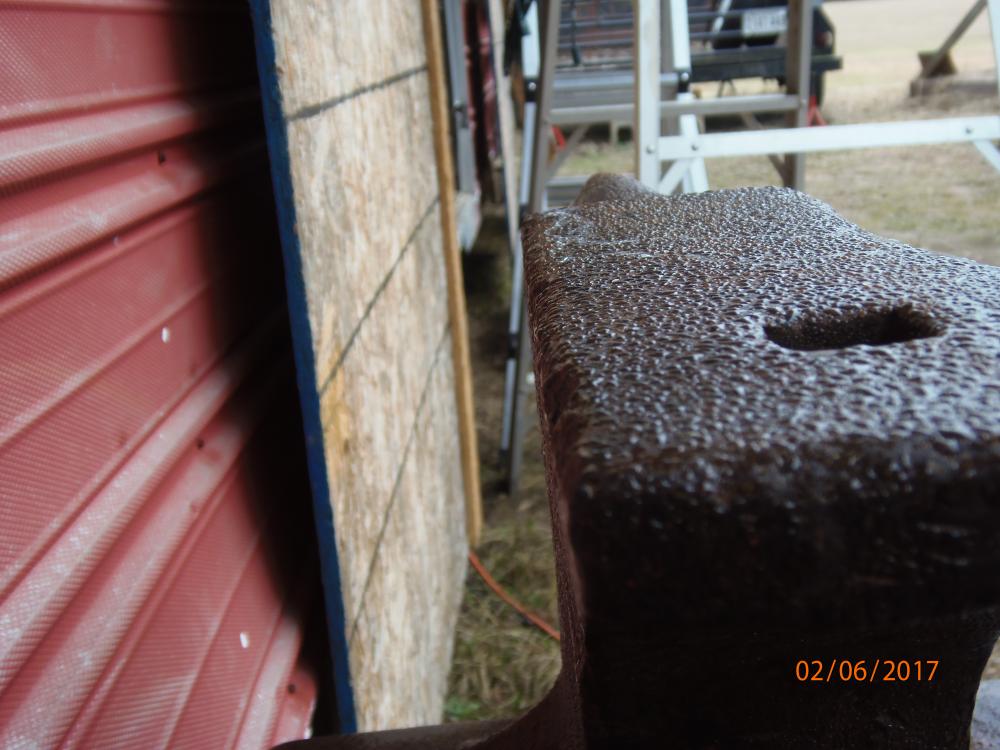
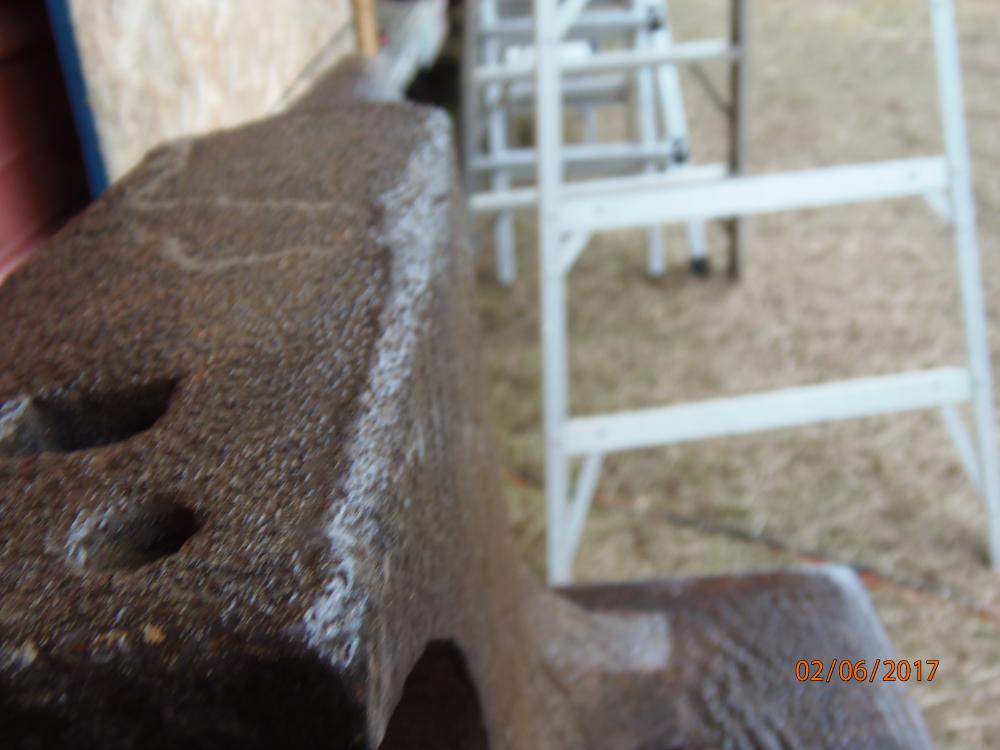
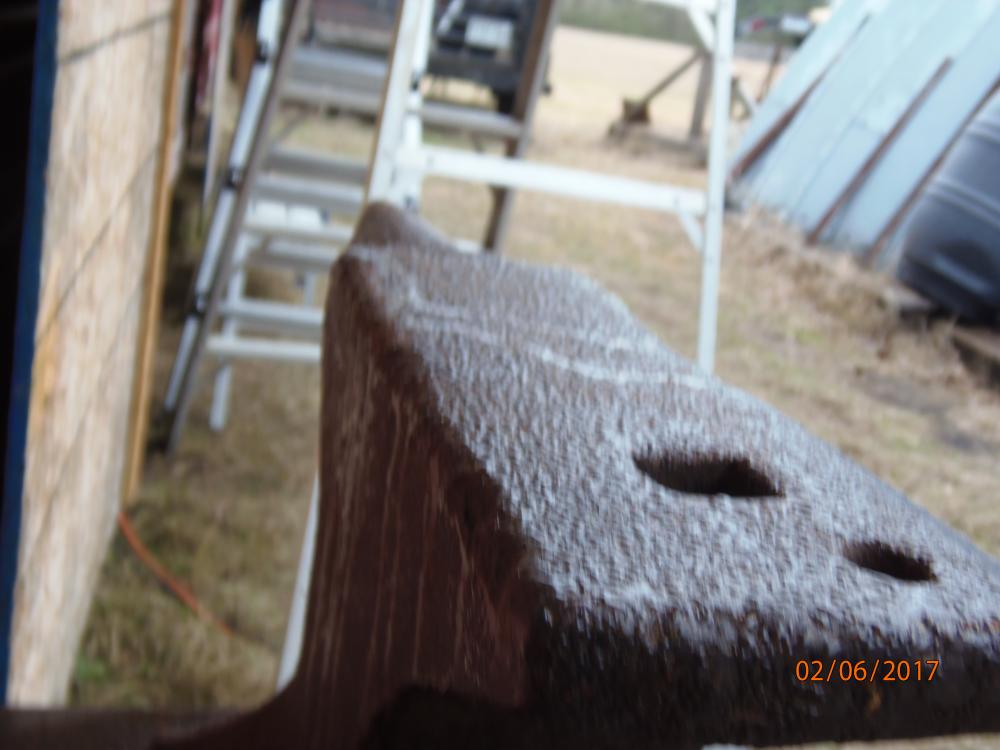
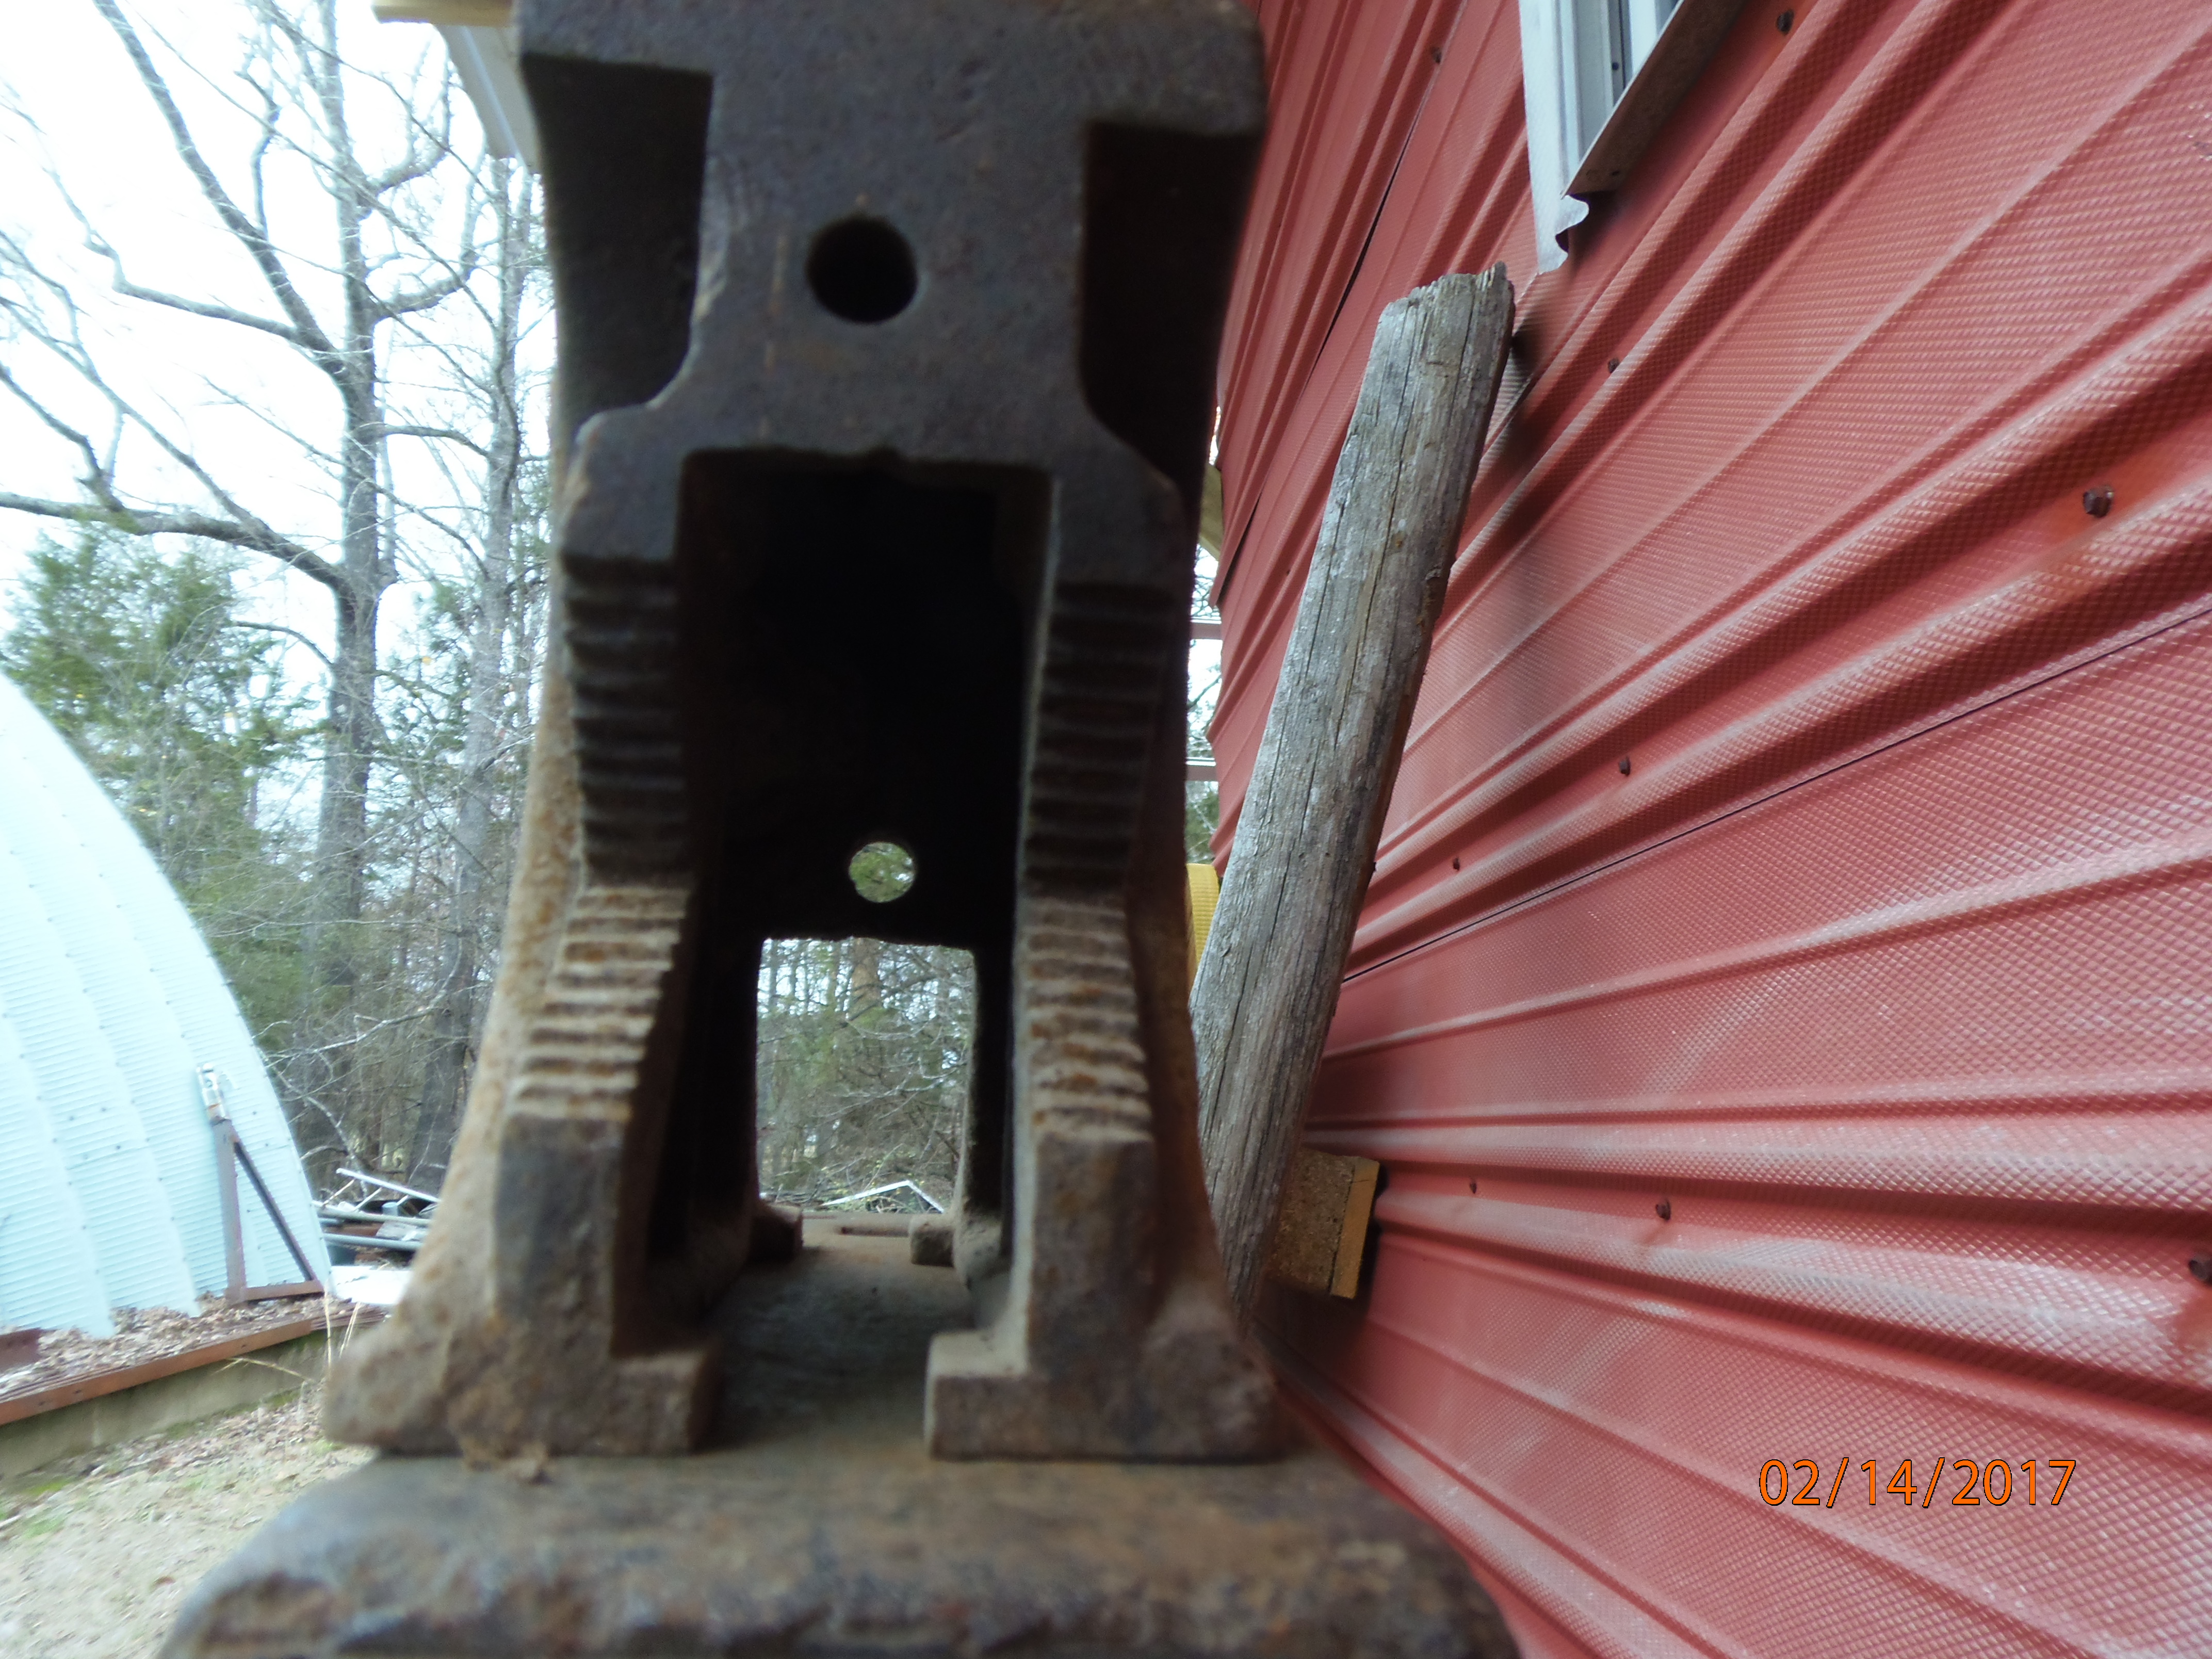
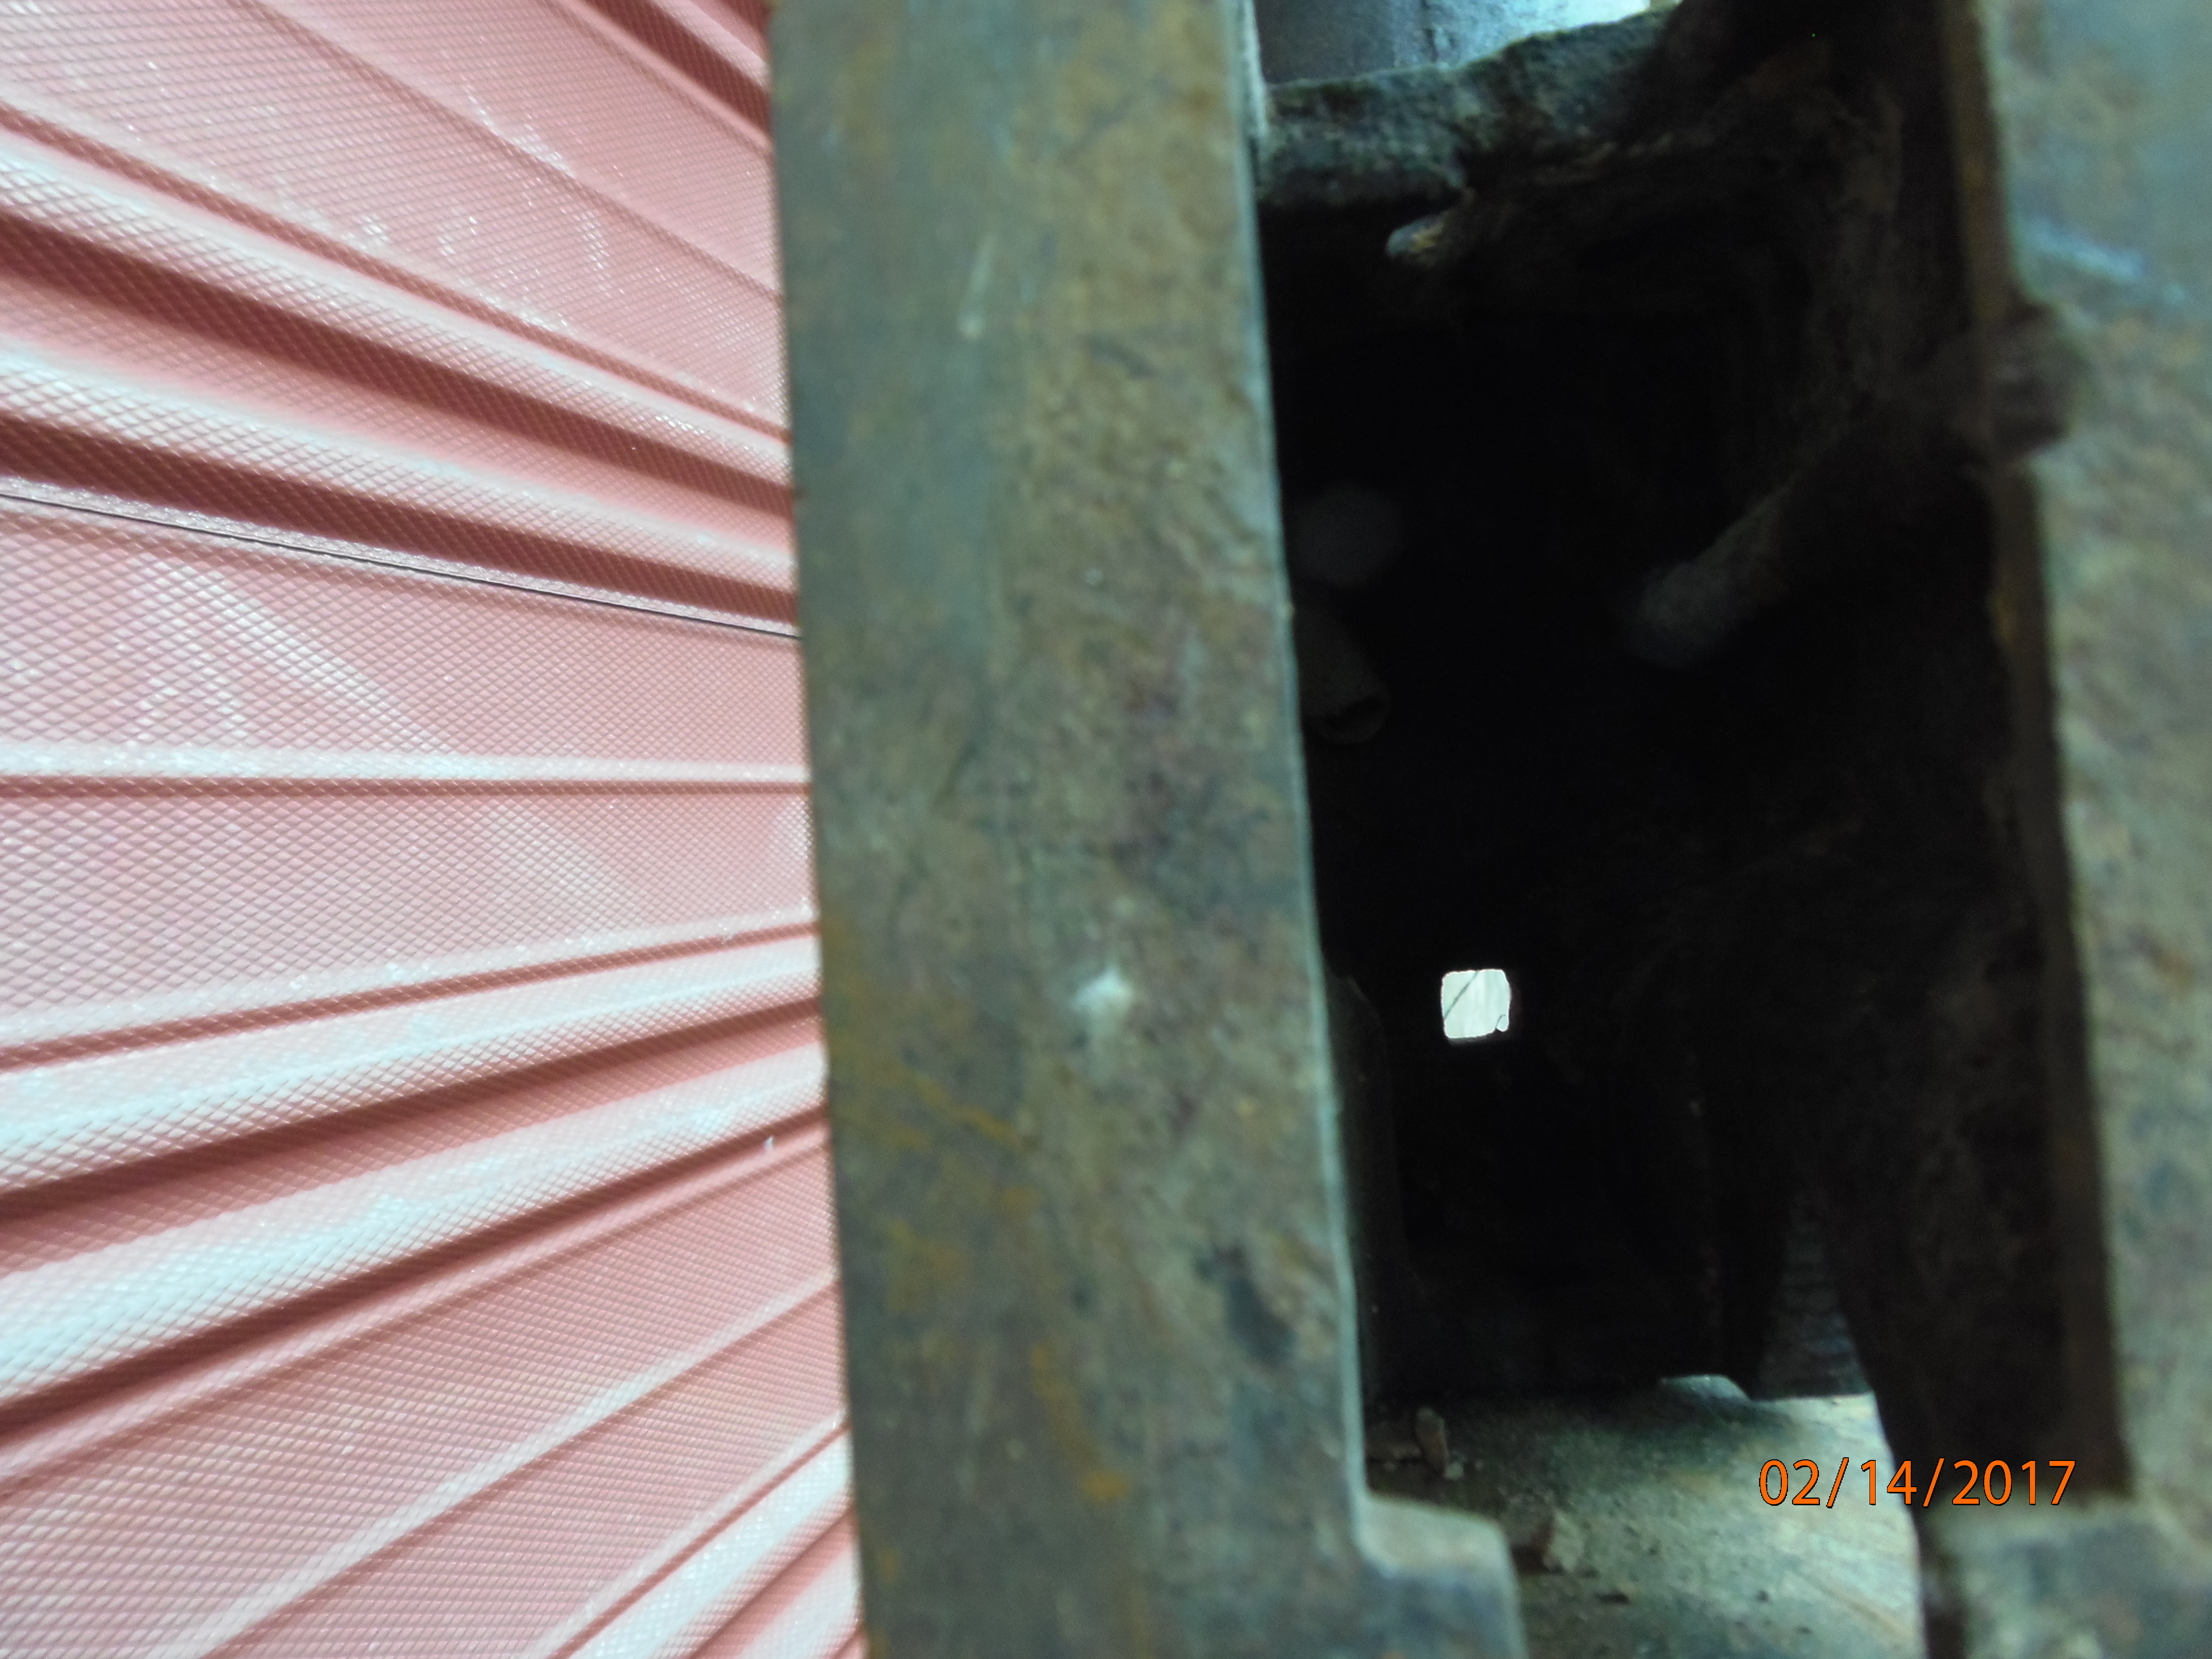
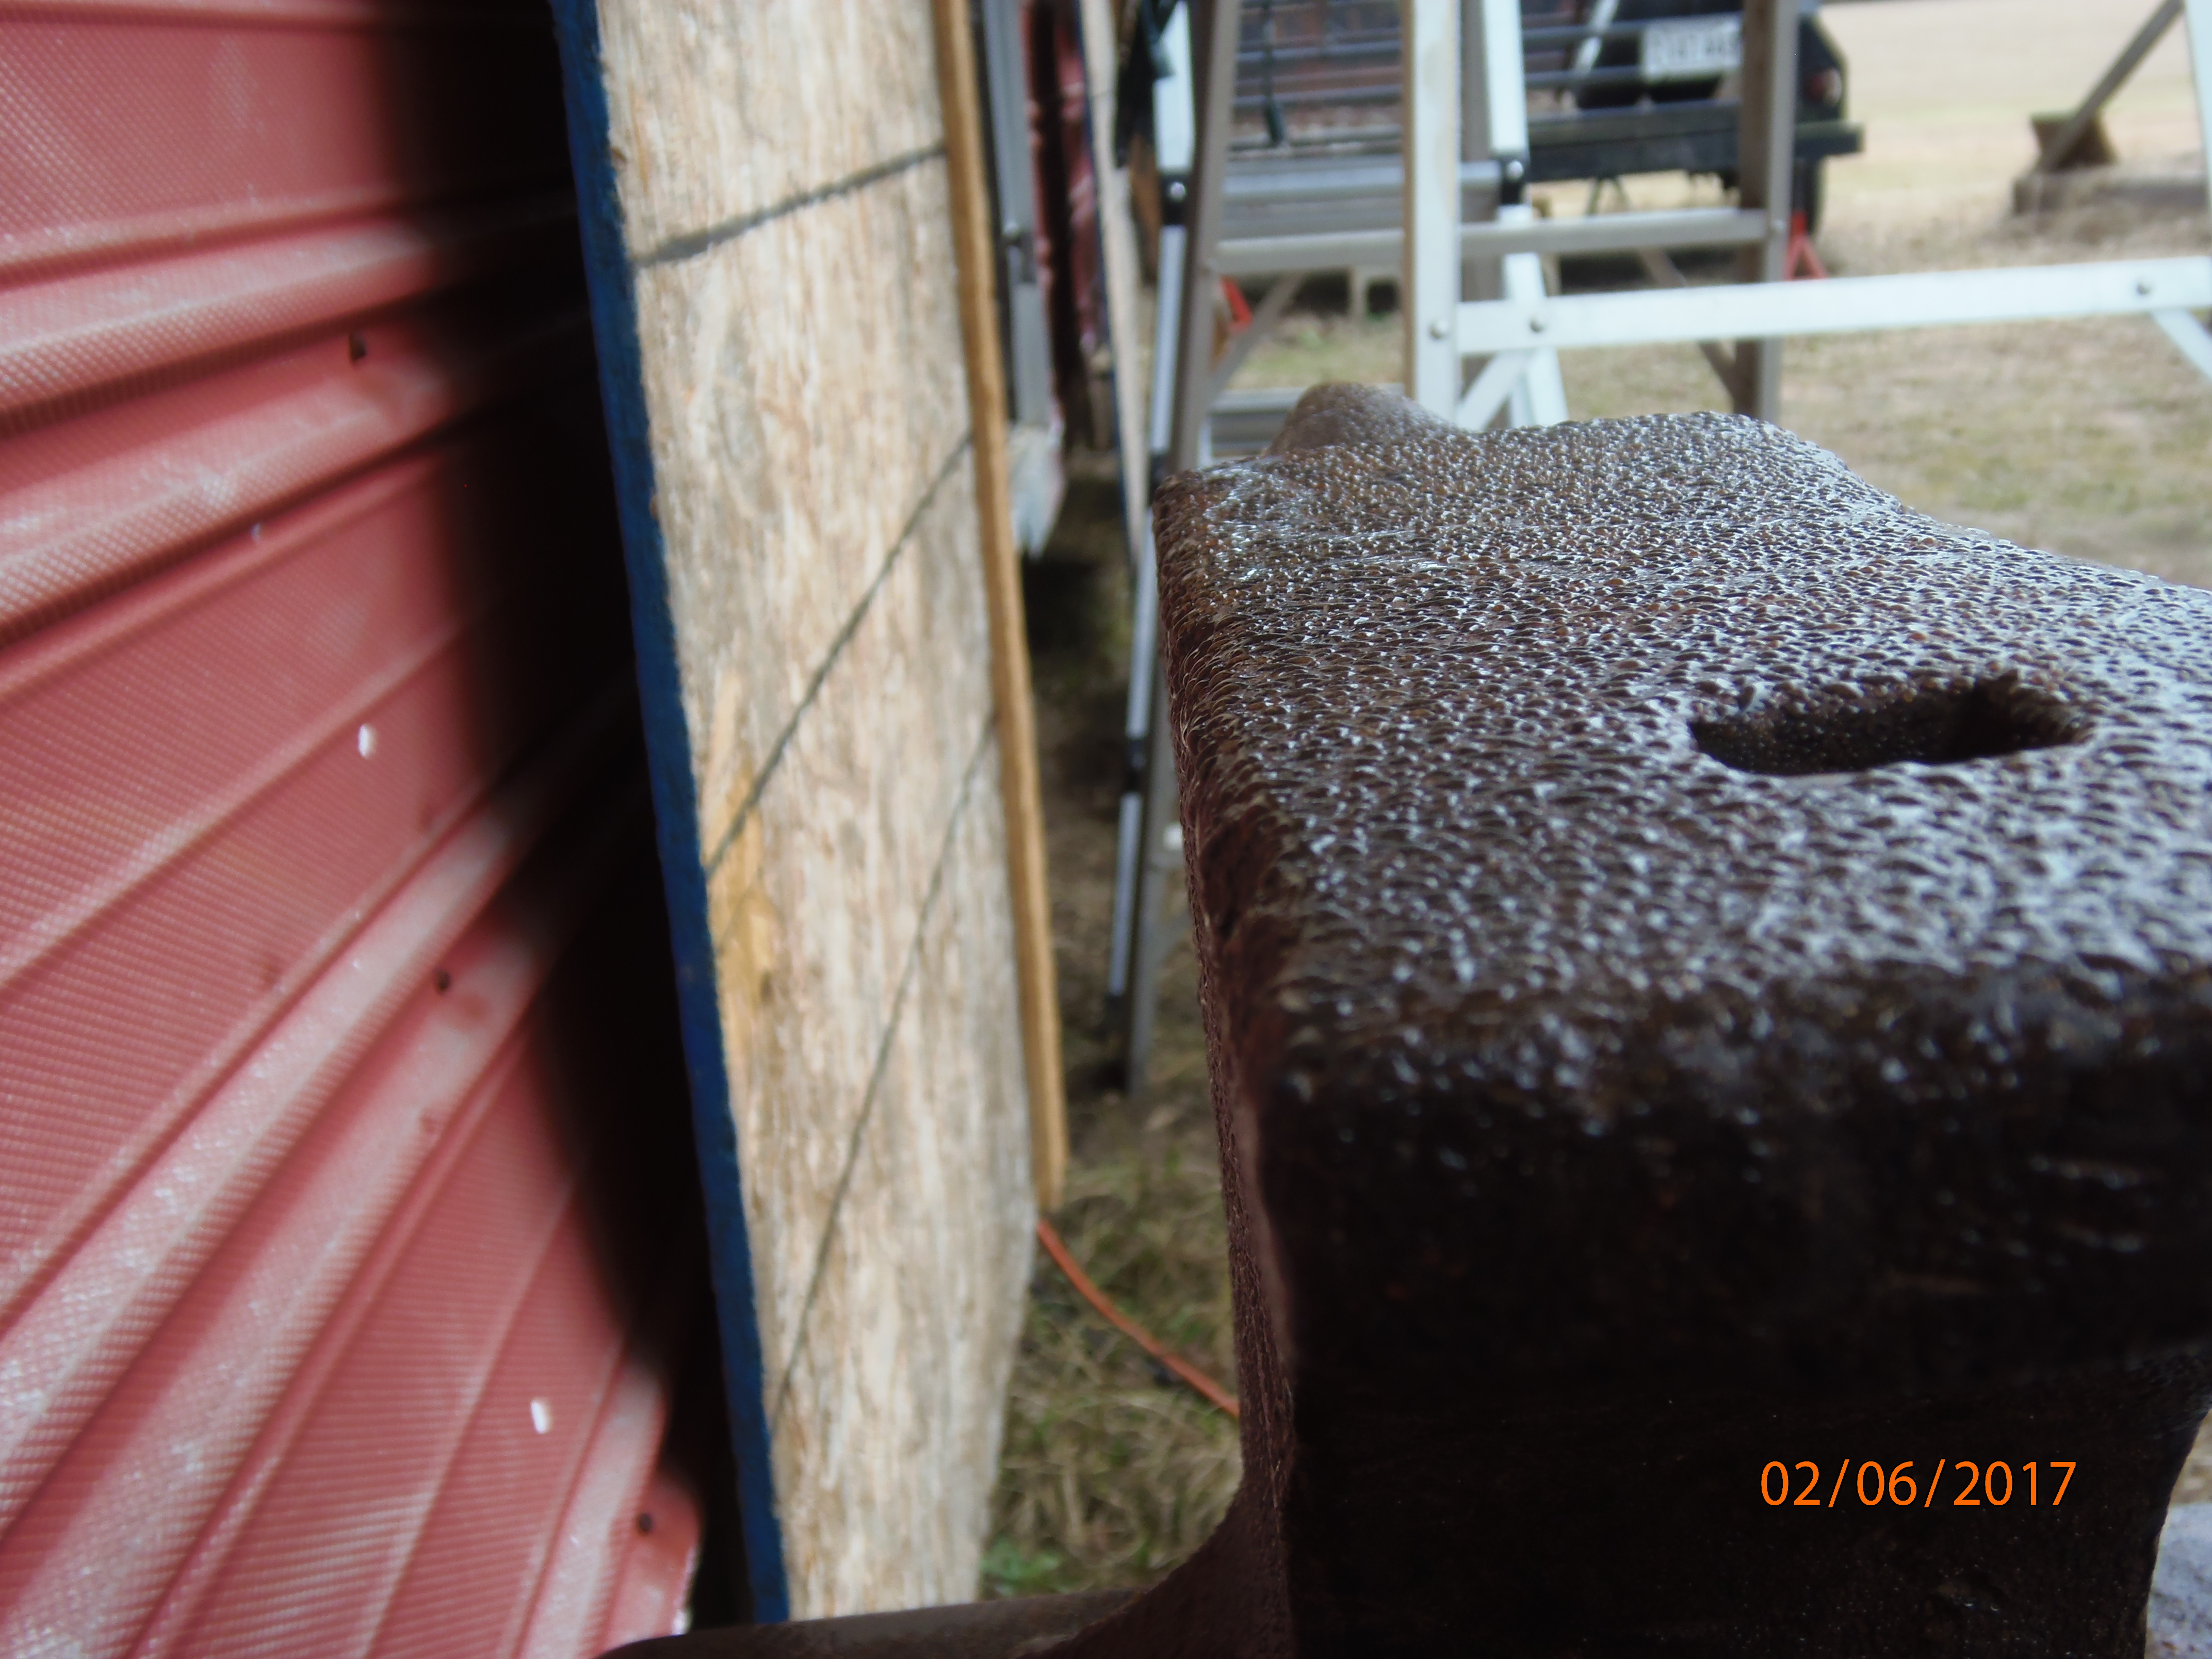
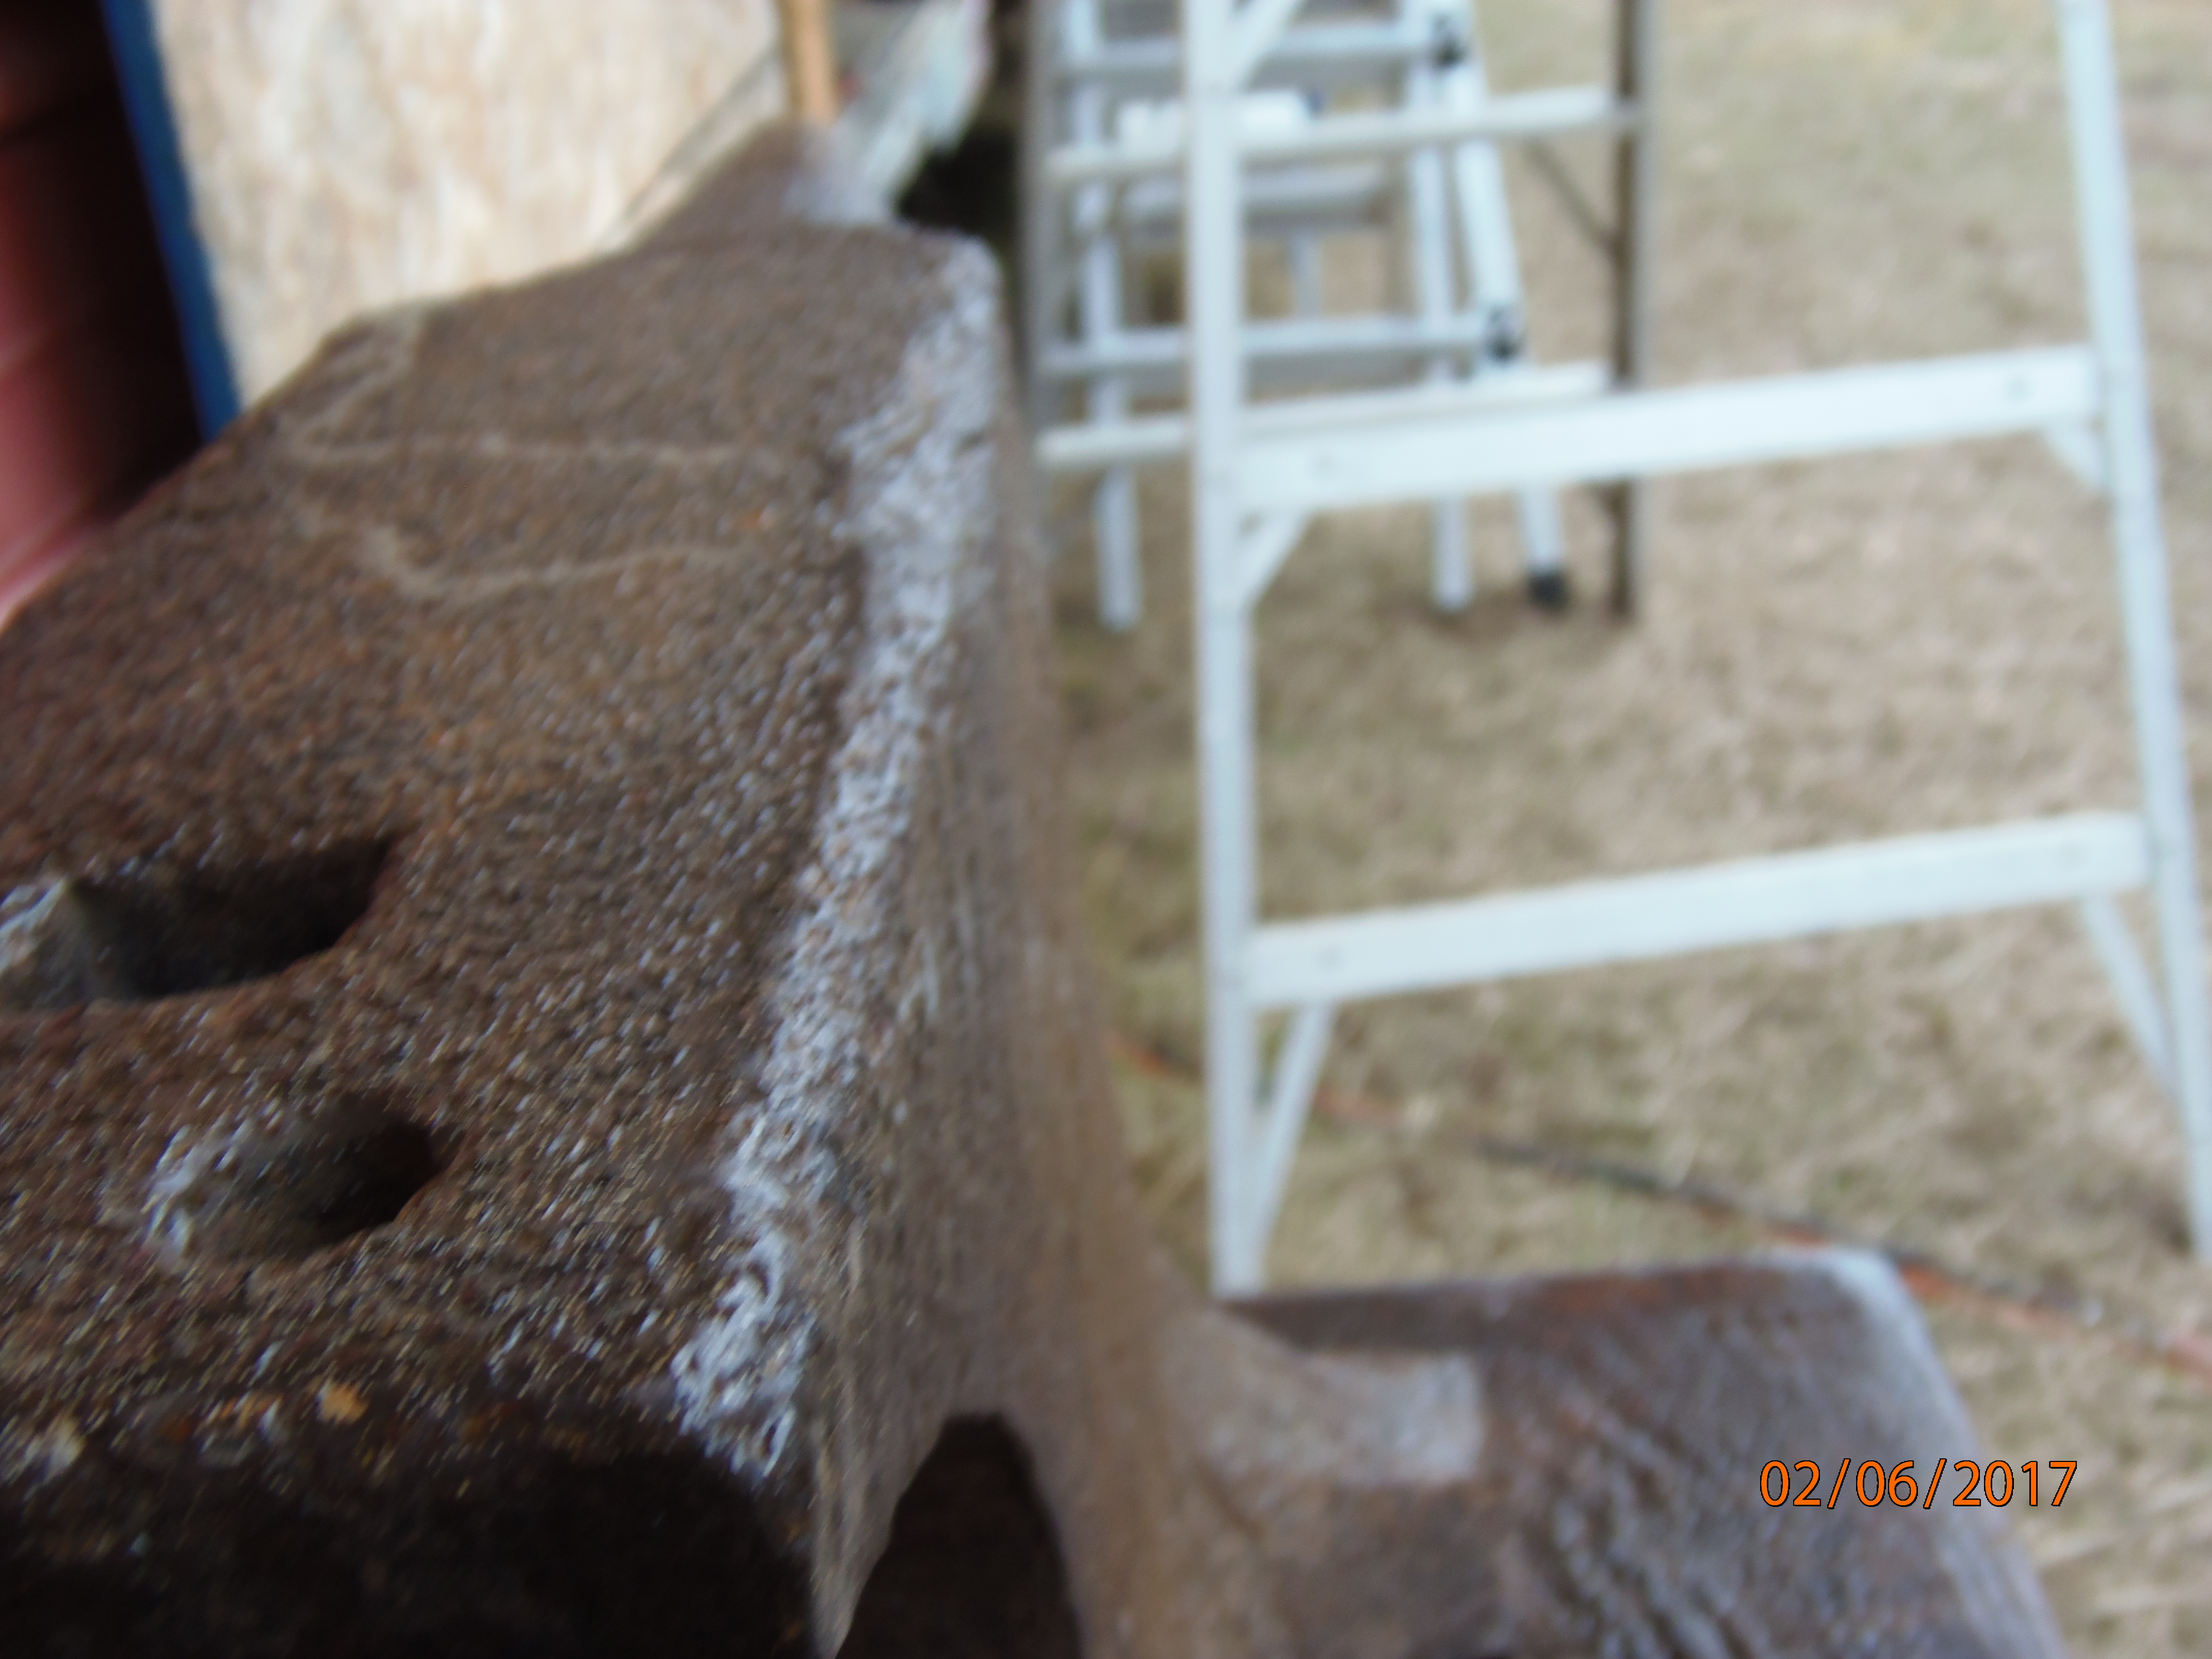
I have had this fer many many years. I think my stepmother gave it to me as a Christmas gift. She was an Antique Dealer and fer years my standard Christmas gift was an Antique hand tool. It has "Pat. Jan.5, 1897 No.1" in raised letters on it. No other information. It weighs 19 lbs. It appears to have been designed to clamp round objects as well as flat. I'm trying to figger out who made it and maybe find an image of a complete Anvil/Vise. Maybe I should of did some measuring before I posted this. I'll do that later today. Oh, the hole in the top is square, although it has been treated rough around the top of the hole. Also, there are no holes in the base for mounting to a flat surface.


-
Thanks fer the test instructions. I'll be checkin it out tomorrow.
-
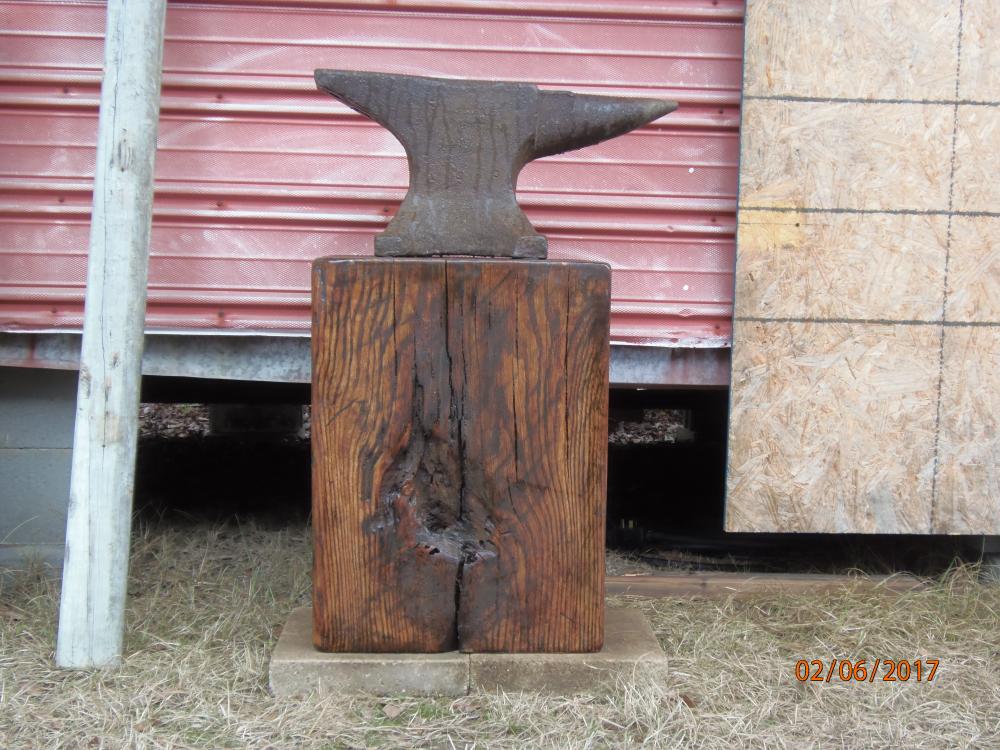
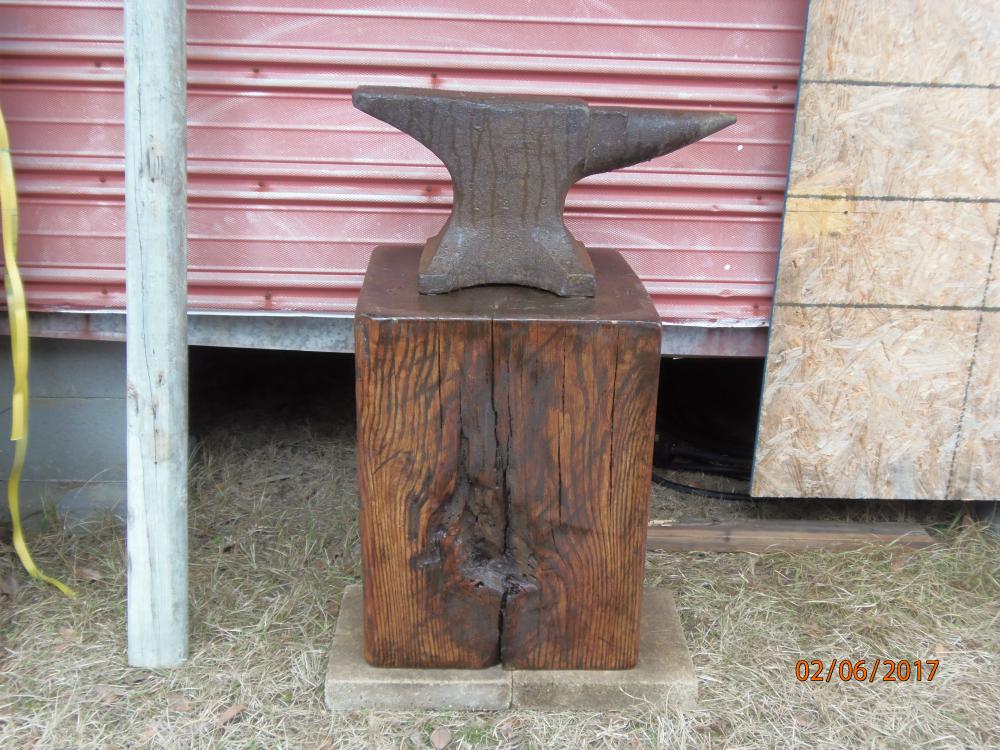
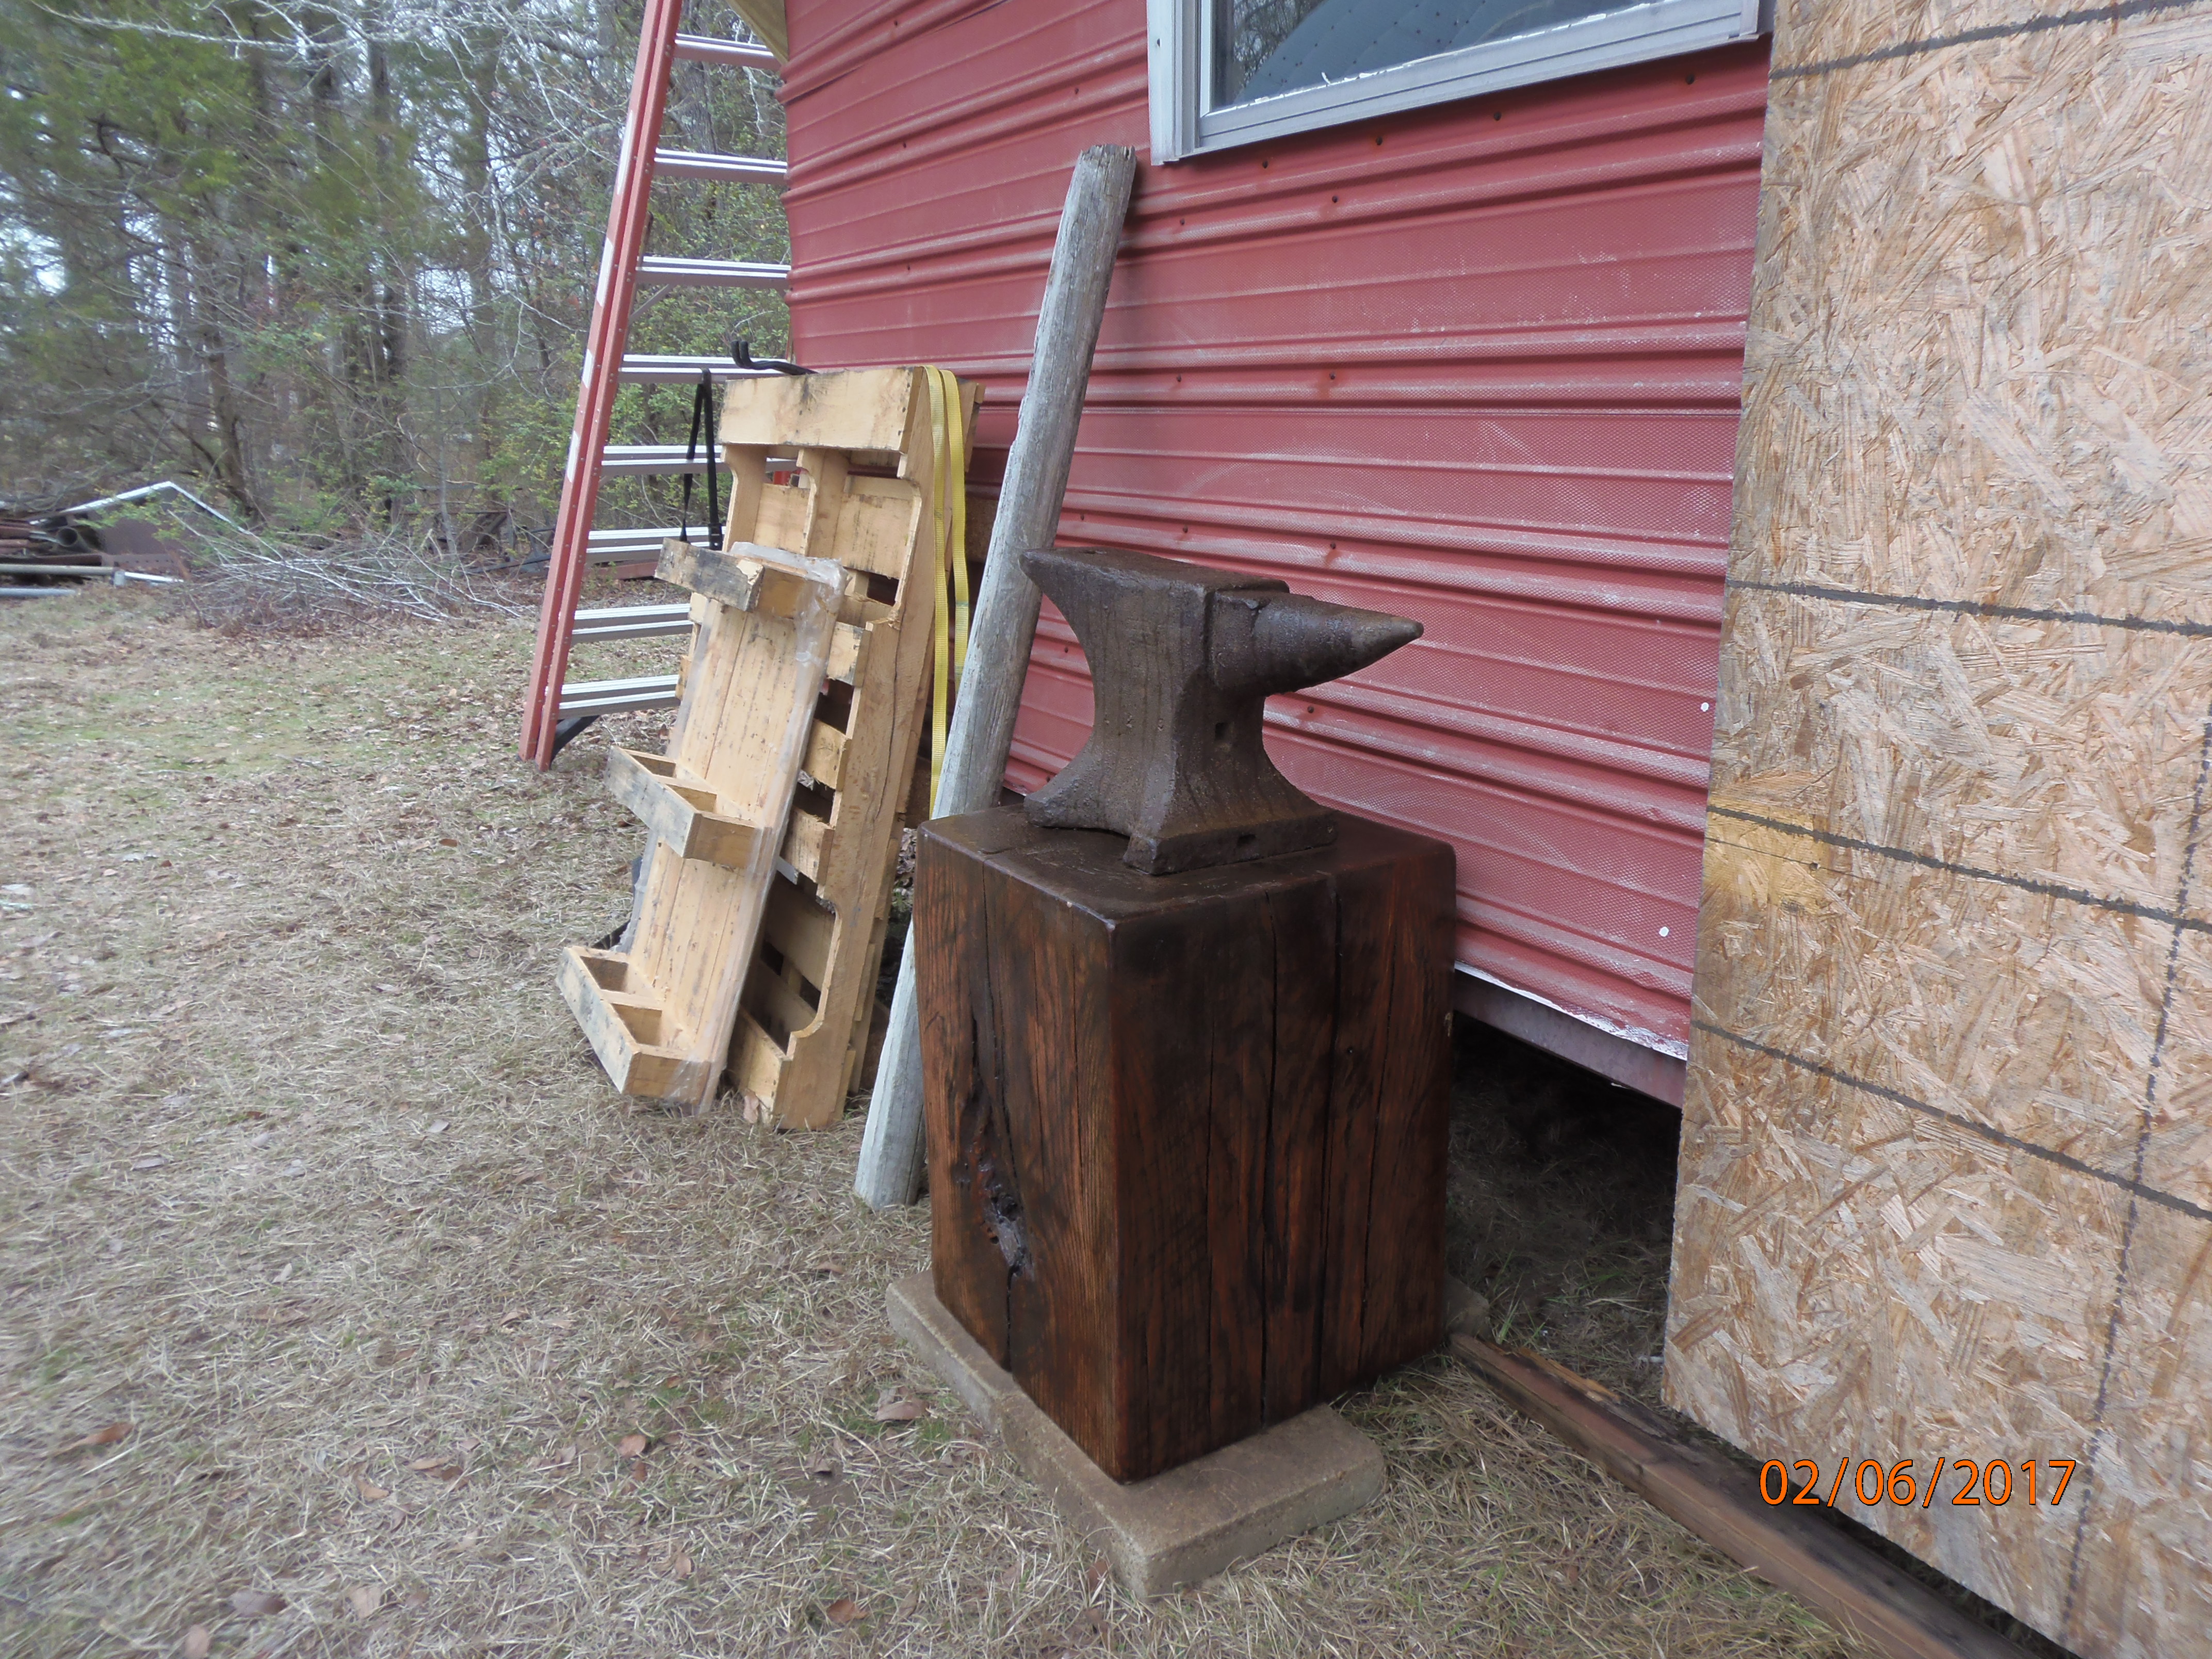
Best I can tell it lacks 4 in. reachin my elbow. It is 37.5 in. from the ground to the top of the anvil. The stump is 24 in. tall. The pad is 2 in. tall. The anvil is 11.5 in. tall.
It will be inside a quonset building, on a concrete floor, eventually, but it will still be wet on days like today. I am not too concerned about the surface rust.
I have a small gas forge, made from a propane bottle, but my next step is to build, or buy, a coal forge. The smoke hood and flue through the roof is my concern. I think I'll have to add a fan to be able to keep the start-up smoke from filling the building. But, this will be another post.
Mule
-
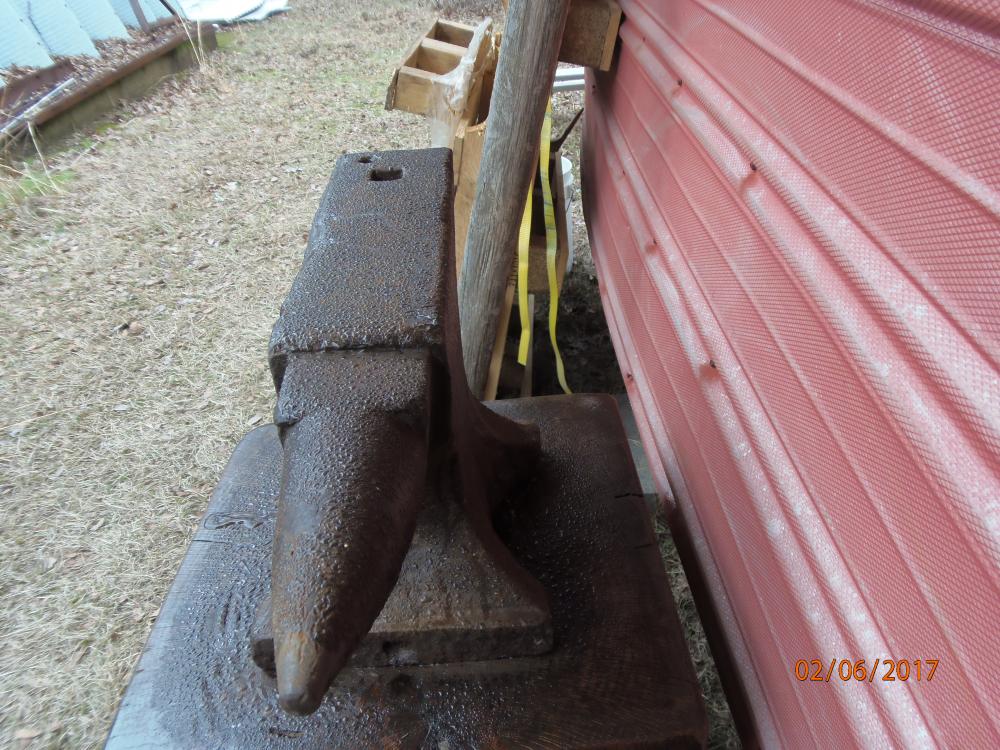
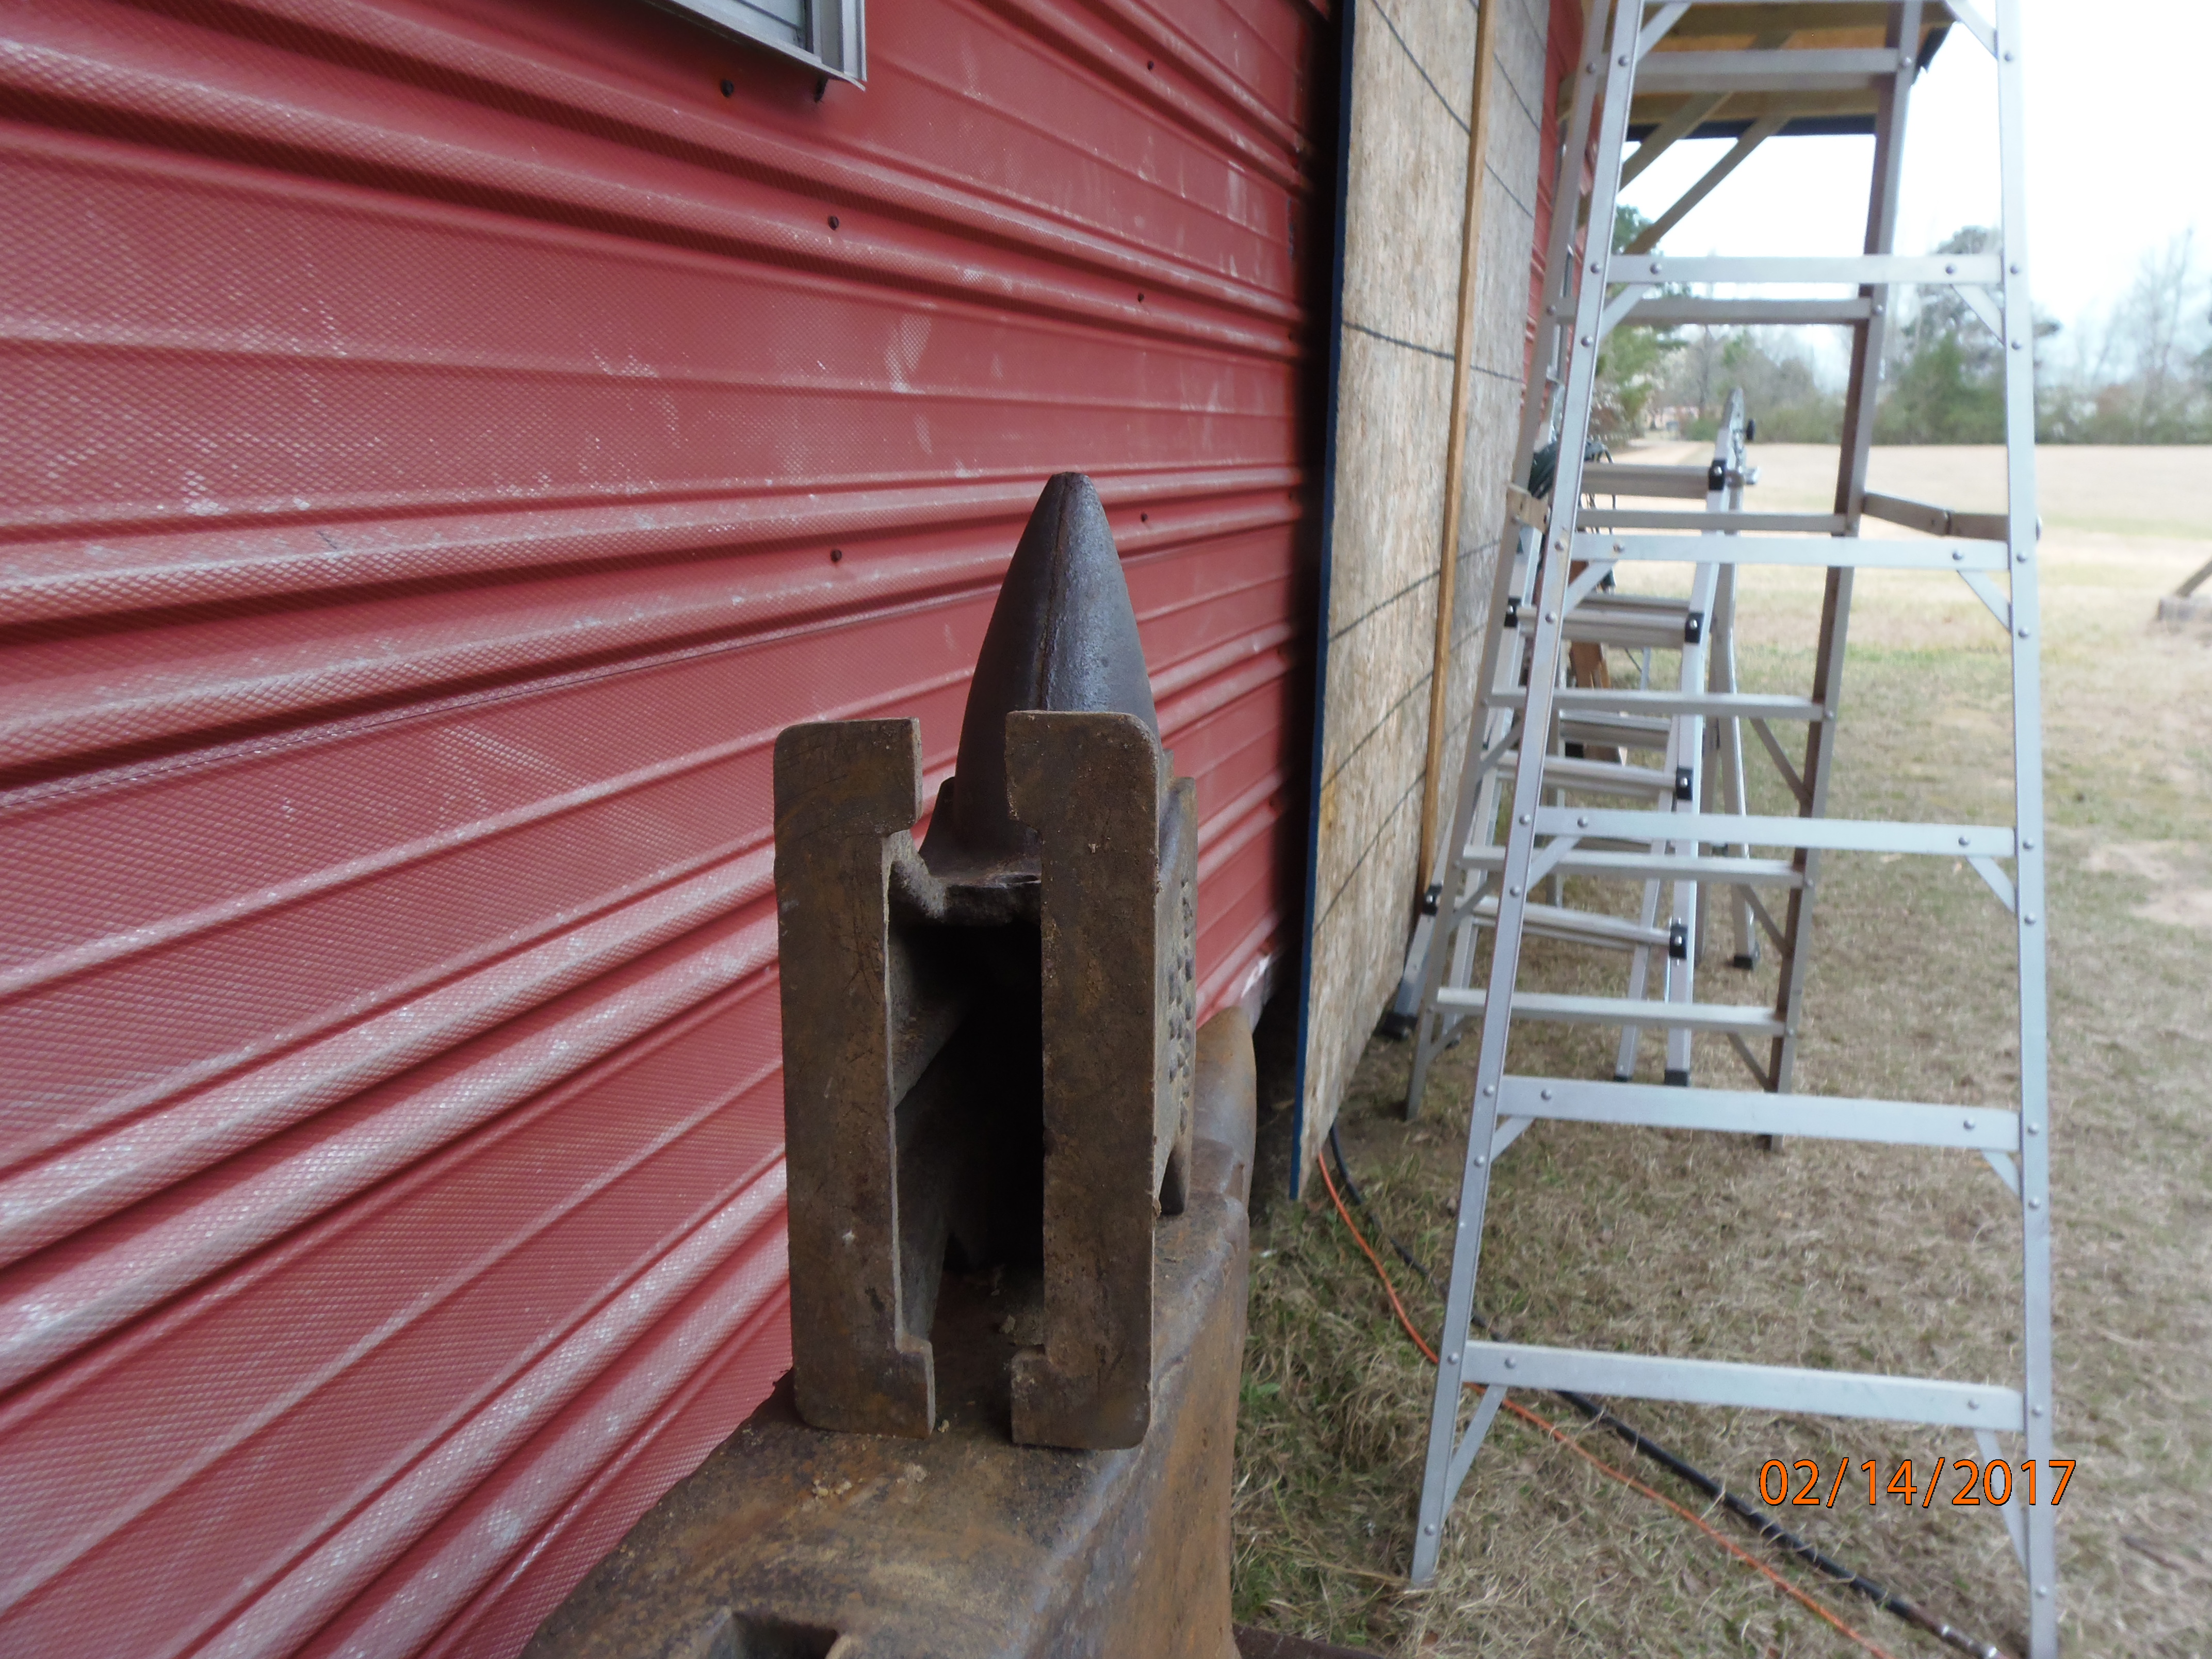
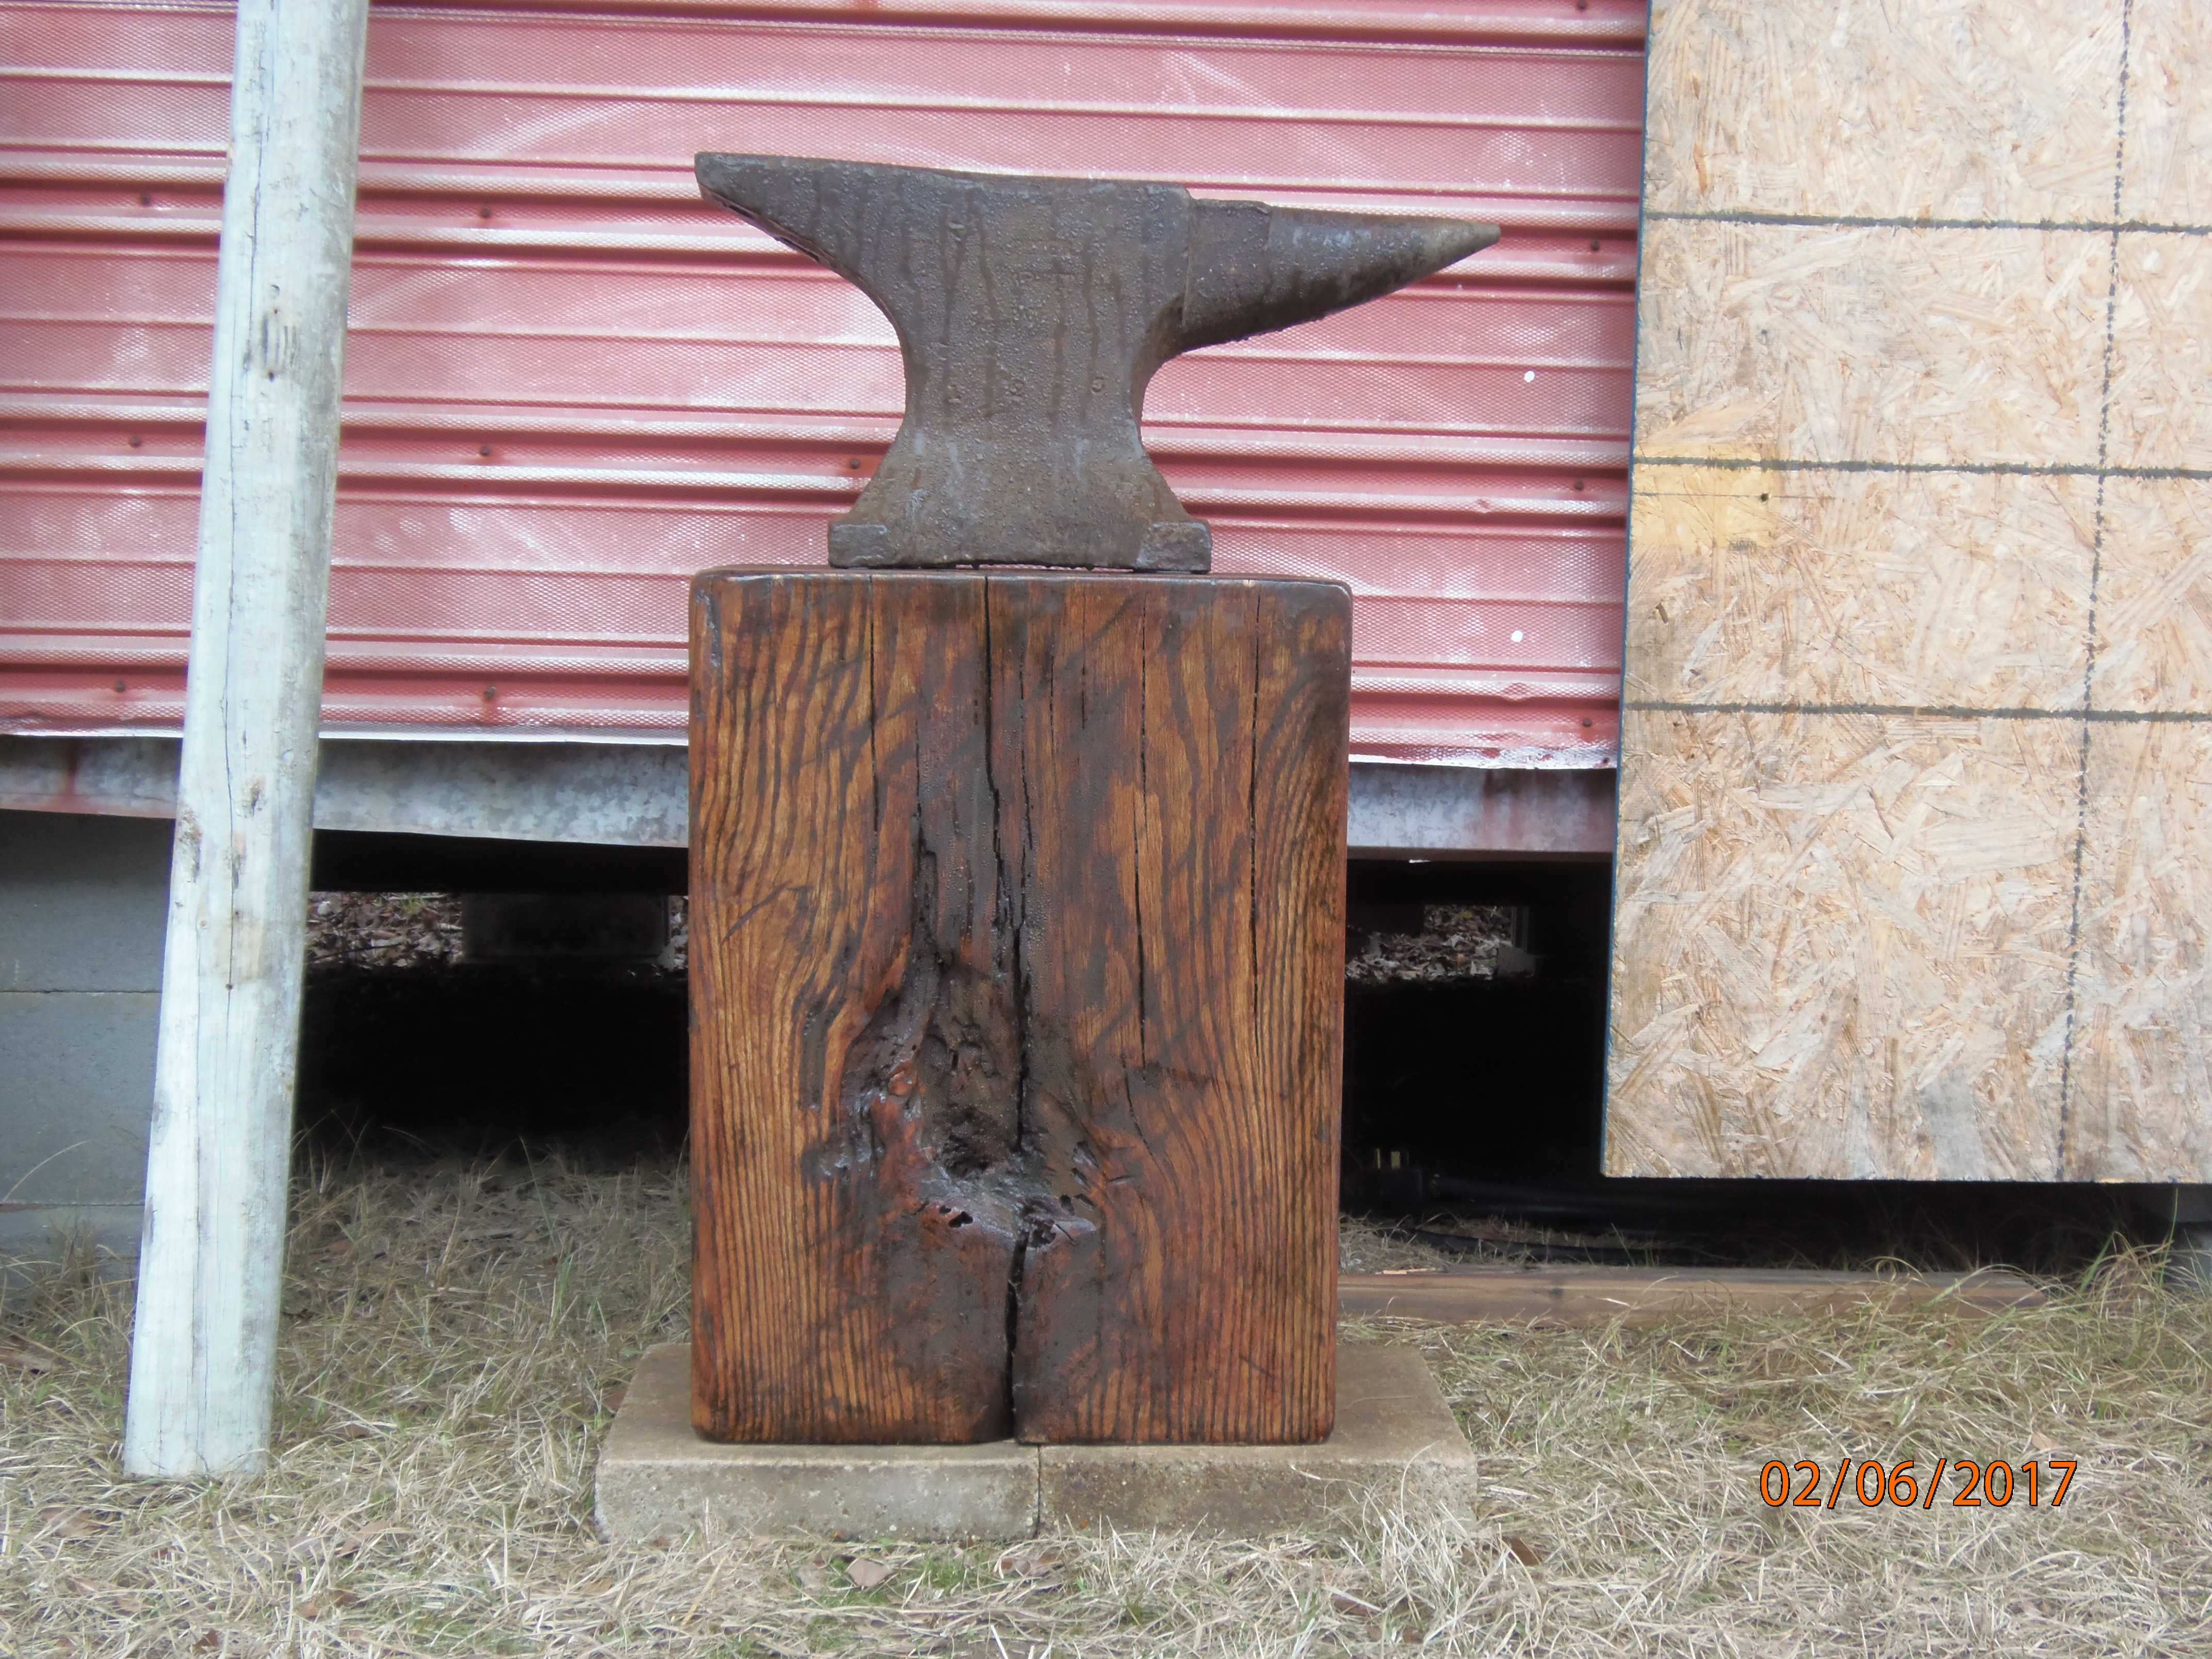
Well, it is very humid this mornin but here are some pictures here at my place. The other pictures were taken by the friend who found it and brought it to me. He also gave me the block of oak, well we actually did a little trading on the stand. He saturated the block of oak with polyurethane. The stump is taller (27in) than most folks would have it, but my lower back won't let me do much bending over
 .
.
-
I wish there was a way to acknowledge that I have read a post without typing a response. But, since they ain't no such option I say I sure do preciate the responses to my posts.
Mule
-
Help please.
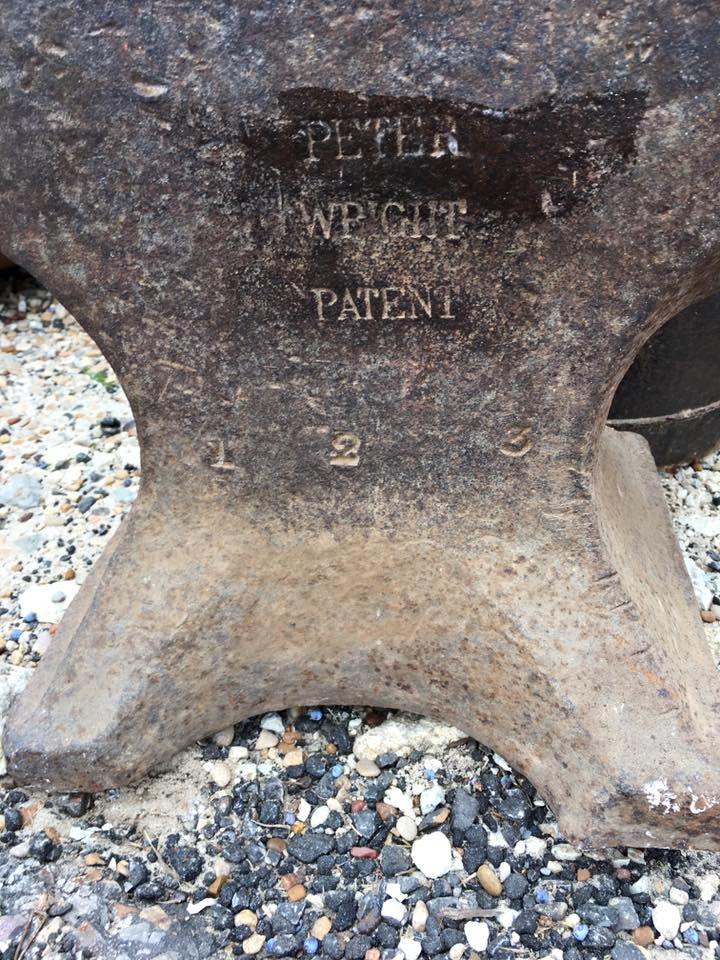
I have figgered out that "PW" means Peter Wright. Maybe HB means Hay-Budden.
I can't figger out what IIRC means.
Thanks, Mule
-
I found this on the internet.
" Peter wright anvils were made from about 1830 till at least around WWII,
these Anvils, at least the older ones were made with steel faces forge
welded on wrought iron bodies, never cast iron,[about the only quality Anvil
that has a cast iron body is the Fisher].Wright actually marked most of
their anvils "Solid Wrought" so that you wouldn't think they were made out
of Cast iron I guess. Peter Wrights are very popular anvils today and sell
for a premium, must have been popular when made too judging from how many
old ones I see, with out the doubt the most common English anvil.I used to
work on a Peter wright and personally I thought it was very noisy and I
think their faces are kind of soft, many that you see have a sway back to
them.I much prefer my old Fisher which sounds like a bag of wet cement and
has a hard face.Also the faces on the older PW's are made out of several
pieces instead of just one plate like most anvils and I have seen them with
one piece of the table plate busted off.Toward the end of their
production,[1930's] they apparently made the anvils out of solid steel,
these were not marked "Solid Wrought" apparently.
Dating PW's involves a little guess work, earliest pre 1850 ones have a
thick blocky look about them, between 1852-60 they are marked with the word
"Patent",this was when they started the very distinctive "Lip" that runs
across the top of the feet. I think PW was the only anvil like this and you
can spot one from 20 feet away when you know to look for it. Between
1860-1885 [and later] they were marked solid wrought, between 1885-1910 they
finally got a one piece table plate, after 1910 they are marked
England.Probably most that you come across were made between 1880 and 1910
or so.....Most of this and more info can be found in the book Anvils in
America." -
I preciate the response. Any responses will help me.


-
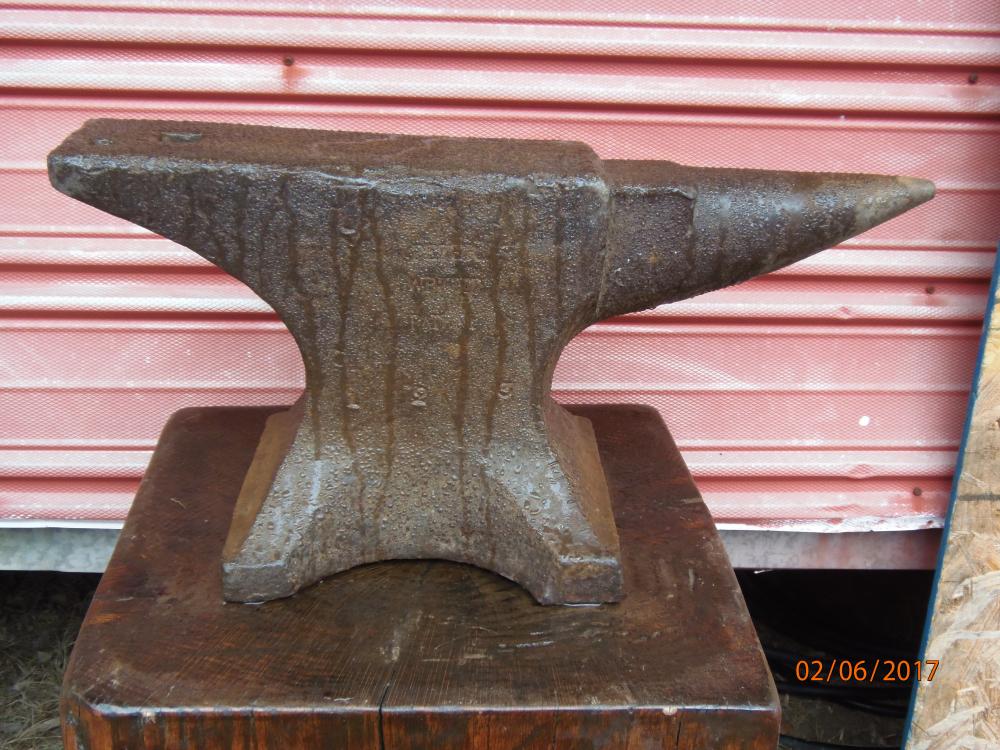
Looking at pictures of Peter Wright Anvils on the internet I see them with "solid wrought" stamped around the middle number. I also see some with "England" stamped above the numbers. I see them with one or both of these markings. Just wondering why mine is as it is.
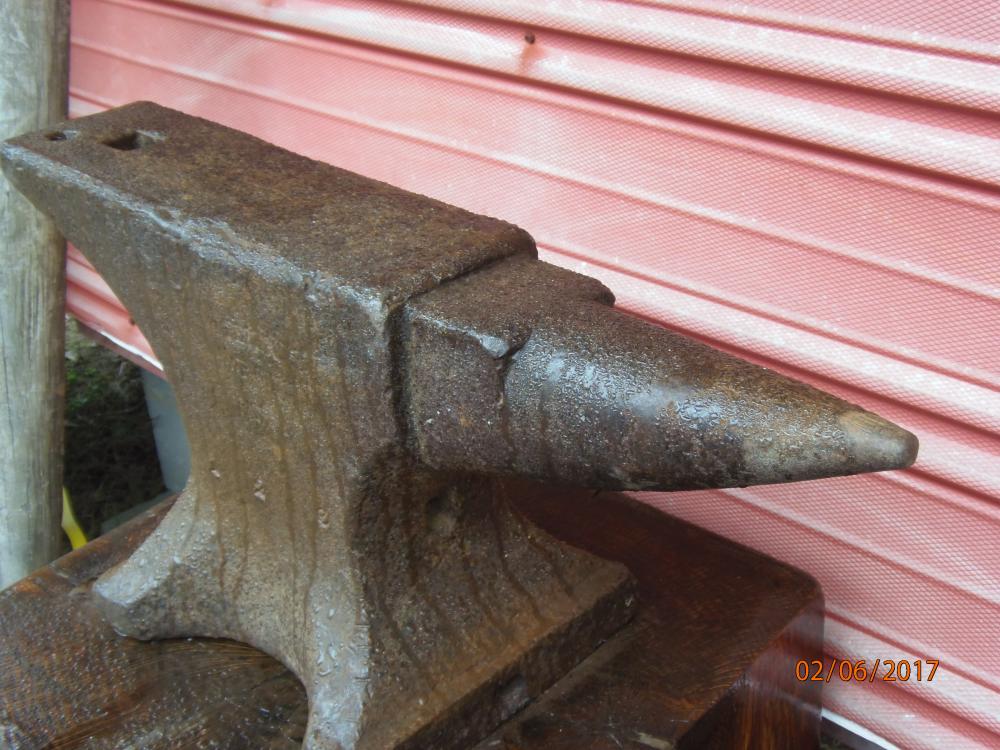
I know (I think) that it weighs 171 lbs.
The age is not important. I am just curious.
Mule
-
I bought a Peter Wright Anvil. I am curious about what the absence of certain markings mean. I have a picture that I will try to post. When was the mfg era? It rings good and rebounds good. Thanks for any help. Mule

-
I'll be glad to.
")
Mule
There are no pictures but I think this is the complete text. Pictures of the various tools can probably be found with a google search, or a similar search.
=========================
An Introduction to blacksmiths tools
Started by John B, Oct 17 2010 05:54 AMPage 1 of 2
1
2Next
Reply to this topic
21 replies to this topic
#1 [An Introduction to blacksmiths tools: post #1] John BSenior Member
Members
2,509 postsLocationDawlish, Devon, UK
Posted 17 October 2010 - 05:54 AM
Many newcomers to blacksmithing have little knowledge of the blacksmiths basic tools, what they are called, and when they are used.This list, originally courtesy of Glendale Forge http://www.glendaleforge.co.uk may help. Thanks also to Frank Turley, and others for contributing the American Terminology and descriptions to allow cross referencing
I have added some other terms also in common use that were originally missed off the list.
The pictures illustrated are mostly of the tools I had in my workshop, some are home made, some bought and others inherited, but all should help to give a visual identification for you to hopefully understand and relate to what may be being discussed.
Blacksmiths' Tools Explained
The Blacksmith's Tools have changed little if at all in design over the centuries and an attempt is made here to explain briefly some of those in more common use today.
I hope you find this useful when looking for, talking about, or using new tools
Anvil: Something solid to forge metal on. A London pattern anvil with a single bick (or horn or beak) is usually all that is required and should be used on a stand so that the top is level with the clenched fist. Ideal weight of anvil 3 cwt. Other substitutes and types can also be found and utilised.Ball Tools: Top and bottom tools used for forming ROUND or SQUAT BALLS or knobs on shanks or otherwise as required
Squat Ball Swages another application.JPG Squat Ball Swages and smaller sample.JPG Ball Tool swages.JPG
Bending Forks: See also Horns and Scrolling Wrenches can be used in Hardie holes, vises, or as wrenches Is in effect a pair of horns on a handle, so that in conjunction with another such wrench or anvil horns one can adjust the shape of scrolls or make light bends. They can also be utilised for making specific bends/items Hickey is an old US term for Scroll Wrench From Frank Turley.
Bending fork selection aka Scroll wrech.jpg Bending forks for jig for curtain rings.jpg
Bolster or Punch Plate; A plate used to support material when it is being punched or drifted, (or it could be a swage block) with different size holes, round and square, and slots in to accommodate your punches and drifts.
Bolster Plates.JPG
Bosh, Slack Tub, or Slack Water: A water tank attached to the front of the hearth for quenching hot metal. (Slack tub or slack water; From Frank Turley)
Bow pliers; also called Collaring tongs are used solely for the opening, closing and fitting of collars to a pair or cluster of bars to act as a permanent fastening
Breeze: Forge fuel, can be coke or coal, usually quite small pieces.
Bow Pliiers orCollaring Tongs.JPG
Brush (heavy wire): It is absolutely essential to remove scale and slag from a hot bar prior to commencing forging to prevent it being splashed into eyes or over bare arms. It is best to use a brush made with coarse long wire, fitted to a handle perhaps 14" long.
Wire Brushes.JPG
Butcher: A cutting tool, particularly for quickly roughing a shoulder. The one illustrated nicks all around the edges of a square bar, giving a guide ready to use the SIDE SET for setting down a tenon shoulder on the Heel bar, then a SET HAMMER is used to square up the tenon shoulders
Butcher.JPG Butcher Cutting edge.JPG
Centre punch; For the accurate marking prior to drilling or forging.
Centre punches.JPG Centre punch point types.JPG
Curved Butchers; can be used to make cut out sections and holes in plates, often used for making decorative back plates and hinges Butchers can be handled, rodded, or hand held.
Curved Butchers.JPG Curved Butchers working end.JPG
CheeseFuller; A fuller made with a face resembling a wedge of cheese, enabling one to gently neck in, or reduce the thickness of a bar.
Cheese Fullers.JPG Cheese Fullers profiles.JPG
Cold chisel: For marking out and cutting steel cold, if used on hot steel they will need re heat treating. The radius on the cutting edge enables location and the ability to cut curves.
Cold Chisel.JPG Cold Chisel from side.JPG
Cold Set / Cold cut: A cutting tool for nicking bars cold prior to their being broken or cut. The cutting edge is radiused, and the body is wider/thicker than the HOT SET See comparison picture (In US called Cold cut if hafted. From Frank Turley)
Cold set blade.JPG Cold set cutting edge.JPG Cold set and hot set comparison.JPG
Collaring Tongs; or Bow pliers, are used solely for the opening, closing and fitting of collars to a pair or cluster of bars to act as a permanent fastening.
Bow Pliiers orCollaring Tongs.JPG
Cone or Mandrel; Used to set and correct rings after they have been formed, and they come in various sizes. Some fit in the hardie hole, others in a vise, or floor standing.
Cone or Mandrel to fit anvils.JPG
Creasng Iron or Creaser (From Frank Turley): A specific type of Fuller, Used for putting in shaped grooves in horseshoes where the nails fit.
Domer; US term (see Rivet snap) From Frank Turley
Drifts; Are used to open up punched holes, or to form a taper, or a finished size
Barrel drift; Used to widen punched holes to a finished size, they can be knocked through due to the
taper on both endsBarrel Drift.JPG
Taper or Carrot drift; Used to widen punched holes, leaving a taper in the hole useful for handled tools.
Taper drift.JPG
Flatter; as its name suggests, is employed in making the surface texture of the iron work piece flat or free from blemishes left by the hand hammer. Can be hand held, Handled, or Rod/Wire handled, the wire handle allows for better seating onto the workpiece, supporting the flatter loosely and not transmitting shockwaves as a rigid handle can do.
Flatter types.JPG
Fullers, Fullering Irons or Creasing Irons or Creasers; having radiused blades, are used for necking in or swiftly drawing down a bar. Can also be individual, Having a profiled finish to put in shaped grooves ie as in horseshoes, centre lines on blades to lighten and strengthen them, or edging features.
If half round, fullers are asked for by their diameter in inches, Fullers are not always half round, they can take various shapes, For example a British Farrier may use a Fuller, or Fullering iron to put the nail grooves in a horseshoe, In the US, the tool is often called a Creaser or Creasing Iron for putting in the "Nail Crease" in the shoe. Sometimes we put it in lengthwise or crosswise sharp bottomed fuller marks for design elements, borders etc. From Frank Turley
Fuller profiles.JPG Top and Bottom Fullers.JPG
Hack; (US term) see Side Set From Frank Turley
Halfpenny Snub End Tool: For rounding up a Halfpenny Snub end, unfortunately only useful for a specific size.
Halfpenny Snub End Tool.JPG
Hammer: For general work a ball pein hammer of 11/2-2 lbs is advisable. An identical spare should always be kept handy in case of emergency.
Hand Square: A Blacksmith's square for use with hot metals.
Hardie: Fits in the square or 'hardie' hole in the anvil and is used for cutting hot iron at the anvil.
Hardie.JPG Hardie cutting edge.JPG
Hearth: Sometimes referred to as Forge; fired on coke beans, coal or other fuels. Forced draught from a fan or blower, produces intense forging and welding temperatures quickly. No real substitute for this original equipment.
Hickey (US): is an old term for Scroll Wrench From Frank Turley.
Horns: Either fitting in the vice or in the hardie hole, allow the bending or adjusting of, in particular, scrolls and similarly shaped bars
Horns.JPG
Hot Set or Hot Cut; A finer edged tool than the cold set, and used for cutting off hot metal, again hand held, handled or rodded
Hot Set Hot Cut Blade Profile.JPG
Hump tools; (US contributed re tazmig33 iForge site) are radius blocks that support the workpiece (hammer or tool) when drifting. In some cases the front of your tool is at a different height than the striking side so there are many different height hump tools, used like a bolster or punch plate. see Brian Brazeal's demo on hammer making
Leg Vise: A Blacksmith's Vise designed to withstand general abuse, heavy bending and sledge-hammering. The shock is taken on its leg set into the floor. This is not a precision instrument and should not be likened to an Engineer's Vise.
Mandrel or Cone; Used to set and correct rings after they have been formed, and they come in various sizes. Some fit in the hardie hole, others in a vise, or floor standing.
Cone or Mandrel to fit anvils.JPG
Monkey Tool: Used for shouldering up a swaged tenon, the elongated sight hole being simply to ensure that the tenon does not foul inside the Monkey.
Monkey Tools for Round tenons.JPG
Punches; Round punch Used to make round holes in hot metal, Square punch Used to make square holes in hot metal,
These can be hand held, handled, or rodded.(wire handled)Hole punches or Round Punches.JPG Square Hand held Punches.JPG
Rivet set and snap; Can be one combined or two separate tools used to Set up the rivet, (close all the pieces together prior to riveting) and the Snap used to finish the dome head of the rivet, it can also be used to support a domed head when riveting to secure the pieces together. (Domer is a US term From Frank Turley)
Rivet sets and snaps.JPG
Rope Tools: Mould or swage iron in such a fashion that when twisted the bar will resemble a length of rope. Limited range of uses
Rope Twist Swage details.JPG
Set Hammer: Not a hammer as such, but is a tool used struck by a sledge to produce a very definite square shoulder on a stepped forging such as a tenon on a heel. To drive the set hammer well into the corner, the best results are gained by directing the blow diagonally, hitting the corner of the head.
Set Hammer.JPG Set Hammer side view.JPG
Scrolling Tongs or Round nose pliers; are used chiefly in making Scrolls, holding the bar on to the Scroll Tool and subsequently adjusting the tip of the scroll.
Scrolling Tongs or Round Nose pliers.JPG
Scroll Tool or Scroll Jig: A former or shaper on which to reproduce a number of identical scroll motifs. Note the ends are elevated to allow starting the scroll before pulling it around the rest of the form using scroll wrenches or scrolling tongs to control the curving. You will also see one that is less tighter than the others, this is for snub end scrolls that will not fit into the tighter rolled scrolling tools.
Scroll Tool Scroll Jigs.JPG
Scroll Wrench or Bending Forks: Is in effect a pair of horns on a handle, so that in conjunction with another such wrench or anvil horns one can adjust the shape of scrolls or make light bends. Hickey is an old US term for Scroll Wrench From Frank Turley.
Scrolling Wrenches aka bending forks.JPG
Side Set, Hack (US): Used for squaring up a shoulder prior to using the set hammer. (Hack From Frank Turley)
Side Sets.JPG
Slack Tub see also Bosh; A water tank attached to the front of the hearth for quenching hot metal. (Slack tub or slack water; From Frank Turley)
Slide Valve; Used to control the air flow into the forge, and is fitted between the blower/fan and the tuyere or tue iron. The one illustrated is fitted to the ash dump for a bottom blast forge, and the tue has not yet been fitted
Slide Valve Open.JPG Slide Valve Closed.JPG
Spring Tool or Veining Tool: A tool designed as a multi-purpose press invaluable for ribbing, veining and raising Acanthus leaves, making obsolete a whole range of Stakes. Not only making leaves more quickly and accurately, but also is used for decorating sheet and making rosettes etc. Can also be a top and bottom tool linked by a loop of steel 'spring' to keep tools aligned when in use.
Spring Tool or Veining Tool.JPG
Swage, (swedge sometimes, rhyming with sledge). From Frank Turley: Top and bottom tools for forging a round section. You can also have square swages. Handled, rodded or hand held top tools, the lower part fits in the hardie hole and can be used seperately, for instance when forging half round sections for ball collars, or backing for when forge welding bundles together to help keep the strands in close proximity making it easier to fuse them together. Specified by diameter produced in inches
Swages.JPG
Swages can also take other shapes than a near-half round. Again, in farriery, we sometimes swage light horseshoe stock by driving it into a bottom swage that has a sort of double-vee indent side by side. This leaves a raised carrot shape almost at the centre. When the stock is drawn through and turned over, you get the reverse image, a nail groove a little eccentric from centre. I have often used a bottom "shallow swage" (home made) for giving a Suffolk latch handle a nice appearance. (From Frank Turley)
Swage Block: Rectangular block of Iron with a variety of shapes around its periphery for swaging on. Also has various shapes of holes through its face which act as bolsters. Must be used on a stand.
Tongs; are used for holding hot pieces of metal and are made in a variety of sizes and strengths strictly according to the size and shape of bar the Blacksmith intends to hold. It is of paramount importance that the correct size of tong is used in each particular application or the bar may well jump out of the tong and an accident occur. The use of one tong for a variety of jobs is therefore inviting trouble.
Tuyere or Tue Iron; In the hearth where the air input meets the fuel it can be plain hole(s) in a plate, or in a water cooled jacket.
Twisting Wrench: Simply a device for imparting torque to a bar to give it the twisted effect, second only to the scroll in its importance as a decorative design.
Twisting Aids.JPG
Veining Tool (See Spring Tool)
Spring Tool or Veining Tool.JPG
As you can see, many of these traditional tools need a striker to assist the 'smith to be used correctly, hence the development of the new alternatives which do the same tasks as the traditional tools, but can be operated by one person, many only needing a simple adaptation, others being newer tools like the Blacksmiths helper or Smithin' Magician and guillotine tools etc.That's progress and innovation, and that is what the craft is all about.
=======================
That is what I have,
Mule
-
On 10/17/2010 at 6:54 AM, John B said:
Thanks JHCC for the response. I made a copy of the text a good while back but did not get copies of the pictures. I can get pictures of the various tools from the internet. Again, Thanks.
-
On 10/17/2010 at 6:54 AM, John B said:
I can't see/read post number 1 by JohnB.
Can someone tell me why?
Thanks fer any help.
-
Well, y'all, I bought one of the 5. I bought the Champion 400. It cost more, but, it was smoother and quieter.
I thank everyone for the replies.
Mule
-
see below. I use this. Regularly too. I would consider buying another or just the blower and mount it on a home built forge (for a deeper fire pot) It is super sweet.
THis is hands down the best I have used. It is way far better than a 400 unless.......................you have replaced every bearing race inside the 400. The 400 is simply too noisy with pitted races. I have a nice 400 that is quiet. The only one I have ever encountered. They are not the best, though the advertising tells us otherwise.
The Champion #1 is an awfully nice blower. I have use one. But never had opportunity to dismantle one to see it's innards. The one I used was smooth as butter.
The ones with a bunch of ball bearings just don't work well unless the bearings are super clean i.e. no pits or grooves. I have used a Buffalo 201 and it was quite noisy too.
The $120.00 Champion blower that I can buy looks like the one in your picture, except that it does not have the tabs to be able to connect to the fire pan, I stands alone. It is very noisy and loose. It was my first choice.


NC Tool Cavalry 112lb
in Anvil Reviews by brand
Posted
Thanks for taking the time to write this review.