Saiga308
Members
-
Joined
-
Last visited
Everything posted by Saiga308
-
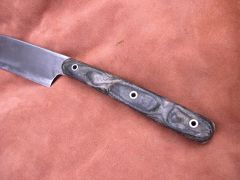
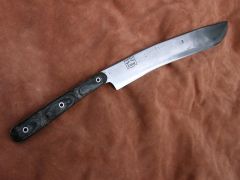
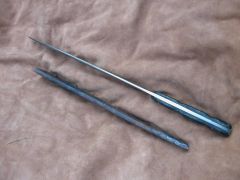
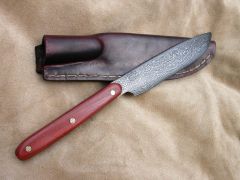 The handle is Pink Ivory and gray spacers, with mosaic pins.
 -
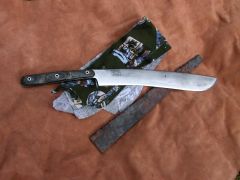
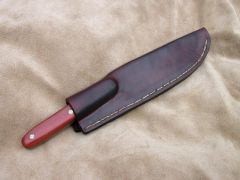 High riding hand stitched, wet molded leather sheath.
 -
Thank! I made the scales by: Laying down a sheet of wax paper on a flat board. Putting a layer of fresh mixed epoxy on the paper the size of my cloth strips. Pressing the first strip down, and pushing it flat. Added another layer of epoxy. Added another strip...and so on. When it was thick enough I then folded the wax paper up like a flat burrito. Put another piece of flat wood on top and clamp them together. Wait for it to dry, and do not touch....it gets hot! Unwrap and cut off the excess edges with a scrollsaw. Plane it flat. Cut out the scale. I should have taken some pics, next time I will!:)
-
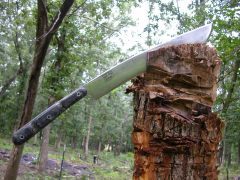
Hey folks! Here is my first attempt at a big forged blade. Steel: 5160 Blade: 12-1/2" convex grind recurve Handel: 6" long Scales: Home made micarta out of epoxy and cotton flannel strips Pin: 1/4" stainless steel tubing This was a Fathers day present to my Dad, and I am really happy how it turned out. The blade is much more lively in my hand than I thought it would, and it pops hairs all the way! #15 - Blacksmith Photo Gallery #15 - Blacksmith Photo Gallery #15 - Blacksmith Photo Gallery #15 - Blacksmith Photo Gallery
-
-
-
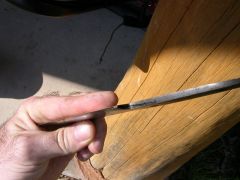
 the final taper compared to the original scrap
 -
-
-
Welcome! I have seen your stuff on Hoods, very nice! The folks here are very helpful and some of the stuff they make is amazing.....you found a good spot. JLane
-
Hey folks, I have been itching to hammer out some khukri style blades, but I am worried about the heat treatment. I understand that the kamis who make them use water out of a kettle and pour it onto the hot blade...I guess they do this edge up? I would like to be able to heat the whole thing to critical temp and then harden the edge, and leave the back softer, but because of the curve of the spine I cannot do this, my tang would be as hard as the edge.:confused: So how do you folks deal with curvy blades?
-
Hey folks, I just gave my first try at etching some 5160, ball bearing, nickel Damascus. I mixed 2qts of distilled vinegar with 15 oz of lemon juice and a 5lb bag of table salt. I mixed it together and got it to a slow boil, and after about 20 minuets I wiped the blade down with acetone and submerged it into the simmering concoction. After about 8 minuets I took it out and washed it off with water and detergent, and then covered it in oil. I think it turned out pretty good:D, I am saving the mixture to use at a later date.
-
Wow, that's a beaut! I have made flutes out of Zebra Wood before, great stuff and very tough.
-
The folks who made the Damascus got back in touch with me, very nice folks. A gentleman named Brad said to go ahead and try another blade off of the billet and if there was still a problem to send it back. He also named a knifemaker nearby who could give me some tips if I had anymore questions. I think my next one I will use a file to remove most of the material instead of forging, if that splits too, I will be more comfortable sending the it back.
-
-
-
Here are some pics. I will write them and let them know about the split, but since there is a chance it could be all my fault I am not expecting a whole lot. I have enough steel to finish the blades that were ordered, but I think I will go with stock reduction this time.:mad:
-
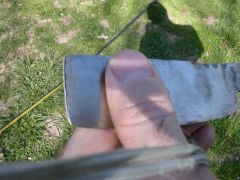
Hey Folks, I got a little problem. A freind of mine ordered some Damascus steel from a supplier and sent it to me to make a few knives for him. I took a hack saw and cut out the first blank and forged the blade, then I cleaned it up with file work and sandpaper. As I was cleaning it up I notice a small gap in the steel the complete width of the blade, and also that you could see a visible black line connected to the gap that went almost the entire lenght of the knife. The next step was my heat treat and after I pulled the blade out of the oil I noticed that right behind the choil the black line had seperated! I now had a blade with a gap a couple of millimeters wide!:mad: This is the first time I have messed with Damascus, so I am not sure if this was something I did, or that the steel had one layer in it that did not fuse well together during its forging. Any ideas? Will this happen on any blade that I make from this blank?
-
Thanks for the kind words folks! Yes, the front is a convex grind like the rest of the blade. My next one is going to have Ebony scales and I am trying to find some stainless 1/4" tubing for the pins!
-
Thank you so much for the info! 91# seems right as I don't bust my gut when I lift it. If you could find out the date on it that would be fantastic!
-
Here are some pics ....
-
I just wanted to say thanks for all the info and help I got earlier this year from you folks, I have been busy for awhile now hammering blades! Here is some of them: Again, thanks for all the info and help! In my (very little) spare time now, I can create good tools and hammer out my thoughts.
-
Hey folks I have a anvil that I am trying to find out the age of. The top is 3 1/2" X 13", and on the right side there is a diamond with "trenton" in the middle. Above the diamond is some letters but I can only make out, S........O.." Below that is stamped "USA", and below that is "91". On the bottom of the base under the horn say "T" on the left and "A804" on the right side. If you guys have any ideas of how old this anvil is and the weight I sure would appreciate the info!:D
-
Guys thanks so much for the info! I am giving some real thought to making my own mark now. The idea of making a hot chisel stamp sounds like fun......time consuming, but fun! Again, thanks so much......and when I am all set I will post some pics.;)
-
Hello folks, I got a question about putting your mark on a blade. What different methods are there? I tried to use stamping on an annealed blade but it did not go very deep and because the grind was convex, only part of it showed up at all. I have seen some makers use what looks like bluing to write their name, like the Boss heat treating mark.....how do they do this? So what do you folks use, or what would you recommend? Thanks in advance for the help!:D