
Everything Mac
-
Posts
1,299 -
Joined
-
Last visited
Content Type
Profiles
Forums
Articles
Gallery
Downloads
Events
Posts posted by Everything Mac
-
-
Cheers bud.
") I worried it would be too subtle.
I worried it would be too subtle. 
Andy
-
On 3/5/2016 at 6:23 PM, the iron dwarf said:
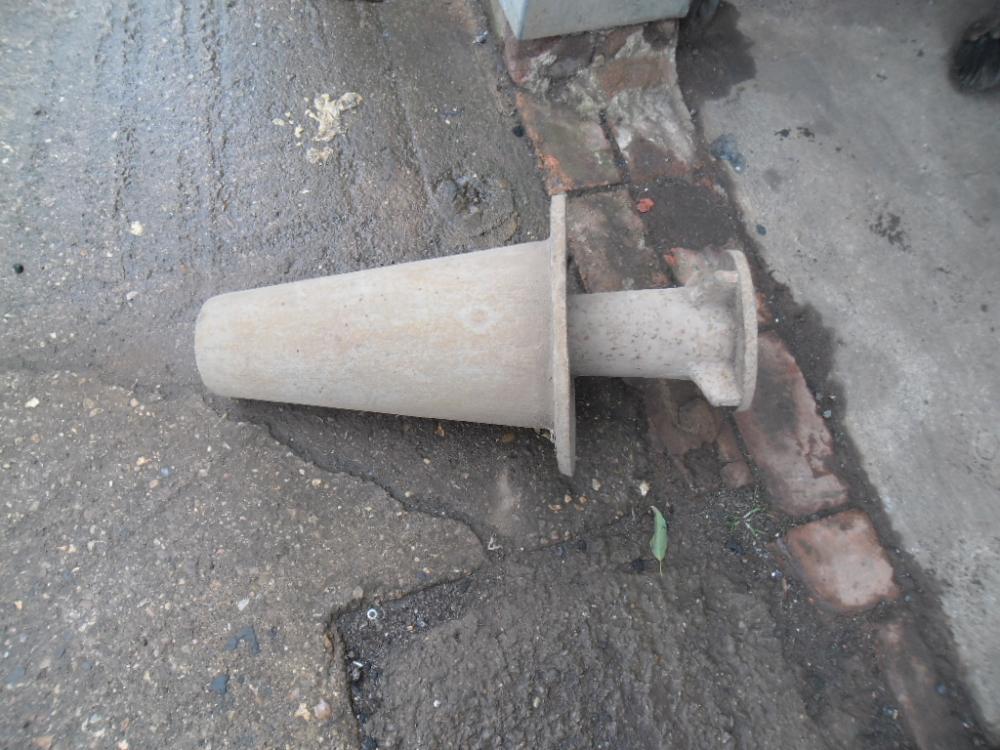
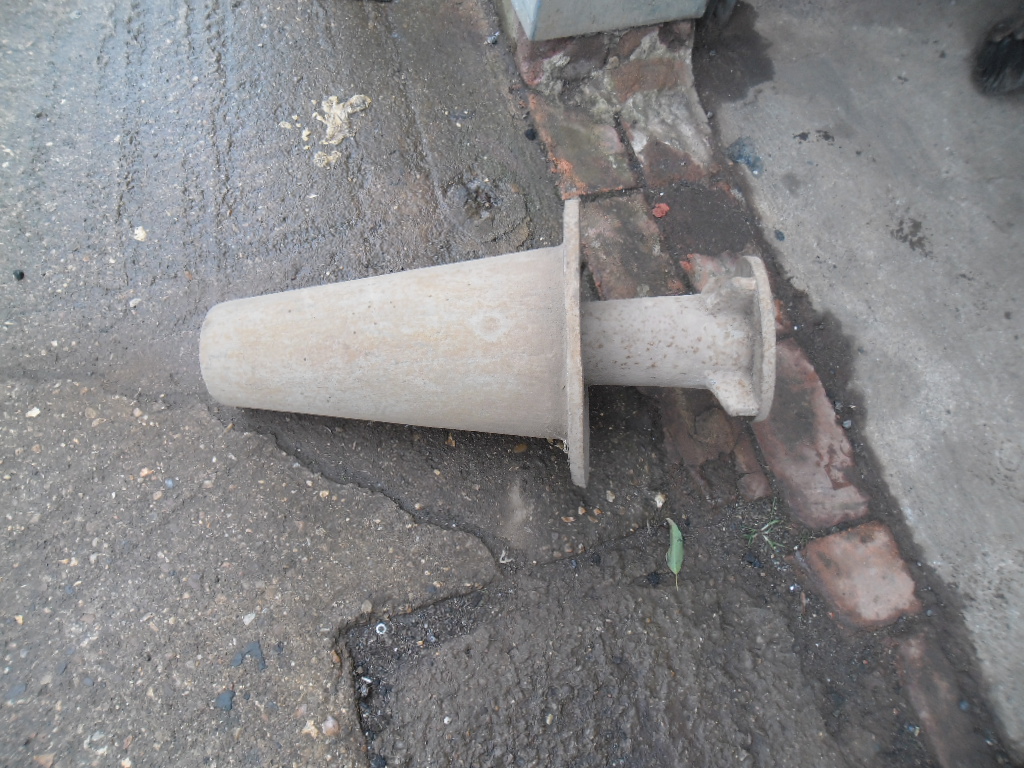
something I found today, made by allday and onions, a very large and unused tue / tuyre
has tag from maker and is about 1 1/8" 28mm bore
I realise this is now a few months old but where the xxxx did you find that!? It looks un-used!
PM me bud. I am potentially interested in buying this if you still have it.
Andy
-
Funny how things work some times. I came across this blog today. - http://3kgsousterre.blogspot.co.uk/search/label/couteaux finis
French Vietnamese I'm told. Their main anvil looks to be a cross between French and German designs. Notice the hardy and pritchpl holes are set to one side of the face. As well as the shelf and upsetting block.
Andy
-
Yup as John points out the face isn't swayed but made that way deliberately. As I said in my initial post it seems like a cross between German and French designs. One could easily be forgiven thinking it was a French anvil if it wasn't clearly marked S&H and had the upsetting block.
Andy
-
Welcome to the forum.
A direct translation of Eselsrücken means something rather rude according to google translate but I wouldn't be surprised if that were wrong.
From the side it looks like a regular South German anvil but it quite clearly isn't. It looks to me like a cross between a South German and a French or Belgian anvil. (having the hardy hole off to one side) I've never seen one like it, though I don't know if S&H made many like it. It's certainly unusual that's for sure. It could easily have been a one off.
Andy
-
Looking good Shogun. I'd have thought it would be ok but be careful with that pipe, looks like it's galvanised.
All the best
Andy
-
47 minutes ago, Black Frog said:
...my Fisher picture. :-)
Hope you don't mind chap. It's a perfect example.

And thank you all gentlemen.
All the best
Andy
-
So I figured I'd write a decent buyers guide for buying anvils.
Repost with photos
First of all I want to make it very clear that if you’re just starting out in blacksmithing you DO NOT NEED a “London Pattern anvil” to start hitting hot metal on.
London pattern anvils are usually very expensive (your location in the world makes a big difference) not to mention relatively rare and hard to find.
All too often I see posts on forums or Facebook where a new smith has spent all of their spare cash because they “HAD” to have an anvil.
A large sledge hammer head, a section of rail track mounted vertically (more mass under the hammer) or any large chunk of scrap steel will make a perfectly serviceable anvil. Some are even better than a “real” anvil for one reason or another.
Also I’d like to make it very clear that this guide is aimed at newcomers to the craft and not seasoned smiths.
Also I’d like to note I’ve copied these images from the internet. All rights go to their respective owners. If you have an anvil that looks similar to the ones I’ve shown then please post them here so that we can use images from forum members. If anyone has issue with me using their image please let me know so I can take it down.
So this is the anatomy of an anvil:

Firstly lets look at a “Perfect” Anvil.

This is a brand new Refflinghaus anvil pictured on blksmth.com - The face is perfectly flat. The edges are straight and crisp. There’s nothing broken or missing. This is arguably the daddy of all anvils. A wonderful tool. If I could afford it I’d buy one. But the reality is I can’t.
Chances are that the anvil you are going to look at is very unlikely to look like the above. If it does you are either a) incredibly lucky or
") spending a great deal of money. Which is absolutely fine either way.
spending a great deal of money. Which is absolutely fine either way.
So you’ve saved up a wad of cash and have found an anvil within reasonable collecting distance. What do you need to know and what should you be looking for?
When going to view an anvil you need to bring a testing kit with you.
You will need:
A hammer
A 1” ball bearing
A ruler. (preferably metal)
A scraper if the anvil is covered in paint. More on all that later.
RULE NUMBER ONE: ALWAYS TAKE CASH WITH YOU AND BRING MORE THAN THE COST OF THE ANVIL!!!!
Step 1: Figure out what it’s made of.
The first thing for me would be to work out what it is made from. Generally speaking it really doesn’t matter at all. The only real thing you need to discern is whether or not it is made of cast iron. (the bad kind)
Just for your knowledge though: There are several materials anvils can be made from - in no particular order.
Wrought iron body with welded steel face.
The oldest construction method of the bunch. These anvils have a forged wrought iron body with a steel face welded to the top. There are numerous British and American makers that used this method and it makes a superb anvil. The fact that so many survive today is a testament to the quality of their construction methods. - Older anvils had the face plate made up of several different pieces of steel, as steel was harder to make in large sections. Notable makers include Mousehole Forge, Peter Wright, Hill, Isaac Nash, Henry Wright, Wilkinsons and many others.
All forged anvils have identifying features that give away their construction. The most obvious is the presence of handling holes at the waste of the anvil and often a handling hole under the base of the anvil. This is where large tongs gripped the body while it was forged.
Another indication of forged construction is having a stamped makers mark, depressed into the steel rather than raised out of it.
Forged wrought iron anvils have two very common “faults” - “delamination” and “sway”. More on these later.

I’ve inserted an image of a forged anvil. This is a Peter Wright. Notice the handling holes at the waste and under the base. Also note the extra handling hole in the feet, this is characteristic of Peter and Henry Wright anvils. You can also make out the stamp in the picture.
Another thing to note here is that I often see beginners try to identify anvils for one another on Facebook with some very strong opinions on what the anvil “DEFINITELY” is. If you are trying to identify an anvil with no clear markings I would suggest asking the forum or PM me directly. There are too many armchair experts out there who quite frankly have absolutely no clue what they are talking about.
Case and point is that there were literally HUNDREDS of forges making anvils in Britain. Below is a forged English anvil. NOT ALL ENGLISH ANVILS ARE THE “MOUSEHOLE” BRAND. - A great many makers made anvils with the same features as Mousehole Forge. The above anvil shares all the features of a Mousehole but I don’t see a makers name. As such it is likely not made by Mousehole. http://www.blacksmithsonline.com/uploads/emoticons/wink.png
 [/url]
Cast Steel
- with technological advances and cheaper steel makers were able to cast entire anvils. Depending on the maker these can be hard to identify but will typically lack handling holes of any kind. - The biggest giveaway to a cast anvil is raised lettering on the body.
Below is an image of a Brooks anvil. Note the parting line running centrally up the anvil and the raised lettering on the side.
Cast anvils are generally less prone to sway, but it can happen. The issue many cast steel anvils have is chipped edges. More on this later.

Cast iron with welded steel face: (Henceforth called CISF) -
There are several makers that constructed anvils in this way. Fisher, Badger, Star and Vulcan are the ones I know of though there may be a few more. These have a cast iron body with a steel face welded to it. Don’t ask me how they did it, as far as I know no one knows exactly how they did it. Either way it produces a perfectly good anvil. Though beware, Vulcan anvils are generally considered poorer quality as they had very thin face plates that were very likely to chip in use. Fisher face plates were quite hard I believe and are also prone to chipping. - It is worth noting that this method of construction produced an anvil which doesn’t “ring” and as such are relatively quiet. If the smith has concerns with noise, an anvil made this way would be a good investment.
Below is an image of a Fisher anvil. Notice the raised numbers and makers mark indicating a cast anvil. If you are faced with an obviously cast anvil but do not recognise the makers mark, posting it to a Facebook group via your phone (assuming you have a smartphone) will often lead to a quick identification. HOWEVER google that maker yourself just to clarify it.

Cast ductile iron
- the last of the decent anvil construction materials. Ductile iron is similar to cast iron but much much stronger. IT makes for a relatively soft anvil but is vastly superior to cast iron. I believe only a few modern makers use ductile iron - they are made specifically for farriers. Below is an O’Dwyer farriers anvil. Identification of these should be rather easy.

Cast iron:
- Finally the worst of all the materials. Cast iron is brittle, weak and frankly an awful material to make an anvil from. These will dent and chip in use and should really only be considered if you honestly have no access to a large sledge hammer head or chunk of scrap steel. The money spent on a new cast iron anvil should easily cover the cost of a cheap hardware store sledge hammer which will serve you far better in the long run.
Cast iron anvils come in several shapes and forms. They are very easy to spot once you know what you're looking at. The proportions of the anvil will be wrong. The horn will likely be either very short and stubby or flat. Or both. The overall shape often looks wrong and they will typically be very small in size. Less than 20lbs in most cases. Pictured are all cast iron junk anvils.
Note that some cast iron anvils are marked USA. Which does not mean it is good quality.


Step 2. Start checking the anvil over. Visual inspection.
Now assuming you’ve given the anvil a once over you’ve probably figured out what it is made from and you may have seen a makers mark. But try not to get too excited and hand over the cash. Now is the time to really check the anvil over.
This is where you need to start your visual inspection of the anvil. How does it look? Does it look in good overall condition or is it chipped or swayed? Are there parts broken off?
Ideally the anvil should be in as good condition as possible. But it is still a perfectly serviceable tool even with some significant damage.
Sway:
This is the name given to an anvil face that has become concave through use. This could be a combination of poor quality materials used to make the anvil. (wrought iron is rather soft) Or simply the scars left from years of heavy use.
*It is interesting to note that Peter Wright anvils were made from high quality wrought iron, compared to other companies that used “Best Scrap” which inevitably had bits of steel in there too. As such the “Best Scrap” anvils were often a little tougher than the Peter Wright anvils. As such the early PW anvils would sway relatively easily; PW started making their faces very slightly concave to combat this.
Sway in an anvil is not a problem, indeed some smiths prefer it. Excessive sway however should really be avoided if at all possible. Ideally is there is any sway it should be less than 1/8” over the length of the anvil face. Use your ruler to check for this.
This anvil has some sway, Personally this is the most I could work with but some folks are perfectly happy with more sway. The anvil is in otherwise perfectly good condition and well worth having.

This anvil however has excessive sway. The face has dipped significantly and even the heel has been bent. (I should really point out that I am spoiled for choice for anvils in the UK and there are enough available within driving distance that I can afford to be fussy. - personally I would pass on this anvil and keep looking. BUT if you’ve spent several years looking and this is all you’ve found then it is still a workable tool. Nothing has been broken off and the central part of the face appears to be relatively flat. The face plate also appears to be intact. Buy it if it’s cheap. Pass if not.)

Chipping and edges:
All anvils can chip, cast steel and CISF anvils are particularly prone to it. As such there is a good chance the anvil you go to see will be at least slightly chipped somewhere.
Whether or not this is an issue on the anvil varies dramatically. In short the less chips out of the edges of the anvil the better. BUT a chipped anvil face does not make it a bad anvil at all. Quite the contrary. Chips should be ground smooth and radiused with a flap disc on an angle grinder. This gives the smith some very useful surfaces to work on when forging.
As with sway, a little chipping is not a problem at all. Almost all of the anvils I’ve owned have been at least a little chipped. Excessive chipping however should be avoided.
This anvil below has chipped edges. In my opinion this is not excessive chipping and with some work with an angle grinder and a flap disc this is a perfectly usable anvil. Notice how the chips are limited to the outer edges of the face and do not extend into the face itself.

Excess chipping would be where the chips extend deep into the face of the anvil itself or deep into the body of the anvil; so much so that grinding it back would require removing a significant amount of the anvil. Common sense should prevail here.

Sharp edges:
New smiths seem to be fascinated by the idea that anvils need to be perfectly flat and have perfect 90 degree edges. This is not the case. AT ALL. You really do not need sharp edges for 99% of forging processes. If a sharper edge is required then a hardy tool can be made for this job.
Delaminating/ Delamination:
This is only an issue for anvils where a separate face plate has been welded on. Nine times out of ten the weld was perfect, but you need to remember these were made by humans and some times mistakes did occur. Delamination is where the weld between the body and the face of the anvil has begun to fail. This can occur on just part of the face or across its entirety.

Above is a perfect example of where a face plate has completely delaminated and broken off of the body of the anvil. Of course this does not always happen like this. Some times the delaminated area of the plate remains attached to the face plate but is detached from the anvil body. This is why it is important to check the entire face for ring and rebound. A delaminated plate will sound different; dead if you will, compared to the rest of the face. More on that below.
Again common sense prevails. If 90% of the face plate is missing I would walk away. If a small portion at one corner has broken off and the rest appears to be ok, and the anvil is in otherwise good condition then you could still buy it.
Welding an anvil:
DO NOT EVEN CONSIDER THIS IF YOU ARE NOT A HIGHLY COMPETENT WELDER. If in doubt don’t buy the anvil and walk away.
Anvils can be repaired by competent welders. It IS doable. BUT only if you do it properly. The vast majority of Facebook armchair smiths I’ve seen have offered WRONG advice on this matter.
As a general rule I almost always suggest that people do not weld their anvils as 99% of cases do not really require it. However there are times when an anvil would benefit from a good quality repair. An anvil with a small piece of the plate missing is a good example. The anvil above has a significant amount of the face missing but it seems to be in good condition apart from that. Depending on the sale price it could be a good candidate for repair.
Just do your research. The Robb Gunther method is generally regarded as a good way to repair an anvil.
Step 3. Testing:
Assuming your anvil passes a visual inspection and has no obvious flaws then it is time to test it.
Ring and Rebound:
These are the most well known tests for any prospective anvil buyer. Be aware that paint or rust on the face will dramatically effect the results so you should clean at least a portion of the face if you can. (with current owners permission obviously)
Ring:
Take your hammer and gently strike the face of the anvil. If the anvil is forged wrought iron or cast steel it will ring like a bell. The pitch of the ring can also help indicate what the anvil is made from.
A wrought iron anvil in my experience usually has a high pitched ring like a bell, with almost a musical note to it. This is usually not a prolonged note.
In my experience cast steel anvils have a very high pitched ring that can be very piercing and almost unpleasant to the ears. The ring can also be quite prolonged and drawn out.
Cast iron anvils with a steel face will produce a note when struck but will not sound like a bell. The note shouldn’t reverberate or be prolonged at all.
Cheap cast iron anvils should sound dead under the hammer. I can’t honestly say what they sound like as I have never been in the situation where I’m looking to buy one.
Strike all over the face, horn, heel and body of the anvil. Even the feet. At this point it is worth noting that the horn and the heel of an anvil WILL sound different to the body. Higher pitched usually. This is because there is less metal in these areas so the note is different.
When striking the face it should all sound the same. If you are striking and suddenly the face sounds wildly different in one area it could indicate a crack or delamination. Be sure to visually inspect this area closely and be sure to test it with the rebound test.
Also check to see if your hammer blows have left dents. Dents left by light blows are a good indication that the face is soft. I’ve used an anvil with a soft face and it worked perfectly well, just keep it in mind and use it as a negotiation point if needs be.
NB - ring is only an indication. It is not a rule set in stone. My first anvil barely had any ring to it at all but it was a perfectly good anvil.
Rebound:
To me this is the more important of the two tests. If you’re on the hunt for an anvil the I’d keep that 1” ball bearing in your car on the off chance you come across something.
“Rebound” is the name given to the amount of energy an anvil reflects back at the user. But it can give a good indication of face plate problems.
Take your 1” ball bearing (Larger or smaller it doesn’t really matter.) and your ruler. Now hold the ball at 10” above the anvil face and drop it. It’s best to do this so you can see how high it bounces.
10” is ideal as it’s very easy to do the math for it. A “good” anvil should have more than 70-75% rebound. So the ball should bounce a minimum of 7” high. Many anvils will produce rebound higher than this but anything drastically less should be approached with caution.
This is where cleaning the anvil face makes a big difference. Paint and thick layers of rust WILL drastically reduce rebound, so clean the face if you can.
Like the ring test, you should check rebound all over the face. The heel will have less rebound than the face, just like the ring there is less material there so it behaves differently.
The rebound should be the same across the whole face. An areas where it suddenly rebounds a lot less may indicate a crack or delamination. If this occurs during the testing then have another good look at the anvil. (Common sense) It may be that there is a significant crack you missed initially so proceed accordingly.
As frustrating and disappointing as it it. (Trust me, I know) You are better off in the long run to save your cash and walk away from an anvil that is too damaged to be usable.
Step 4. HAGGLE!!!!
So you’ve looked over the anvil and everything is in order. There’s a couple small flaws, a little sway or maybe a chipped edge. Use that to your advantage. Start to umm and ar about the price. Make a cheeky low ball offer. You never know you might get lucky.
If for arguments sake your seller wants $400, why not offer $250 or less! They might know what they have is valuable but they might not. You might get laughed at but on the other hand they might either accept the offer or come back with a slightly reduced figure. Ultimately you’ve saved yourself some cash.
Remember rule number one? Always bring cash and bring more than you need if you can afford to. Money talks. Your seller might start to budge on price if he sees some nice crisp notes being counted out infant of him.
A trick I’ve heard of people use is to count out the sum they want to pay in front of the seller. Some guys crack at this.
The other trick to try is to ask if they have any other blacksmithing stuff. You might stumble on a gold mine of equipment. If that is the case and you can afford it (and there are things you want) then you should try and get some other stuff as part of the deal.
So I hope this has helped some of you out there. If you have any questions don’t hesitate to ask. PM me directly if needs be.
All the best
Andy
-
Hi Todd,
I'm afraid I've never heard of or seen that type of blower but it certainly looks interesting. If you could post up some more pics of it some folks might be able to help you out.
Looks like you got a great haul though.
All the best
Andy
-
Can you imagine the the face of the smith when he saw it had been broken? I can imagine he was not a happy camper. At least he tried to repair it. Those welds really are awful though.
What's the plan of attack ID?
Andy
-
On 5/21/2016 at 4:21 AM, Broadus said:
When I build a much bigger indoor forge I want to try to build it with a remotely placed bosh on top of the forge. There's a good photo of this type of set up in Richard Postmans book on mousehole forge, I would post it but I believe the photo is copyrighted... the bosh works the same way a "pop pop boat" or coffee pot works.
So how is this build progressing then?
Andy
-
On 4/23/2016 at 10:47 AM, blackleafforge said:
I am in the process of fixing a chimney to my forge hood and I have some sealant rated up to 350 F, 177 C. It occurred to me I have no idea how hot exactly it will get. I remember a student leaning forwards when I was at college and getting a big burn on his forehead and the hood often gets too hot to touch, but how hot is that? I know there are a lot of factors, I am using a traditional english design with a big hood over a back blast forge, but I was just curious to hear how hot everyone else hoods are getting.
I just bought a laser temperature gauge gadget and the hood and chimney of my forge got to 115 degrees C.
All the best
Andy
-
I'm going to go against everything I'd normally recommend and say that you may have success grinding the face flat. It looks pretty flat, if you removed minimal material I reckon you'd probably be ok.
Andy
-
Why not just get a tin or a jar - write "Anvil fund" on it. then stick $10/ $20 in the jar when ever you can afford to do so then put the jar away out of site some where. Before you know it you'll have enough to buy an anvil.
I'll be doing exactly that to save up for some equipment I want just now.
Andy
-
"Well loved" certainly isn't the phrase I'd have used.
Fair enough. I recall seeing a hornless anvil on that site some years ago that was in an awful state. I really fancied buying it to do it up. In the end I decided not to bother which was a shame. I'd like to give it a go at some point.
Andy
-
On 9/30/2016 at 3:49 PM, the iron dwarf said:
" weight is between 100 and 112 pounds at a guess."
" I got it from the south coast, devon / dorset way "
" the anvil has broken from above the feet to the middle of the table as can be seen in the second picture and 2 ugly plates have been added "
from previous posts on this, hope that helps andy
Sorry chap missed those. Just not reading things properly obviously. It's a xxxx shame I'm moving out of the workshop I'm in, I'd have offered to have a go at it myself.
I look forward to seeing it fixed up though. It'll be a lovely little anvil once it's done.
Andy
-
Anyone else notice the weld running diagonally down from the centre of the face towards the horn? It looks as though the front half of the anvil was broken off completely and then welded back on. And rather badly by the looks of it.
Where did you find it David? It looks like a Czech anvil, you don't see very many of them over here.
And what size is it?
Andy
-
https://www.youtube.com/watch?v=jWAy7Wb8_Oc
Episode 7.1 - disappearing post gremlin yet again...
-
On 9/22/2016 at 0:02 AM, bengriswold said:
Nice is this you? EDIT* my mistake, I didn't realize i was on the 2nd page of this post. Great stuff Mac. I think a fire rake is actually the first thing i made funny enough.
Hi bud, thank you. It's really nice to know people are enjoying the videos.
I love the fire rake, both as a tool and as a project.
All the best
Andy
-
-
Cheers Button. New video coming soon.
Andy
-
Cool. Good luck with it. Do post pics if you can.
All the best
Andy
-
http://www.iforgeiron.com/topic/44142-basics-video-series/
Your first few projects should be your tools to manage your fire. First and foremost is the fire rake.
Best of luck.
Andy
-
Any idea as to maker
in Anvils, Swage Blocks, and Mandrels
Posted
I reckon you could easily have a hardy and pritchel hole water jet cut if it does turn out to be a decent anvil.
All the best
Andy