

digger9523
-
Posts
111 -
Joined
-
Last visited
Content Type
Profiles
Forums
Articles
Gallery
Downloads
Events
Posts posted by digger9523
-
-
Why didn't you take it?
The whole town is now a war memorial. I didn't fancy being lynched by an angry French mob ;) -
What are your thoughts about the best anvil stands?
When i get this baby I'm going to need to get it on a stand. I really like the look of some of the laminated ply pyramid stands, but are they the best option? Or just a relatively cheap way of doing it? -
Yeah i wondered if the vice could be built into a wall, or that it has those long arms so that the fixed jaw can be moved towards the rear for larger work?
-
I was in France back in the summer. Visited a town called Oradour Sur Glane, it's a sad place, i suggest you look it up some time.
Anyways, as i walked around the place i went past one of the burnt out forges. Not much remains of it, but the anvil is still sitting where it was abandoned in June 1944.
Here are the only pics i got of it: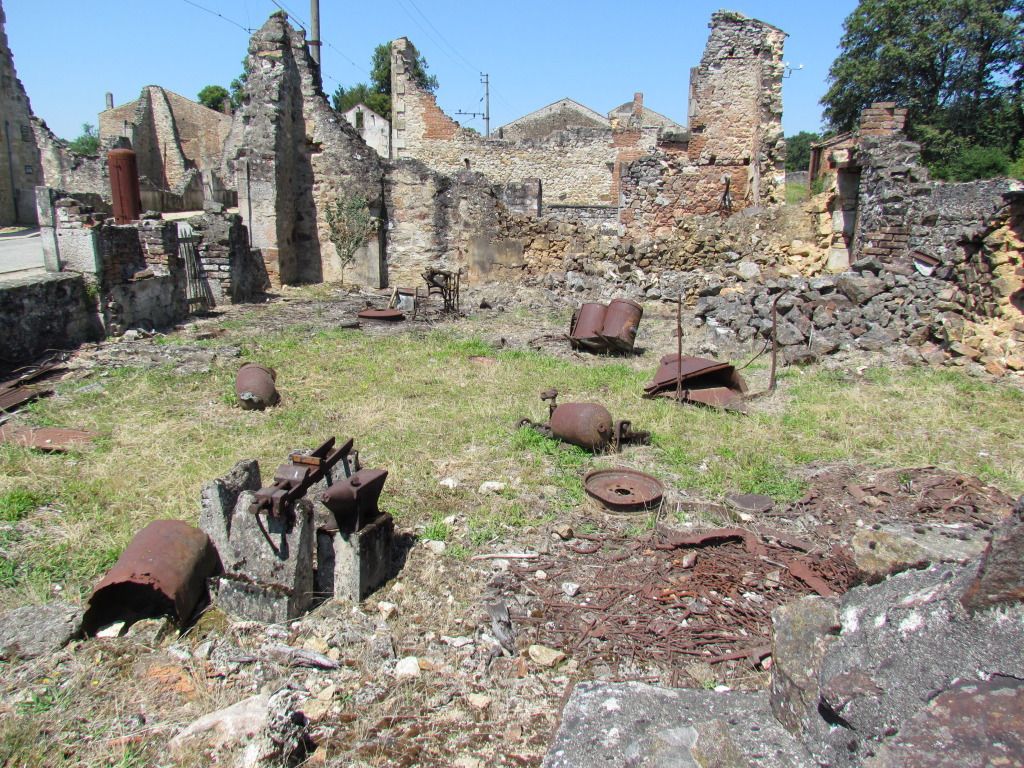
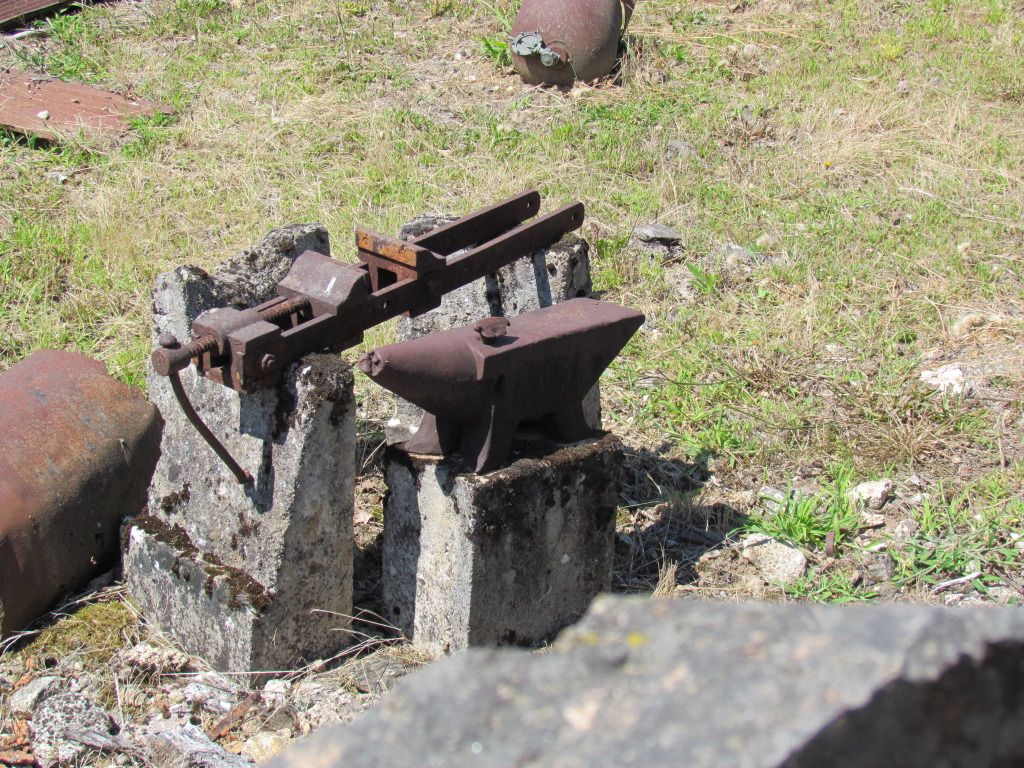
I say it's sat where it was abandoned, but i suspect it was on a wooden stand at the time and it's been put on the concrete block after the fire.
It amazes me how good the face seems considering that it was in an intense fire and then out in the weather for 68 years. -
Wow digger 9523, I think thats the one, Im thrilled with that! Many Thanks.
I would imagine this one to be fairly old then, do you have any idea of the date?
It's a great anvil although a little on the small side for my ham fists!
Thanks again.
Paul
No solid idea of a date mate,
but that picture has the date 28/11/06 on it. All the other numbers are old money terms, as in shillings and pence. I think it's the price per CWT. So it's a safe bet that the date refers to 1906. So you know that your anvil has the potential to be at least 106 years old. ;) -
An interesting eBay listing:
http://www.ebay.co.uk/itm/Rare-Mid-19th-Century-Double-Horn-Blacksmiths-Anvil-In-excellent-condition-/110953949937?pt=LH_DefaultDomain_3&hash=item19d55eeaf1#ht_500wt_1413
:) -
Hi Paul,
Check out this picture: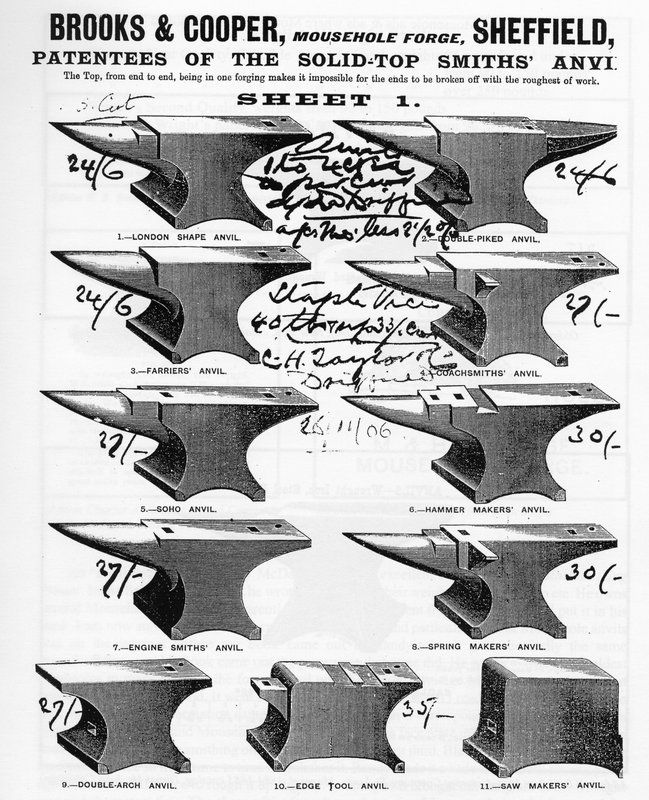
The one with the "Side Horn" appears to be a Coachsmiths anvil. :) -
Well it could still be a "Foreigner", only thing leading to the belief it may be a PW is the shape of the base. Surely he can't have been the only anvil maker that put those flats on?
Each day that passes brings me nearer to seeing it, really looking forward to it now. :)
This pic shows a few more anvils made in the UK
-
With my generally positive outlook to life, I'd have taken the theft of my first knife as a compliment! If somebody likes it so much that they have to steel it, then surely it was a good one! I'm feeling mildly upset that nobody liked mine enough to steel it now :)
-
I'm afraid i haven't seen her in the flesh yet, only got the scale of the anvil and the wheel behind it to go on really. If my guesstimations are correct she's a minimum 200 lb'er.
I've been reading through this thread with interest re electrolysis:
I think that i could do that fairly easily. I've worked as a diamond tool maker since leaving the army, and the electrolysis technique is exactly what we do to coat tools in diamond, except that our anodes are Nickel and the solution is also Nickel based. So i should be able to take it into work and get it in a tank. I could wire it up to our meters, some of which go up to 20+ amps, though I'm not sure it'll need that much juice! -
I'll go with an "English response".....
Bloody hell, please no! Don't touch it with a mill!!
Lovely anvil. I'd love to see it cleaned up with a wire wheel and rubbed down with some linseed oil. Oooh la lah!
Don't worry folks, no way I'd get this one milled! The little one got done because it's face was a complete mess of rust and pitting.
This'll get a good going over with a wire wheel, and I've heard of this stuff:
http://www.idealworld.tv/Black_Magic_Paint_-_2.5_Litre_Tin_@bCovers_approx_28_Square_Metr_156102_156102.aspx?fh_location=//idealworld/en_GB/&cm_mmc=Google%20Base-_-Ideal%20Feed-_-Home-_-Black_Magic_Paint_-_2.5_Litre_Tin_%40bCovers_approx_28_Square_Metr_156102
I might give the base and sides a coat of it in the name of preservation :) -
Nice anvil! That's a double horn Peter Wright anvil. Those are RARE!
Be sure to post pictures of you using it, we LOVE pictures!
Will most definitely take some photos mate.
Do you really think it's a PW? I thought it might be with those flat areas on the base, but then i thought that would be too good to be true :) -
A while back i put out emails and texts to all my friends asking if they knew the whereabouts of any anvils. I'd found a forge and so naturally needed an anvil.
I ended up finding this old thing:
After a clean up she looked much better:
Not much, but it'd do for a start!
On Monday evening i had a call from a deer stalking friend of mine, "Nick, I've found you an old anvil, it's got two pointy ends, one flat, one round and a couple of holes in the top. It's been at the back of a shed for 50 years, it's bloody heavy, i can't lift it".
This was all the info i had on it, then i got this photo:
I'm now really excited as i always liked the idea of a double piked anvil, but they normally go for silly money. This one's coming for free! He won't take any money, but i have to forge him a blade on it. Can't say fairer than that :)
I asked if there's any markings or names on it, but he'd left for a trip to Scotland, so i won't know for a week or two now :( -
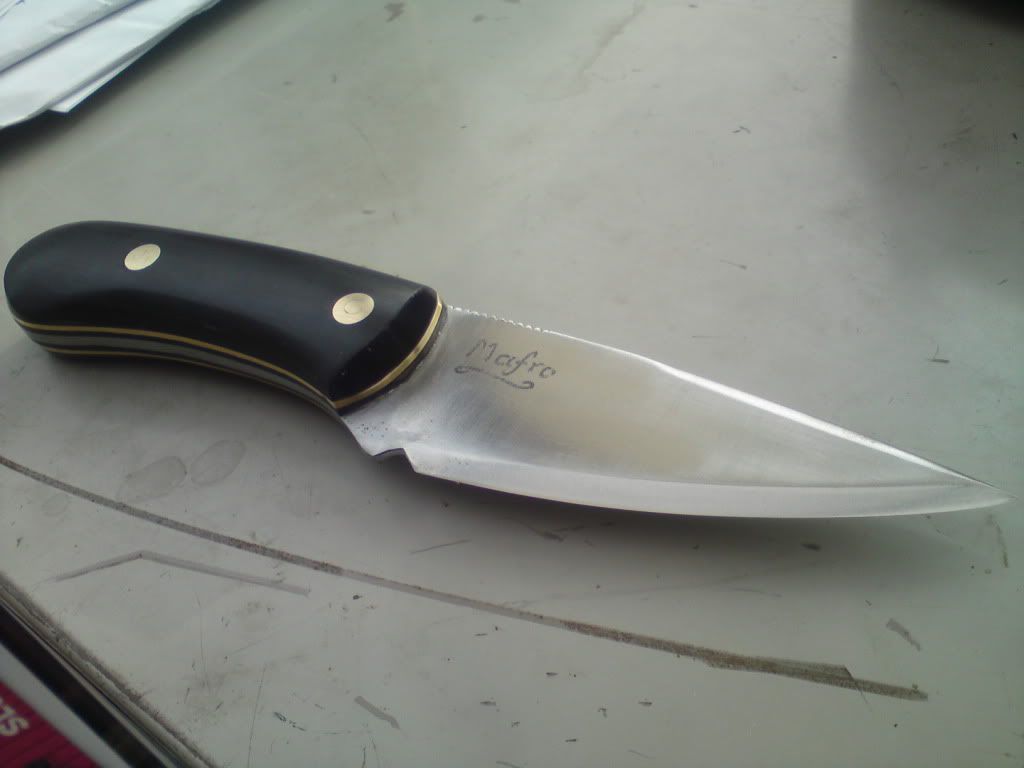
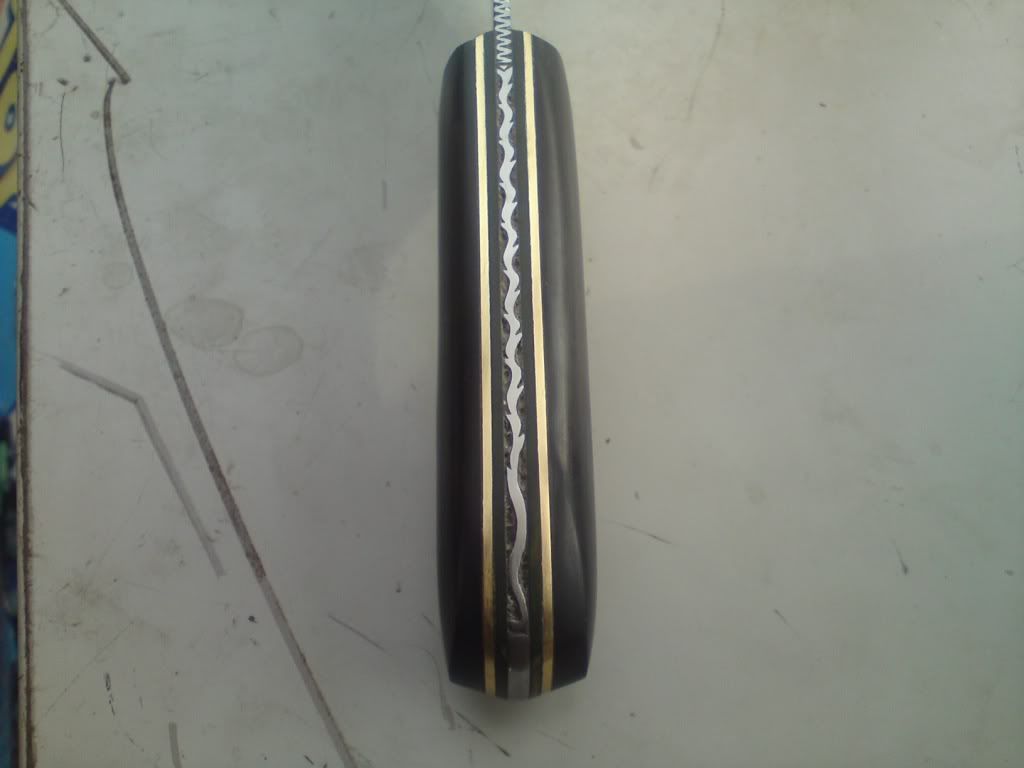
Thanks mate!
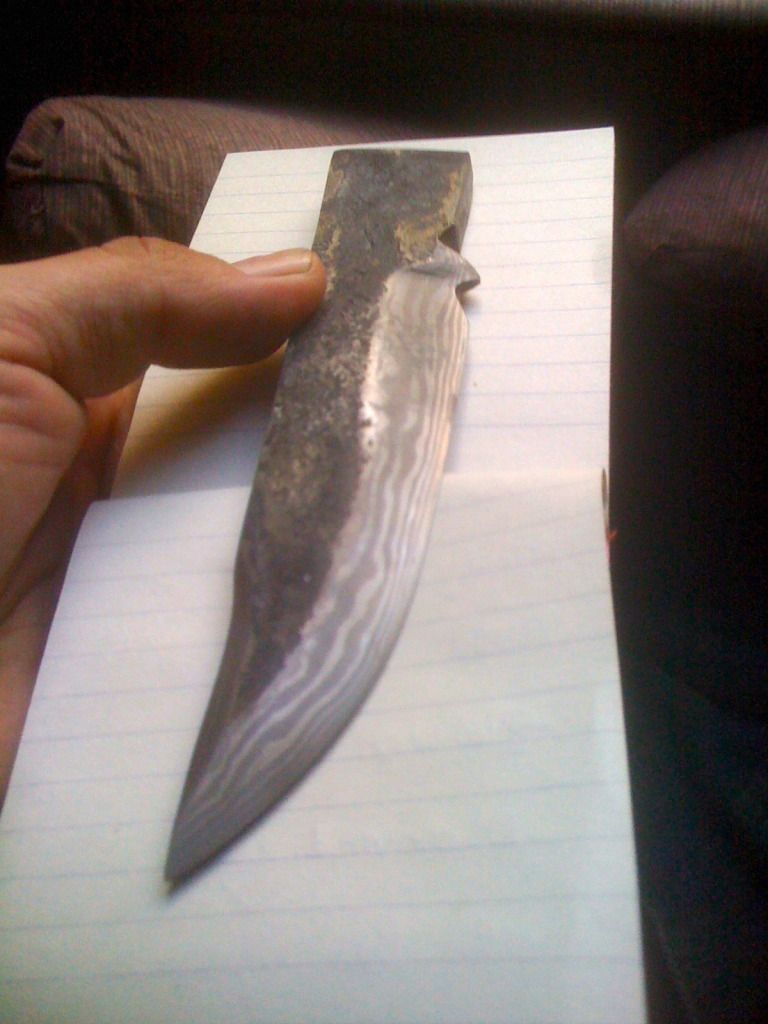
Had a tidy up on the blade today and a quick etch to see how she looks: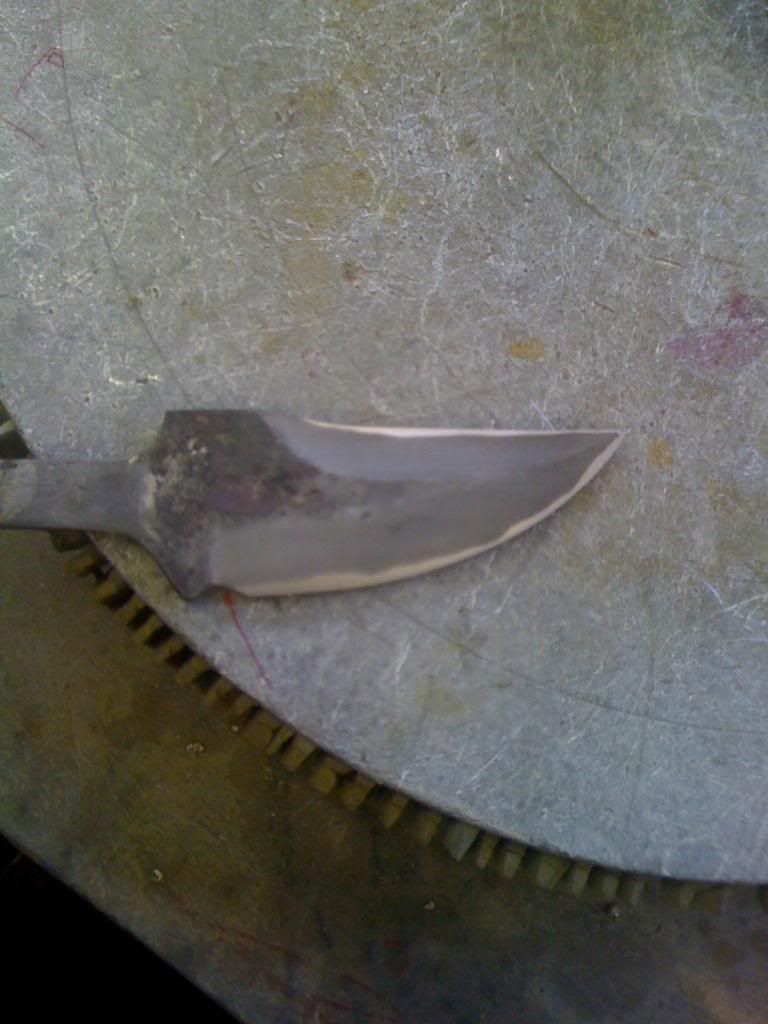
Have to say I'm really digging the contrast of the spring steel against the 15n20 :) -
Hi all,
Just finished a quick grind up of this little thing: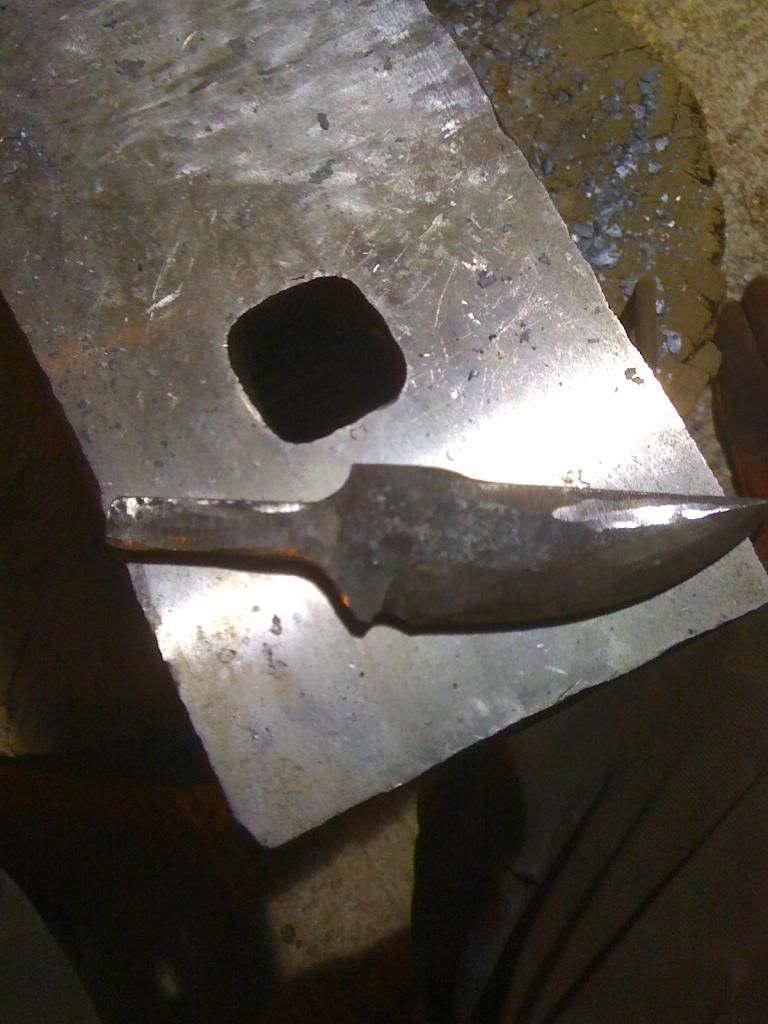

It's a very basic 3 layer job. A core of 15n20 wrapped in some old Land Rover series 3 Leaf spring! It's good to recycle :D
Going to do some more work to it tomorrow, thanks for looking :) -
Thanks a lot Frosty, that's very kind of you to say so :wub:
My next session I'm planning another 7 layer piece, but with a thicker 5mm core of 01 as the cutting edge. I won't fold the next one, so it will stay as the 7 layers, but i think/hope with a higher grind it should still look good.
Another project for the future is creating a 'Hamon' in a knife blade..... :) -
Thanks a lot folks! Really appreciate the comments. I'll update the thread as and when i do anything else with the blade :D
-
Well,
i finally got around to sourcing some 15n20 steel and spent a good chunk of Saturday over a hot forge attempting to forge weld it with some honest 01.
I'm over the moon with my first attempt, (it was a special moment watching the layers appear after a few minutes in some hydrochloric at work this morning) by no means a masterpiece, but with no training other than hundreds of Youtube videos and a bit of advice from Mick Maxen the night before, i waded in with my usual "If somebody else can do it, surely i can as well" attitude and produced This monstrosity:
The pics are terrible, but it needs some more shaping and eventually a stick tang will be dovetailed and welded on. Thinking of a brass guard, or i may get adventurous and do another piece on laminate steel for it, then either DI or Bog Oak for the handle.
This constitutes my 5th time doing any kind of blacksmithing, so all in I've had about 13-14 hours experience knocking around hot metal, so be gentle with me!
Started out with a stack of 7 pieces of steel, 4x 15n20 and 3x 01. Folded the billet twice after drawing out so it's 28 layers by my reckoning

Arm was getting a bit weak by the end of the day!
Thanks for looking, comments and abuse welcomed!
PS, I'm saying Laminate steel blade as I'm not sure whether this would qualify for the name Damascus.
-
I know you don't like the handle shape, but i think that the hammer marks on the blade area give it character.
If i had commissioned you to make me that knife i would ask you to leave them there. A knife that has been forged and then had all of the forging marks cleaned off during stock removal/final shaping may as well just have been a stock removal knife, but anybody that sees that blade will know straight away that you pounded it out over an anvil :ph34r: -
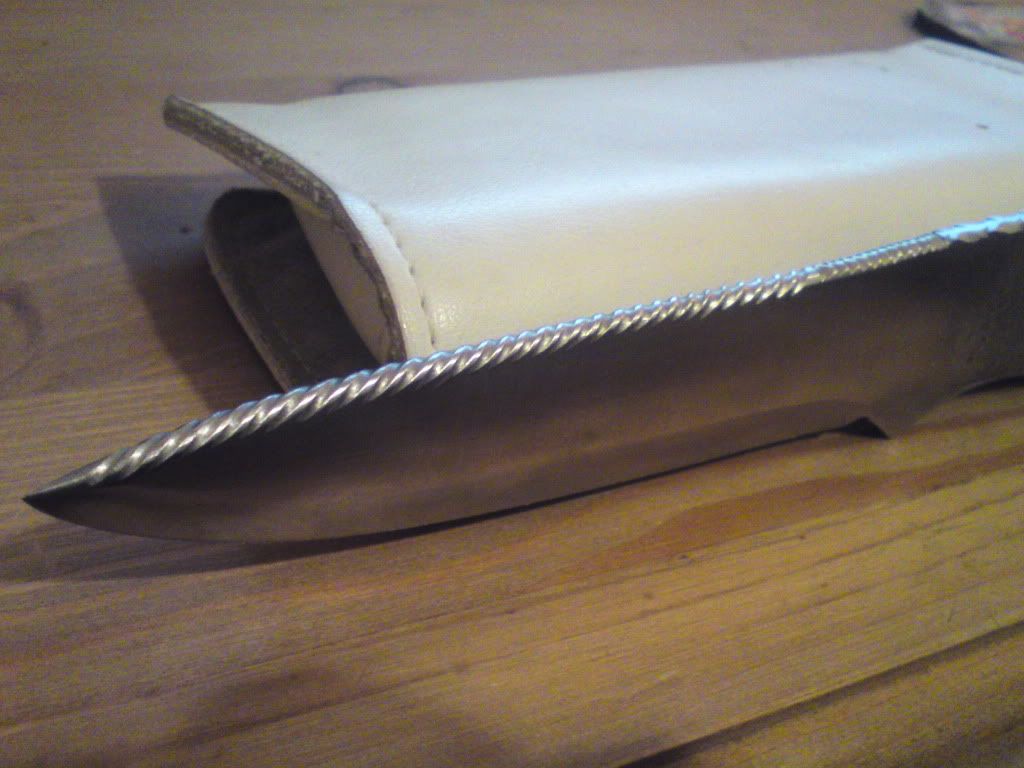
Thanks folks!
Didn't think they'd get as much praise on a forum with so many talented artisans present! :)
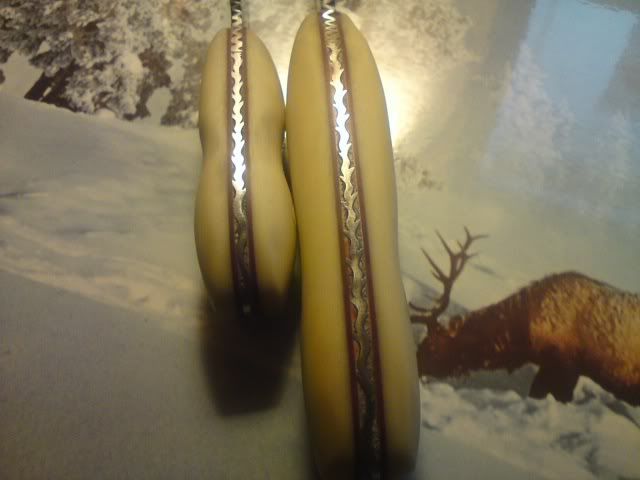
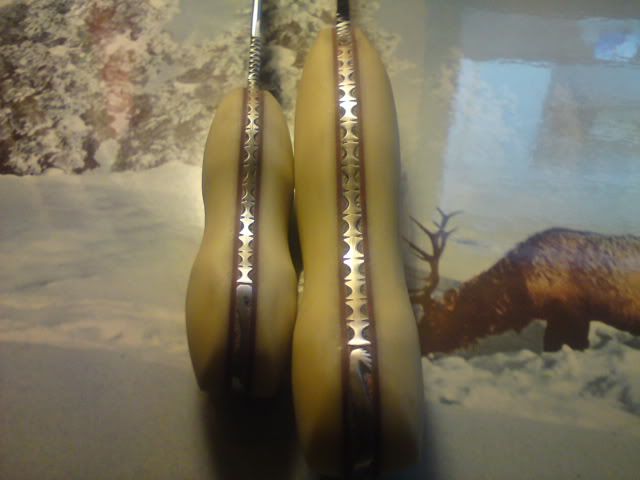
Some folk don't like so much file work on their knives, i just love to do it. I mostly sit with some good music going of an evening when i do it. It's all done with Bahco needle files. I think it's easy to do, some of it looks very intricate, but can be easily achieved with good sharp files. I never draw on a pattern, i just file away material until i see what i want left behind.
The blades are done with a mixture of tools. A bench grinder (stone) to get out the rough profile and a prelim bevel, then i tidy up the blank with a belt linisher. After that i finish the bevels with a hand file. When the blank is ready, it's file work time.
We moved house/county last December, so I'm a bit behind with knife work. But as soon as i have anything new I'll post it.
All the best,
Nick -
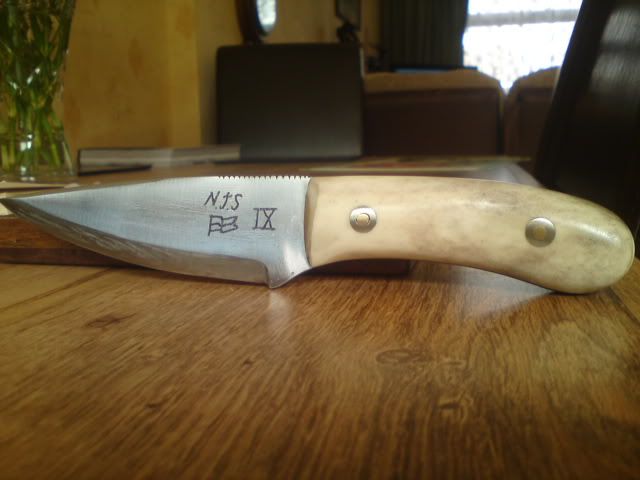
Forgot to say that i favour a high Scandinavian grind for the bevels. Sharpening knives seems to be a dark art for some folk, and i believe such a bevel is easy for beginners and experienced users alike to sharpen :)
-
Fantastic filework, I'm a huge fan. Looks like the bevel is pretty steep, but that might be the images.
What were you thinking for your first damascus piece?
Thanks Theo,
I'll start small with typical hunters knives, then go up to a good sized Bowie.
I've been greatly inspired by these two videos on youtube recently:
http://youtu.be/gLlObpob6lg
http://youtu.be/2f01tU9akqY
I think the end piece is a masterpiece, and one day i would like to do a sword of a similar style for an old friend of mine -
Hi all,
I've made a few knives in the past, all stock removal, but i hope to get into pattern welding some in the forge as well. Here's a few of my past efforts, only done 10 or 11: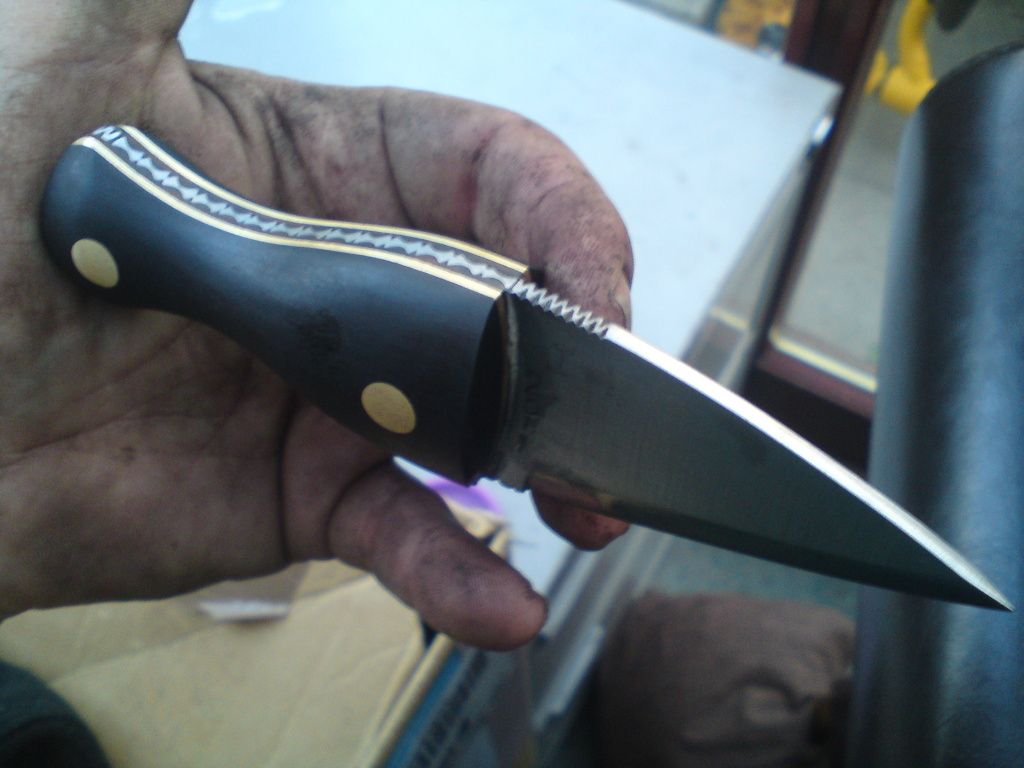
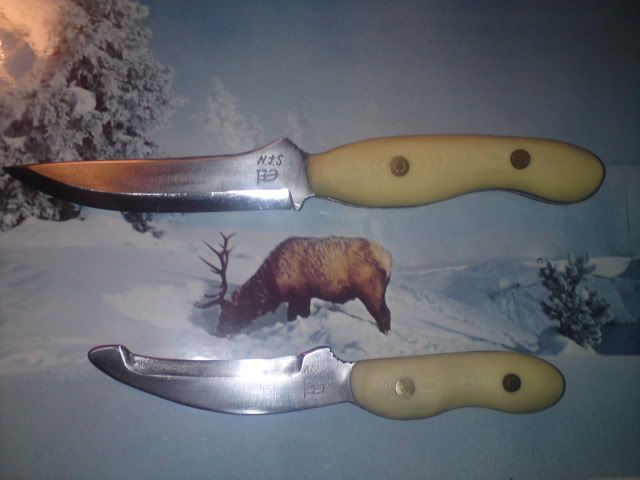
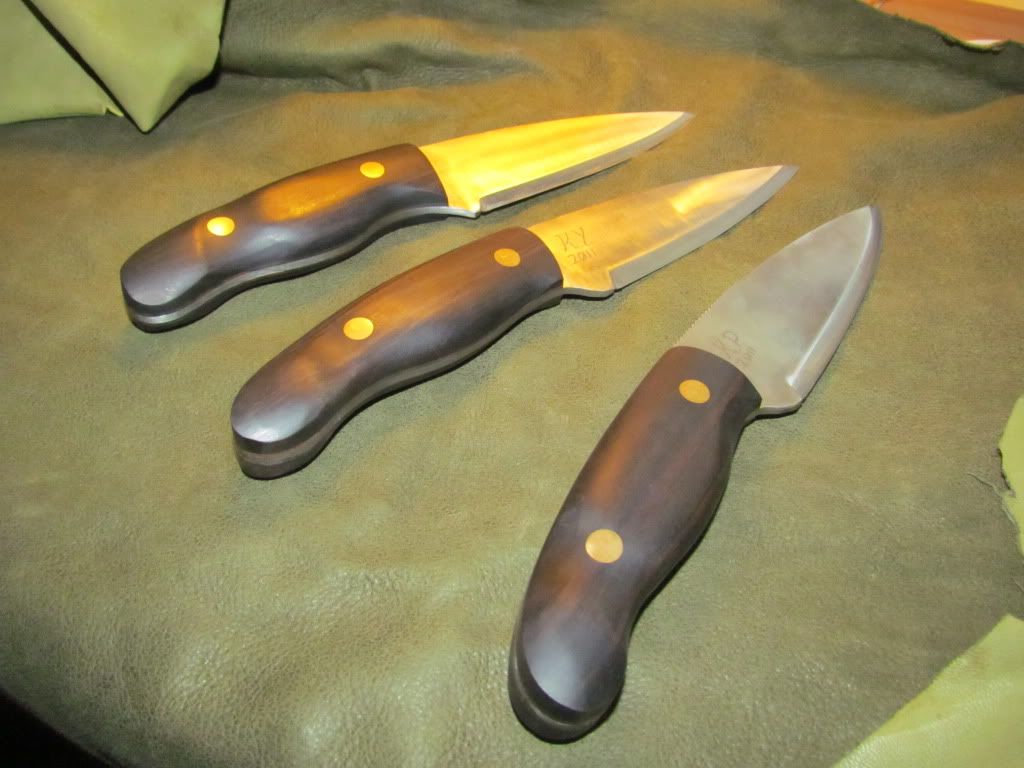
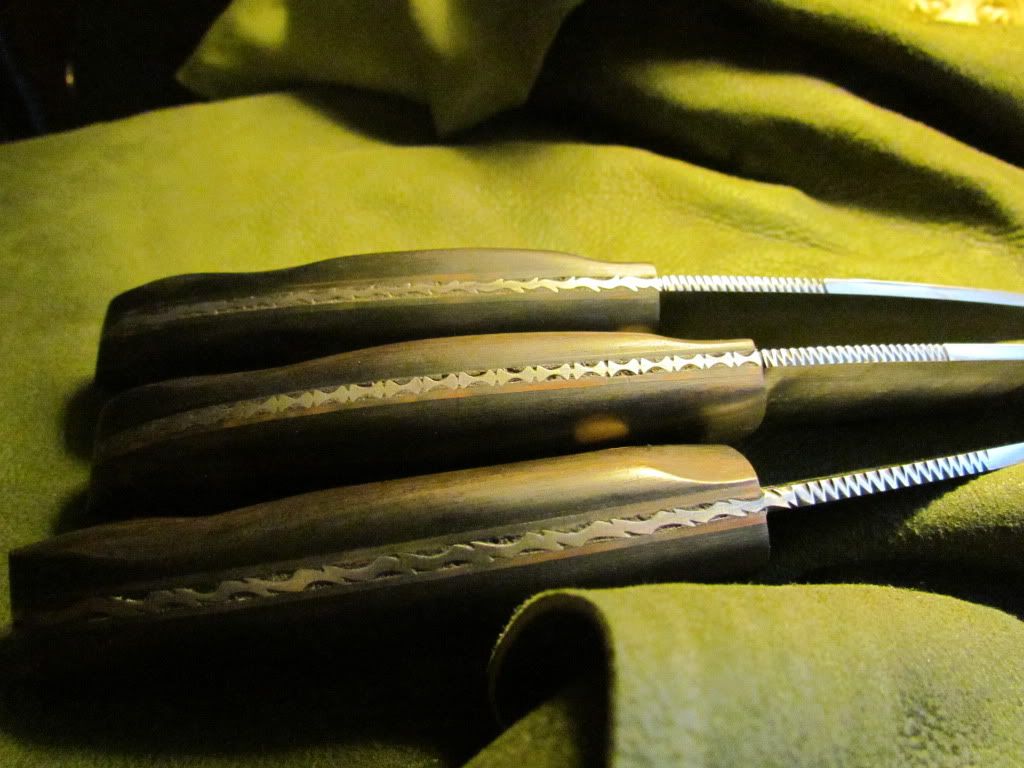
Hope you like them, all the best,
Nick -
Wow! The right tool for the job makes all the difference in the world. Good thing that's a nice thick face, the old girl will be glowing after her makeover.... :wub:
I would dress the edges and stop a that point. No need to make 100% of the face perfect as that is removing a lot of tool steel face.
Phil
And did the *right* way----Truing the base to the face and *then* working on the face to ensure minimal thinning is done.
Yep, she's gonna look great by the time i'm done!
Going to dress the sides once the top is done, i hear what you're saying Phil, i may just stop where i am now, build up the last few dips with weld and then do one more pass to clean up the welded area and make it true with the rest.
The grinder is water cooled Mac, so the face doesn't even get warm. The ring grinder is set to take of 15 thousandths of an inch each pass and takes about 3 seconds to travel the length of the face, then it automatically comes across the width of the stone for the next pass. I've stayed with the machine all through the job, but in theory i can set it to do it all un manned until it's taken off a set amount. I estimate we've taken 5-6mm off at this stage.
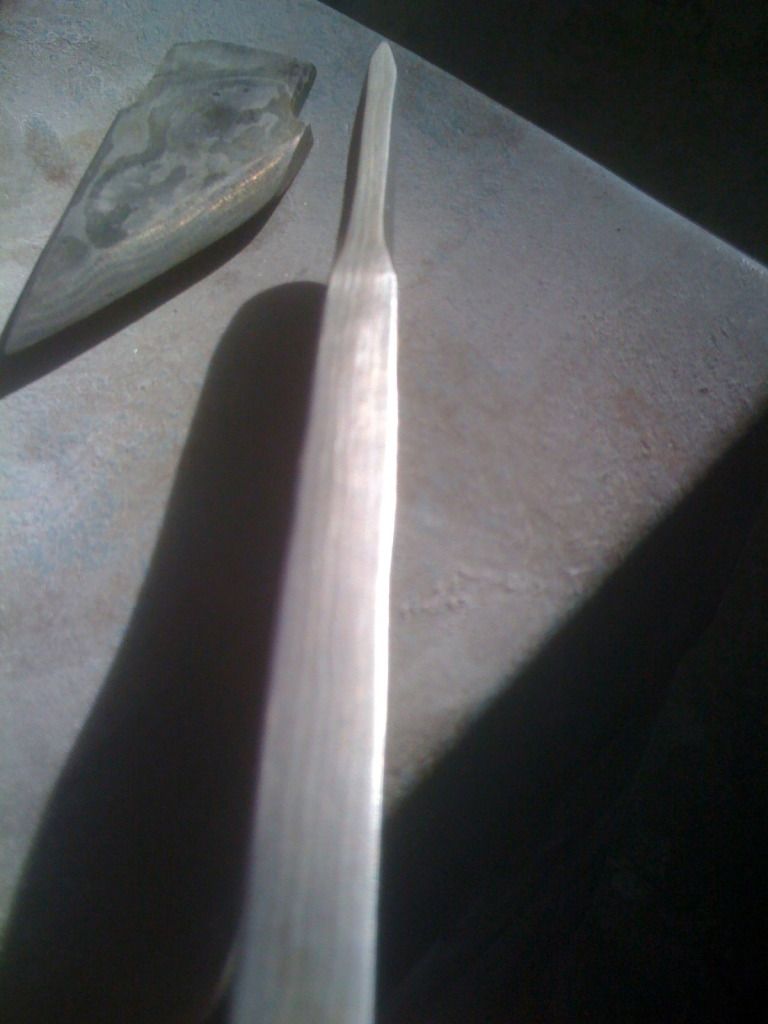
More pics will be posted here as and when i do anything new :)
Got a new/old double piked anvil coming my way
in Anvils, Swage Blocks, and Mandrels
Posted
So close now, get her this week some time!