
Rashelle
-
Posts
504 -
Joined
-
Last visited
Content Type
Profiles
Forums
Articles
Gallery
Downloads
Events
Posts posted by Rashelle
-
-
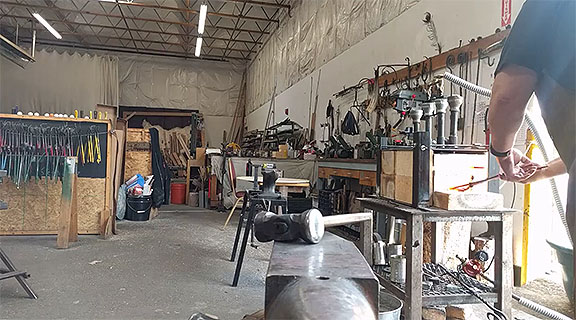
It's the lesser of the inconveniences Glenn. As is the homeschool and forest school personnel occasionally bring their students in when I am not there. I did use to keep my personal tools some of them locked up, but found that the bulk of what wasn't kept locked up is used regularly for demo's. Going oops got to find a tool during a demo sort of negatively affects the flow. Especially with youth students. The adults aren't so bad when that happens. I normally ensure everything for a demo is there but things get interrupted and thus forgot till the oops moment.
On the plus side the blacksmithing and bladesmithing programs are expanding. I'm getting a new building and we'll have multiple classes going at once. With that the blacksmith staff will increase and I can restrict access to only allow other instructors in, with students to when one of my staff is present. The new building will be before Summer.
-
LOL. I'm having more issues with breaking hammer handles lately then with redressing. Except when people get ahold of my hammers when I'm not in the shop. The rule is no one uses my anvil and the tools at my anvil other then me and my assistant Caleb. But someone has been when we aren't there. That is causing quite a bit of redressing tools, grrrrrrrrrrrrrr. The hammer handle breaking issue is just me mostly. The more effort I put into making pretty tools the sooner they get broke. I like pretty hammer handles. Next is an osage handle methinks.
Had some H-13 hammer eye punches. They lasted good until they didn't. I went back to 4140 and 1045 for ease of maintenance and cost. No great loss when damaged.
-
Chisels, punches, and fullers tend towards 1045 sometimes 4140. I can get those cheaply in 1/2"R and 3/4"R. Easy heat treat and when abused by students easily fixed with no great loss.
Hammers tend to be the same, and I make my personal use hammers. Occasionally I'll case use mild for small hammers and case harden. I had made some beautiful S-7 chisels and punches, etc. once upon a time, then later realized they were harder than my poor hammers I made. Think I gave them away.
-
Welcome to IFI. For your information the NWBA has monthly mentoring center events in Longview. 3hour demo in morning followed by open forge. Plus yearly conferences.
-
"How much do you get for shop rate?"
When I sell stuff/services my pricing rate reflects a minimum of $250.00 a day. Depending if needed I will up front say why and charge more. Such as extra expenses or difficulty, or I flat out would prefer not to do it. I'm either selling small stuff and or knives that I already want to do. Occasionally I'll take commissions for things that intrigue me or otherwise catch my interest.
"Do you feel it's enough for what you make and the quality of your work?"
For now it fits.
"How do you feel your rate compares to other professional people in other trades as well as blacksmithing?"
I'm on the low end at the moment.
"Please state where you are in the scope of things.. Hobbyist, part time, full time, retired second income/fun."
Full time blacksmith and bladesmith instructor. With that said I can not go into my rates with my employer. The above rates are for my it catches my interest I want to do it stuff, but I do not have to take commissions.
-
I've used pipe to make slotted monkey tools.
-
I have a local one I go to for odd things. They are pretty good about getting stuff in for me and for having on hand.
-
To get the copper look on steel. I've seen others use copper wool. Didn't work well for me. So I just brush the steel or dip it into etchant that is contaminated with copper.
-
Take notes. When I find a size of stock that makes my idealized knife size/style I write it down in a notebook. I then write it on a cut down ruler (cut to the right size), then I have a cut template and a notebook with my sizes. For unusual things, I usually do like jeremy k says and go off of weight if I have to. Such as for a sword. I take the finished weight I want to end up with, then figure out the size of material on hand and the amount needed for that weight when done forging and grinder clean up. With remembering handle, guard, pommel weight.
-
It's a ball fuller rather then another rounding hammer used to refine the cup. You can get some cupping from hammering the sides of the tool. That will start cupping when the force of the hammer blows do not reach to center. If your dome cap is enough use it to planish the inside of the cupping tool after hammering the sides up a little.
Quote -
Contact the NWBA. I get my stuff in Portland Oregon. There will be someone closer.
-
One hammer = 12 lbs sledge, one tong = hammer/pickup tongs, power tool either a good bandsaw to cut the first few chunks of steel, or belt sander to clean up the faces edges of the tools I'd be making to get myself going. Note a good angle grinder would fulfill the first few cuts and conceivably with a different disk perform the clean up. Start making tools for tooling as per Brian Brazeal, with a hot cut hardy, hand hammer, combo punch/hammer eye drift being the first tools made.
-
I just re-thought of something. All these video's of people dis-regarding PPE (ok video games also), is leading the youth and their parents into a blase attitude towards common sense in regards to risk while forging. Seeing some adult "expert" forging in shorts and flipflops, grinding with no goggles, welding in tank tops without a helmet, is leading the youth and other newer peoples down a risky path.
If you are going to do a video to show people how to do something, then take responsibility for your actions and do it properly.
-
Seeing as since most of my students are youth. They arrive in flip flops and polyester shorts way too often. My solution to that is as follows. They and their parents are stopped at the entryway, where they get the safety lecture, and are reminded about the email they receive prior to taking the class. If the adult does not then get them proper clothing. The children are wrapped up in a heavyweight canvas skirt going down to the floor for leg protection and are given over shoes made out of 4x36 sandpaper, which is then secured around feet/ankles. They normally do not repeat it. Oh yeah they are also required to wear the aprons and such over the skirt, for the little bit of added protection it gives. Note those students work on small things, so any burns they may get are on the lesser side.
-
Moonshine on your pancakes?
-
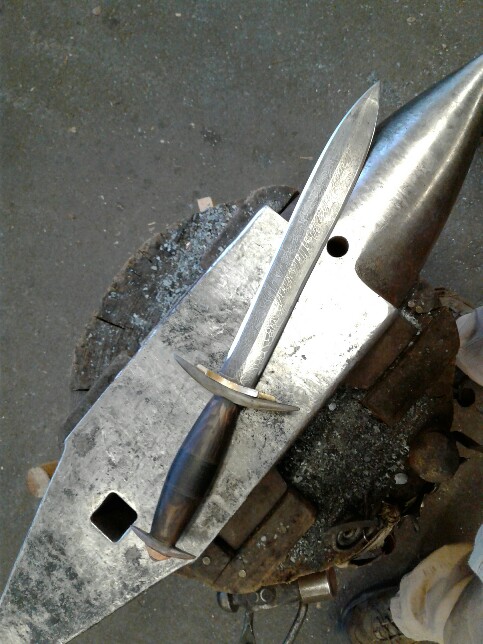
Thank you Nate. I forgot to mention the guard and pommel are both cable damascus with brass fittings also.
-
Thank you Das and Frosty. Couple things went wrong with it but I adapted. LOL not like I had a choice. Early on fitting up the handle, drove the tip into the screw on the vice, luckily it was before hardening. It rolled right on up ...... was never the same after that, heehee. On glue up, (everything is pressure fitted, epoxied, and peened) the purple heart must of swelled up from ambient moisture cause it cracked a little, and I put the pommel on inside out. It was going to sweep backwards, but the epoxy was setting up and I got rushed. I had everything laid out in order in orientation, but must of spun it around. Oh well lesson learnt.
-
It's been awhile so thought I'd share this. Cable damascus sanmai over 1095 core.
-
Since this thread is resurrected. The current person for coal in Portland Oregon is Jim VonMosch of Mountainbrook forge. NWBA board of directors. Arnon Kartmazov keeps some of his in stock locally for if you want to pick it up in Portland. Arrange payment with Jim and pickup from Arnon.
Quote -
You can work harden it by hitting it with a wood or rawhide mallet till hardened. You can also work it by bending back and forth ti;; you feel the desired resistance.
-
I'll second that. It was good being able to make it to an event again. It was also good to meet you in person John in Oly.
-
LOL thank you Aus. I do bottle openers the same way with leaves and wizards.
-
That's what it looks like for me.
Skills needed: think on my feet, fix things, improvise. Use equipment a plus but my start was in historic 1845 blacksmithing so not totally necessary. Major skill for me is teach effectively and use humor to engage audience and students.
Time spent training: I went full time at the 4 year mark of hobby blacksmithing. In that 4 years I spent most of my off time learning. This month makes 2 years as sole occupation blacksmith. My hours are I show up 1-4 hours early and stay 1 hour or so after. In order to balance what I want to do vrs what I have to do I spend at least one day off a week working on my own projects. Most of my off time is spent learning. It is rare otherwise to work on what I want to work on, I have to work on what my students need, or maintenance, or occasionally skill building (which I enjoy anyways).
3 related occupations: general blacksmith, bladesmith, farrier. Welder, fabricator, machinest.
Additional photos, large images.
-
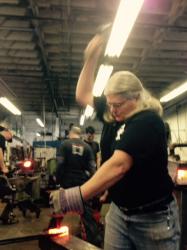
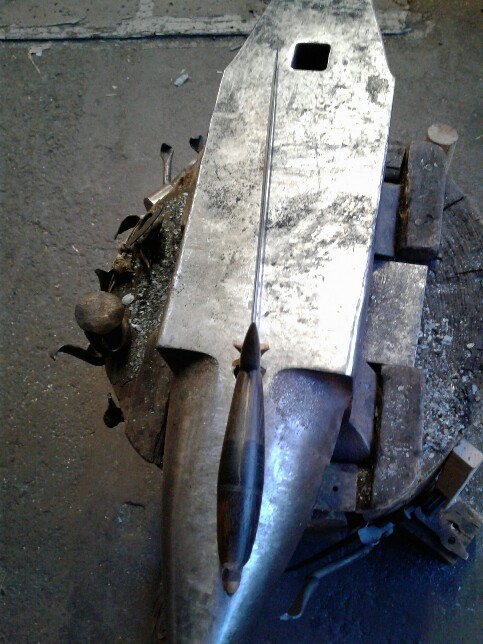
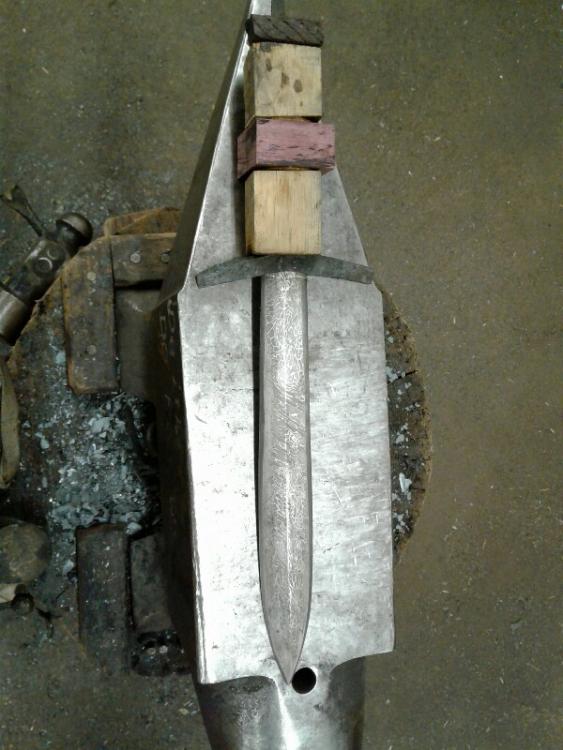
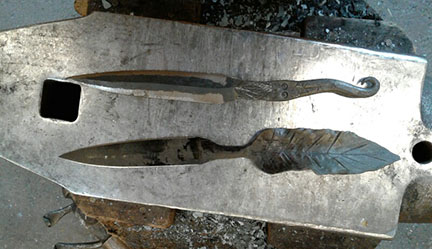
These were made during demo's some time ago. Excuse my sloppy picture taking please.

What's the best place in the USA/World to learn & practice smithing?
in Blacksmithing, General Discussion
Posted
New England school of metalwork is right there in Auburn Maine with you. There are also like others have pointed out local blacksmithing groups in your area. LEarn locally first then go from there as you need/desire/specialize.