
Stormcrow
-
Posts
1,095 -
Joined
-
Last visited
Content Type
Profiles
Forums
Articles
Gallery
Downloads
Events
Posts posted by Stormcrow
-
-
Thank y'all!
")
David - I spent years on the back end of axes, machetes, billhooks, etc. I'm used to whirling about sharp objects.
 As for usage, zombies, of course! They just aren't going to off themselves.
-
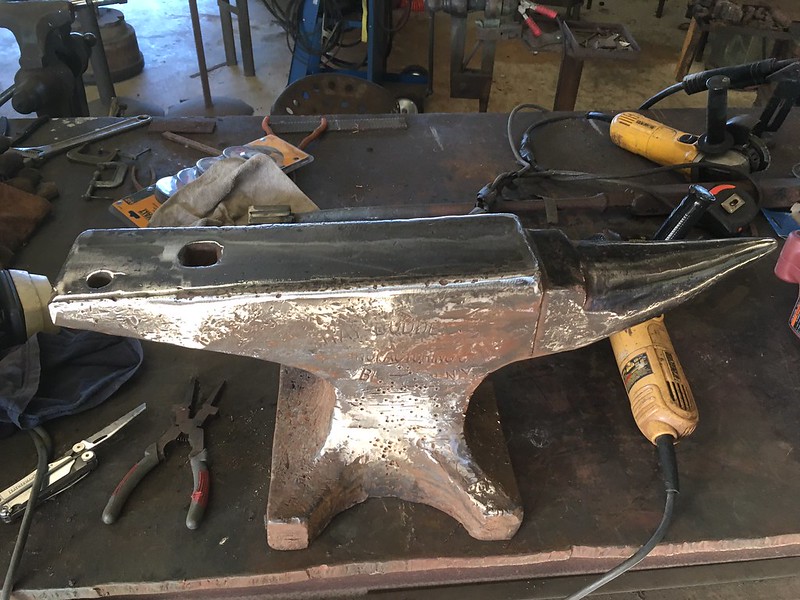
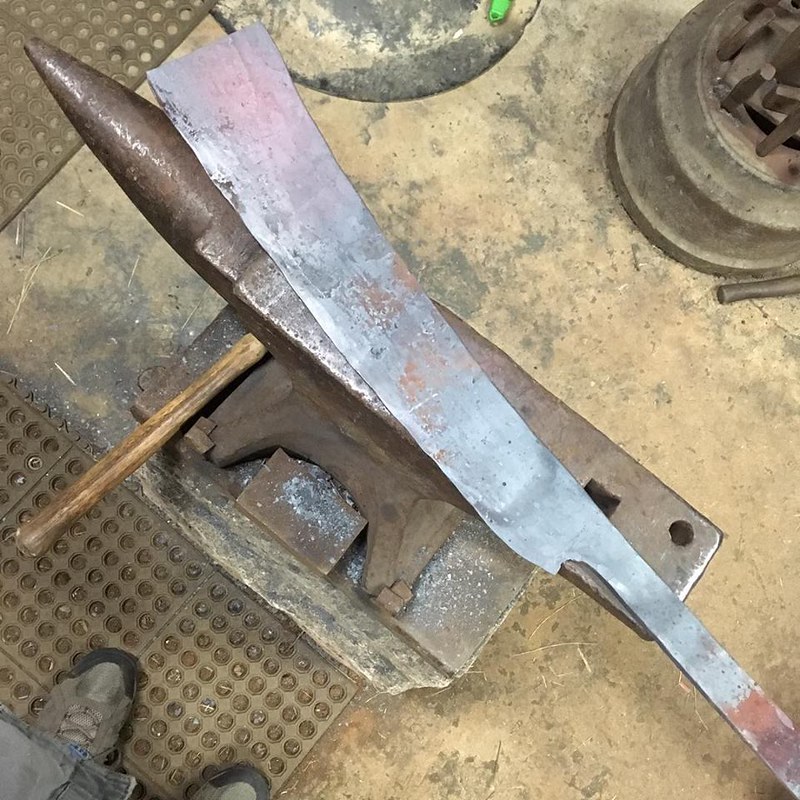
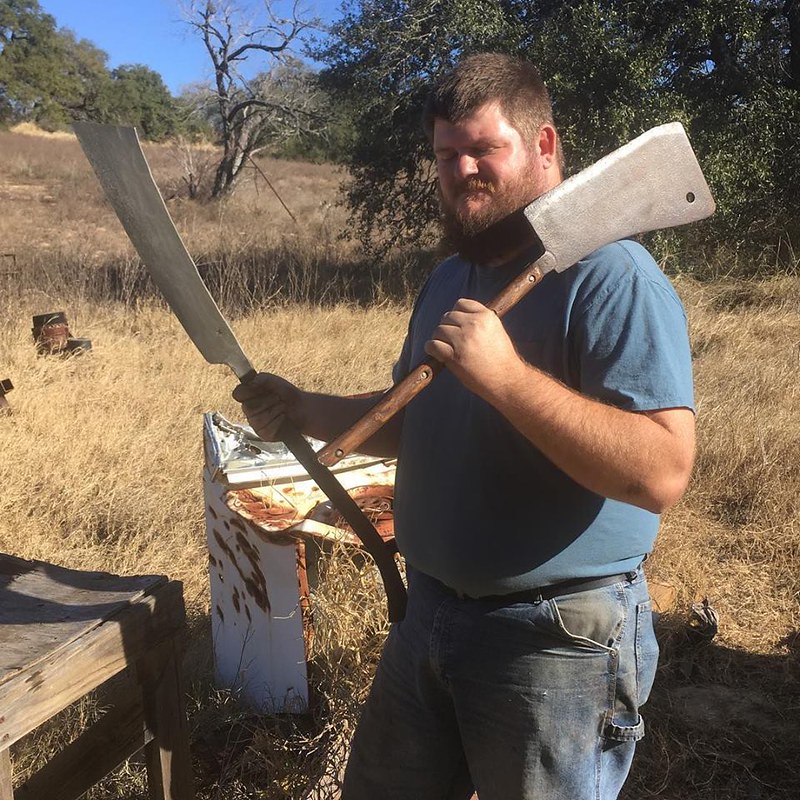
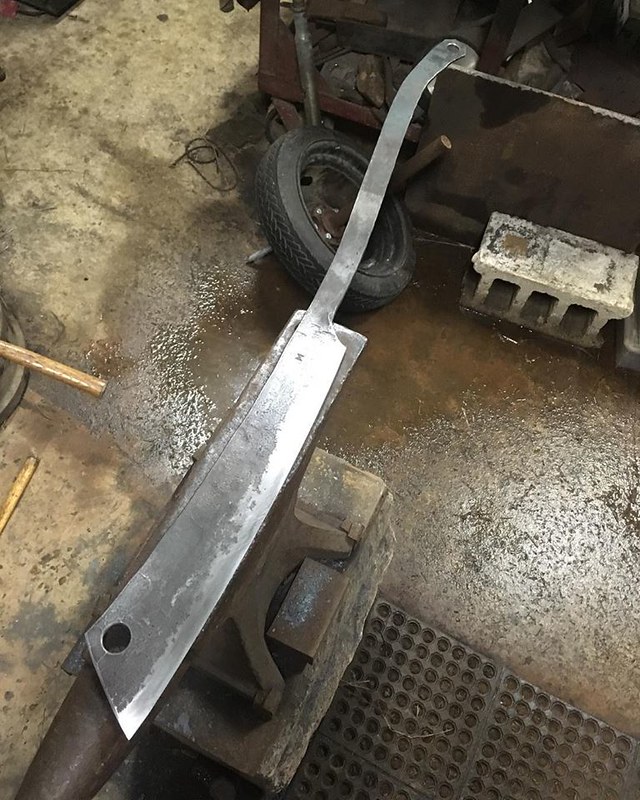
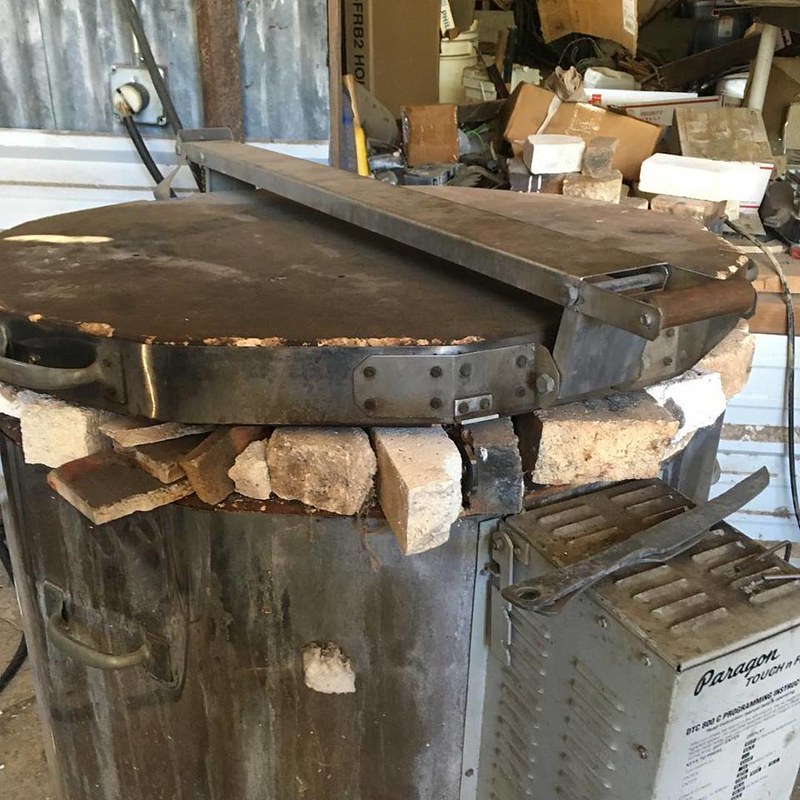
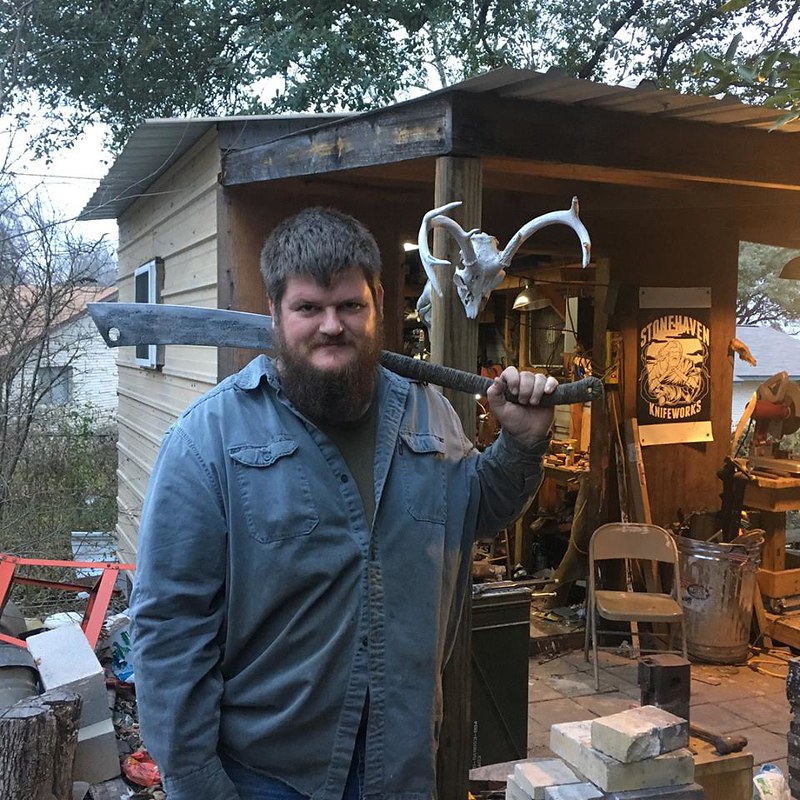
I just mailed off an interesting project: The biggest carcass splitter I've built to date. It was the widest and heaviest blade I've made (though not the longest), and I really want to make more. Probably will have one on my table at the Blade Show in June.The blade is 18" long by 3 1/2" wide, with an overall length of 40 1/2".Its size made it difficult to take a picture that really showed the size and proportions correctly, but I got a few, and shot a video comparing it with an antique carcass splitter I was given by a customer.Here's the starting blank, cut from 1/4" x 3" 5160.After forging out, the blade was about 4" at its widest, though after trimming the end to be aesthetically pleasing, it was 3 1/2".Comparison with the antique carcass splitter.Ready to heat treat. To give an idea of size, my anvil is 148 lbs, and the face is about 4" x 15".It was so large, I couldn't fit the whole thing into my kiln that I use to draw temper. I ended up holding the kiln lid open with firebricks, then filling in the gap with various bits of broken fire brick. If you look closely, the end of the tang is poking out between two bricks just under the little angled tab on the lid.Ready for mischief!There is a better look at both carcass splitters, more details, more construction pics, wildly irresponsible swinging about of an 18" long razor-like blade, and general silliness in this video.
-
5160 is readily available new, and the price ain't at all bad. Assuming USA, of course. Shipping will be a bit pricey.
If you're worried about chrome in fumes from 5160, I have never heard anything ever mentioned about it, and it is a widely-used blade steel that is forged.
It is going to be stiffer under the hammer than plain carbon steel like 1084. Learn hammer technique. Proper hammer technique will make a tremendous difference in how you are able to move steel without a striker or power hammer. Here's a video on my technique, there are other methods.
Don't try to work it too cold. You're making it more difficult to move under the hammer and potentially introducing dangerous stresses in the steel. You can hammer at a lower force at a lower temp to smooth out hammer marks at the end, but if you are trying to move the steel you need it hot.
-
Thanks, guys!
It was a prank that paid well, if was a prank.
Biggundoctor - No idea, I just engraved what they told me to put on the blade.
-
I had an interesting opportunity pop up recently when I was contacted about making a couple of knives to be used as diplomatic gifts between the US Army and a couple of generals in the Mexican Army. I didn't have a whole lot of time to work with, but I happened to have some prototype mid-tech Benghazi Warfighter and Little Rok blades already ground, heat treated, and powdercoated, so I agreed.3/16" 80CrV2 steel, TeroTuf handles, and flared stainless steel tube handle rivets.
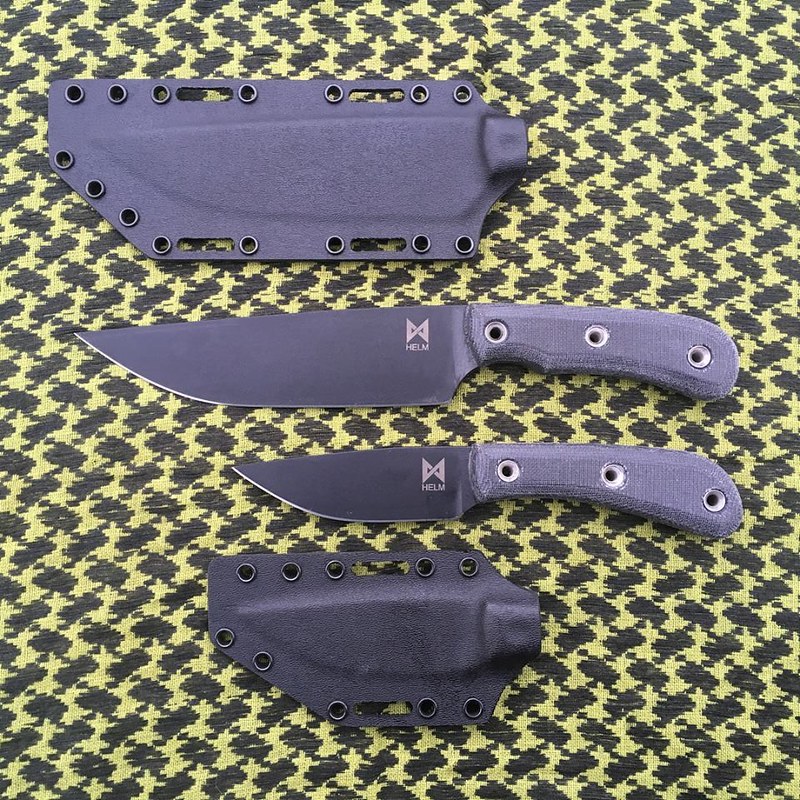 diplomacy01 by James Helm, on Flickr
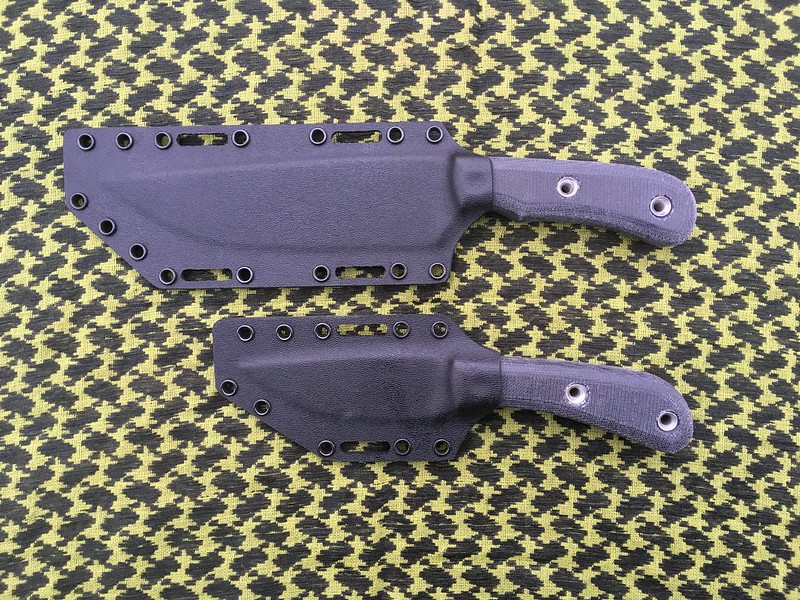 diplomacy02 by James Helm, on FlickrWhen I was given the names and ranks to be laser engraved in the blades, I was surprised to find that the knives were gifts for the Mexican Secretary of Defense and his Chief of Staff! :o
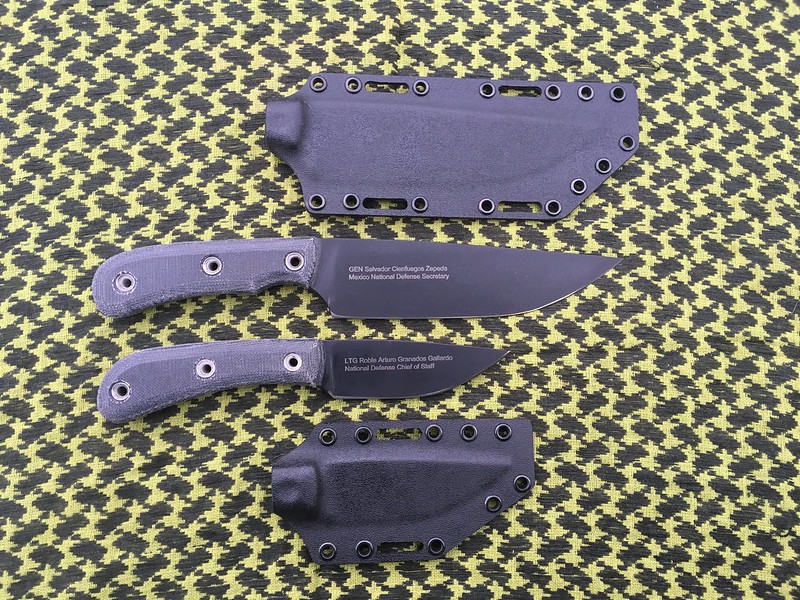 diplomacy03 by James Helm, on Flickr
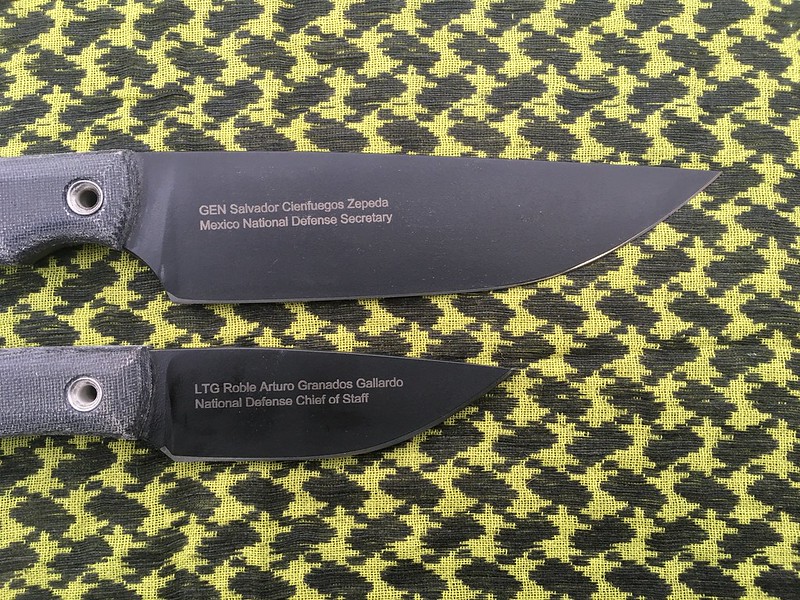 diplomacy04 by James Helm, on FlickrIt was an honor to be chosen for the task.
And, on an entirely different tack, a couple of choppers finished up recently. Forged 80Crv2, paracord over neoprene, marine epoxy, the usual.13 1/2" blade, black and gold. Customer commented, "Love my knife."
diplomacy04 by James Helm, on FlickrIt was an honor to be chosen for the task.
And, on an entirely different tack, a couple of choppers finished up recently. Forged 80Crv2, paracord over neoprene, marine epoxy, the usual.13 1/2" blade, black and gold. Customer commented, "Love my knife."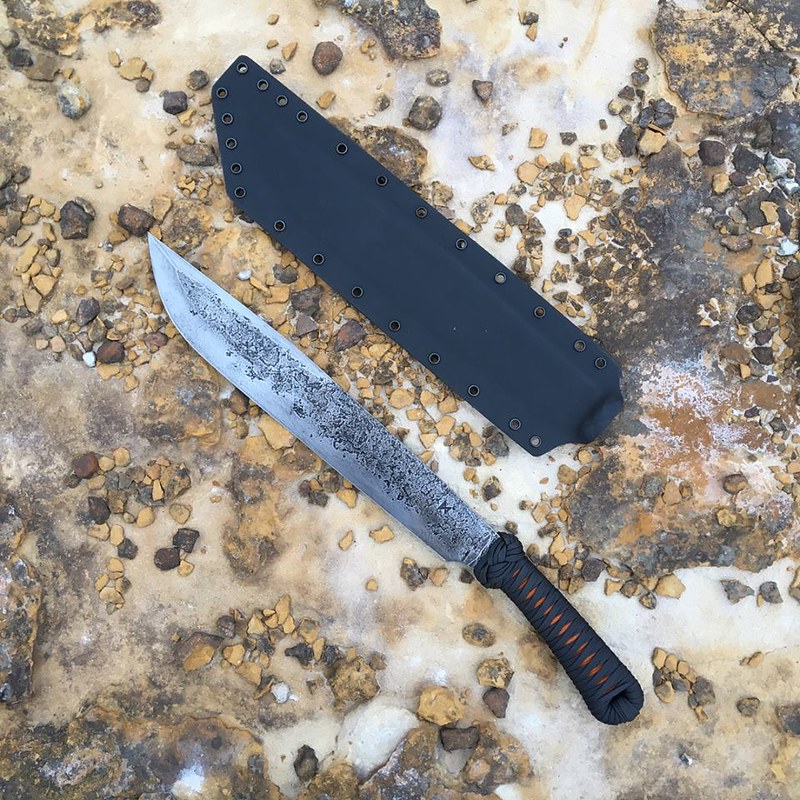 chopper01 by James Helm, on Flickr
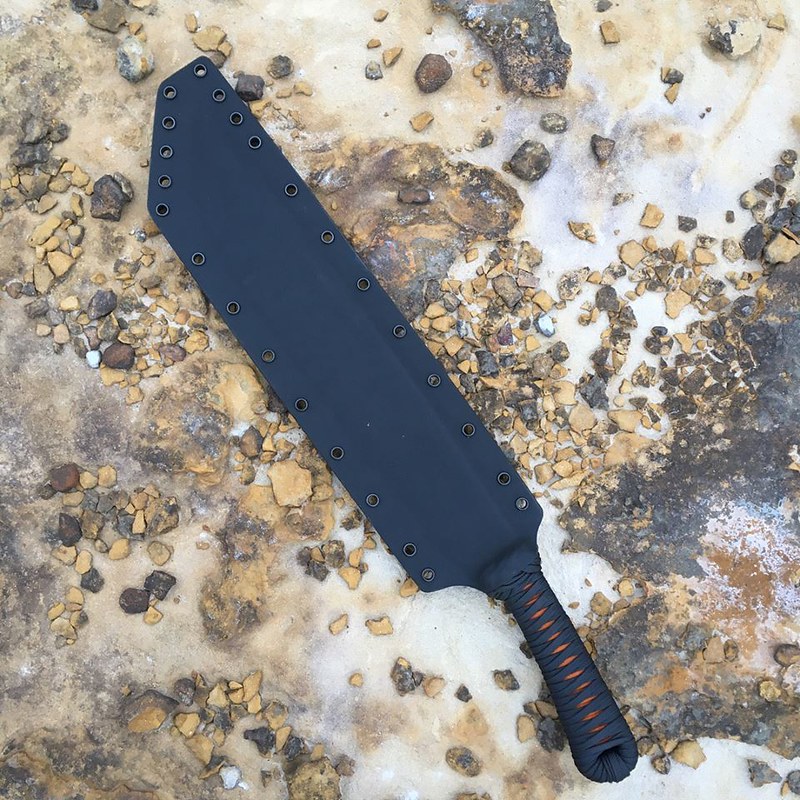 chopper02 by James Helm, on Flickr14 1/4" blade, tan and black. This customer, a fellow knife maker, commented, "Dude! This thing is perfect. I love it!"
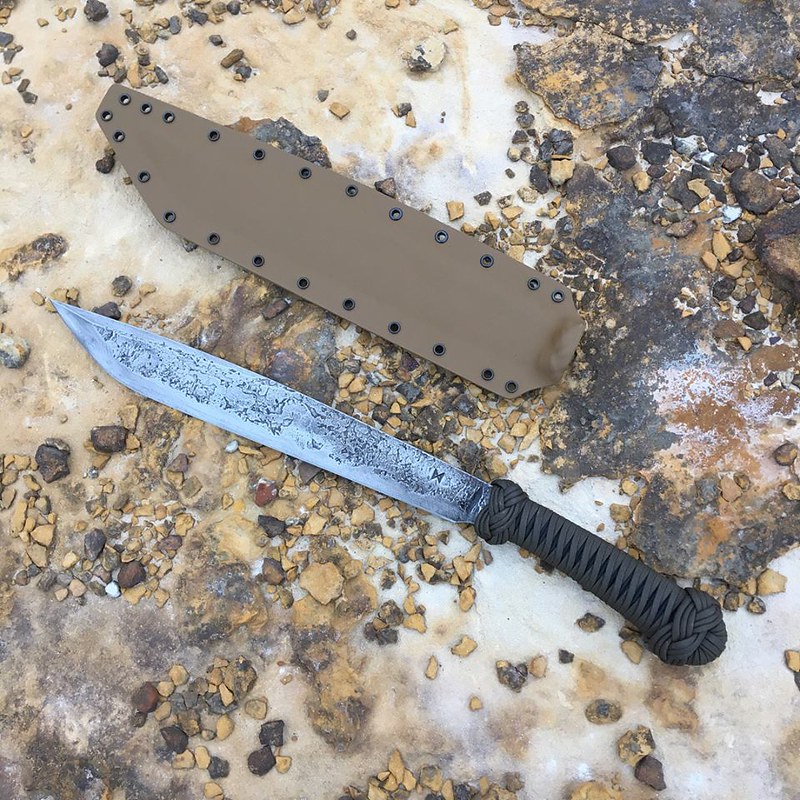 zw01 by James Helm, on Flickr
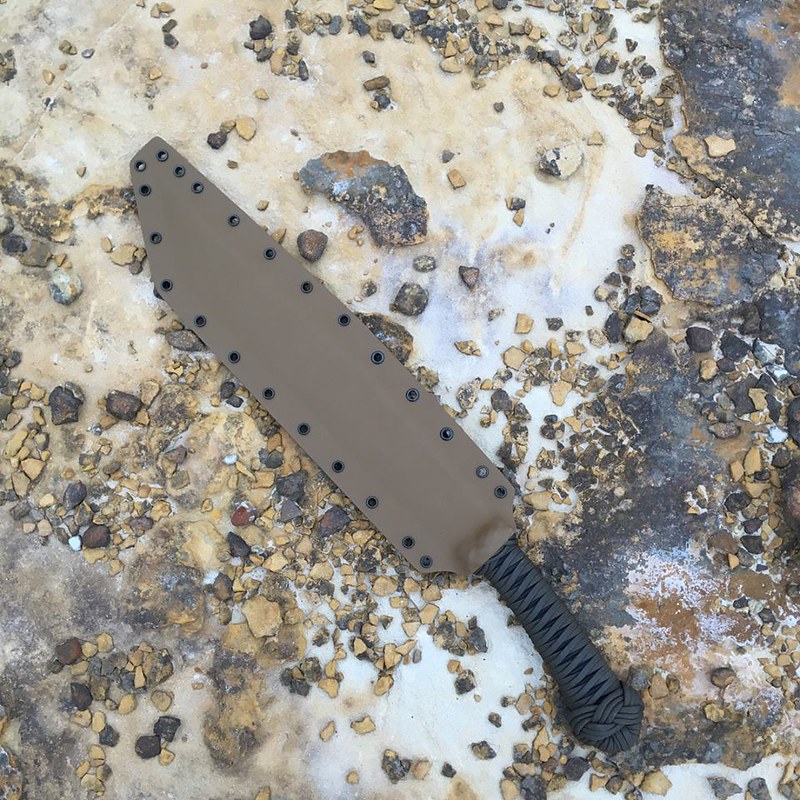 zw02 by James Helm, on FlickrAlways glad to have happy customers.
-
Almost like a beautifully made machine. Love it!
-
Well-done, sir.
-
Thanks, guys!
Shifty Sasquatch? shifty by James Helm, on Flickr
Looking forward to seeing what you come up with, Gergely.
-
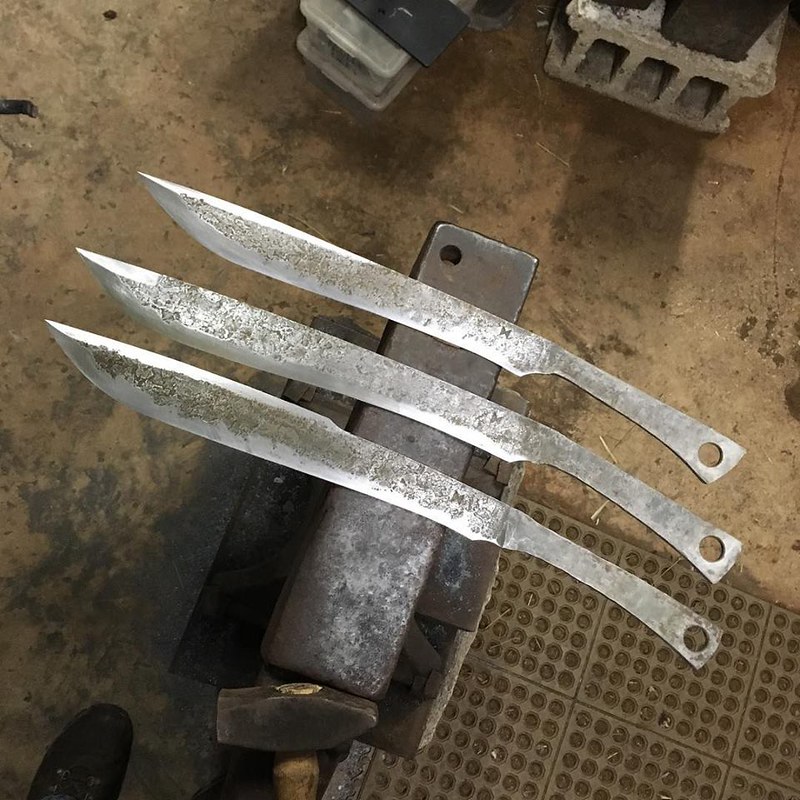
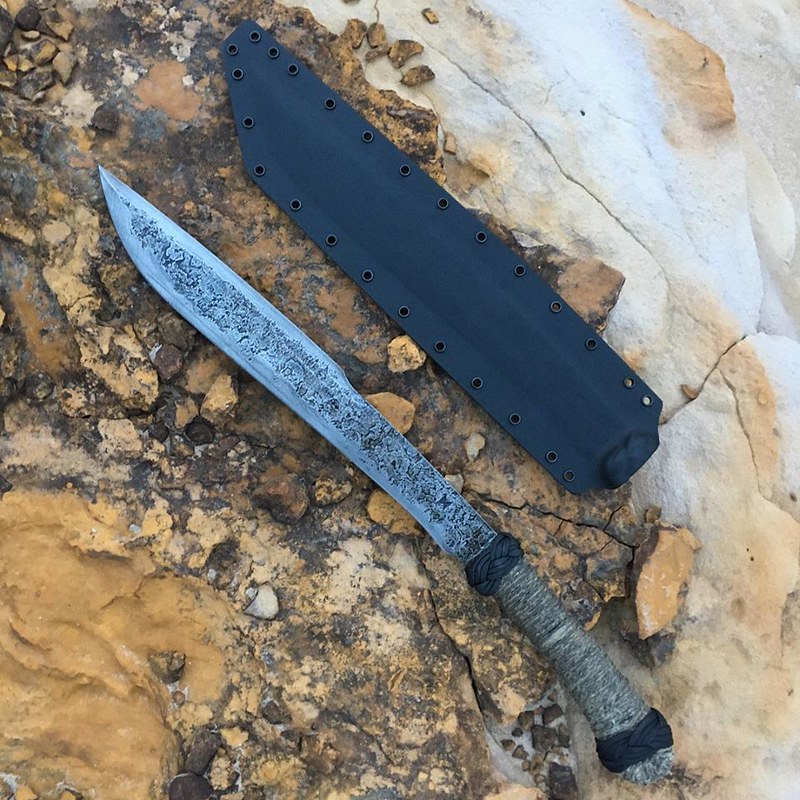
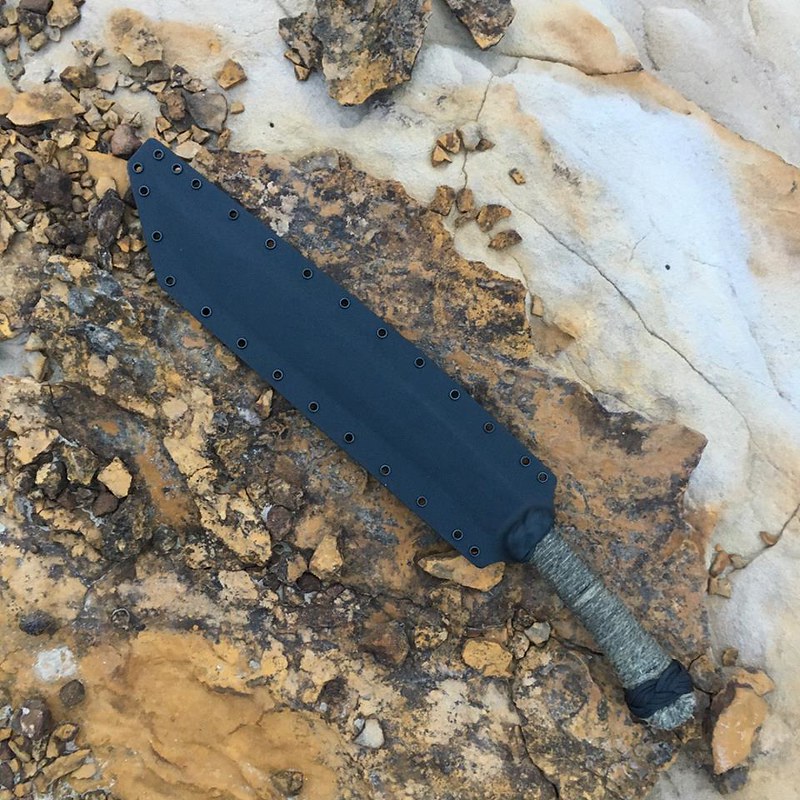
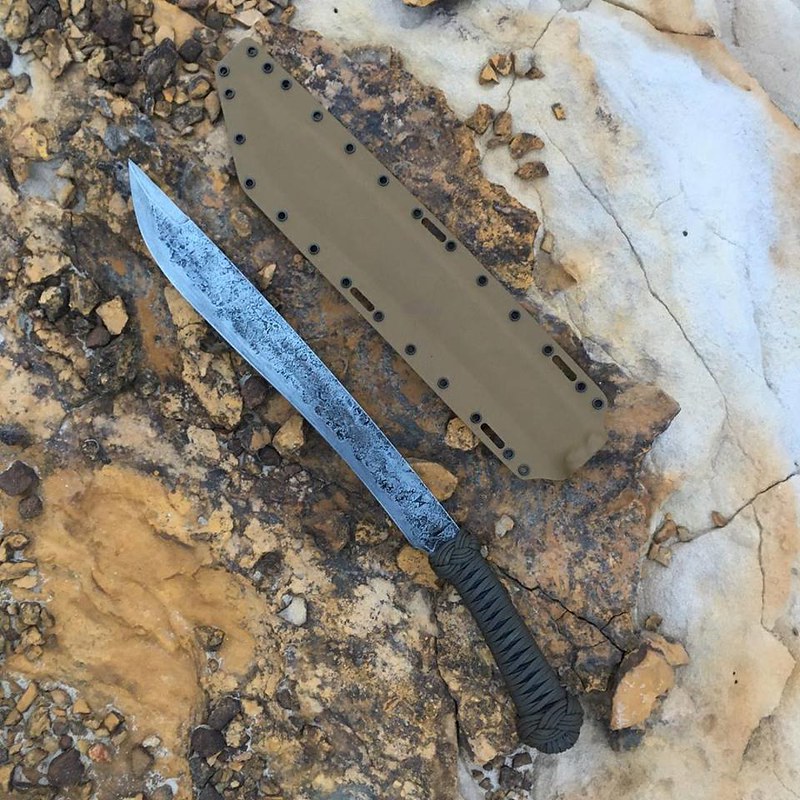
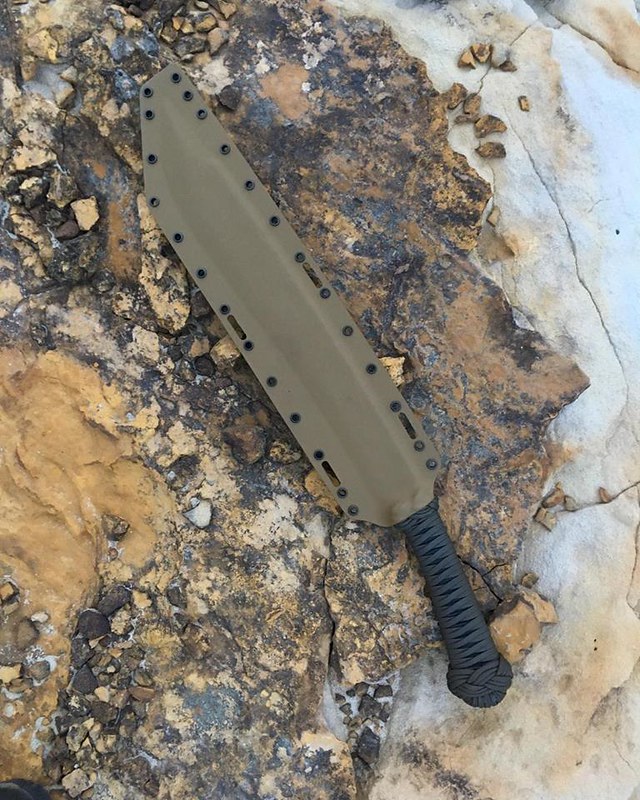
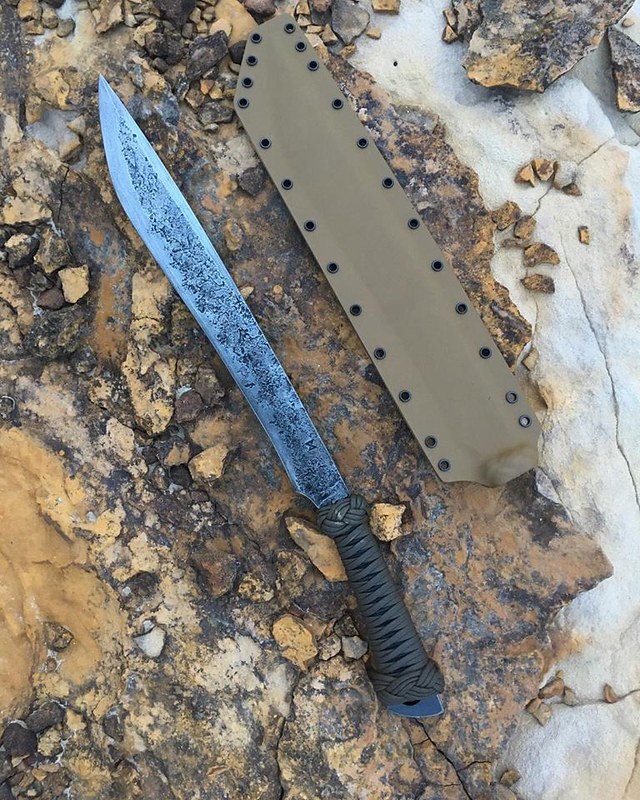
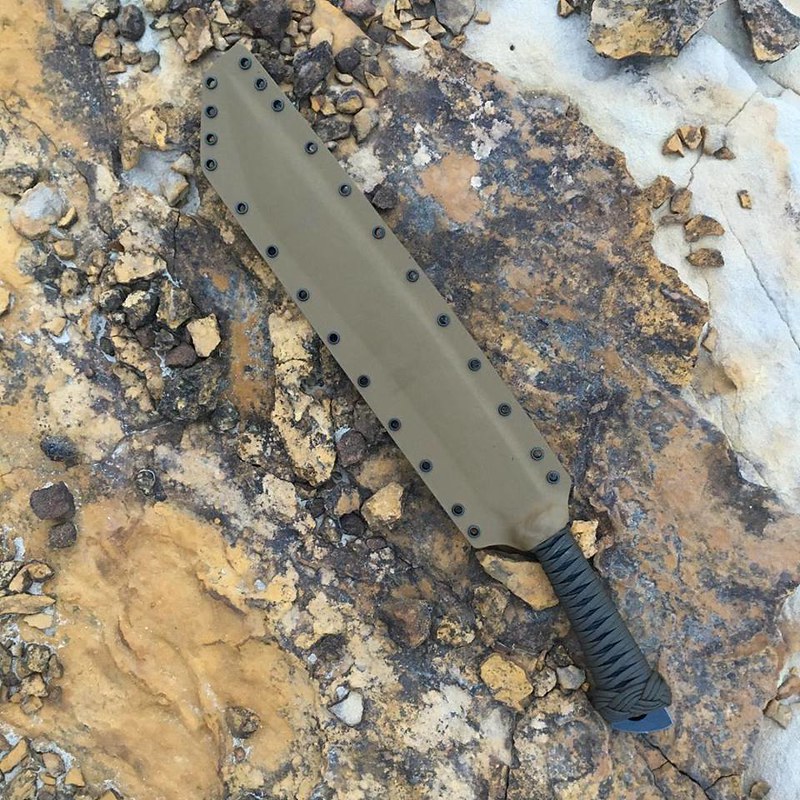
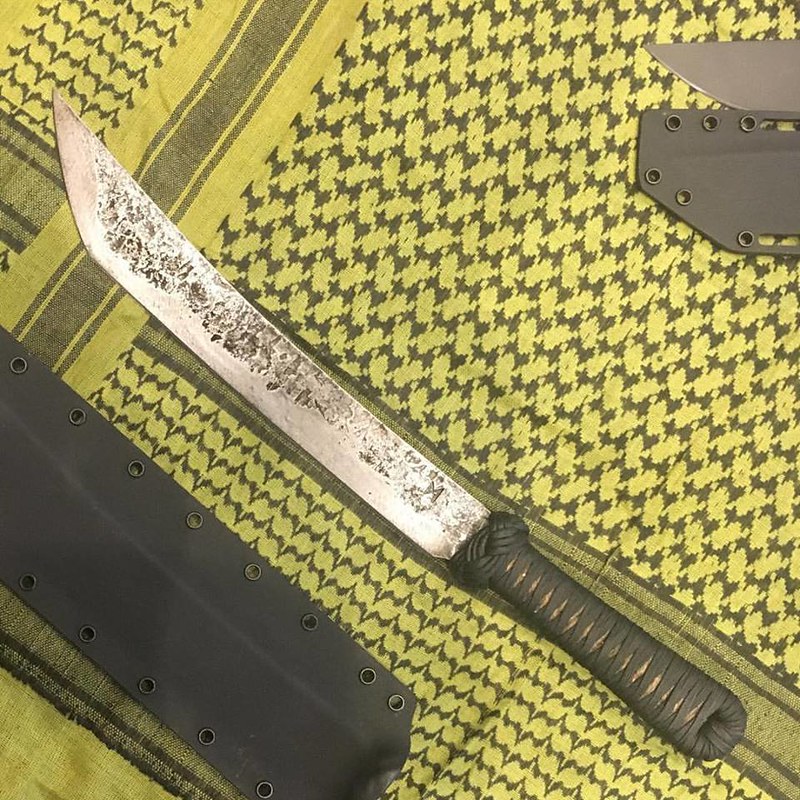
I finished up the bush swords I showed forged out in my last post.
 bushswords01 by James Helm, on Flickr
All are 80CrV2 steel, between 14" and 16" blades.
This longest one had a hemp cord wrap with black paracord Turk's head knots, and a raised false edge.
 eosword01 by James Helm, on Flickr
 eosword02 by James Helm, on Flickr
This one with tan and black paracord had a short, fully sharpened top edge per the customer's request.
 kusword01 by James Helm, on Flickr
 kusword02 by James Helm, on Flickr
And finally, the shortest one. I liked the way the butt end of the handle had forged out, so I left it exposed instead of rounding it out and wrapping all the way around.
 cvsword01 by James Helm, on Flickr
 cvsword02 by James Helm, on Flickr
After having it for a few days, the customer commented, "I can't believe how light and responsive this is for such a large blade. Awesome work my friend! I just can't get over how freakin' awesome this bush sword is. I am sore from swinging it so much. Destroying everything in its path so far. Thank you."
Always glad to have happy customers.
-
I think the Bowie is my favorite.
Any time you need to ask about my experience on the show, feel free to ask.
-
These tanto tips are definitely built with stabbiness in mind.
Just had a customer in Finland who got this other red-and-black wrapped slim tanto a while back post video of it batoning firewood and having its tip used to split kindling sticks. It was made as a slim fighter, too.
 jltanto01 by James Helm, on Flickr
-
Helping out, this is a picture of the anvil in question. Can't really see any more of the markings, but gives you an idea of the condition.
haybudden by James Helm, on Flickr
Wayne's not looking for value, just a time frame on his latest addition to his shop.
-
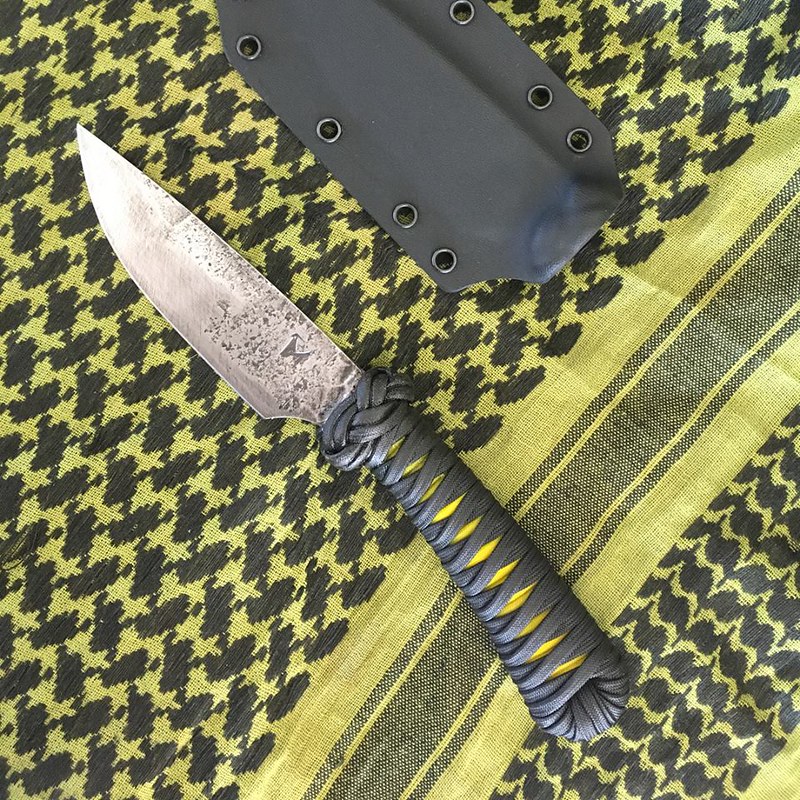
While I've been working on a variety of blade sizes and types, what I've actually finished up lately have been on the small side for me. All are 80CrV2 steel with marine epoxy-impregnated paracord wraps.
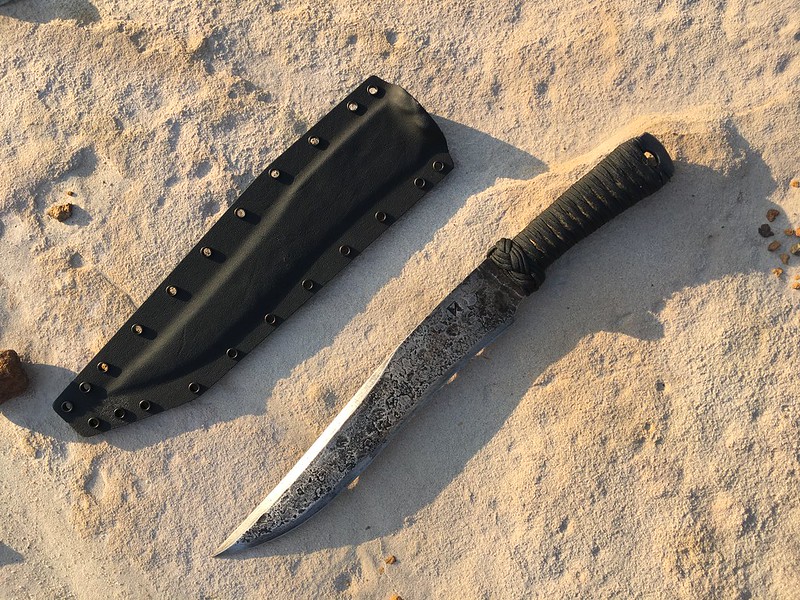
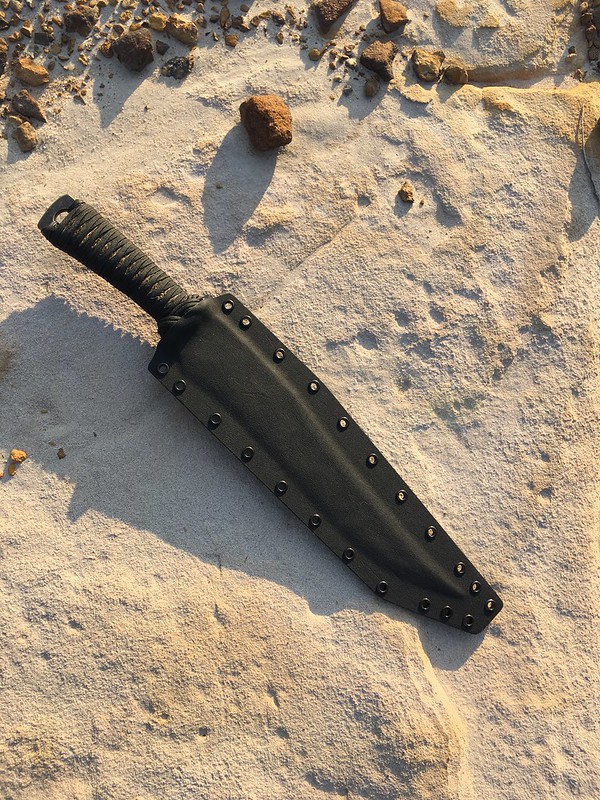
This first is the smallest of the bunch at about a 5" long blade. A fellow contacted me about making a knife for a friend of his who is going on a big hiking adventure in New Zealand. He liked the looks of a smaller knife I had done several years back that appeared in an article by Joe Flowers in the final issue of "Tactical Knives" magazine, which featured retina-searing neon lemon cord for the underlay. I happened to have some of the cord still on hand, and built an updated version of the one from several years back.
 nz01 by James Helm, on Flickr
 nz02 by James Helm, on Flickr
I was able to get finished up and in the mail in time to get there the day before the friend was to leave, thankfully!
The rest of the bunch were forged to demonstrate for various shop visitors at different times, then claimed on Instagram. They are all a bit longer than 7" blades, two long drop points and two tantos. A couple of them went to repeat customers, which is nice, and the others to new customers, which is also nice.
 smallblades01 by James Helm, on Flickr
 smallblades02 by James Helm, on Flickr
 smallblades03 by James Helm, on Flickr
 smallblades04 by James Helm, on Flickr
 smallblades05 by James Helm, on Flickr
And now I'm working on finishing up bush swords.
 bushswords01 by James Helm, on Flickr
-
I don't often work on blades that I didn't make myself. However, I agreed to do a re-handle/re-sharpen job on a Collins engineer bolo mostly because I wanted to get to check it out first-hand. I took waaaaay to long to do the job, though the work itself went fairly quickly. I had thought that these were WWII-era, and have found since then that they started making them pre-WWI.
The bolo wasn't in terrible shape, but definitely wasn't pristine. The owner picked it up for $25. It had cracked handle slabs and was missing a chunk from one, and there were some pretty deep notches out of the ax-like edge. It looked like re-sharpening had altered the profile a bit.
I started out by grinding the heads off of one side of the brass handle rivets and removing the slabs. There was no glue/epoxy/cutler's resin. The handle wood was untouched by rot, though cracked from impacts. I think it is probably rosewood.
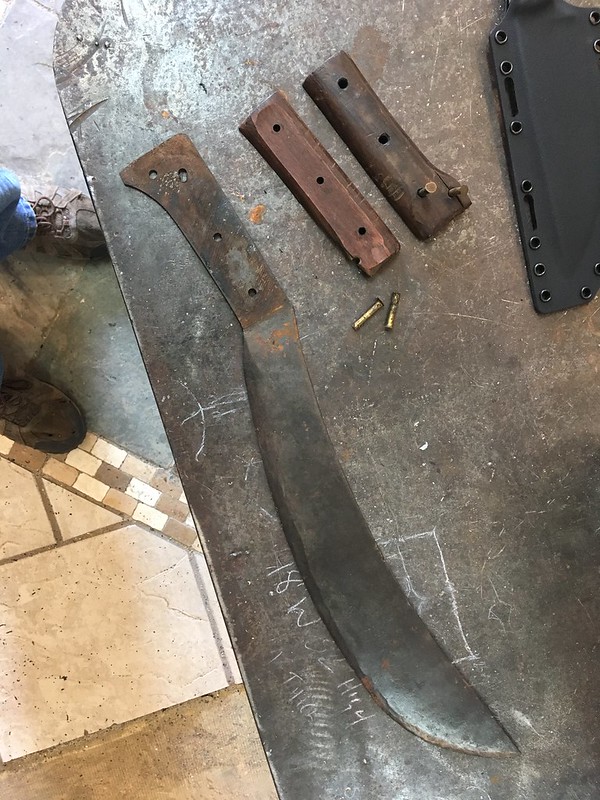 engbolo01 by James Helm, on Flickr
I drilled out the rivet holes from 3/16" (I think, didn't actually measure) to fit the 1/4" stainless tubing I was using on the replacement. The third hole was double-drilled, apparently at the factory, which made getting it sized a bit tricky as it kept catching the drill bit. Then I built a jig from poplar wood, cut out slabs from TeroTuf, attached them to the jig, and shaped them with a series of router bits.
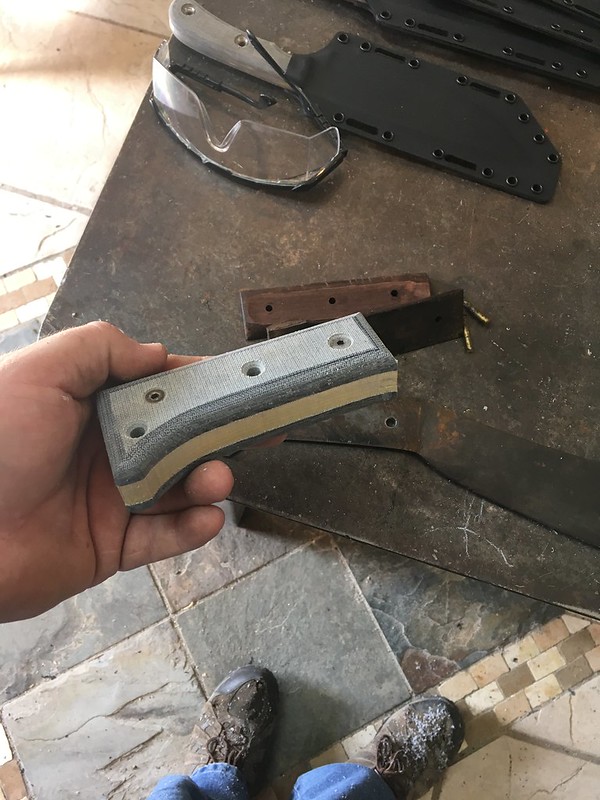 engbolo02 by James Helm, on Flickr
I then cut out the 1/4" stainless steel tube rivets. Due to the tapered tang, I ended up needing to cut them different lengths. The original slabs were the same thickness throughout, so I didn't try to taper the replacement slabs.
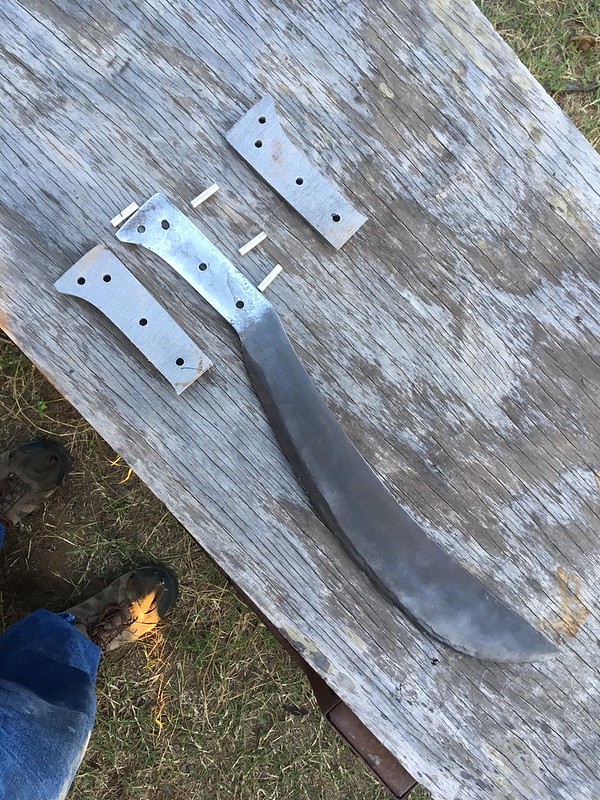 engbolo03 by James Helm, on Flickr
I cleaned up rust with a wire brush on a bench grinder on the blade and a ScotchBrite belt on the tang, then attached the new handle slabs with rivets and epoxy.
 engbolo04 by James Helm, on Flickr
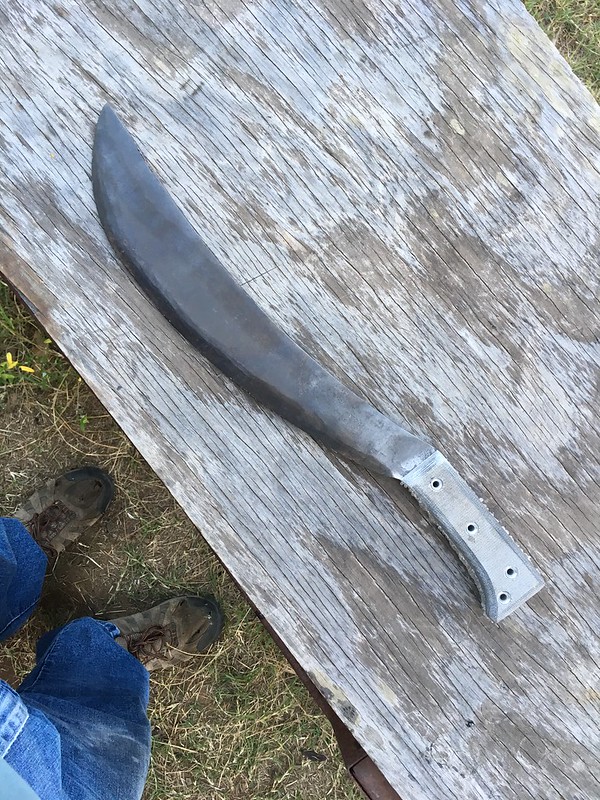
Then on to working the edge. I had not intended to try to get all of the notches out, but by the time I had the bevel cleaned up, most of them were gone.
 engbolo05 by James Helm, on Flickr
This thing is truly frightening now. It's a massive blade, with a convex edge that will scare the hair off my arm. The owner is going to have to make sure he hits what he's wanting to, because it will tear up Jake on anything it contacts.
 engbolo06 by James Helm, on Flickr
Should be good for another century of work now.
-
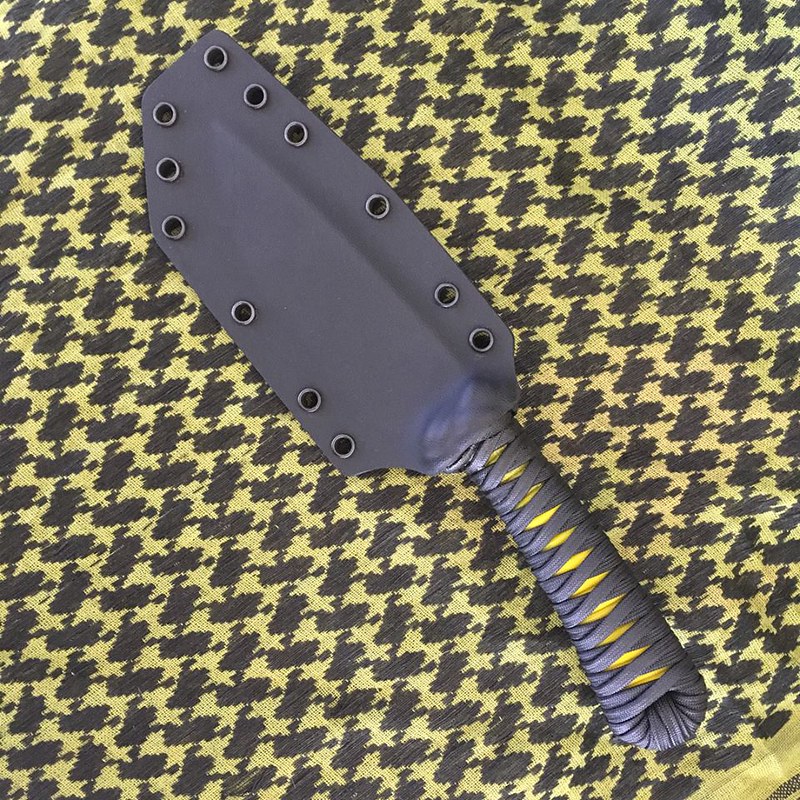
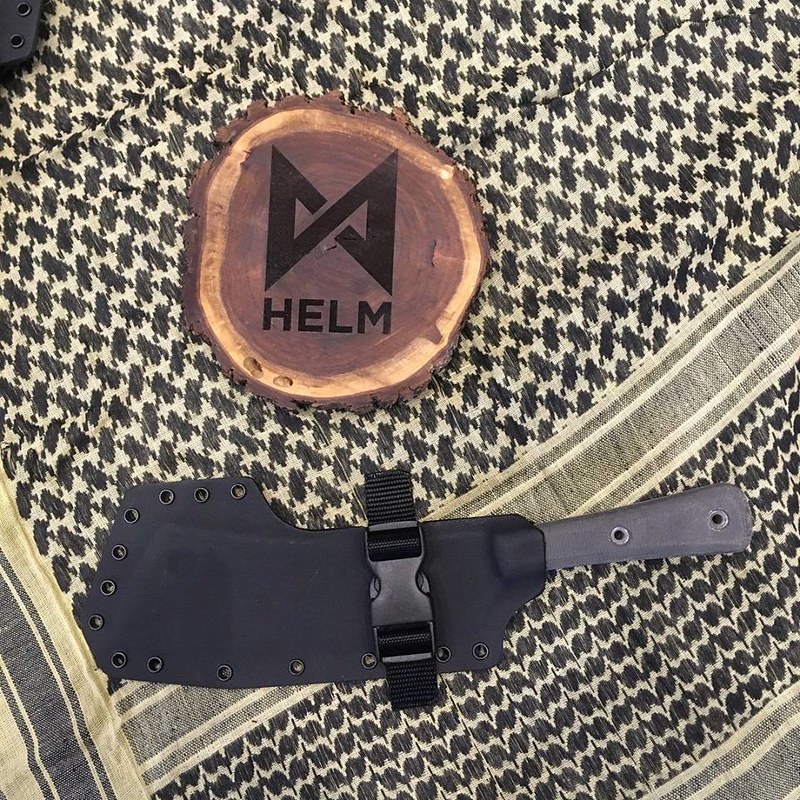
Templehound - Thanks! I have improved on my Kydex sheaths as I go, but of course there are always improvements to do. I'm probably about to swap out to Boltaron instead of Kydex as it is supposed to be more resistant to heat and cold once it's been molded to shape. It has to be molded about thirty degrees hotter, but otherwise seems to work the same.
These sheaths have been built using some standardized hole layout and trim tooling. I could probably pull it in a bit tighter, but I had some older pieces of tooling that were too tight, and wanted to give a little bit of room for error.
-
Thank you!
I ground and heat treated the last batch of old-style Benghazi Warfighters tonight.
-
Some more recently completed work.
A forged camp chopper, 80CrV2 steel and TeroTuf handle slabs. The blade is about 10 5/8" long. The customer wanted a large finger choil for choked-up work. It's not the biggest blade I've made by any stretch, but everyone who handled it agreed it was a beast.
 tw04 by James Helm, on Flickr
Kydex sheath.
 tw05 by James Helm, on Flickr
The customer requested an exposed skullcrusher tang and a dedicated lanyard hole. This was a first for me, to build a slab handle with a notch to accommodate a lanyard hole. I say "dedicated" because the flared tube rivets also afford lanyard attachment points.
 tw06 by James Helm, on Flickr
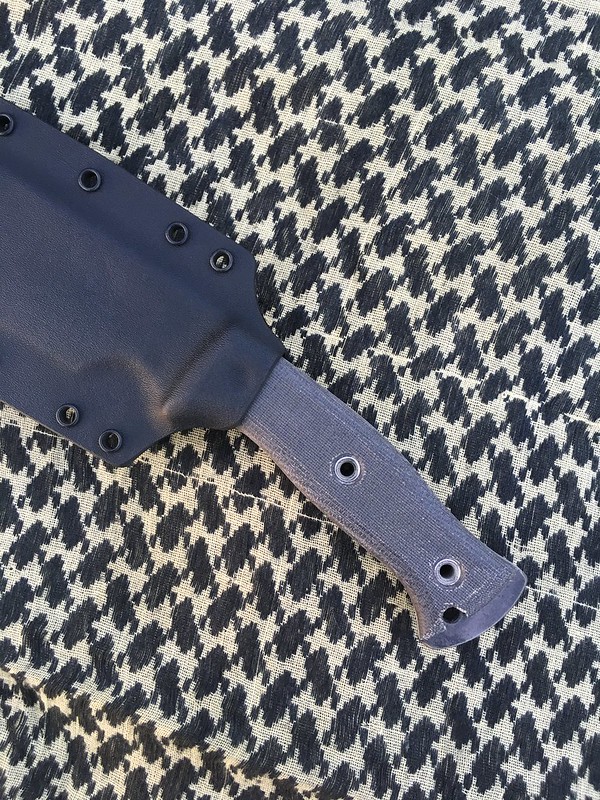
I've been in the very long, slow process of trying to launch a mid-tech stock removal line based on my more popular forged designs. I haven't posted too much about it because I wanted to have everything ready to roll first. I'm finally approaching that point. Along the way I have had small batches of blades waterjet cut and have tweaked my design a bit as I go, getting everything zeroed in to the final product. I have a very small handful of the older style blade designs in various states of completion, most of which are already claimed, before doing a full launch of the line.
This set of three Benghazi Warfighters was bought by fellow for himself and some family members. The blanks are waterjet cut from 3/16" 80CrV2 steel, ground and heat treated by me, and handle slabs shaped from TeroTuf using jigs and a series of router bits.
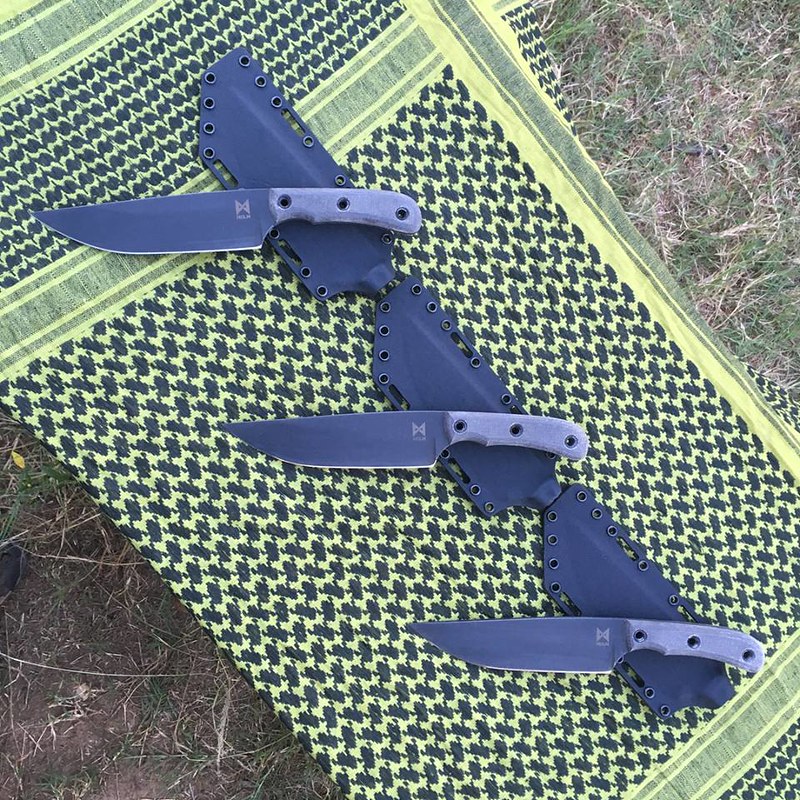 bw04 by James Helm, on Flickr
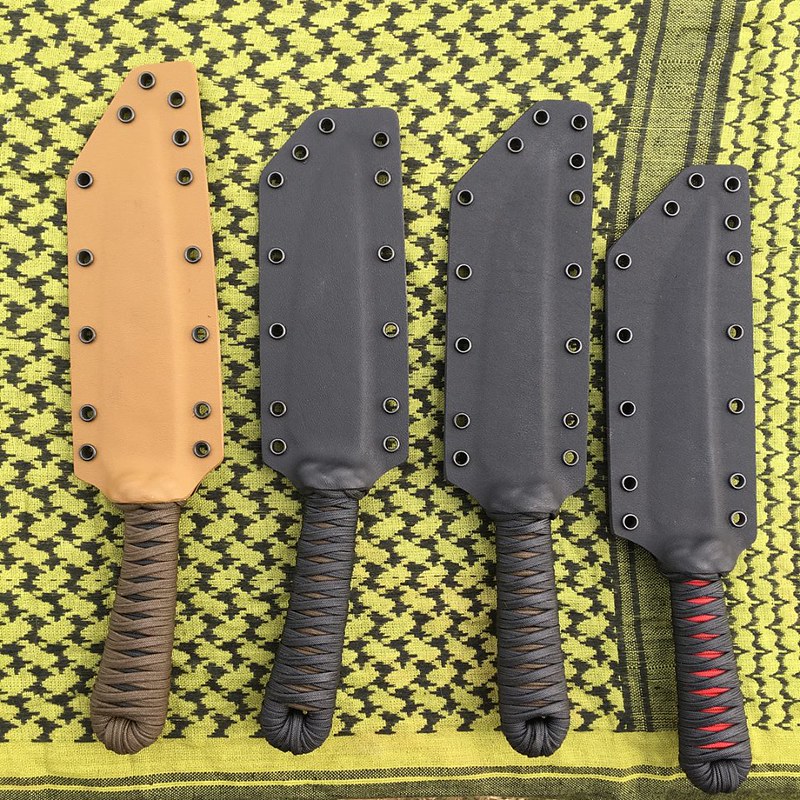
The blades have a Caswell black oxide finish (the final version will have a coating) with the touchmark laser engraved. The sheaths are standardized, one will fit any of the blades.
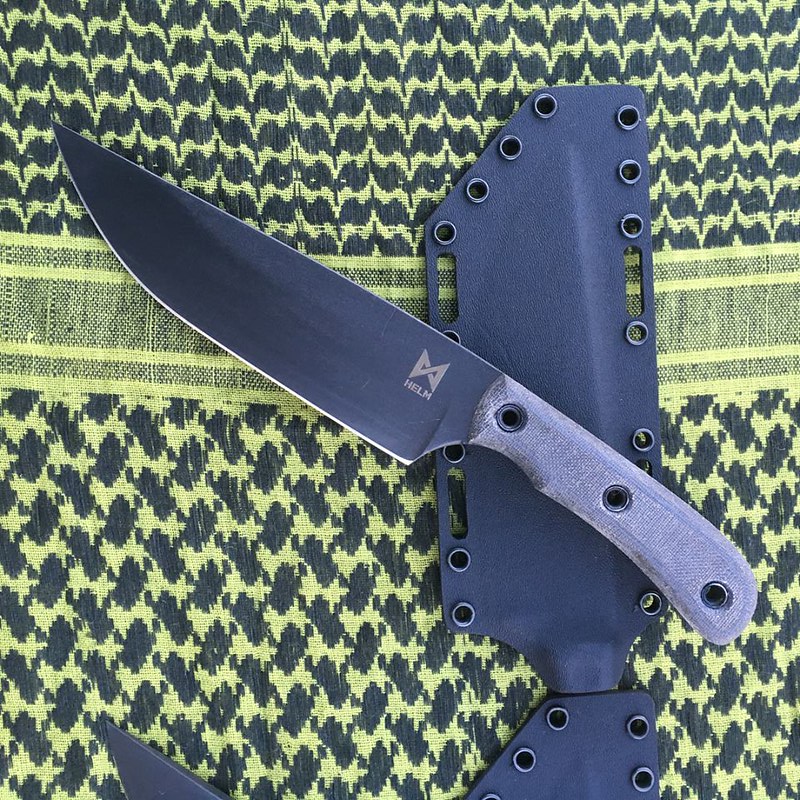 bw05 by James Helm, on Flickr
A couple of hours after picking these up, the customer called up and laid claim to one of the older-style Little Rok mid-techs in progress.
-
I liked that you added the 3D printed elements to it when I first saw it on the show.
-
14 hours ago, gmbobnick said:
This knife looks like something Arnold might have swiped off the alien in the movie "Predator".
That's a good way to put it.
-
Thanks, guys!
Templehound - One of the terms I use to describe my style is "primal/tactical".
Lyuv - The texture is just me hammering the steel to shape. I soak in vinegar overnight to eat the scale off after I normalize, do my stock removal, heat treat, and then sand off the quench oil. The vinegar doesn't do anything to the texture; that's just my hand hammer and the natural texture left by the scale.
Thomas - They were all drilled with the same drill bit, starting near the tip where the leverage would make the most difference, then moving back toward the handle. After I was getting close to the POB, I went back and enlarged three of the holes to 3/4". They all got countersunk. It was a bit surprising how much steel I had to remove to shift the balance back. The difference between a blade with multiple compound tapers and a flat bar cut to the same profile.
-
Some mid-sized blades finished up a while back. All are 80CrV2 steel.
First up is a small meat cleaver commissioned by a customer. He liked the looks of a cord-wrapped cleaver I had forged for the Blade Show and wanted one with a TeroTuf handle. I liked the results well enough I traced it out to have a reference if I do future versions.
It's about a 7" blade.
 cleaver01 by James Helm, on Flickr
 cleaver02 by James Helm, on Flickr
It was picked up at the Usual Suspects Network Gathering knife show, and I didn't get a chance to get good pics before traveling, but here are a couple of interesting shots of it. The first is during thermal cycling, after forging and before stock removal.
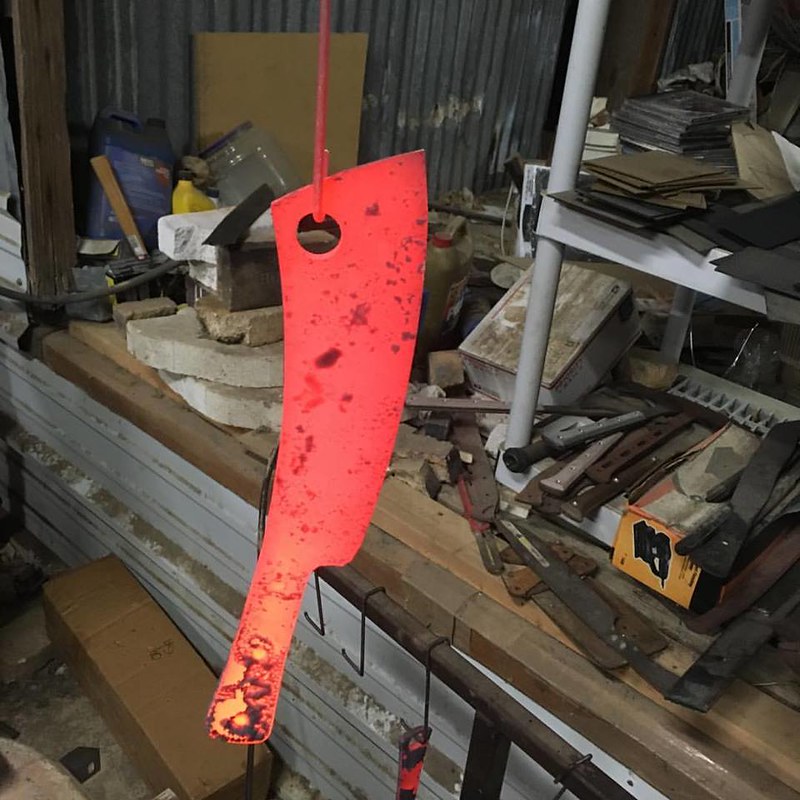 cleaver03 by James Helm, on Flickr
And a picture from the customer himself, just prior to cutting up these ribs. According to him, the cleaver "went through them like they weren't there".
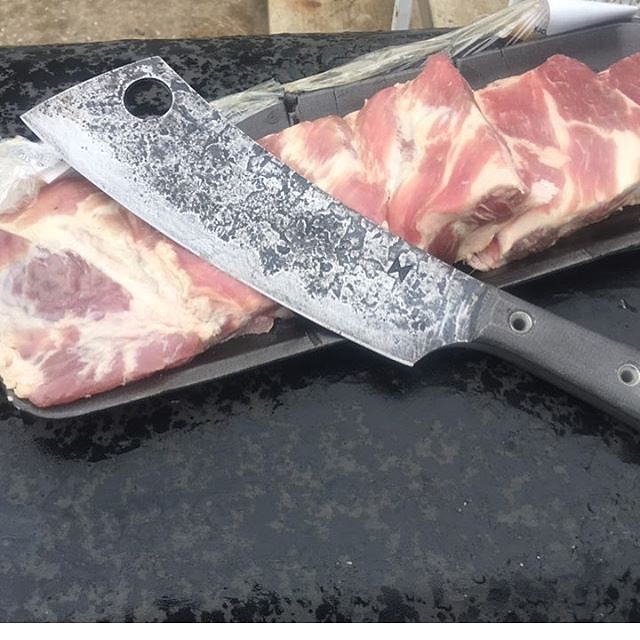 ribs by James Helm, on Flickr
And speaking of cutting up critter parts, another customer had this pic of his drop point processing out rabbit along with an ESEE.
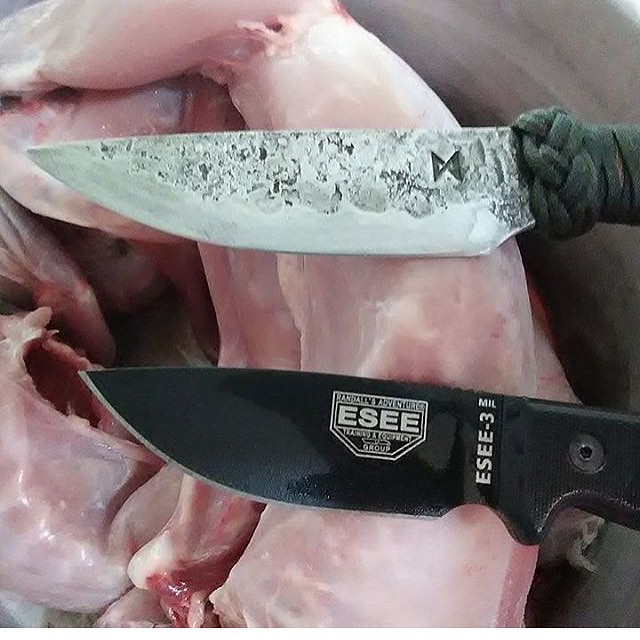 rabbit by James Helm, on Flickr
This bush dha was another casualty of having to get everything ready for the show. These are the only pictures I managed to get. It was originally intended to be a different blade shape, more of a bolo, but sometimes you have to work with the steel rather than boss it around. It's about a 12" blade with a handle of hemp under paracord.
 dha02 by James Helm, on Flickr
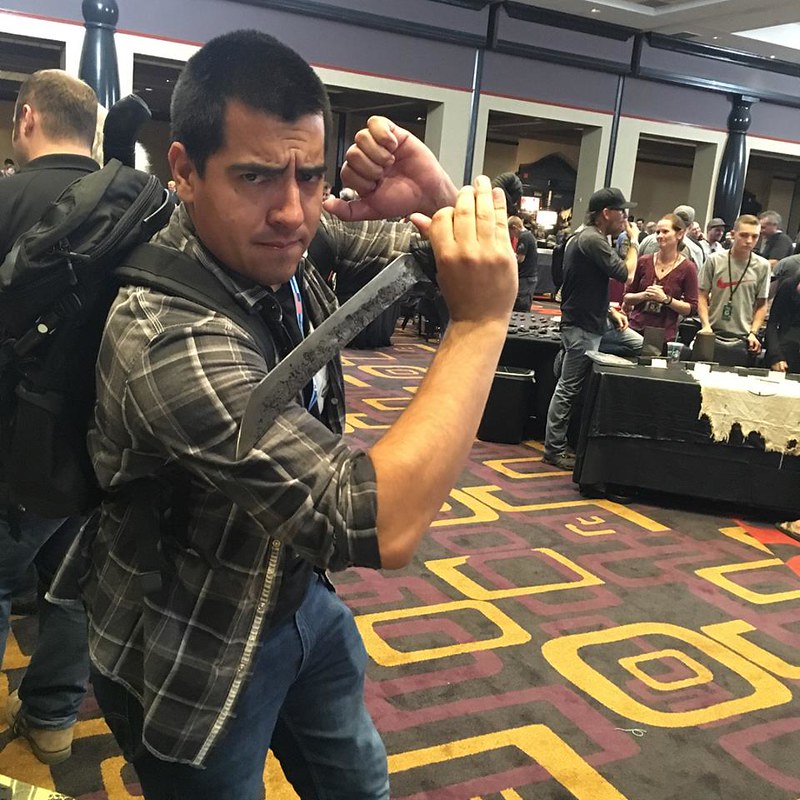
I did get an awesome shot of it with the infamous Ed Calderon, the Taco Ninja. Got an interesting upcoming project with Ed.
 dha01 by James Helm, on Flickr
And this 12"-bladed Persian fighter was originally planned to be on my table at the Blade Show, but ended up missing out because I was running out of time. It went to the Gathering with me and came back where it was claimed once I posted it on Instagram. The blade is about 12", and the top edge is unsharpened. I'd consider this to be about as close to doing a fantasy piece as I do.
 persian01 by James Helm, on Flickr
 persian02 by James Helm, on Flickr
The customer requested a mild steel trainer to be predominantly used on his BOB training dummy. That was a first to me, but I agreed. I used 3/16" mild steel and trimmed out the shape on a bandsaw before cleaning up on my belt grinder. The handles of both
are hemp under paracord, and it took three tries to get the wrap to feel almost the same as the original. Then I worked on getting the balance the same as the original. persian02 by James Helm, on Flickr
The result was a trainer that's a bit lighter than the original, but due to having the same balance it feels very close to the same.
 persian01 by James Helm, on Flickr
 persian03 by James Helm, on Flickr
-
You have a very distinctive style, and superbly clean craftsmanship to execute it. Always a pleasure when you share your work.
-
"By doggies, you *will* let me check your grip on my tang!"
-
Congratulations, Theo! I would have loved to do the challenge to get in, but would have hated to do the challenge to move on! Good choice on the 80CrV2, and loved the 3D printed handle elements.

Tanto and Kogatana knife set
in Knife Making
Posted
That is very cool! 3D printing on the wax for the fittings?