
Stormcrow
-
Posts
1,095 -
Joined
-
Last visited
Content Type
Profiles
Forums
Articles
Gallery
Downloads
Events
Posts posted by Stormcrow
-
-
Thank y'all!
")
-
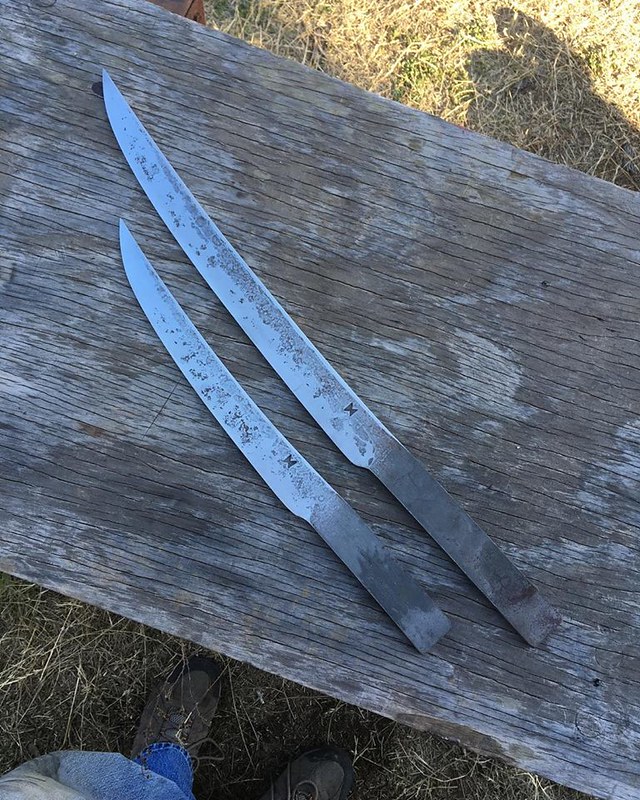
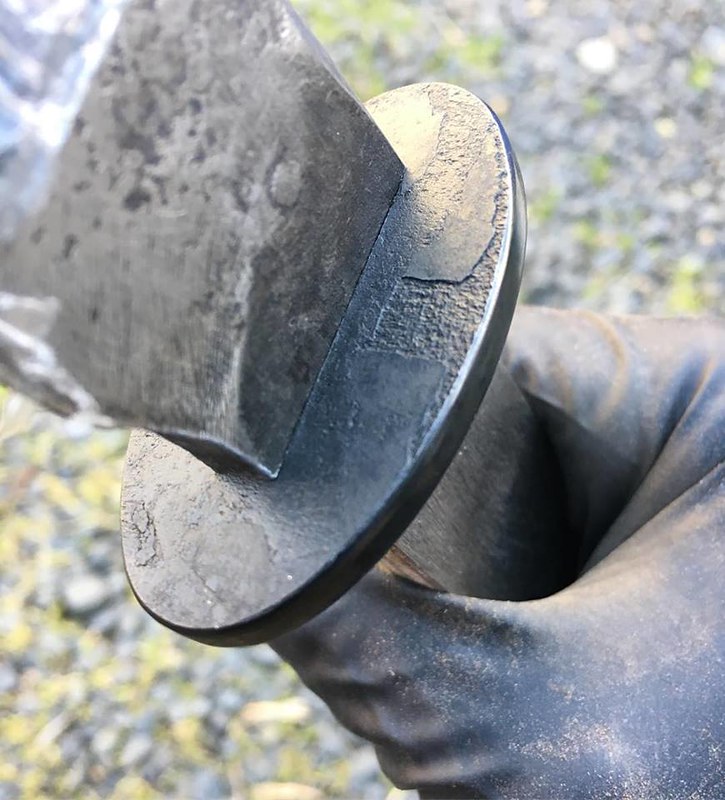
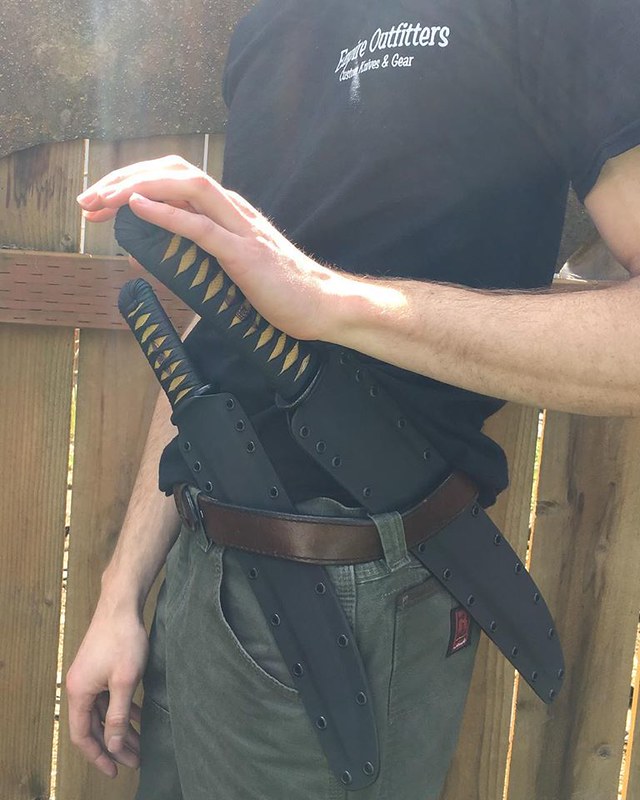
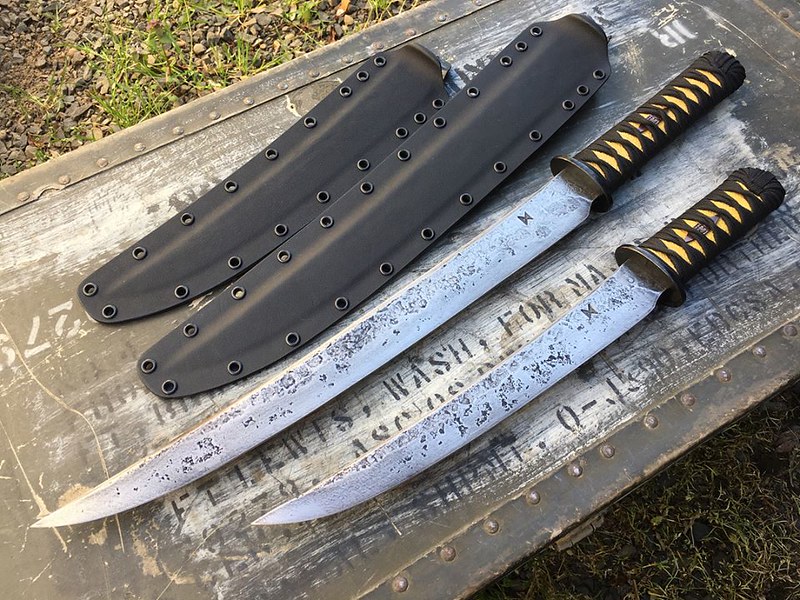
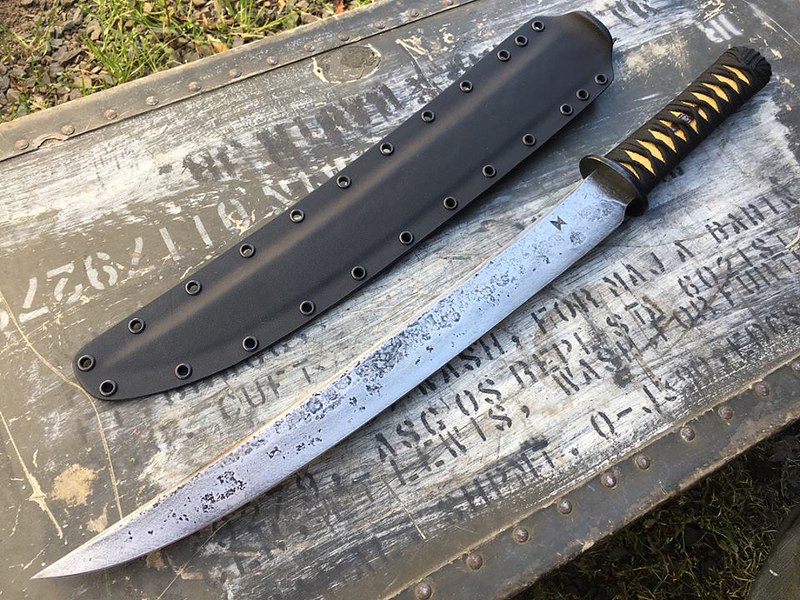
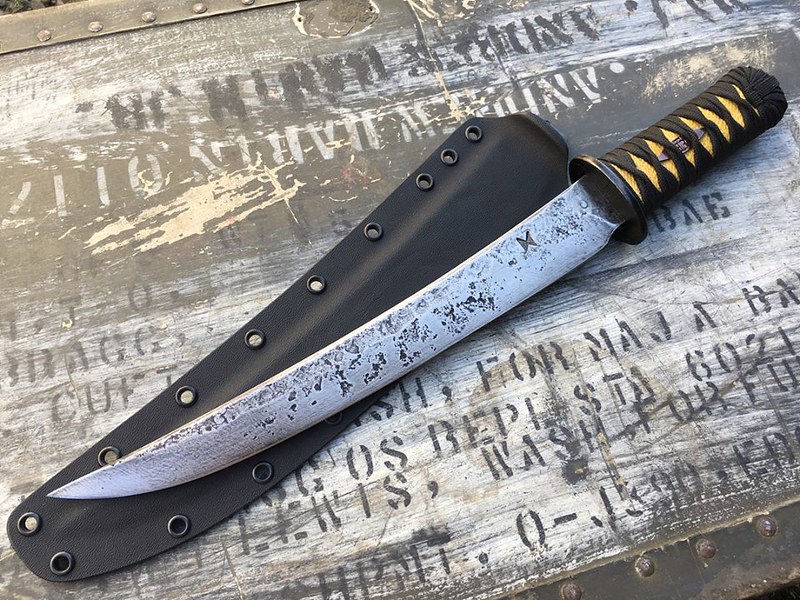
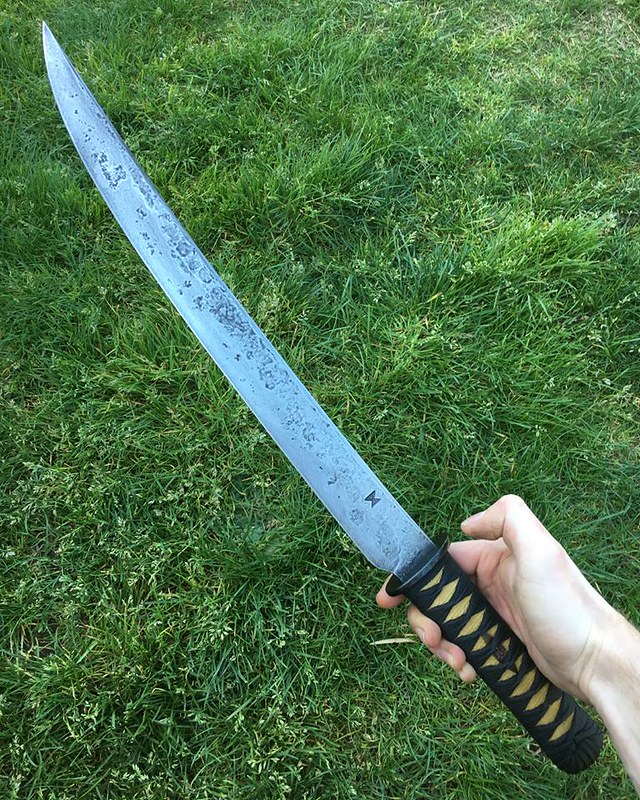
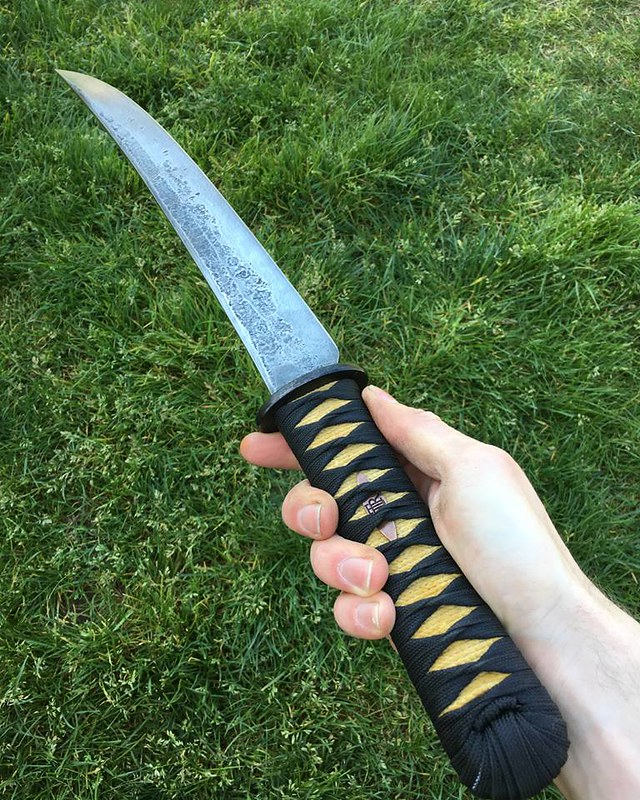
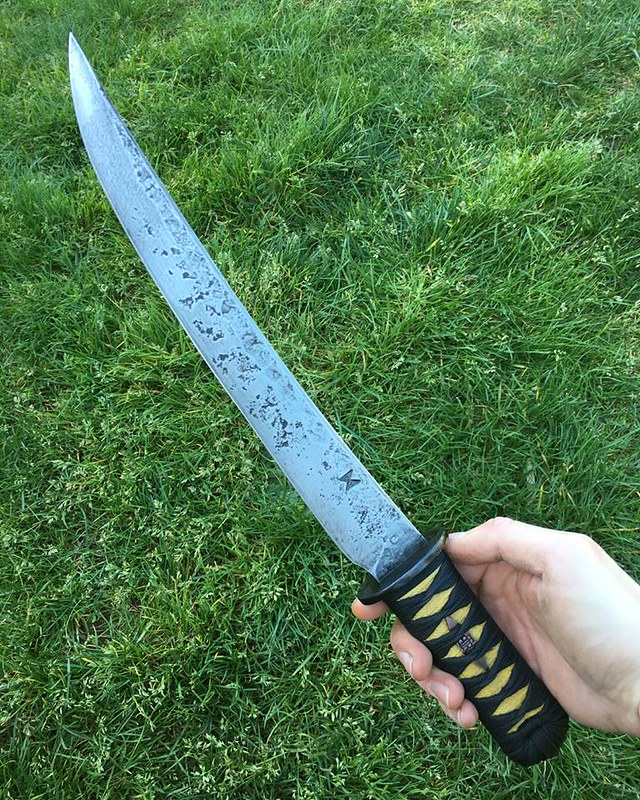
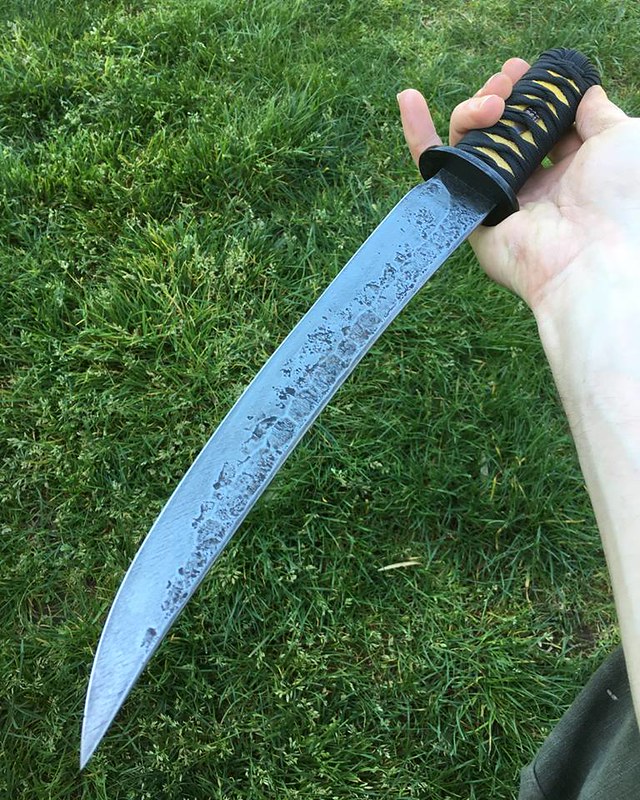
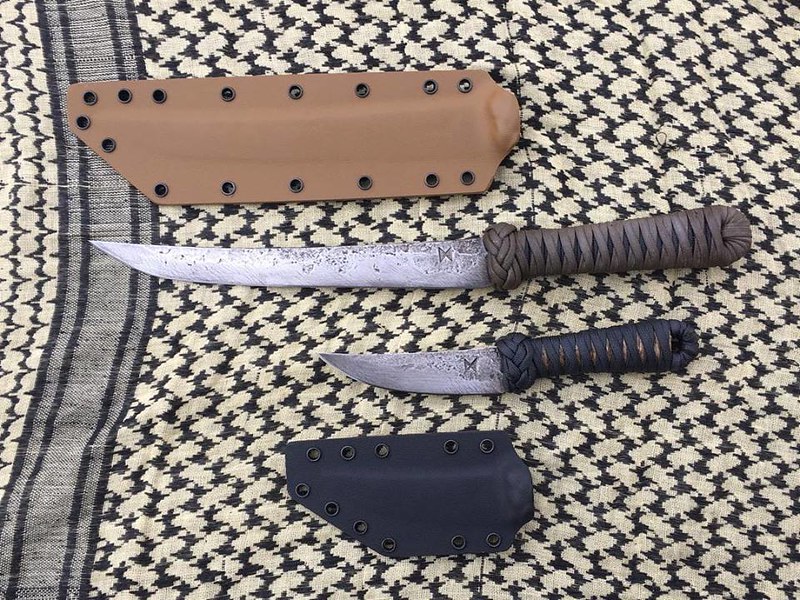
Sometime last year I made an o-tanto that caught the eye of the very talented Ben Tendick of BRT Bladeworks in Oregon. We had been wanting to do a collaboration for a while, and it seemed like a good direction to go. The tanto was slated for someone, so I forged another, and ended up making a wakizashi in the same style as well. I forged the blades, and Ben did the rest of the work.
Here's what was sent to Ben, a 16" and a 11.5" blade forged from 80CrV2 steel, heat treated and ready for Ben to work his magic on the handles. I left the tangs big and blocky to give Ben plenty of canvas on which to paint.
 helmtendick01 by James Helm, on Flickr
Ben worked them down, shouldered the tangs to fit the tsubas, and drilled the holes to anchor the wrap.
 helmtendick02 by James Helm, on Flickr
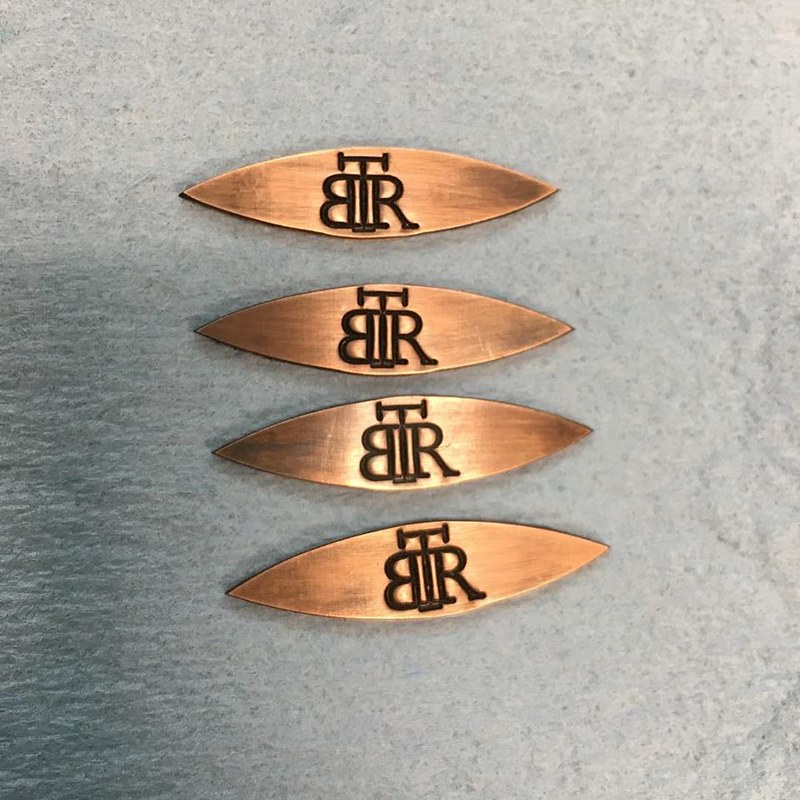
I left all the details to Ben on how he wanted to finish. He decided to use wrought iron for the tsubas. In his words, "I did my best to capture that well used Ronin style in this set."
 helmtendick03 by James Helm, on Flickr
 helmtendick04 by James Helm, on Flickr
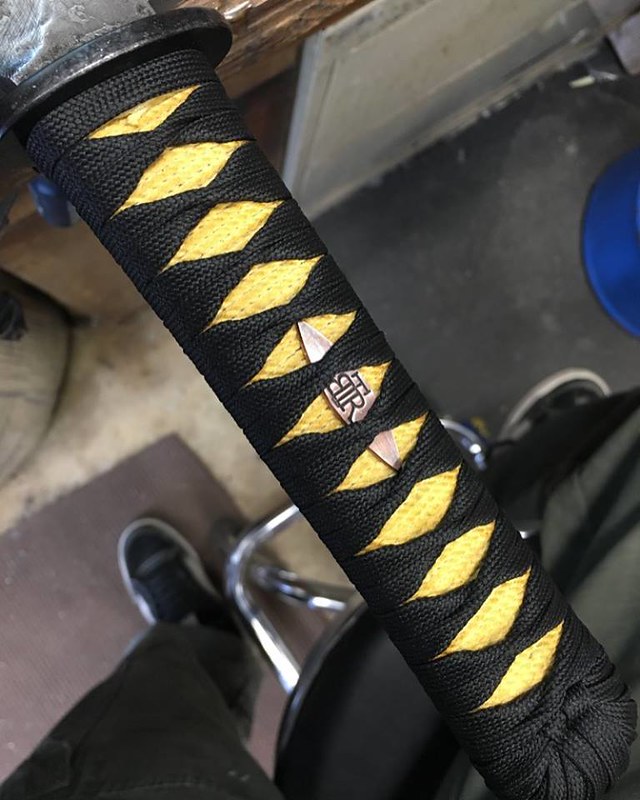
And copper menuki with his touchmark.
 helmtendick05 by James Helm, on Flickr
He went with antiqued cotton cord for the underlay.
 helmtendick06 by James Helm, on Flickr
 helmtendick07 by James Helm, on Flickr
Finished up.
 helmtendick08 by James Helm, on Flickr
 helmtendick09 by James Helm, on Flickr
 helmtendick10 by James Helm, on Flickr
 helmtendick11 by James Helm, on Flickr
 helmtendick14 by James Helm, on Flickr
 helmtendick16 by James Helm, on Flickr
 helmtendick17 by James Helm, on Flickr
I think Ben nailed it. 8-)
-
Besides health issues, motor oil is not the right quench speed for blade steels, at least. Canola oil is cheap, non-toxic, and is a good quench for a variety of simple carbon steels such as 5160, 1084, and 80CrV2. Pre-heat to around 120 degrees before quenching.
Don't use motor oil. Not worth the tiny amount of money saved vs. buying new canola, to have a less-than-ideal, carcinogen-laced quench.
-
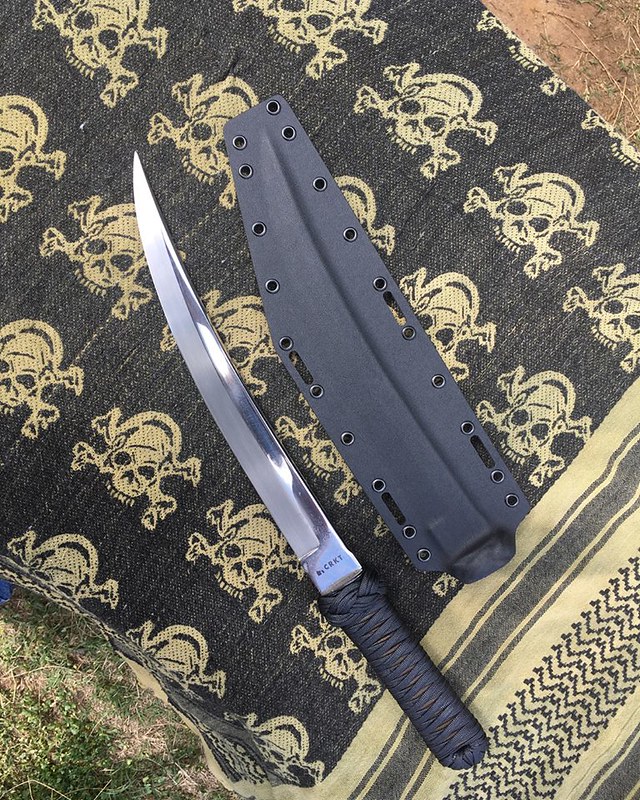
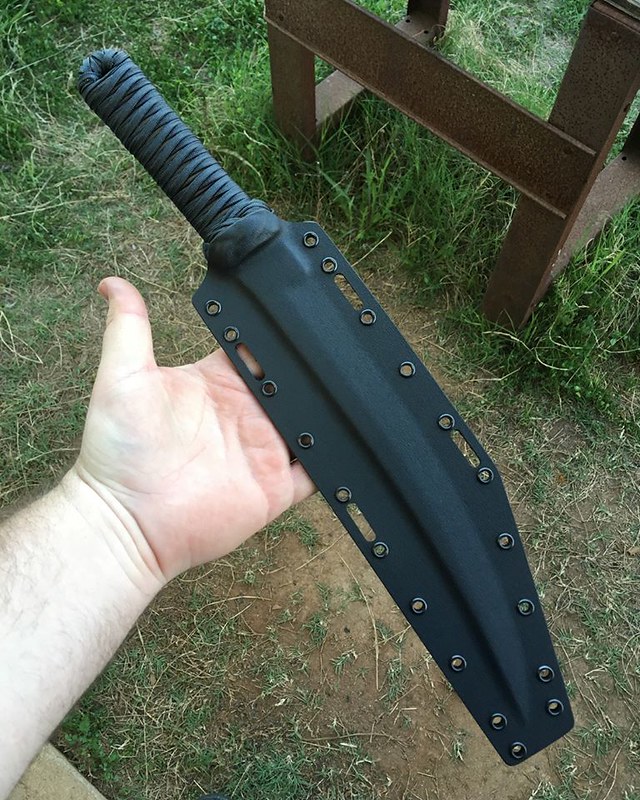
A couple more blades that have recently left my shop.
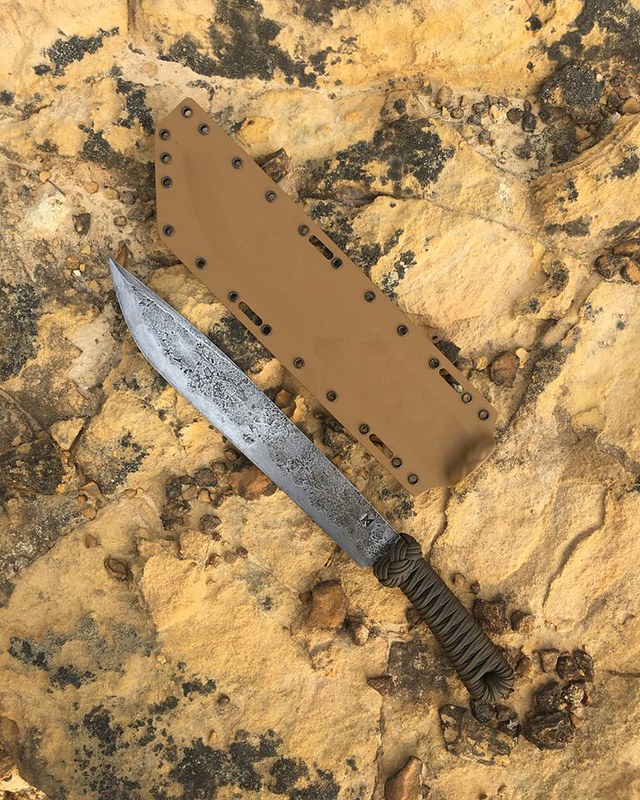
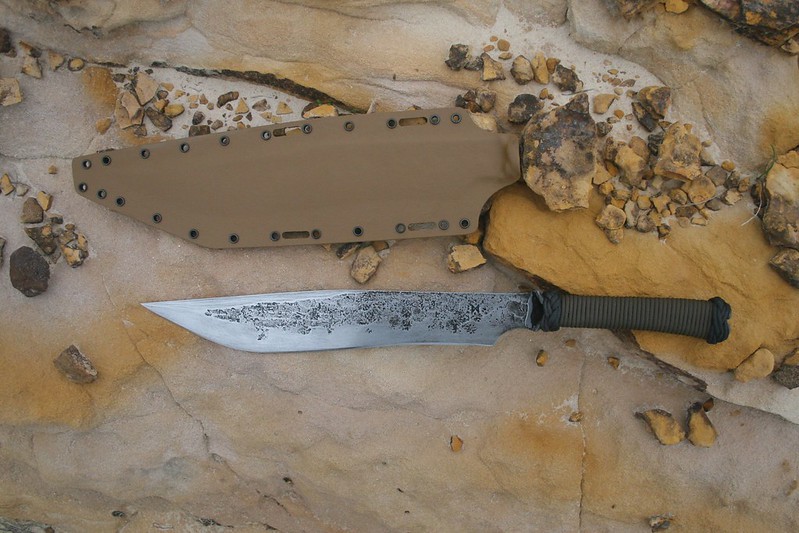
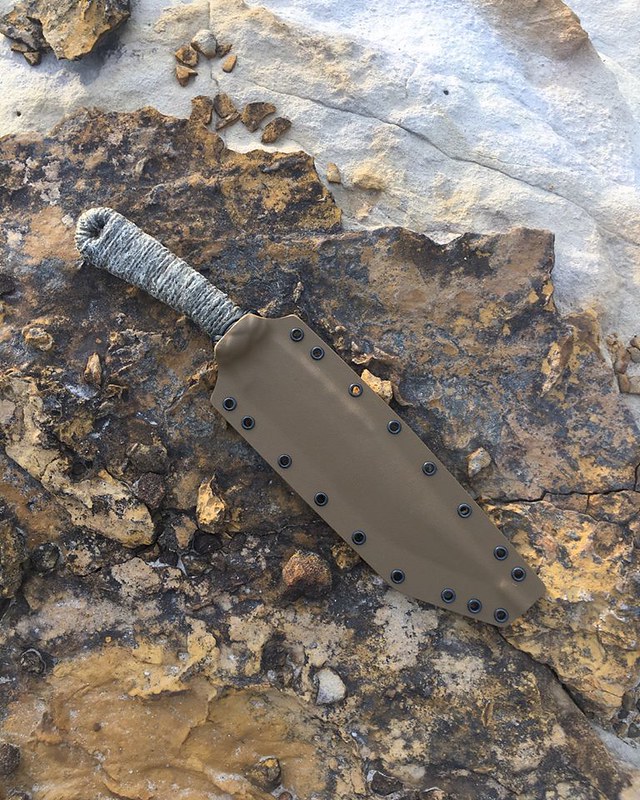
The first is a camp chopper traded to another knifemaker for a kitchen knife for my wife. It's taken a loooong time for me to finish it up. It has a 13" blade forged from 80CrV2 steel, with a tan over black paracord wrap and tan Kydex sheath.
 joec01 by James Helm, on Flickr
The second is a re-wrap on a CRKT Hisshou, designed by James Williams. I usually don't work on other people's blades, but this is the design that started me playing around with tanto designs of my own. The customer had already stripped off the handle wrap and ray skin underlay, leaving the polymer bolster in place. I laid down a neoprene foundation, followed by a tan paracord underlay and tang paracord overlay, with a three-strand Turk's head knot on top of the bolster.
 hisshourewrap01 by James Helm, on Flickr
The sheath on this is Boltaron, very similar to Kydex but less susceptible to temperature changes once molded. I think it has some better definition as well. The pistol holster guys like it. This is what I'll be using on sheaths now.
 hisshourewrap02 by James Helm, on Flickr
The Hisshou is zero ground, something I've never done, but I touched it up with my stropping belt on my belt grinder with some green chrome compound. He noticed, sayin, "It's xxxxxxxxx shaving sharp!"

-
Thanks! I want to say the parangs are around 10". They all started with the same size of stock.
-
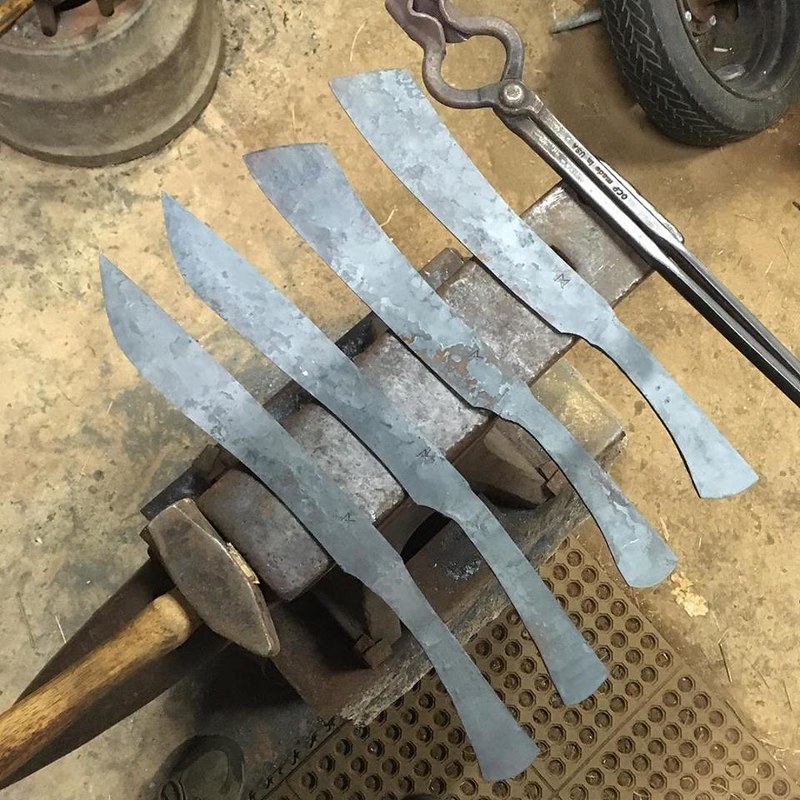
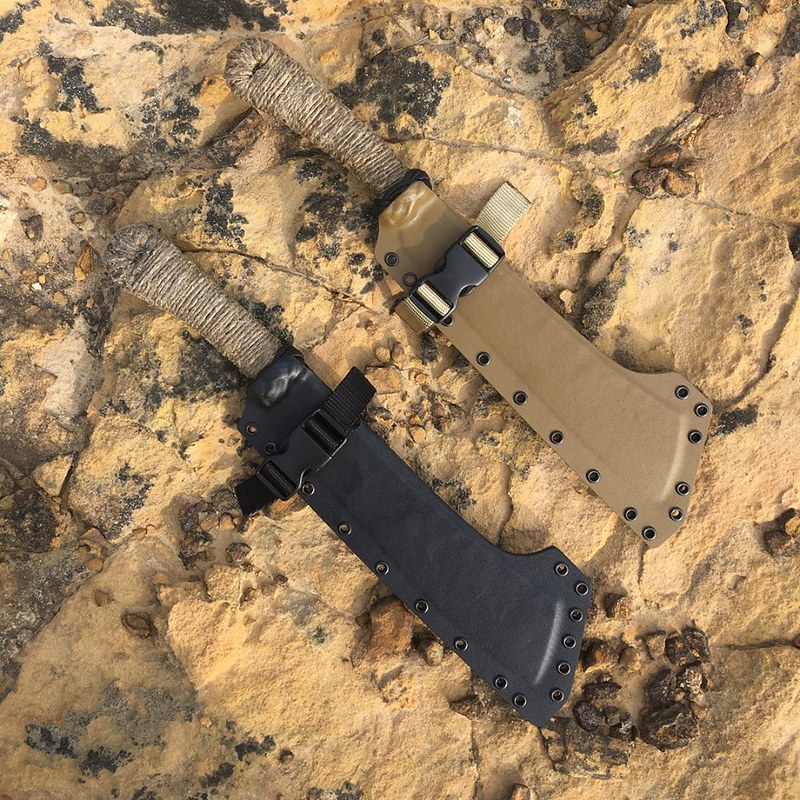
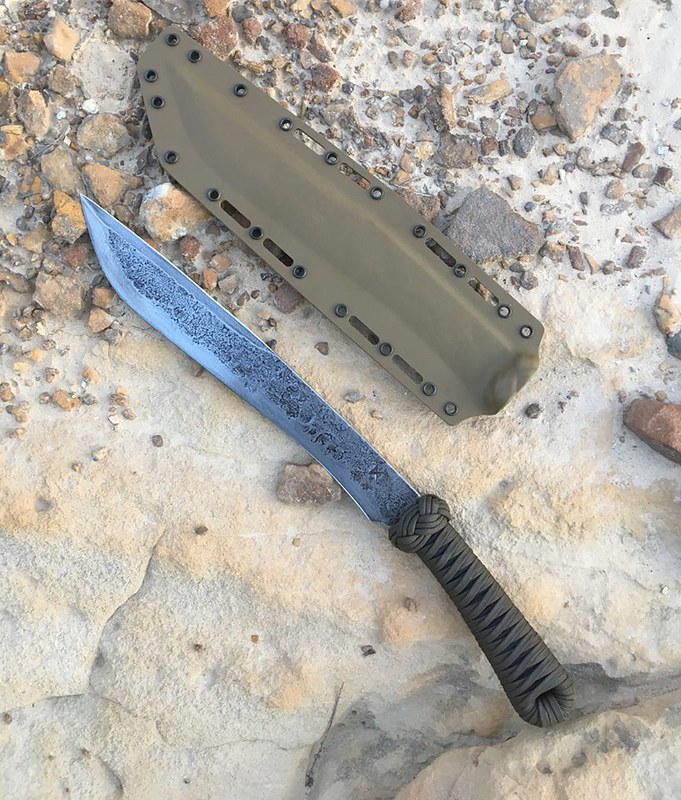
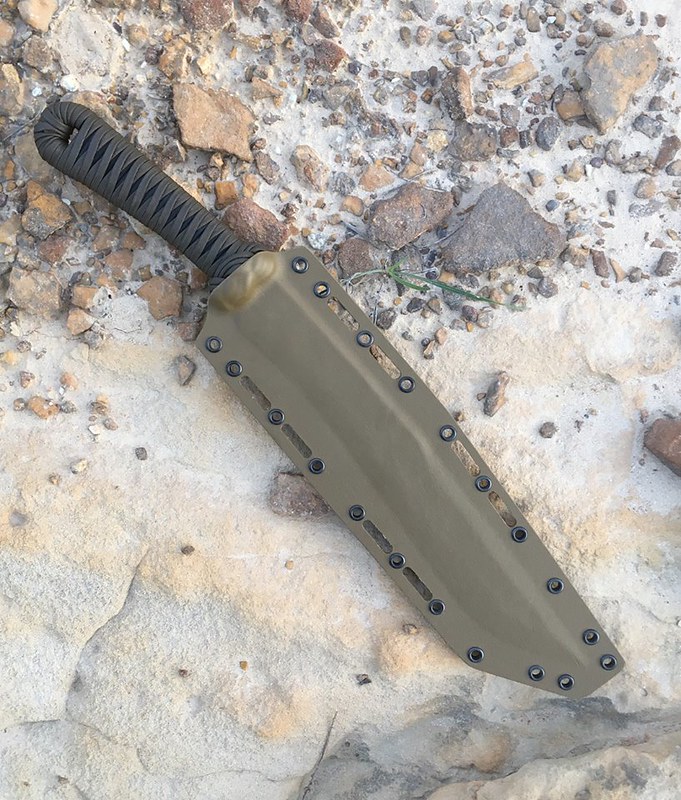
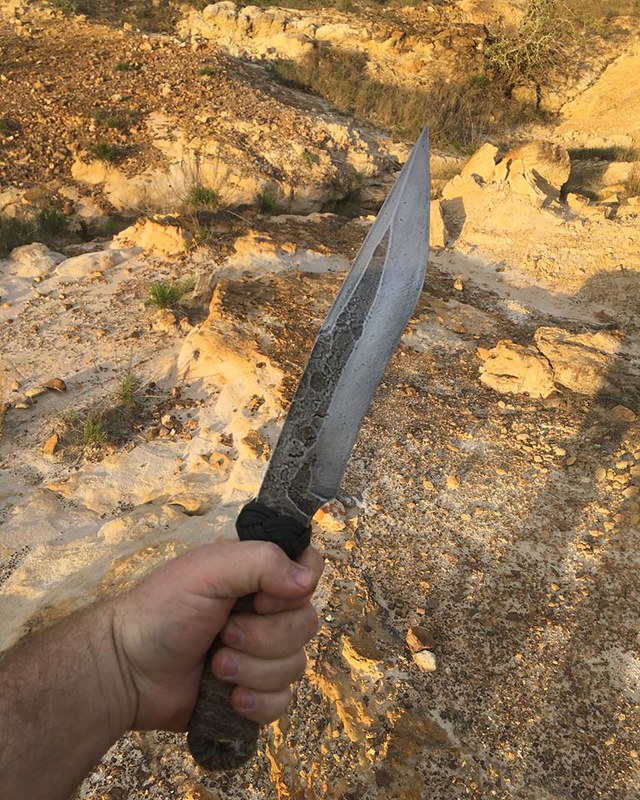
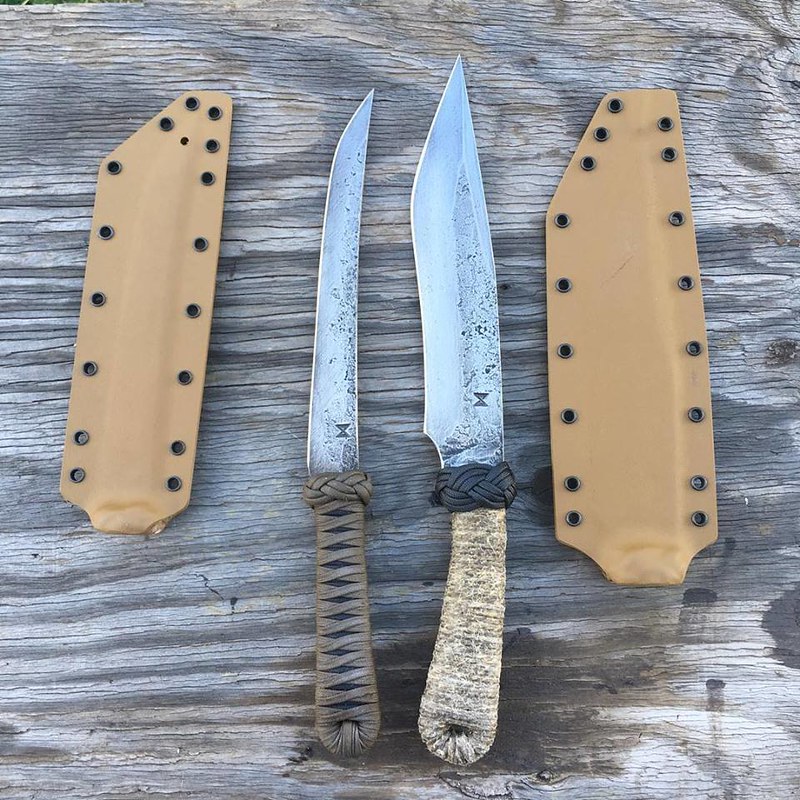
I recently forged out four choppers for inventory for the Blade Show, two parangs and two bolos. A couple of customers came along and laid claim to one of each design, so now I have one parang and one bolo for Blade. Better get hammering!
They were all forged from 3/16" 80CrV2 steel and came out light and fast in the hand.
 parangobolo by James Helm, on Flickr
The parangs ended up with hemp cord wraps and paracord Turk's head knots. All of them got Boltaron sheaths.
 parang01 by James Helm, on Flickr
 parang02 by James Helm, on Flickr
 parang03 by James Helm, on Flickr
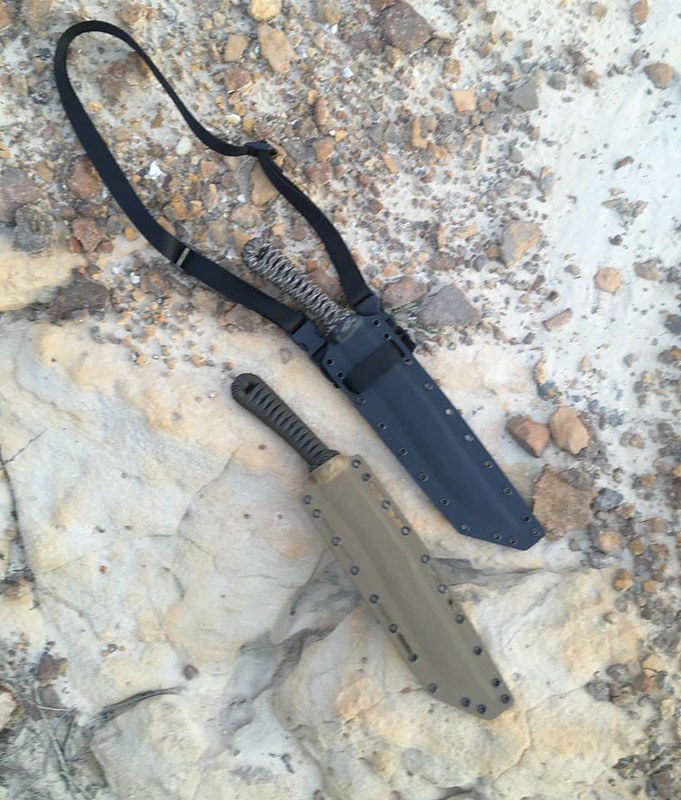
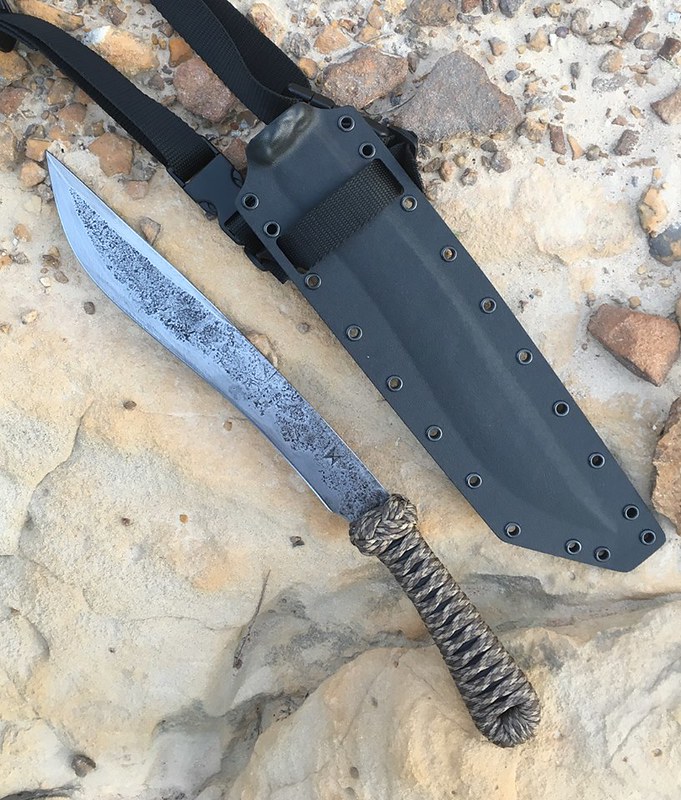
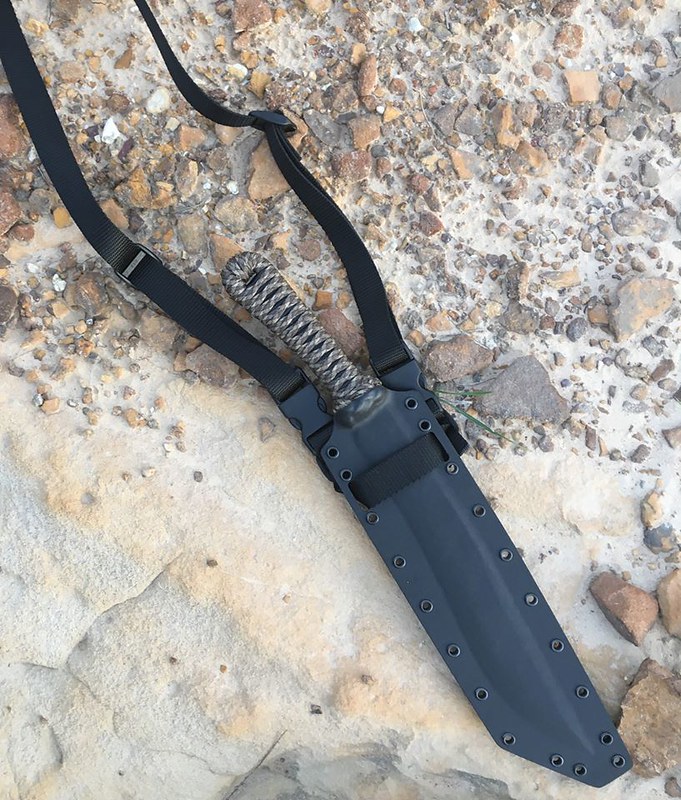
The bolos got paracord wraps and fully sharpened top edges. The one claimed by a customer got a "rattler" pattern camo paracord per the customer's request, as well as a shoulder sling.
 bolo01 by James Helm, on Flickr
 bolo02 by James Helm, on Flickr
 bolo03 by James Helm, on Flickr
 bolo04 by James Helm, on Flickr
 bolo05 by James Helm, on Flickr
 bolo06 by James Helm, on Flickr
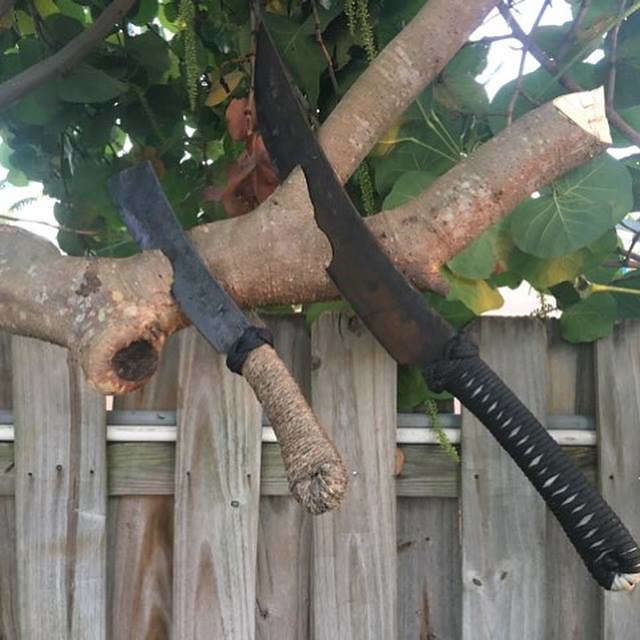
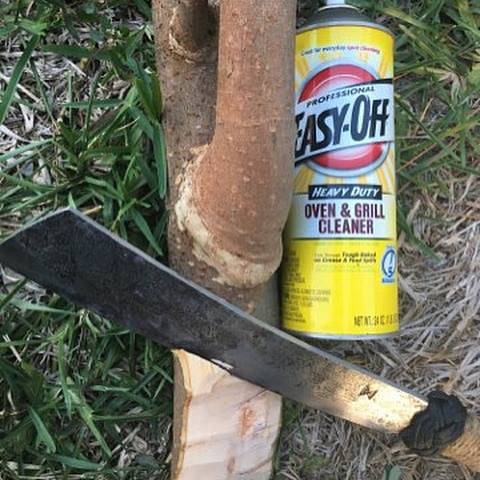
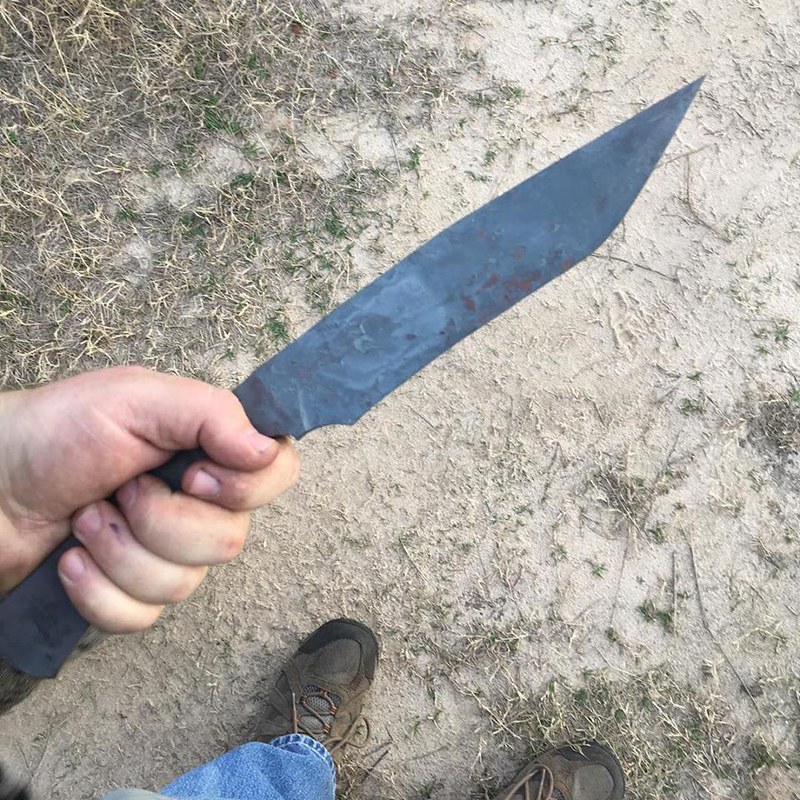
Both customers were happy with their blades. The fellow who got the parang sent some pictures of it being used for yard work, along with a blade from my buddy Tobin Nieto.
 use01 by James Helm, on Flickr
 use02 by James Helm, on Flickr
 use03 by James Helm, on Flickr
 use04 by James Helm, on Flickr
Always glad to see my blades put to work.
-
Frosty - That's one of a number of reasons I'm in the long, slow process of setting up to do mid-tech knives in addition to forged ones. This is a design that I want to do as a mid-tech, maybe as a limited run, maybe as a more permanent model.
-
Thanks, guys! Definitely a design I will be playing with more.
-
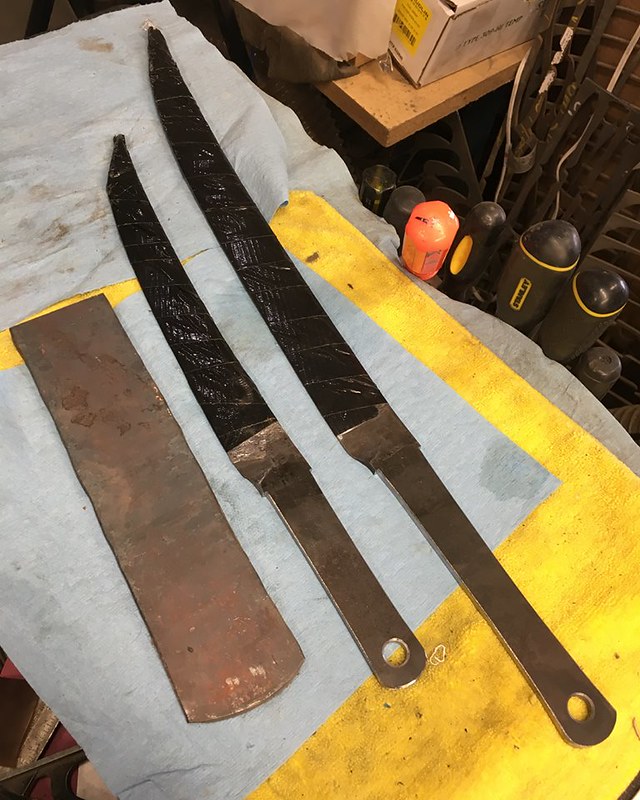
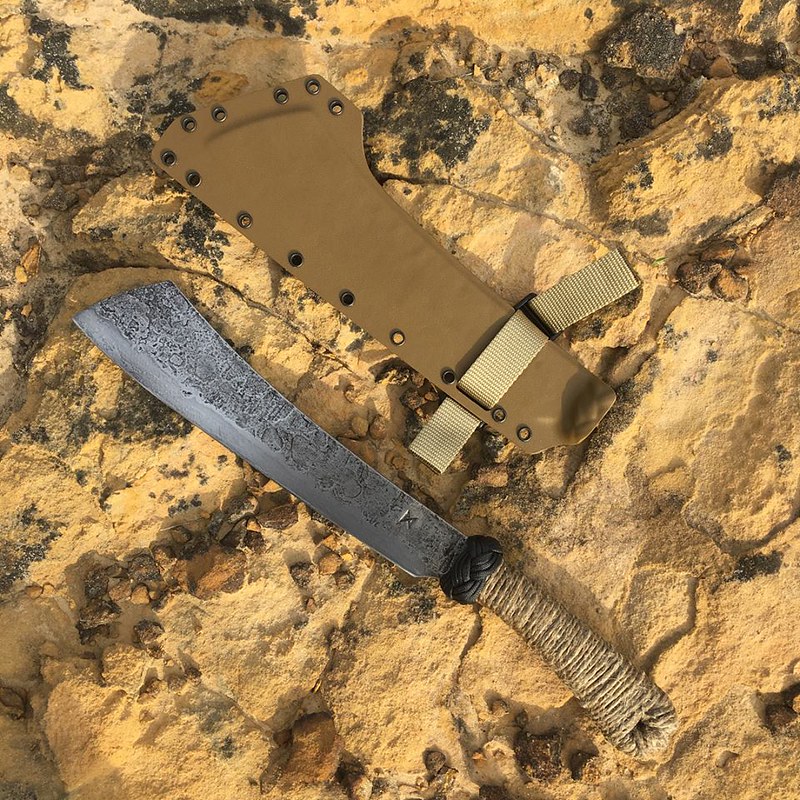
I've made a number of bush swords down through the years inspired by a certain blade in a zombie-killing video game. They typically are around 15" blades. Here's the first of this basic style to be made, back in 2015:I recently made a shorter blade that is essentially the Biohazard Outbreak Response Blade scaled down to a 9 3/4" blade. I really dig it!This was the fastest knife to sell that I've done. I had forged and trimmed to the rough shape, posted a picture on Instagram, and it was laid claim to within three minutes!
Here's the initial picture:It was finished out with a thick false edge, aggressifying the aesthetics but not coming close to a cutting edge. The customer wanted a hemp cord wrap, and I topped it off with a three-strand Turk's head knot in paracord.The sheath has my first-ever molded drainage hole at the tip, again per the customer's request.Feels great in the hand!In comparison with a tanto with an 8 7/8" blade. Similar lengths, totally different knives!The customer's response upon getting it was, "What is this xxxx monstrosity!" In a good way.
-
I can't afford to give away too many knives, but I do the occasional donation piece. I *always* make sure to donate a blade to Knife Rights for their Ultimate Steel fundraiser (currently forged out), but these two are not for that.
The first is for a fundraiser at my old high school, raising money for teachers whose projects for their students go beyond the allotted budget. I never have and never will have any school spirit, but I have a lot of respect for certain individual teachers because it was their efforts in conjunction with mine and not necessarily the institution itself that made a difference in my education. I was approached by an old classmate to make a knife for the fundraiser and agreed to help the teachers going above and beyond the requirements. I used a black and gold wrap because those are the school colors, of course.
I demonstrated the wrap as a class I taught at Johnny Stout's Guadalupe Forge Hammer-in.
donation01 by James Helm, on Flickr
The second one is for WISH, a women's and children's shelter in Muskogee, Oklahoma. As there was no requirement for a particular color scheme, I went with a subdued black-over-olive drab wrap. I used this one to demonstrate making sheaths at the same Hammer-in, though I ran long with the wrap class and ended up having to finish out the sheath in a piecemeal fashion the rest of the day after molding.
donation02 by James Helm, on Flickr
The two together. No reason for the difference in length, that's just how they ended up.

donation03 by James Helm, on Flickr
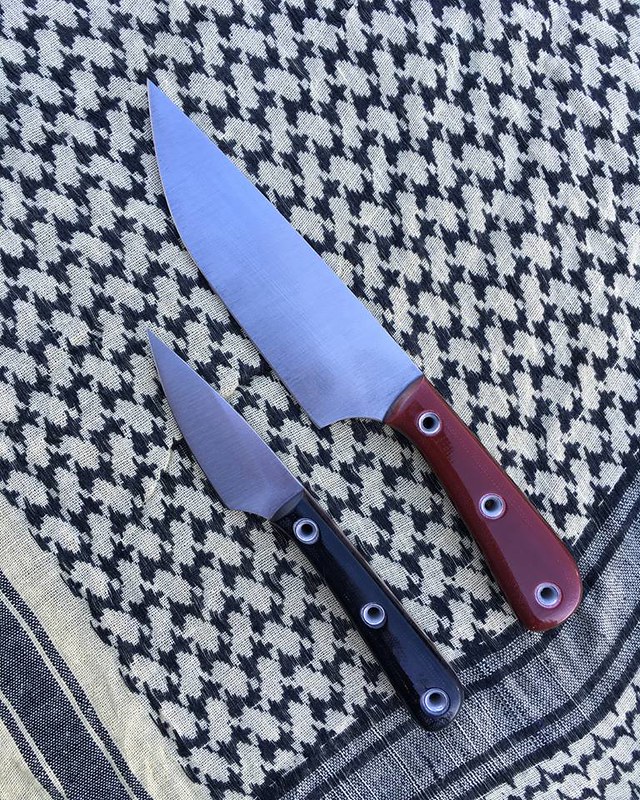
And something well outside my usual wheelhouse, a couple of cooking knives ordered up for wedding gifts. This is the first pair of a series of wedding gift knives since apparently everyone the customer knows is getting married. The customer wanted a 3" paring knife and a 6" chef knife. Handles are red G10 with black G10 liners and black G10 with red G10 liners.
chef01 by James Helm, on Flickr
I have made a small handful of cooking knives in the past and never really been happy with them. I've had a lot of trouble with warping due to the thinness of the blades, so in this case I didn't forge the blades at all but cut them from 1/8" 80CrV2 and heat treated them at full thickness. That, of course, meant grinding the bevels carefully so as not to ruin the temper. The VFD controller on my new AmeriBrade grinder helped a lot in that department. The customer wanted a 3" paring knife and a 6" chef knife.
 chef01b by James Helm, on Flickr
He picked them up in person. Good guy! Not the first knife nor the last he'll be getting from me. The finish on these is a machine finish with a Scothbrite belt, with the handles buffed on a fine Scotchbrite ball. They're coated in butcher's block mineral oil (contents: mineral oil).
chef02 by James Helm, on Flickr
-
Thanks, guys!
-
I like making big knives, but of course make small ones too. It's actually more difficult for me to make a 4" blade than a 12" blade. Here are some littler ones that recently left the shop for new homes. All are 80CrV2 steel with marine epoxy-impregnated wraps.
Two tantos. The long, slim one has an 8 7/8" long blade. The little kwaiken is a 4" blade, 4" handle, with hemp cord for the underlay on the wrap and paracord on top.
 tantos01 by James Helm, on Flickr
And two rooster spurs. The top one has a 5 1/2" blade, the bottom a 4" like the original. Both have fully sharpened top edges. This was a his-and-hers set, hence the pink camo cord on the bottom one.
 clippoints by James Helm, on Flickr
-
My favorite part is the cast brass elements.
-
57 minutes ago, Will W. said:
Well now i REALLY want to quench and break test a tape measure. I mean, who needs the first 4 inches of one anyways?

No, no: cut the last four inches off, so you can use the rest of it.

-
Thanks, guys!
-
Nicely done! The bog oak handle is a nice touch.
-
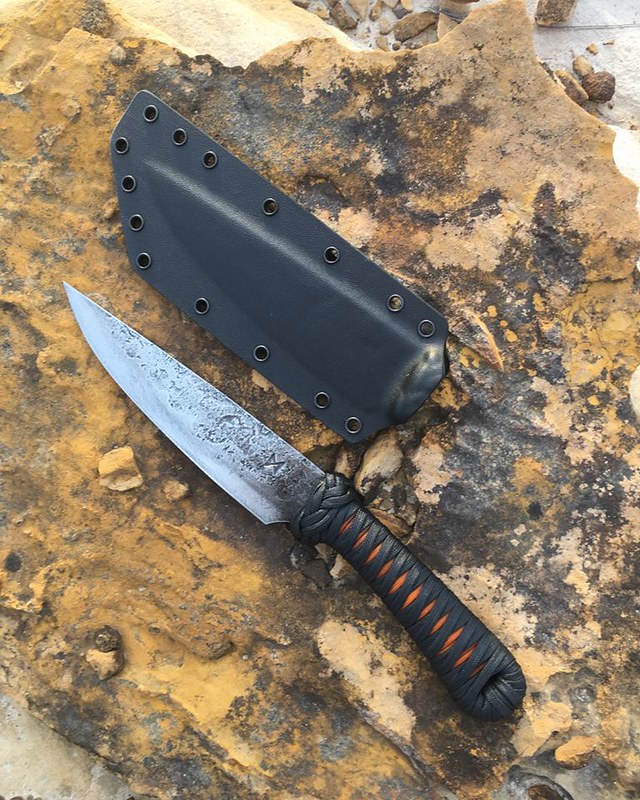
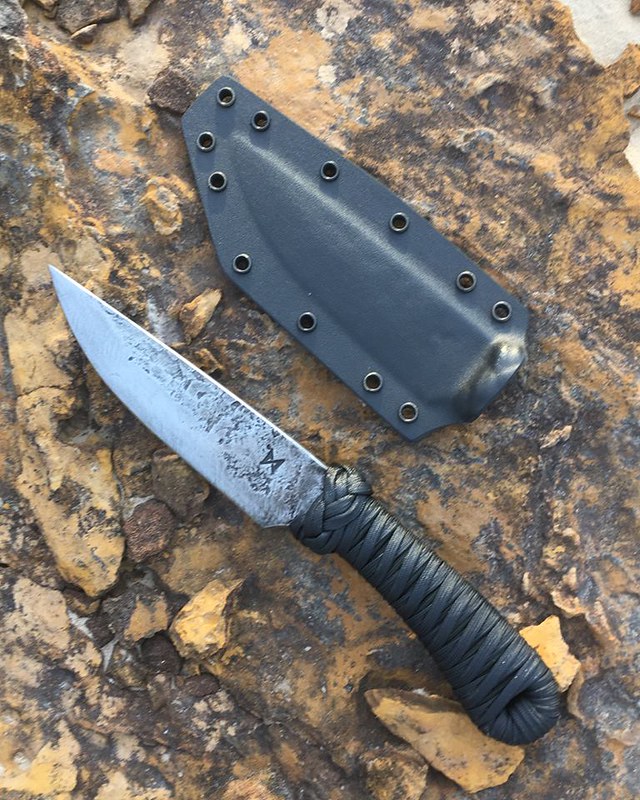
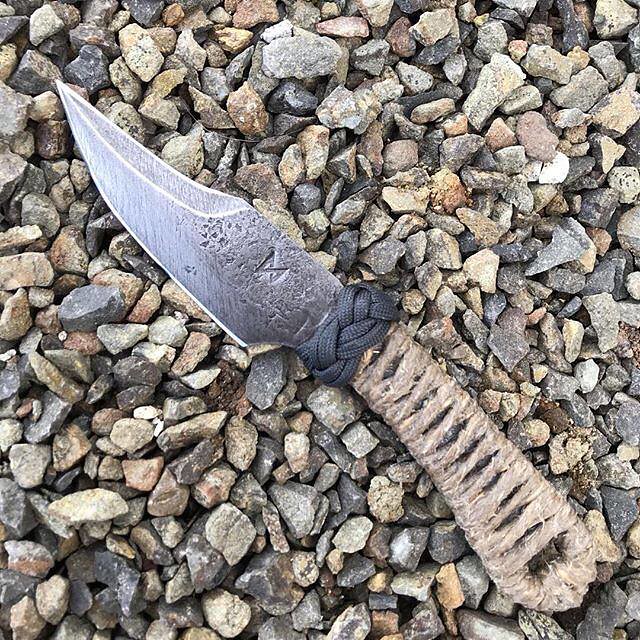
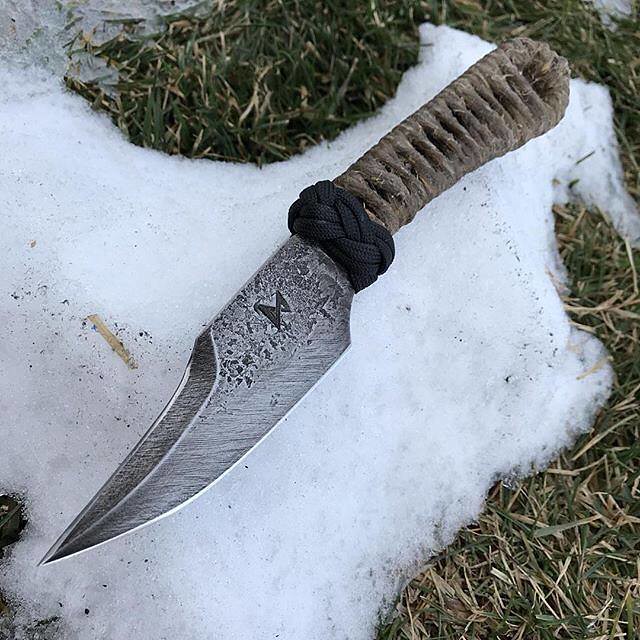
A guy who does bodyguard work for rock stars approached me about doing a short, cord wrapped knife for him. It seemed like an interesting project, so I took it. He wanted a 4" blade (about as short as I ever make) and 4" handle (shorter than I usually do), sharpened top edge, cord wrapped handle, but left the rest of it up to me. I took a few tips I've picked up from Ed Calderon and a bit of Spanish navaja influence, some pikal design, and came up with the Rooster Spur.
roosterspur04 by James Helm, on Flickr
It's forged from 80CrV2 steel, with a hemp cord wrap over the bare steel of the tang.

roosterspur03 by James Helm, on Flickr
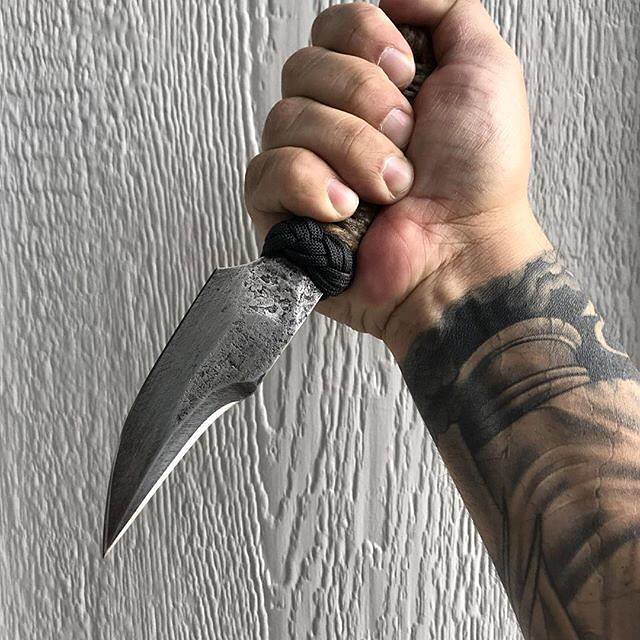
It has a narrow little point for easy penetration. A two-strand Turk's head provides a mechanical lock for the hand to keep it in place when stabbing.
roosterspur05 by James Helm, on Flickr
As mentioned above, it was designed with pikal techniques in mind, and the handle works well with a thumb anchor grip.
roosterspur06 by James Helm, on Flickr
roosterspur07 by James Helm, on Flickr
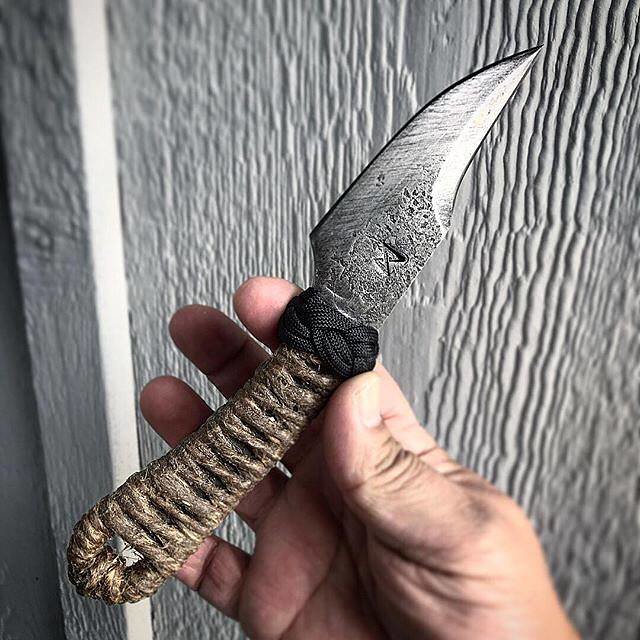
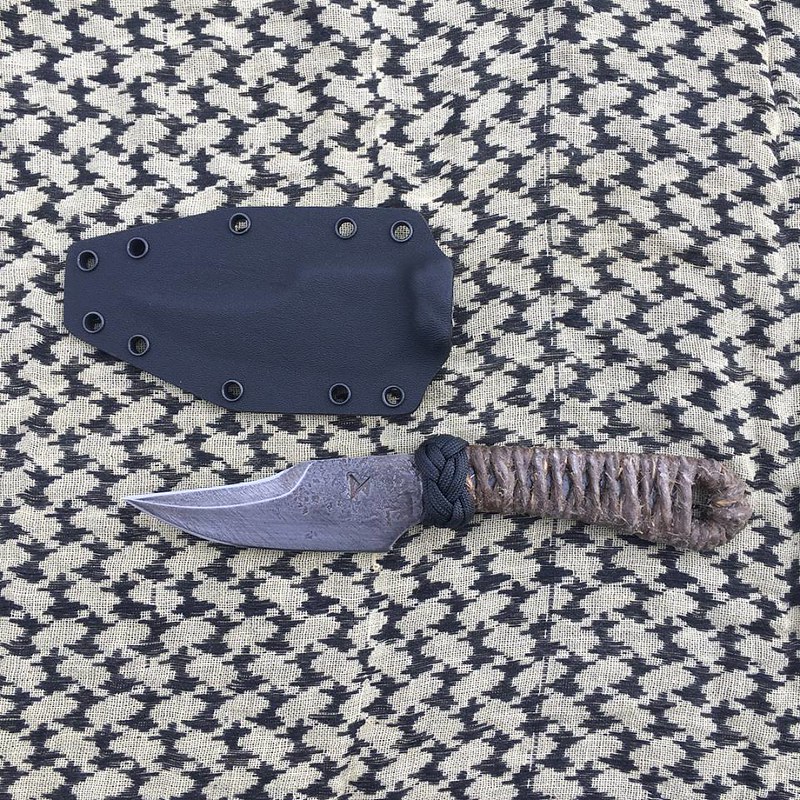
And, of course, a Kydex sheath for carry.
roosterspur10 by James Helm, on Flickr
It's garnered enough attention that I'm strongly considering a mid-tech version once I have the process all sorted out.
The customer described it as "a tank with a razor edge".
 roosterspur09 by James Helm, on Flickr
-
LYUV - If you run the first temper cycle before doing the clamping trick, you should be able to safely pull the blade well past the center line for the subsequent temper cycles. Of course, you can over-clamp, then have to clamp in the opposite direction to fix the new warp you put in the blade trying to straighten the original one.
-
I use the clamp-while-tempering trick all the time. I run one temper cycle before clamping, then clamp on the second cycle and repeat if needed. I pull the edge past the center point. Sometimes it needs pulled over further, sometimes it just doesn't want to work and I end up re-heat treating the blade. With the katzbalger, it had fought me three times and I couldn't afford to dedicate more time to trying to straighten it; the gloved-hand-flex-while-still-hot-from-quenching trick worked.
-
You have a narrow window of about thirty seconds during which you can straighten a warped blade out of the quench using gloved hands, quench plates, etc. I don't like to do it, but sometimes it's the only way. On my episode of Forged in Fire, after about three times of re-heat treating my katzbalger blade to try to fix warps, I finally had to do it. Worked just fine.
-
Beautiful! What handle material?
-
-
Very nice blade!
-
I'm starting to see a fair number of these Yakut knives with the fuller on one side show up in my browse feed on Instagram. They also have an interesting long-bladed, short-handled spear that I'd like to see more of. You can see a couple in the painting about halfway down that page that shows a smith thumbing the edge of one and a woman working on an armored shirt.
The Ghost Dog
in Knife Making
Posted
Would look at home on the belt of one of the Khan's generals.")