mslisaj
-
Posts
48 -
Joined
-
Last visited
Recent Profile Visitors
1,442 profile views
-
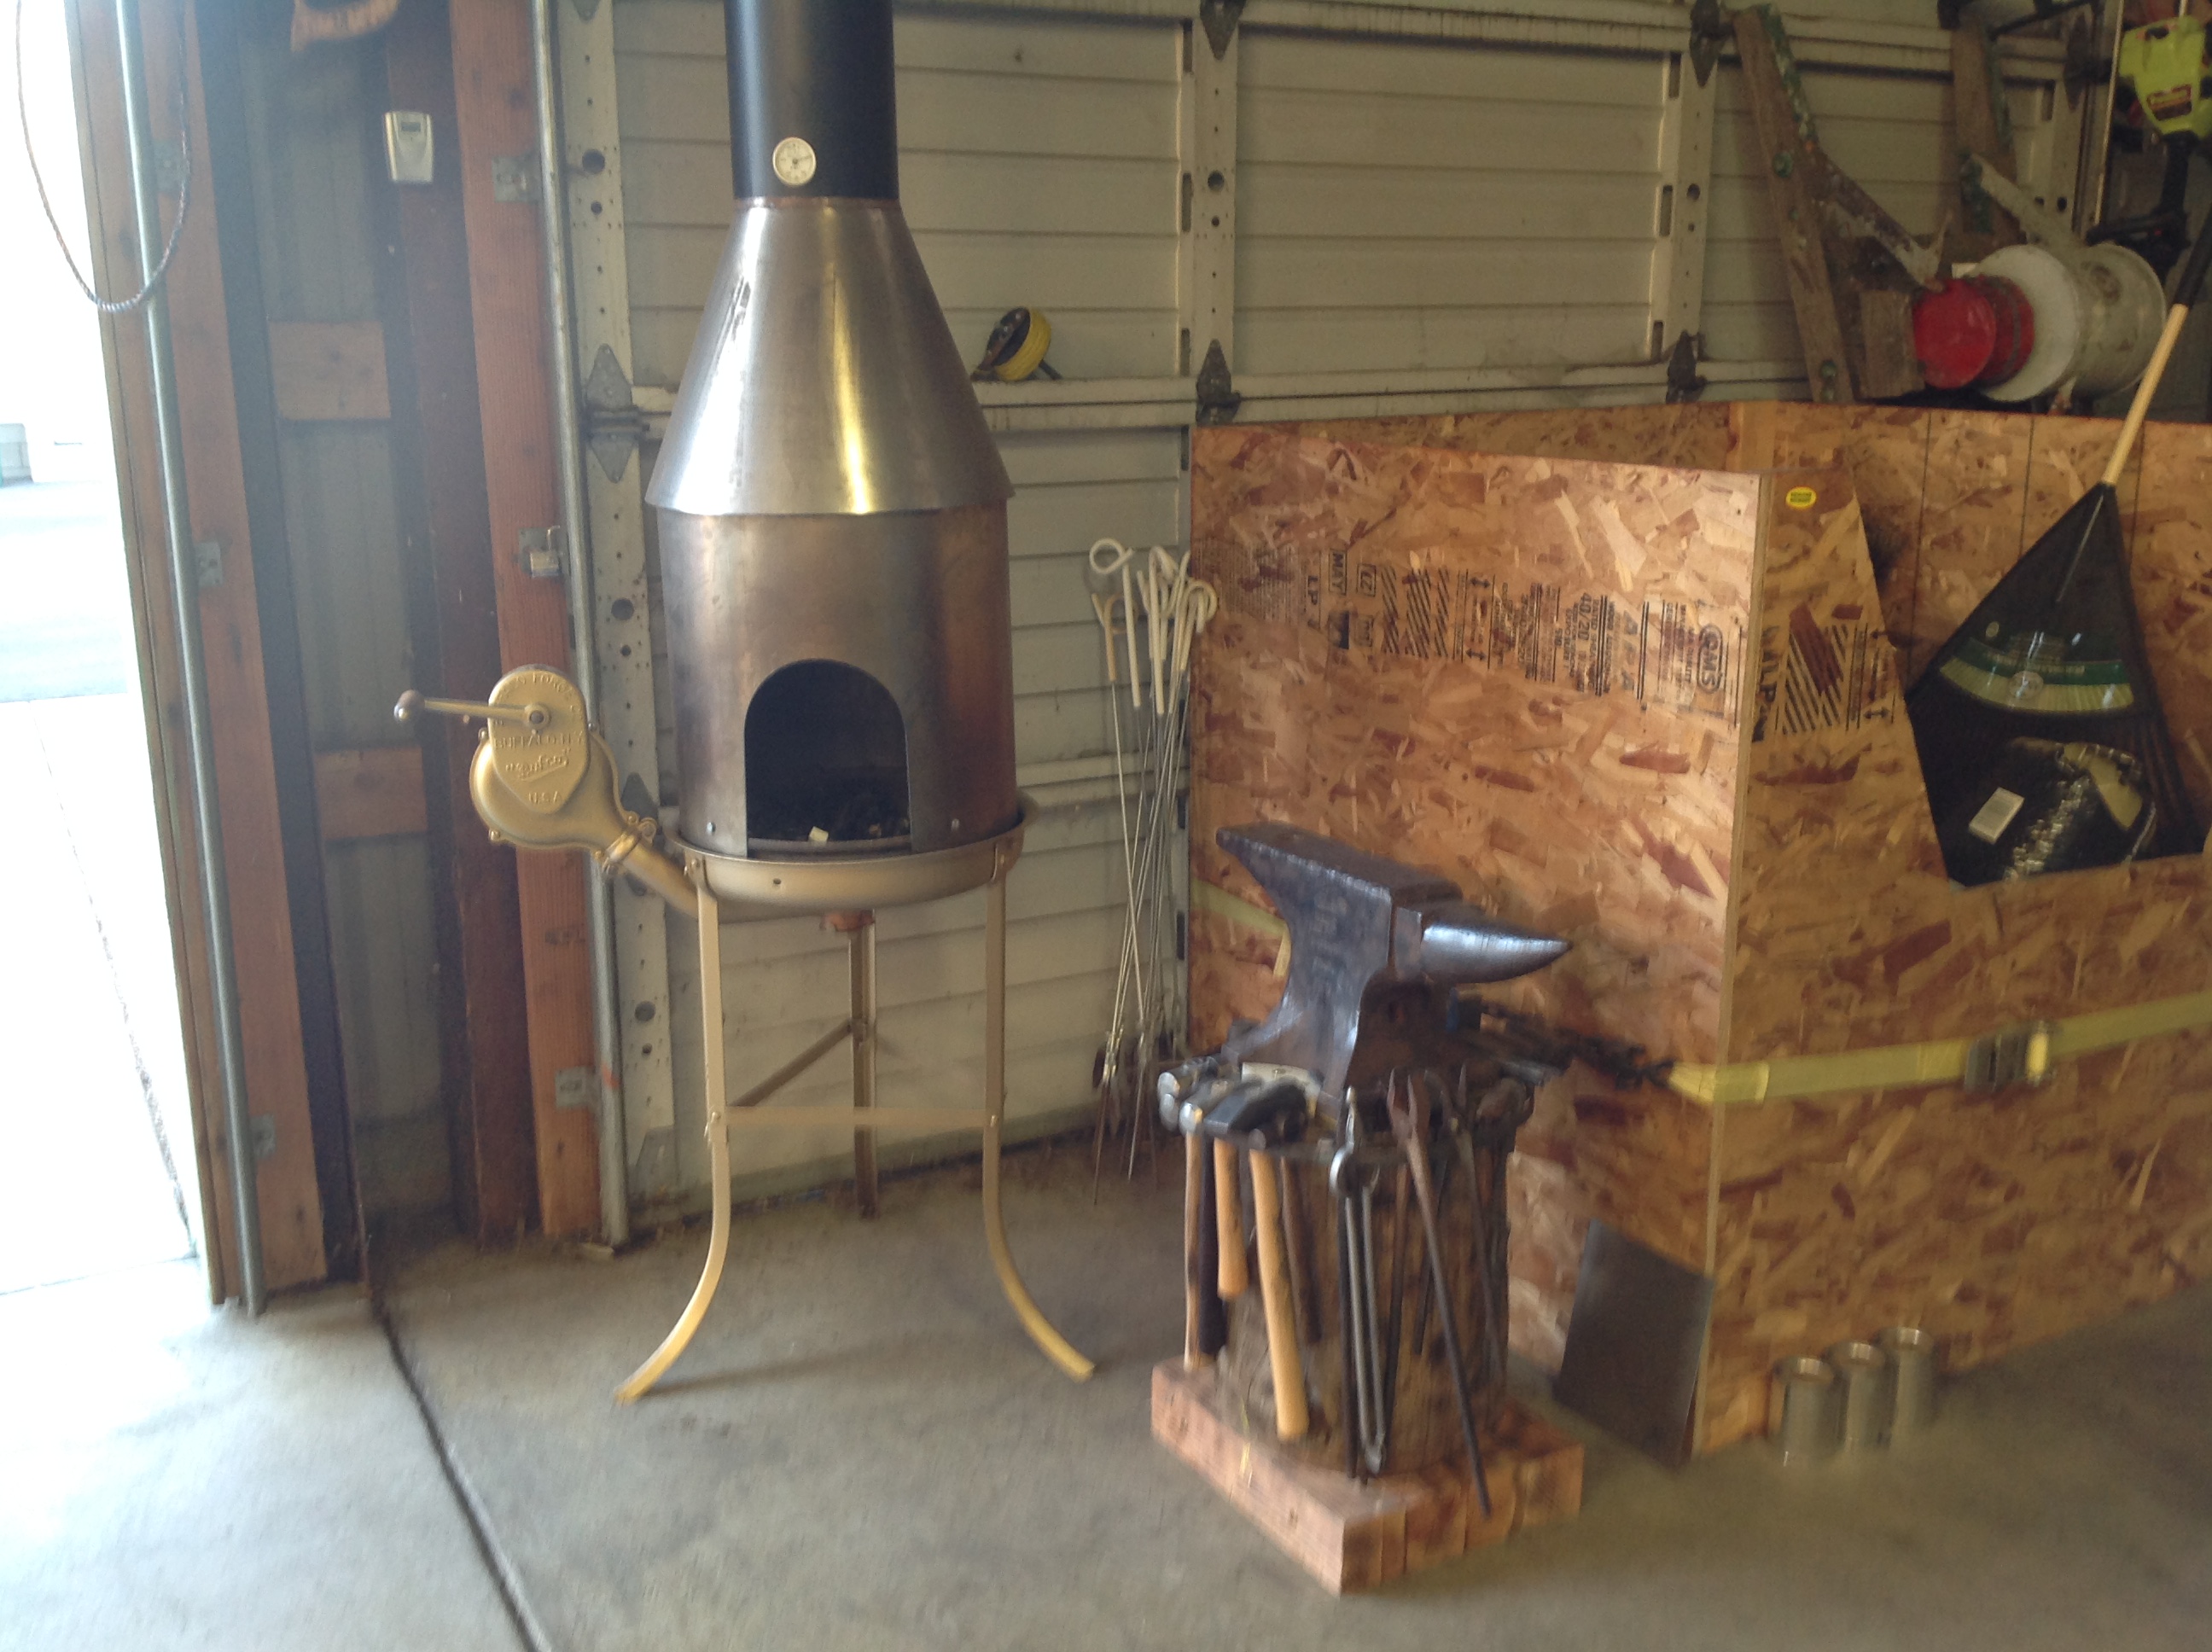
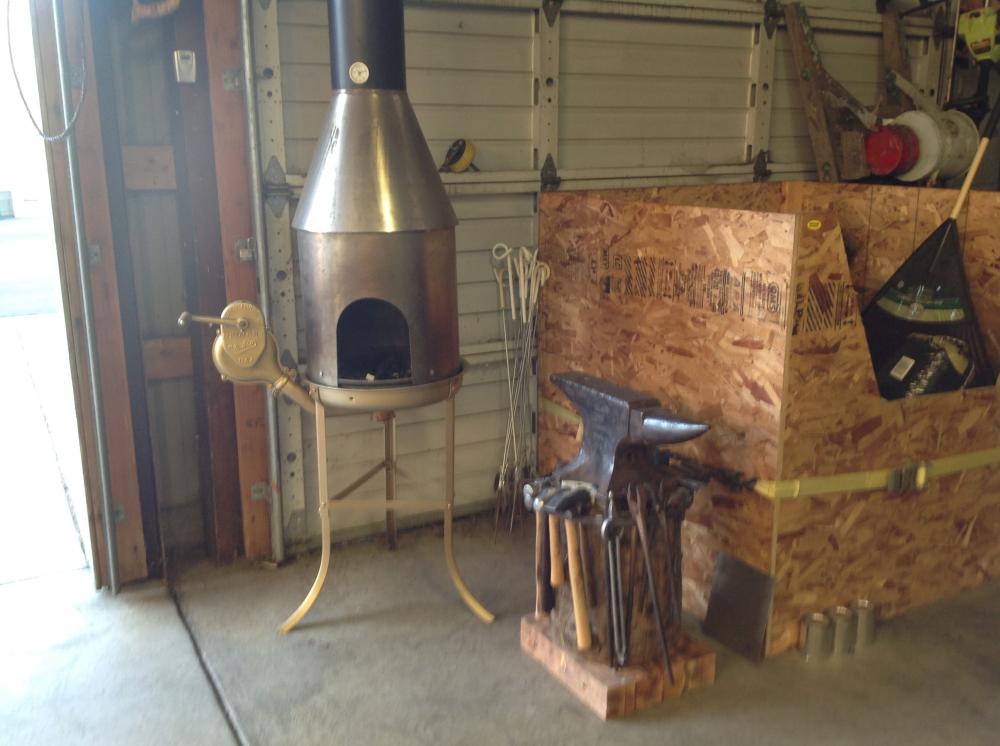
I have a lot of fun with this set up. I put it together over a year ago and works perfectly for me. Yes it's small but I am heating and pounding small things and enjoying it. Just wanted to share. Yes I did build the base for the anvil and set the height specifically for me. I also restored the entire forge and made the hood and chimney for it too. Happy Smithing, Lisa

-
Thanks Scrambler82 and Charles R. Stevens. It's always and on going project. I probably will have to post some more pictures as I have added more tools and hammers and while this is just a hobby for me it's fun to get the fire going and practice my hammering techniques. I haven't moved beyond making screwdriver blades and punches I enjoy the practice and it's fun for me to think I put all this together. I promise more pictures. Best Regards, Lisa :)
-
Stellar idea on the channel iron top. That would work nicely too. Although I have acquired with a lot of searching nice variety of hardy tools and one of them is a big square block that is hard and has shape edges too. So I am actually moving ahead with this project. I just need more time to practice the art and learn more. I can't believe how useful this anvil is in my daily work too. No longer do I beat up on my big bench vise as now I have a better place to do that kind of work. I have decided to leave the anvil alone as the "chips" are just part of the "history" of this anvil and are not detrimental to the way I use it at all. It has a pristine surface and fabulous rebound so I am not going to play with that at all. I so appreciate the continued advice and thanks for taking your time to comment. Best Regards, Lisa
-
Well Frosty, your response made me smile. I hope to learn the skills to make a pair of tongs or two. To have the facility and equipment to build a set of tongs for what you need and the talent to do it will be nice to work on.
-
Great point Charles and that is exactly what it looks like. It was drifted with a true 1.0" drift and in the cooling it shrunk down to this .975". But if this was a standard way to manufacture I would think the folks that make the "one inch" hardy tool would make it to .970". As I pointed out, it's not a big deal to make it fit but I was just curious that is was .025" undersize and if all hardy's, except the 7/8" holes were the same. Lisa
-
I have a Henry Wright 137# anvil. I got a couple 1" hardy tools for it and was surprised that they didn't fit. On closer examination and careful measurement I find out in stead of 1" or a little larger this hole is actually .975". Now I have measured this on the surface of the anvil where there is a lot of wear and tear but I have come up with the exact same measurement on the bottom of the heal also. Yes my new to me hardy's will just take a very little fitting to make them work but I was wondering what other folks hardy holes measure and if my is standard or .025" under standard. Just curious and I have the grinder to make it work but was just wondering. Thanks for your help. Lisa
-
Interesting that you can buy coke. I think where I live I'm lucky to be able to buy coal. So using pre-coked coal is probably not an option for me to buy. But I will get a hood/flue system worked out and then I'll be fine. There is a lot of good information out there on Flues and how they work and I am going to use that information to make a system that will work for me. Then green coal won't be an issue. Lisa
-
As soon as I work out the details of venting a flue on my forge I'm going to google some youtube instructions and see how to build tongs. That would be fun too and I do need more. You can never have too many tongs......................... :rolleyes: Lisa
-
Fabulous Idea. If I had a real ringer I would take this idea. But my anvil, for what ever reason is decent to use and does not have an obnoxious ring. If I work on the heal it will ring but again it's not a problem. So for now I am going to get my forge working better and going to start working some hot metal. Thanks so much for your comments Andy. :-) Lisa
-
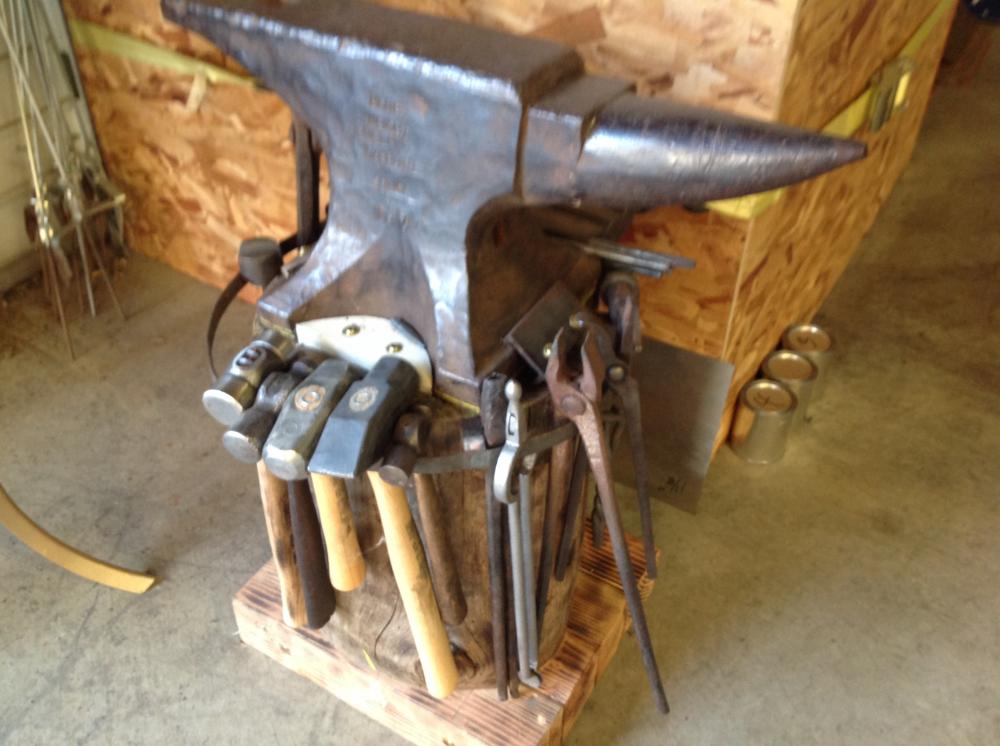
Thanks Frosty. Well my anvil and Forge are kind of close together when I work. But at least they are all off the floor and look like they belong there. I just wish my father was alive to see it as I know he would be very pleased and proud. I'm always on the lookout for more tools. I'm going to go out and get a cross peen hammer and I think I will be set there. But tongs are hard to find. The gentlemen that sold me all you see there, minus the hammers was very fair with the pricing and wonderful to deal with. He also showed me how to use the nail too that is on the stump too. As soon as I get the drafting details worked out on my forge I'm going to start to really work with it and have fun. That is what it's all about for me anyway. I have no idea what to make other then the little exercises that Mike-HR gave me to work on and that will keep me busy for quite awhile. Thanks again Frosty. Lisa
-
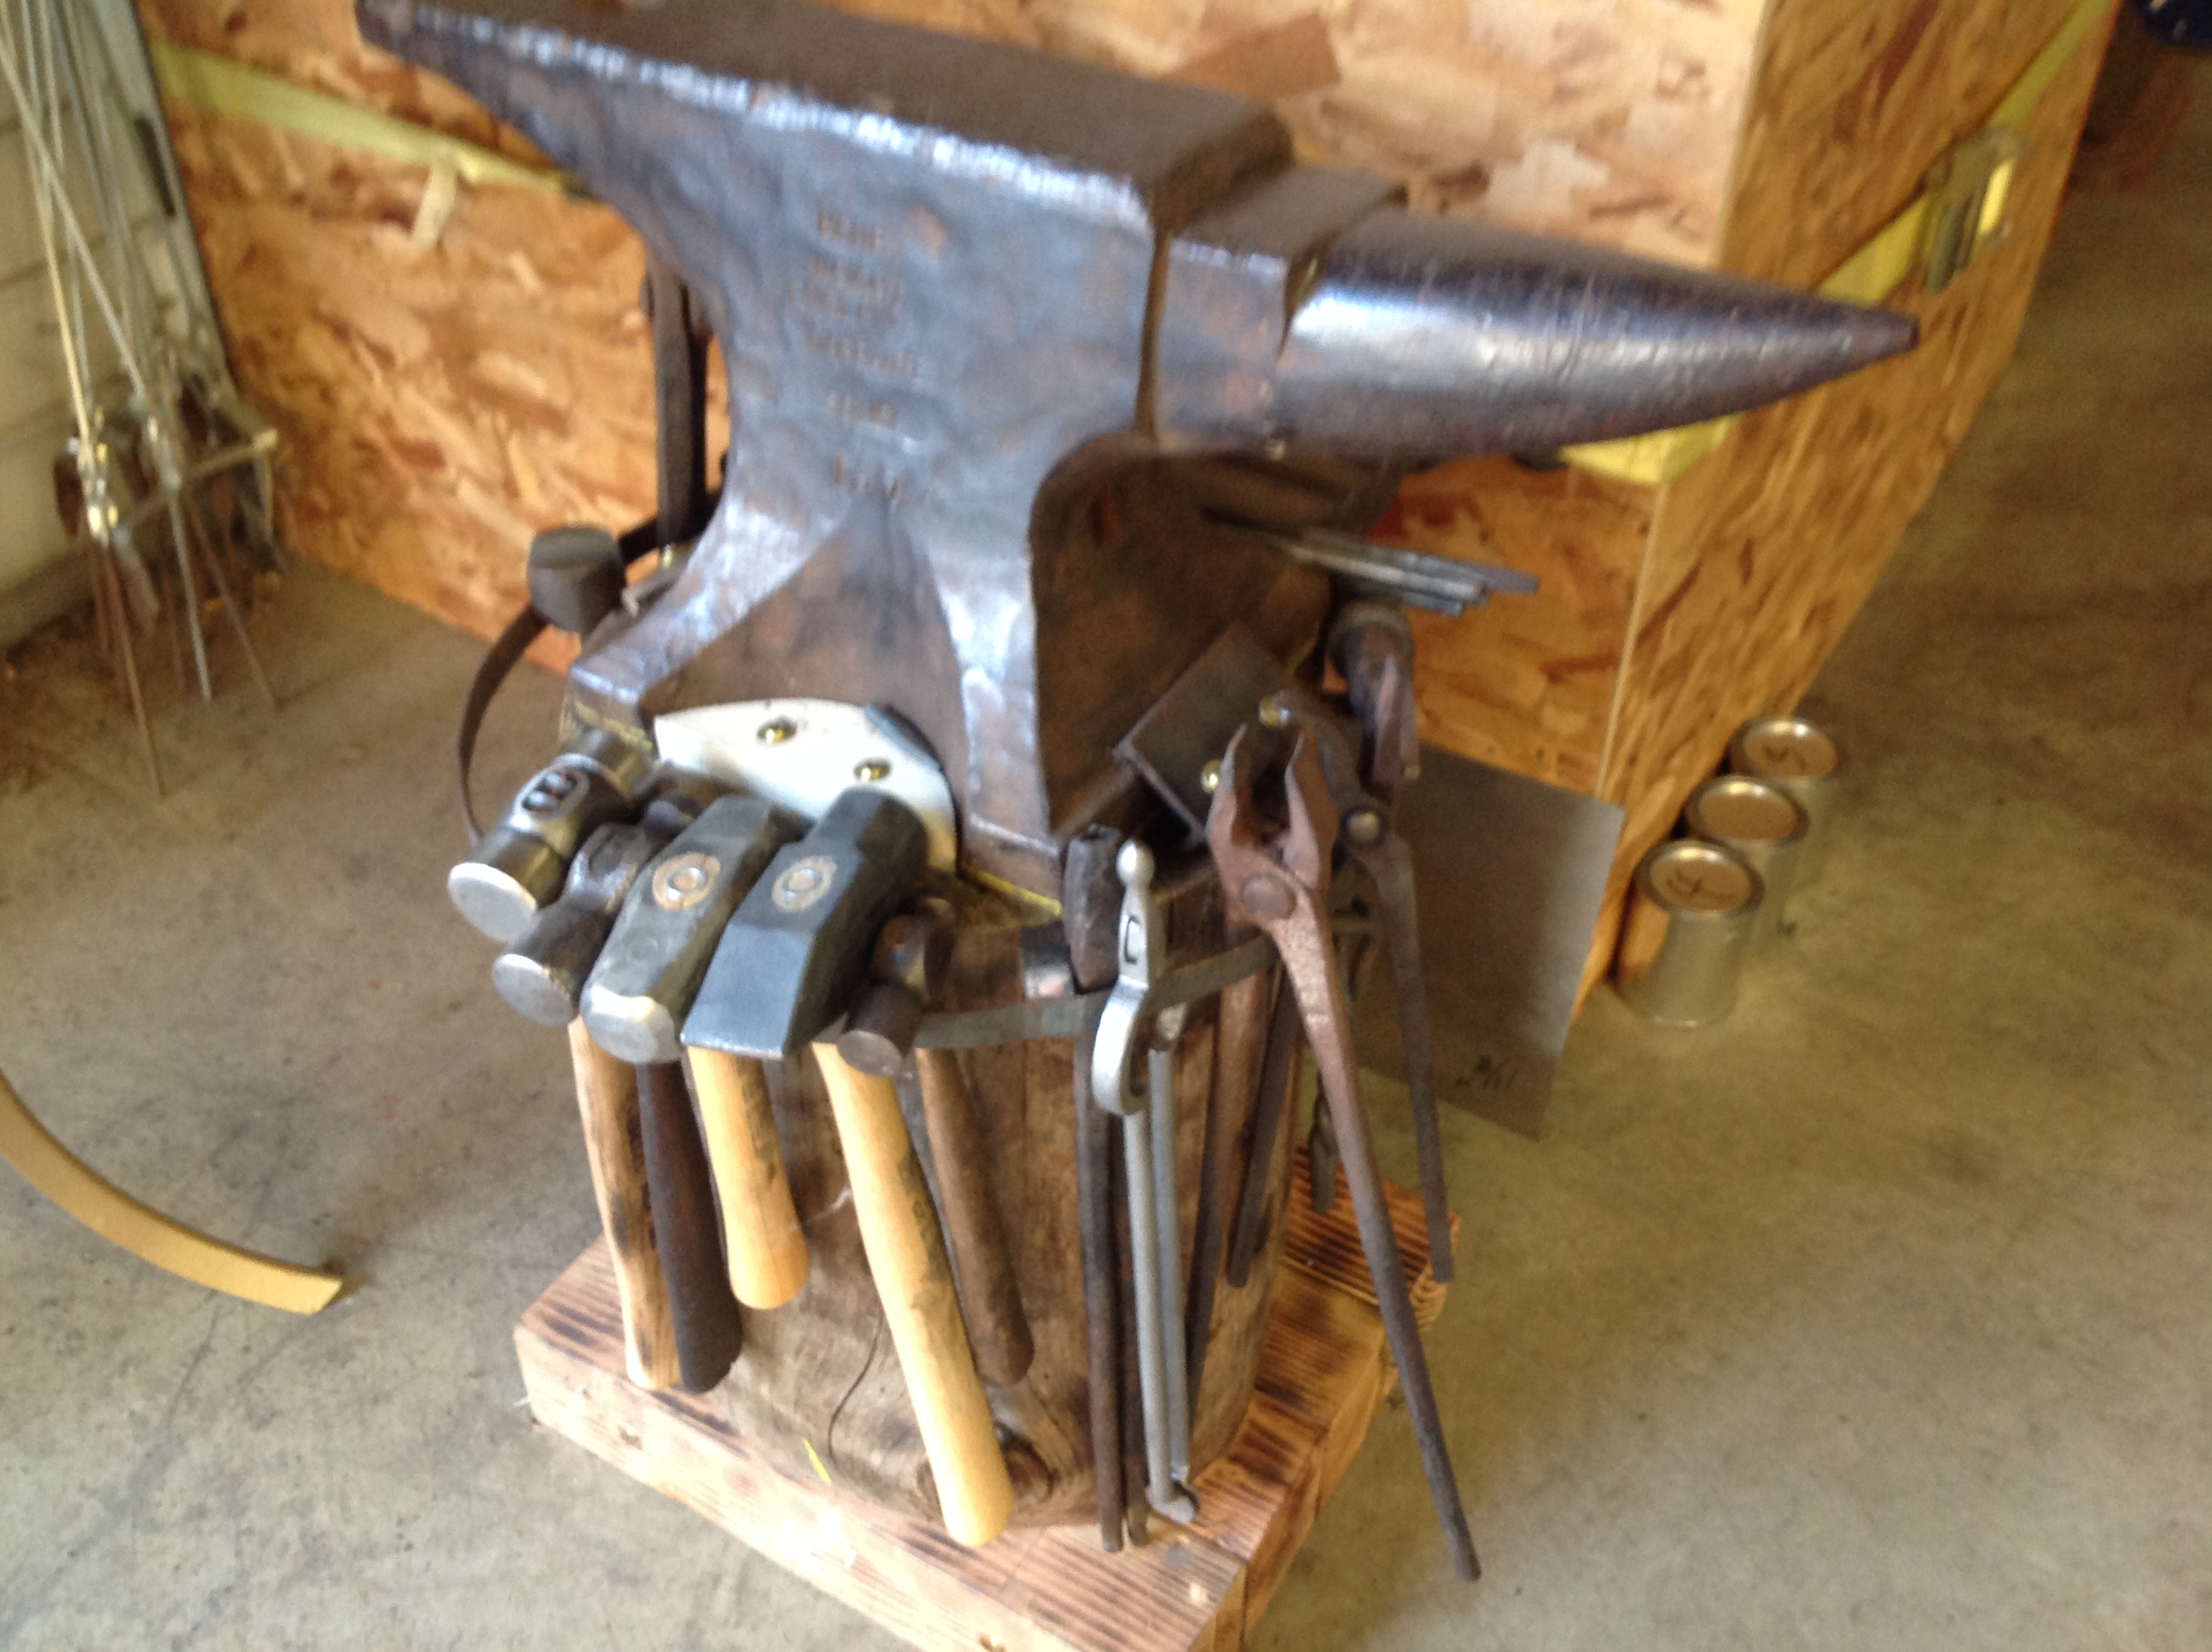
Here are some pictures and additions to my anvil stand. I finally got the tool holder build and I have all my blacksmith tools here with the anvil. I think it's a very workable set up. Comments and suggestions are always welcome. Lisa
-
Well I am new to coal and coke. So I believe I have to take my coal, burn it and coke my own. Is this correct? I have a ton of Bit coal and am breaking it up and adding it to my "coked" fire a little at a time and then when I am finished with the forge I cool the coke for the next time. More to learn..... ;-) Lisa
-
Well, like "novicesmith15" my learning curve on actual forging has come to a halt because I have to work the kinks out of my forge first. The forge itself works great and through trial and error I learned to build a bigger fire. But the smoke chasing me around the forge (because I have to move it outside) is too much to have a good hammering and learning experience. I have a very small Buffalo Forge and my actual forge area is only 16" in diameter. So what I am going to try is a 6" side draft flue. I have the six in pipe and I am giving up that much area in my fire pan. I am also going to put a skirt half way around the pan which will help support the flue pipe and I am going to attempt to construct a small hood over all this. I'm going to try to rivet all this together so I can just pick it up off the forge and move it all inside when it cools but when I get it done I will post pictures and results - good or bad. I am enjoying this hobby and a lot of it is the building this stuff for me but I also like to heat metal and get good and making shapes. But the coal smoke is the issue of the day now. Good thread "novicesmith15" and hope all this moves us forward in this trade. Lisa
-
Cheapest side draft hood I have seen yet!
mslisaj replied to BackyardBlacksmithin's topic in Chimneys, Hoods, and Stacks
Yes I did cut the rim in half. But I think you're also right that I needed a bigger fire and welding a strip of material around the inside to give more height is a great idea too. There is not much any of us can't do with a welder and an idea. But drafting the smoke away from me is going to be my first priority and also improving my fire. As usual I so appreciate the advice and idea's. Lisa -
Cheapest side draft hood I have seen yet!
mslisaj replied to BackyardBlacksmithin's topic in Chimneys, Hoods, and Stacks
Very interesting idea. The five gallon bucket would overwhelm my little Buffalo Forge pictured here but then we move down the tread and I find one from a paint can. Now that is a more doable size. Then I'm thinking maybe a 10" high shield running horizontally about a third of the way around the fire pan to add that wind protection and this may work really well. Also that "wind skirt" rived to the can would add some stability to this side draft chimney. Something to build and try. For us that have to work outside it's like a BBQ, no matter where you stand the smoke comes toward you. Thanks, Lisa