

White Fox Forge
-
Posts
77 -
Joined
-
Last visited
Content Type
Profiles
Forums
Articles
Gallery
Downloads
Events
Posts posted by White Fox Forge
-
-
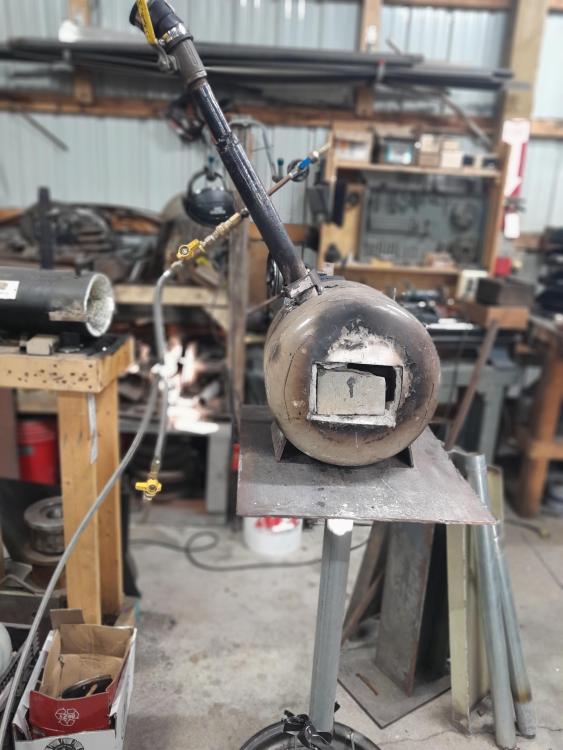
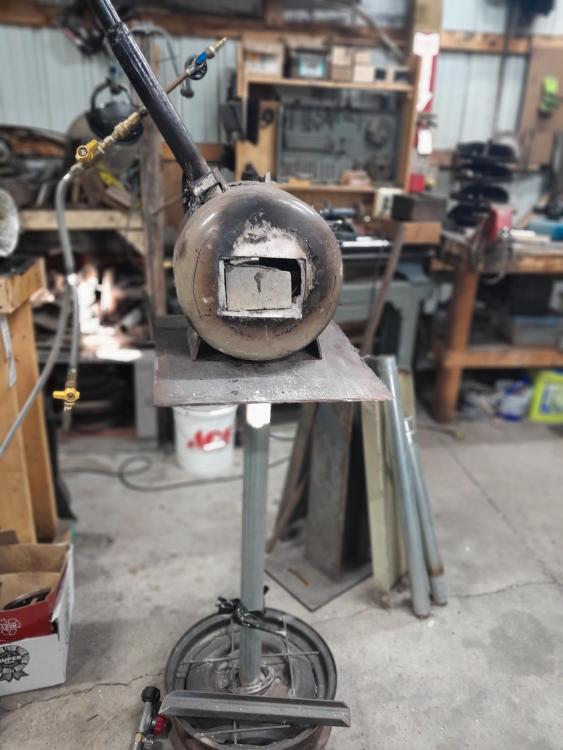
I got it running. It still needs a ton of work but it is fuctional. I'm in the process of making a pedal for it.
-
-
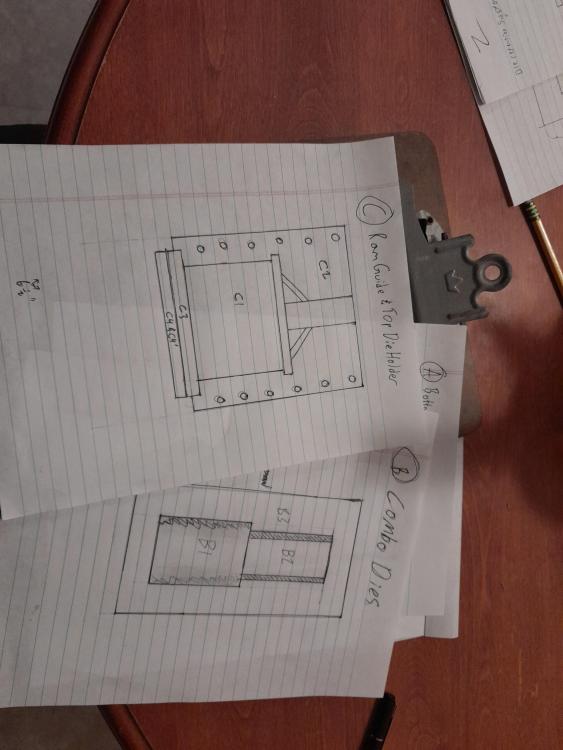
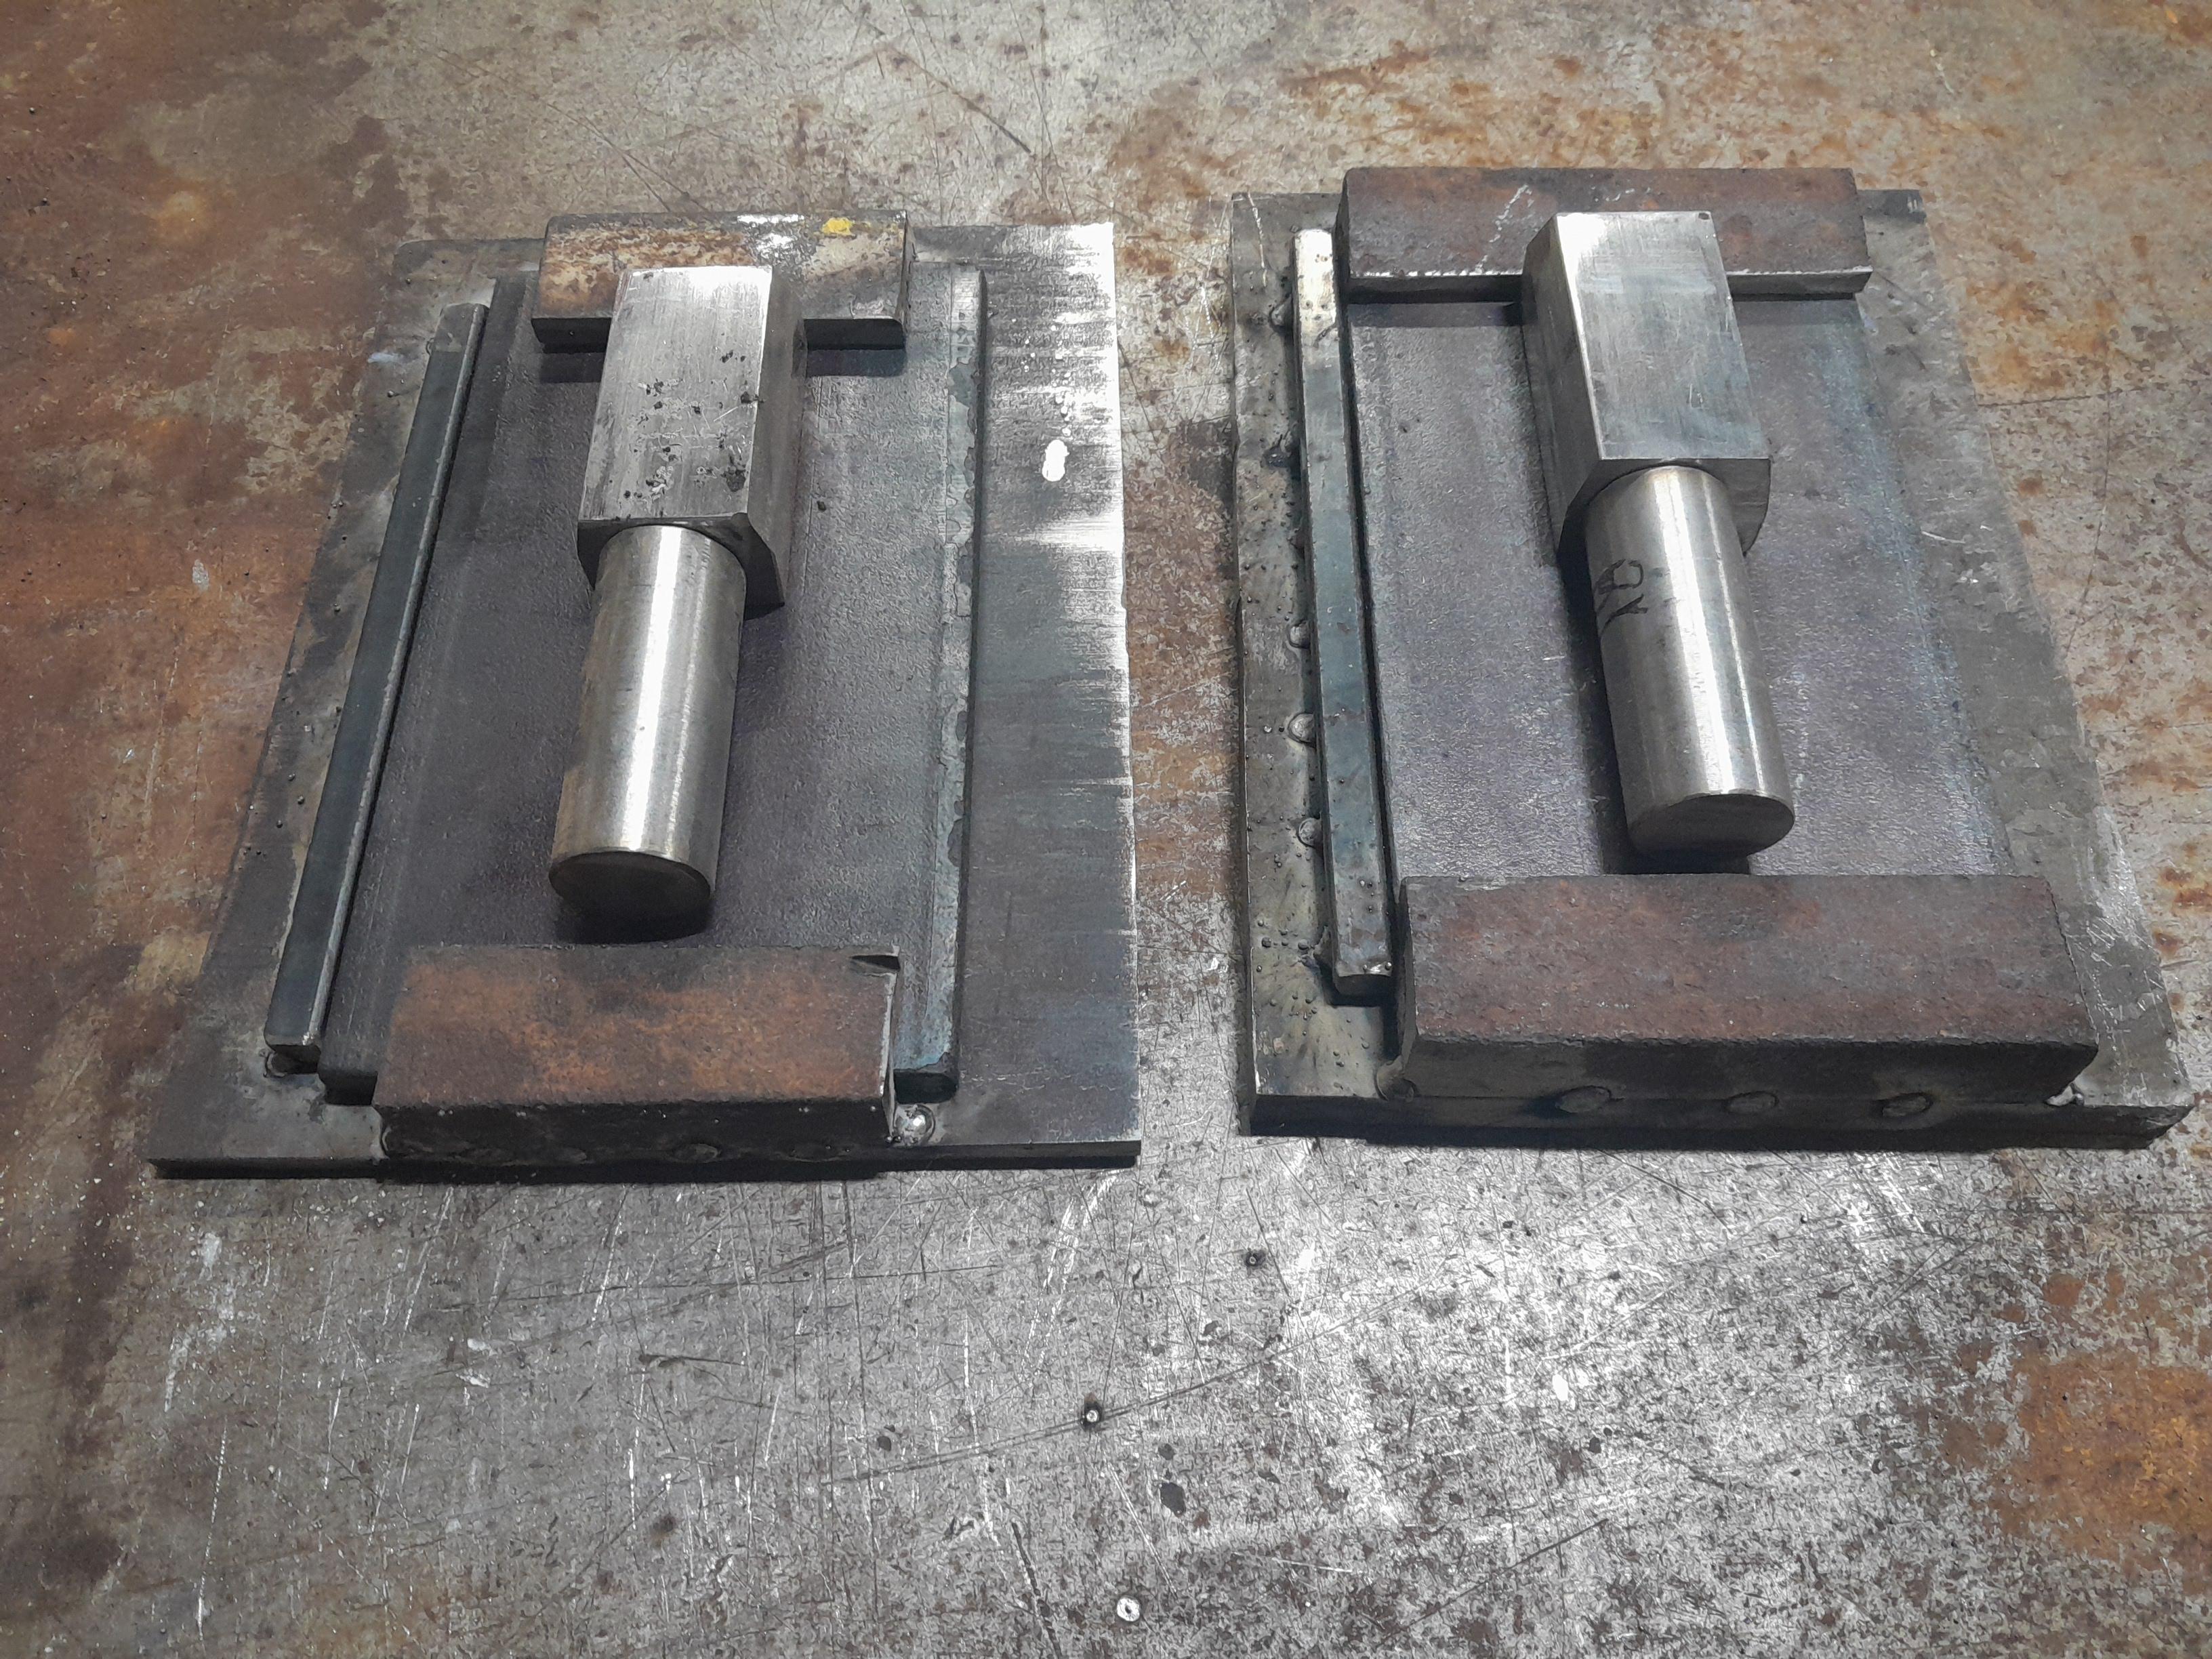
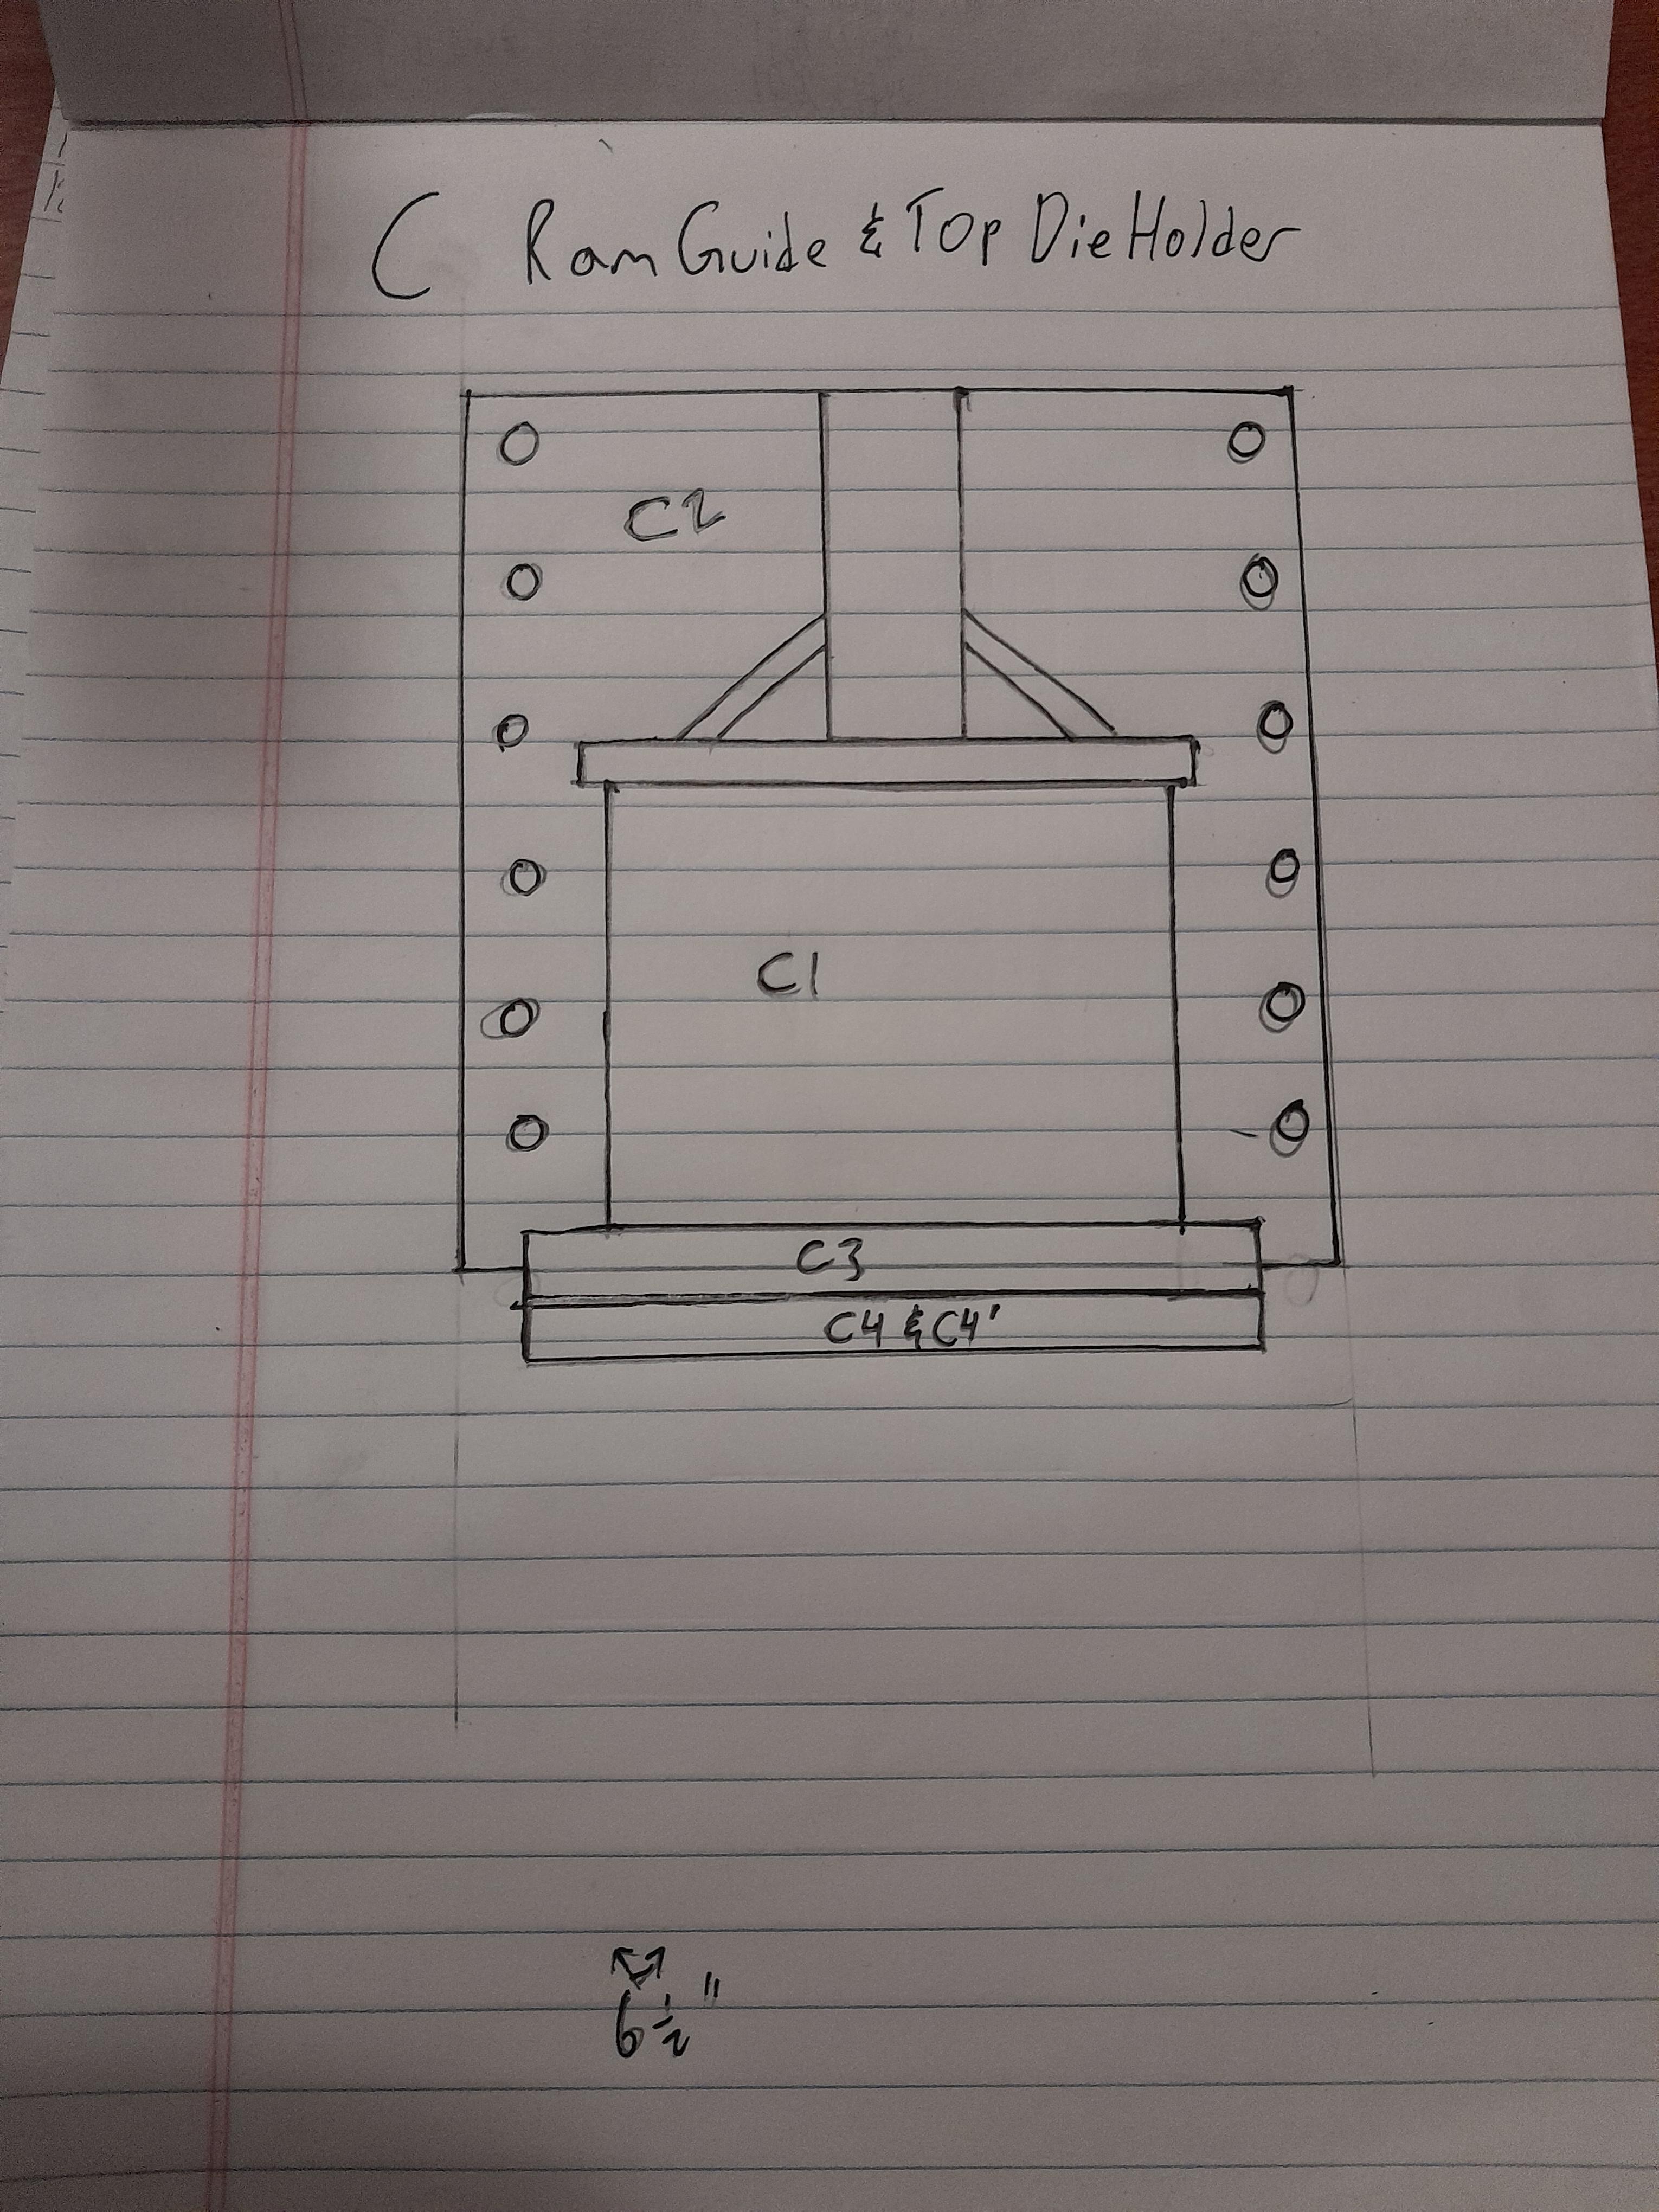
This migh help clear up confusion. I tacked up the top die holder and ram guide. I will do the same for the bottom guide. My little 110v Lincoln flux core isn't nearly big enough to glue this son of a biscuit together so my neighbor is going to let me use his larger welder. I have a combo die setup and I have enough steel for one more kind of die. Not sure what I'm going to do yet.
I think I'm going to stick to the steel guides for now I can always switch them out later if need be.
Hope this helps clear up the prints a little lol.


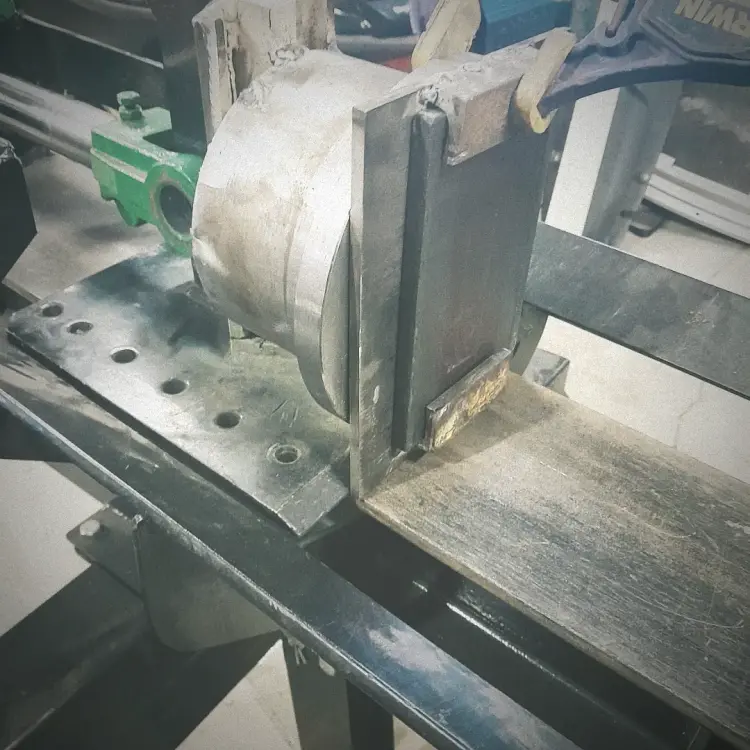
I should also add that the die holder I have in the picture will be the bottom die. I just used it for reference. The too die holder is made of ½ inch plate steel instead of the meager ¼ inch.
-
Thanks Scott.
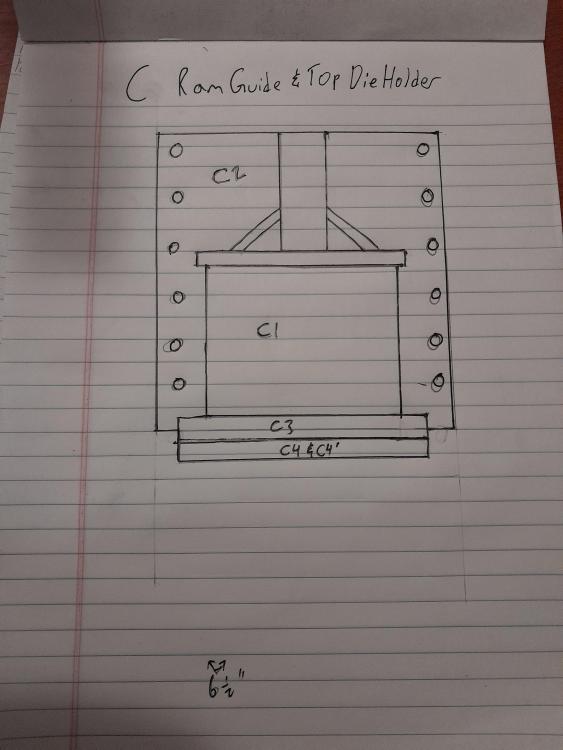
Frosty: you are right. The sketches do net elaborate enough. I should've put more of a description on the parts. The sketch is of the guide, die guide and dies. The combo dies are in the sketch and in the picture.
In plan C the die guide/holder is sideways so it is difficult to picture. I am using angle iron to retain the dies. To remove them I will slide the dies out horizontally. I've seen guys bolt them on but I don't have a big enough drill press or taps to do so. I'm just going to weld it all together.
I did see (I believe it was on IFI) a press on which the maker used a type of plastic as a spacer in between the ram guide. I've also seen some presses use aluminum bronze. Is there any pros or cons to using steel vs bronze vs plastic? I would think plastic would bend and shear under even 22 tons.
-
Hi all,
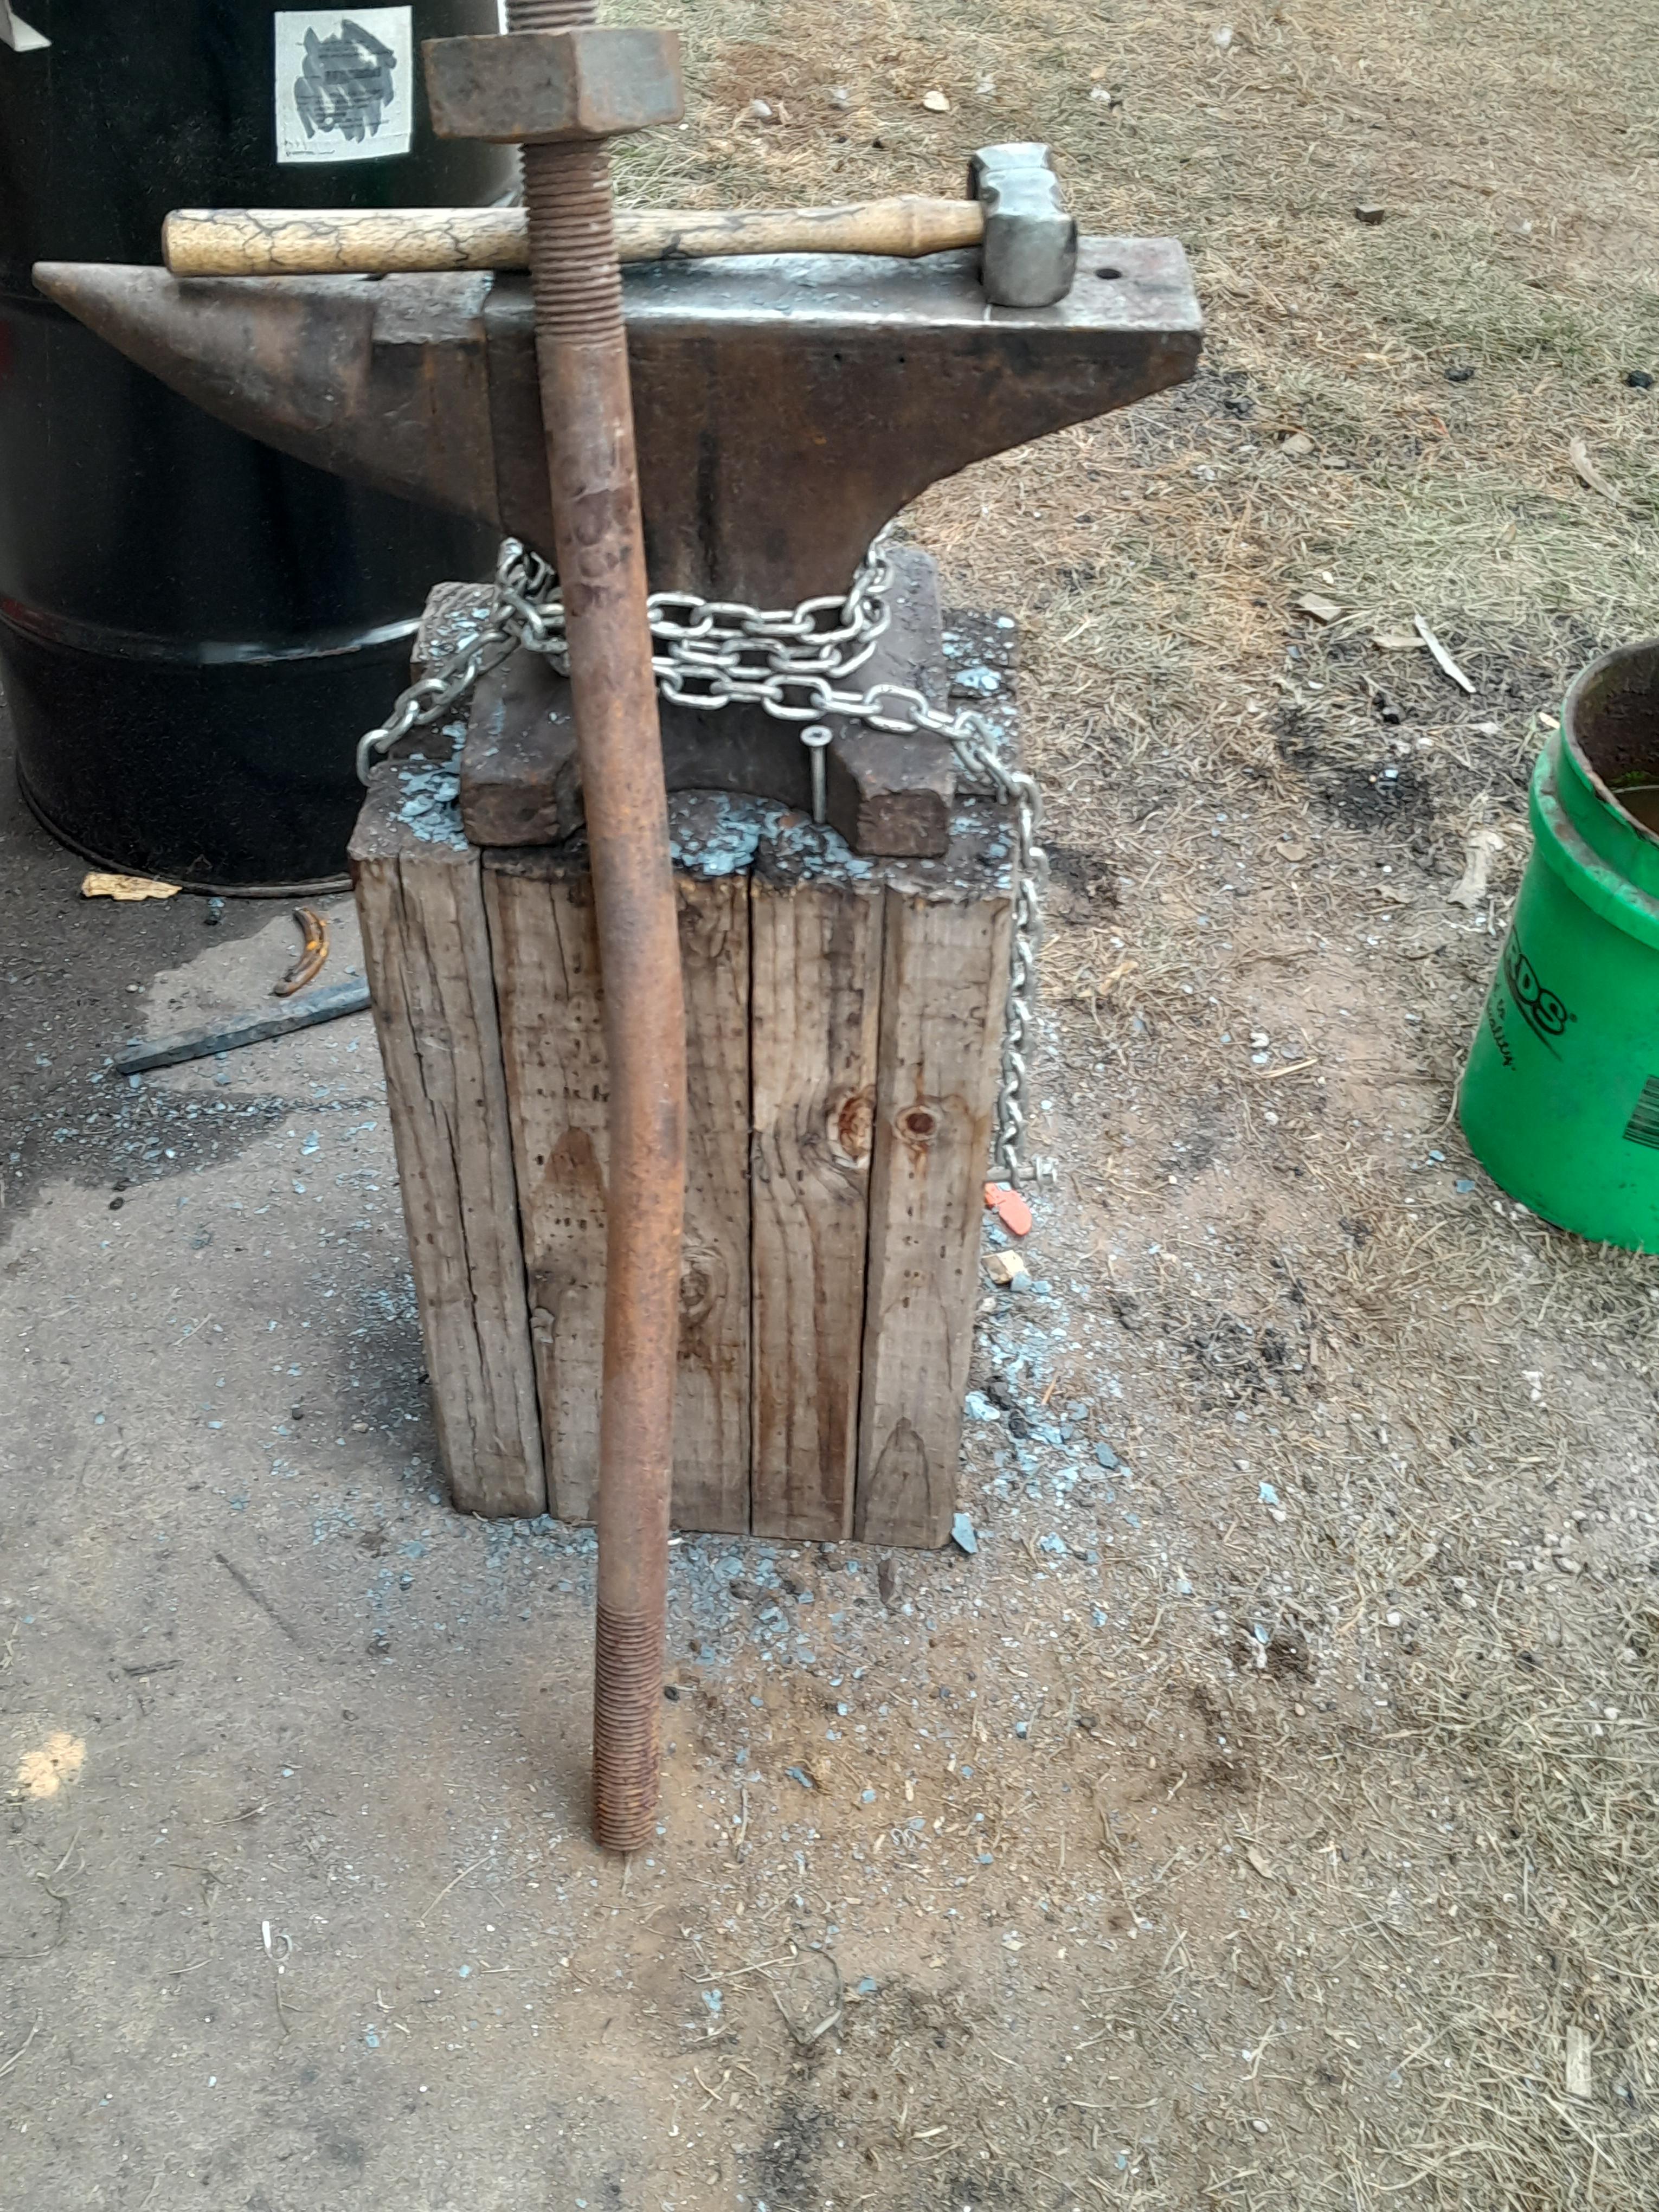
I'm working on turning a 22 ton forest king log splitter into a forging press. I bought this one last fall but never got around to converting it. I've wanted a press since I started making knives. I considered purchasing one however it is a little out of my price range. I have the steel, tools and (hopefully) the enginuety to make my own.
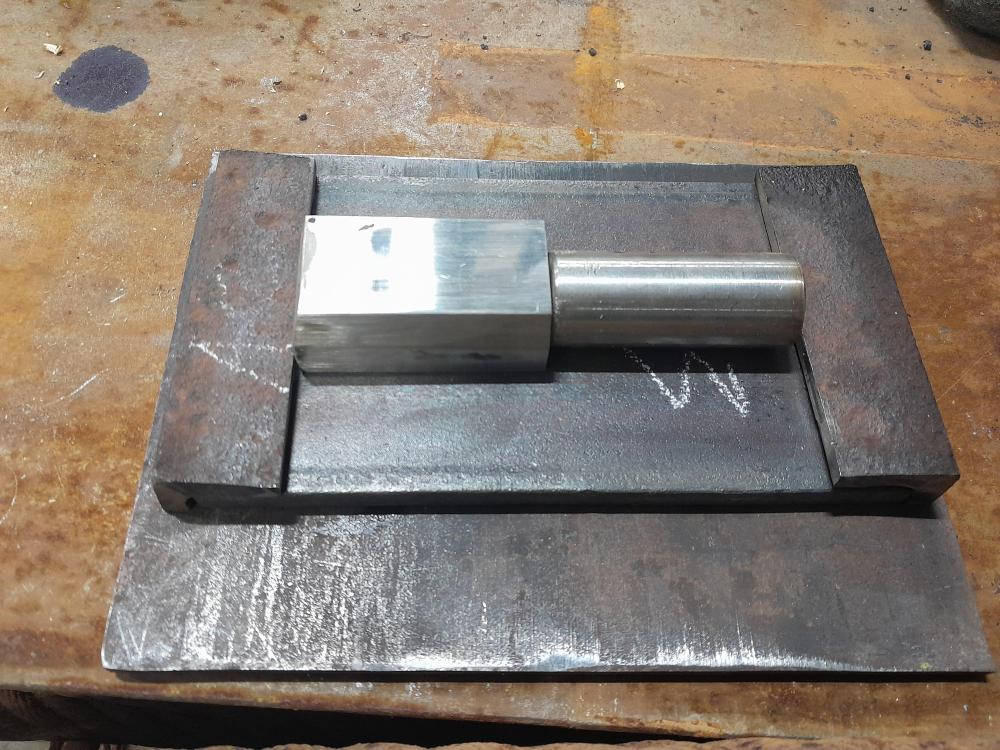
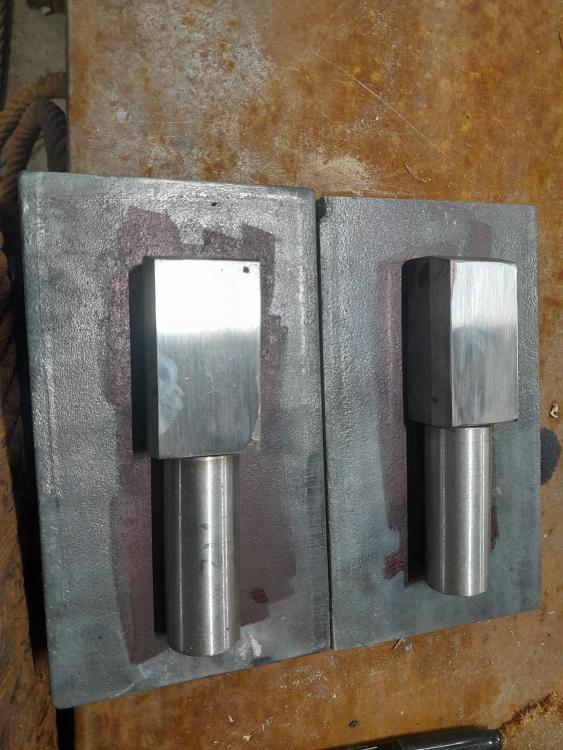
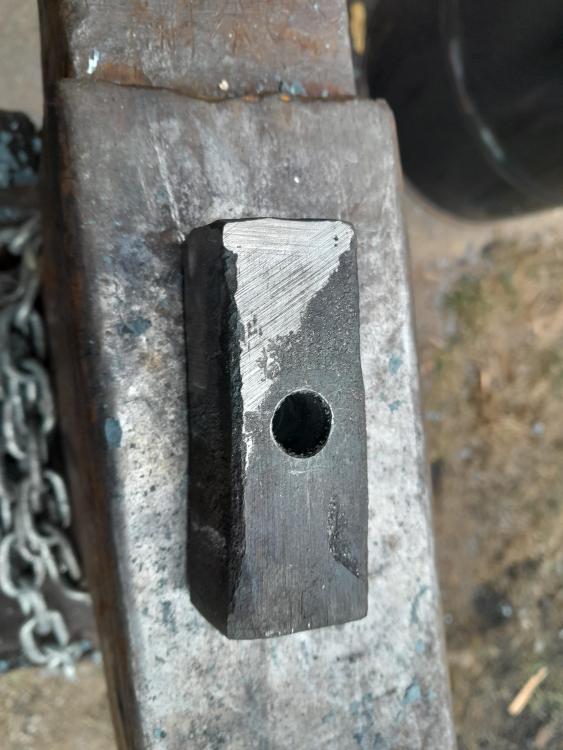
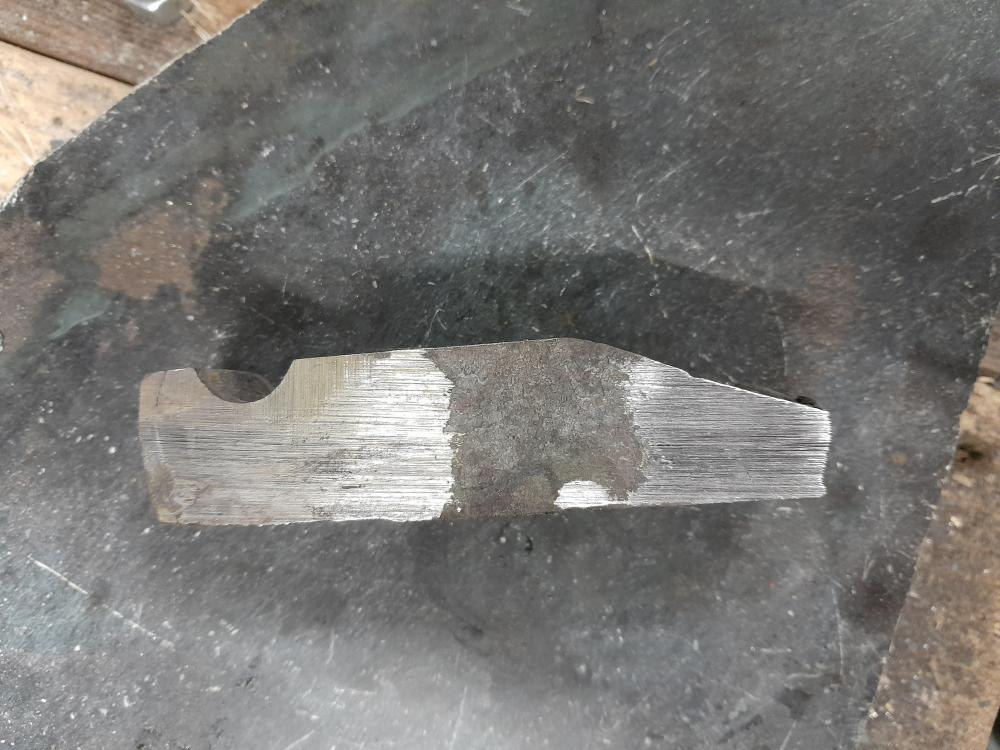
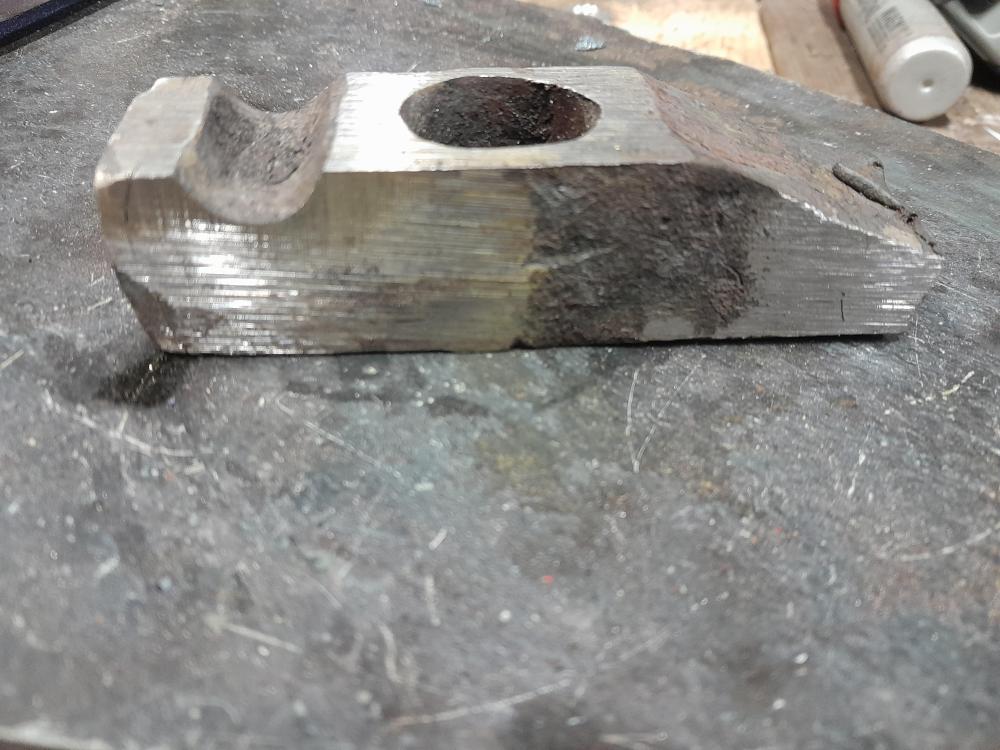
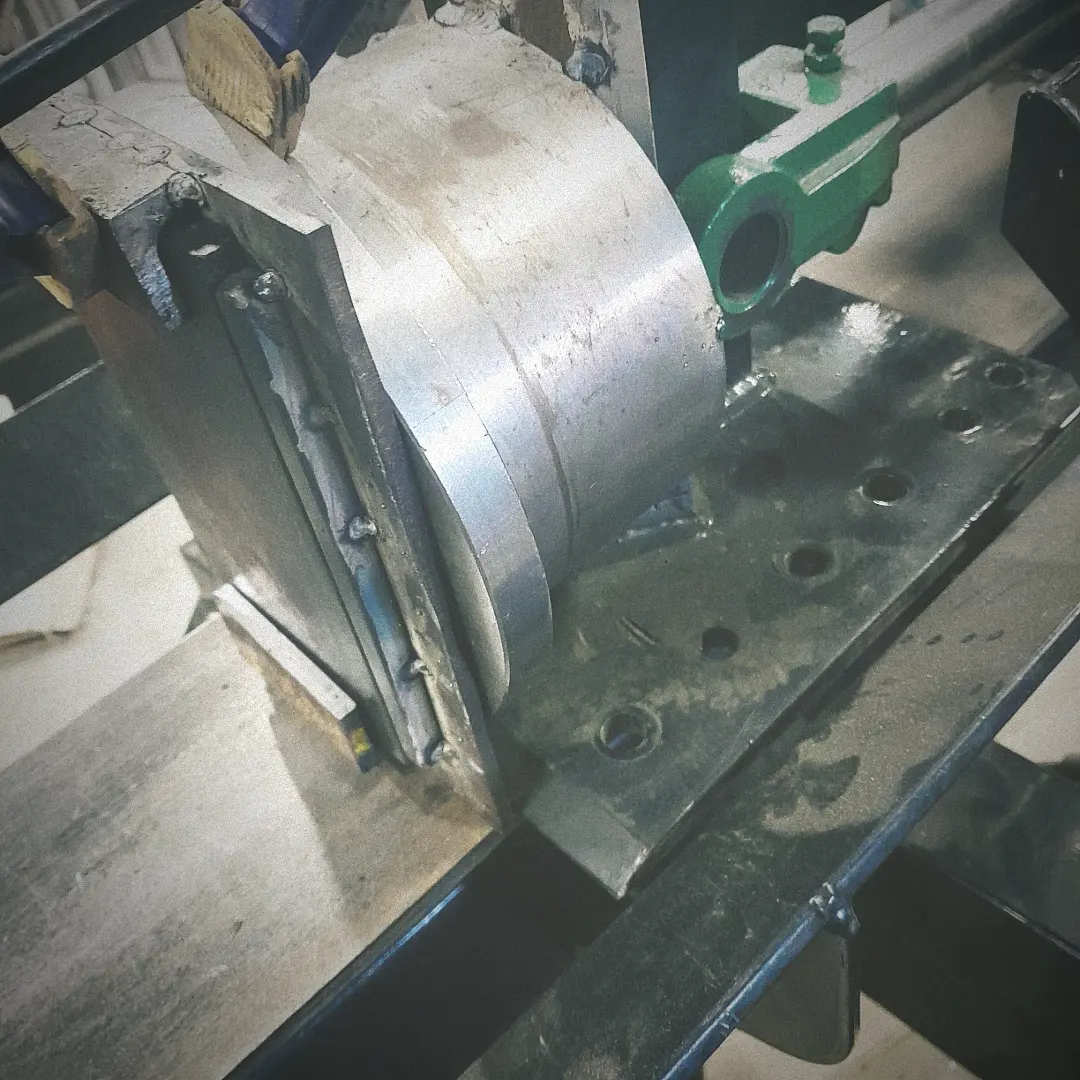
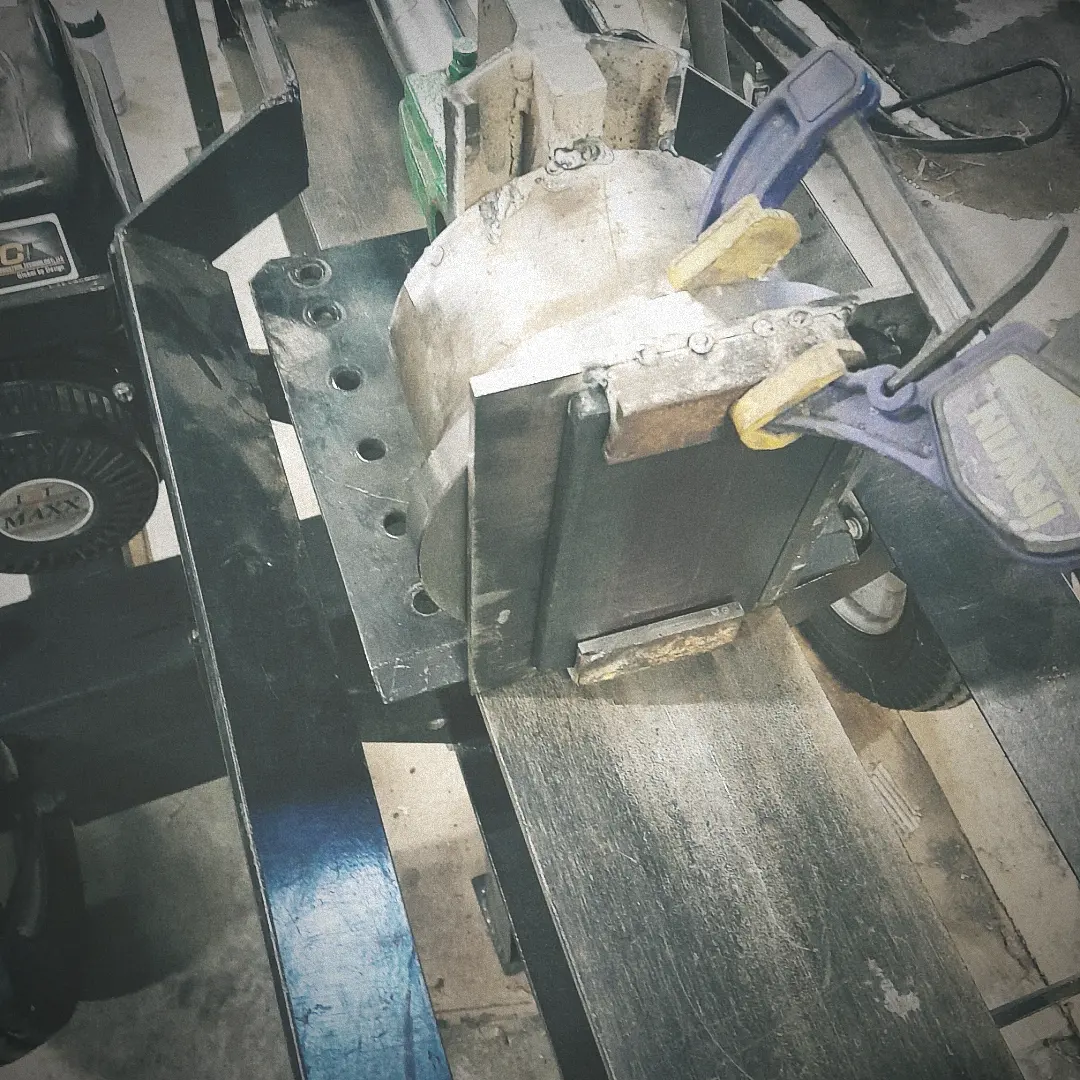
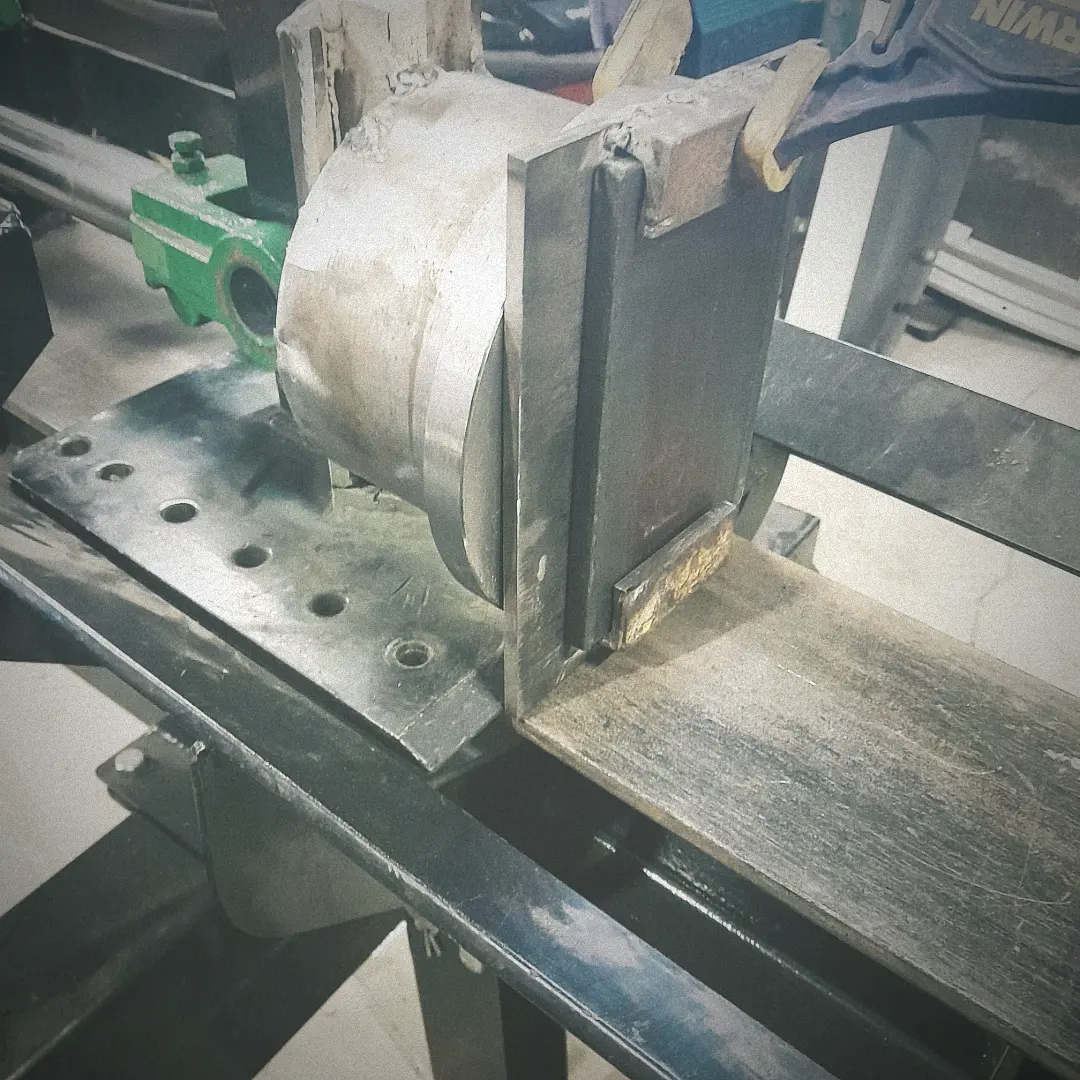
I bought three log splitters before I found one that I liked. The reason it took me that many tries is because the previous splitter had too much wobble iln the guides. This one is adjustable (I can make my own tighter guide if I need to) because it unbolts from the I beam. I'm planning on cutting the wedge off, welding a big steel cylinder to it to add support and then adding the top die. The bottom die will be made separately and then welded to the machine. I don't have a big enough welder so I'm going to tack the prices up and bring it over to a friend's shop to use an industrial welder.
I have drawn up dozens of prints for this build and these seem to fit the best. I have the prints and parts labled to help avoid confusing myself. My only dilemma is with die retention. I've seen guys use a peice of steel that acts as a flap to hold the die in. I've also seen the same flaps bend over the years of use. I'll have to do some more research before I pull the trigger on a certain design.
I have the bottom die holder almost completely cut out and the top die will be next. These are my goals for this press.
1. Be able to draw out billets of damascus, break down tool steel round stock and make hammers.
2. Have a smallish foot print.
3. Have universal dies that are easy to make.
I will leave the gas engine for the time being because I don't have enough electricity to the shop to run a 220 motor.
Cheers!
WFF
-
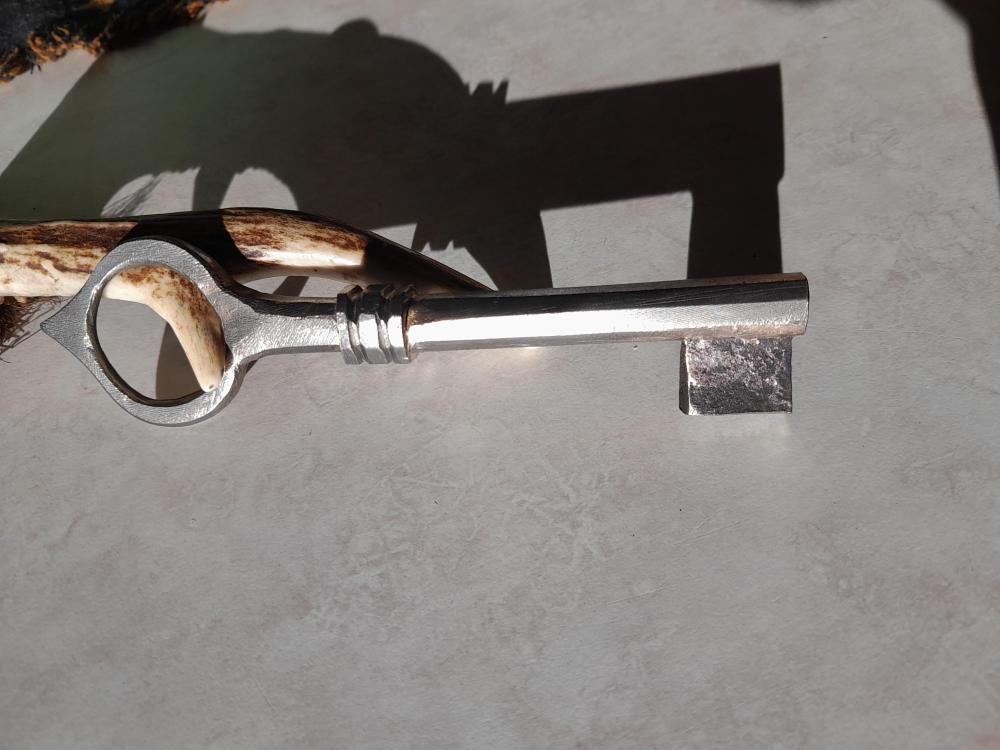
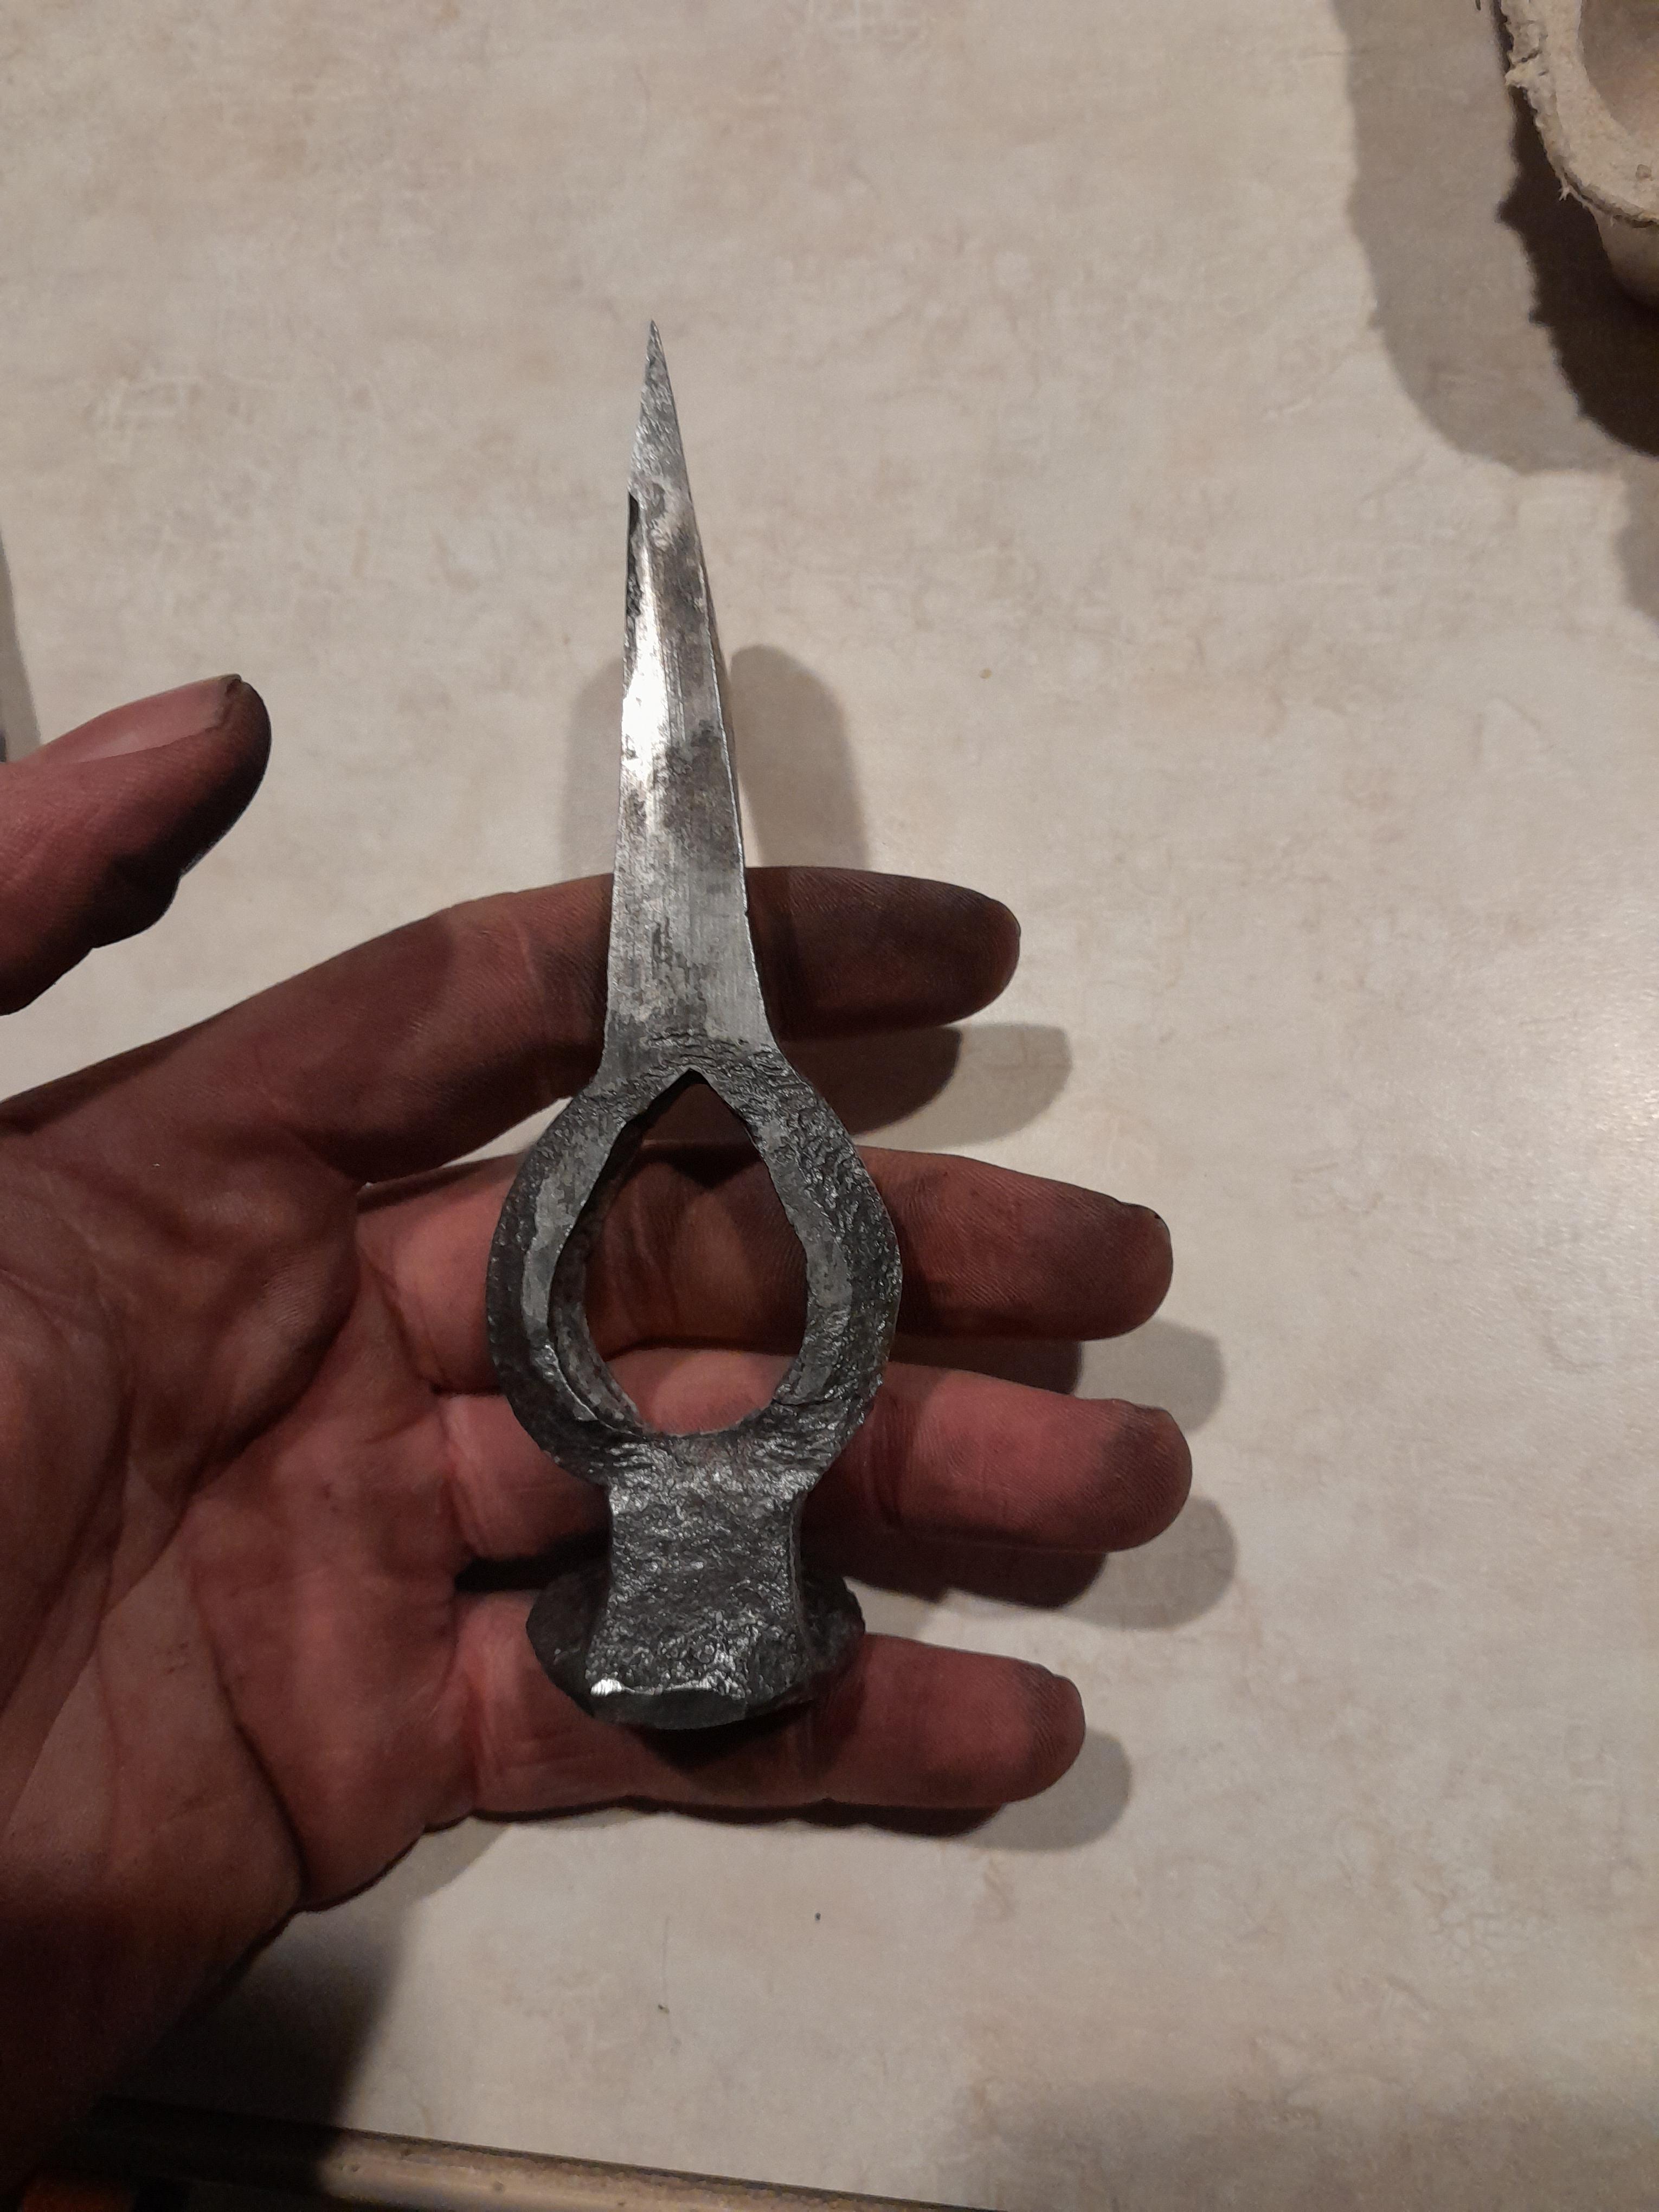
Yessir! Four parts. The ring, tube, collar and bit.
-
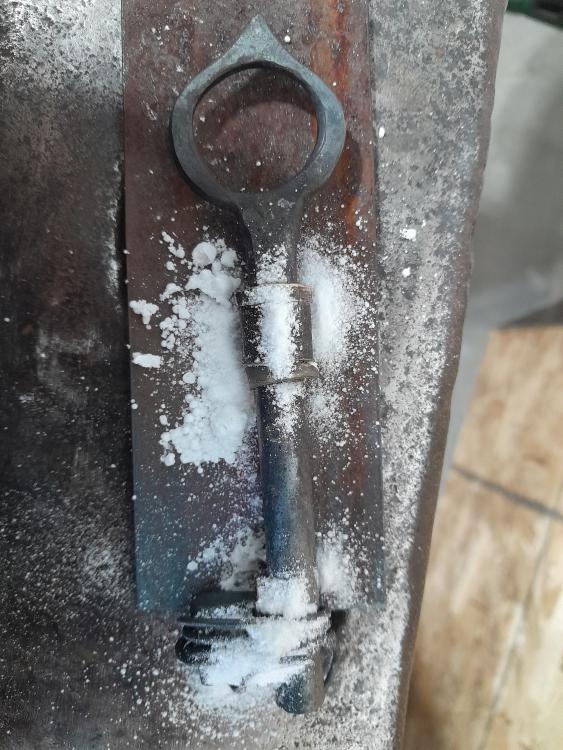
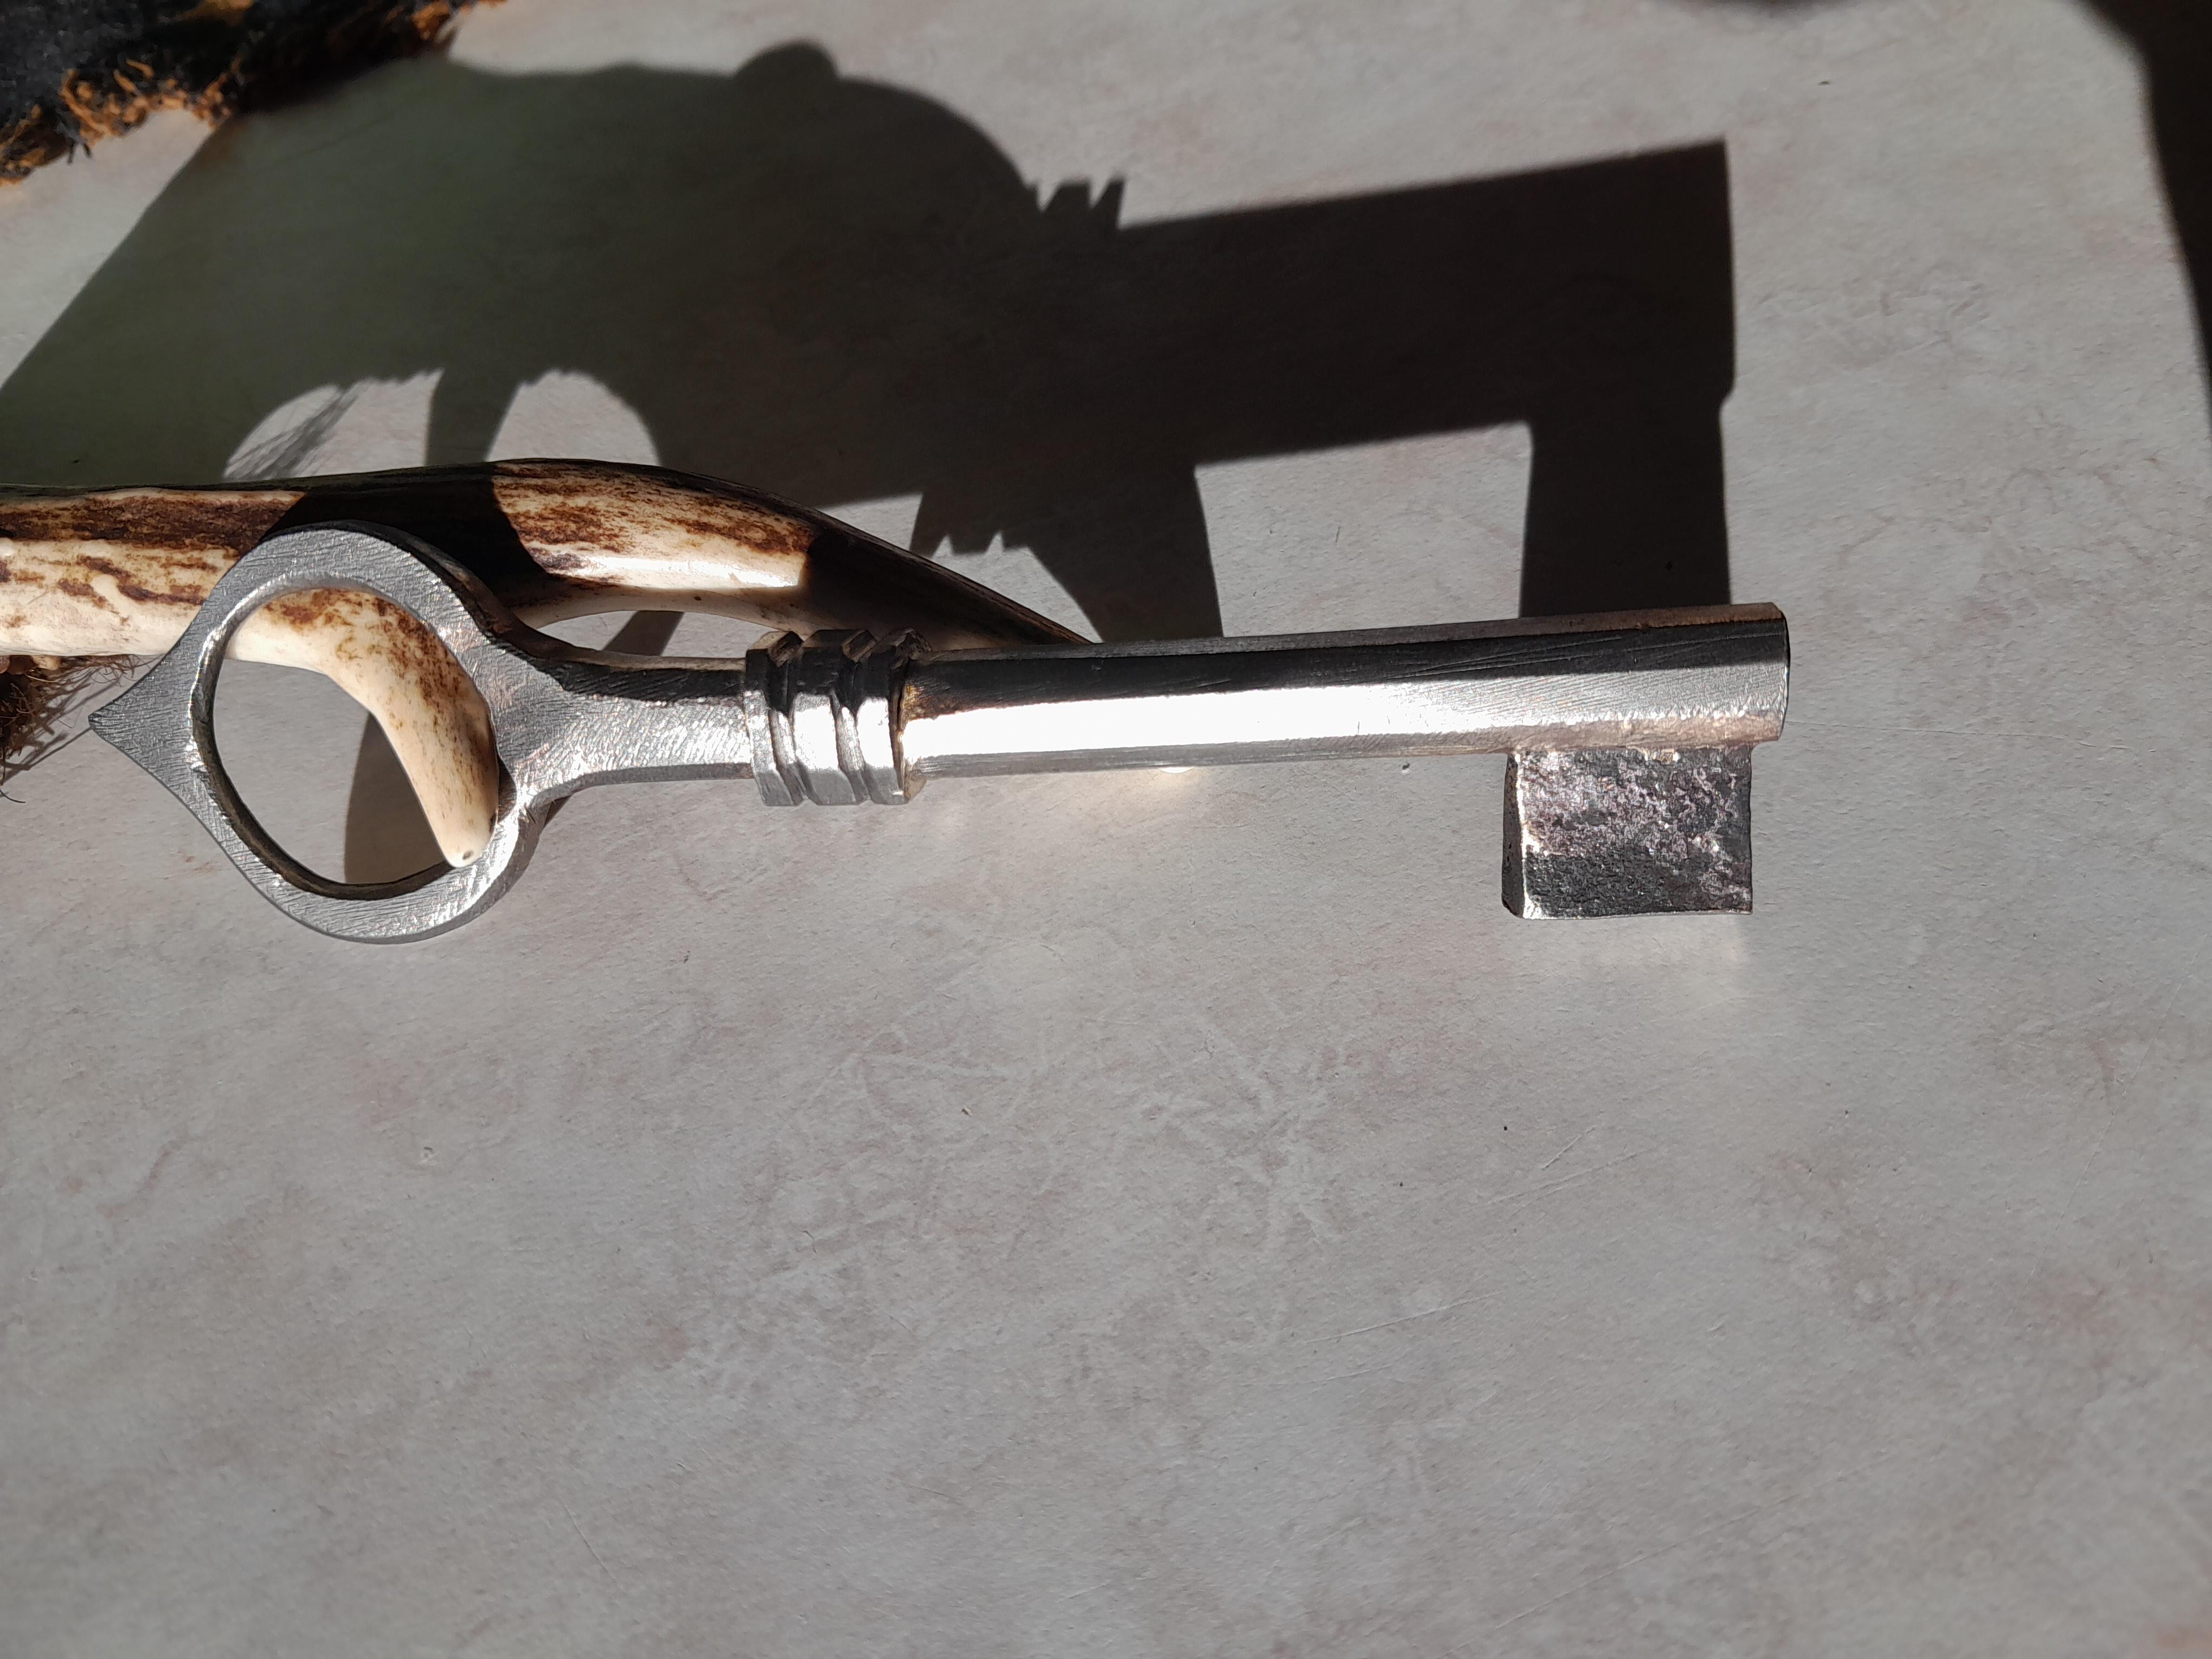
I worked on a key for a immigrant chest and lock I am making. The key is still really rough and needs some clean up on the intricate parts.
-
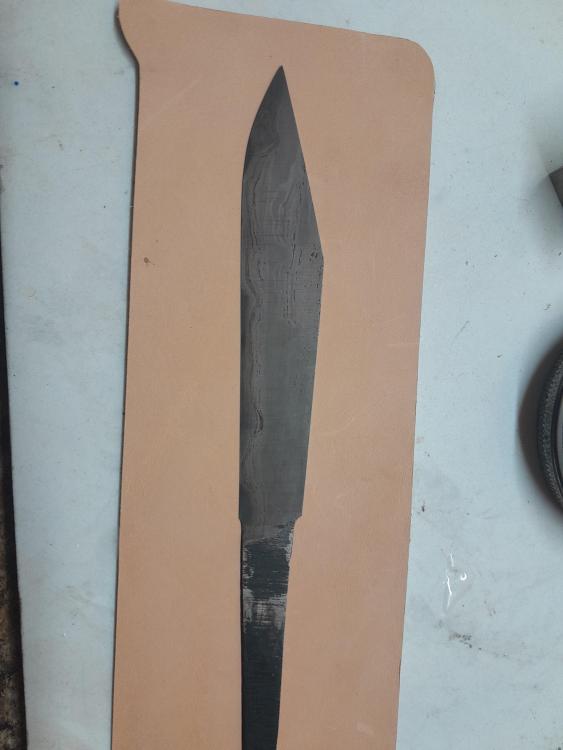
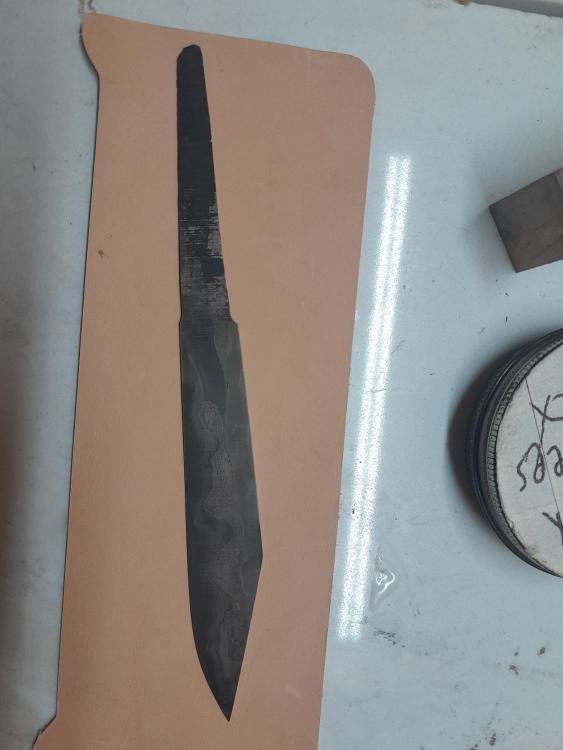
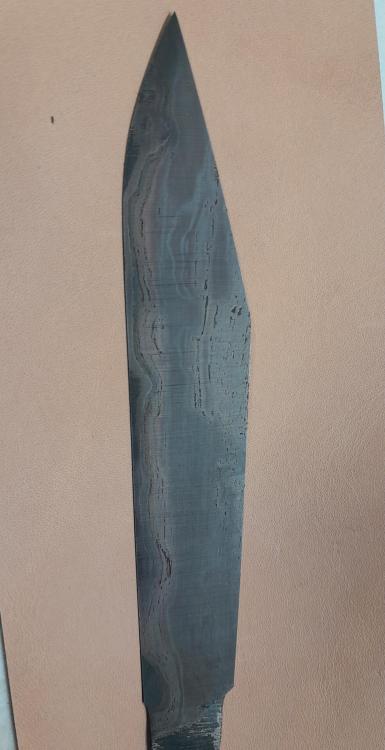
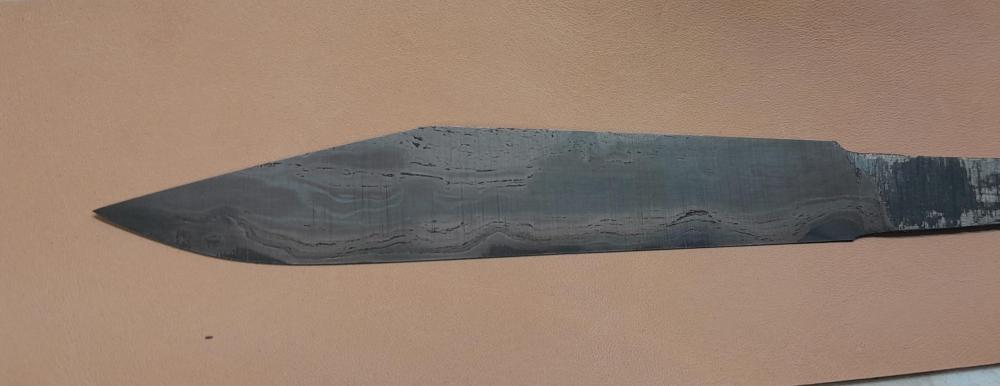
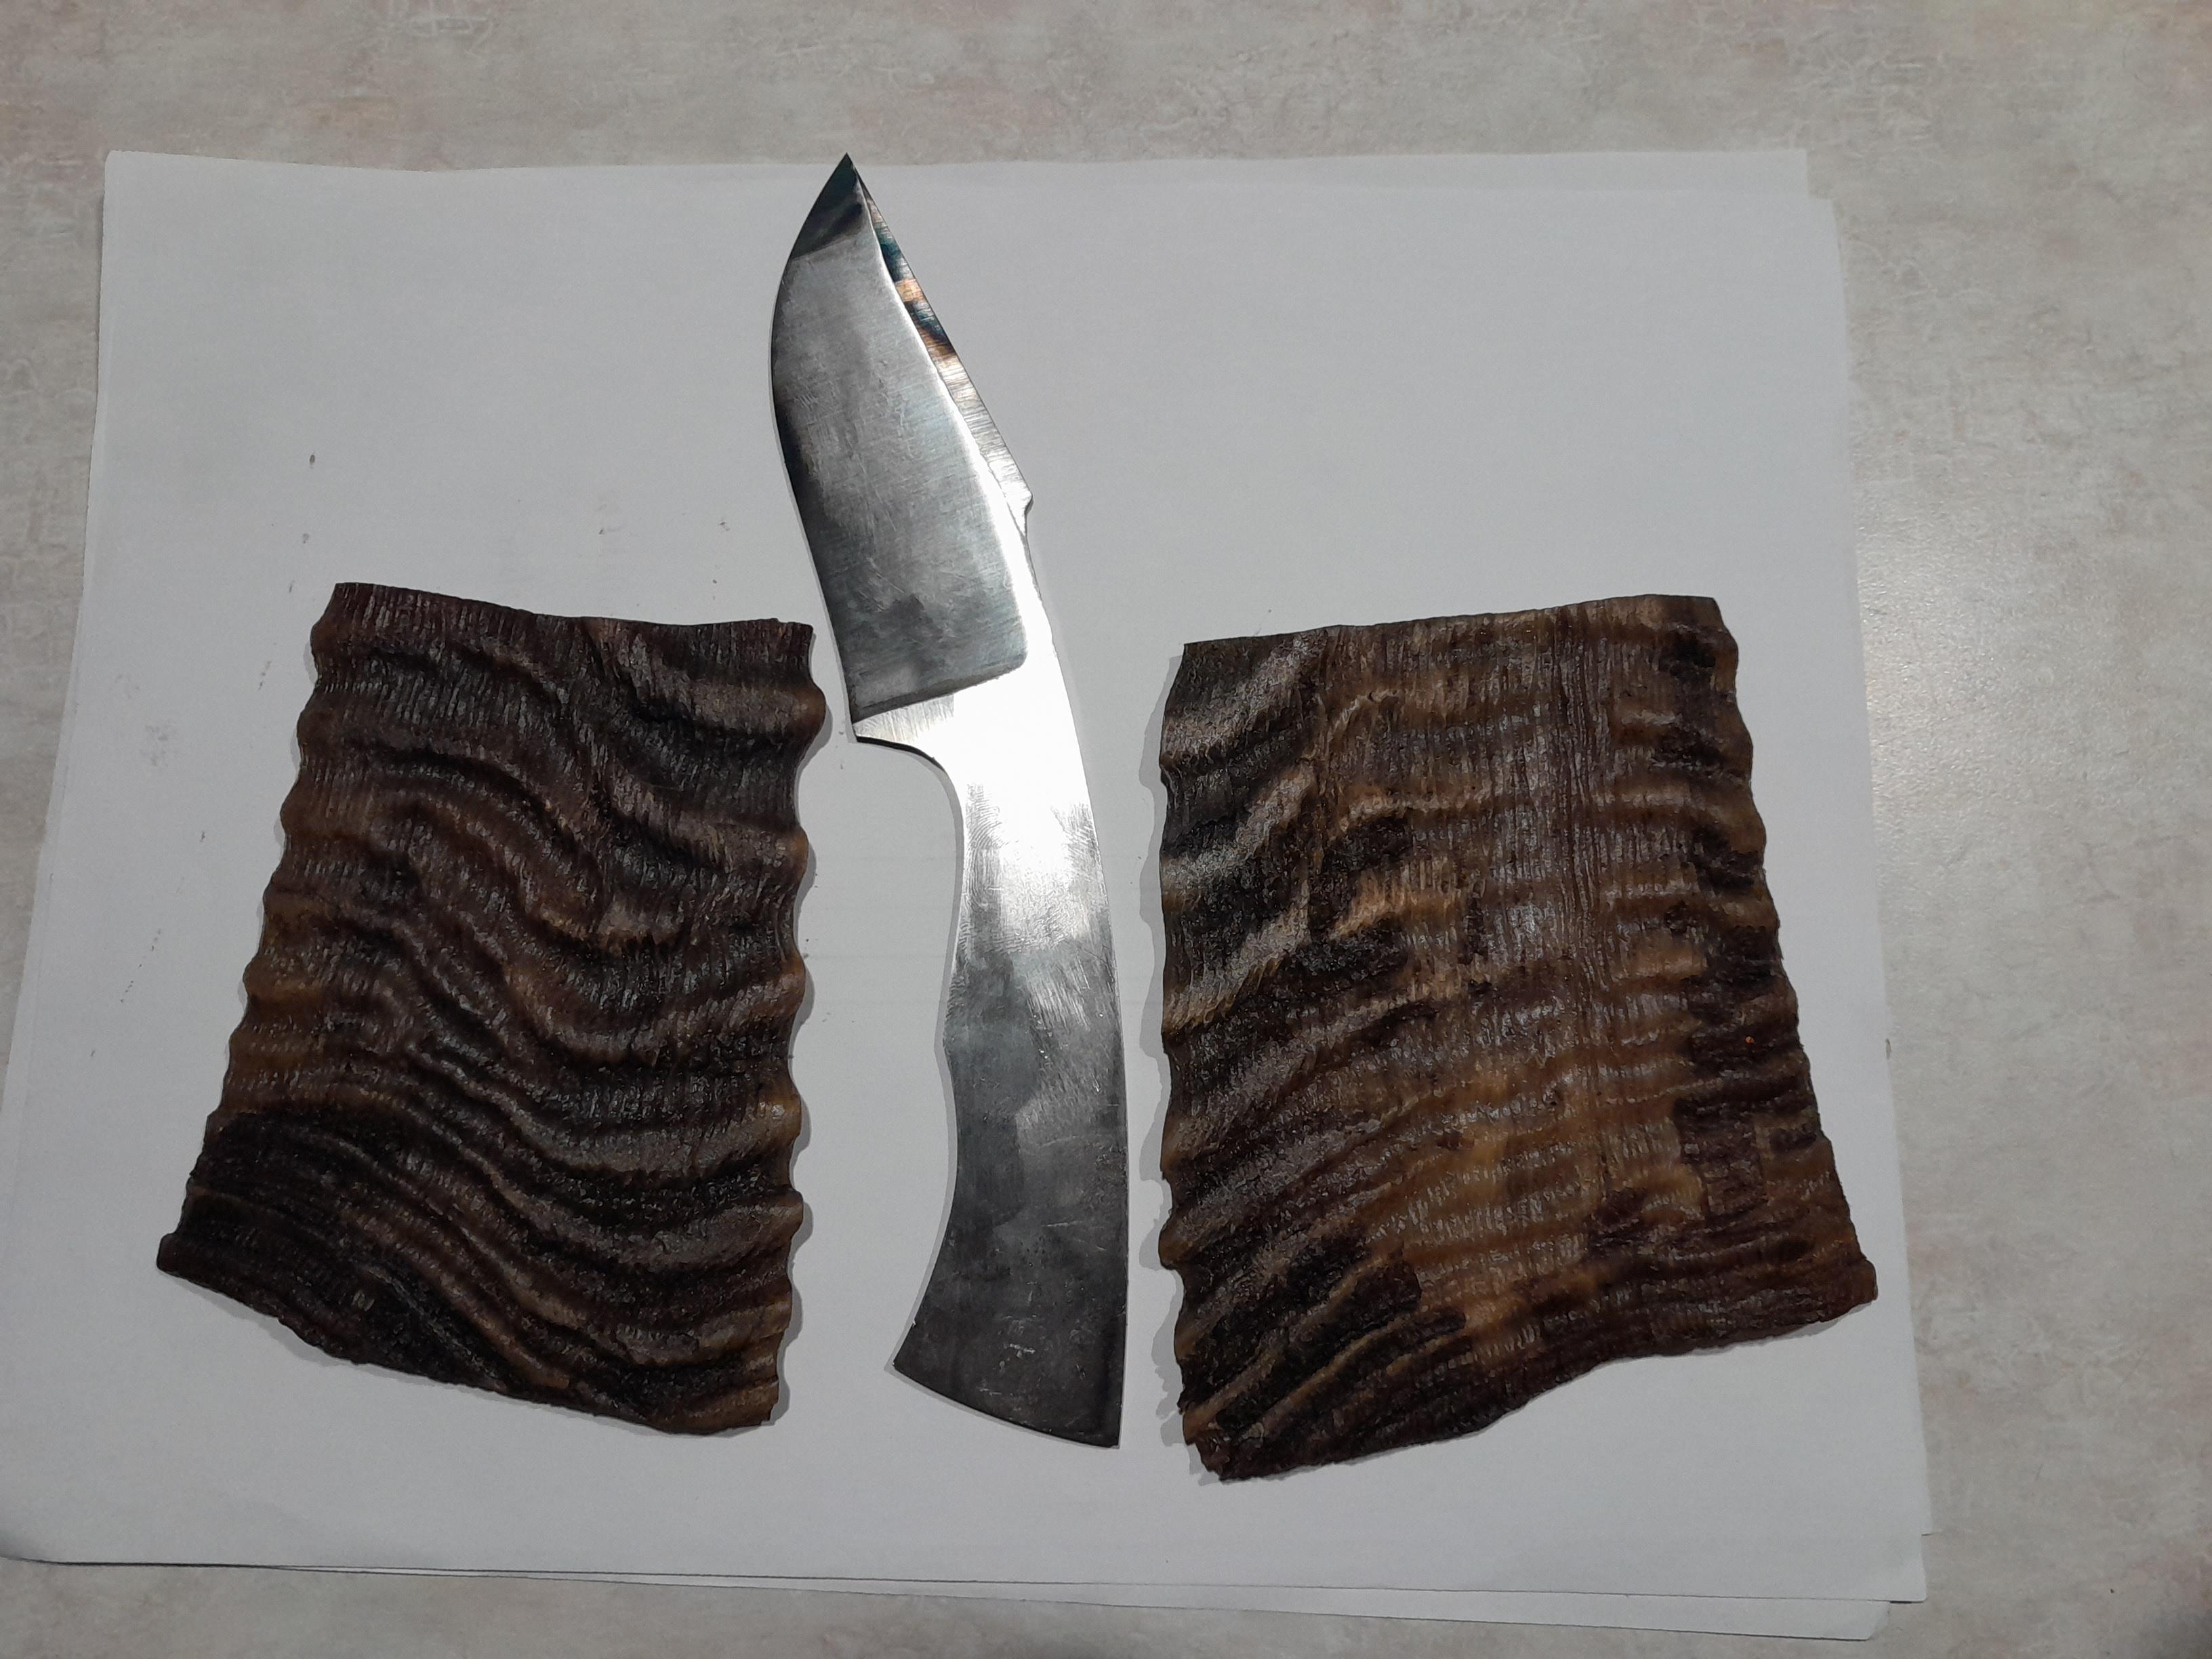
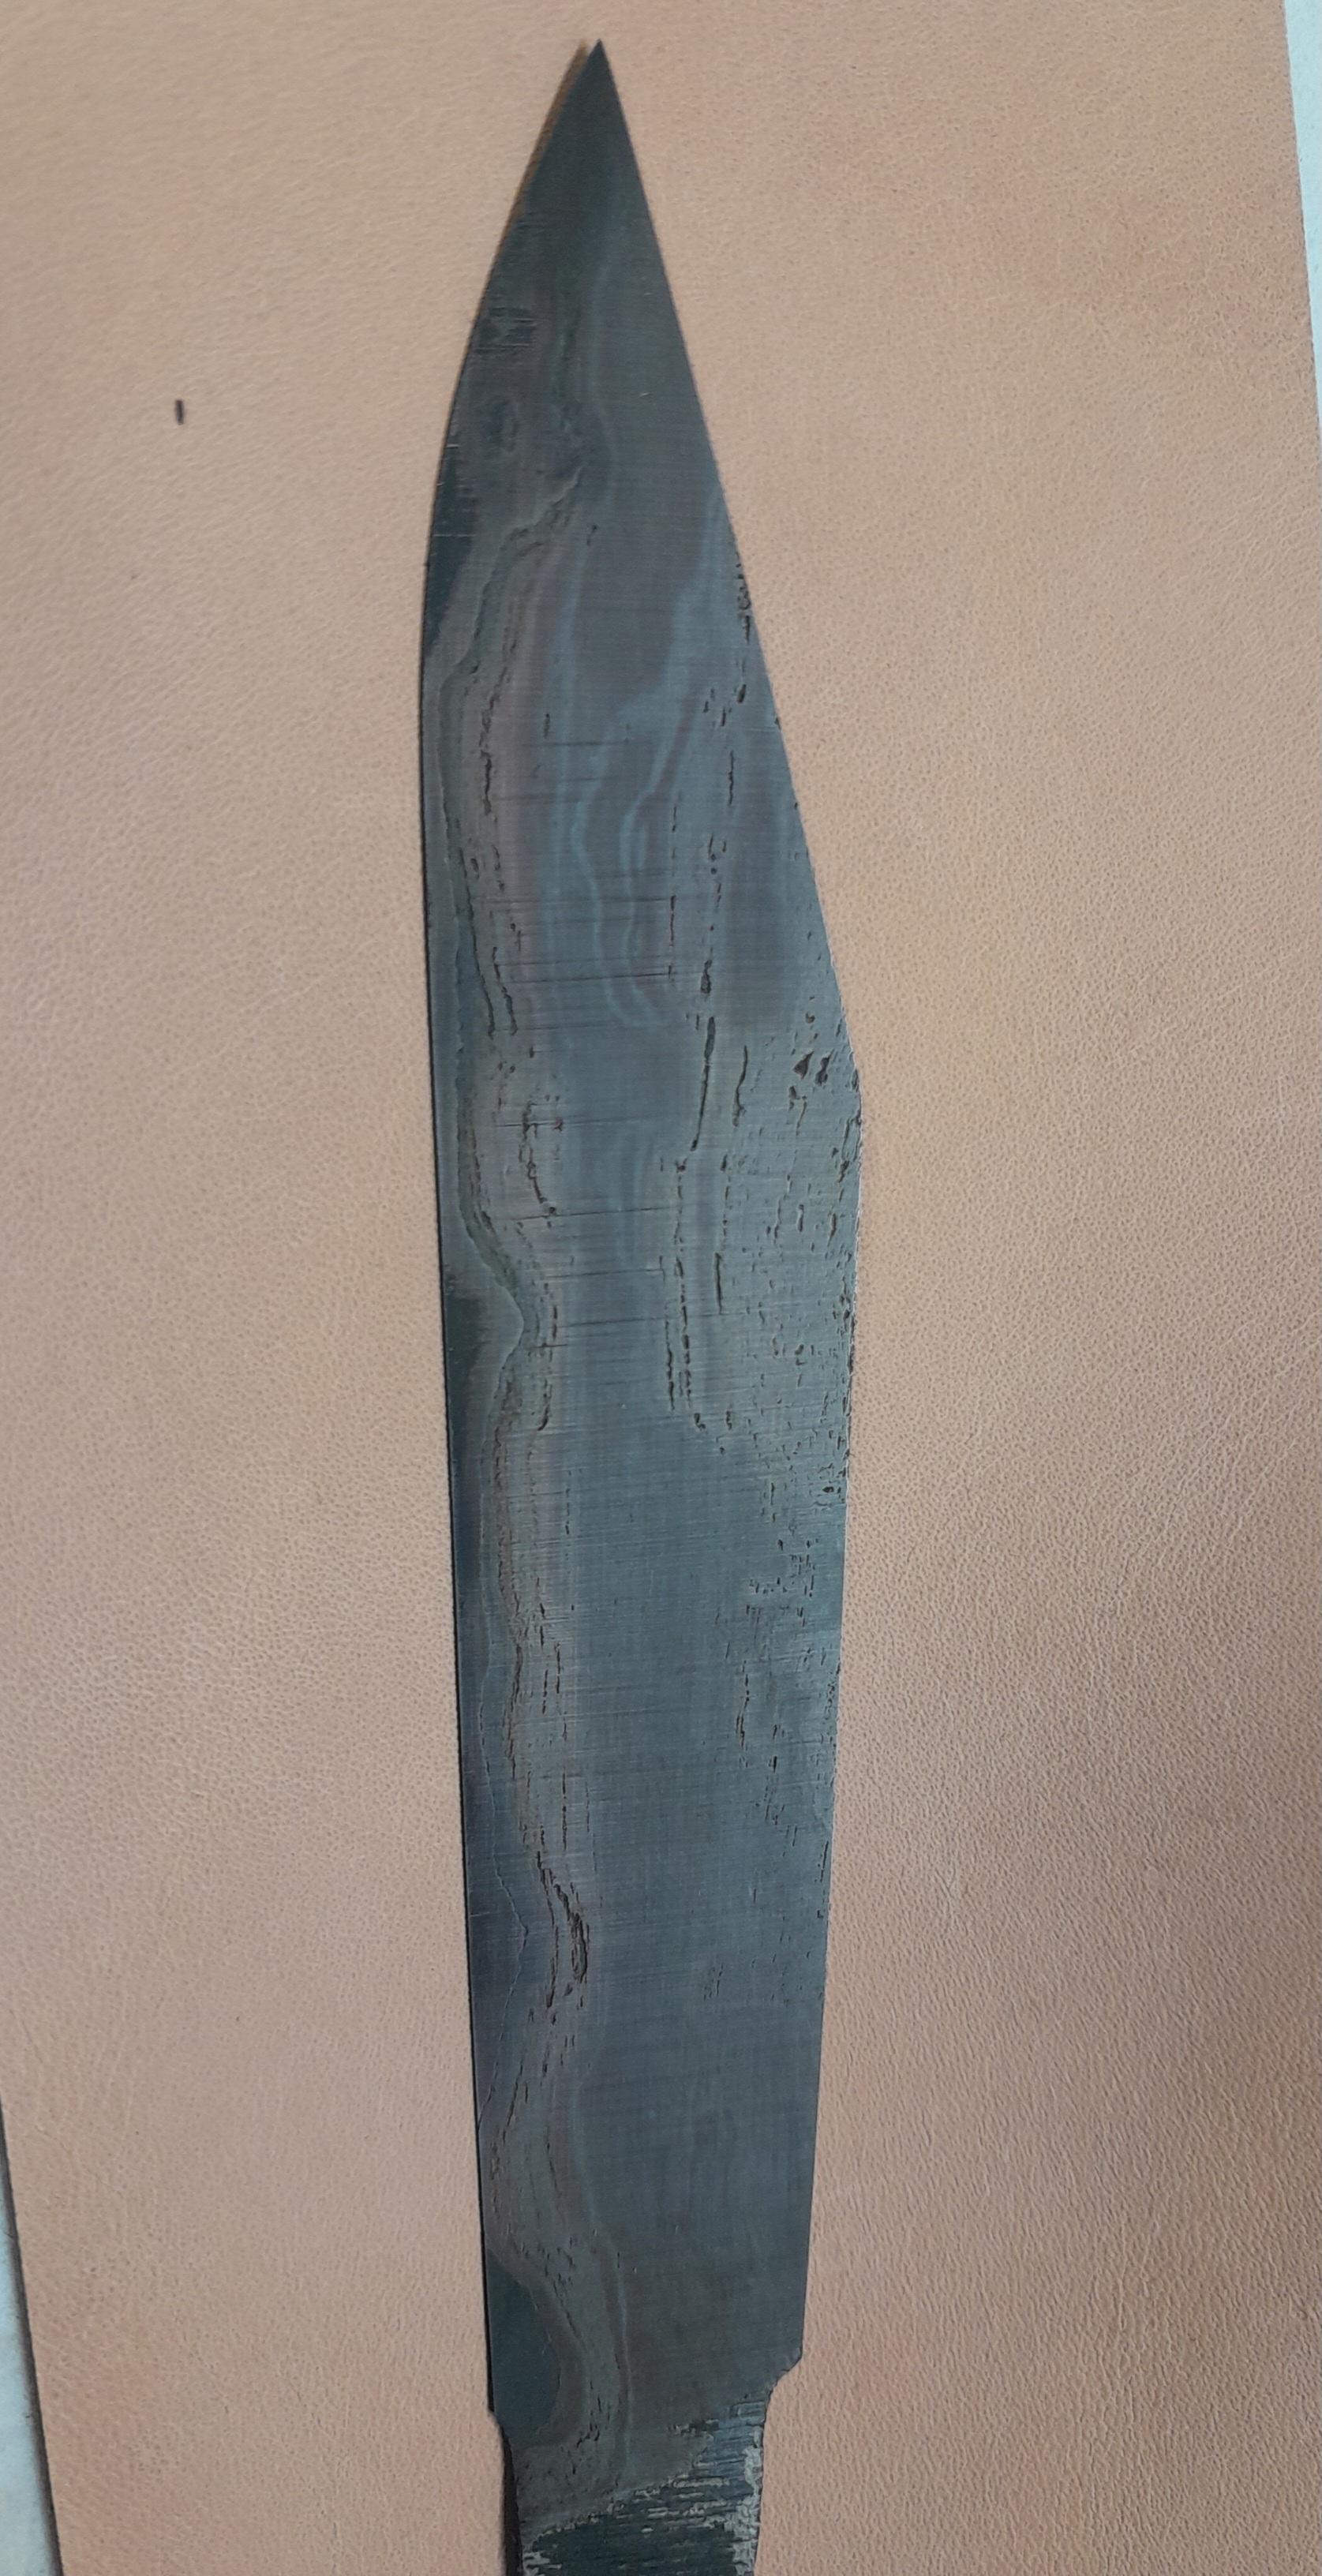
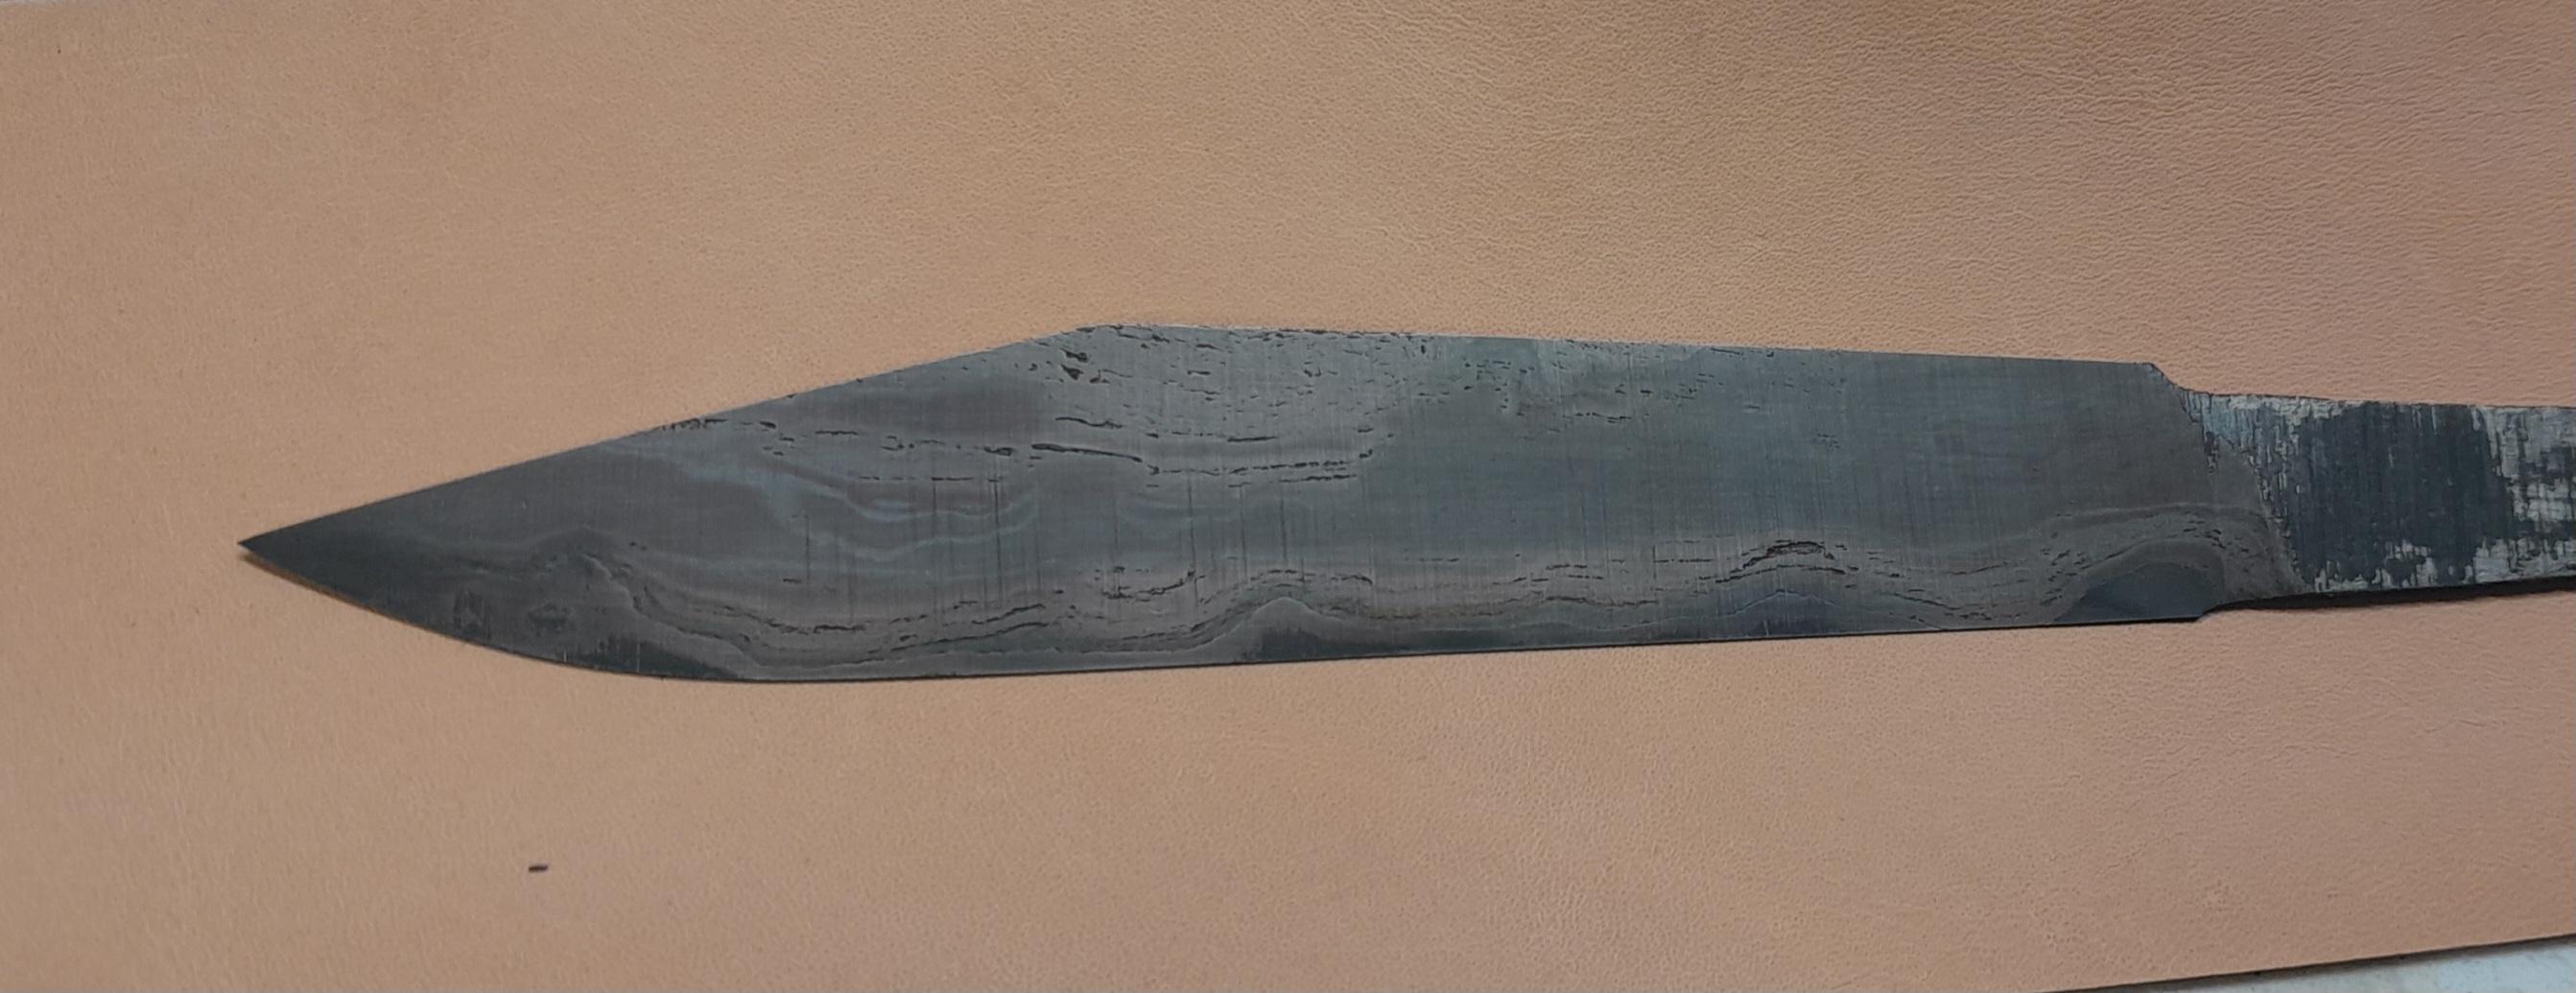
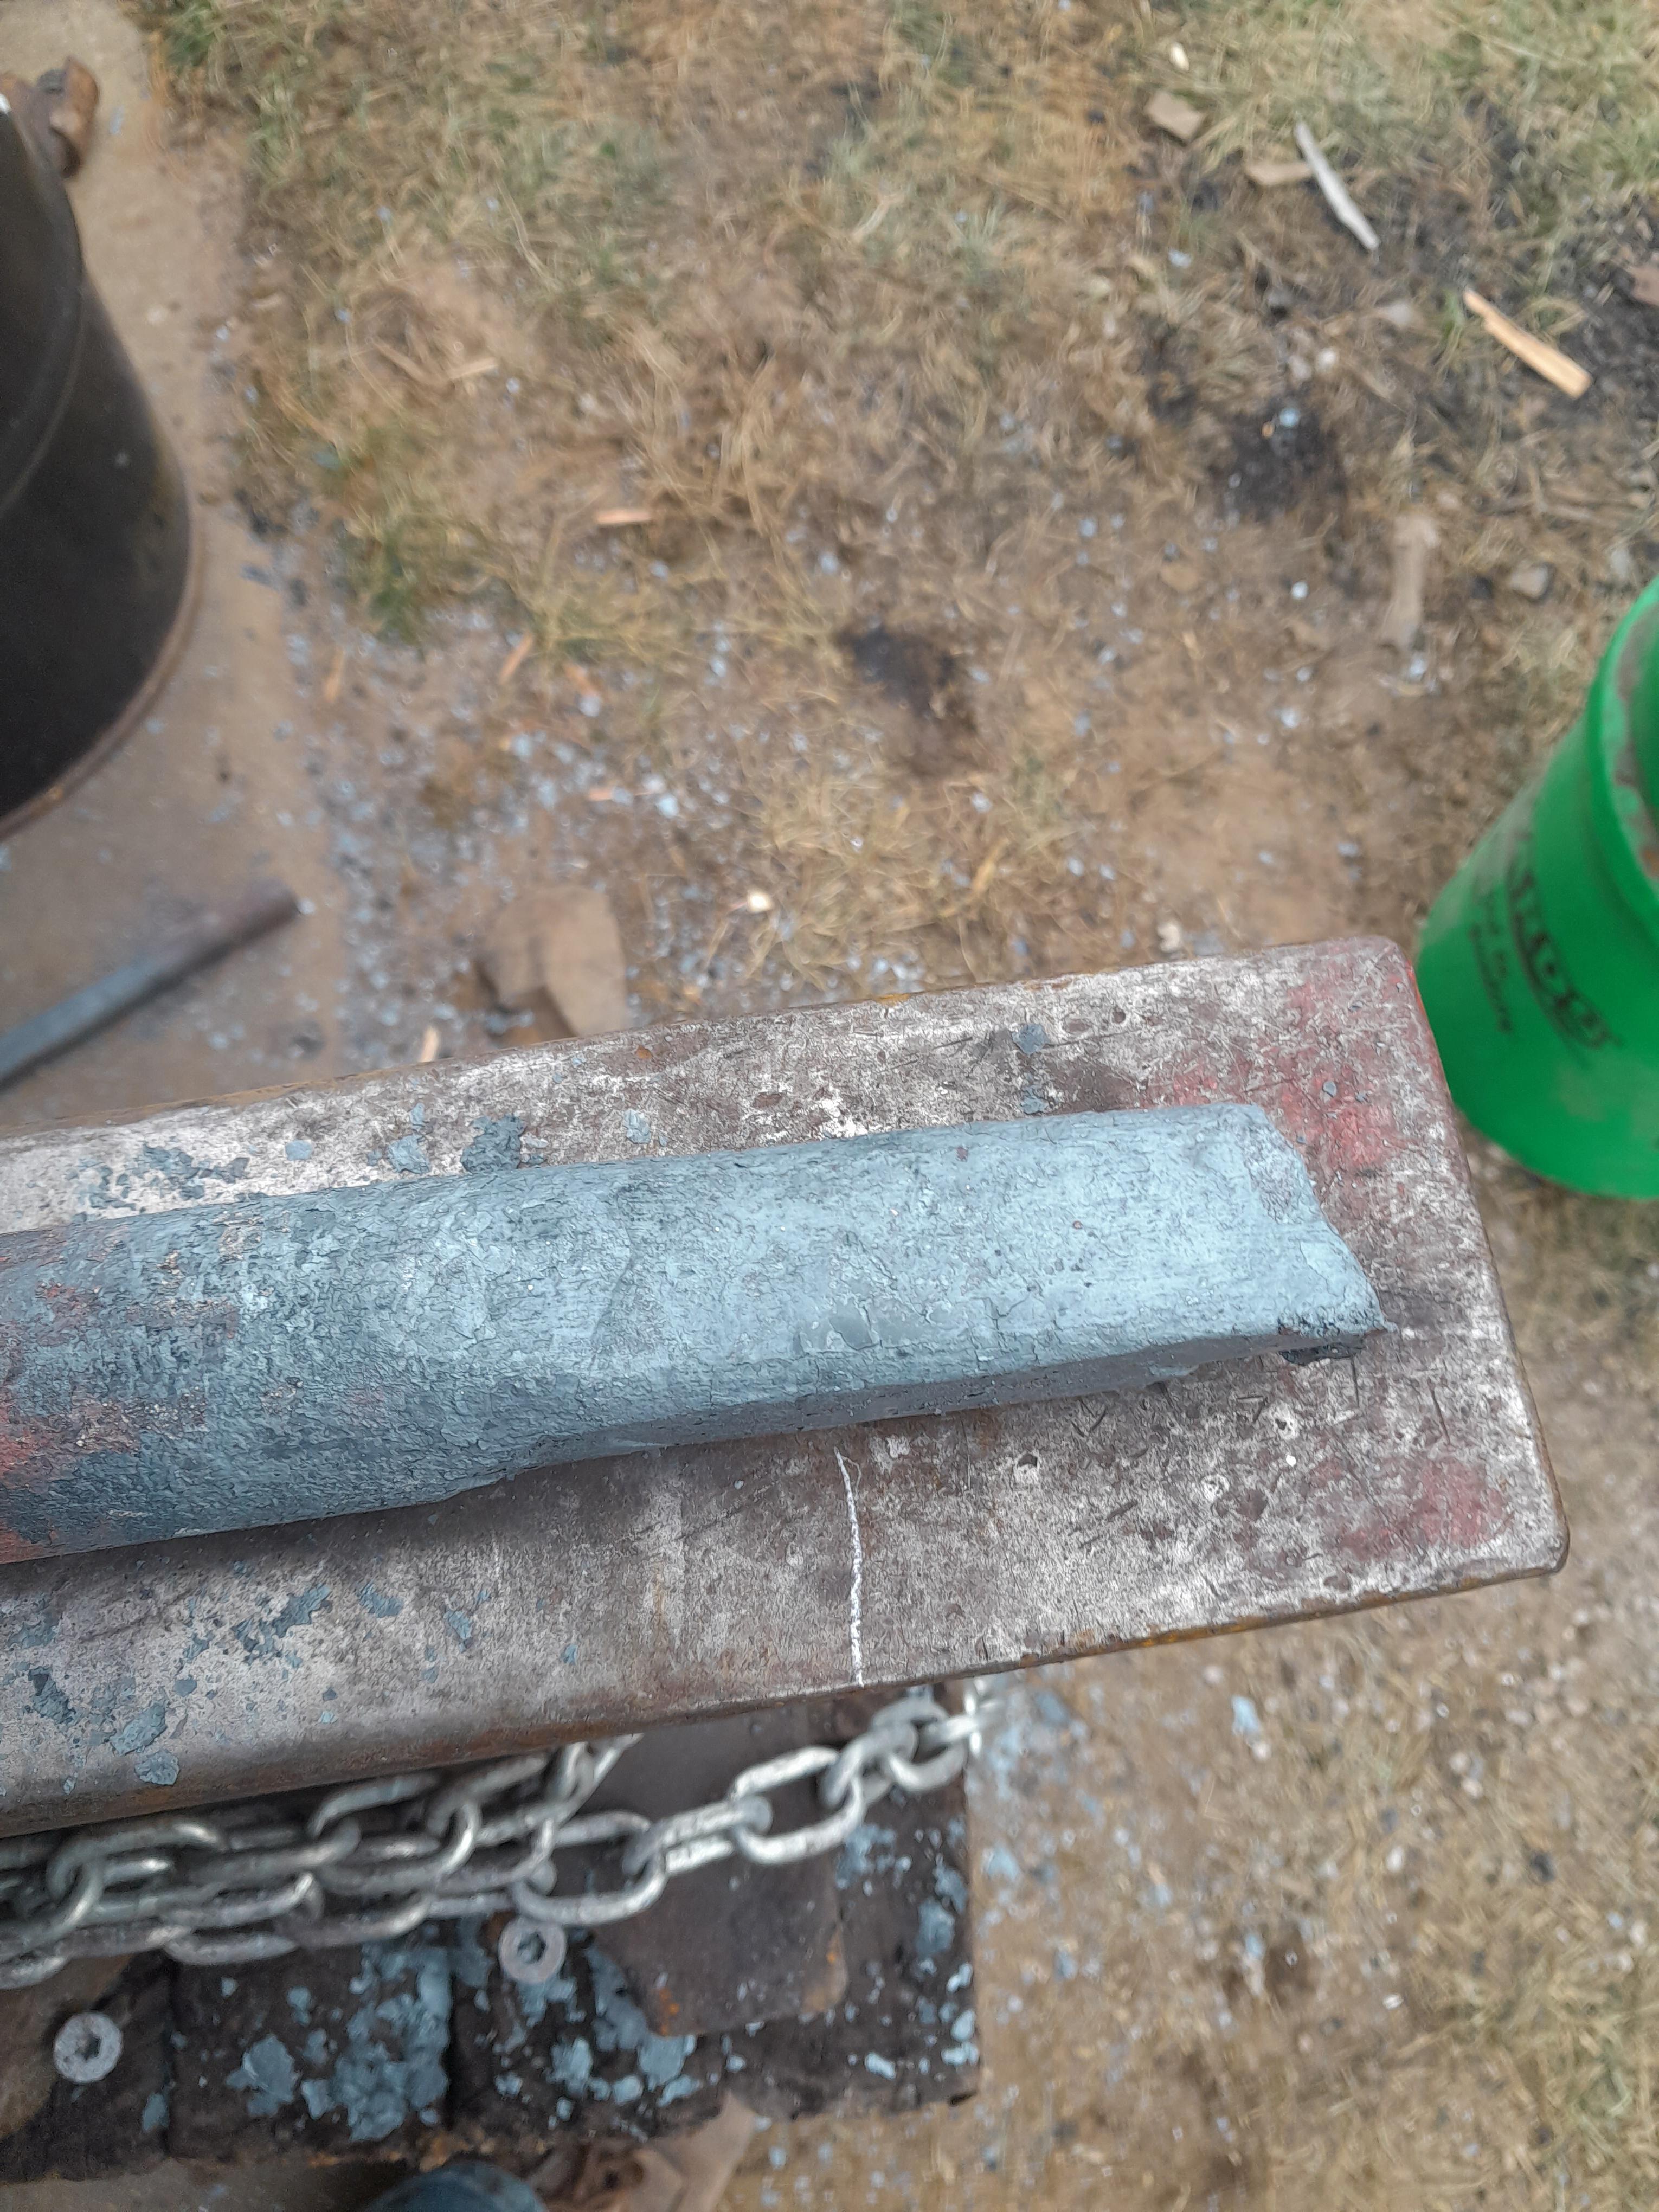
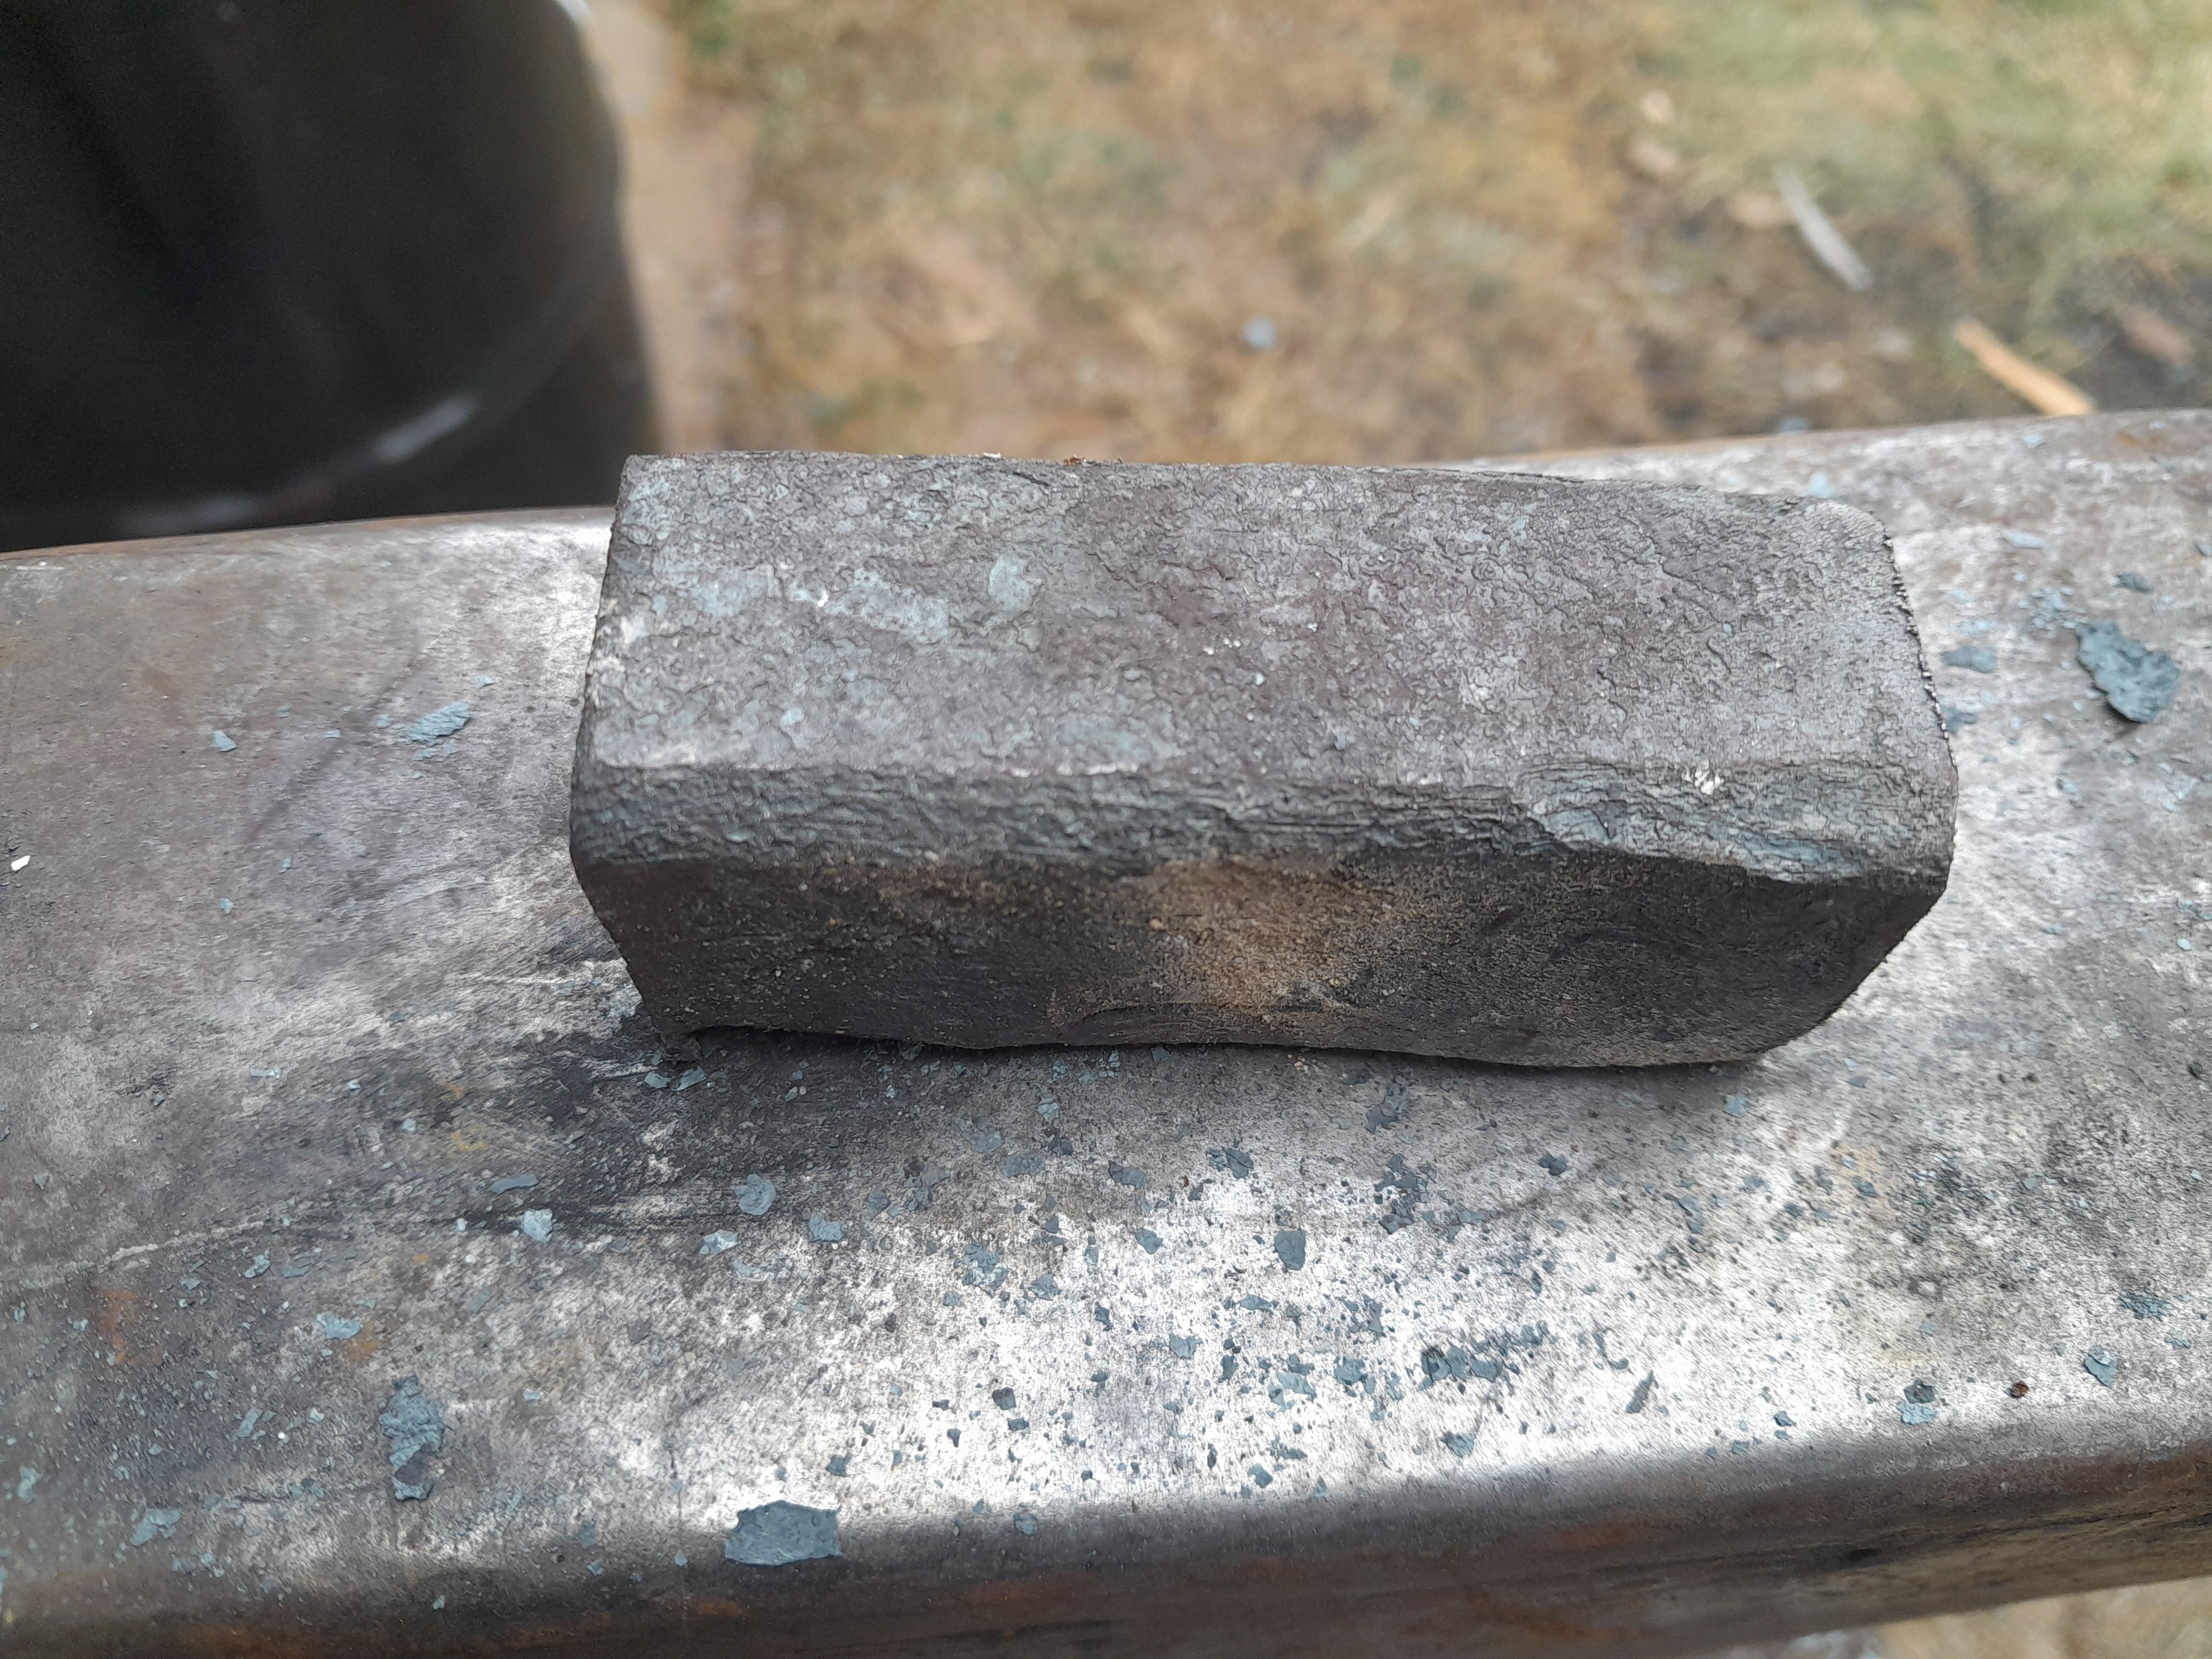
I cut out a newish design of knife. The steel is the usual, 8670 and the handle scales will be waterbuck horn. I boiled the horn in hydraulic oil for an hour and it got soft enough to clamp straight. I'm probably going to try a hamon on the blade.

-
Nice twist gewoon. Looks really good.
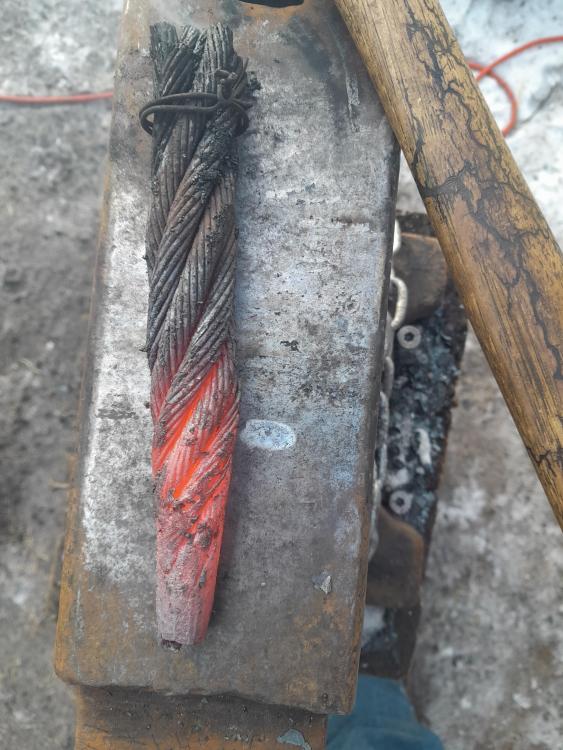
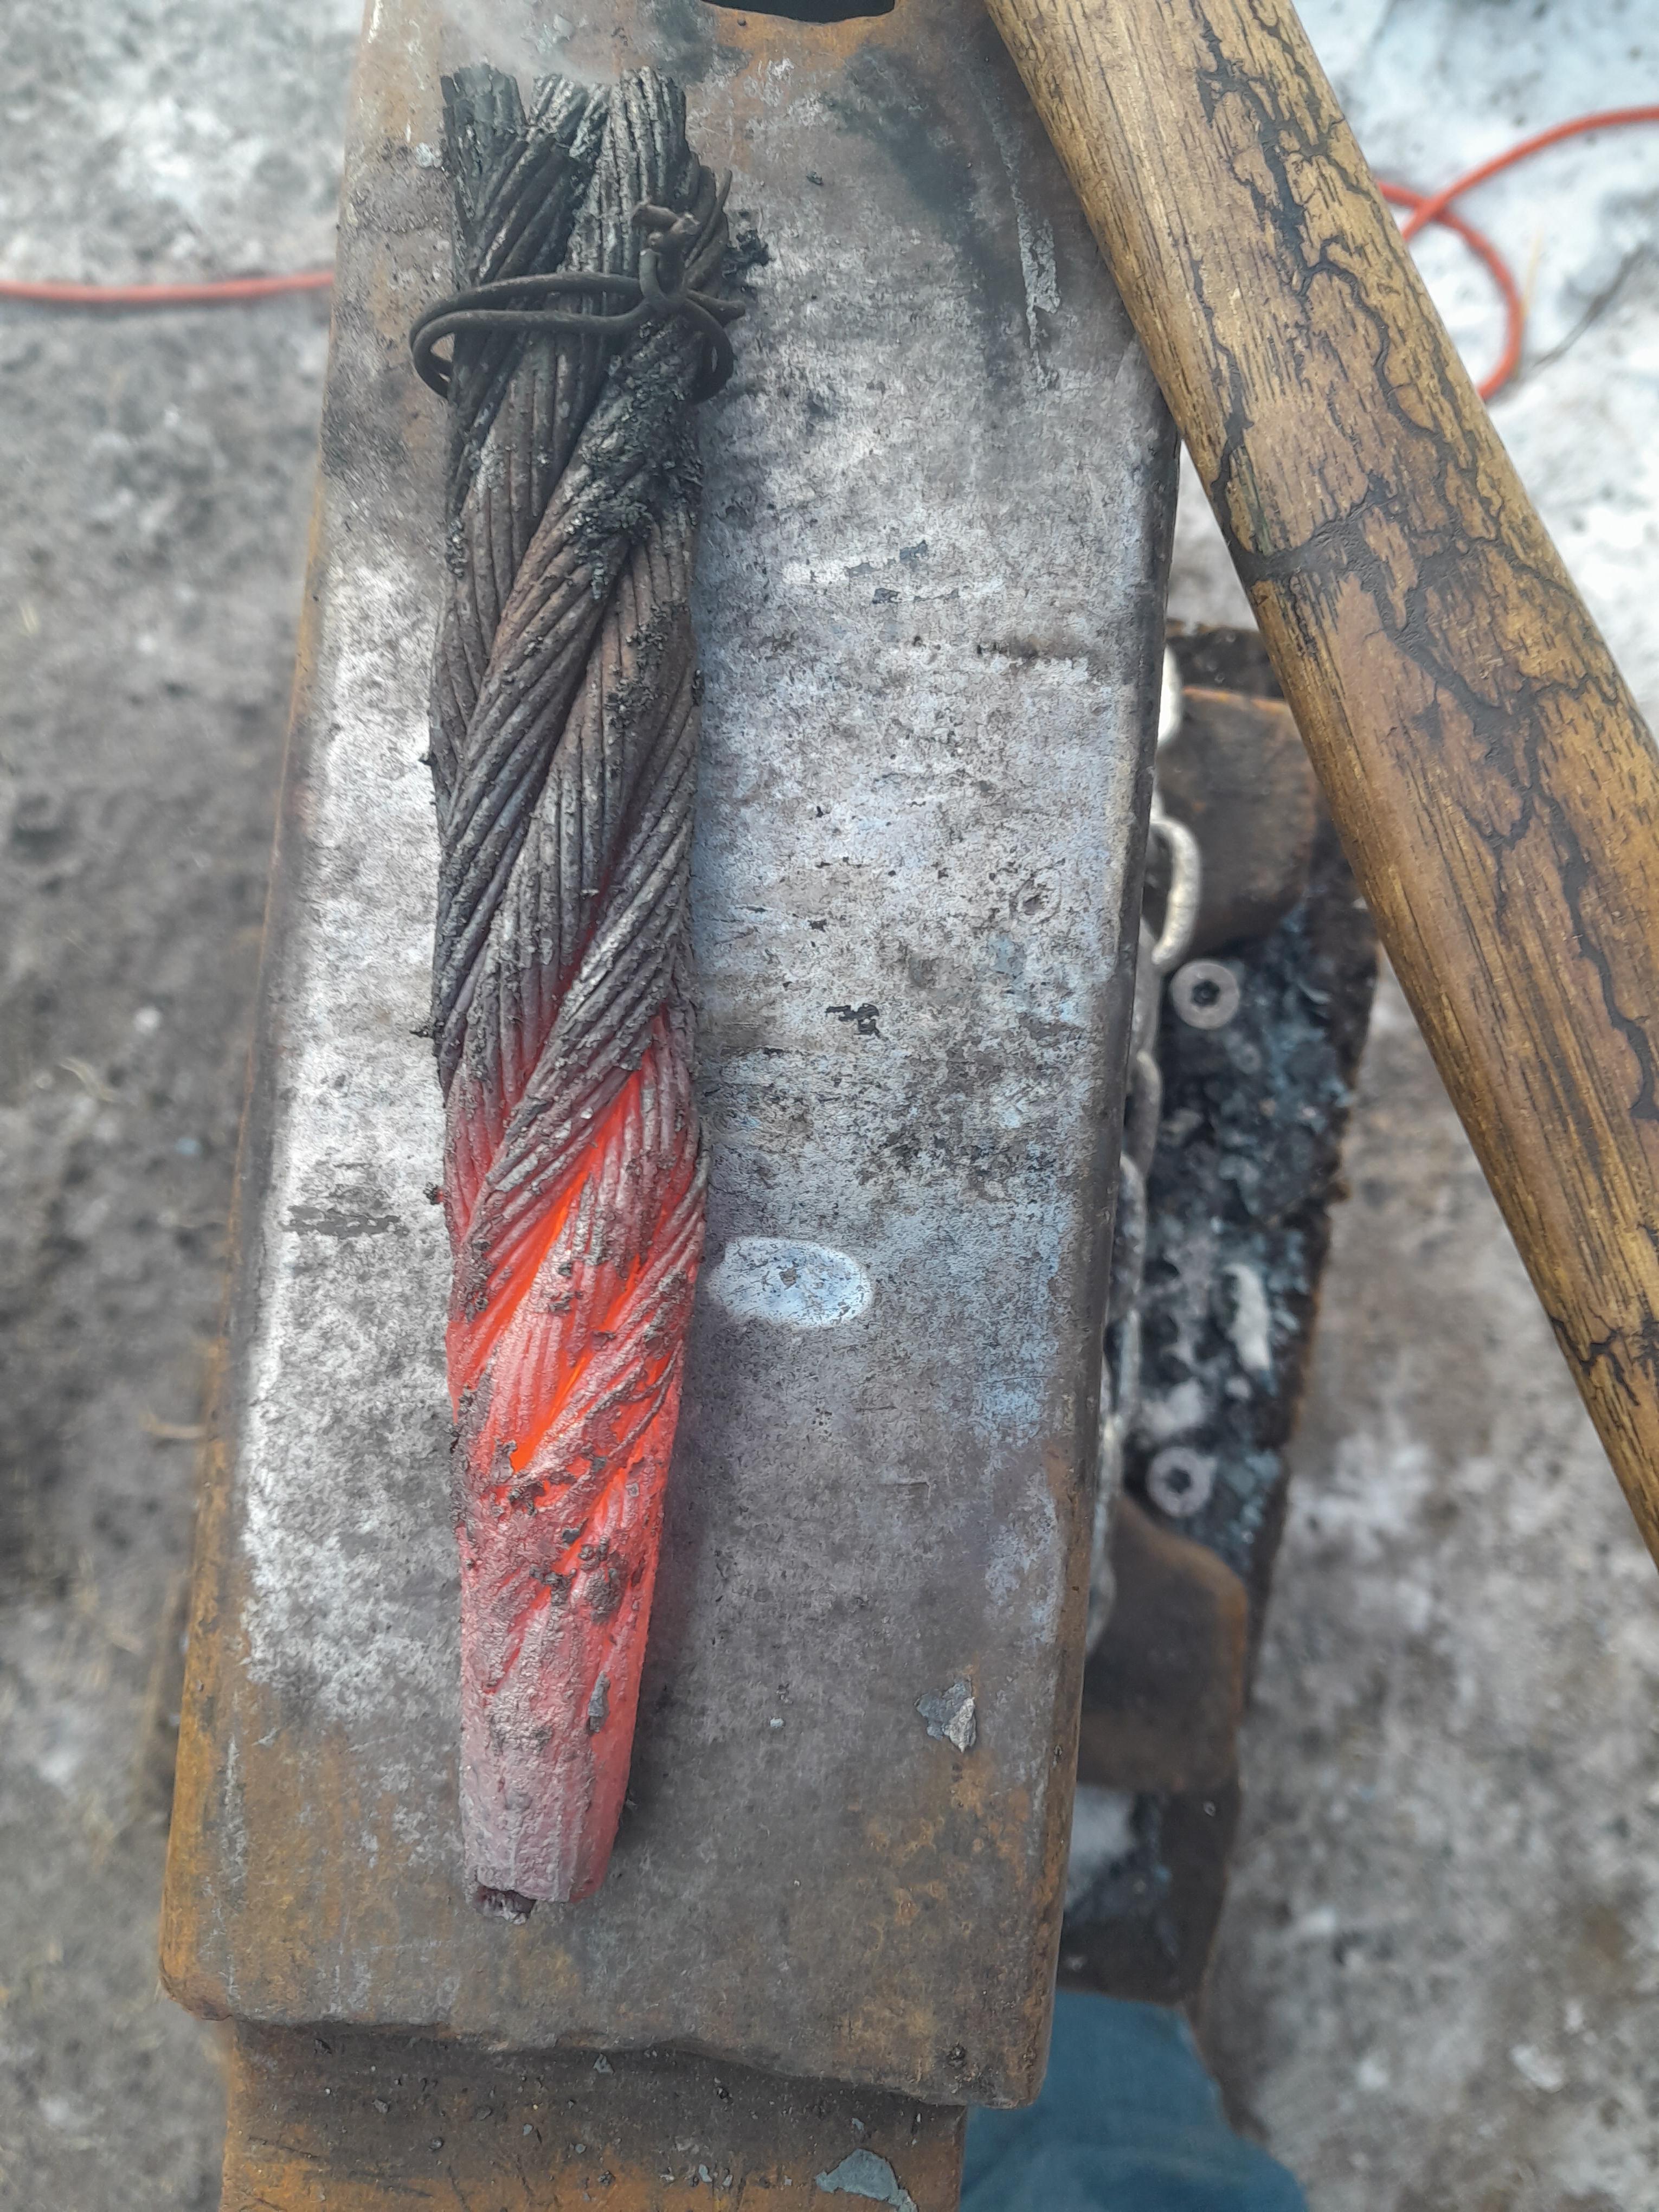
Nobody, I took a pic of the cable damascus. Forged it into a puuko. I didn't harden it so I didn't get a good etch. You can kinda see the pattern though

-
Thanks Nobody! I'll have to take some when im in the shop next. I'm having trouble getting the watering right but I also forgot to quench the cable damasucs lol
-
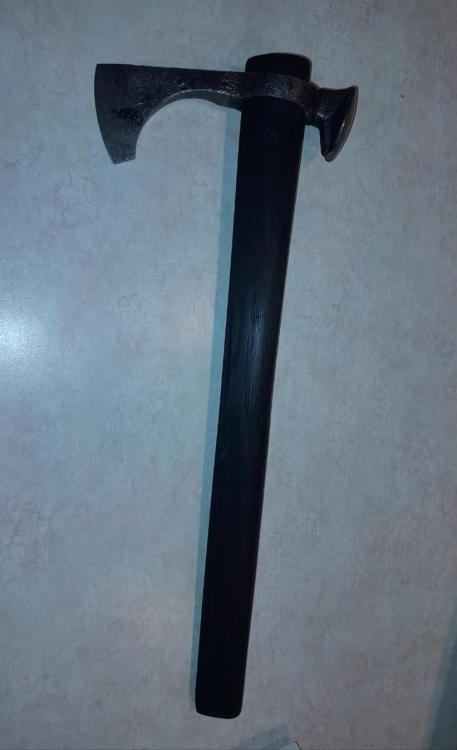
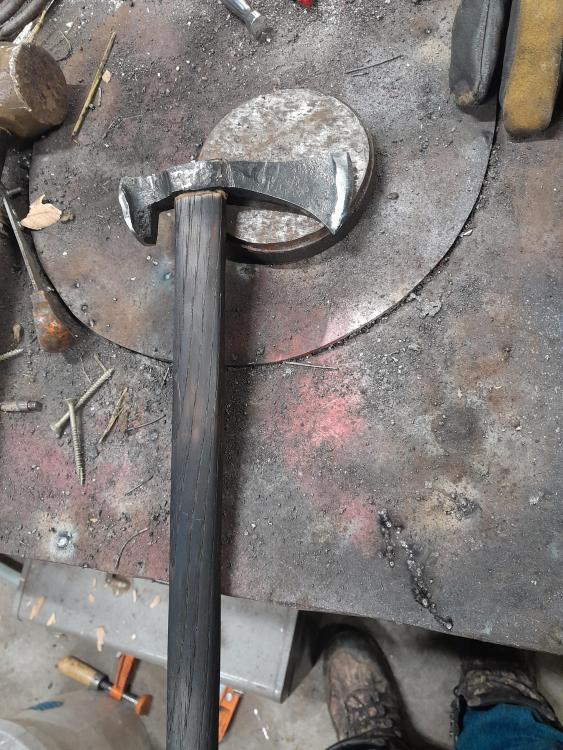
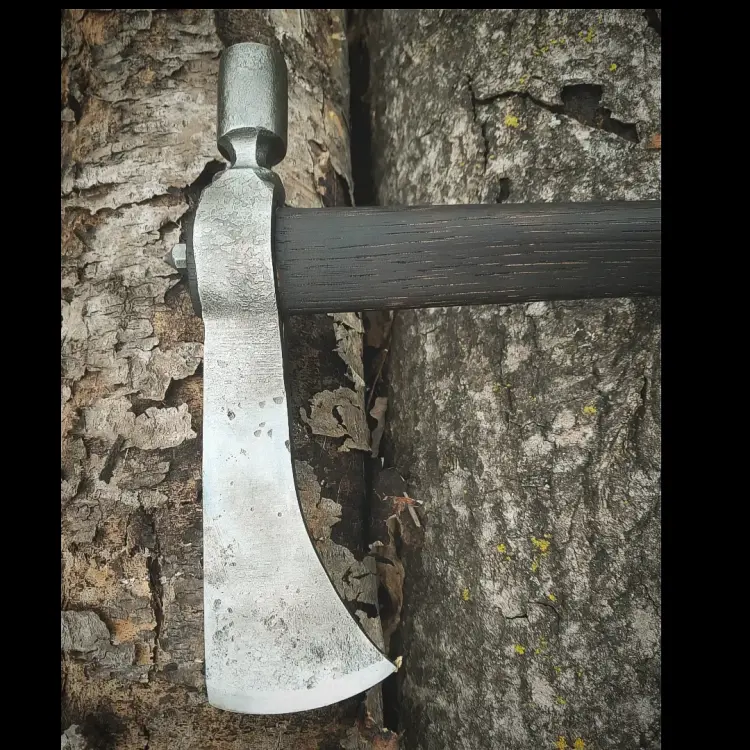
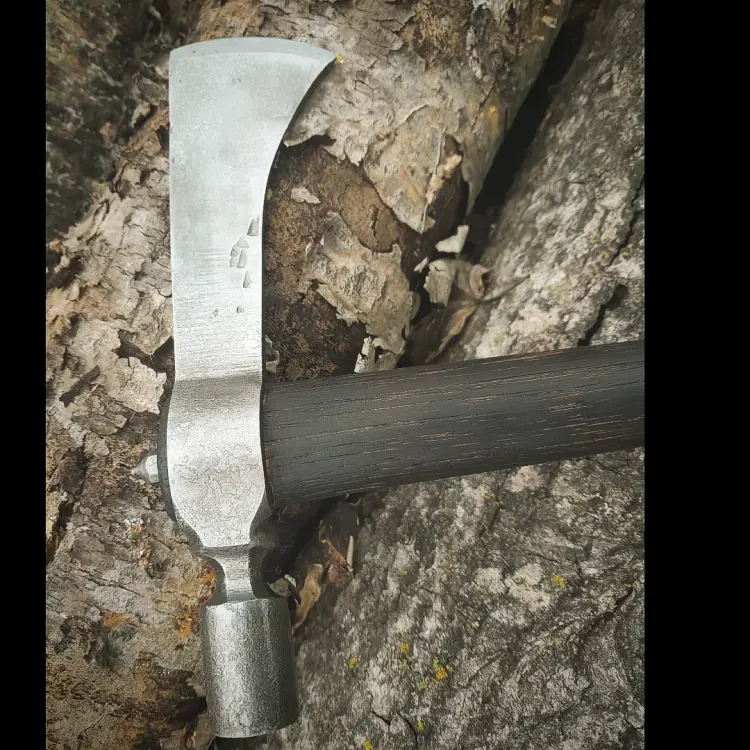
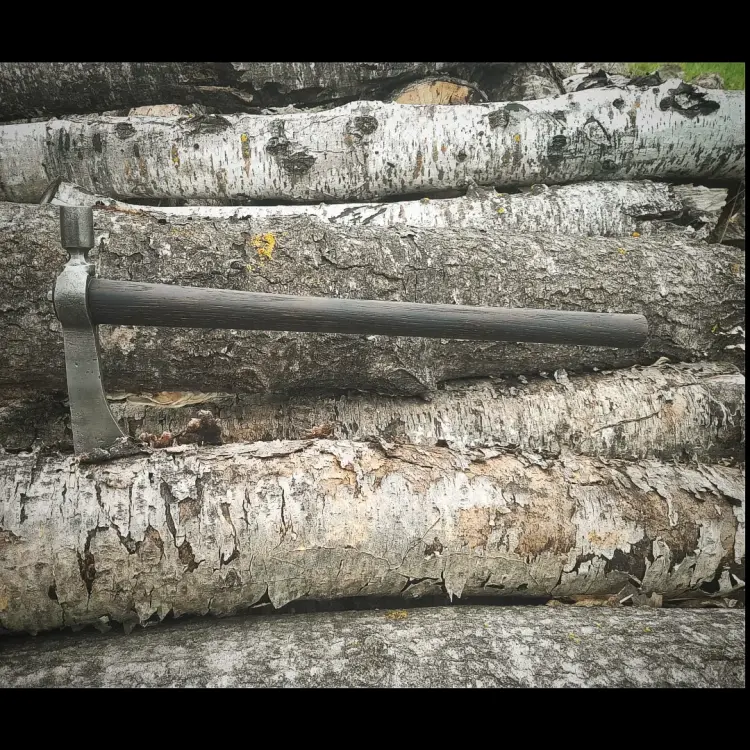
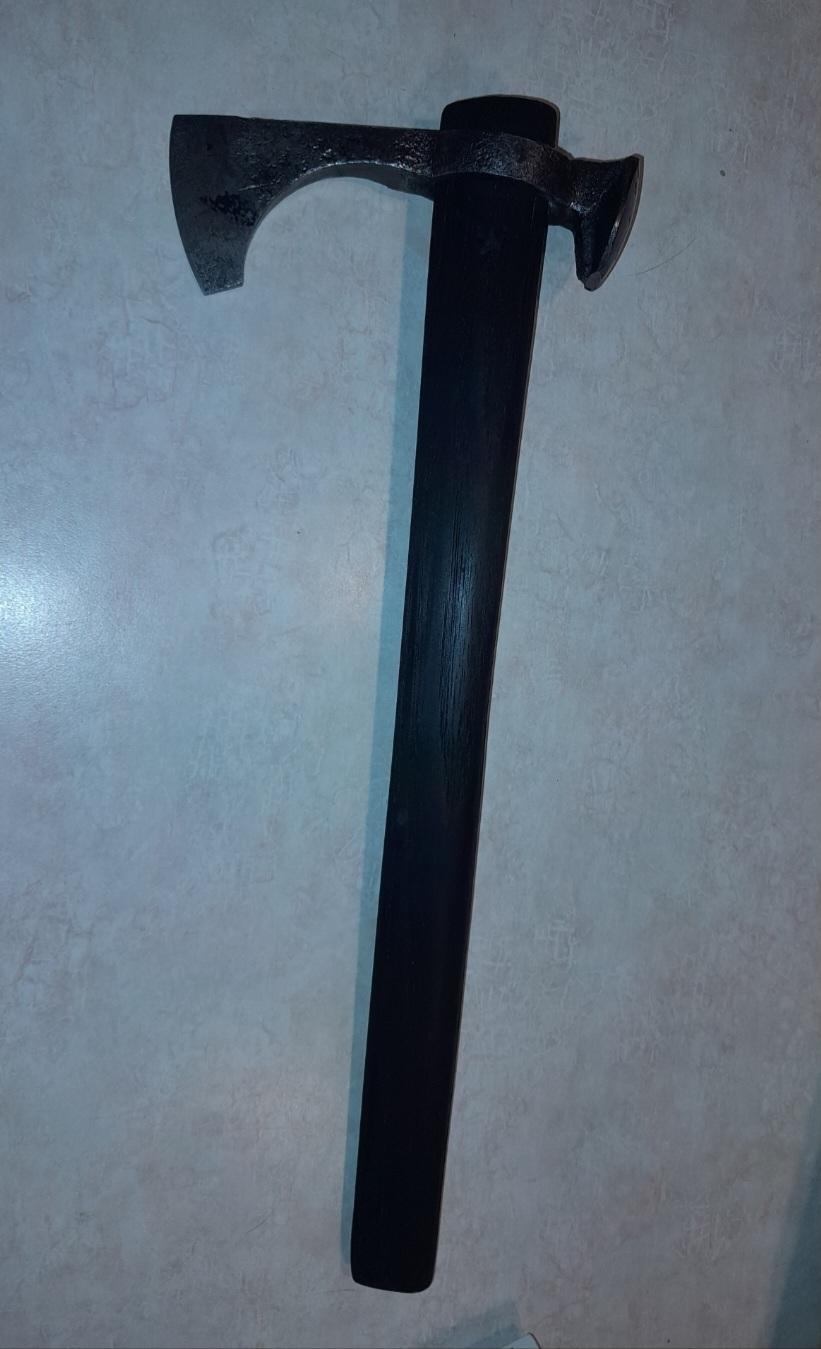
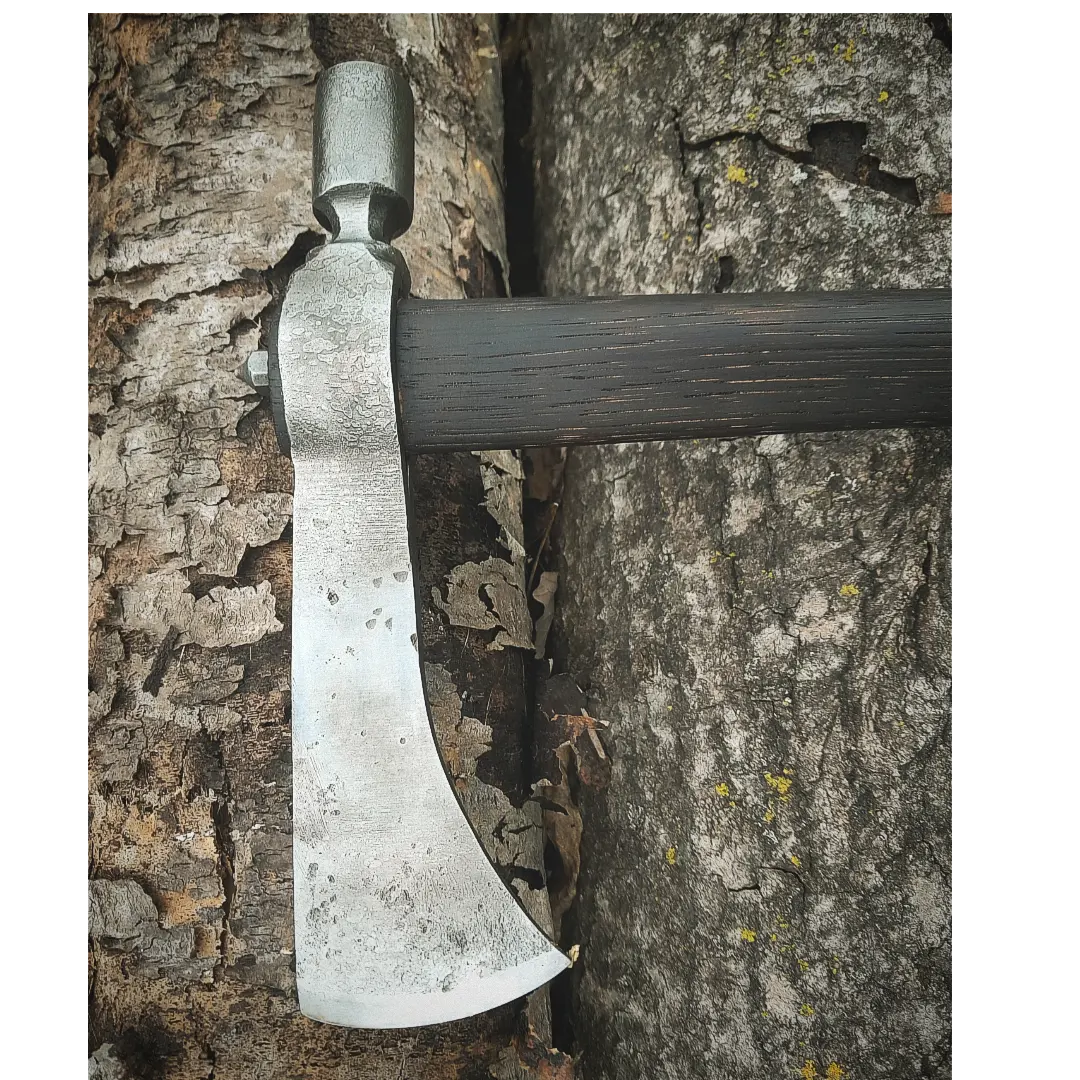
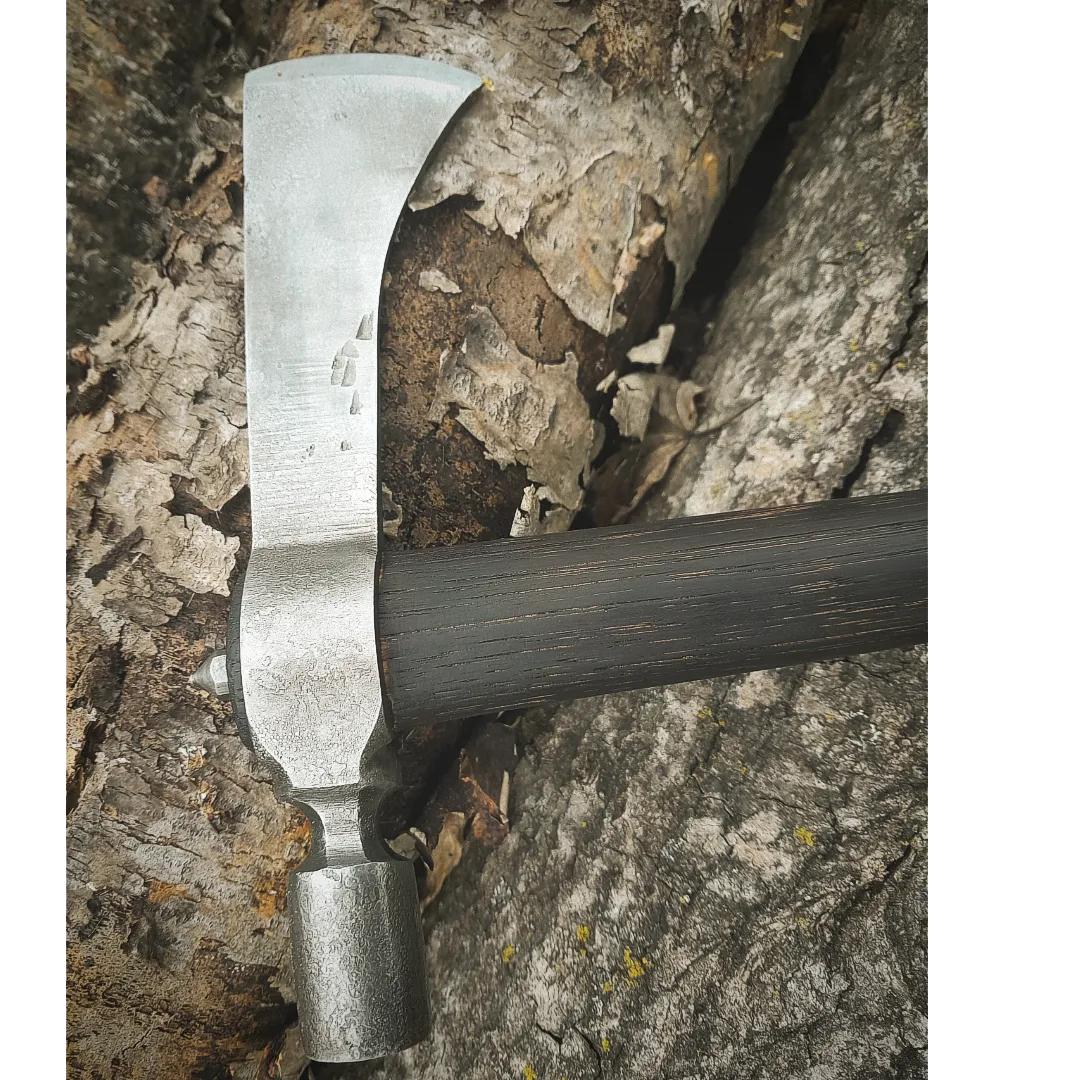
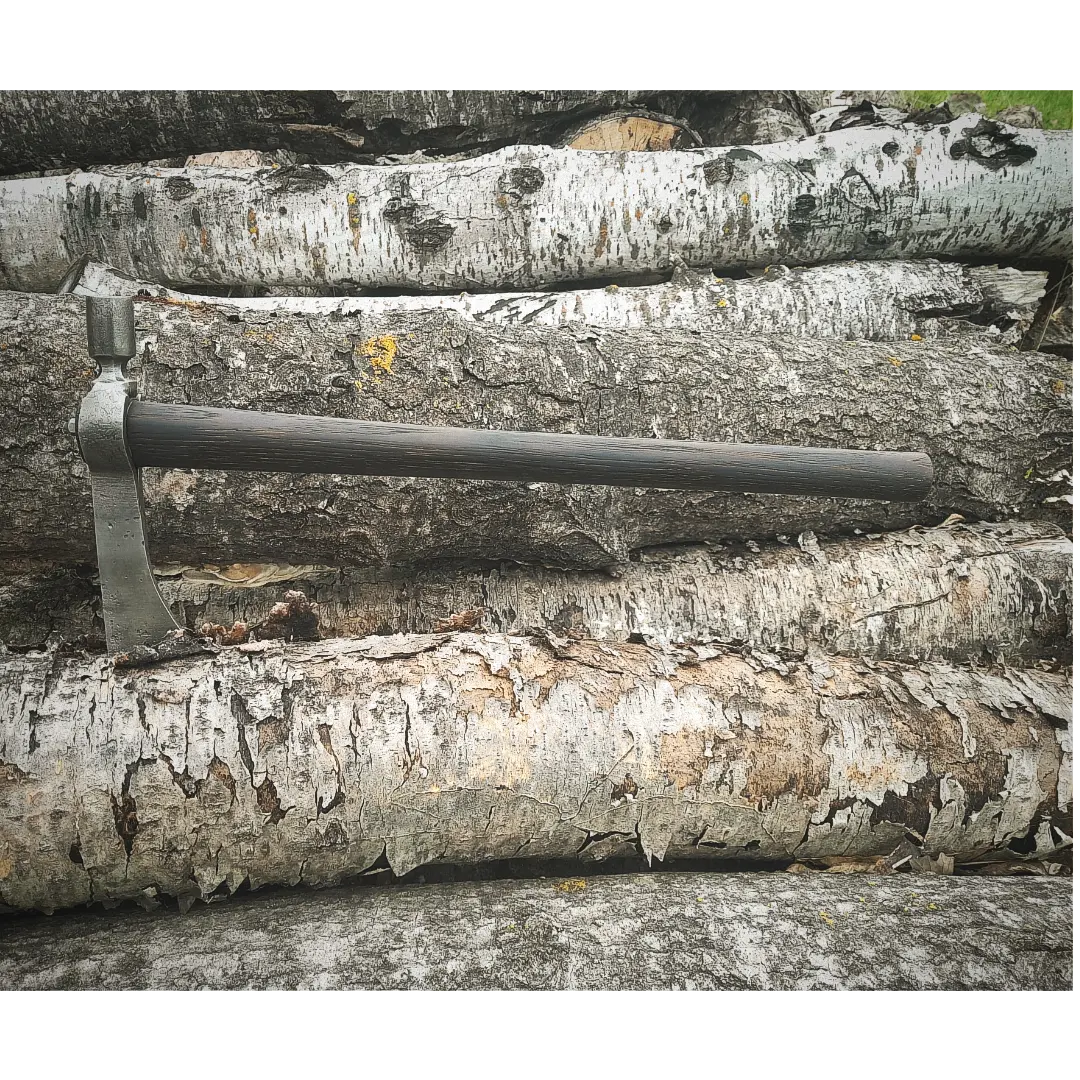
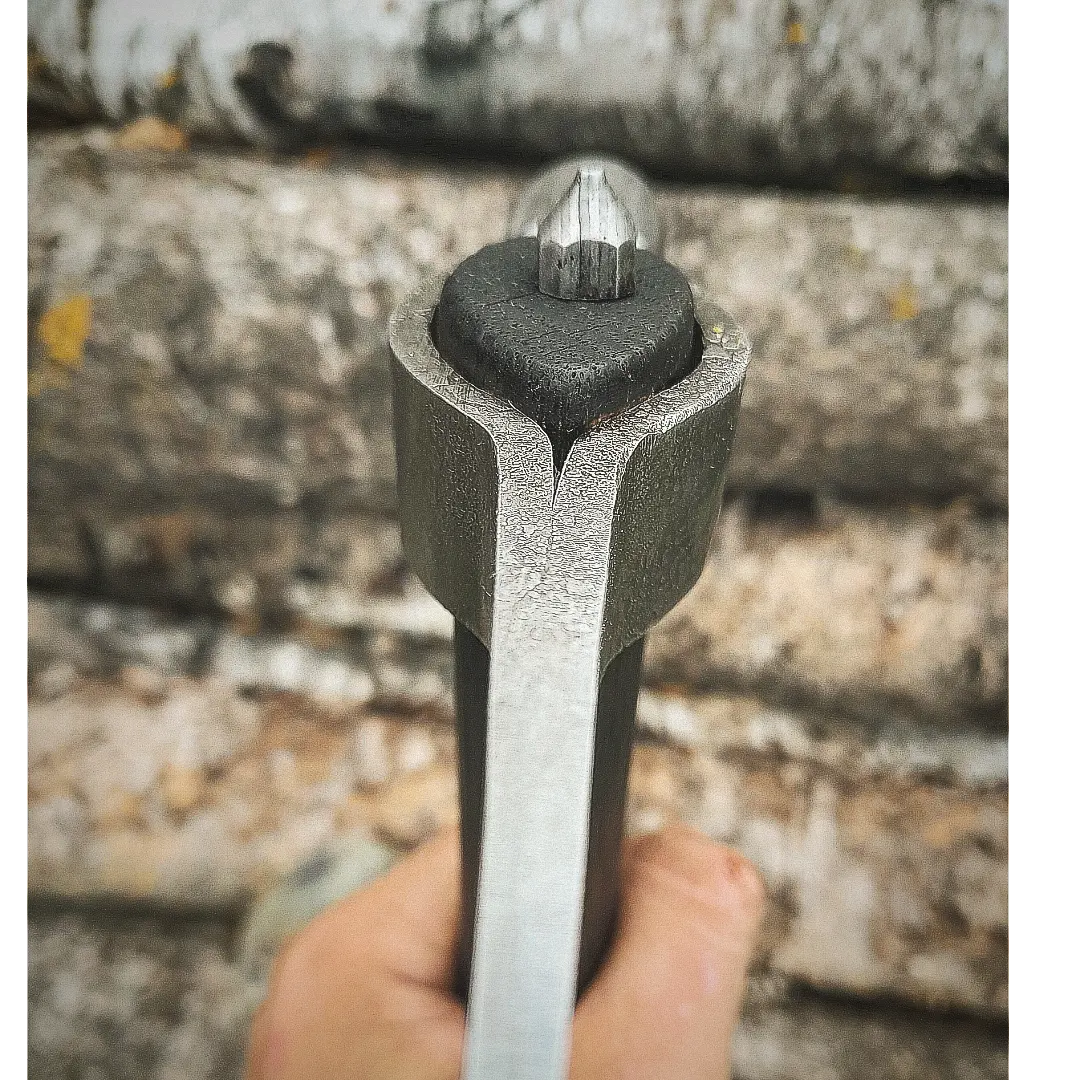
I finished up the handle on my tomahawk. Surprisingly the handle was harder to make than the head. It throws super nicely too!
-
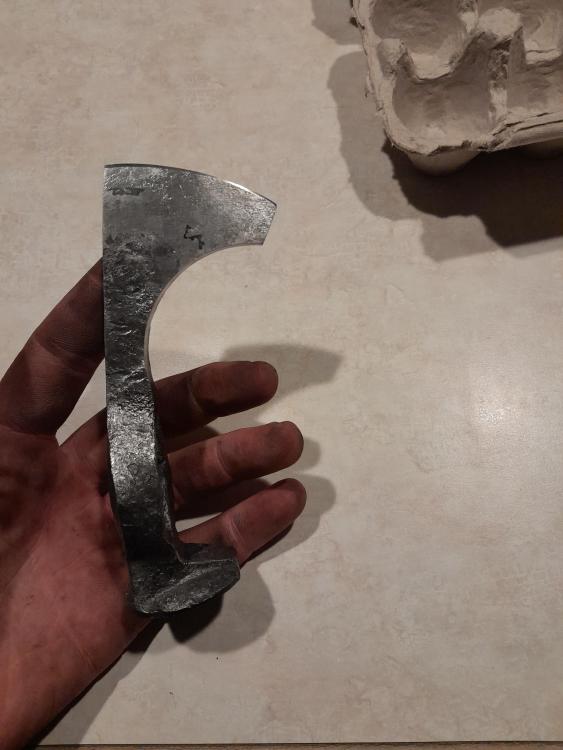
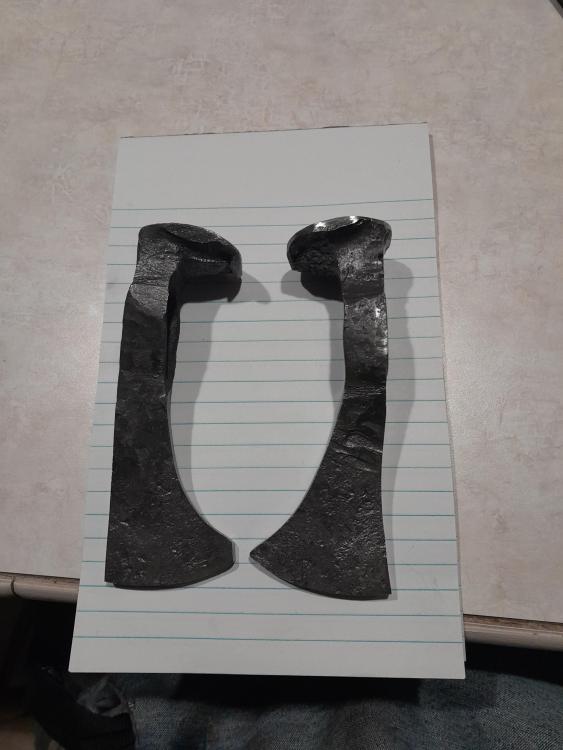
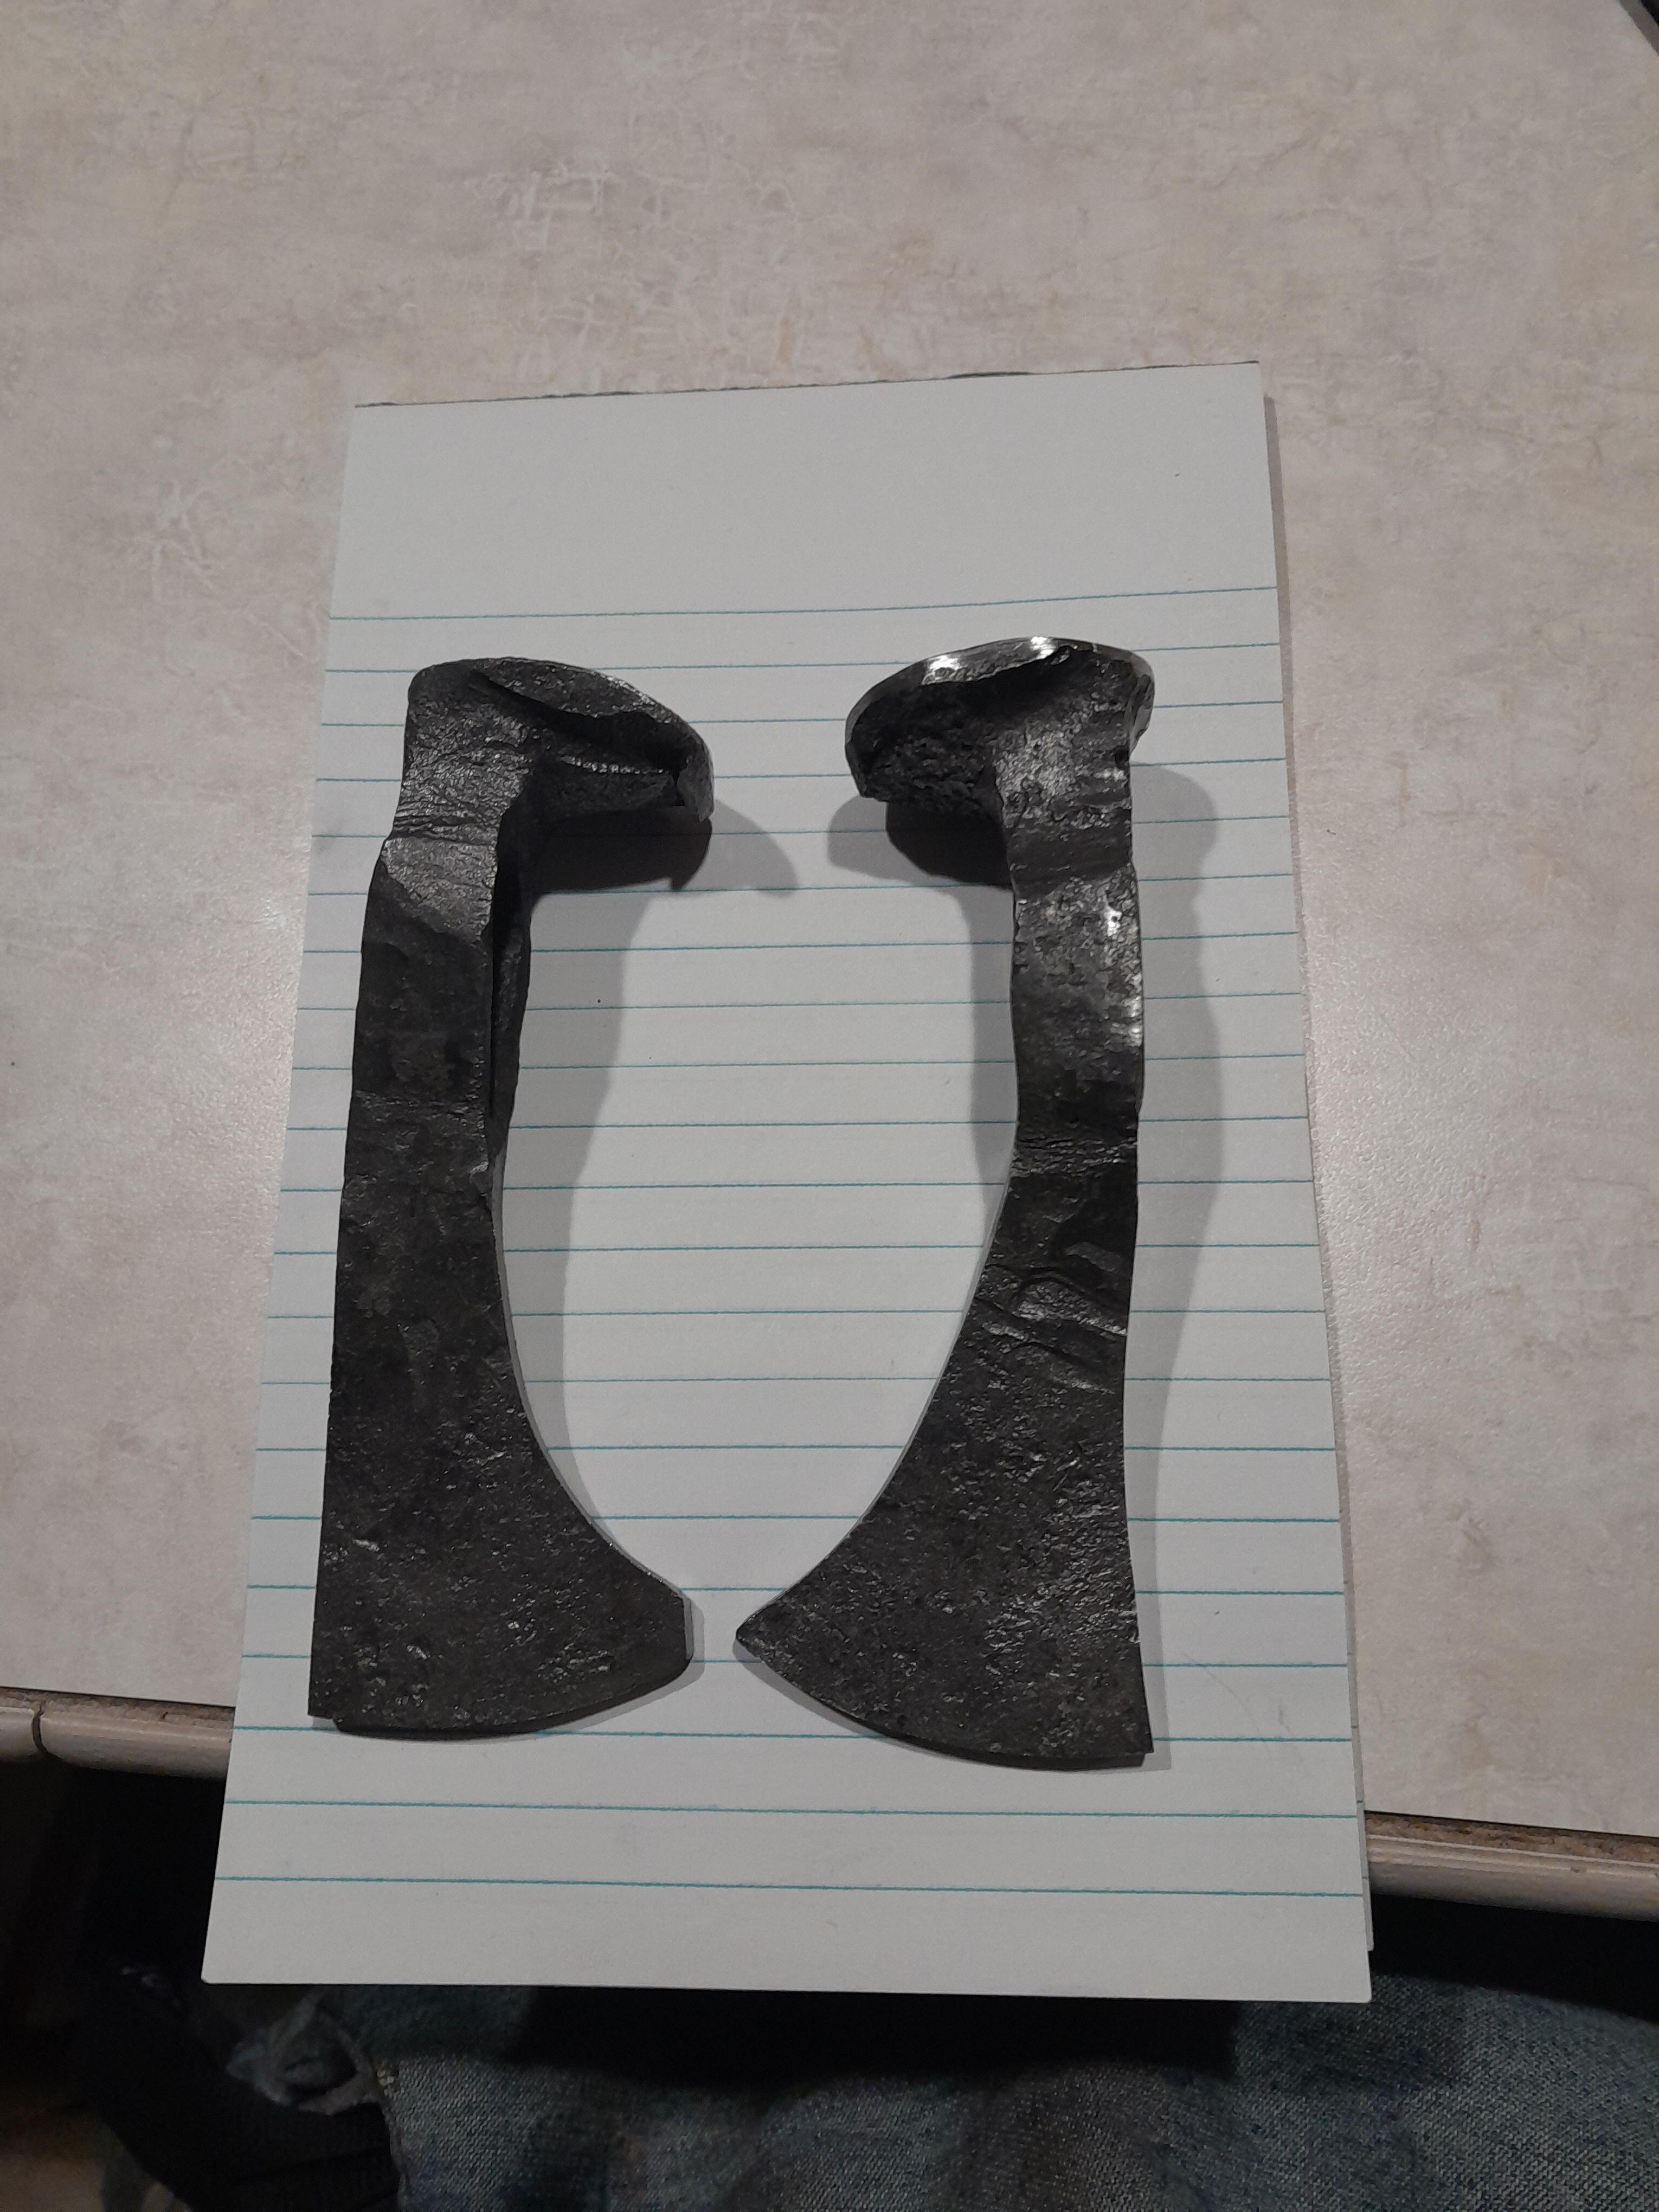
My new design for railroad spike tomahawks. I welded two together for more metal. I like this better than my first attempts. I also welded up some cable damascus which turned out wonderfully. Don't have any finished pics of that tho. I love working with cable damascus.

-
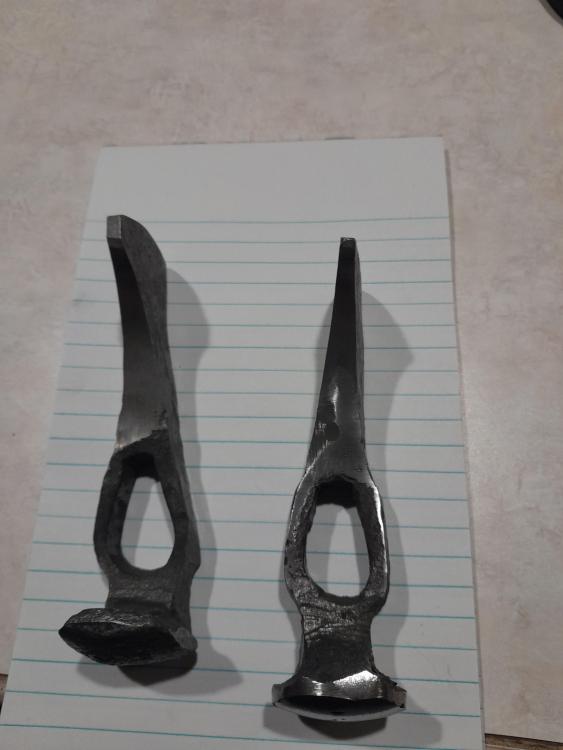
Alright. I'll do that next time I'm at the shop. I did make the medium and it makes the file skate across the tomahawk like with a regular knife. Unfortionately the hawk turned out pretty terribly. The head is crooked, the handles cracked and the bevel is too sharp. That one goes to the scrap bin lol. Hopefully I'll have better luck on my next couple attempts. It is my first rr spike hawk after all. I'm hoping to get a bit more of a beard on my next couple. Also my drift is deformed and not the right shape. I'll probably make a new one soon. Drifts are always pretty difficult for me to make lol. Is there a difference in using a round drift and a tear drop drift? I could probably use my hammer drift. They are only going to be throwing hawks anyway.
Cheers!
WFF
-
Ok. I'll try that. Lucky for me I have all the stuff to make it right under my kitchen sink lol. I'm planning on trying my hand at a few more hawks or spikes tonight if I get time. I'll post pics and results if I do.
WFF
-
Thanks, George! Honestly, I've never heard of a super quench before. I've always just quenched my spike knives in water and draw back to straw color with no issues and it gave me a decently hard edge for garbage steel. I looked up what it is and apperently its salt, water and dawn? What is your recipe for super quench? Thank you for mentioning that. Can't believe I've gone 5 years in blacksmithing without hearing about a superquench lol

-
I'm not entirely sure either. I've seen seax knives both with swoops and without. I certainly wouldnt say mines a traditional seax lol.
Your kitchen knife looks nice. I really like the shape of your blade.
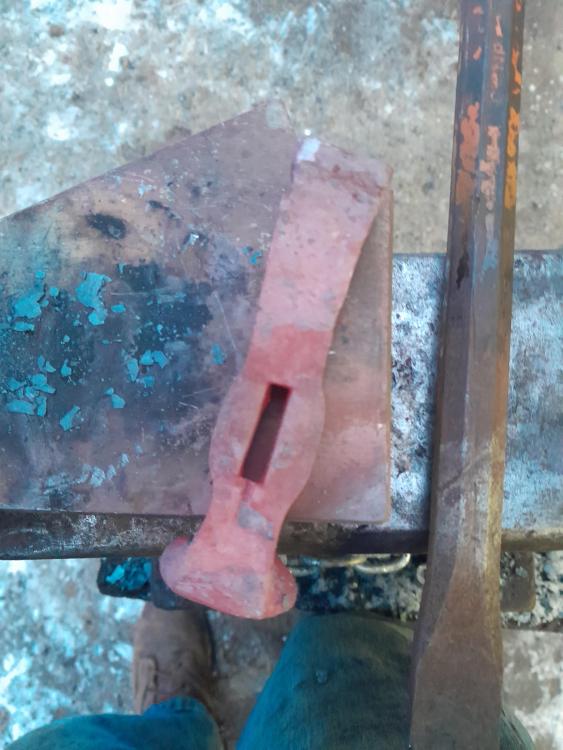
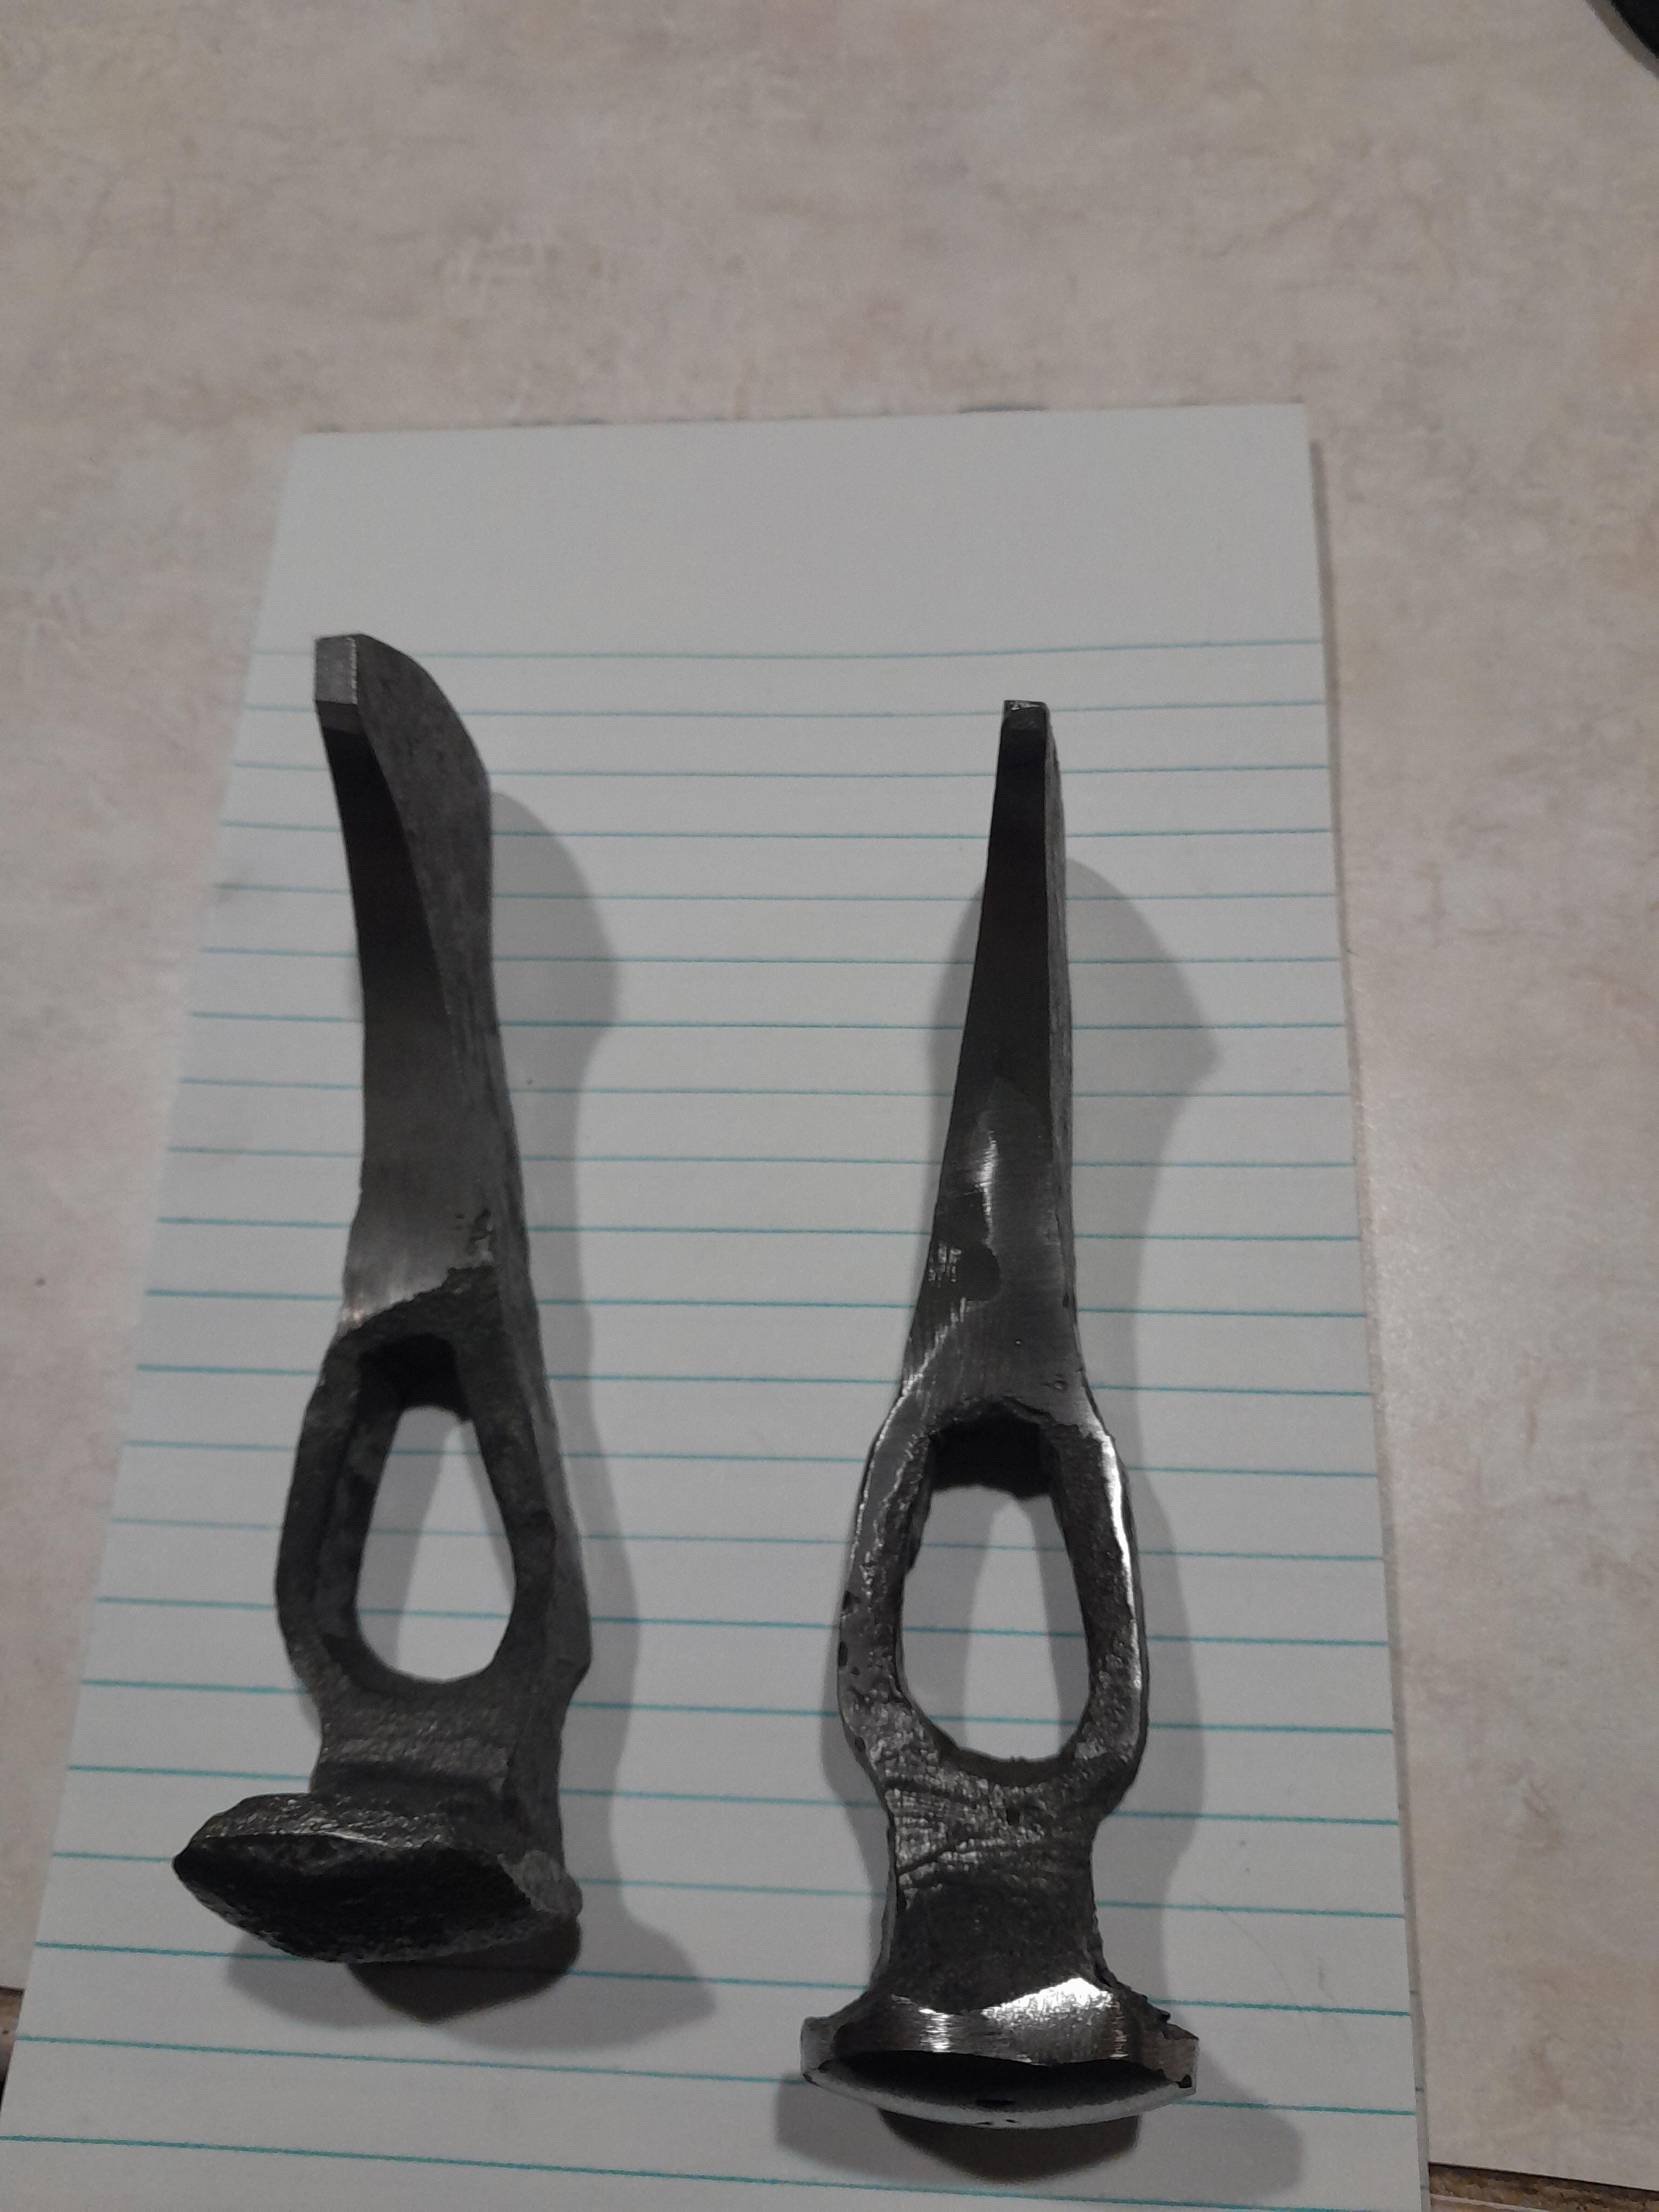
Hammered out two spike hawks today. These are my first ones. Once I get more practice with making these I'll probably sell 'em at some craft fairs. The eyes need a lot of cleanup and filework. I also need to grind the bevels. Does anyone know of a good way to make tomahawk handles from lumber?
-
I worked on a few projects yesterday evennng. All of them were very frustrating but I learned a lot it. I tried my hand at a hatchet/tomahawk with a wrought iron body. Didn't realize that the wrought should have been refined before hand. It started flaking around the back of the eye. Don't have any pics of that unfortionately. I also tried making my fourth, unsuccesful blacksmith knife from an old file. It broke at the handle stem. Grain growth. It may have been left over from a demo that I never got to finish. It was sitting in my forge while I was cleaning up and talking.
 Ik what most people would say, that it's mystery steel and that it's a beginner mistake but what can I say I like talking to people lol.
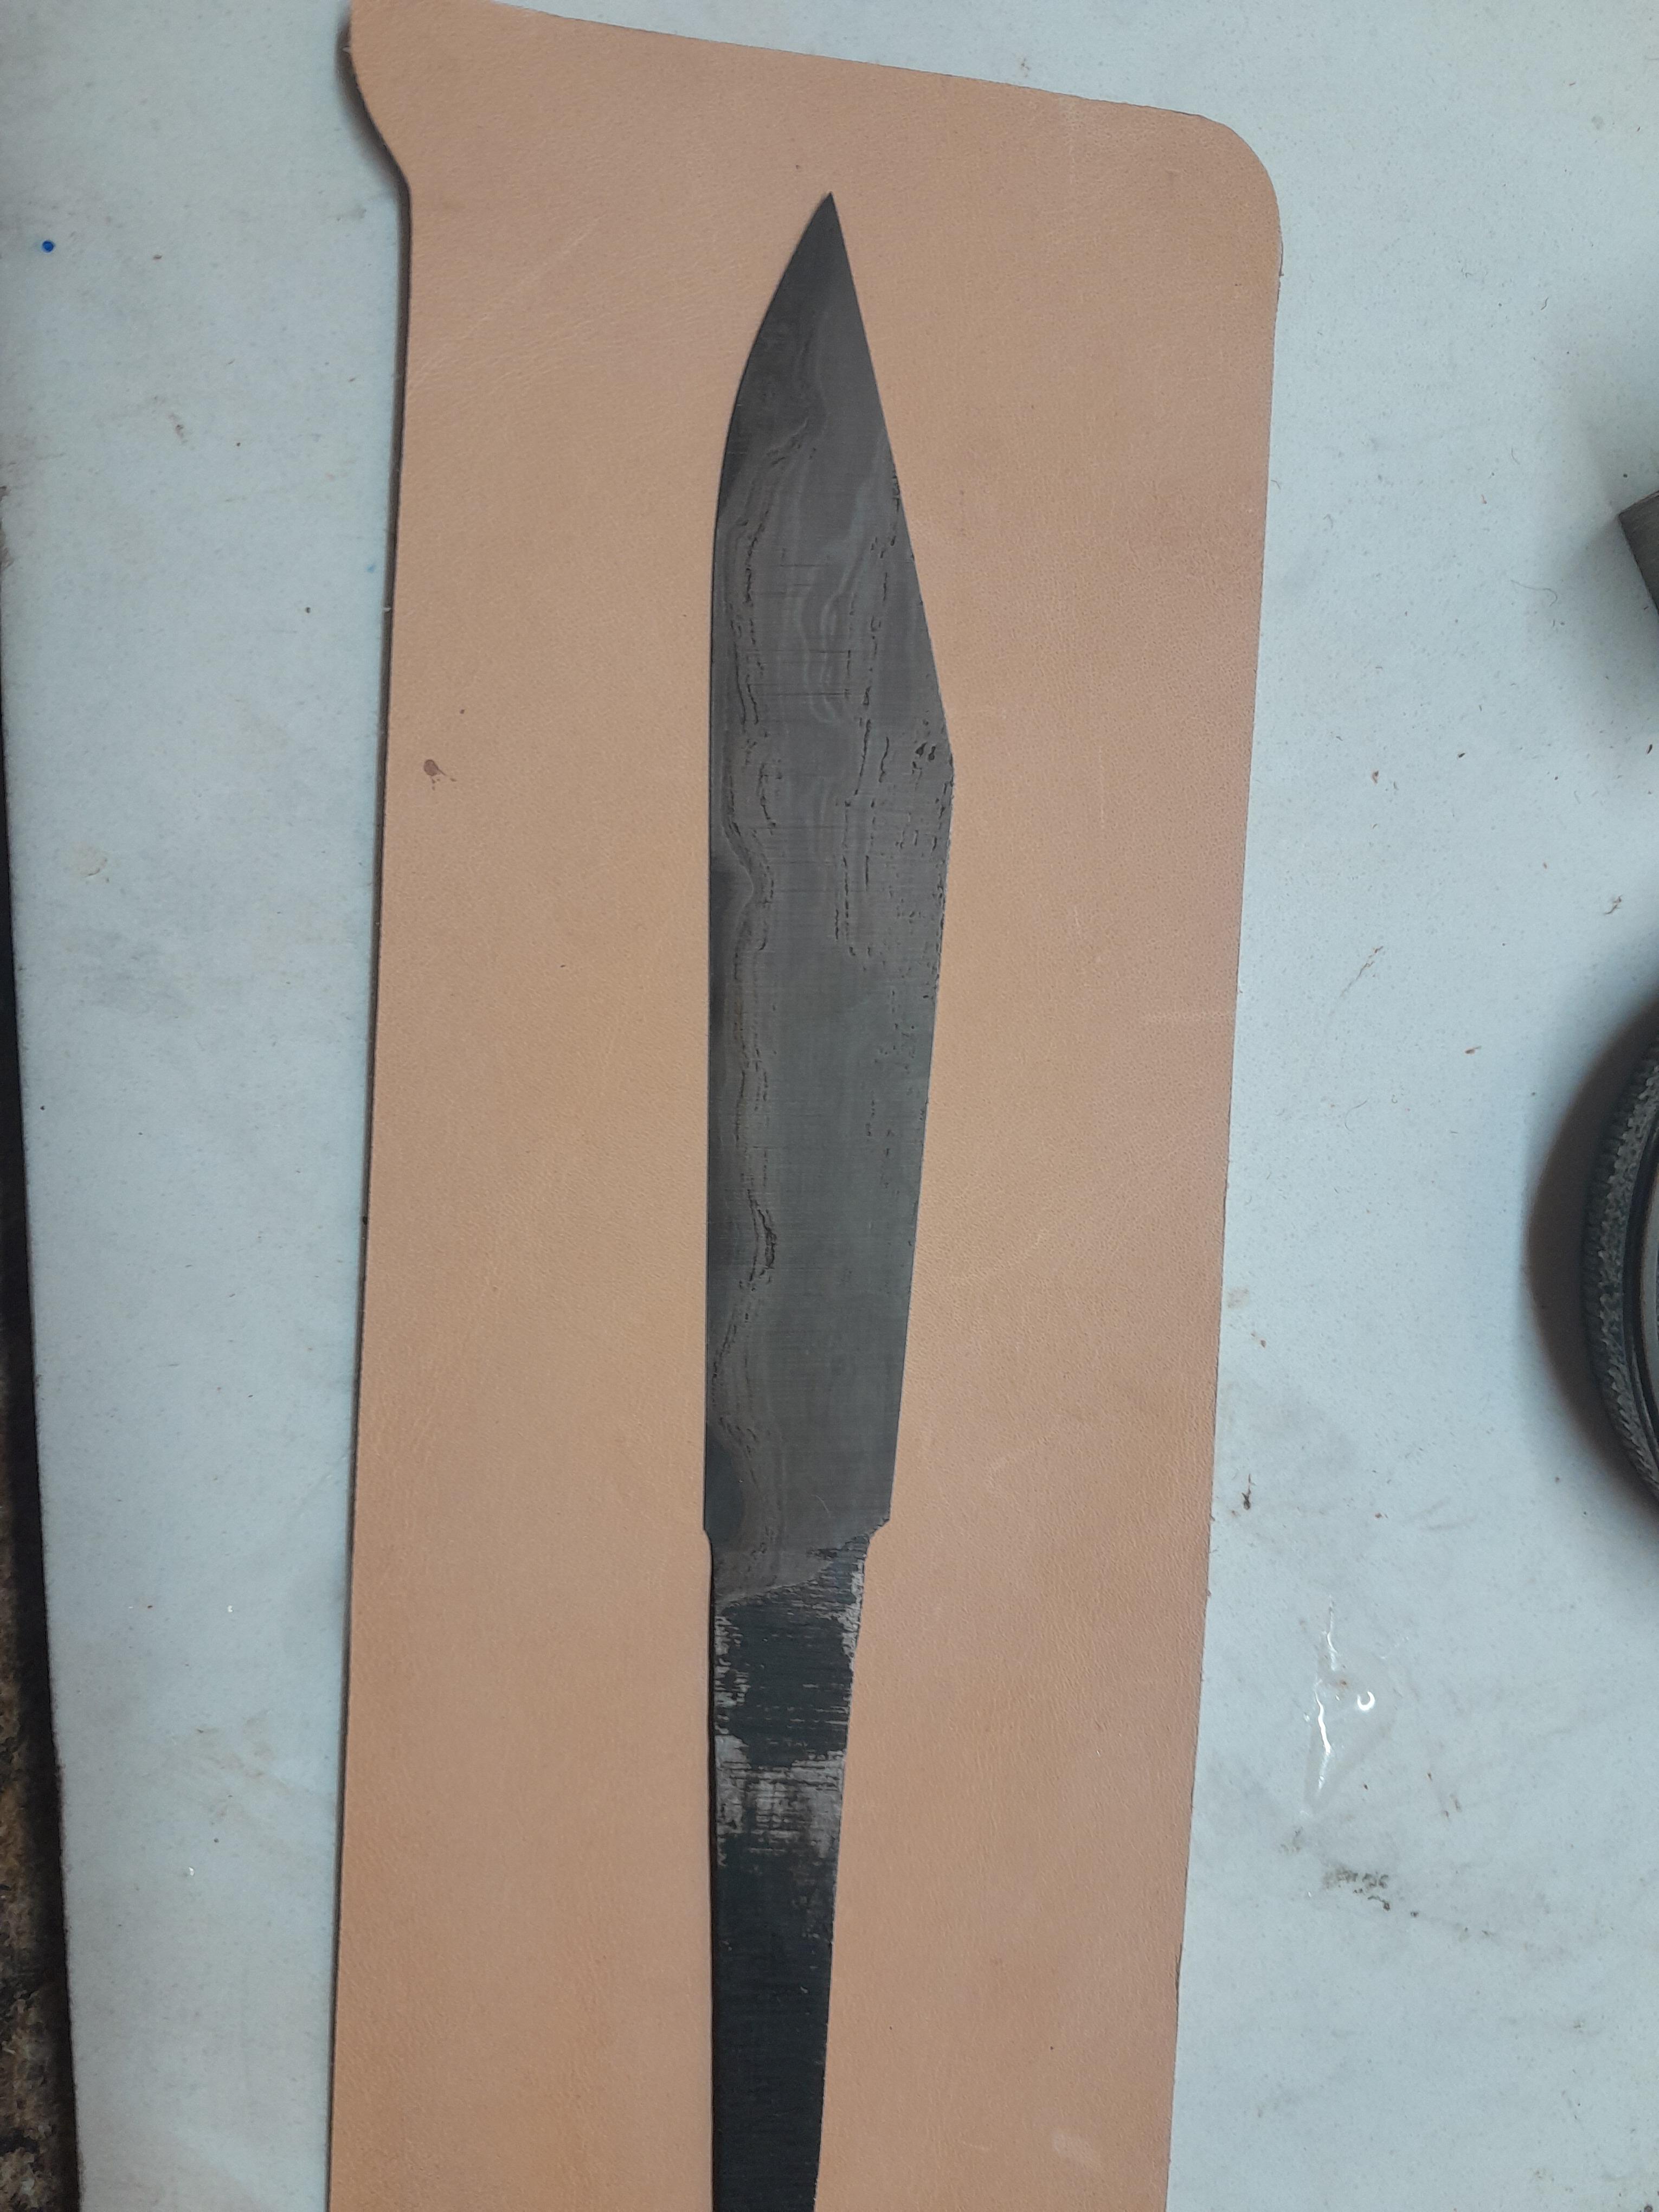
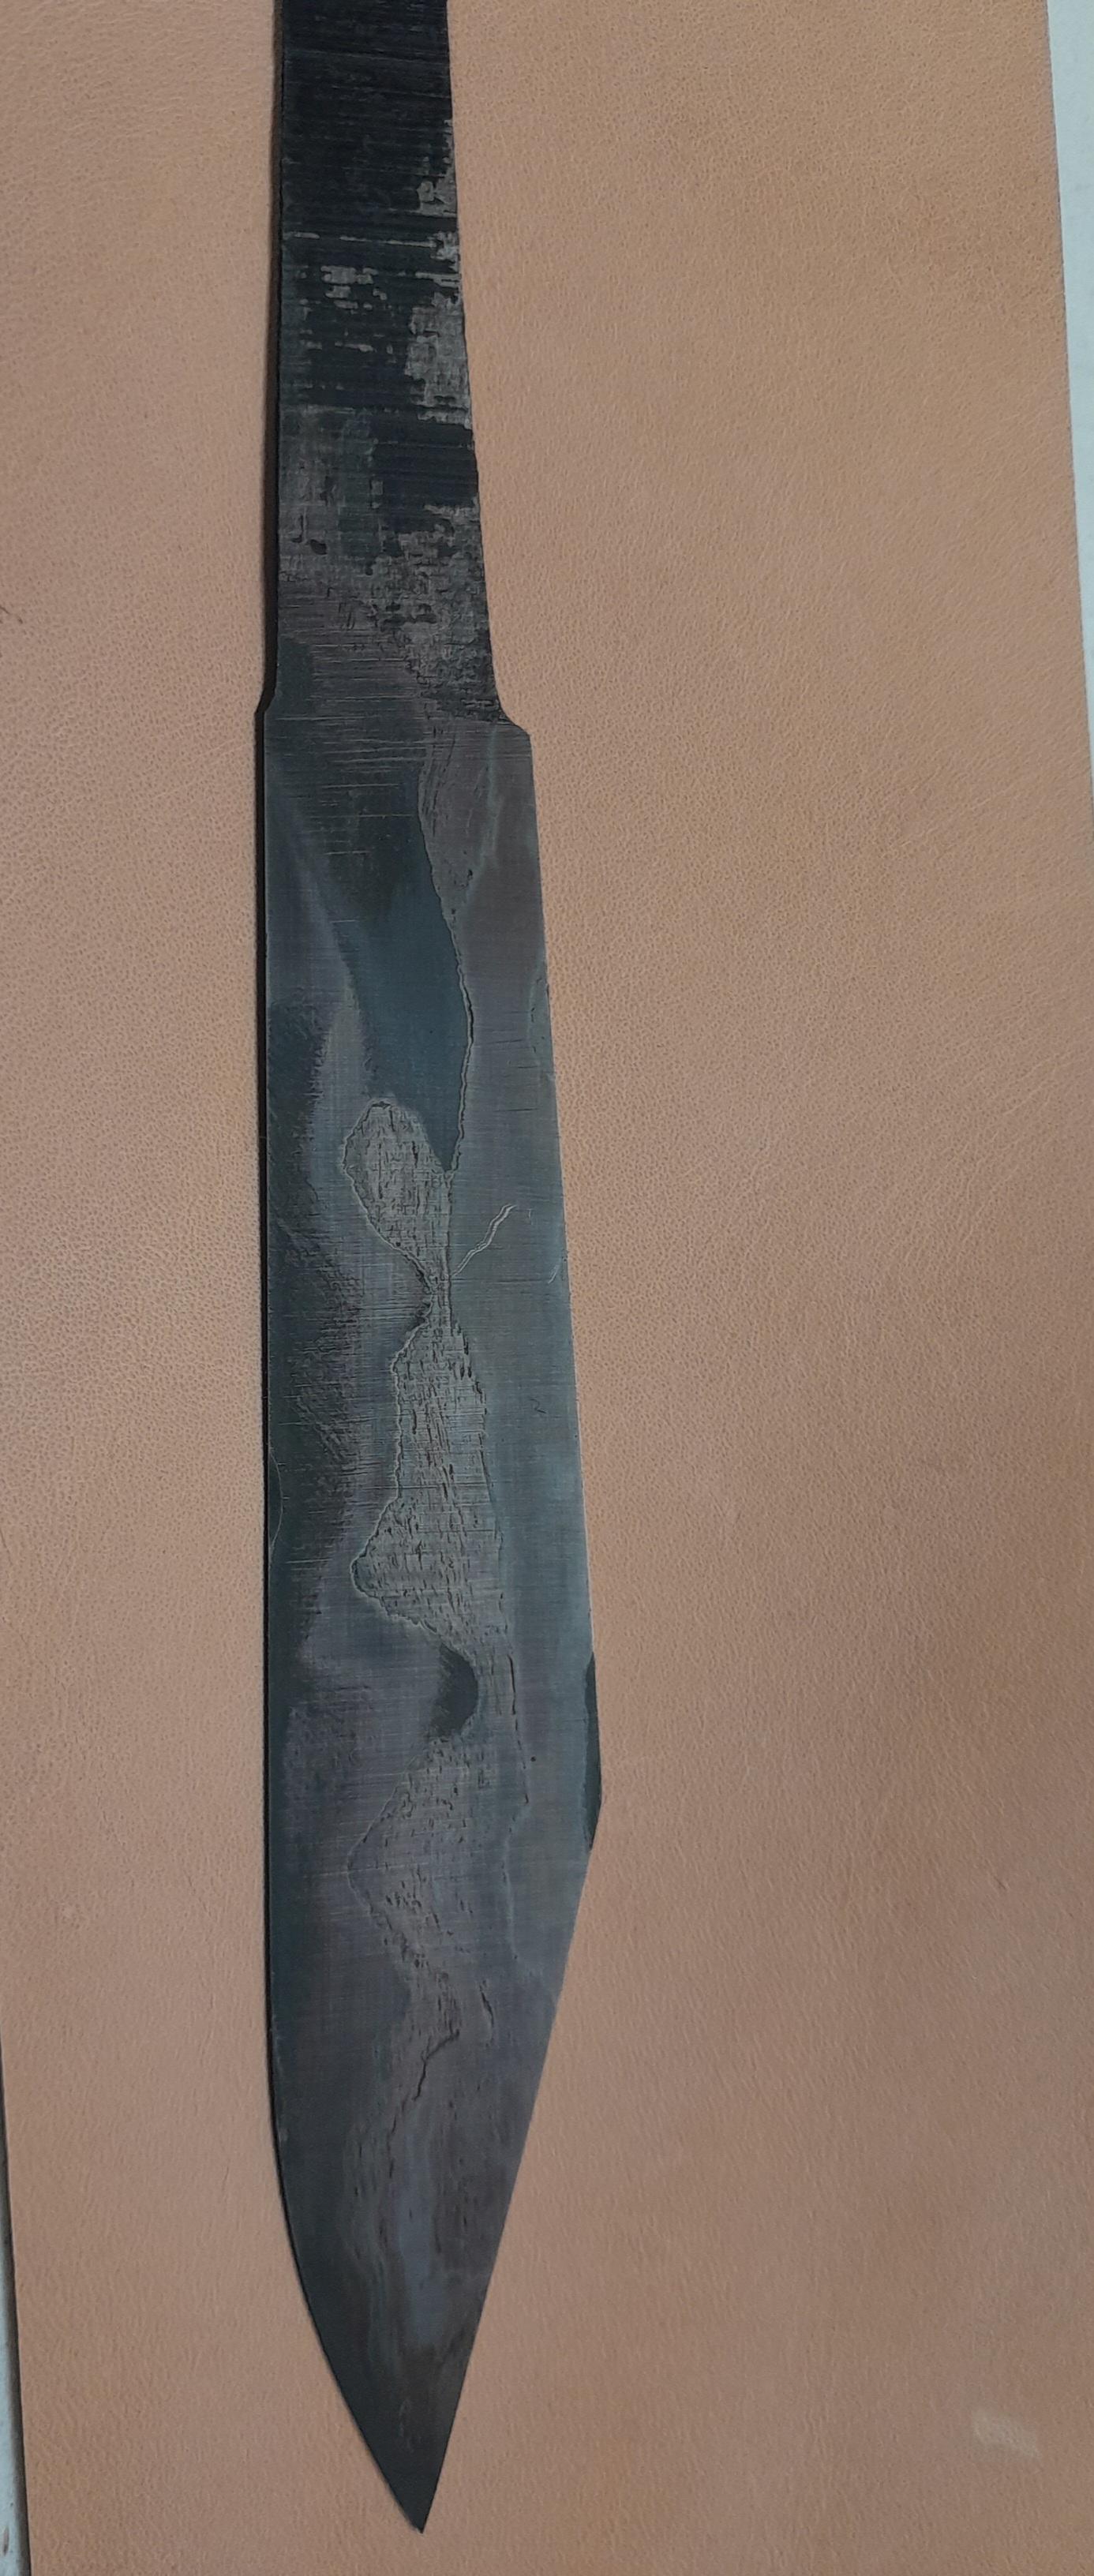
My third endeavor for the day was a san mai broken back seax. It is 8670 clad in wrought iron. I've had good results welding and heat treating up until this project. The welds were fine but it kept warping during heat treat. I made an accidental inverted distal taper on the blade while grinding due to the blade shape and bevel angle. I think this is part of the problem in addition to grinding the edge too thin. The tang needs to be refined a little more before I add a handle. I'm really frustrated as I had a hard time keeping the core centered even tho i forged both side equally. The grain is pretty cool I think but it's pretty weird. Even tho the pic doesn't show it the core is on both sides.
Tips for future attempts? Friendly criteques?


Nice sword, Chad. You could wrap the handle in leather or steel twisted wire to add girth. Just a thought. The balde and guard look wicked as heck
-
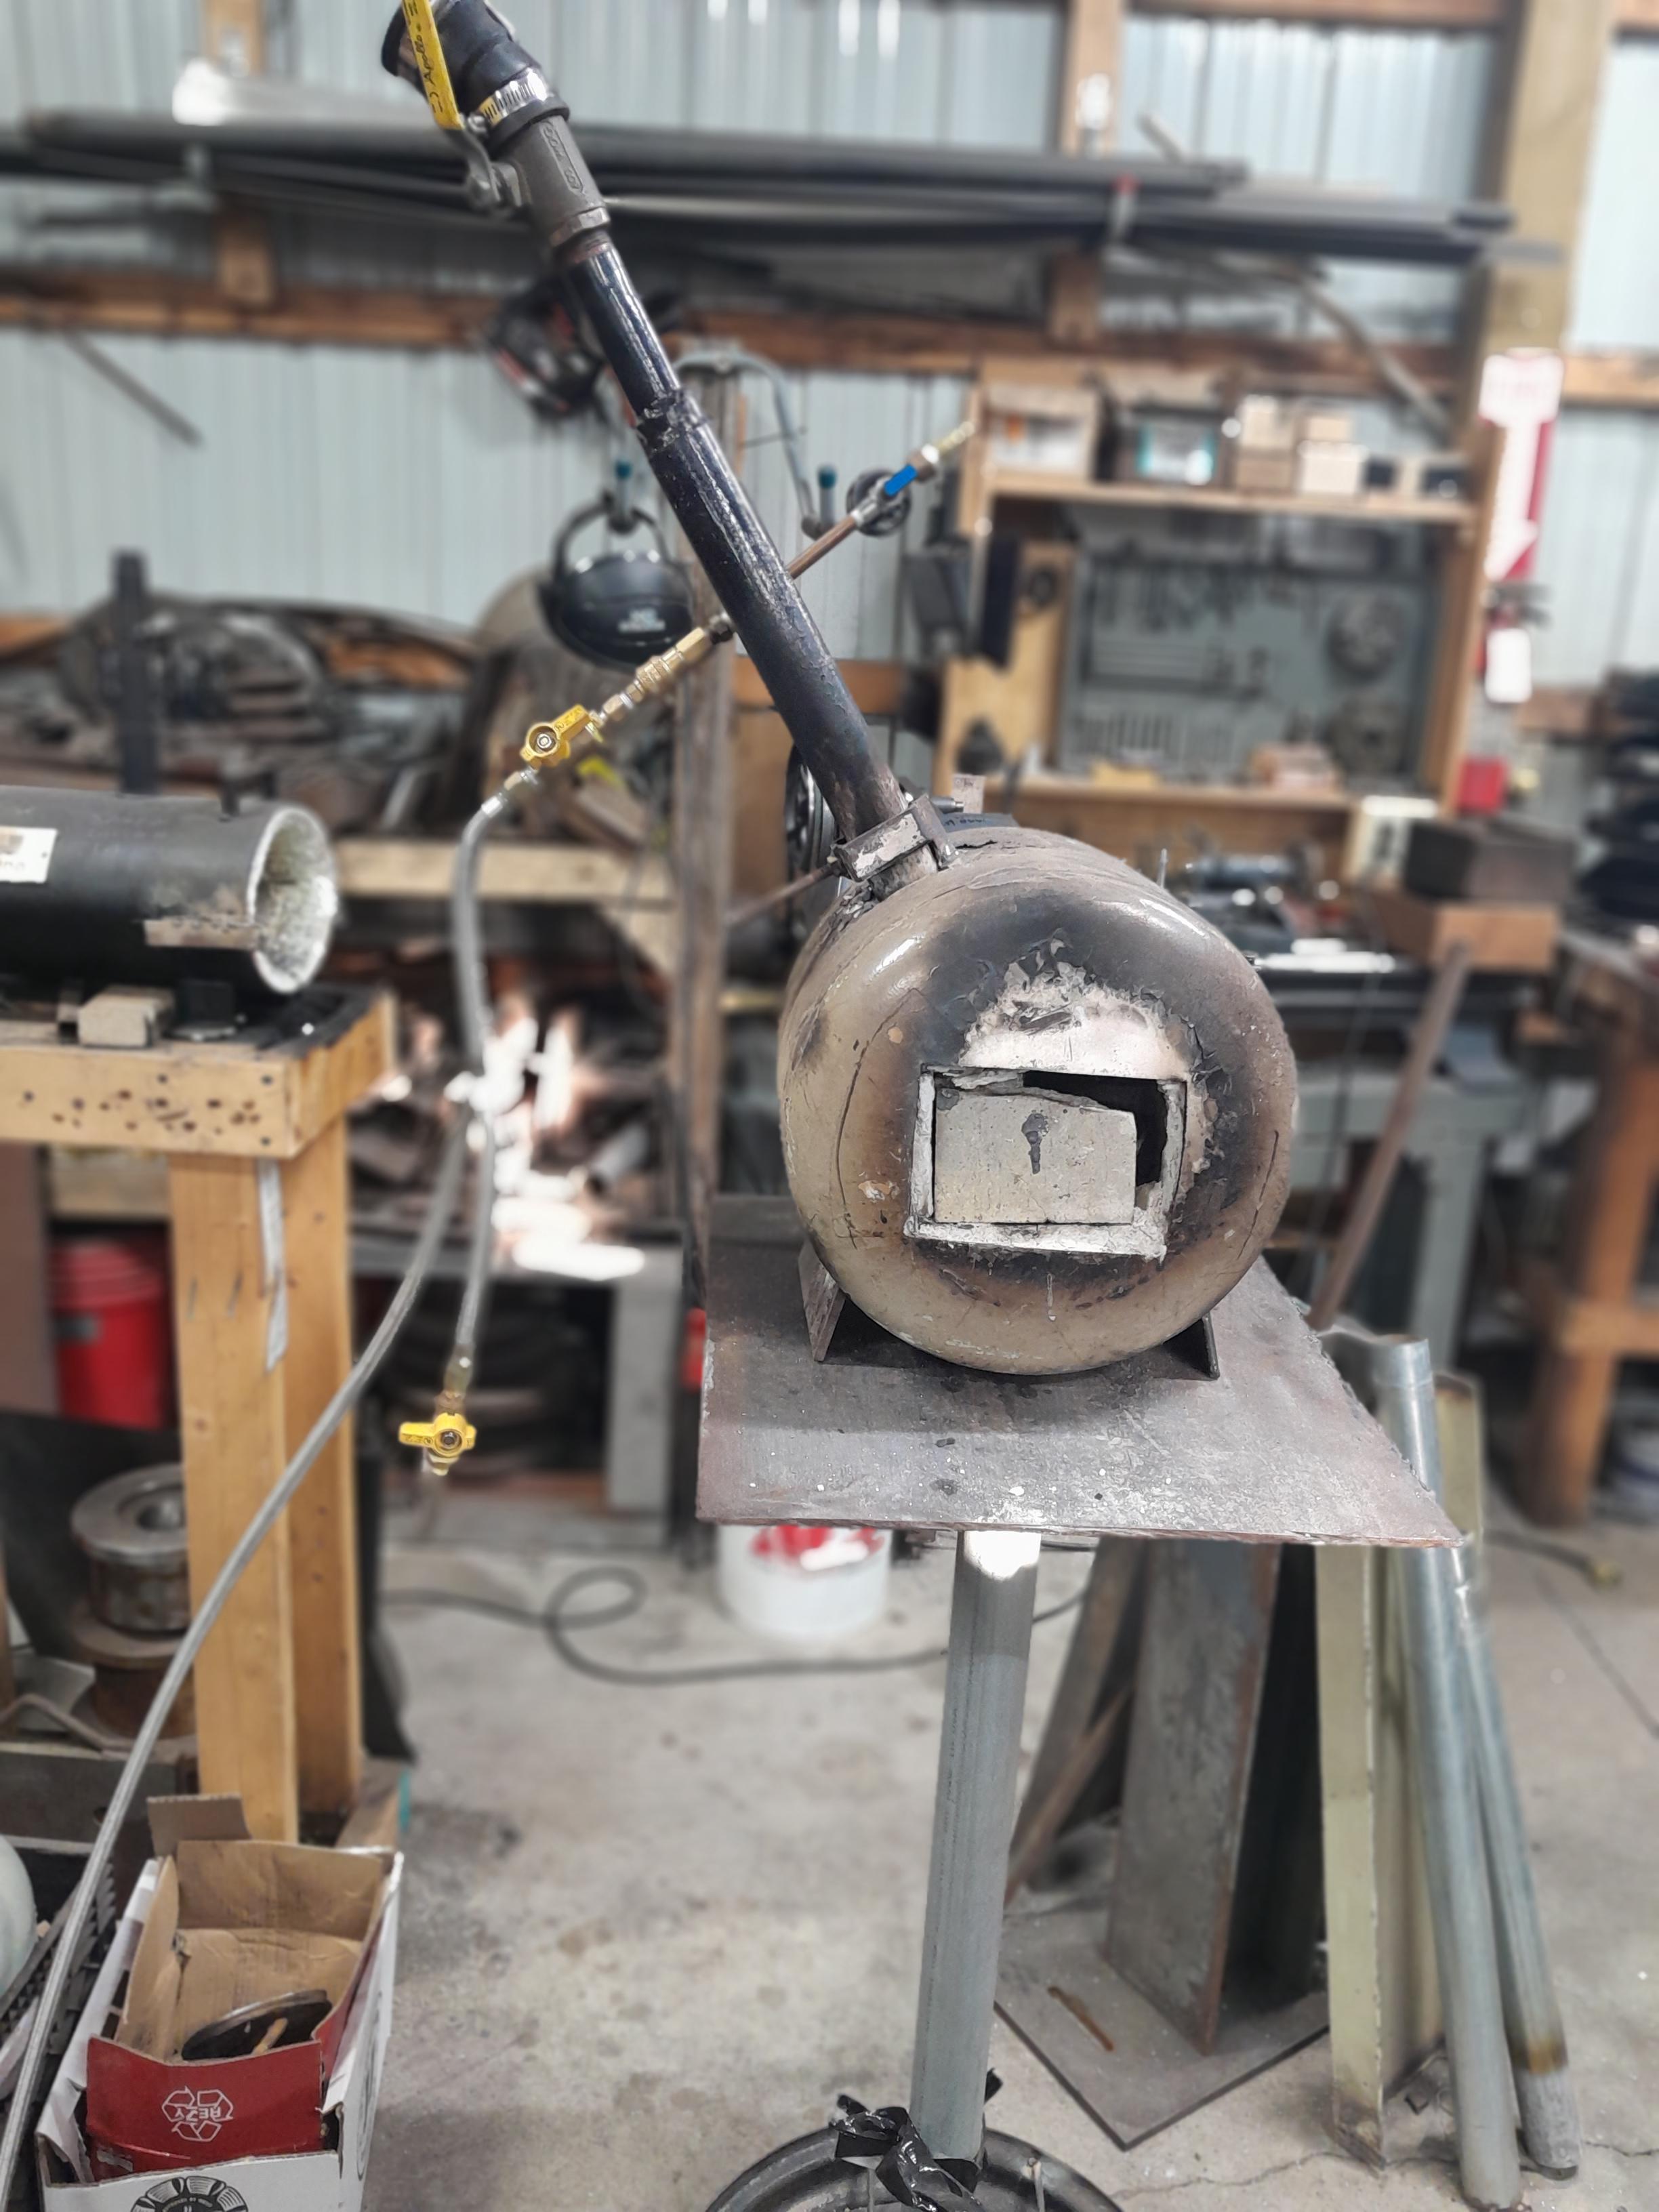
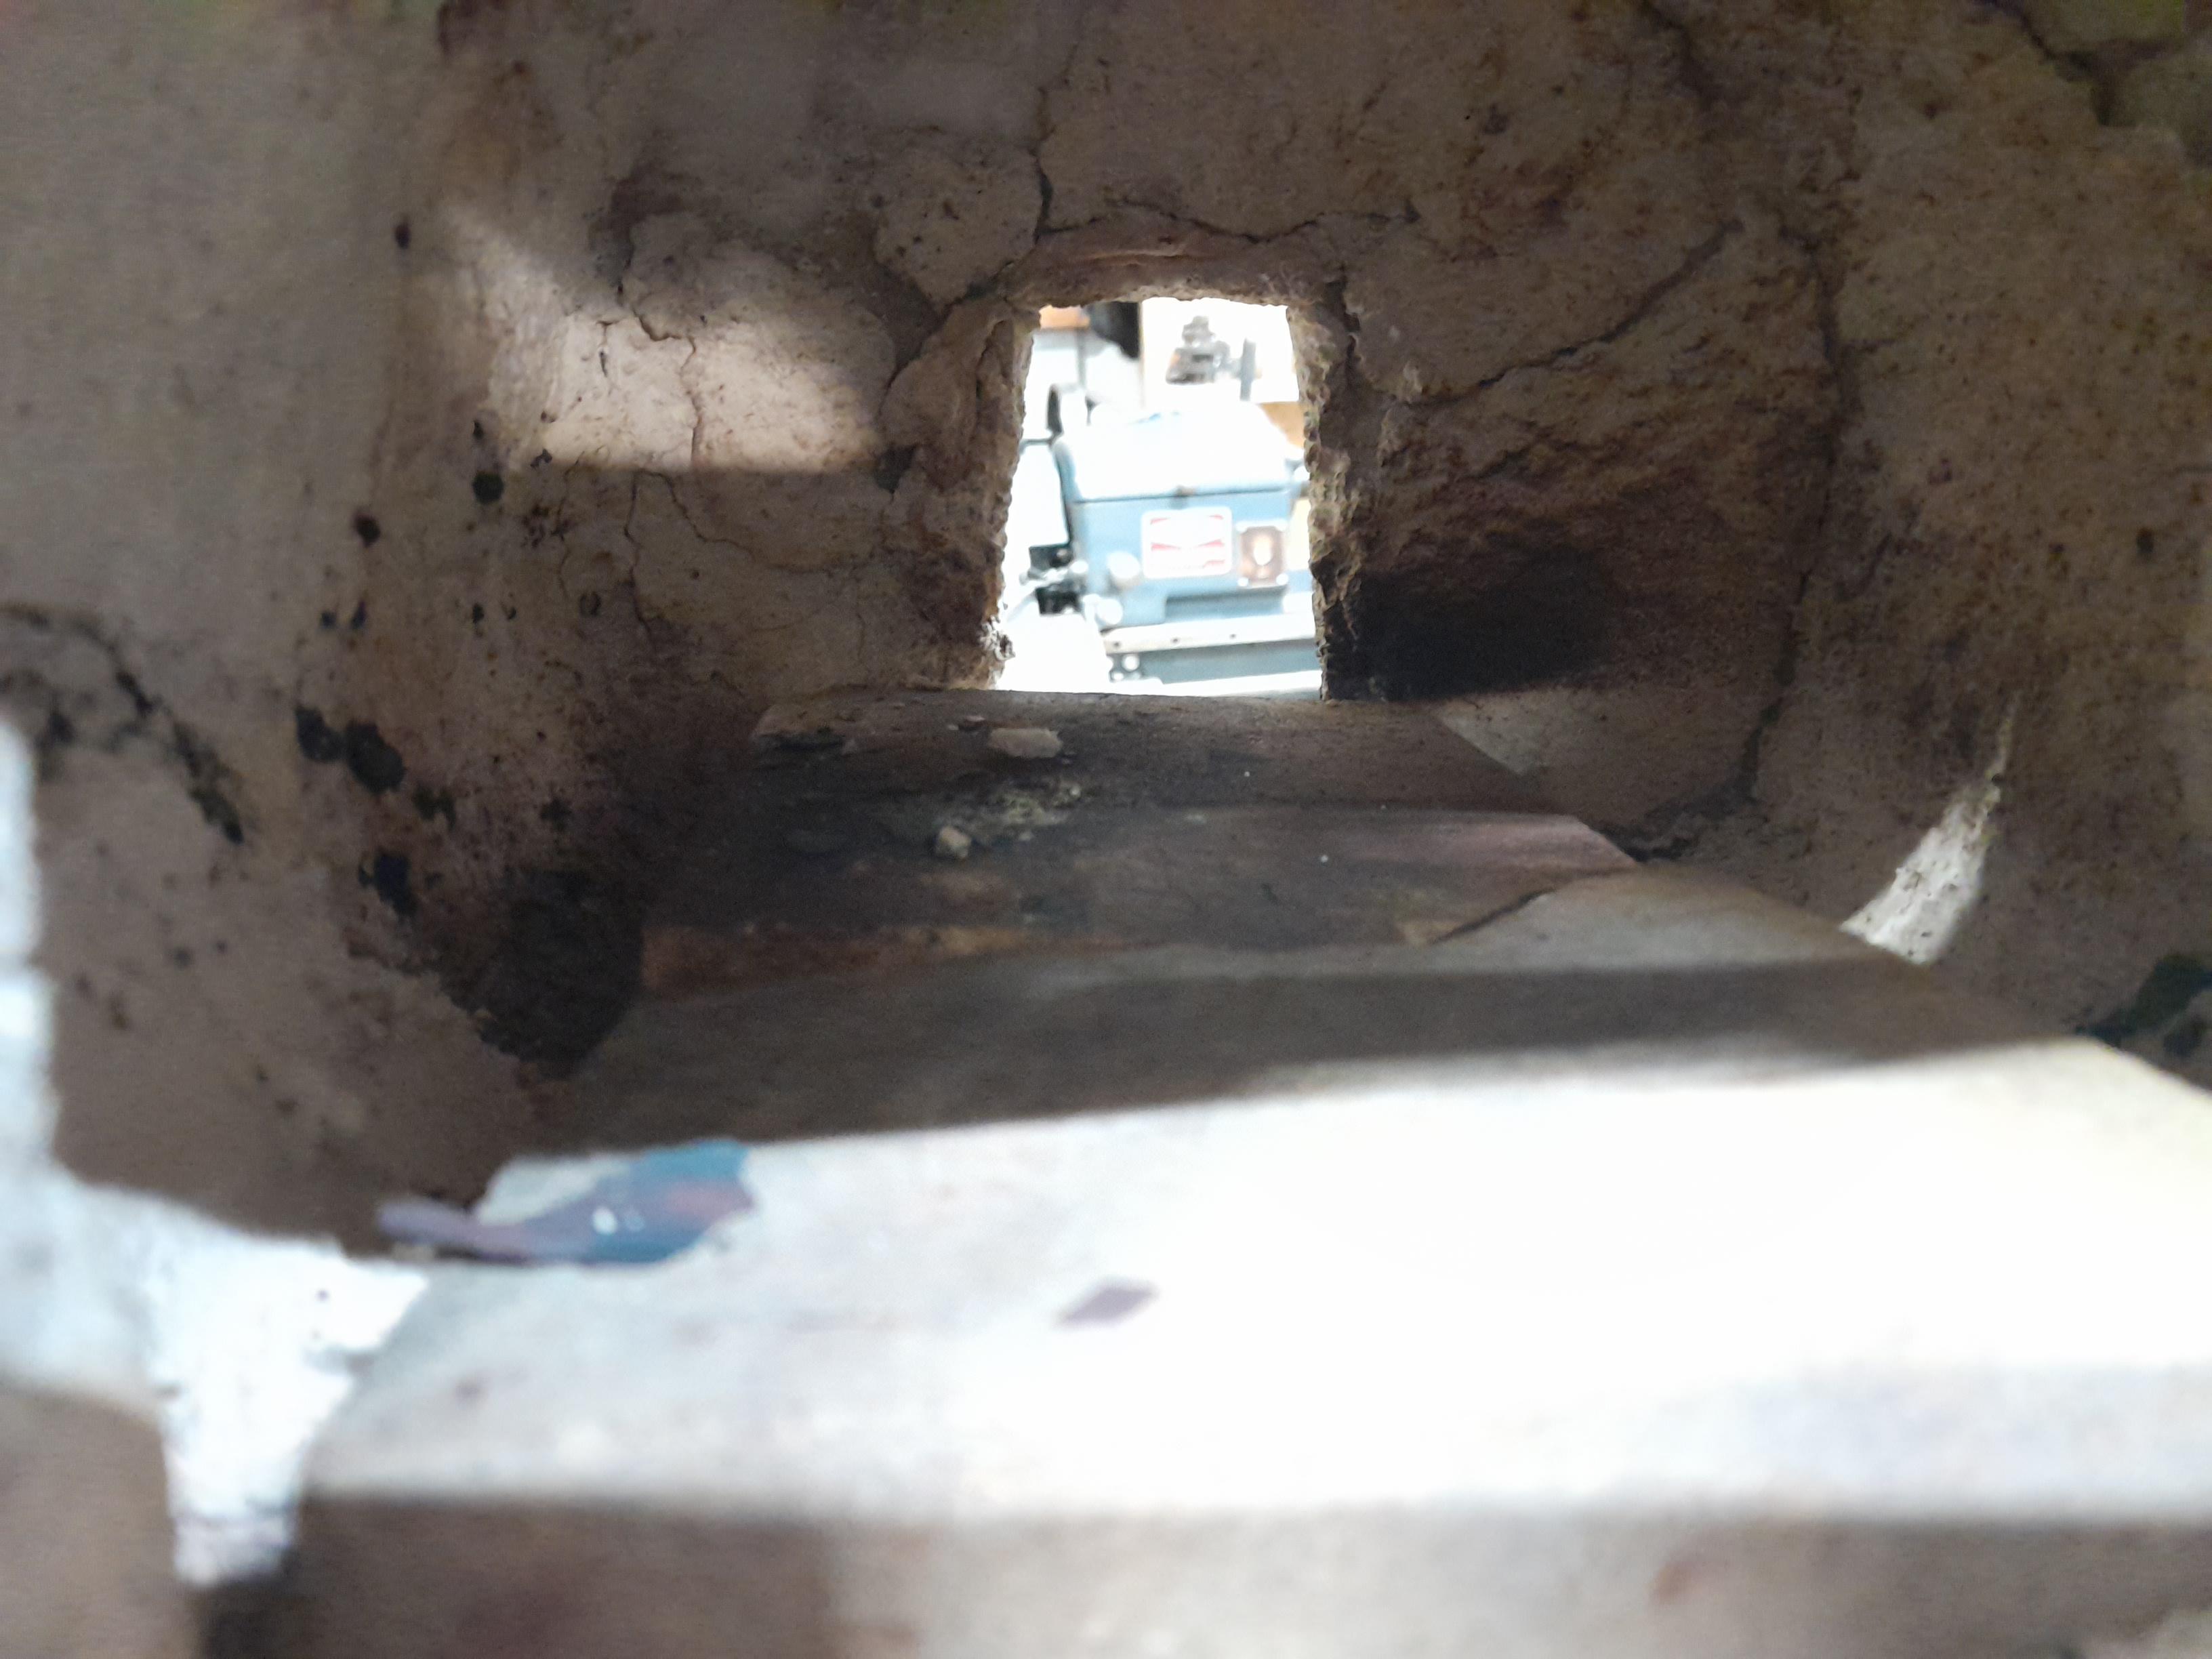
I almost finished my dual fuel forge. Got it running smoothly on lpg and forced air but the liquid fuel still needs some fine tuning.
I got a stand built for it out of a steel tire rim, 3 inch round pipe and cement. I would like to make a stand for the liquid fuel so that it can stand freely and be gravity fed. I did need to re-refractory the forge because my cat knocked it off my bench while I was prepping legs for it. Besides that it runs nicely and geats up relatively quickly. My pressure dial for the lpg is slightly off so my best guess is it's running on 5-6 psi which is better than the 14 psi my venturi does. I'm going to build a foundry and annother forge of some kind in the future but this one will suffice. Should u paint it with heat resistant paint? I found some rated for 1800f if I remember correctly. If so, color suggestions? Cheers!
WFF
-
Thank you! It wasn't as difficult as I first thought. The big thing is to make sure you don't remove too much material when splitting the pipe so use a thin bandsaw blade. My next one will have a wider blade. I think i took off a little too much this time. But it'll be easier when I get a big metal musher lol.
-
I agree with Goods. Les your cable knife is pretty awesome. I've tried my hand at cable and failed pretty miserably lol
-
Thanks Nobody Special! I like the idea of splitting it. I guess I really didn't think of that. Drilling the holes before splitting would probably work better in my case. I am by no means very experienced with hammer making or with working wrought iron. I've only made a few. I think I have that book by Bealer tucked away somewhere. Thanks for bringing that up! I really appreciate the advice. I looked at the hammer again this morning and I am not certain that it didn't weld. I might have judget it a quickly yesterday. I can't tell if the faint line is a delamination or if I am just seeing the different metals meeting. Some of it for sure did not but I am wondering if I should try to salvage the face or just cut it off and retry. Thoughts?
Michael, that spatula turned out nice!


-
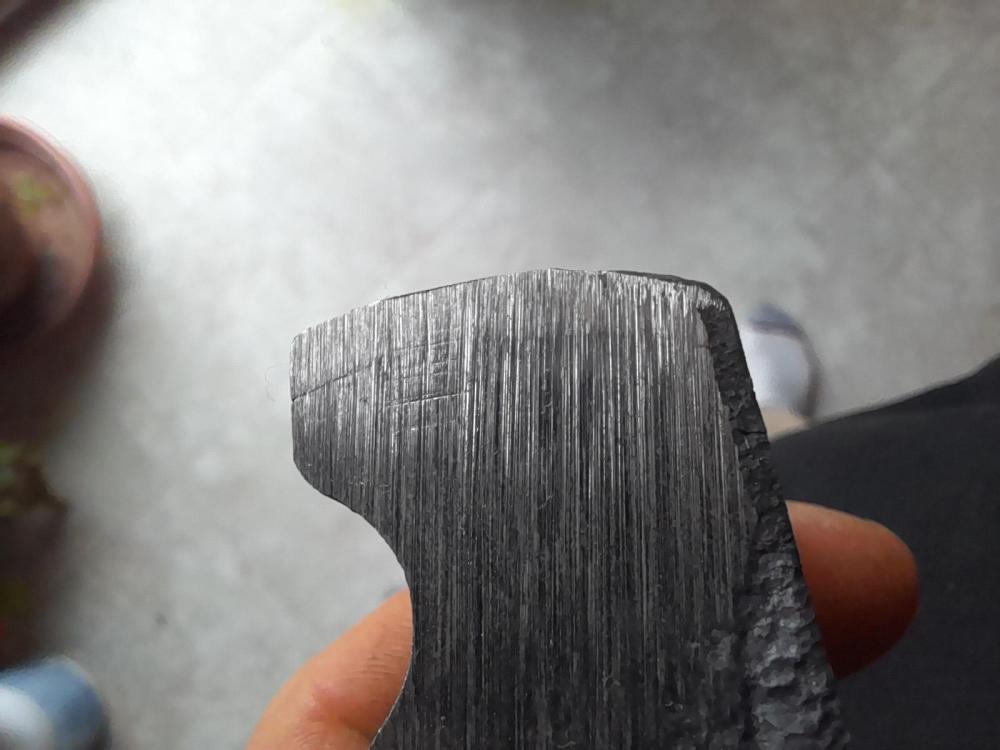
I worked with some wrought iron today. Big, heavy inch and a half round bolts from a grain elevator that burned down. It moved like butter under my hammer. I found that using a 3 or 4 lb dog's head hammer really aided in keeping it square while breaking it down. I was going to wait until I made my forge press to mess with the wrought iron but I got a little squirrely.
I squared the bar up and then drilled a ½ inch hole to start the eye. Normally I would punch the eye but I've had my last few hammers split on me. I drifted the eye to about .7"×.950" which should be enough to fit my handles. Here is where I made my mistake... I welded a bit of scrap jackhammer bit on to the front for a hitting face. (The bit was hardenable). This was mostly experimentation. Both faces were perfectly cleane of scale, oil and grime but somehow still didn't weld. I tried fluxing, getting it really hot and nothing worked. I am wondering if I cooked the HC steel when I was trying to weld it because, if I remember correctly, WI takes a higher heat to weld. Anyway I will try to salvage it but maybe it'll find its home in the scrap bin. I may try welding a bit of 1045 to the face instead of mystery steel. Rookie mistake, am I right? Also I didn't put a HC bit in the cross pein end. Well live and learn I suppose.
Cheers!
WFF


-
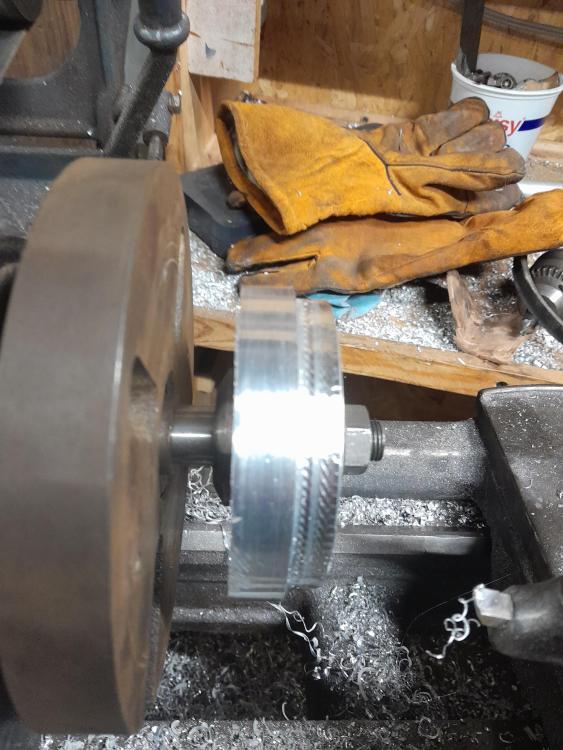
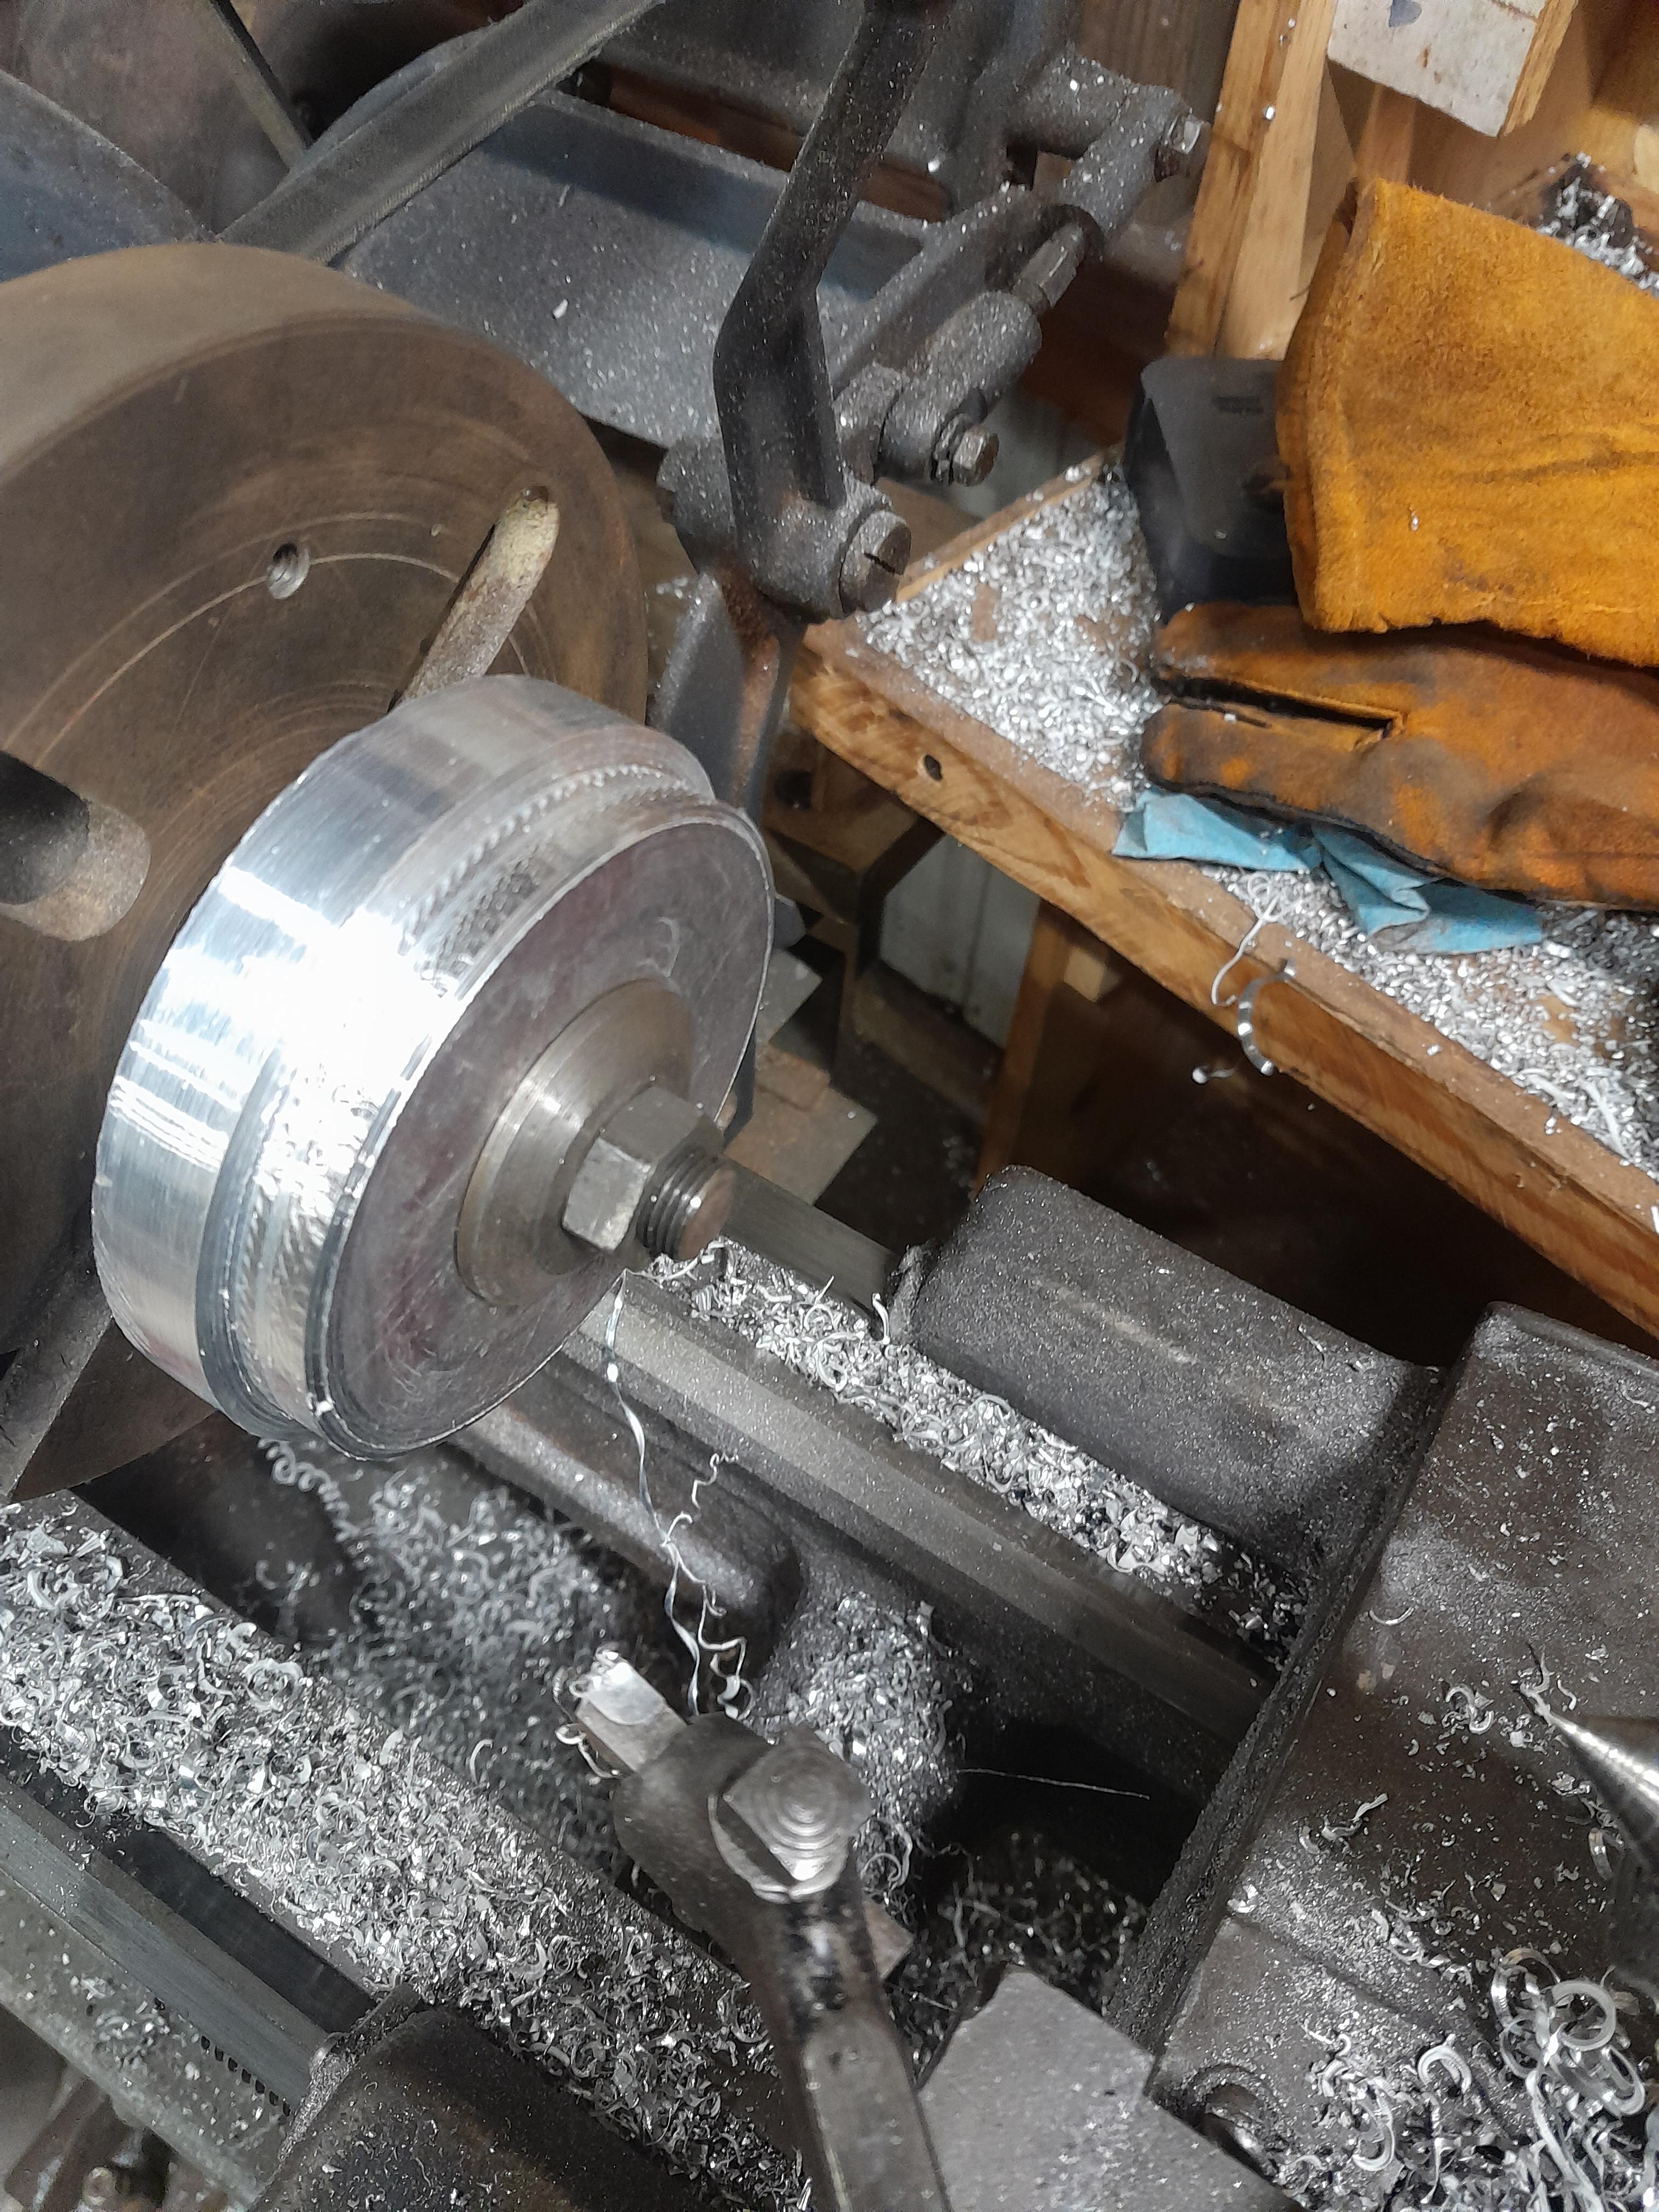
I'm machining pulleys for my belt grinder to slow it down. I cut the aluminum on my table saw and then turned it on the lathe. I couldnt figure out how to turn it without chucking it up. I sat there for over an hour trying to figure out a solution. I then remembered i have a wirewheel/buffing tool that ended up fitting the aluminum perfectly. I was super pumped about it. You can probably see the chatter from the bit because my motor is undersized and dying plus my tool wasn't set right (don't judge). Also, needless to say, it is not complete yet.

-
I just finished up a pipe tomahawk today. I forged it out of a peice of 1inch Dom pipe with ¼inch walls, slit it down the middle and forge welded a 1080 bit. The handle is charred hickory with a damascus smoke plug. I put a sliver of leather between the bowl and the handle to create a better seal.


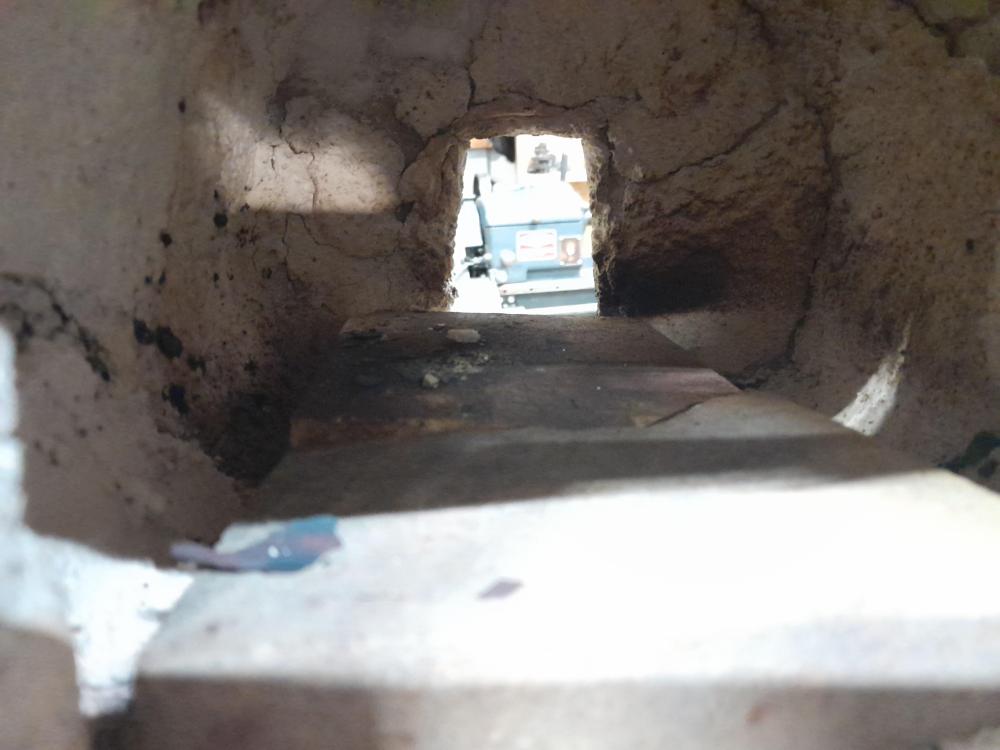
Log splitter forge press build WIP
in Presses
Posted
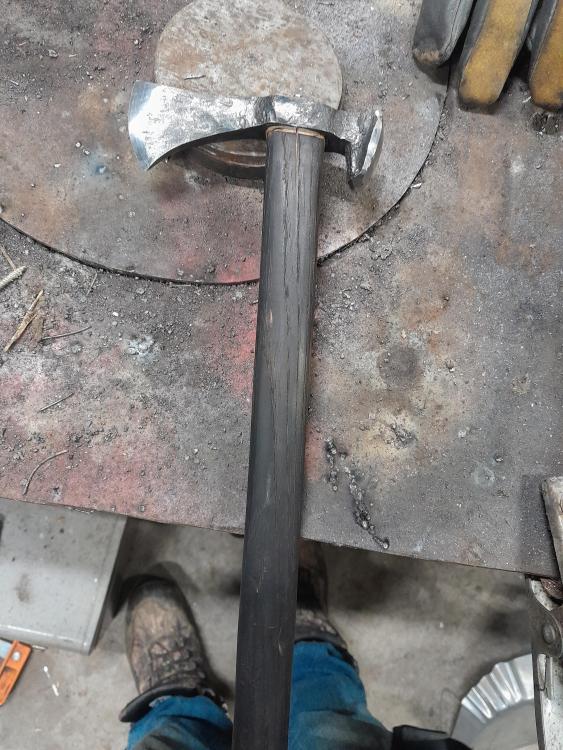
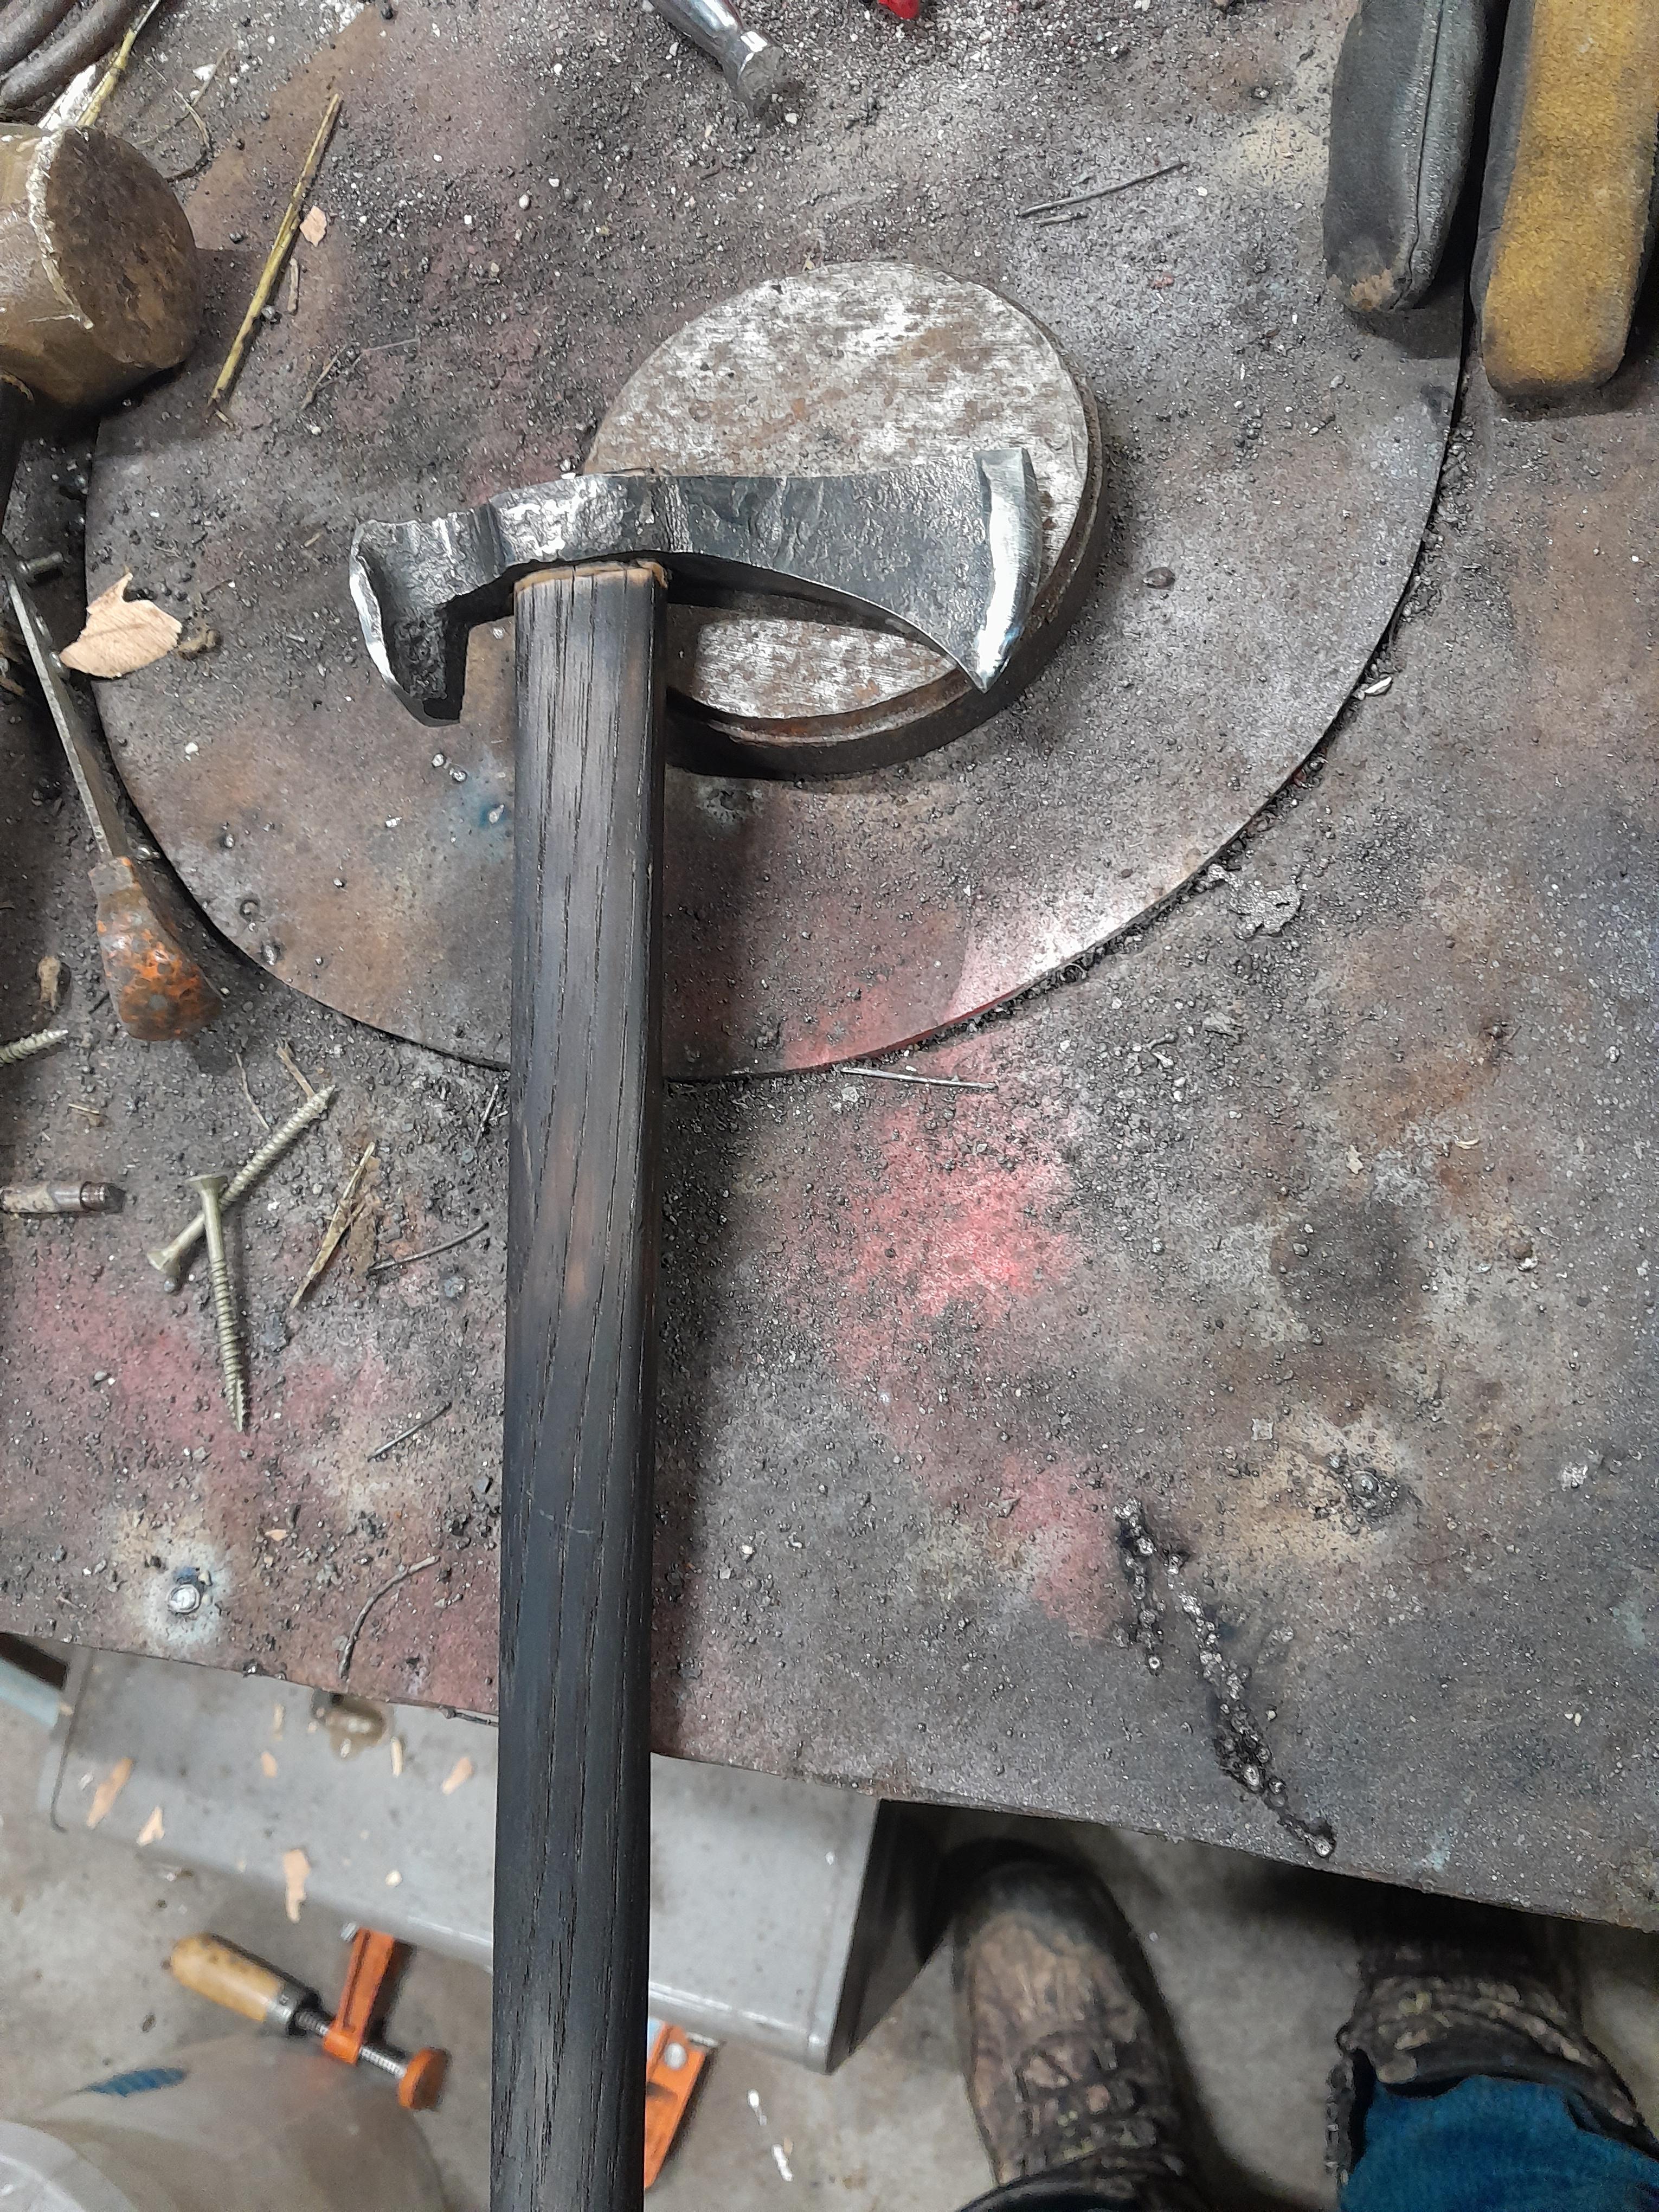
I welded up a handle for the press and will eventually use a pedal. I made a prototype pedal but the action caused the press to stall out. I think that I may have to redesign the pedal. The press can crush a peice of 1 ½ inch steel down to about ⅜ flat in one heat. I like the freedom to work with bigger steel bow that i have a metal musher. I need to fine tune everything. I still need to make a top die retainer. I'm out of ideas... there isn't enough room to make a gravity swiveled retainer.
Cheers!
Wff