
Alaskan Bladesmith
-
Posts
10 -
Joined
-
Last visited
Content Type
Profiles
Forums
Articles
Gallery
Downloads
Events
Posts posted by Alaskan Bladesmith
-
-
Thomas Powers, yes sir!
-
I know Im a couple months late replying, but I would recommend a flat grind. With it being a kitchen knife used for shearing dense mediums in the kitchen like common fruits and vegetables you want to grind it as thin as possible. Trying grind it thin enough on a round wheel will result in grinding through the blade. This might sound a little crazy, but the reason I say this is because Im talking grinding the blade to a spine thickness of about 55,000ths (about 1/16th of an inch) and the edge before sharpening to about 25,000ths of an inch. This needs to be done after heat treat of course, otherwise the blade will warp significantly. All that being said, I have ground kitchen knives on my 16inch diameter wheel and I can still get the over all blade thinner on my flat platten. With kitchen knives, think lowest resistance possible. As thin as possible equals low resistance which equals a happy food prep
") Hope this helps
Hope this helps
-Alaskan Bladesmith
-
As a fulltime bladesmith now that started making blades about 20 years ago as a kid, I can say that it has to be in your blood to love doing it. For me, the difference between blacksmithing and bladesmithing is that I can make the steel become "alive" through the heat treating process. It is a make it or break it(sometimes literally) moment when I pour life into a piece of steel. So unlike a blacksmith that puts character into steel, a bladesmith puts character and then breaths life into his steel. As to why we dont really make tools, well, I think man has always been fascinated with the "power" of the edged blade. And let me say, Im not slamming blacksmiths, they can shape steel in their own way like I never do. And lastly, a bladesmith is not just forging steel, he machines it, heat treats, works with brass, precious metals, hardwoods and leather too. I find the complexity of a beautiful, functional, tool to be intriguing.
-
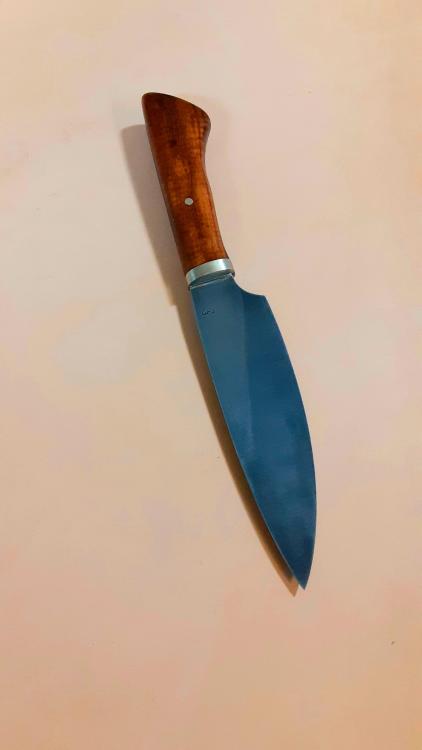
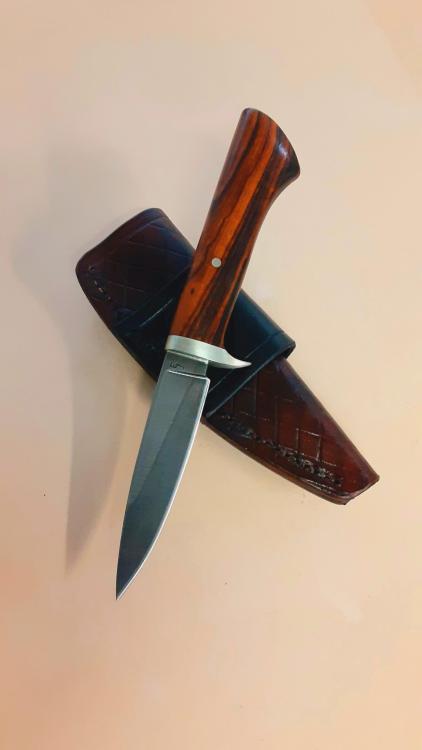
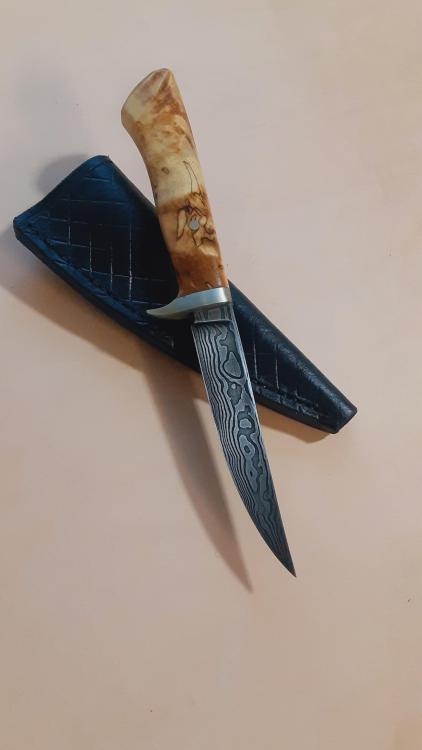
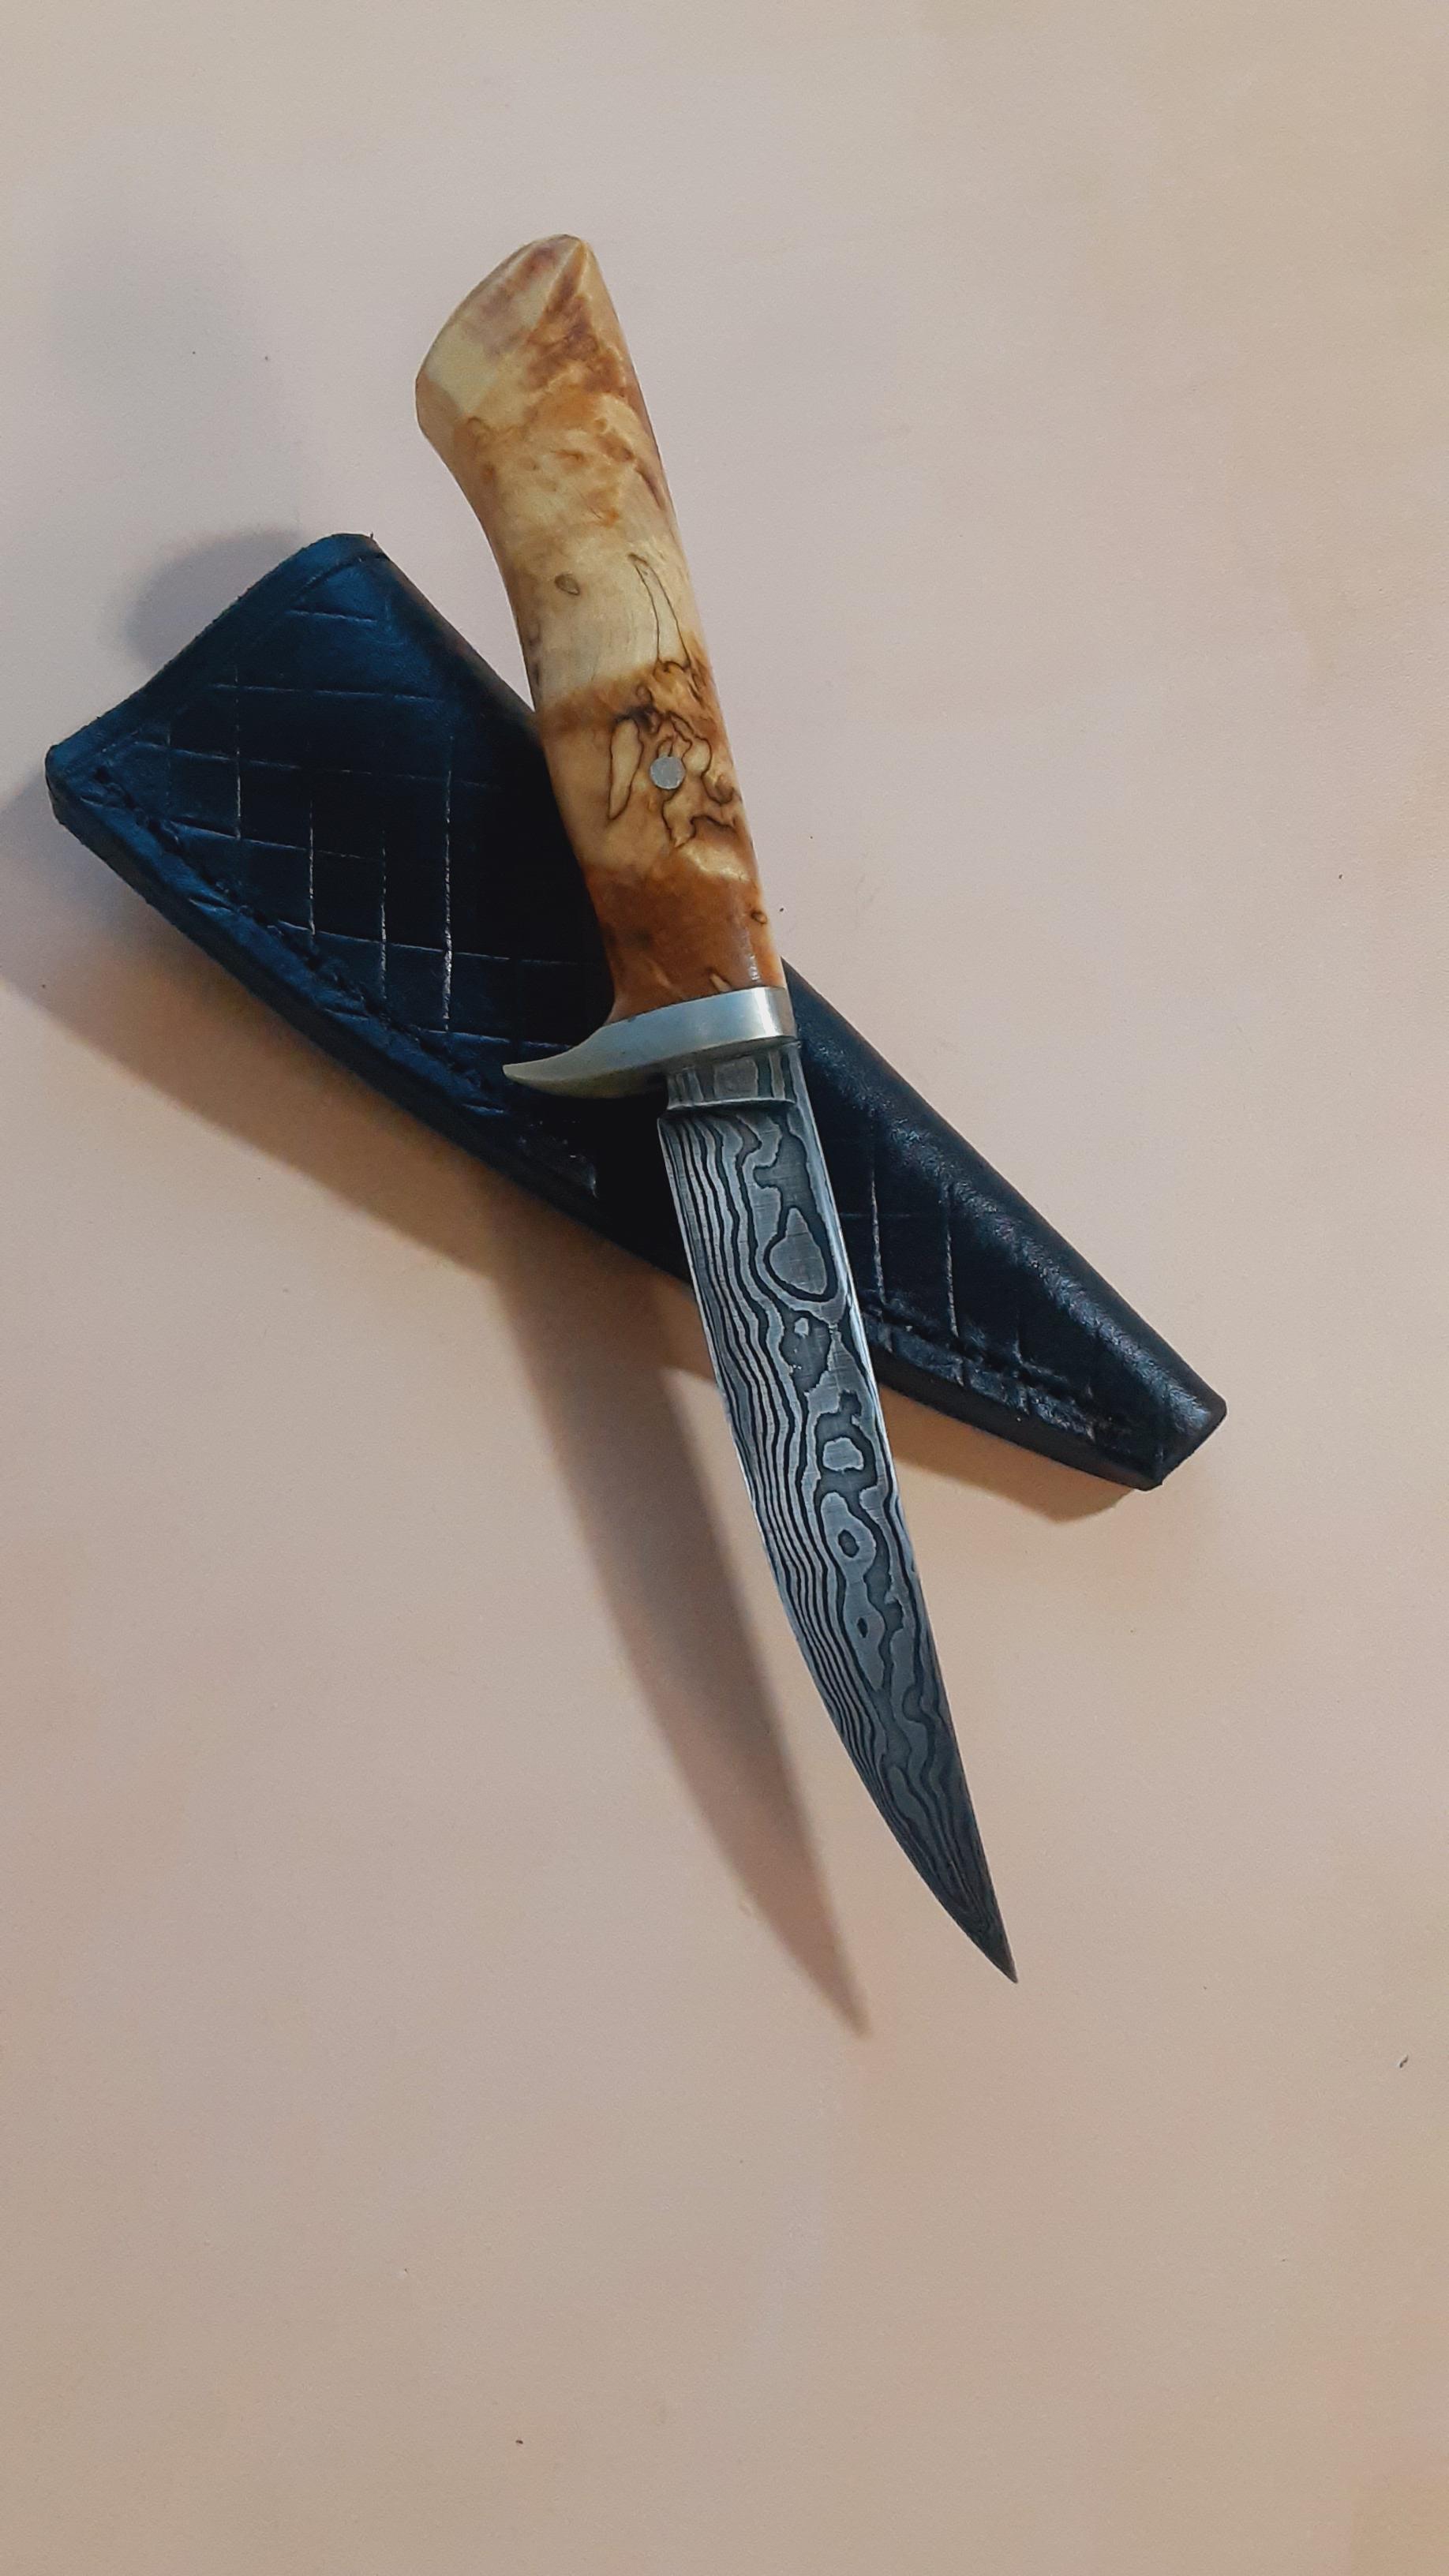
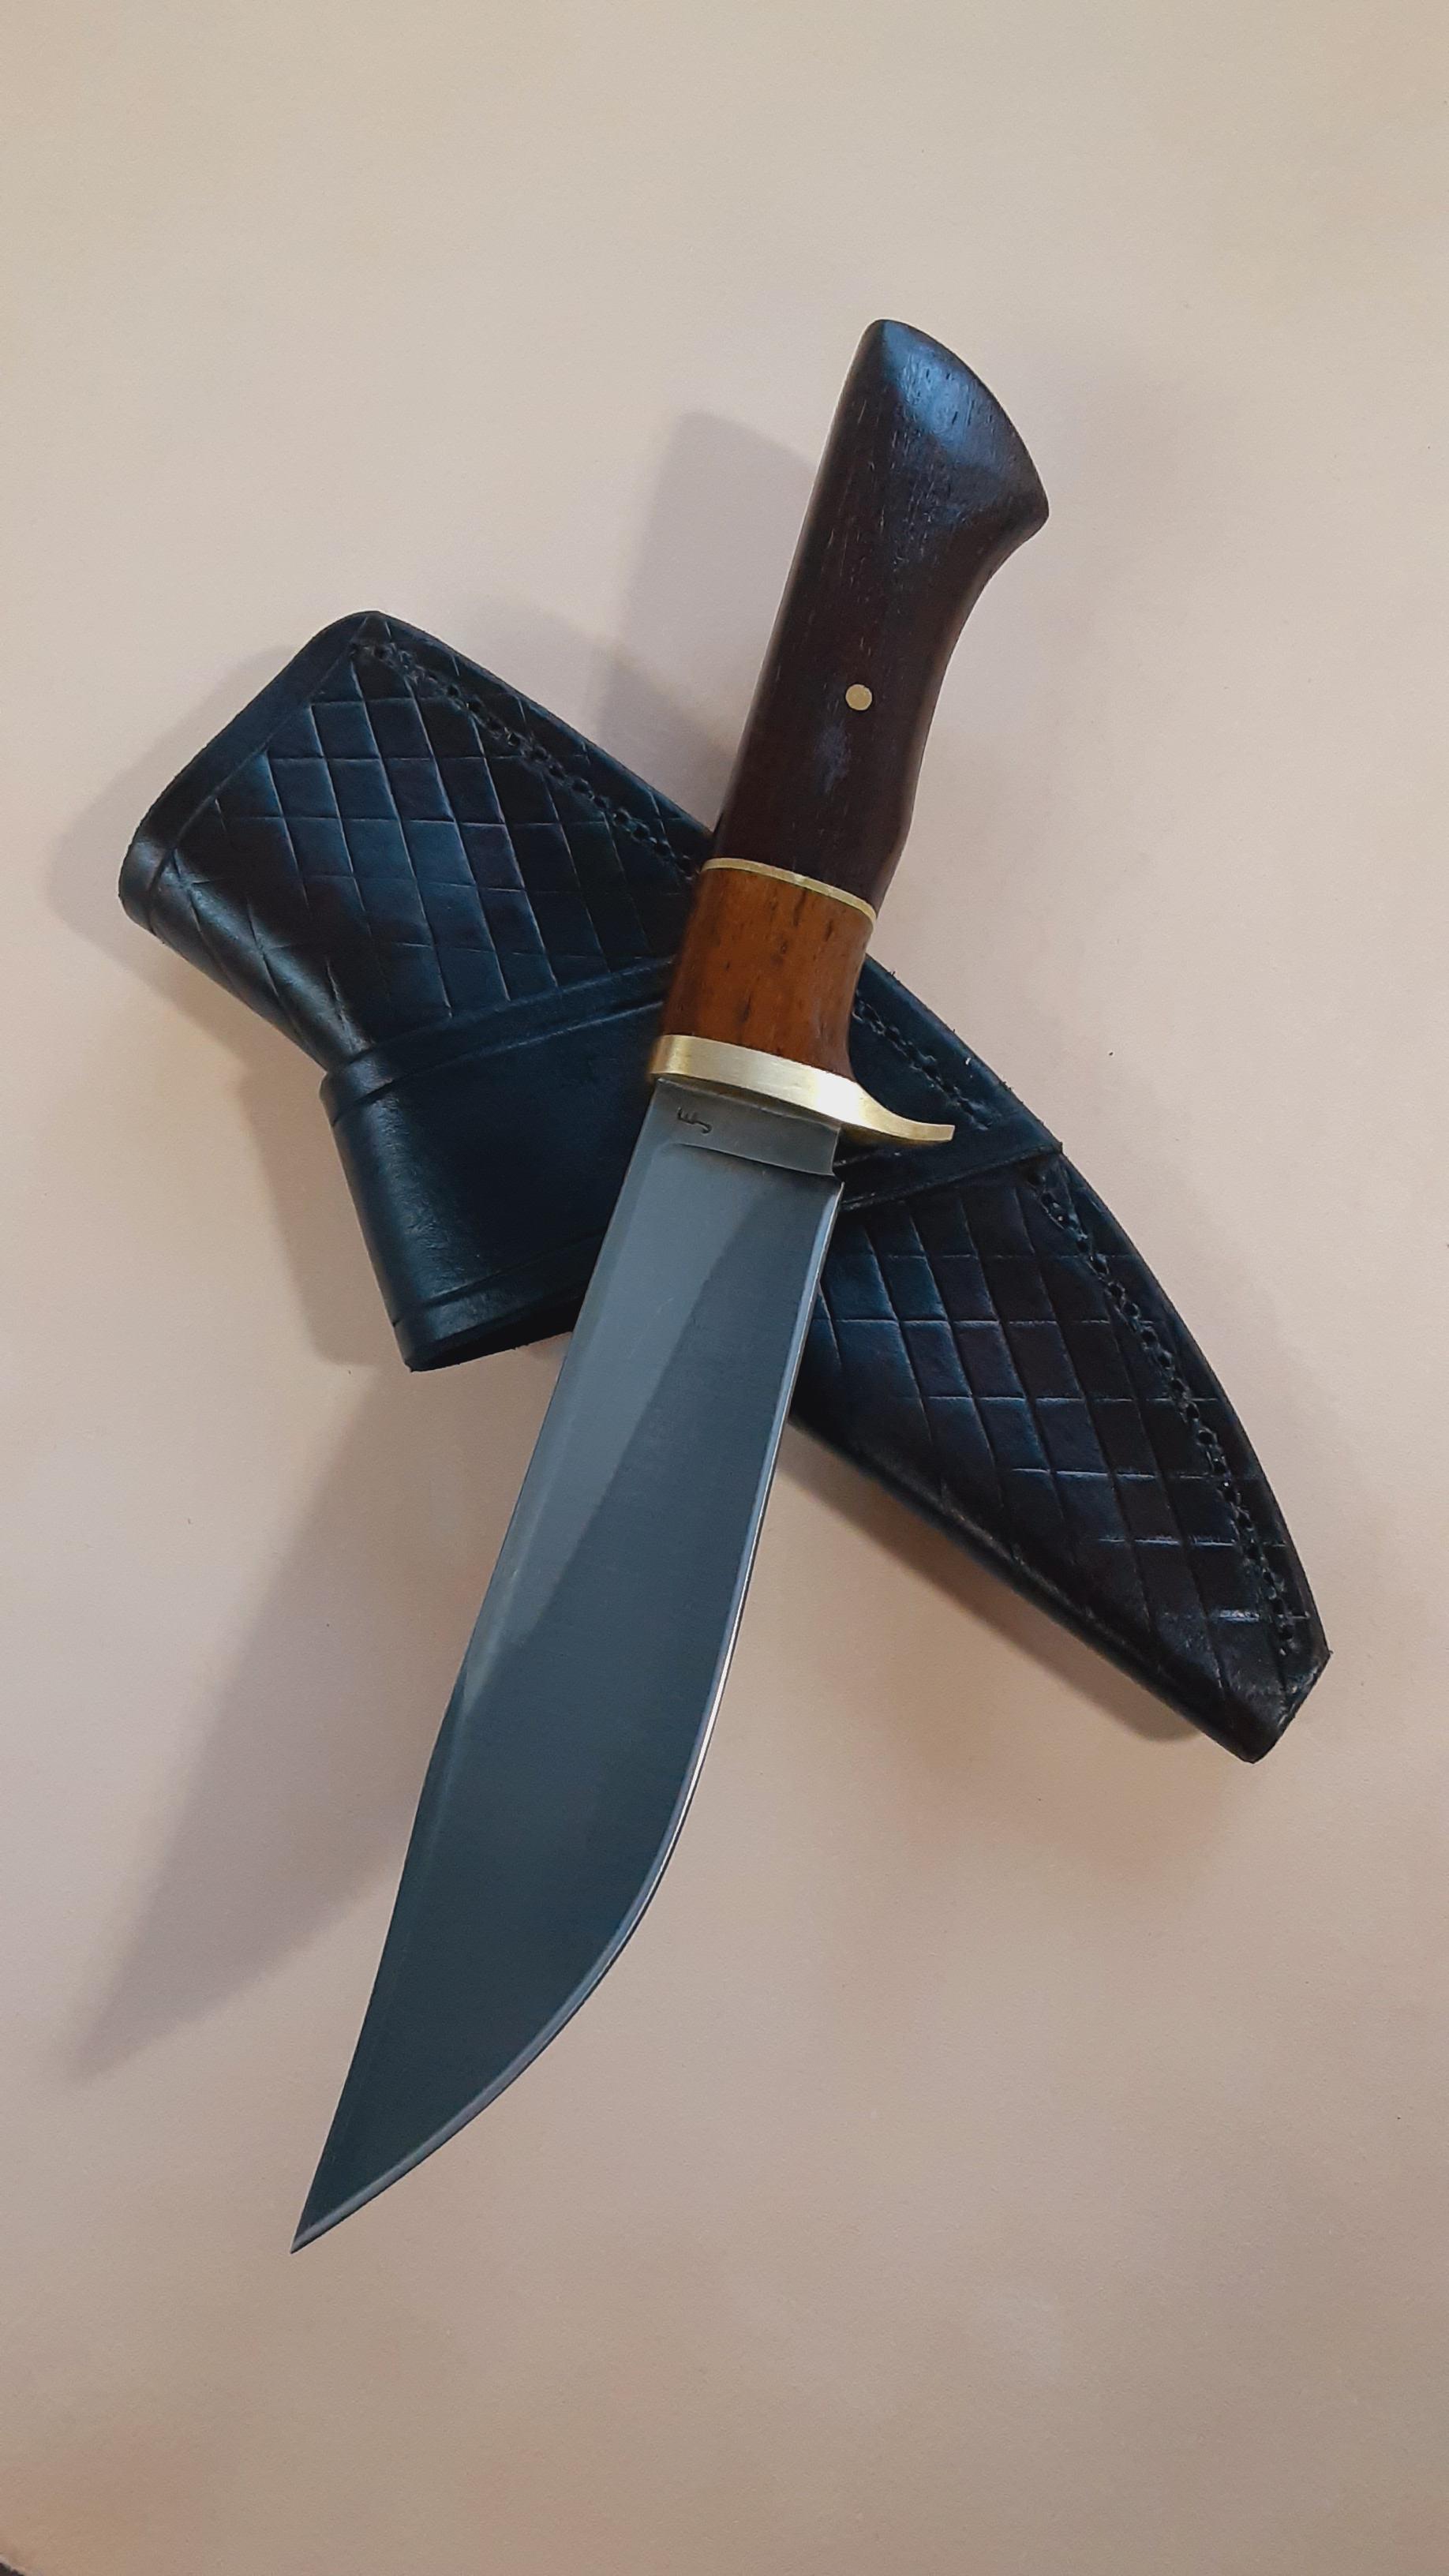
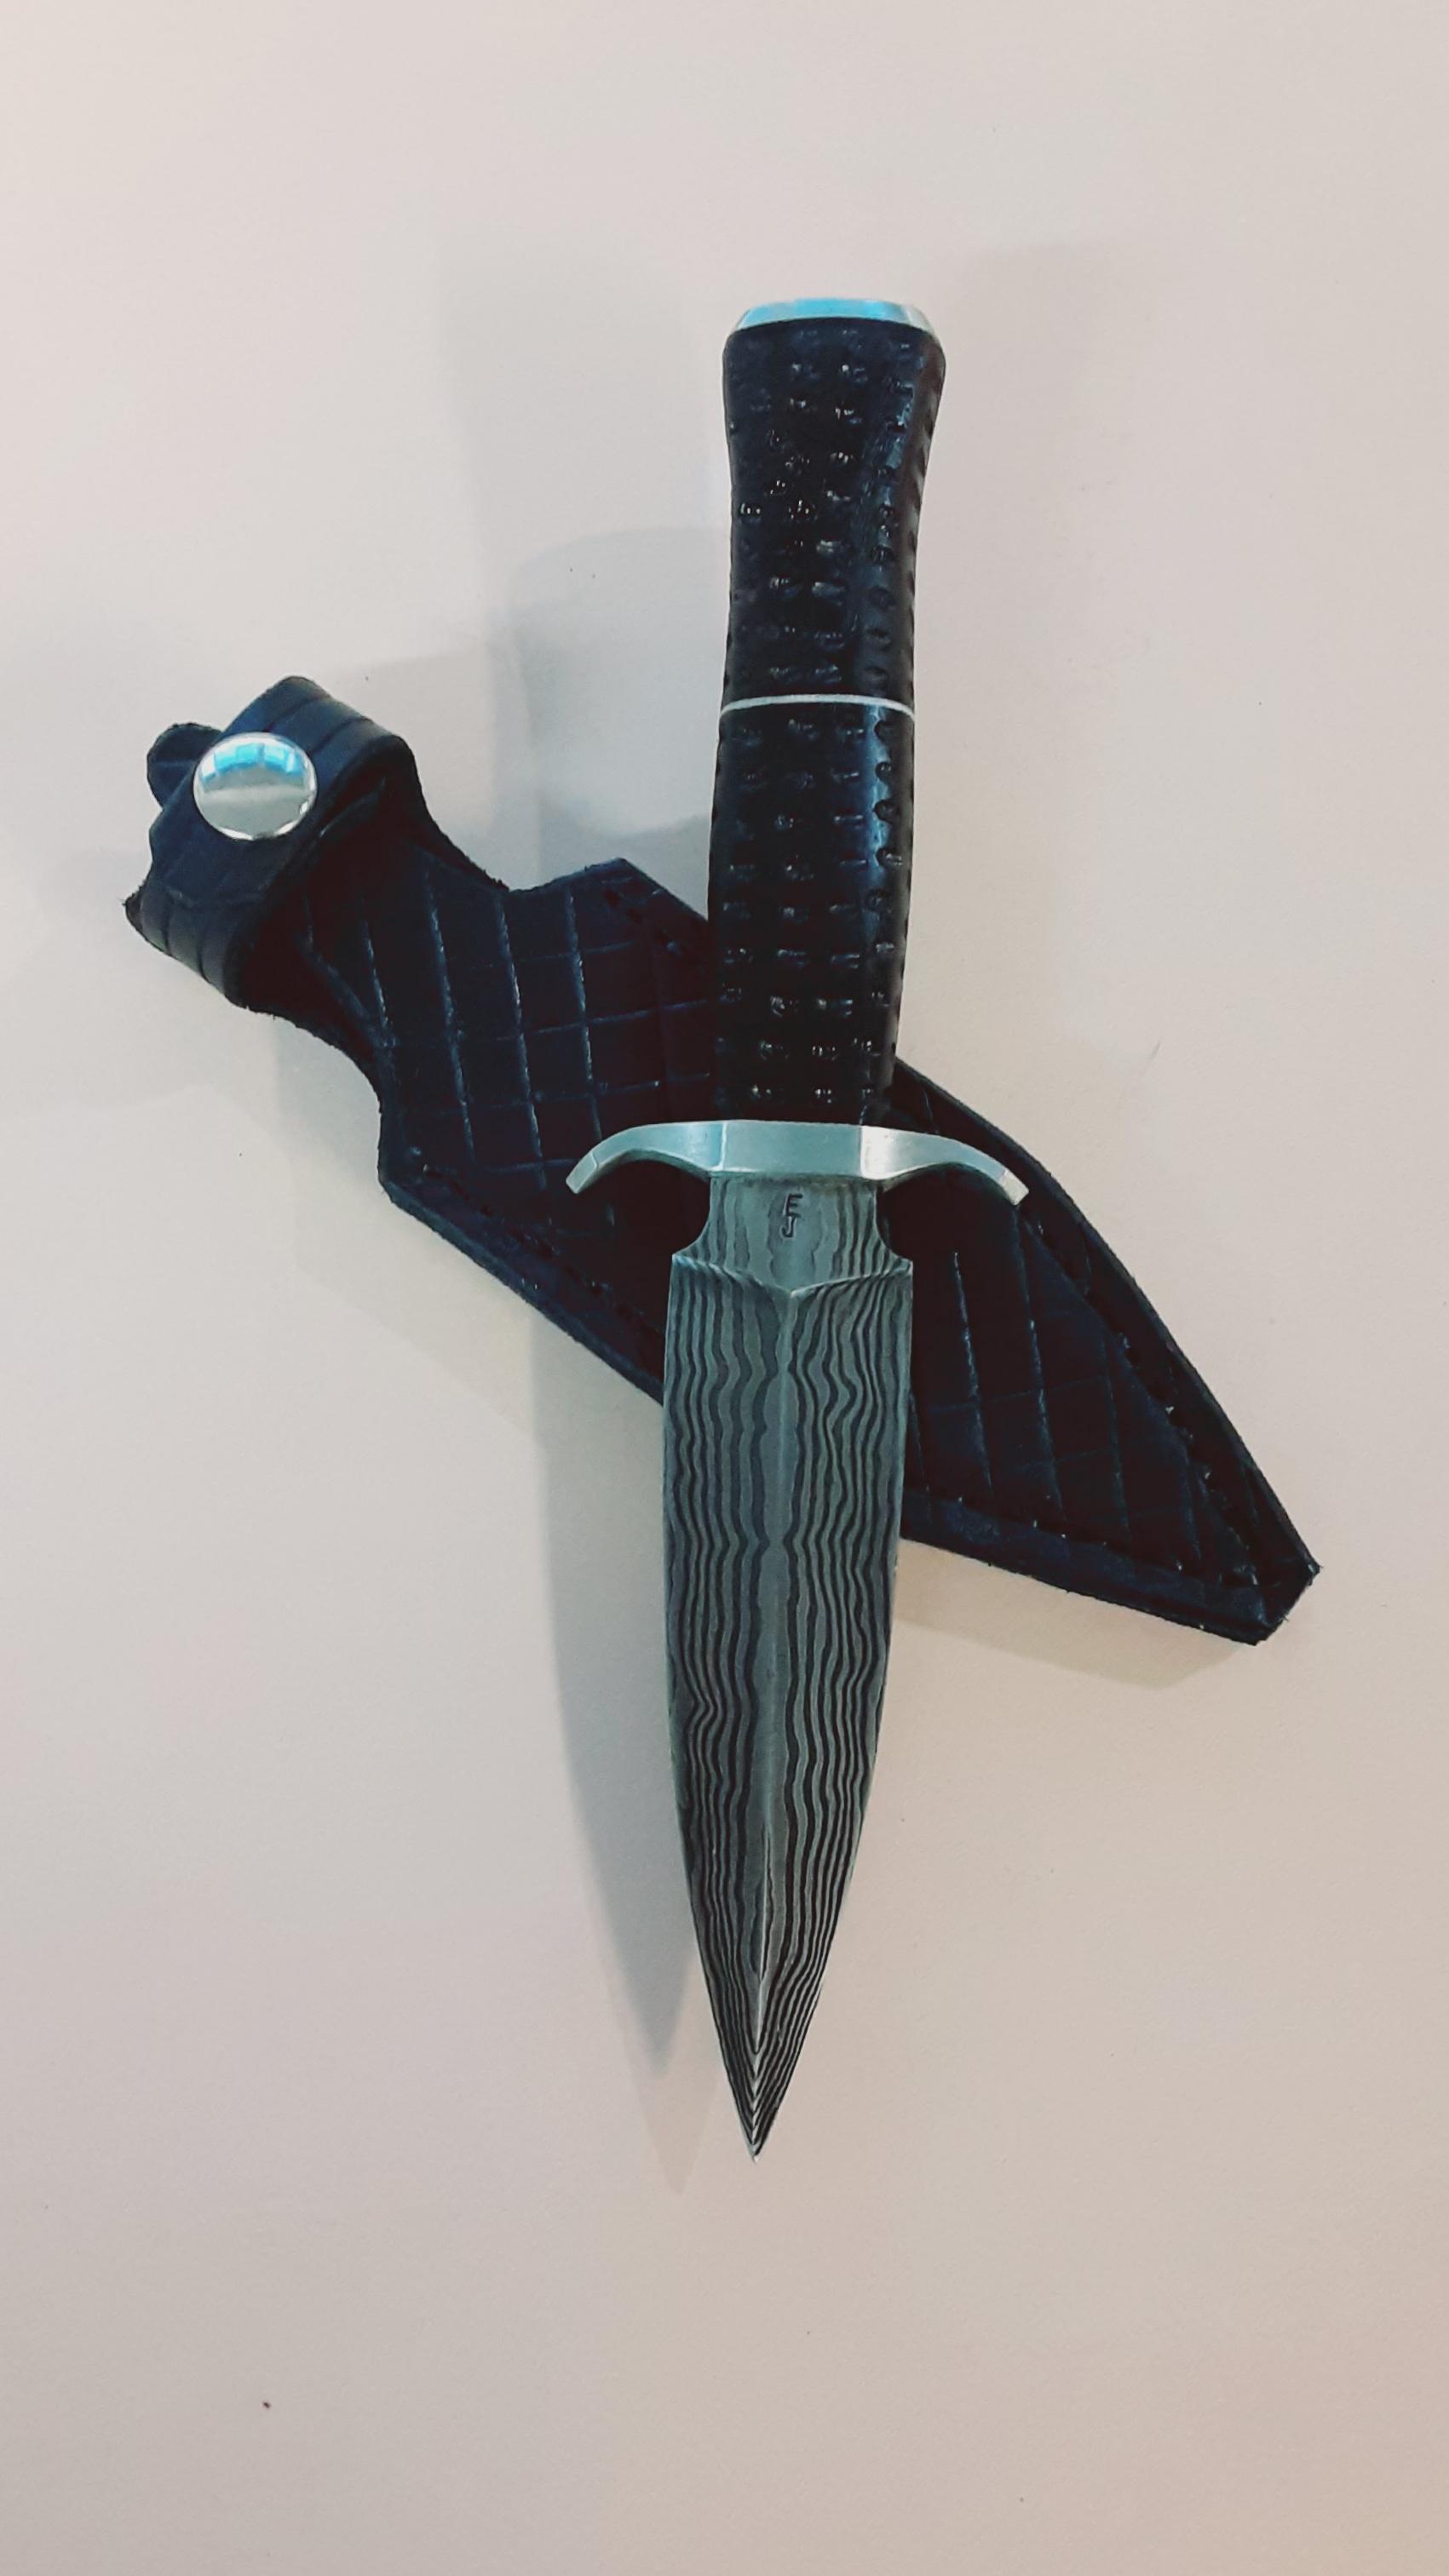
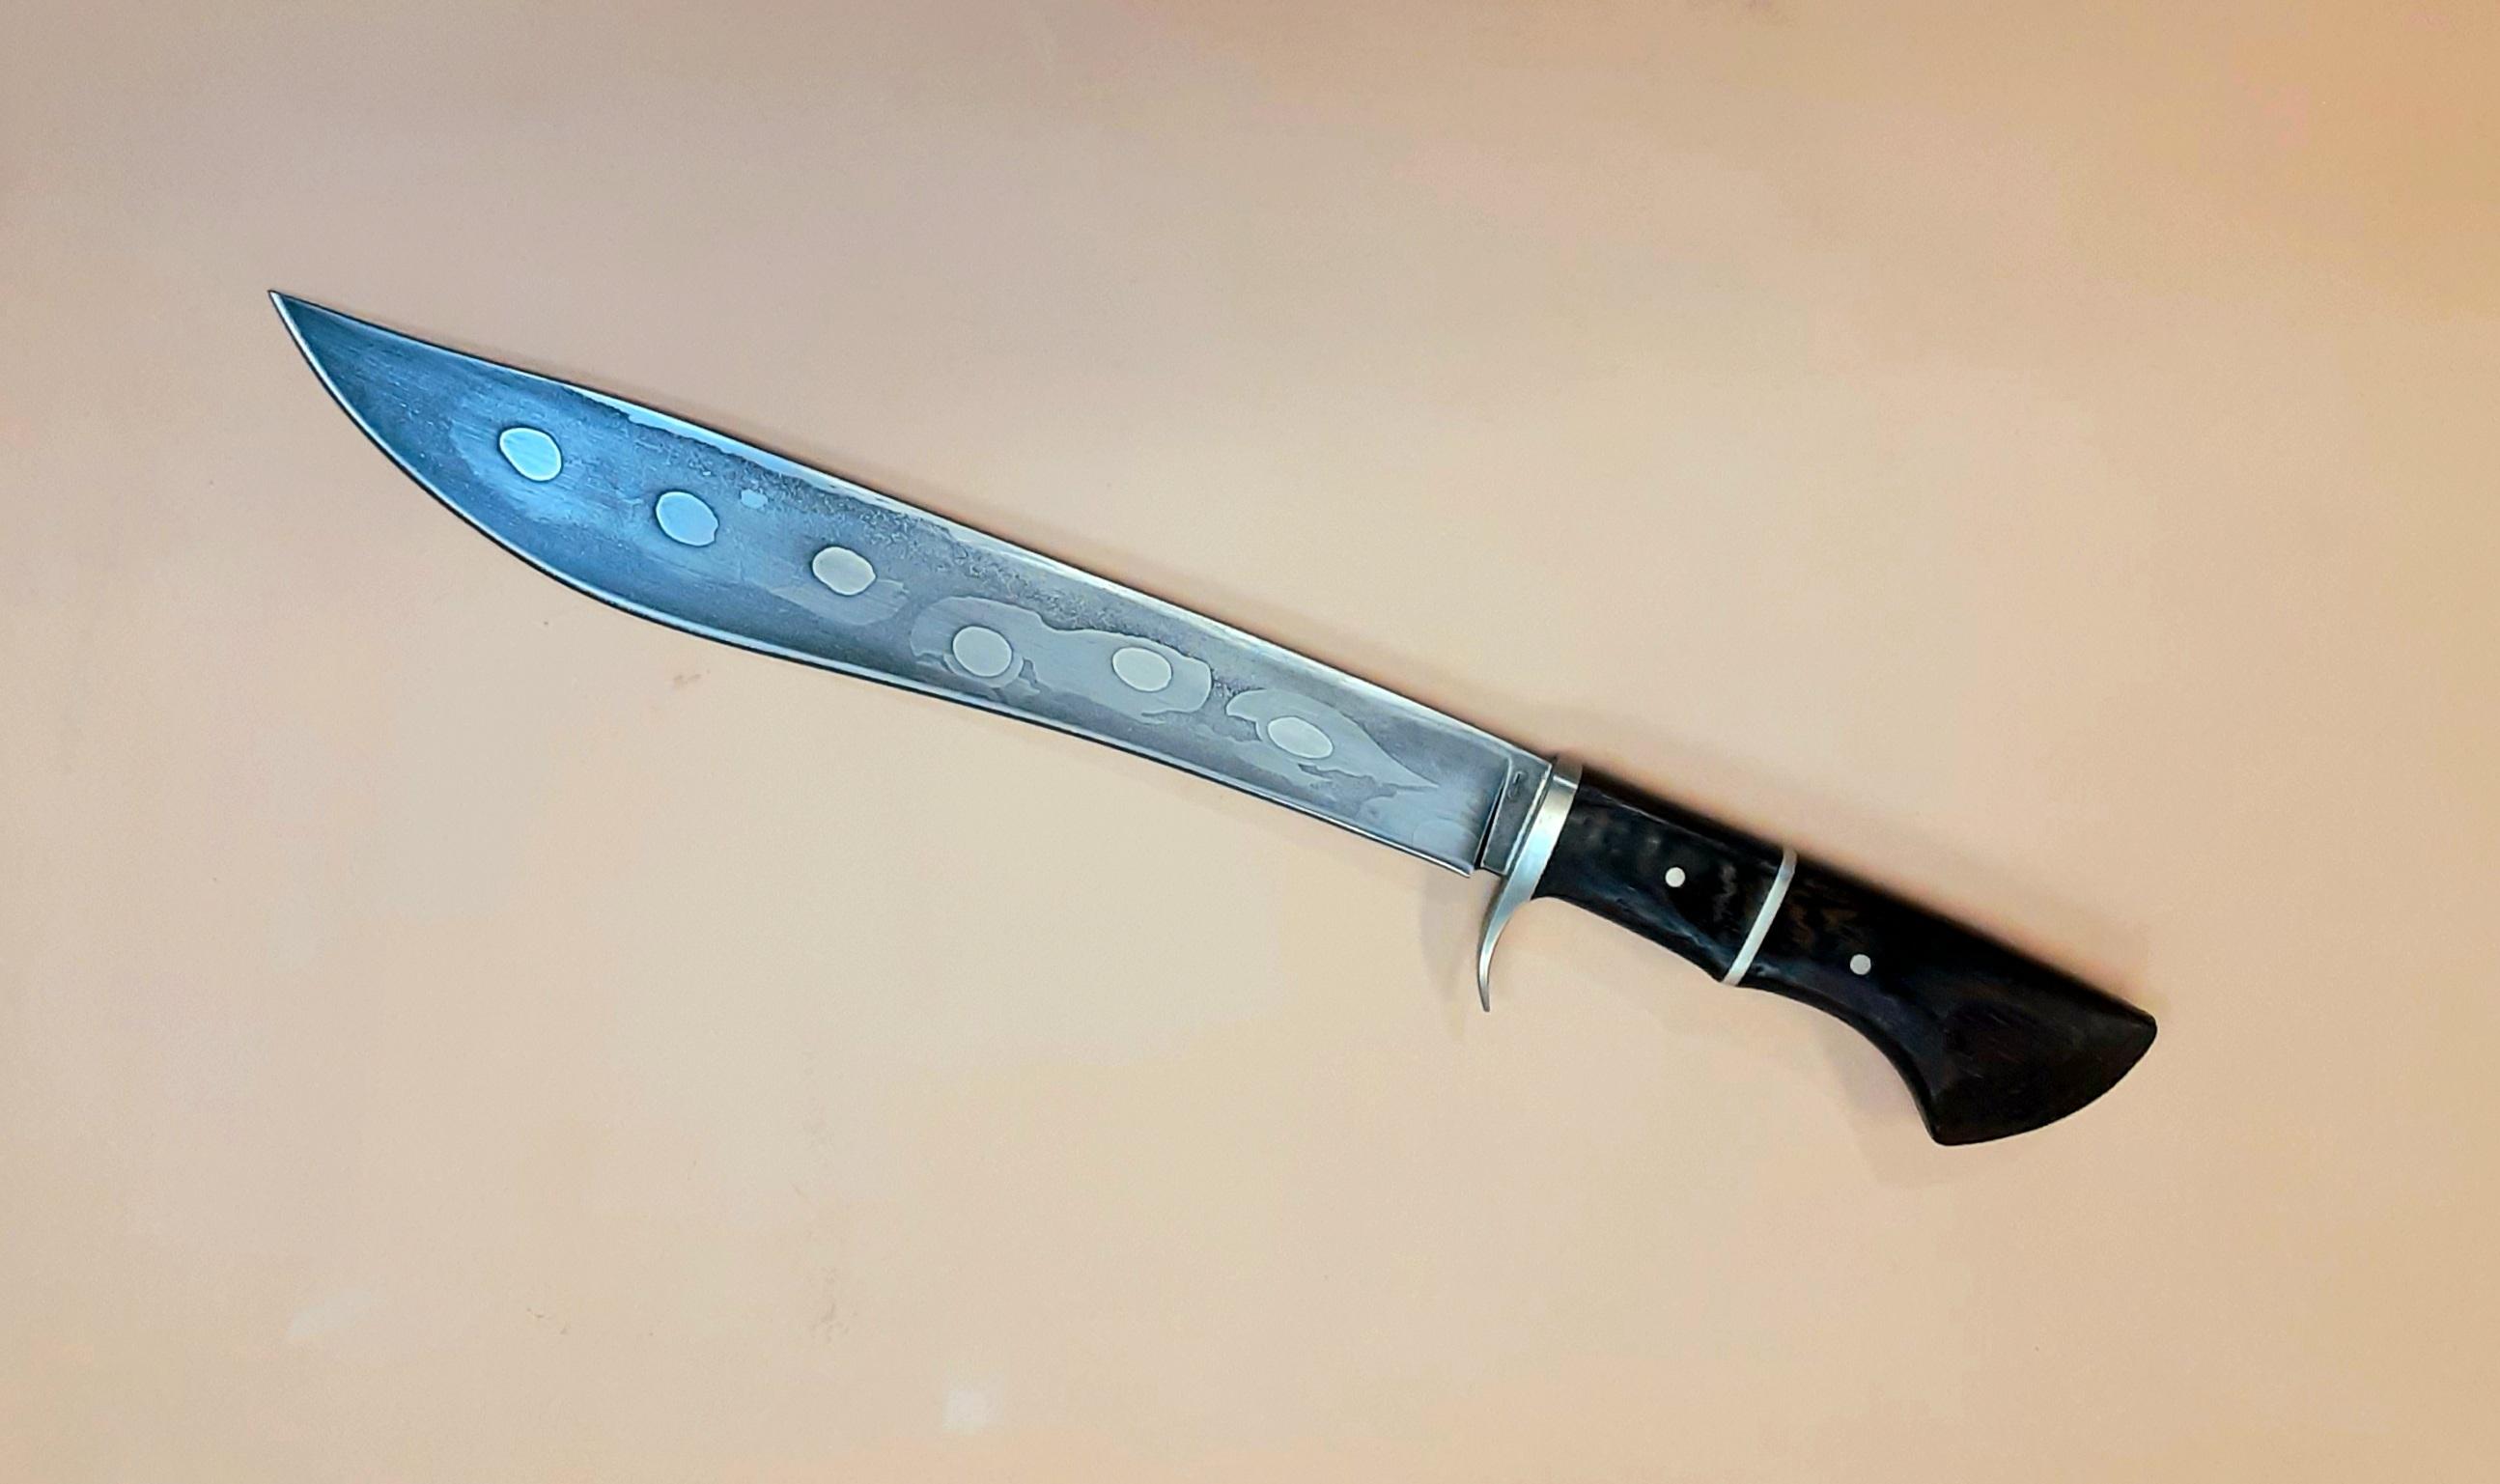
Here are several blades I built recently. The kitchen knife I finished today. The blade is 1095 high carbon with a handle of Koa. The falcata below that I forged from motorcycle chain and 1084 powder cannister damascus. The fittings are nickel silver and the handle is African Wenge. Next is a 4.5" blade Japanese hissatsu with some of my 32 layer damascus and local Alaskan Birch. Then a bowie, and last a dagger also from my 32 layer with nickel silver fittings and an ebony handle.


-
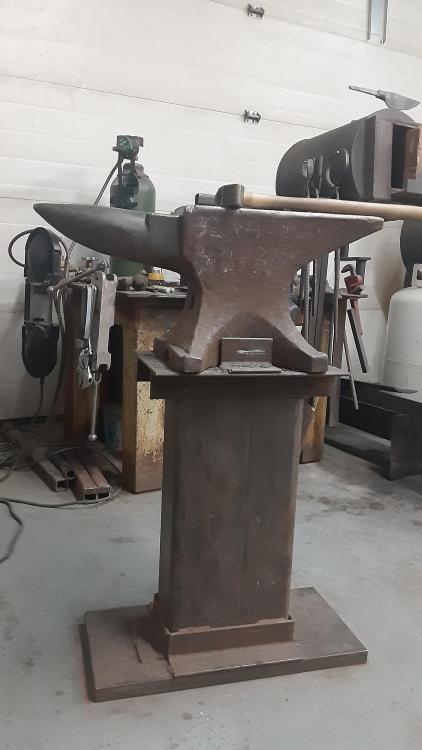
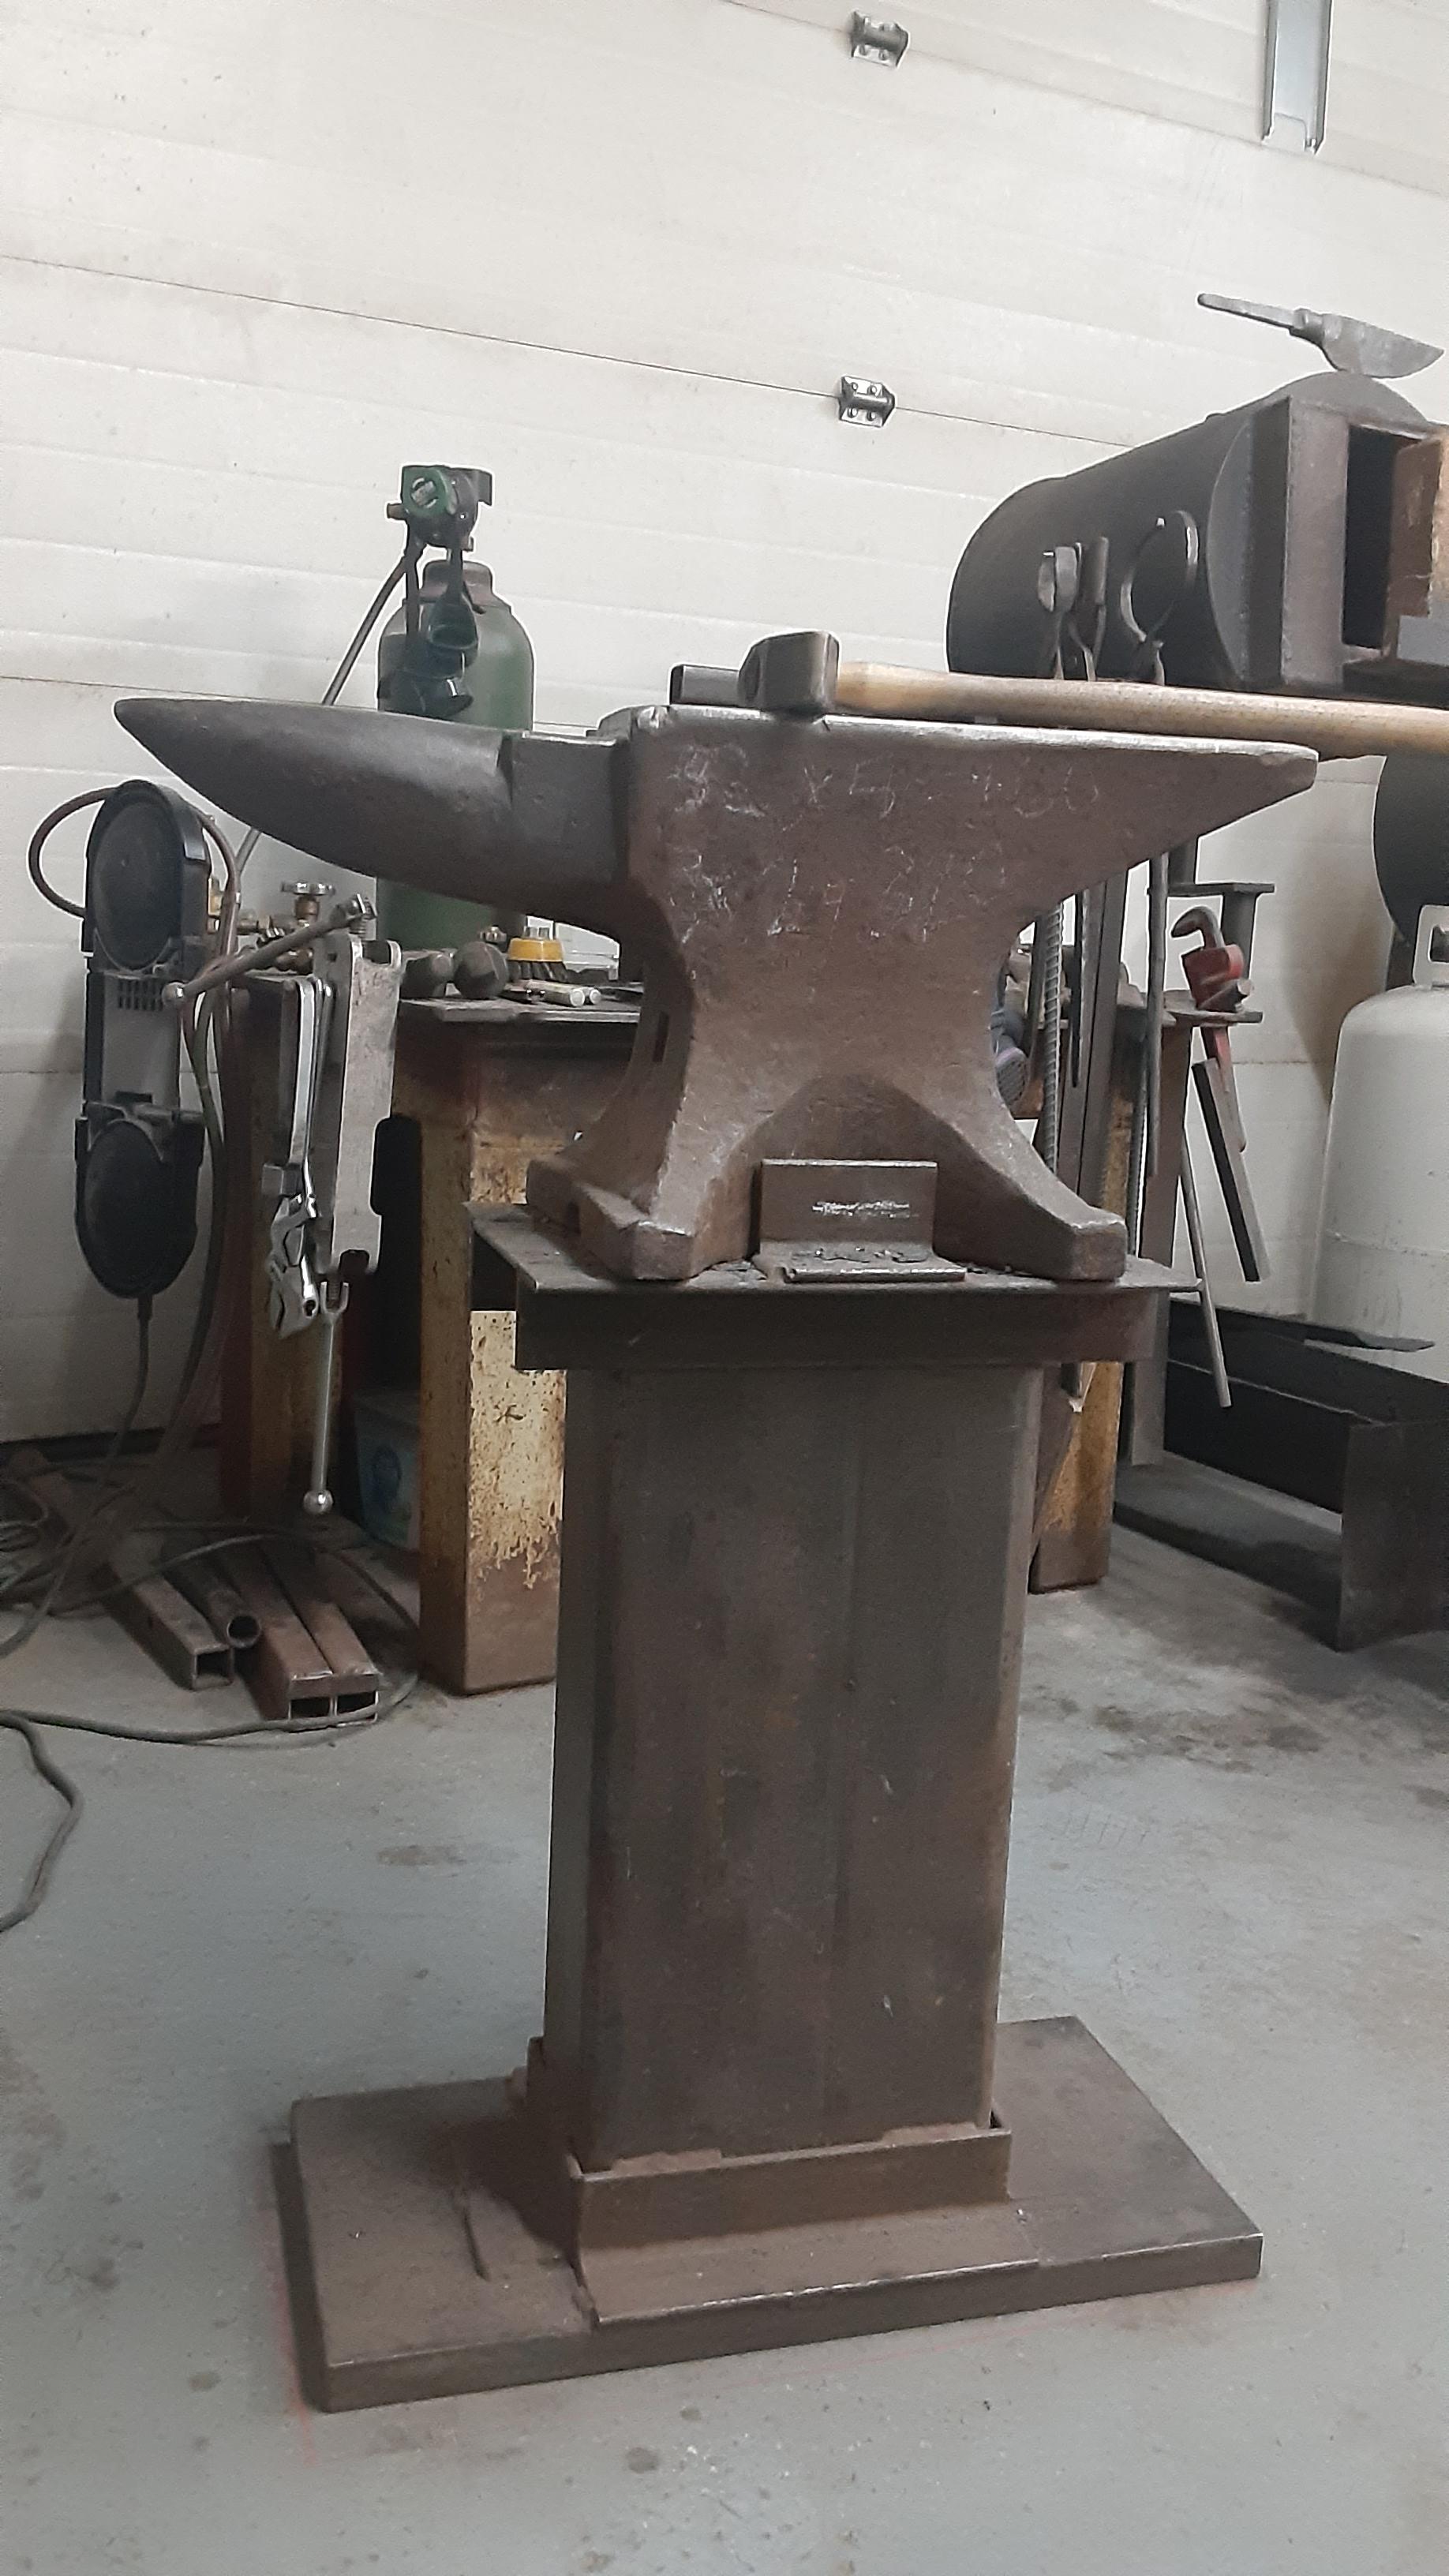
Ive got an old 200 year old, about 115lb Peter Wright made in England. Its in decent shape. I bought it from the man who turned me from a knifemaker into a bladesmith.
-
On 11/17/2021 at 7:01 AM, Merlin05 said:
Speaking of welding on spring steel:
IMO, Scott made two mistakes when he made his Burke bar: He hardened the bar, then tempered it. Despite spending quite a bit of time discussing tempering, i don't think he tempered it to a high enough temperature. The other mistake was that he left a forging defect right at the bend of the bar; he called it a "Beauty Mark".
Scott made this bar for fellow YTer Andrew Camarata - and Andrew promptly broke it. He very briefly shows the repaired bar in one of his videos and it appears it broke right at the forging defect near as I can tell. The repair? Andrew welded it right up; says it has worked fine since then (see his comments in the video in the OP.
So, relevance to this thread: Everything I've read for pry bar tempering is to leave it as-is after normalizing; the failure mode should be bending, not breaking. Granted my normalizing procedure may not have hot enough or long enough to cool or whatever. This steel has never been hardened or quenched since it left the factory; it's been brought to forging temps, not once but twice and it sat in a "tempering" oven for 6-8 hours total. I plan to heat it up one more time to at least a dark blue temp before I put it into any heavy use.
If it breaks, so be it; I've got tons of leaf springs hanging around here.
Im curious what the broken Burke bar looked like in the middle of the broken section itself. Steels grain structure never lies and can easily be seen with the naked eye. A coarse, sandy grain structure is a sign of overheating in the quenching process and even though it may be hard, makes for very weak steel. The steel, when quenched at the appropriate critical temperature and then broken (prior to tempering) will look smooth as silk. If it is given an appropriate temper after being quenched at the correct critical temperature, it essentially cannot be broken. Scott did temper the steel long enough and hot enough for the intended purpose although its typically a good idea to give it a 1 hour tempering cycle to insure there is no untempered martensite. Based on the blue color he described, the steel was at approximately 550°F. What he did is called flash tempering. I believe he might have gone wrong resulting in a break for one of two reasons: 1. Didnt quench at critical temp or 2. He finished the cooling process in water. It is very risky to finish cooling medium to high carbon steels in water. Once its temperature has been driven down to about 400°F in the first few seconds of quenching, it will continue to air harden as it cools. Also, not to pick at him too much
but Scott was a bit off on his terms-kinda funny hearing his discription of the heat treating process. The terms are actually:
Martensite is hardened, untempered steel;
Austenite is steel at critical temperature
Ferrite is steel in its annealed state
-
On 11/4/2021 at 1:09 AM, Frosty said:
Welcome aboard Bladesmith in beautiful Soldotna, glad to have you. I'm just the other side of the road from Wasilla a few hours north of you.
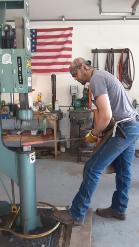
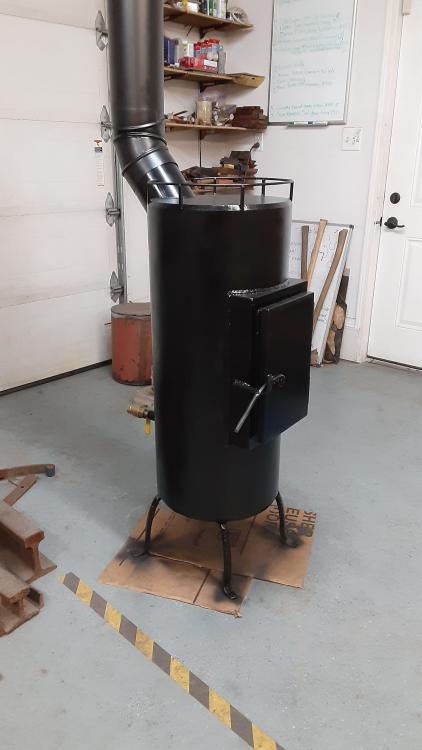
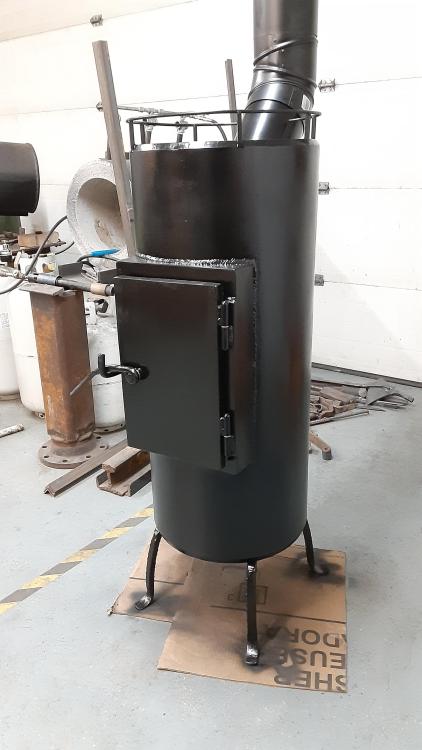
Thank you sir, glad to finally be a part of the forum. About 99% of what I build is blades with a little welding thrown in on occasion and a little bit of blacksmithing. Honestly, Im not much good as a blacksmith and have specialized in the forged blade for some time now. I built myself a woodstove recently, and here are a few blades I recently completed.

-
Yes sir! It is, thank you very much. I just checked the pricing and as you mentioned, a steel scrap anvil is probably his best route. They are around $350 before shipping. Thank you
-
Hello all, I am trying to recall the manufacturer of a specific anvil. It is similar to a rectangular Japanese anvil (although if I remember correctly it has a hardy hole) and wieghs in at only about 80lbs. It is currently being manufactured at that weight so that it can be shipped at a reasonable cost and is meant to help begginer bladesmiths get underway. Im inquiring for a young man who wants to forge some blades and needs an anvil. Thank for any help you might have.


Small rectangular anvil
in Anvil Reviews by brand
Posted
Thanks, the Falcata/Kukri has a blade of just over 12inches long.
You can call me Zeke if you'd like--its what most people call me.
The woodstove has an air supply coming in the backside with a quarter turn on it. I will run a pipe from it out the wall of my house to that I wont being pulling air through thd cracks in our tight house. Im afraid there's no ash cleanout. I'll just have to man up and scoop out the ashes")
by the way, how to I attach the name of the person that Im replying to at the top of my reply??
Thank you
Oh, just figured it out-ha!