Sendit
Members
-
Joined
-
Last visited
-
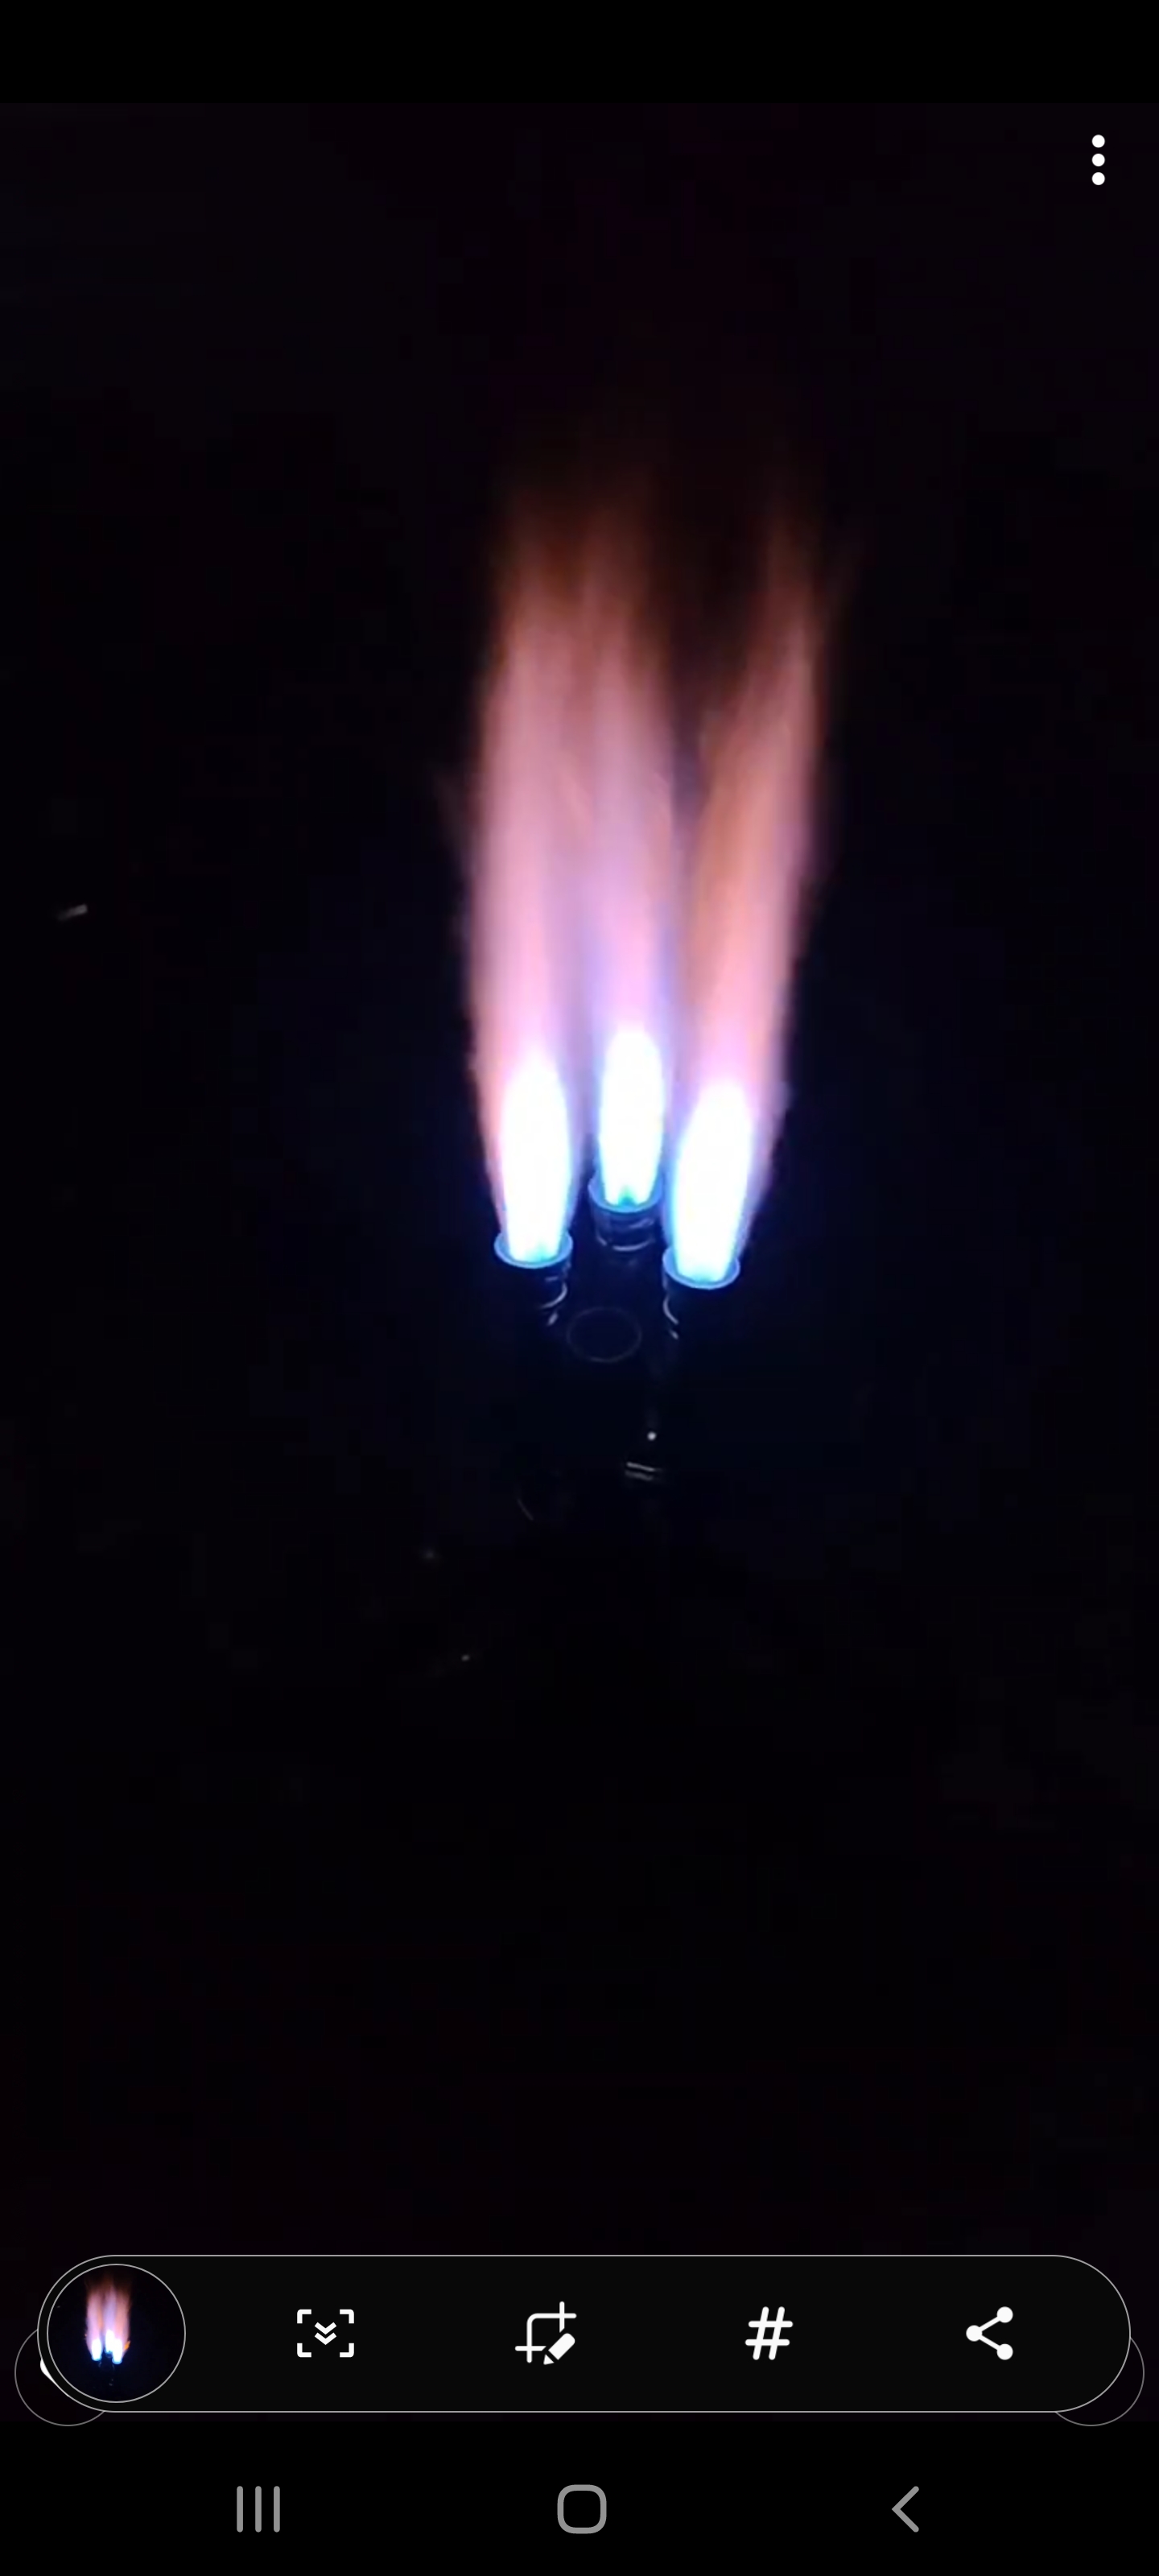
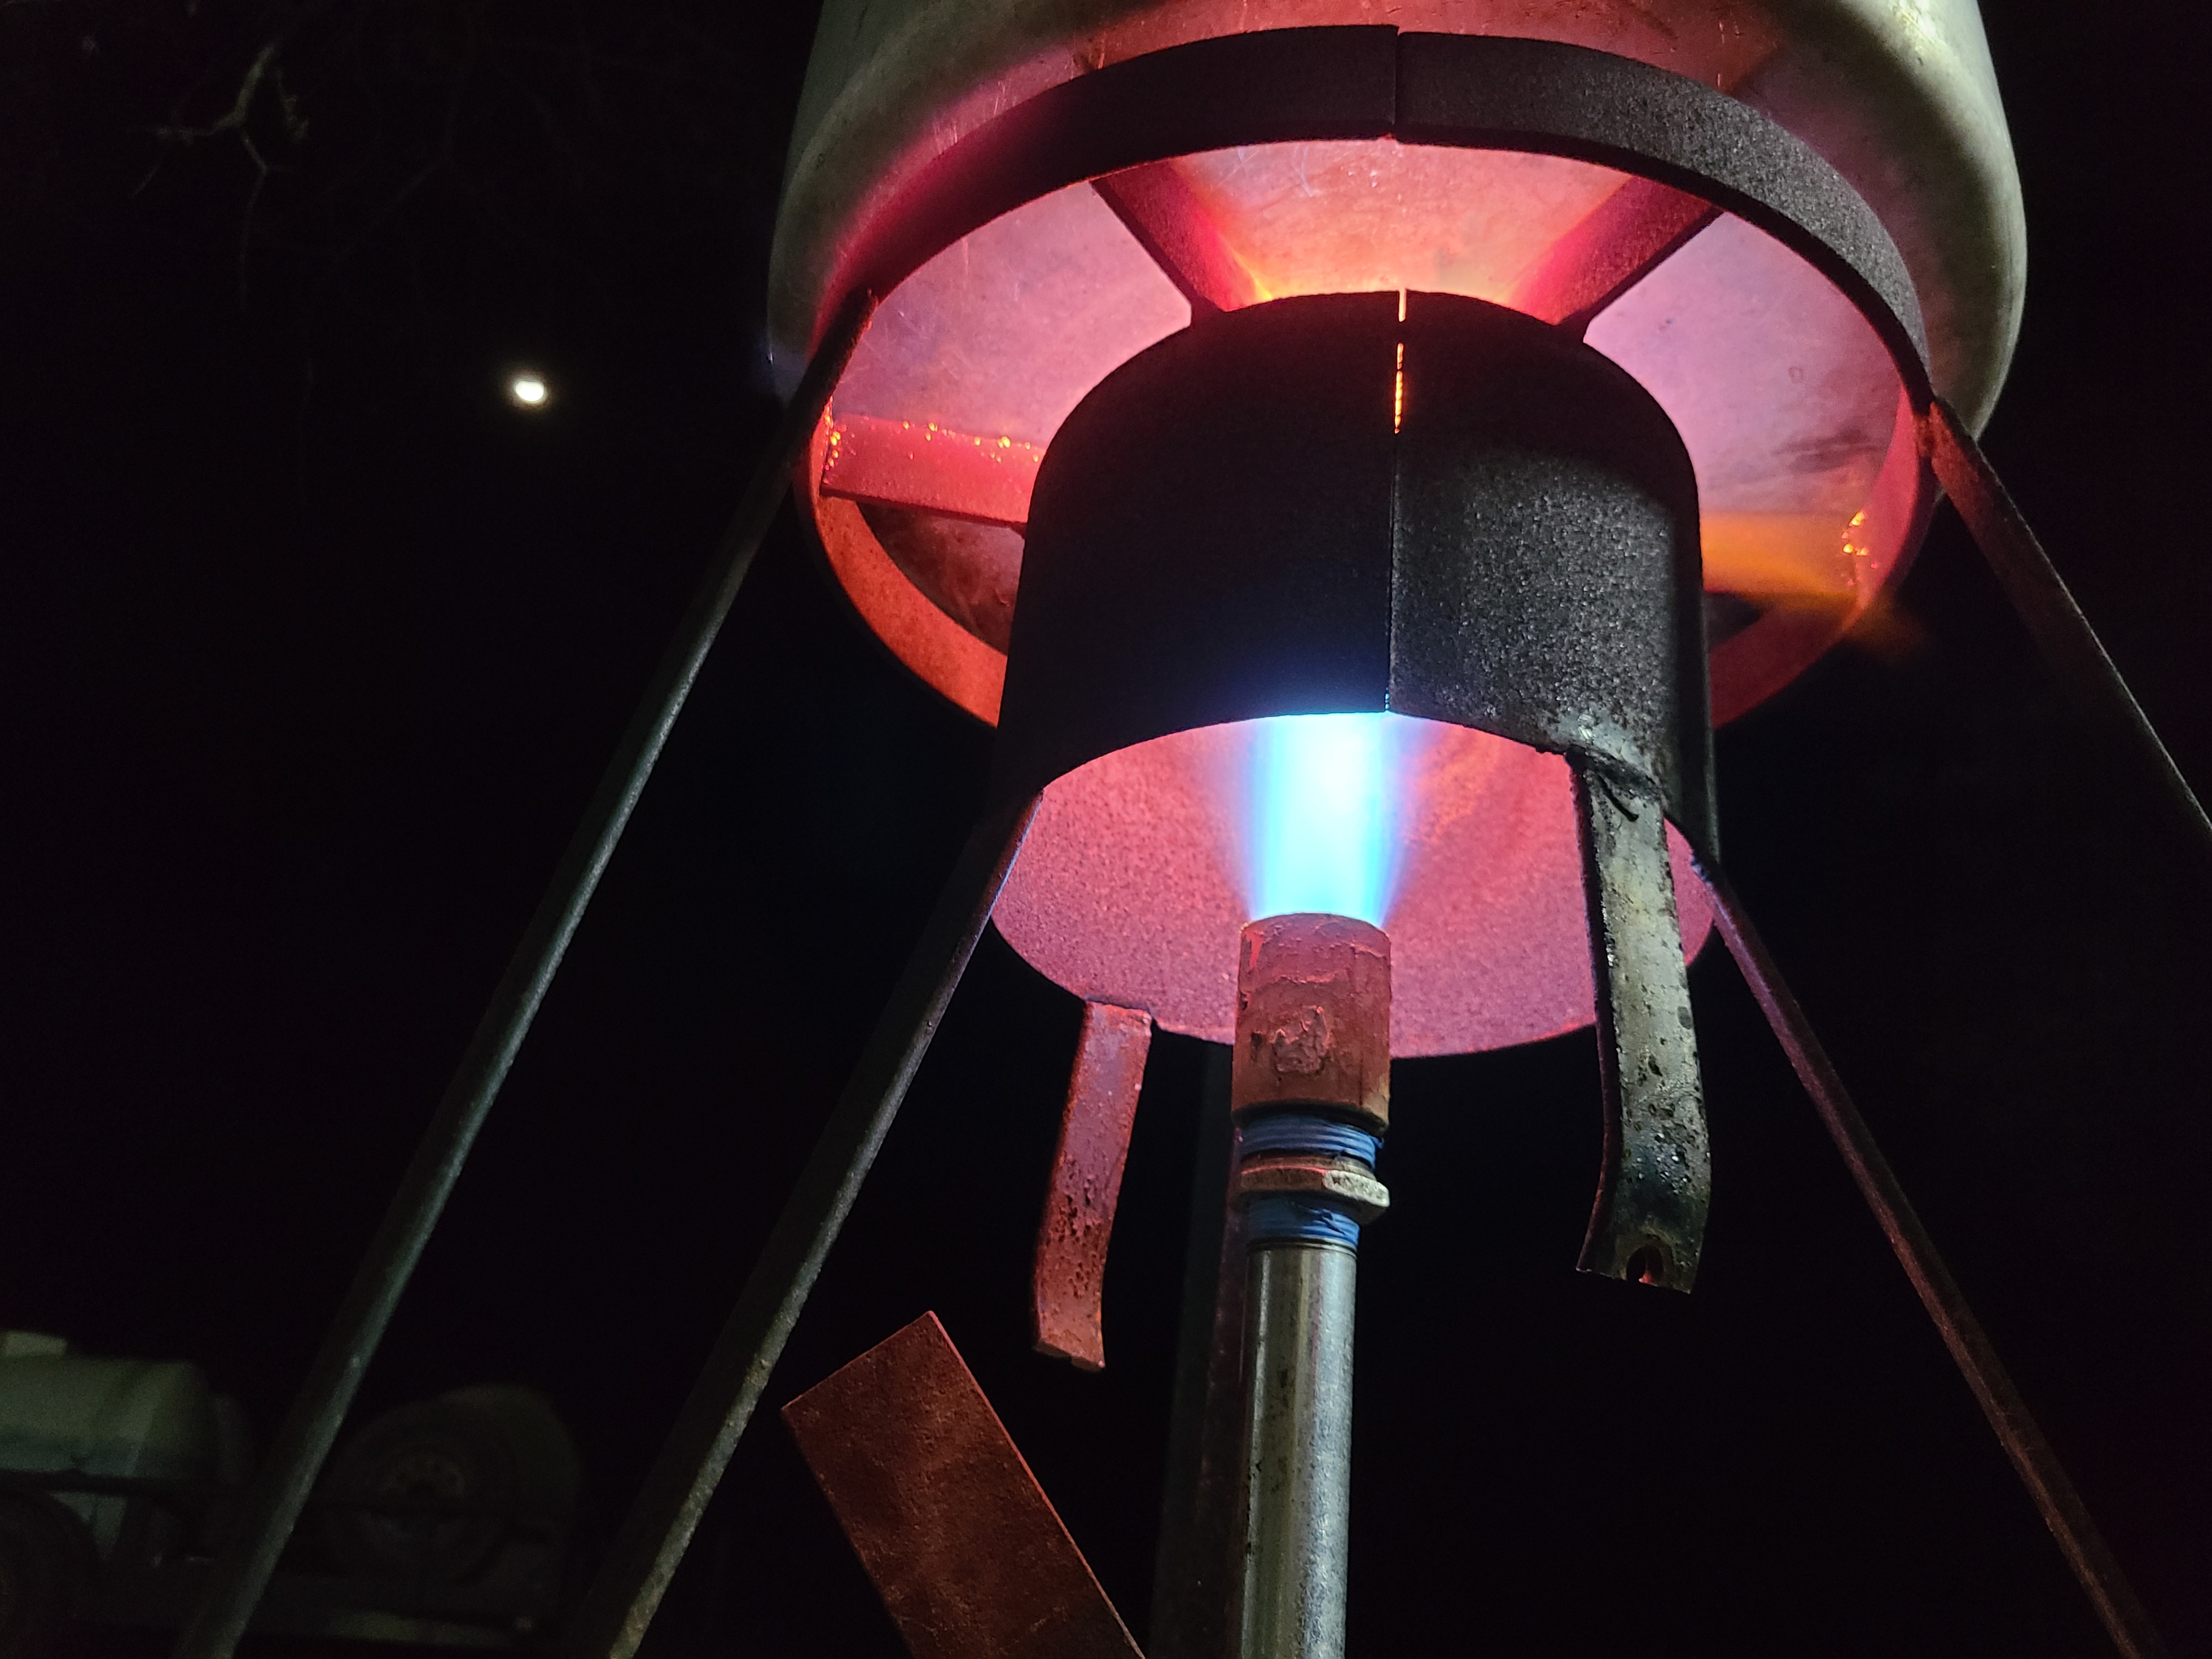
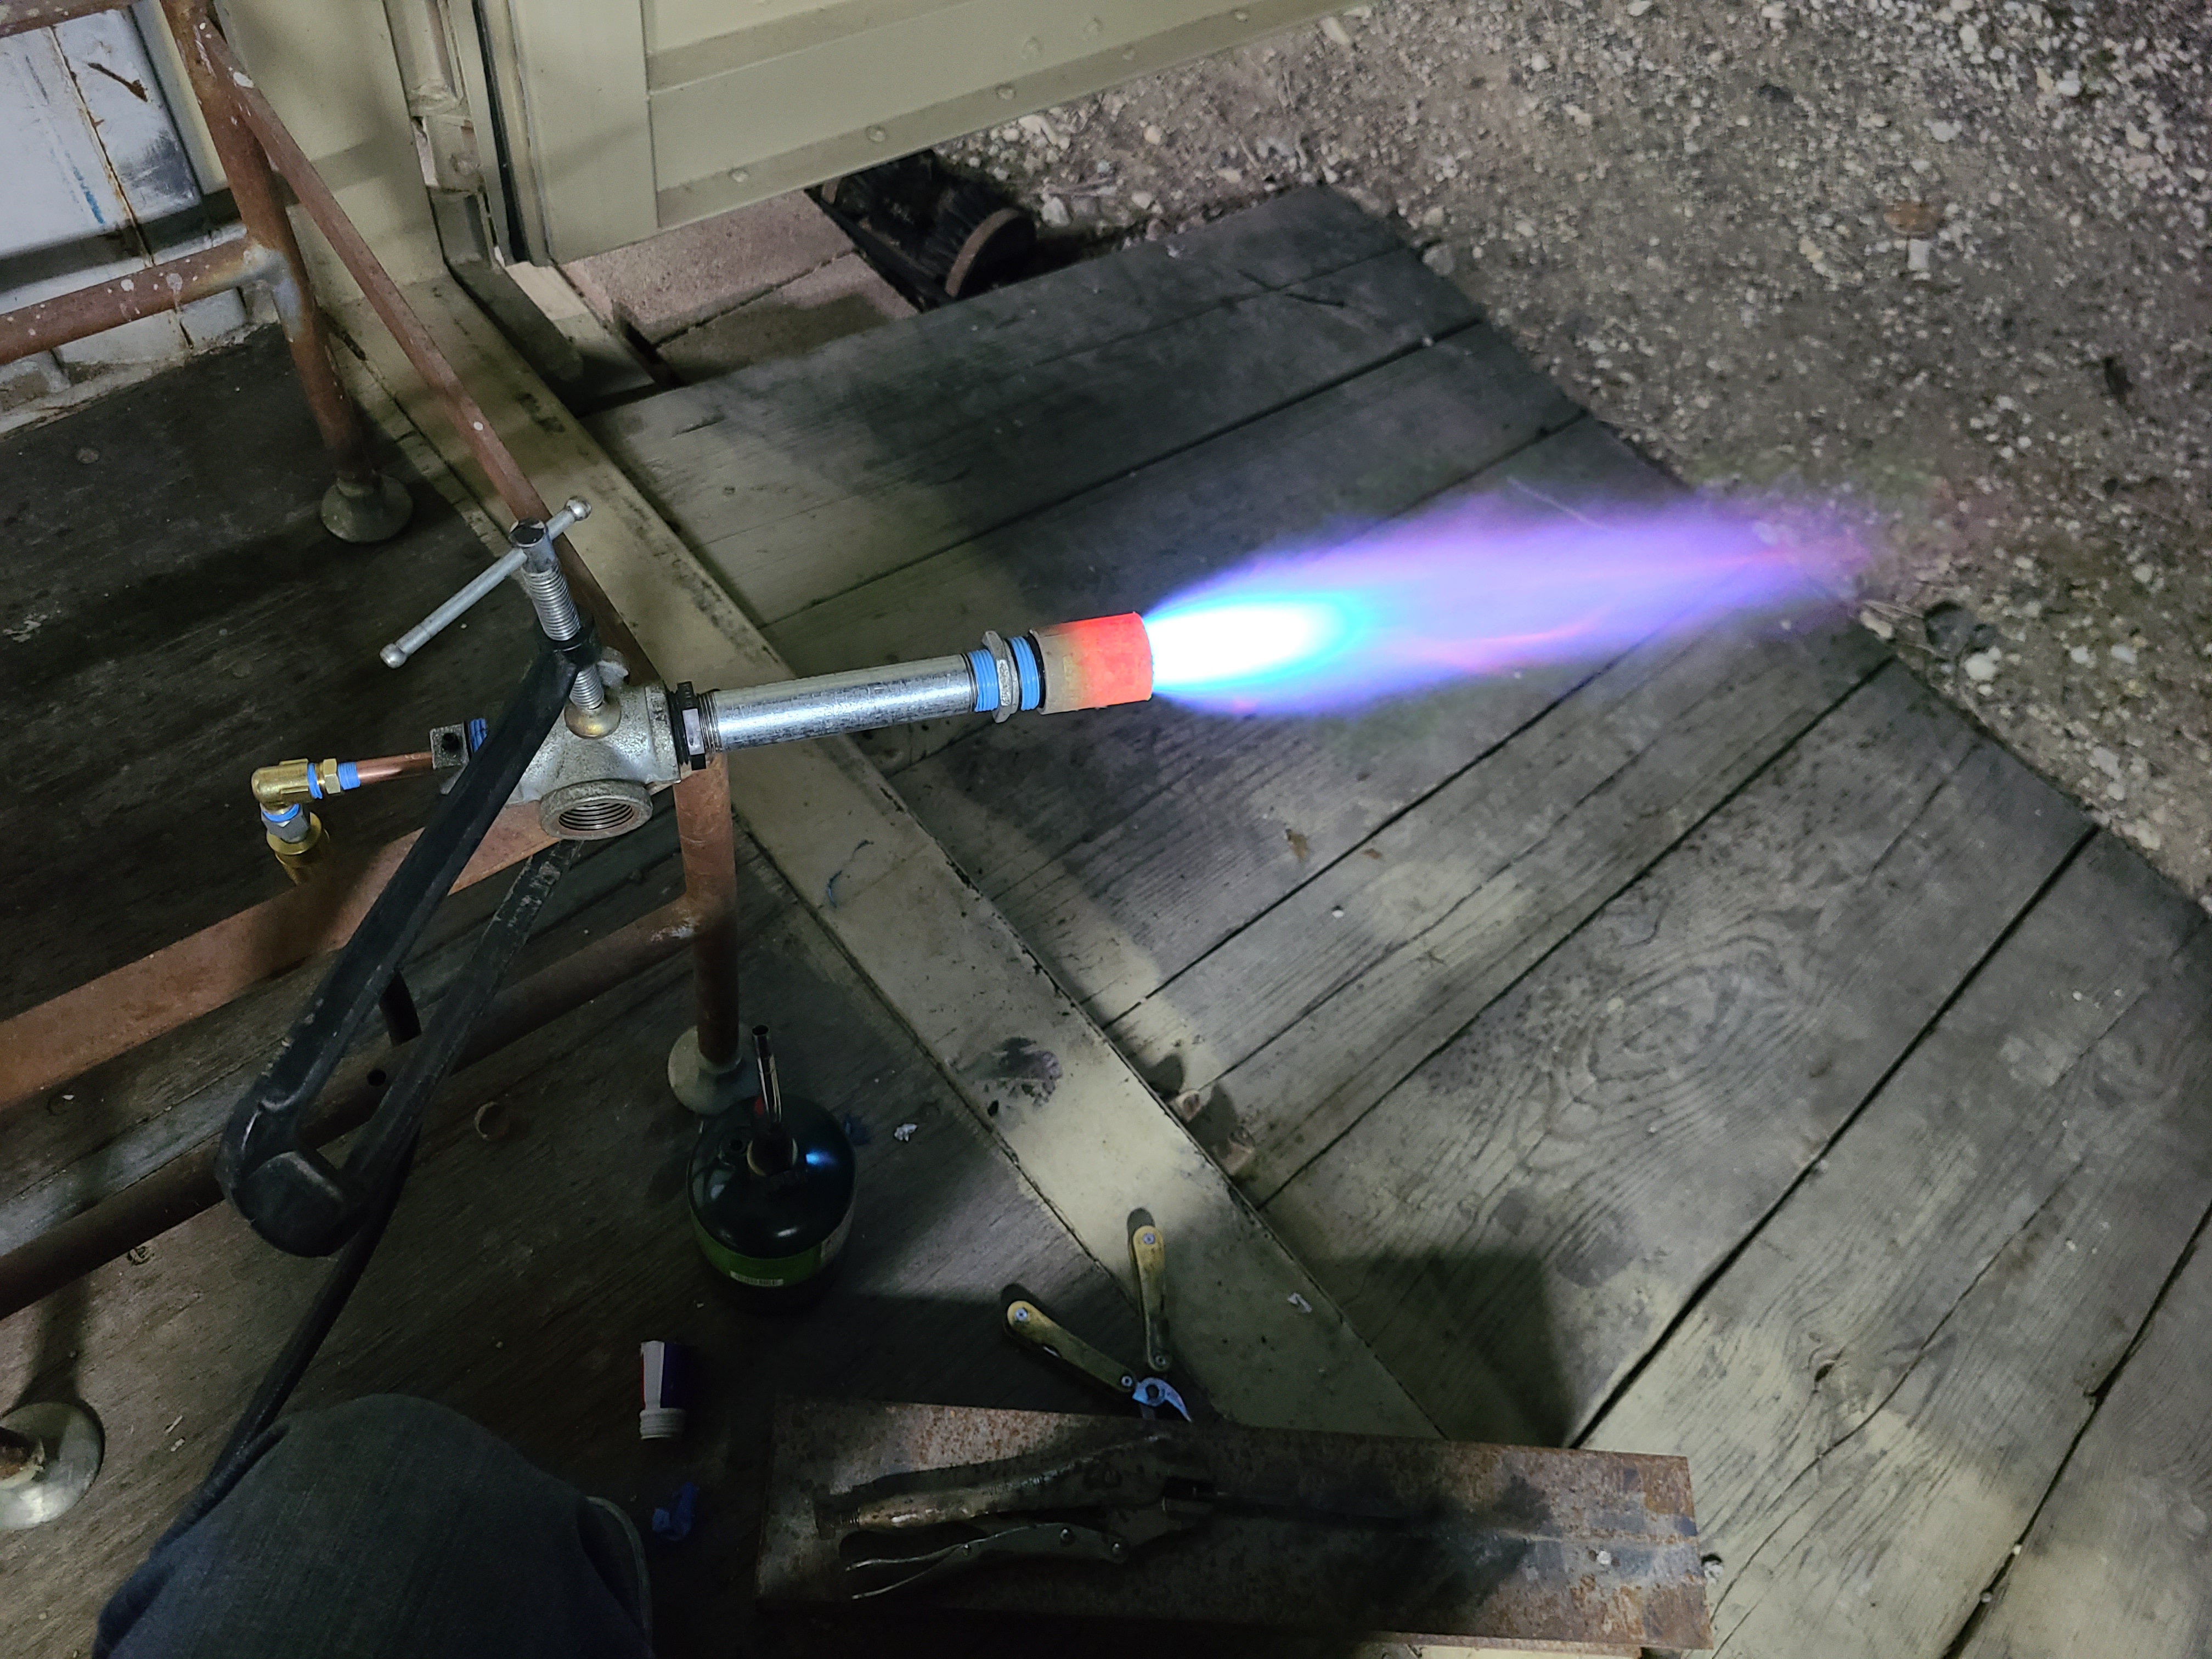
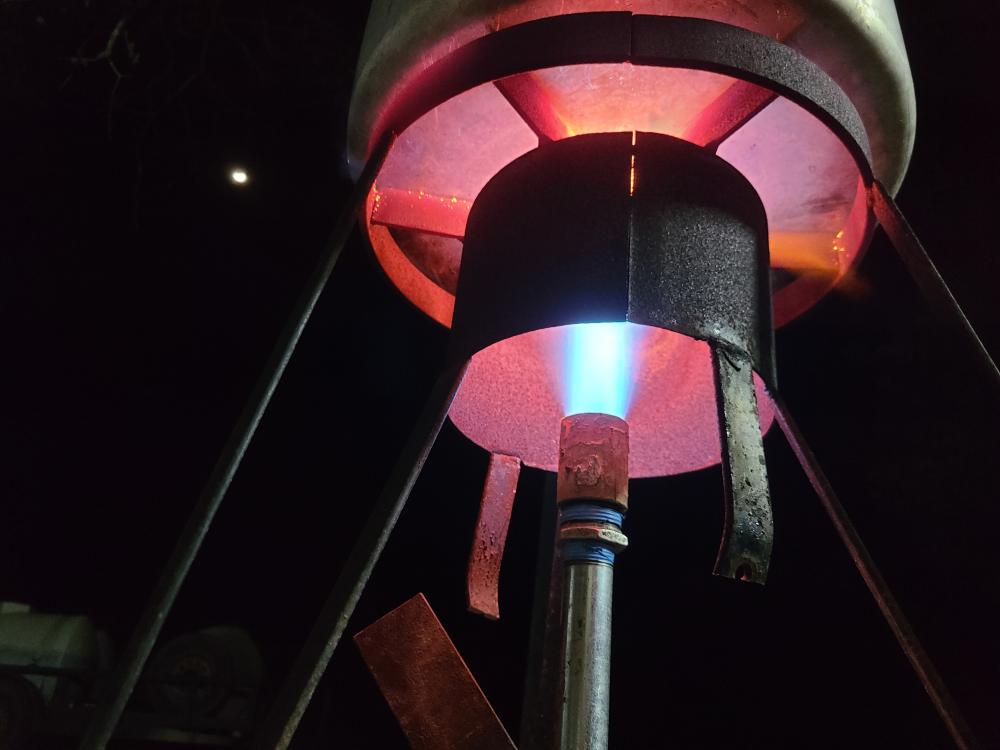
The sidearm was just one I found in the web and wasn't built by me. I liked the design for my application only because after reading and research I was under the impression that I might have to tune the air intake port and that would have allowed me better access with these being positioned under a large pot. The second burner photo is the one I slapped together myself just to get a feel for what these burners we're all about.....and WOW. They're just all around badass. It handles a wide range of flames from low to xxxx xxxx and has handled the wind blowing extremely well. Couldn't be happier. I had a 1" cross and plug, so I just milled the plug to fit a long 1/8" nipple with two set screws and a F x 1/4" flare fitting on the end to tap and hold the .035 mig tip. I did it this way so I could play with the settings of the mig tip to see how sensitive it was and to my untrained eye I didn't see much of a difference to justify building more this way. In the end I've stuck with Frostys trusty design and it is hands down exactly what I was looking for on this project. I go so far as to square the poorly cast fitting and nipple to my mill, then use my centerfinder on the ID of the nipple. I remove the nipple and drill from the inside out so that I'm drilling my hole based on true center of the nipple vs using any of the other external measuring points that may not be true to the center. I did a test run with the one burner on a very small and thin aluminum pot and it worked flawlessly. Brought 20qt of 49°F water to boil in 16min with zero visible negative impacts to the pot. So now I have three of them to mount in a stand and will hard pipe copper to a 4 way cross mounted to a bracket with a quick disconnect. I also picked up the fittings to daisy chain three 30# bottles together to help with tank freeze. If this works well this season then my plan is to go all out and build everything for the entire project (except maybe the mig tip, lol) from stainless. As a side note..... With all the lights off at night here in the countryside, these double as arguably the coolest bug zapper on the planet. June bugs look like shooting stars.

-
It is, it is.....but is better experienced after the work is done lol. Built my first burner this evening with parts I had at my shop (except a few brass fittings) and I am beyond impressed with the results of this thing across a wide range of gas pressures and flame sizes for the low amount of effort I've invested so far. Going to play with the setup to get a better understanding of the variables. I'm thinking I'll build two more and get them arranged in a triangle layout. Going to give that a timed test run and see how it performs as well as test my bottles with the rig. The last couple questions I had didn't receive any responses, and I understand since what I'm doing is not at the core of this forum. I'll carry on with more research and some trial and error but I think I'm in the pocket here. Thank you to all that have shared their thoughts, ideas, and advice on this forum as it has been enourmously helpful. Until next time, ~Laissez Les Bon Temps Rouler~ -SendIt

-
I like this design with the air intake on the one side if I can shorten up the gas imput with a 90 where the reducer coupling is to to help save on the overall height (I know, I know. I'm straying from the tried and true TB design). Two, three, maybe four of these arranged in an even pattern. Could they work in proximity to each other?

-
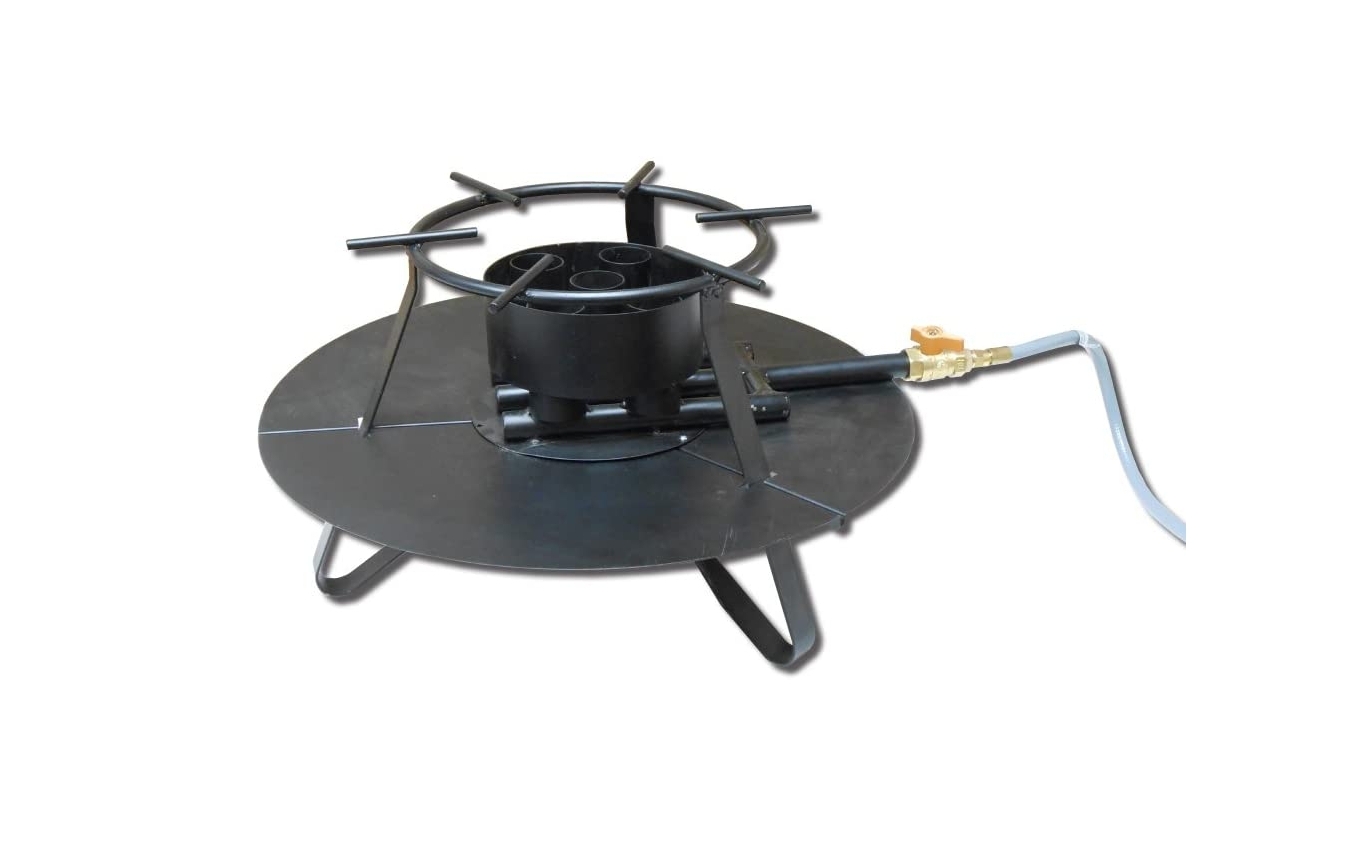
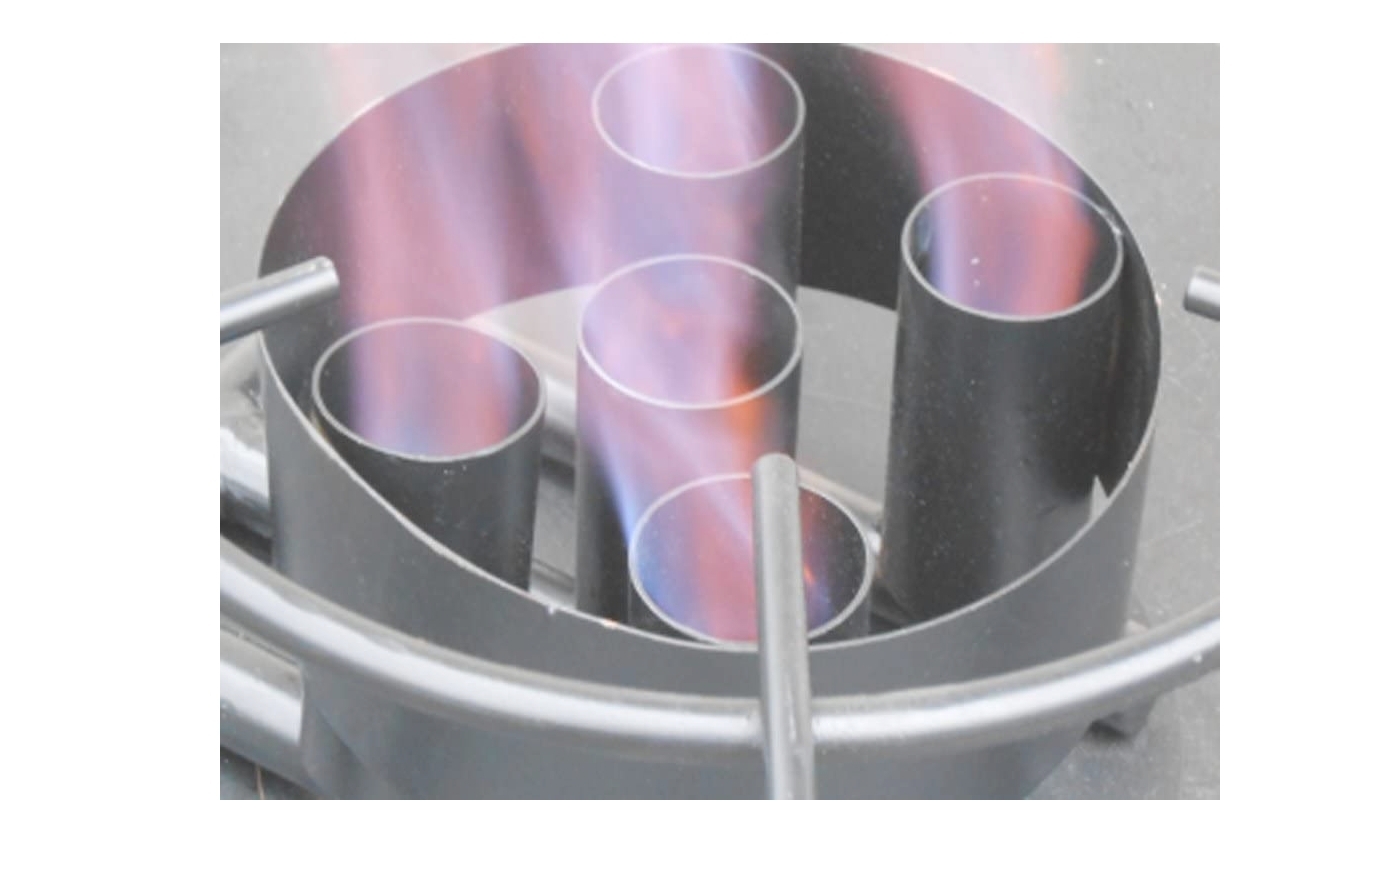
The center tube idea is a good thought, but would interfere with the straining basket that sits inside the pot. Overkill??? Hah! That's my middle name. I always say it's only weird if it doesn't work. So yes there are plenty of commercial options, but they are flemsy and boring. My compulsive and challenge driven nature has me determined to design something that screams precise flames and BTUs like a tesla rocket....at half throttle. I'm just searching for the best fit to produce these flames. I studied the NARBs last night, and while the results of those burners seem right in line with what I'm looking for I don't think they will suit me for reliability and durability. In essence, I'm looking for the best performing and strongest burner(s) to assemble in a manner similar to the photos I've attached where they are using an inferior burner design compared to you gents in the forging world. Hypothetically, if 2 or more 3/4 TBurners were used side by side what's the minimum distance apart they would need to not interfere with each other's flame etc?


-
Hey, thanks for the replies. Here's a little insight to the purpose in case any are unfamiliar: as ThomasP mentioned it's a very large pot that is sized to hold ~two 35-40# sacks of mud bugs and a couple of times each year it's used to cook more than just two sacks at one feast. I first have to bring the pot to a slow boil to start cooking the "extras" then load the basket and drop in the Crawfish(CF). That always brings the temp down, and they need to come back to a boil for a mere minute or two before cutting the fire off and starting the "soak". In my circles, the best flavor here is achieved by cooling the water down by different means and allowing them absorb all the goodness. THEN - it's time to repeat. The water has been cooled from soak, so it needs to get back to a boil pronto or else I may expedite the risk of overhydrating myself with adult beverages during idle time. So, I feel it's worth my effort to test out a burner and see what could happen. My fab skills and resources are strong, but I don't want to over-exert myself on this one if I can avoid it...so I'm thinking my limit may be trying a large single T, or possibly doubling up two smaller T Burners. I have a much smaller pot to experiment on in case it did cause the pot some kind of trouble. I'm going to research the NARB tonight and get a better understanding. Whatever the case, it would probably have to be square since that fits my abilities better and would still be sufficient. I've attached a picture of a commercial double-jet burner that showimg their layout. As I said they basically use the weed burner design that loses its flame quality pretty quicky when trying to get more heat to output. My stand would be taller and more robust so I would have some options to adjust a TBurners height etc. How sensitive would the forge style burners be to some wind??
-
Hello and thank all of you members for the wealth of knowledge that is shared here. I'm beyond amazed at the vast amount of information that can be acquired. I have a project on my hands thats slightly offbeat, but is related to the burner technology you folks have developed and tested so well. I would like to ask for some experienced guidance on which burner design would suit my needs the best. I'm building myself a custom crawfish cooker, a fairly small and simple stand for a 120qt pot that I want to heat as effeciently as possible using one of the heavy duty burner designs I've seen on here. The commercial jet burners that are sold today in my mind are just low end weed burners and don't seem to give me what I'm looking for in terms of quality, effectiveness, and longevity. Plus, they lack the cool factor that my custom stand and burner would produce. So with that said, would anyone advise me of the design they would suggest for this application? For my pea brain, a likely choice would be Frostys T-Burner in 3/4" or 1". Open to any and all suggestions, thanks.