

Pat Masterson
-
Posts
244 -
Joined
-
Last visited
Content Type
Profiles
Forums
Articles
Gallery
Downloads
Events
Posts posted by Pat Masterson
-
-
Very nice again Ted.
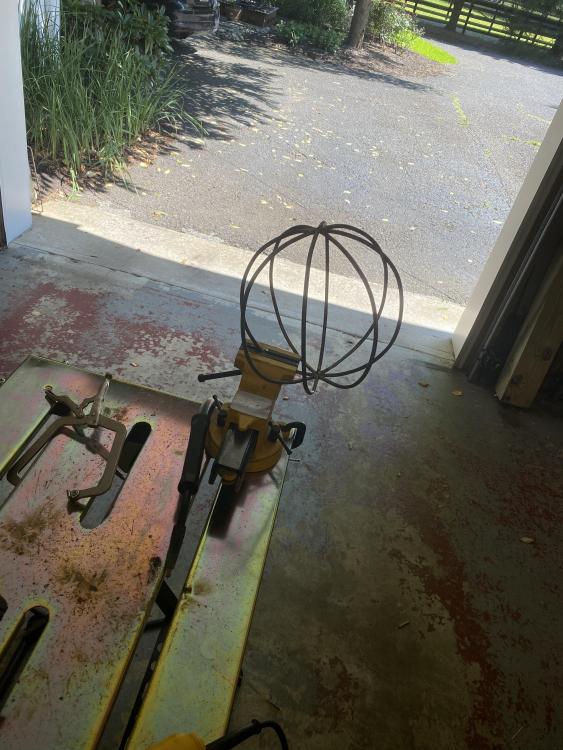
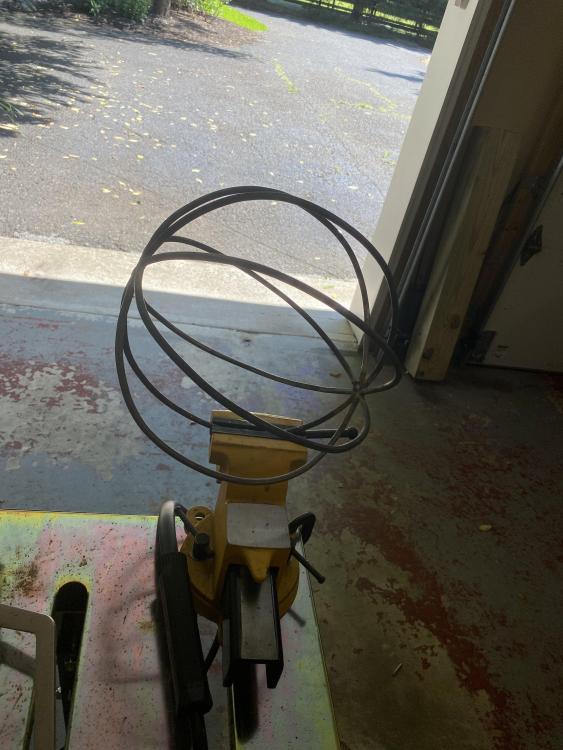
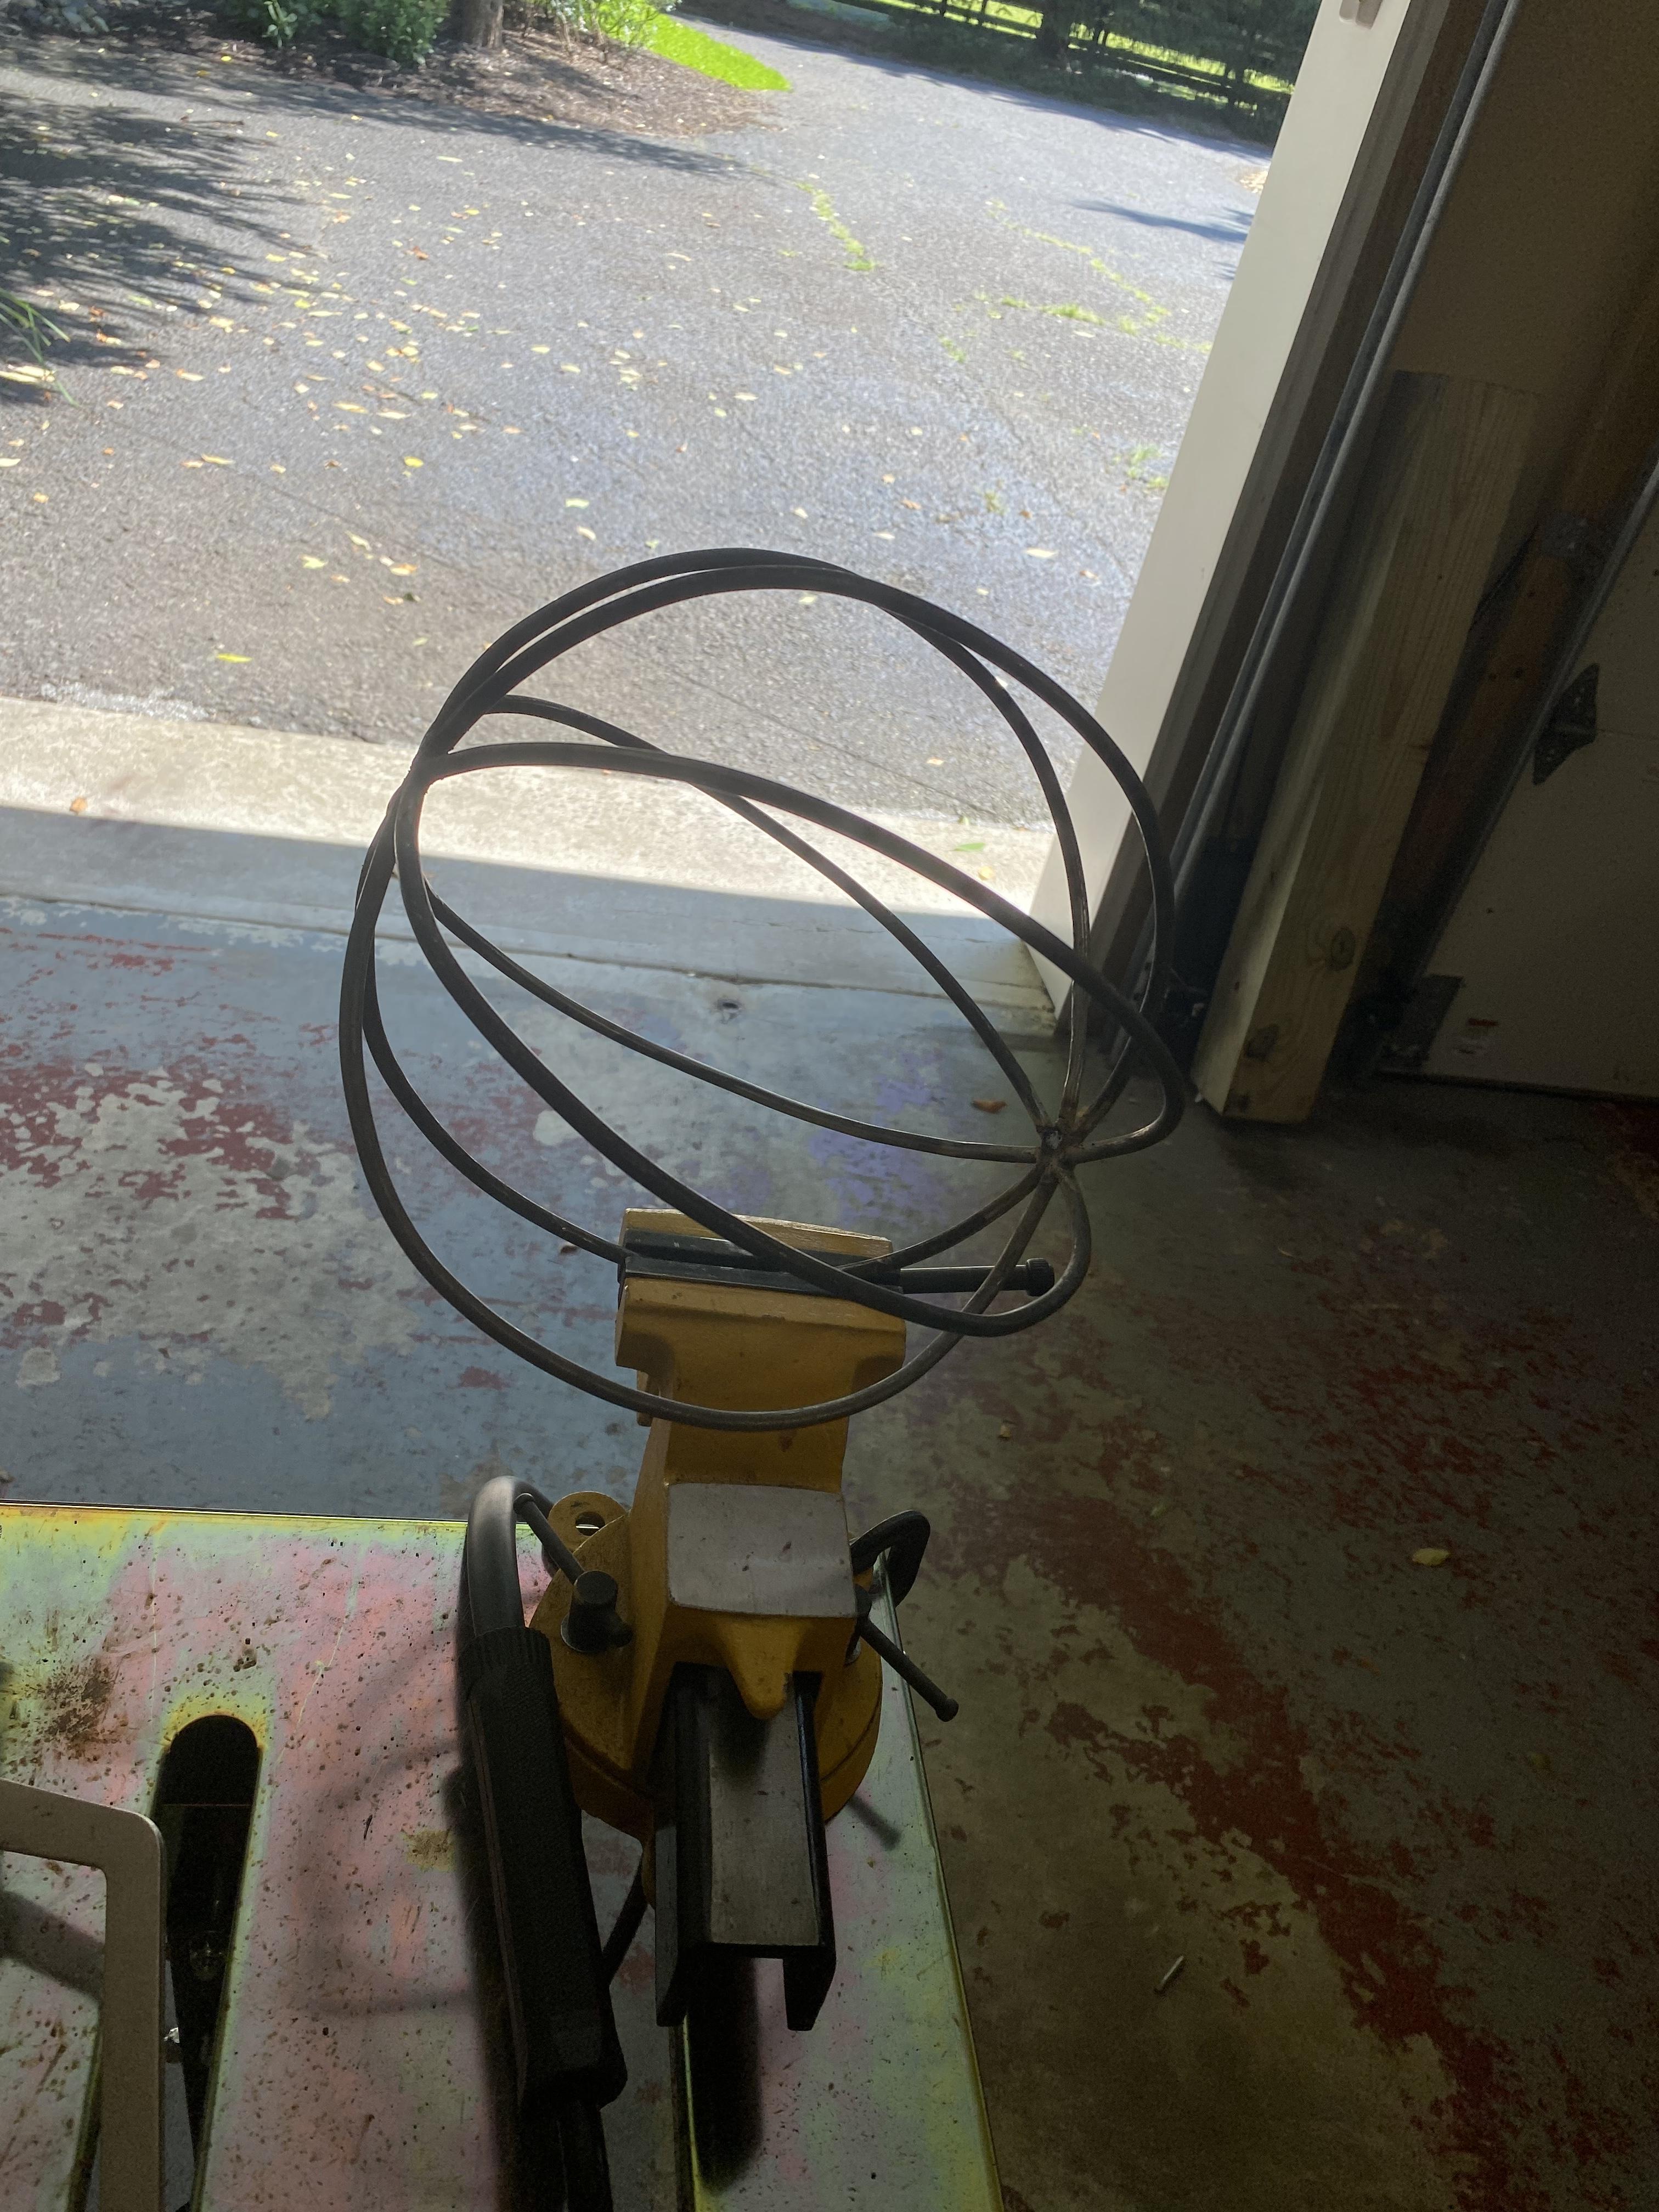
I got started on this globe I had imagined. Got the sphere part done. Not showing any close ups since my welds are that embarrassing lol. I think it’s going to work though. I think I might blacken and finish everything and then attach the sheet metal continent shapes with some JB weld or something instead of risking blowing through it with an actual weld. Definitely want to do another one though - I would make a simple jig to get all the bends on the sphere pieces the same. They’re a little out of whack on this one. Also trying to think of a way to make it spin but that may have to be on the next one.
Also used my new post vise for the first time to fix this spring fuller. Vise is awesome. Dumb question - I have some half inch coil spring - do I weld pieces on the top to be the part that gets struck or on the inside to be the part making contact with the work? Or should I just remake the whole thing out of the coil spring? I’ve got plenty.
-
Correction that was Frazer’s opinion of using them as is.
-
Very good point about the multiple dies Frazer. Butcher and flat dies for tenons is exactly what I had in mind but if it all goes together well (very big if) I know I’ll eventually want other dies.
Thomas to your point about the leaf spring - I see what you’re saying. Even if I just got my hands on one decent sized one I’d probably have enough material to make all the dies I want and have them be uniform width right off the bat - I’m assuming your answer is yes but I’m going to ask anyway…would your opinion be the same about using them as is after grinding to shape without any heat treat?
-
Lol Yes a piece of tine. The one I got is about 4 inches wide and I was planning to take cuts from the section that’s about 1/2” to 3/4” thick for the dies.
-
Hey guys. I want to build a guillotine tool. If I were to use fork lift tine for the dies do you think I should re heat treat entirely after grinding in the shapes I want? Or do you think as is they won’t be so hard as to chip and be dangerous? I have little to no heat treat knowledge by the way lol. Won’t they get tempered back a bit from the heat from grinding also? Making them a bit softer…
-
I got what I’m hoping is a nice score from work. Two springs from under the dock plates (work in a warehouse) and a fork lift fork. There’s another one I can take also but it was tough to get in my car lol. I was trying to figure out exactly what it’s made of but the markings on it aren’t telling me much. They read:
1500x24
750x600
75324-3 and then AW off to the side. Anyone know anything about these? Should I just assume it’s 4140-4340ish?

-
14 hours ago, Ted Ewert said:
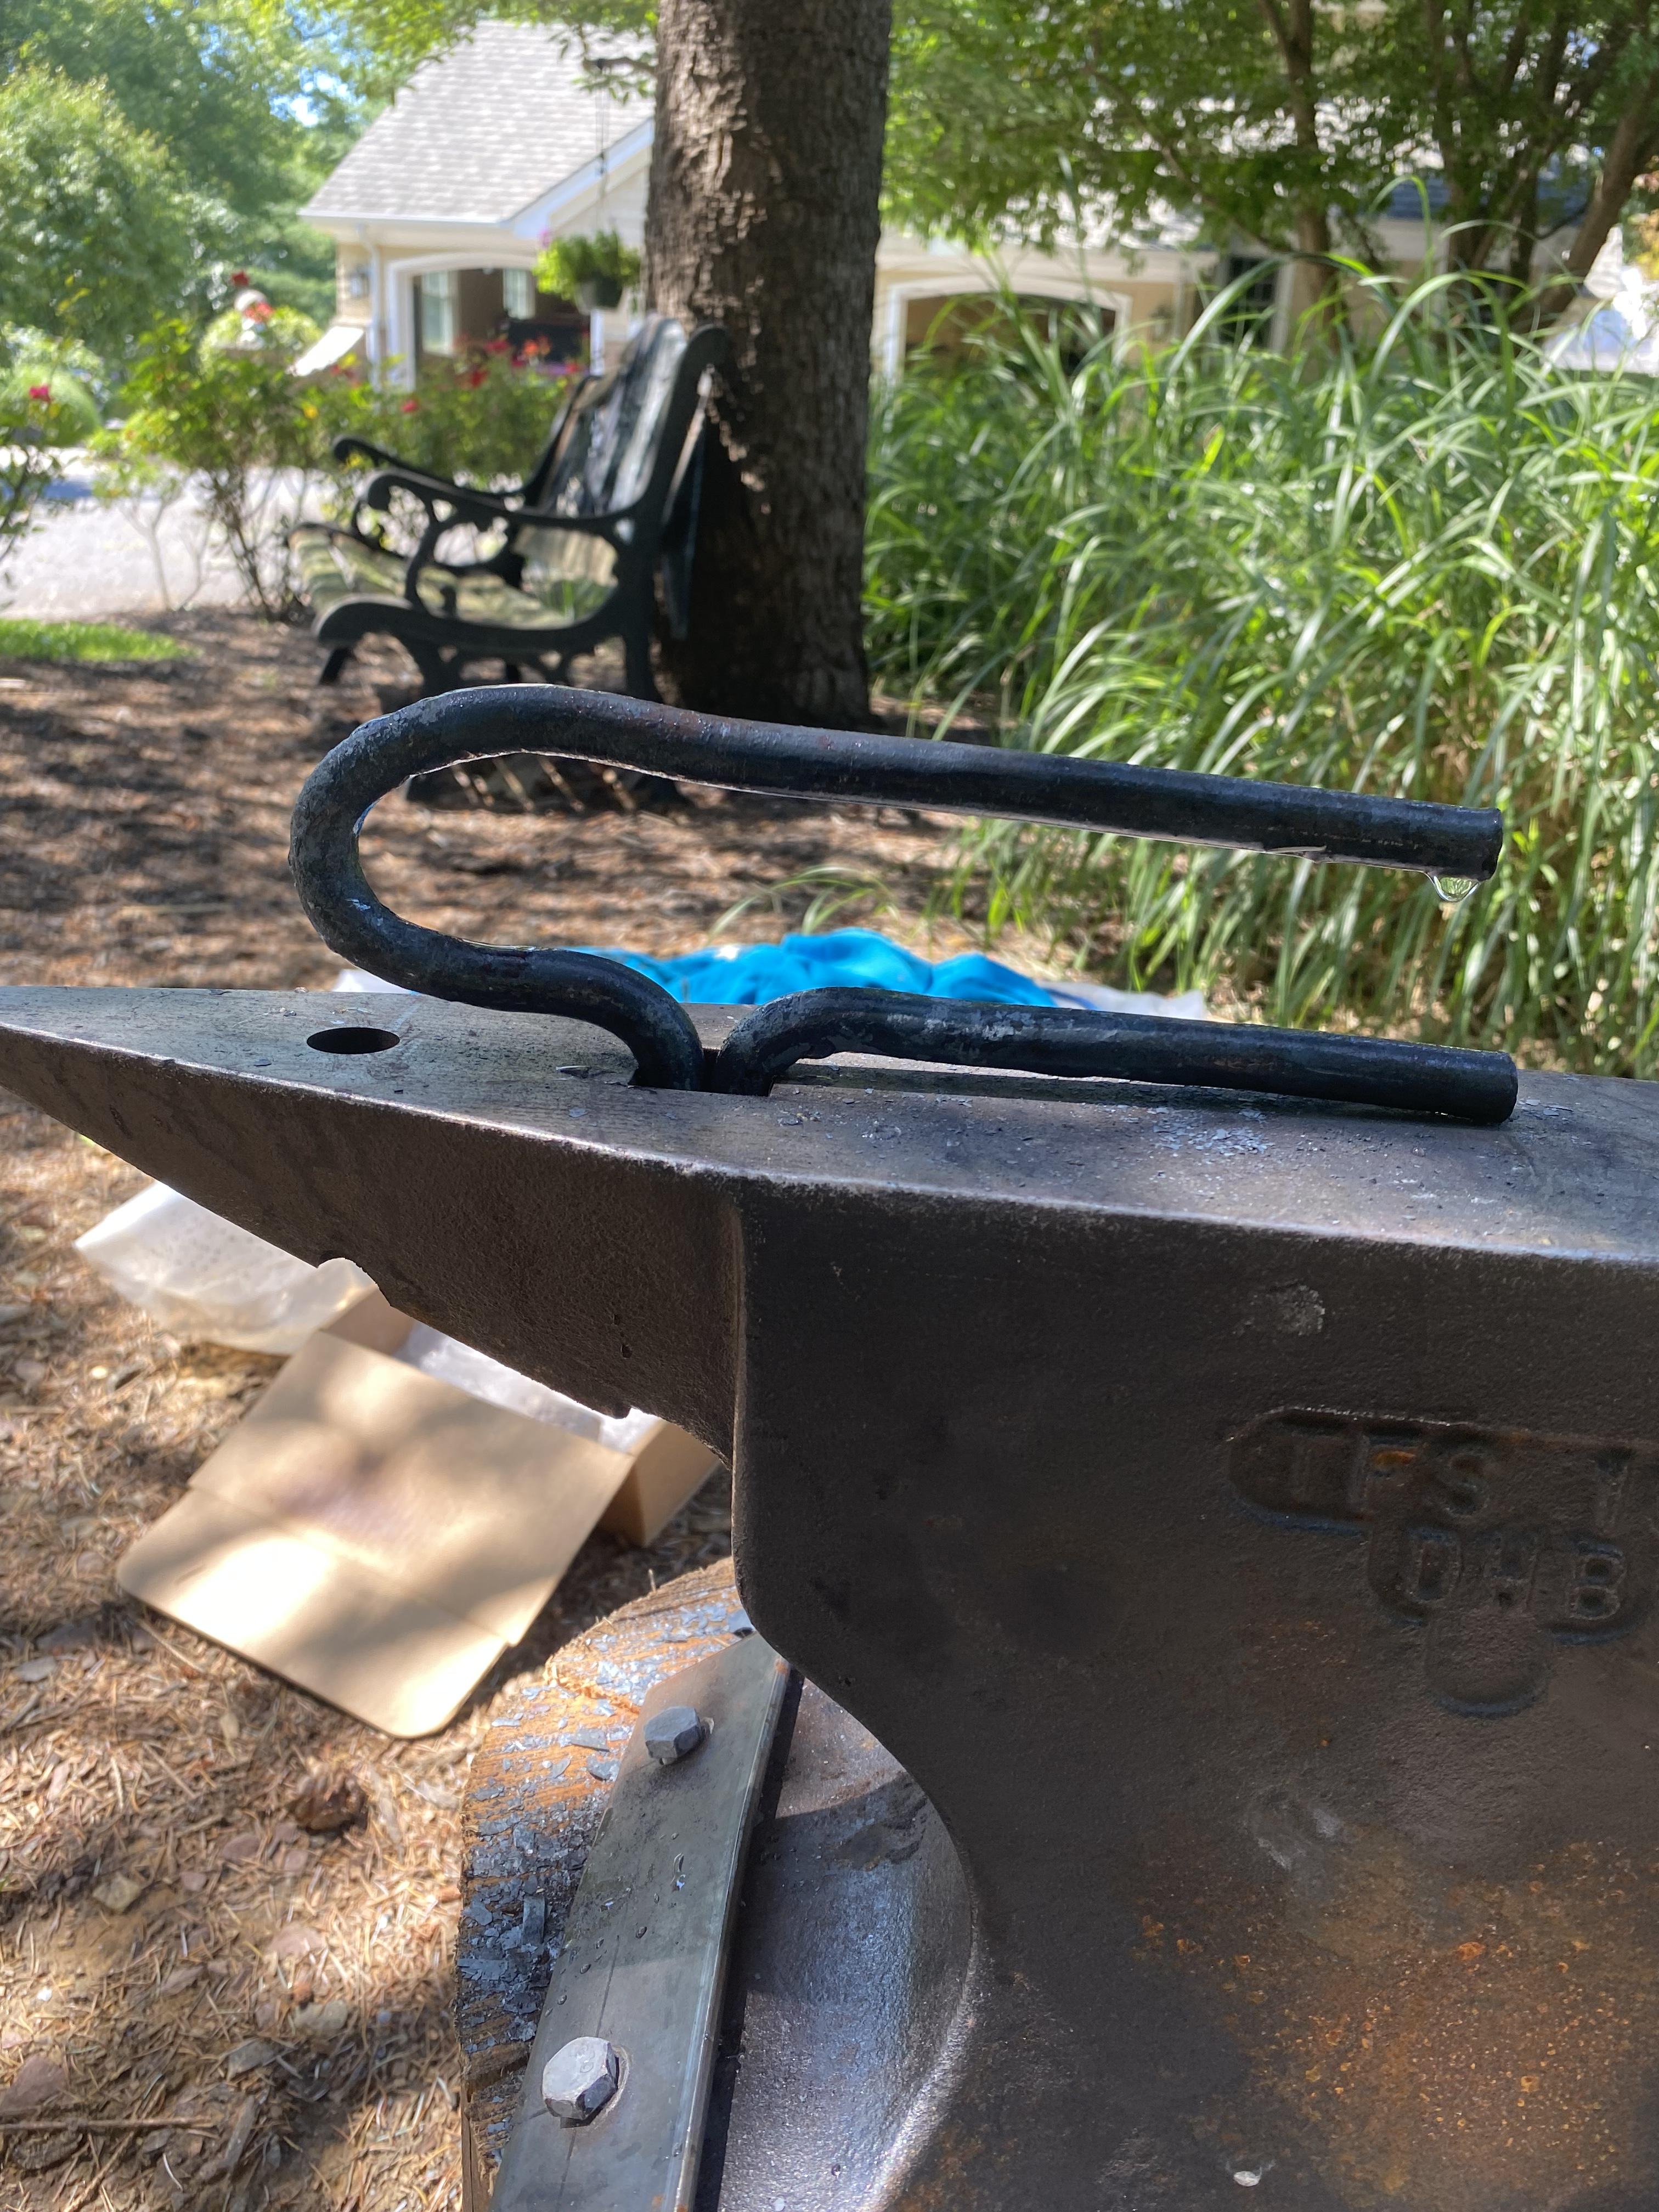
Hi Pat, I used a piece of 3/8 × 3/4" flat bar for the mount. I bent 1" on both ends 90 degrees and drilled 2 holes for the 1/4" rod to fit in to.
Ah - simple but really cool. Did you put any kind of wax or BLO as a finish? Maybe it’s just the lighting in the picture but it seems to have more of a satin type finish than the black I get from a paste wax.
-
15 hours ago, Ted Ewert said:
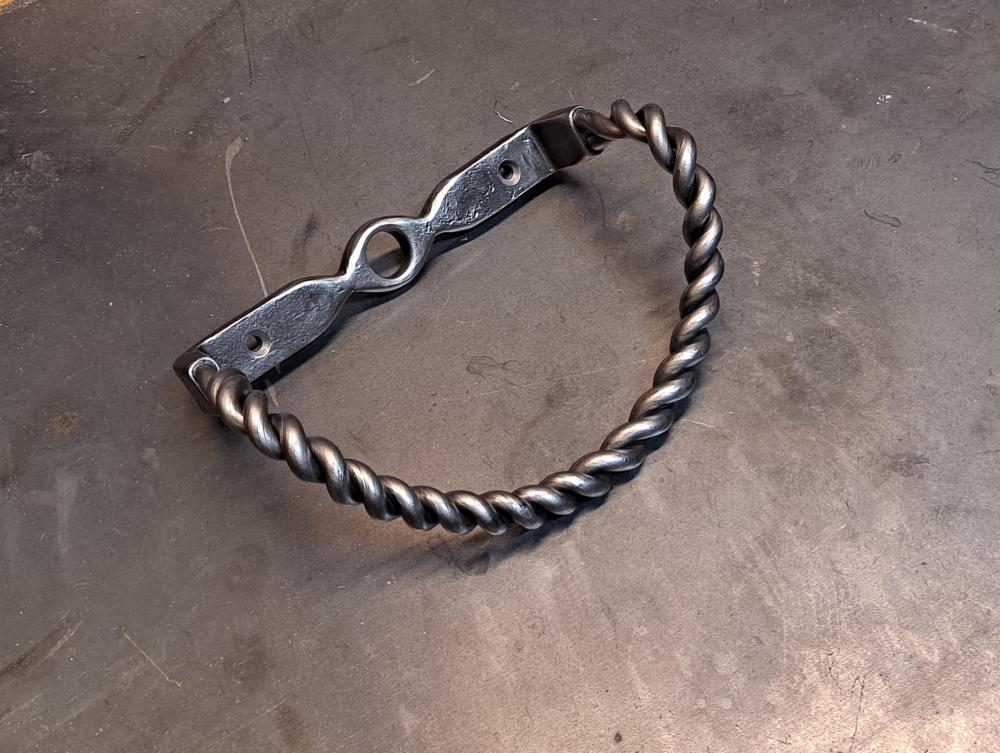
Ted - what’s going on where the twisted bars go into the part that would be mounted to the wall? Was this welded at all? Can you give some details and pics? Really interesting piece. Thanks.
-
Gandalfgreen that’s a pretty good first forging session in my opinion. Keep at it.
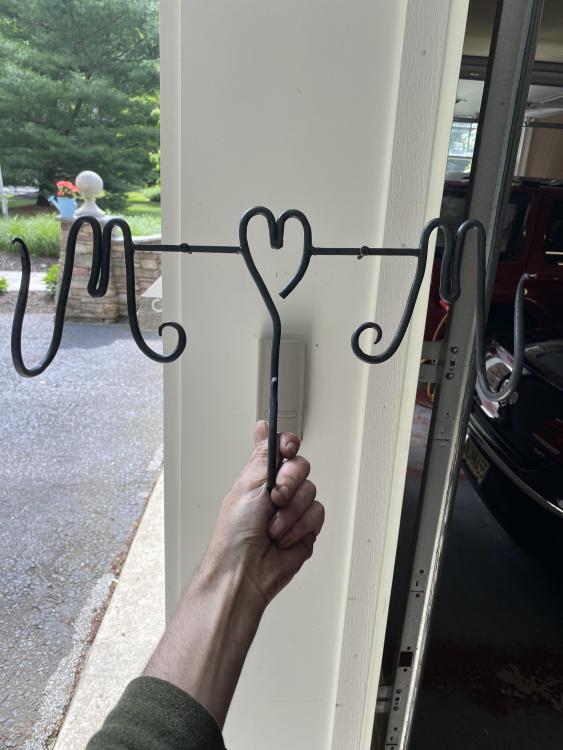
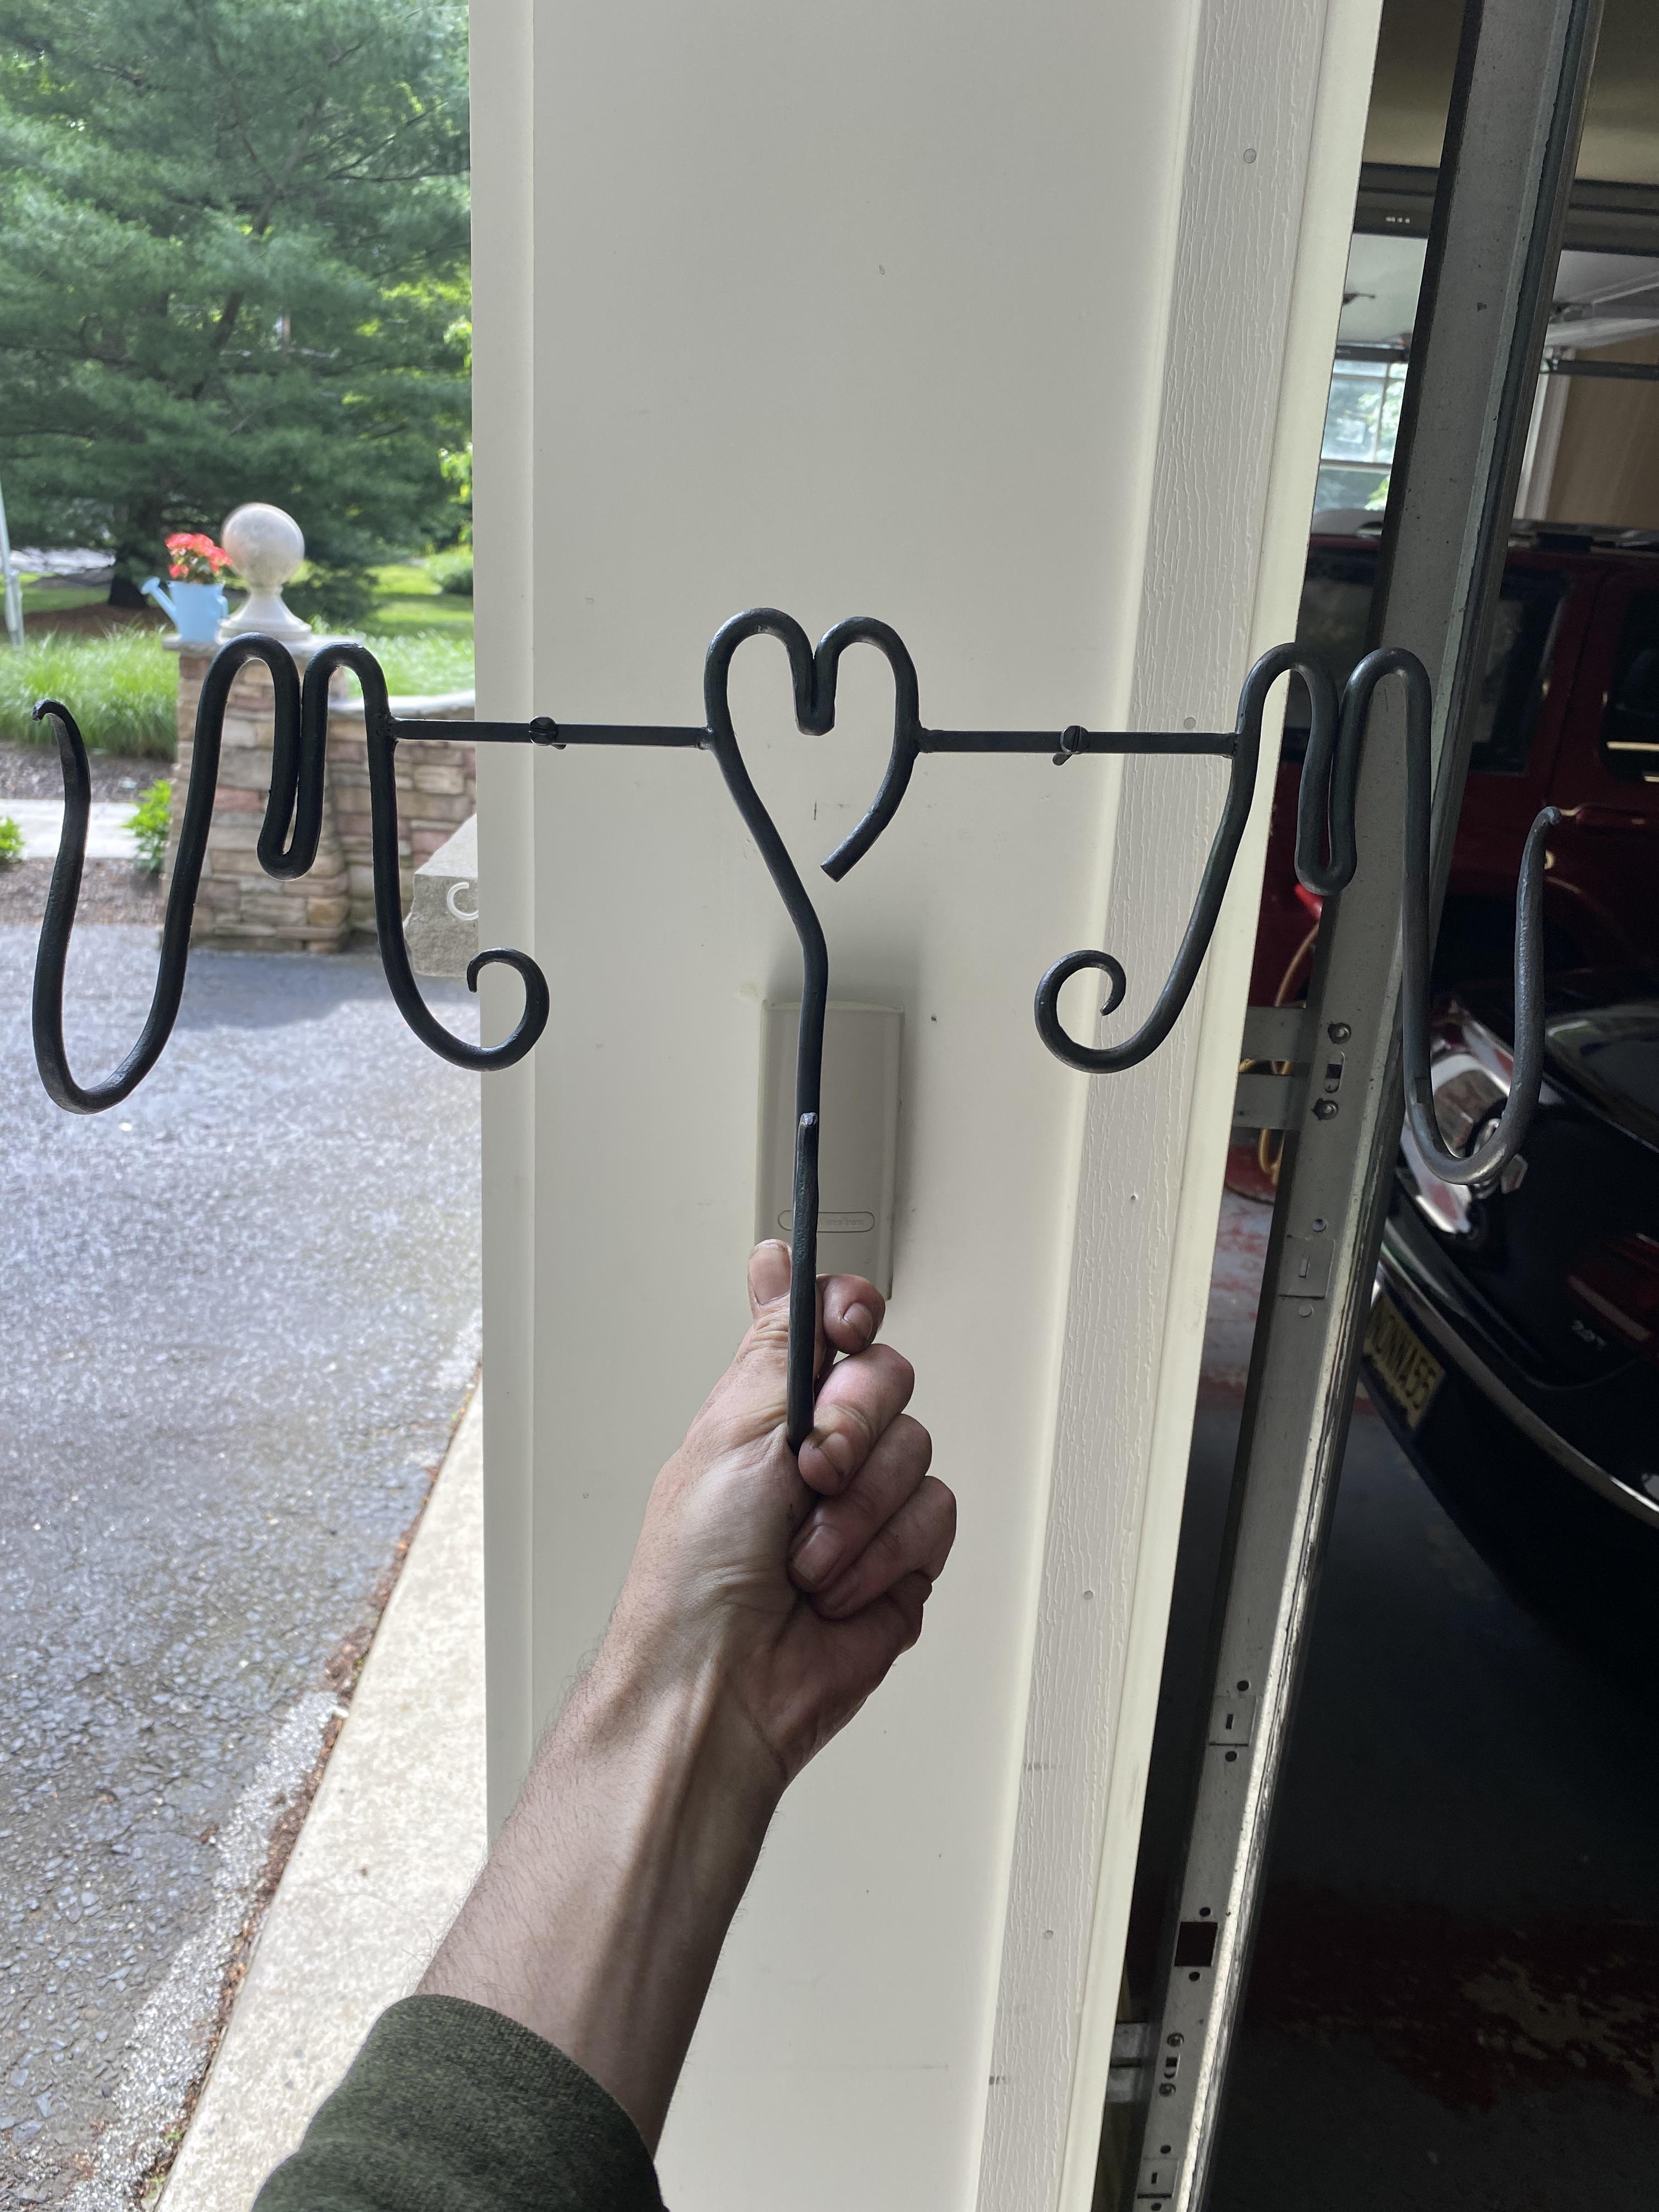
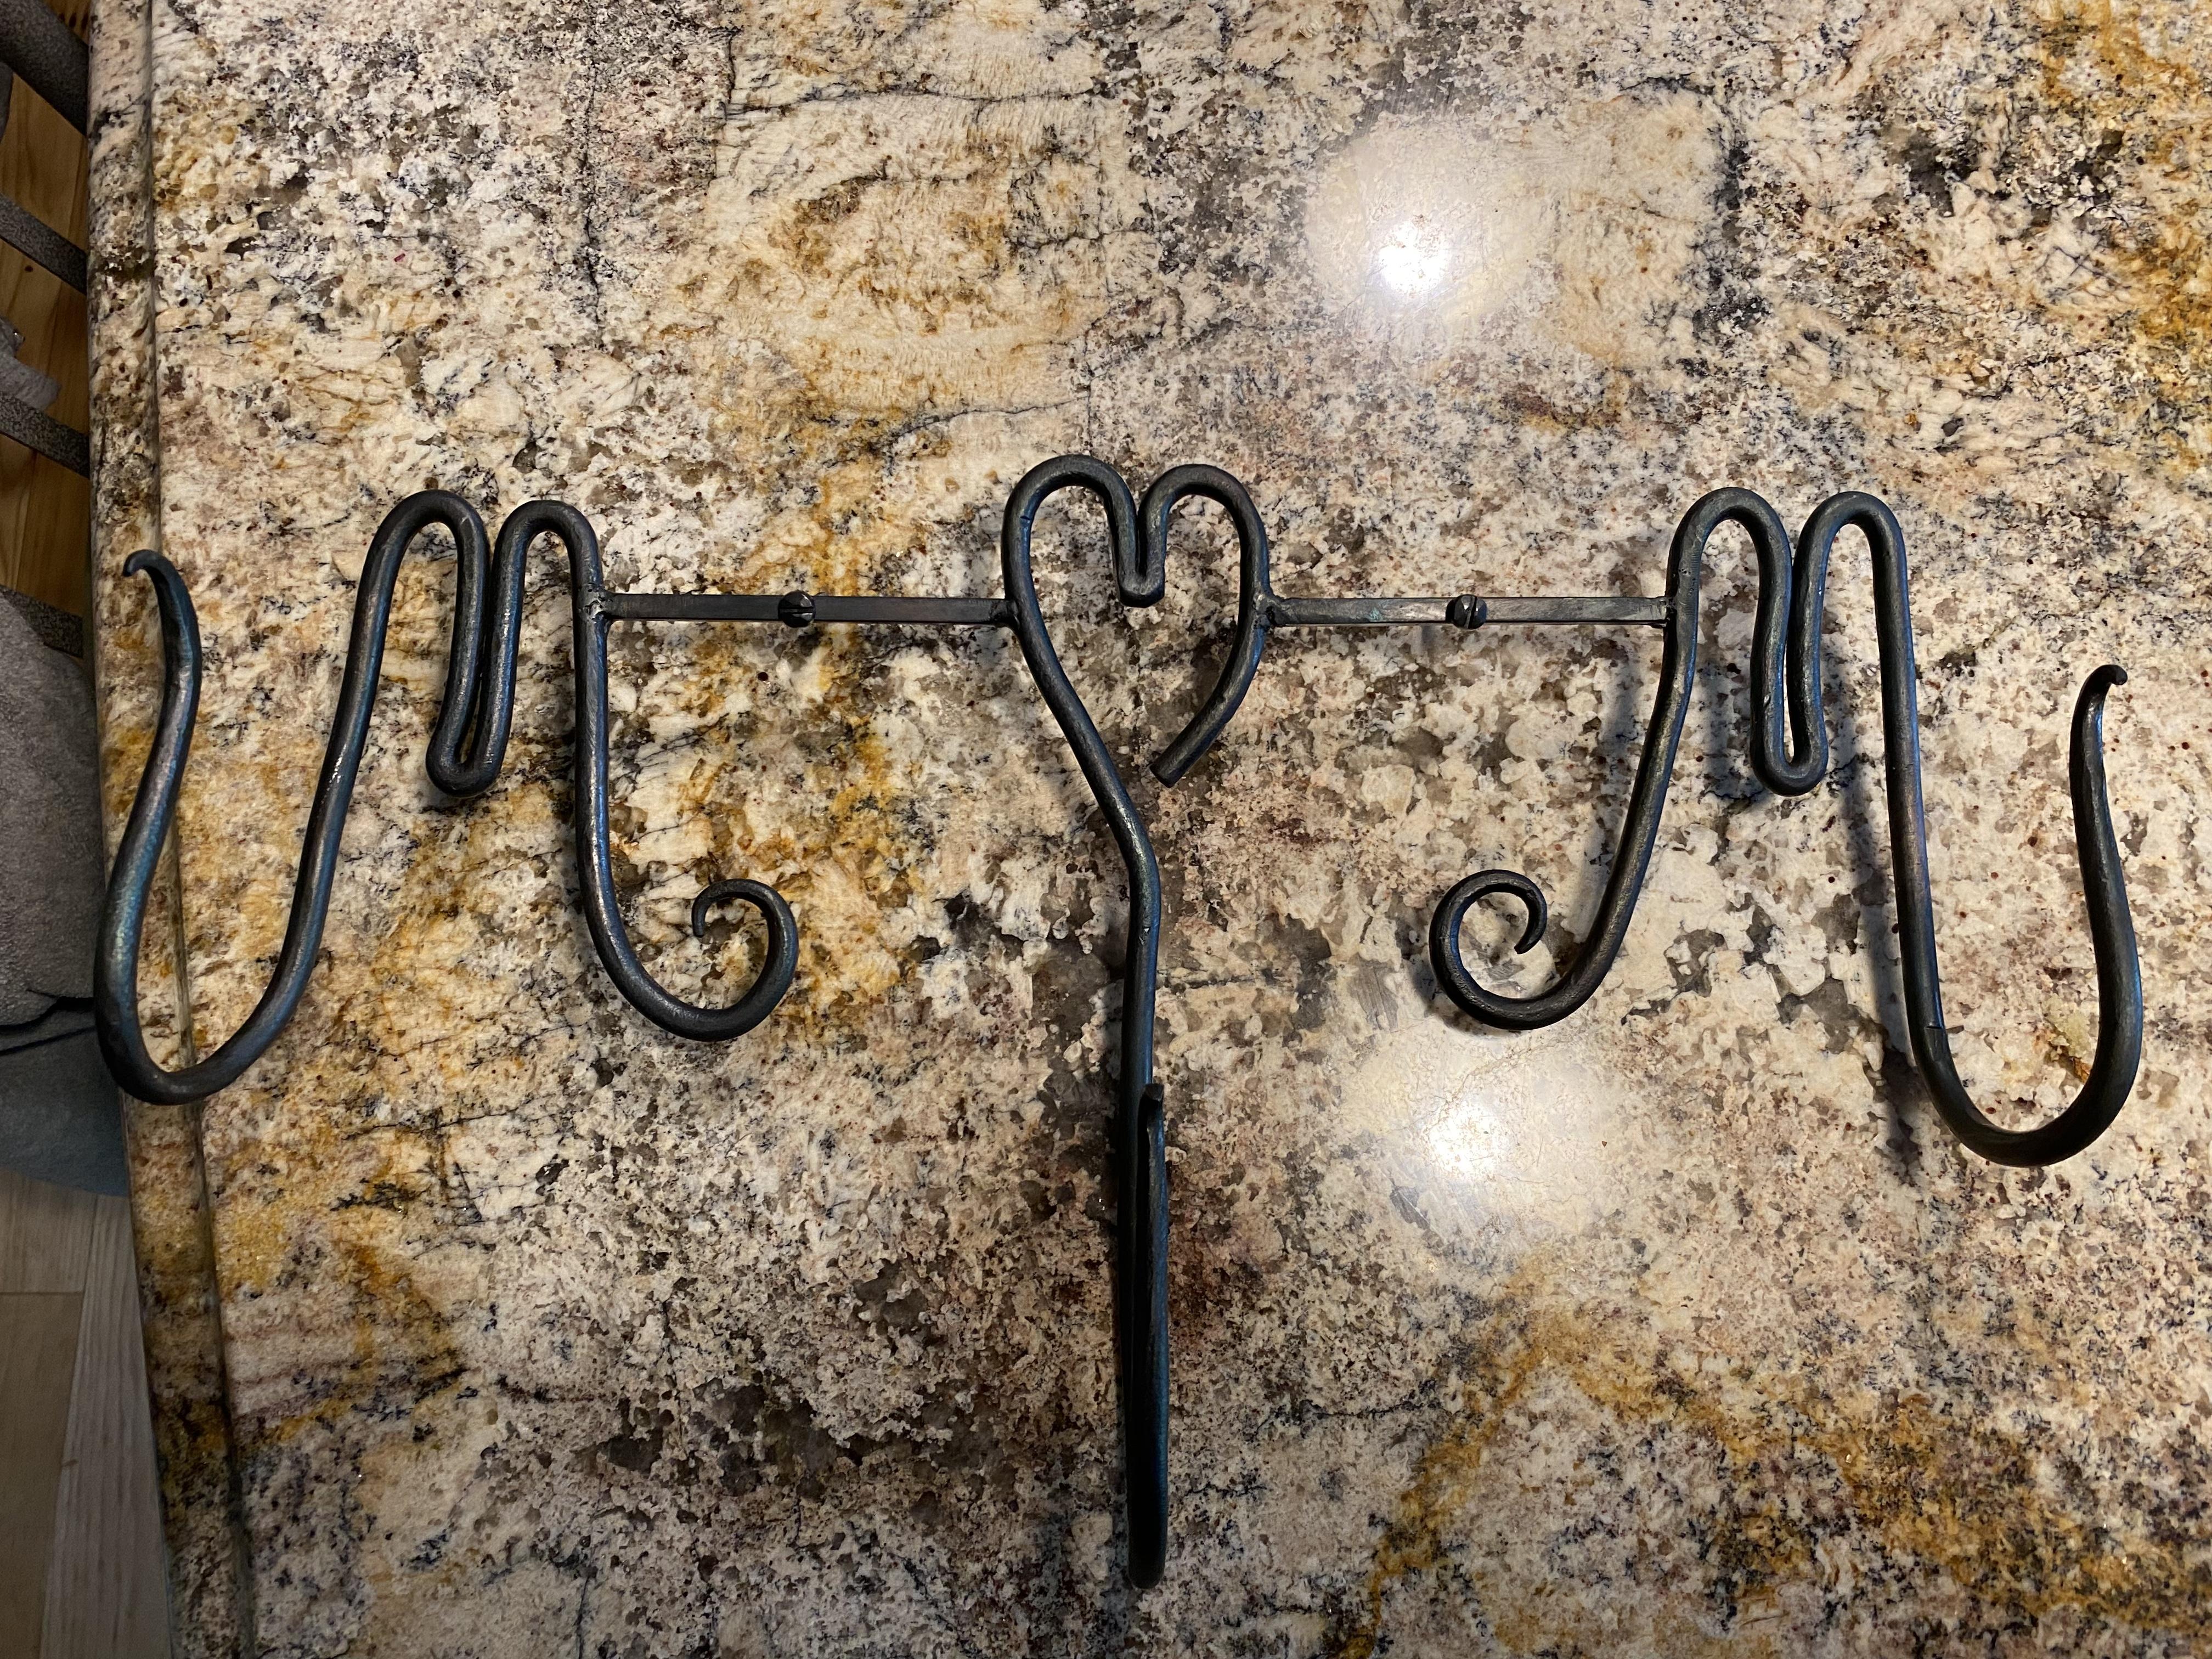
No actual forging for me this weekend but I did finally get my post vise in which I am incredibly excited about. Couldn’t do any heavy stuff with it as the cement needs some time and I need bigger bolts but just using it to grind way my awful welds on this coat rack thing showed me just how useful it’s really going to be. Rack was a mother’s day present - little late but she still liked it.

-
2 hours ago, ThomasPowers said:
Please allow for plate tectonics or your globe will be out of date in a few million years!
Good call! Haha
-
I had a dream last night that I made a globe - dreams are weird so it didn’t look like this planet lol but the idea stuck. Would be more fabricating than forging I guess but my thought is basically a sphere shaped cage from round bar, the continents traced onto sheet metal and cut out and then everything tacked together. There’s no way someone hasn’t done this before - anyone seen anything like that I could use as a guide? I also need a lot of practice welding and have never cut sheet metal. I can get 24 gauge sheets pretty easy - think that thickness would be easy enough to cut by hand and be ok to weld?
-
On 6/21/2021 at 1:43 PM, Frosty said:
super thin layer is almost bulletproof, I've had plant hangers on the barn and our upper decks the barn for going on 25 years with no signs of rust. Even where hanging plants have been swinging from them in the wind.
I definitely need to try that then. That’s another part (and the main part I guess) that I didn’t mention. After about a month of the dinner triangle I made hanging outside it had rust starting. I had the paste wax and two coats of some rustoleom rust inhibitor - super disappointing to get out and see your stuff starting to look terrible.
-
On 6/20/2021 at 1:17 PM, Frosty said:
What kind of wax are you using for the finish?
Thanks Frosty. I forget the name of the wax at the moment but it’s whatever Home Depot had in place of Johnson’s since they were out of that. You can kind of see what I’m talking about in this picture. It’s quite blotchy.
-
JHCC - the hook holding the lantern is really nice.
And Alexandr once again - amazing work.
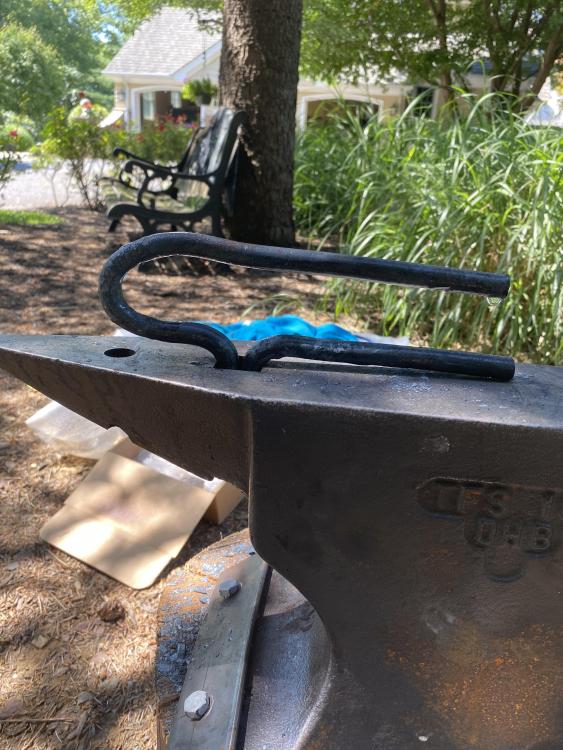
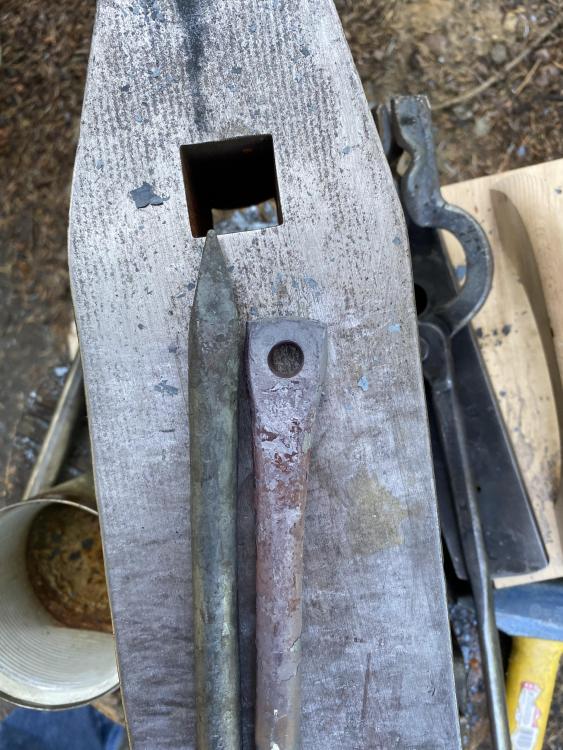
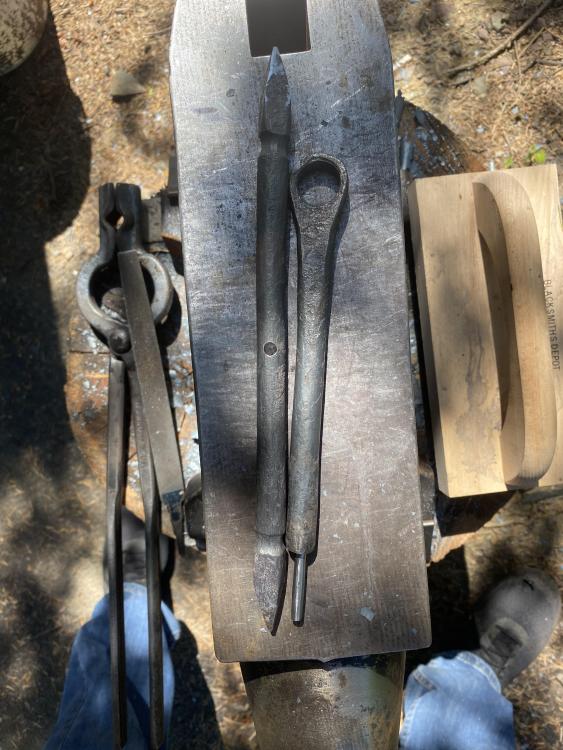
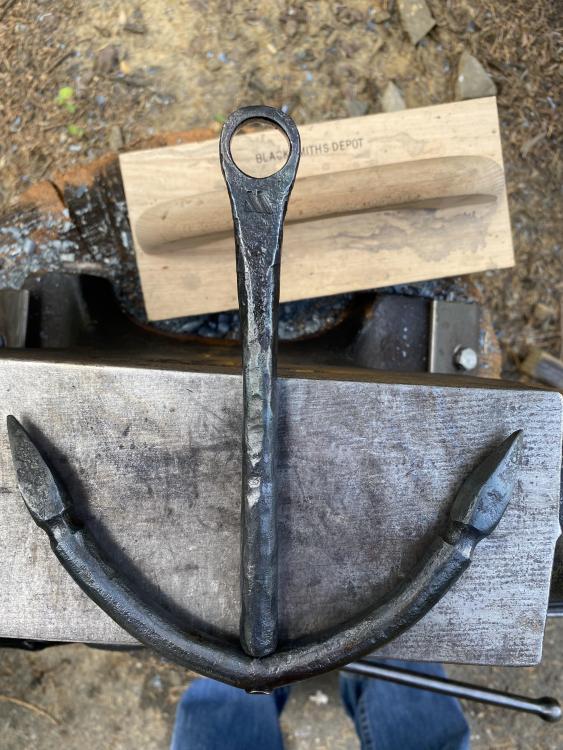
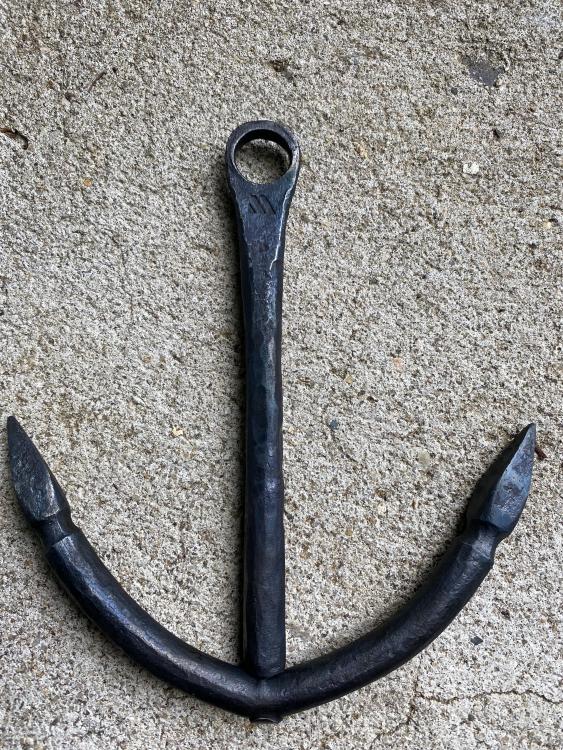
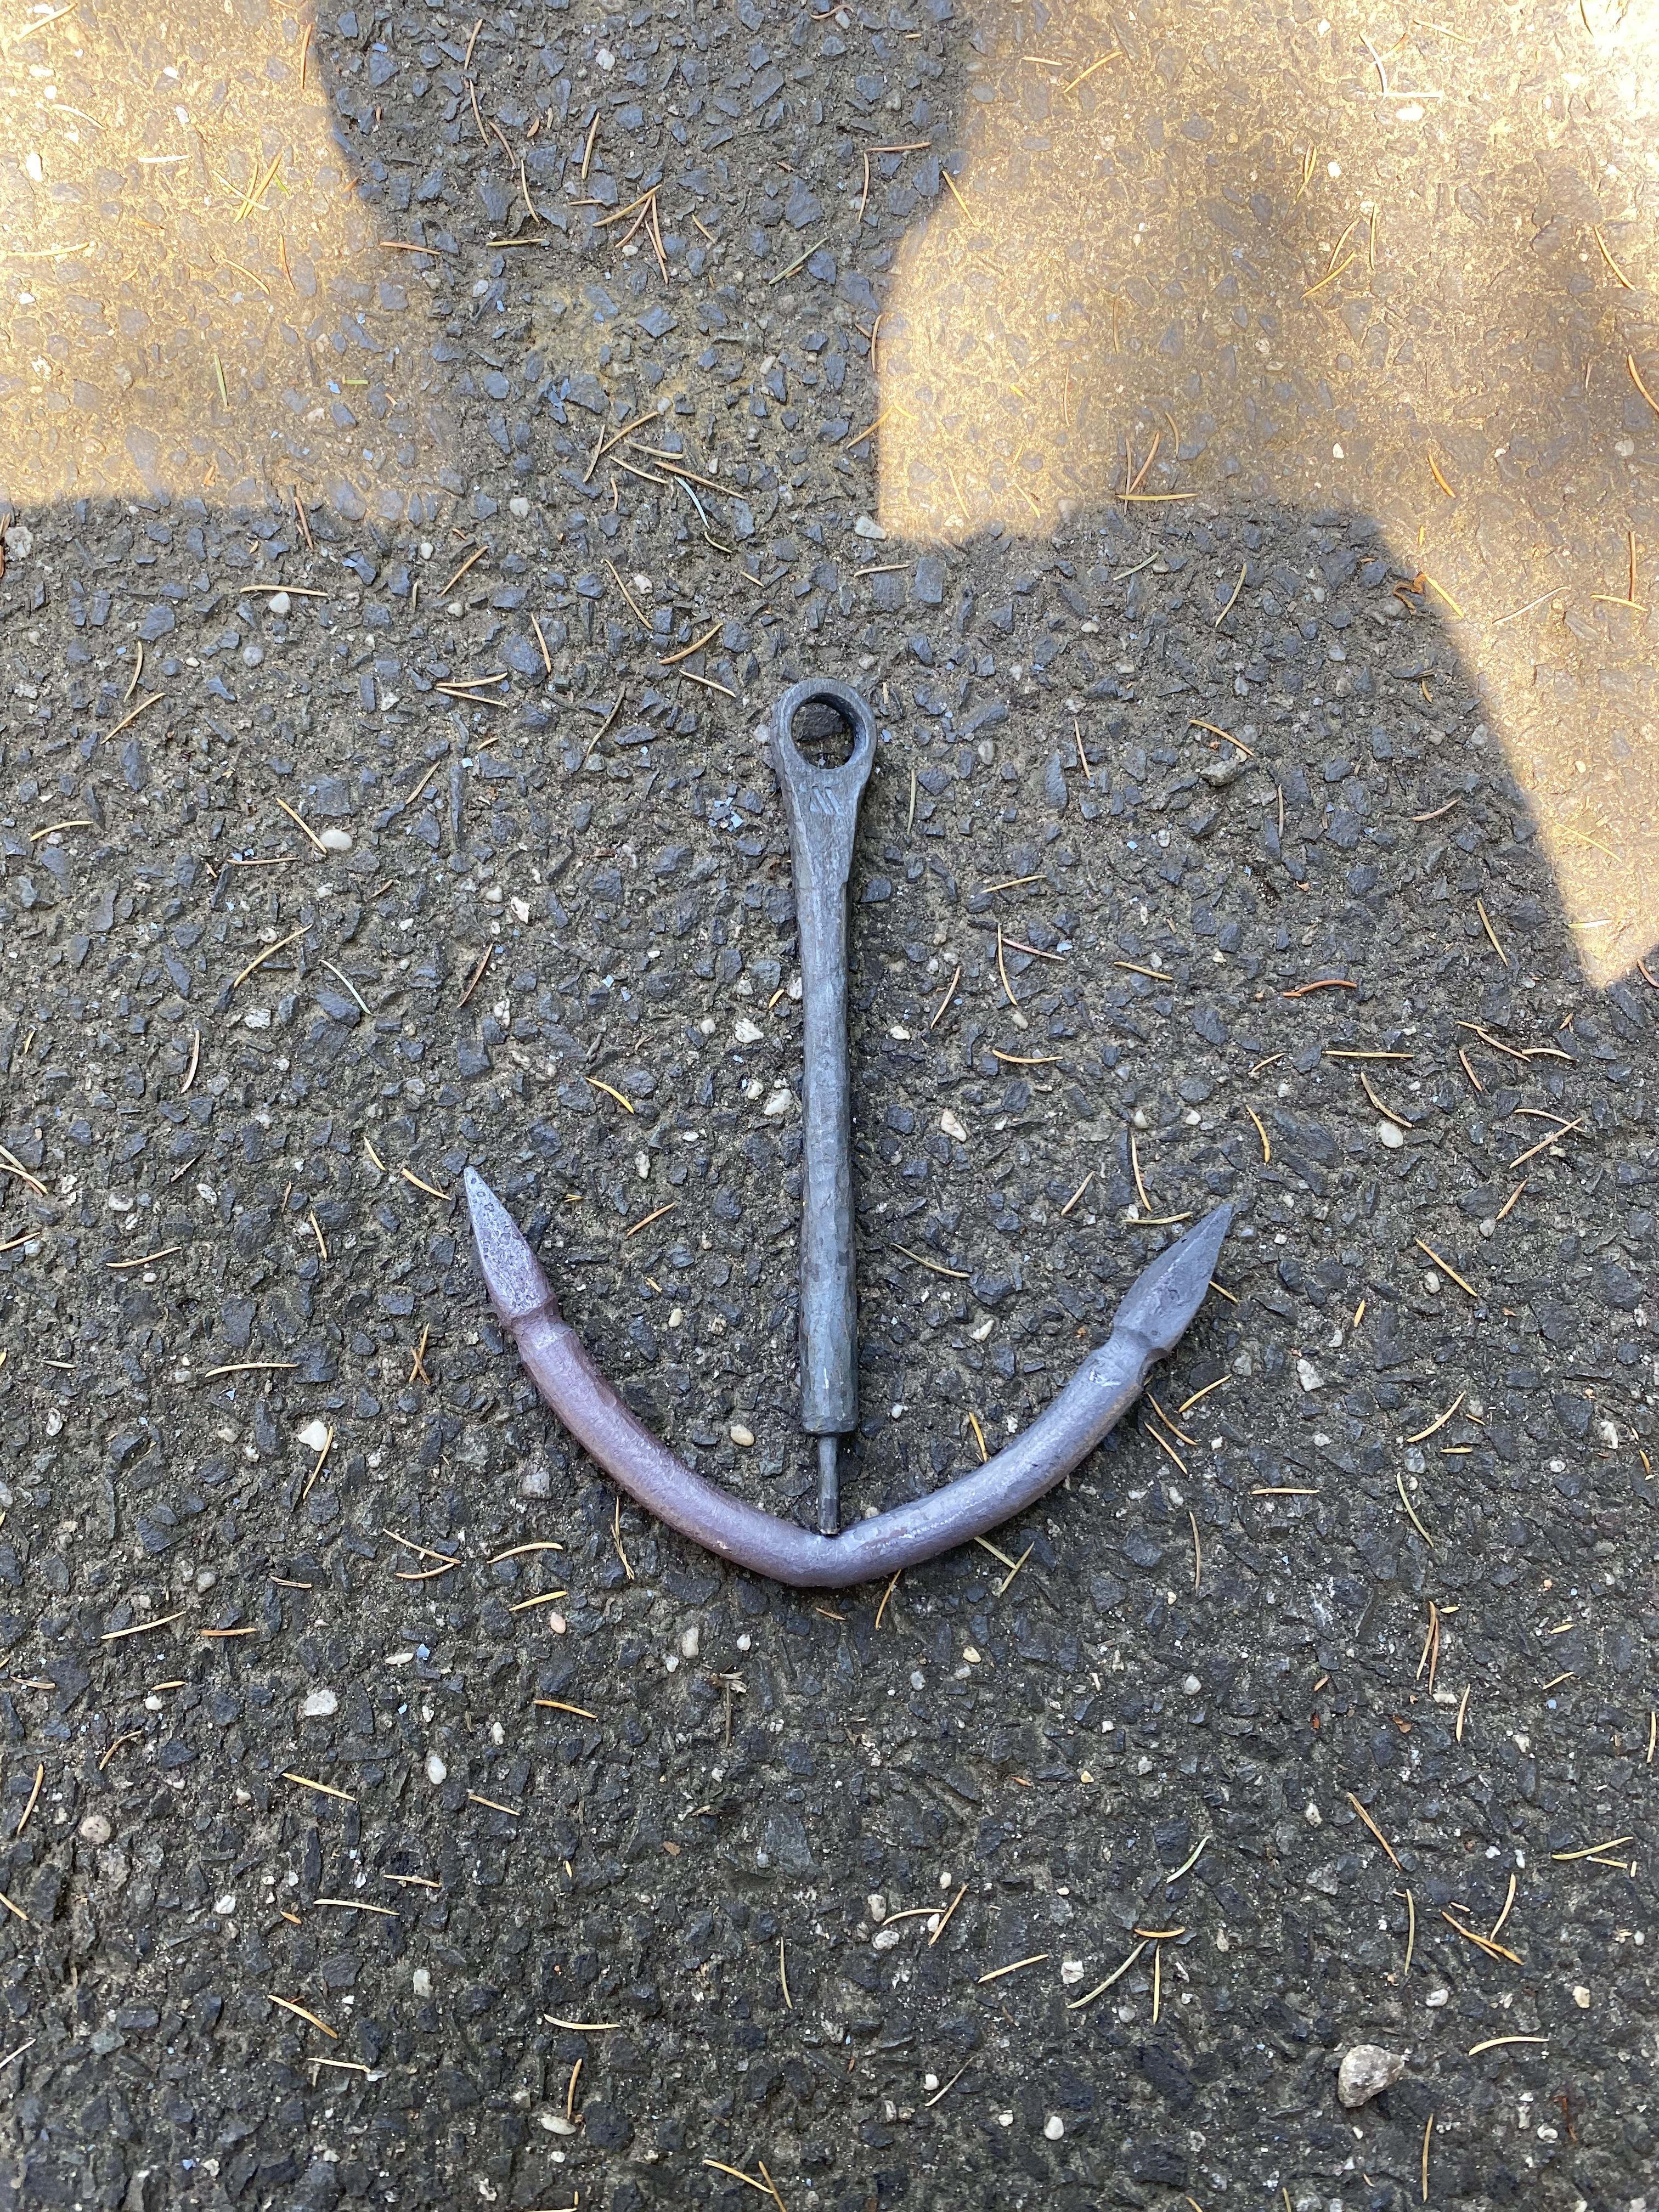
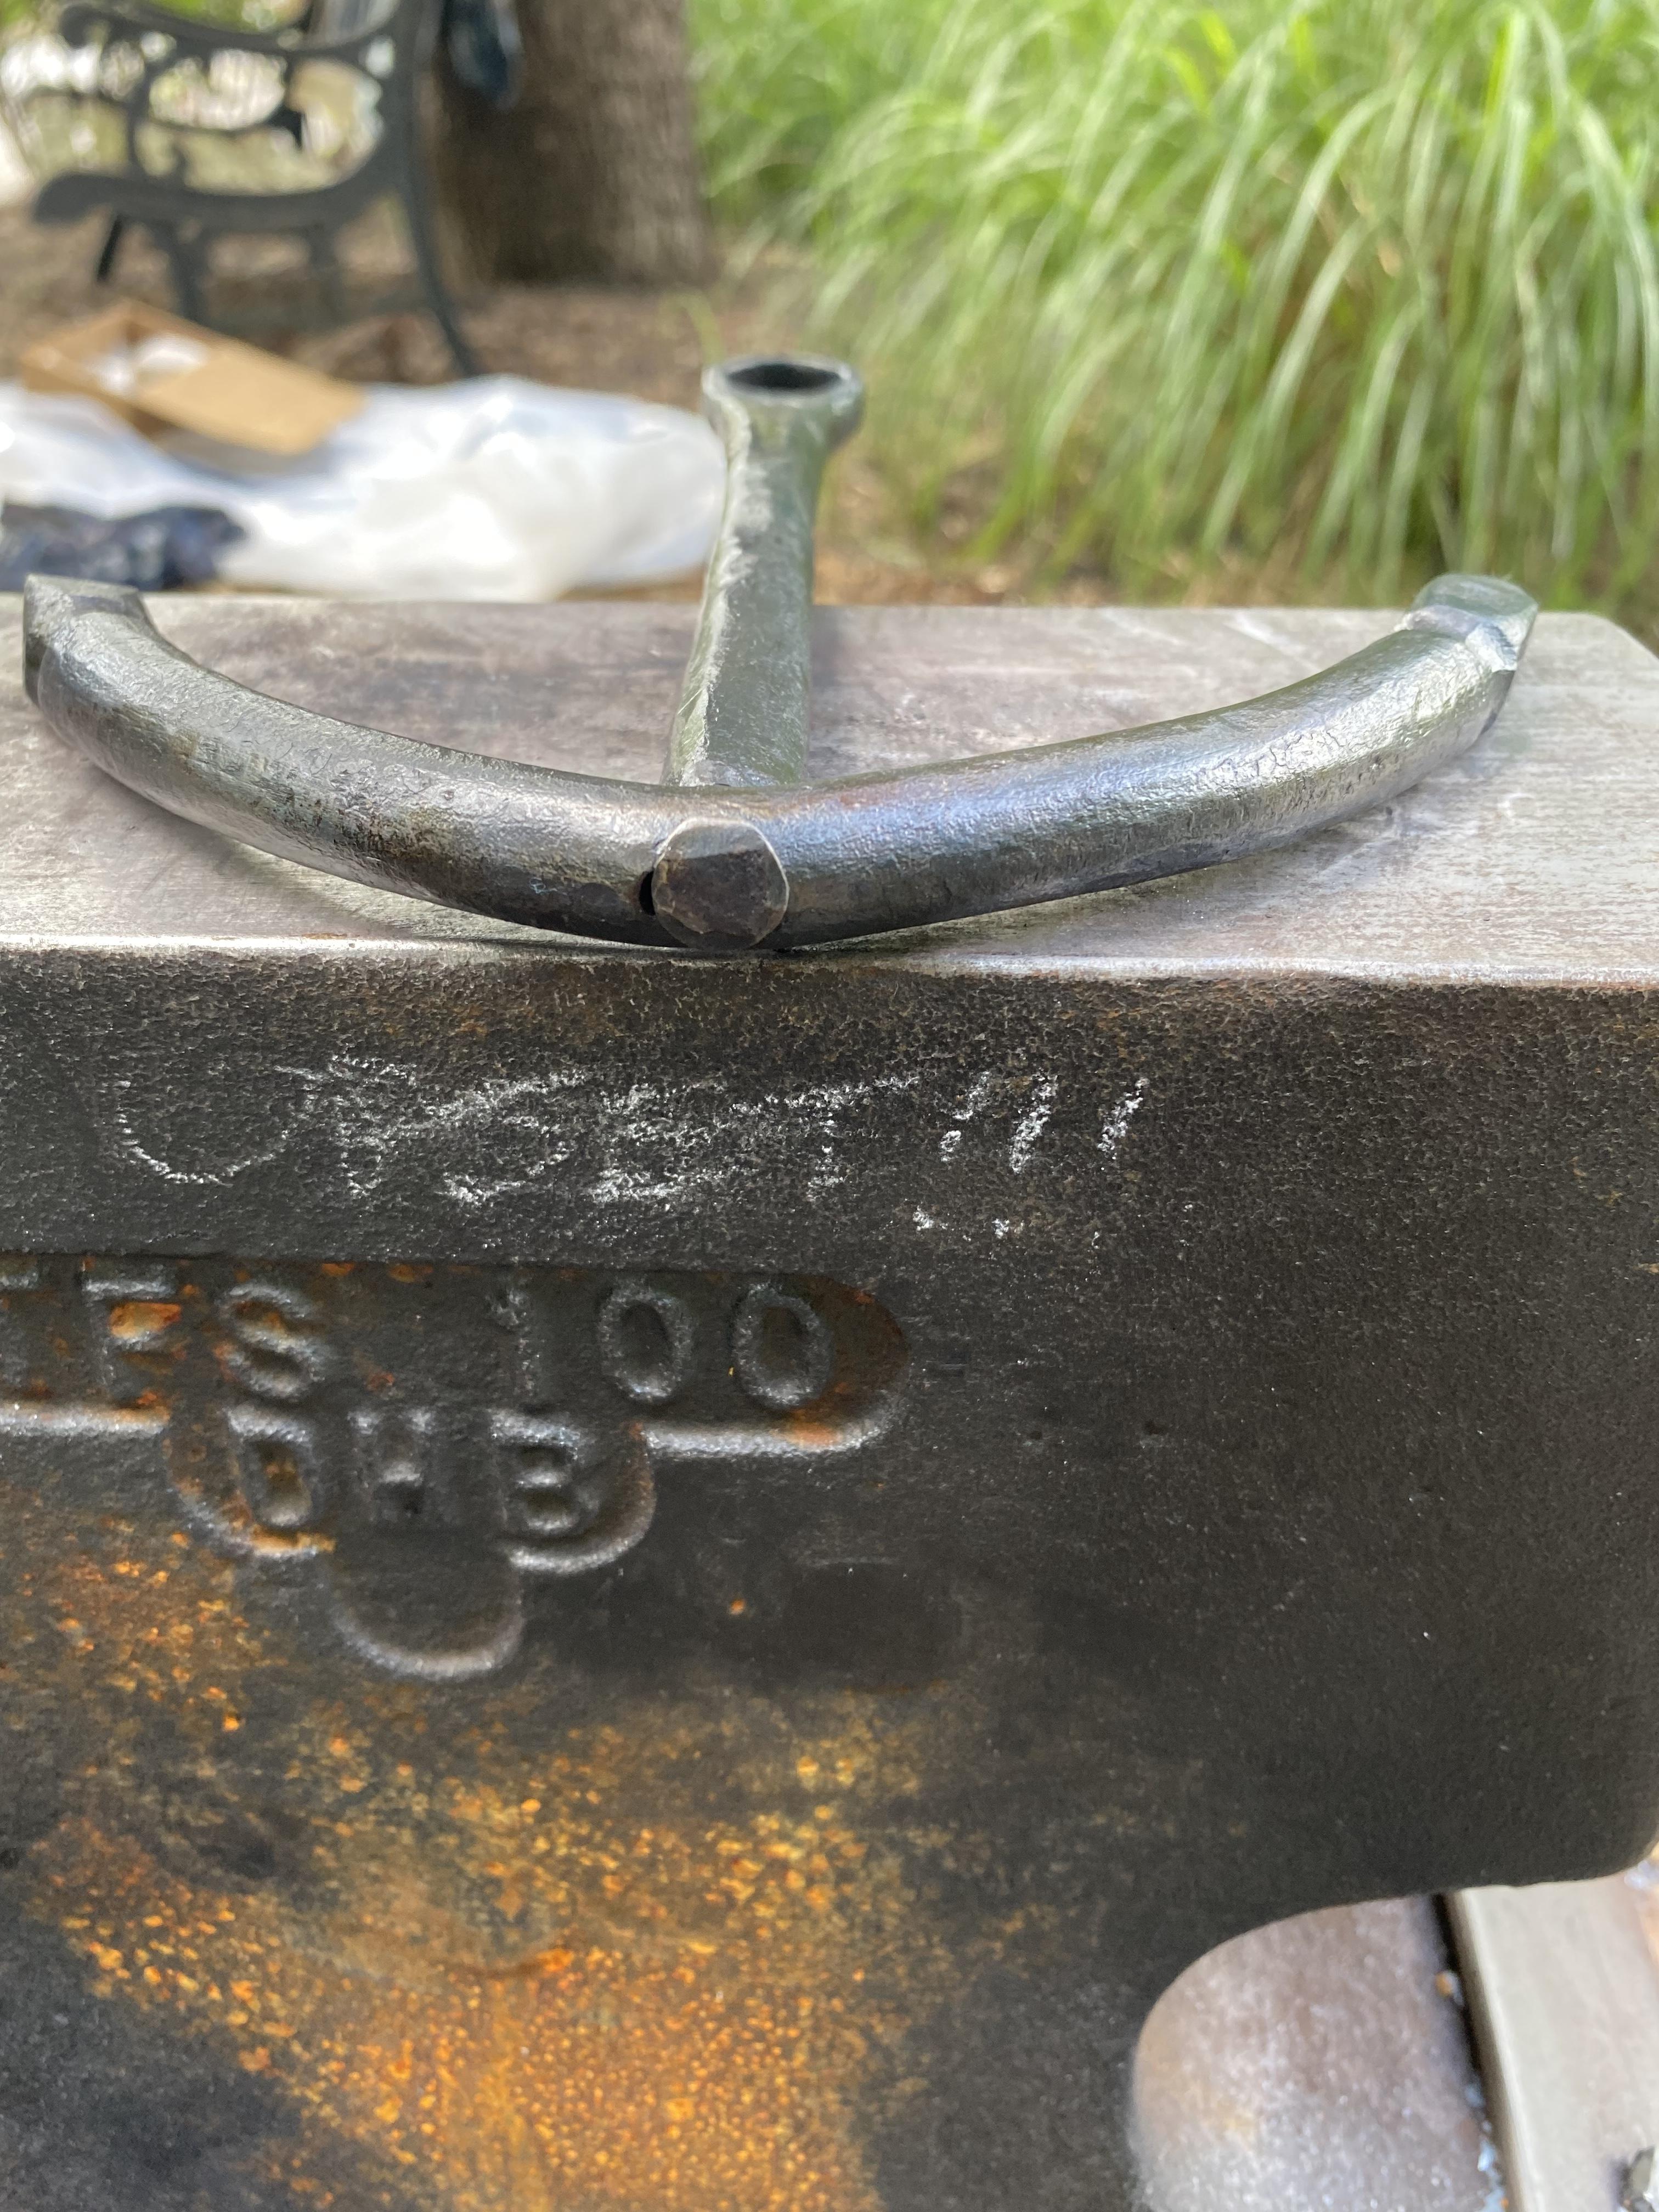
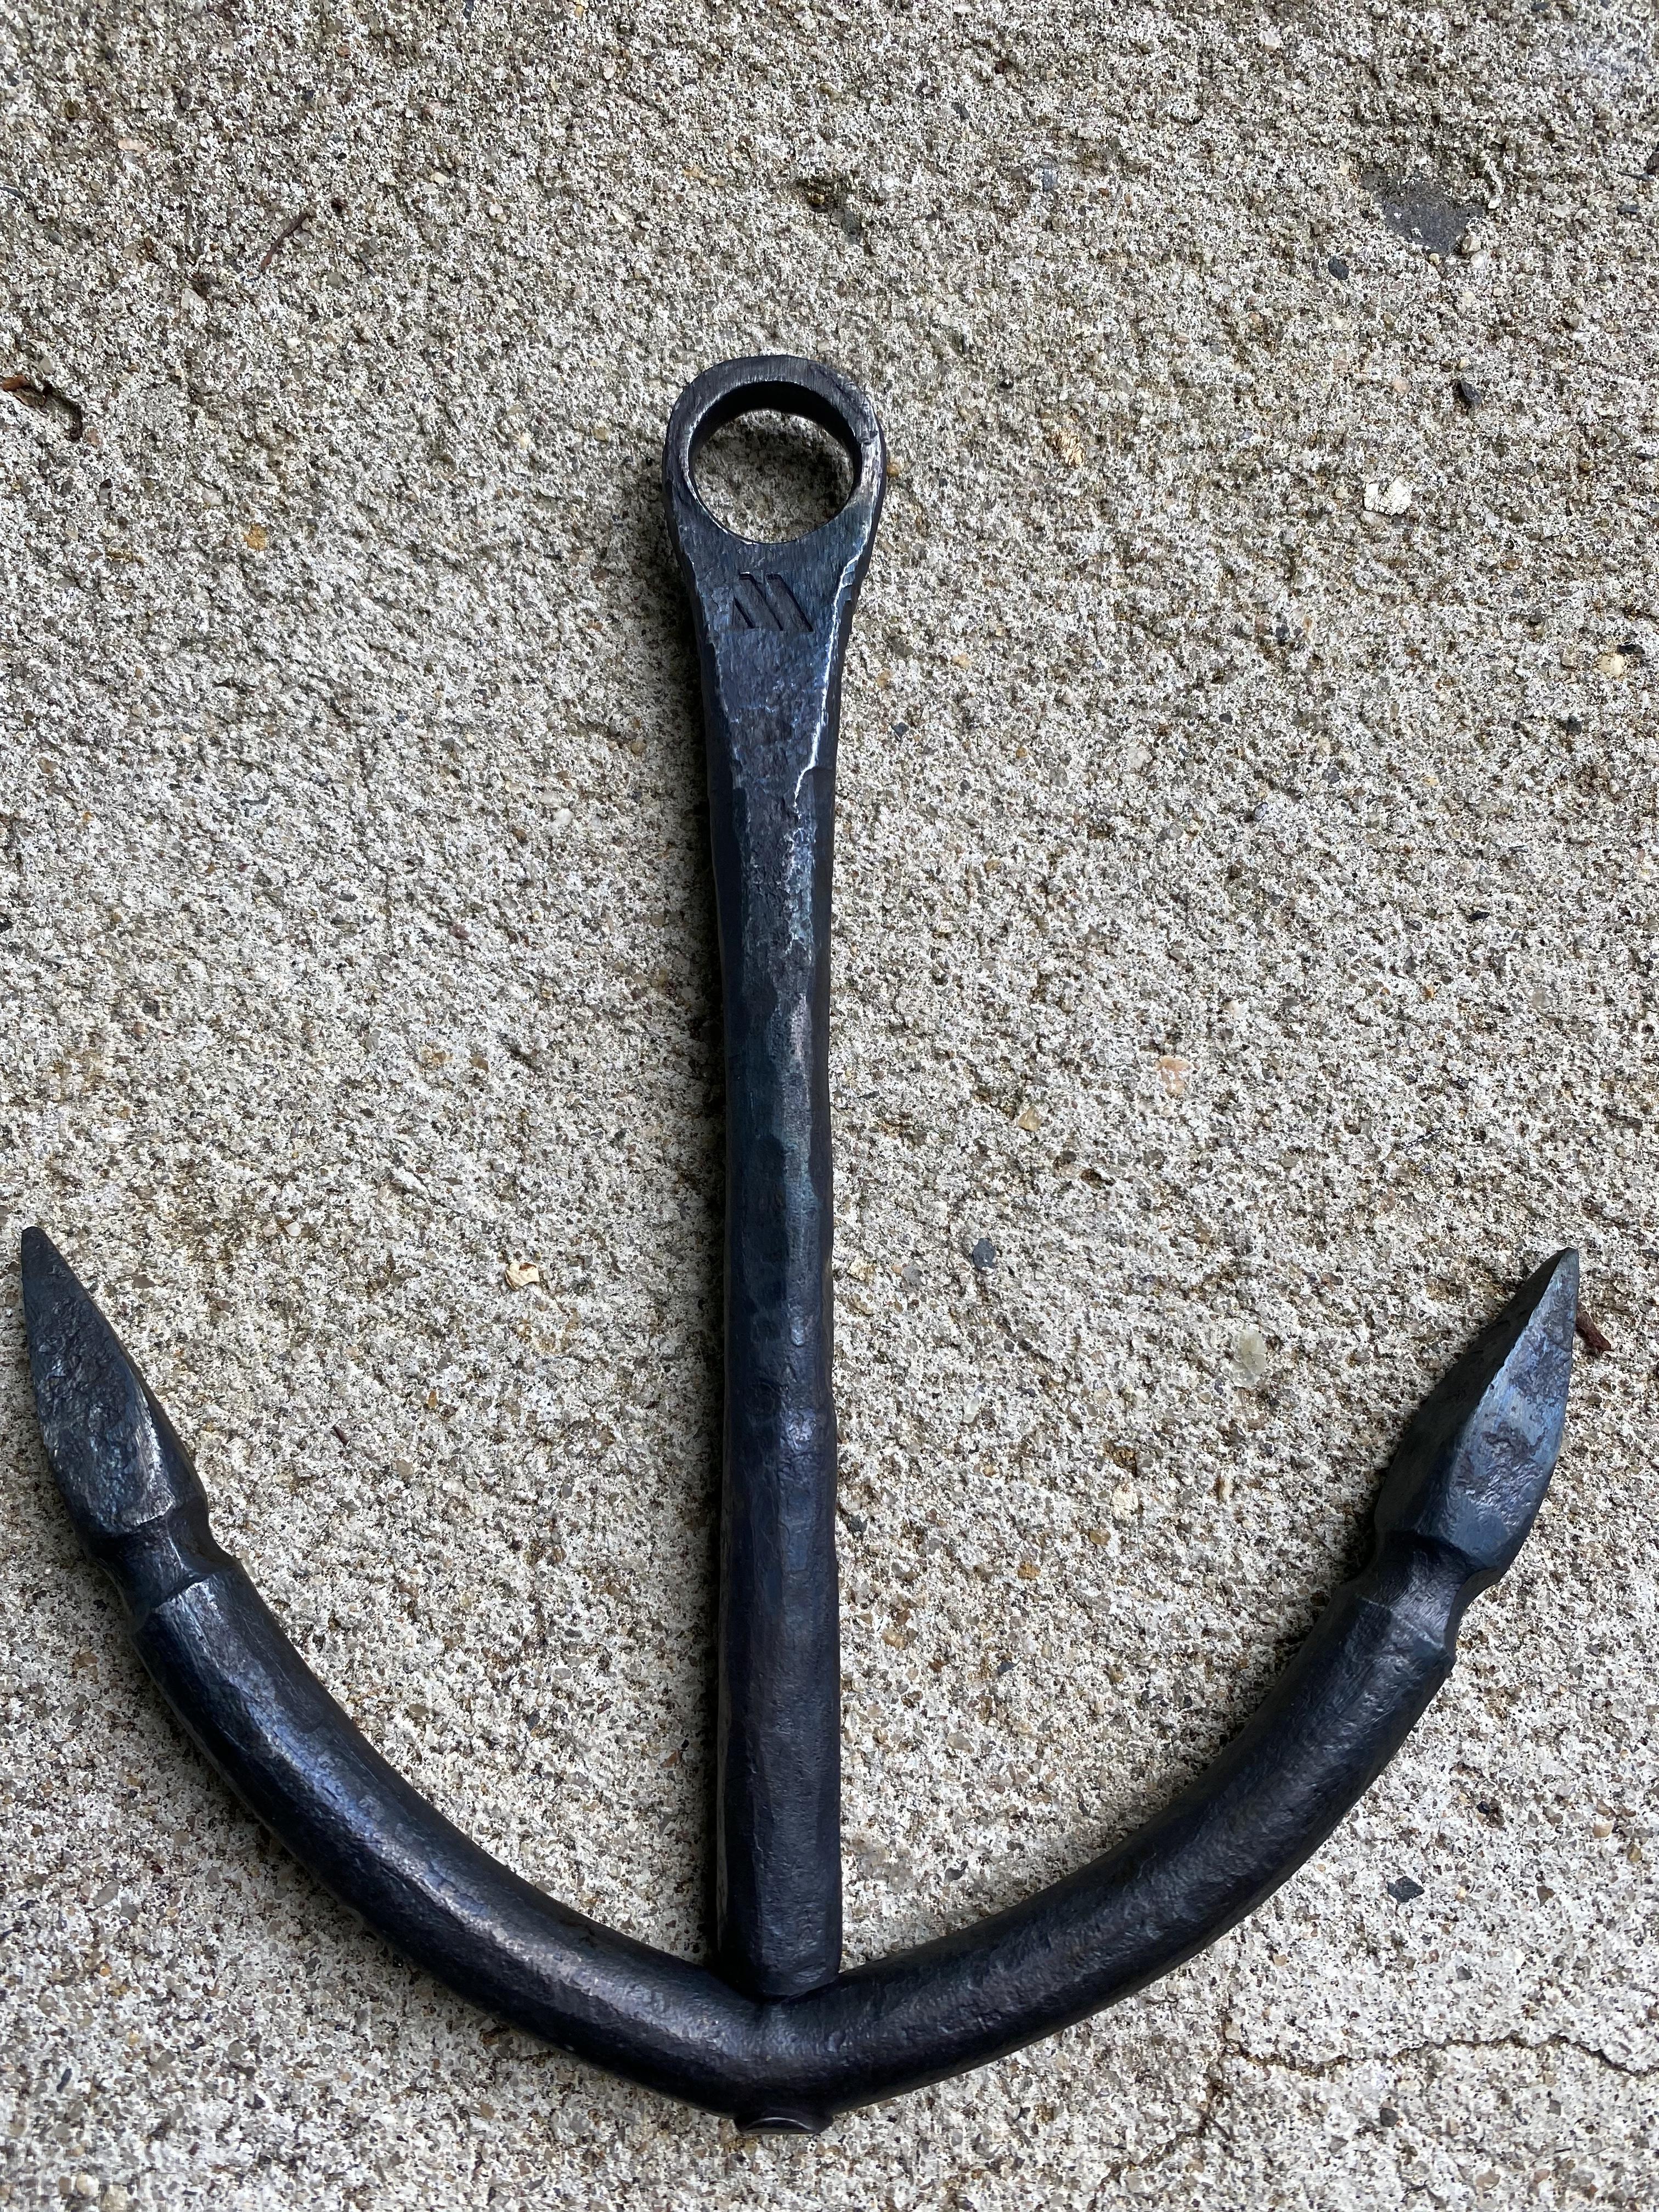
I got a really cool project idea from my grandmother this morning. She asked for an anchor to hang on the front of my grandfathers grave as he was in the Coast Guard. Making a tenon freehand at the anvil is tough! And yeah … I drilled the hole in the bottom piece BEFORE bending the points up. Lesson learned. It got totally deformed lol. But pulling off even a crappy tenon, making this horrible “spring fuller” spur of the moment to do the end of the hook parts and joining two pieces with a tenon for the first time were all really fun. First time punching a hole through anything thicker that 1/8” or less and then stretching it out over the horn too. Learned a lot this weekend. If I was more confident in my welding and grinding I would fill the gap in the bottom where the tenon didn’t fill it from the deformation but it’s not too ugly.
I’m assuming there’s some formula for setting the correct tenon length…help?I also keep getting this brownish residue when applying paste wax. It’s becoming really aggravating. It will rub off but not completely and it’s just doesn’t look right. I supposed it could just be the type of paste wax I’m using but I also thought it might be this little brush I’m using to apply it - I do that because I’ve seen others a use paint brush. What do you guys use to apply it if you’re using wax? Thanks


-
On 6/14/2021 at 5:24 PM, Ted Ewert said:
Just don't get discouraged when your first tries don't turn out like the video you saw on YouTube. Most of those guys don't show you their own scrap bin.
Well said Ted, thanks!
22 hours ago, Jobtiel1 said:I like the way this turned out, and maybe I'll make a few more to sell.
Really cool striker. I found this punch at work and thought I could make one from that. I was curious if you hardened and tempered yours though?
-
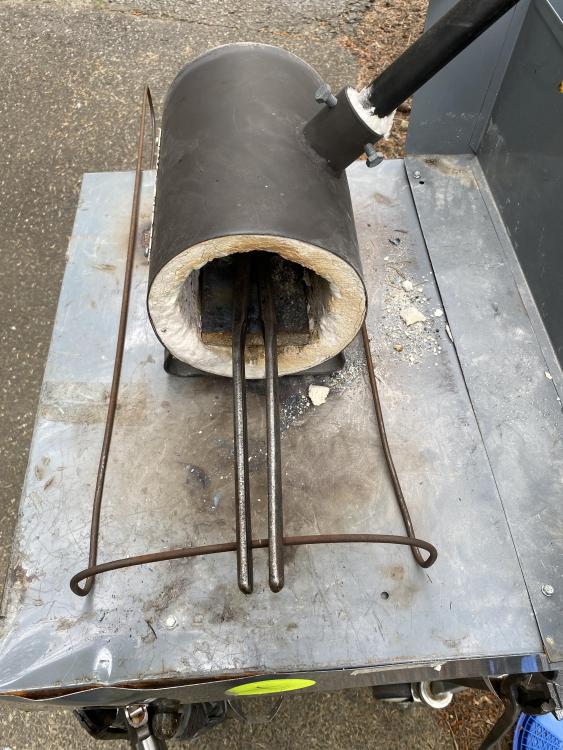
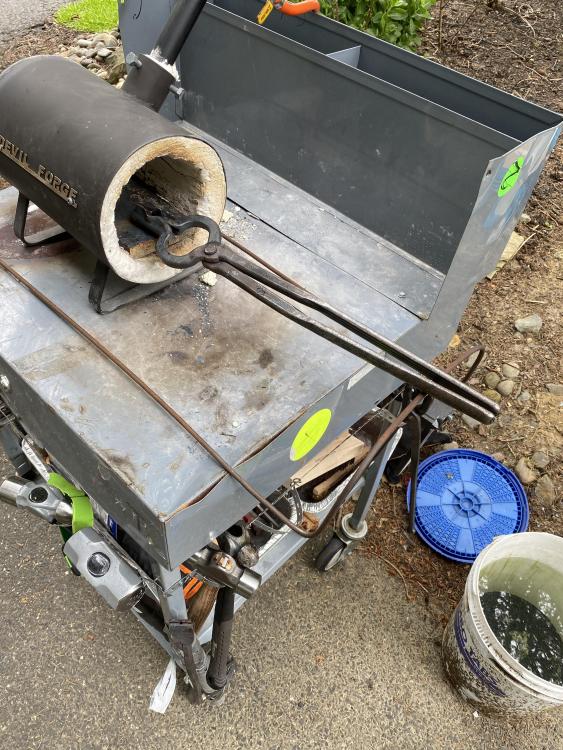
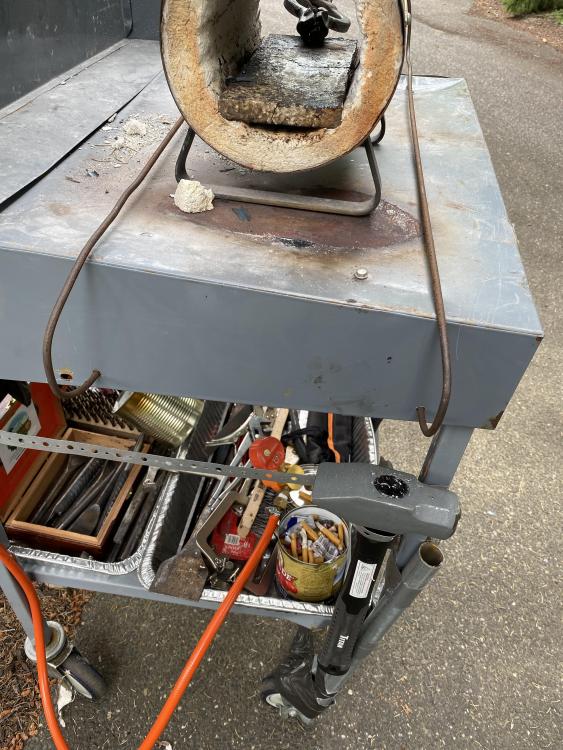
This weekend I made this awful “D” for an old friend of my mother. Not my best work lol. I also took ten minutes and bent up this long thin piece of rusted bar I found on the side of the road and made an adjustable work holding thingamajig…I’ve been fighting with holding my work since I got this forge and all it took was ten minutes of bending this stuff cold with my hands to solve it. And I finally tried out my new flux core welder…I thought I was bad at forging…then I tried welding. Way more difficult than I thought but I did manage to make my first hardy tool. It’s super ugly but I’m excited as it’s going to do the job and well…it’s my first hardy tool. So it was good weekend.


-
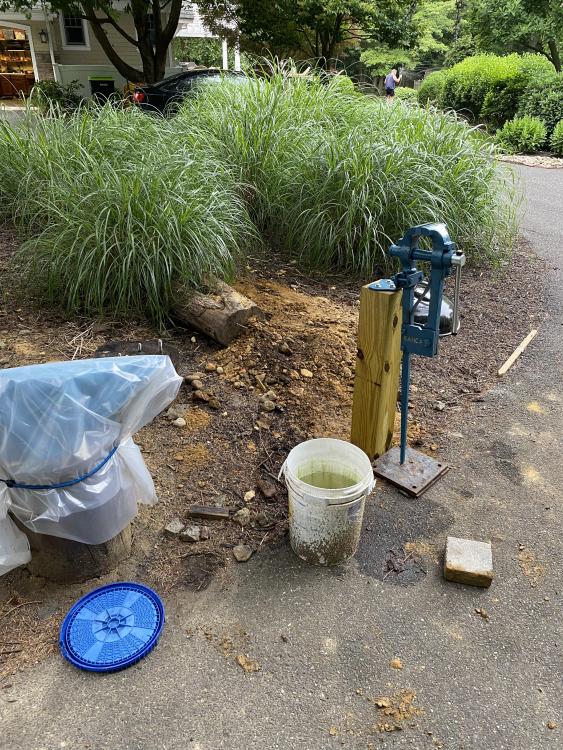
Vermiculite worked great. The weight is much more manageable now. I think I’ll still try to reinforce the legs in some way just to be safe but I’m not too worried about it now. Thanks guys.
-
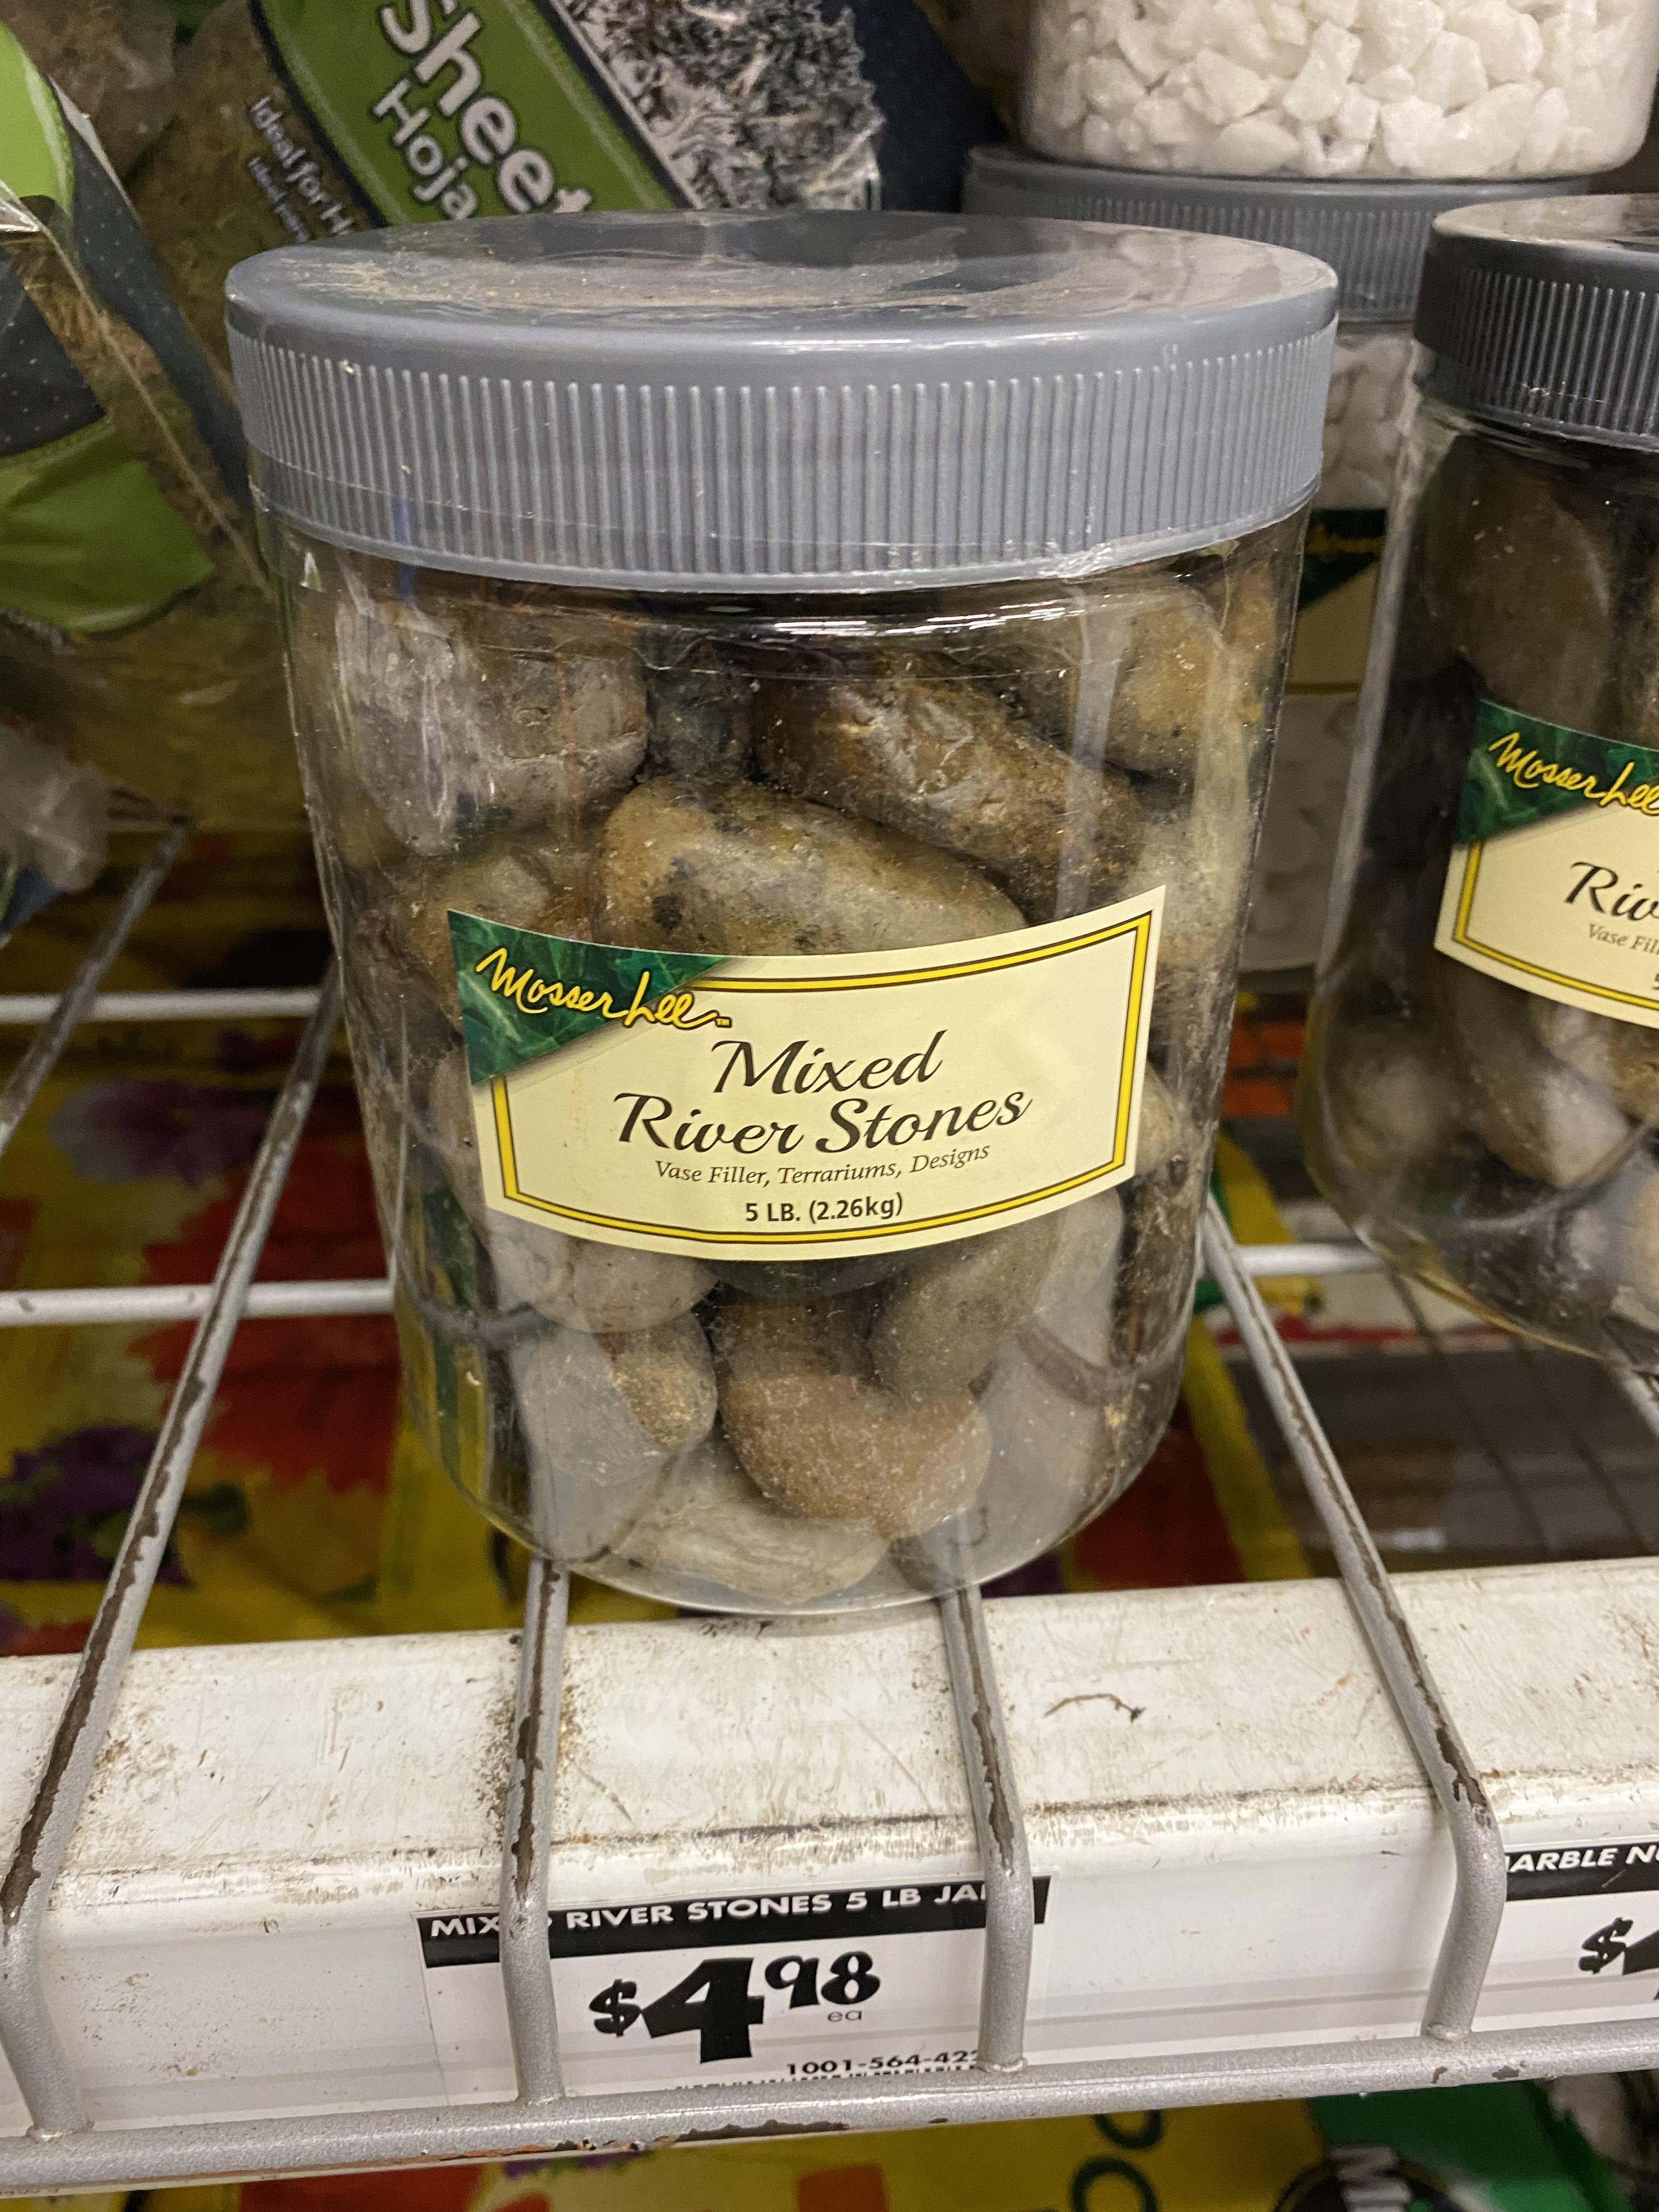
Ok so they ended up finding the last bag of vermiculite. But did you know they take rocks you find in the back yard and put them in a jar, call them “river stones” and sell them for five bucks? I thought that was funny.

-
Help lol at Home Depot. No vermiculite. Will perlite work?
-
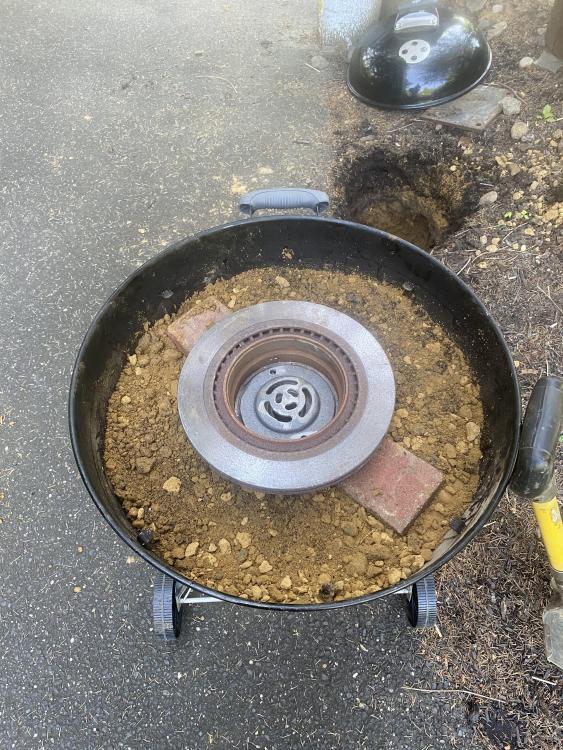
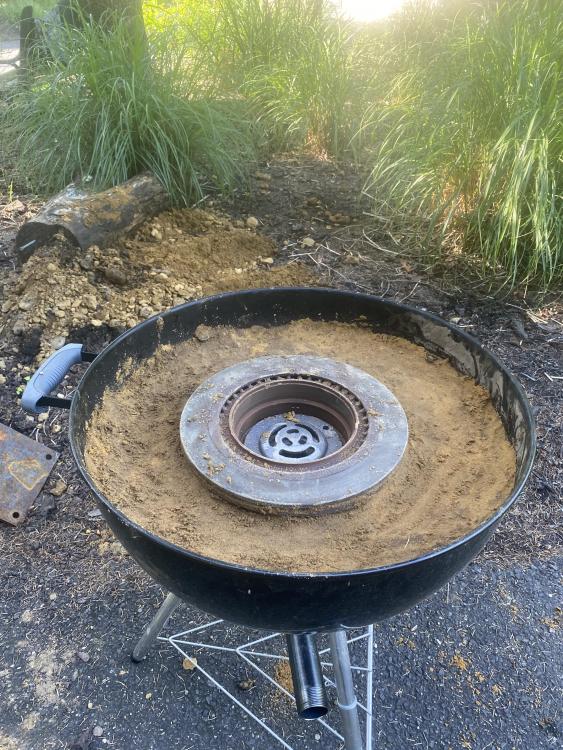
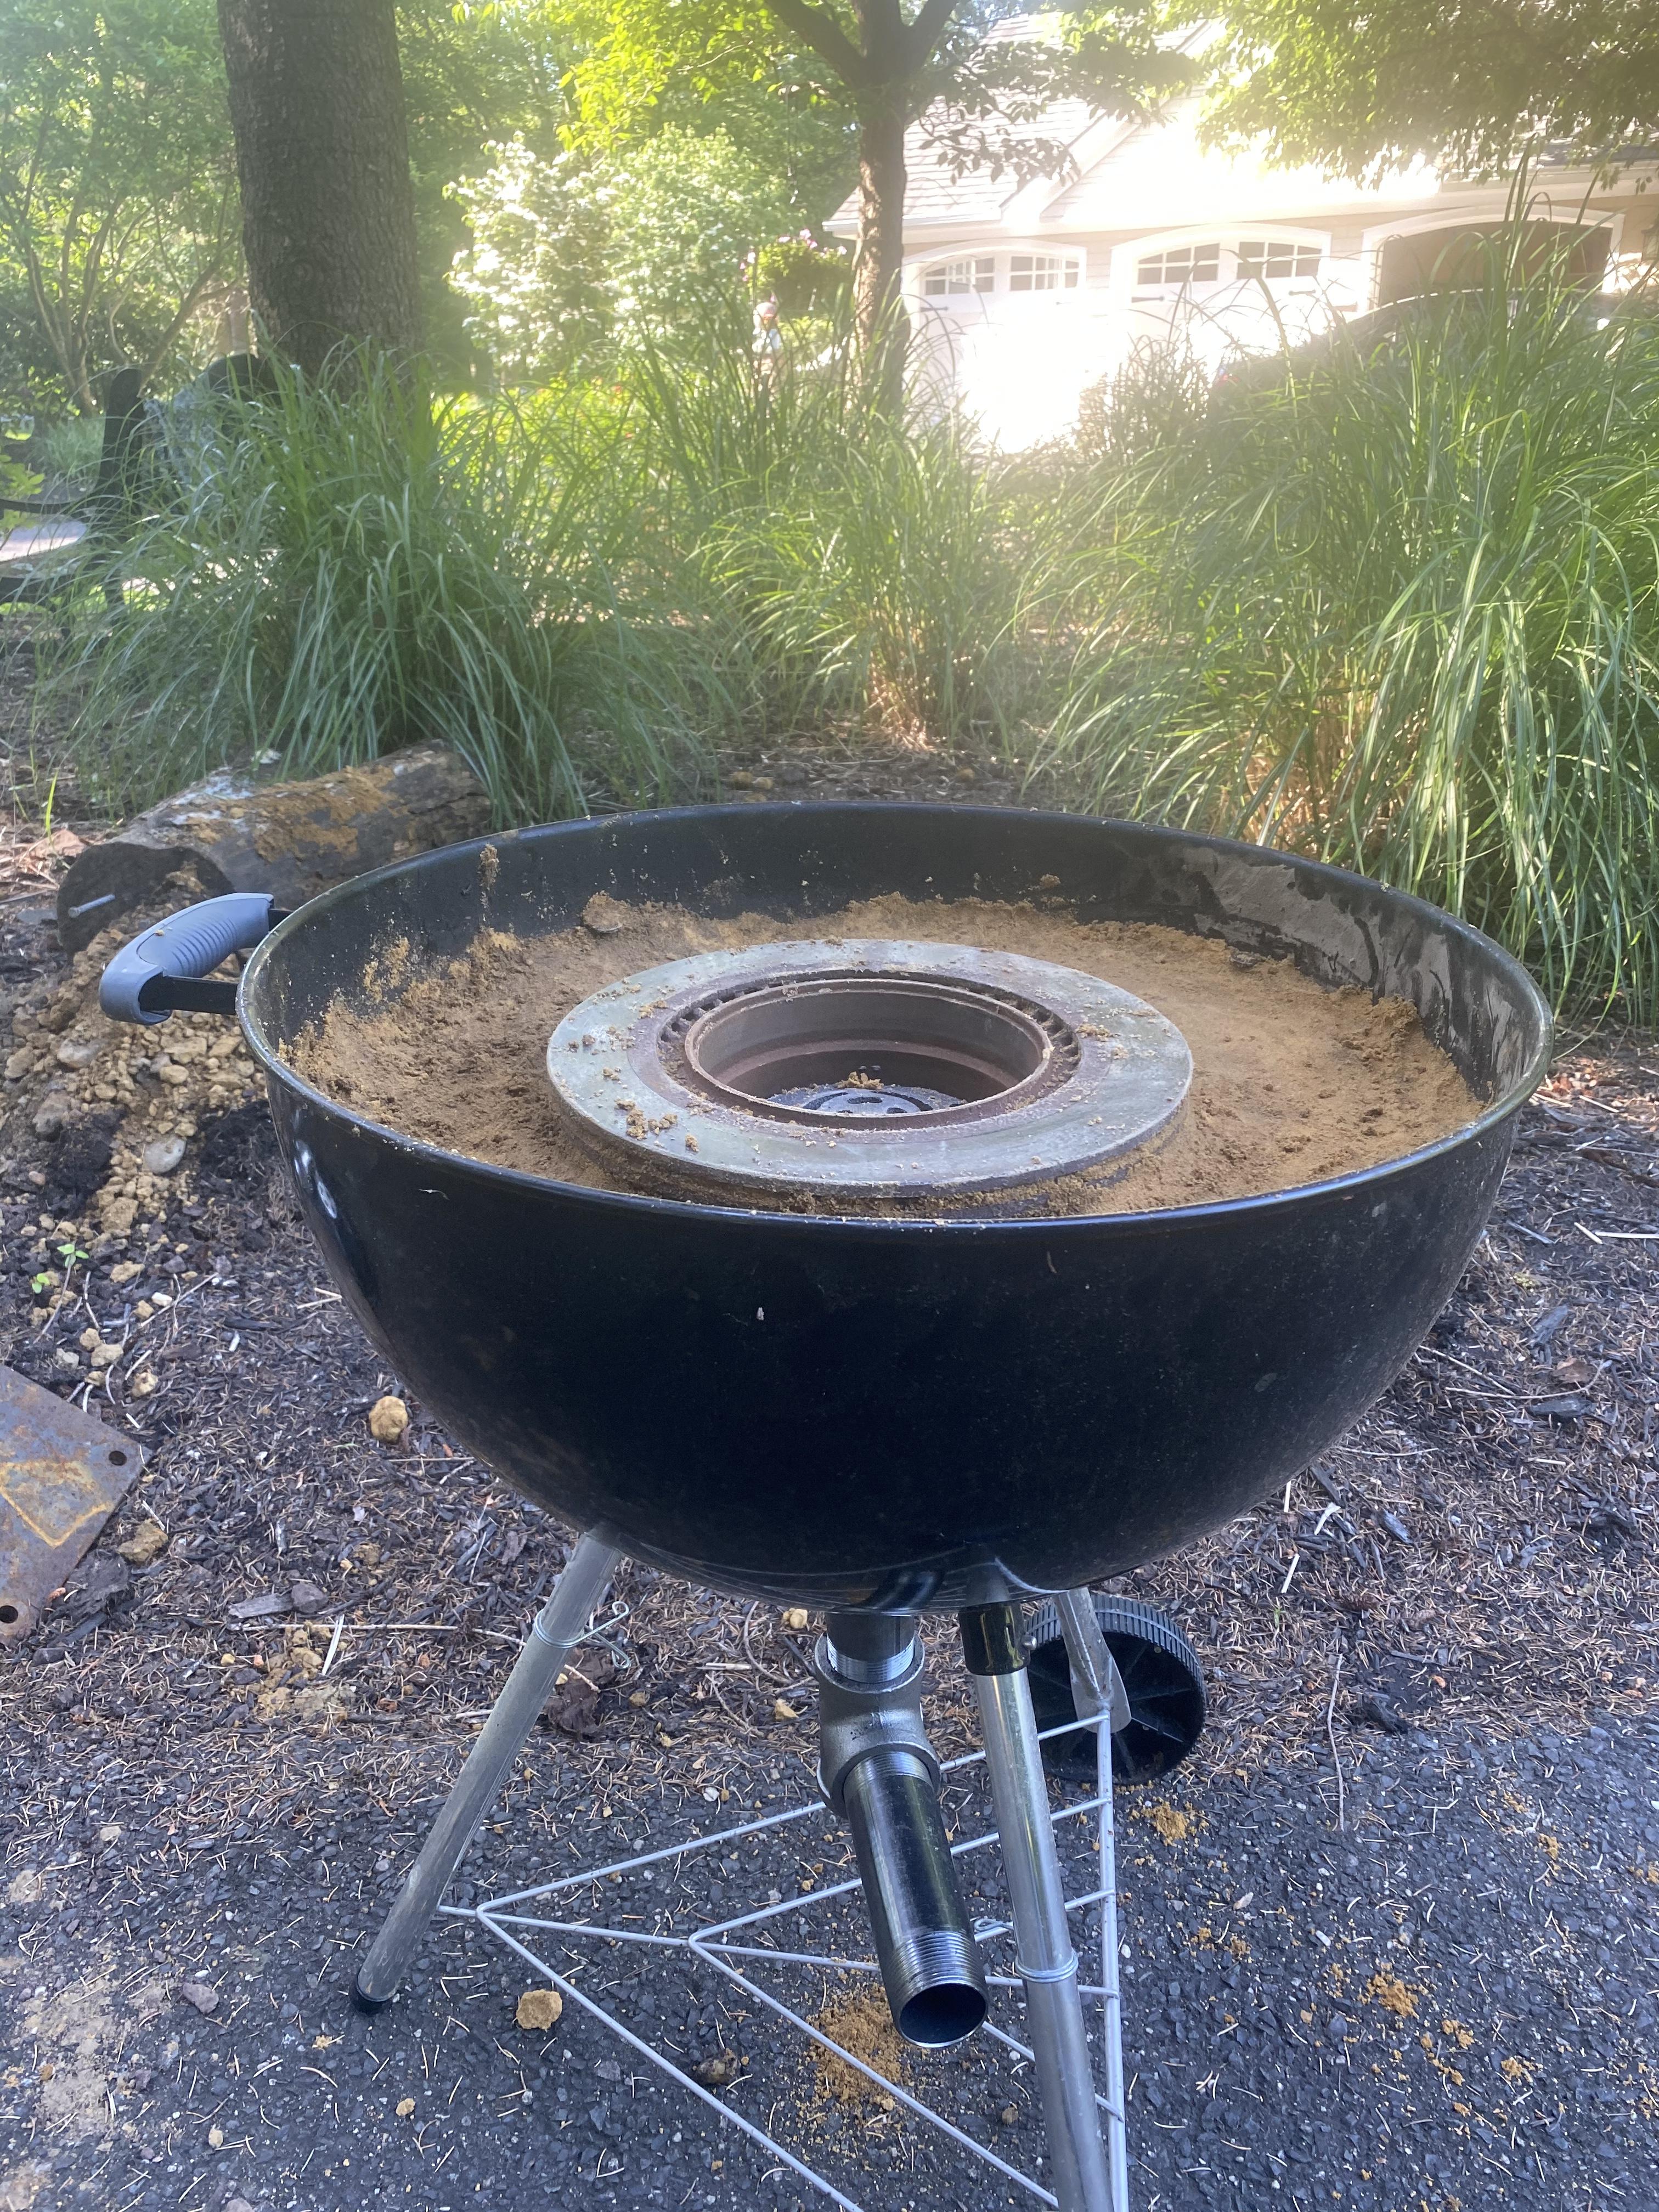
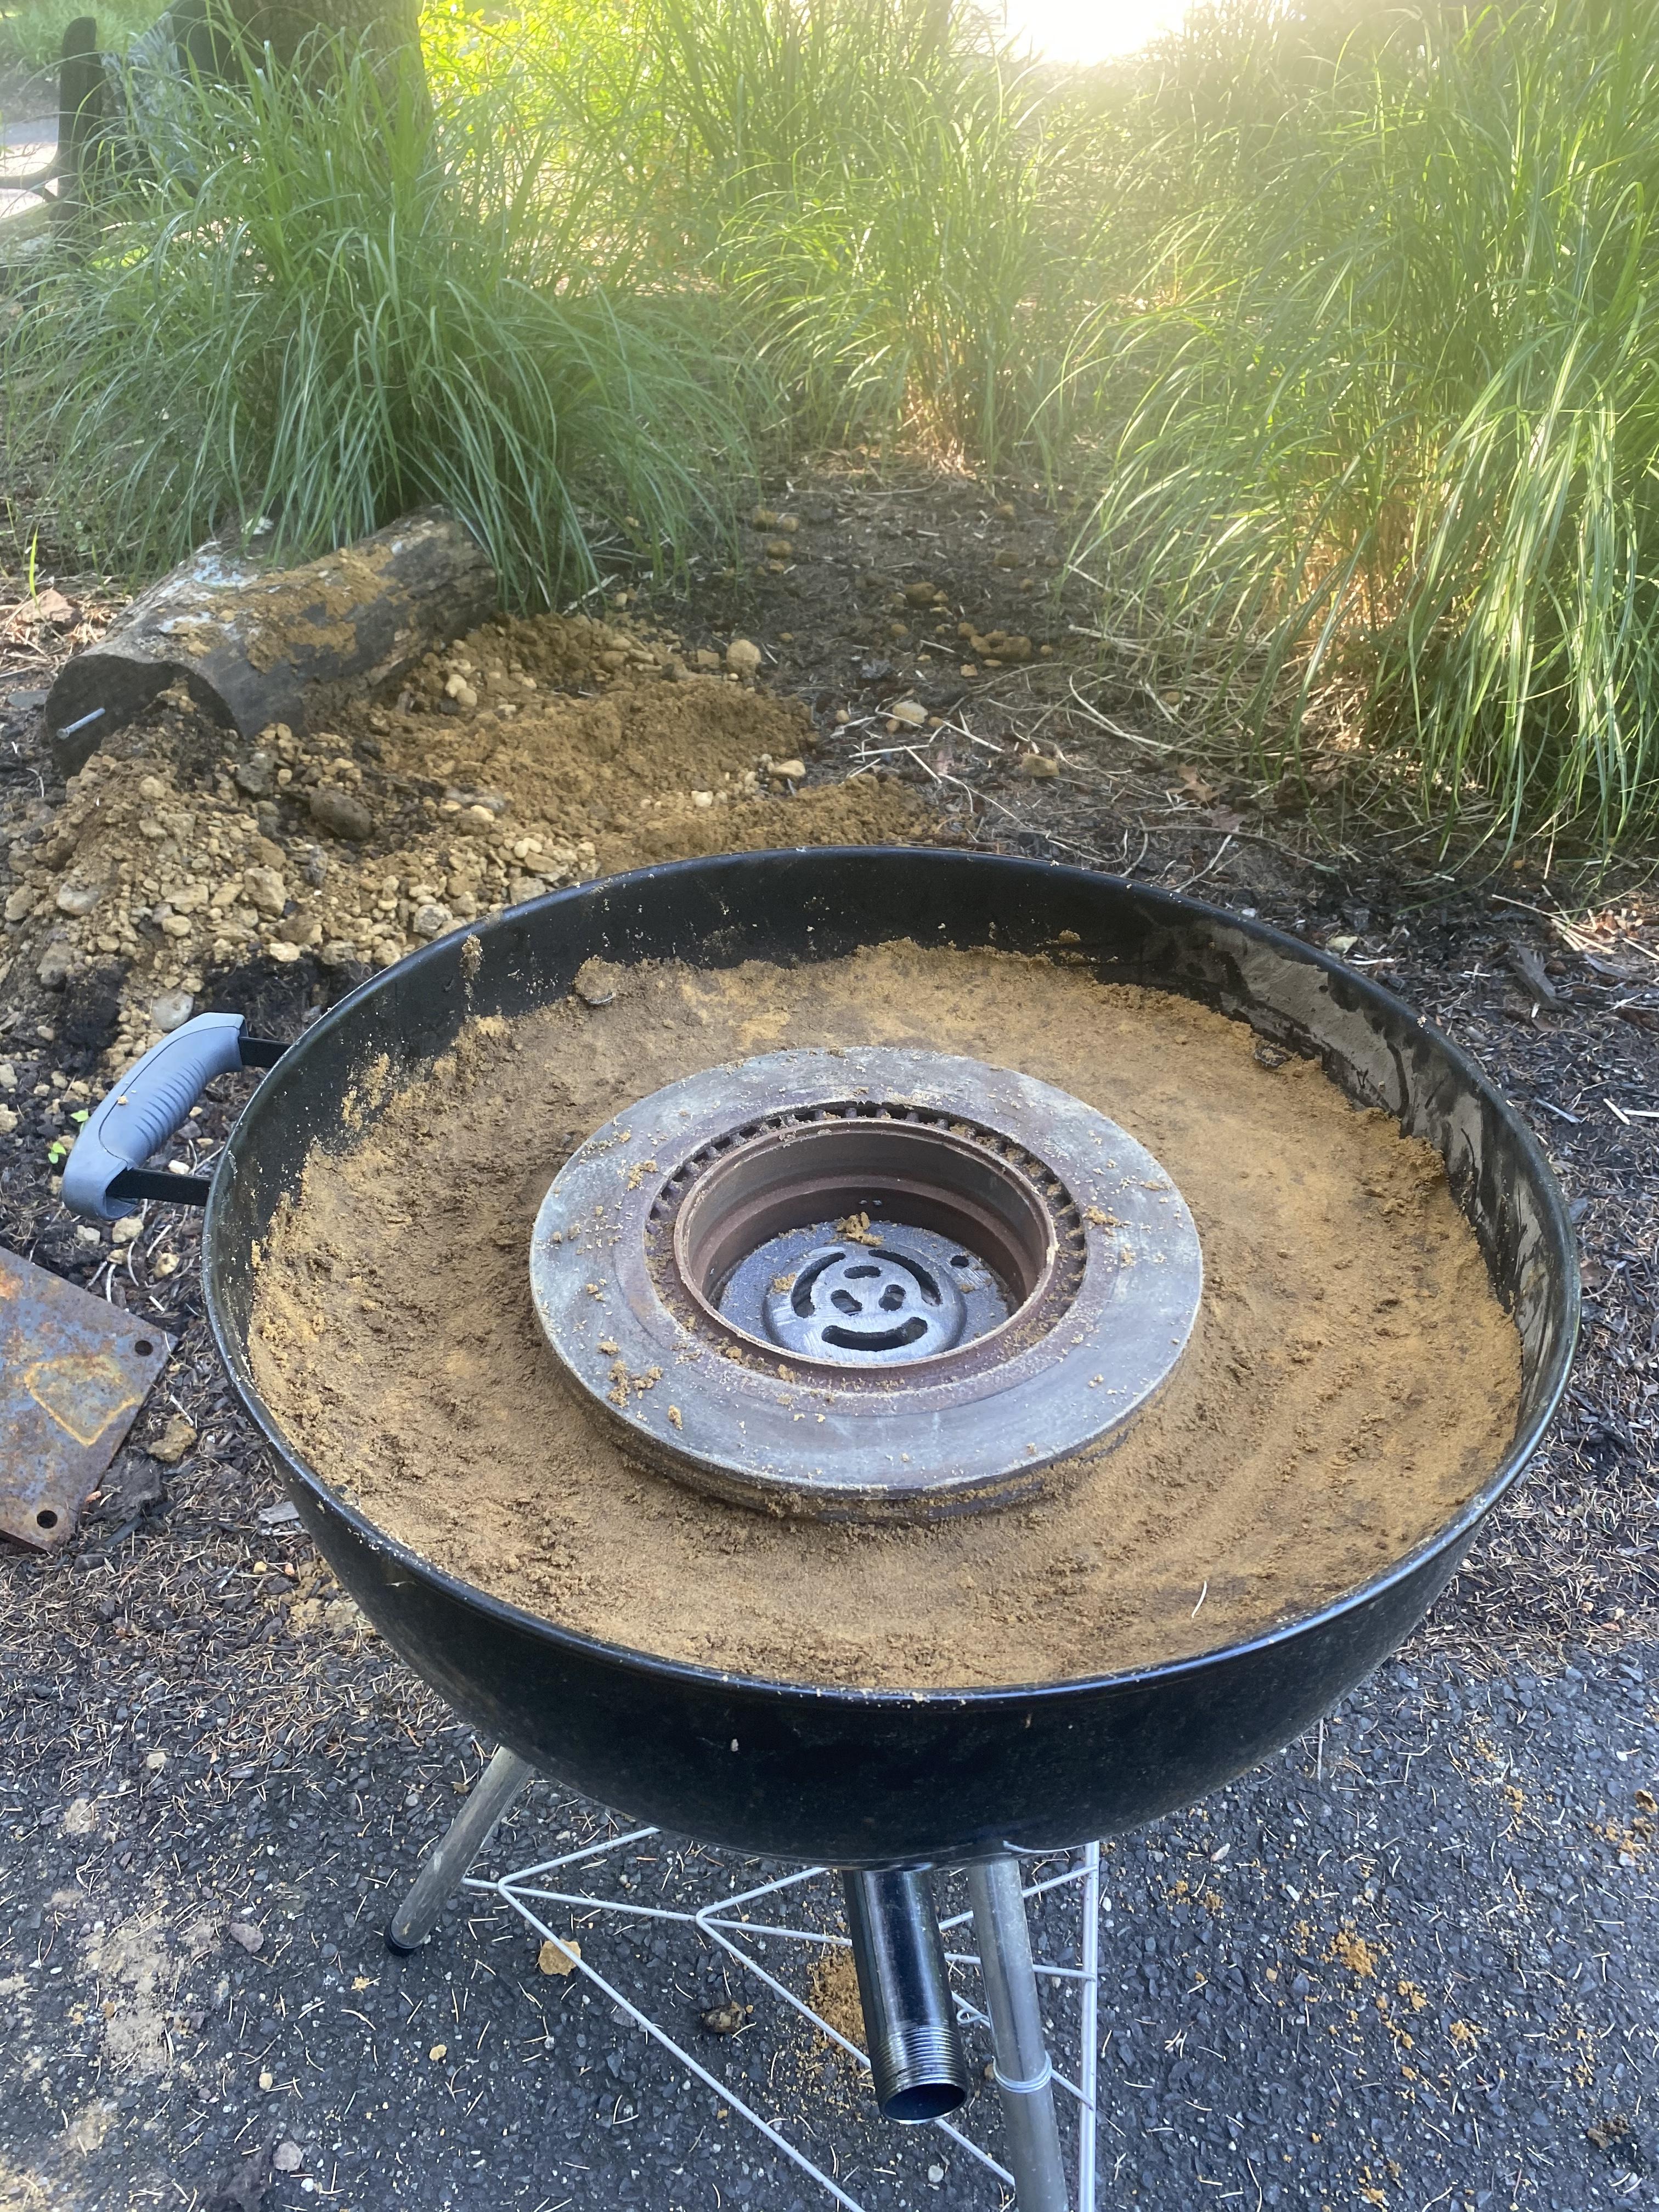
Yeah I like the idea of still having the lid. The level of the dirt and the rotor were the last questions I had. I left the dirt level lower than the rotor thinking it would be some extra space to have fresh coal. The rotor is about 2 inches lower than the rim of the grill right now. So the way it sits I would definitely need to cut those slots for long stock or I bring the rotor up flush with the edge of the grill.
Once again though I spent way too much time worrying/thinking about the right way to do something instead of just trying it. I could have had this going weeks ago and gotten it to my liking by now lol.Oh and I forgot to order the coal...might need that.
Thanks for all the help though guys. Much appreciated. -
That’s not a bad idea. Easy enough to change it to that. Would definitely take a lot of the weight out.
-
So this is where I got this weekend. I was really liking it until I went to move it haha. Not that it’s too heavy to move but I think it’s just too heavy for the legs of this cheap grill. So...I’m thinking about doing it the same way but using the lid instead of the bottom like Frazer suggested. Cut the same hole in the lid as I did the bottom and just slip the lid on to the pipe so the lid would be resting on the edge of the bottom and there would be a gap between the top of the lid and the bottom (where most of the dirt is with the current setup) I hope that’s making sense. If it does, does anyone see an issue with that? In my head it would basically be exactly what I have here except half the weight of the dirt?
OR I leave it the way it is and move it to a mostly permanent spot but that would be outside. My plan was to bring it in the garage once the fire is out after each use.
What do you guys think?
-
Thanks guys. All super helpful. I was worried about just going with dirt/clay but now that I know others have used it that’s what I’ll try. And being able to easily redo anything that doesn’t work as opposed to breaking up some kind of refractory is a huge plus and a great point.
-
hoping to finally get around to this over the weekend. Frazer did you end up using any kind of refractory cement as a base below the coal? If so what kind? My head is spinning looking for something to use as some range from 20-100$ for the same amount. Hoping someone can throw out a name of something that’s worked for them so I can stop the guessing game. Thanks.


What did you do in the shop today?
in Blacksmithing, General Discussion
Posted
Ted - awesome idea with the light.
JHCC - I’ve never done brazing before - but I’ll look into that
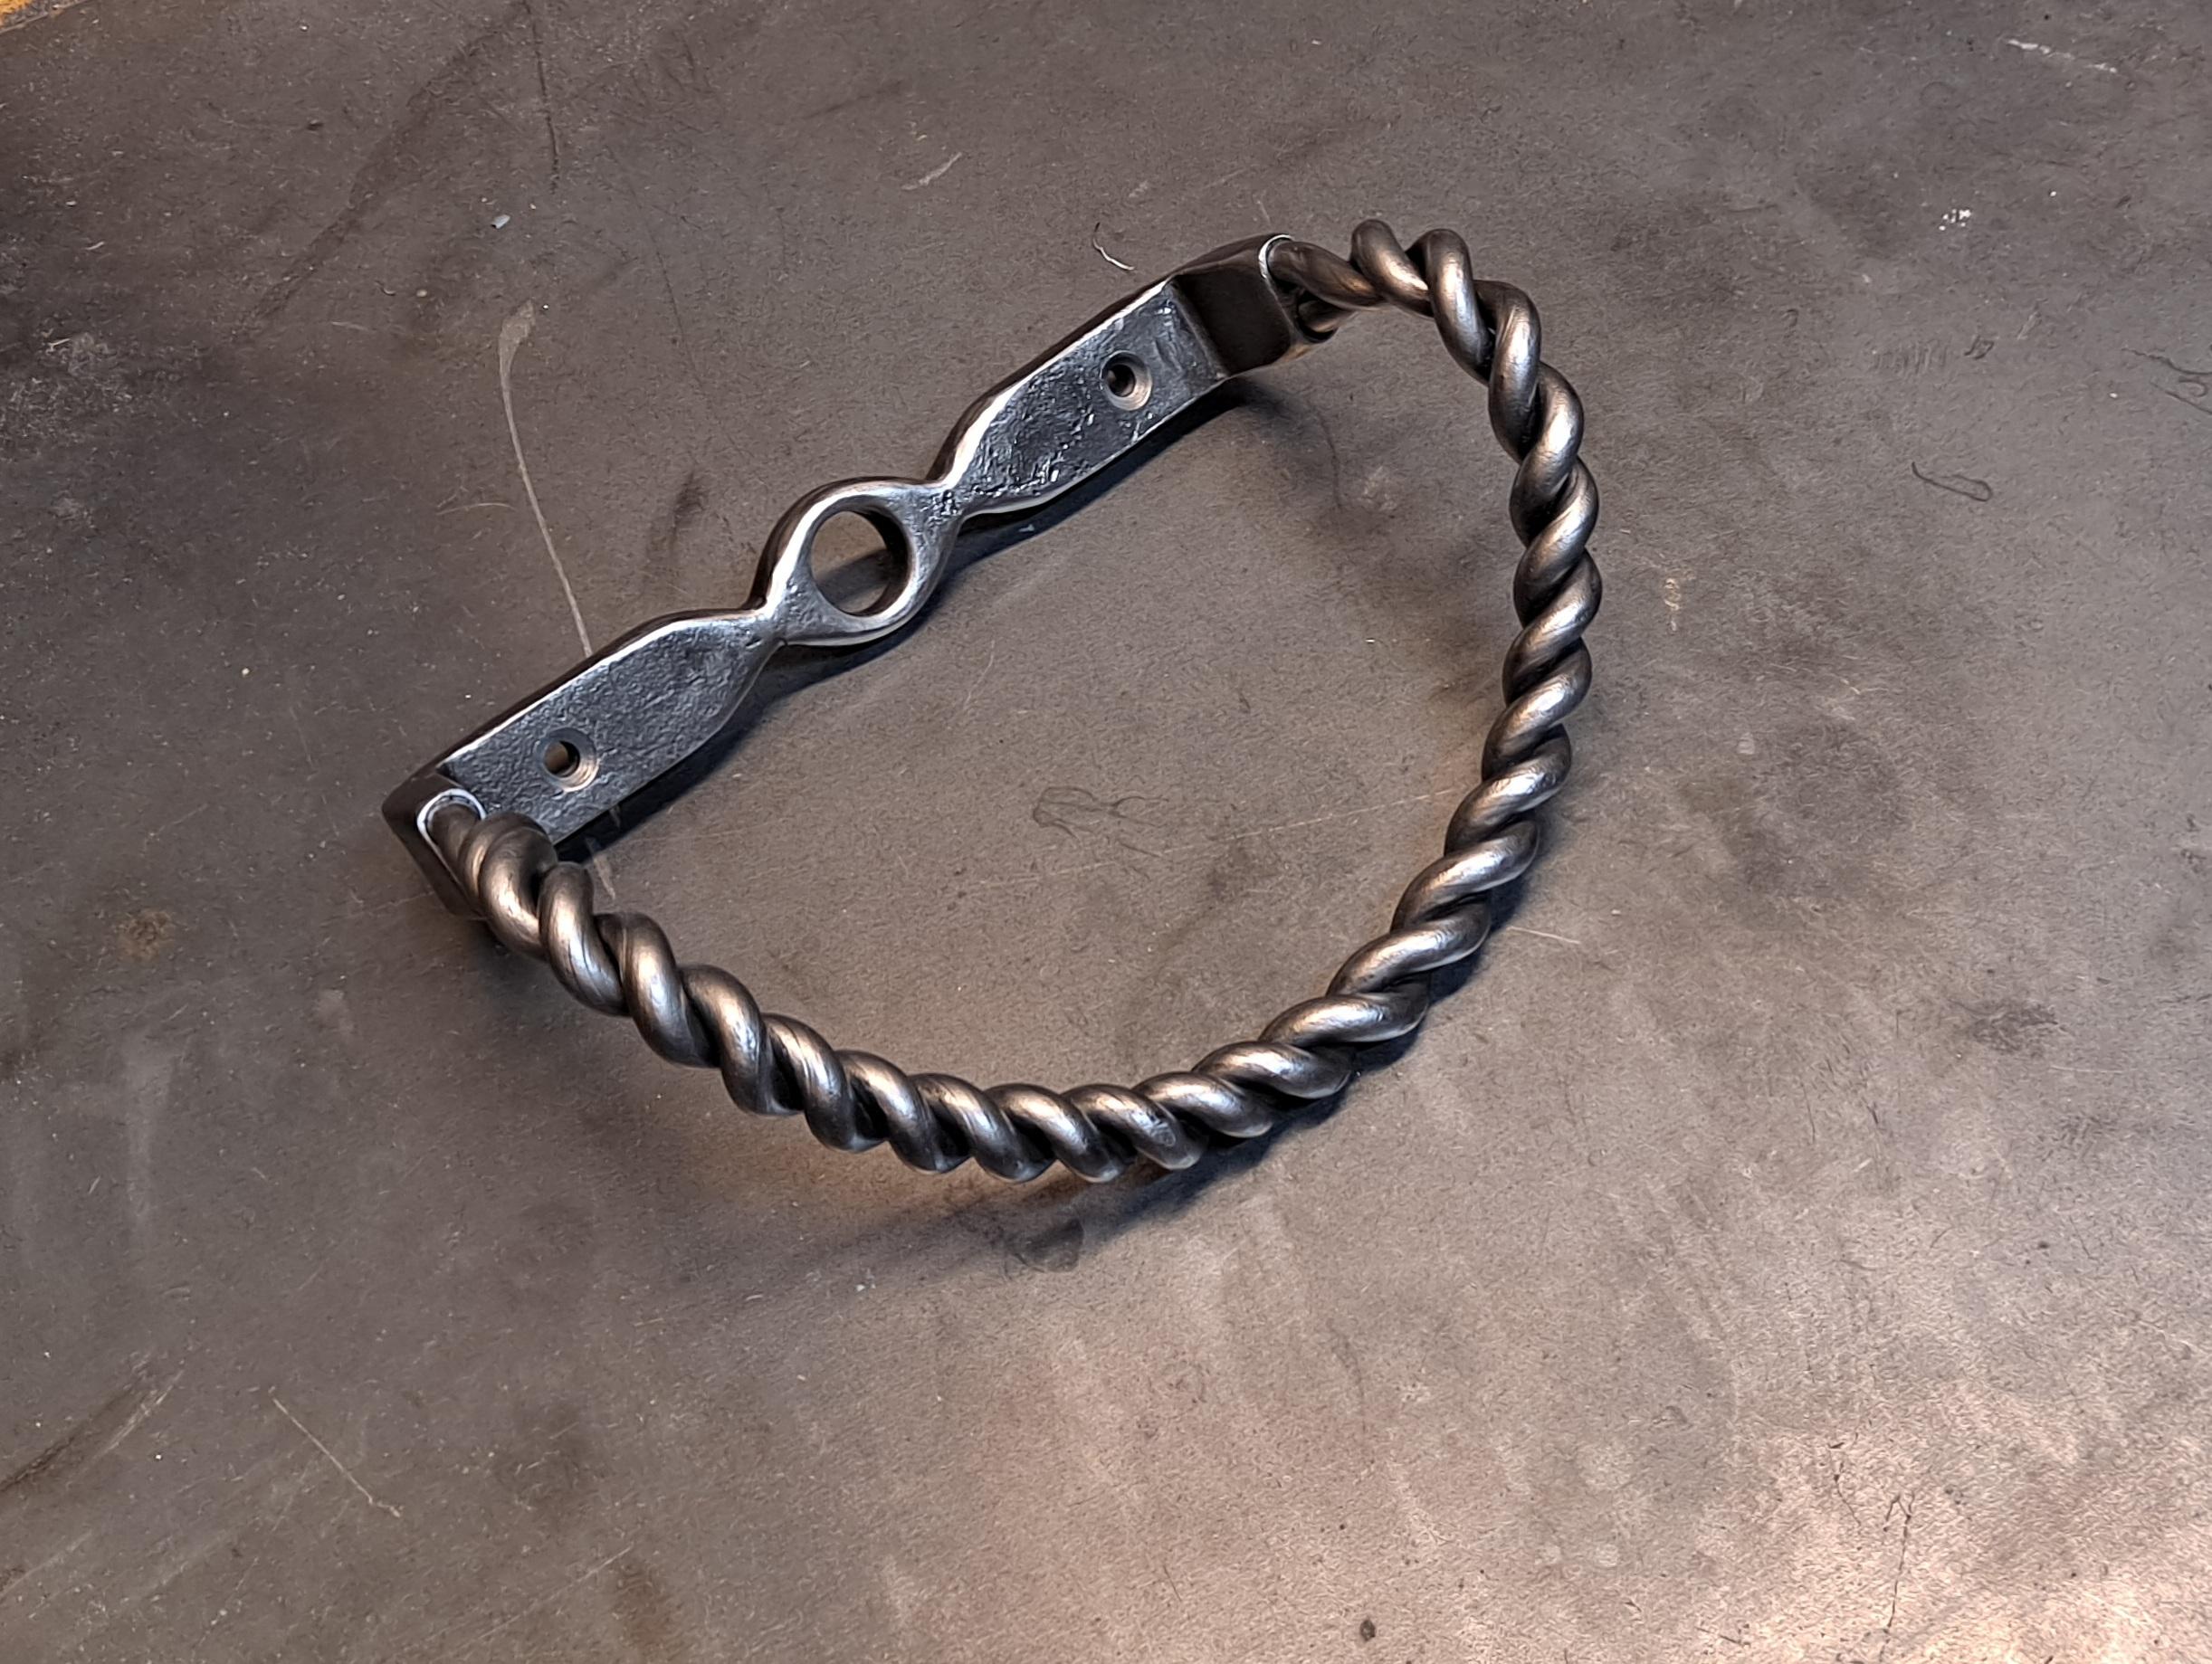
Nodebt - got any pics of this ring roller contraption? Not only has this project been fun so far but I (and guys on this site) keep thinking of ways to make future ones even cooler so I definitely want to make more.
LOL so true. Everyone hates driving with me now because I’m constantly on the breaks looking for what most consider junk.