Mel Fischer
Members
-
Joined
-
Last visited
Everything posted by Mel Fischer
-
Hi Pnut, Yeah, I have noticed it move, especially when I have used the horn. I plan to router out a space for the feet to fit in to hold it snugly. Or i might be making a different stand, one that is lower so that it is at the right height to use when I am sitting (I have knee issues) that will have a lip and some blocks to hold it in place. My problem is, now that I've gotten to the 'actually hitting metal' stage, I don't want to 'waste' my forging time by doing more shop improvements, I want to bang on metal LOL but I hope to get a bit done over the next week and a half to make some things better. Also, bemused laugh at 'little anvil' since this 110lbs one was a huge upgrade from my 25lbs piece of track and my 25lbs cast iron anvil - No, I get it, it is still a little anvil, but it is my 'big' one for now!!! heheheh! But you're right, it will move around and I have to watch it until I get it better secured, thank you for the warning and advice! Irondragon, omg it is so much fun!!!!
-
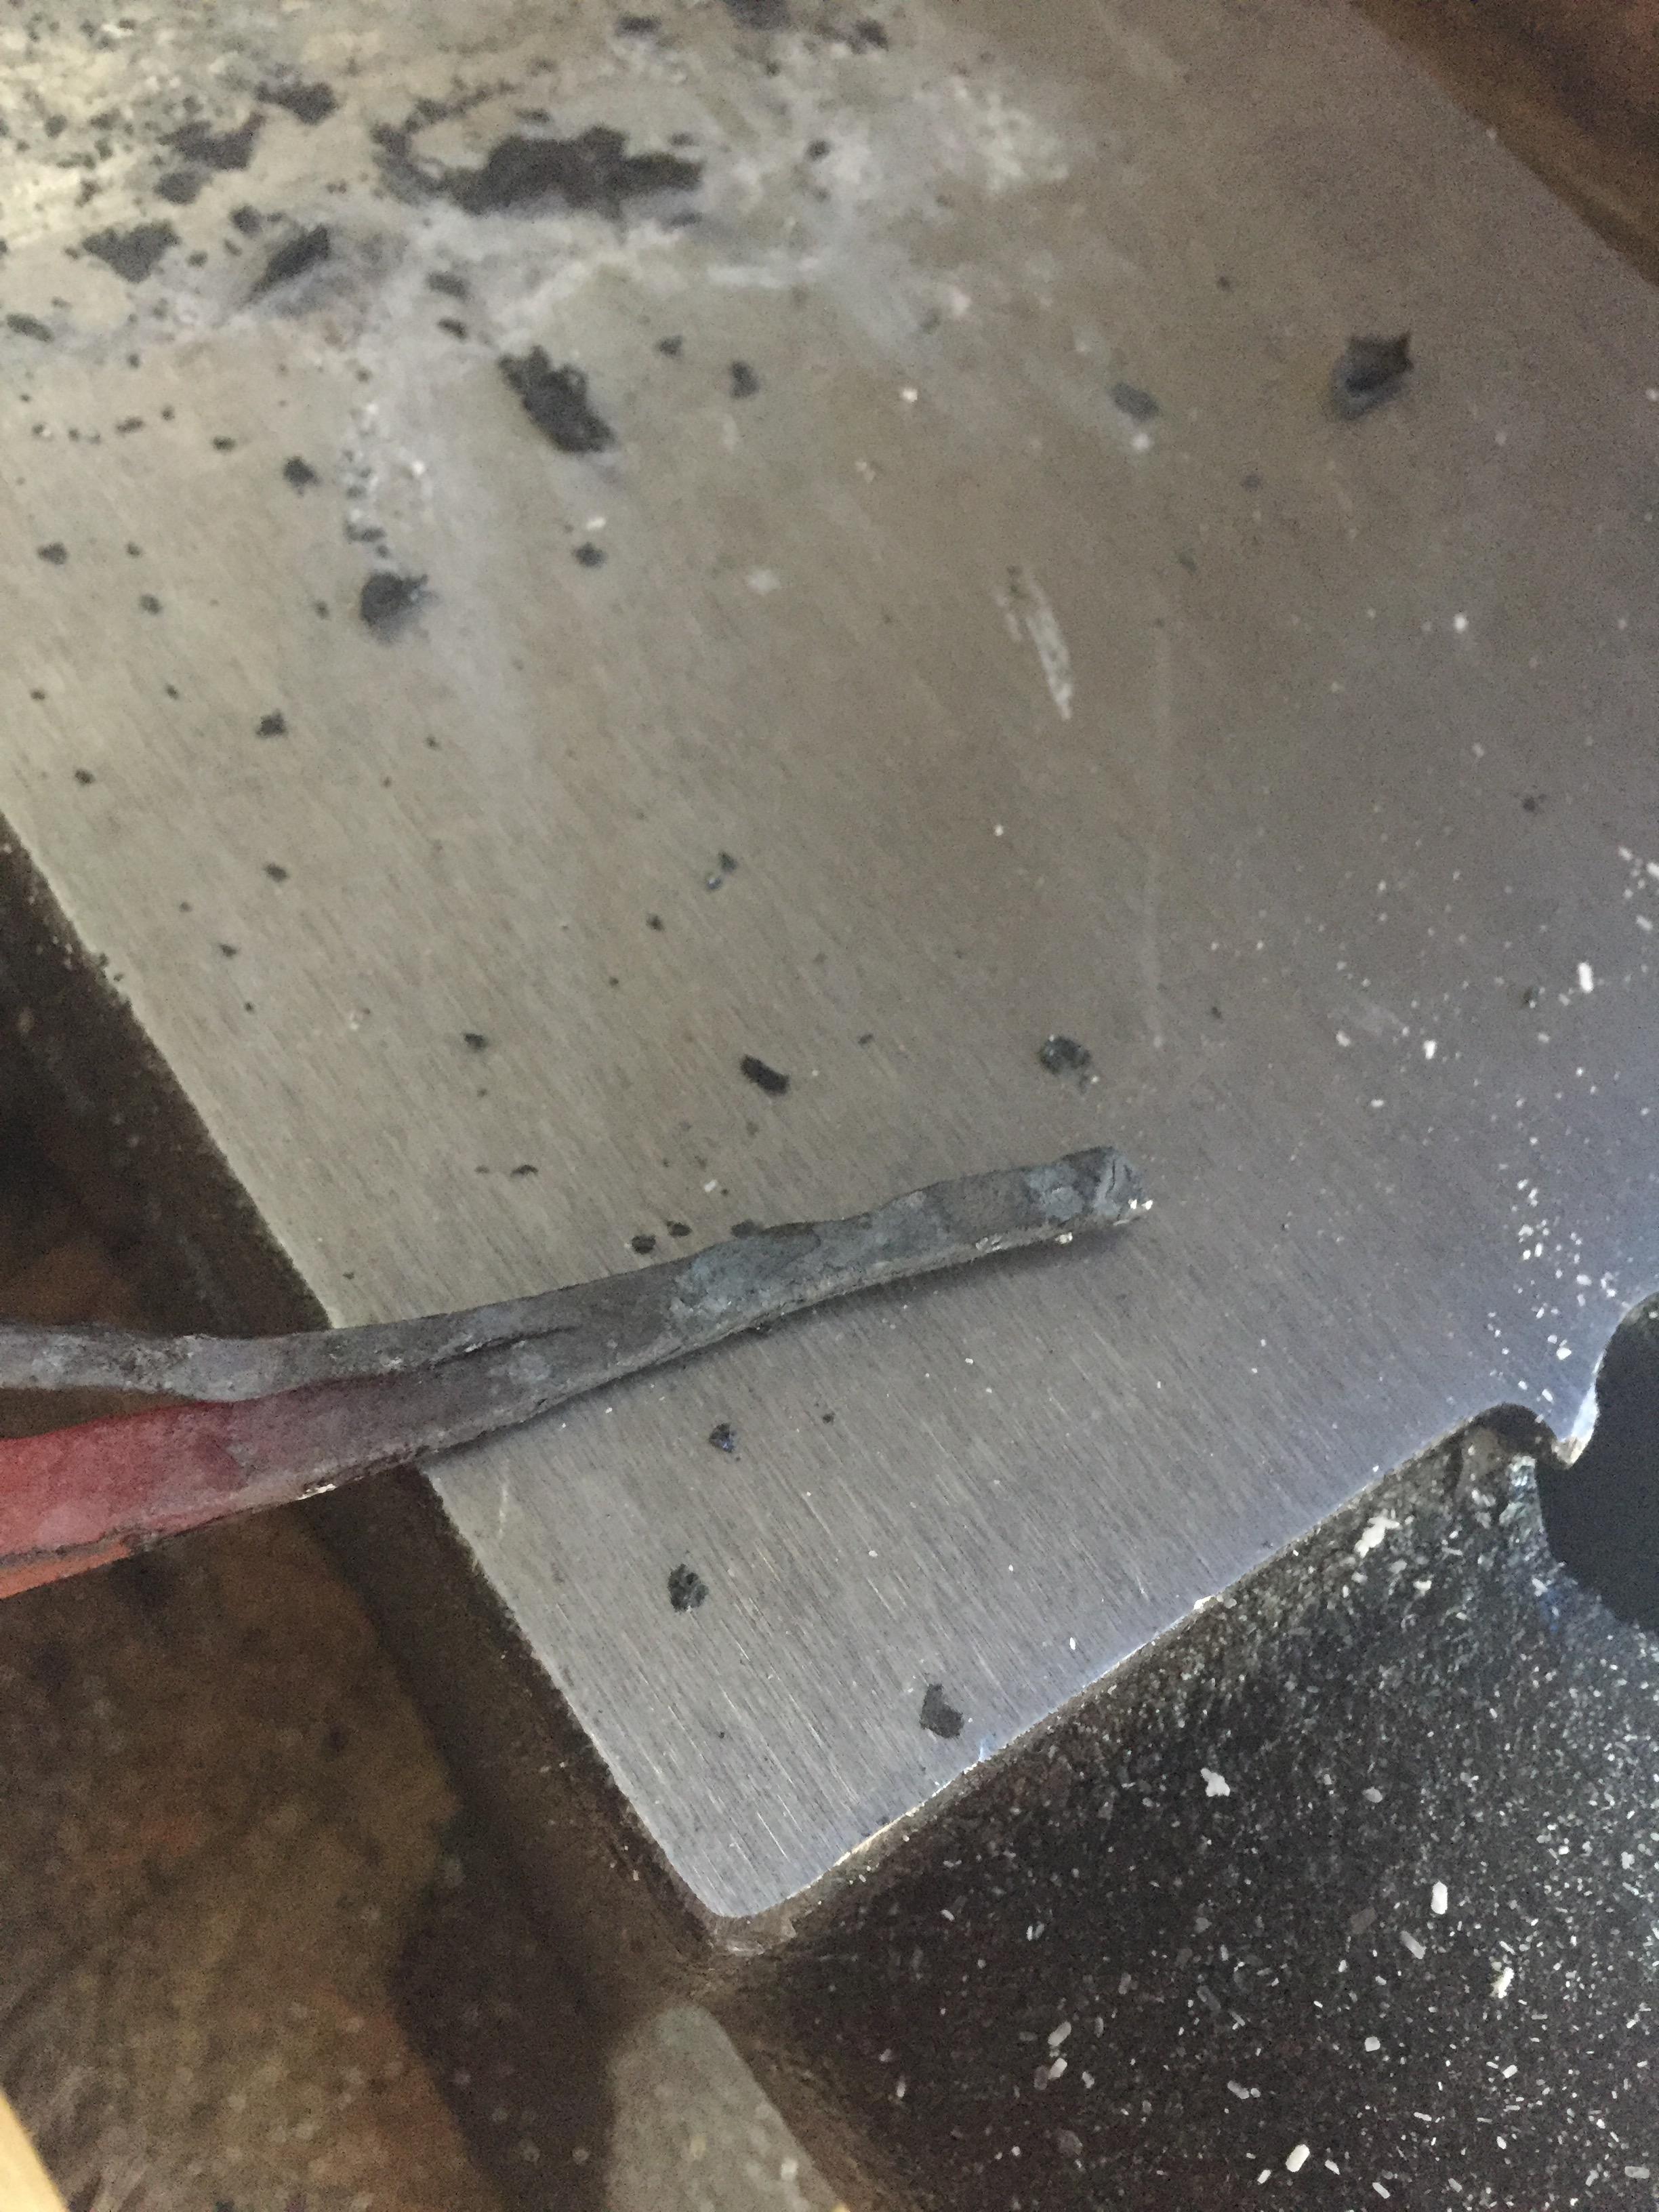
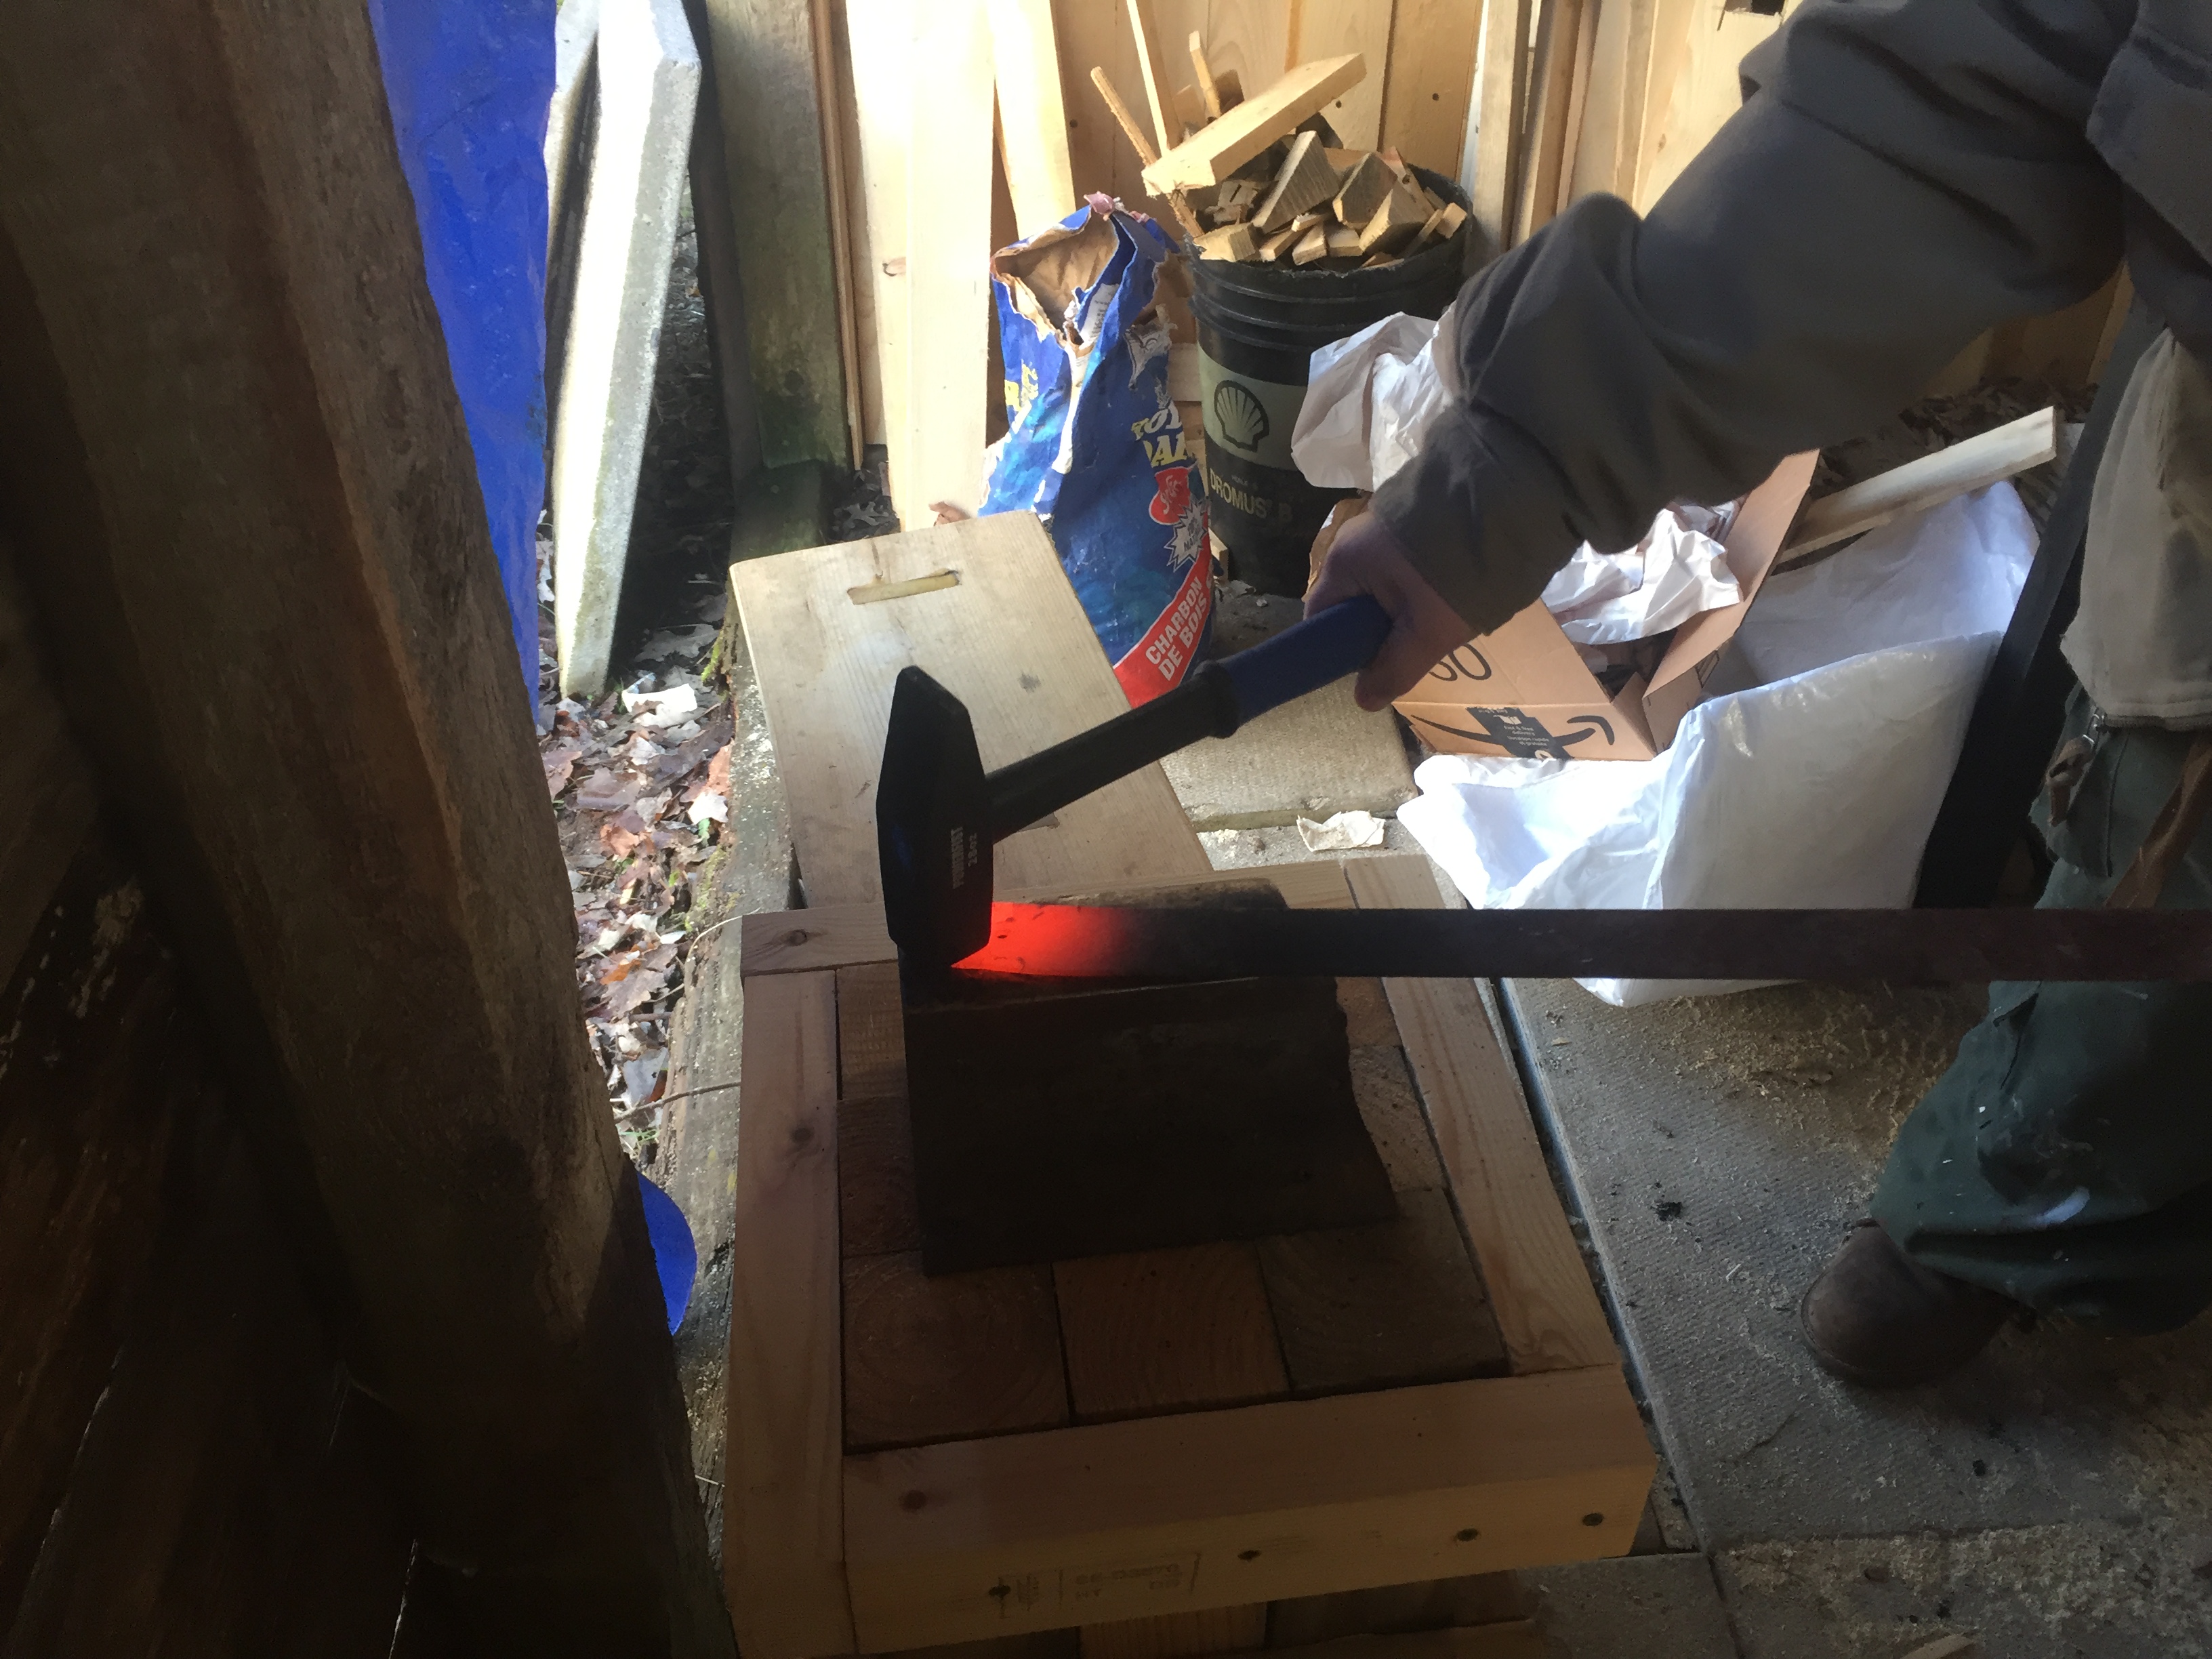
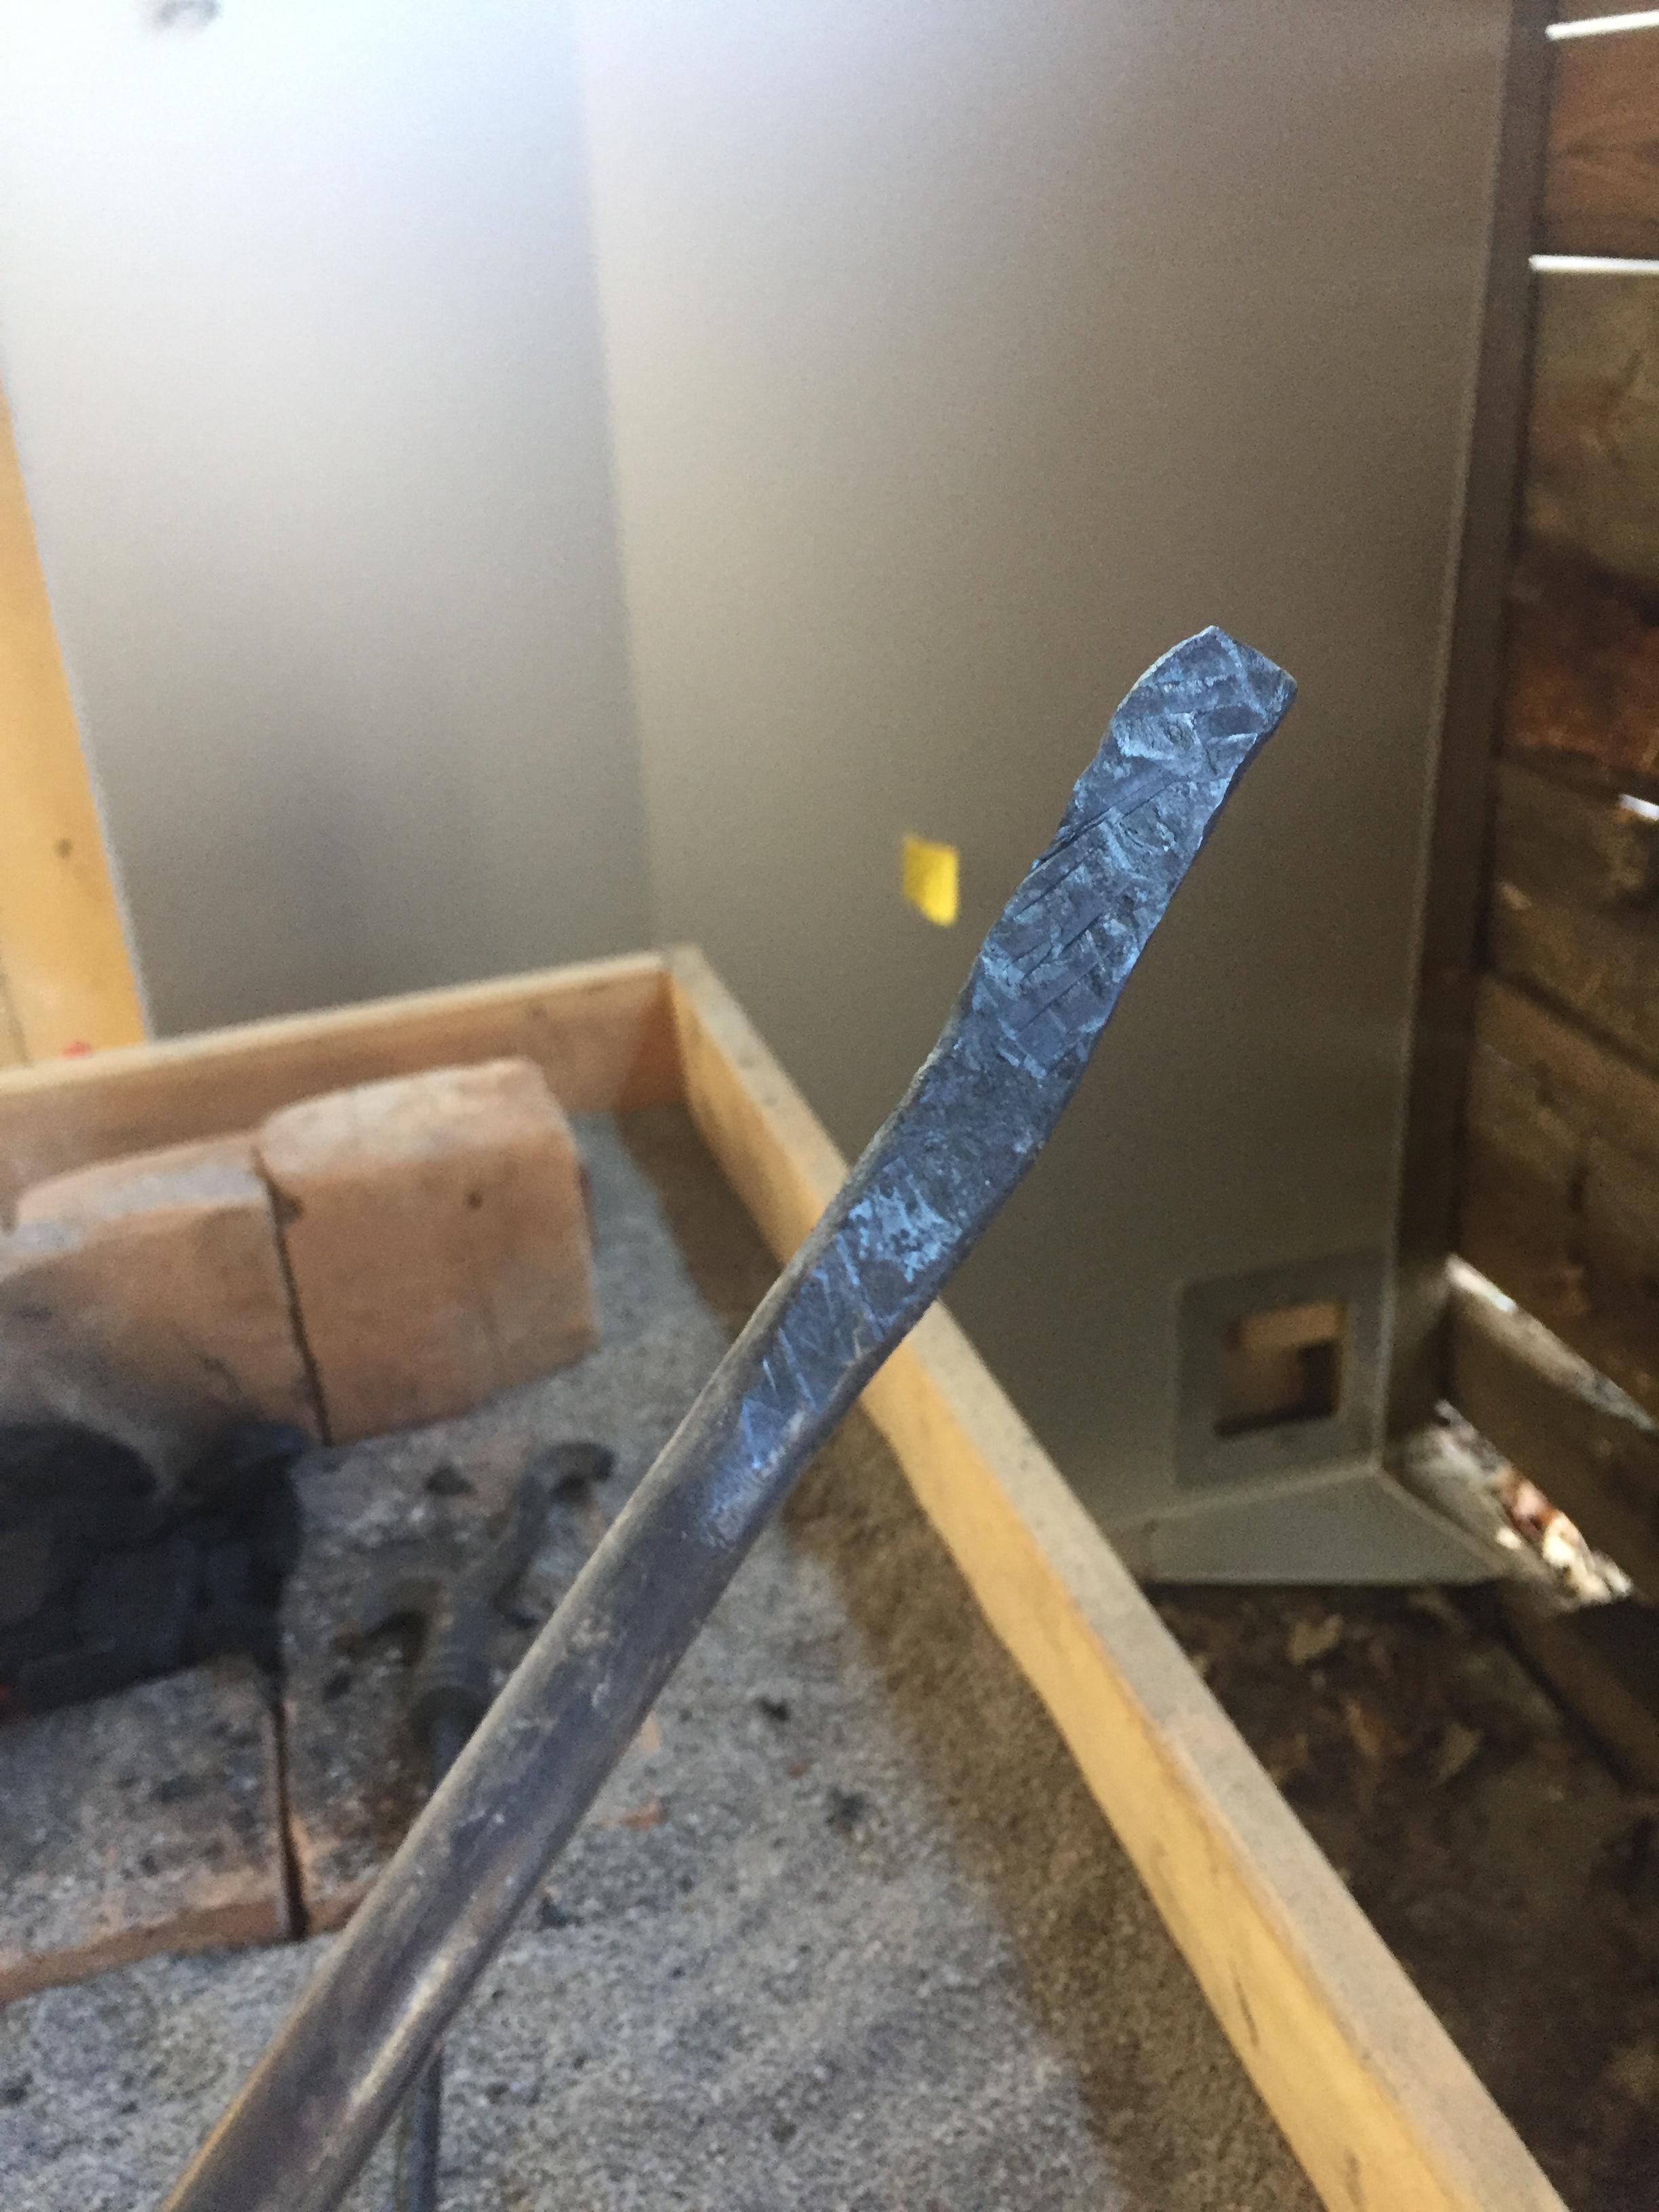
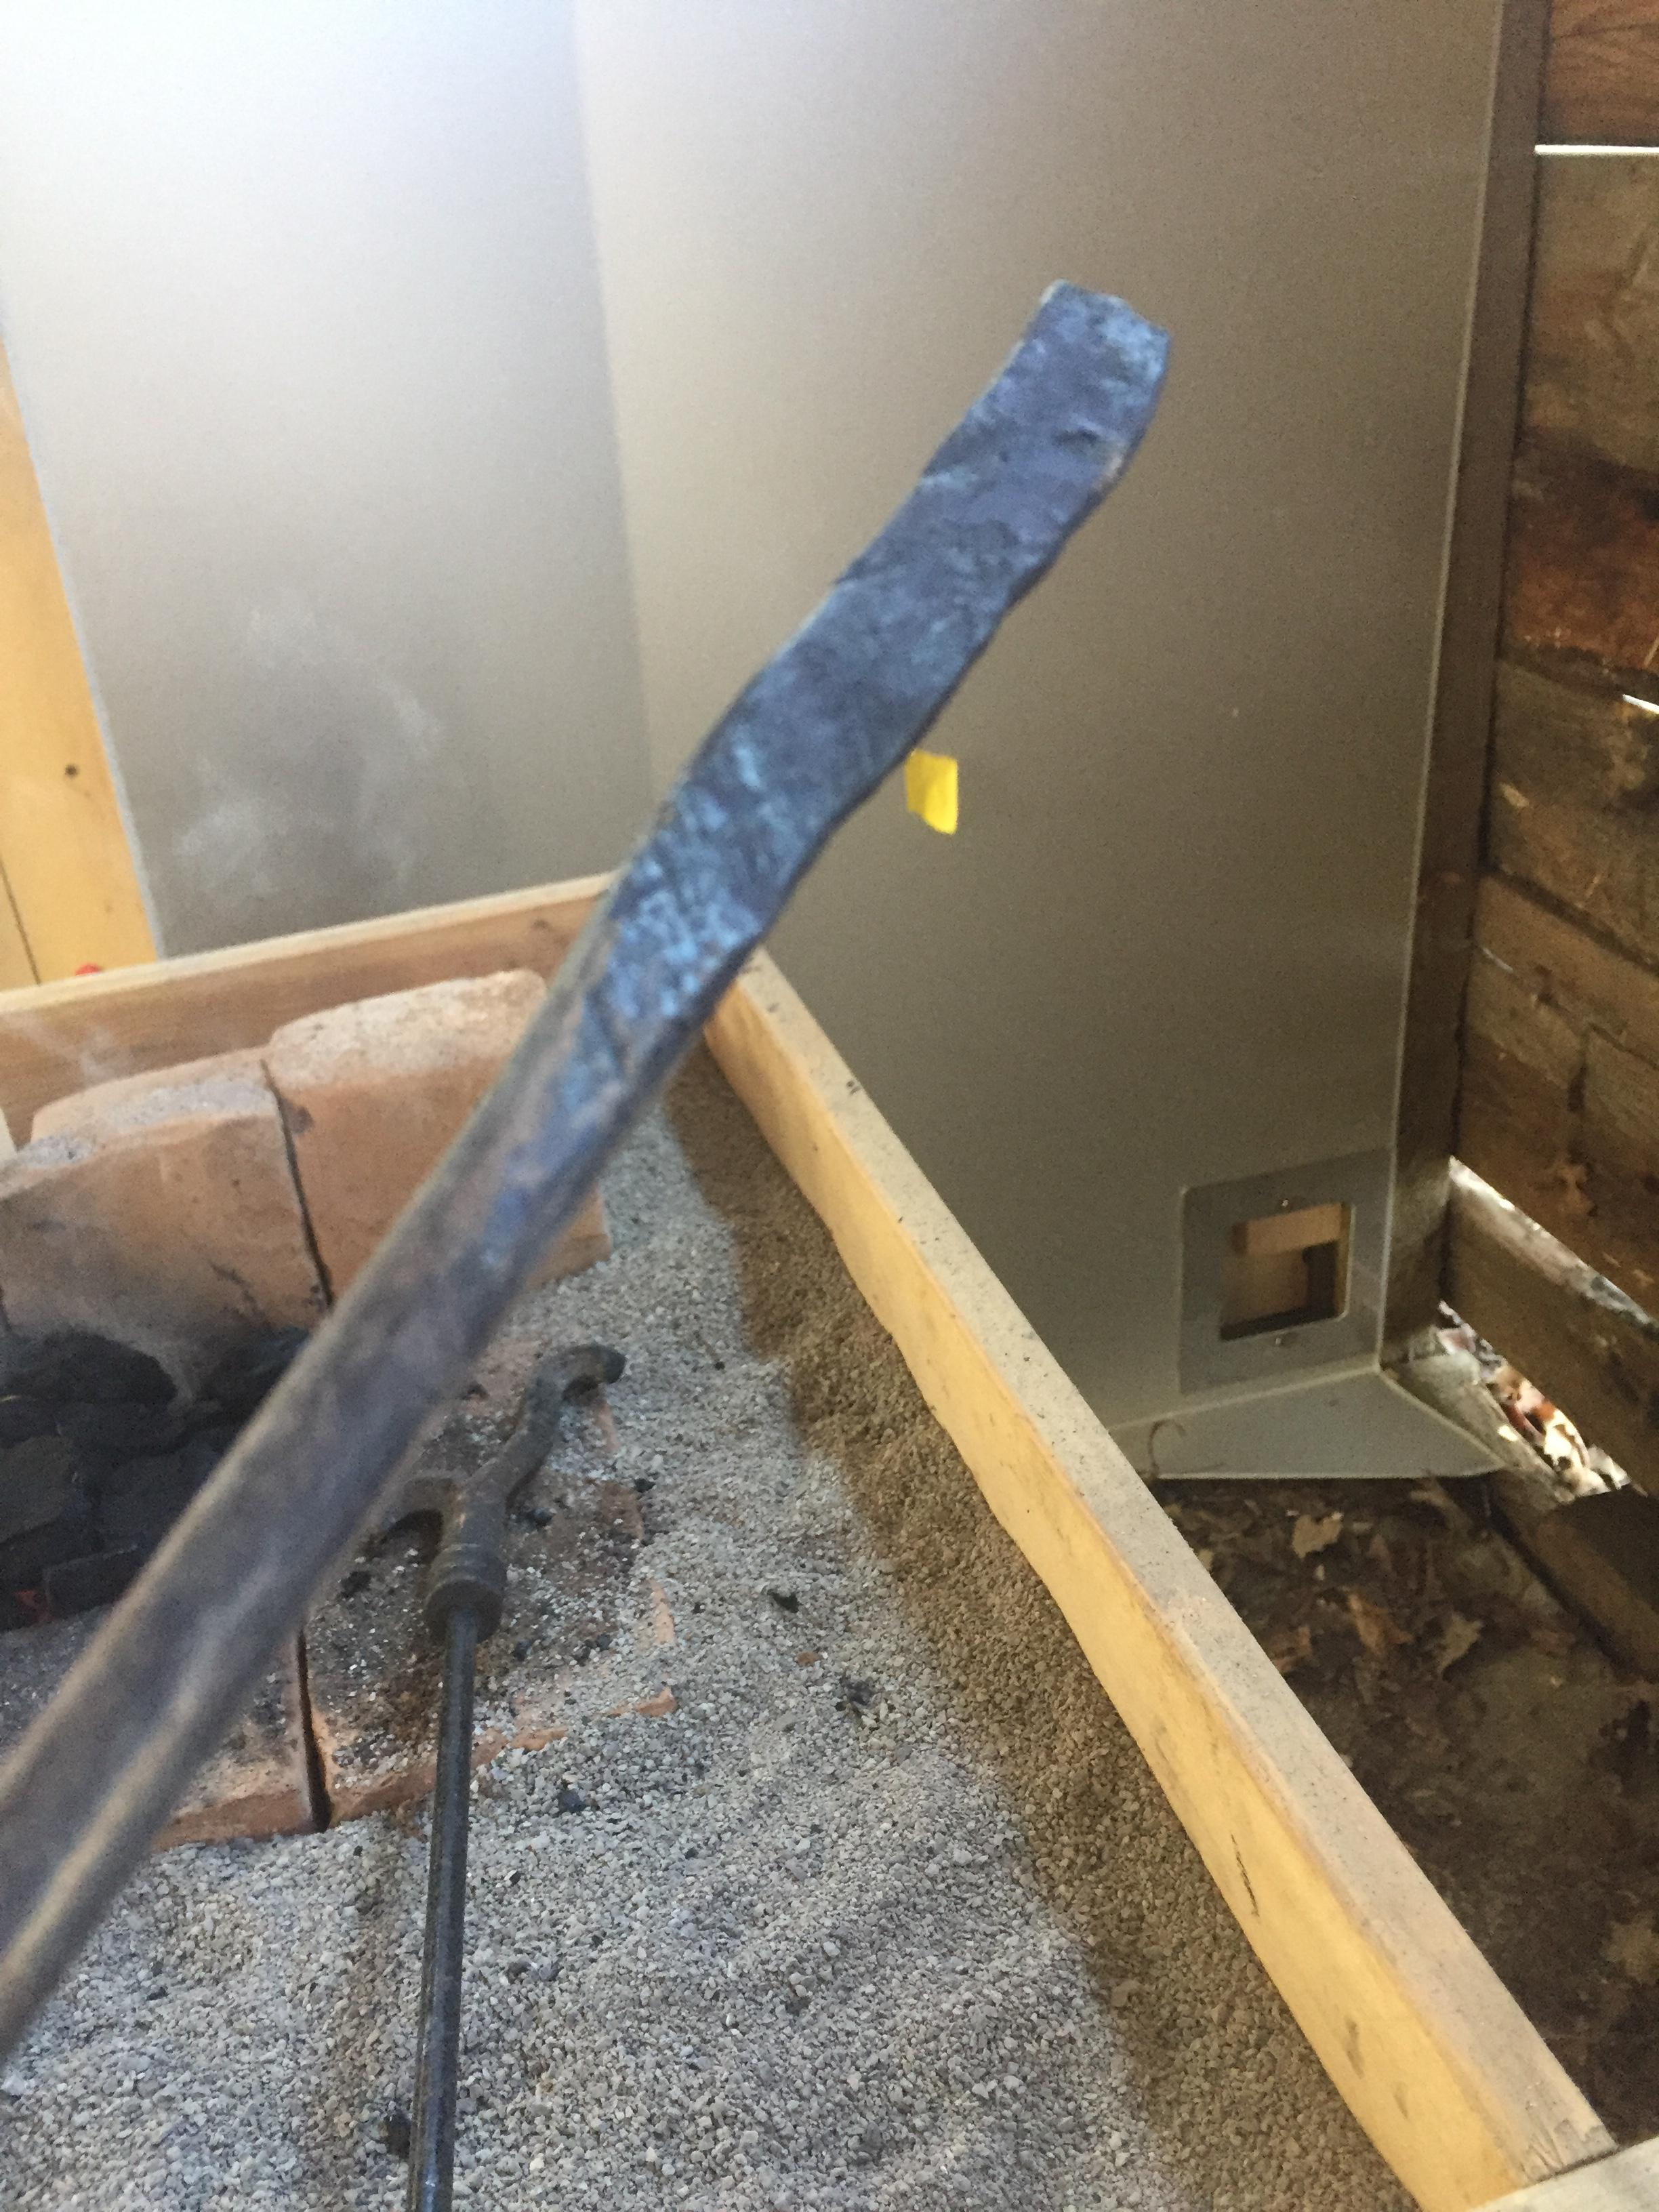
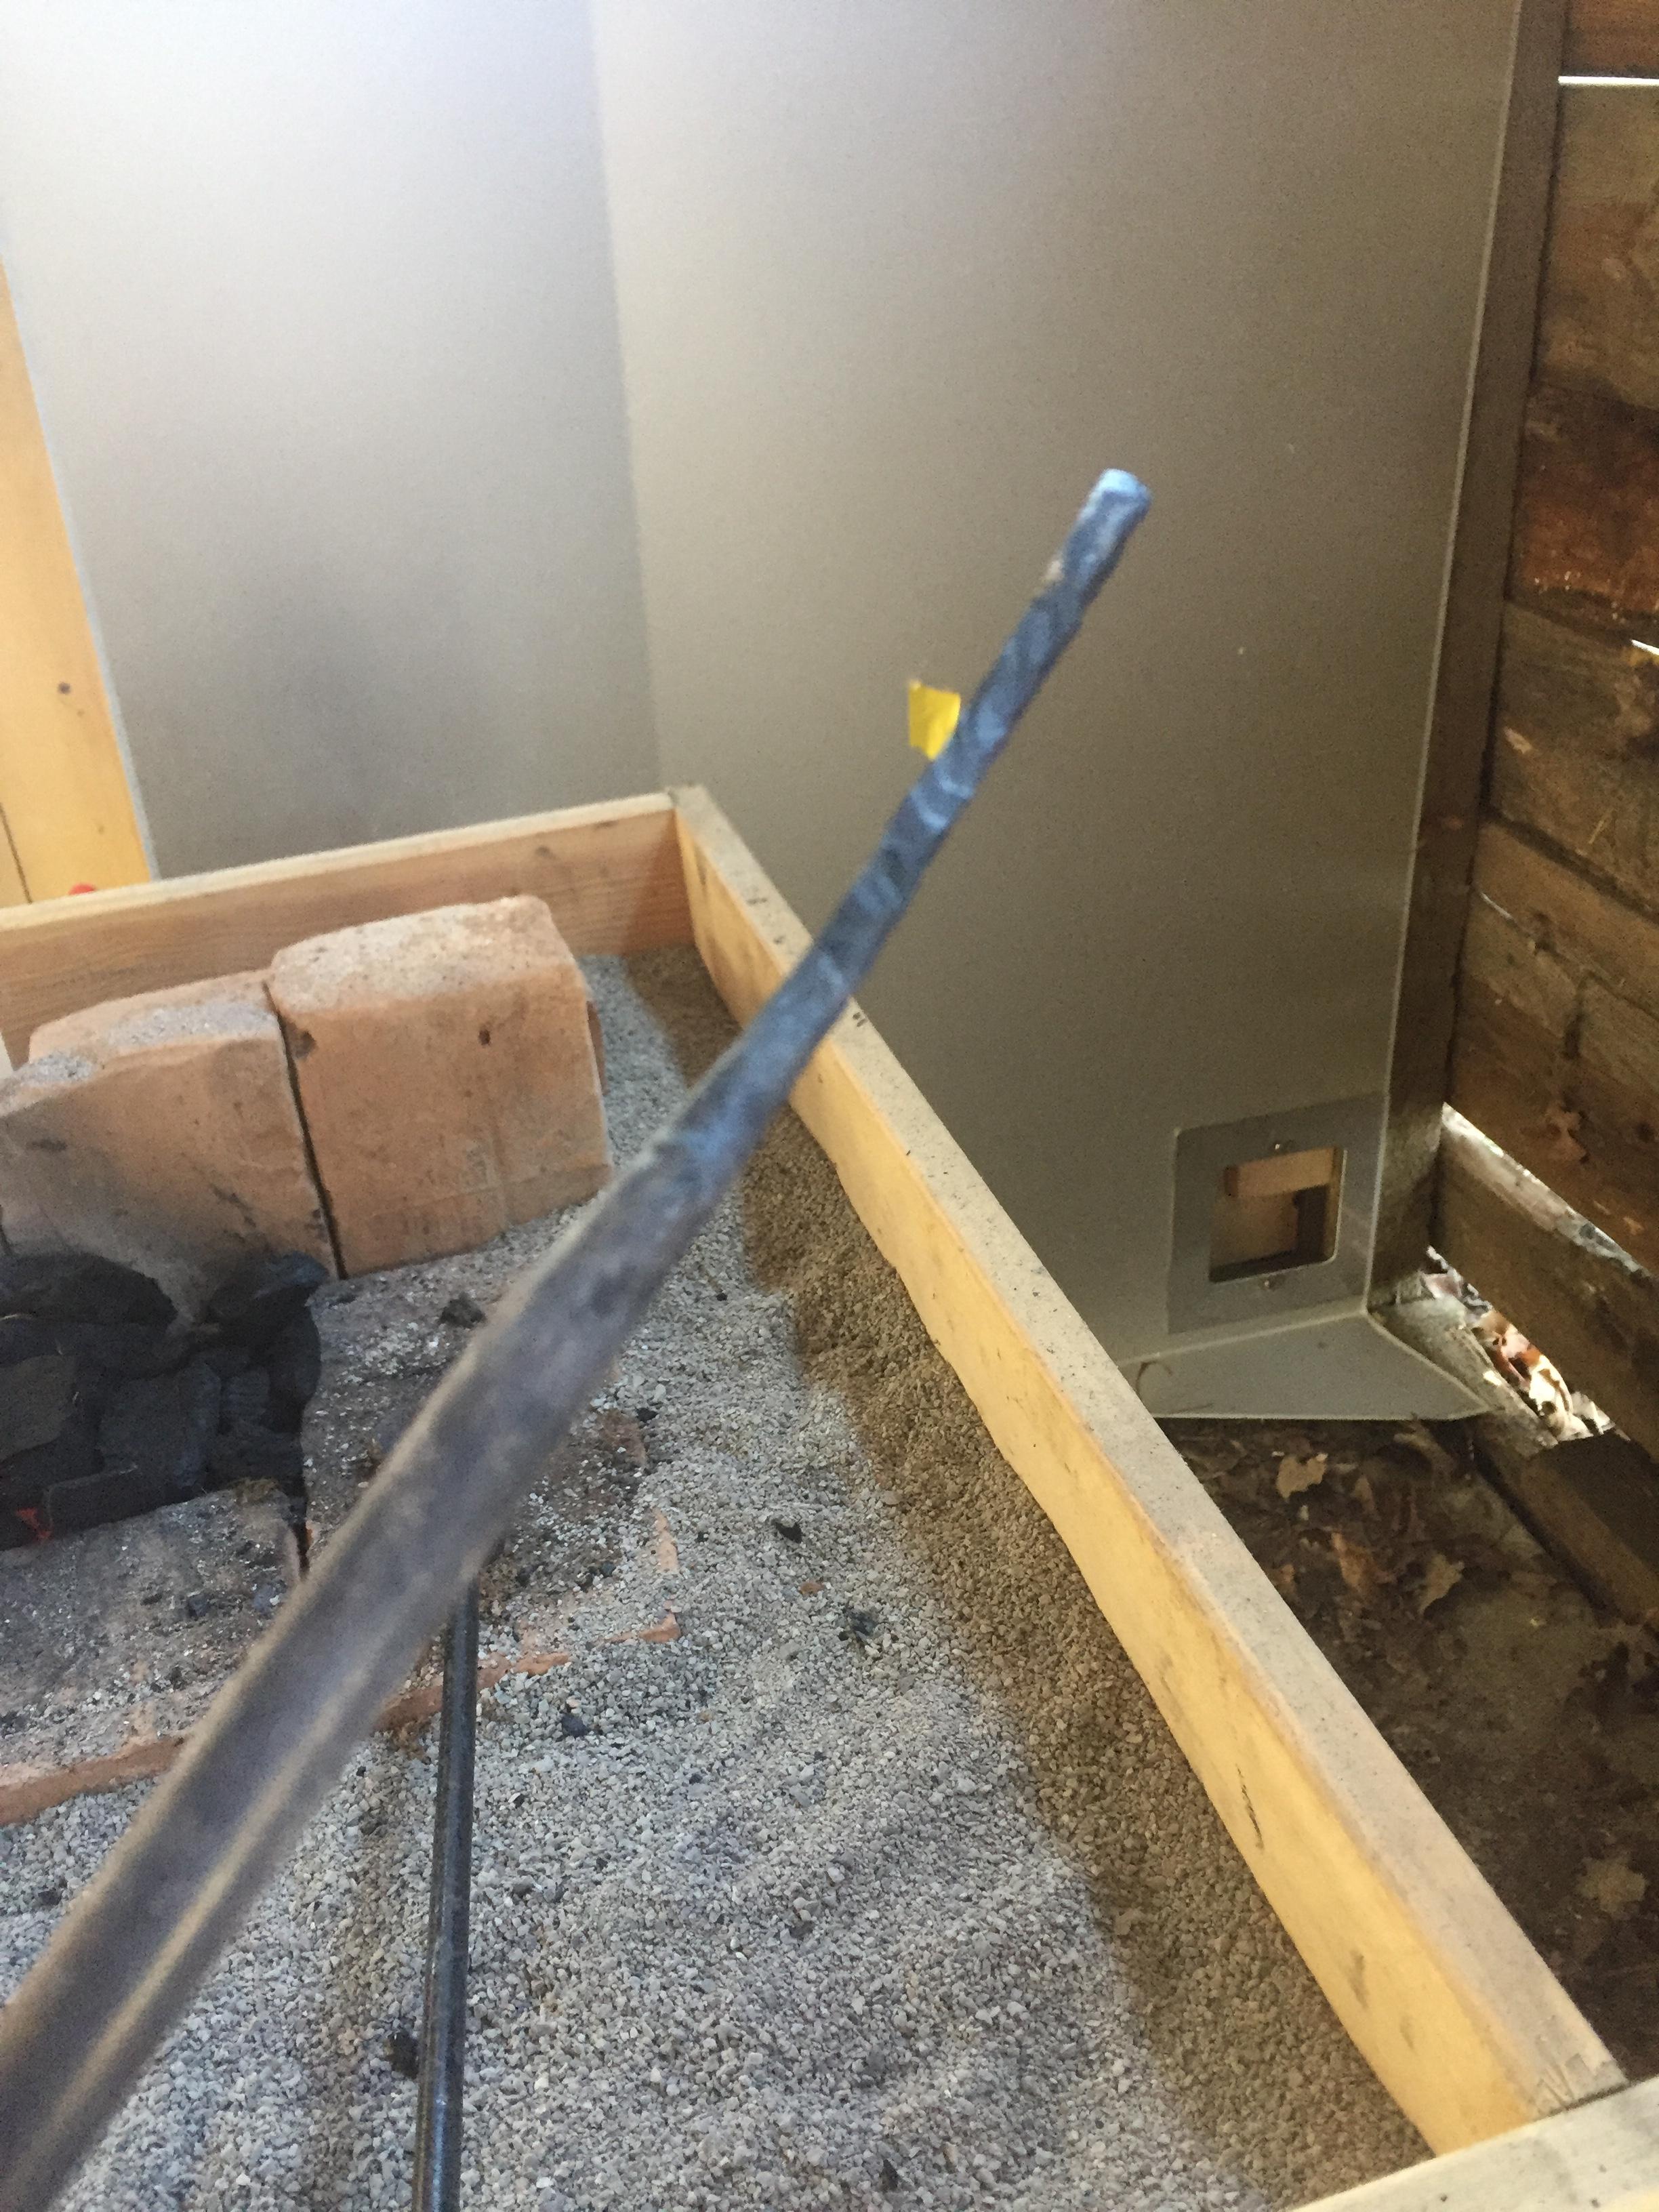
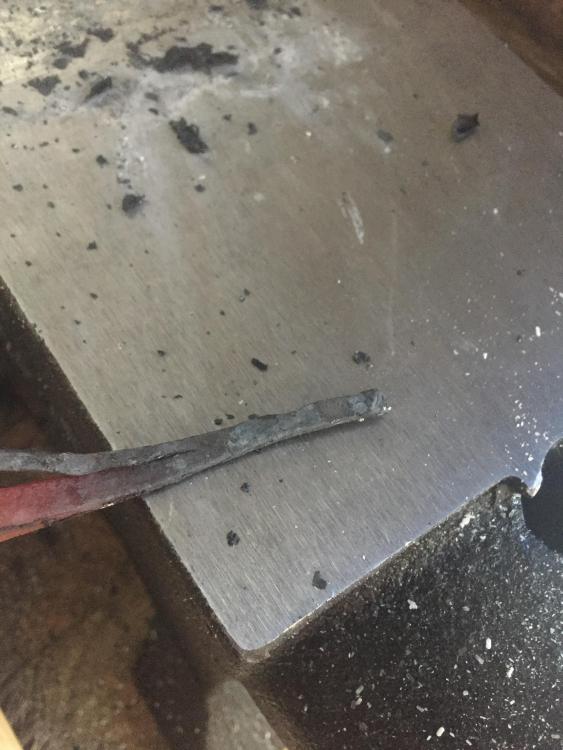
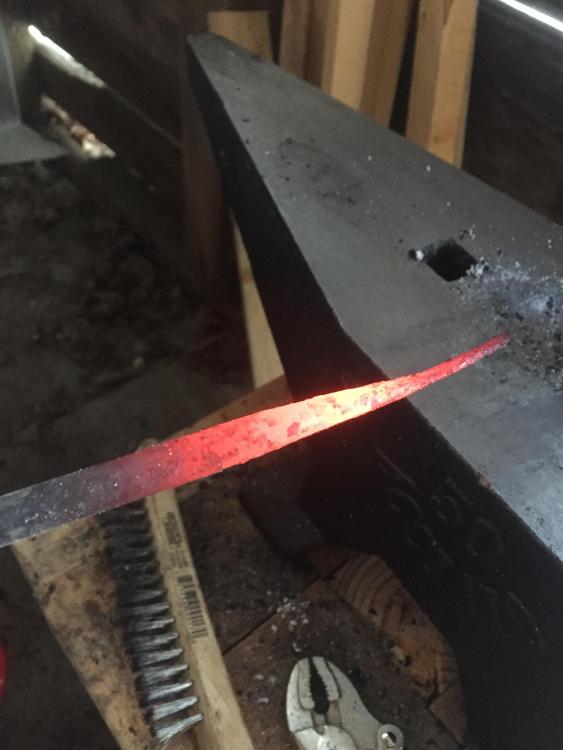
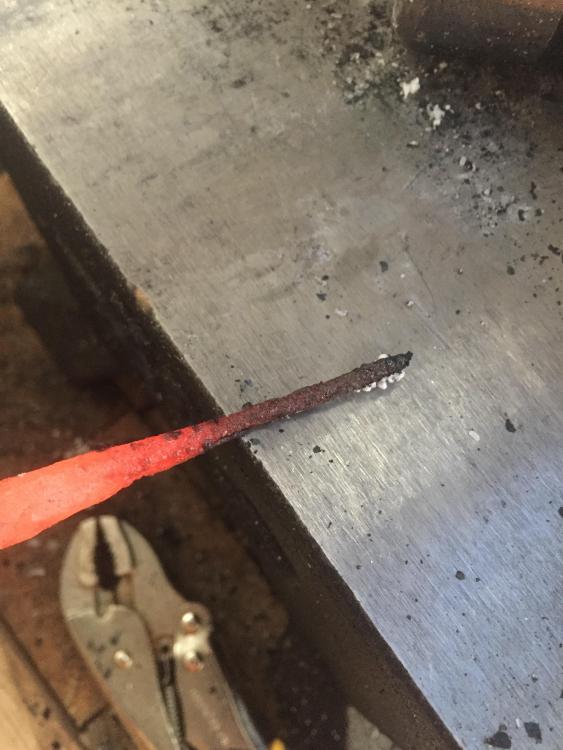
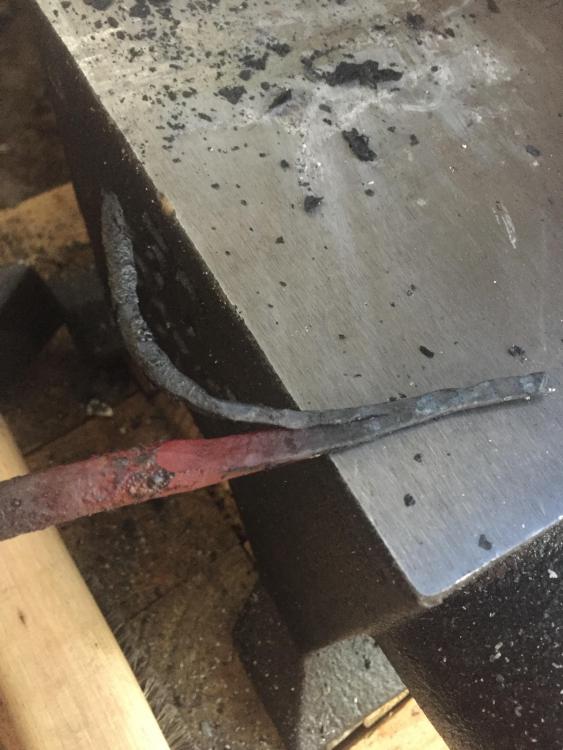
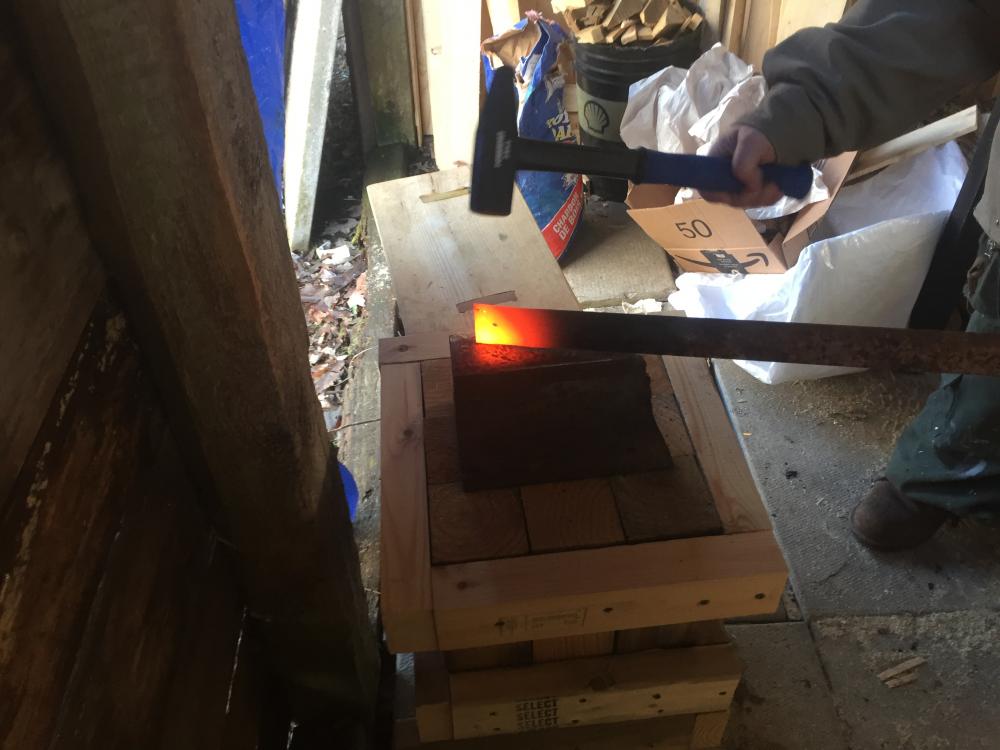
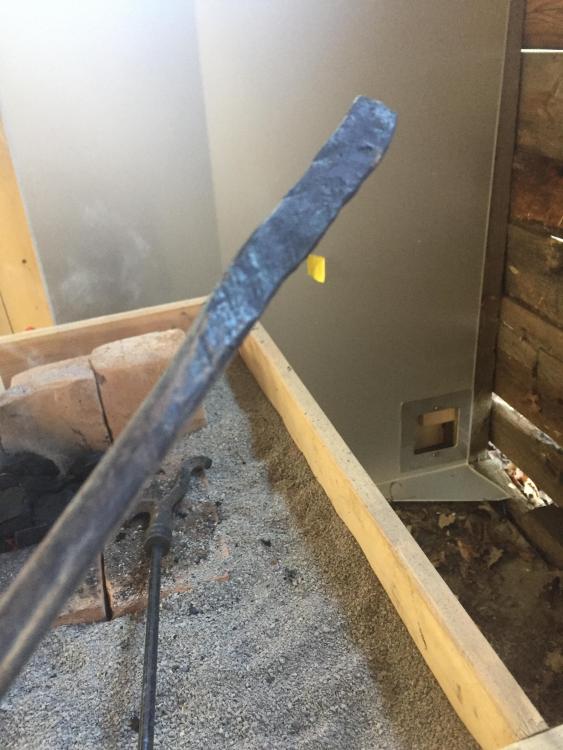
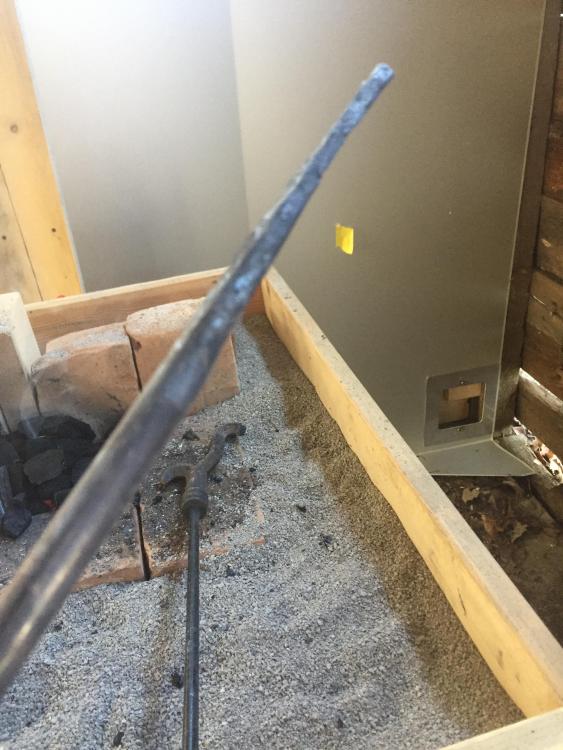
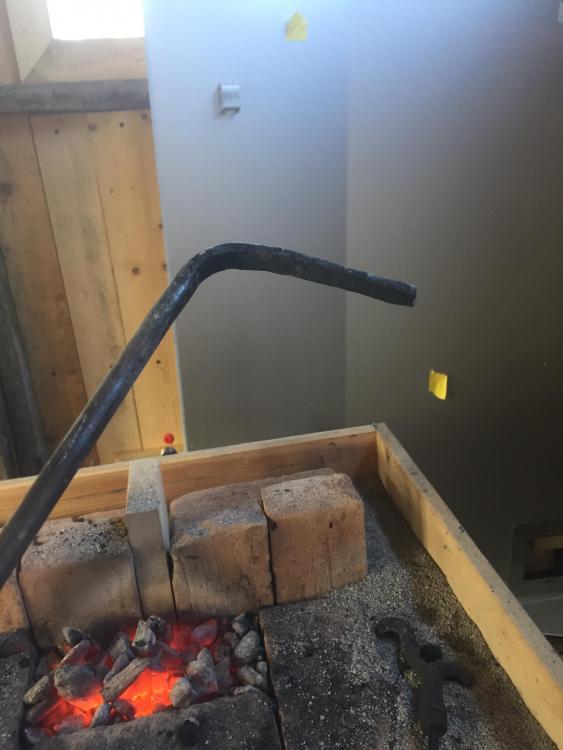
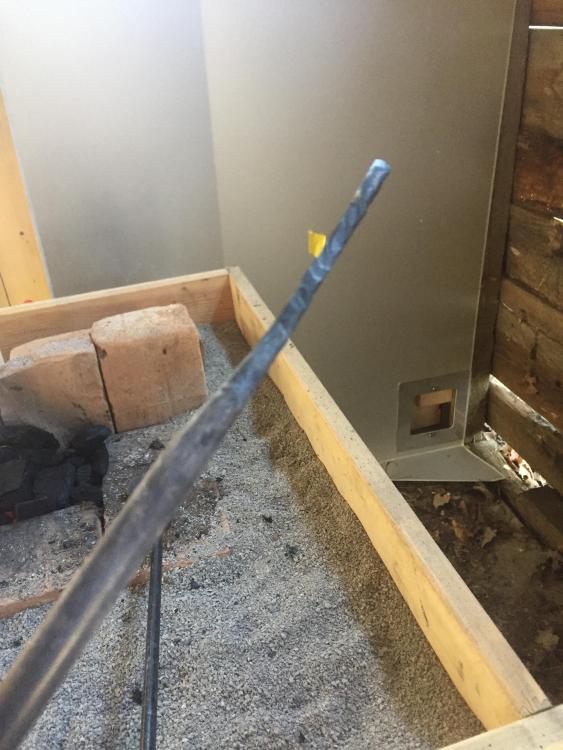
Yeah, I certainly found the wood fire pit off a lot more heat than just the charcoal did, which was nice. It was warm today, and I’m off for the holidays, so went out for a little while. Forgot the plywood for under my feet though!!! Fortunately it wasn’t too bad. I heated a 1/4 inch thick piece of steel plate I have and placed that on my anvil face periodically to give it some heat which seemed to work a bit better. Was going to attempt to make the poker end of a fire poker today, including my first attempt at a forge weld, and learned a whole bunch in the attempt. While I did not end up with a poker, I did make my first successful forge weld I think!! However, I made my taper too small, and boy does metal move at welding temps!! so things went a little too long and thin, but the tip welded!!! It was really interesting, watching the fire, there was a definite different quality to it as I got it up to hitter temperatures. And the first time I hit metal at forge temperature and blew off some big chunks of scale, that was pretty cool lol. I ended up breaking off the too long, too thin hook and attempted to bend and forge weld the tip again.... wasn’t entirely successful the second time tho, maybe too much flux?? Will go back and do some more reading. Should have done that before going out probably, lol, but it was still fun.
-
Very true Glenn!!! But, I wanna keep my first ugly one to look back on But I'll keep that in mind for future projects! HojPoj, you're not wrong - the space heater did keep my feet warm though, which is generally my biggest issue in winter, my feet are always cold. But planning now to build a side draft chimney/super sucker so that I can enclose things a bit more to retain some heat, while not poisoning myself with smoke and CO inhalation - I also picked up a CO detector to be sure of that! So next up is re configuring the shop a bit and figuring out how I'm going to build my chimney and from what... But, in the meantime, I did play a little bit on the weekend, practicing my tapers a bit, and my bends. I experimented with a wood fire on saturday since I had used up my one leftover bag of charcoal, but it was much more time consuming, took a lot longer to get it going and heat, and i ended up having trouble working the steel (I belatedly realized I wasn't getting it hot enough, too impatient) so the day was mostly a bust, but still a lesson learned. Sunday was much better, dug out another bag of charcoal and had fun again, made a flat taper and bent it and flattened it back on itself - no forge welding attempt yet, but it's on the schedule I think my hammer marks have definitely improved since I dressed the faces, so it looks a little less rough. Progress is slow, but I'm having fun!

-
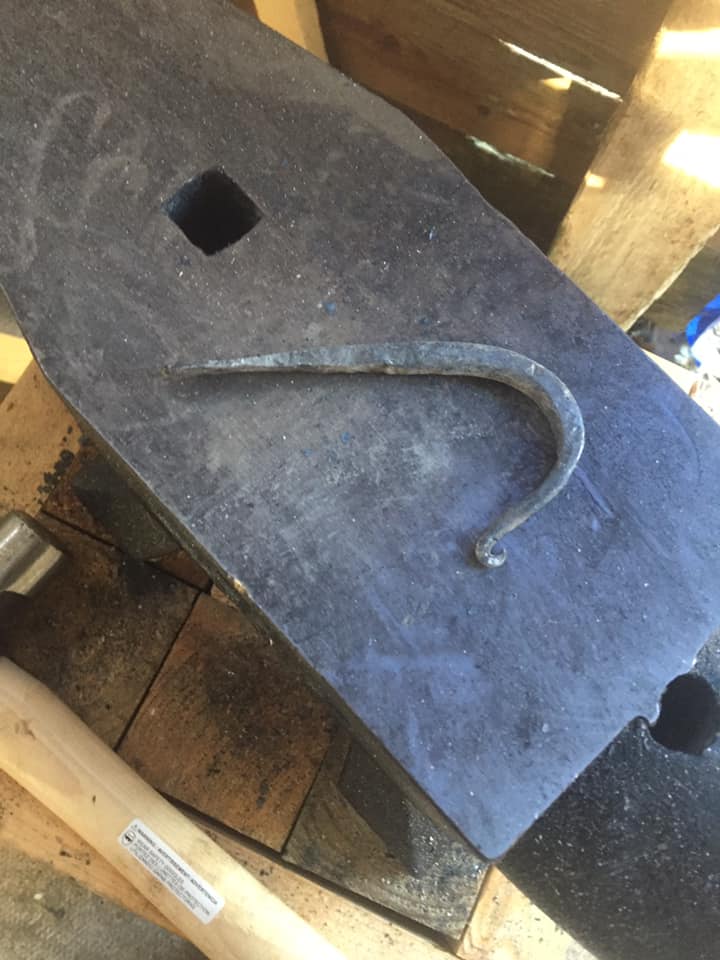
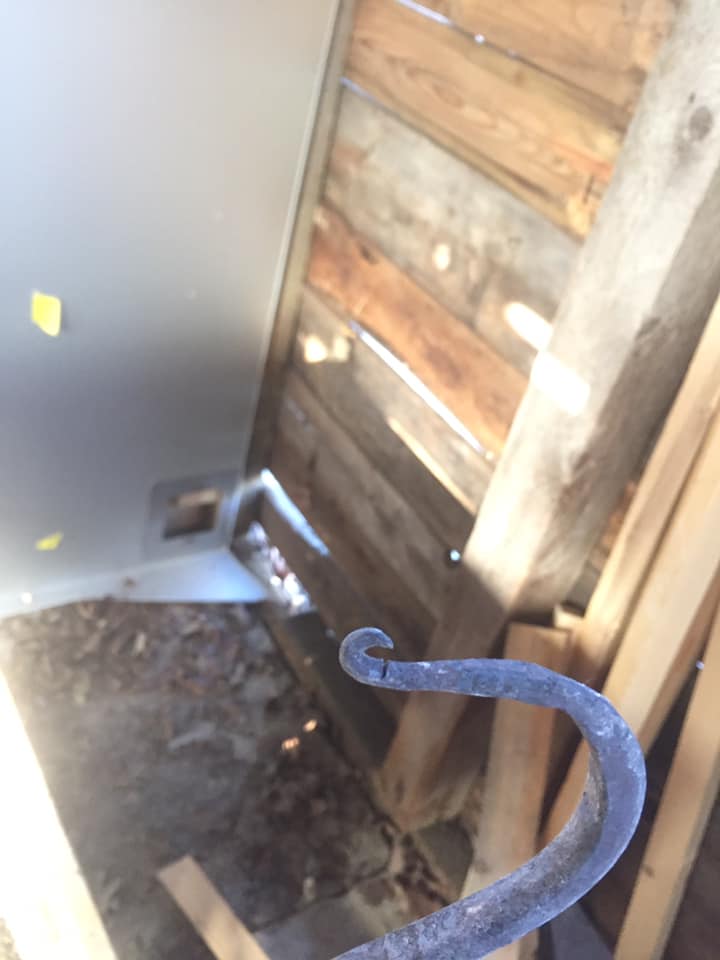
Thanks guys, that's good advice on coming at a project in different ways. Got to make what I have work for *me*! I will definitely give the pliers a try, that sounds like a great idea. Also need to find some cans so I can 'light a fire under my anvil' so to speak - I mean hang on the horn and heel to heat 'er up, of course ;) I am picking up a little garage heater and heavy duty extension cord (shop doesn't have its own power) so I can try and warm things up in there and maybe get to keep working in the winter a bit. The space is only about 8 x 10, but it's not entirely enclosed, so it'll be interesting lol I decided I'm going to leave my hook as it is, crack and all, just as a reminder and as something to look back on as my first ever one ;) It'll still be functional, and I'll put it on the wall in my shop somewhere to hold ... something LOL Dressed the faces of my hammers the other night as well, so hopefully next time there won't be as many ugly marks in my work!
-
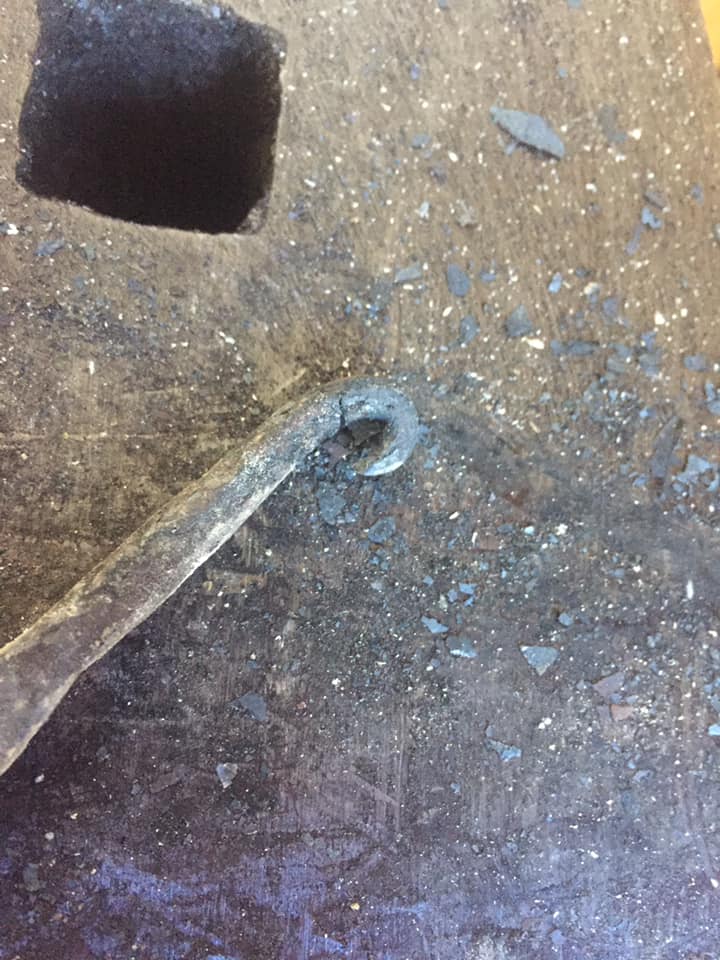
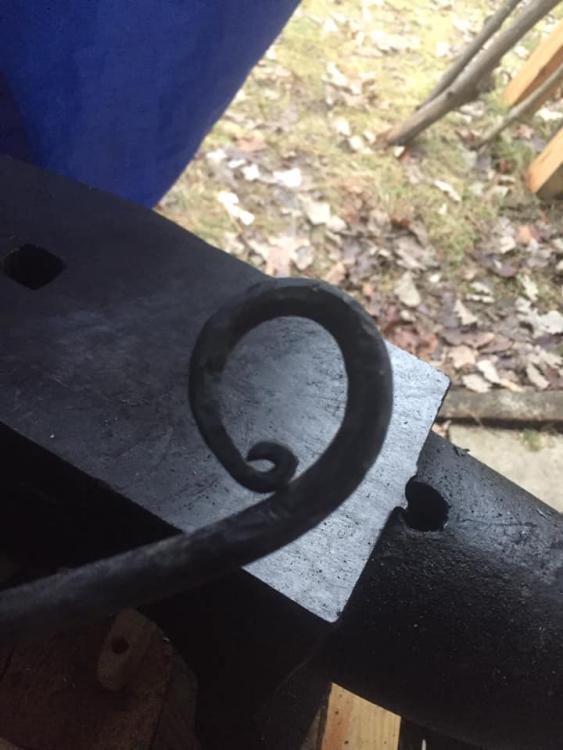
*adds 'pig tail' to mental lexicon* I actually did do the pig tail first, and then discovered the crack, before I moved on to the main curve. I did not dip in water at all though (I actually don't yet have a slack tub) Stuff was cooling off very fast, and I think I pushed it one (or two) many hits past temp - unless there's something else that you can think of?
-
-
-
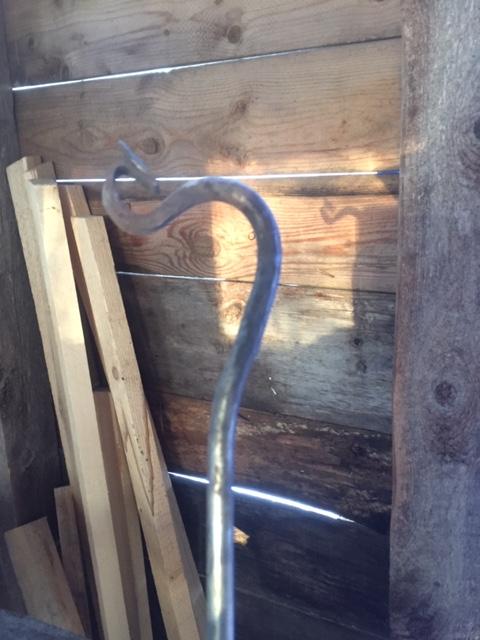
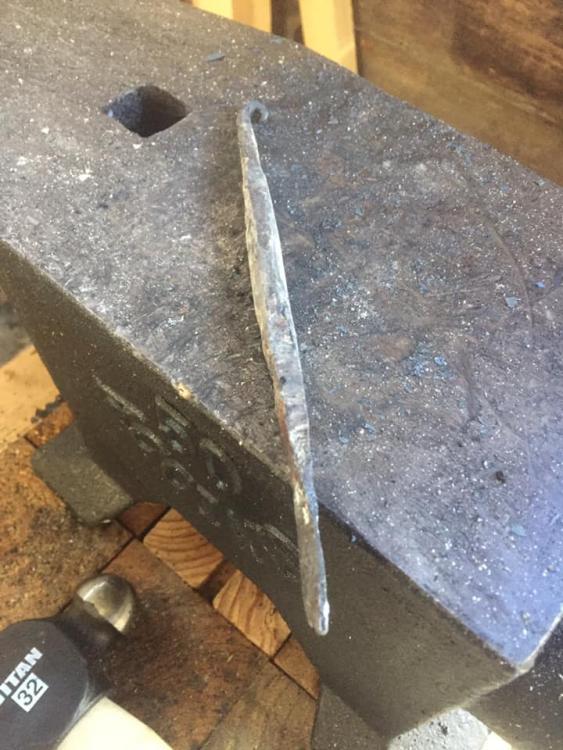
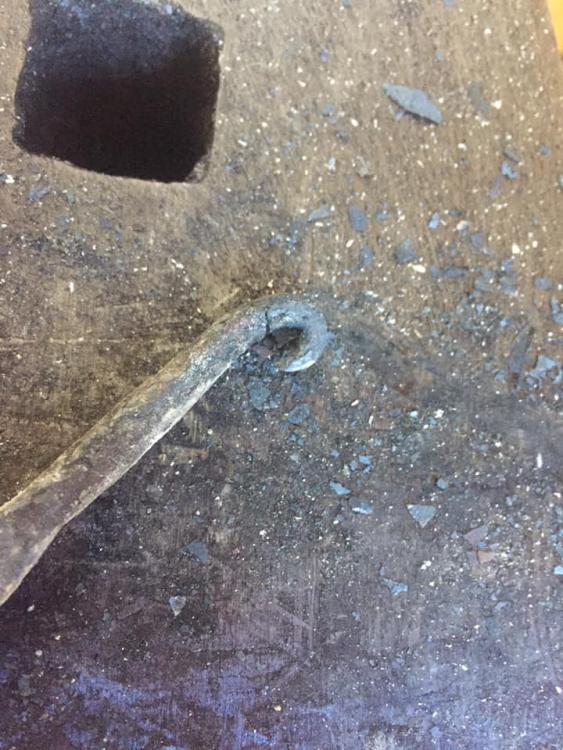
Well, I went back out today. Didn't have anything to really heat the anvil with yet, so it was cold, which stole the heat from my piece really quickly, but I managed to bend my first ring/loop on the end of my rake! I tried making it square first, as advised, before tapering. It was surprisingly difficult to hold the round stock straight while doing this lol. Still had a bit of difficulty keeping it even and forgot to go octogonal and then round before I began my curl, so that's something for next time. I also didn't quite bend the section just below the tip enough before beginning the larger bend, so it didn't quite finish as gracefully as I would have liked, but overall I'm pleased for a first attempt. New anvil worked great. Only one missed hammer strike in 2 hours, and it only left a slight discoloration on the surface. Looks like there are some irregularities in the horn that I may have to smooth out, but it worked well for hammering in the loop. Feel that I learned a lot today, and finished my rake, so it was a good day

-
-
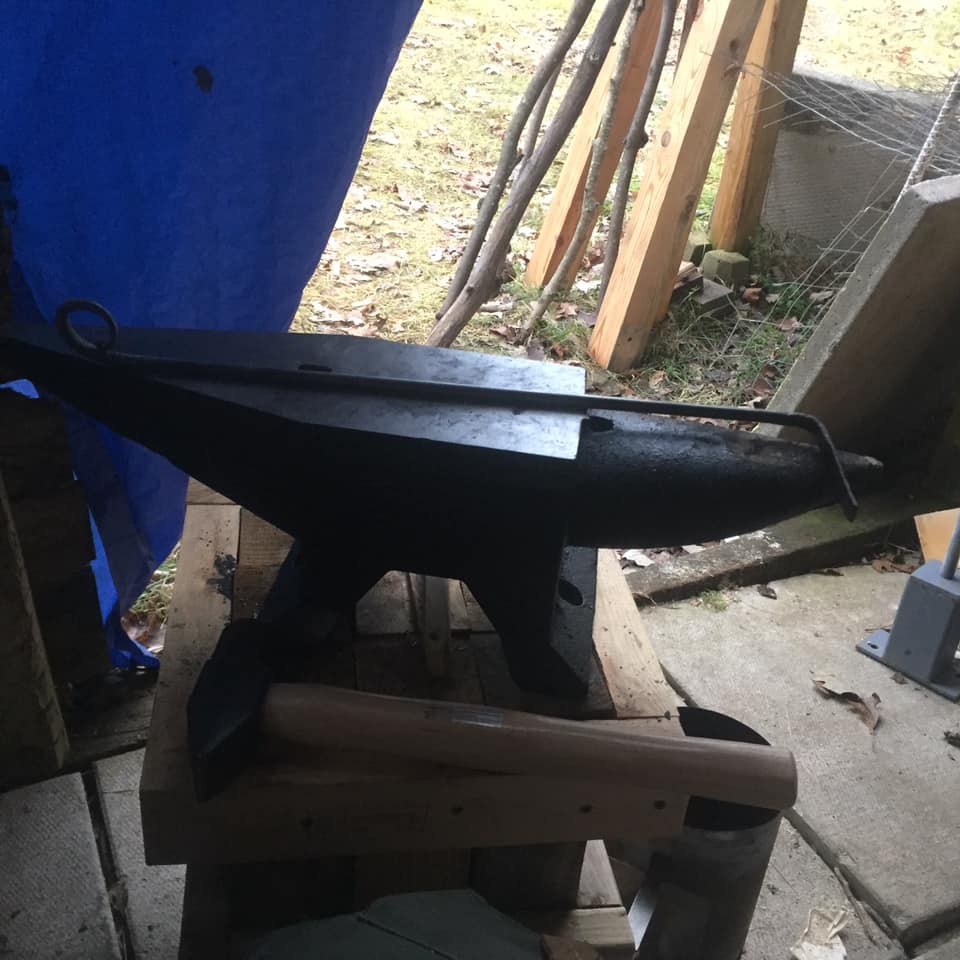
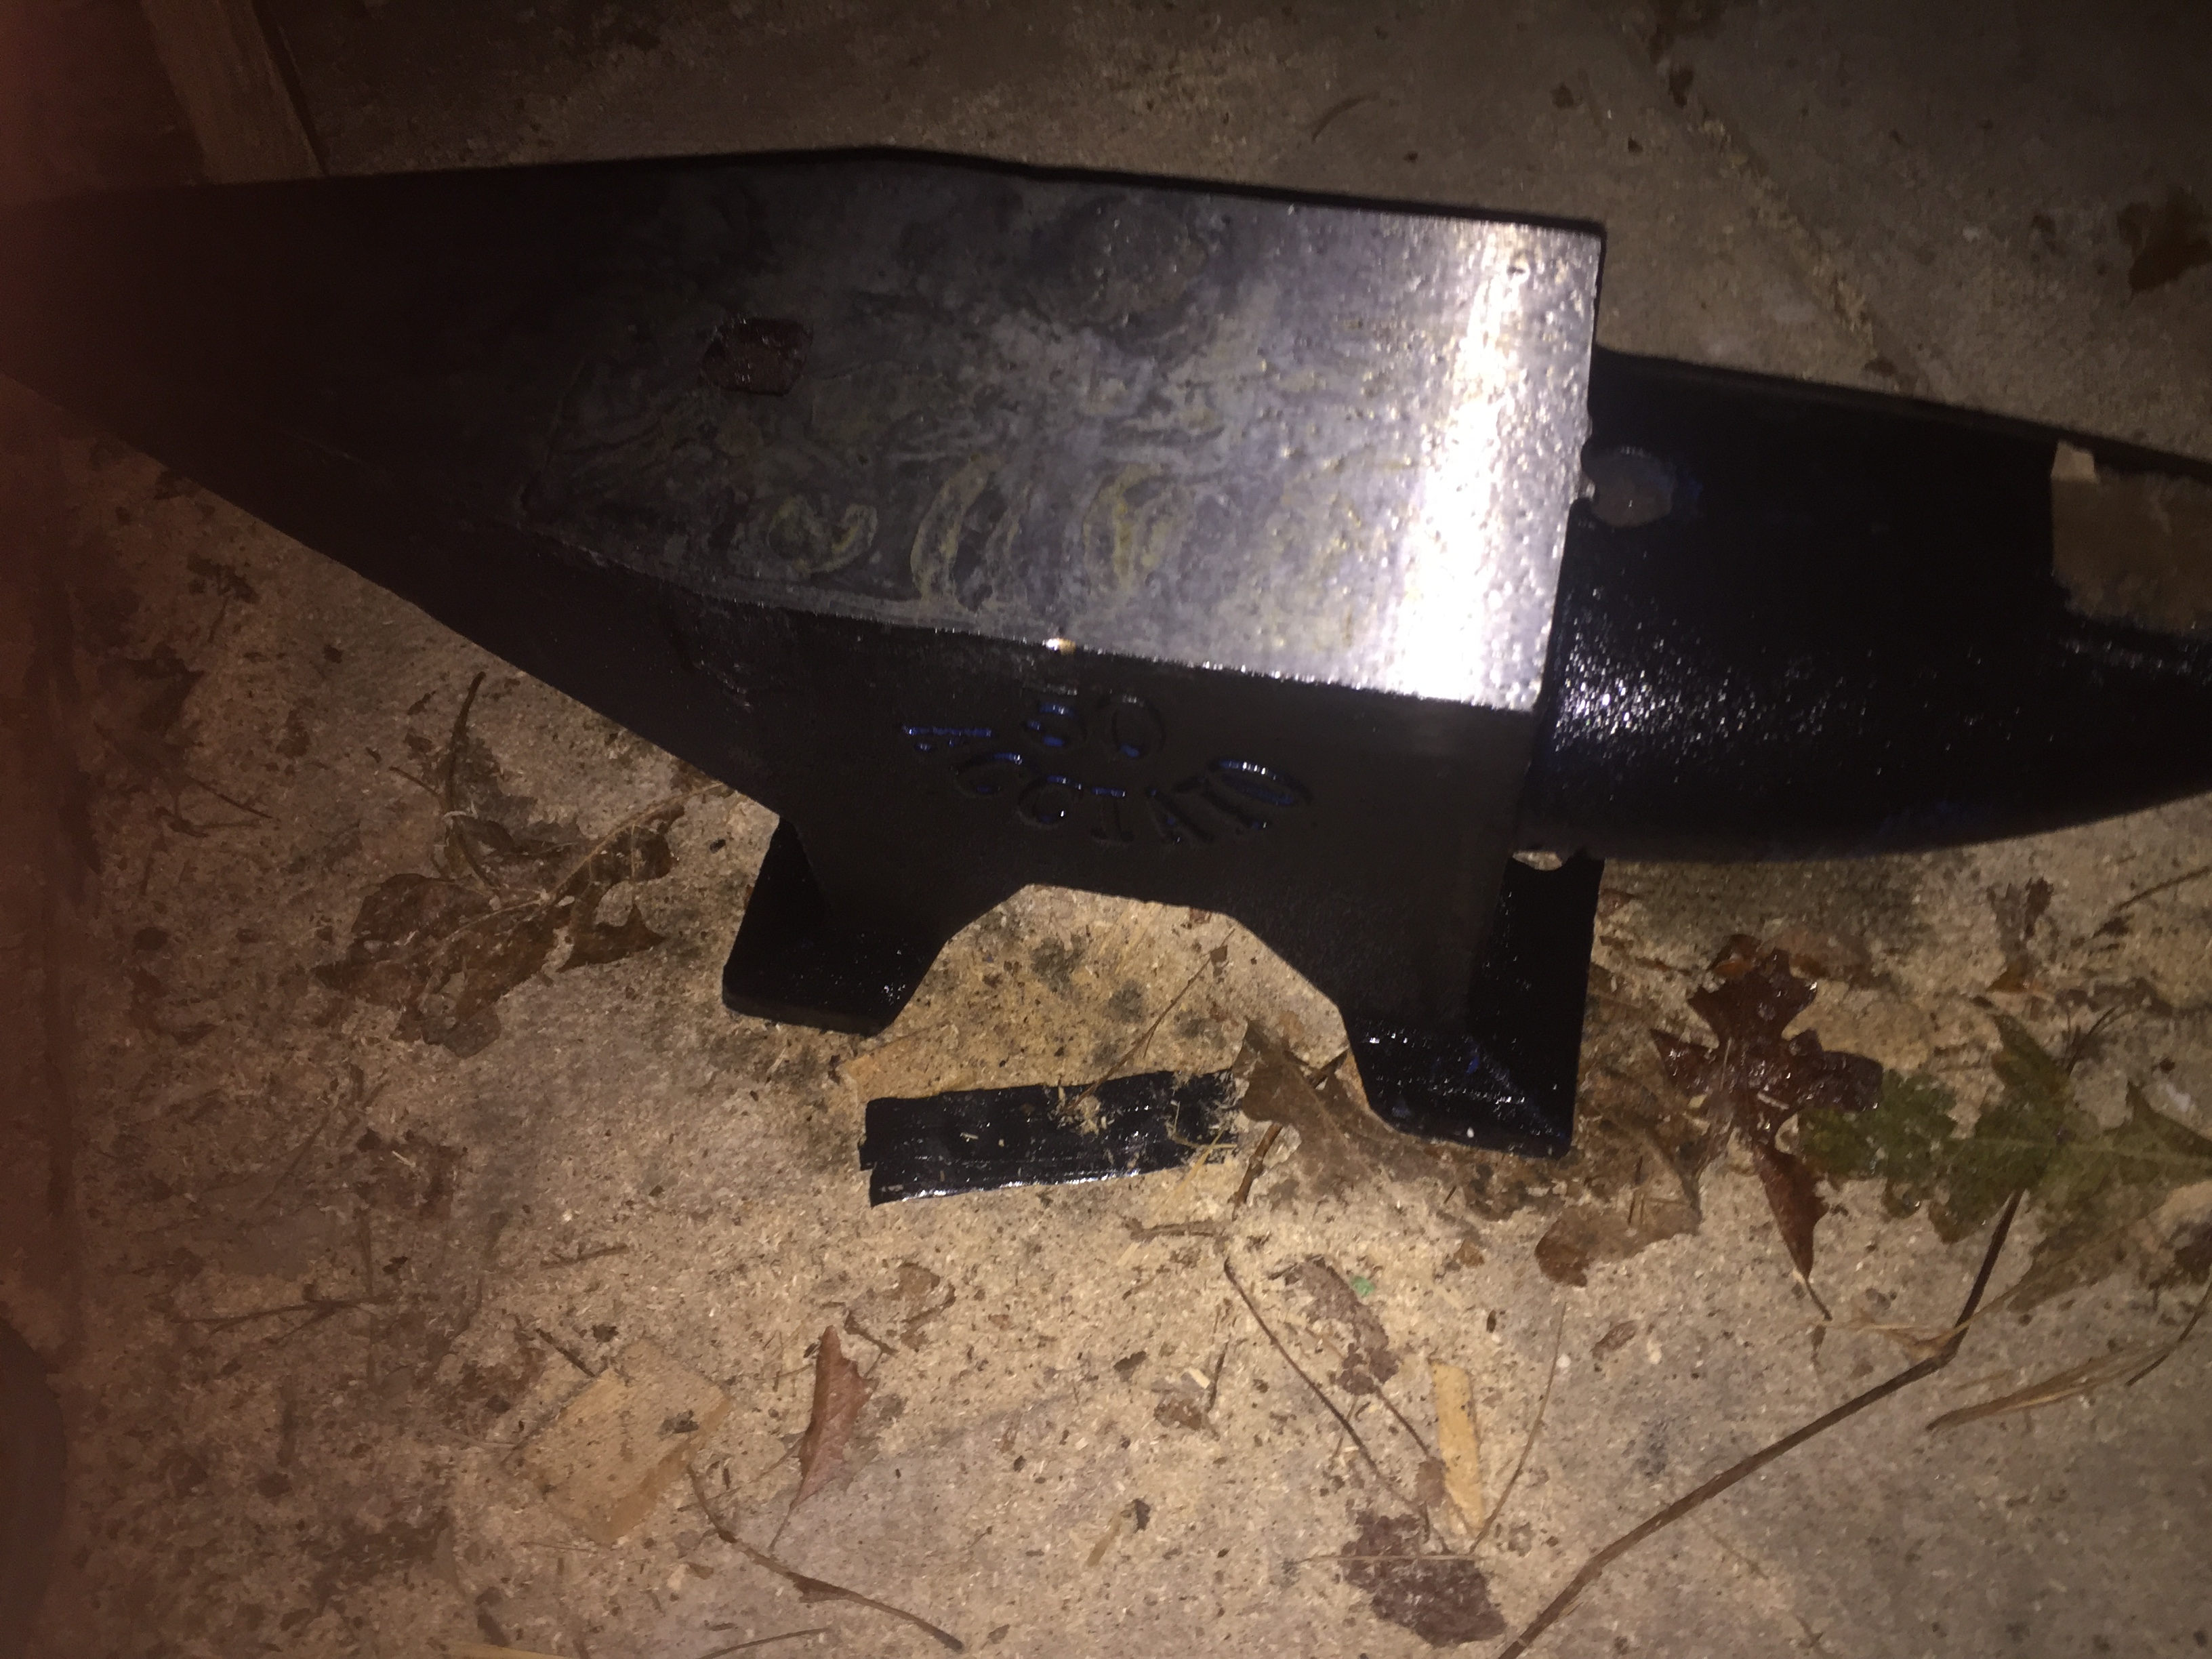
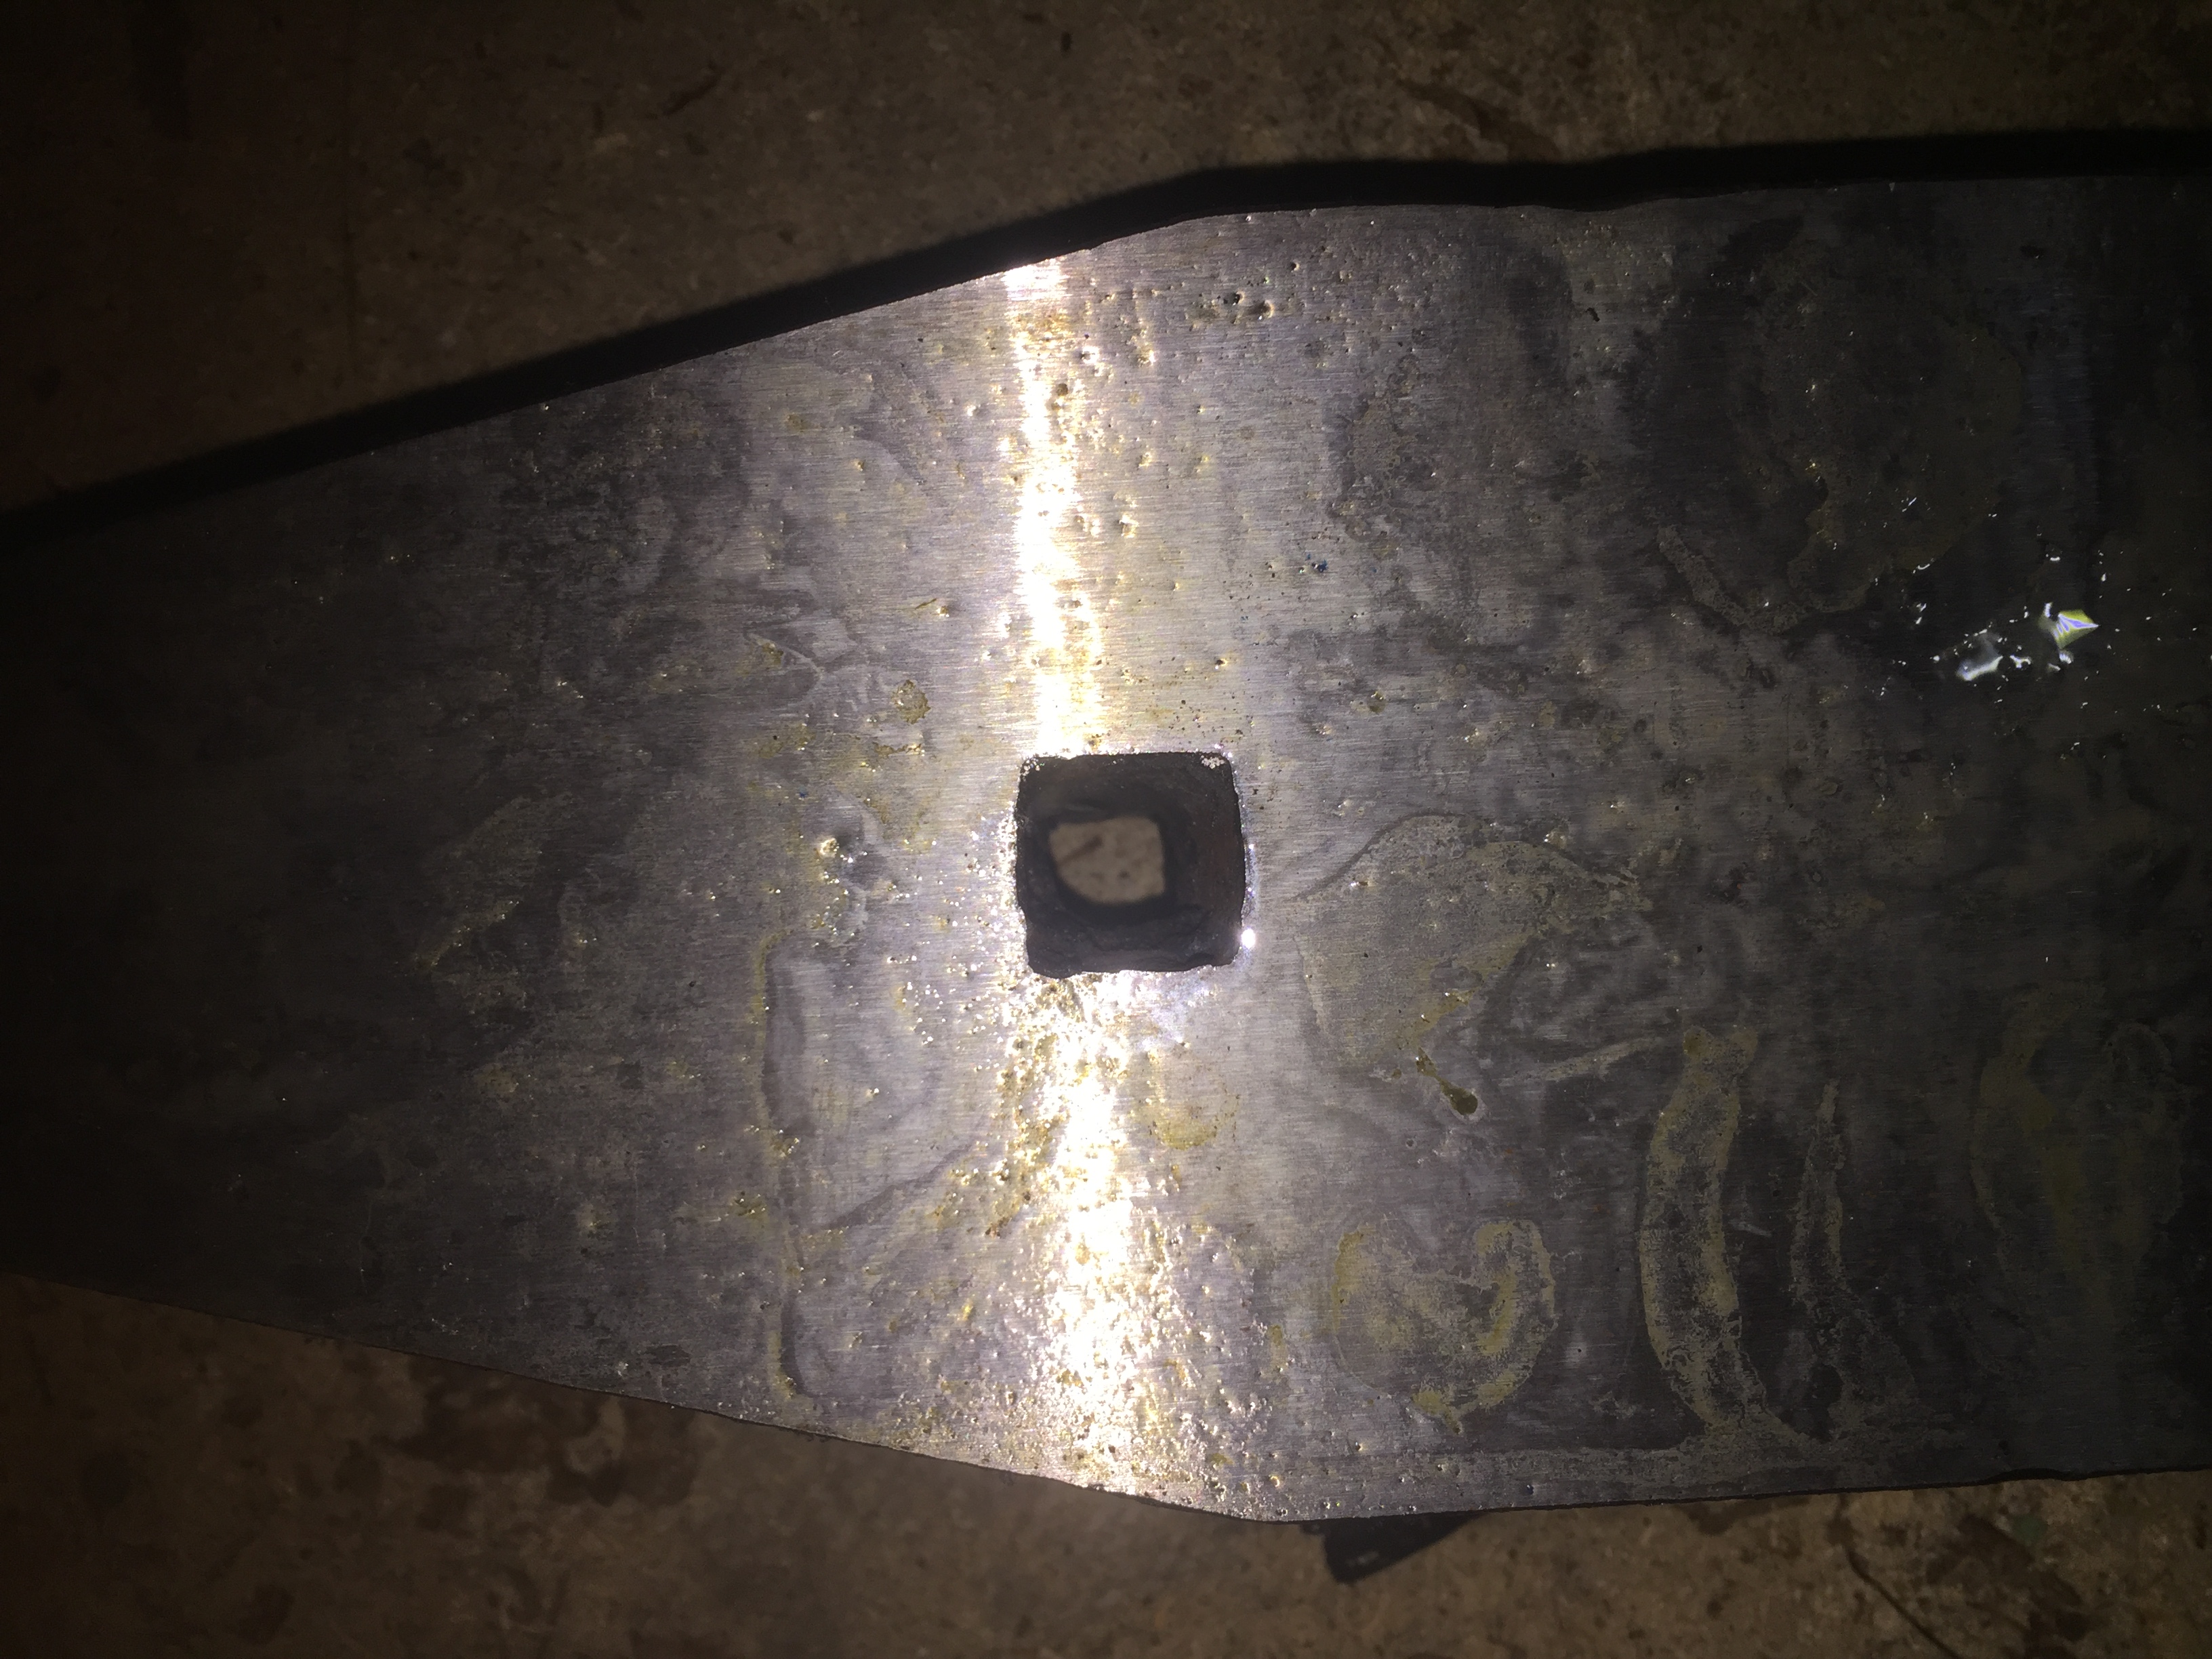
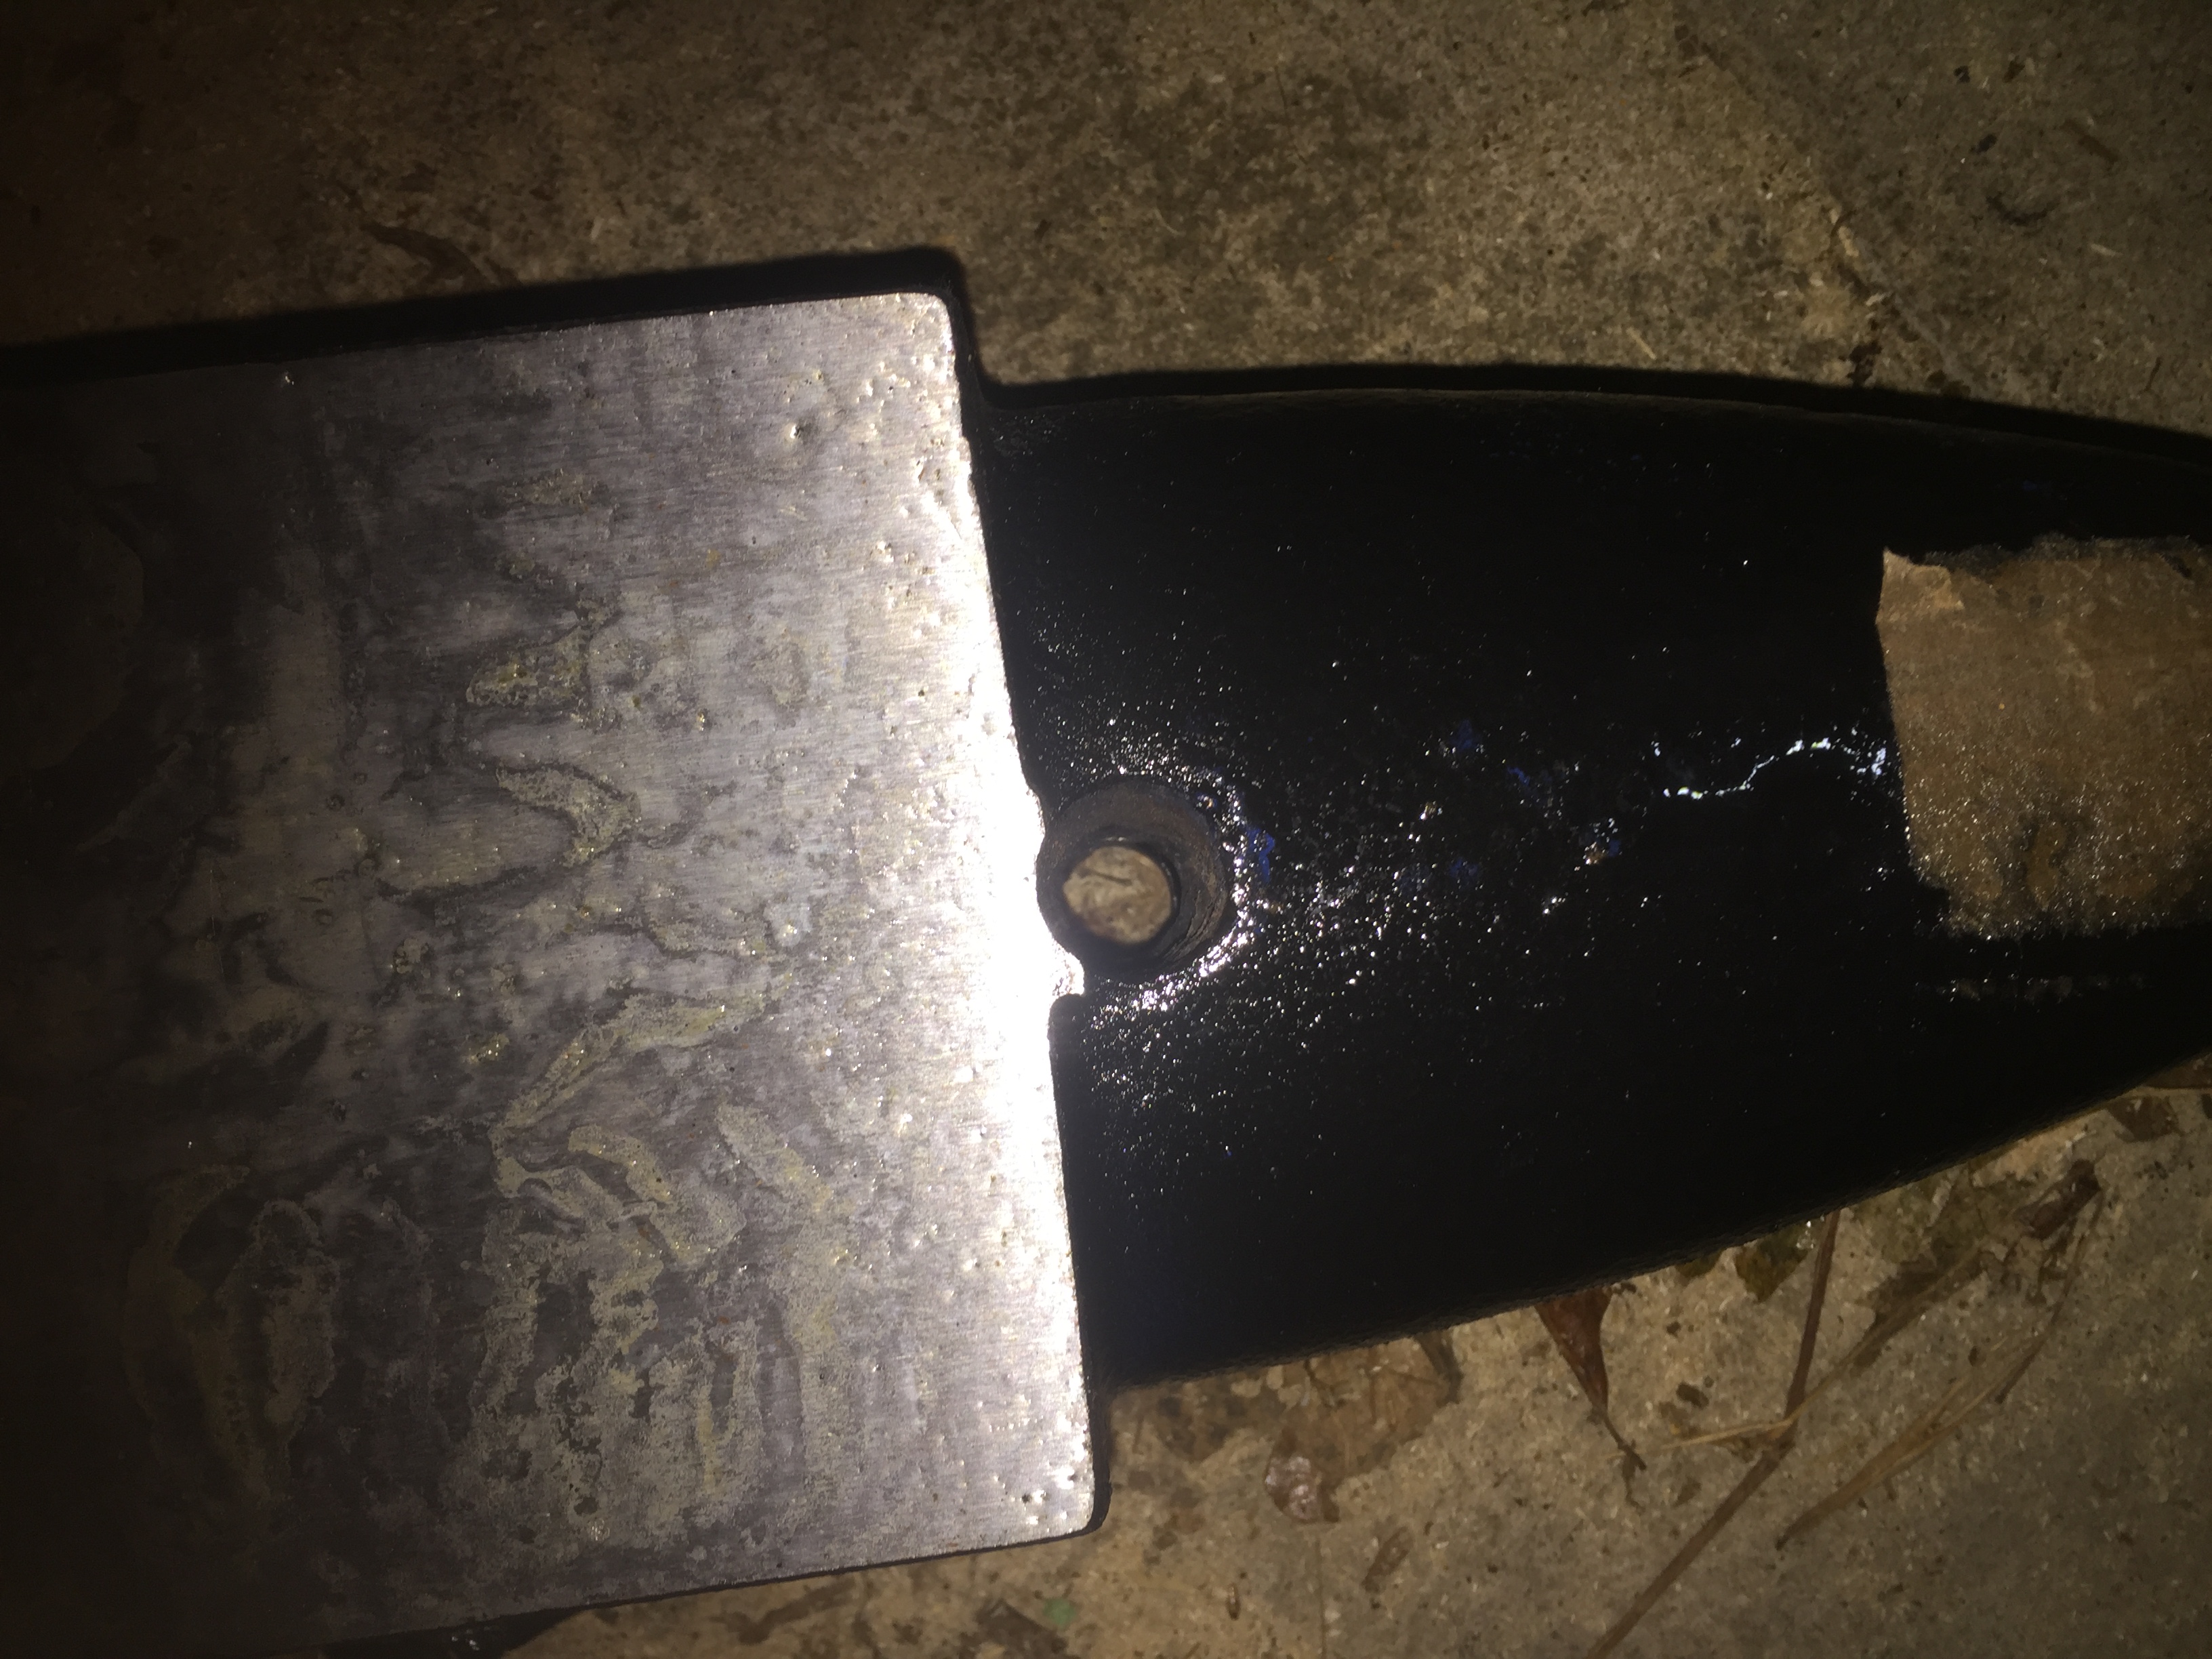
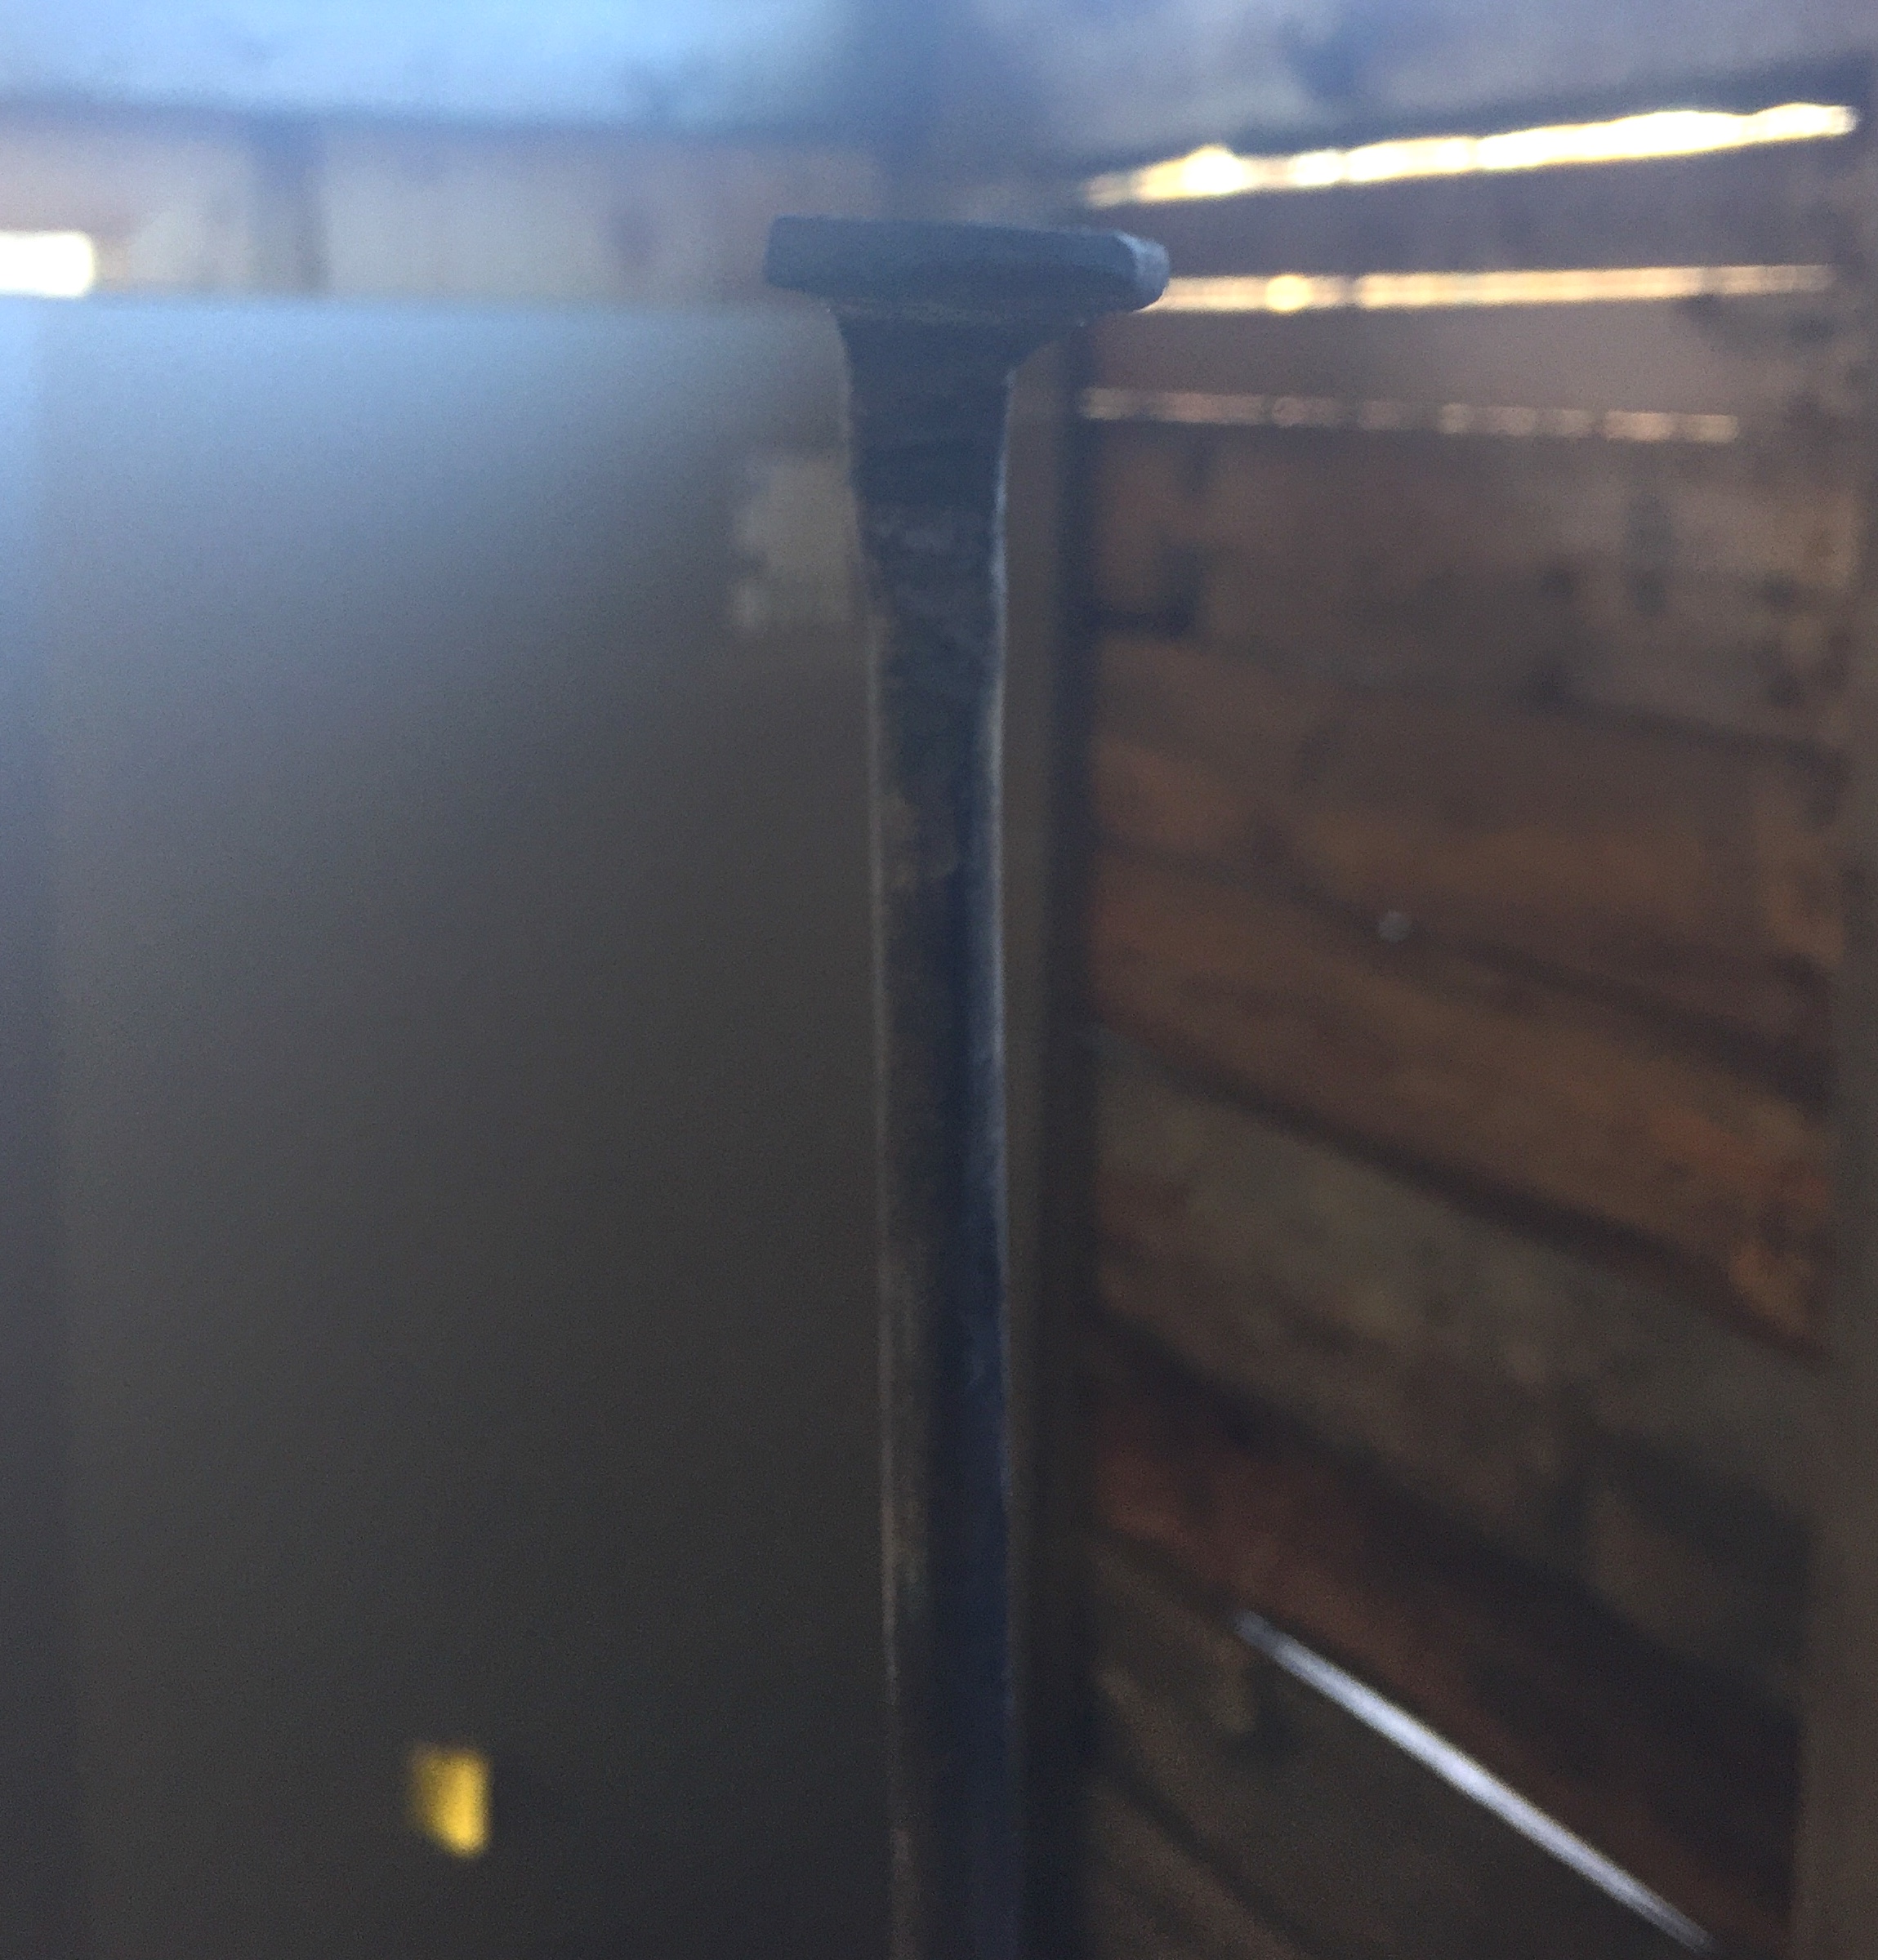
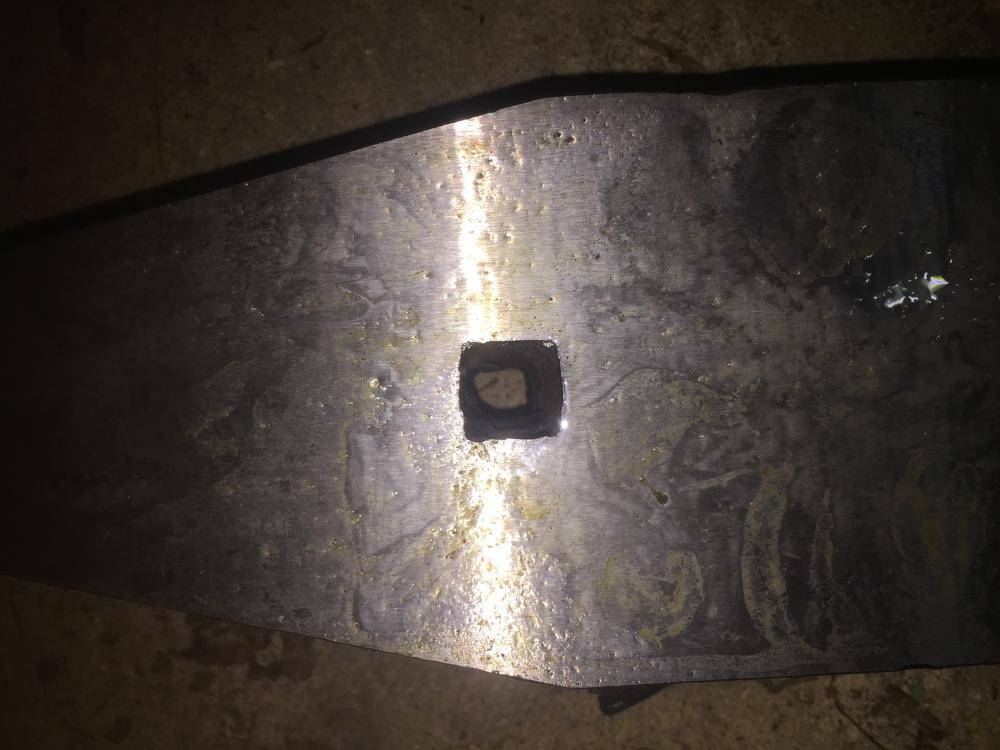
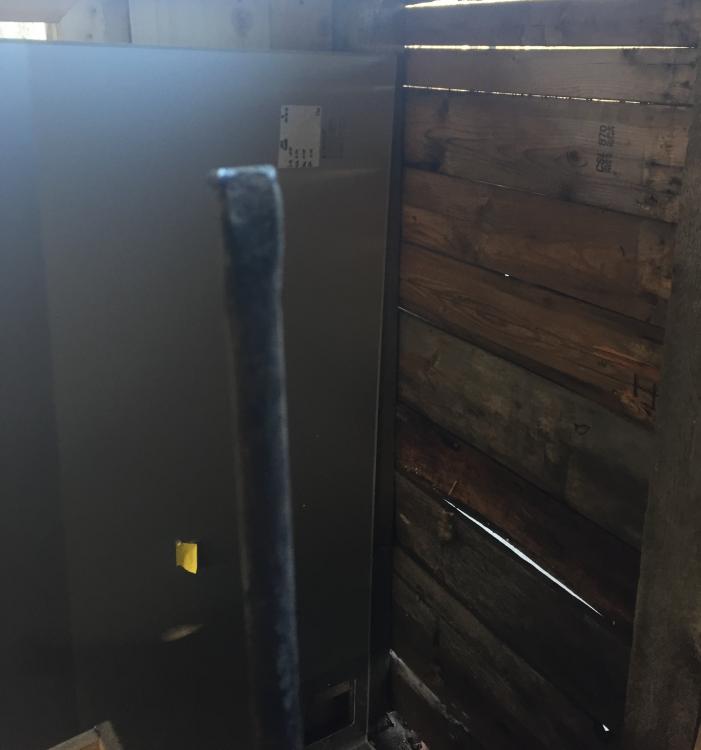
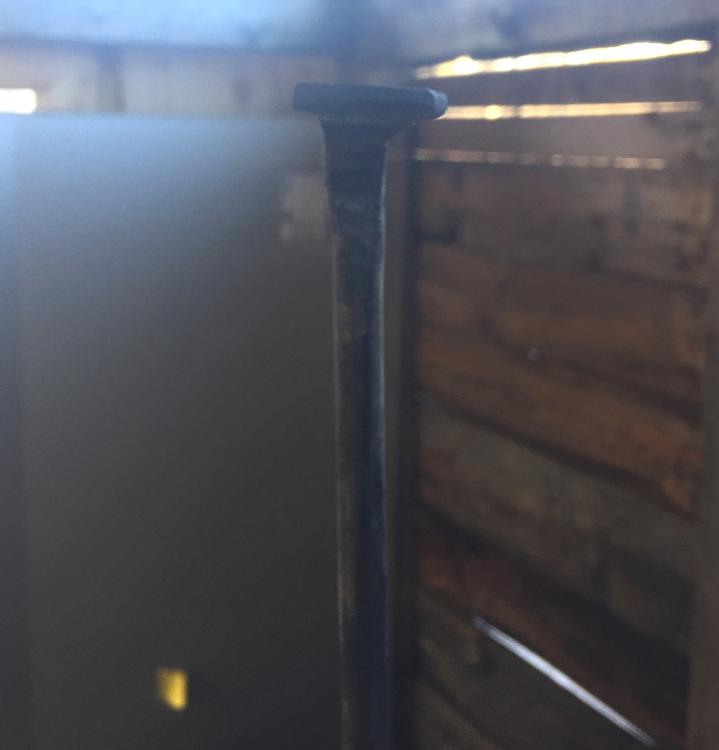
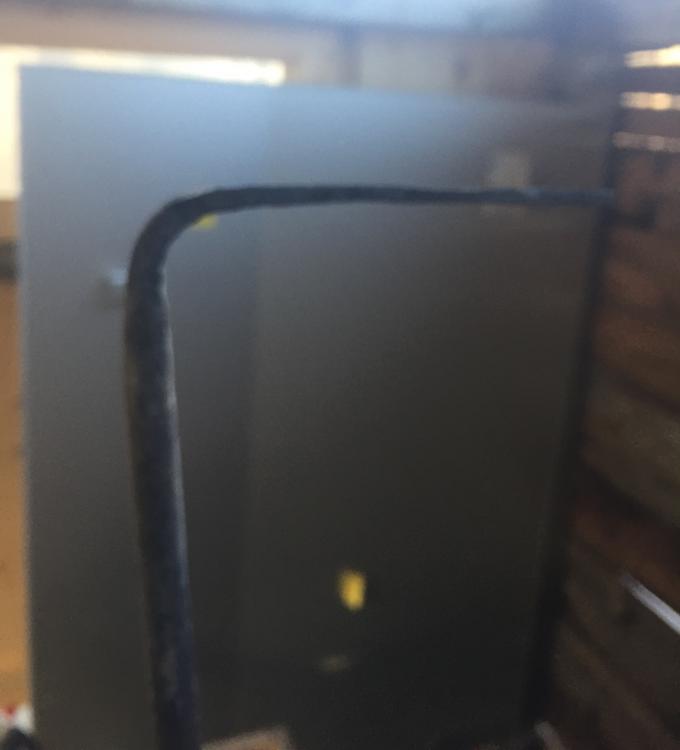
Oh yeah, good point about the anvil being too cold to work on... Huh. I am obviously going to have to work out a way to weather proof the shop and maybe get a small stove eventually... if only money were no object! I decided to pick up a 110 LBS cast steel ‘beginner’ anvil for a couple hundred bucks. It will give me more mass to work on, a hardie hole and pritchell hole, and a horn, so I figured it was worth it considering the price of anvils around here. The face seems pretty consistent, only one side next to the hardie hole was a bit ‘dead-er’ than the rest, and the holes are both fairly clean and should only need minor cleaning. Going to leave everything else as is until I work on it and learn what I’m doing a bit. Right now it’s just sitting in the floor of my shop until I either swap it out for my railroad track on my existing stand or build another stand for it. Sprayed it liberally with WD40 to protect it since my shop is not fully enclosed, hopefully that will do the trick. Want to try and get out there this weekend, but also have other chores and commitments this weekend :/ here’s a couple pics, should suit me for a good while at least theres some sort of oil/wax on the surface from packing/shipping - all those marks are not surface dings or anything


-
Thanks for the advise swedefiddle! One edge of my little piece of rail is rounded a bit, so I will definitely give that a try next time! I'm a bit confused on why you;'d make round stock square and then bring it back to round before flattening it out? Will that aid in keeping all the edges straight and flat? Thomas, that is surely a sign that you were meant to be together :) My husband and I are much the same (for about 24 years now, you have a few on us ;) ) Ooh, good idea with the plywood, that's one to try for sure, and thanks for the 'tricks of the trade' ;) The biggest hurdle will be whether or not I can make myself go out there when it's -22 F LOL Hmmm, I think I may need to make myself some wool forging garb!
-
Thanks wirerabbit!! Tools are definitely on the menu, since I don’t have many/any yet lol! And, like you say, good practice! And it’s getting pretty cold here too! Don’t know that I’m have many more opportunities before spring now, since all my stuff is n an open air space, sadly. Hey Thomas, yeah, I actually have a couple post vises I picked up last month, the big one needs a spring forged and the handle replaced, but beyond that, I’m not yet set up to mount it, but I have procured a giant stump for when I get the shop expanded in the spring. I knew just looking at the twist that I could have easily straightened it out in the vise, just didn’t have it available yet Definitely going to cut it down to a more manageable size, and if I get another shot at the forge this year, I’ll try and taper and put a loop on the end to be able to hang it Nice of you to let your wife have your tools and nice that you have someone who appreciates them!! Cheers Mel
-
-
-
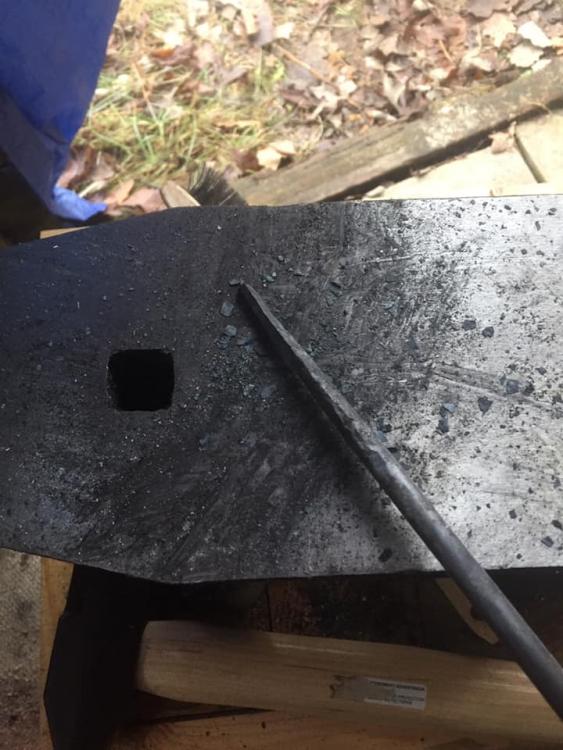
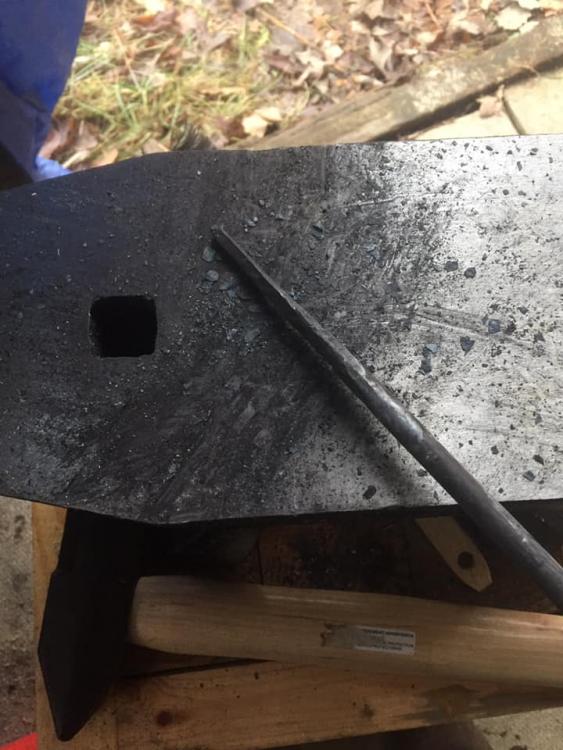
Lol I will leave it to time to decide the correct answer ;D And as requested some pictures of yesterday’s inaugural metal whacking And here are some from today’s attempt. Wanted to play with a railway spike, but I do not have the proper tongs yet so switched to a 1/4 rod of mild steel instead. It was a bit awkward as it’s five feet long, but managed to hammer out what will become a little rake for the fire. Need to dress my hammers still, they leave al kinds of marks. Had better results with the heavier 3lbs hammer but it’s a bit heavy. After a couple hours, I have to say, It’s certainly not as easy as it looks! I expected flattening it to be a little faster than it was (though I was using a lighter hammer at that point) but the bend went even easier than I anticipated! Tried to even up the edges but ended up putting a bit of a twist in the flat part that was difficult to get out again. All of it was made more difficult by the unwieldy length of my stock, and the awkwardness of holding it in the fire while pumping the air pump that’s not affixed to anything. All things that can be improved. Overall not bad for my first go, but lots lots lots to learn.


-
-
Hahaha! Thank you for that LOL. Yeah, the box is already actually too deep I think, unless I double up the bricks, so I'm pretty sure the rim extension will not be needed (which is also good because it kinda fell apart when I moved it a while back LOL fortunately the rest of the forge is a bit more sturdy) Thanks Frazer, yeah, I'm looking forward to learning the ins and outs of how it's going to work, and how it's going to work for *me* Thanks Frosty, that's a good tip! I'll be sure to post pictures of projects - once I get something done lol
-
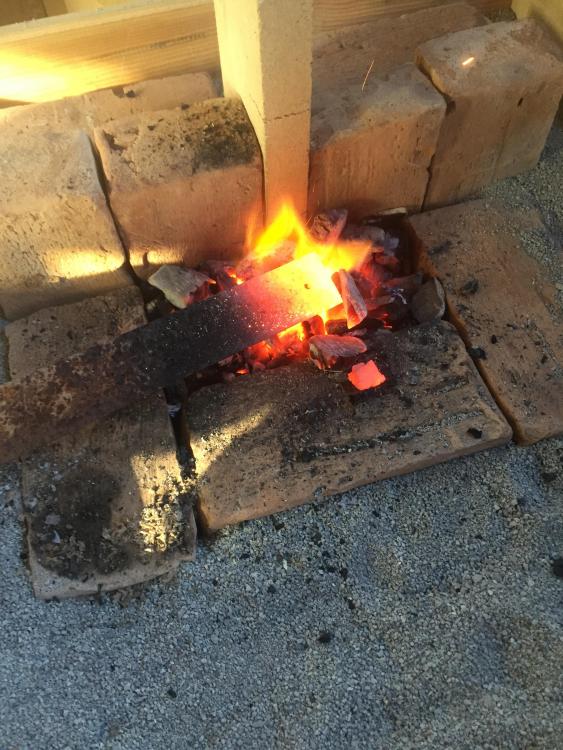
I made fire! First test fire of my forge build today. Just wanted to at least fire it up before winter truly sets in, as I am in an unfinished, uninsulated building. Was able to get an orange heat on a piece of scrap with little effort. (The picture makes it look yellow, but it was really only orange) Whacked it a couple times just for fun. If it stays as warm tomorrow as today, I may actually try and make something out of a rail spike Already some changes I’ll need to make, will need some notches cut out of the sides for longer stock, a more stable base I think, and rig up a way to mount the air pump I’m using. Its not much yet, but I’m super happy to finally get to even this point 03C27A58-6C07-41F8-BDA2-0BFF31C80CD6.MOV
-
Thanks. It's been so rainy here for the last month, I haven't had a chance to finish it or dig up any dirt (too wet) but we've had a couple days of warmer weather again, so I might be able to get it finished before the cold returns for good. In the mean time, I've managed to build a small anvil stand for my track anvil and am working on clearing out and cladding the inside of an old shelter on my property to have a place to set up shop. Still haven't actually put hammer to iron, and it may become too cold soon, but trying to get as much done as I can while it's still warm enough to work outside
-
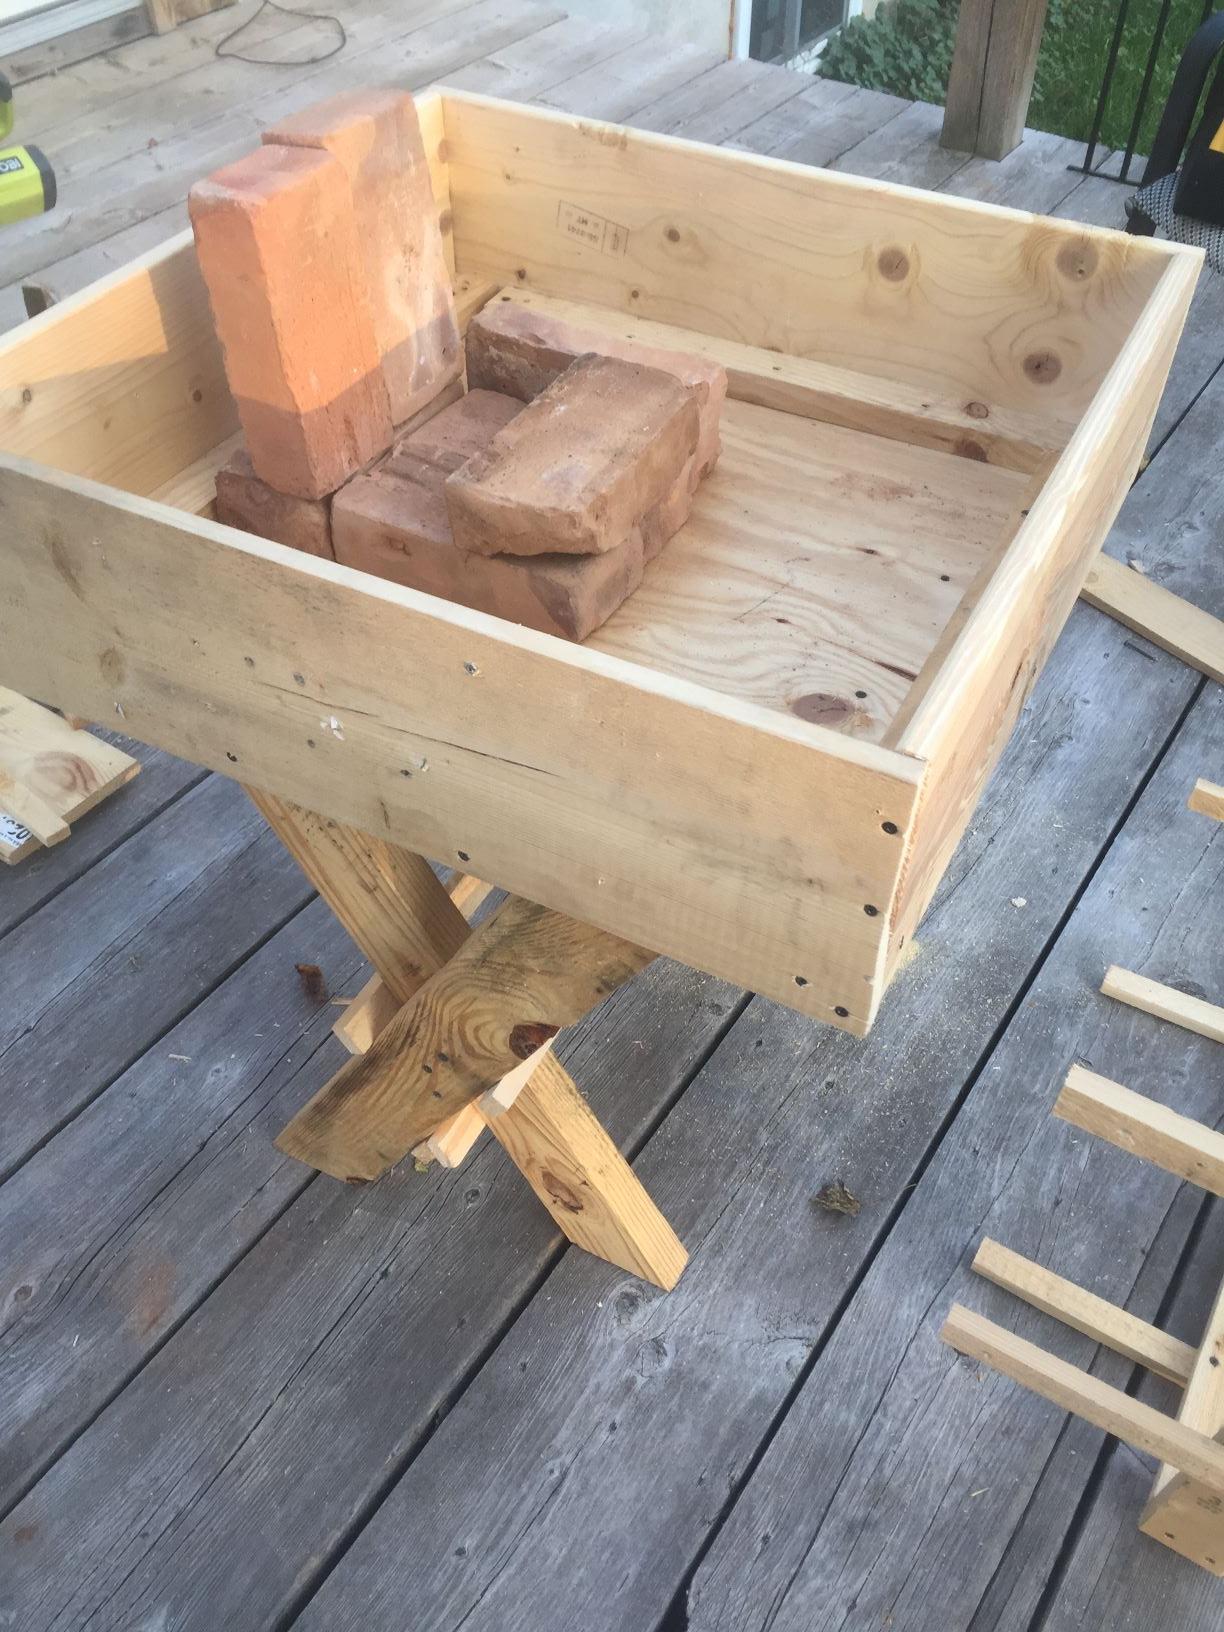
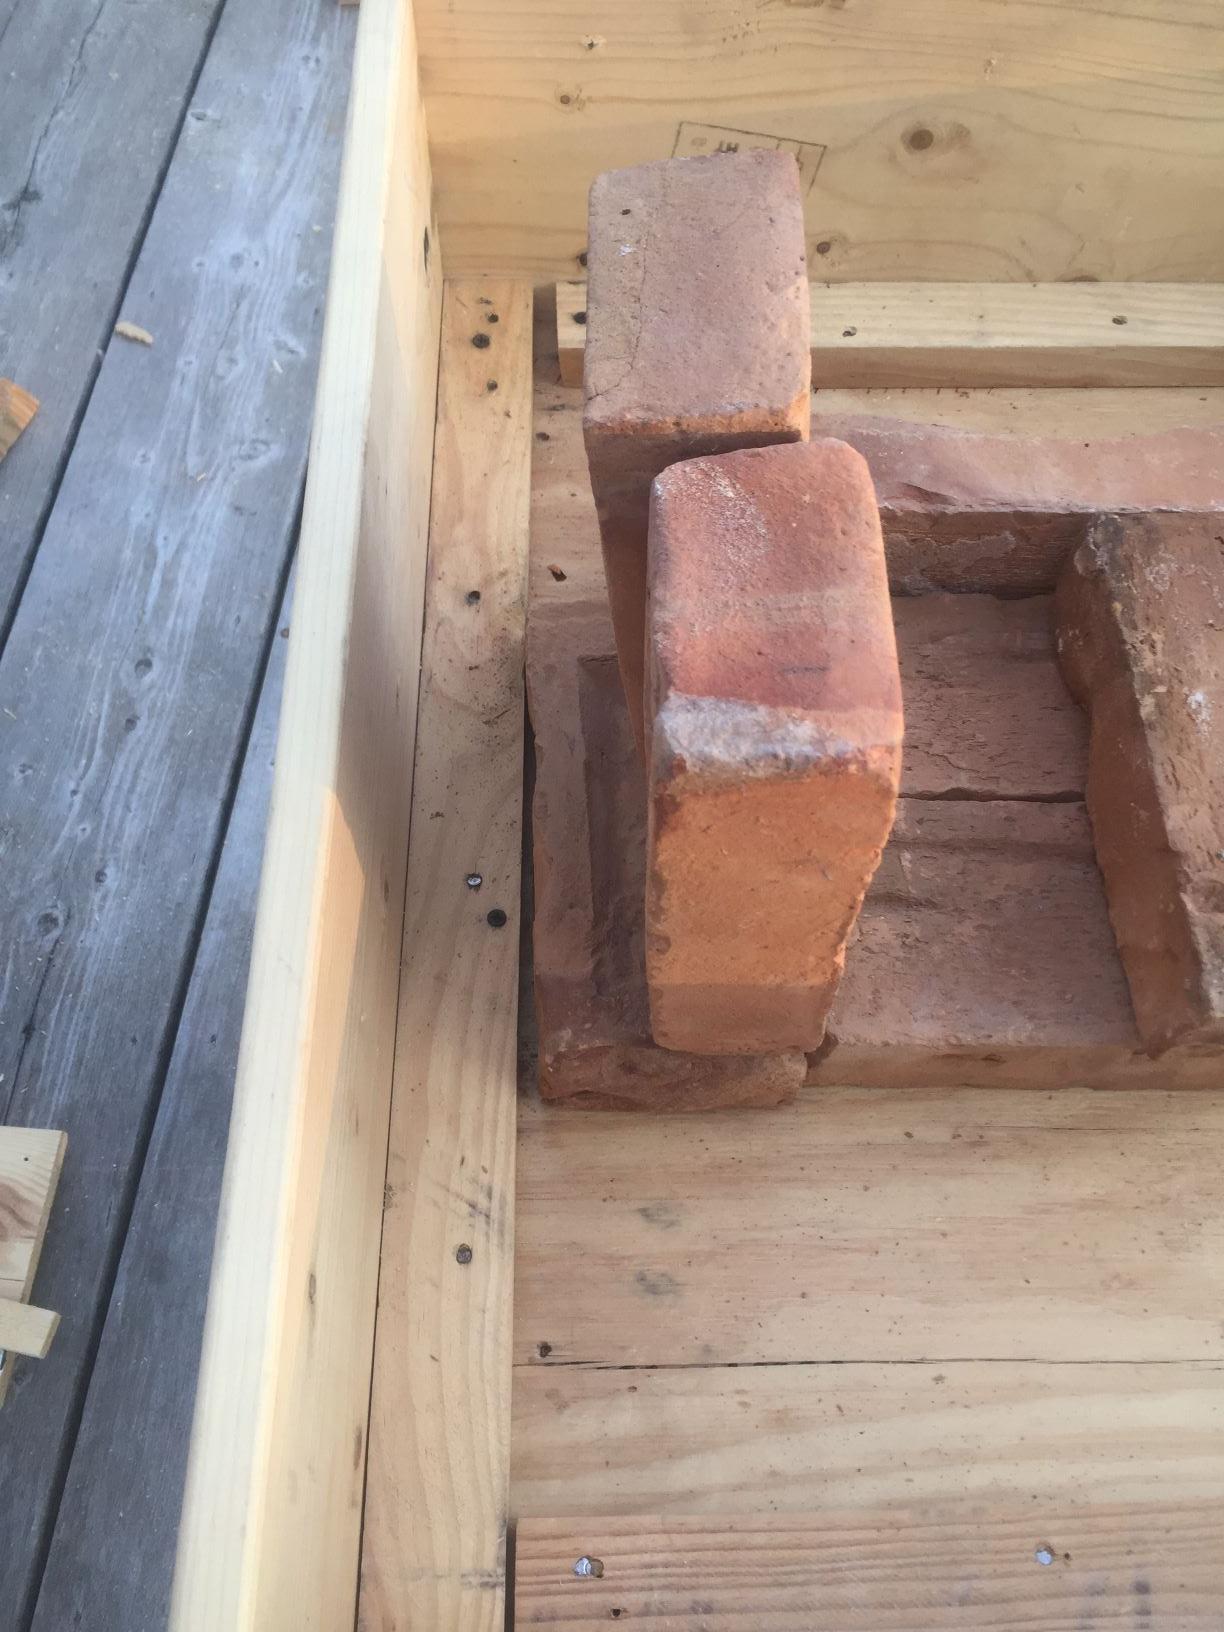
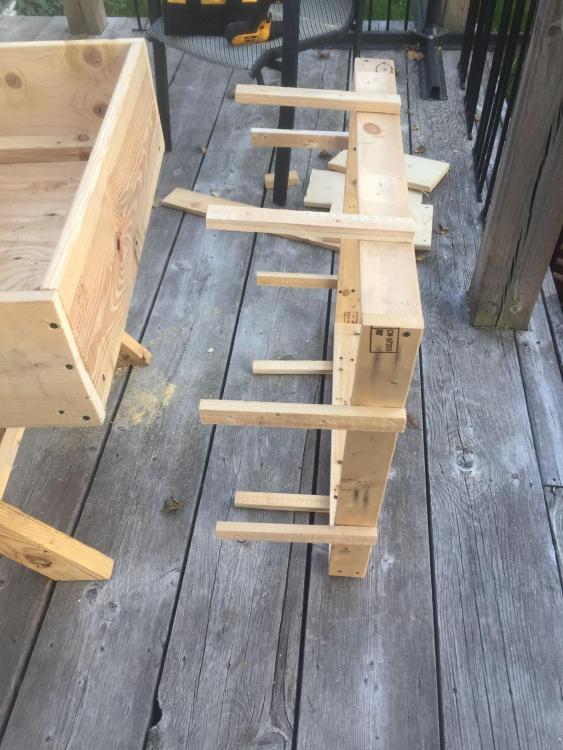
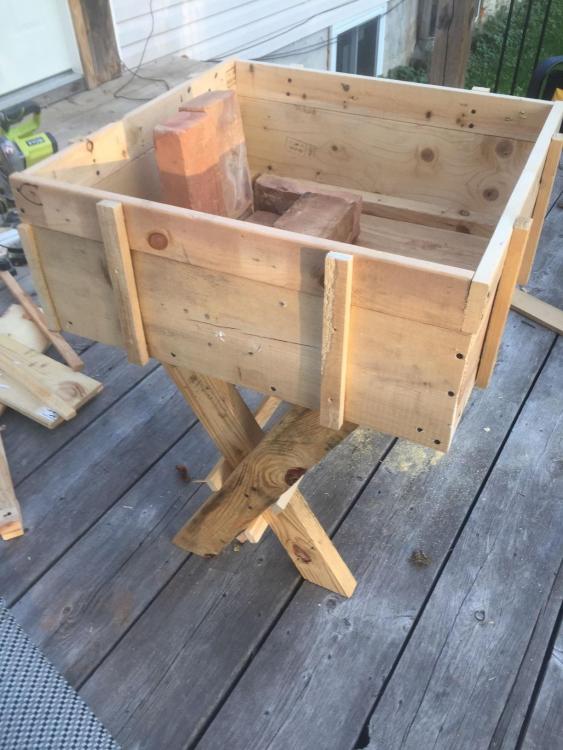
Got a chance to work on getting my JABOD build today! It's built from reclaimed skid wood from my work, even the screws are reclaimed, so cost so far is $0 for the wood and screws, and $10 or so for my piece of 18" x 3/4" black pipe (not pictured). Still need to grab a few more bricks from the pile, but I grabbed all the orangier ones (I read that there might be a higher percentage of fire clay in the orange-to-tan bricks?? Figured it couldn't hurt!) They don't look as orange as they are in the picture though... I wasn't sure if it was deep enough at first, so I built an additional rim to add some height to the box in case it's needed (my tape measure seems to have gone walkabout, but I estimate it's roughly 6 3/4 deep without the additional rim, and 8 1/2 - 8 3/4 high with the rim added) Still have to drill the hole for the tuyere, and will likely need to build some support for it since it's 18" long. Any glaring mistakes or anything that I should fix before I move on? Thanks for the advice and all the great posts on building one of these. I'd have done this years ago if I'd realized how easy it is to build one


-
I guess you've been in a while, my membership has quite a few more digits than that, and I'm coming on 20 years! LOL Only gone to Pennsic 3 or so times. My husband developed some health conditions that made camping in the heat/damp of Pennsic too difficult unfortunately. Saw some smithing going on, but not a smelt. That must have been a lot of hours of work!
-
hah! Yes, I've been there many times I've actually met Darrell a couple times at some local SCA events I have a small saex that he forged (possibly from an iron bloom if I'm remember correctly - it was gifted to me by another friend) that is a prized possession A good reminder tho, it's been a while since I stalked through that page
-
Oh, almost forgot! I am definitely interested in some cooking gear, I would really like a tripod or similar set up for cooking over the fire, and utensils!! I will be sure to hit you up for advice when the time comes, thank you! Mel
-
Hey Thomas! My 'persona' is 10th century Norse, living in Yorvick around 945, so viking era is my primary interest, with 14th century scotland as a secondary, though I'm not really worried about limiting myself to one specific period at the exclusion of all others. I have not yet done a lot of research into those periods as far as smithing goes - I have done some on metal casting, which is another interest - want to make all the shiny belt fittings that I can't afford to buy Thank you for the links! I will give them a good looking over, they look like a good place to get started LOVE the anvil! That is Pretty!!!! Hey guys! Thanks for the welcome. As to bentonite, yeah, I have used it before in making 'greensand' for sand casting, and yes, it does make a mess when it is over wet!!! From what I've been reading, it sounds like an ideal mixture of sand and bentonite for a JABOD forge has pretty much the same moisture level as is ideal for greensand! (i.e. able to clump without leaving your hand muddy, or squishing or crumbling, and able to 'break' cleanly), and I do have both, so will likely go with a mixture and pack it in as you suggested, thanks!!! Ah, okay, that's good to know, re the amount of air required with charcoal vs coal!! Honestly, I do like the idea of a hand powered bellows (note I said 'idea' and not 'actually using' as I'm sure I will be cursing whatever set I end up building a time or two hahaha ;D ) and I am keen to make a set of teardrop double bellows some day, but I think I have a pump somewhere that is similar in design to the one Charles uses in his Mark III Jabod build, so will likely start with that, since it's already made! (why reinvent the wheel, so to speak...) Thank you both for the great tips!! I'm really hoping to have some time to get started on my build this weekend - there are other 'chores' that must be completed first, but if there's time, I'm gonna try!
-
Hi All, Just getting started in all this. Have wanted to try smithing for years, but hadn't gotten around to it yet. I have done a bit of metal casting work with pewter and have built a little portable foundry to move up to aluminum and bronze. BUT, now that I've moved to the new 'homestead' as it were, I have the space to build a little lean-to shop and set up a forge, so here I am! Planning to start with a charcoal JABOD, since it's cheap, with plans to (eventually) make my own charcoal from scrap pine (which I have a good, free supply of from my work) I have a little track anvil to start with, and am in the reading phase now, but hope to start building the box soon. Planning to use bentonite in the box. Have wood to make it, but not sure on a stand yet. Until I build my lean-to, I'll want to move it into the shed, or maybe just build a cover for it - so many options! I have an interest in period, traditional techniques (I'm into medieval re-enactment) so would like to build a bellows as well (though will likely go with an electric blower of some sort for day to day playing around) Anyway, keen to get started and pound on some metal! Mel