

Allen0311
-
Posts
15 -
Joined
-
Last visited
Content Type
Profiles
Forums
Articles
Gallery
Downloads
Events
Posts posted by Allen0311
-
-
Hello Everyone,
I have been making knives for about 8 months and I have started to get some of the basics. I recently joined the ABS as an apprentice smith. I am looking for some advice on how to go about finding a bladesmith in my area to learn and develop my skills from. It doesnt have to be an ABS smith but would be a plus if they could help me work toward my journeyman rating. I live in the central Georgia area. I am open to any advice anyone may have. Thanks.
-
I’ve learned a ton from this forum. I always like to get my hands dirty. Helps me remember where I started and teach guys after me.
Any ideas As to where I should look for information on judging flame colors and temps so I can make sure when it does fire I can tune it?
-
Frosty,
I made the mistake of asking a very open ended uniform question once in this forum. Won’t make that mistake again. lol
As a commercial construction superintendent I get paid to follow plans so I make sure I read them.
I also don’t like to waste money so I read all of forges 101 and burner 101 To make sure I built what suites my needs and was the right size.
I’m still learning the welding piece as I am teaching myself that too. Ive done finish carpentry for years.
it would be interesting to see if the stainless shell did well enough to offset the cost of the added expense. I’ll let you try it first
-
Thanks for the compliment and advice frosty. I’ll cut the steel back and tack a piece of flat bar for the KL30 to extend out so flame contacts it instead of steel. I did leave sections of the steel unweleded for vents based off the Forges 101 page.
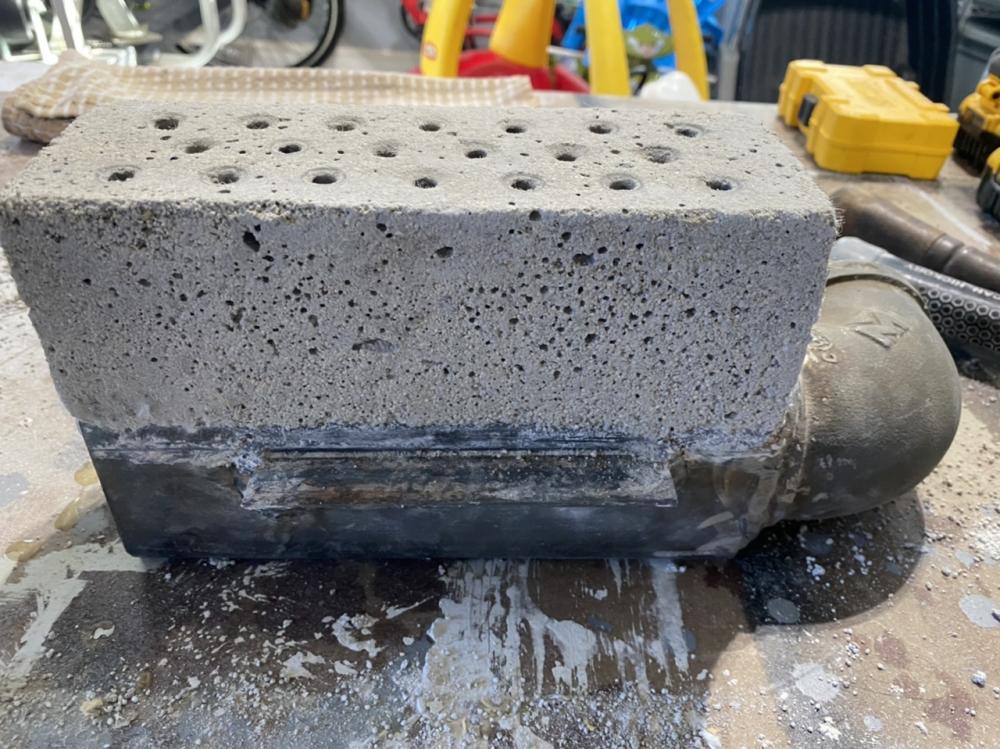
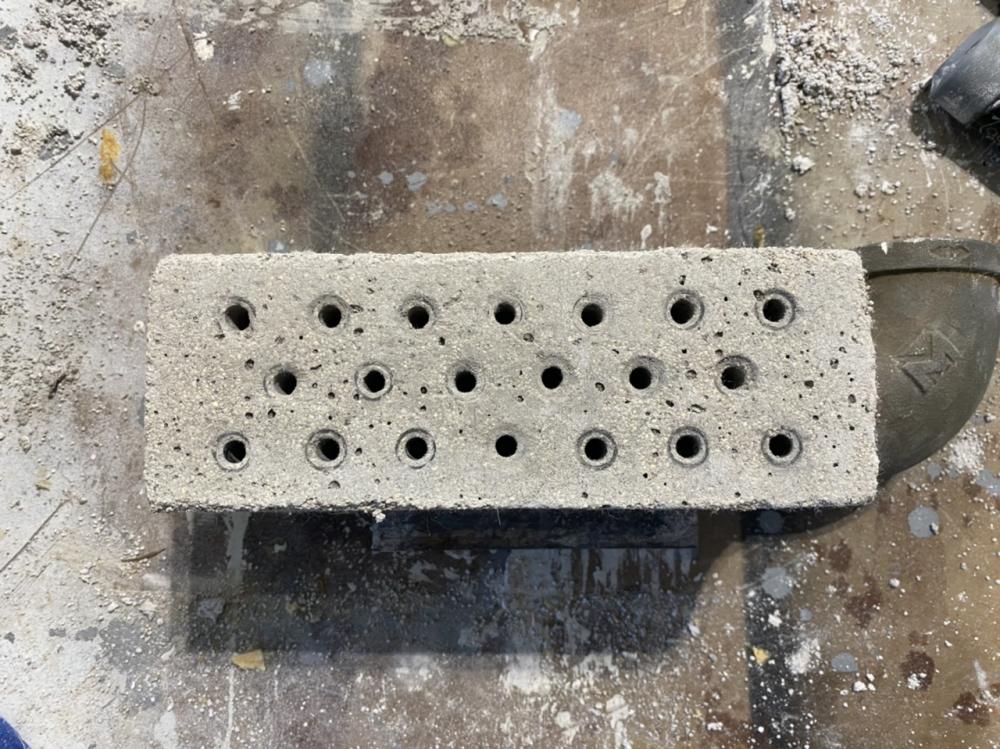
I added the mixing diffuser based off the instructions but I did add more/larger holes and it has about 1/4” gap on either side to reduce back pressure.
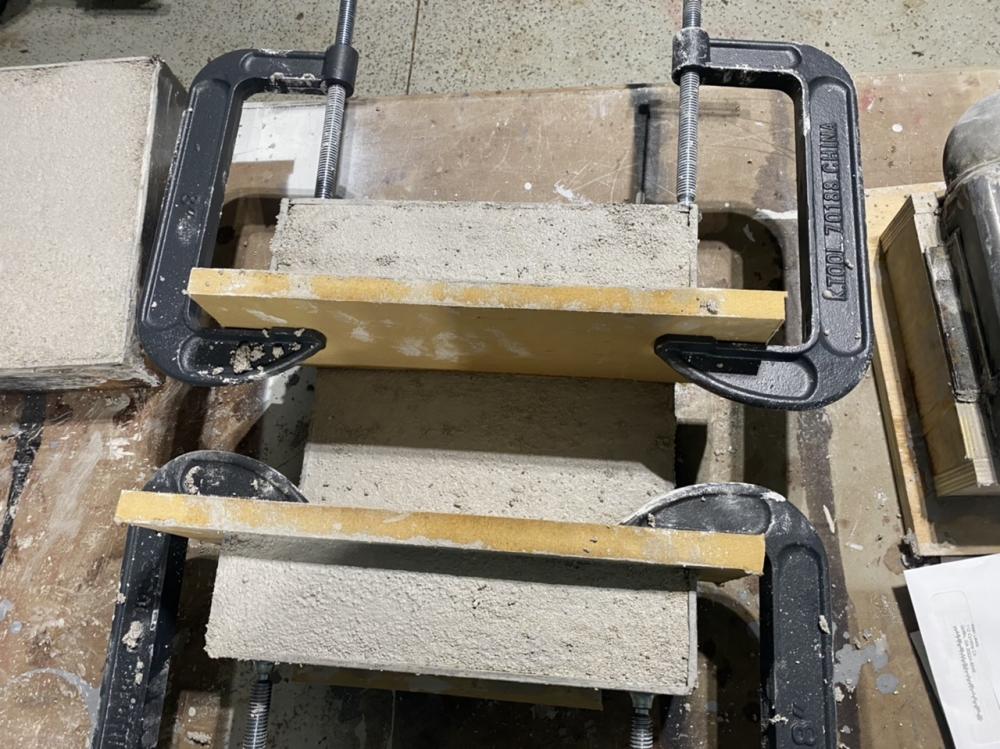
The stand will have shelf 1” lower than the forge floor to support fire bricks to act as doors if need be.
-
6 minutes ago, Frosty said:
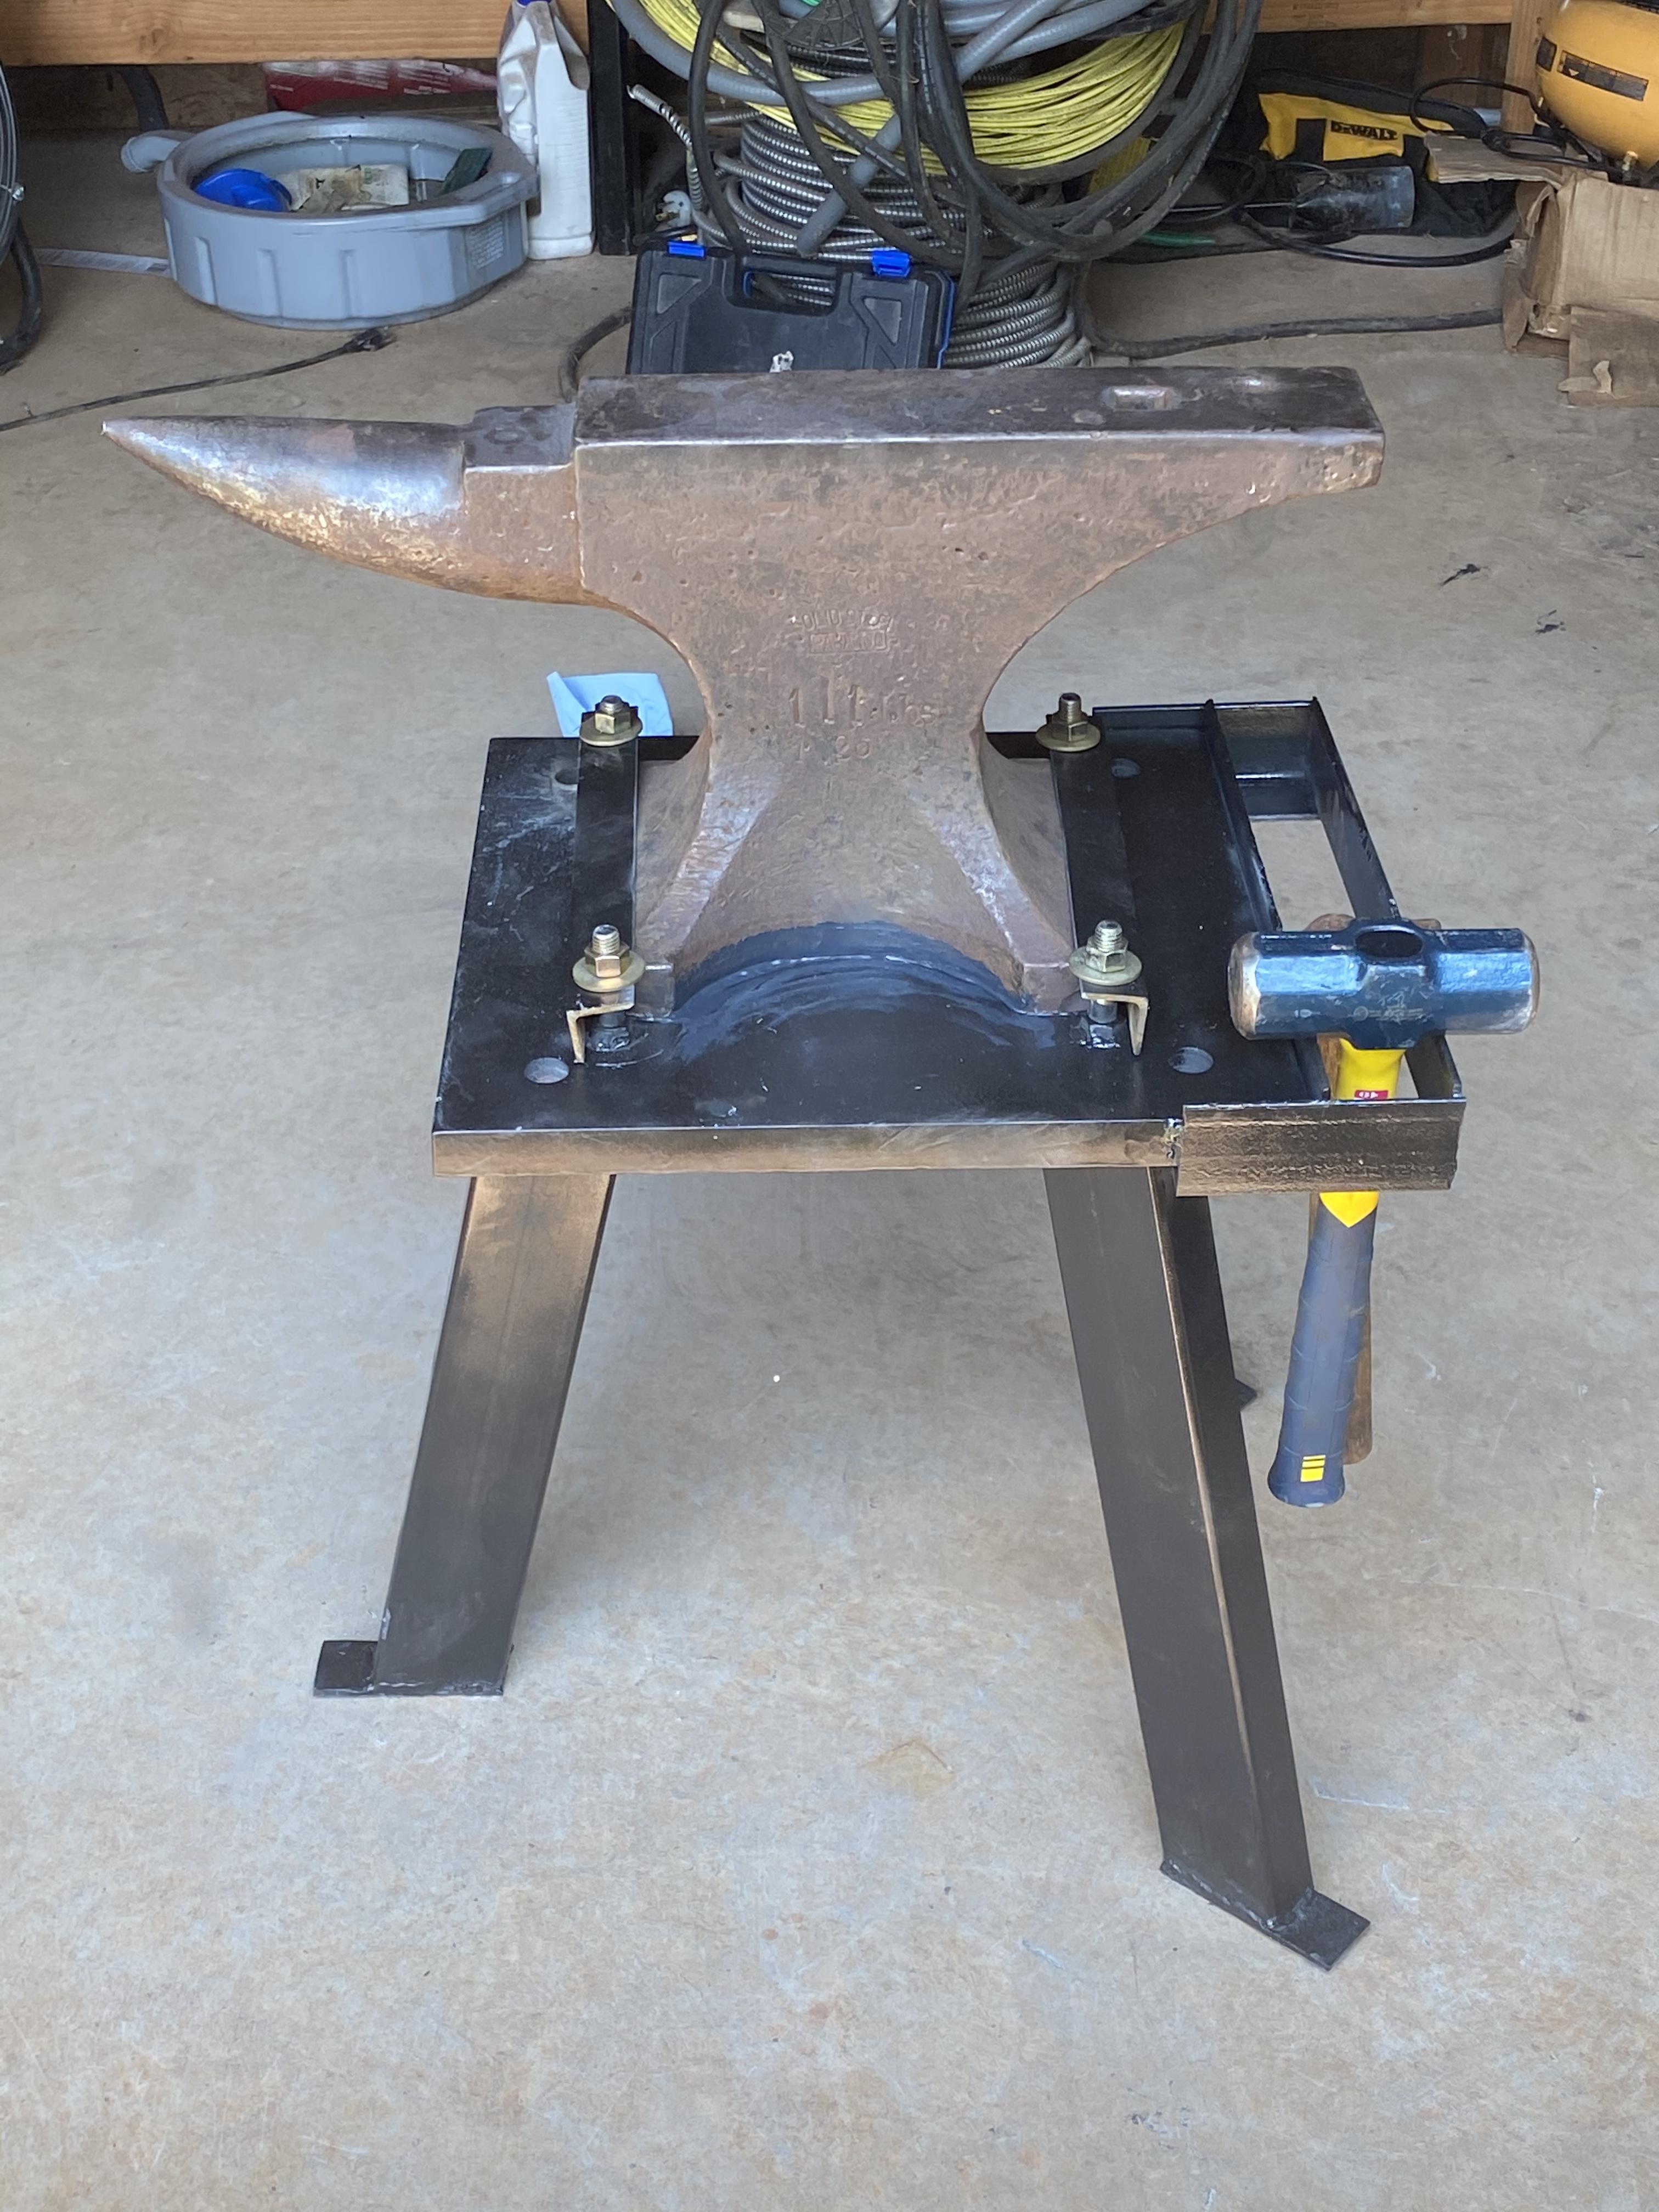
Looks good, nice job Allen. I'd round the corners on the plate though, they're real shin barkers as is.
Frosty The Lucky.
Thanks Frosty. I’ll take any advice to save shins!
-
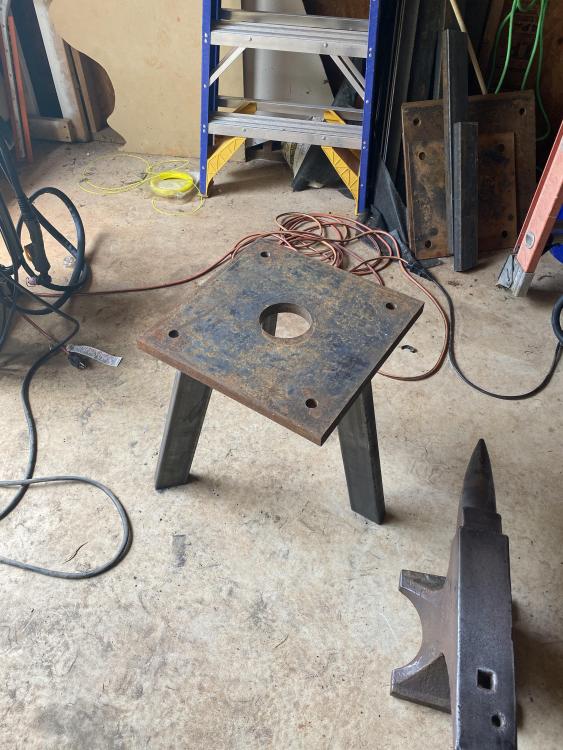
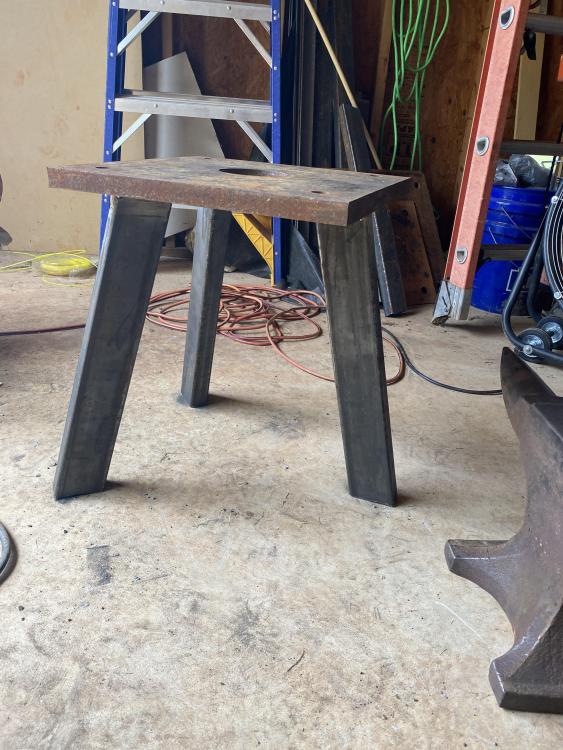
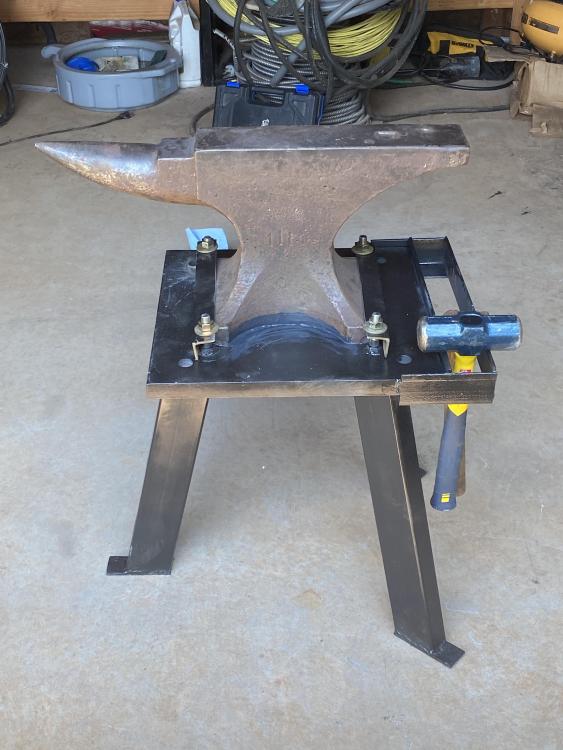
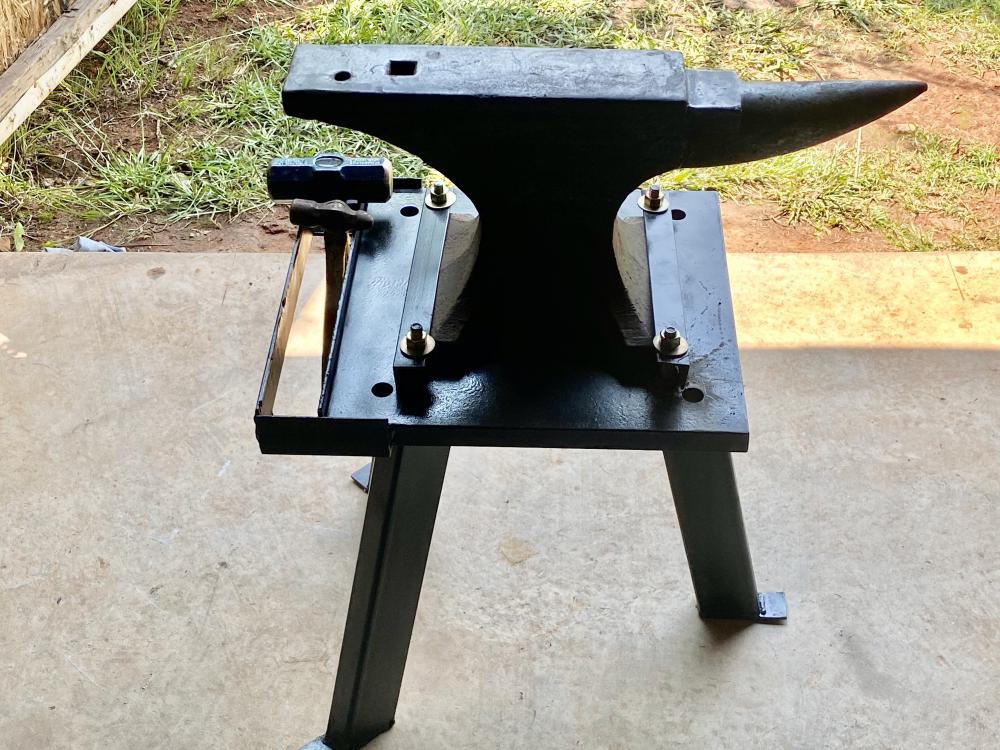
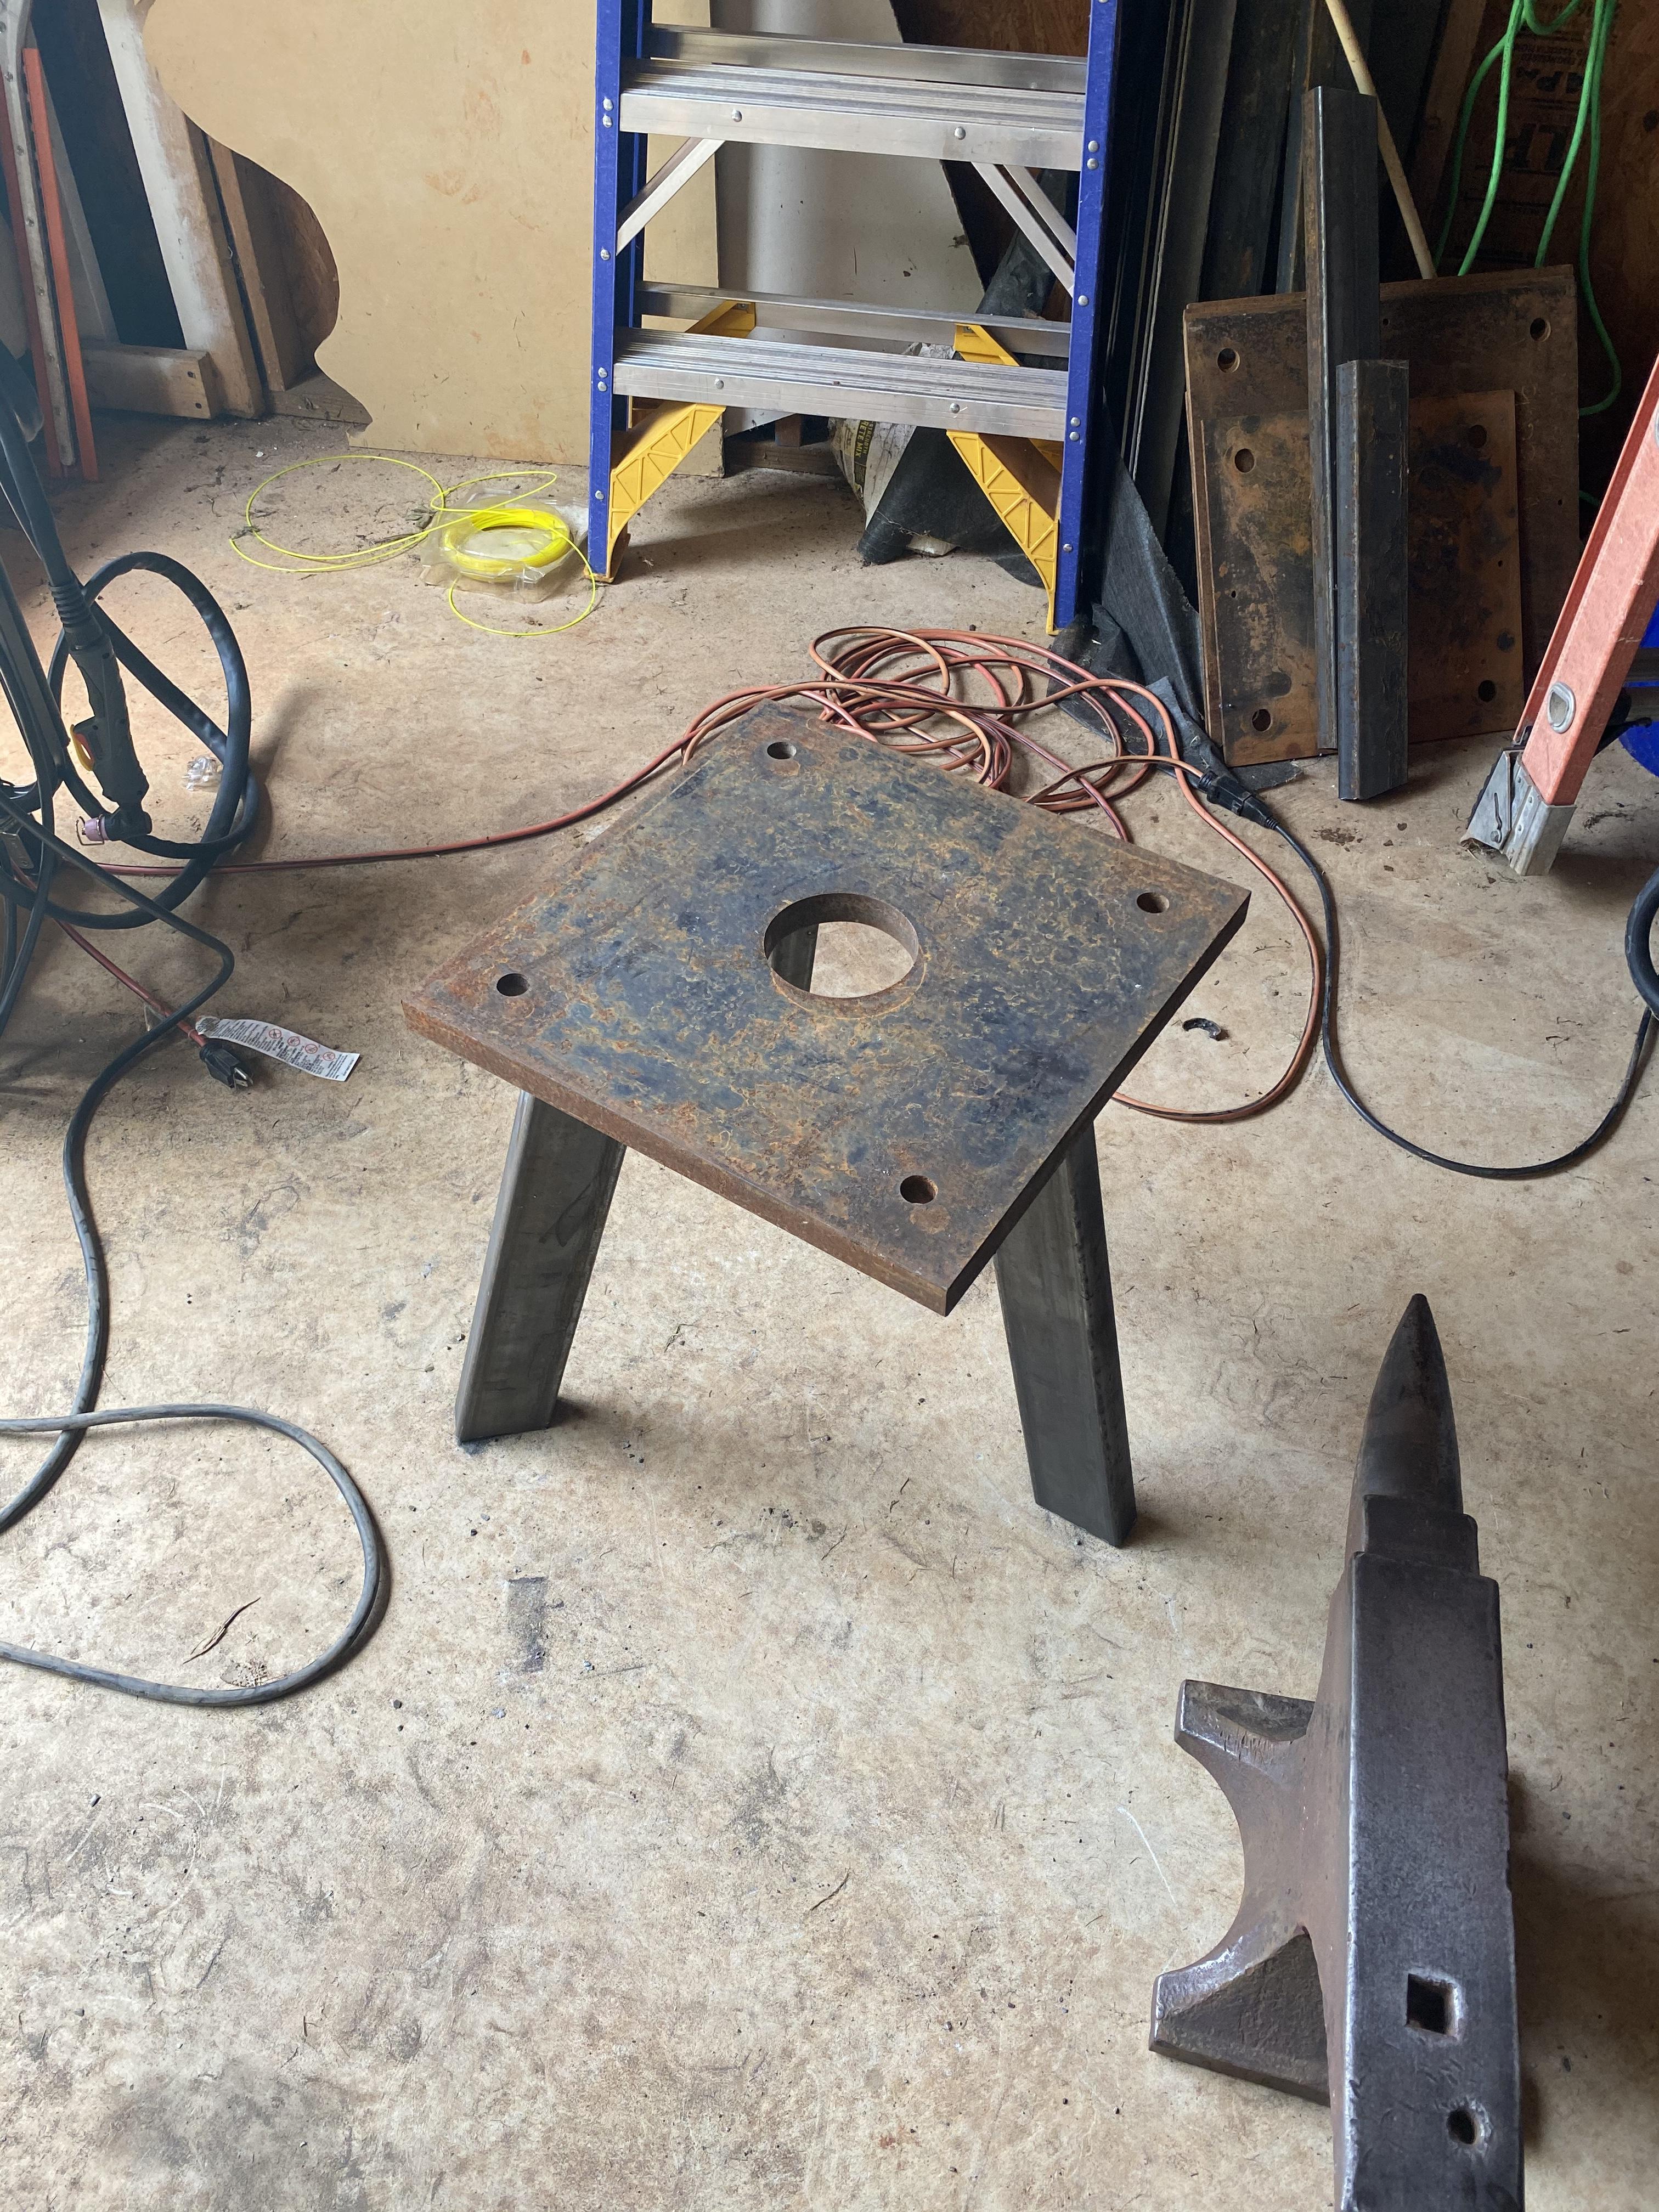
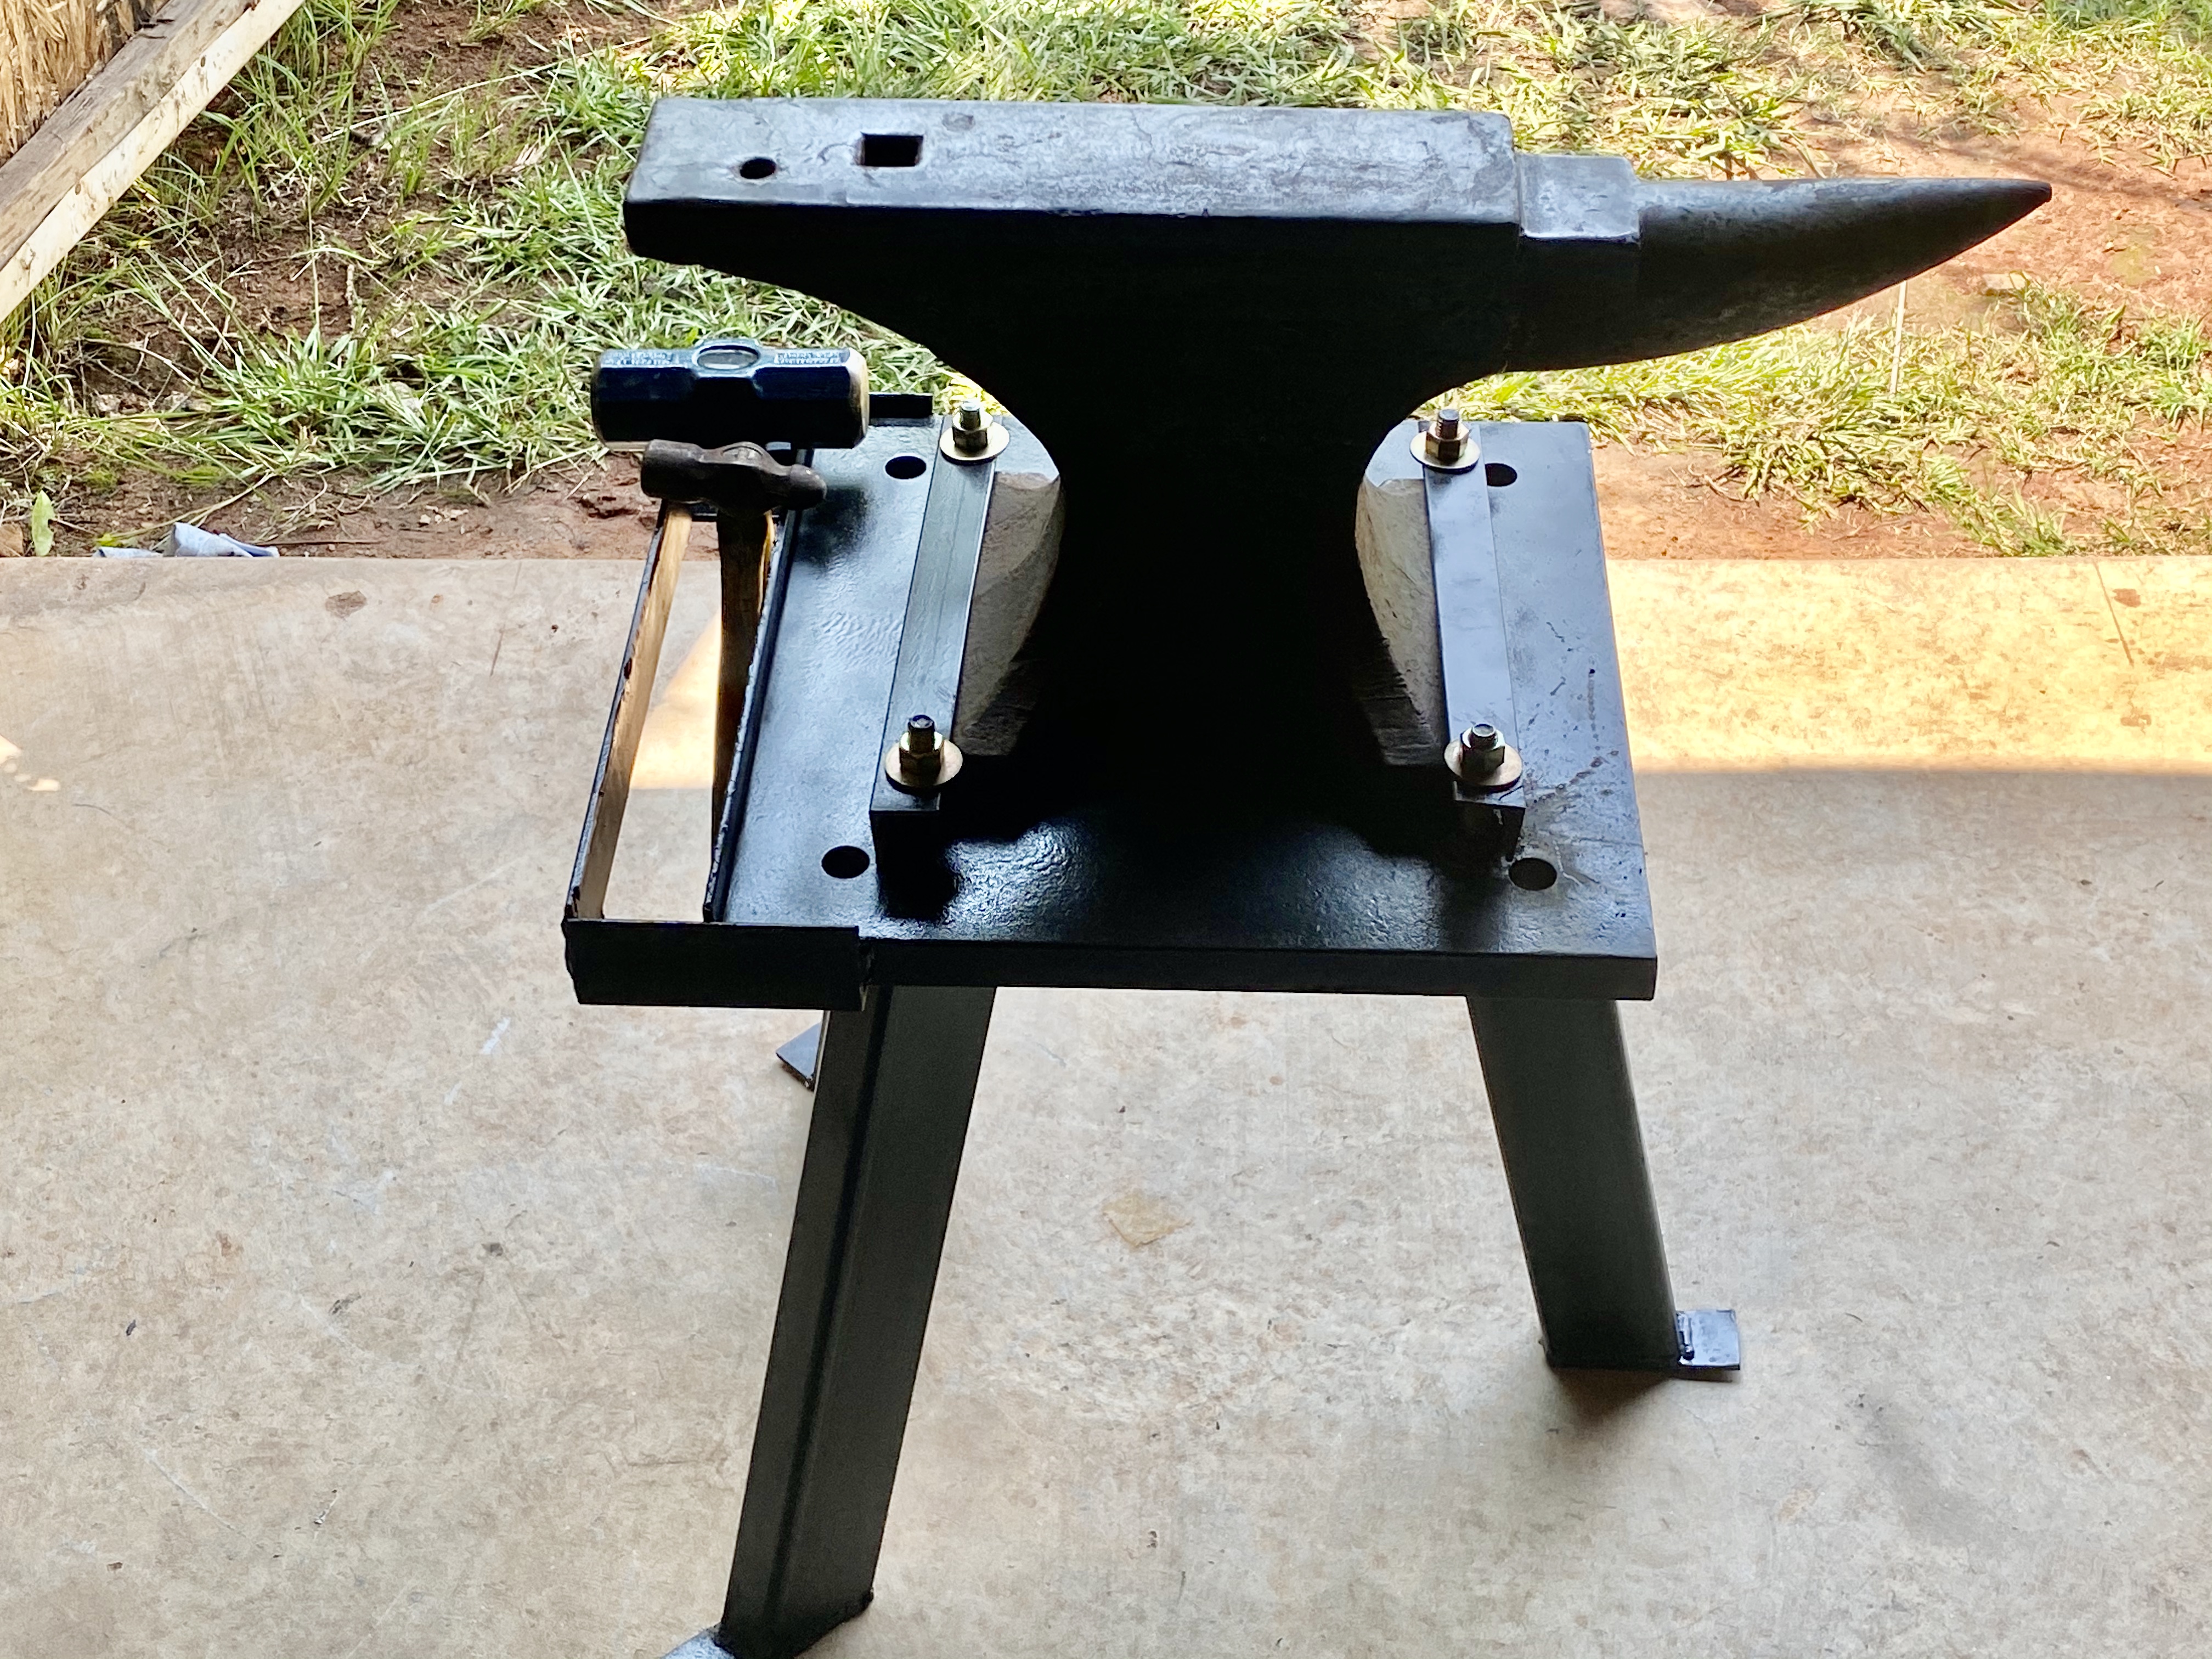
Built my stand for this anvil and it made a huge difference in the sound.
Used a 1” thick plate that was an uplift plate for a set of anchor bolts. Welded legs of 2x3x1/8” tube at 12 degree angle. Filled with sand and compacted and capped with 3/16 plate steel.
I welded grade 8 1/2” bolts to top of the plate and made angle iron brackets to hold down to stand.
Primed and painted it with hammered black paint.

-
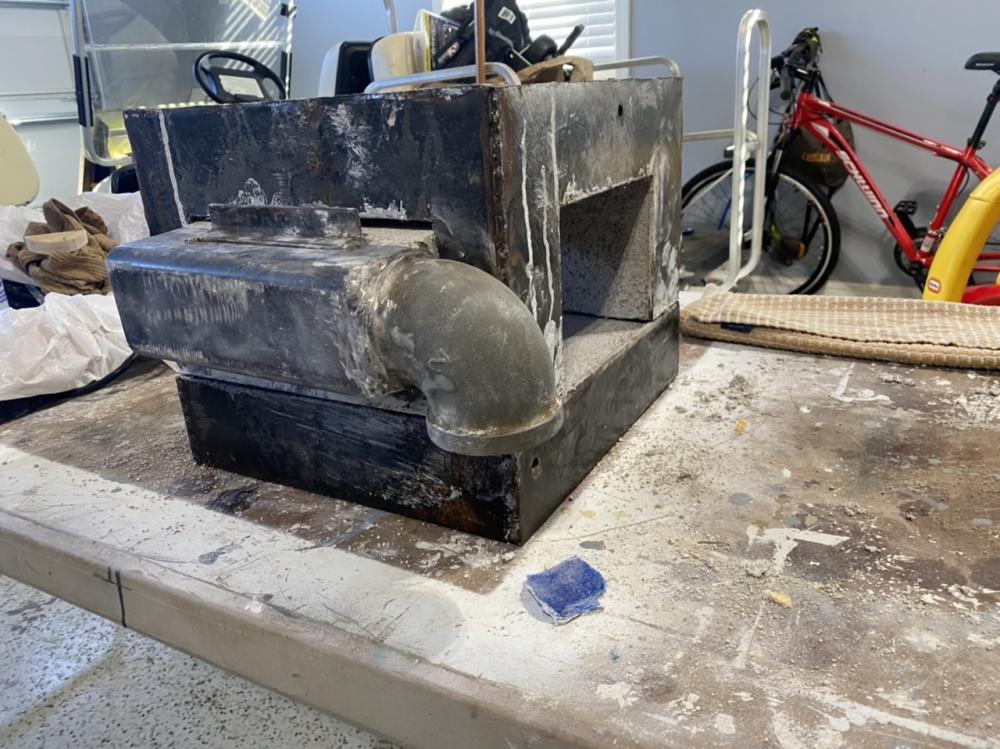
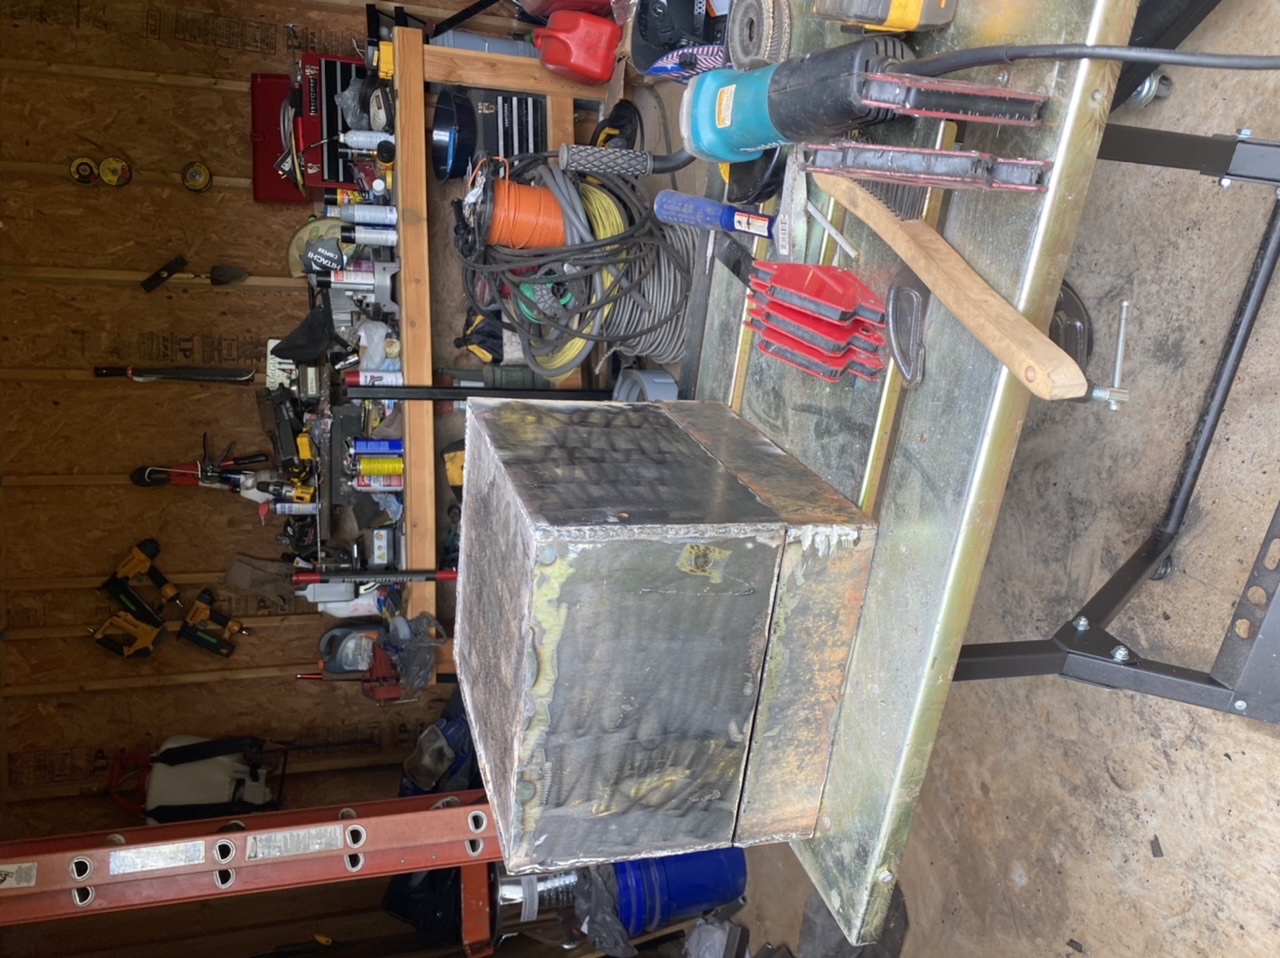
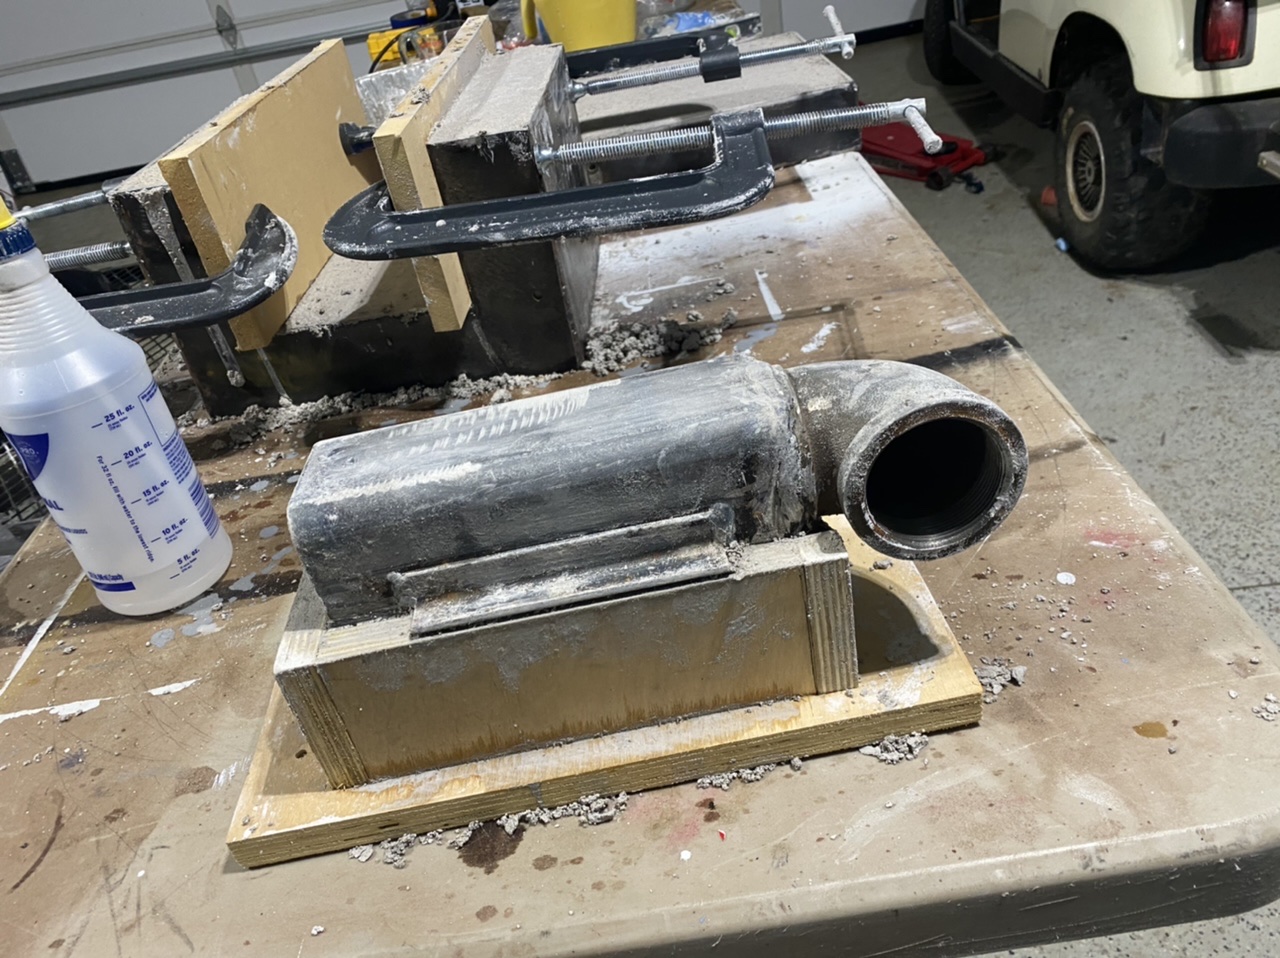
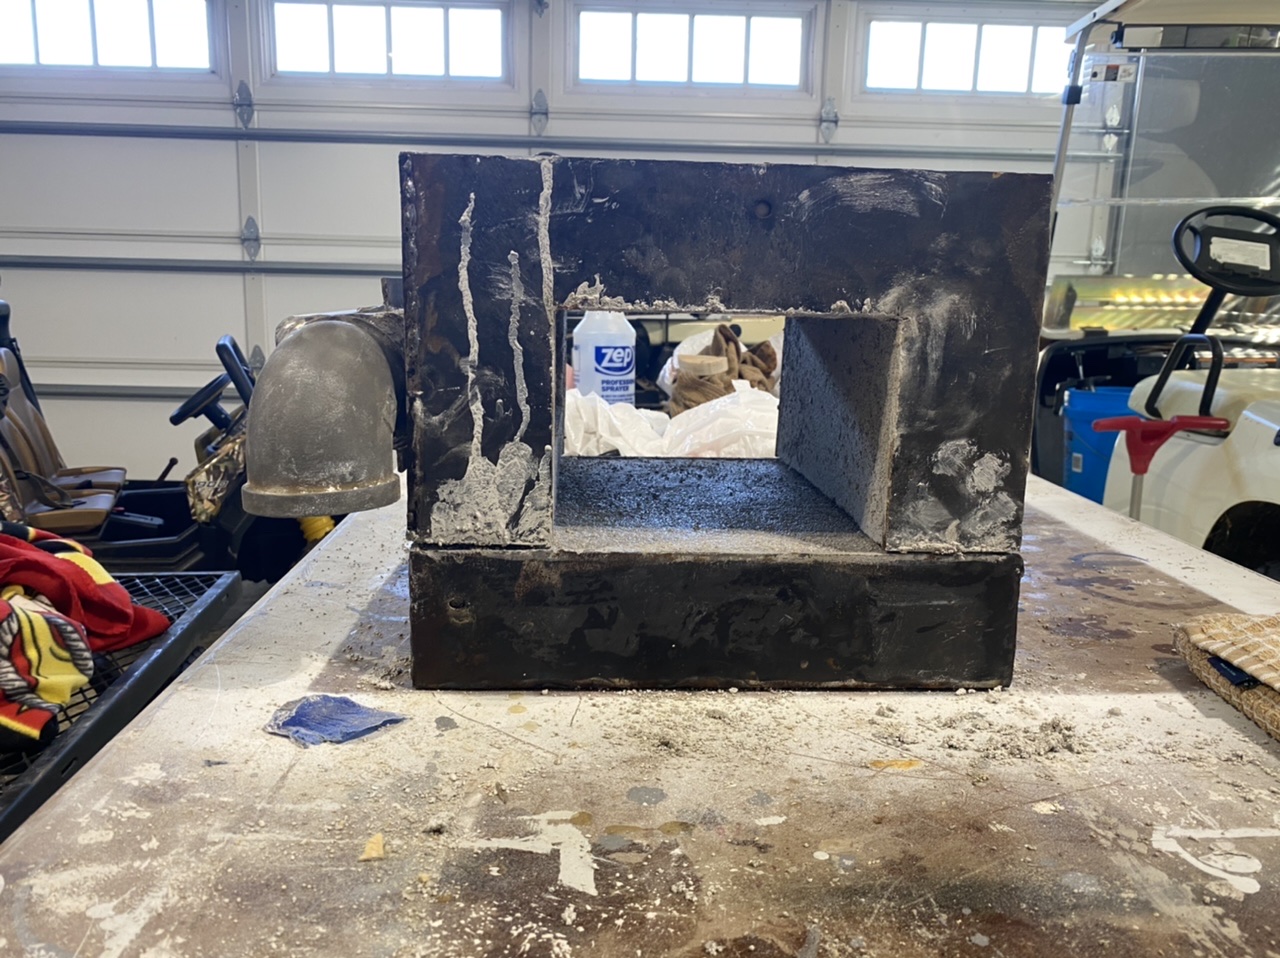
I started a few weeks ago building my first forge. I’m wanting to start bladesmithing/tool making.
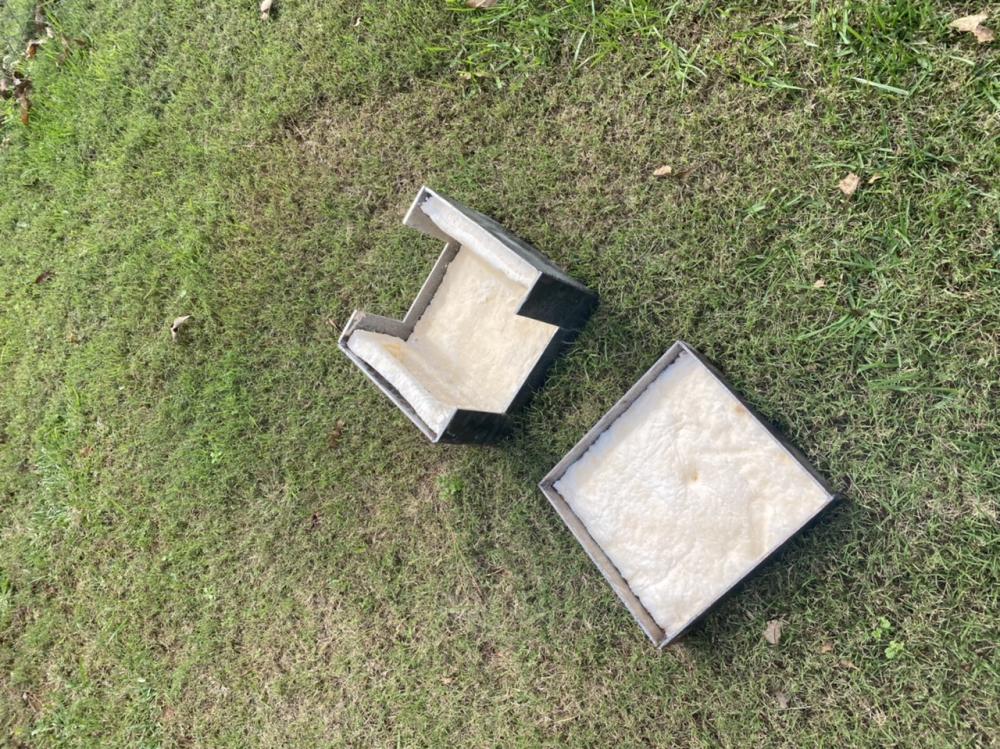
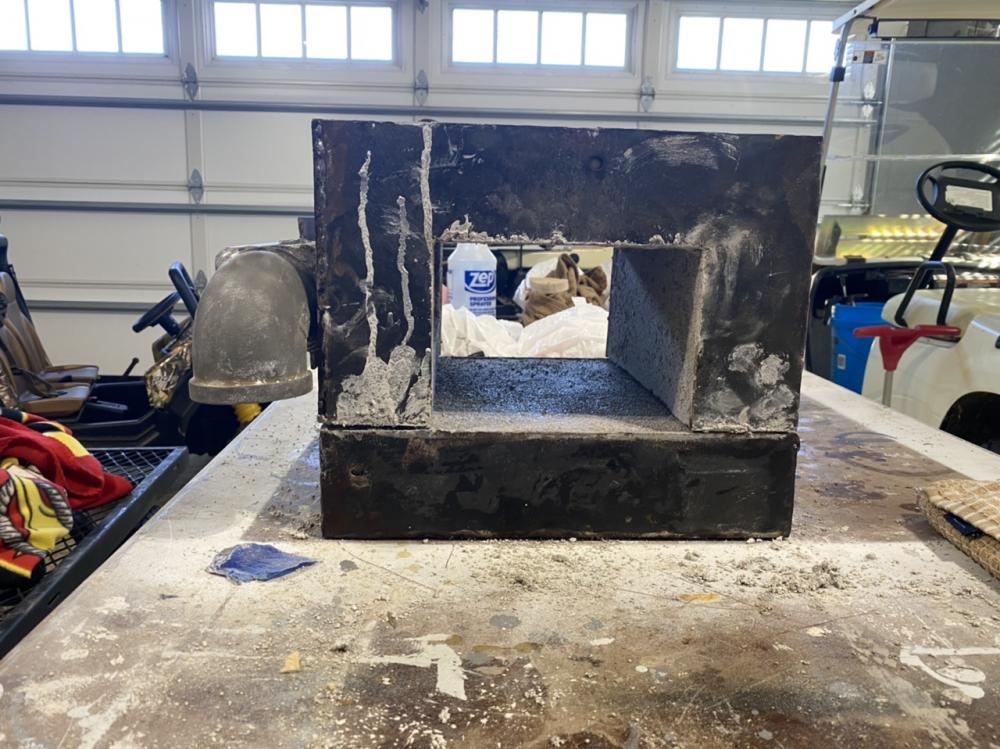
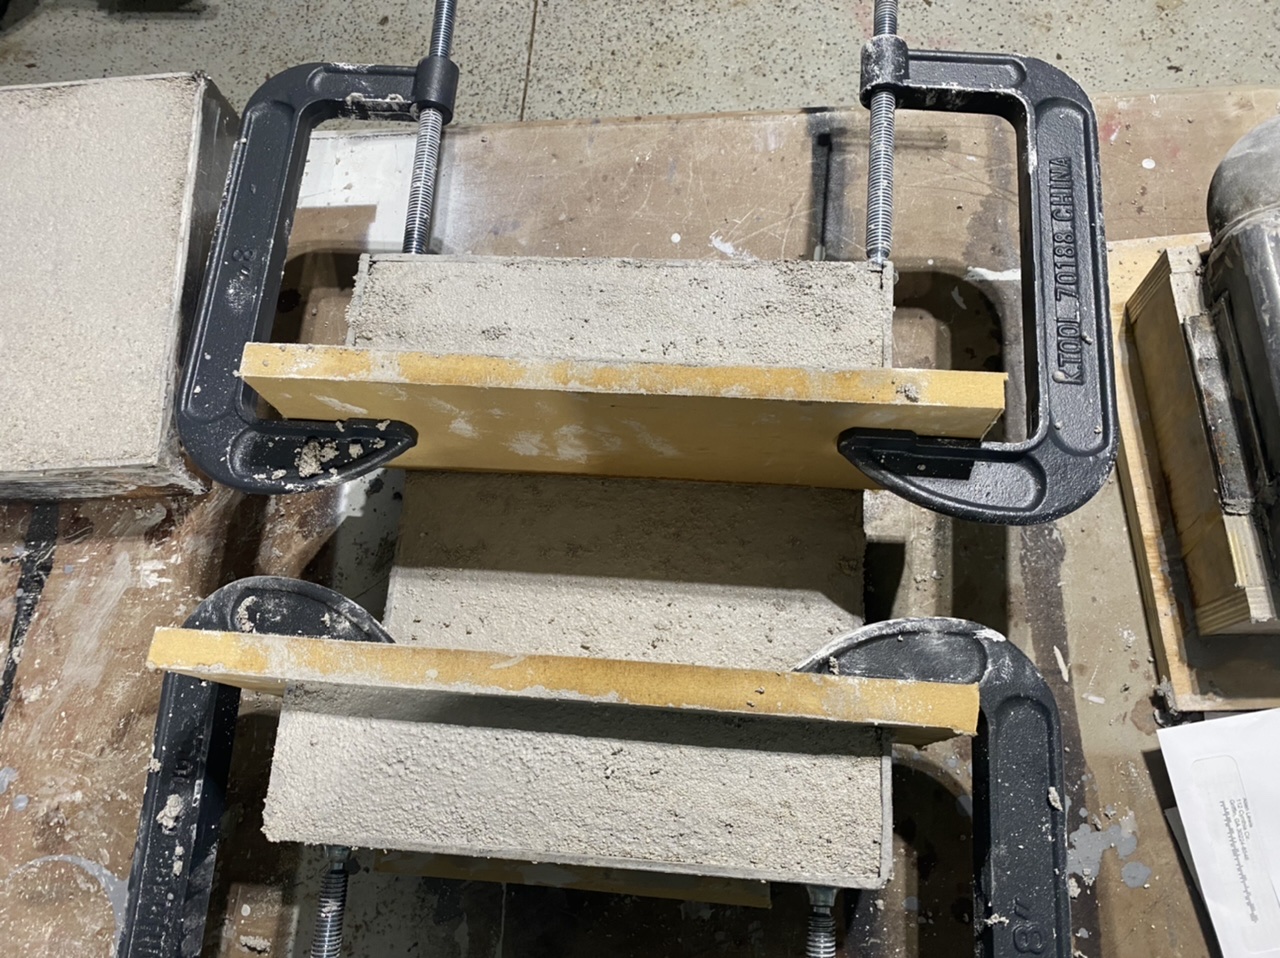
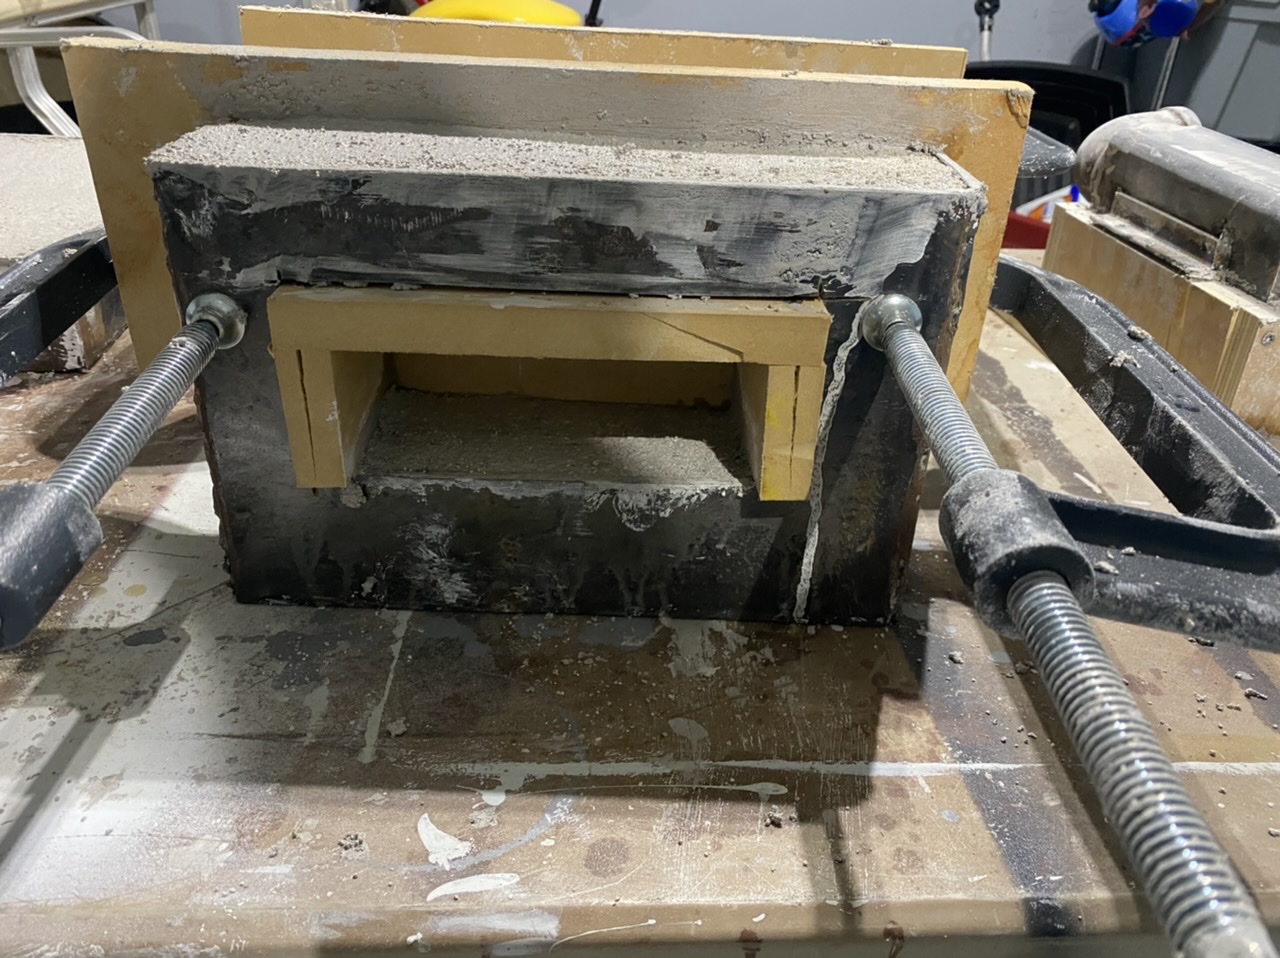
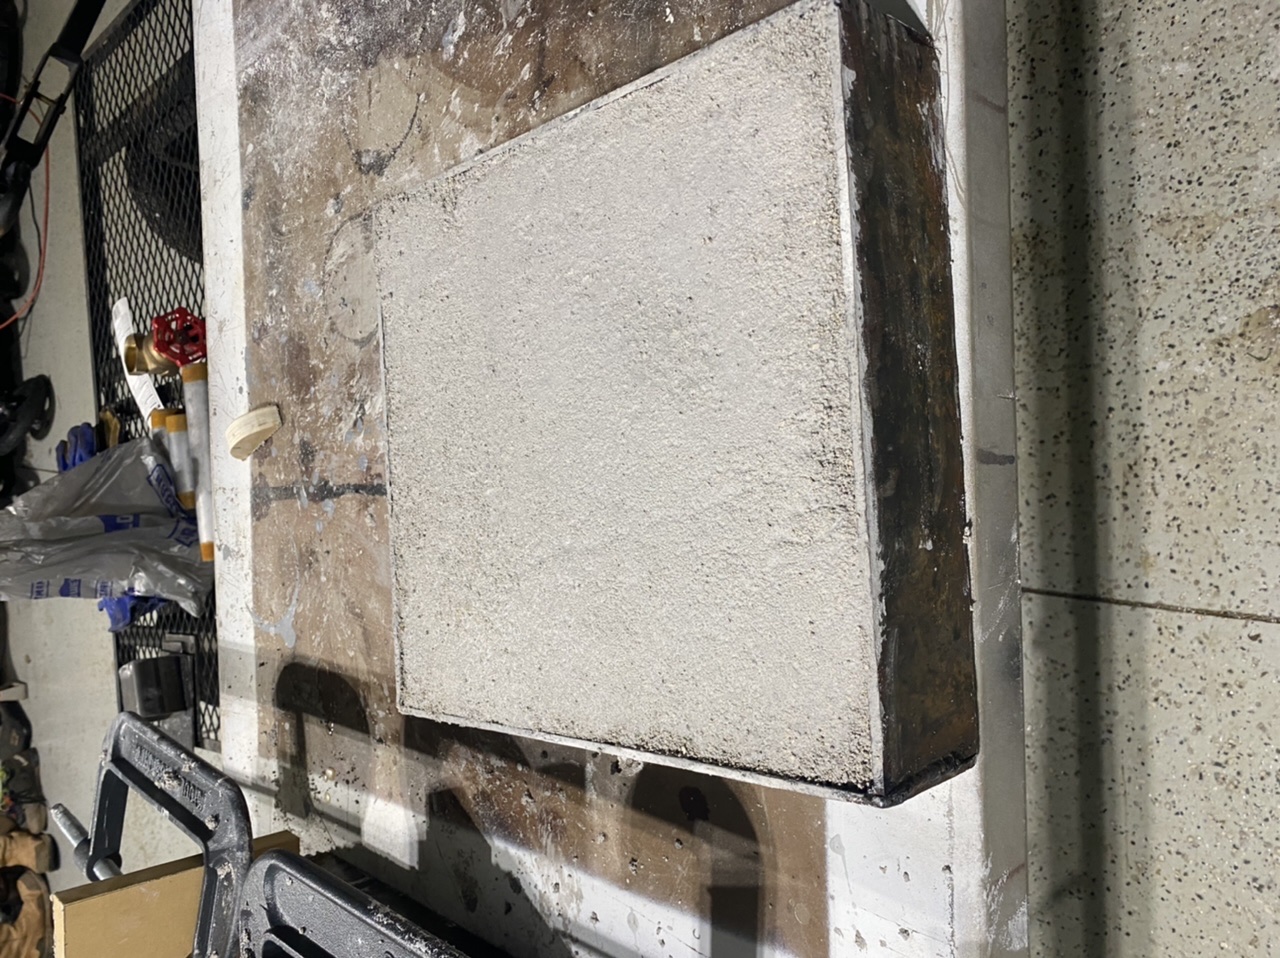
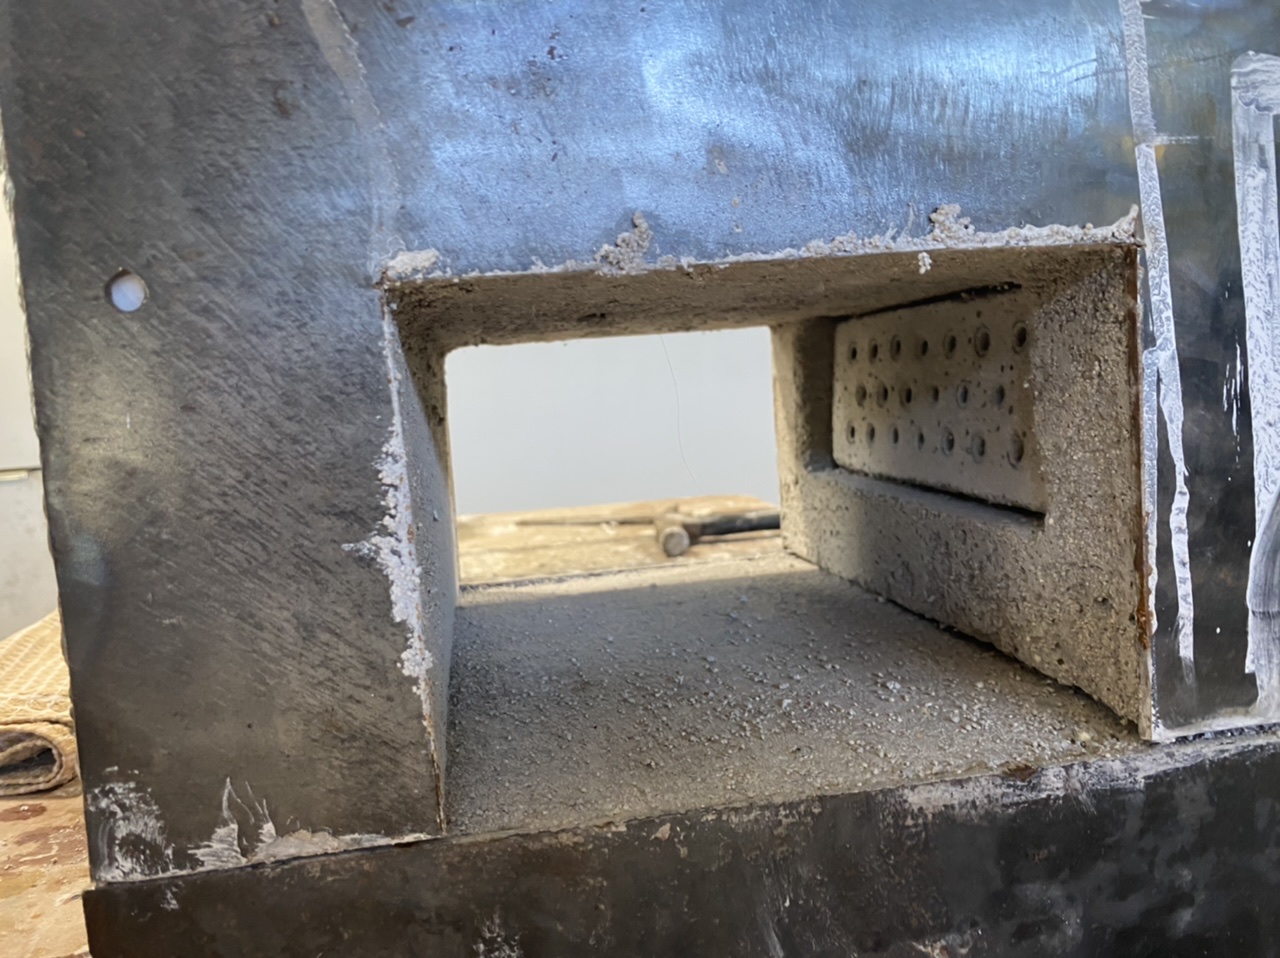
I've built a box forge out of 3/16 plate steel. The internal diameter is 5” x 7” x 12”. Insulated with 2” of rigidized kawool and then 3/4” of Kasto-Lite 30. I am going to cover it with ITC-100 Kiln wash. I had already bought this before learning Plistex would’ve been better.
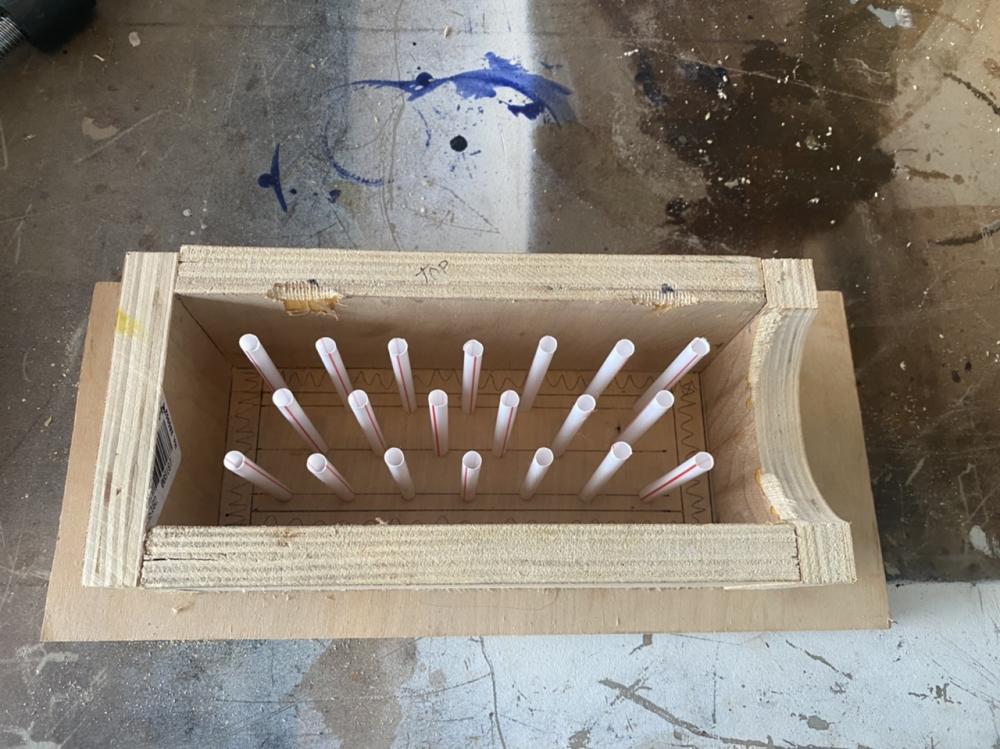
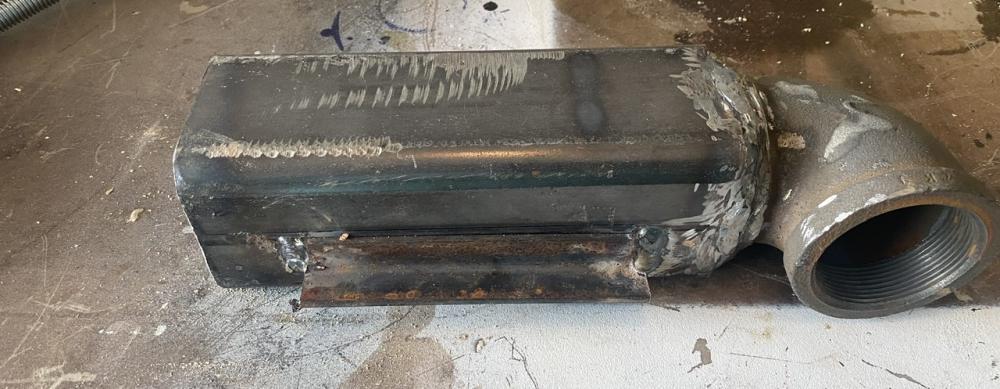
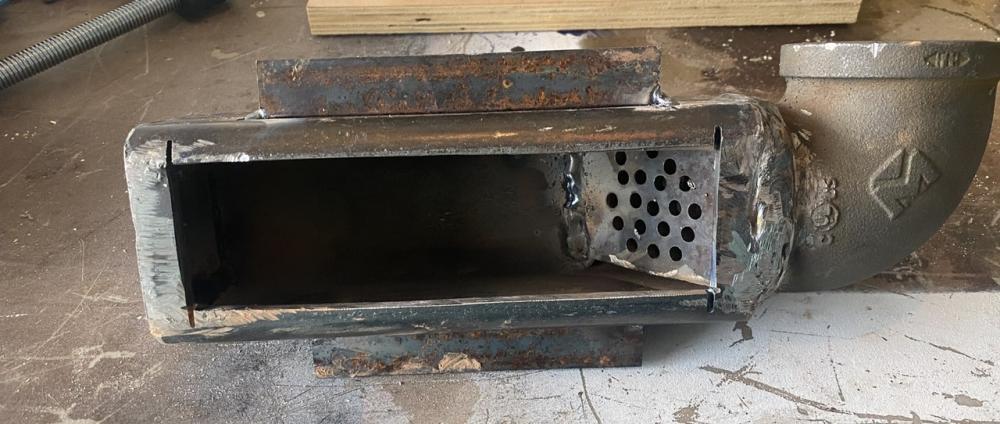
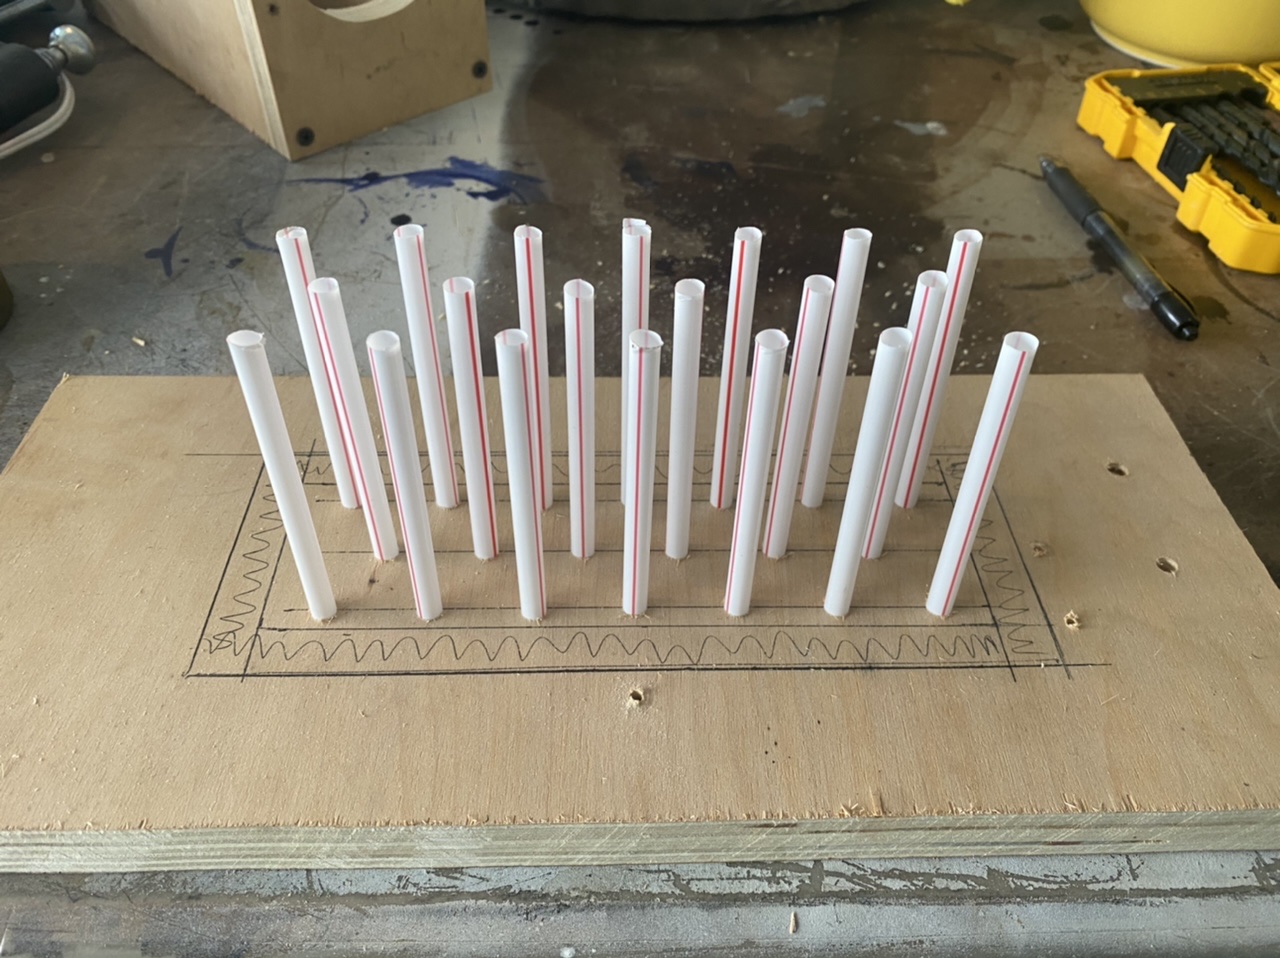
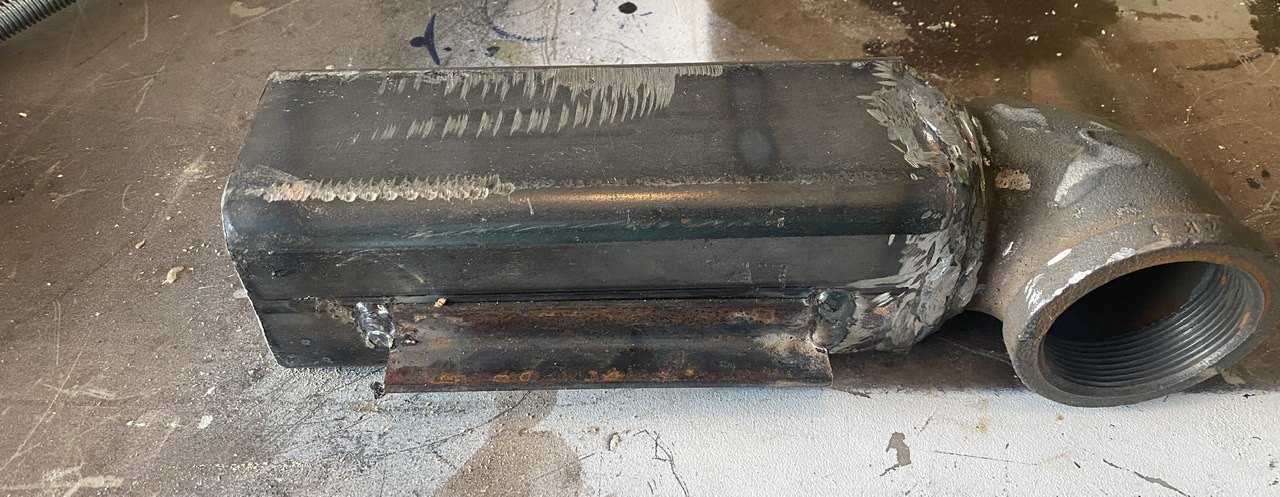
I chose to build a 8” ribbon burner. I used the Wayne Coe instructions for the burner with a few changes. I used his spacing but used drinking straws instead of crayons. And made the pipe entrance from the side instead of rear to save space. I also elected to put the burner on the side and at the top of the forge wall.
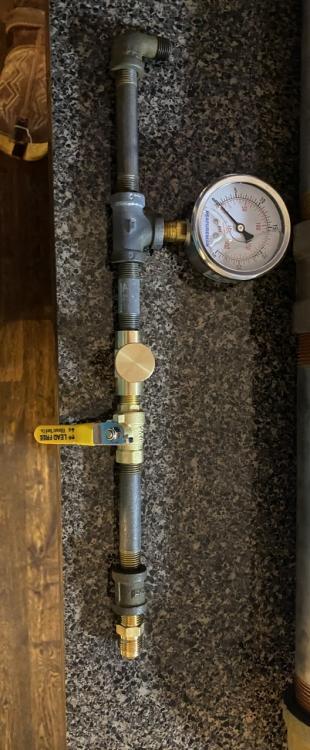
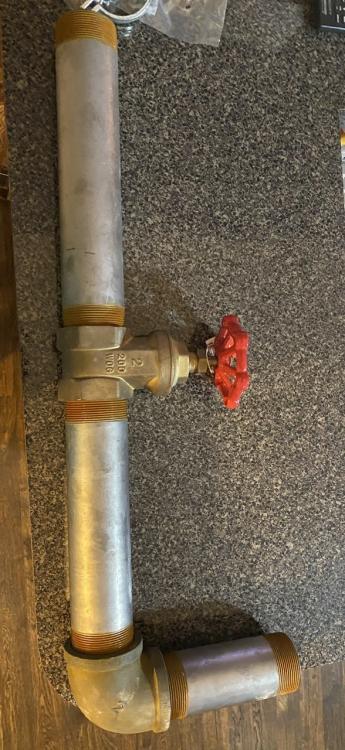
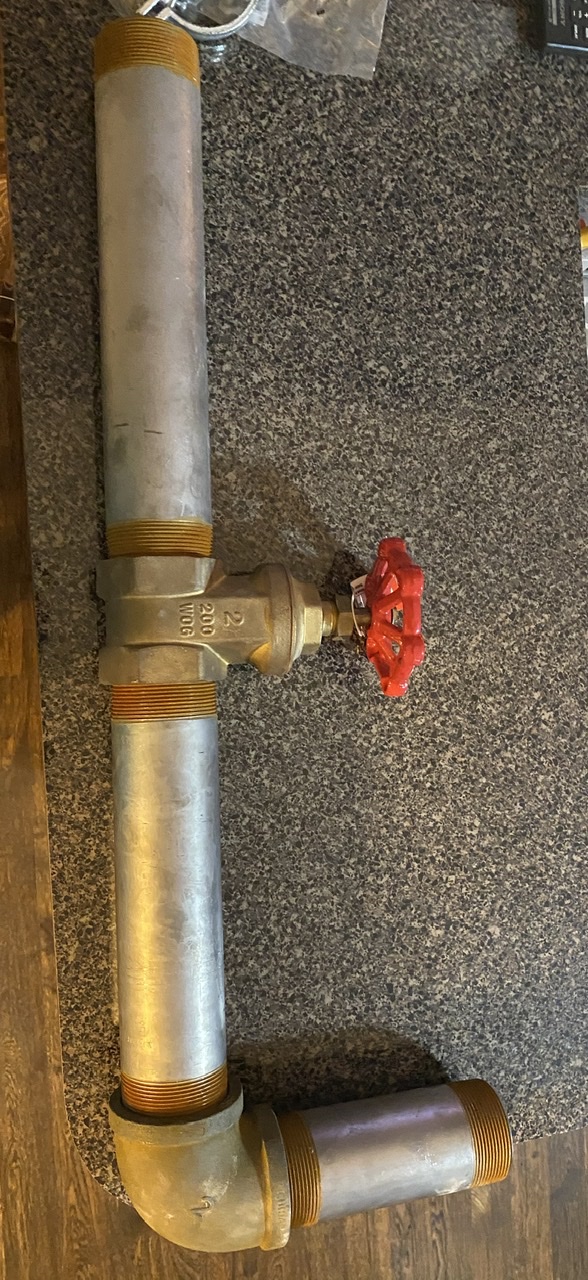
I had a hard time finding how to pipe it so after lots of looking I finally figured it out. I chose to run 2” pipe down to the blower. The blower is a 2” blower from blacksmith depot. I added a gate valve for air control.
The gas entrance is 1/4” piping that I am going to drill and tap into the 2” pipe above the gate valve. The gas pipe will be as follows.
1/4” MPT/FPT 90–>1/4”x3” NPT nipple—>1/4”NPT tee with a 0-30 PSI gauge—>1/4”X2” NPT nipple—>1/4”FPT to FPT needle valve—>1/4” MPT to FPT ball valve—>1/4”x3” Nipple—>1/4” Union—>1/4” MPT to 3/8 Flare Fitting.
All the pipe was galvanized so I soaked it in vinegar to remove galvanization prior to welding or heating.
I will run from the gas connection to the tank with a 12’ braided 0-30 psi regulator with the gauge.
I opted to have the additional gauge on the regulator and after the needle valve to be able to measure and duplicate the tuning as easily as possible.
I still need add surround to hold burner and finish the stand.
I hope to have it burning be next weekend. If anyone knows where to find the best info on tuning and the proper colors for temps that would be greatly appreciated. I’ve been reading just hasn’t find it yet.


-
It was $249 asking. I gave $200 for it.
-
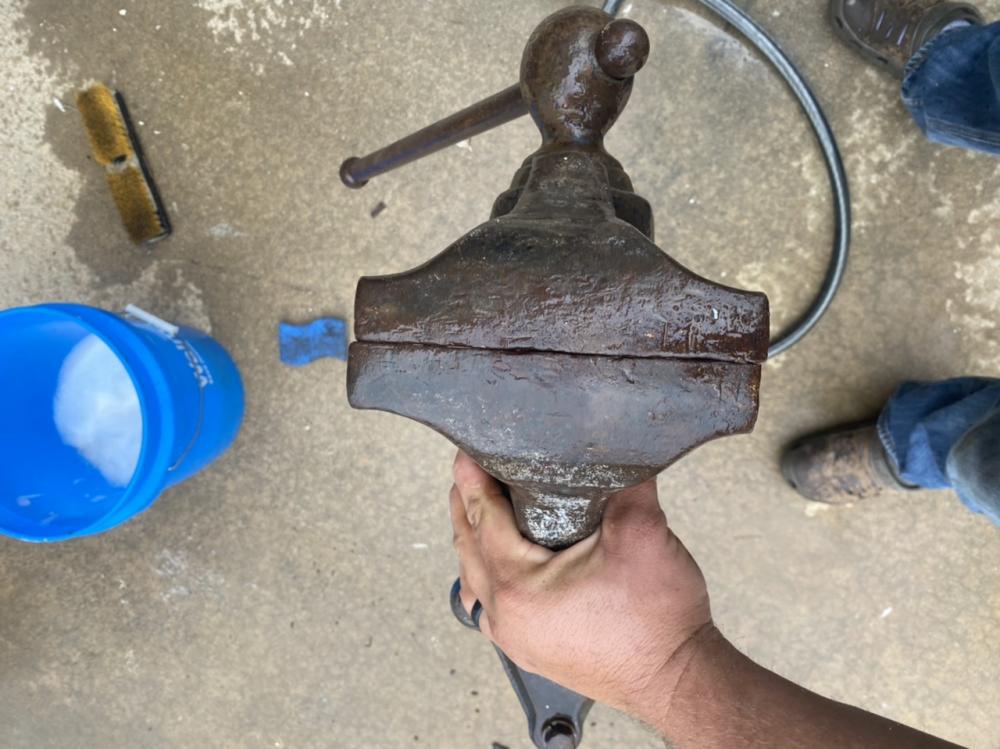
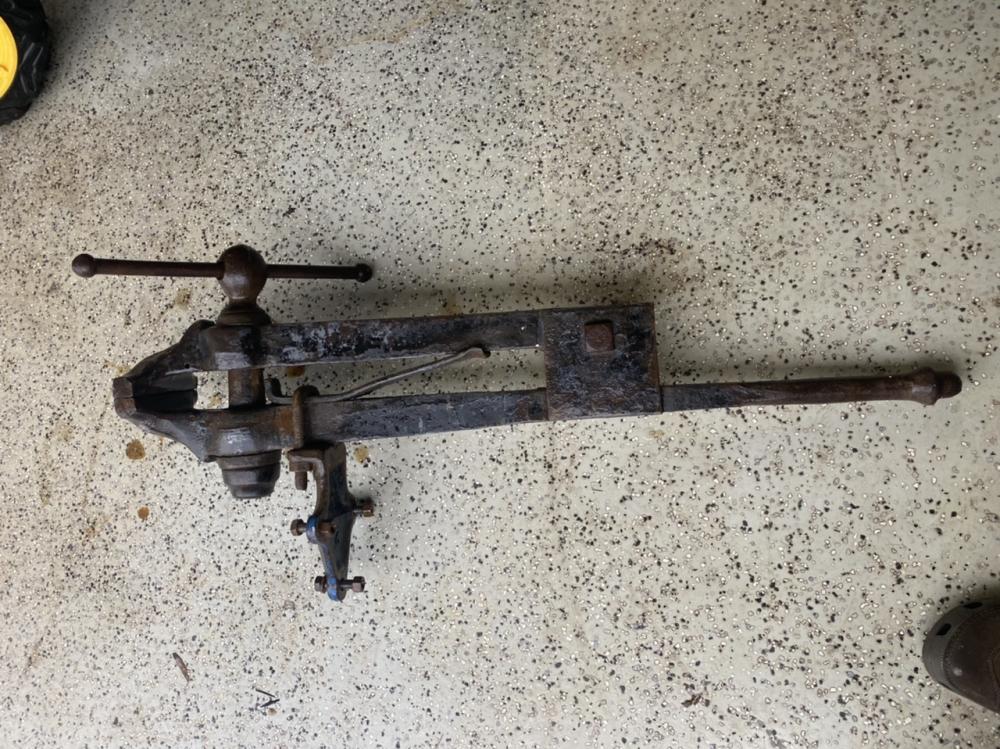
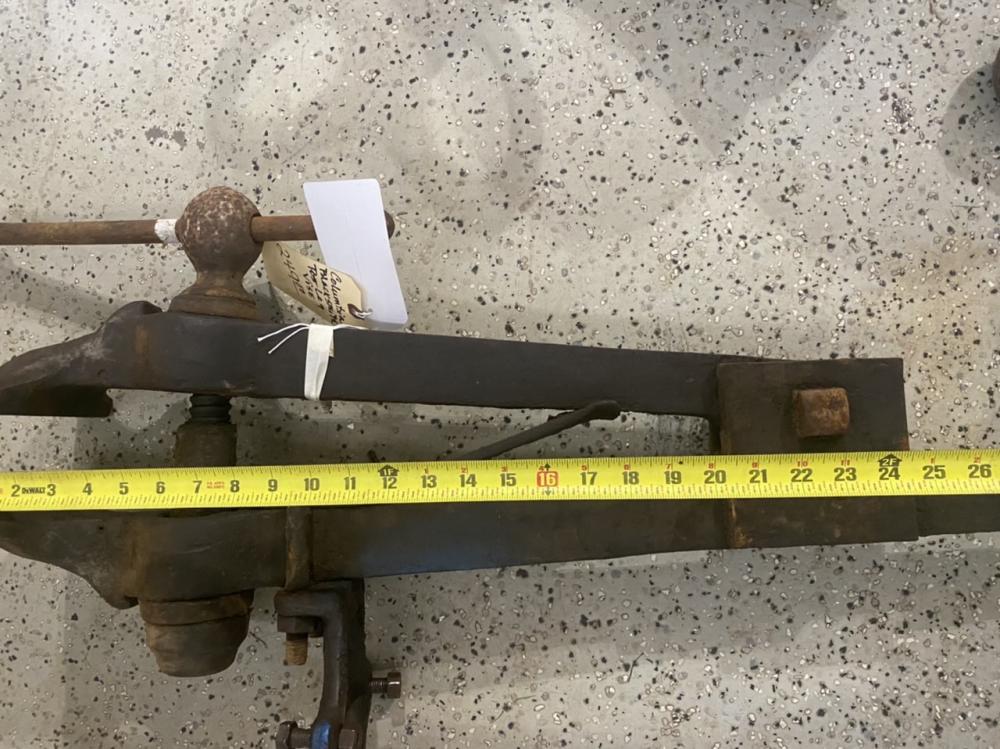
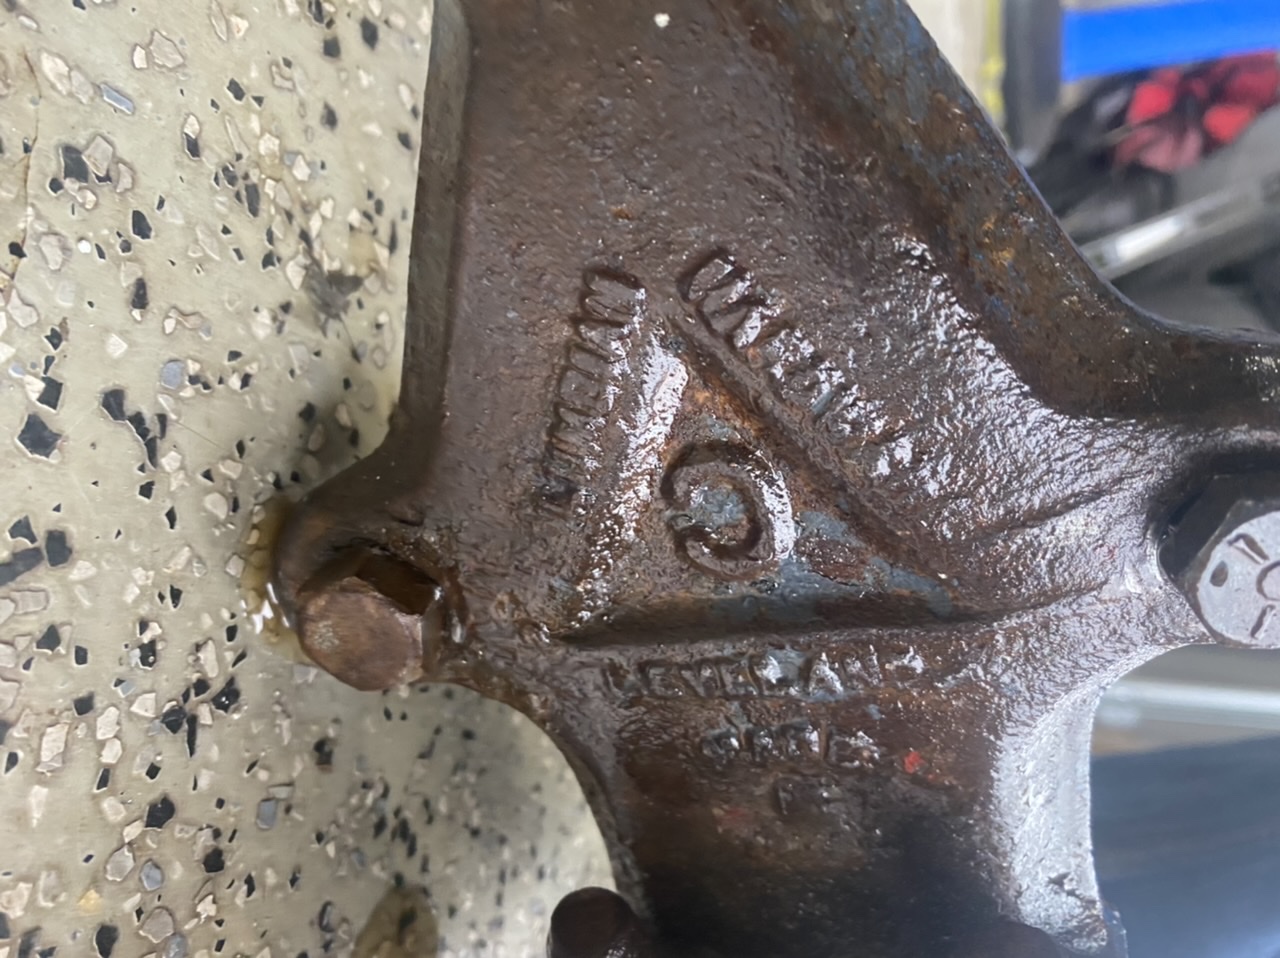
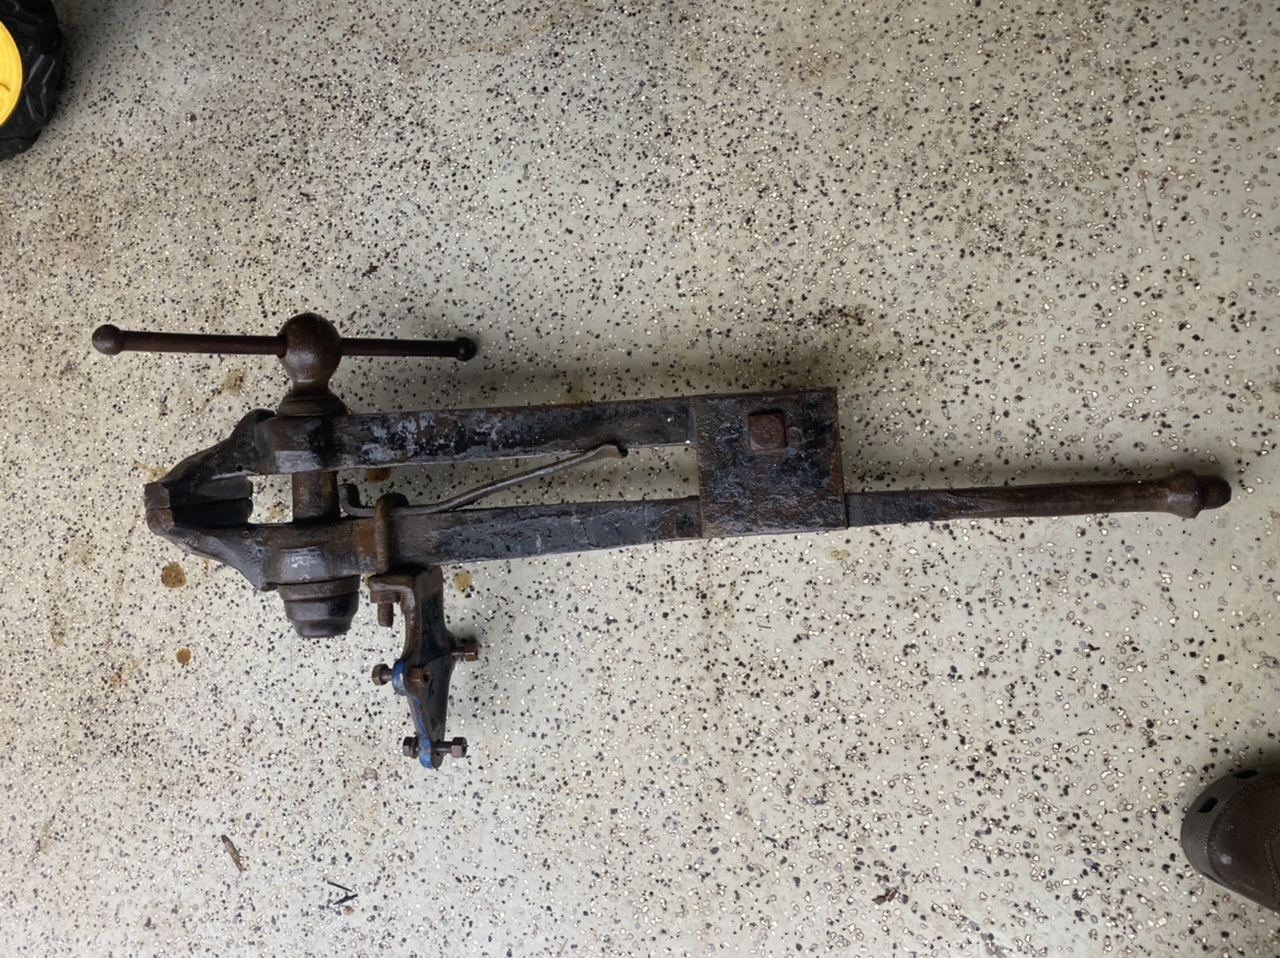
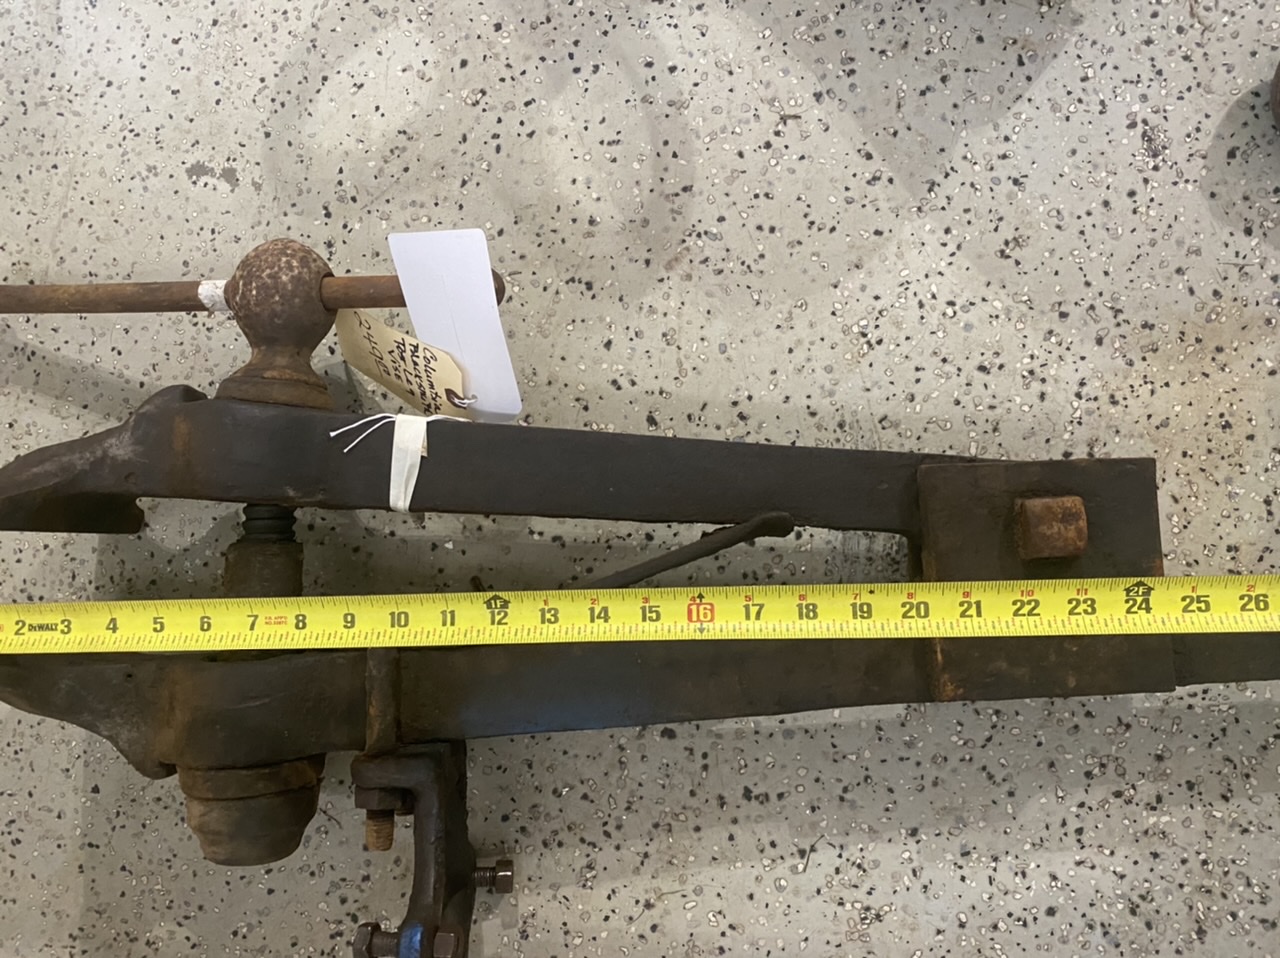
Picked this Columbian 6” Vise at an estate sale today. Weighs around 70+ pounds. Vise is complete and in good working condition. Jaws clamp evenly. Plan on cleaning up and building a stand in upcoming weeks. Will post more pictures to come.


-
55 minutes ago, ThomasPowers said:
Complexity of build, and noise are two factors. BTW are you talking about a blown ribbon burner or a NARB? You didn't say.
Blown ribbon burner.
-
I’m not asking to actually debate it Frosty. All I’ve seen is people debating the two based off of fuel efficiency and power requirements. I’m asking what is the other pros and cons of the two. But I’ll read it again to see if there is something I missed. Thanks
-
I’m working on building my first forge. I am building it out of 1/16” plate steel with 2” of kawool and 1” of Kast-O-Lite 30 Refractory. Inside diameter of the forge will be 8”x12”x6”(WxLxH). I have done a lot of research on burners and am thinking of going with a ribbon burner.
With that being said, I think one of the Greatest debates I seen is Venturi or Ribbon burners? Can someone help me with the pros and cons of both other than fuel efficiency?
Is one better than the other for heat treating? Do you get better temps with one versus the other? What is the downside to them other than the power connections?
I have the means and methods to build either one but want to make sure I’m building what is the best for my needs as I will be making knifes and tools as a hobby on weekends.
Thanks -
On 7/19/2020 at 3:10 PM, Jonnytait said:
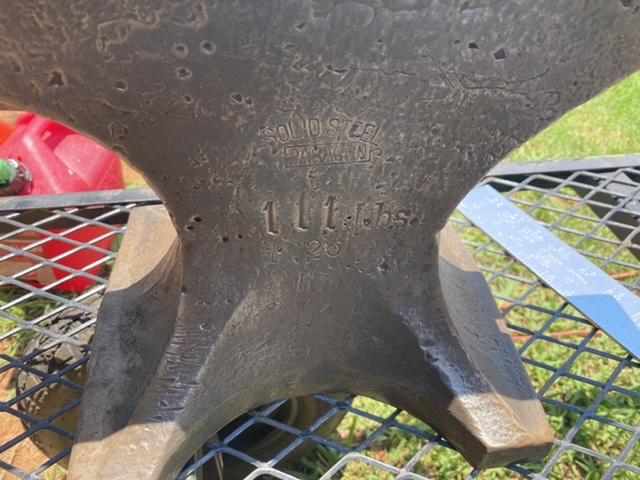
Very good Swedish cast steel anvil at a fair price. Nice score. Remember not to grind or sand the face. That anvil is ready to use as is
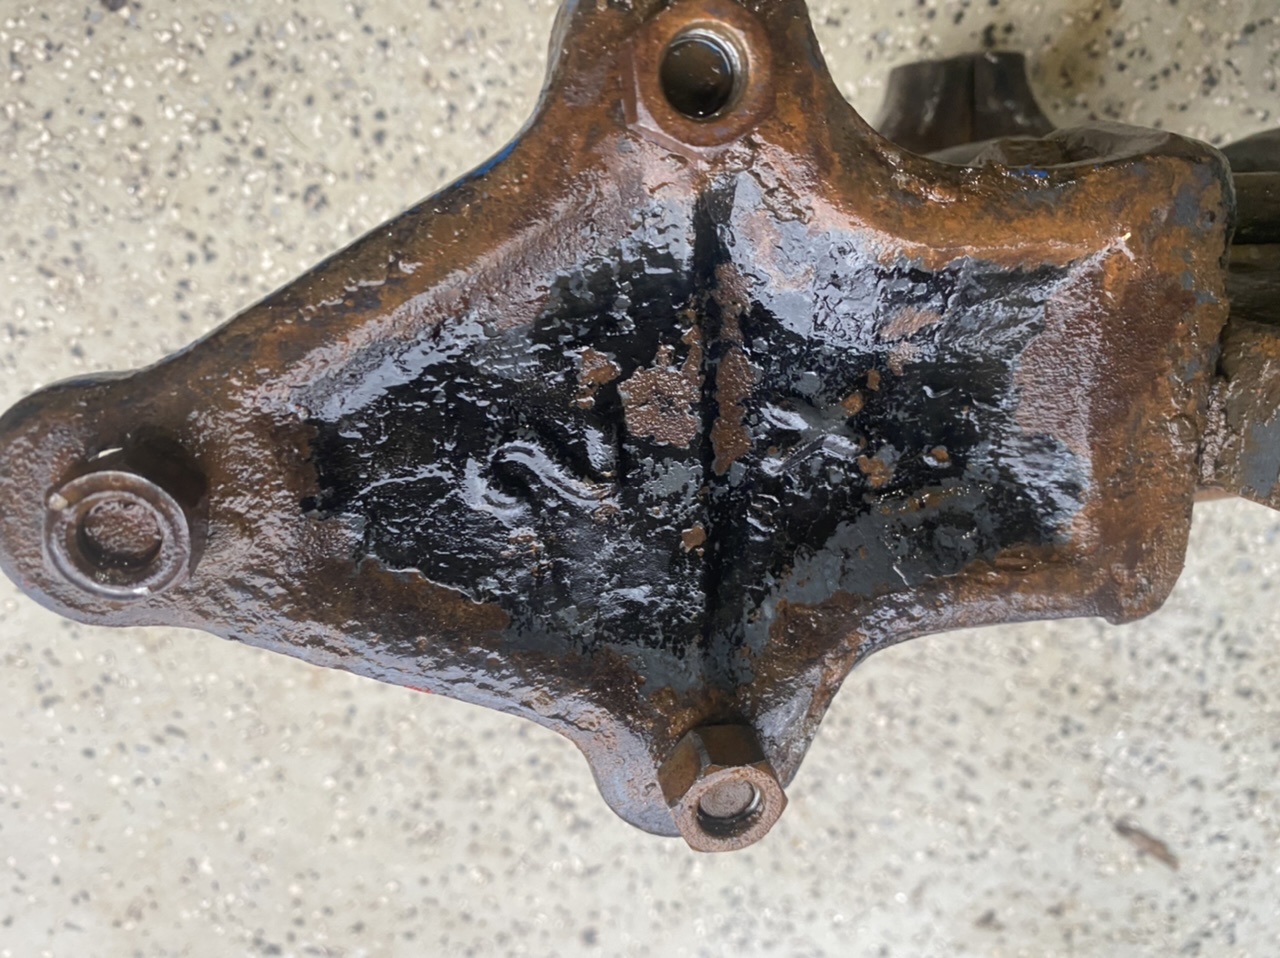
I didn’t sand the face. Just wore brushed the non striking areas and boiled linseed oil those areas. Left the face as is.
On 7/19/2020 at 5:15 PM, Frosty said:Welcome aboard Allan, glad to have you. Once you've spent some time using that find lady you'll be spoiled for using almost any other. Soderfors are some of the best on earth. Hot steel and hammer time will put a shine on her face.
BOY, talk about the way to break into a craft! You my friend are one lucky dog.
")
Frosty The Lucky.
Thanks Frosty. I’m pretty excited about it. Was looking at new ones when a friend sent me the estate sale link. Drive right up there to get it.
On 7/20/2020 at 8:33 AM, Frazer said:She's a beauty! I love my 151# Soderfors. The face of yours is in excellent shape. I paid closer to $3.60/lb for mine and it had a pretty significant amount of sway in the face. That doesn't really effect the performance in my opinion, but I would say you got a pretty good deal! No clean-up required on that beauty. Just needs a stand and some hot steel. Maybe a coat of lindseed oil on the non-working surfaces.
A few things to note, my neighbors are somewhat close to me and boy was she loud when I first started using her. A quality Soderfors are known for. So when mounting her up, I recommend adding a nice thick layer of silicone caulk between the stand and the anvil. I also have strong neodymium magnets under the heel and the horn and a chain wrapped around the waist. Any one of these might be enough to deaden the ring of yours, but of the 3 I would say the caulk made the biggest difference. Even if you don't have neighbors that don't like listening to you work, your ears will appreciate you quieting the anvil down a bit since the ring was really quite loud when I first got mine.
Thanks for the tips Frazer. I plan on welding a tripod stand for it out of 1” plate steel and 2” tubing 1/4” wall. Will definitely put some silicone between it because she definitely sings now. Hearing is bad enough from Marine Corps and commercial construction.
-
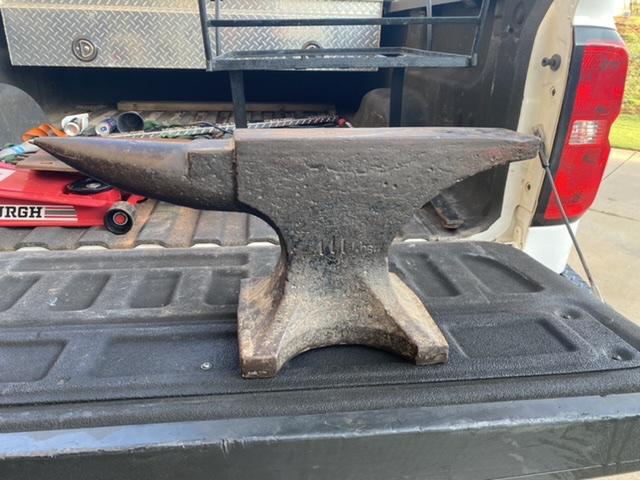
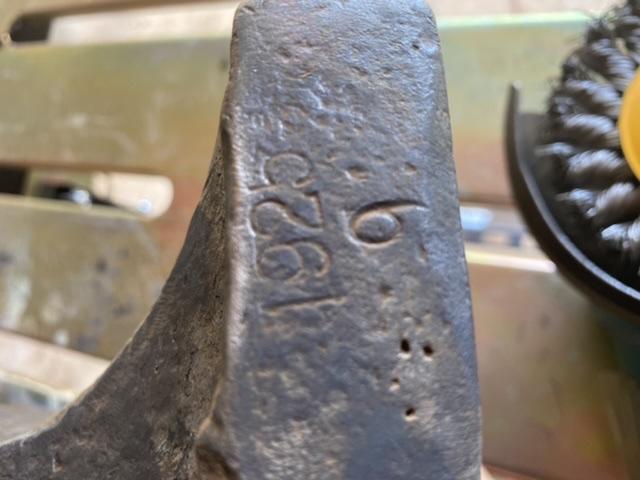
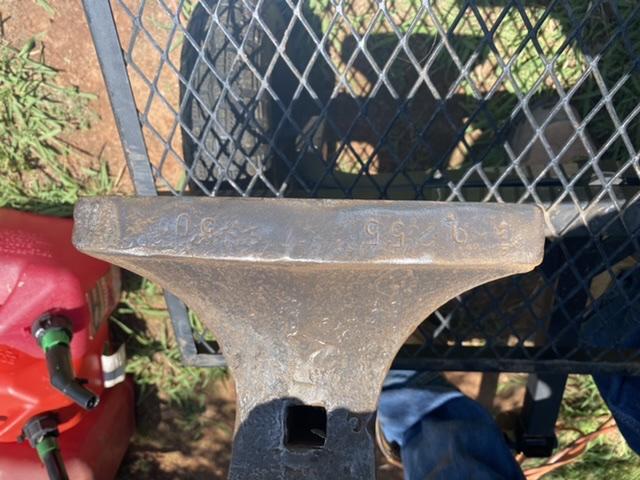
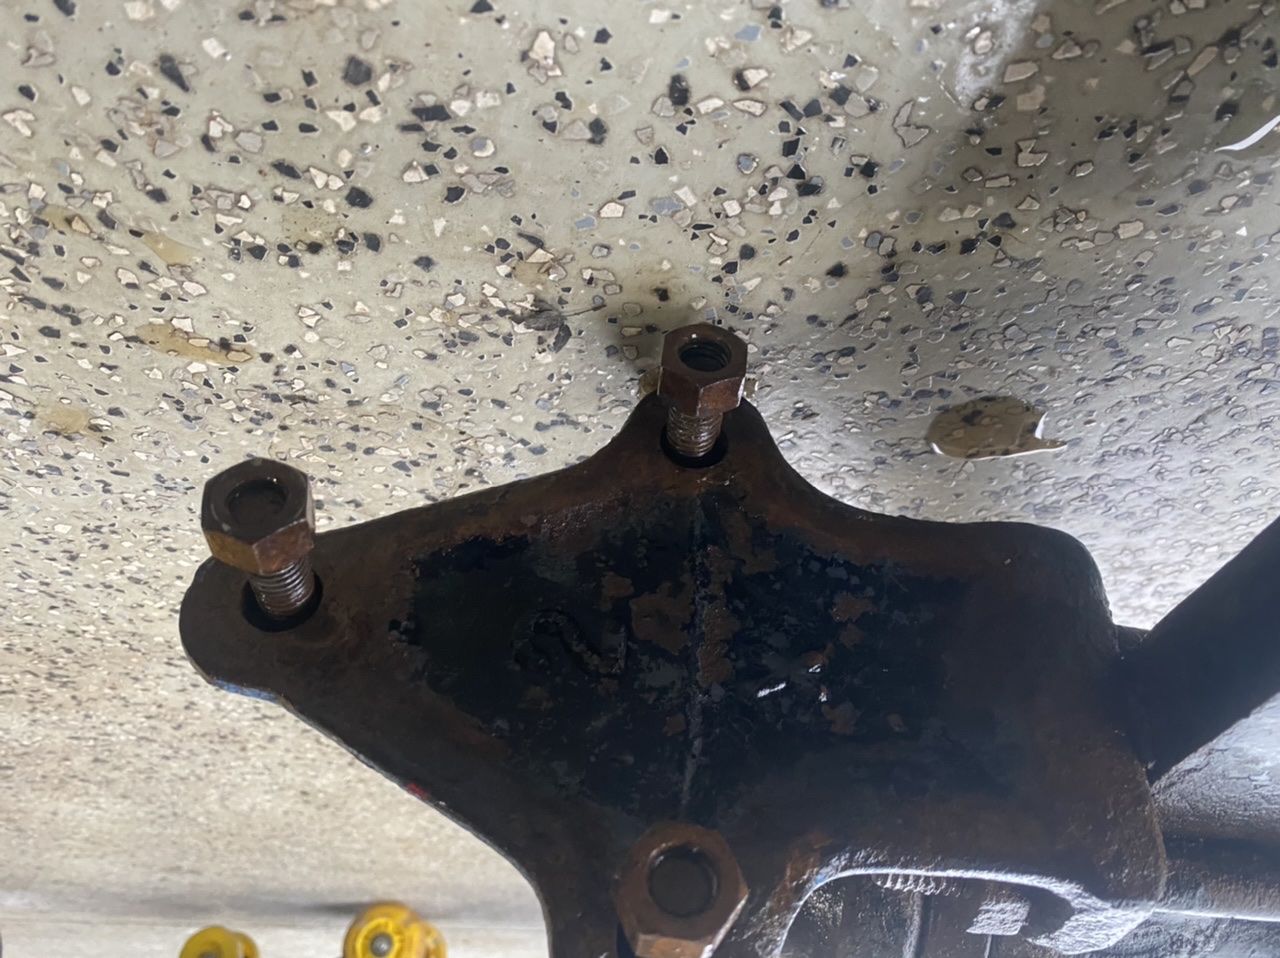
I bought my First Anvil! It is a 1926 Soderfors Paragon 111 pound Anvil. I know it is cast steel. Face is in great shape and has very few chips. Picked it up at an estate sale for $350. I think I got a good deal. Anyone know what the marks on the foot mean or what it might be worth? Not gonna sell it. Just curious. Gonna build my first forge over the next few weeks! Ready to start a hobby in the craft!


Looking for a Mentor in my Area
in Knife Making
Posted
Thank y’all for your input. Everything I’ve learned this far has been self taught through reading a YouTube. Just looking for someone who has been in the business for a little while to help hone some skills. I’m looking at the class maybe end of the year or next. I am taking some classes at the Blade show this year as well. I’ll look into more of the abs stuff.