
Nihil
-
Posts
15 -
Joined
-
Last visited
Content Type
Profiles
Forums
Articles
Gallery
Downloads
Events
Posts posted by Nihil
-
-
Hence why I was thinking of the need to include 2x4's to connect the 4x6's on the long sides of the walls. With 4 inches of gravel underneath what would be a 4" crushed stone floor, I felt that water infiltration will be limited. The area for the shed currently drains well and doesn't have standing water after storms.
I could put in some foundation screws to add extra strength to the foundation.
I was planning on using one end of the shed (4') for storage, mostly seasonal stuff (outdoor Christmas stuff primarily), not things with gasoline in them.
-
Hello all,
I'm planning on building a 12x16 shed to use for storage and for blacksmithing. This size keeps me under the size needed for building permits in my town.
I was planning to have a crushed stone floor as I'd rather not have a slab poured. I'd level the area prior to building with 3/4" gravel (approx 4 inches), then build a 12x16 perimeter of 4x6 pressure treated beams on top of the gravel, building walls, etc. on the beams. I'm thinking tying the perimeter foundation together with at least 6 2x4's between the 4x6's would be good and would still let me bring in crushed stone for the floor.
Any initial thoughts on this idea?
-
In this pic:
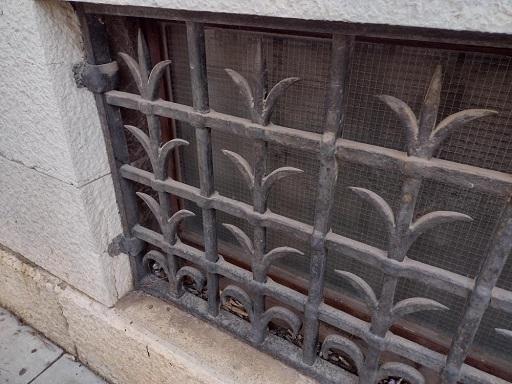
Were the vertical bars inserted through the slots (tenons?) of the horizontal bars and then split to the three pronged shape?
Curious as to the technique to doing something like that?
-
Quote
I can only see the first two photos.
Same here
-
Quote
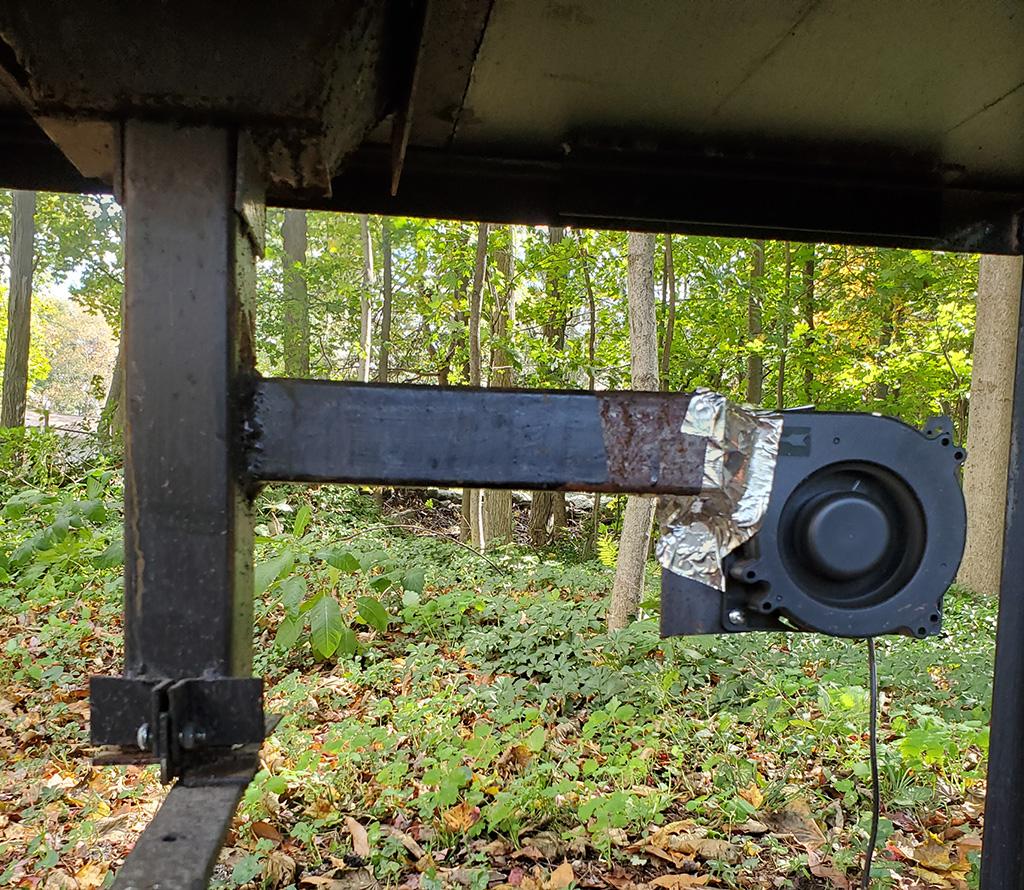
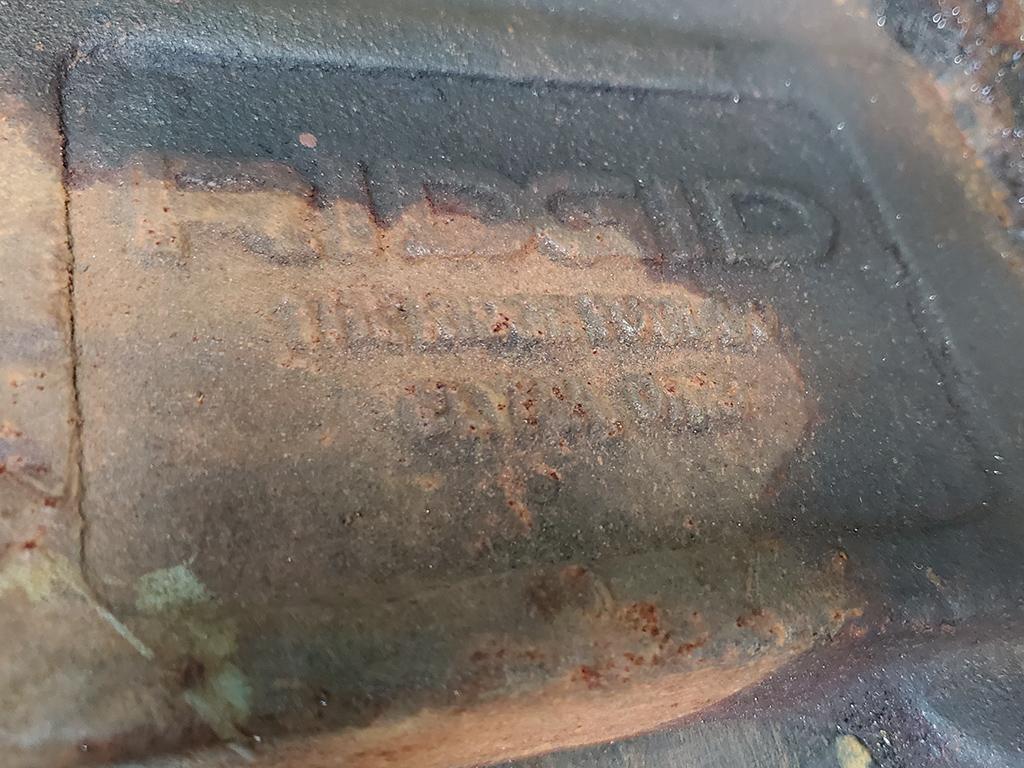
My ridgid has a T jaw that fits in a slot and is then pinned in place,
Took a wire wheel to the sides and found the 'T'


Now the question is, how do I get it off? I assume it has something to do with the three "pin"(?) hole on the underside?

-
Quote
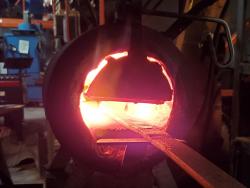
Have you been to affiliate meetings and seen how other folks run their coal forges?
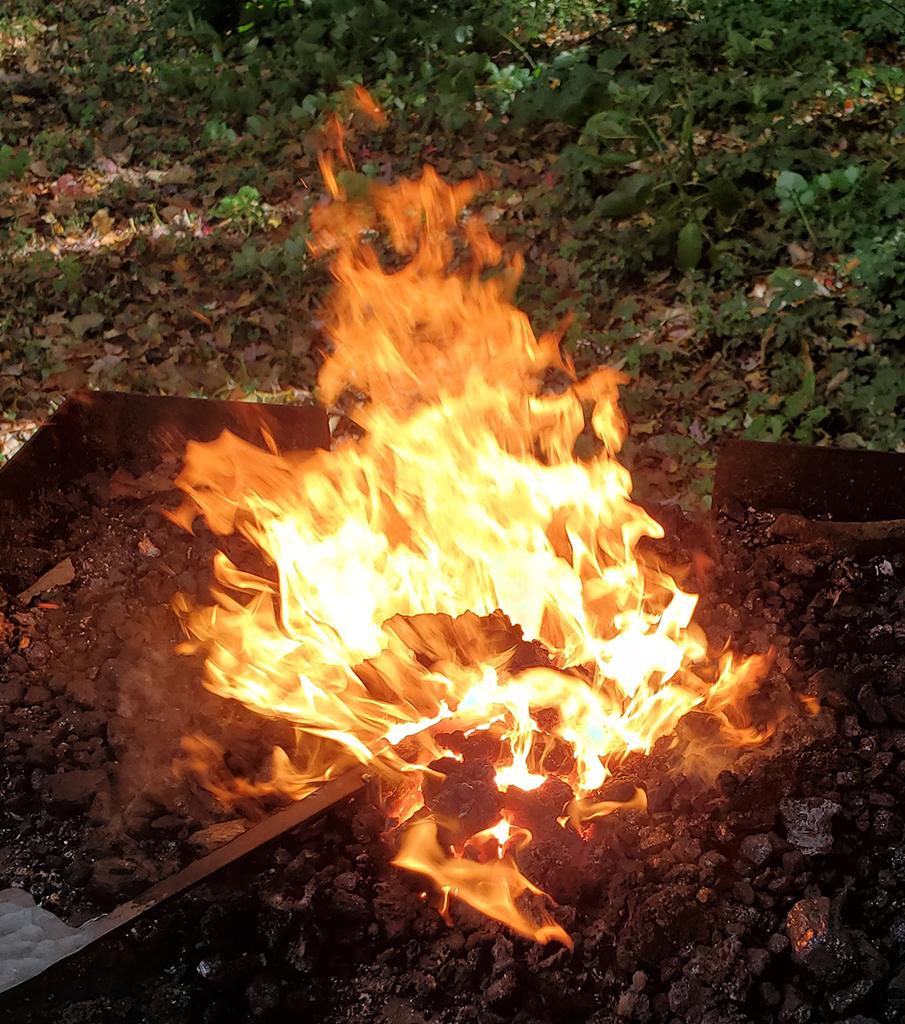
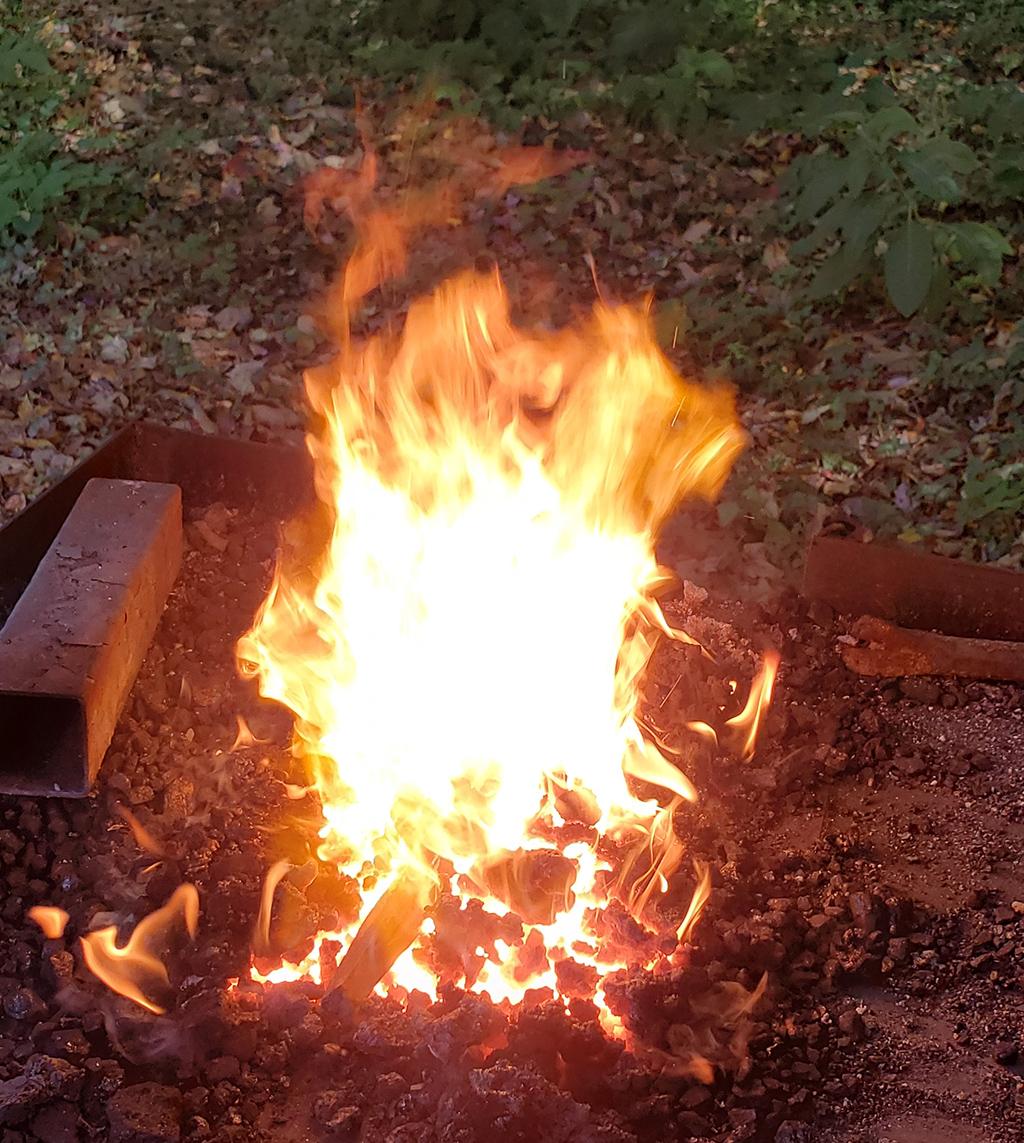
I have not. Its definitely on my list to make it to some so I can see how other people work. I used a coal forge 5+ years ago but that was my 1st time forging ever so I was not paying close attention to the fire.
QuoteThe amount of orange and yellow flames suggests to me that you may be burning green coal rather than the coke which should be produced around the edge of the fire and then raked into the center to burn. Coke does not produce such enthusiastic flames, even when there is a good blast of air going to the fire. You can apply a bit of water around the edge of the fire (many folk use a sprinkler made of a can with holes in the bottom and with a handle attached) to keep the coking area darkened down. Combustion outside the area actually heating the metal is just wasted fuel.
That could have been the case. I know as the day was winding down I needed to get a weld done and put a bunch of "new" coal on. A sprinkler is a good idea as that might help the coke producing, I could also make more of a pile at the beginning of the day.
I find that the coal/coke around the edges/walls of the firepot sticks together and needs to be broken up to move it to the center. I also find that I'll have a decent size cavity in the center, especially if I've not been actively mixing the fire. Normal?
Thanks much for all the responses! I'm sure experience will improve my outcomes, just wasn't sure how much was practice and how much was inferior infrastructure.
-
Hello,
I built a coal forge based on Bob Patrick's firepot design and picked up what I knew would be an underpowered blower online for $15 just to get up and running.
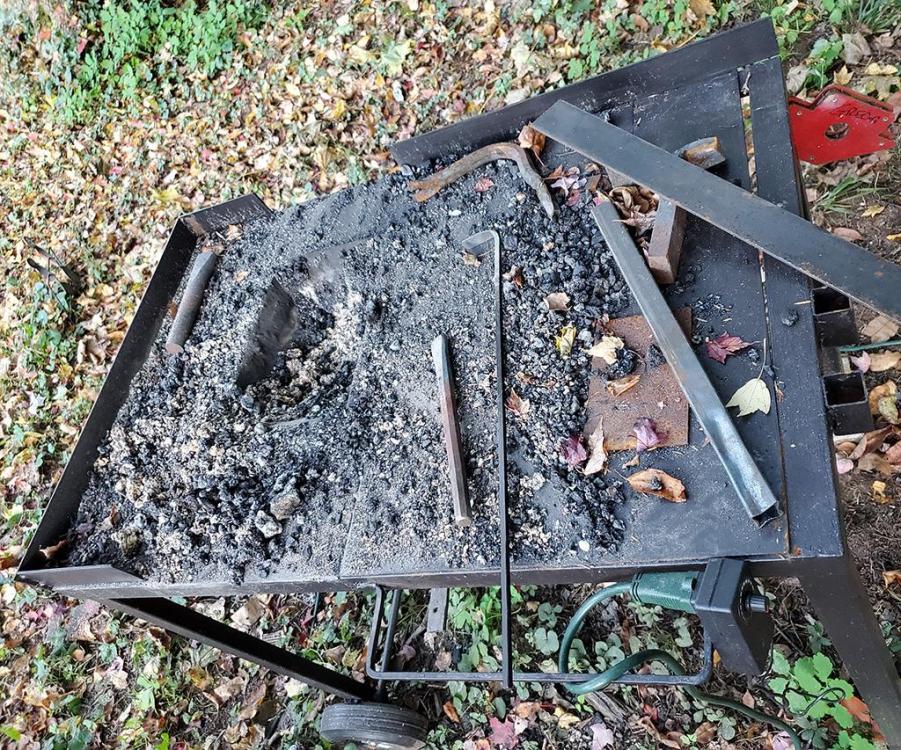

With the blower running at 50% I get good heat that lets me forge nicely and can heat up a 6-8" bar of 1/2" to put some twists in.

At 100% I can get a pretty substantial mountain of fire and have made several welds of 1/4"-3/8" stock.

After forging a couple of hours I do need to fish out some clinkers but I knew going in as I didn't include a clinker breaker in the design (maybe for version 2.0).
My question is how much improvement will I see with a "true" blower? Will it primarily be how much coal I can pile up and how large a hot spot I can make? I have trouble imagining how much larger/hotter this size forge would be. This is the first coal forge I've run so there limited experience.
Thanks for your thoughts!
-
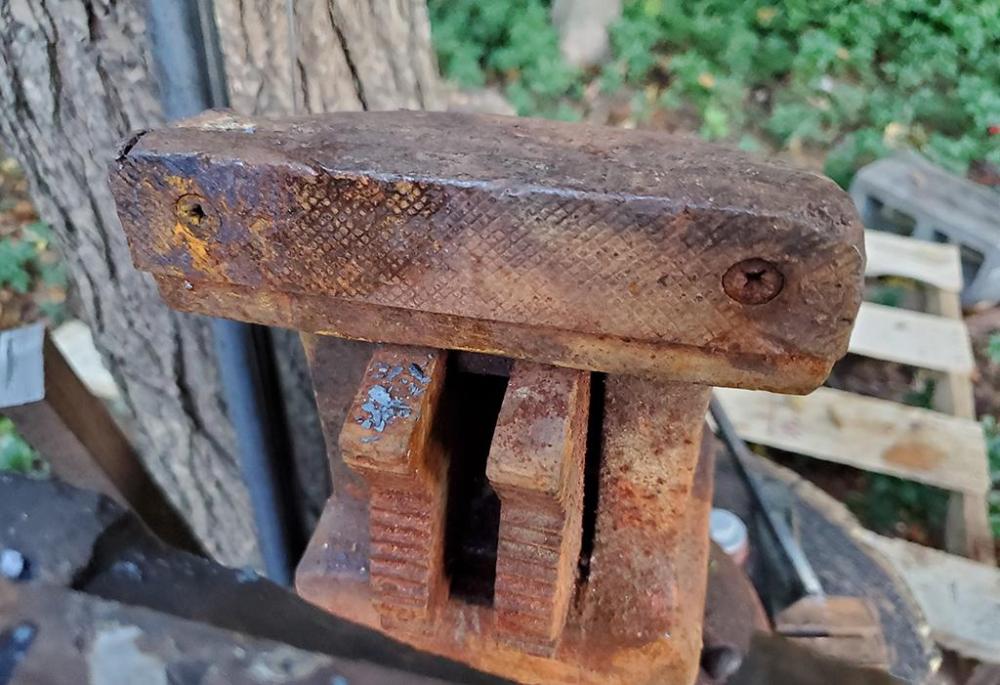
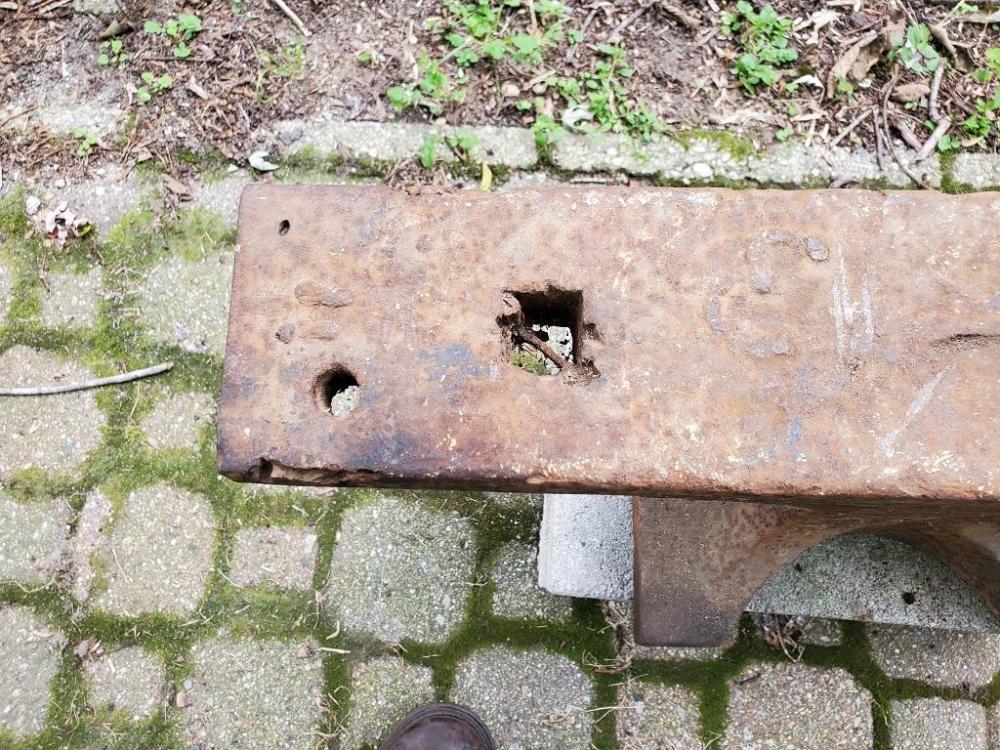
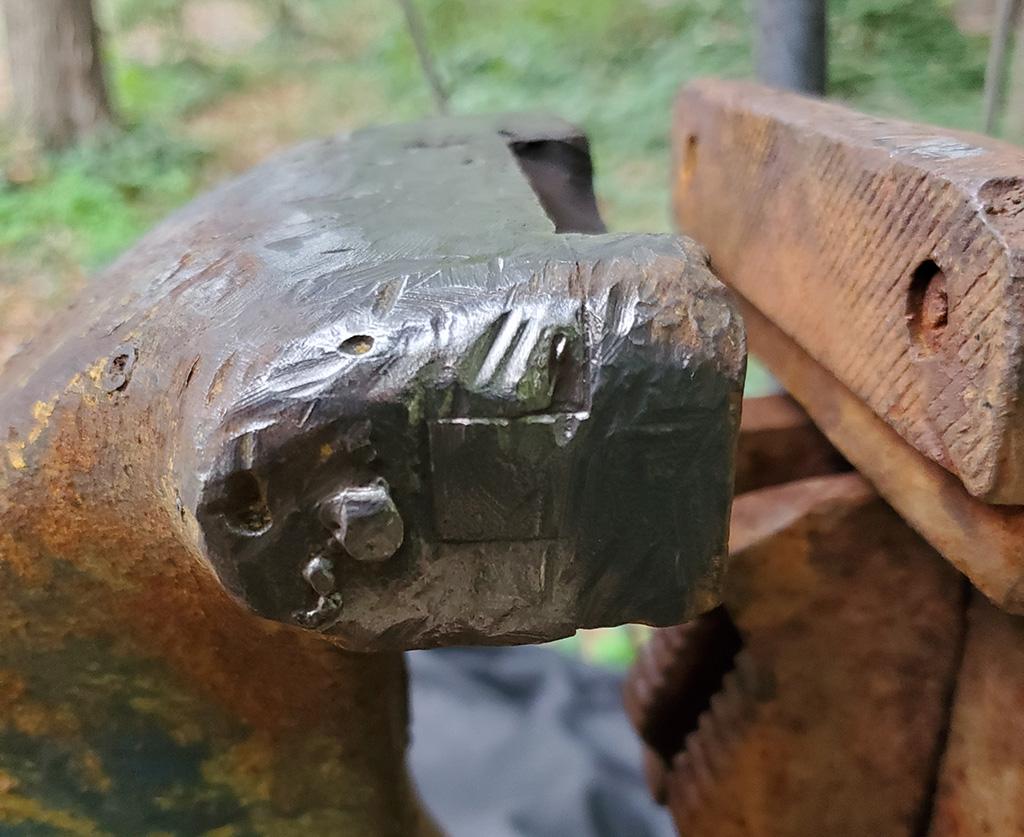
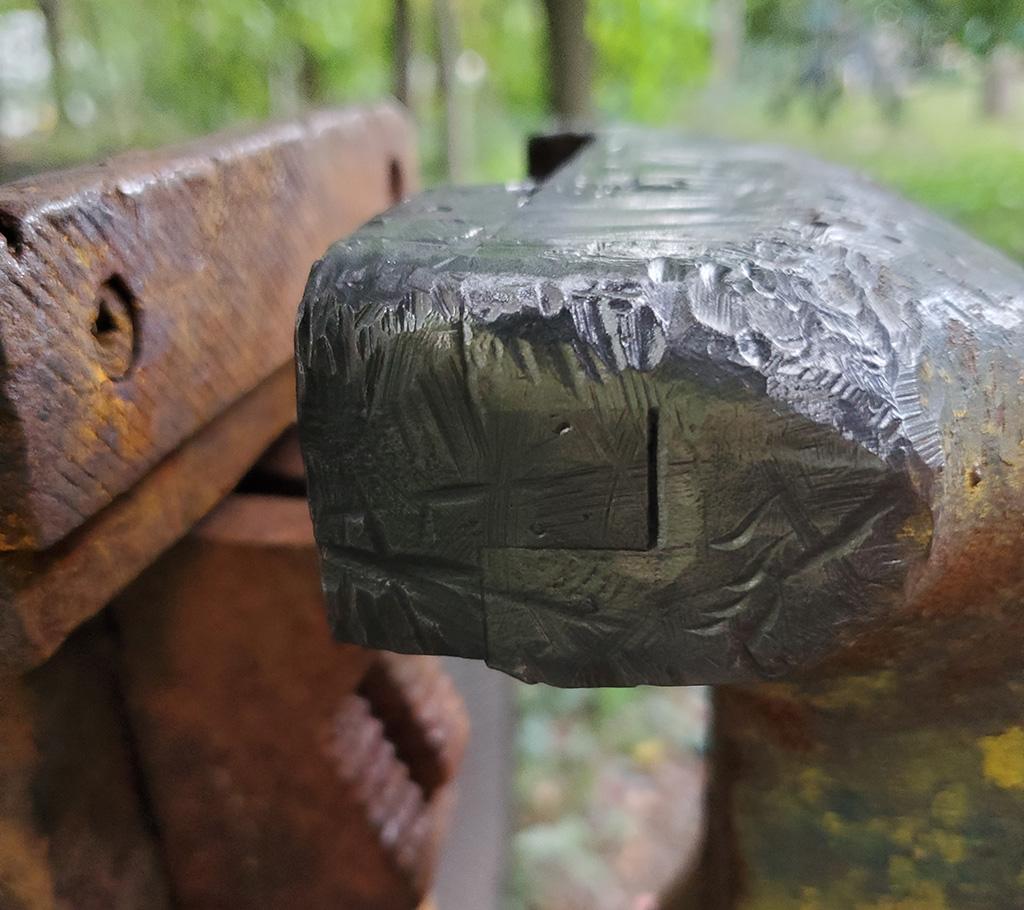
My step-father gave me a very large "bench" vise (seems to be at least 80lbs) but one of the jaws has a fairly large chunk missing. I can't see any obvious screws to remove it (which are very obvious on the other jaw) so I'm not sure how to go about repairing/replacing the face.
Any ideas would be appreciated!


-
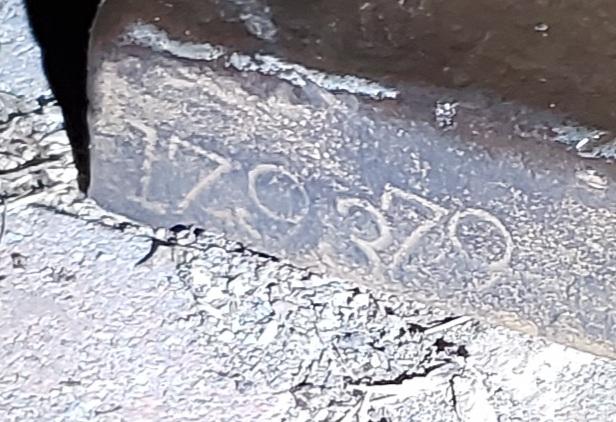
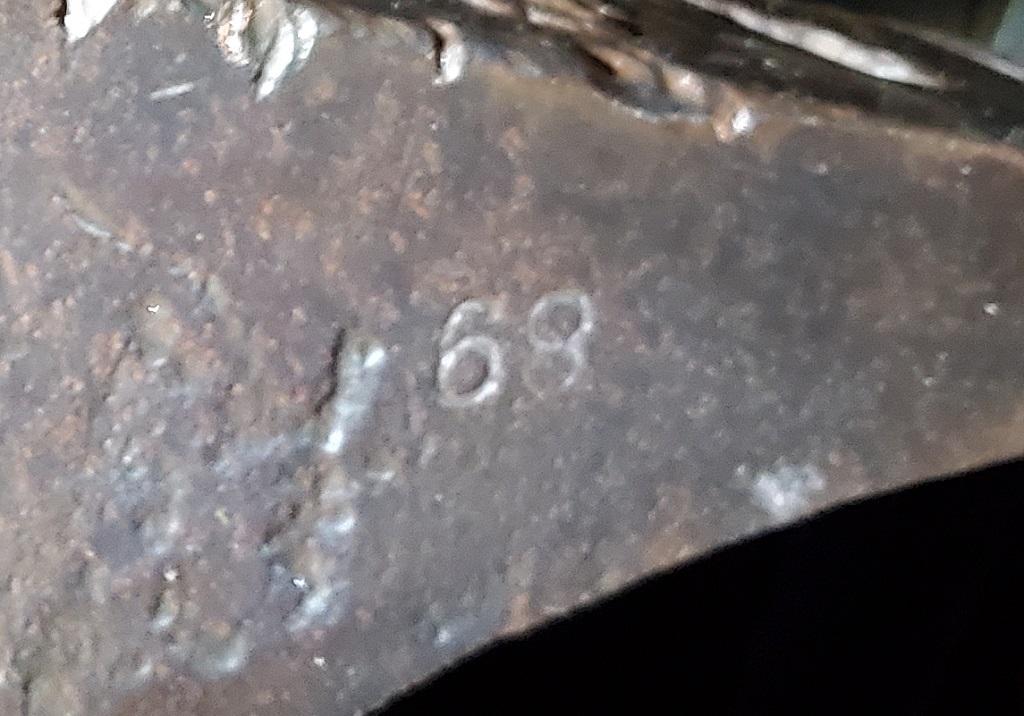
Found the serial number:
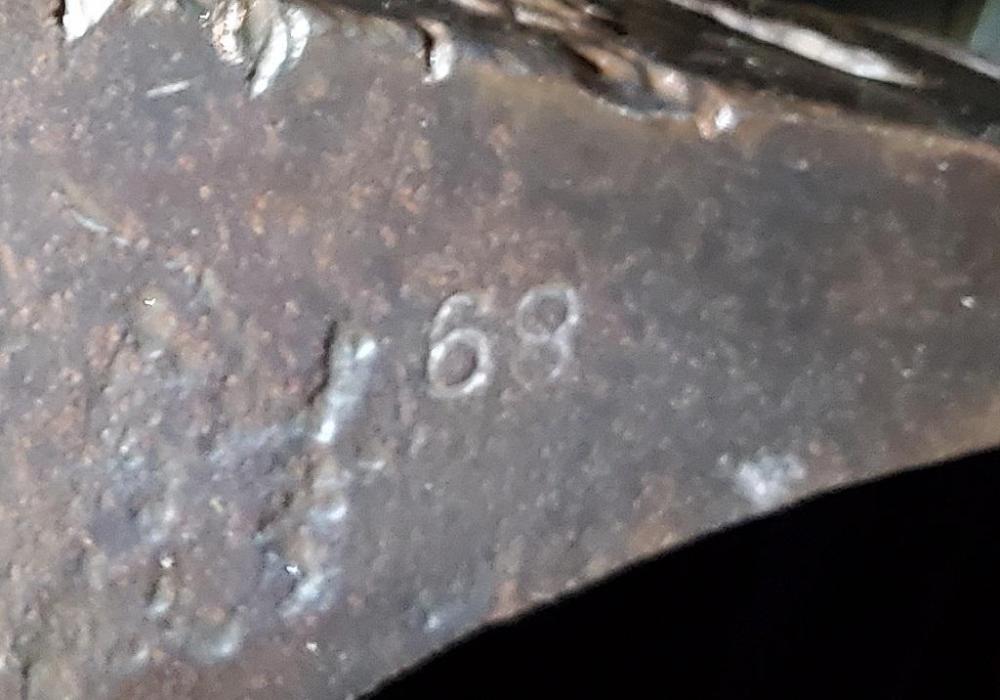
Also found a '68' on one of the sides:
Thanks for the advice on the chisel and file!
-
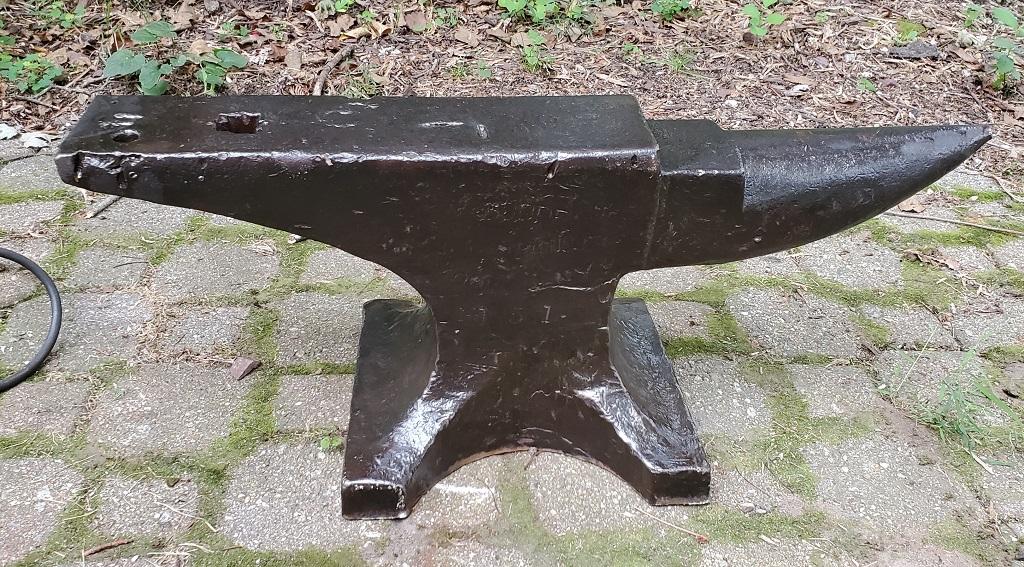
Hello,
My step-father gave me an anvil he's had hanging around for a while and today I cleaned it up for use.
It started like this:
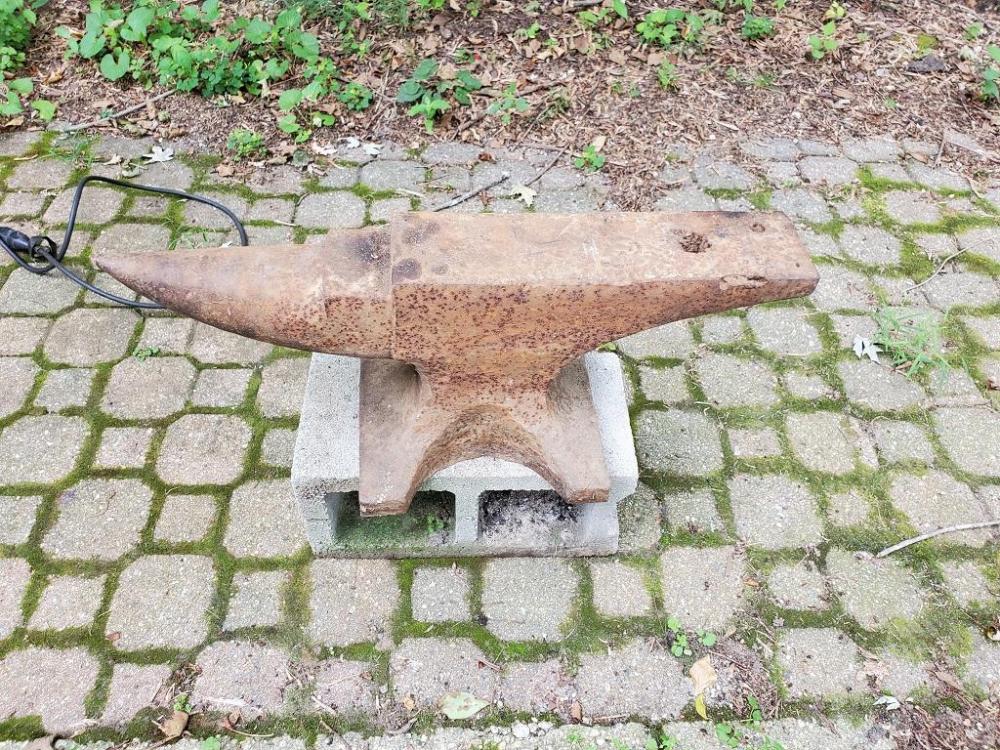
and wound up looking like this after a wire brushing and some boiled linseed oil:

He said the guy he got it from used it for welding which is probably where the gouges in the face and corners came from. I'm fine with avoiding the gouges but I'd like to know if I can safely grind off the leftover weld on the face?
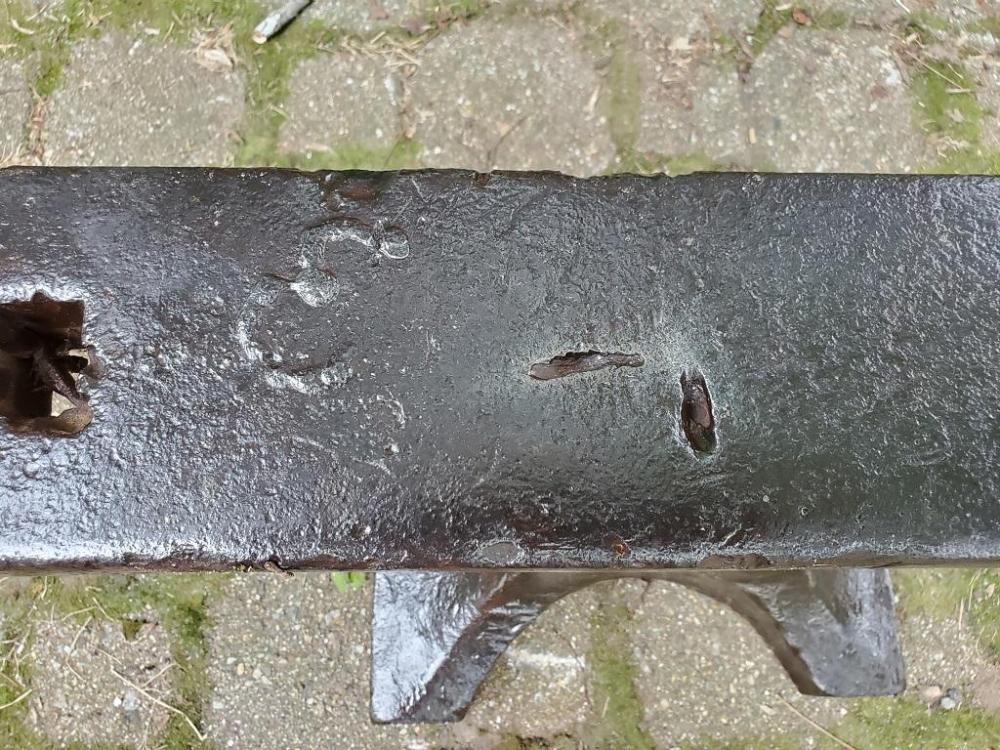
I'm not sure what they did to the hardy hole but would like to clear it out and get it usable, too.
Thanks for any advice you might have!
-
8 minutes ago, Chris C said:
I really like that Nihil. Good job, I'd say. Bet she was tickled!!!!!
Thanks! She loved it!
I was a bit bummed that I had planned both of the twists to be to the "outside" but after I'd done the second I saw they were in the same direction. Ah well.
Love the look of the rubik twist but don't love making the cuts.
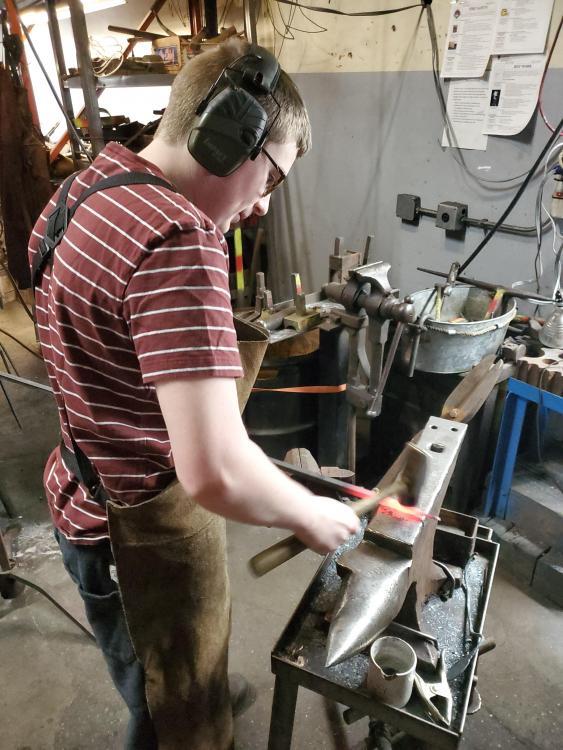
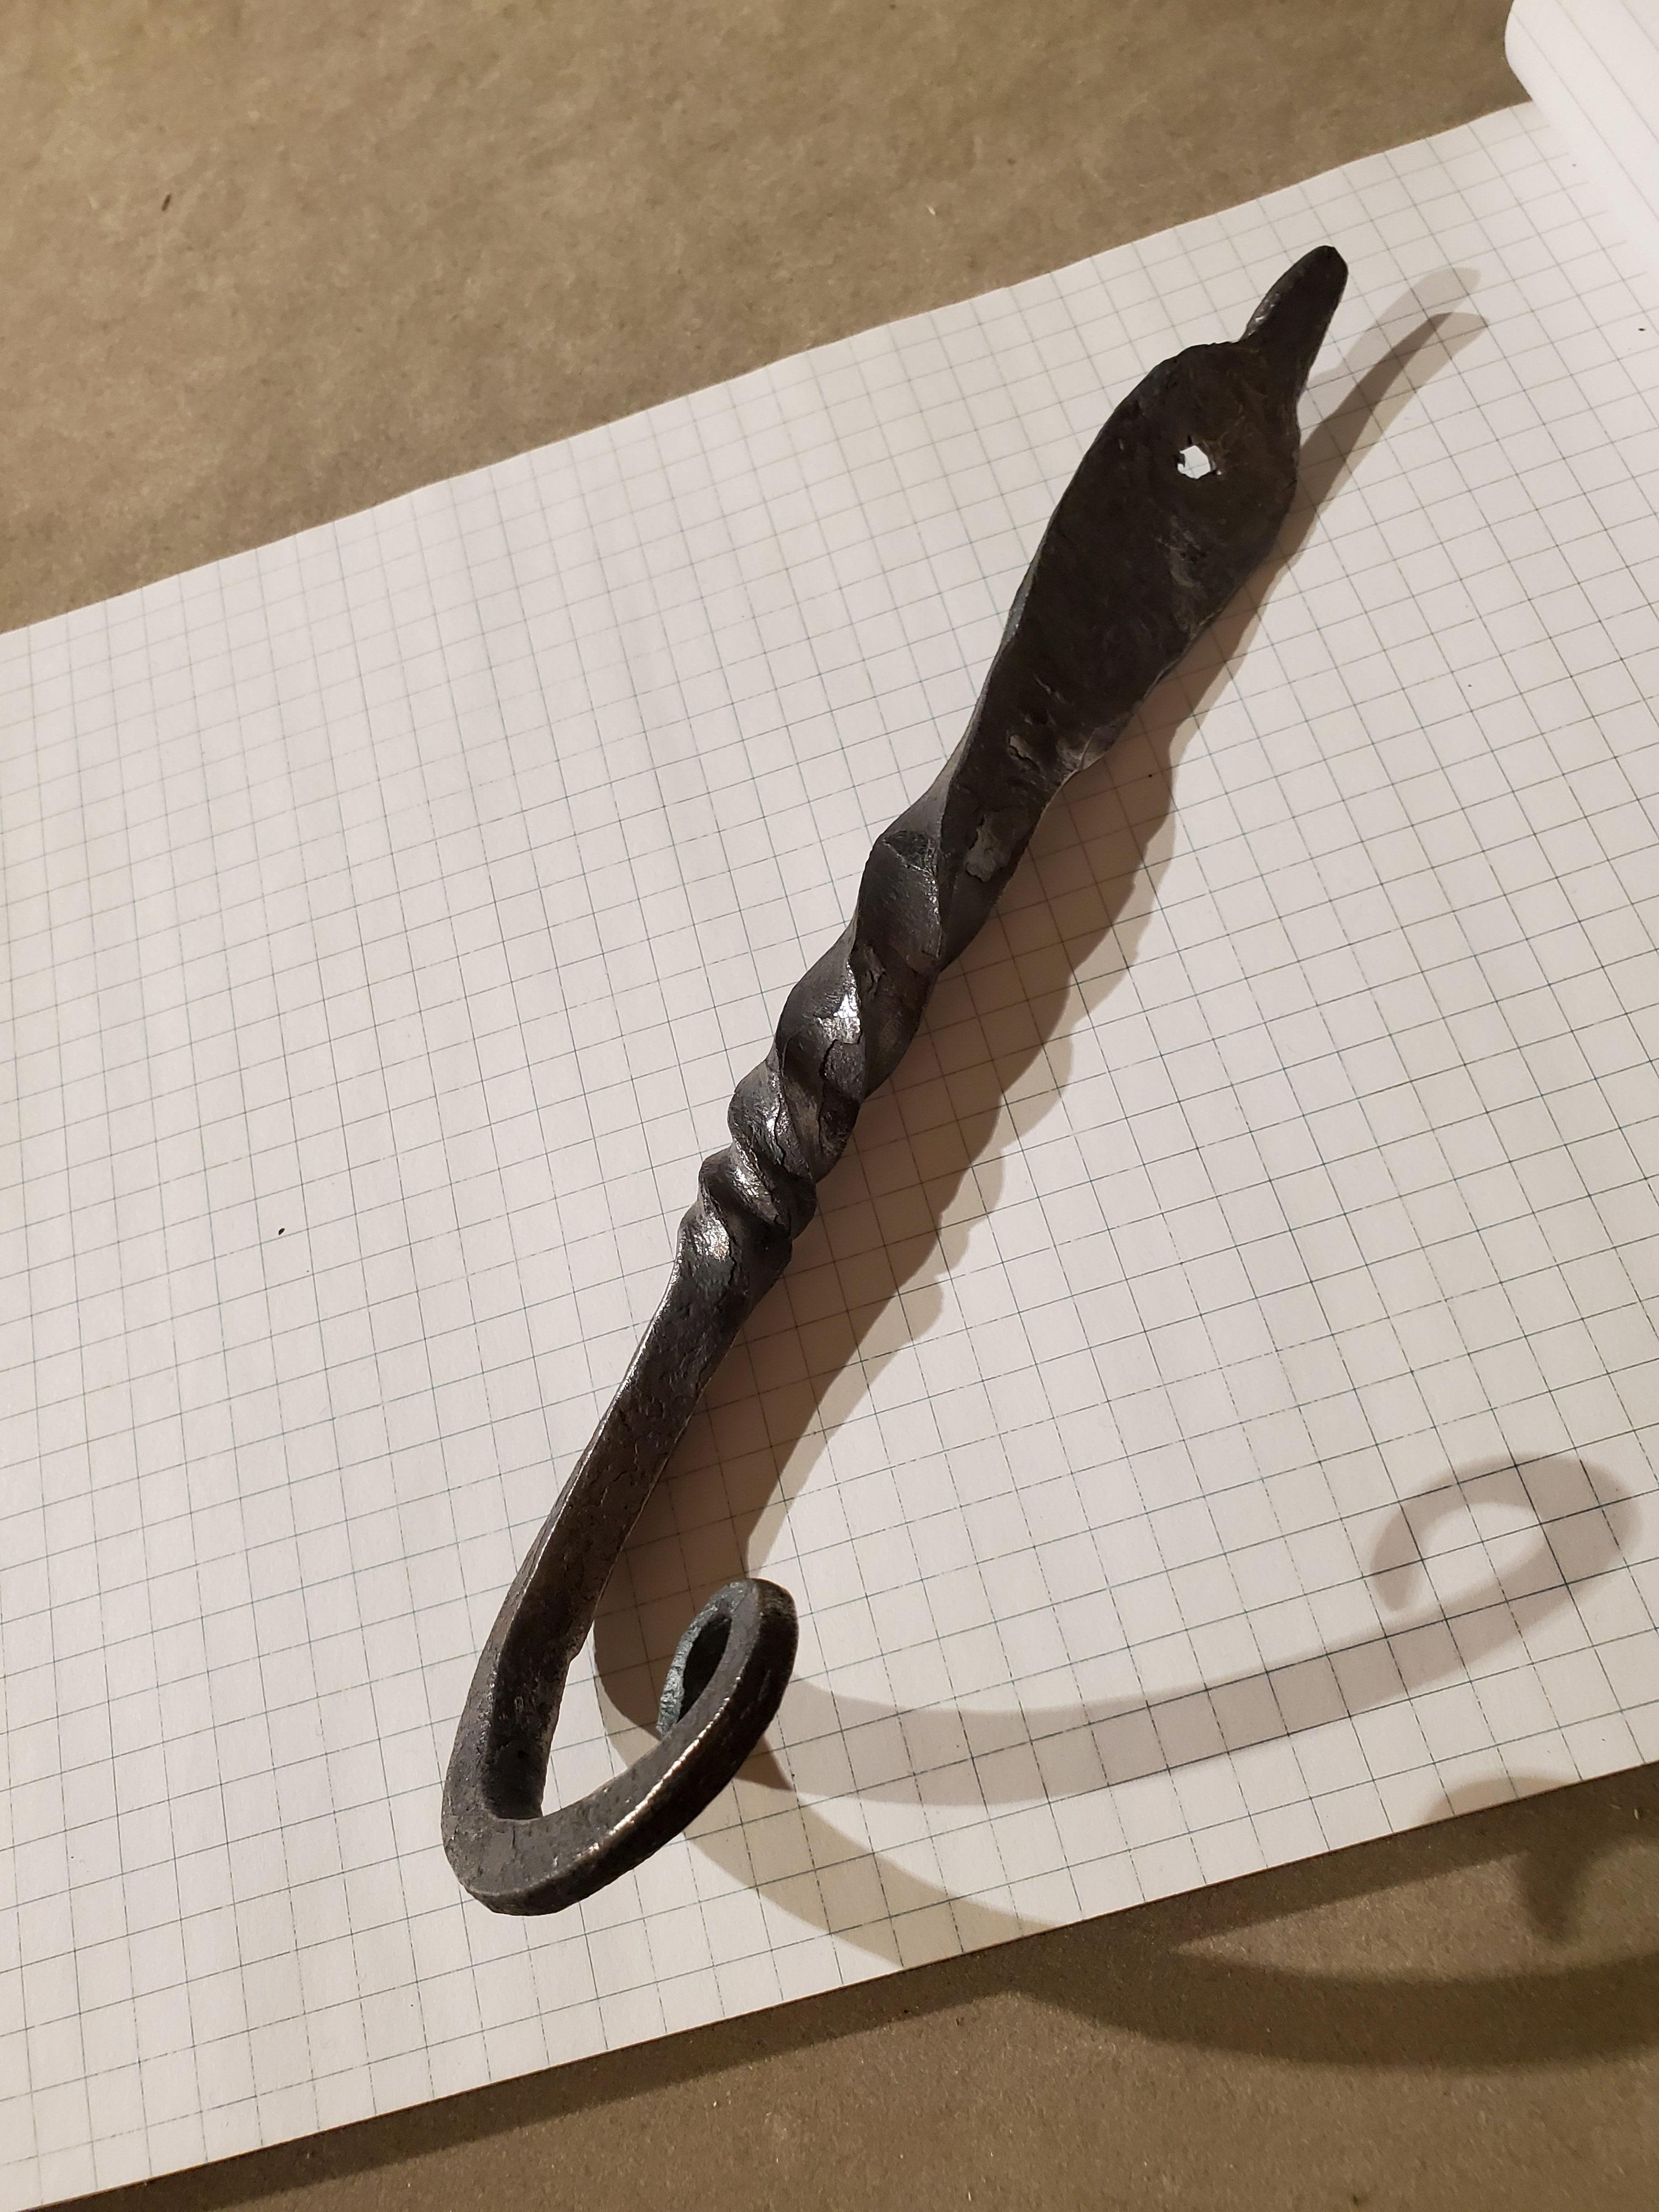
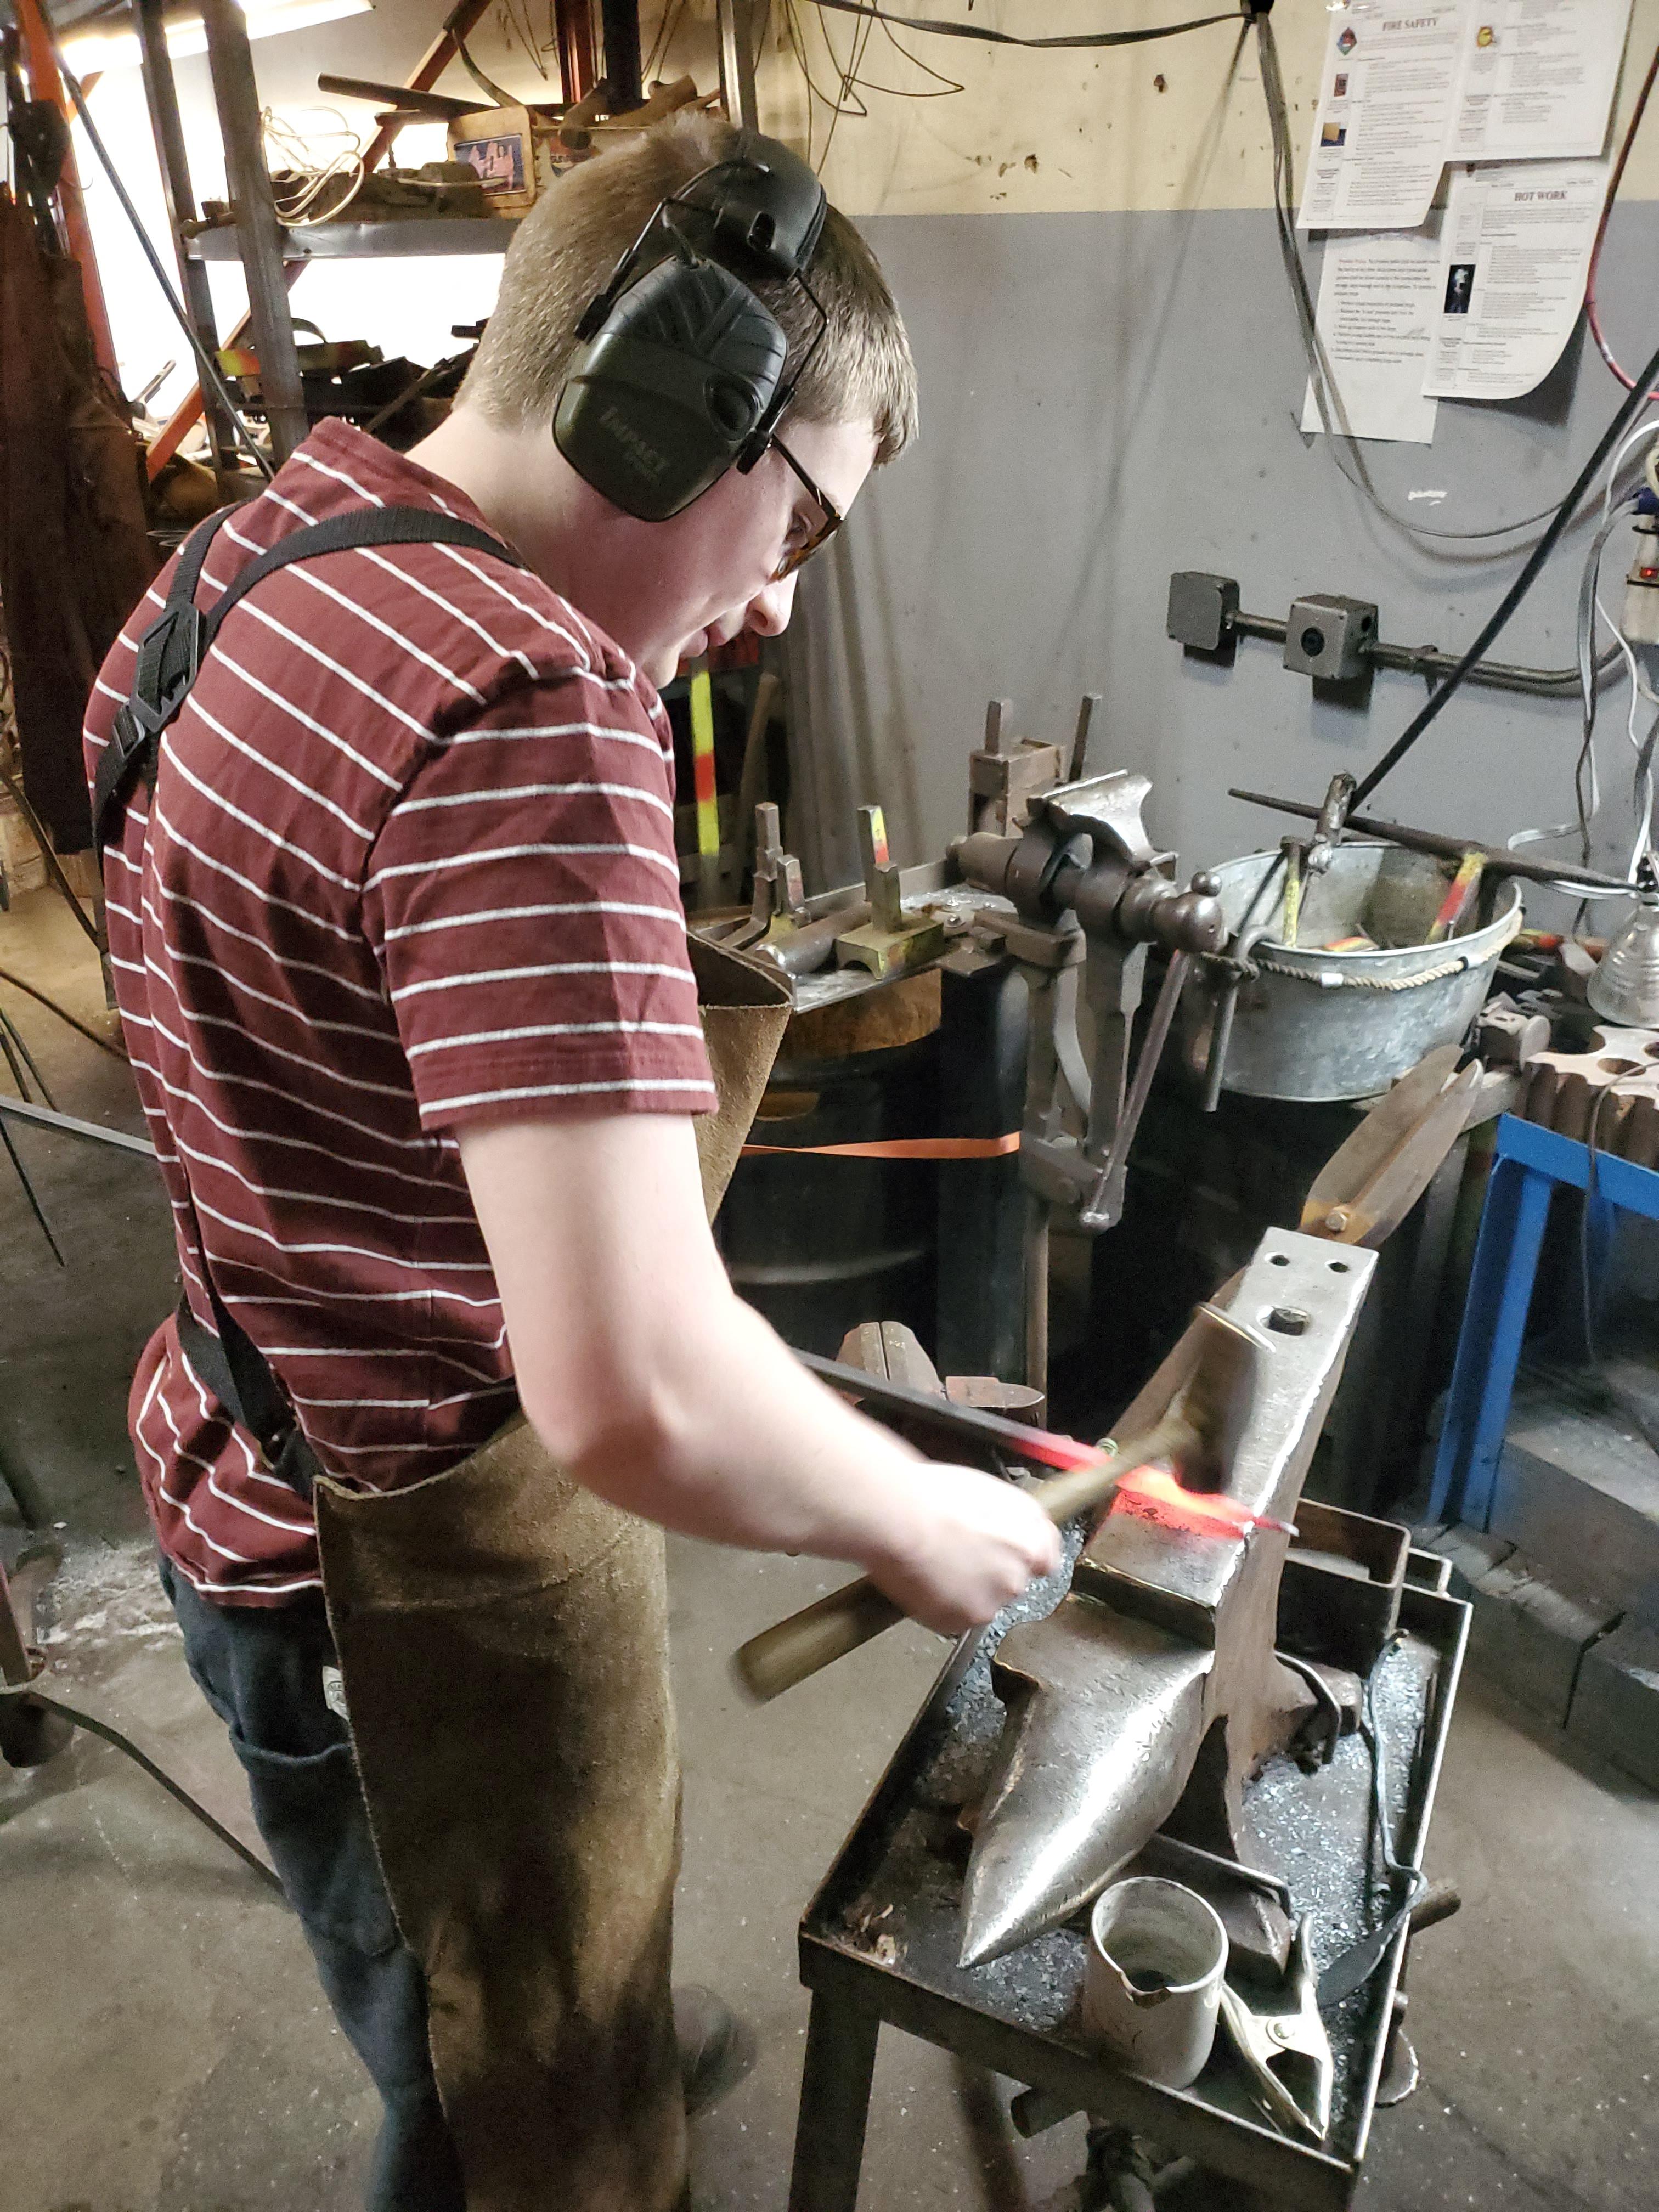
Brought my son to the forge over his winter break and he made a hook. His first product from forging. Only helped him drift the hole. So great to share time with him at the forge
")

-
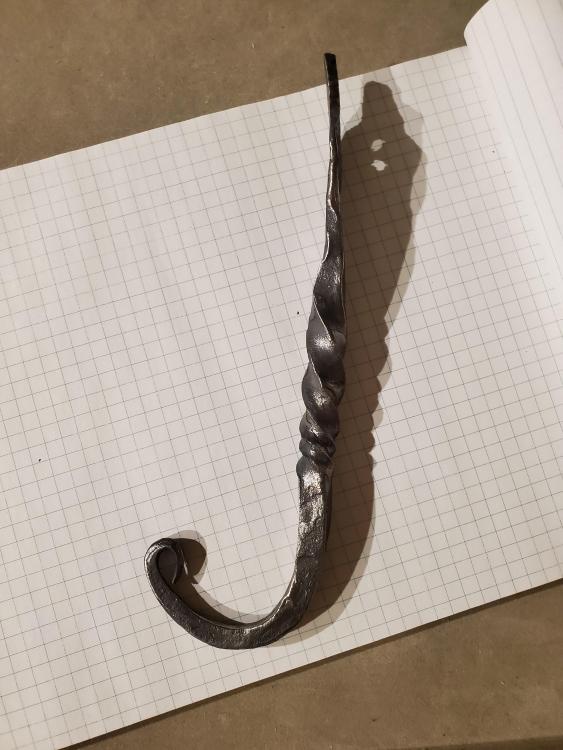
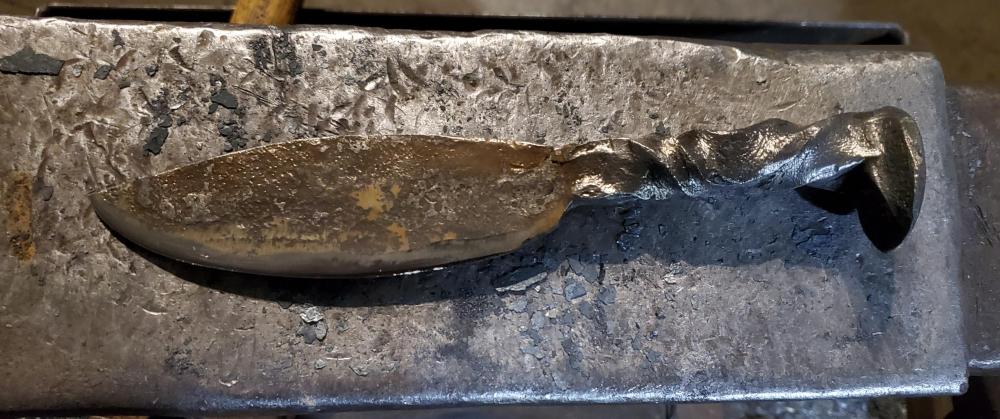
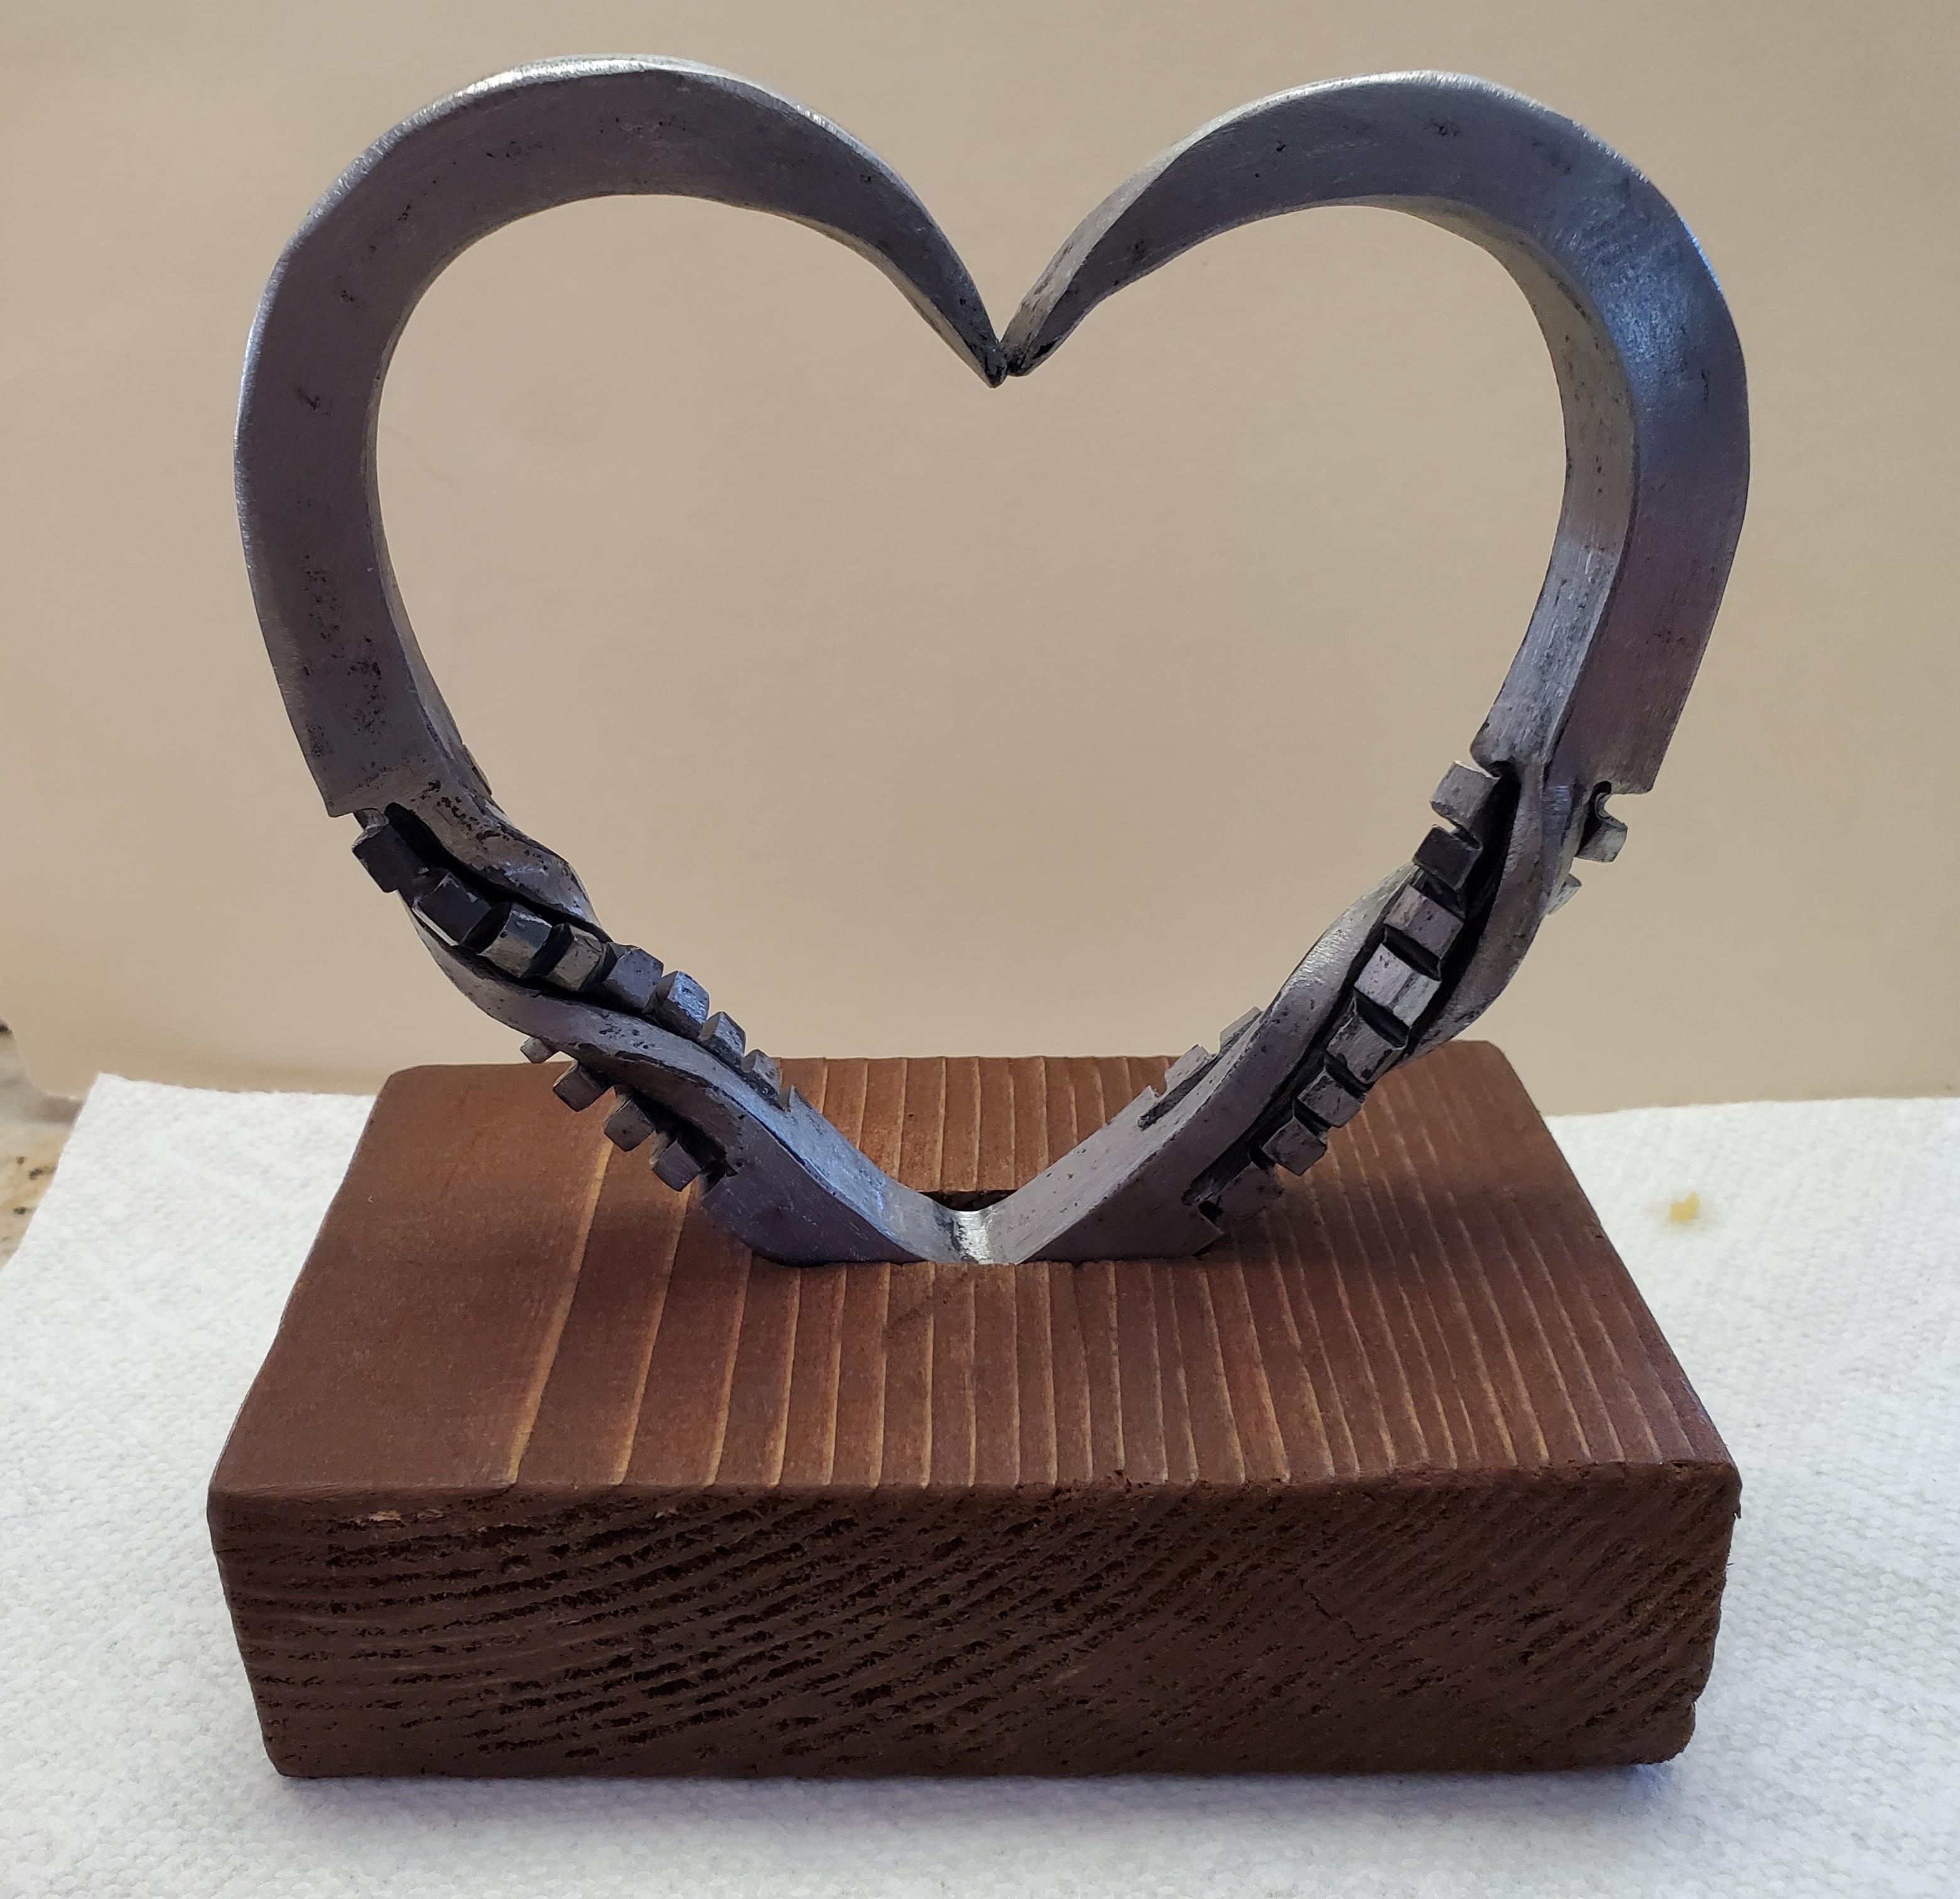
Made this for the wife for Valentine's Day. Started as a 14" piece of 1/2" A36.
-
-
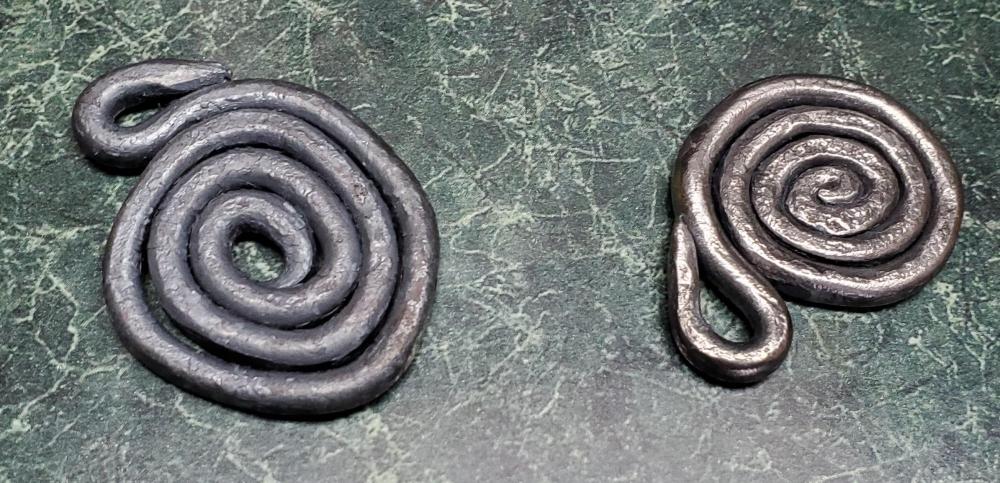
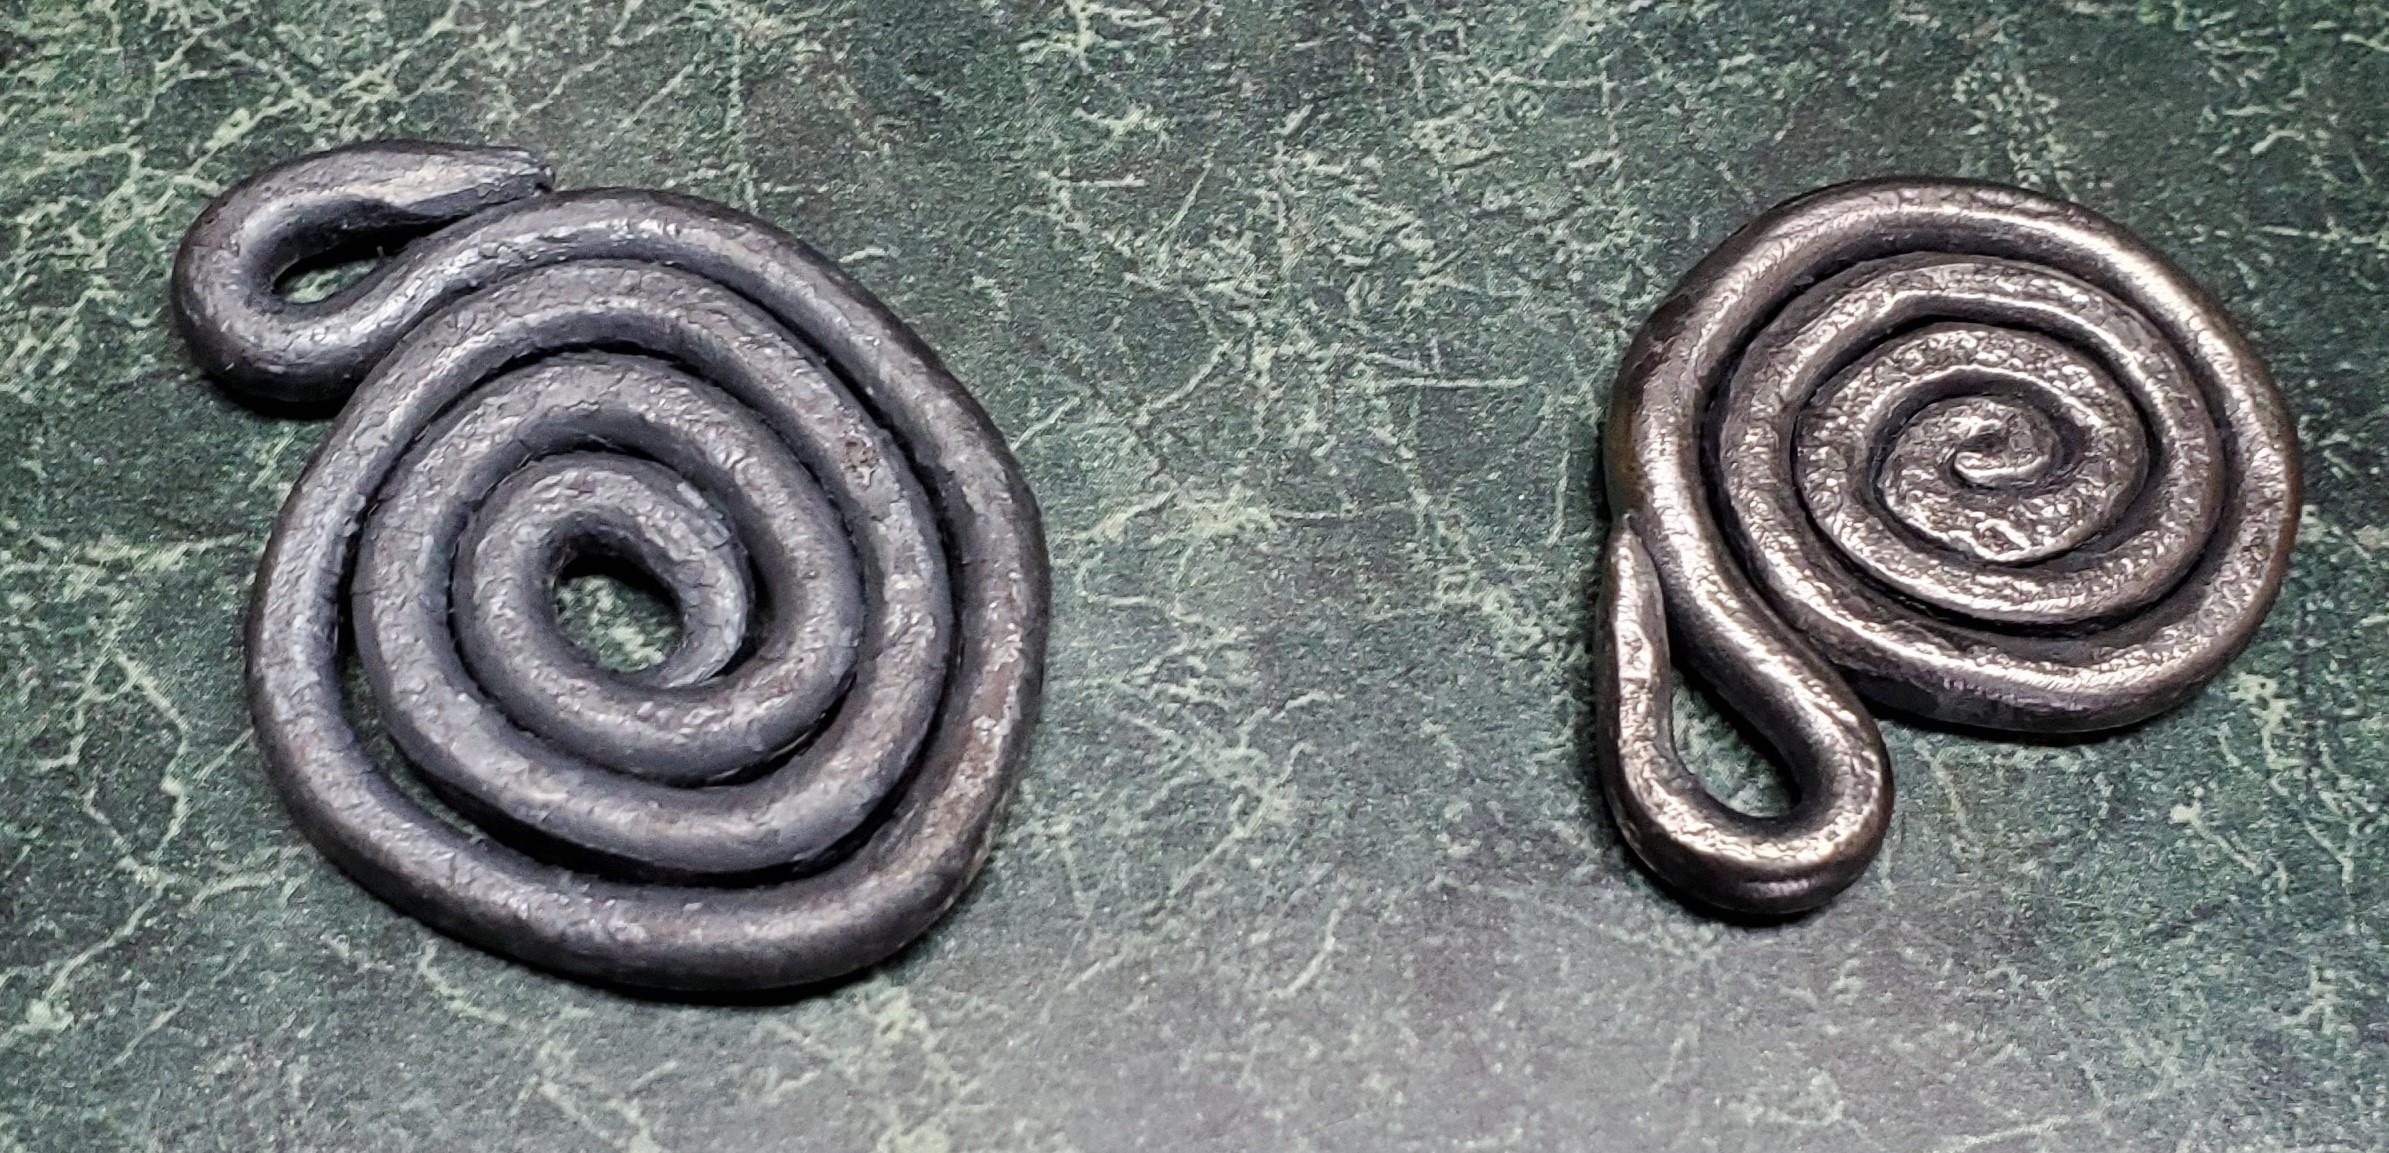
I liked the spiral idea so tried it yesterday. Definitely tougher that I originally thought. My 2nd attempt is the one with the tighter spirals.
Great practice idea.
-
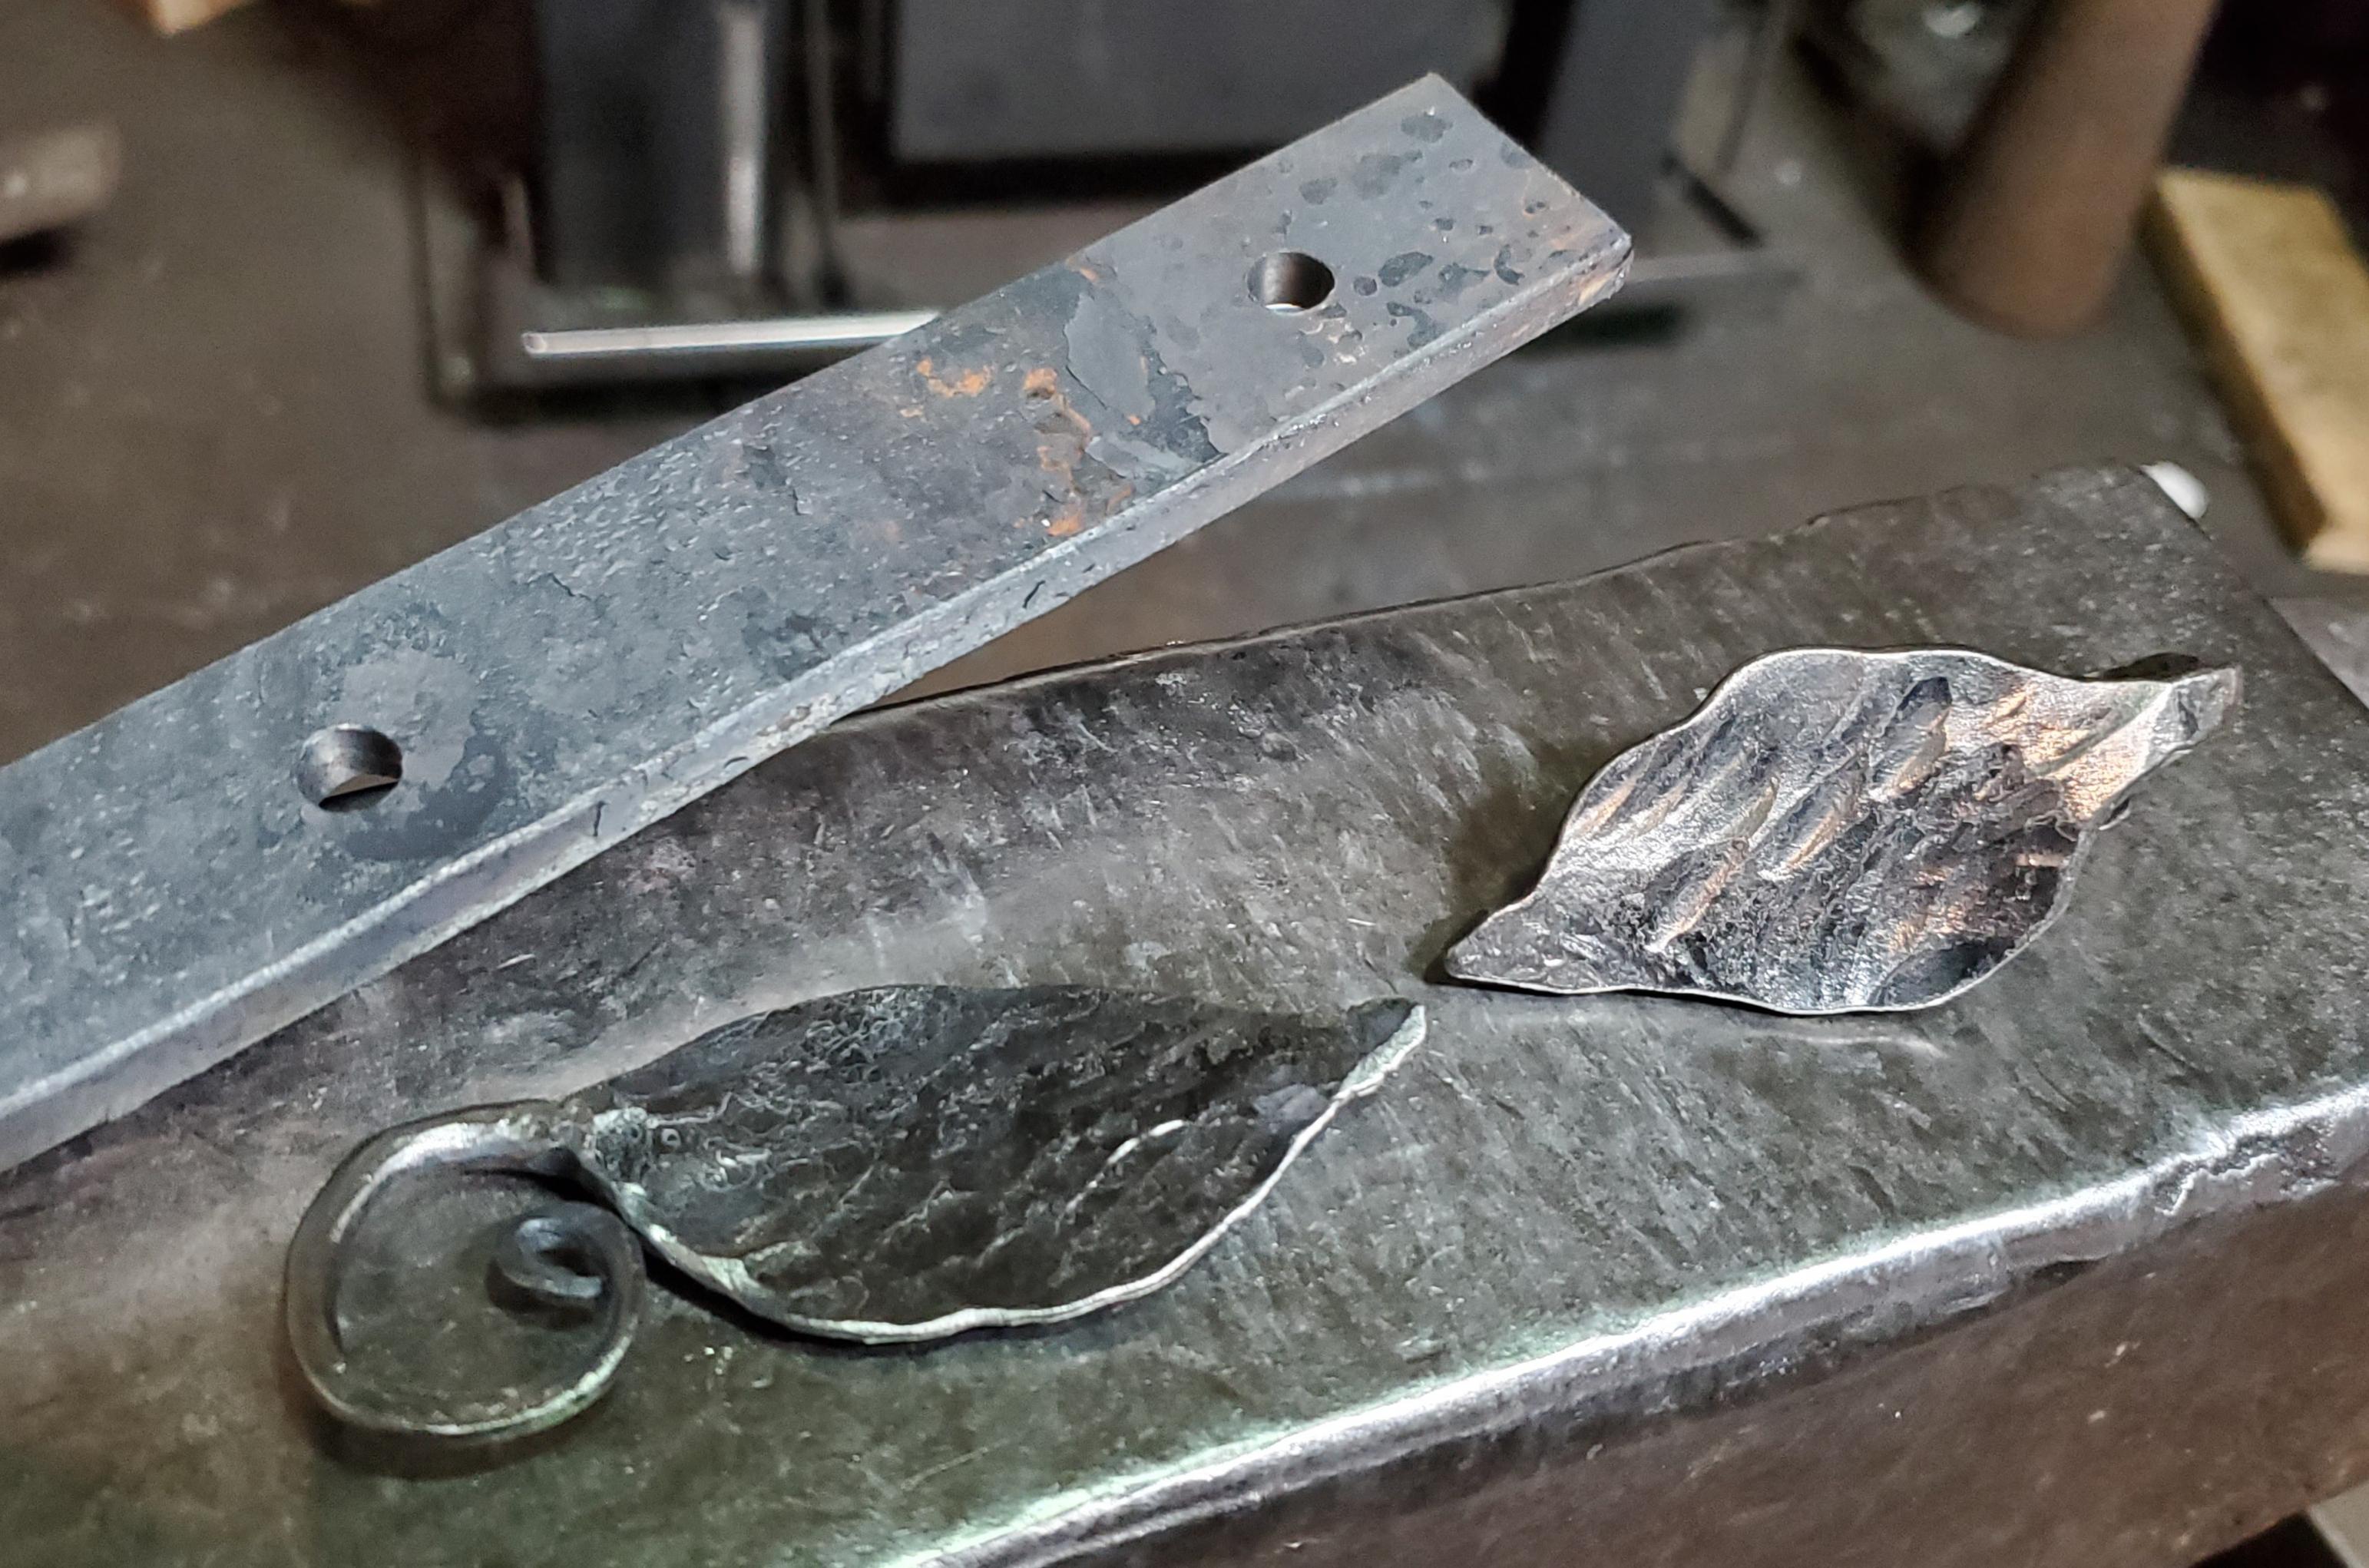
I just started forging a couple of weeks ago and started with a Forge a Railroad Knife class. It was very accessible and fun. I've since joined the community forge in my area and spent a few hours last week just making a couple of leaves which let me practice some skills and start building some arm strength. This week I'll probably try making some scrolls. I'm definitely hooked


Planning a shed build
in Building, Designing a Shop
Posted
Goesinta?