MarriedWithAnvils
Members
-
Joined
-
Last visited
Everything posted by MarriedWithAnvils
-
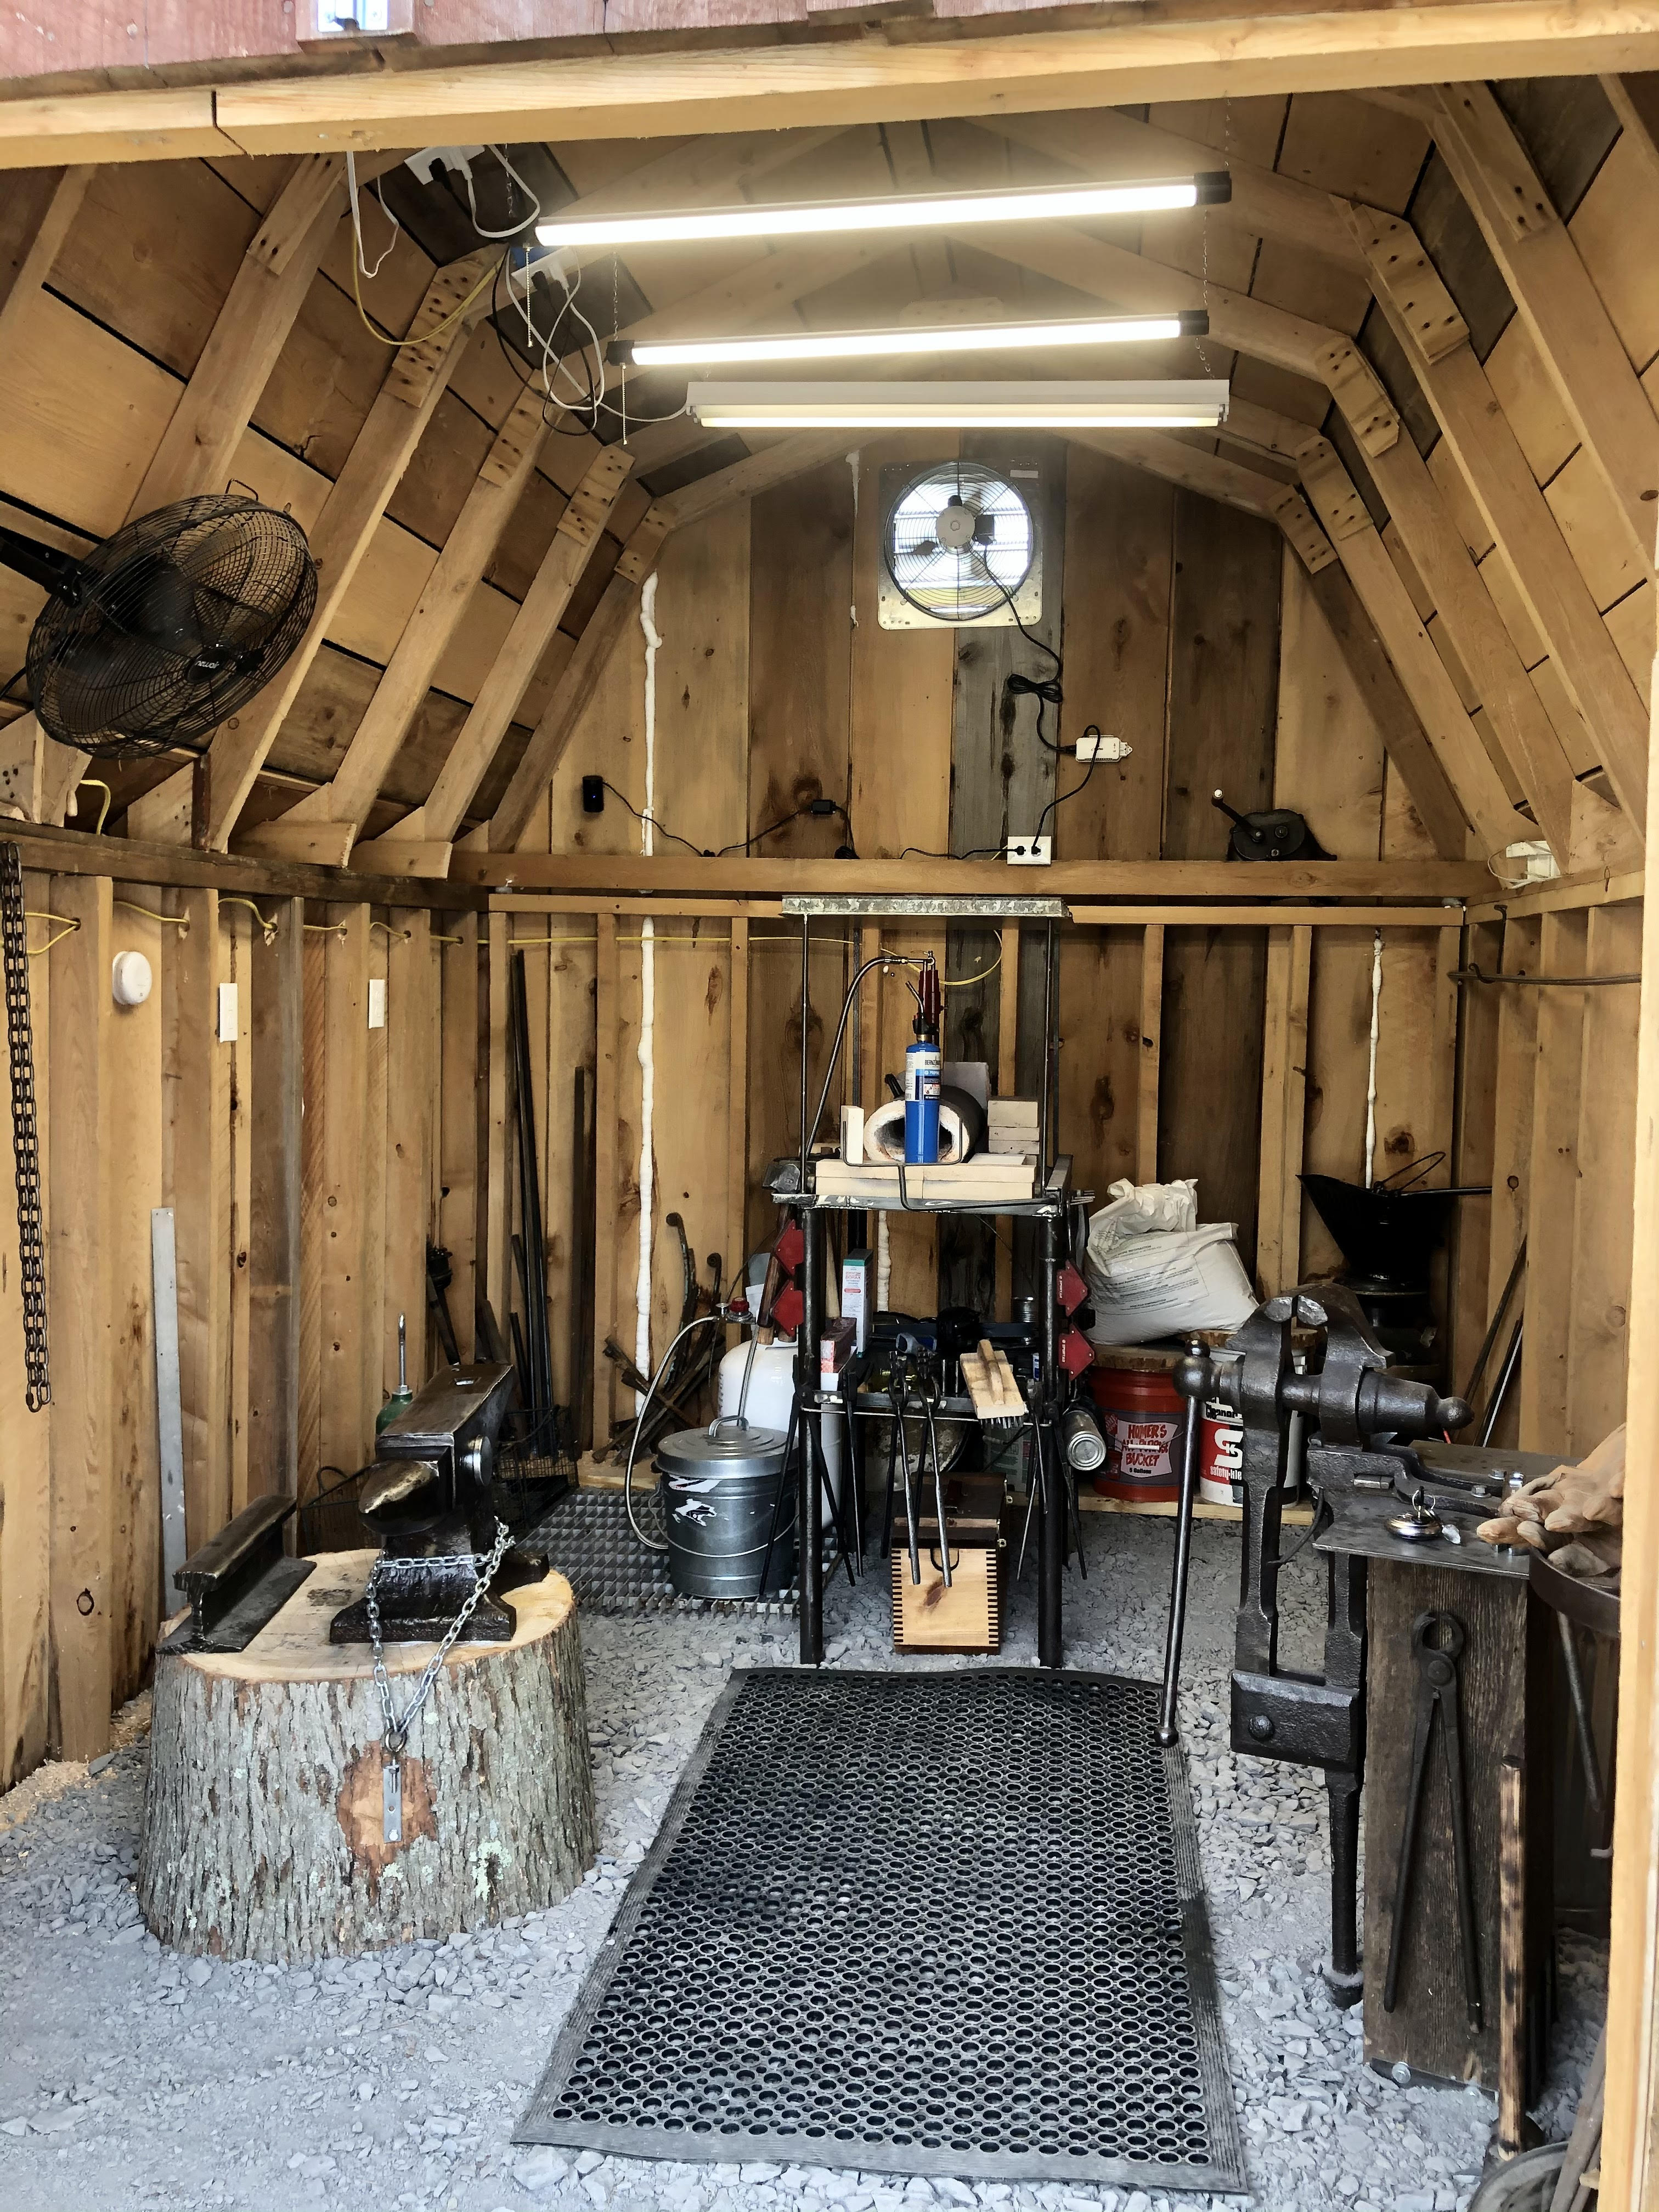
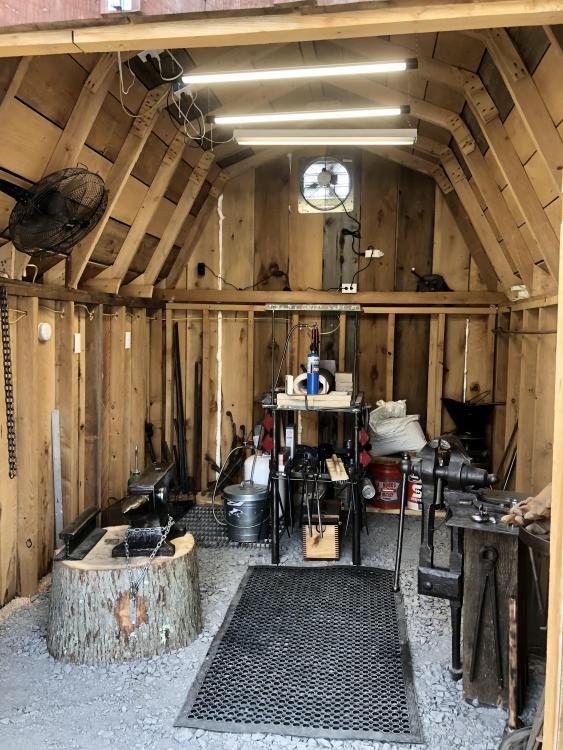
Shelves and racks are coming, and I just put my dad's homemade desk in it with drawers and spot for a stool. Yes, the shop is clean, but it is new. I forged today and dirtied it up a bit. Also, I can still build larger things in the shop because there's double doors that open up to a flat ramp to the driveway. The major issue with building anything large is the small propane forge, but I have an outdoor coal forge and am planning on building a lean-to off the shop for that. Thanks for all the advice and tips. It's a work in progress, and will adapt to my needs as I go along. It's far better than the garage!
-
This will be my final post in this thread regarding my wood shed conversion to blacksmith shop. Thanks for all the advice and things for me to think about. I found a good solution and it's working out great. My main question was about flooring options. I chose to cover the wood floor with 1/2" cement board, and covered that with a limestone mix of #2 down to dust, which allowed me to tamp it down to a hard pack while still not being too hard on my feet and knees. Power was brought into the shop this weekend, and now I have plenty of juice to light the shop, run the 16" attic exhaust fan and the auxiliary fan to keep me cool at the anvil, power the Ring security camera, and five outlets across two circuits for various power tools. I have plenty of room now, and a far safer setup than being in my garage. I have the CO alarm and fire extinguisher in the shop, too, all tested and current. I'm sure things will evolve with the shop as I start using it in full now, but this is a great start. The smithing "triangle" is perfect; I'm less than one of my strides away from the vise, forge, and anvil respectively. Needless to say, I'm stoked to start using it!
-
That would’ve worked, too. I just didn’t think of it.
-
Thanks Will-I-am, but I've been using the forge in my garage and it's never once set off the CO alarm. That being said, I've purchased a 16" shed exhaust fan that I'm mounting this weekend. It has auto and manual fan/temp control, so that will work great for ventilation, plus the open shed doors. I'm transferring the CO alarm out there. I also found a solution for the floor: cement board covered with a thick layer of packable limestone. We've decided to run power out to the shed, too, which will be key for lighting and security, among other things. Thanks for all the suggestions.
-
I have considered doing that, but that would put my anvil and forge outside unsecured. I have a 260lb anvil on a large white oak round (weighs easily over 500lbs total), so it's not easily put back in the shed for safe keeping. I'd rather be able to lock everything up inside. We're running power out to the shed, so there will be security setup. I won't be keeping power tools inside the shop for that same reason. I'll just have to carry tools from the garage to the shop (about 20 yards away) when I need them. The lean-to may work when I get my coal forge going, but for now my portable propane should be inside the structure. I probably don't even need the floor totally covered, just where the anvil and forge will be. The rest of the shop floor can remain wood. I may just get pavestone slabs if I can find them cheap.
-
Hey all, I have a 14x10 custom-built shed in our yard that I'm converting into a blacksmith shop. The problem is that it has a wooden floor. I'm researching options but not sure which way to go. I don't want to bring dirt inside because it might rot the floor out underneath. I was thinking of using cement board over thin mortar underneath, then covering with with some small gravel (yes, I know dropping stuff in gravel might mean losing it). I don't want to tear the floor up because then I might be staring at the ground, and I don't want to lay concrete in that situation. Just trying to convert a wooden shed floor into a usable blacksmith shop floor. Any suggestions? Thanks in advance.
-
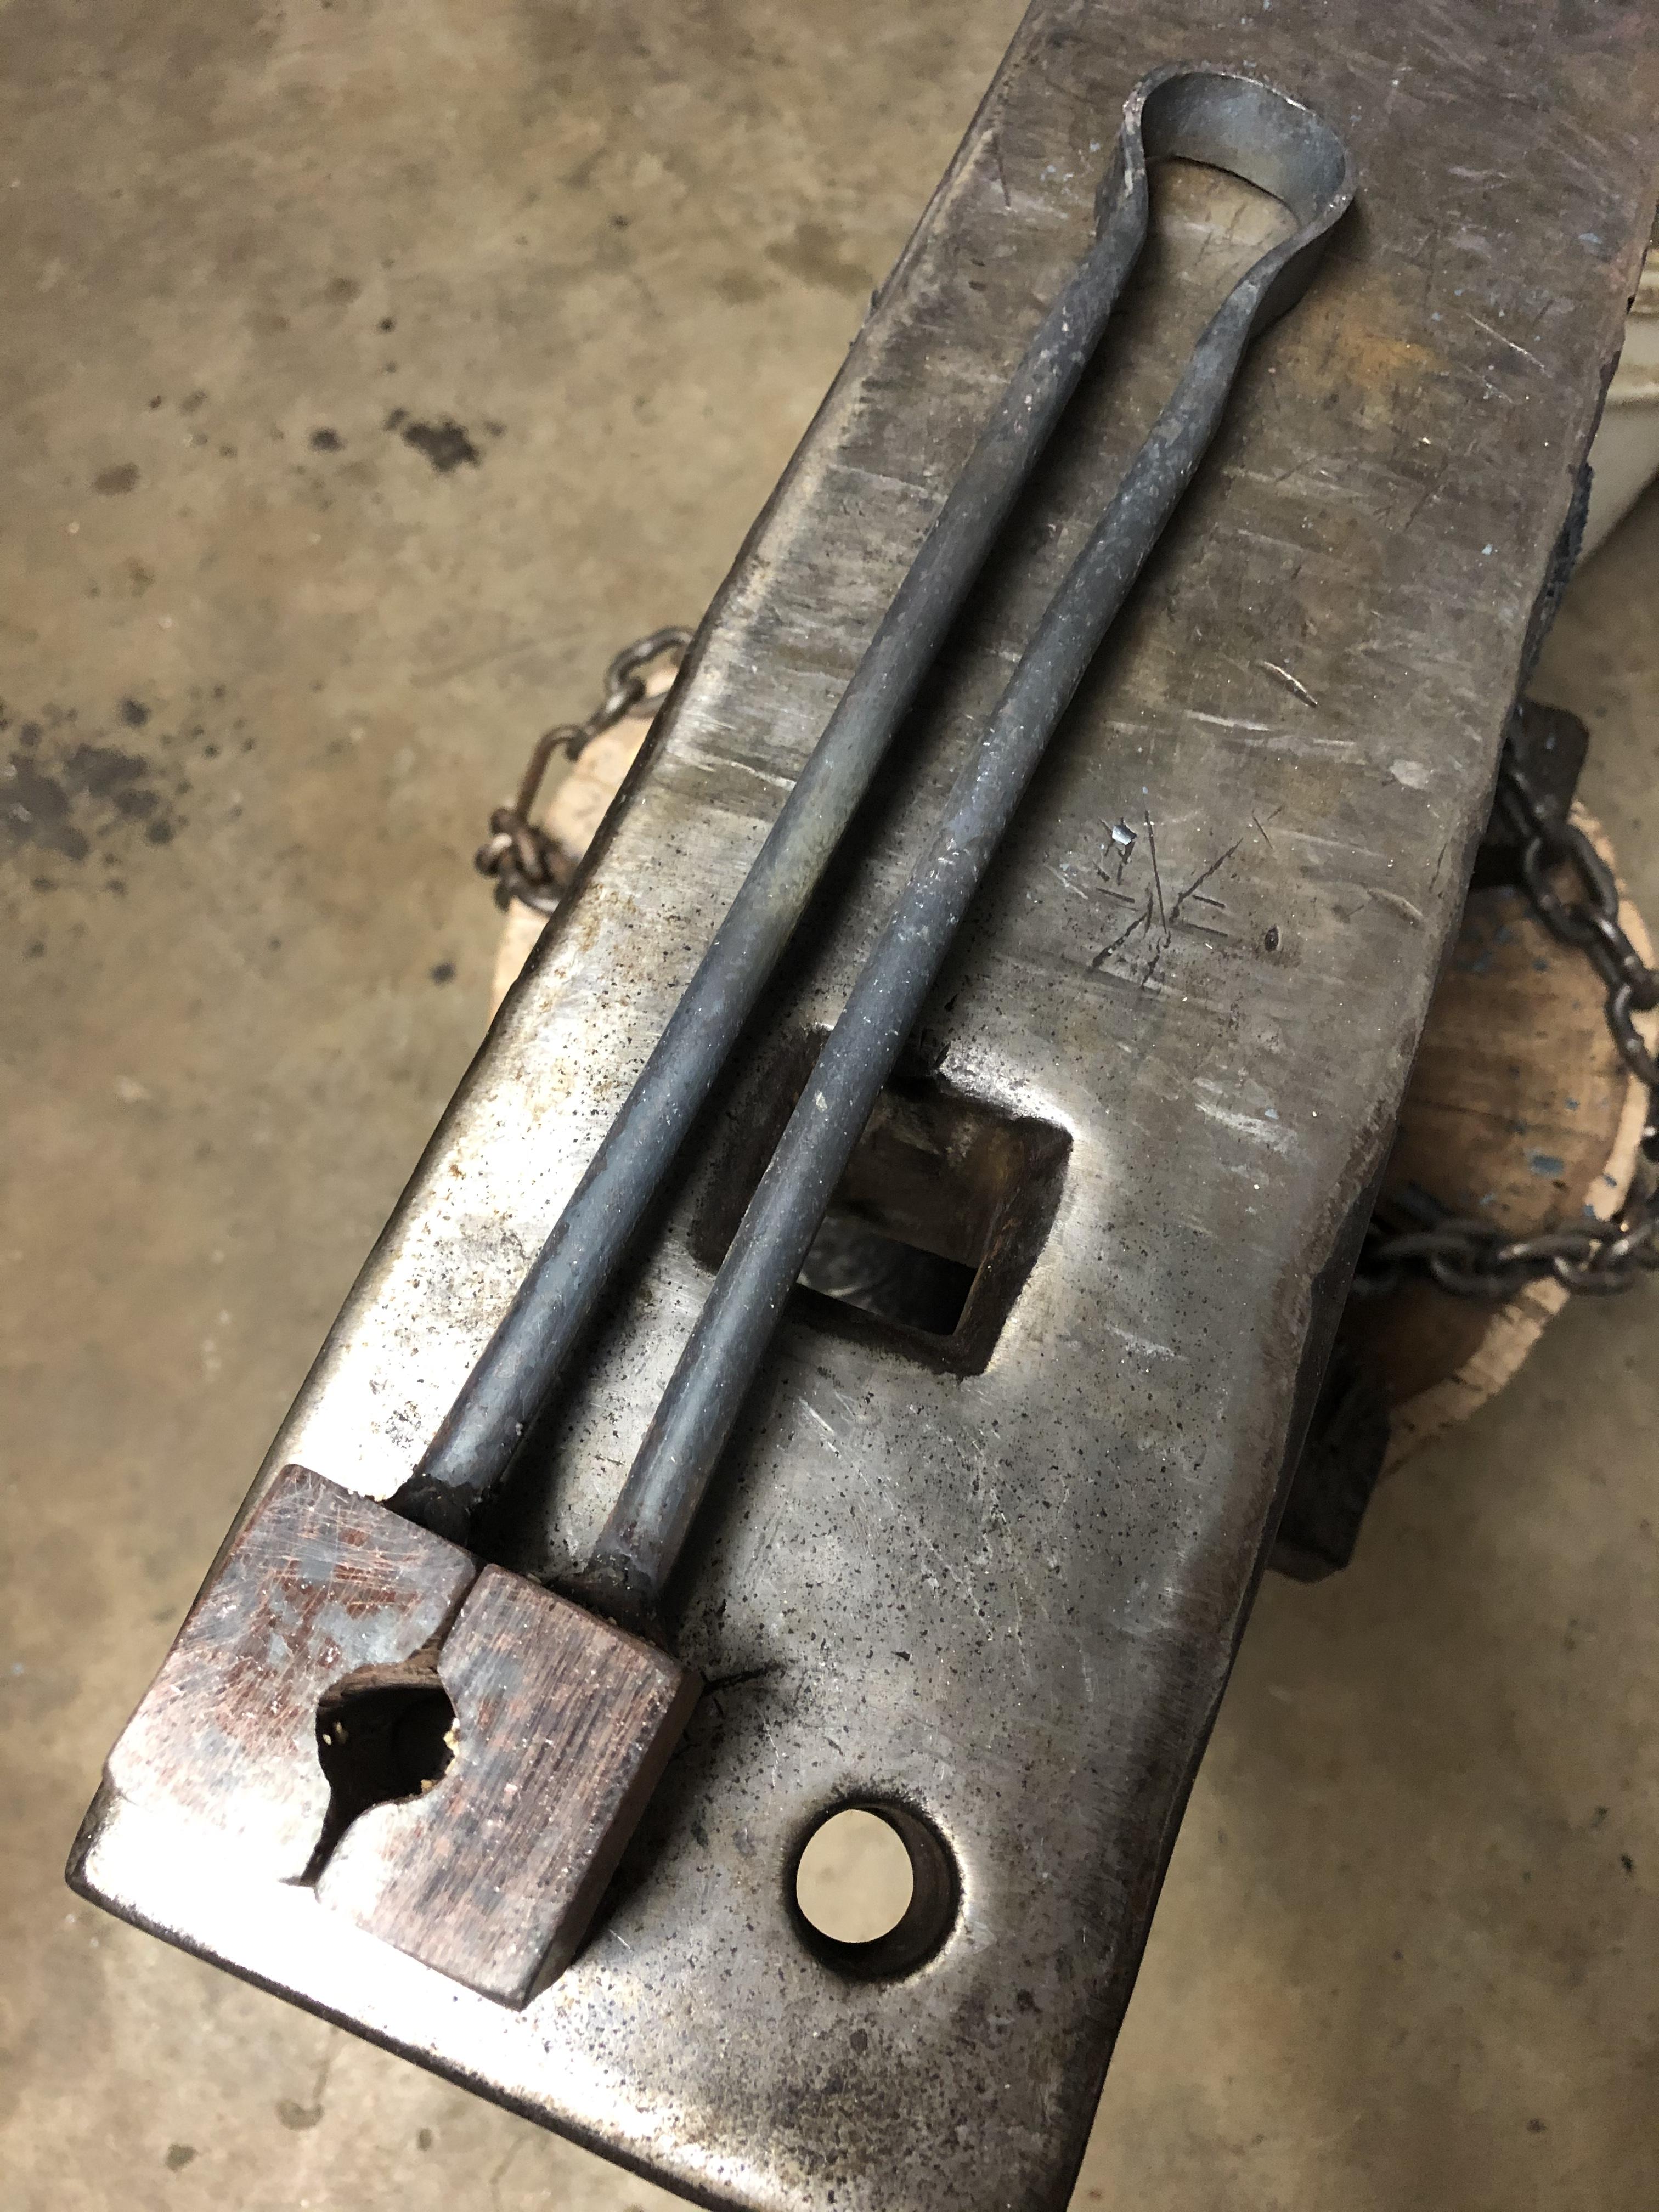
I’m not trying to harden and temper mild steel. The spring is not the part I’m talking about. Sorry if that wasn’t clear. The swages attaches to the mild steel spring are what I’m referring to that are 4350 steel. I know I can’t harden and temper mild steel. Thanks George. I’m not making the spring out of 4350, just the swages that are attached to it that will be hammered upon. Sorry if I gave the indication that the spring itself would be 4350. The spring is simple mild steel, which I know can’t be hardened or tempered. I will have to just experiment like you said, but I will likely go with a darker straw first, which should be tough to prevent deformation while being soft enough to prevent shattering. Thanks! A picture can help. The square swages are 4350; the bar spring is mild steel. Just need to harden and temper the pieces which will be hammered to create the pattern. I know to harden will be to take it to around 1500F and then oil quench. Then when still warm, temper to desired color. Will do it slowly to do a thorough harden rather than just surface harden (right?).
-
I found some properties for the 43xx family of alloys that would seem to apply to 4350, too, but the tempering color for a spring swage is a bit of a mystery to me. Does anyone know generally what I want for a spring swage that will not be used under a power hammer? Do I want straw color, or a bit darker into bronze/purple? I want to minimize deformation while also minimizing brittleness, but not sure what I'm supposed to target for a tool like this. I've never made one before. The 4350 blocks (x2) are just an inch thick each, and about 1.5" long each. They are connected with a 3/8" mild steel bar that acts as the spring. I will be hammering on this to put texture into round bar accents, so nothing really major in terms of striking. Thank you for your kind advice.
-
It’s done. Minor restoration complete. It leaks a little bit, but that’s typical. But it works much better than before. Thanks again, all.

-
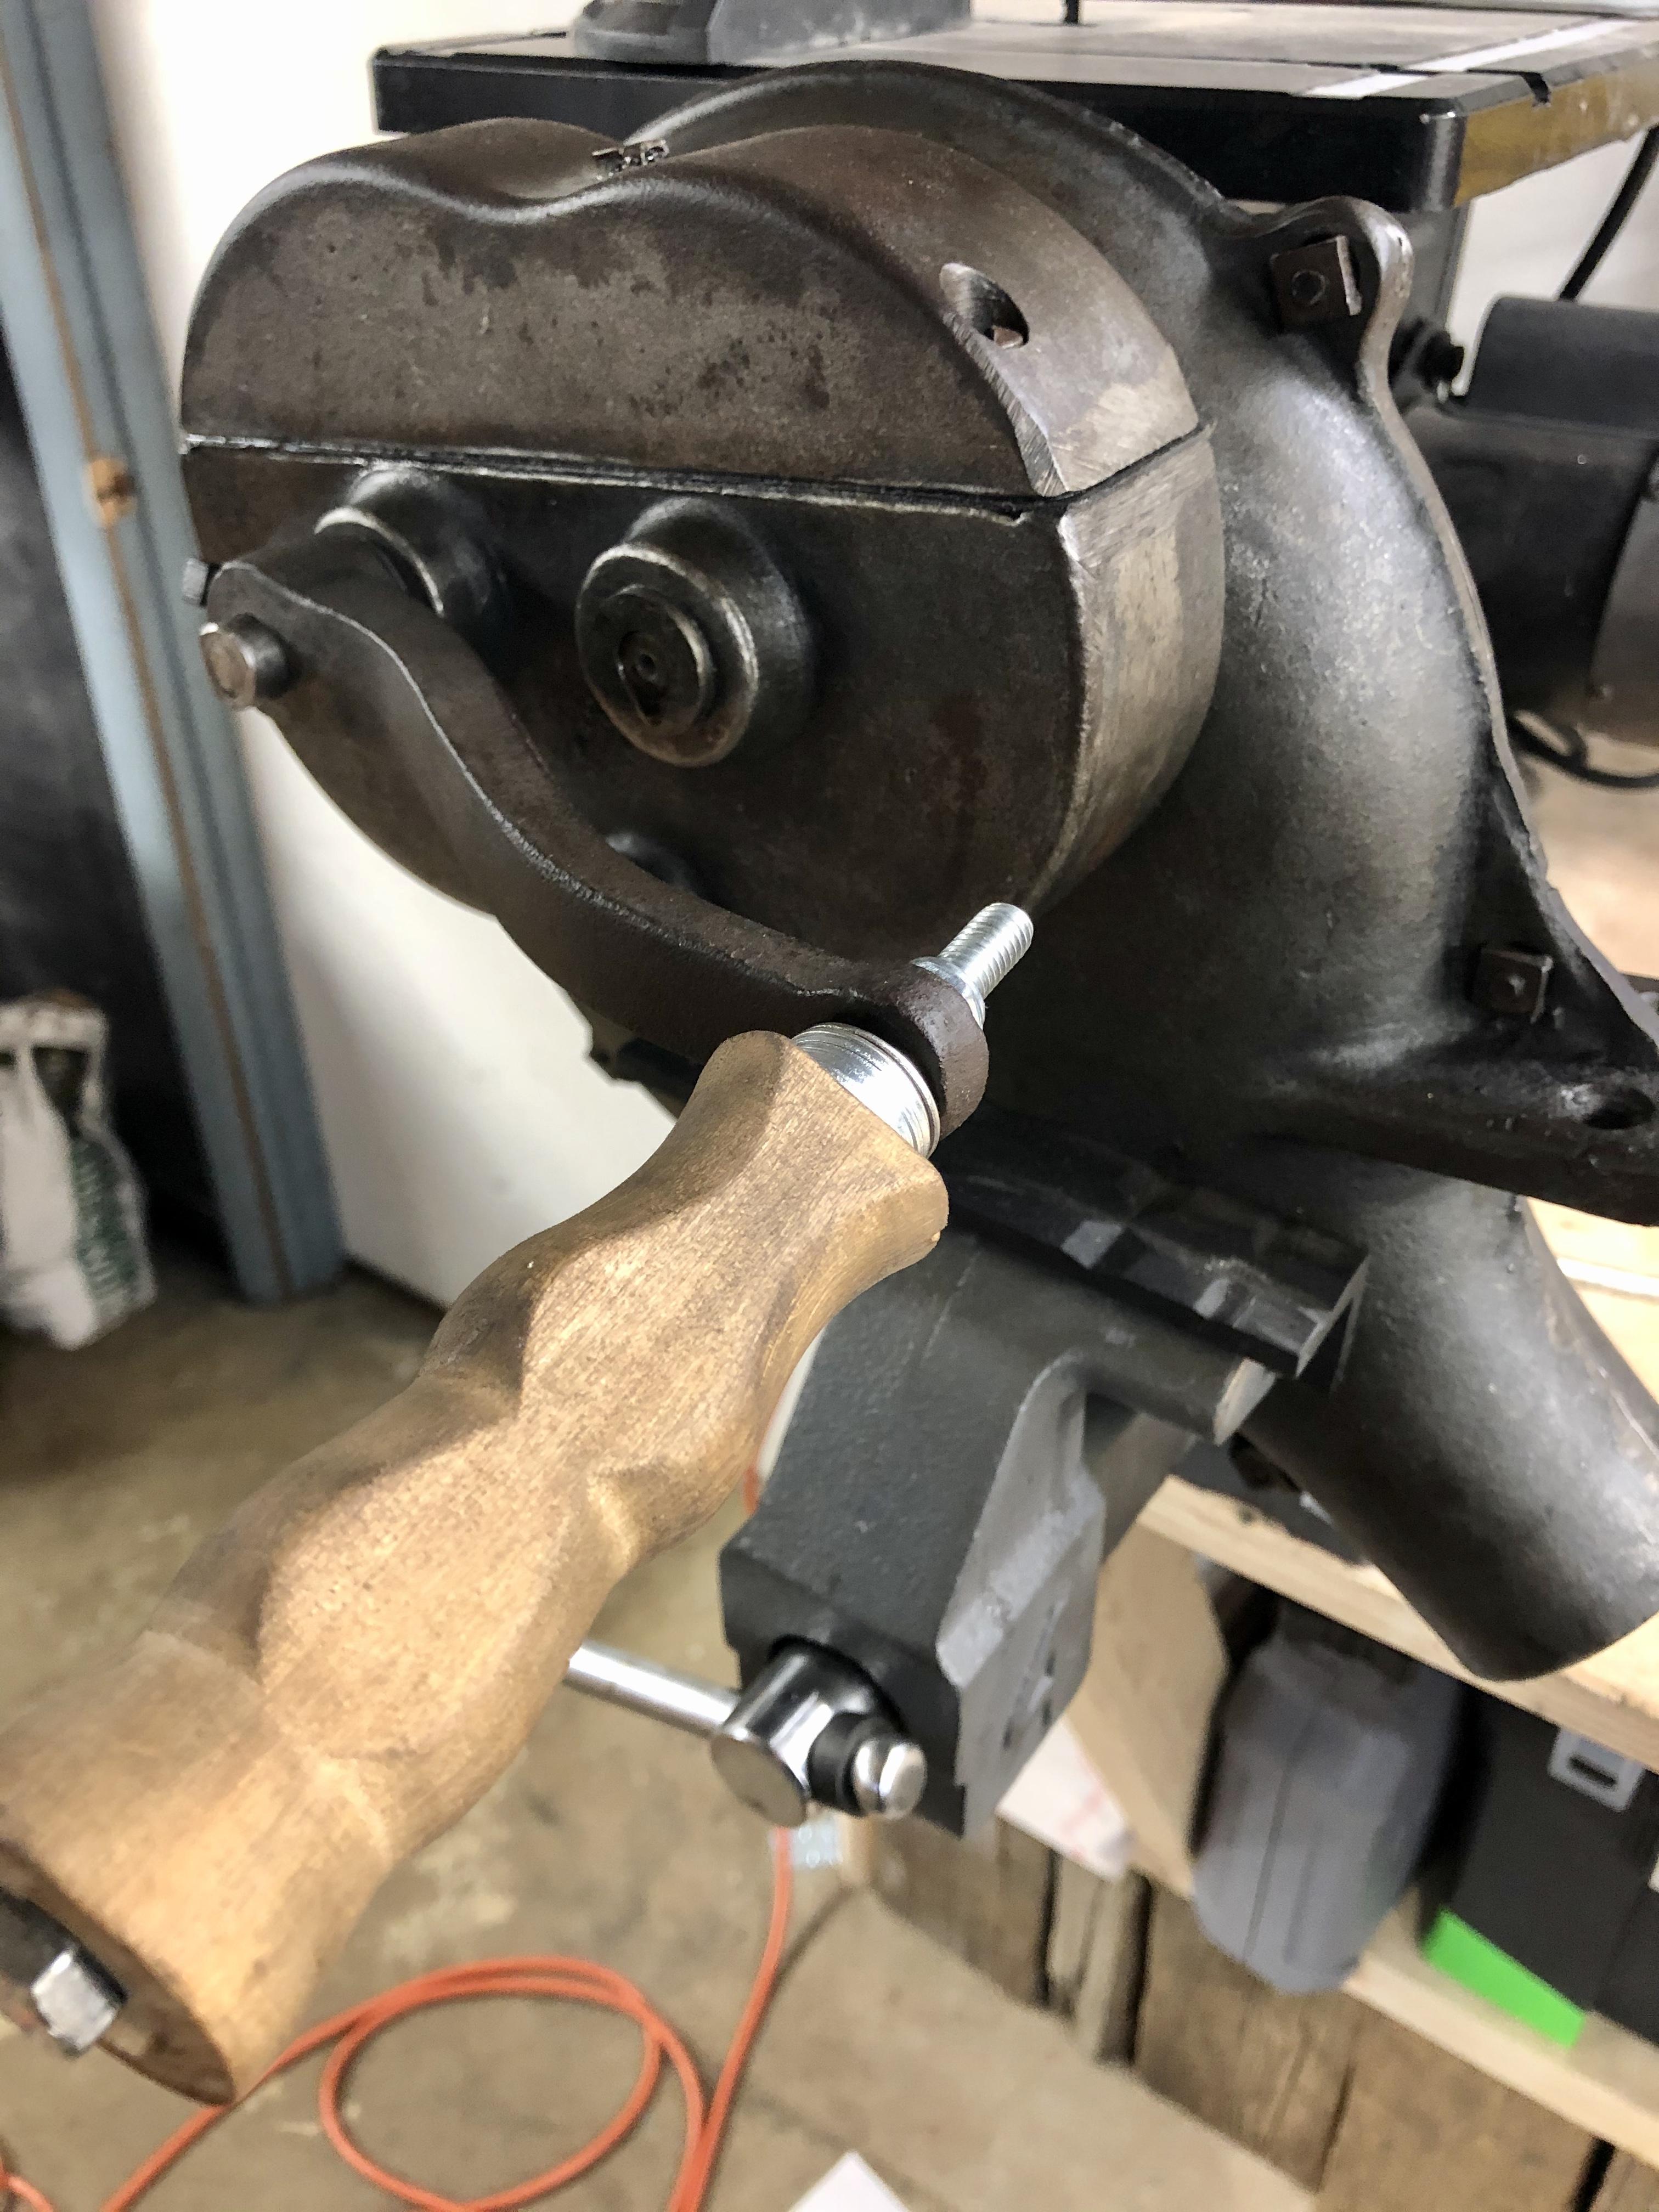
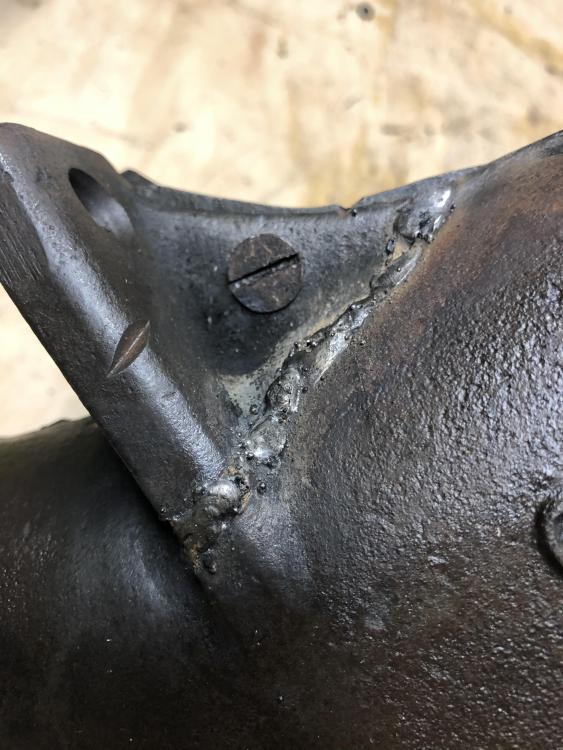
Thank you. I used my Forney Easy Weld 261, 140 FC-i MIG using 120V power. Not a beefy welder but my first one and it worked well. Got penetration into the crack without deformation or melting.
-
Awesome will do. I have some Lucas gear oil and will not use too much. Thanks a bunch!
-
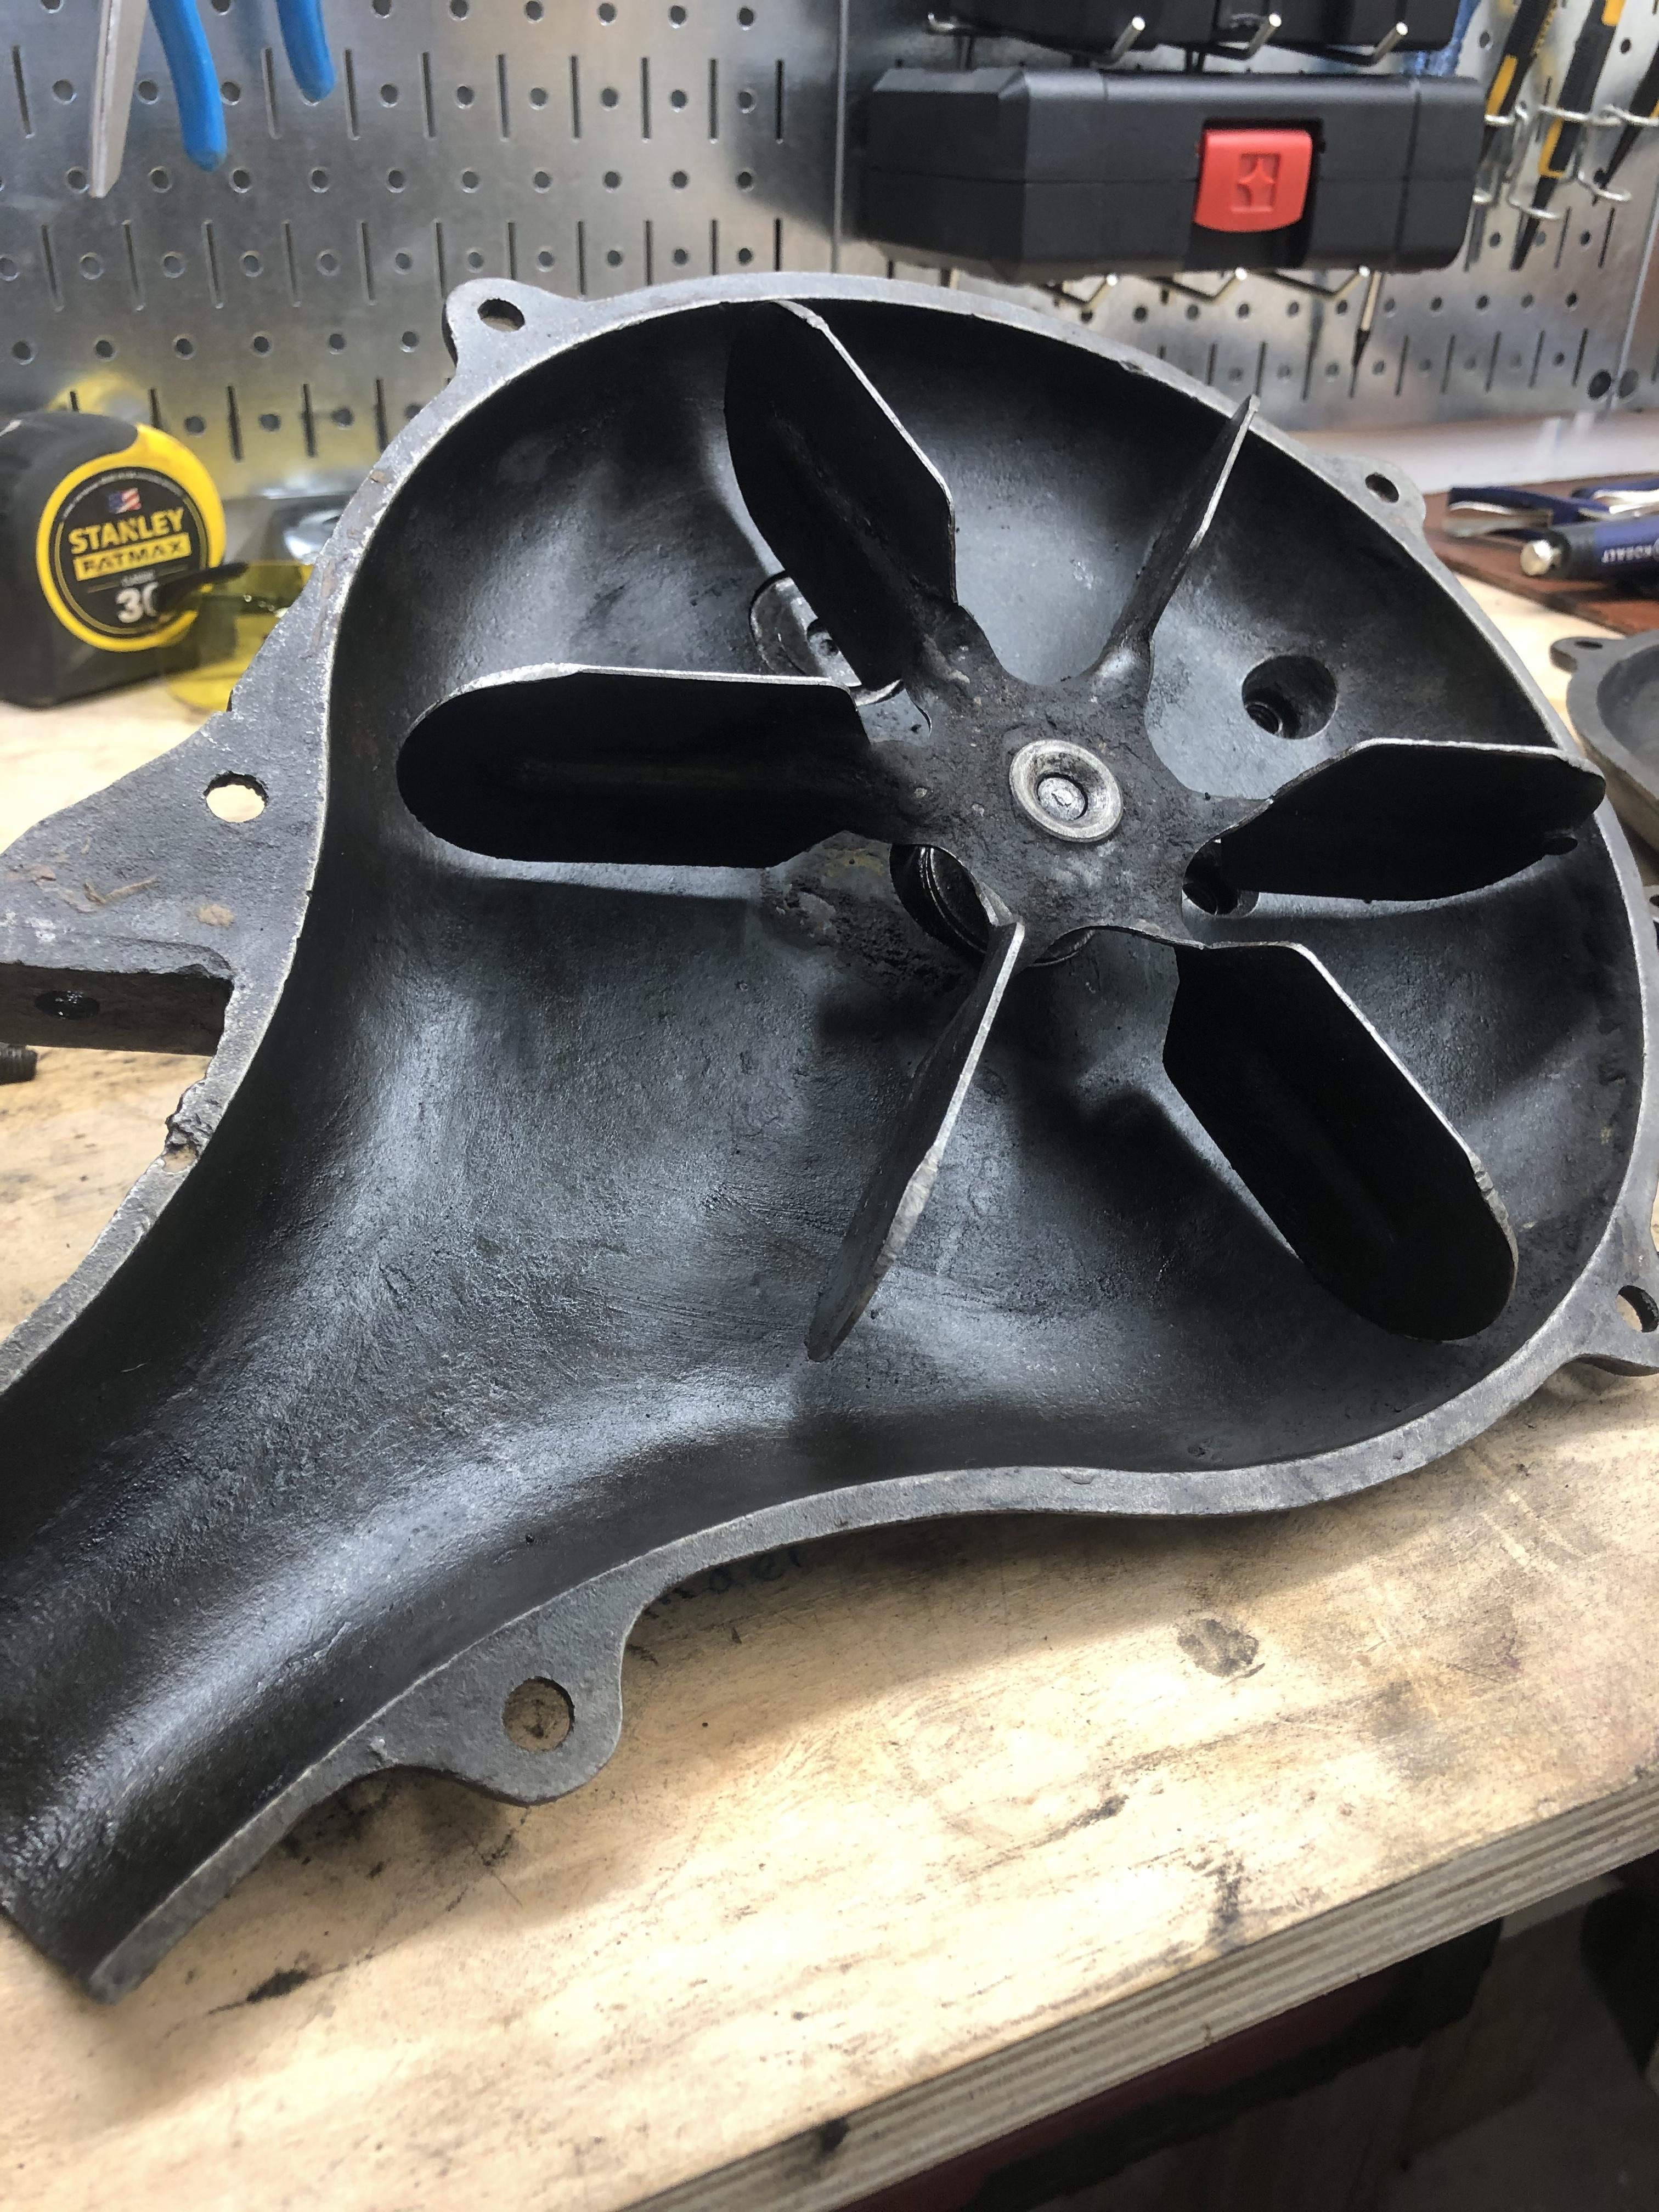
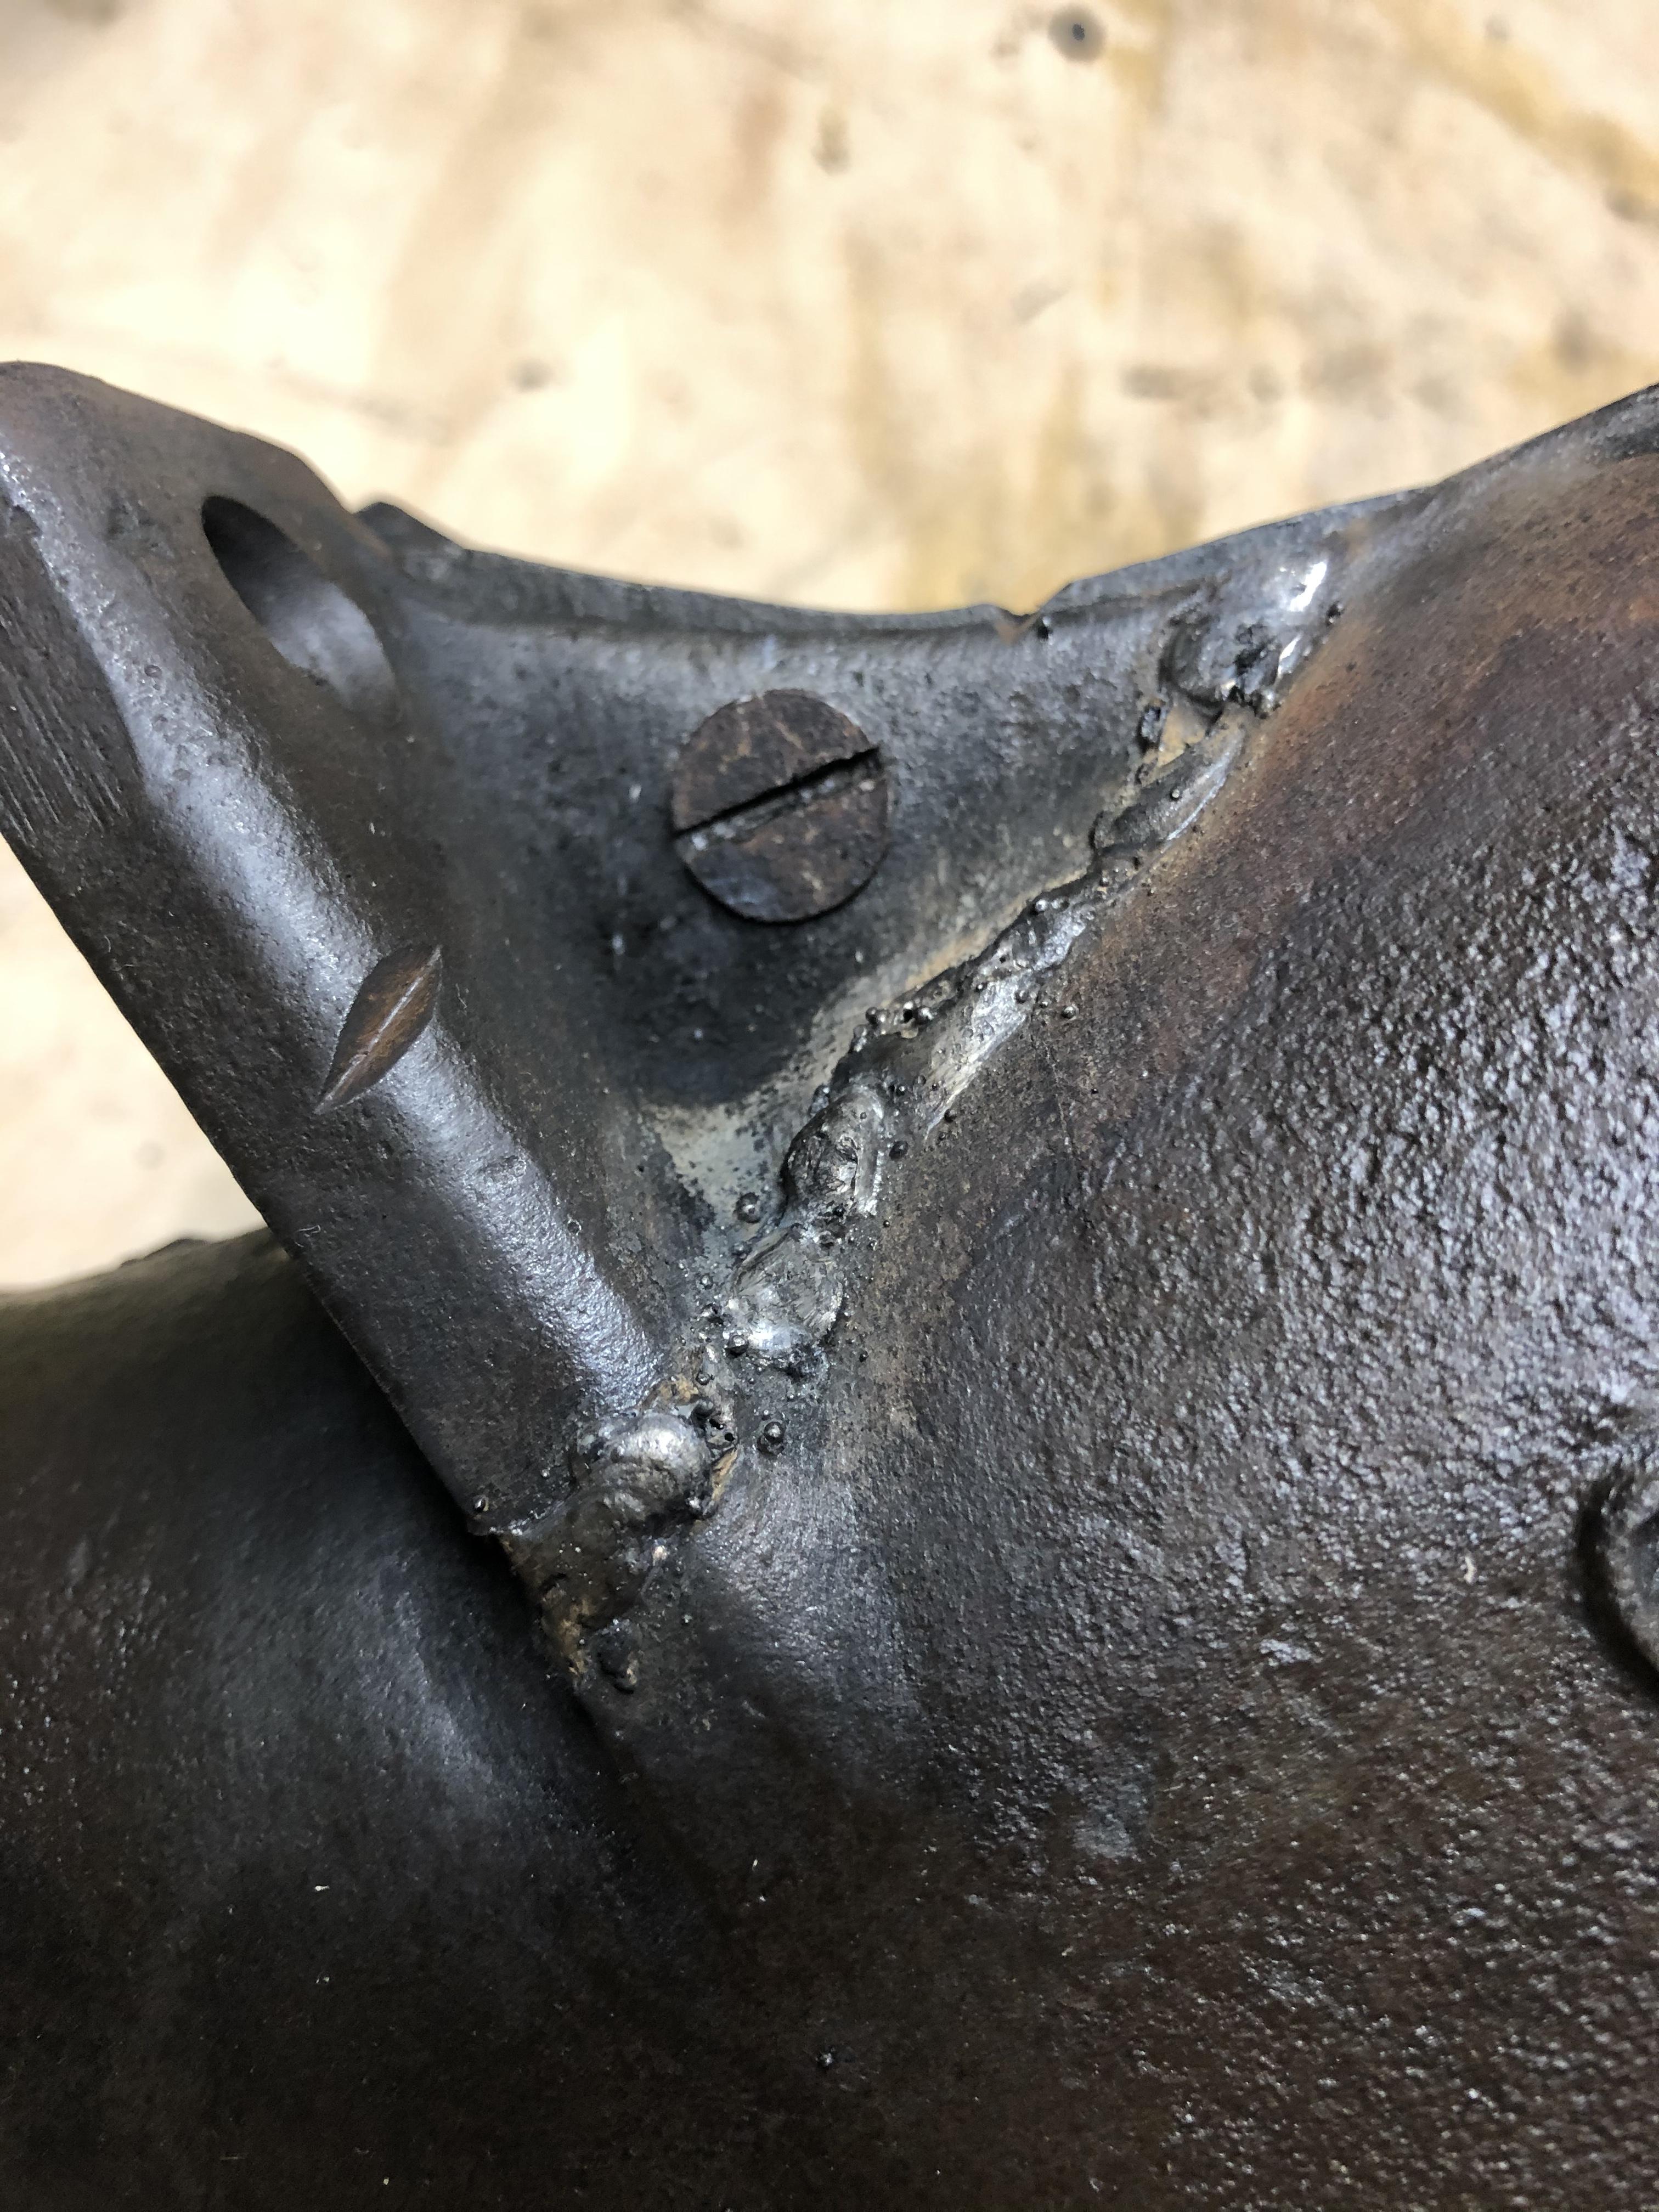
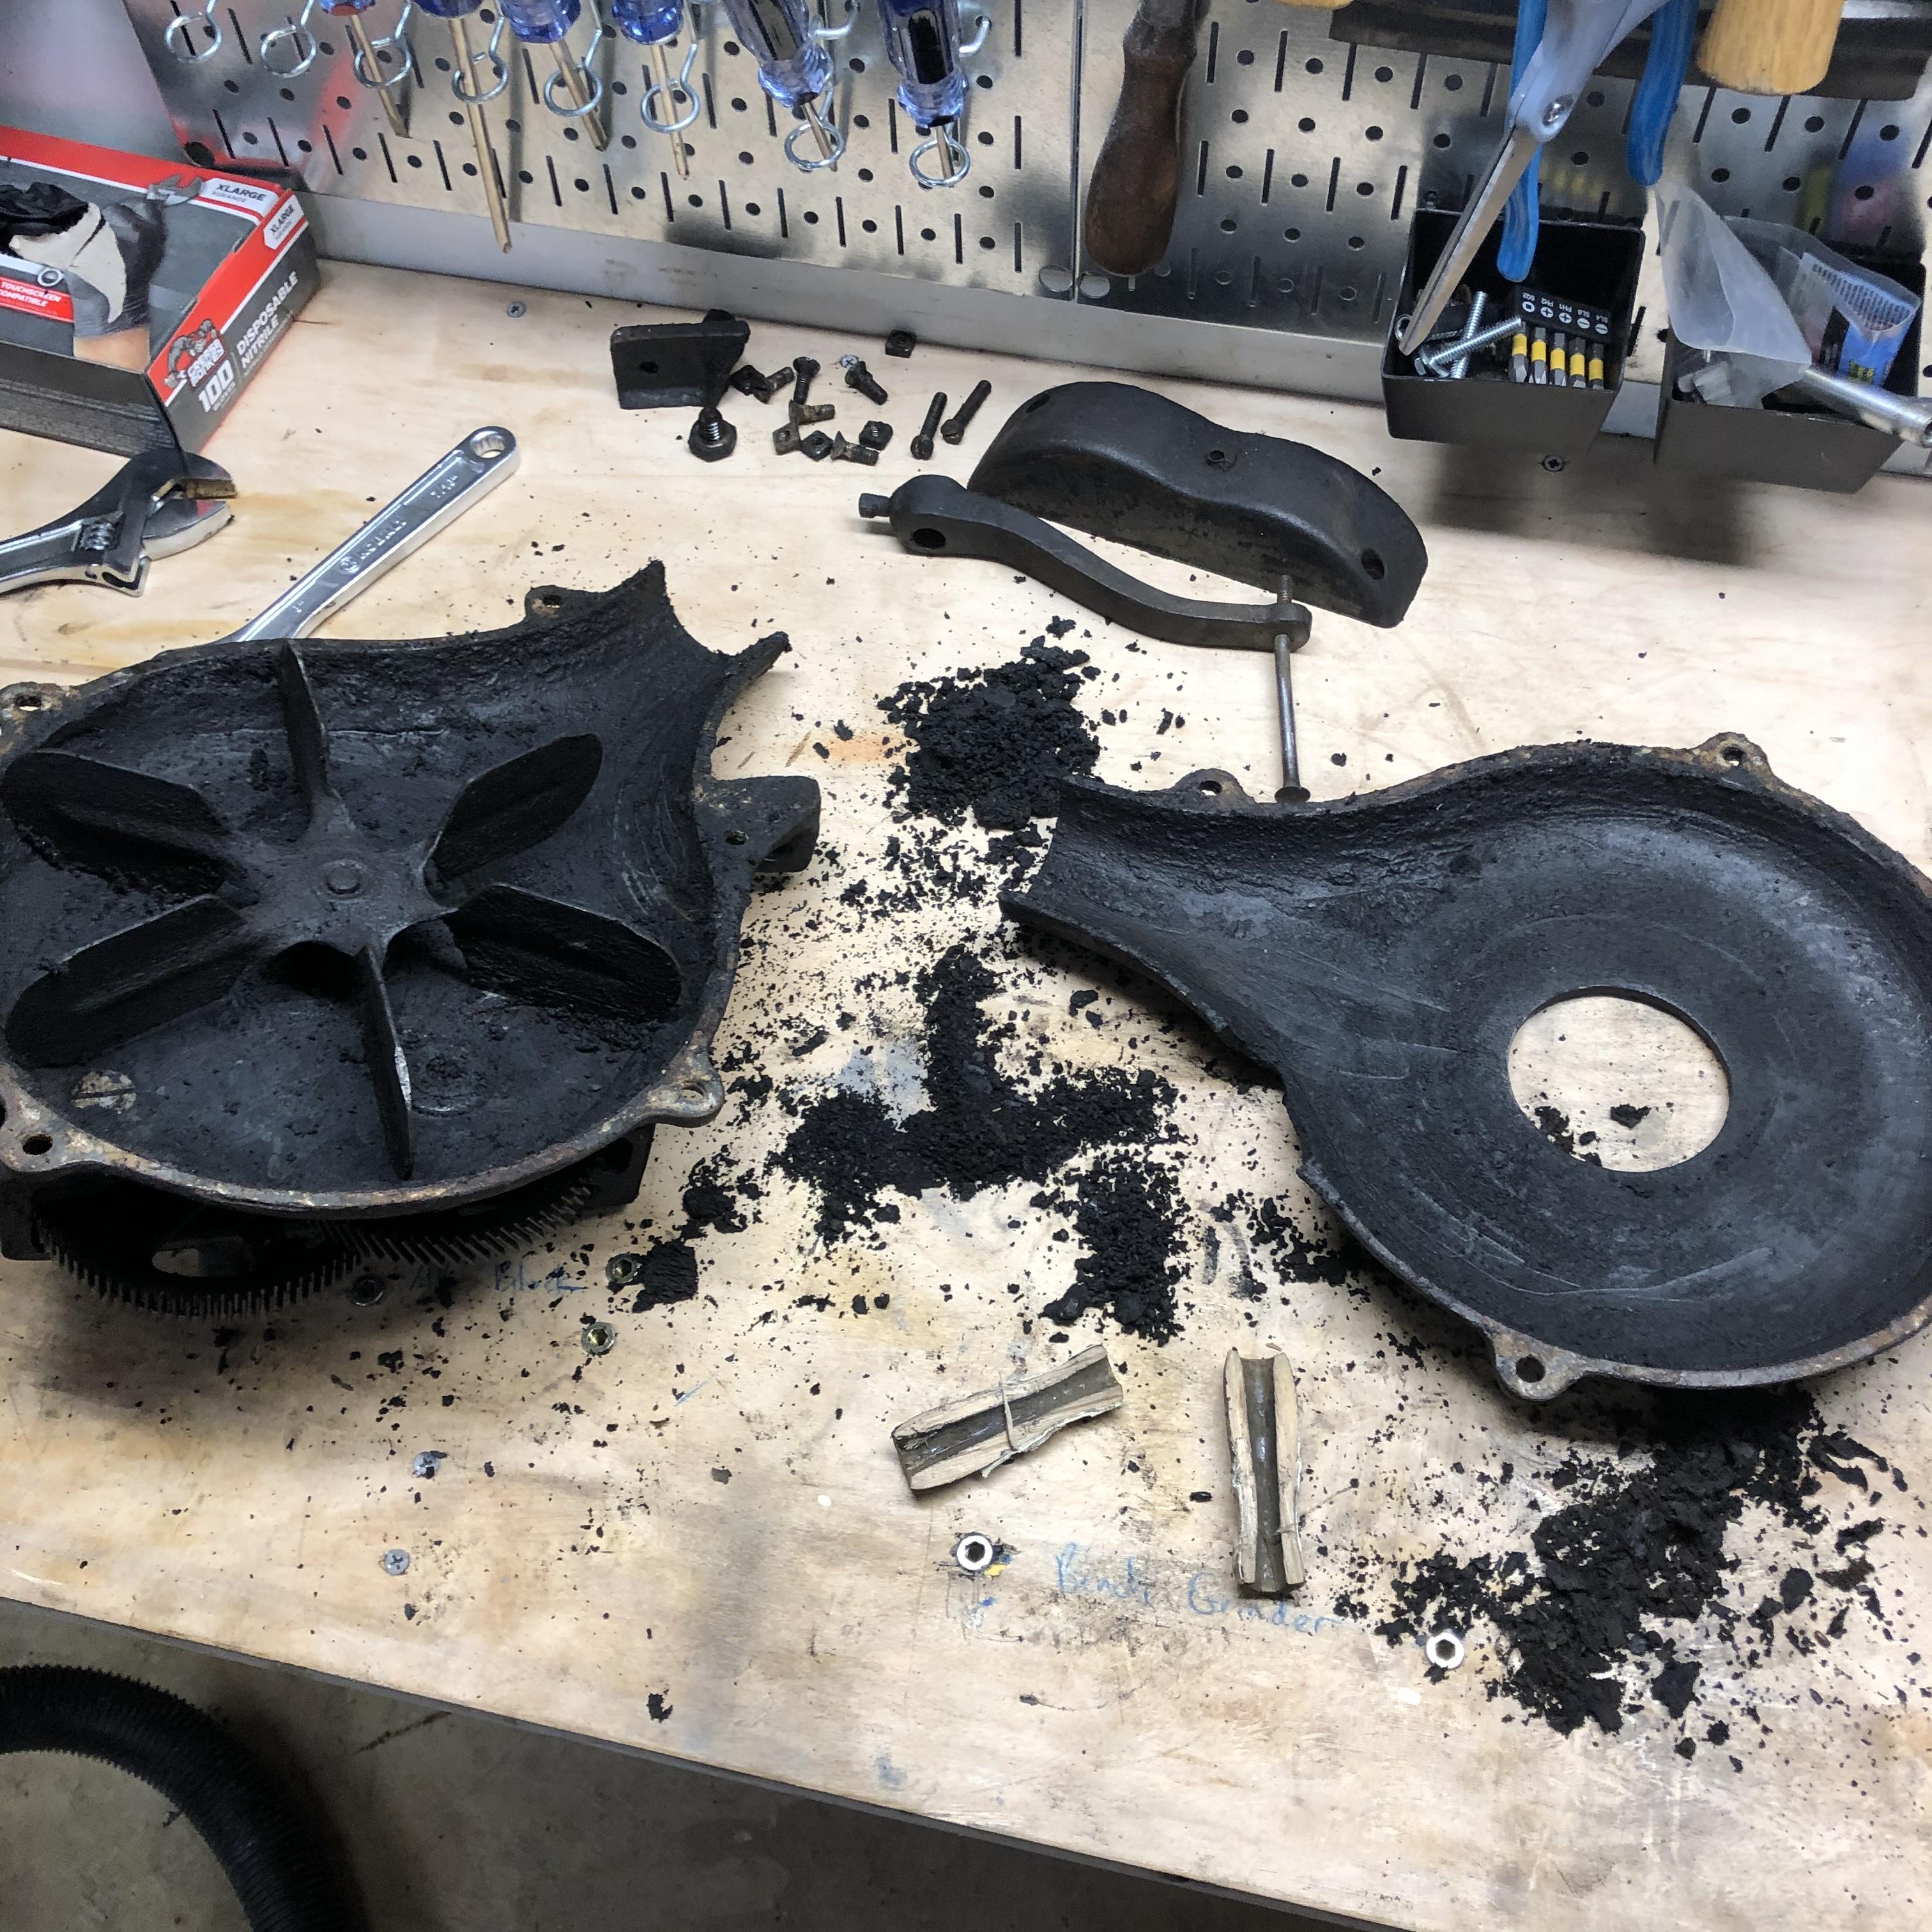
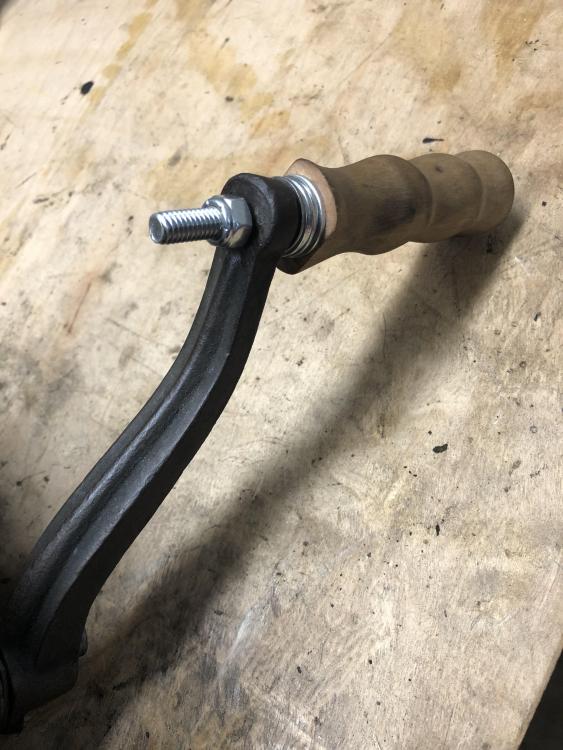
The 50/50 acetone, ATF, and Seafoam mixture really did a number on the sludge. It’s gone. Put it back together today and a couple of things of note: 1.) JB Weld didn’t hold the broken piece together, so I had to weld it. I welded it from the outside to keep bead away from the spinning blades inside. Worked great. Didn’t melt or warp it, and it’s holding solid. My welding skills are below noob level. Forgive the sloppy work. Learning as I go. 2.) I had to re-handle it, as you can see. I don’t have a lathe, so I had to improvise. I bought a wooden-handled paint roller, took the roller out of the handle, cut it to size, drilled the 5/16” hole all the way through, and bought a new 5/16”-18 6-inch long carriage bolt and washers for spacing. Works great and is larger than the original...and less cracked. 3.) I need to let the gearbox dry out before putting the top cover back on and adding oil/grease. Will likely let it dry for a couple of days to be sure. 4.) I added white lithium grease to the bolts to help prevent rusting and seizing. I hope that was ok? I researched it and it seems good for this application. Thanks for all your help and guidance. I doubt this blower will ever not leak oil because it’s not perfectly sealed around the fan shaft that runs through the gearbox. Maybe I’m wrong about that, but I didn’t take it apart per your recommendations.

-
Yes sir, I’m over it as well and thanks for the helpful advice. That goes for all of you. I will consider all of it and will post up when I’m finished. The week of soaking is probably the direction I’ll go, then I’ll try to determine the best way to weld that piece back on. I don’t have a torch, but definitely have access to one. I’ve used JB Weld a lot, and hadn’t considered that until now. Seriously, thanks for the forgiveness. I’ll do better the next time I’m feeling like a 2-year-old.
-
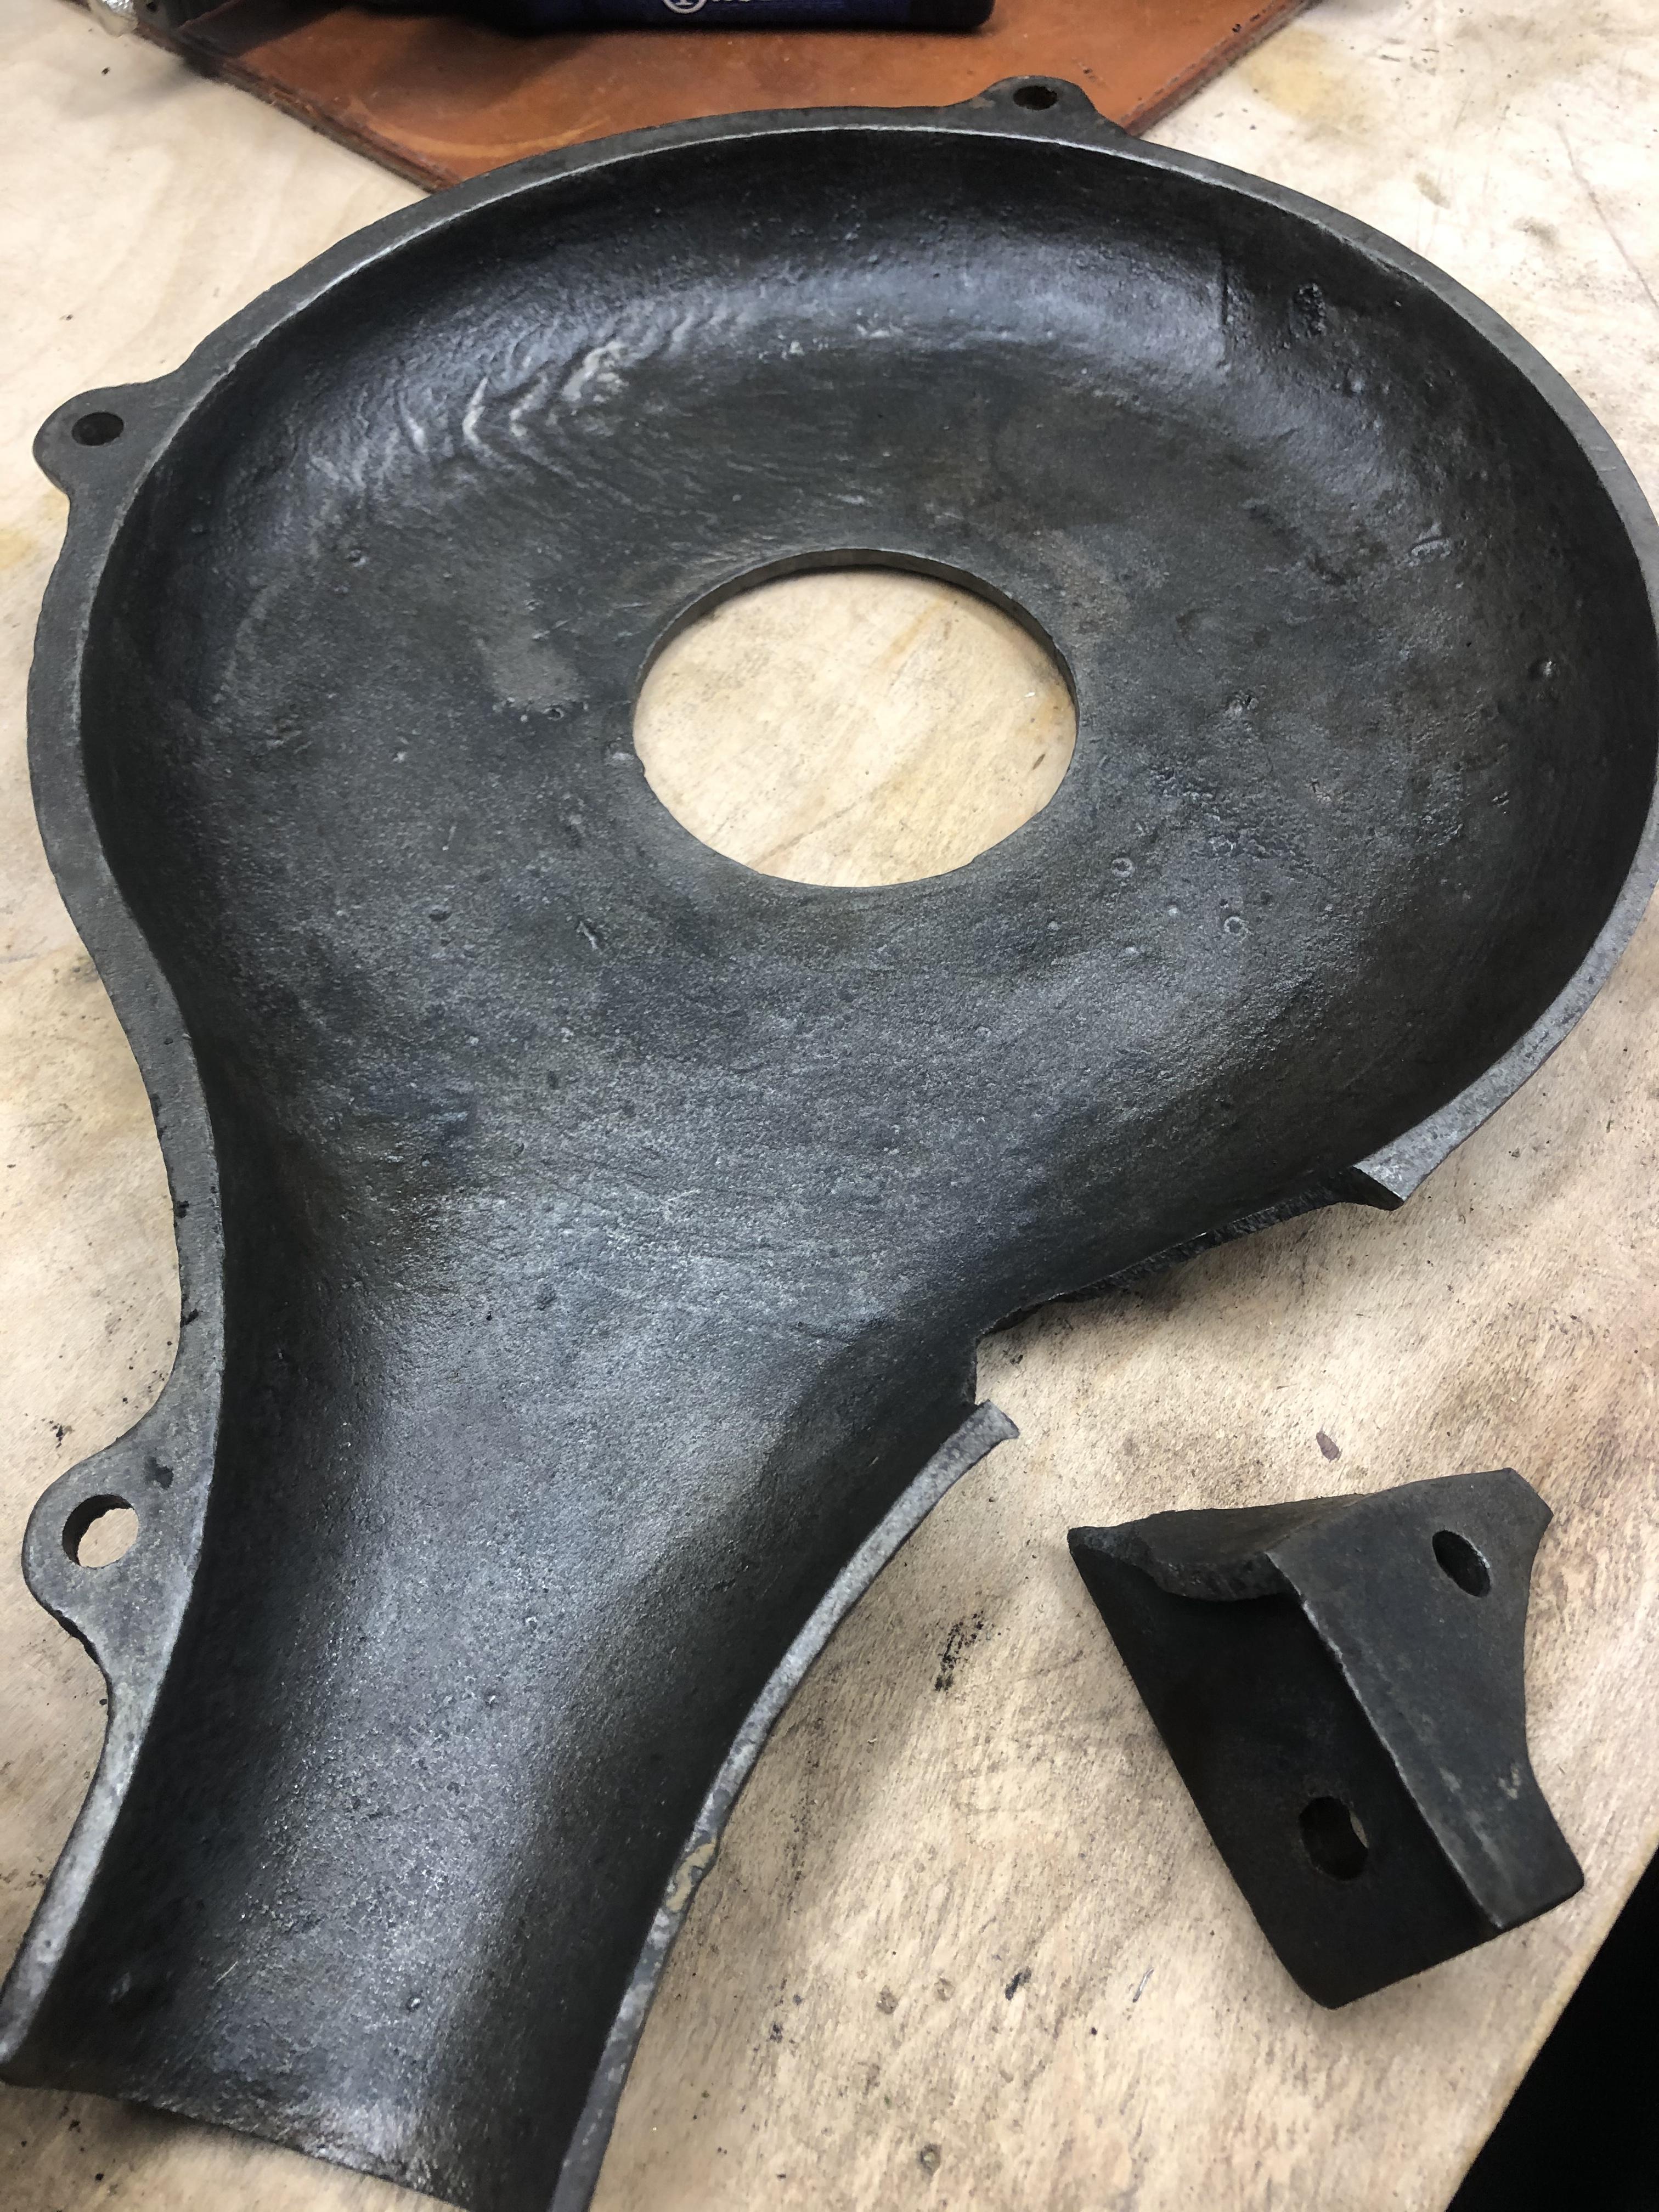
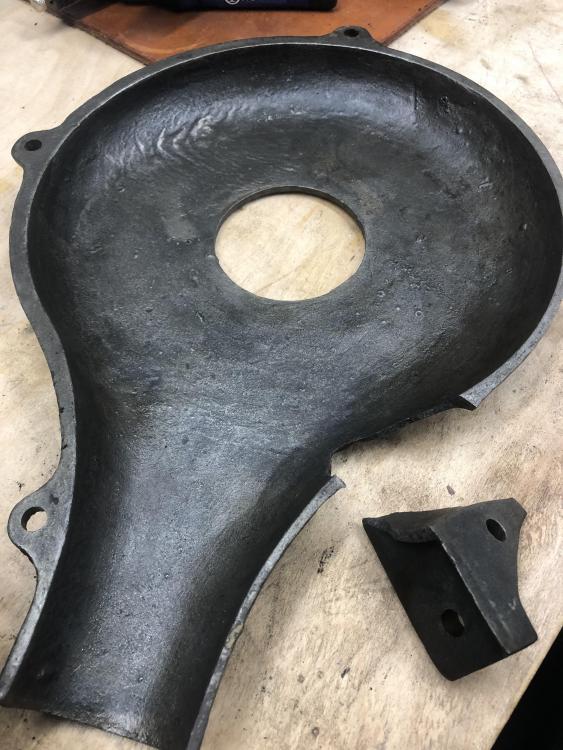
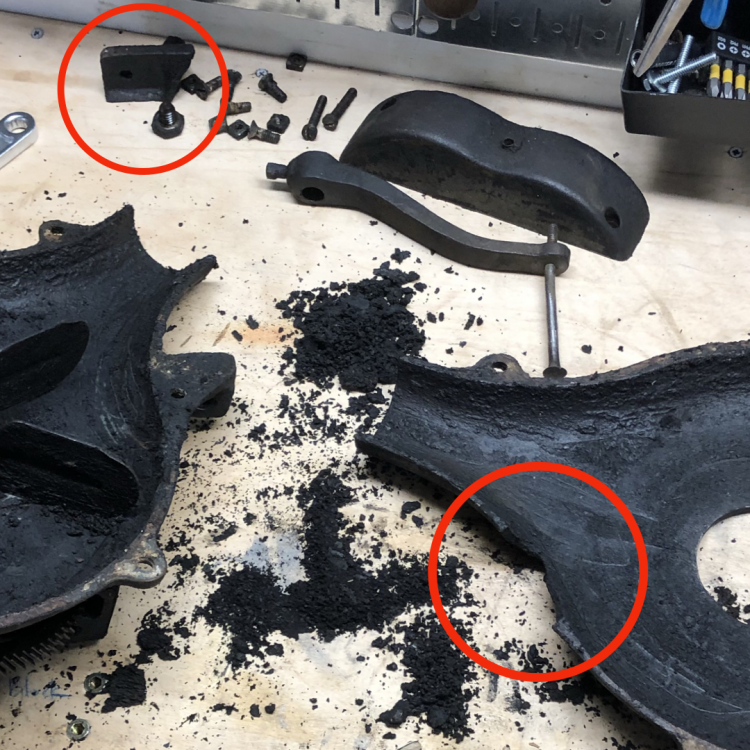
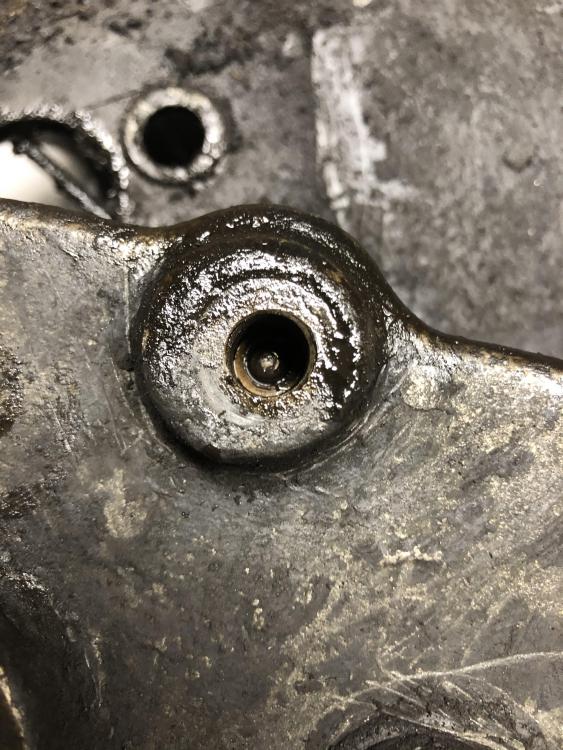
Ok everyone, perhaps my response was a bit terse, but I already had it apart from the pictures, so the warning - while maybe beneficial to the world - I perceived as being a bit sarcastic. My bad. Honestly, sorry. I hate the Internet. It’s a necessary evil and it bothers me. I’m skeptical of people I don’t know, and when I ask for help I don’t particularly like perceived unhelpful replies. I didn’t take the gearbox apart. I actually listened to and heeded Thomas’ advice. The club guys said I could take it apart and reassemble, as there’s a ton of talent there, too. Are they wrong? Right? I don’t know. Did you see in the picture that a piece of the blower is cracked off (see picture attached), and that the gasket is totally gone? I didn’t do that. I need to weld the piece back on and re-gasket the case. Or not? Perhaps this one’s already toast and ready for the parts bin. It was in poor condition when I got it. No oil. Gears grinding. Very stiff and sluggish mechanism. Handle was taped due to a split down the middle and a bent carriage bolt was holding it on. Maybe this is how they all are? I have never once heard from anyone not to take it apart to clean/restore it. I’m trying to salvage what I can and I thought I could take the fan out to better clean the gearbox half of the case. If I can’t, ok, I’ll clean around it another way. I did listen. I didn’t stomp away mad. I apologize for my initial response to you, Thomas.
-
It’s not functioning properly and is caked with oil and dirt so badly that...never mind. I come here for help and I get “why are you doing this?” Thanks anyway. I’ll take it to my local smith club and get help there.
-
Hello all. I’m taking apart this old blower and it’s absolute sludge inside. I have it mostly apart, but I can’t find a way to get the fan shaft out. I removed the screw by the fan blades to loosen it from the other side, but the shaft goes all the way through and I can’t find a way to get it out. Thanks!

-
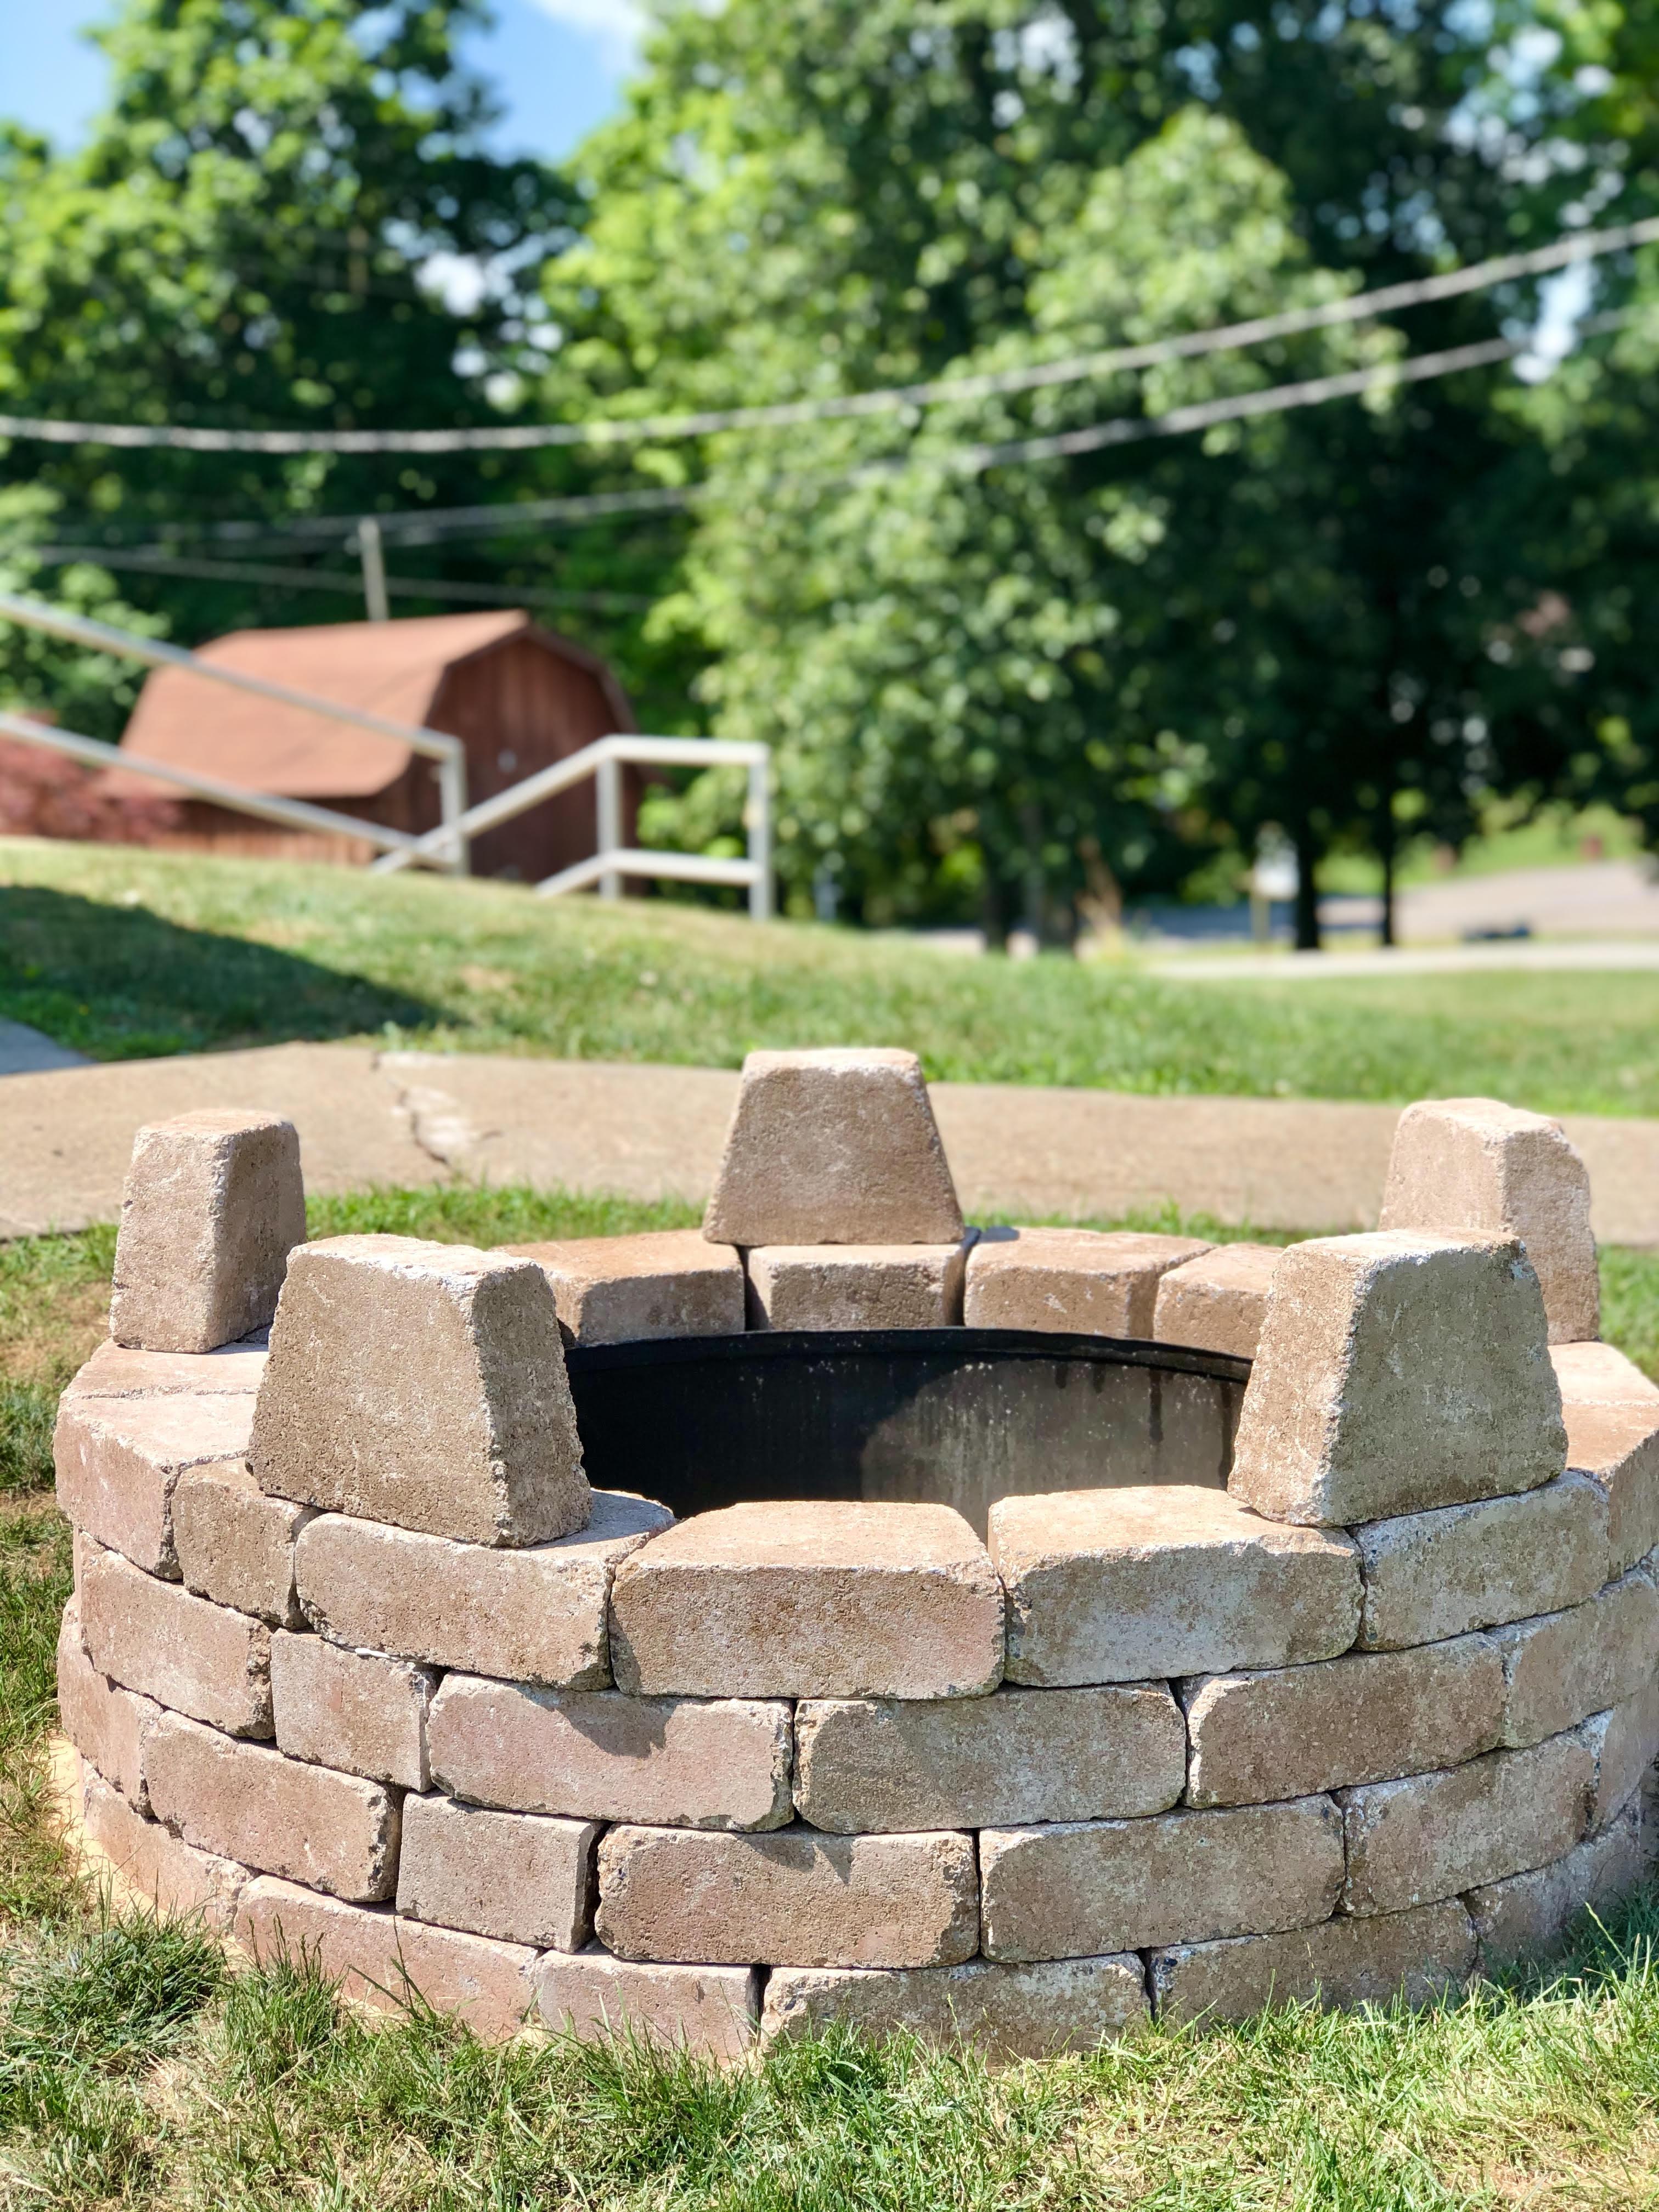
Hello all. So I recently built a stone block fire pit at our house, and I think it turned out quite nice for my first attempt. The five extra blocks that make it look like a castle were a last-minute addition because I had the five left over from the Home Depot delivery (they actually gave me four extra blocks than I ordered). But now I'm thinking it needs a blacksmith's touch. I could use a masonry bit and some rivets to mount some iron accents around it, but looking for ideas from those who may have attempted a similar thing. Do I use 1" flat bar and some homemade rivets to put a band around it? It's not perfectly circle, so each band would need cut to the 10" width of each block around the third row up or so, I was thinking. That may be a lot of work and drilling, though. My wife was thinking some accent pieces on the five blocks that are sticking up. Thoughts? Thank you in advance for your ideas!

-
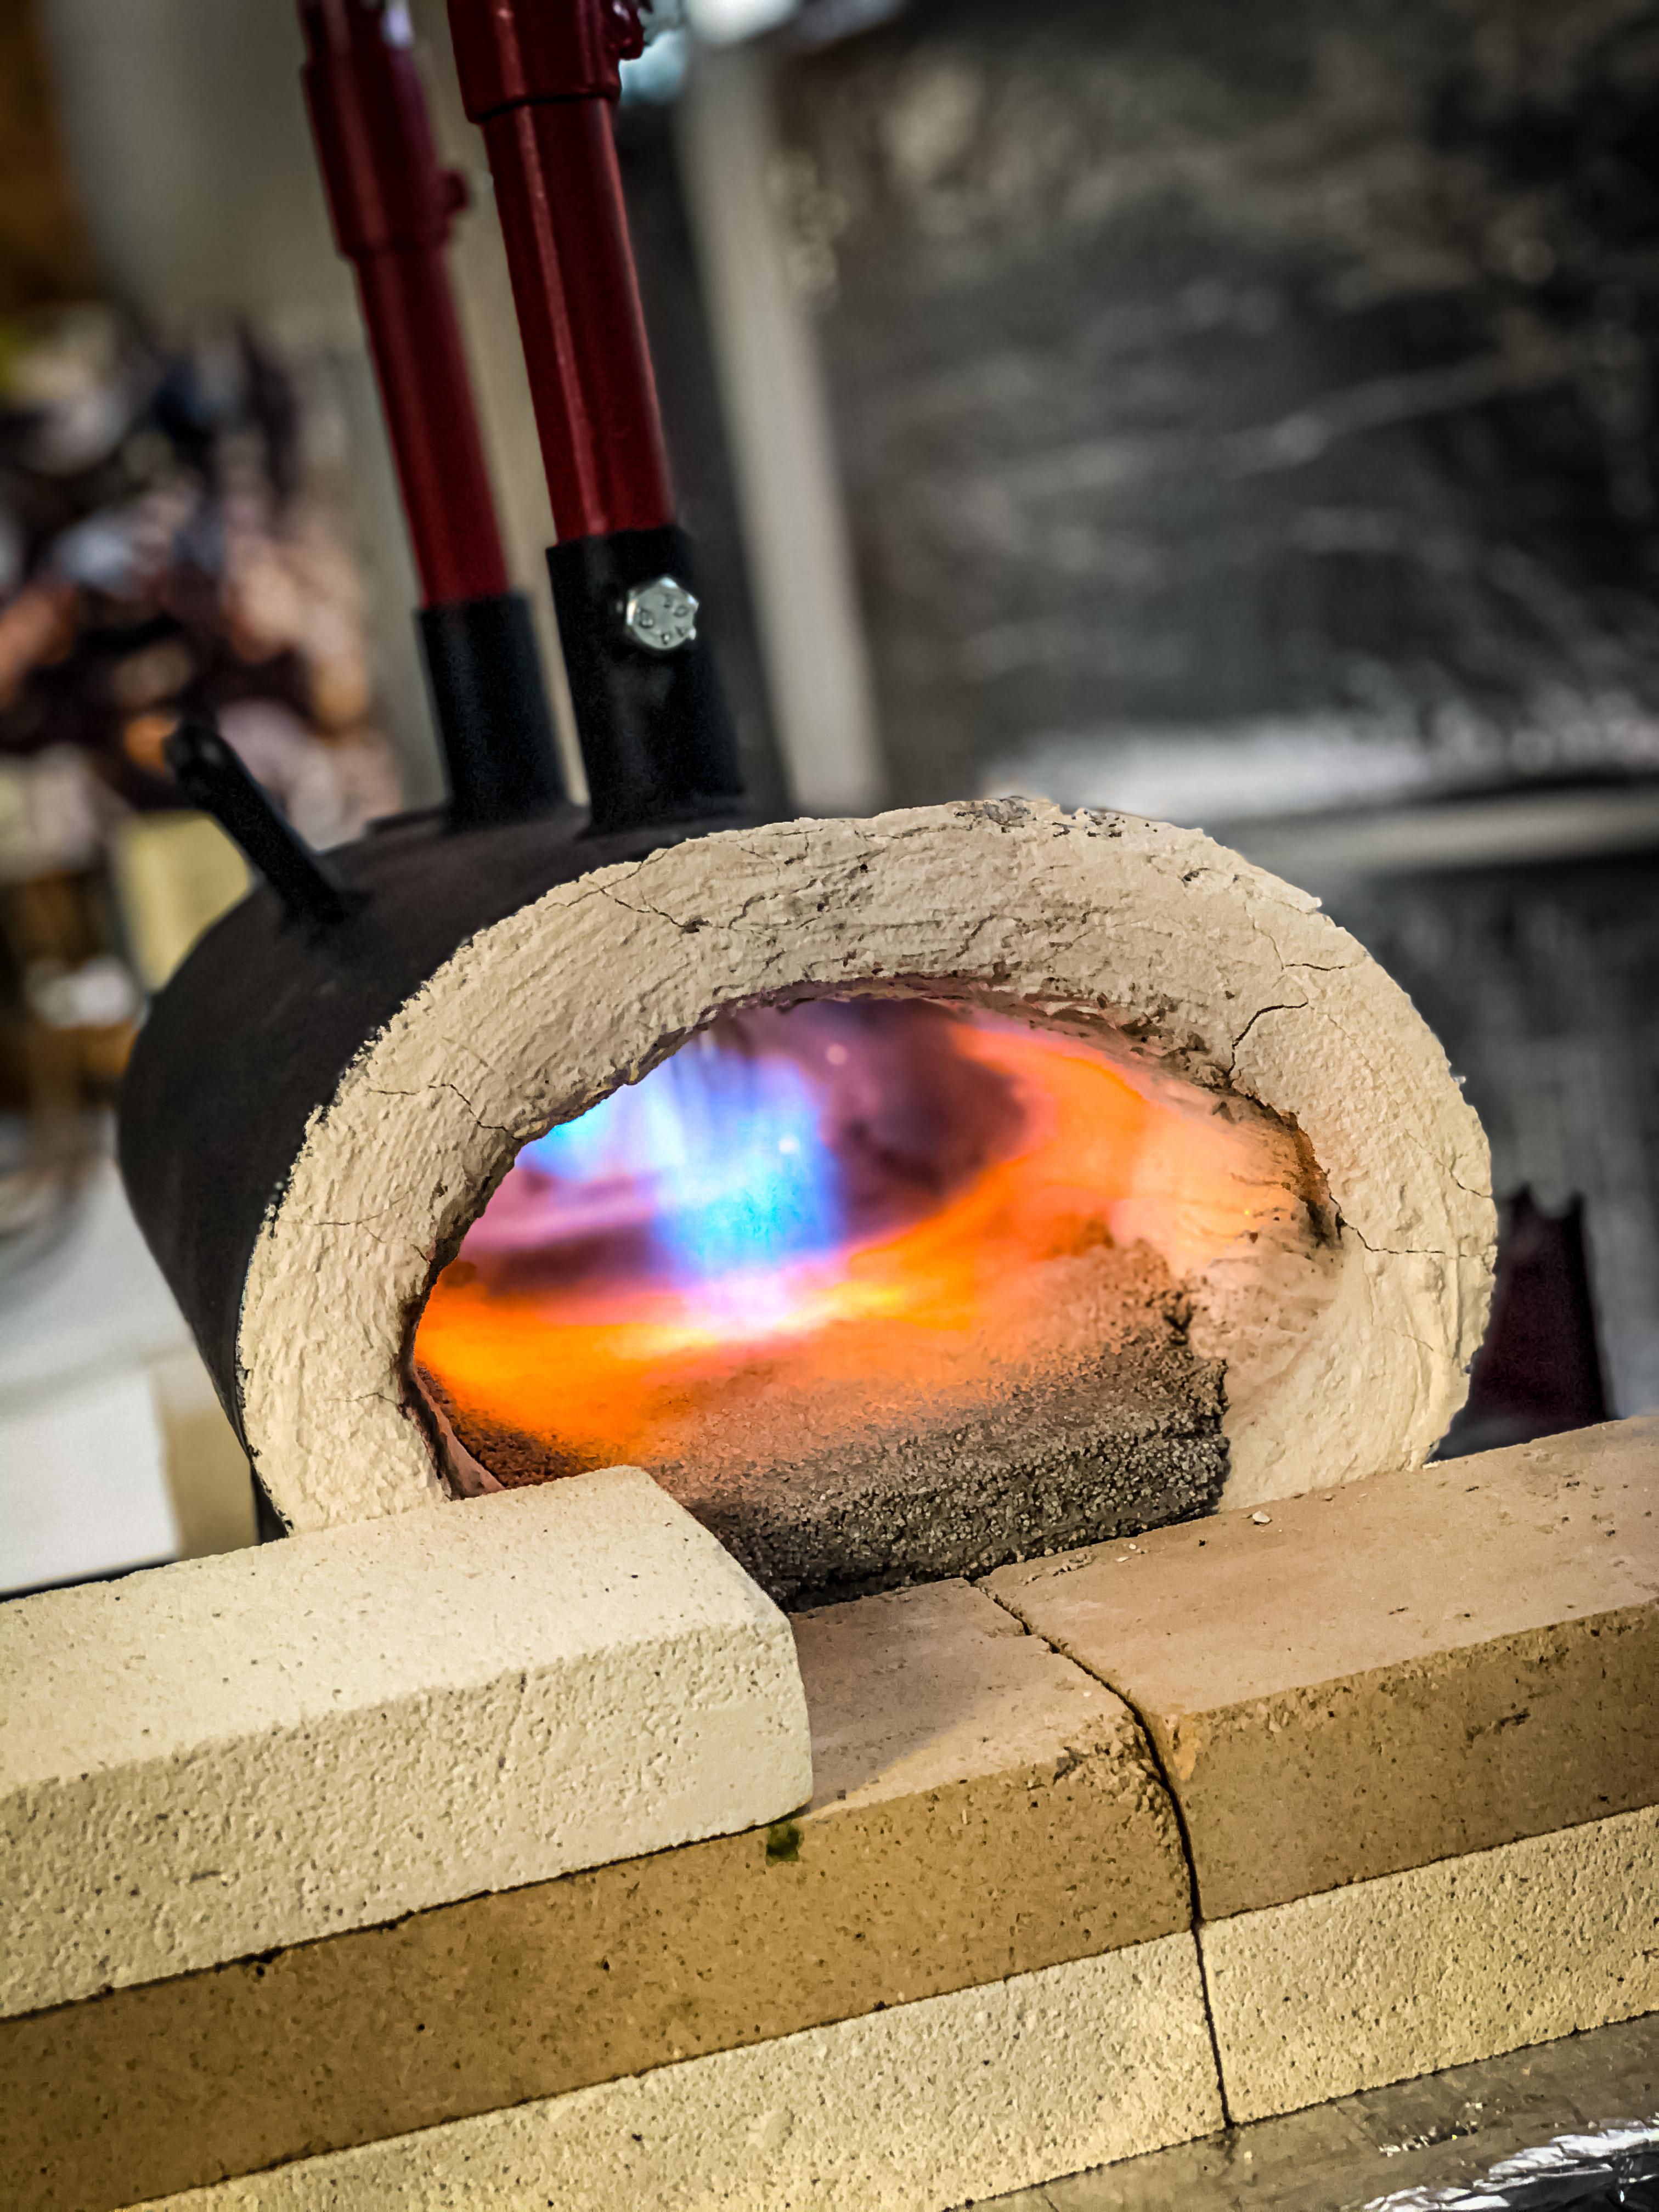
Thanks to Glenn and Frosty and everyone else who helped me with the Kast-o-Lite 30 process. I was able to easily install it as the floor to my gas forge. I let it set for far longer than it needed, using the plastic bag and spray bottle method. I fired it up today with both burners and let it run for maybe 4 minutes. I shut the burners off and am letting it set overnight. I heard a little snap and crackle popping when I turned the flames off, so that must be the water sizzling out of the KoL? No steam explosions occurred, but I didn’t run it for too long. Should be good to go? This is far better than the fire brick floor that the forge came with, and now I can use the bricks as a shelf.

-
Does anyone have 5lbs of Kast-o-Lite I could buy from them? My forge is small and I’m not buying a 55lb. bag! All I need is 5lbs max. Anyone? The rest of the options are out of sight price-wise for what I need.
-
So, I just bought my first forge: a Hell's Forge double burner, large capacity knife model. It's about 19" long, 7" wide, and 4" tall in the oval mouth (after compensating for the 1" blanket). It's a bit smaller than I may have wanted, but the deal is done and it's in my shop. The problem isn't the forge size, it's that they sent 1.25" fire brick along with it to use as the forge floor. That's fine, but it makes the opening even smaller. I'm not making knives, but I am making smaller projects as I'm a beginner blacksmith at best right now. The goal is to eventually get to knife making, so that's all fine. But an oval opening with a flat fire brick floor is a complete WASTE of space. There's a gap between the bottom of the refractory and the fire brick because of the oval forge shape. It just seems silly to waste space because of a thick fire brick as the floor. But, what are the alternatives? They don't make thinner fire brick because of physics and all that. I could risk cracking the refractory by exposure to the direct heat over time if I don't use the brick. My question is simply this: is there another solution to a forge floor other than 1.25" fire brick? Something thinner that would still protect the refractory? Thank you!
-
All this talk about water is making me thirsty. Sans lead or any other toxic material, of course.
-
Hello IFI. My name is Branden, and I’m a 42-year-old full-time pastor at a small church in Apollo, PA. We just moved to this area from further south of Pittsburgh. In September of this year (2019), my wife and I attended the Pittsburgh Renaissance Festival. That’s nothing new or exciting since we always go, but this year I decided to spend more time at the blacksmith shoppe. Glad I did! I got connected to a local club who taught me some basics for free! I made an S-hook, a letter opener, and a key rack so far. I think every beginner makes those first. LOL Anyway, I’m hooked. I have wanted to blacksmith most of my life. When I was a kid, I loved playing medieval-themed video games and reading about “old time” European culture. As with any fantasy fiction, blacksmiths are always a big feature (it’s always the dwarves...why is it always the dwarves?). This is a lifelong dream being fulfilled. I may not have my own forge for some time, but I am smithing with a local veteran one-on-one now that winter is here. What an opportunity! I’m eager and willing to learn, and I’m also watching the prayer requests section closely. You can count on me to be praying for anyone and everyone here to the best of my ability and memory. Hope to meet many of you soon!