8upSmith
Members
-
Joined
-
Last visited
Everything posted by 8upSmith
-
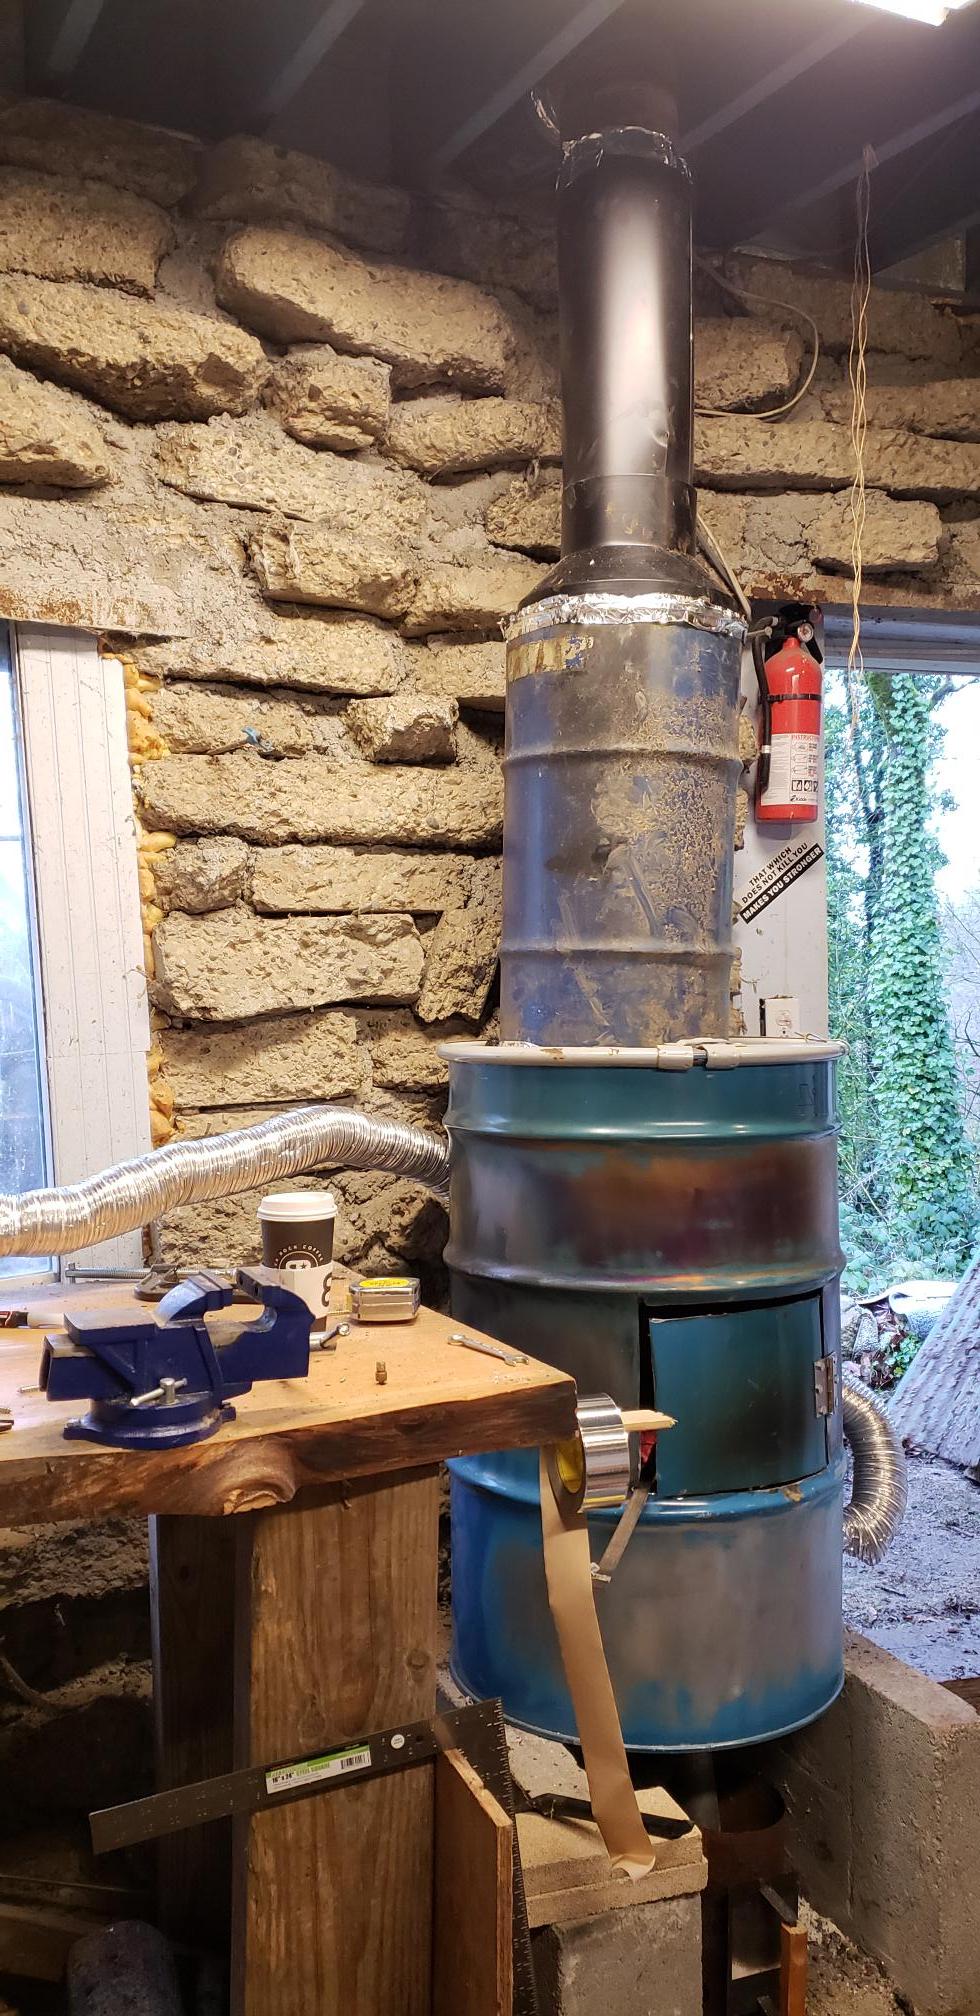
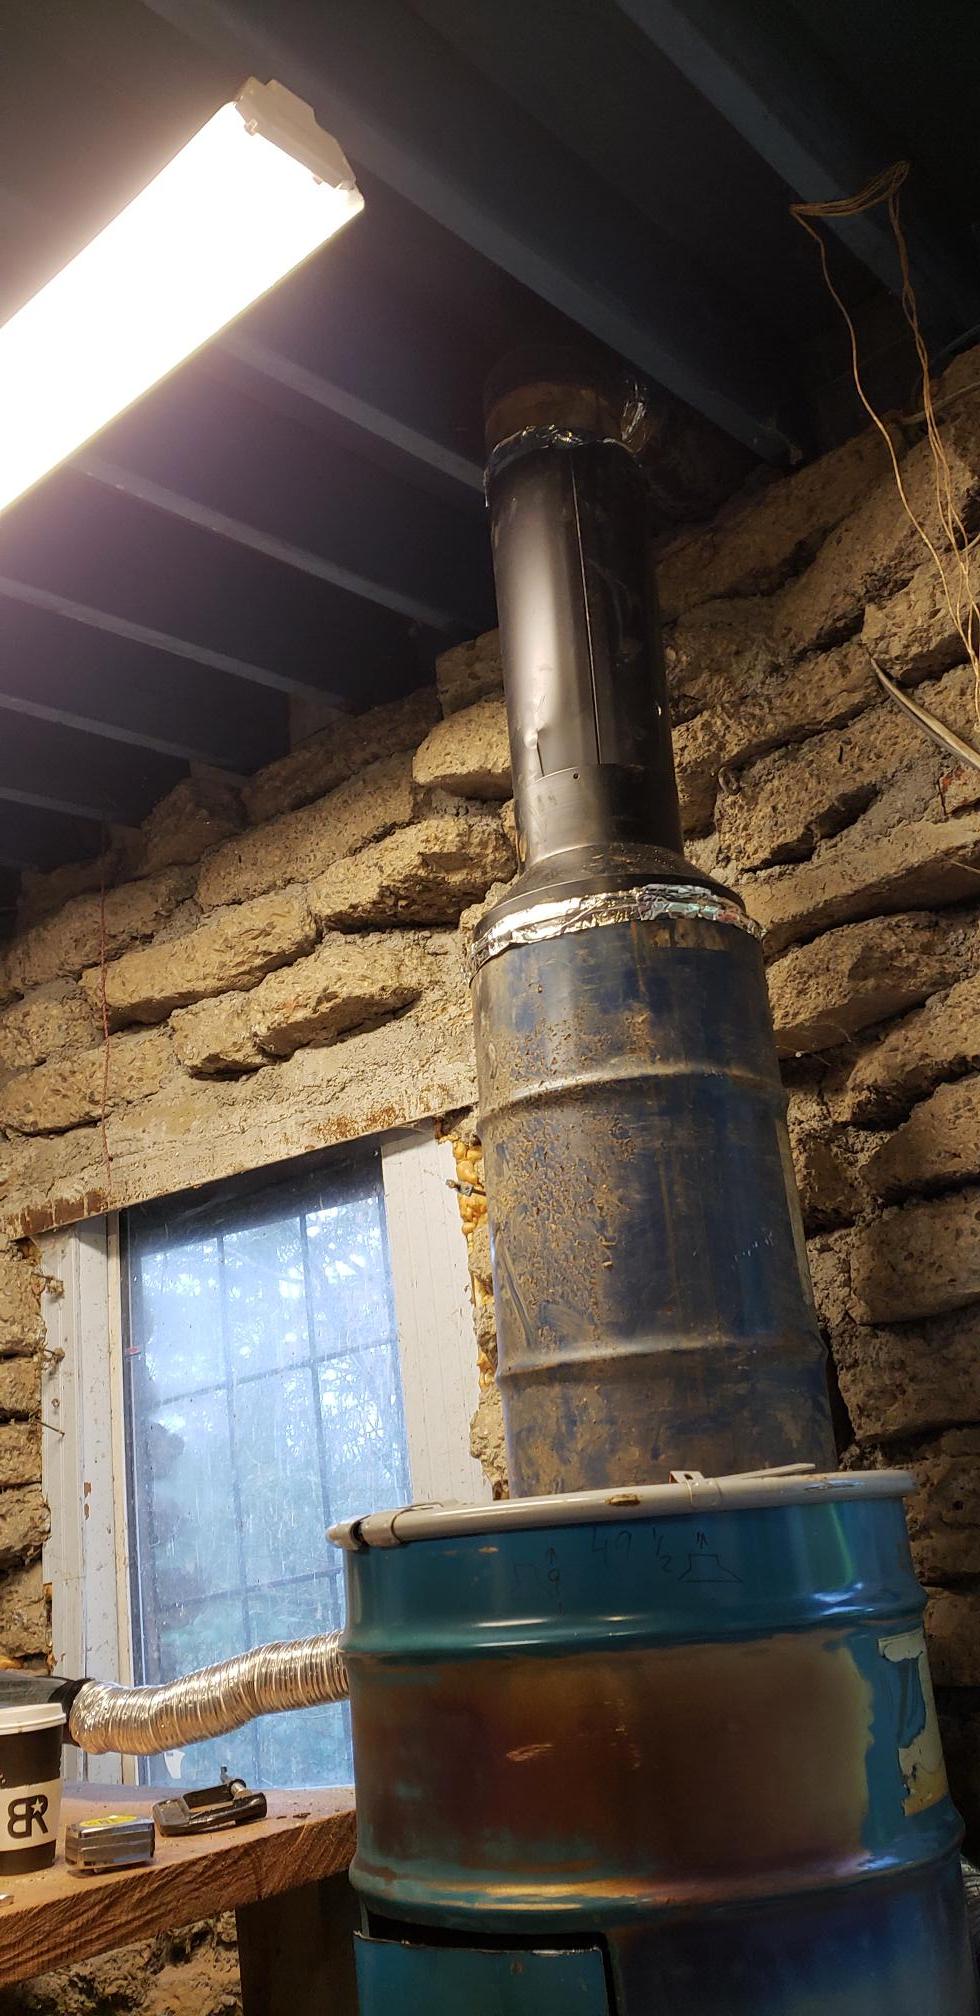
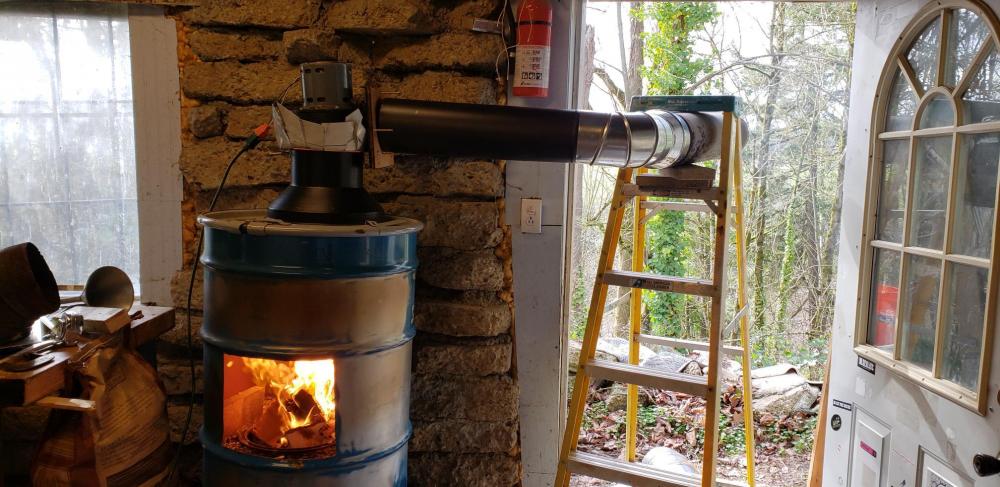
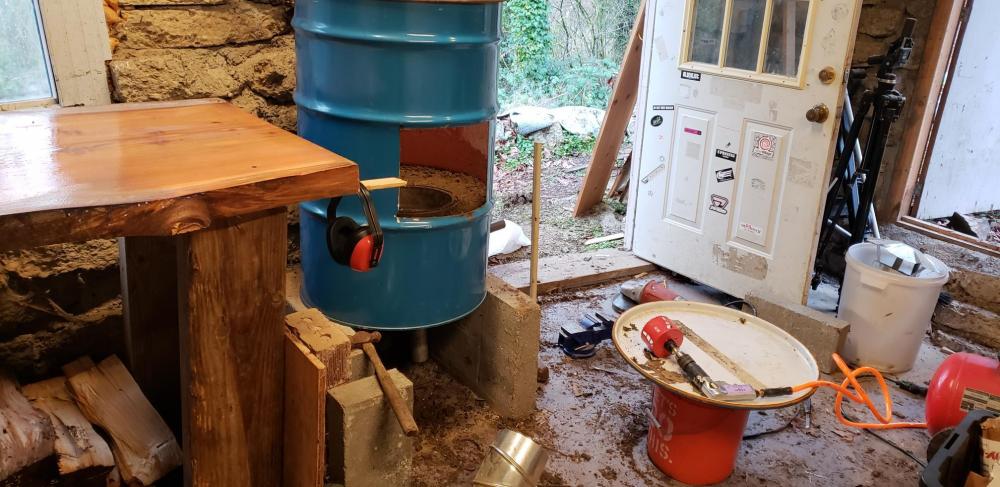
Thank you all for the copious amounts of advice! This new set up works, without a fan even. I still need to extend the pipe outside the building a few more feet, but adding the larger tank as the initial piece of the pipe seems to have done the trick.


-
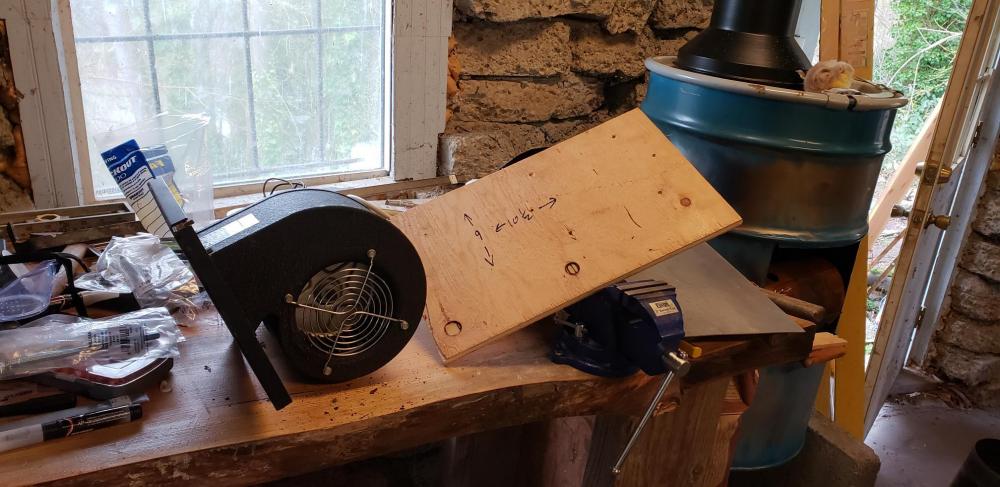
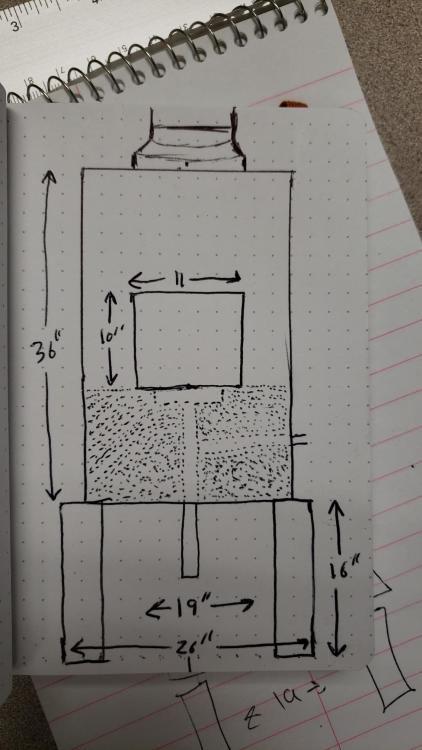
Okay, time for an update. BLUF: After reading through all the posts, following Glenn's math and a healthy dose of whiskey I've learned that my current smokestack is not nearly close to capable of handling the forge. Also, I don't have enough material (or money) to go get more pieces of stack. ~~~ Working with the material and equipment I do have, I've mocked up a prototype blower fan exhaust system. It works wonders. Even with the gaping holes in the system (I didn't bolt anything down since it was just an experiment) there wasn't an ounce of smoke accumulating in the workshop. Solved the old problems, now to deal with the new ones. I was able to get the steel (very thin bar of mild steel) to a red/bright red heat. It hammered just fine, but I couldn't achieve anything hotter than that. Conclusion: The exhaust fan is too powerful, and in addition to the intake fan, creates a vortex of moving air that burns the fuel faster than a snowball in the Sahara. Next modification will be to mount the exhaust fan on the roof. Originally I was going to mount it in the rafters, but I don't have the proper mounting hardware at hand. I'll run a straight pipe from the forge to the ceiling, install a 90 degree turn to connect it the fan and attach a spark catcher to the output pipe. Alternatively, there is another idea I've mocked up but don't know how well it would work. Instead of running the exhaust through the fan itself, creating a cut out in the 90 degree bend and blowing across it to create a draft pull. Along with this, I need to find a better input fan. The shop-vac is simply putting air in too fast. If I'm understanding it correctly, the air should be max volume/min speed. The shop-vac seems to be quite the opposite of that. Any thoughts/advice on the new ideas?

-
Thanks Frosty! That was very clear. I'll be doing some measuring this evening, then getting to work on it this weekend. After reviewing everything from the other post (and looking around my shop) I realized I still have quite a bit of work ahead of me and that my current smoke stack will not function as intended without a serious overhaul .
-
Glenn, Shabumi, thanks for this.
-
Arthur, will do! Glenn, thanks for the info. Im atrociously horrible at math but I'll do my best to muddle through that.
-
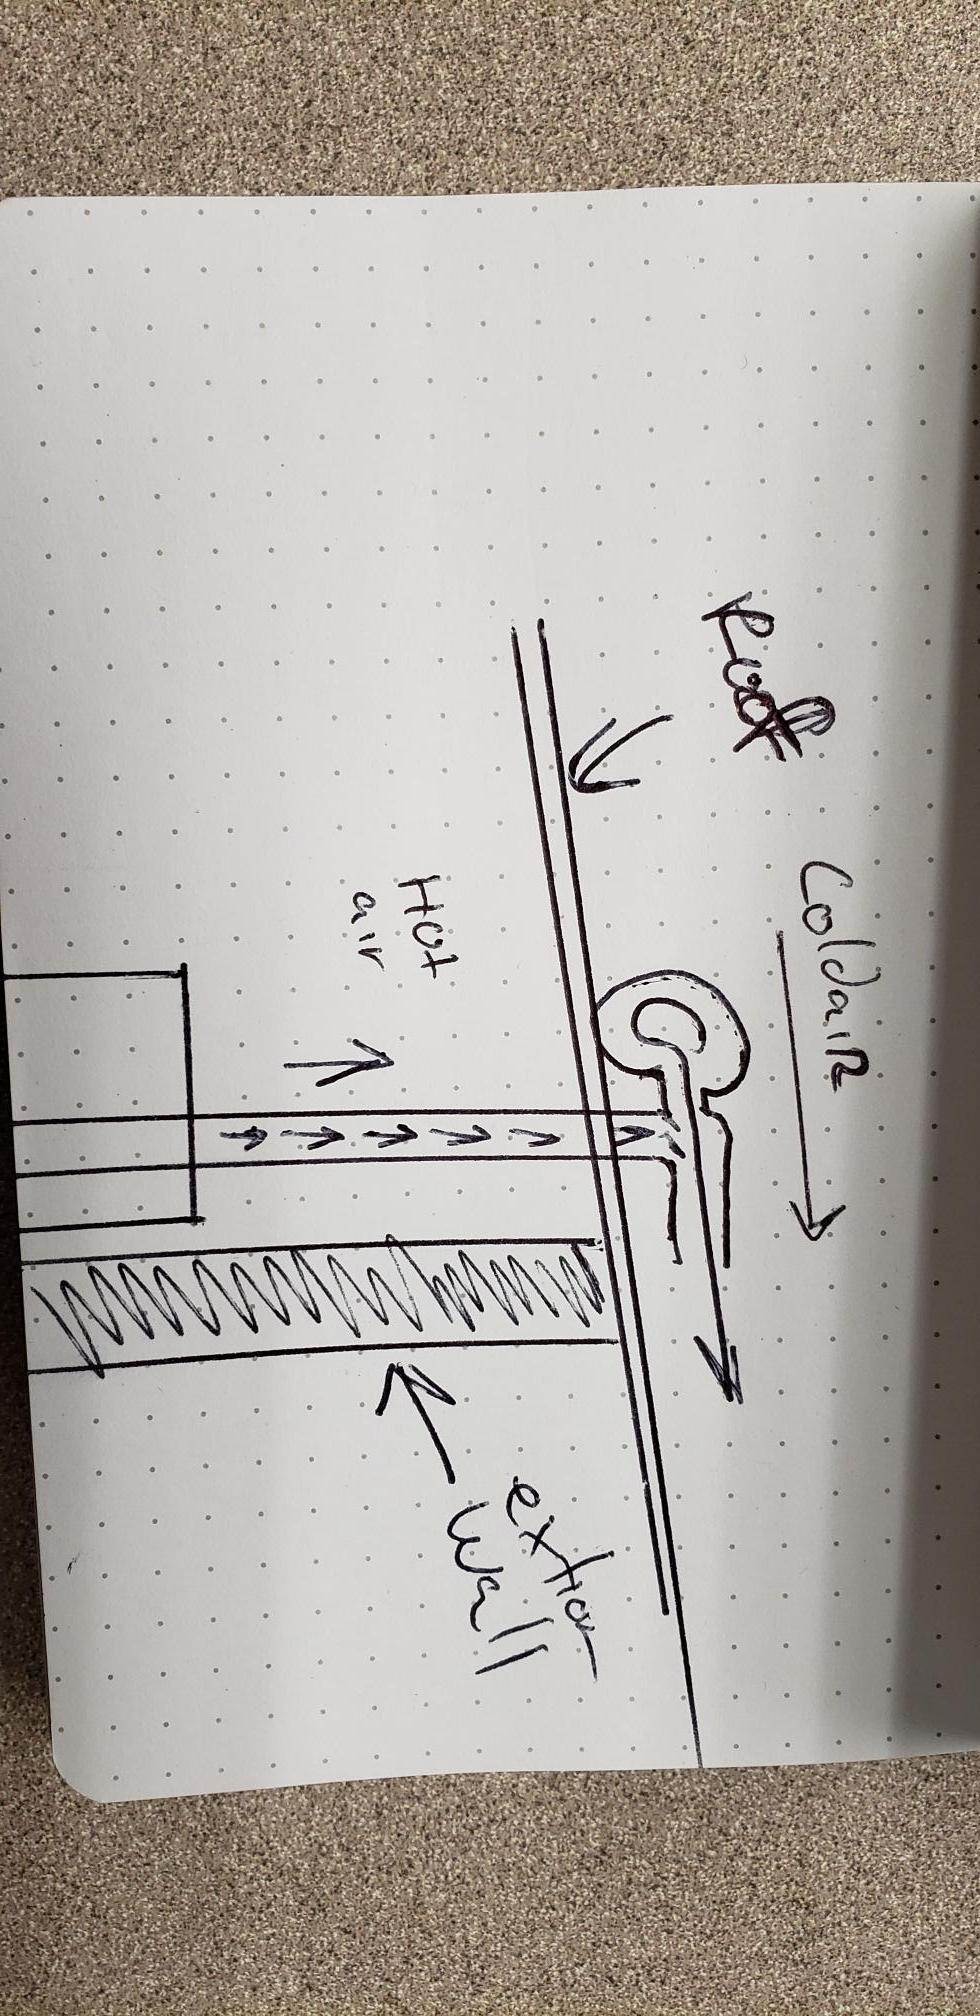
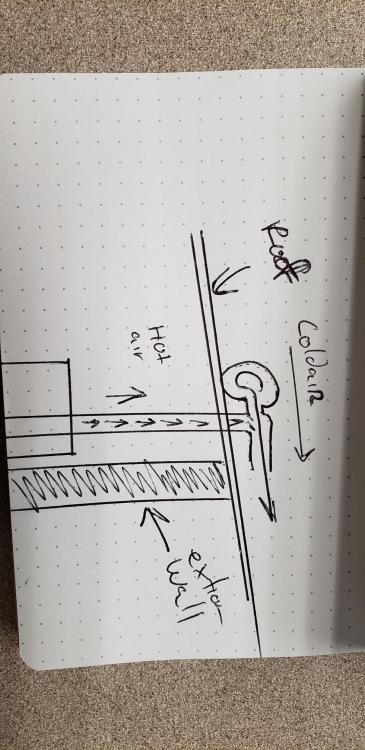
Frosty, thanks for the reply and the information. I've never thought about air movements like this before, but it does make a lot of sense, even if its completely backwards from how we learn about it in school. With the "T", would I face the T opening downwards to allow the air to drop? I know that may sound like a dumb question but Im very much a hands on learner. Doing my best with all the text and pictures Im reading, but my brain doesnt really work well that way. Also, what about adding a draw out fan at the junction point in the wall?
-
I should have time this friday to start working on it again. I'll give it a whack (and hope it doesnt all fall down) and let ya know how it goes.
-
Did you happen to solve the issue? I'm in the middle of trying to fix mine... same issue, 90 degrees straight out the wall with a 5' rise to get to it.
-
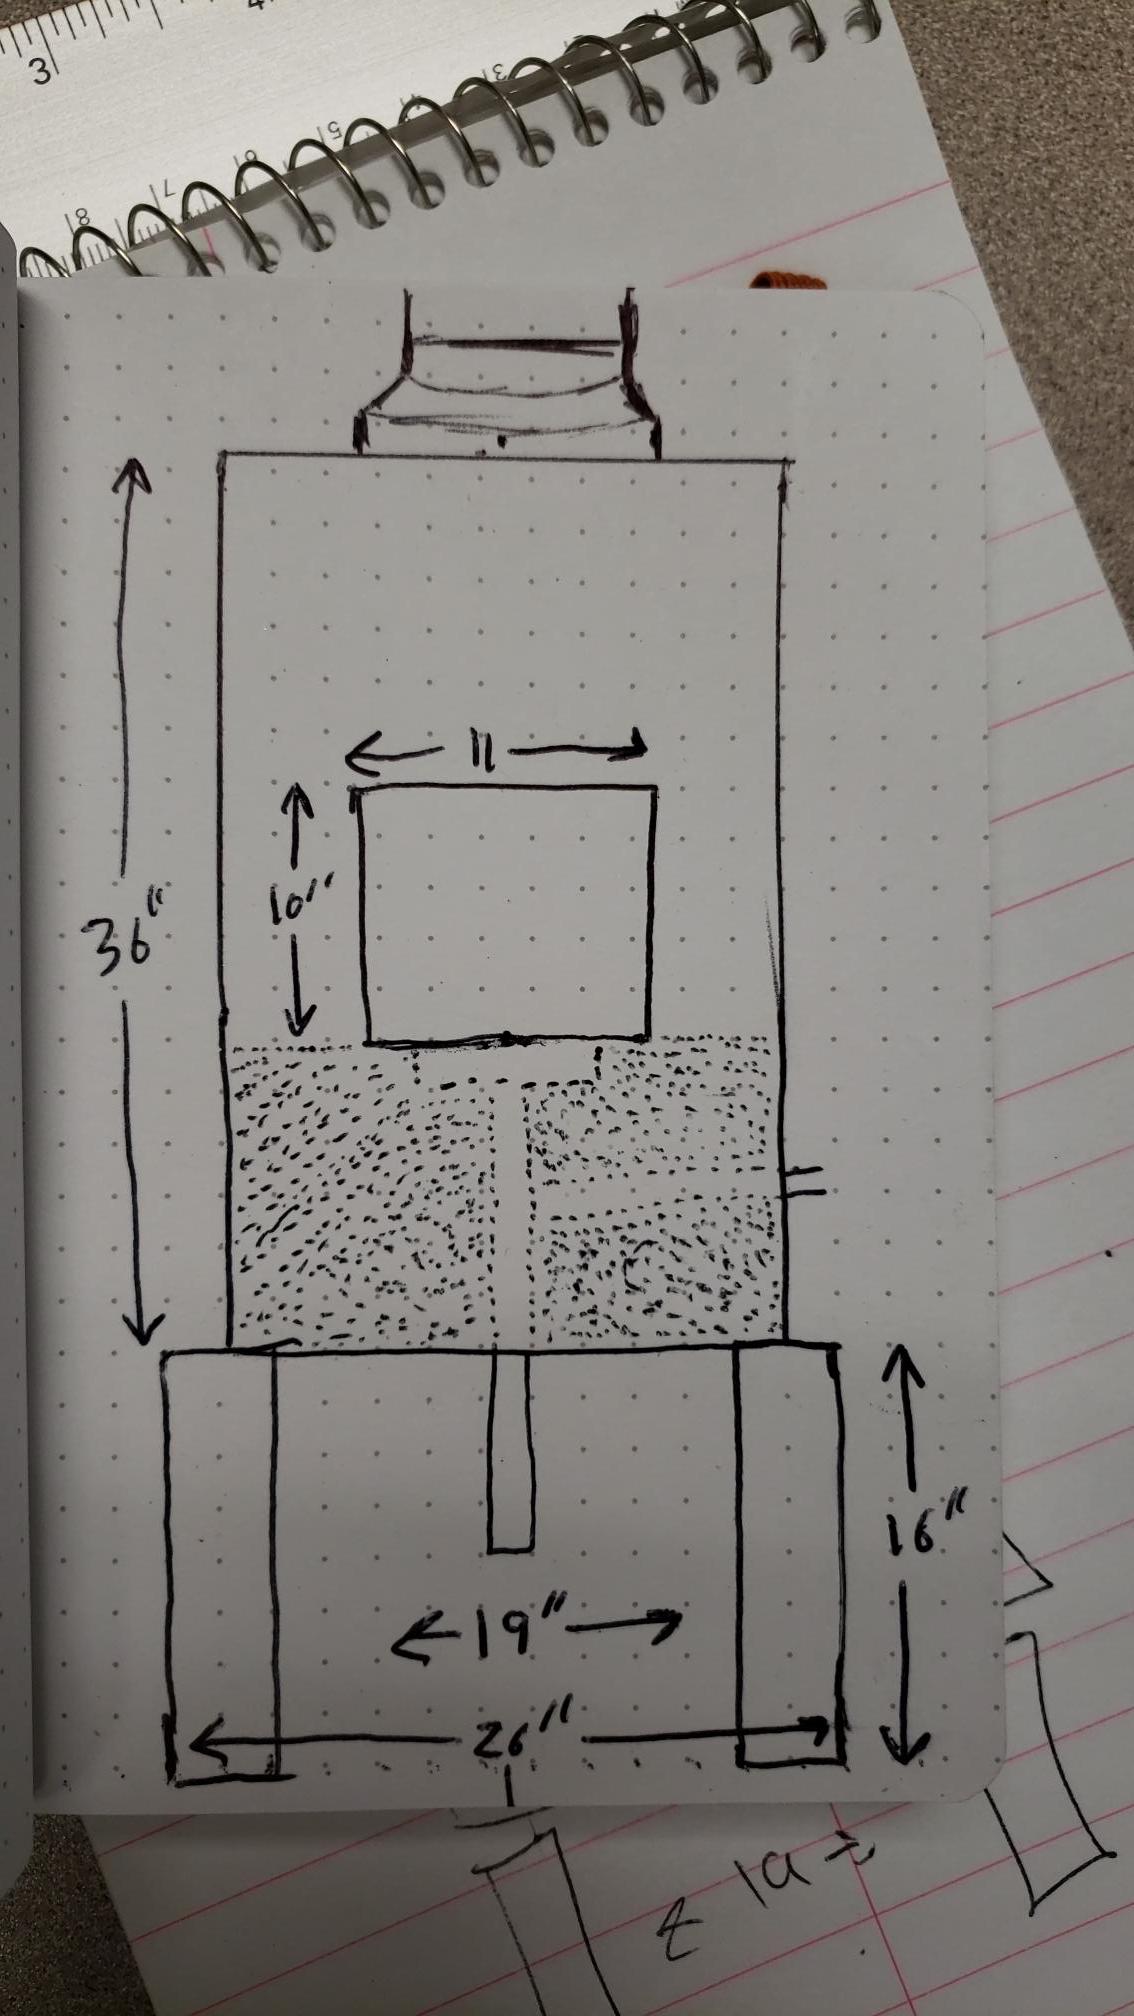
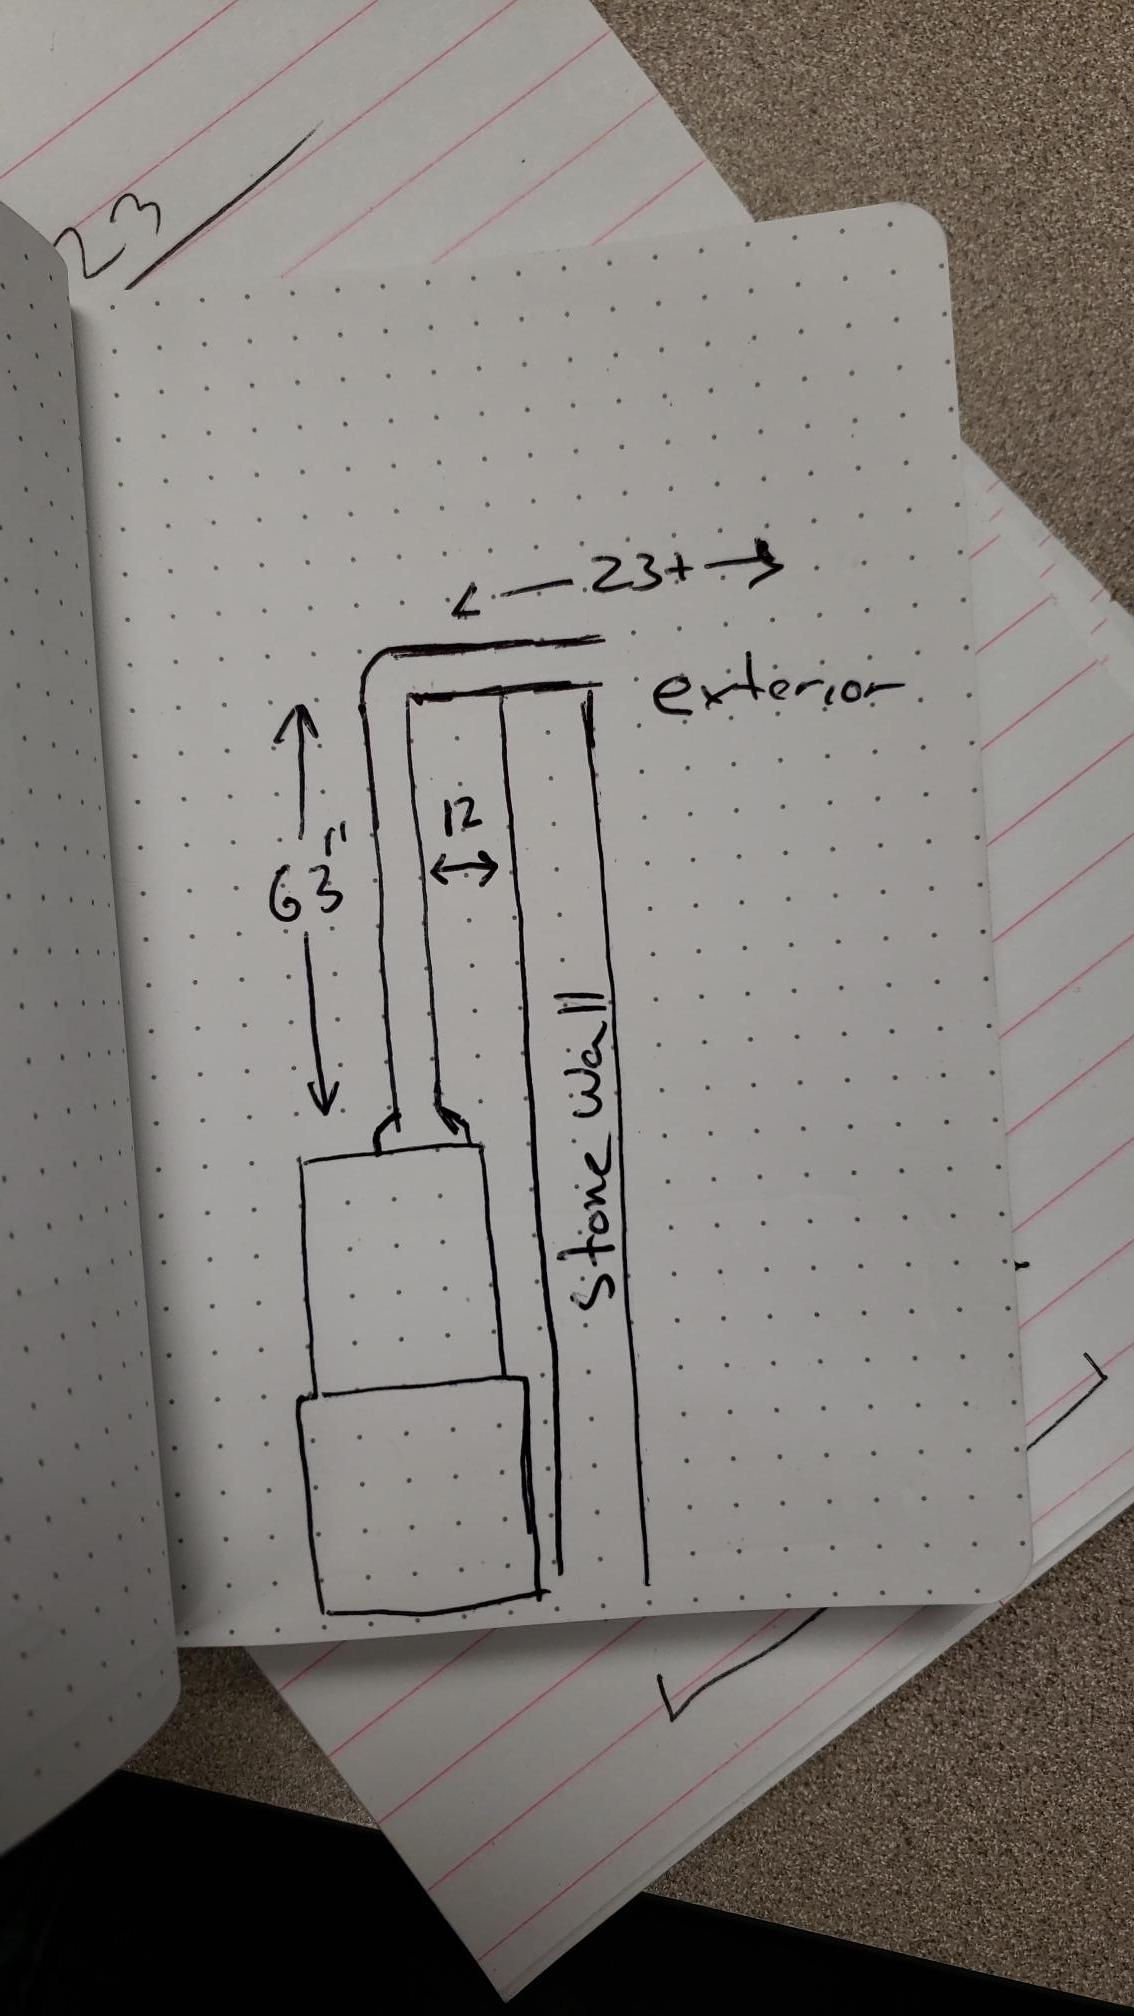
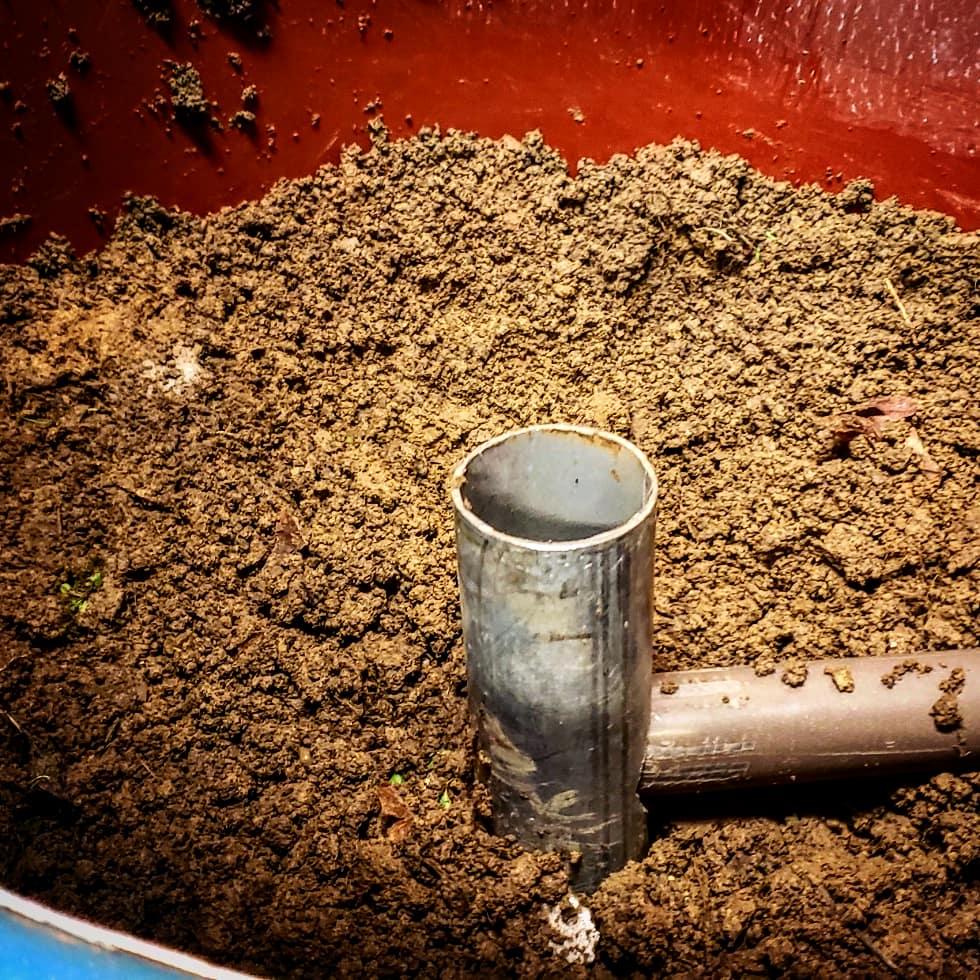
Arthur, Im not sure on the exact size... Im guessing 8". Im going to try and get down there tomorrow to make measurements of all of it. I'll also try the slow and steady route. Im also using charcoal in mine. I got tired of reading the debates between charcoal and coal... and where I live I have an almost unlimited supply of trees Daswulf, I dont really have room for anything other than a straight bend through the wall unless I want to punch a hole in the roof (not something Im in a position to do at the moment). When I get around to re-roofing it later this year I'll be able to put a different stack in. Glenn, I'll take the reducer out, strap some more pipe to lower it to level and through the petals on the inside of it. Might need to pick up a new piece to fit the width and give that a shot. Charles, I used the brake drum to hold the pipes and shape the dirt. As simple as they seem to be, most of the brake drum forges I saw are beyond my current ability to put together. All, thanks much for all the advice (and patience).
-
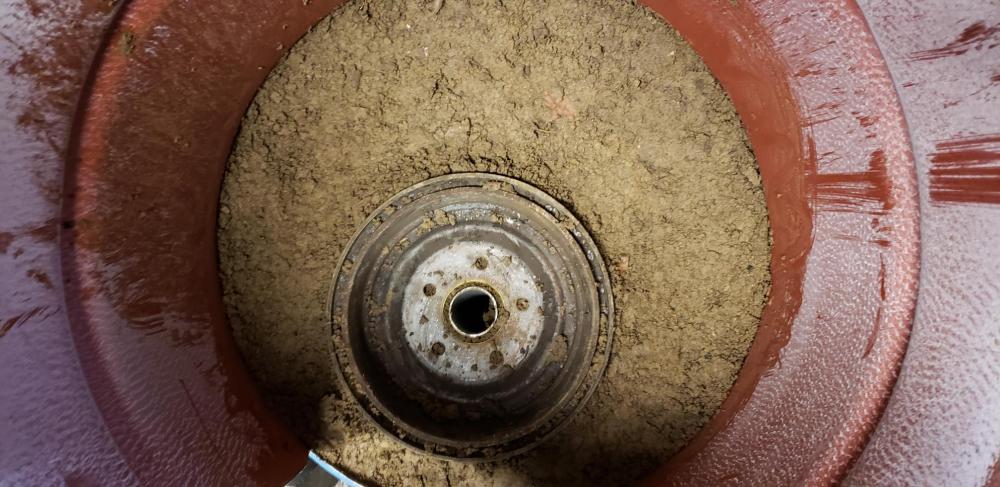
Daswulf, There is a bit of open space there, I didnt want to lock anything down until I knew it would work (at least halfway decently). The reducer fit the hole I had cut and added the extra couple inches I needed to reach the barrel. The stack goes up about 5 feet, makes a right angle turn and punches out of the wall for about another 3-4 feet. Charles, The break drum is in there to hold all the pieces together. Im not really very mechanically intuitive so it seemed the best way to connect an air pipe and an ash dump. And, rightly or wrongly, I figured it would be a good spot to congregate the charcoal and heat. Glenn et al, Okay, after reading ya'lls description of preheating, it seems that I did indeed to that. I started with a pile of papers, burned through that and then slowly started building the fire in it. Might still have gone too big too fast though. Not really sure. Im used to operating burn barrels, no smoke stacks on those. Also, I'm guessing the external air temperature has a lot to do with how much preheating is going to be needed. Its gotten a bit chilly round here so I'll work on that. From what I can tell, most of the smoke actually seemed to come out at the lid seams, with some coming out of the cut-out. I had both the double doors and the main door open, as well as adding airflow through the air inlet with my shop-vac (set to blow). ----- If Im reading ya'lls comments right, I think I need to lengthen the part of the stack sticking to the outside, close of the opening at the reducer, remove the reducer entirely and preheat the forge longer. Should the forge outlet be the same size or smaller than the stack? I can cut some sheet metal to size as a mediator between the forge and stack to reduce hole size, or.. make a larger hole to accommodate the stack. Frosty, Punfortunenantly I'm very puncomfortable with puns. To say that I lack a sense of humor is a punderstatement.
-
We'll have to get a beer sometime Mike.
-
I'll try to get more pictures and dimensions either tomorrow or Tuesday when I have time to get back to it. As for preheating..... Since I'm not exactly sure what that entails, I'm going to go with, no I did not.
-
I'm over on the wetter side. Out in McMinnville. Thanks for the warm welcome! 8up, like a soup sandwich.
-
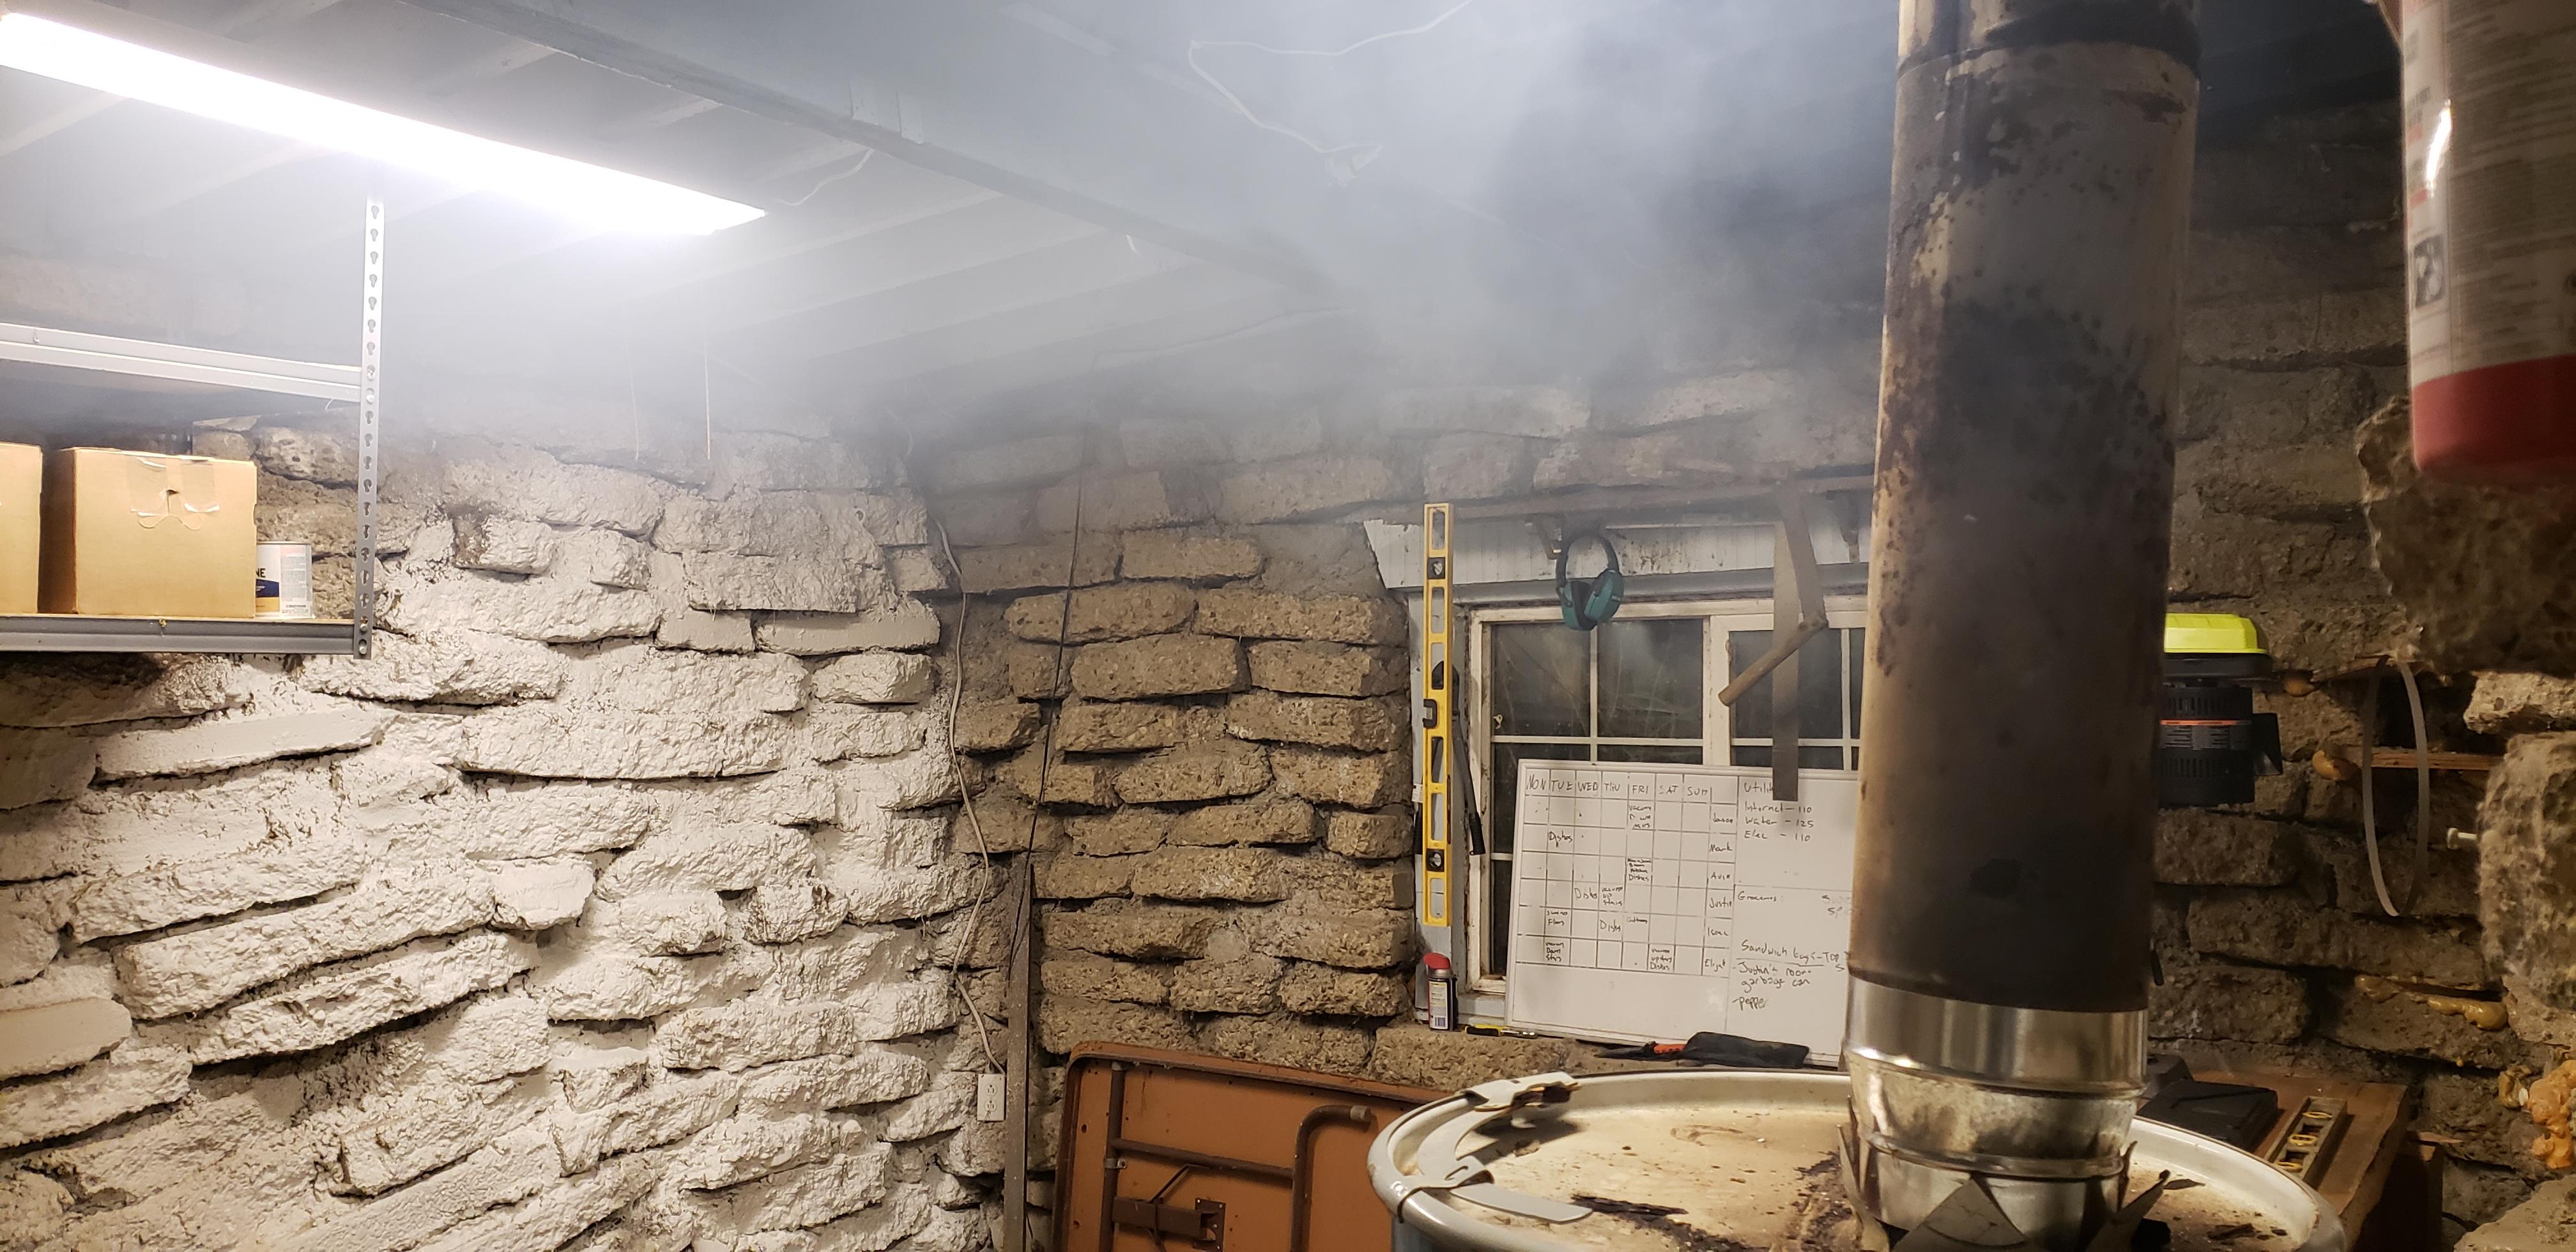
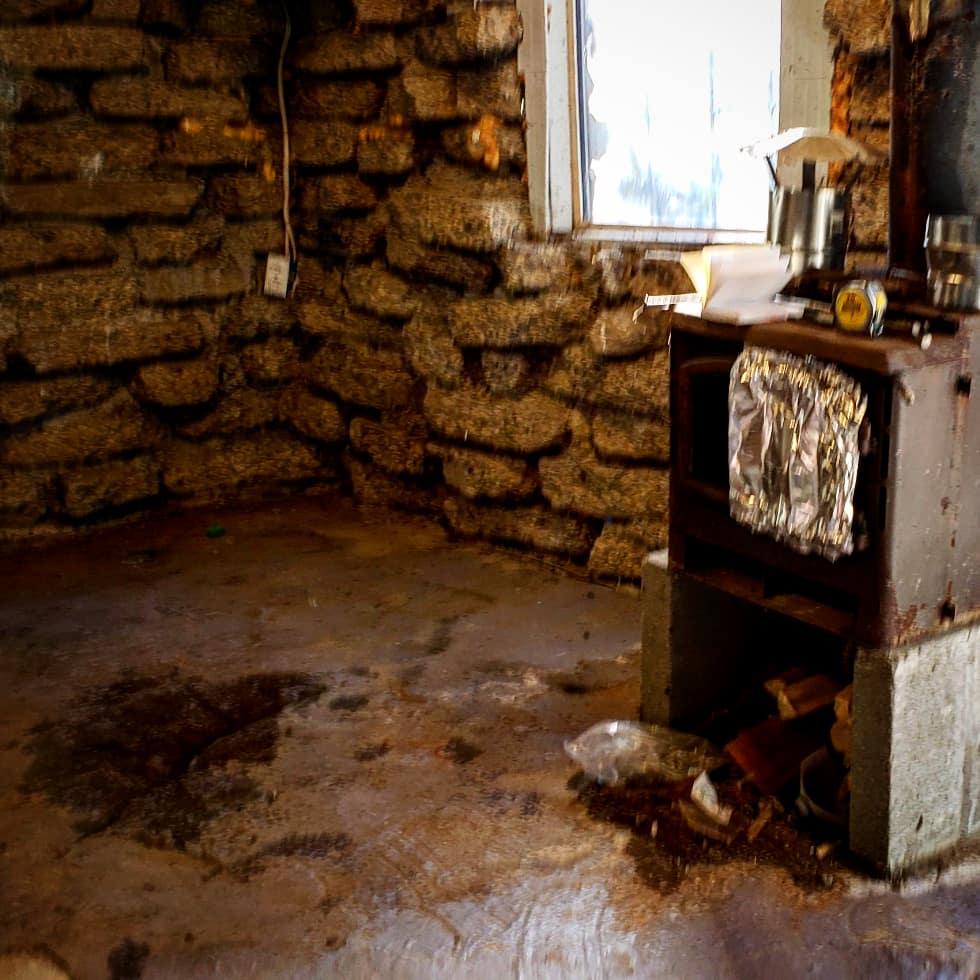
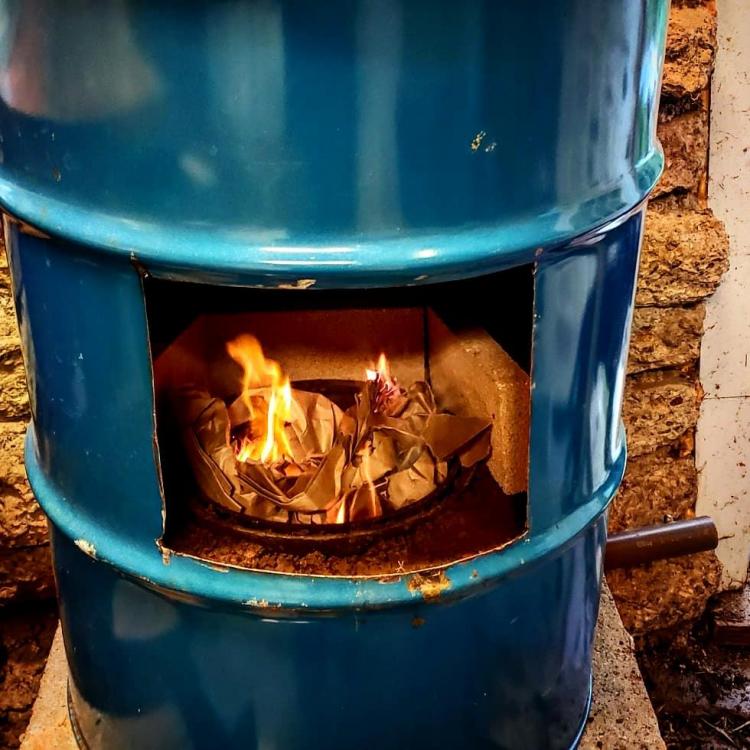
While it breaks my heart to hear my first project is probably not anywhere within my grasp (cause I'm still a big dummy) I know I must hold my head high and carry on. I'll take a look for those twist tongs you mentioned. Before I can hit steel I need to get the smoke figured out. Lit the forge and smoked myself right out of the shop. Back to the drawing board on that one. Just started what I thought was a small fire to see how it works. Air blower worked great, fire stayed contained. But as you can see, the smoke stayed inside too


-
Ah, I had not thought of that. Though tongs are first on my list to make. We'll see how many times I screw them up though
-
I had thought about that..... after putting everything in place. I have room cut a pass through window in the back. though, since Im a complete noob, I dont plan on doing anything spectacular for a while yet that would require longer pieces. Im hoping to have a second, smaller, gas forge built by the end of the year for longer pieces.
-
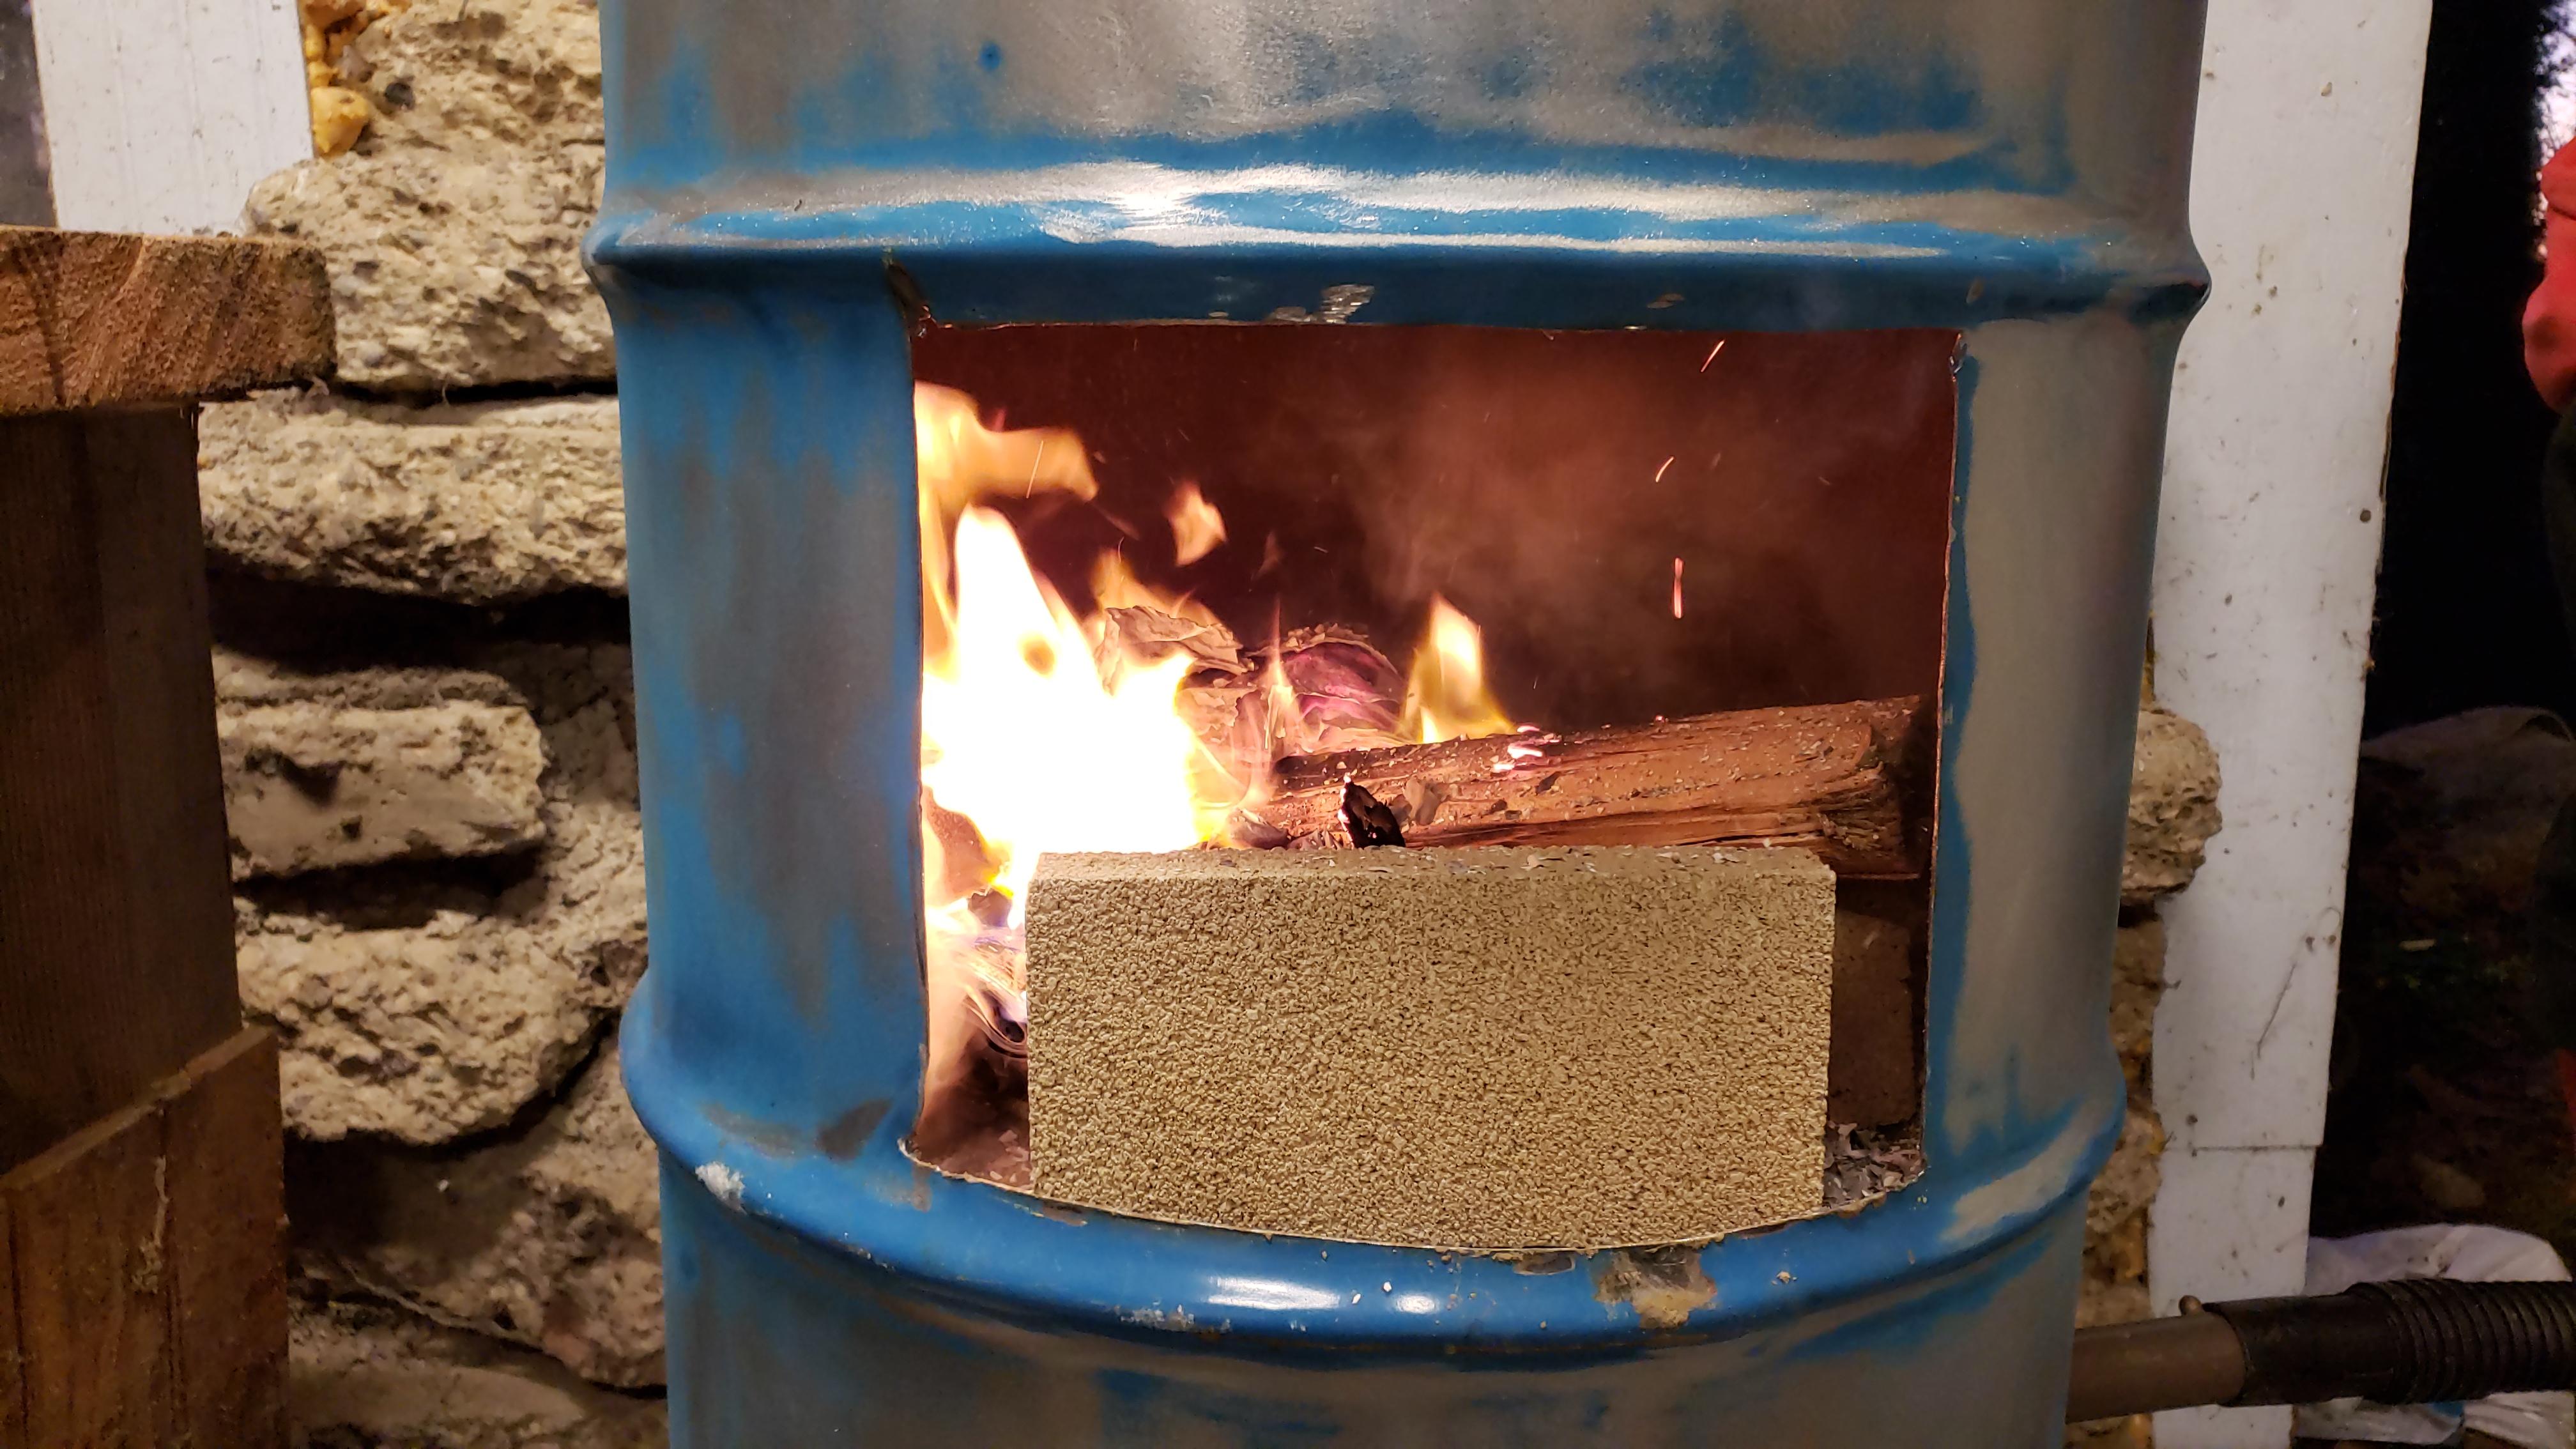
I read over the 55 forge instructions, and tons of JABOD posts and figured Id give it a whack. Any feedback would be awesome. Here's (hopefully) some pictures of the process, the shop (yeah, its a mess right now) and the finished 55BOD. I did an air flow test and it seems to work great flowing out the chimney. I'll need to replace parts of the chimney before I crank it up though since its old and filed with holes.


-
Hello everyone! Im excited to have found this forum and all the information here. I'm pretty new to all of this.