

Whiskeysup
-
Posts
34 -
Joined
-
Last visited
Content Type
Profiles
Forums
Articles
Gallery
Downloads
Events
Posts posted by Whiskeysup
-
-
Dropped by a local tire shop yesterday after I noticed several coil springs in their scrap pile. Asked if I could buy them. Answer was no, it all goes to the scrap yard. I said I would pay more for them than he would get for the whole trailer full. I went home without springs. Go figure.
-
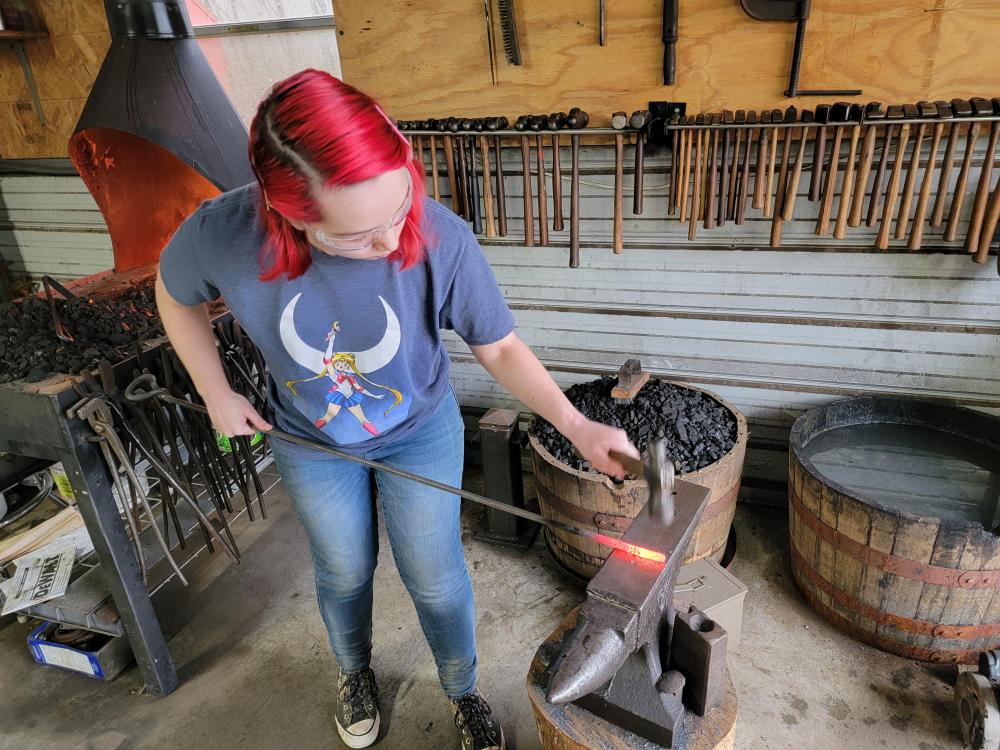
 My granddaughter was curious and wanted to learn about smithing. Had some great discussions about the art and technology of the craft. She's now hooked. I see my coal usage going up but I gladly welcome it.
-
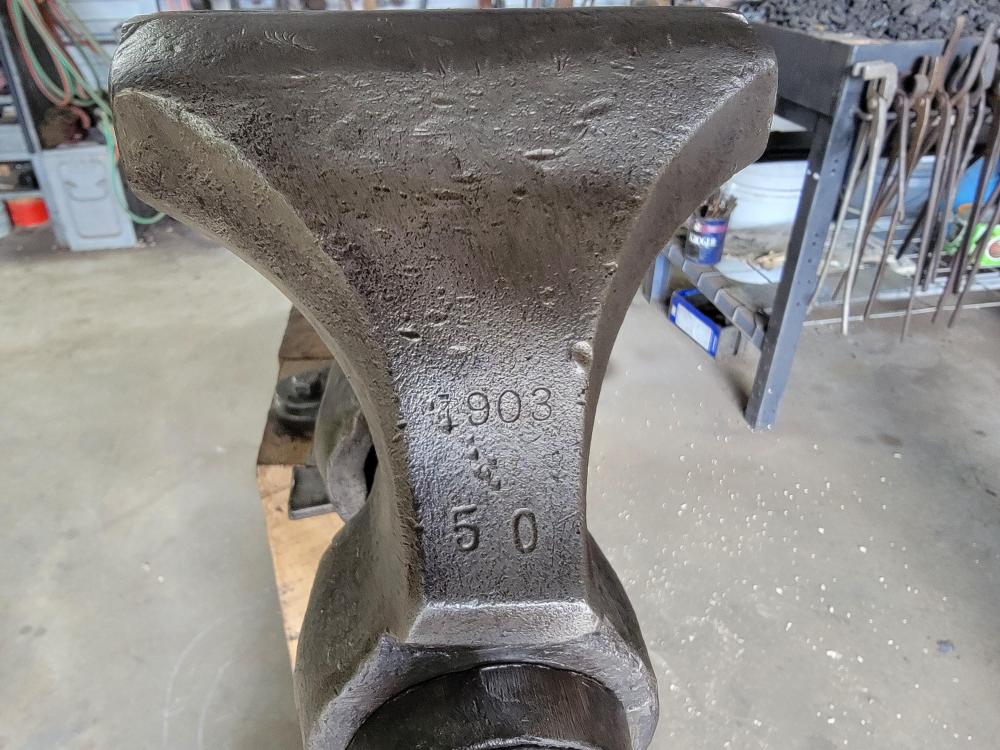
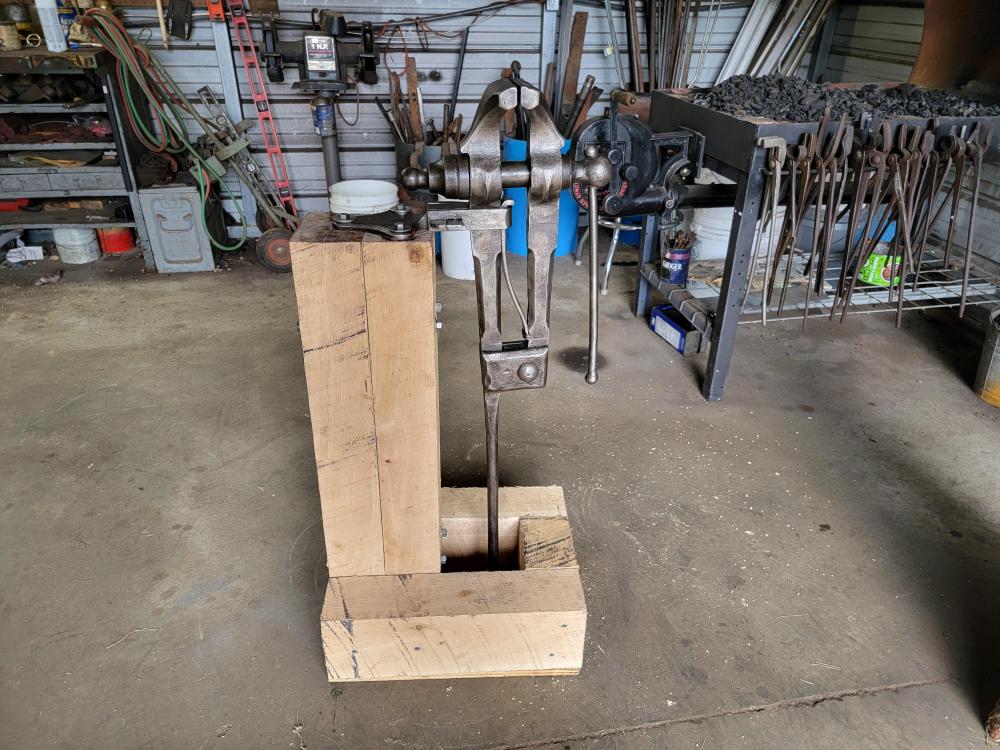
Finally found a leg vise for a price that wasn't painfull. I didn't take a before Pic, it was pretty dirty, just a little rust. Screw and screw box in great shape. Made the stand from an oak 4x6. Marked with date and weight? (50 lbs) Thinking it's a Columbian?

-
Make a great T shirt
Thanks for posting my pic-I am an idiot with computers. Definitely an analog guy in a digital world.
-
Found this in an old dresser I was restoring, coincidentally I am a bottling supervisor in the bourbon indusry here in Kentucky. Thought you all might enjoy it.
-
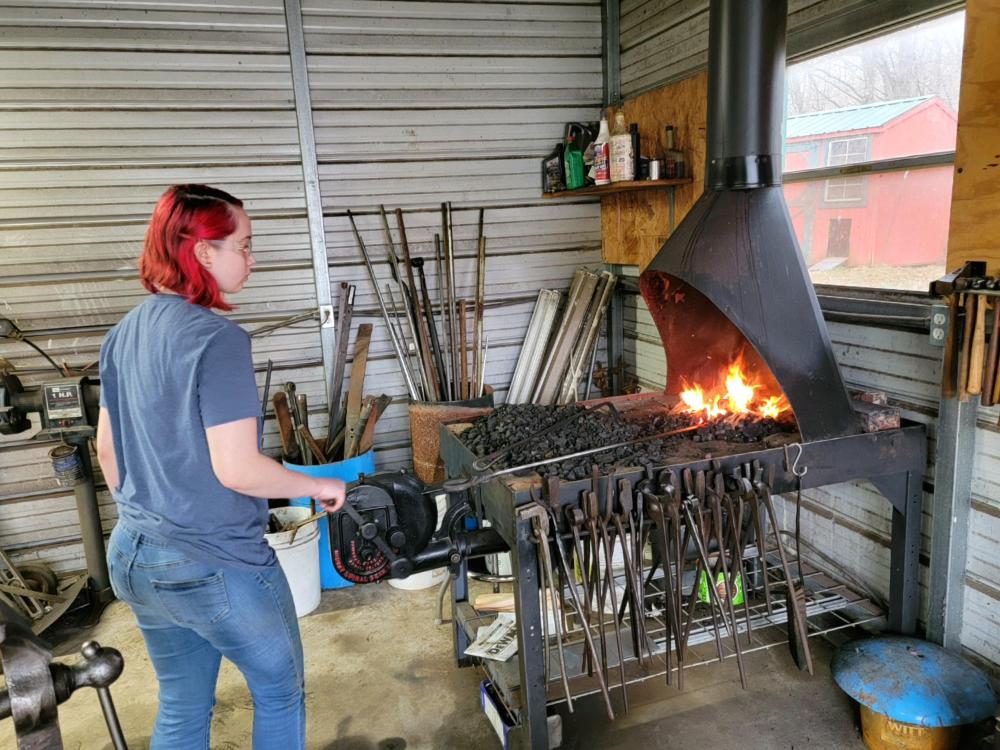
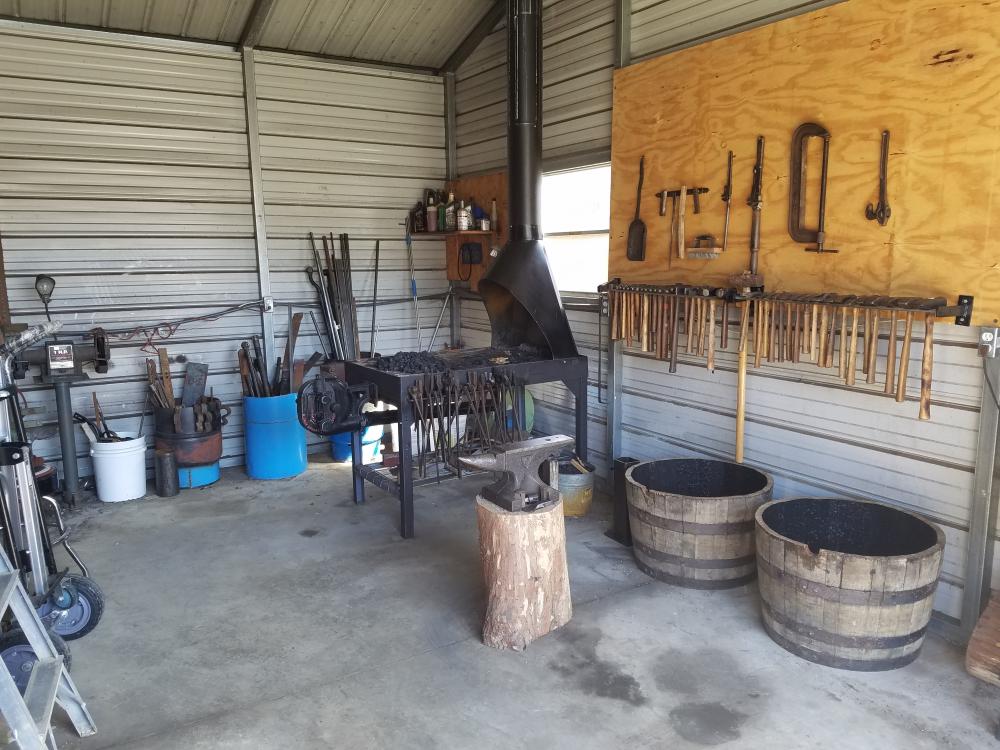
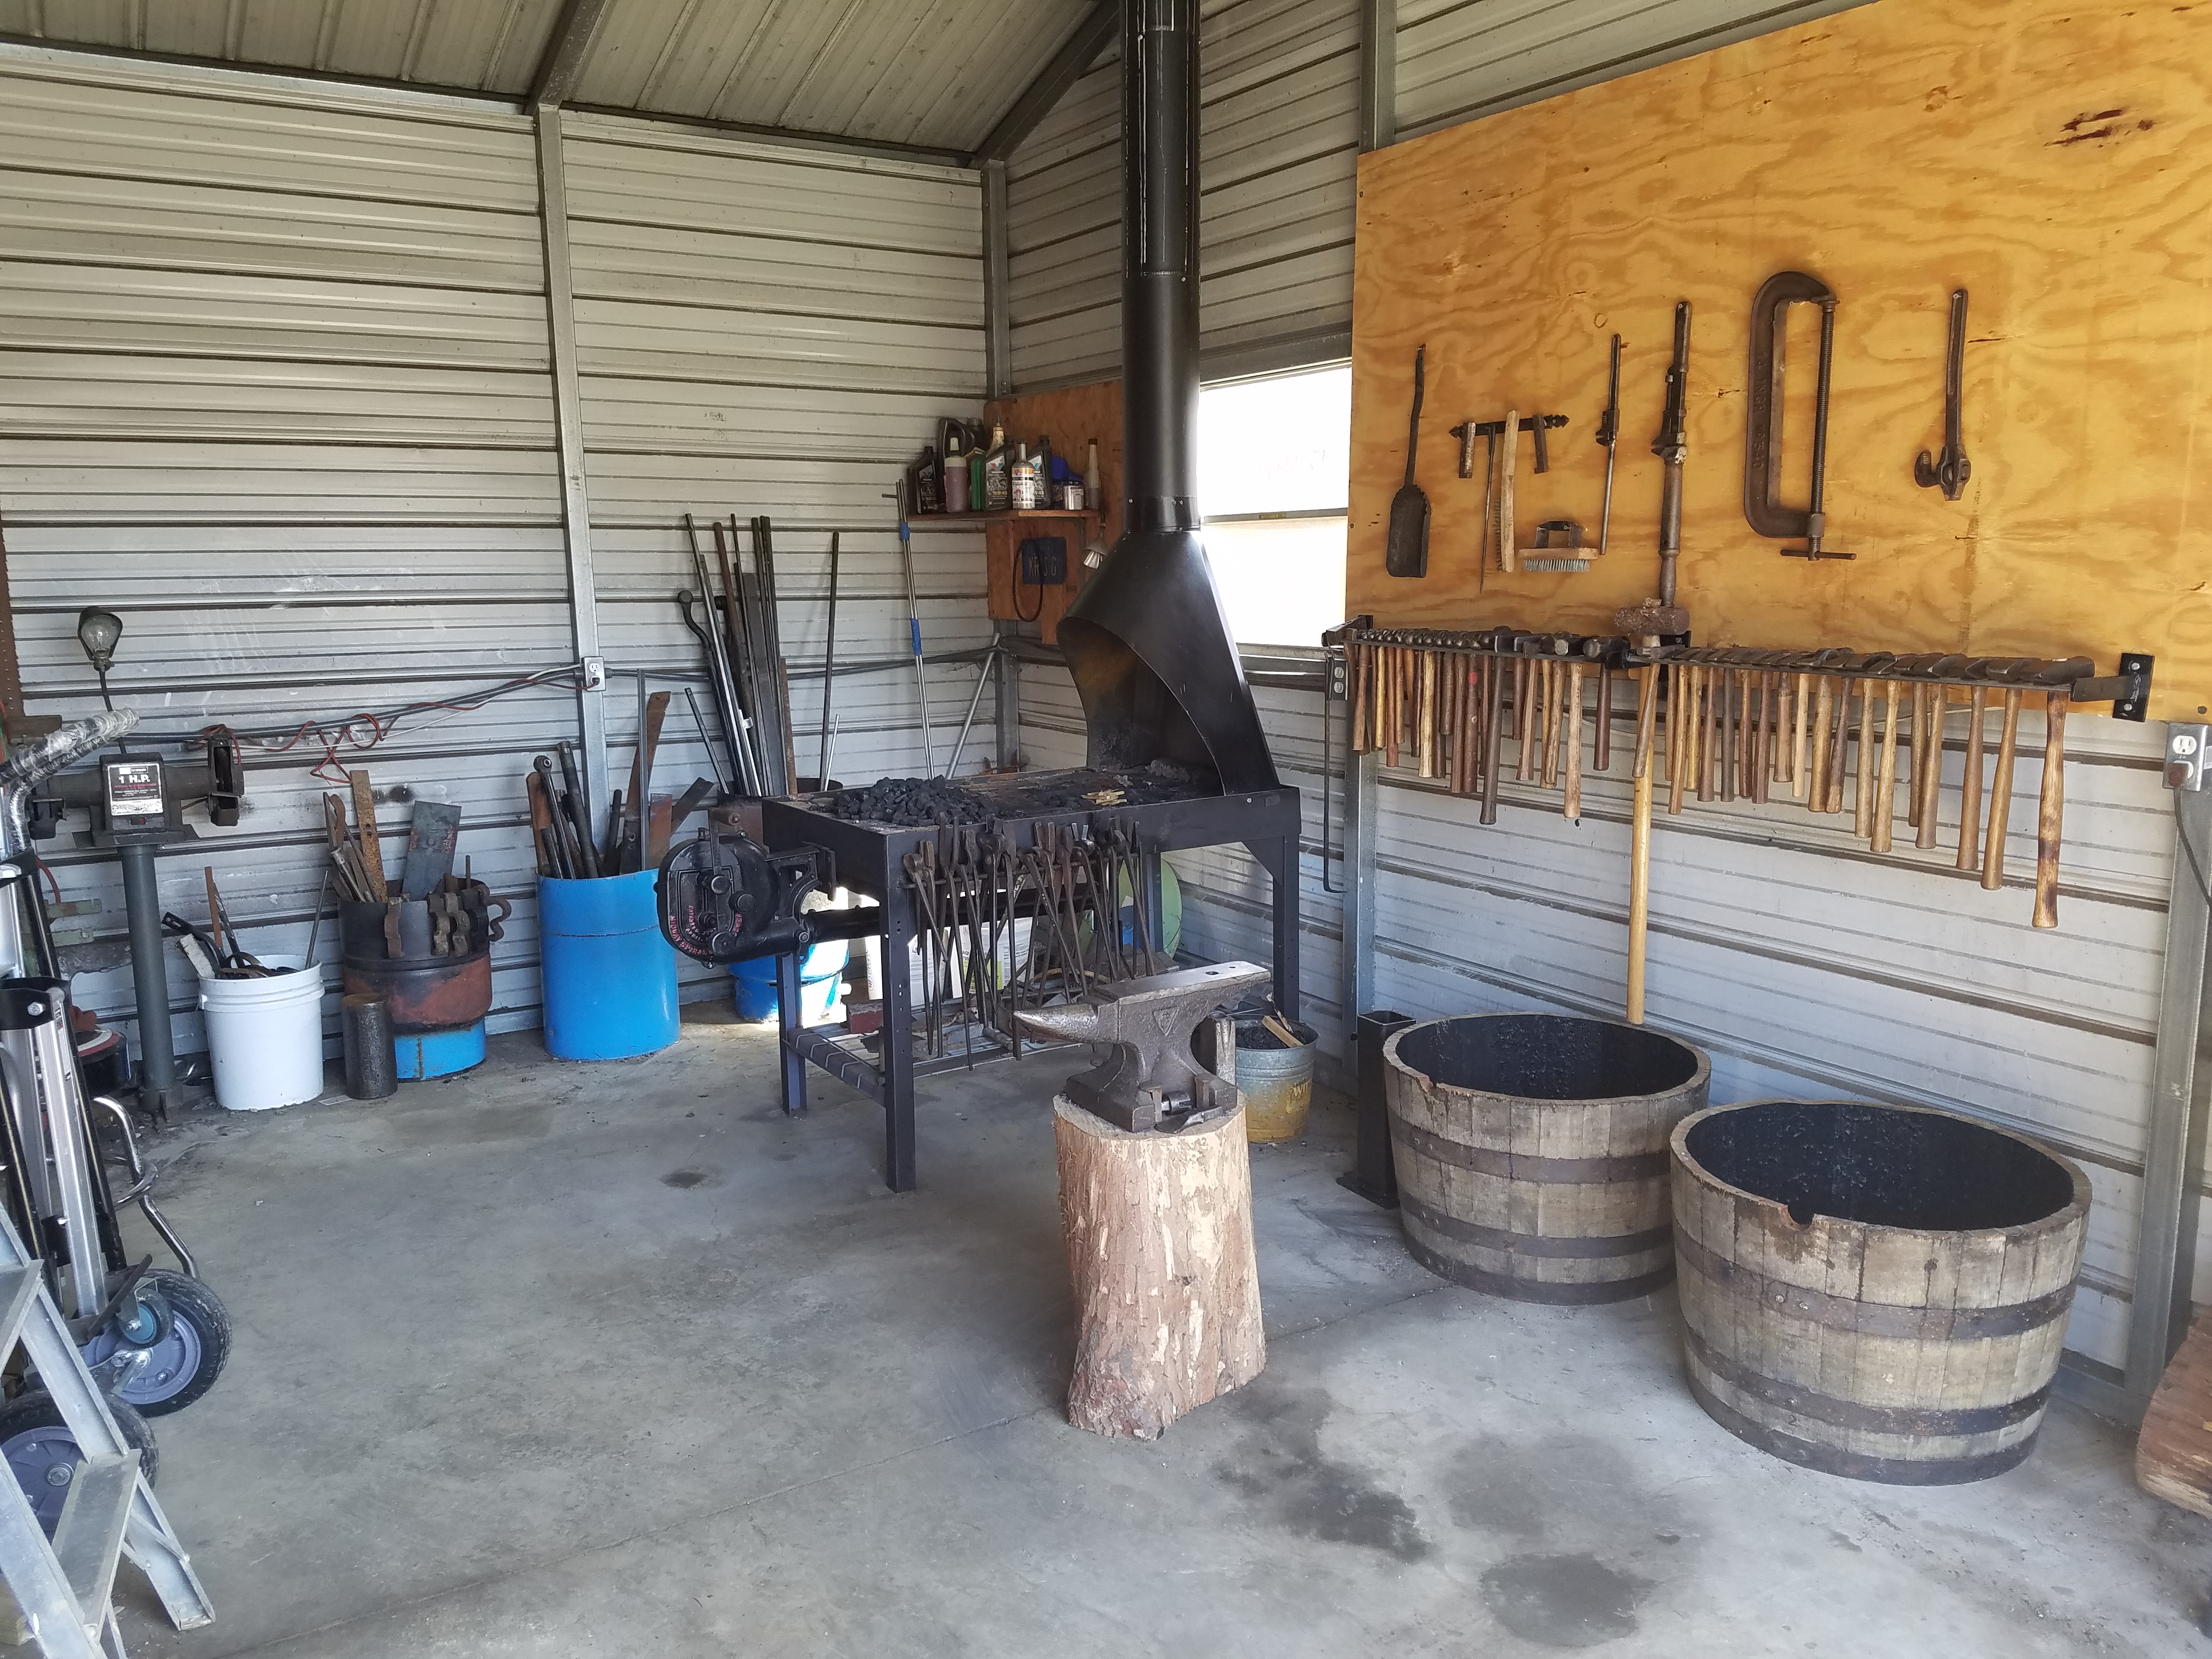
Two years after starting the build, a new granddaughter, tearing down the old and building a new house I finally got the forge done and started making tools. Making lots of mistakes but am learning a lot. Didn't know how easy it is to burn steel. Made a hot cut hardy from a truck axle, boy that was some hard steel. Ugly as xxxx but it sure cuts! Feel free to comment. Still figuring out the best placement of everything, so far it's working out real well, having lots of fun.

-
Am planning to cut a bourbon barrel in half, the water will keep it from leaking. The other half will be for coal storage. Guess I can always add a bucket to it if frozen or use a stock tank heater. Figured water would be handy for wetting the coal as needed, cooling parts while forging etc.
-
Was wondering what you all use to keep your quenching water from freezing in the winter. I have an unheated shop and am thinking of putting salt in it. Dont want to use antifreeze because of the dogs. Thanks for any suggestions.
-
Tons of Shagbark hickory on our place, going to find a a piece of seasoned dead fall and start shaping.
-
Was at a flea market last weekend with my wife and granddaughters when I found this for $5. Got the "not another hammer/old rusty tool" look from them. Still very new to smithing but knowing that rounding hammers are not that common couldn't pass it up. Was pretty grungy but it cleaned up nice. Just need to fit a handle, weighs about 2 1/2 lbs. Let me know what you all think, always looking to learn something new.

-
Here's mine, brand new to smithing, found this up in Southern Indiana. Columbian about 100 lbs. Sweet ring and great rebound. Stump off a blow down from last winter. Paid $2.00/ lb. The face was in terrible shape, weld splatter all over it, very careful scraping,mild sanding brought it back.

-
Was at the Lanesville Indiana Heritage festival yesterday(crazy about old tractors,machinery etc.) when I saw a couple of blacksmiths giving demonstrations. He said he made the pattern out of styrofoam and had it cast. Beautiful and impresive.

-
Absolutely
-
Thanks, very cool. I am hoping it would be useful for making chisles.
-
Can you explain further what you mean by working cable?
-
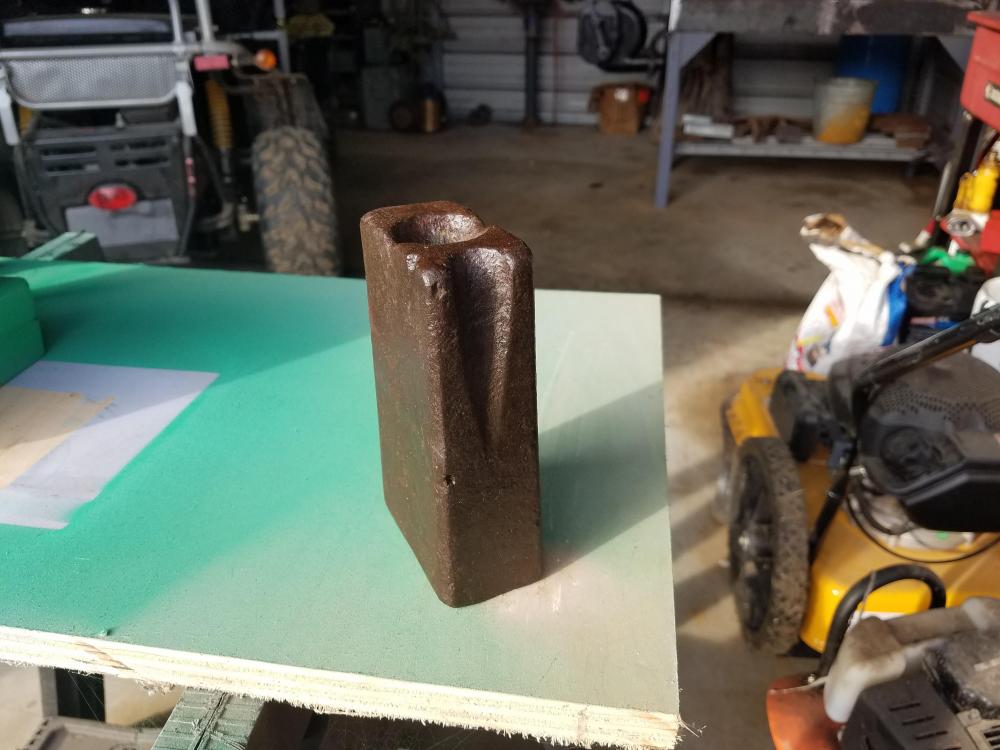
Found this today scrounging for blacksmithing tools. Tag said it was a bench anvil. Measures 5.5 in tall, 3.5 in wide and 1.5 in thick. For $6.00 figured I couldn't go wrong. Any opinions what it is?
-
You may be right, but I really don't mind finding out if I am, been wanting to do this for so long. I will post success and failures. Thanks for all the advice.
-
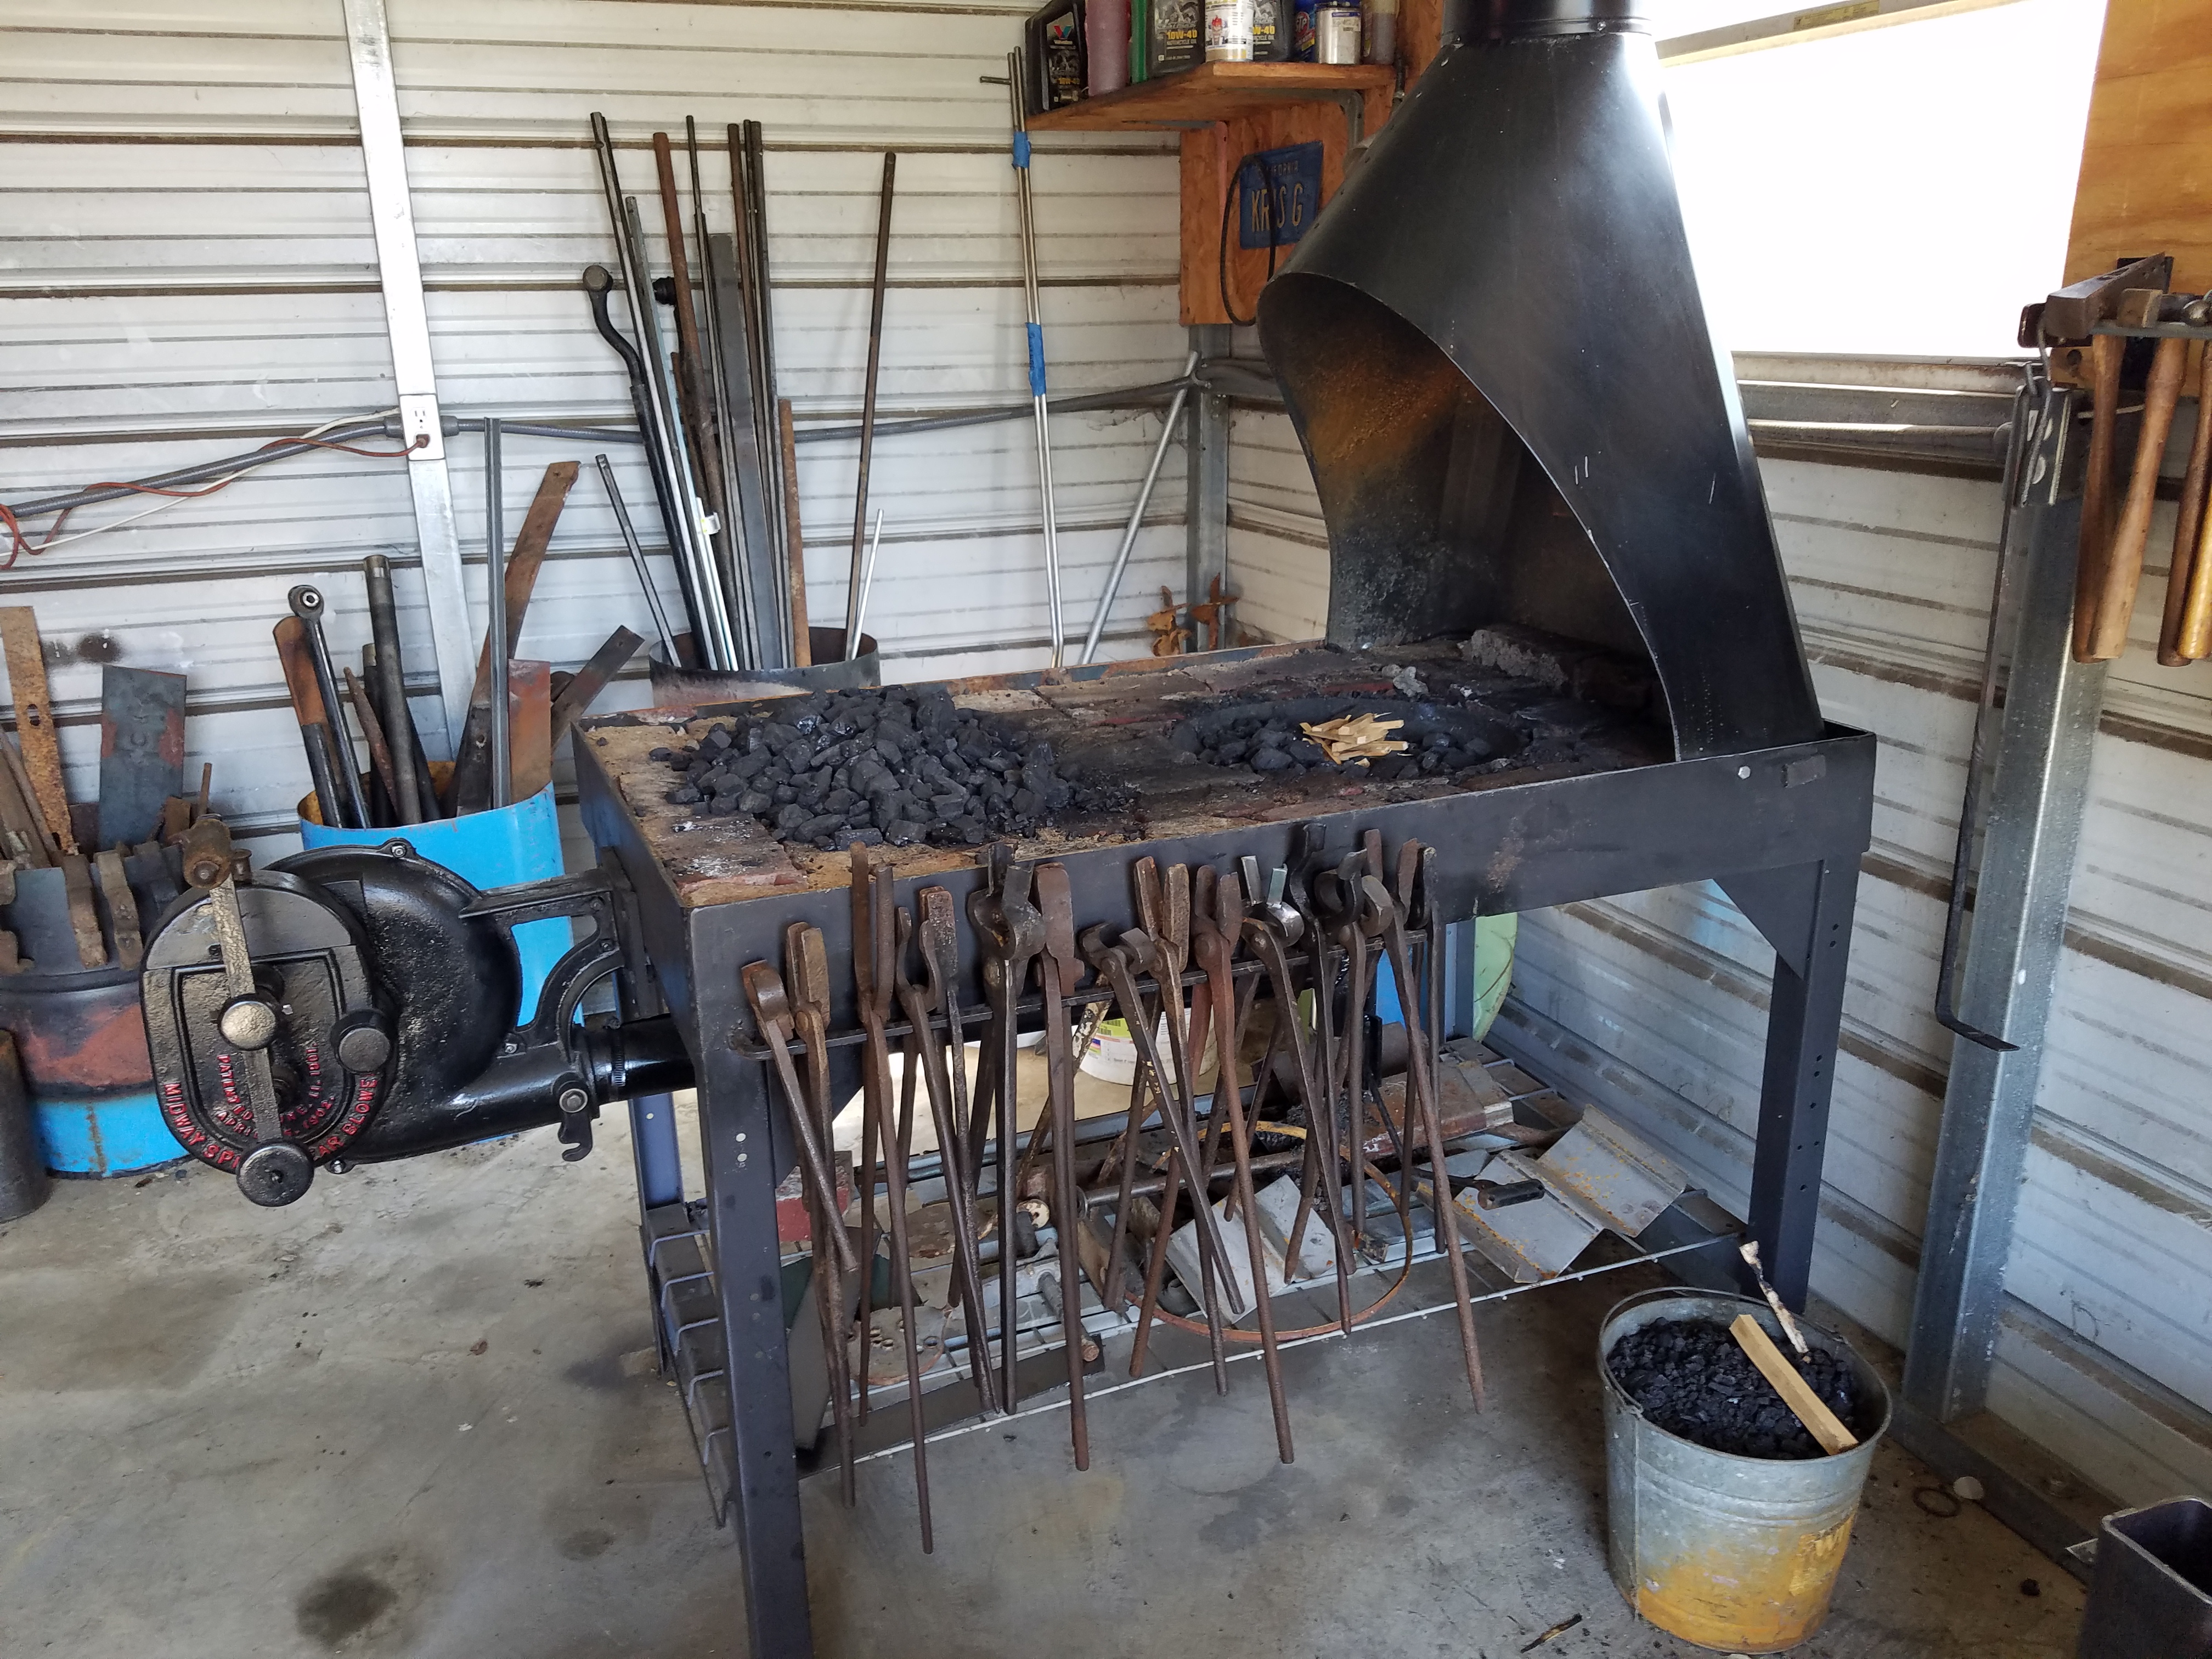
Charles, Thanks for responding. I can remount the blower but I would have to remove the brick. The reason I mounted the pot and blower where I did was to be able to use both sides of the pot, be able to mount the hood to the table sides and leave room on top for coal and a handy place to leave tools. Once I start making sparks I will know if my 5hinking was off base, all part of the learning curve.
-
Thanks for the advice, wasn't aware that at times you need to rotate stock while cranking. Unfortunately the pot is bolted to the table through a hole I cut in the top- it's how the pot is designed. If it becomes a problem, I have a couple of electric squirrel cage blowers I can replace it with.
-
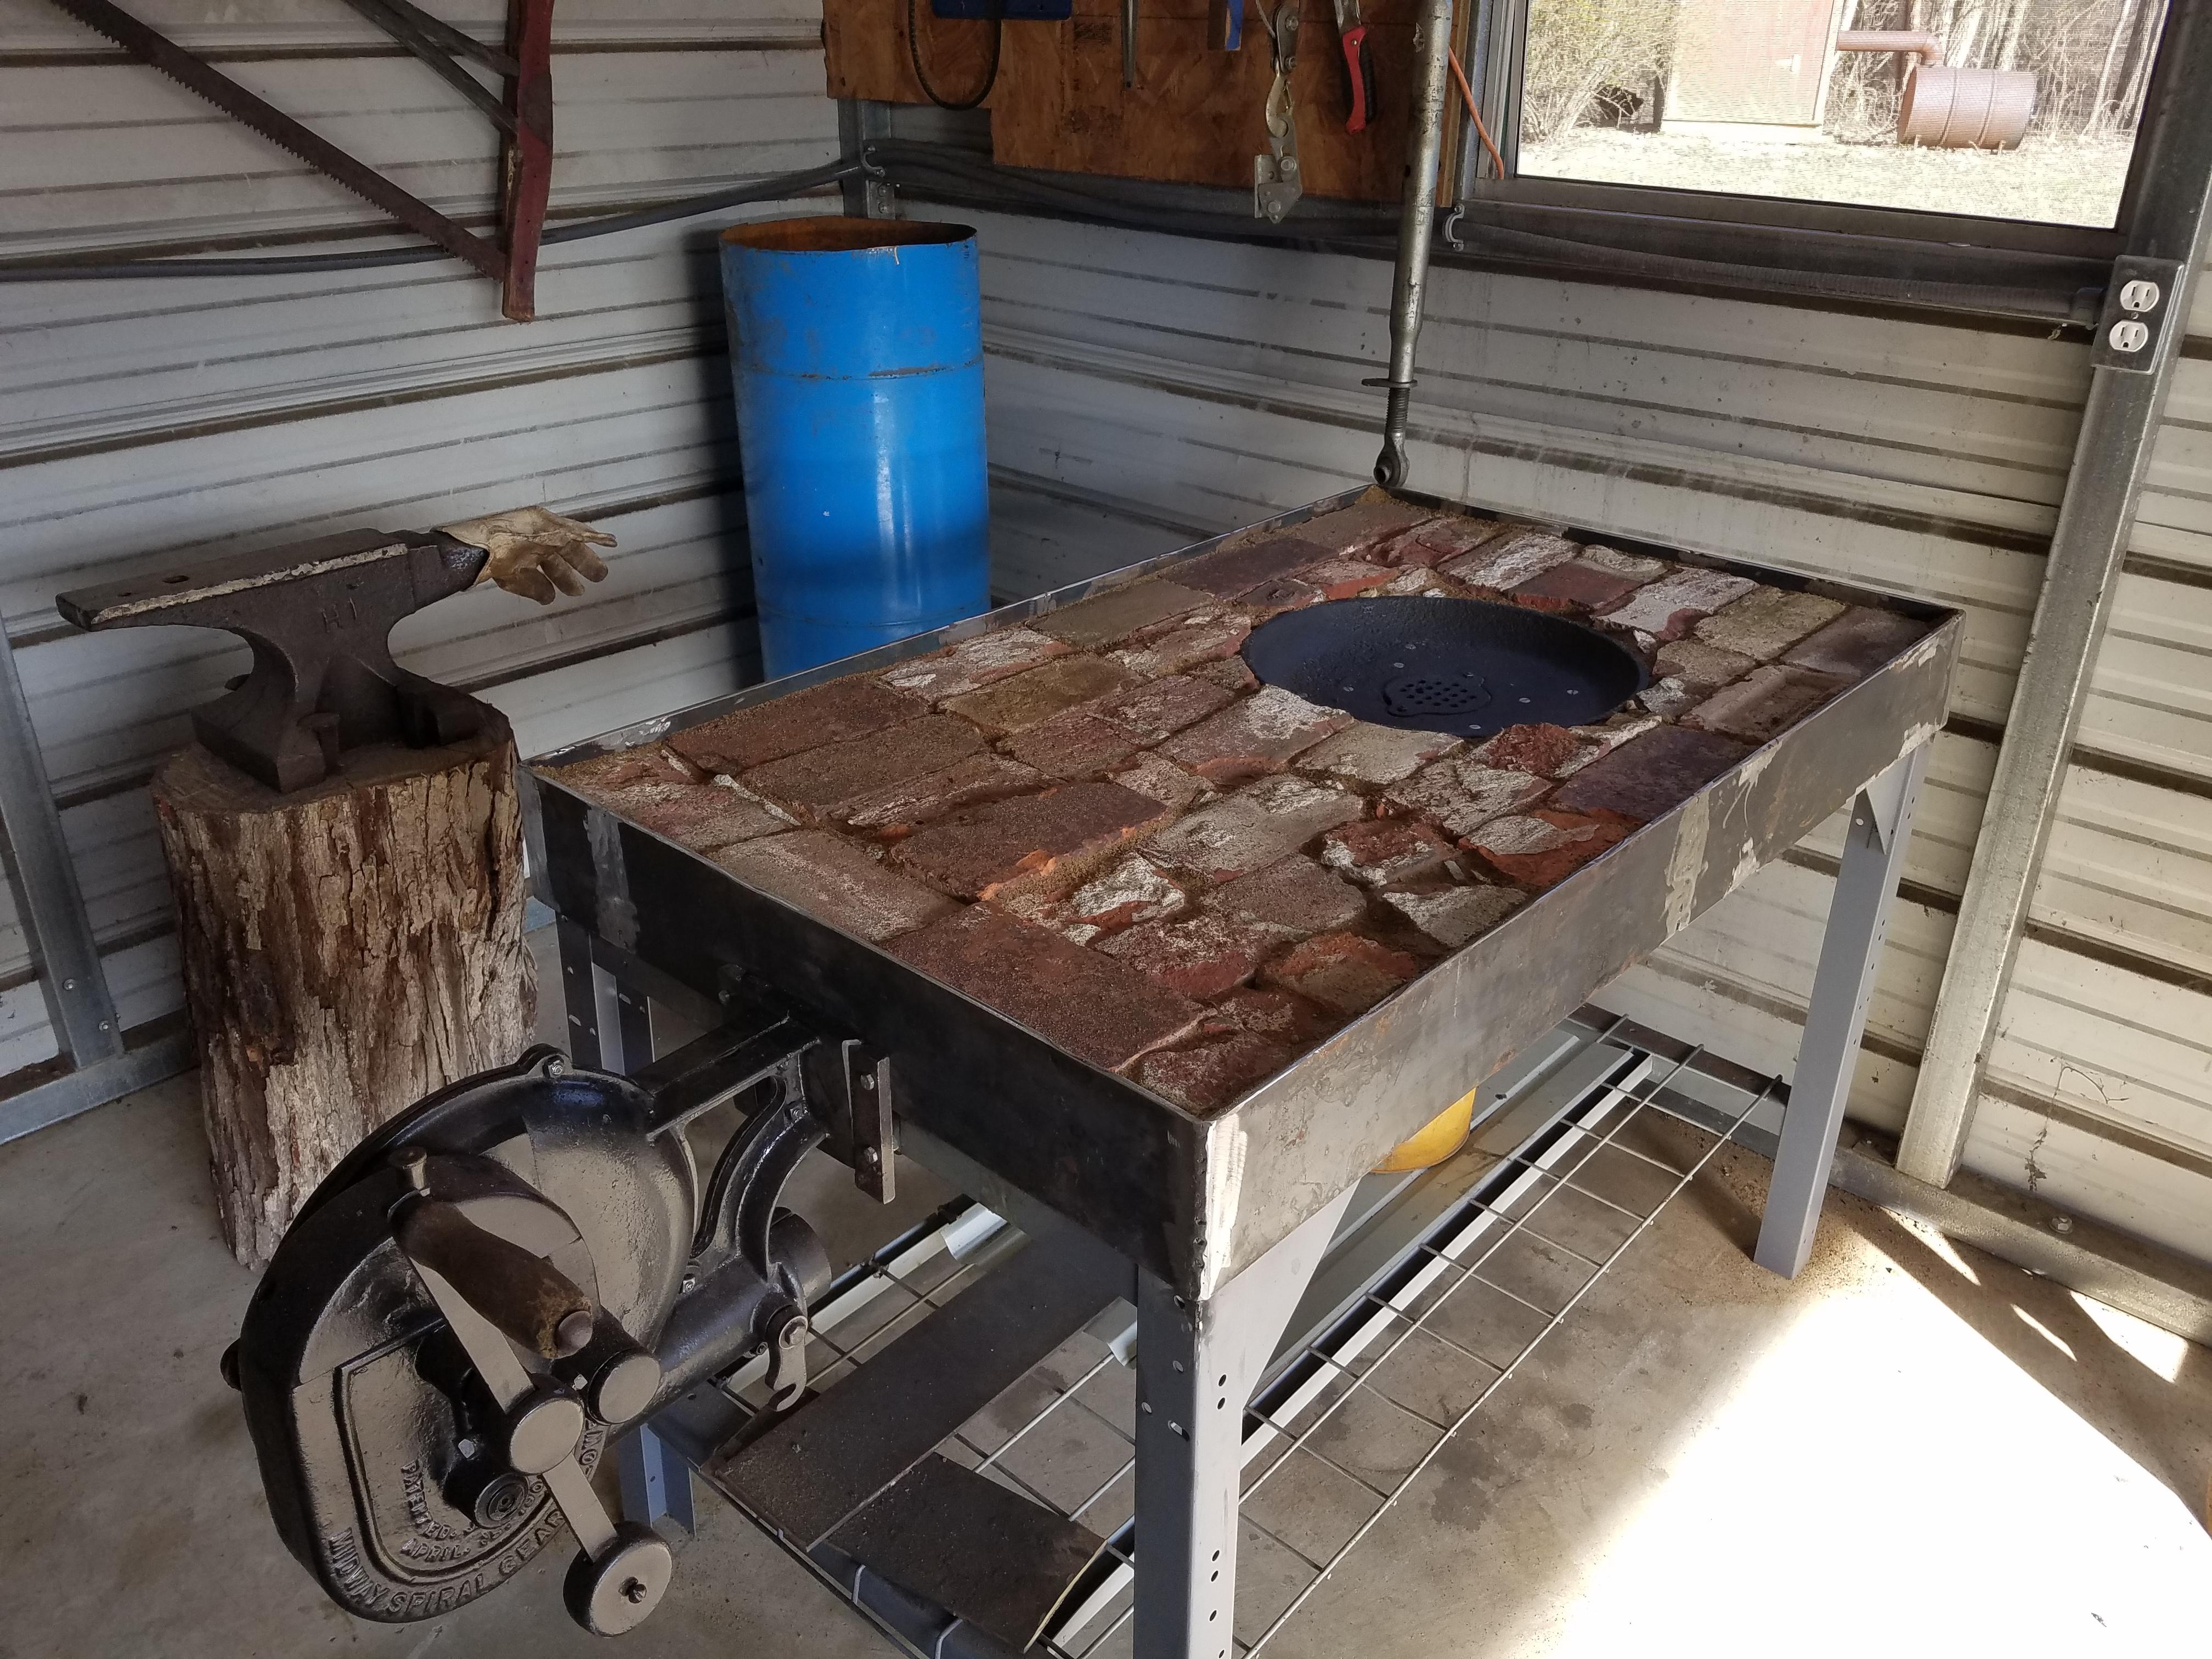
Pieced together the brick to to level out the table to make pushing coal into the pot easier. Boy howdy I am no stone mason! At least the brick was free and the sand came out of my creek. Next is figuring out a hood/ stack. As always comment and suggestion welcome especially if it keeps me from big mistakes.

-
Frosty, thanks, that's a great idea, I think I have an old exhaust flap cap from an old tractor rebuild around here someplace. Love the ash dump idea.
-
Thanks for the idea. I figured it would be easier for me to fabricate the "T" fitting underneath the bowl for the air pipe if it was at 90 deg. There is a plate that I will weld the T to that slides 8nto a fitting under the center of the bowl . It looks to me that the original design was for portability and ease of assembly/ disassembly. Notice the hooks on the blower outfeed. Anyway there is still lots of room to adjust the handle, I have it adjusted so its balanced.
-
Finally got a weekend free and got my welder working. Found the forge parts and anvil at a yard sale last year. Pretty rusty, they were portable calvary forges so the guy said. The boxed were beyon salvage but the blower I rebuilt and the anvil cleaned up very nicely. The fire pot took a lot of work but it turned out all right. The table was $10.00 on craigslist and the side wall metal was free scrap from work. I am lining the table with old red brick to bring the bowl edge level to the table surface to make it easier to rake in the coal. Some final air pipe and fittings and I will start making smoke! Please give comments as I am as green as you can be at smithing.
.


-
Many thanks for the info, gives me some ideas.


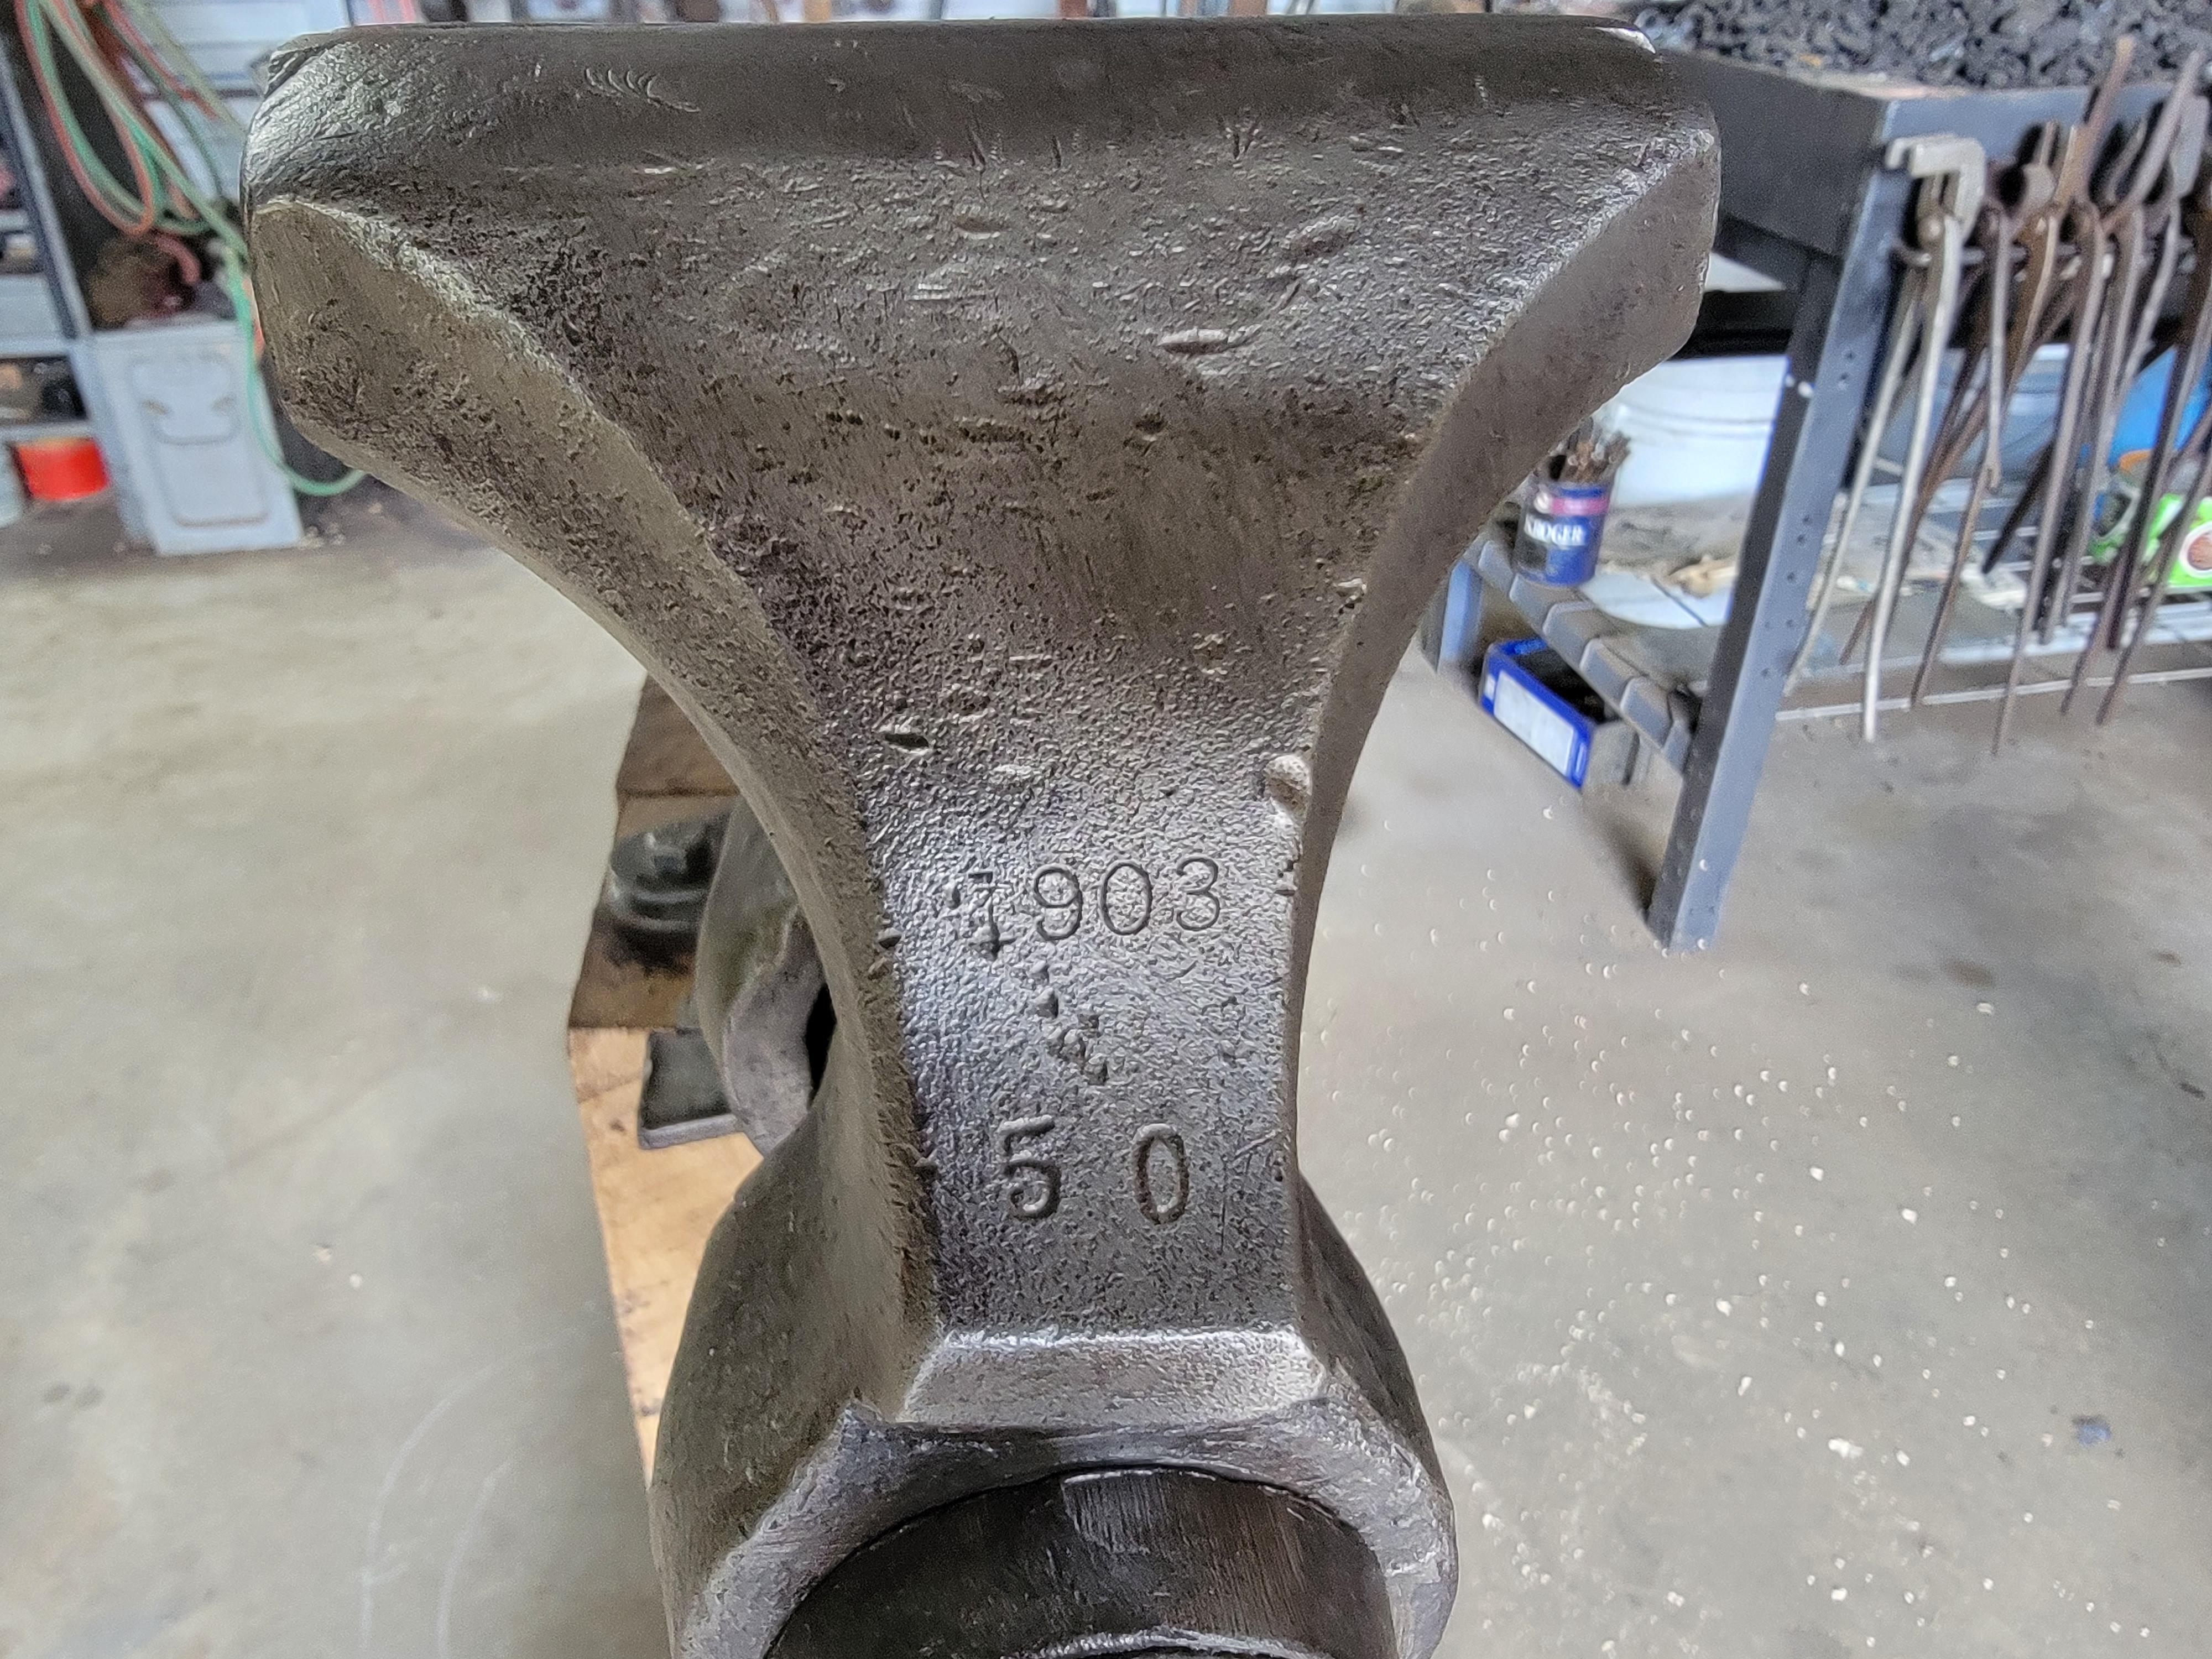

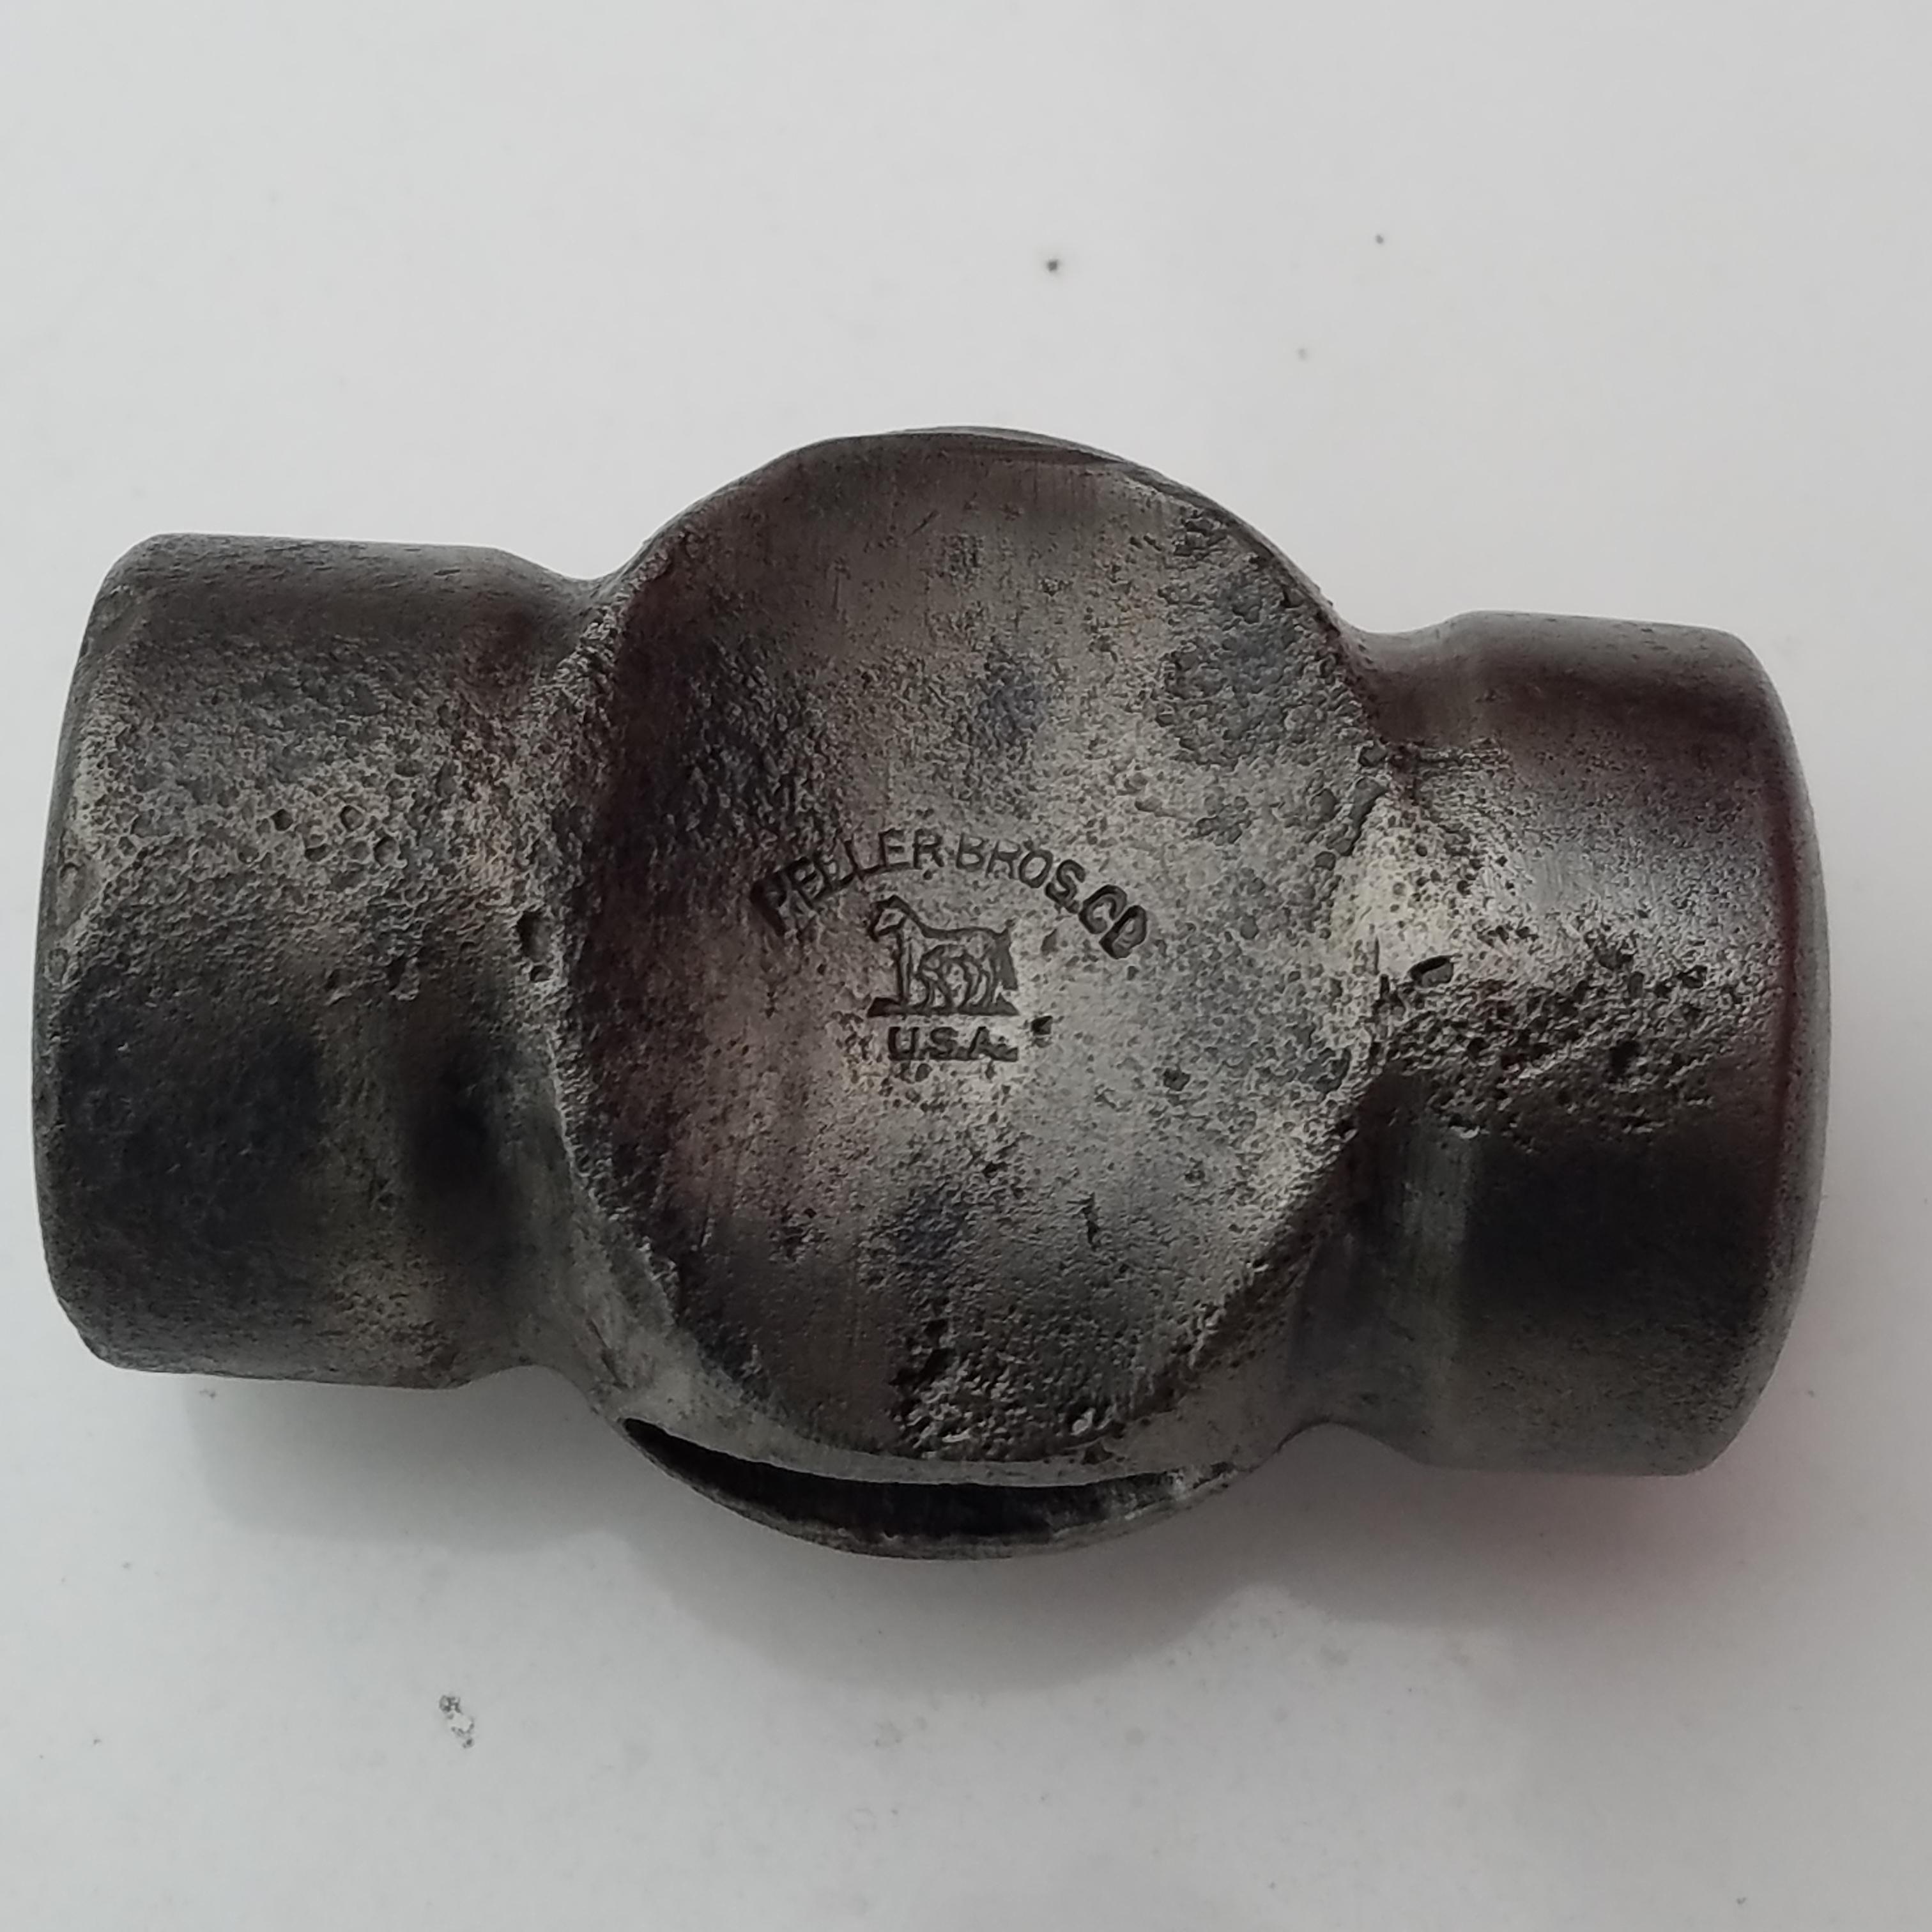


Can anyone identify these markings?
in Blacksmithing, General Discussion
Posted
Looks like a lot code i.d. and a production date/ shift/ time code.