

Les L
-
Posts
855 -
Joined
-
Last visited
Content Type
Profiles
Forums
Articles
Gallery
Downloads
Events
Posts posted by Les L
-
-
Twisted, I would start with rubbing it down with penetrating oil and a cotton cloth to see if it would bring out the writing, but leave the patina.
-
I use olive oil on my cast iron pots and grinder plates, it does not polymerize.
-
My SISCO, solid cast Swedish steel, anvil has the mouse holes, also called handling holes
-
Just what I thought Frosty, but sometimes you need revenge
-
30 minutes ago, Frosty said:
I can't control my wind
 , all can do is warn people off.
Frosty The Lucky.
Frosty, for some reason I think that you would be more like “ sneaky Pete”
-
Great work Ted on all of the projects
Gewoon I’m sure that your girlfriend is very proud of the rose and will cherish it forever
-
I enjoyed watching FIF, I learned a lot of things Not To Do
-
On 1/20/2024 at 9:54 AM, hbmasa said:
If i can figure the color to heat, is there good temps to stretch out cable.
A good quote that I saw on here, I believe by Anvil, that has helped me is "yellow is mellow, red is dead". As has been said several times in this thread Work the cable at near welding heat, put it back in the fire when it cools (starts to loose color) It will move easy at first, when it starts resisting to move heat it back up.
-
Billy, it may help to inform him that the expansion rate of propane from liquid to vapor is 270 to 1. I found that it helps people understand why using a small bottle, pulling a large amount freezes, plus what can happen if you start pulling the liquid to an ignition source
-
Billy, good catch with your nephew. Did you tell him he needs a larger tank to keep it from freezing up?
-
15 hours ago, TWISTEDWILLOW said:
i should have just taken off the whole week
Then you would have missed all the excitement! Good to hear no one was seriously injured.
-
On 1/18/2024 at 6:57 PM, Daswulf said:
Best of luck
Thanks Das
-
Thanks for the advice Irondragon, I’m already seeing the difference between the two eyes and noticing what I wasn’t seeing before.
-
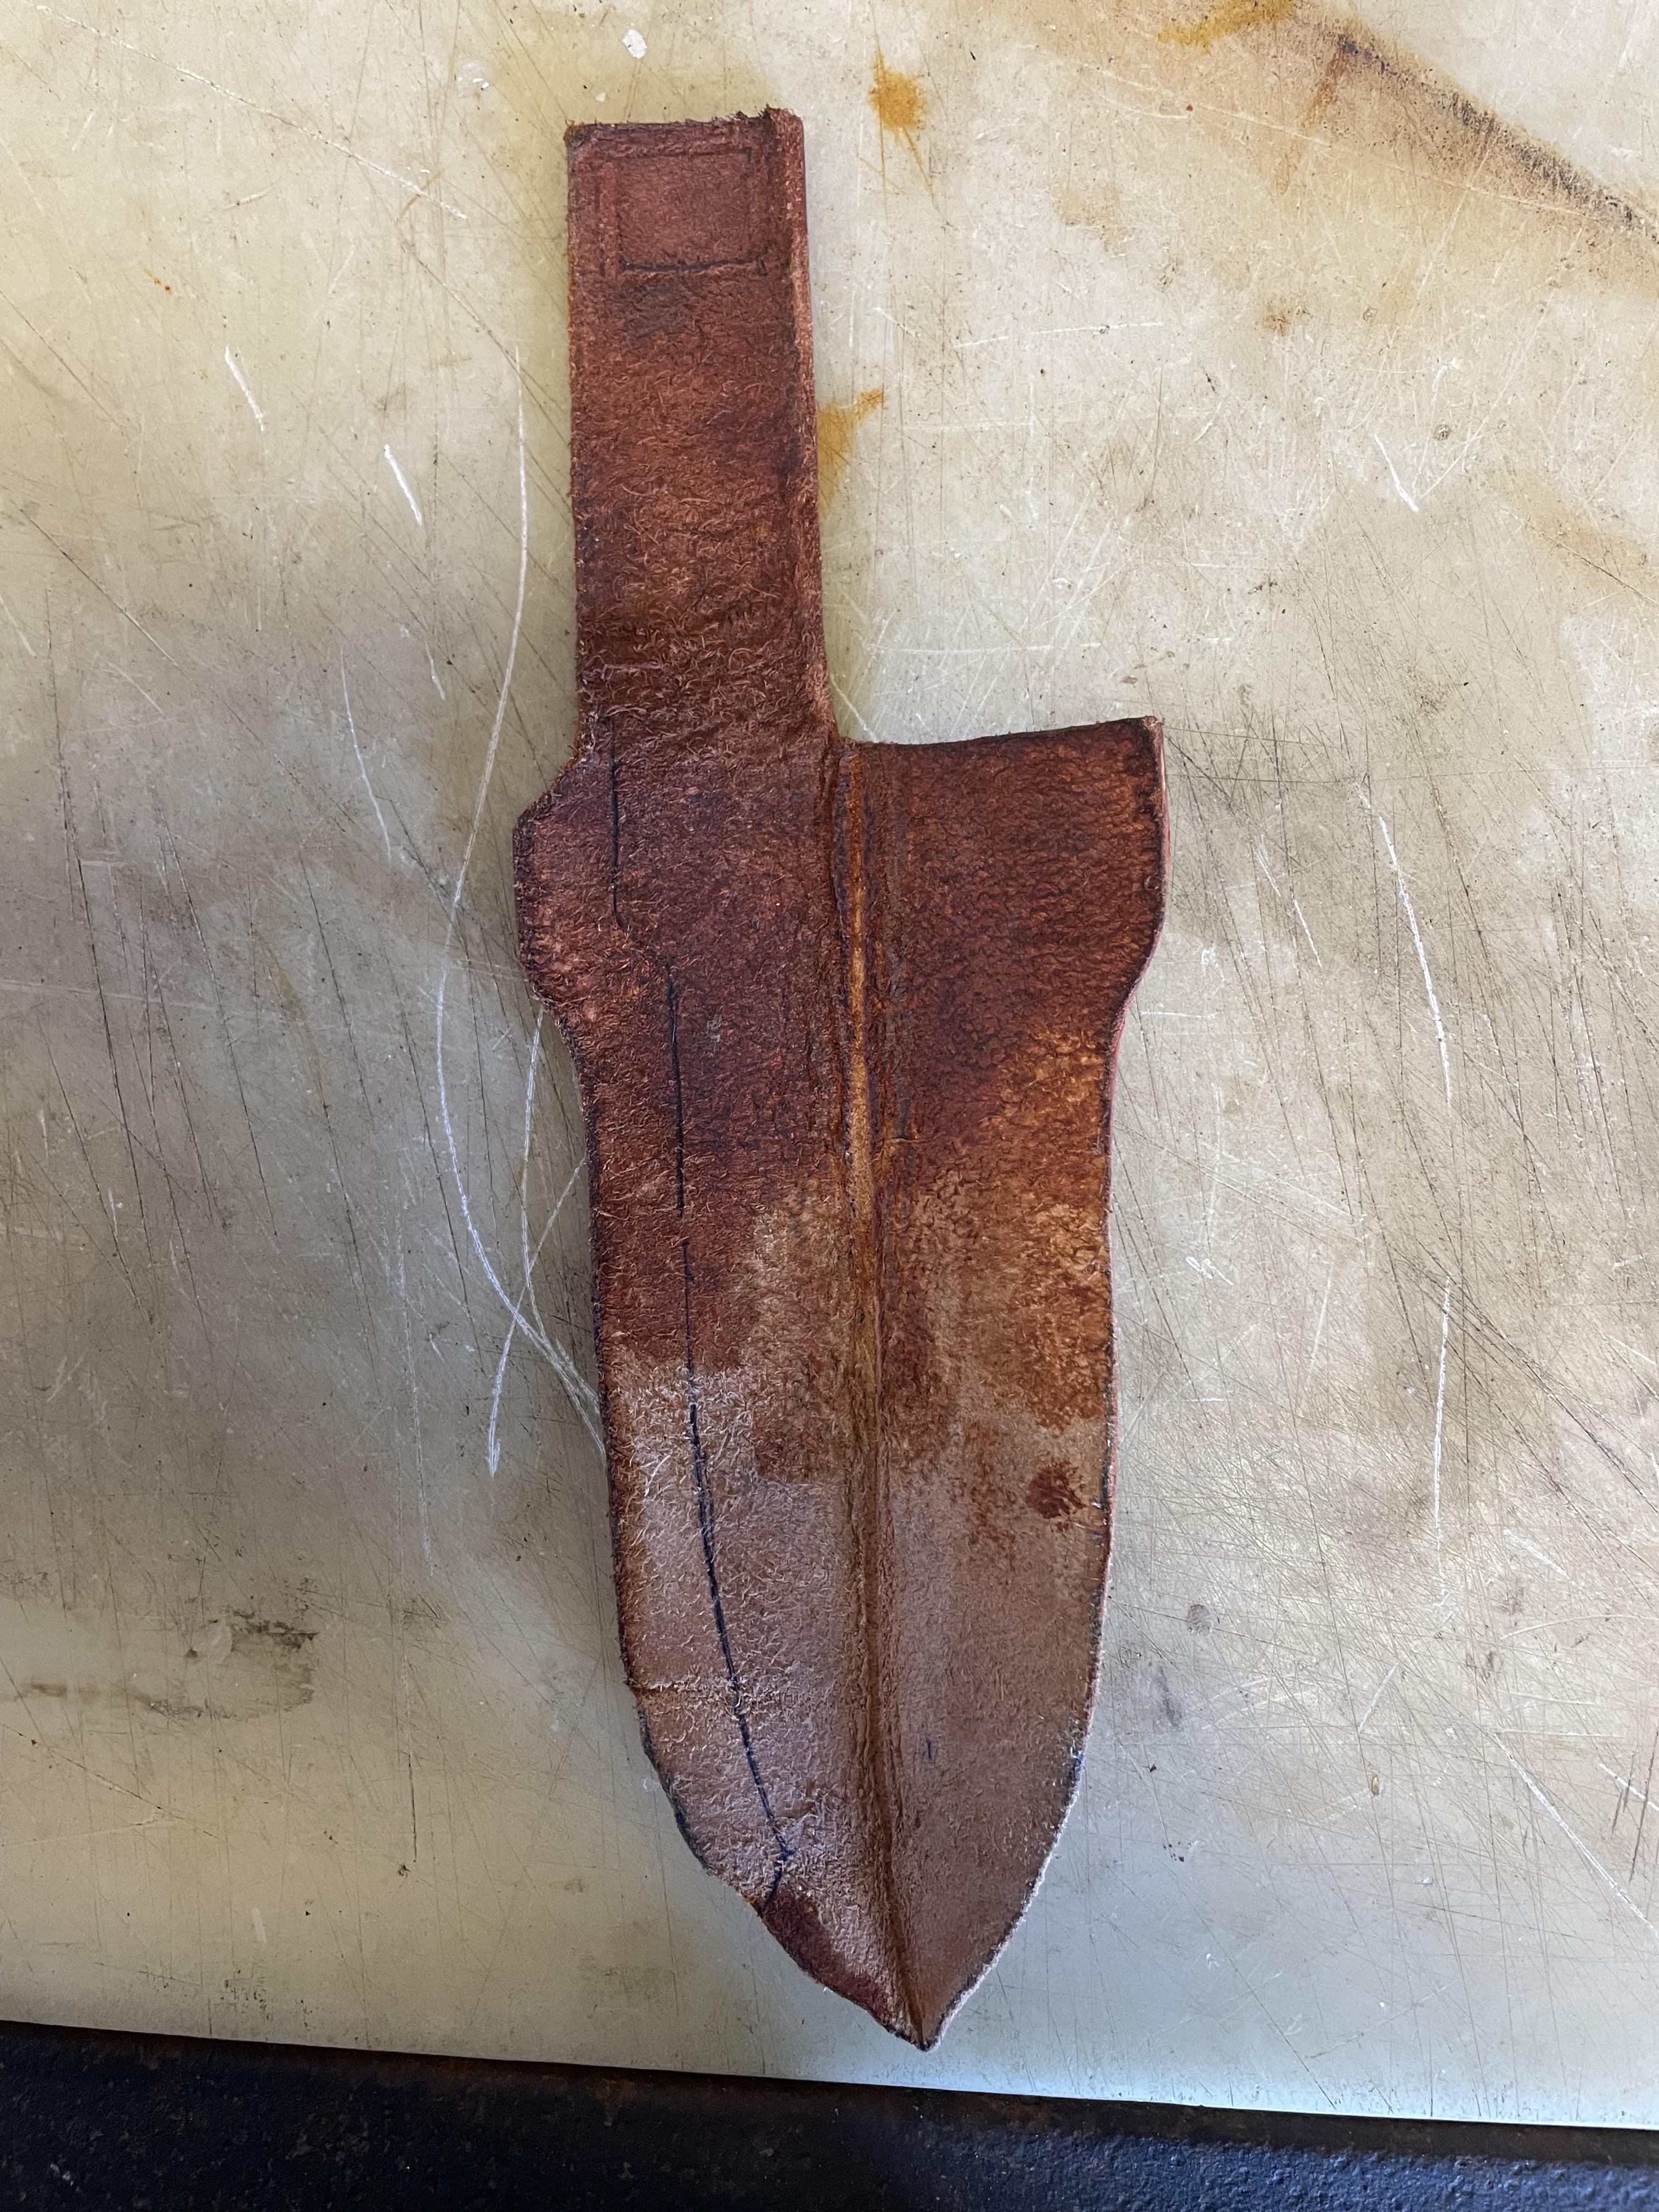
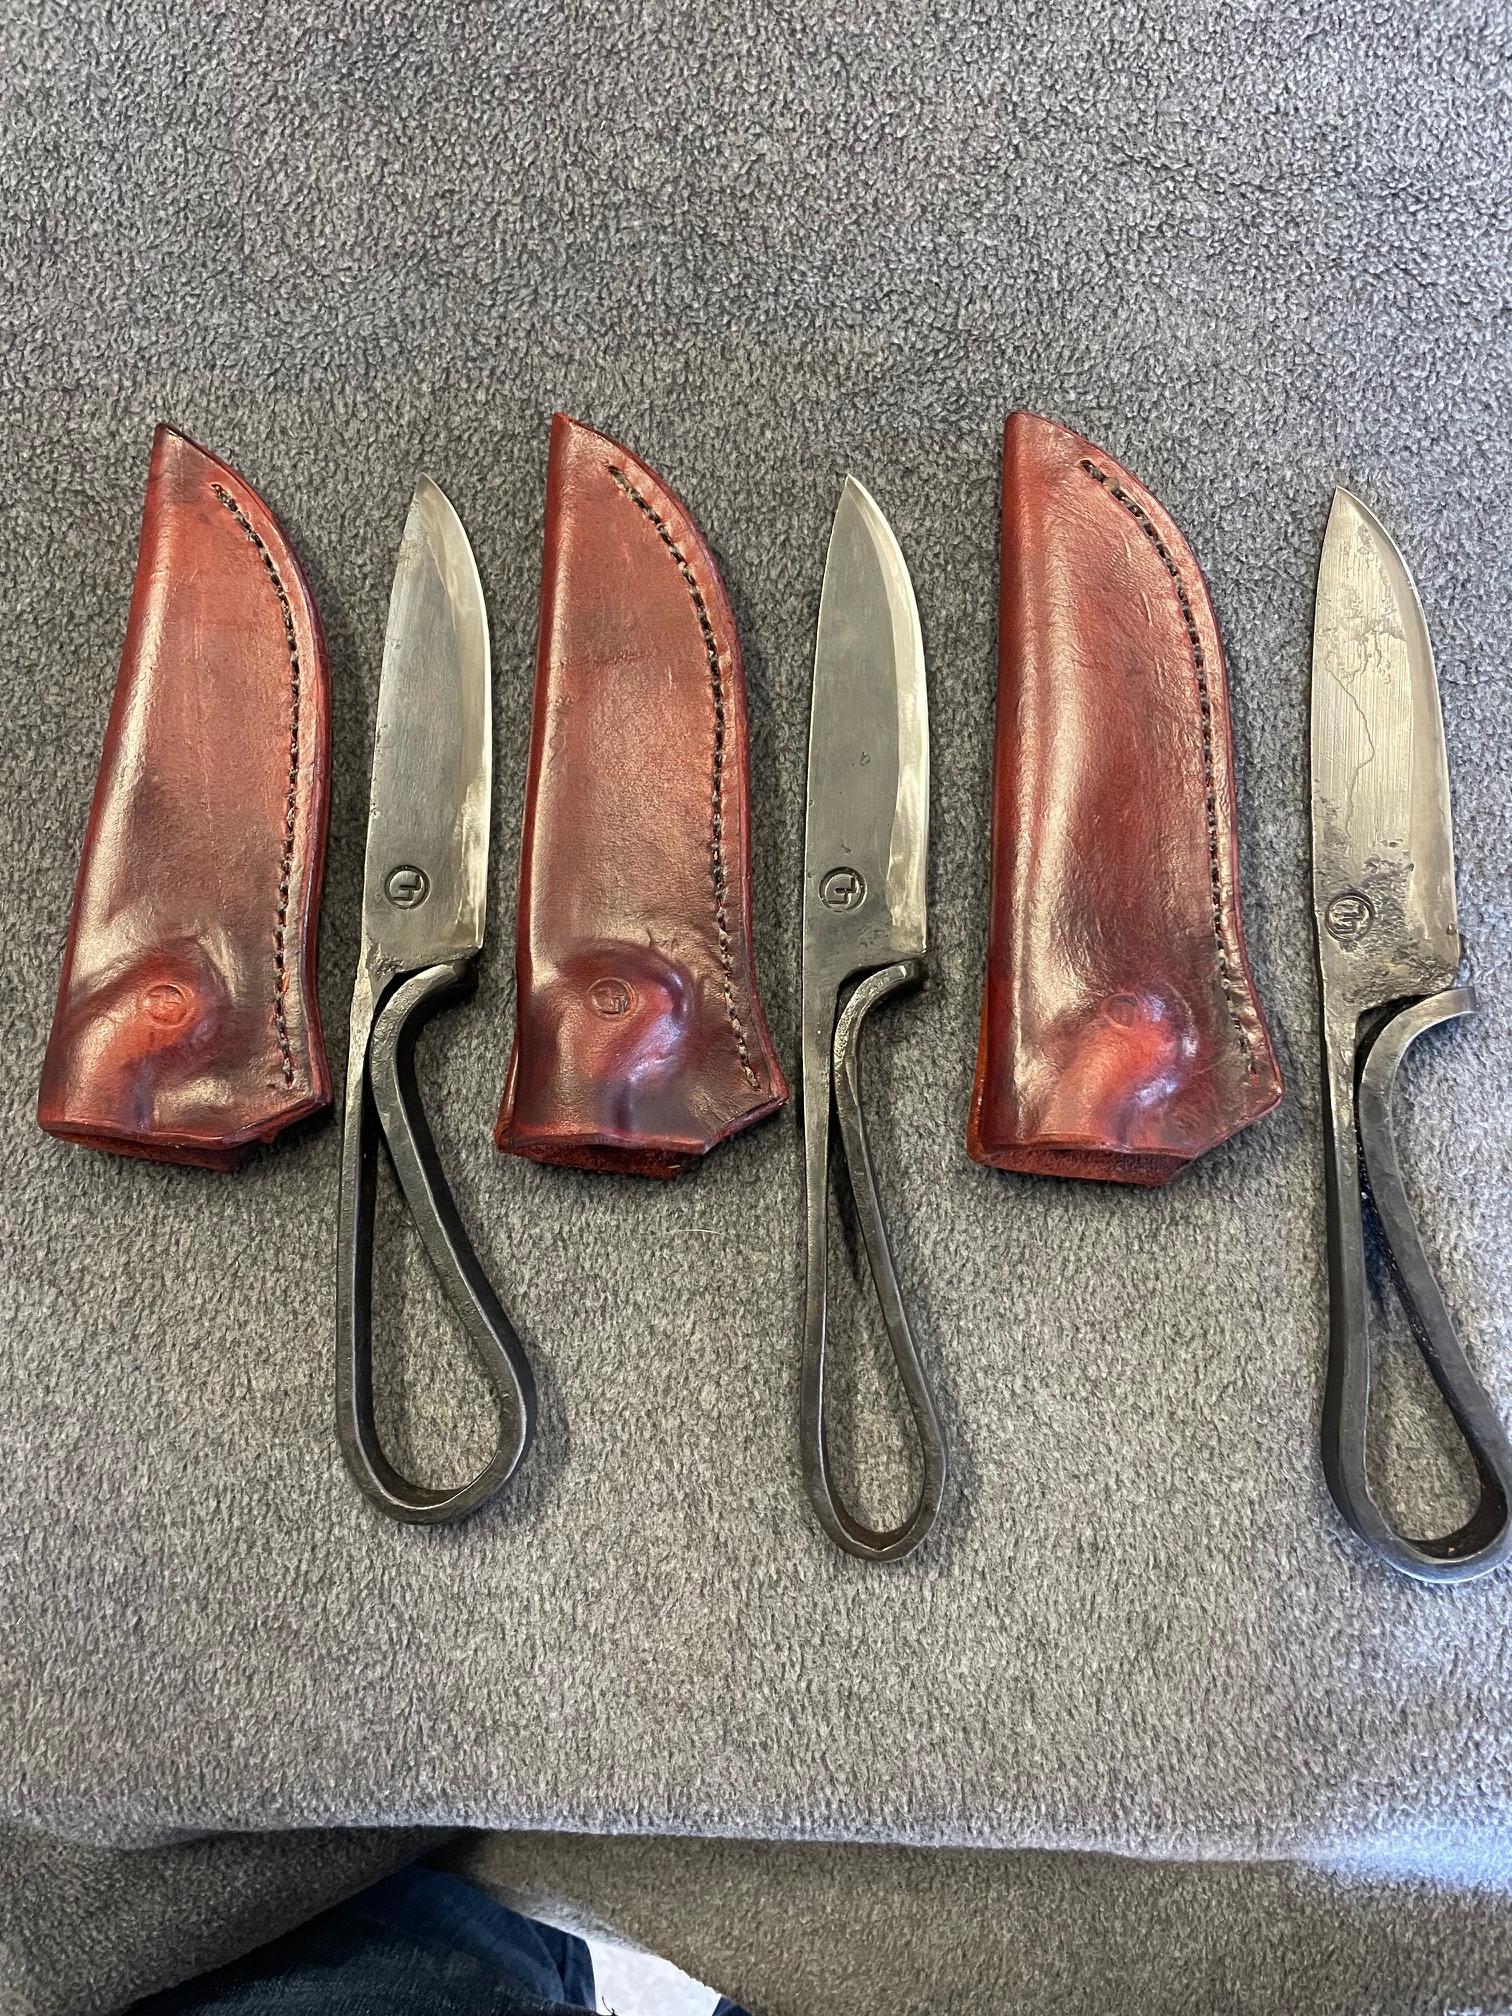
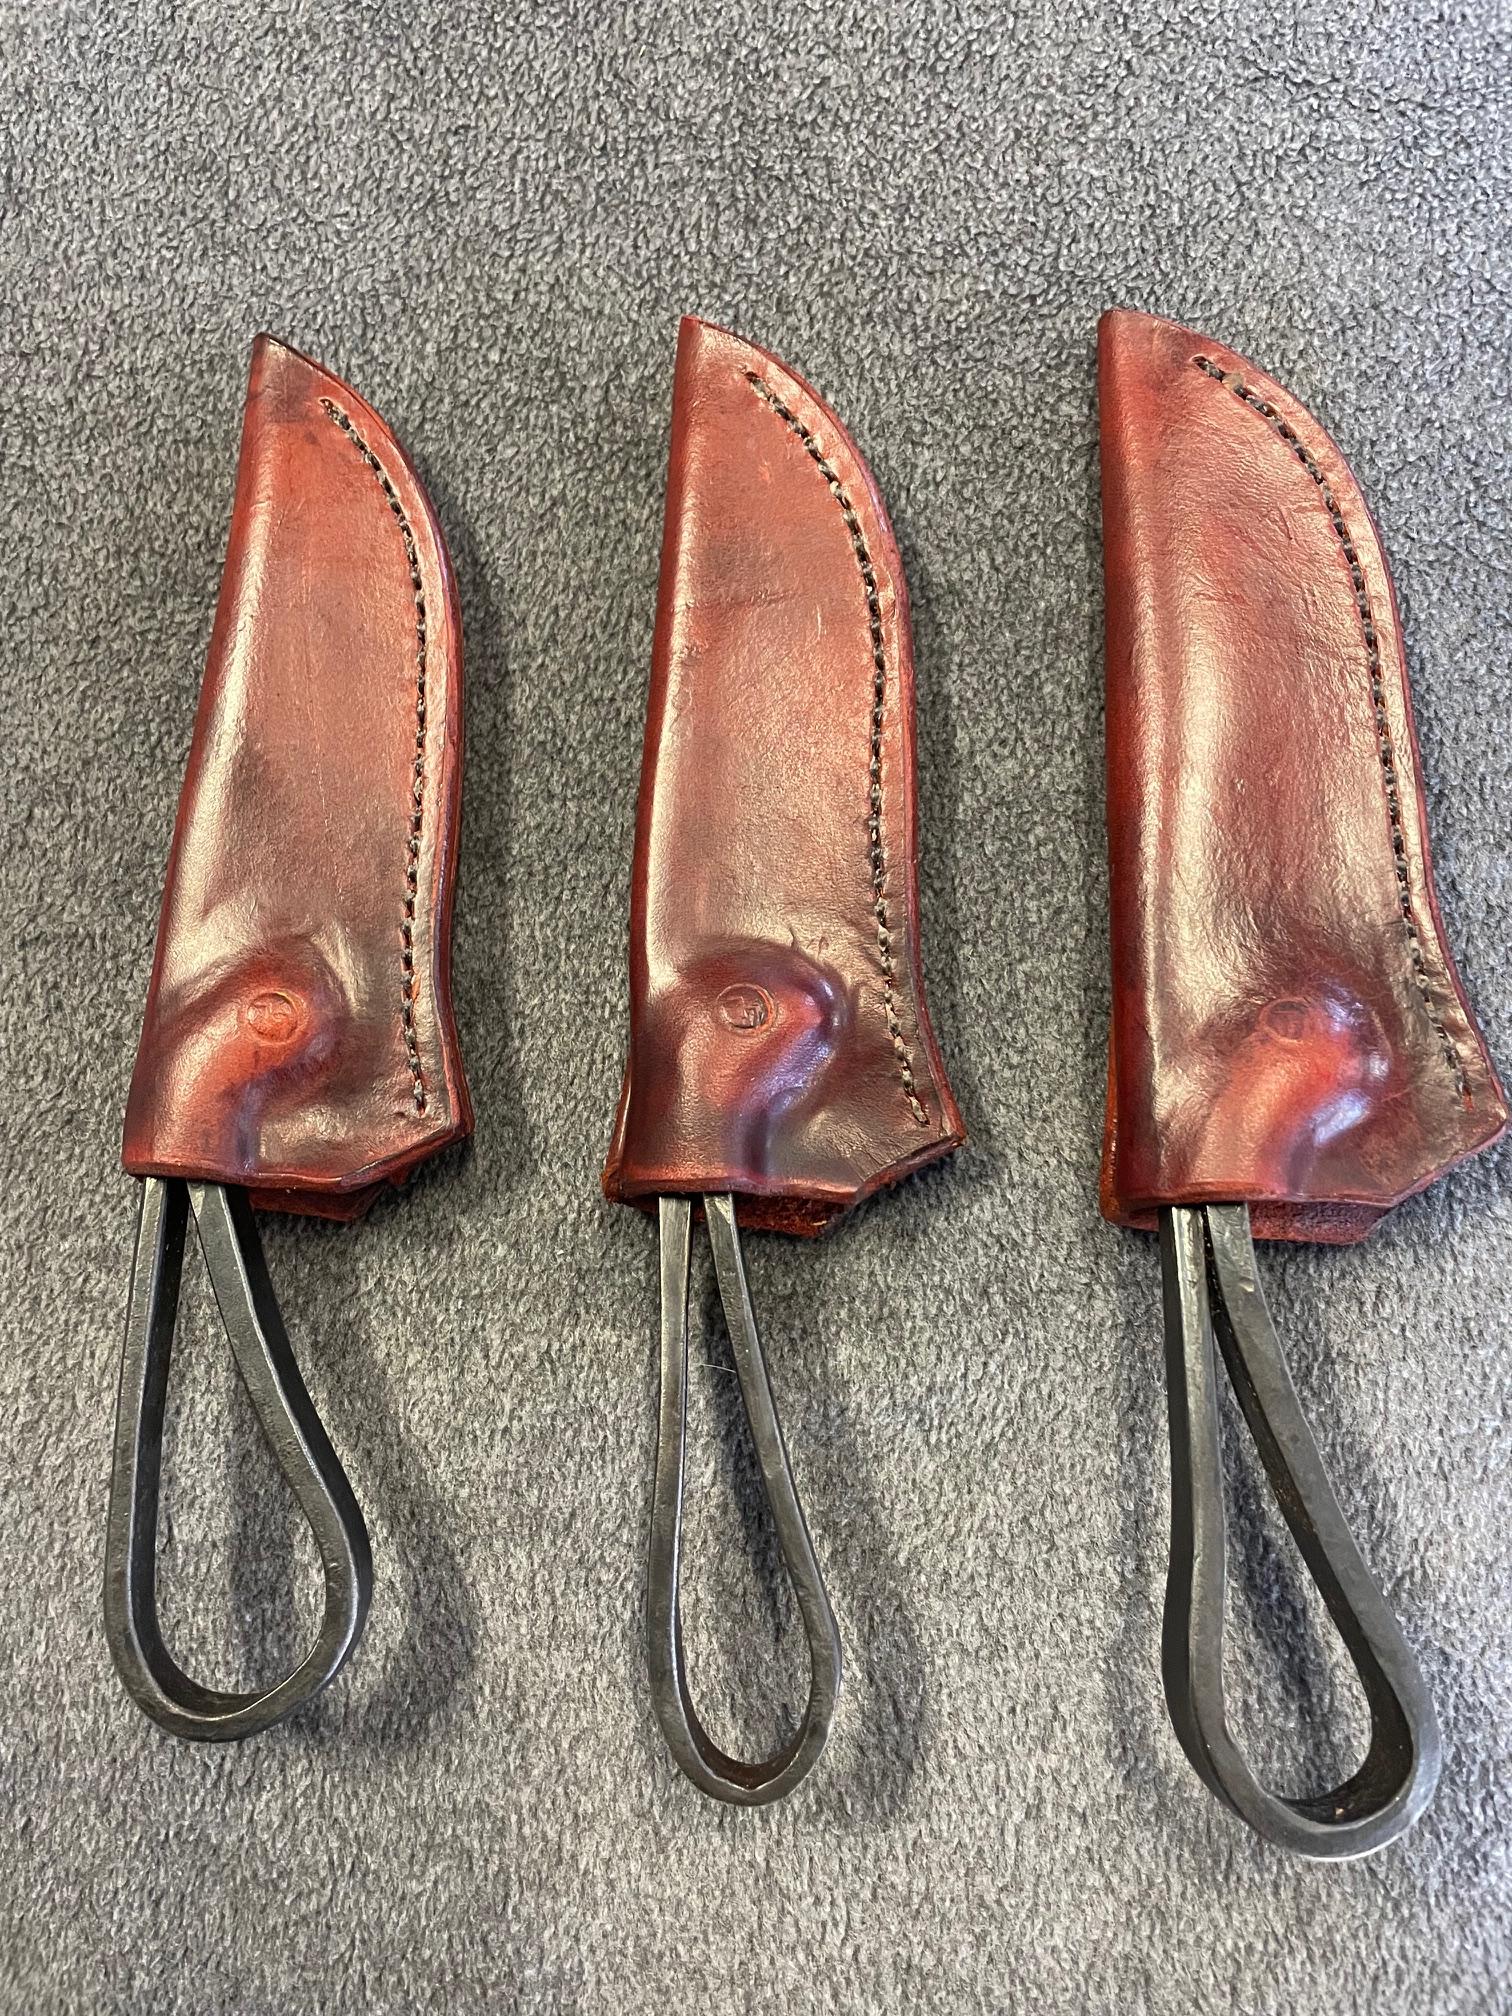
George, I use veg tan leather and stain it, but I don’t use any other treatments on it, I sew by hand, punch the holes with a diamond shaped awl and use a heavy waxed tread. After sewing I use a cotton cloth to buff the sheath with the wax that comes off the thread while sewing. I also use a 4 hole and 2 hole diamond punch to lay out the holes before finishing punching with the awl. I recommend the customer to rub a light coat of olive or conala oil on the sheath when it starts to dry out. I find neatsfoot oil makes the leather too soft to retain the friction fit.
I don’t like the drilled holes, I prefer the diamond shaped holes so I can stack my thread as I sew. First pass from the front, pull down to the bottom of the hole and push the back needle of over the top, it keeps me from cutting the thread as I sew.
Im no expert, this is how I was shown and I am still learning and improving with every project -
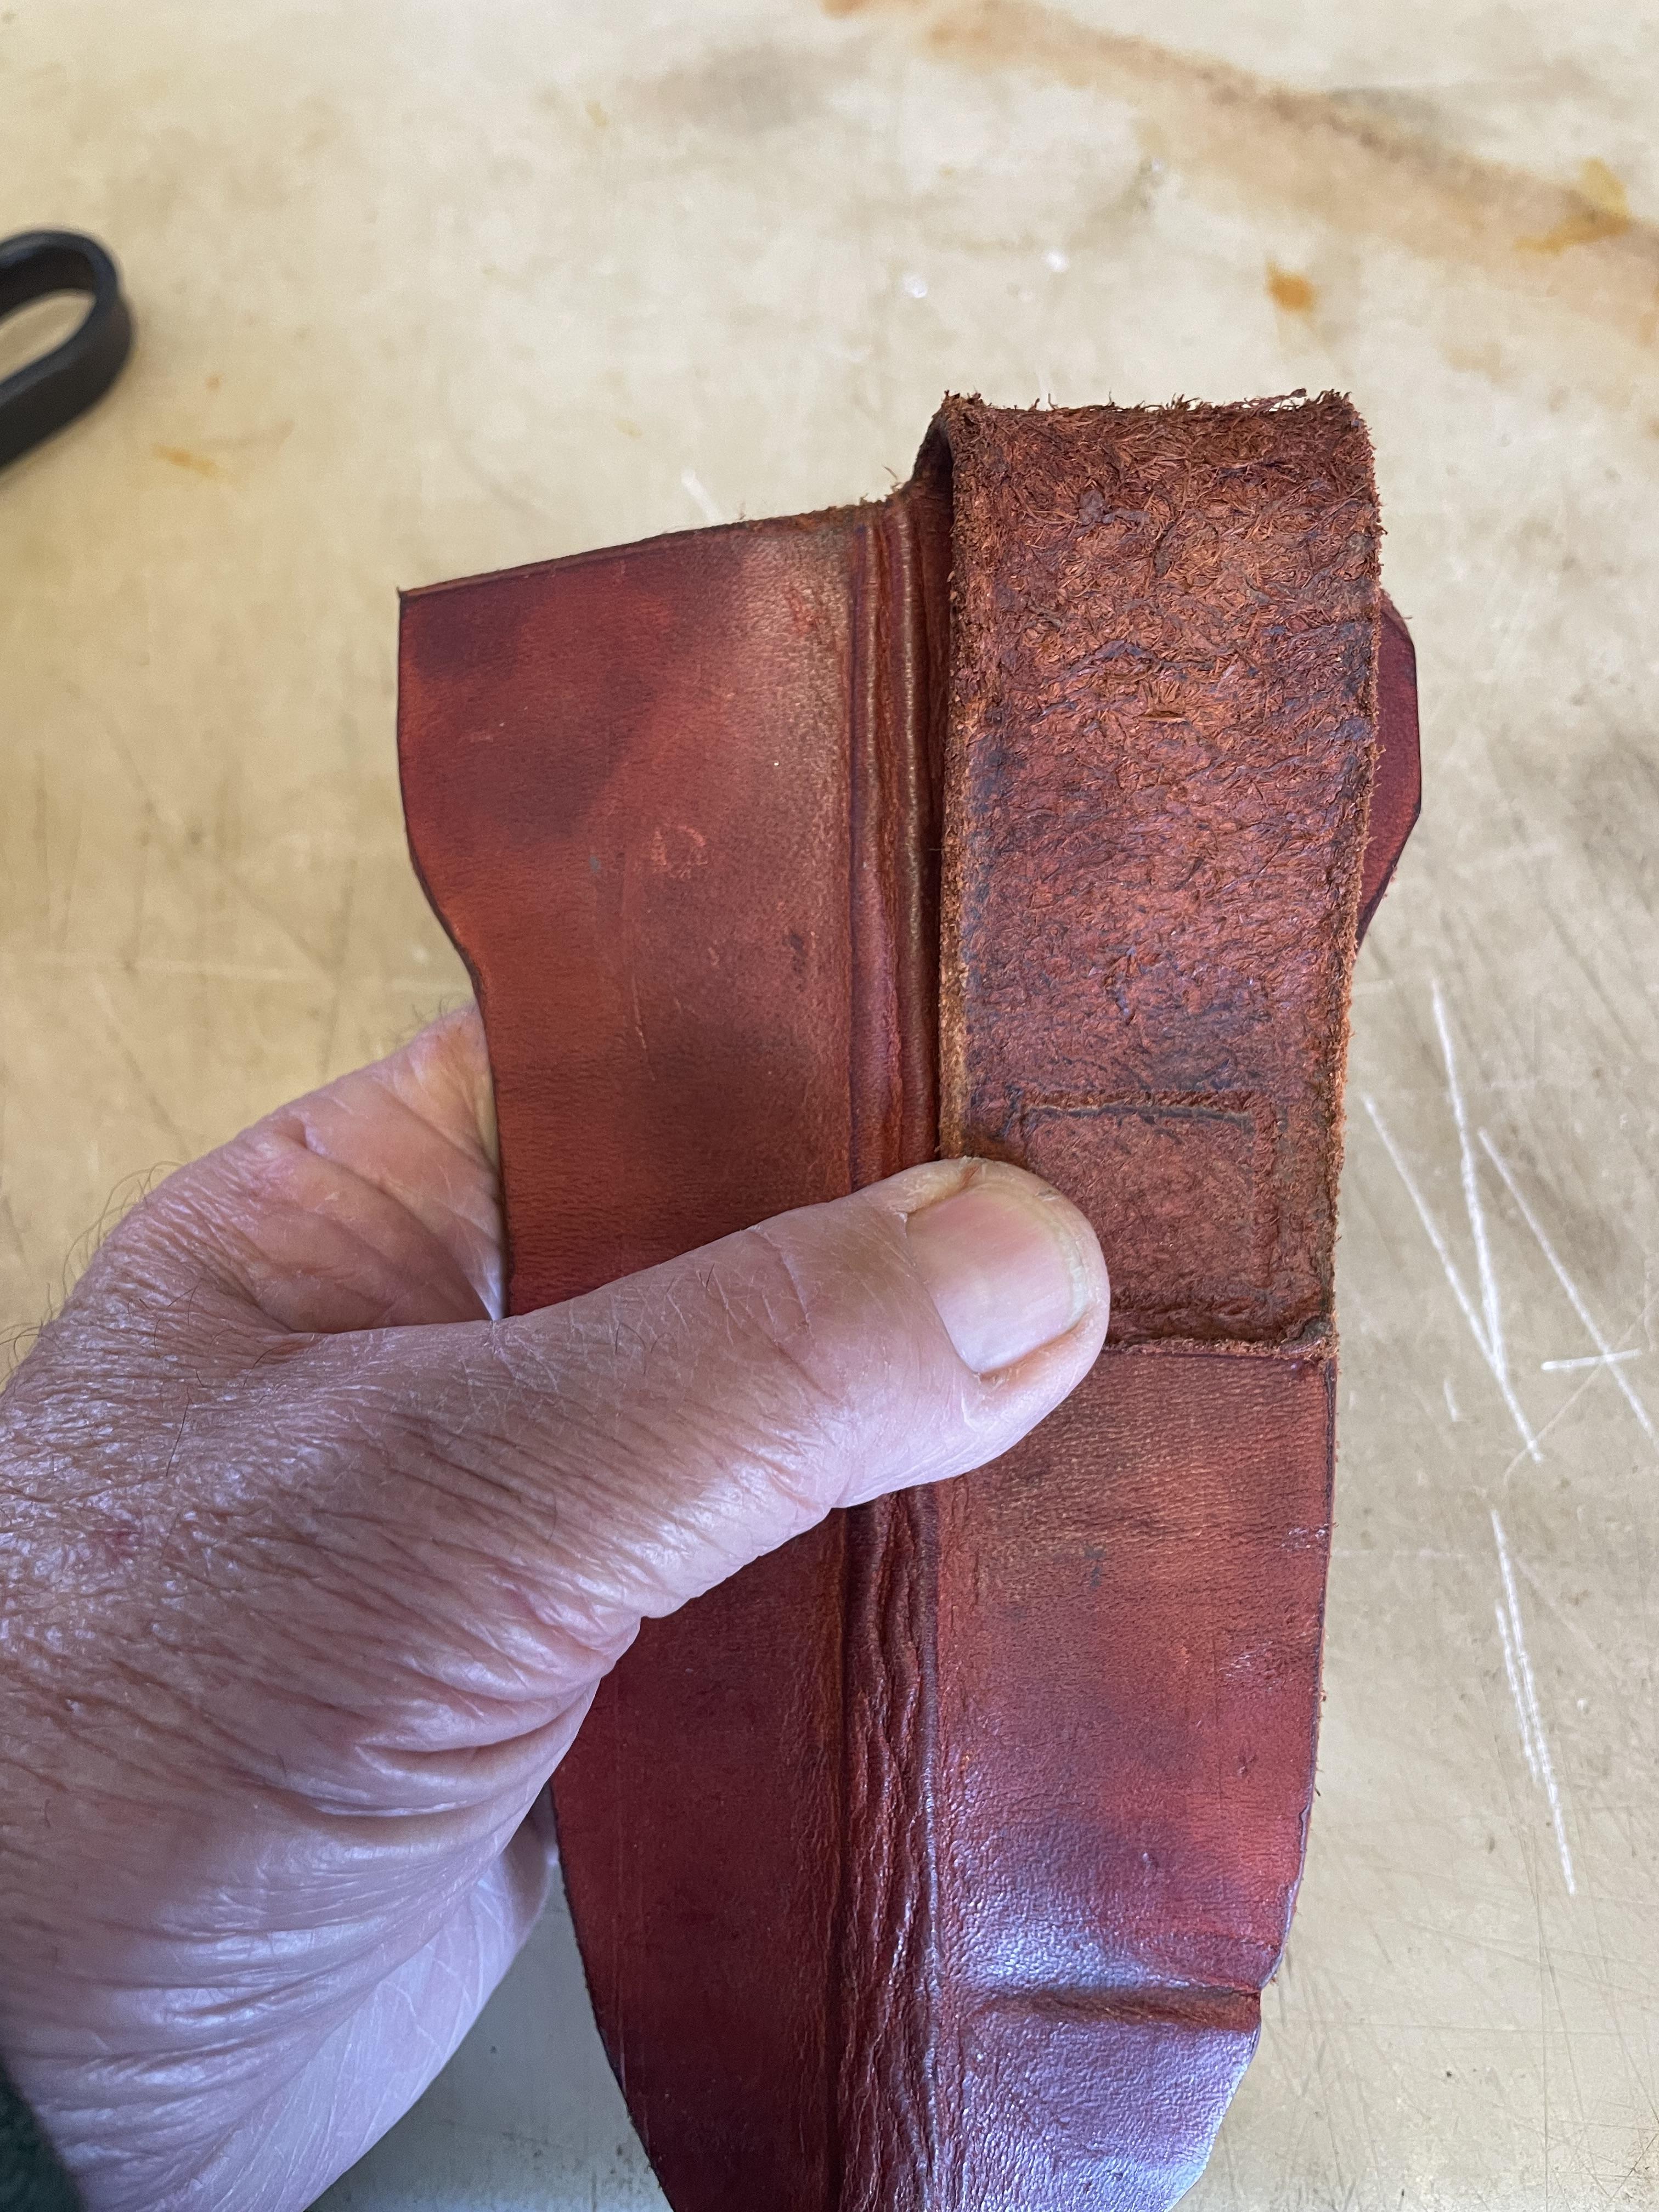
George, the sheath has a belt loop on the back, when I draw the pattern I extend a 3” long section past the top of the sheath, that gets folded against the back and sewn before the sides. After sewing I wet the front of the sheath, where the impression will be, insert the knife and use my fingers and a smooth rounded wood dowel to shape the area. Leave the knife in while the leather dries and you get a friction fit that secures the knife in place.


 Just now, Les L said:
George, the sheath has a belt loop on the back, when I draw the pattern I extend a 3” long section past the top of the sheath, that gets folded against the back and sewn before the sides. After sewing I wet the front of the sheath, where the impression will be, insert the knife and use my fingers and a smooth rounded wood dowel to shape the area. Leave the knife in while the leather dries and you get a friction fit that secures the knife in place.
Yes, I’m getting the implants, right eye is about 90% now and getting better every day. I’m already seeing better with it than before the surgery.
-
I completed these last week, before having cataract surgery on my right eye, and completed the leather work this week, after I could see good enough to cut out and sew the sheaths. Left eye will be done next week, so I'll be away from the forge for a couple of weeks.


-
George, I enjoyed the article, thanks for posting it.
-
I'm glad we were able to help and that you have had good progress. As you work that piece down square then draw it out flat for your knife you should end up with a completely welded billet. Just remember to only work it HOT, unless you are planishing the final shape.
The next one should not be a problem for you, just remember to work short sections and finish them before working more of the cable.
-
hbmasa, I don’t think you are understanding what we are trying to explain to you
#1) quite wasting time on this billet until you have learned how to correctly forge weld a section of cable, then try to save this piece when you have more experience
#2) you don’t need to have your forge cranked wide open, you only need it to get to welding heat. That is the lemon yellow color of the material in the video. Light your forge, place your cable inside and heat it up until the entire section of cable is that color all the way through the cable. You can not time this, you have to go by the color. The cable and inside of the forge will be the same color turn your cable to make sure it’s the same, with no shadows on any sides
#3) follow the directions you have been given to weld it working in short sections. Complete one short section at a time
#4) pounding is not the answer, or weight of hammer, it is technique which has been explained. If it is not at welding temperature it will not weld, no matter what you do. When a section doesn’t weld it gets scale trapped in the area and the only way to get it to weld is to grind the scale out of that area before trying to weld it again , which is very hard with cableI hope this helps
-
That’s a good haul, you’ll find a use for it
-
Sorry to hear about that Scott. It's amazing how low down people can be these days, no respect for anyone, including themselves.
-
When welding you will feel a soft mushy hit with the hammer, with dull sounds, until it is completely welded, then you will start getting rebound from your hammer, a solid feeling like working a piece of bought steel, and you will start hearing a ring from the metal as your working it
-
I agree with Jo Bai that it probably won’t weld at this time due to the scale built up in between the layers, but you can try it
Don't try to turn your forge down, keep it at welding heat and keep rotating the cable until it is a full welding heat all the way through. As soon as it starts loosing color back in the forge and bring it back up to welding heat
I would have started a thread in the general discussion “ need help welding cable “ or something similar and I think you would have received comments quicker
-
hbmasa, I'm just seeing your post. Looking at the pictures i think you may have worked the cable too cold and not at welding heat all the way through the cable, so you didn't get a full weld. This is how I do it, I know there are other ways, but this is how I was taught and it works for me.
I don't electric weld the ends of the cable before starting, I will weld a short piece of round or square bar on one end of a short piece of cable to hold it with tongs if the section is too short to be able to hold it with my hands. I heat about 2 inches of the end, flux it bring to welding heat then place it in the v swedge and set the weld, while constantly rotating the cable in the direction of the cable twist. reheat and complete the weld only working at welding heat. After the end is fully welded I heat up the length of cable I'll be welding for my project, usually 6-12 inches, then place the welded end in a vice and untwist the cable to open the strands, pour flux inside, twist closed, then reheat and twist back closed as tight as I can, then I bring short sections, 2-3 inches at a time, to welding heat fluxing the outside as needed and continue welding the cable in the short sections down the length of cable until I have all the cable welded into a solid round bar. I loose about 1/3 of the diameter of the original cable. After I have it all welded I move to the face of the anvil and forge it to square then to the shape I need. I only work it at a high, near welding, heat. I take my time heating the cable, rotating it as it heats and making sure it is completely heated all the way through before working it. I use plain borax for flux. I hope this helps you.
Your topic, Got first v swedge, may be why you haven't received more answers to you cable welding question

Question about controlling spatter
in Welding/Fab General Discussion
Posted
I’ve used the Jells, nozzle spray and Pam for the last 45 yrs and can’t tell the difference between them
if I have a project I don’t want bb’s stuck to I use nozzle spray because it doesn’t leave an oily mess on the project