Jimmies
-
Posts
34 -
Joined
-
Last visited
Content Type
Profiles
Forums
Articles
Gallery
Downloads
Events
Everything posted by Jimmies
-
Plenty of belts available and they seem to be around £14 for 2
-
Hello All and Happy New Year I'm just looking at a grinder and like everywhere else a 2x72 grinder is alot but this is 6x89 with a 2.2kw ( 3hp? ) motor axminstertools.com at2260bs2 belt sander What am I missing Cheers
-
Thanks Both....I'll get hunting
-
I can't find plistex or itc at all here in the UK online
-
Apologies... I've checked the tub and it is castable refractory.... Is that a better/correct covering for kaolwool
-
OK, cheers Mikey... What should be used on top of kaolwool? I will be looking to build a smaller forge as this one is quite big for 1 burner
-
What should I have used instead of refractory cement... From what I remember that was the suggested covering for kaolwool I'm happy to resolve issues and appreciate any help
-
Hello Mikey At present the forge gets to 1010 deg C at an indicated 5psi....then the plastic at the near end of the probe gets soft. The gauge will go well over 20psi fully open so I would imagine that it will get hot enough.... I'm nowhere near thinking about forge welding anyway. What heat resistant coatings are you referring to and what would it do for me. If I remember right there are two wraps of 1 inch kaol wool with refractory cement... It is very hard and stable
-
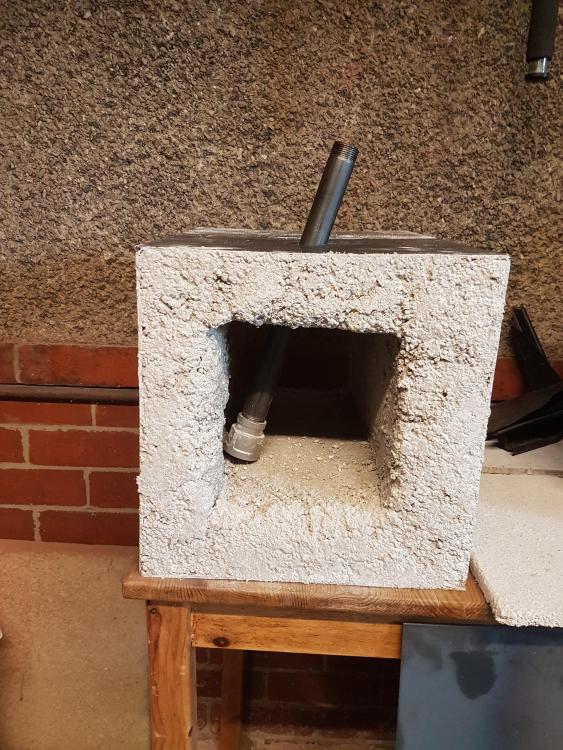
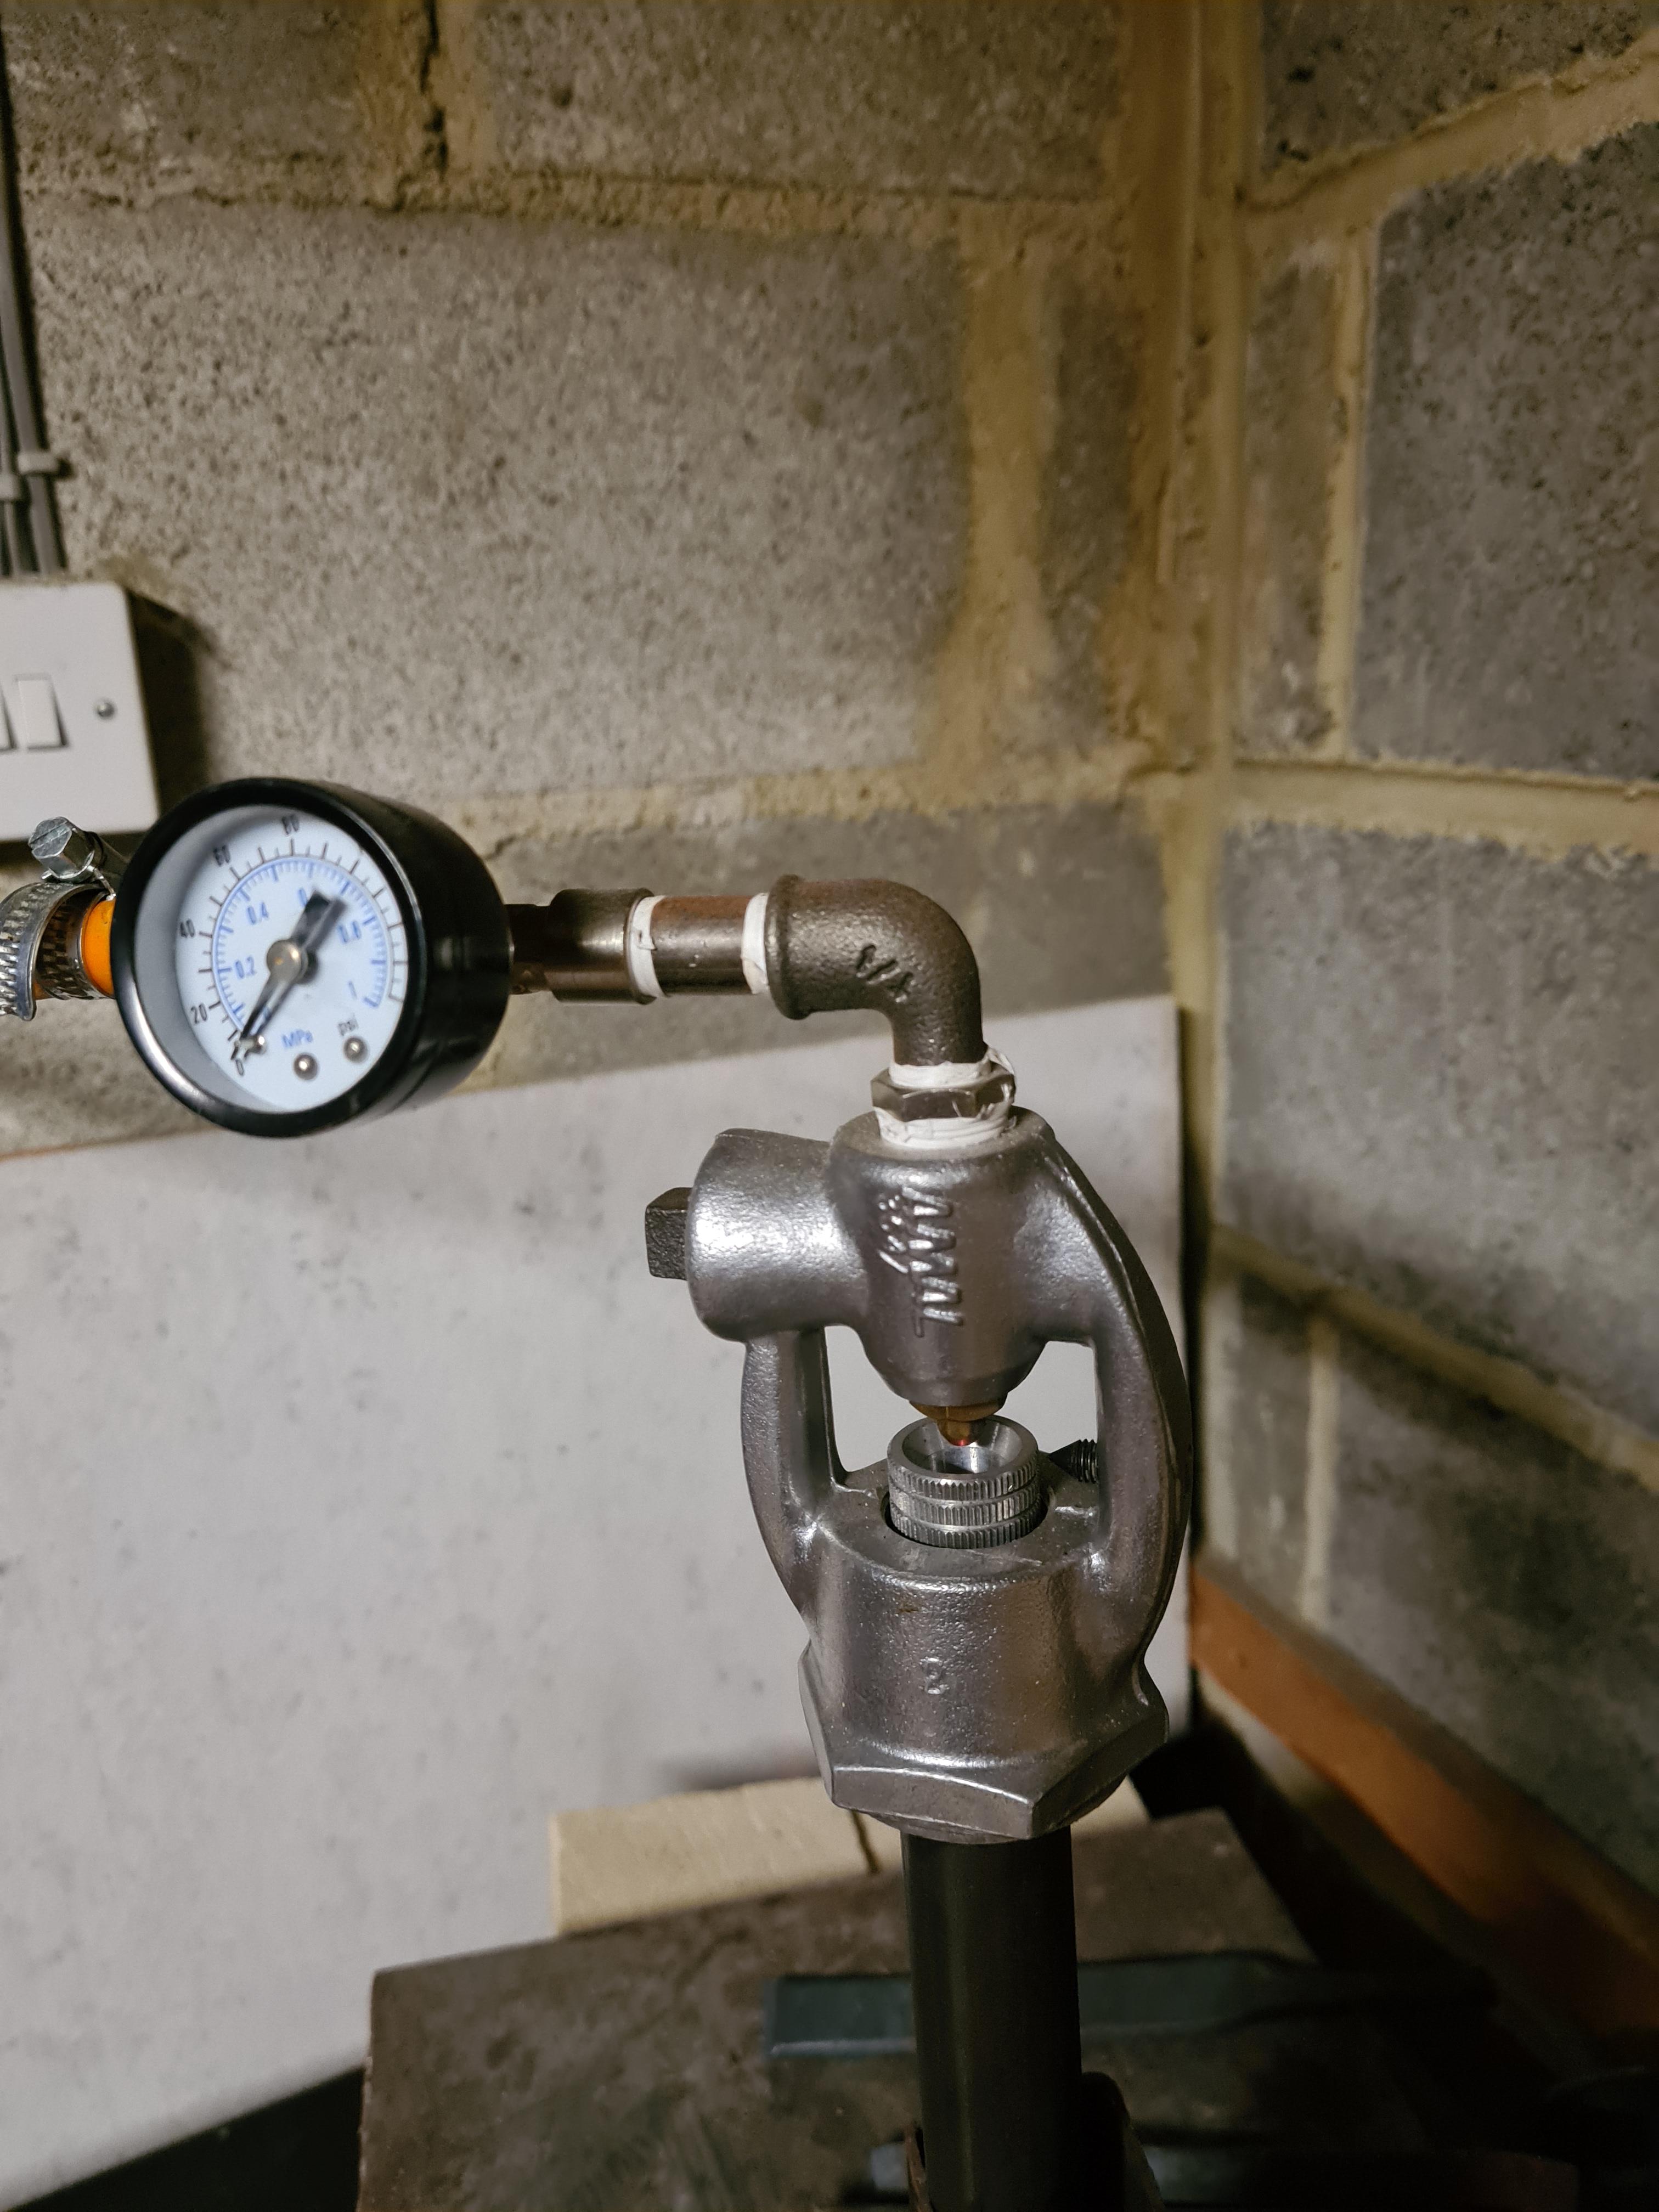
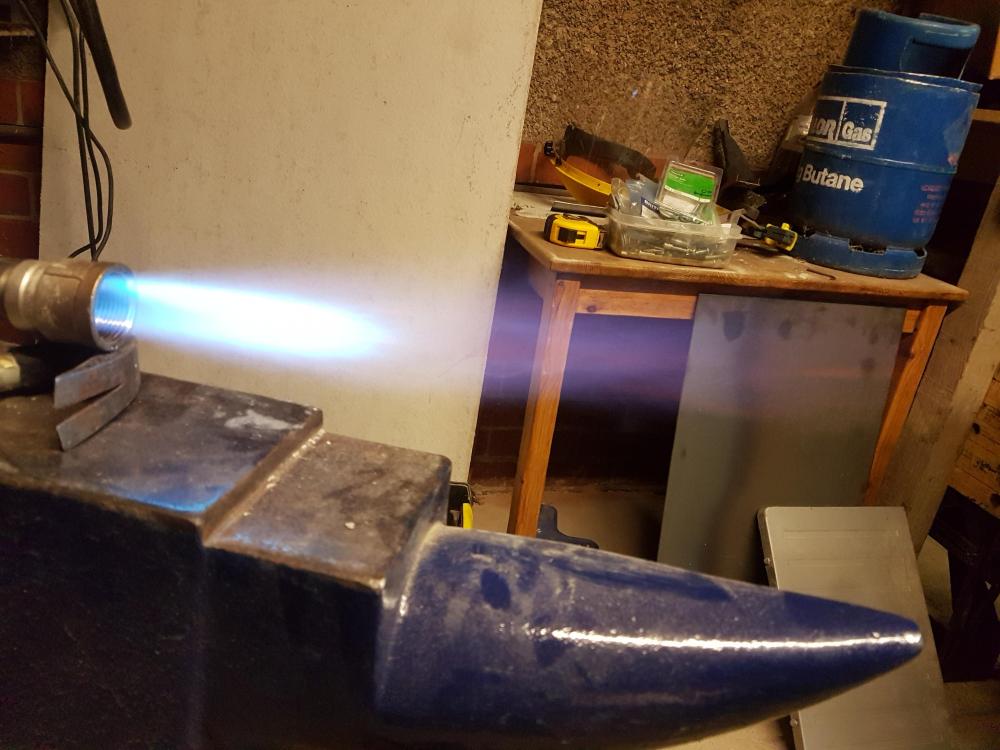
I actually made the forge and burner a while back (two years).... Bought the anvil at the same time... Then kids and work got in the way. I'm hoping to find the time to get this hobby moving but I'd like to start with the burner and making sure it is setup fairly well. I bought an Amal burner after not getting on well with a homemade version. Pics attached and any thoughts greatly appreciated

-
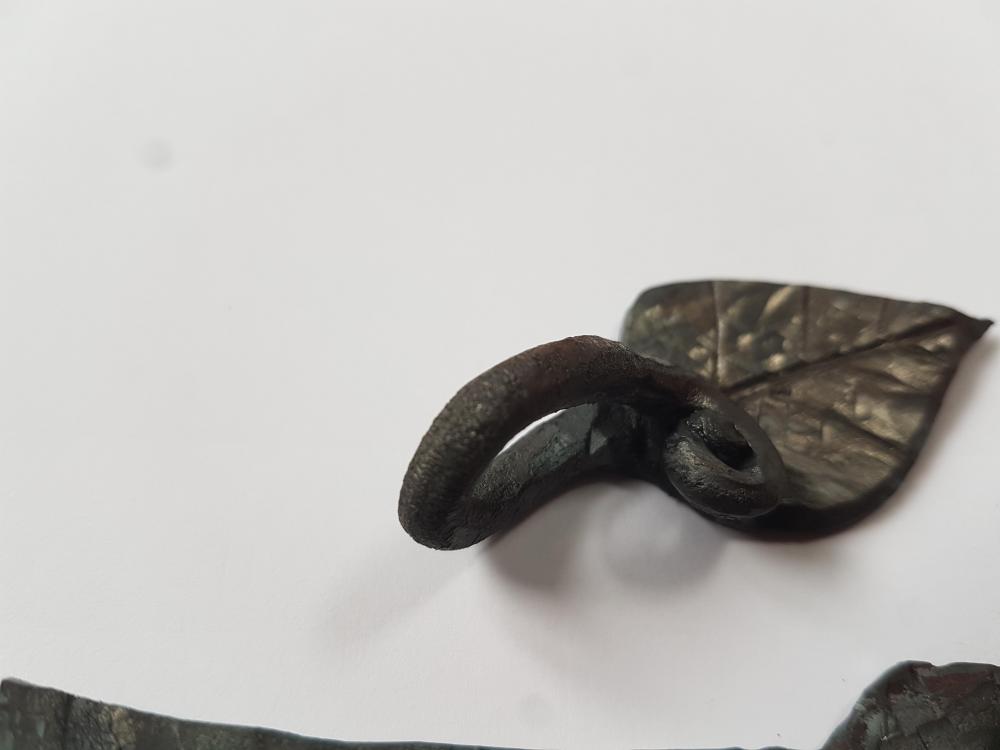
Hi Frosty It was the edge of the cross pein that was making those marks...and yes it was completely by accident. In fact I was going to ask if I should round off the edges of the pein to remove the errant strikes...but I guess as you say once I start to learn some control it will give me more possibilities of texture
-
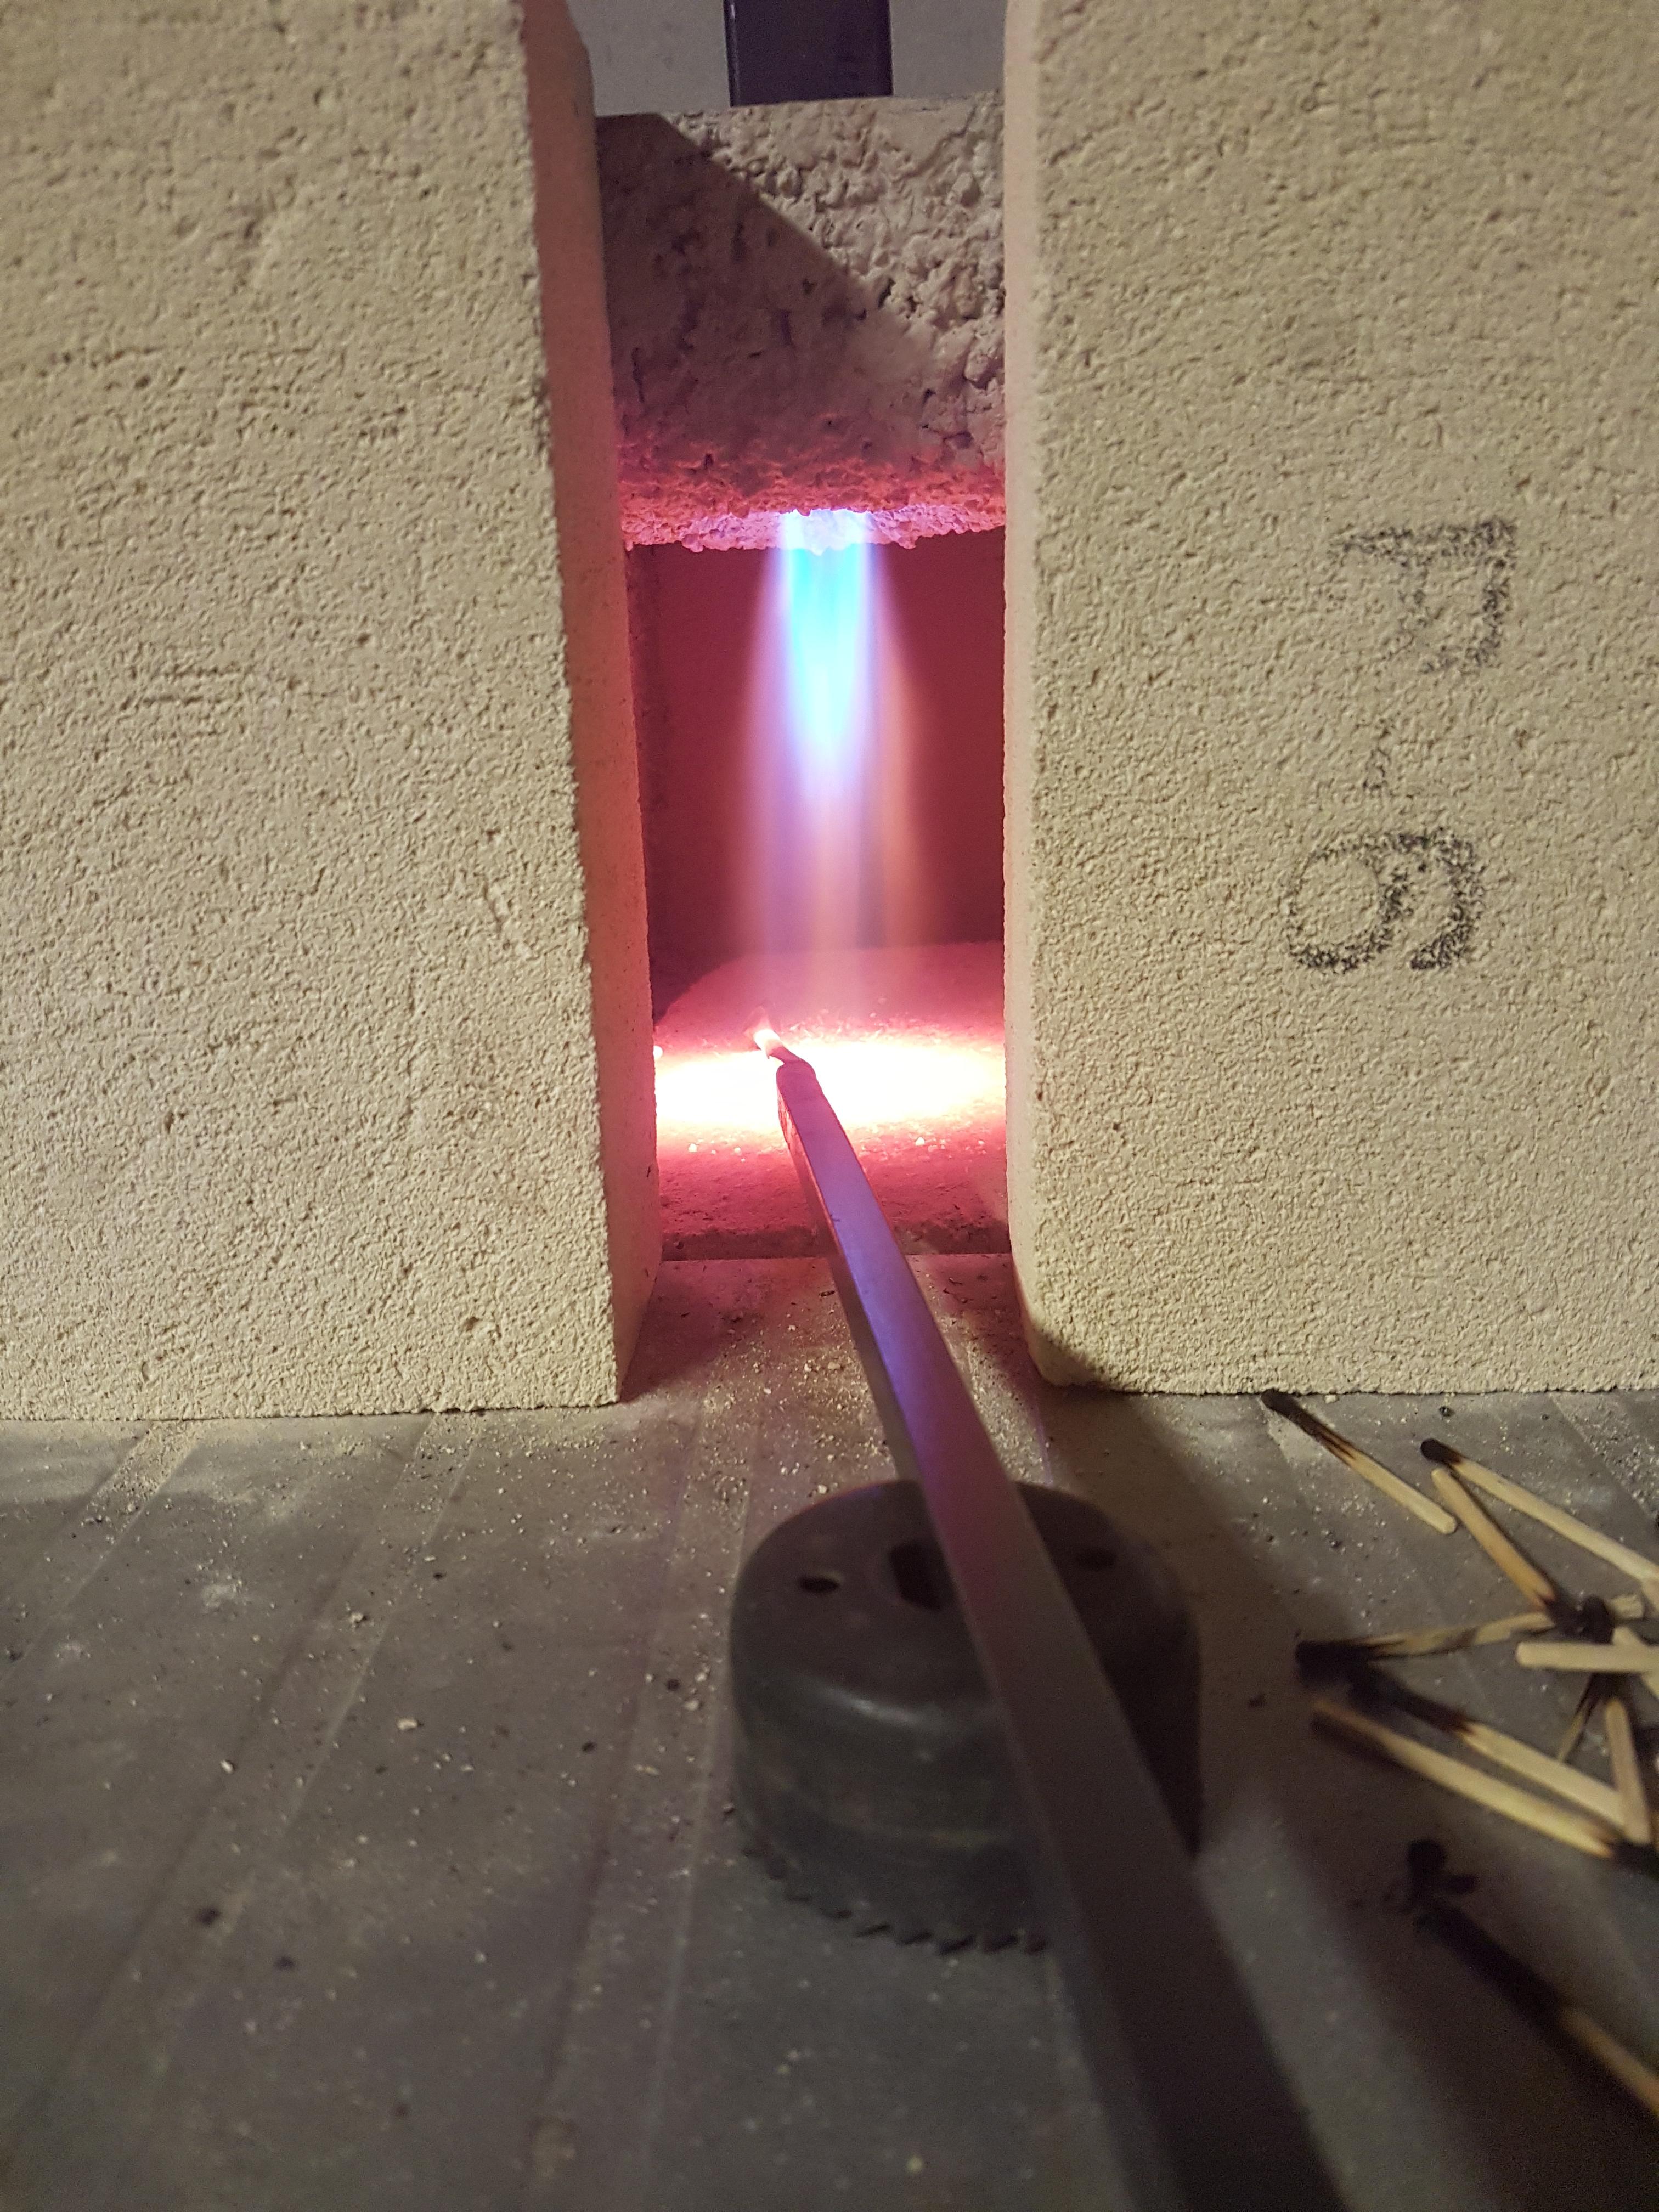
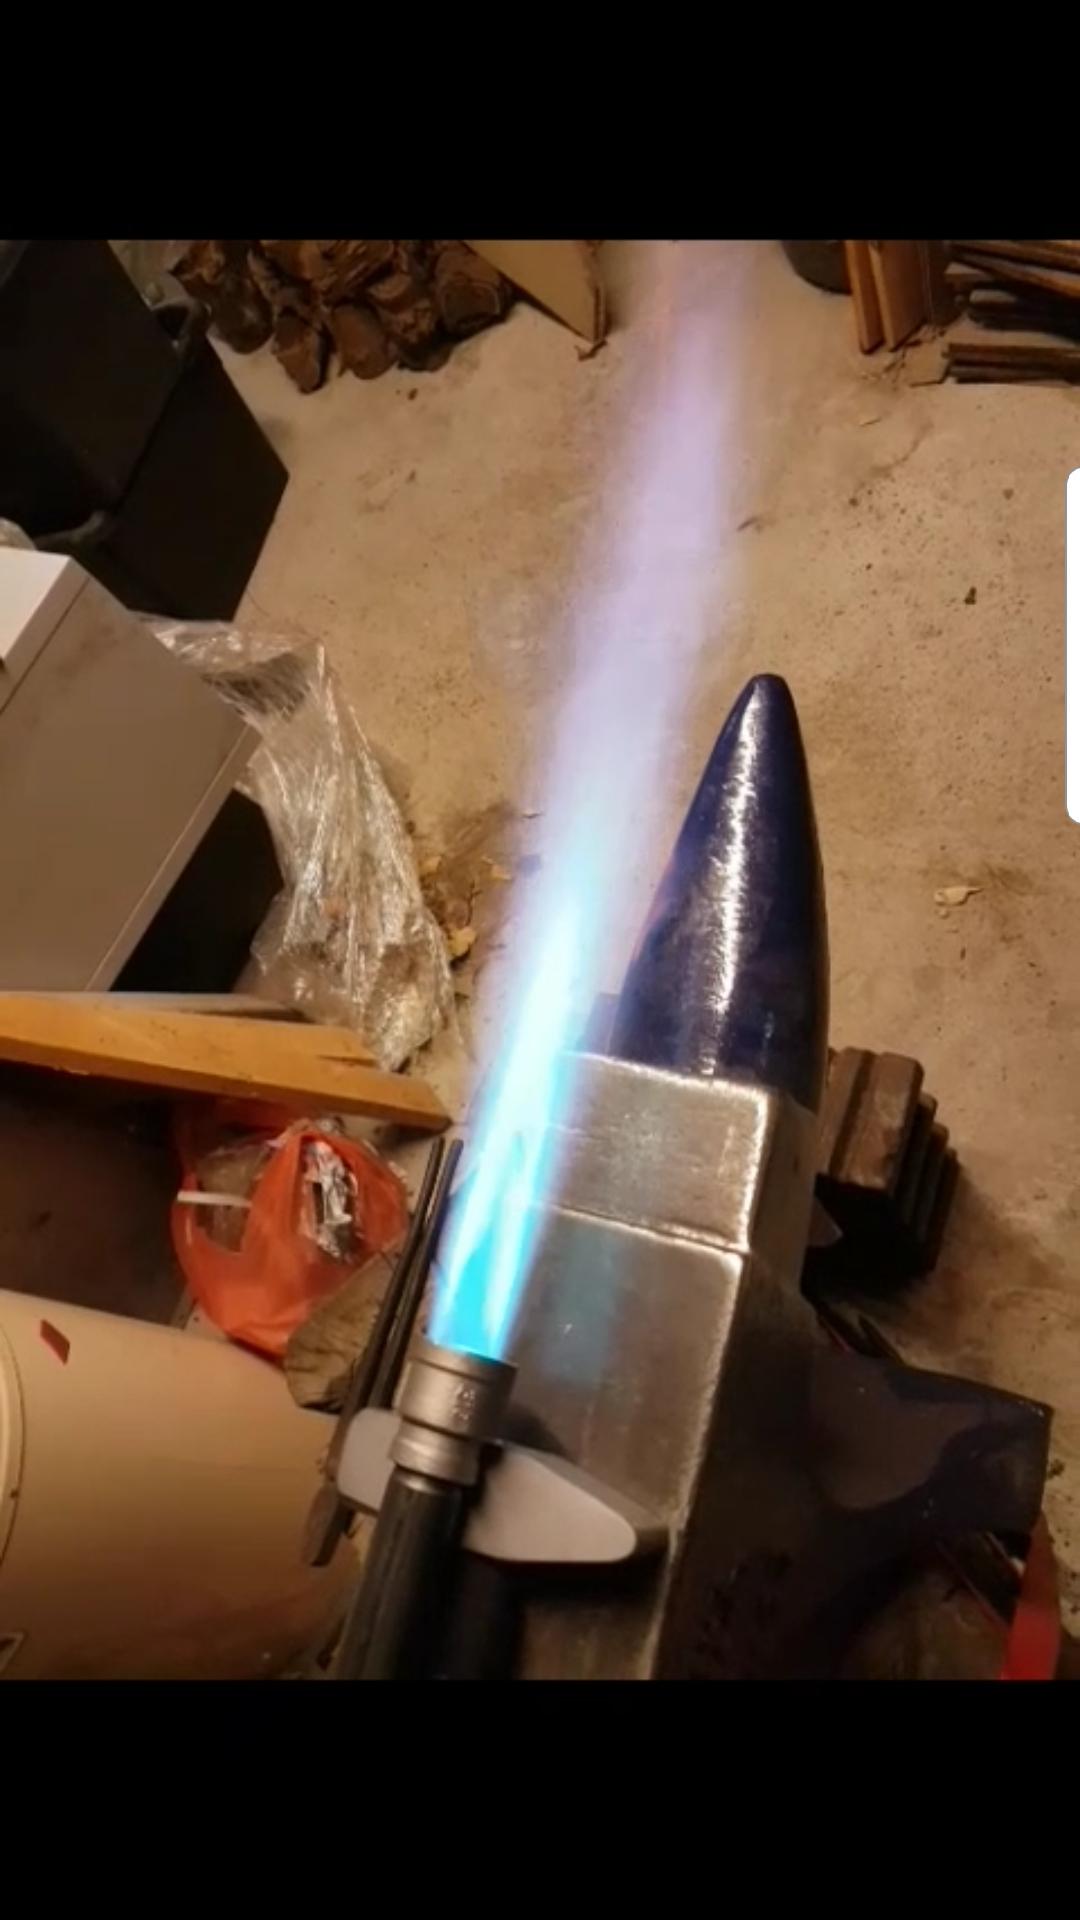
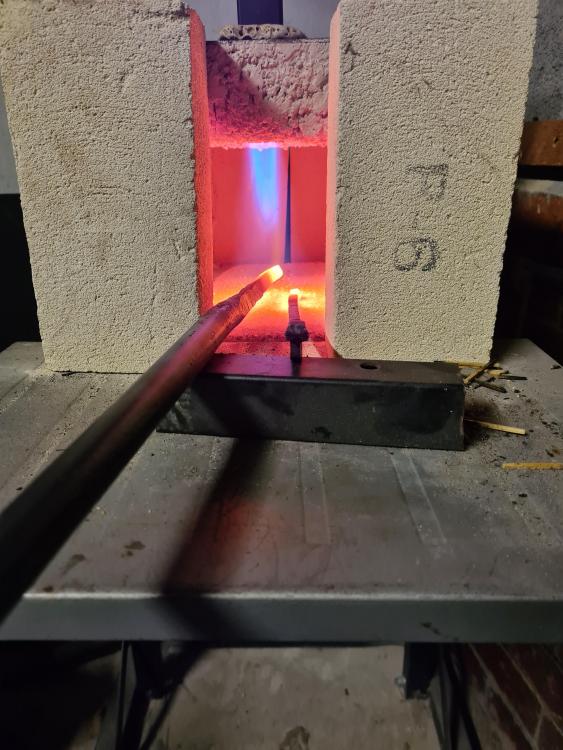
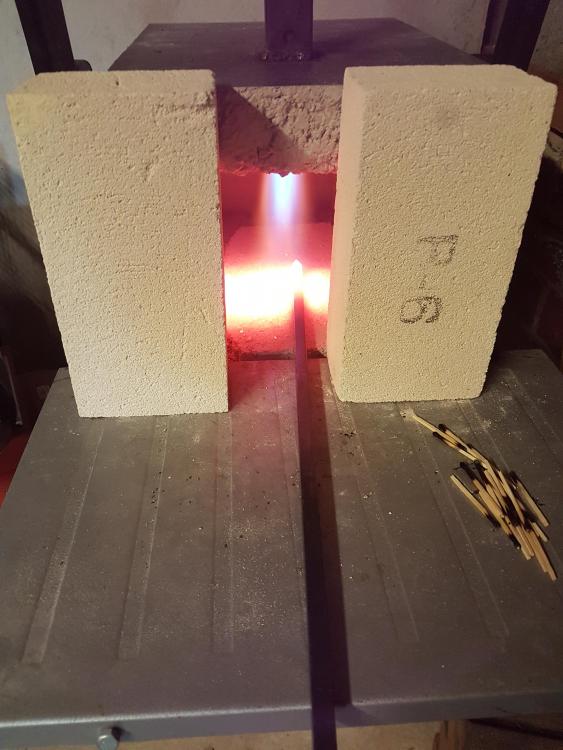
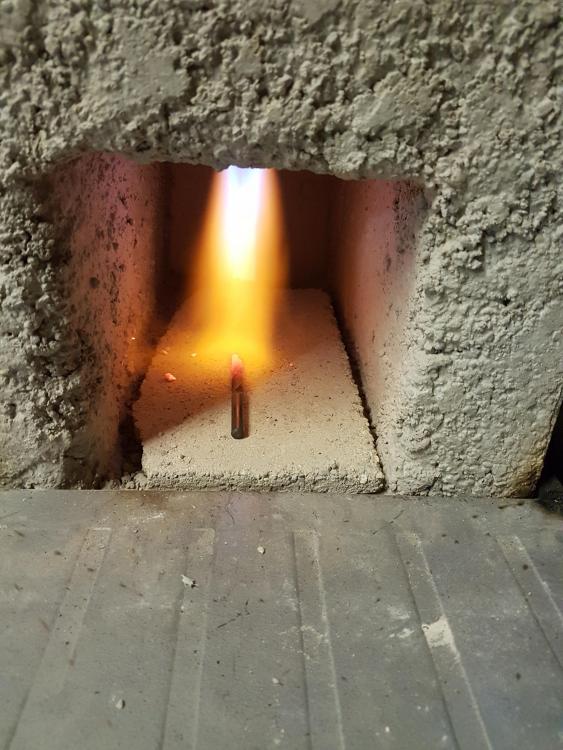
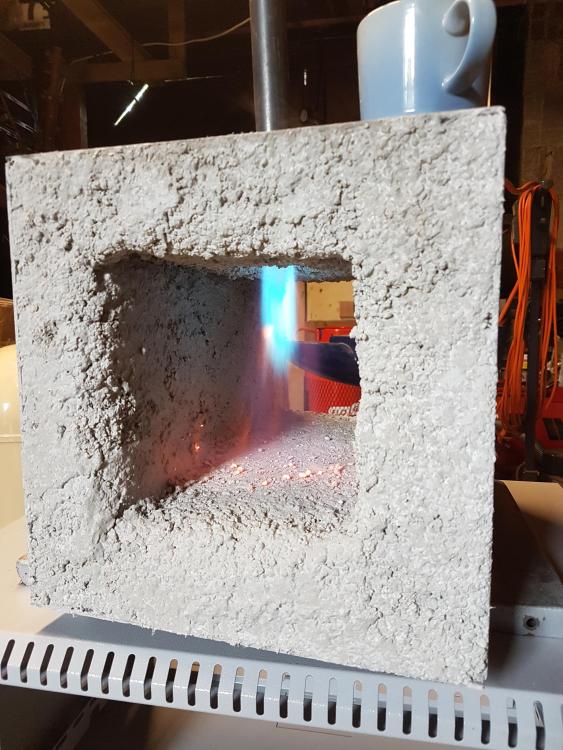
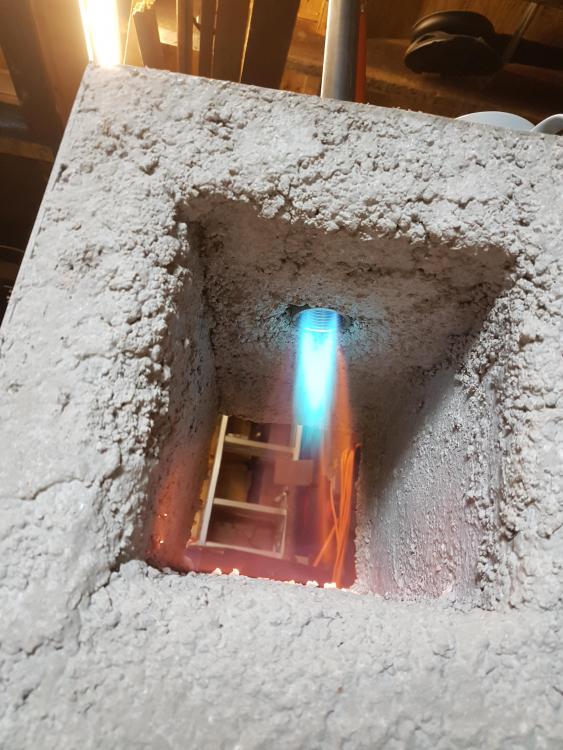
This is the flame earlier when I had a good heat in the forge after 10mins of ignition. I've yet to run it at full whack yet...this was it at around 2 or 3 psi


-
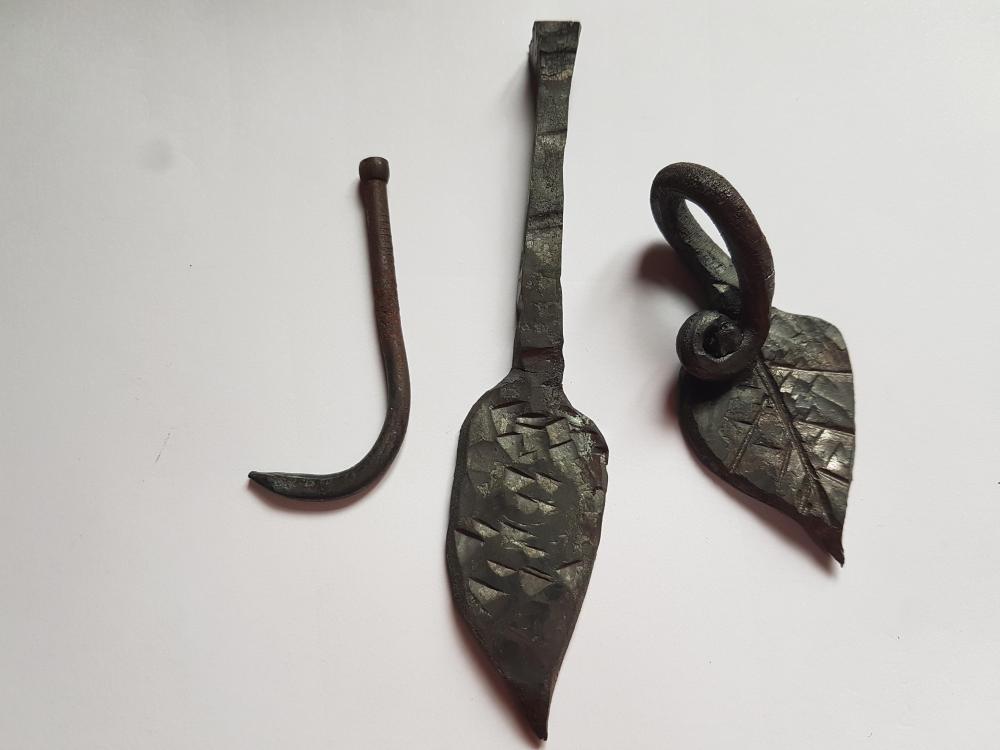
Well I've given it a good warm up and these are the first three things I have every forged, Bent a nail....then a bad leaf....then a better leaf.
-
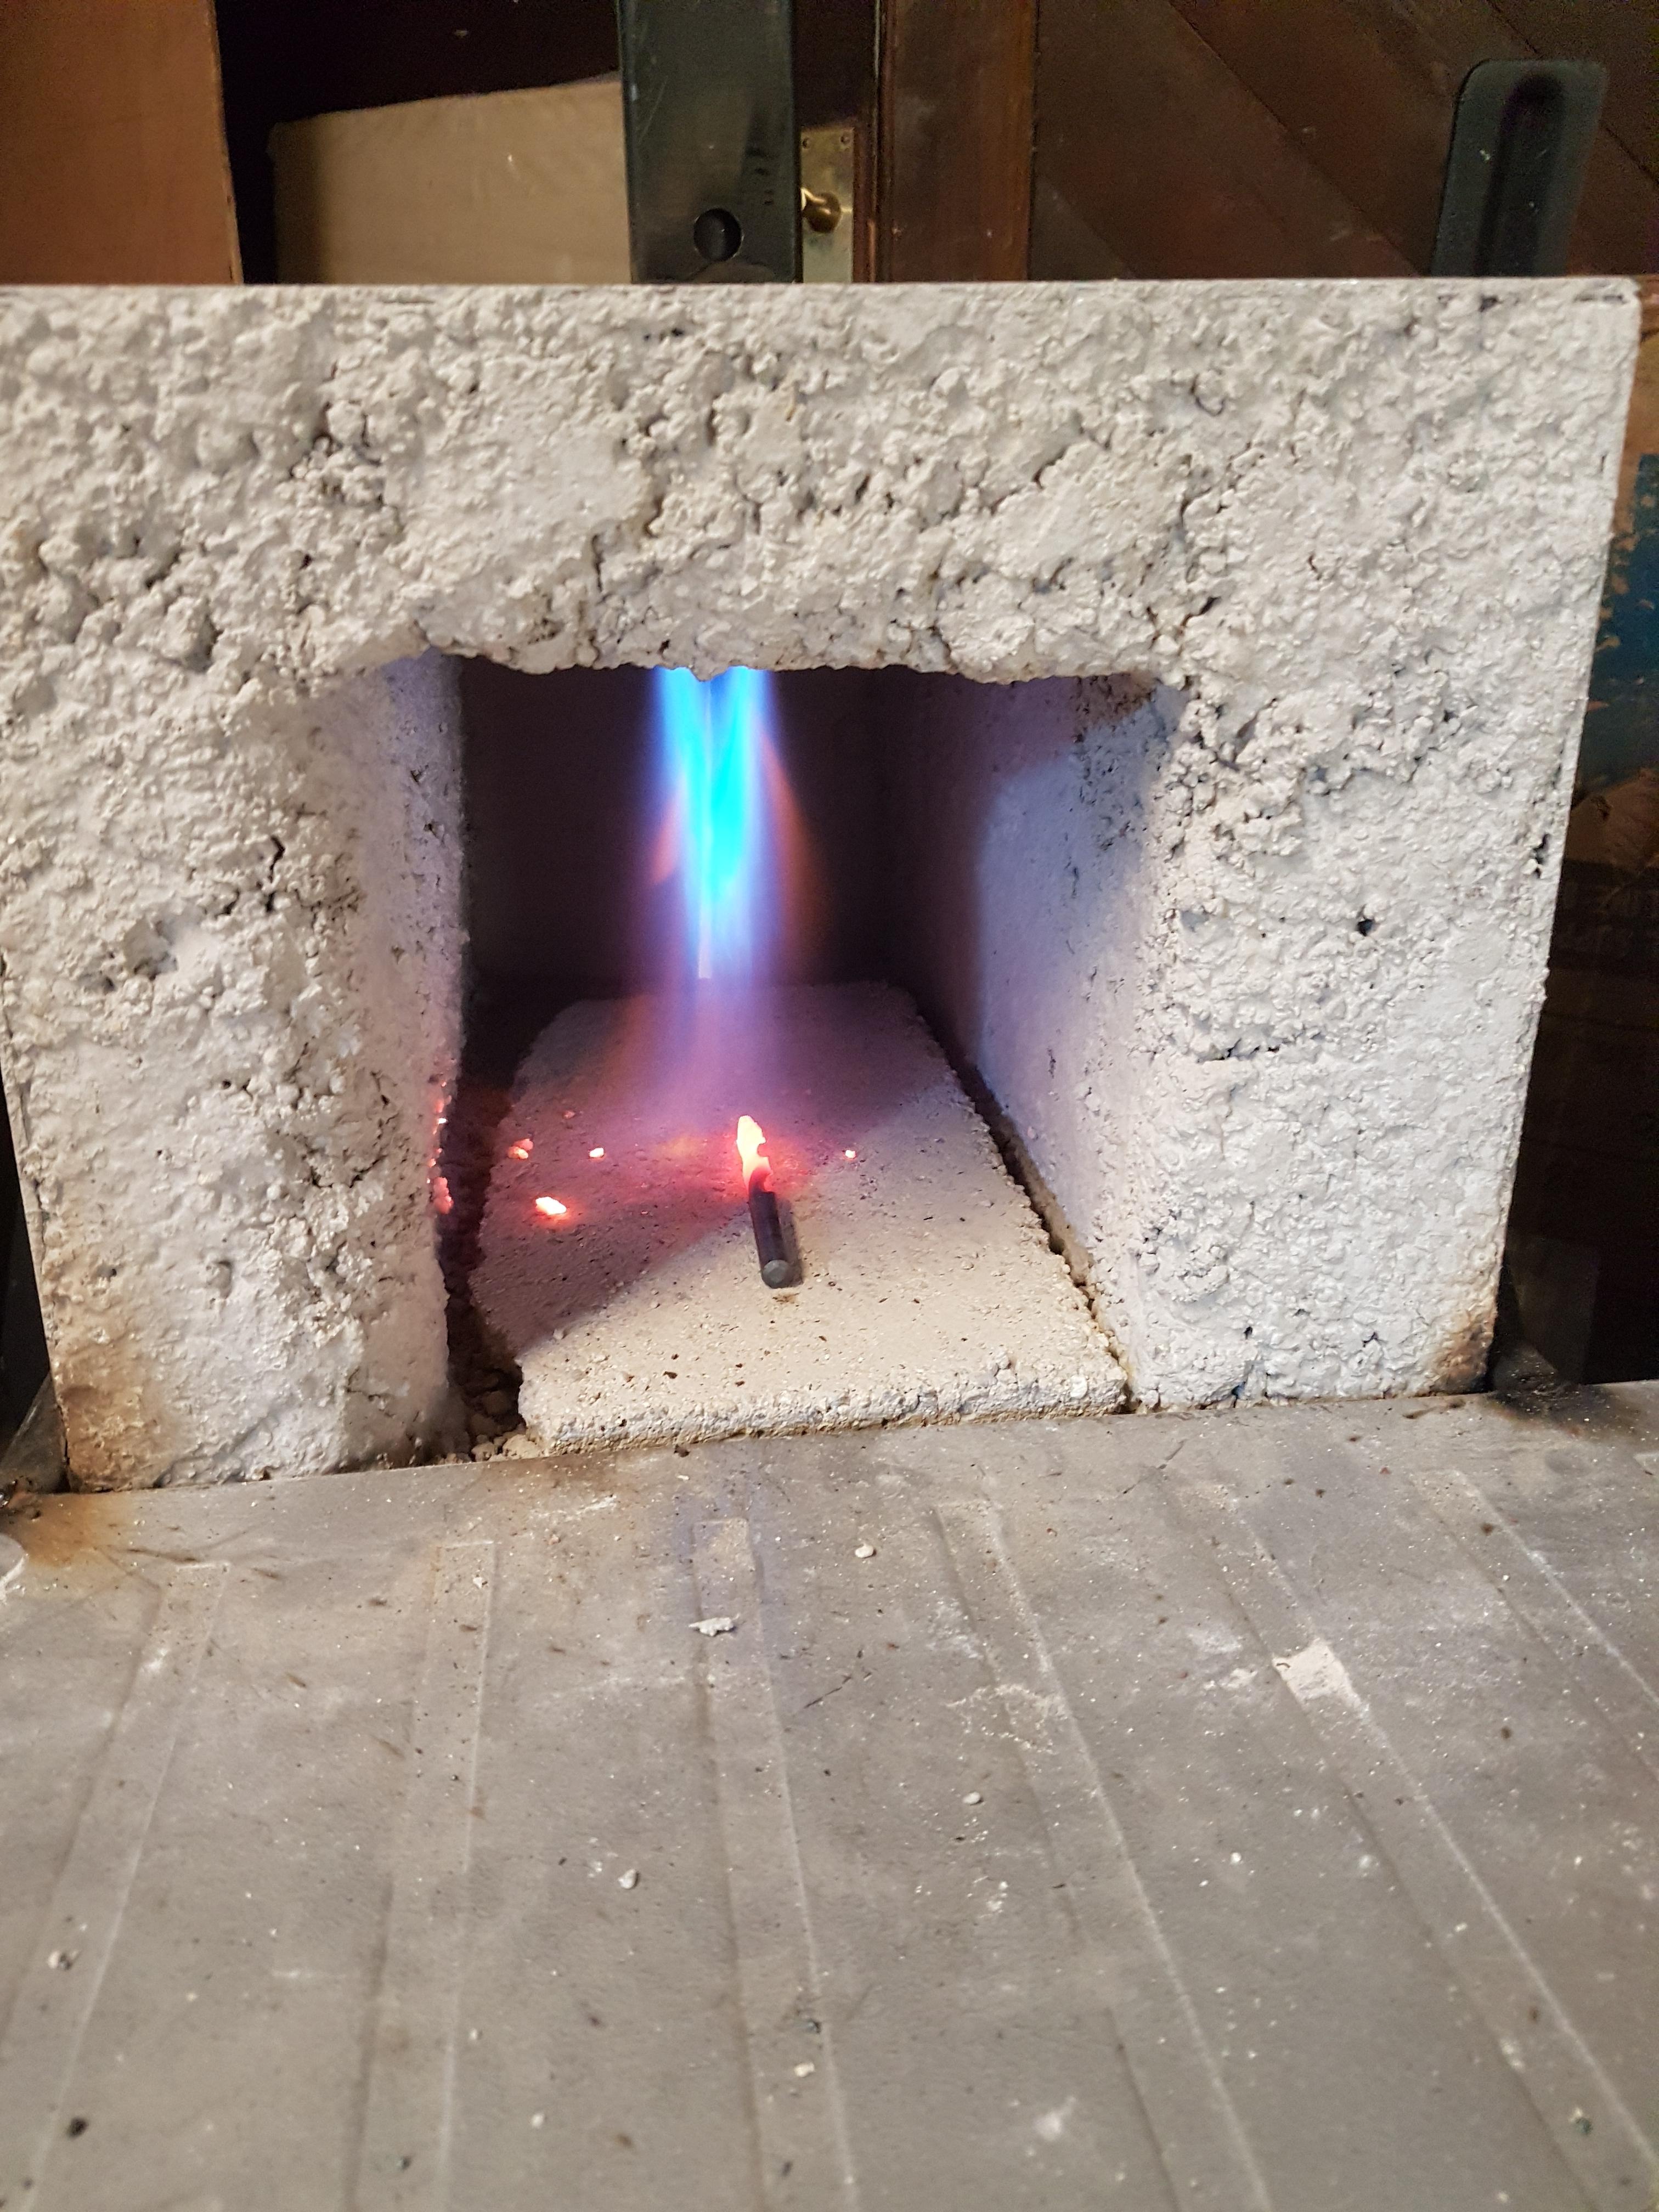
What is it that you are descriving as the tertiary flame....what part of the flame am i looking for?
-
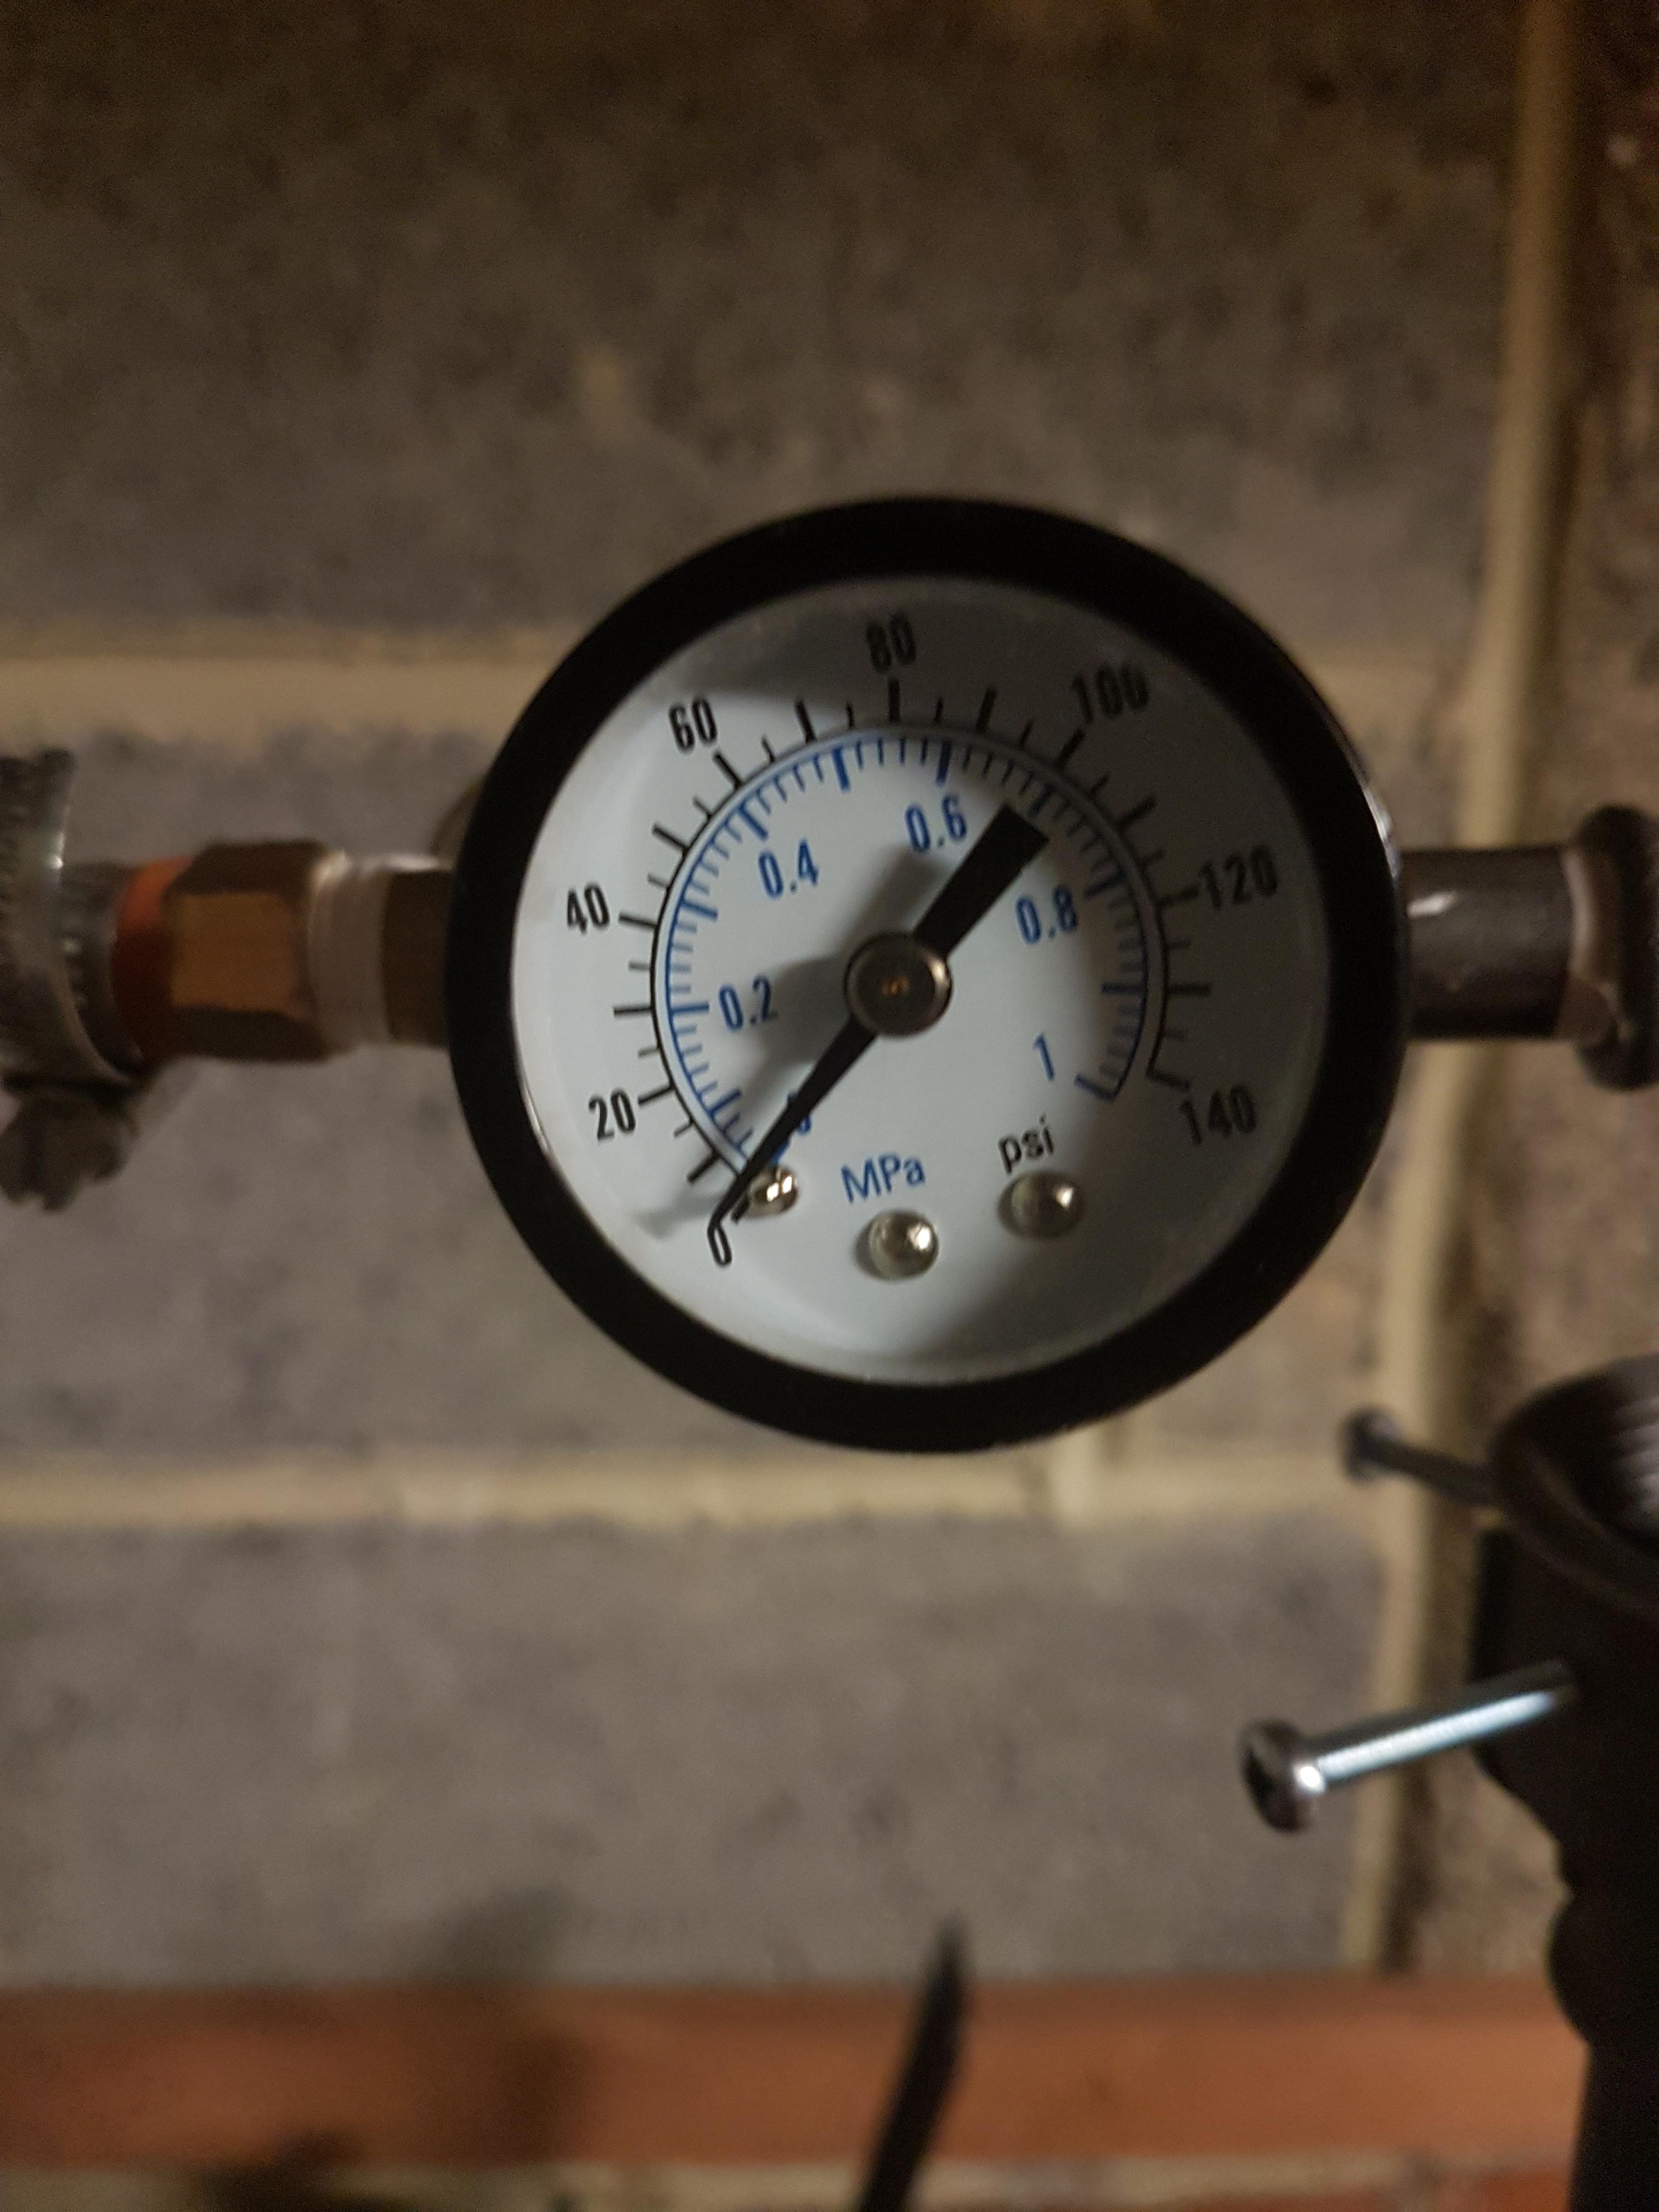
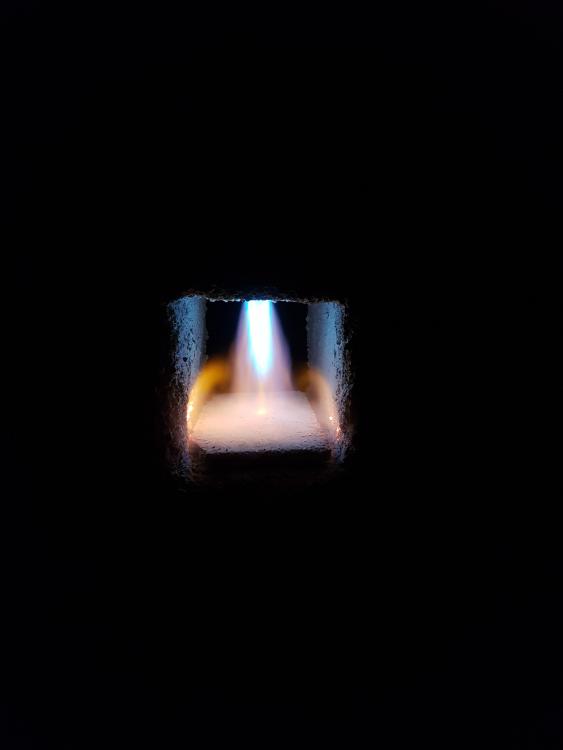
I've gone for a longer heat at around 5 psi and it was a steady flame. Are there any views/opinions on the video below? It shows me covering and uncovering the air inlet on the burner. Also worryingly when fully open my psi gauge shows a reading of over 40psi !!...that seems high as my regulator is supposed to be a 0.5 to 2 bar 20180919_114615.mp4 20180919_114615.mp4
-
Haven't done a long heat yet...still putting it together and haven't found it spot yet in the garage. Need to think where the forge, anvil and vice will go. Going to have to rearrange the workbench location probably too
-
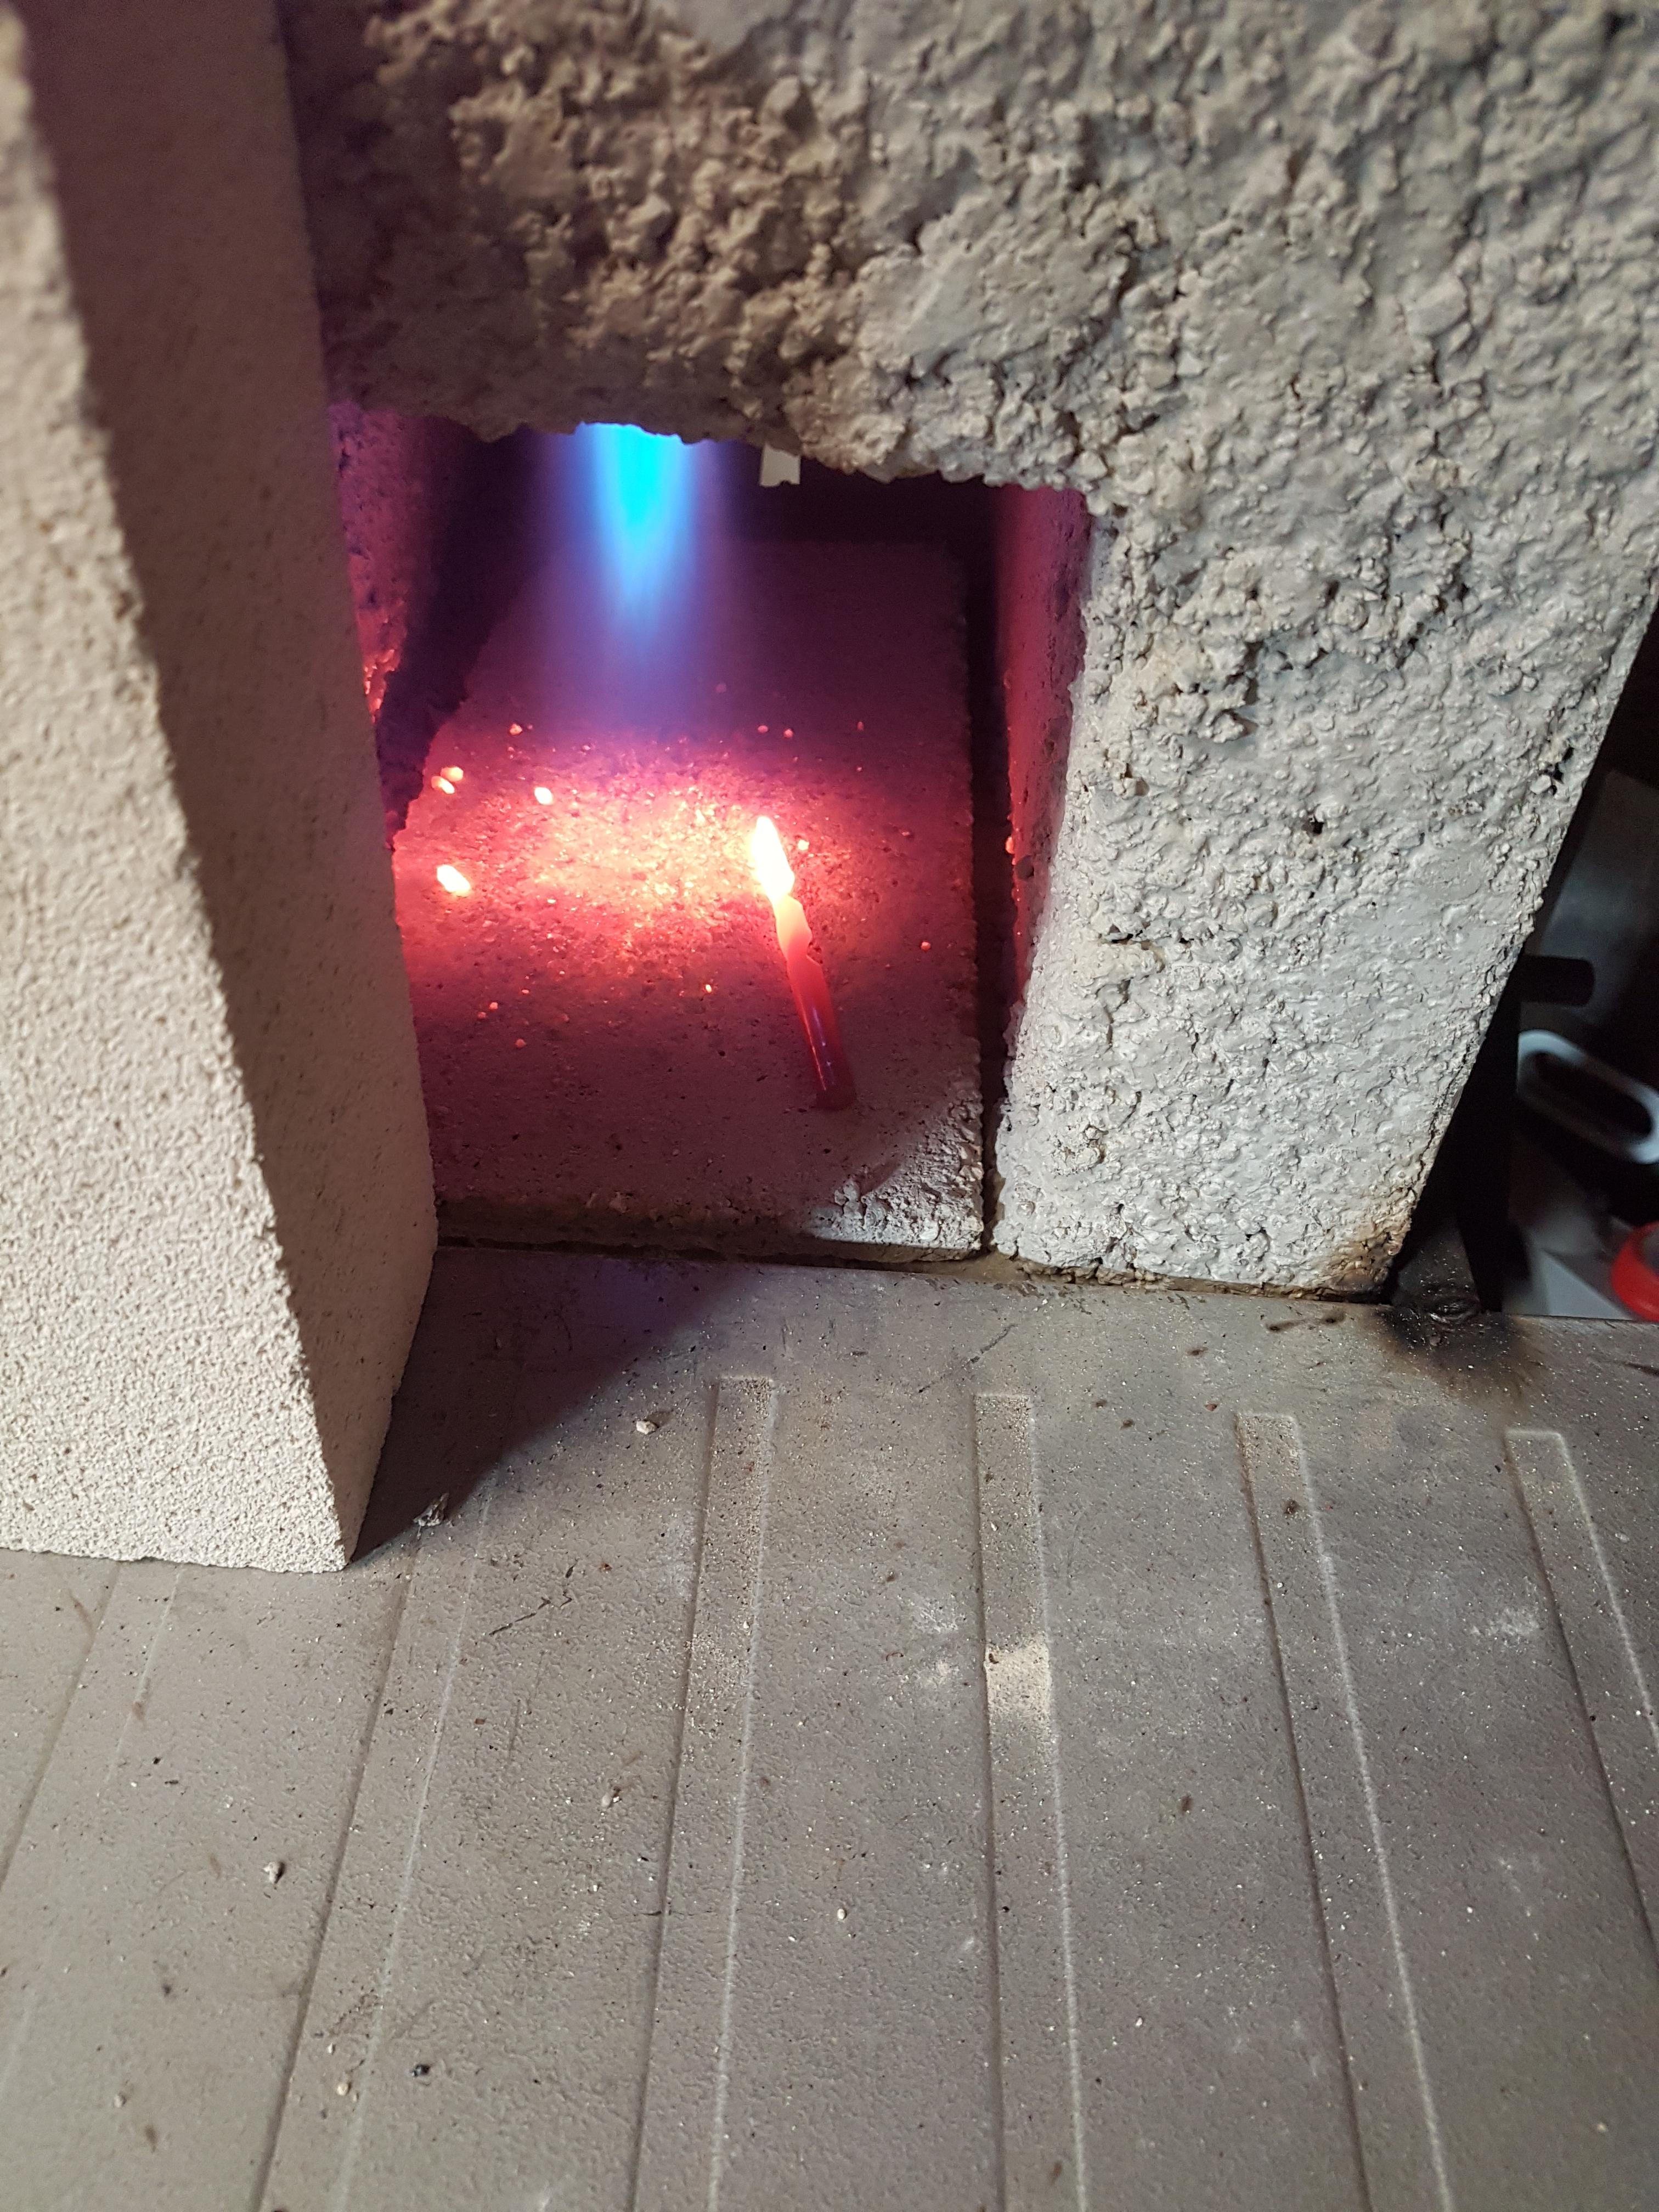
Just tried it again and it was completely different again......??? Changed nothing from the yellow flame on above


-
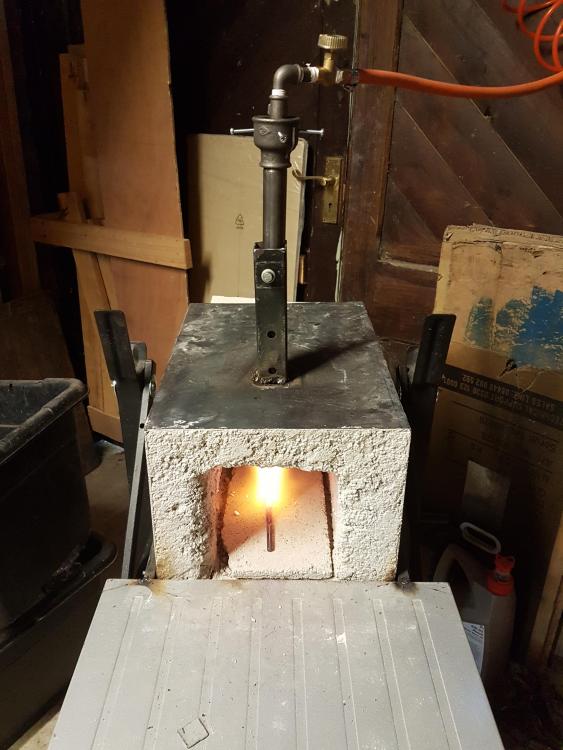
I've added a couple of insulation bricks to the back and added the burner holder to the frame and it has completely change the flame to way more yellow...is this worse or better than the previous flame? Cheers
-
I'll seek out some drill bits and see what I can do....I'll get a hole in there somehow even if I have to patch repair afterwards The refractory is described as below "1600c rated Refractory Castable Cement/Concrete Medium graded and high density"
-
I've used it to forge the 4 sections of flatbar that will hold my railway sleeper anvil stand together. I need to get the end doors sorted as I'm obviously losing alot of heat out of the ends. The refractory has held up perfectly with no shifting at all with the heat cycles. I wish I had preformed the hole for the second burner as the refractory is very tough.....not sure how I will now add in the hole for the second burner
-
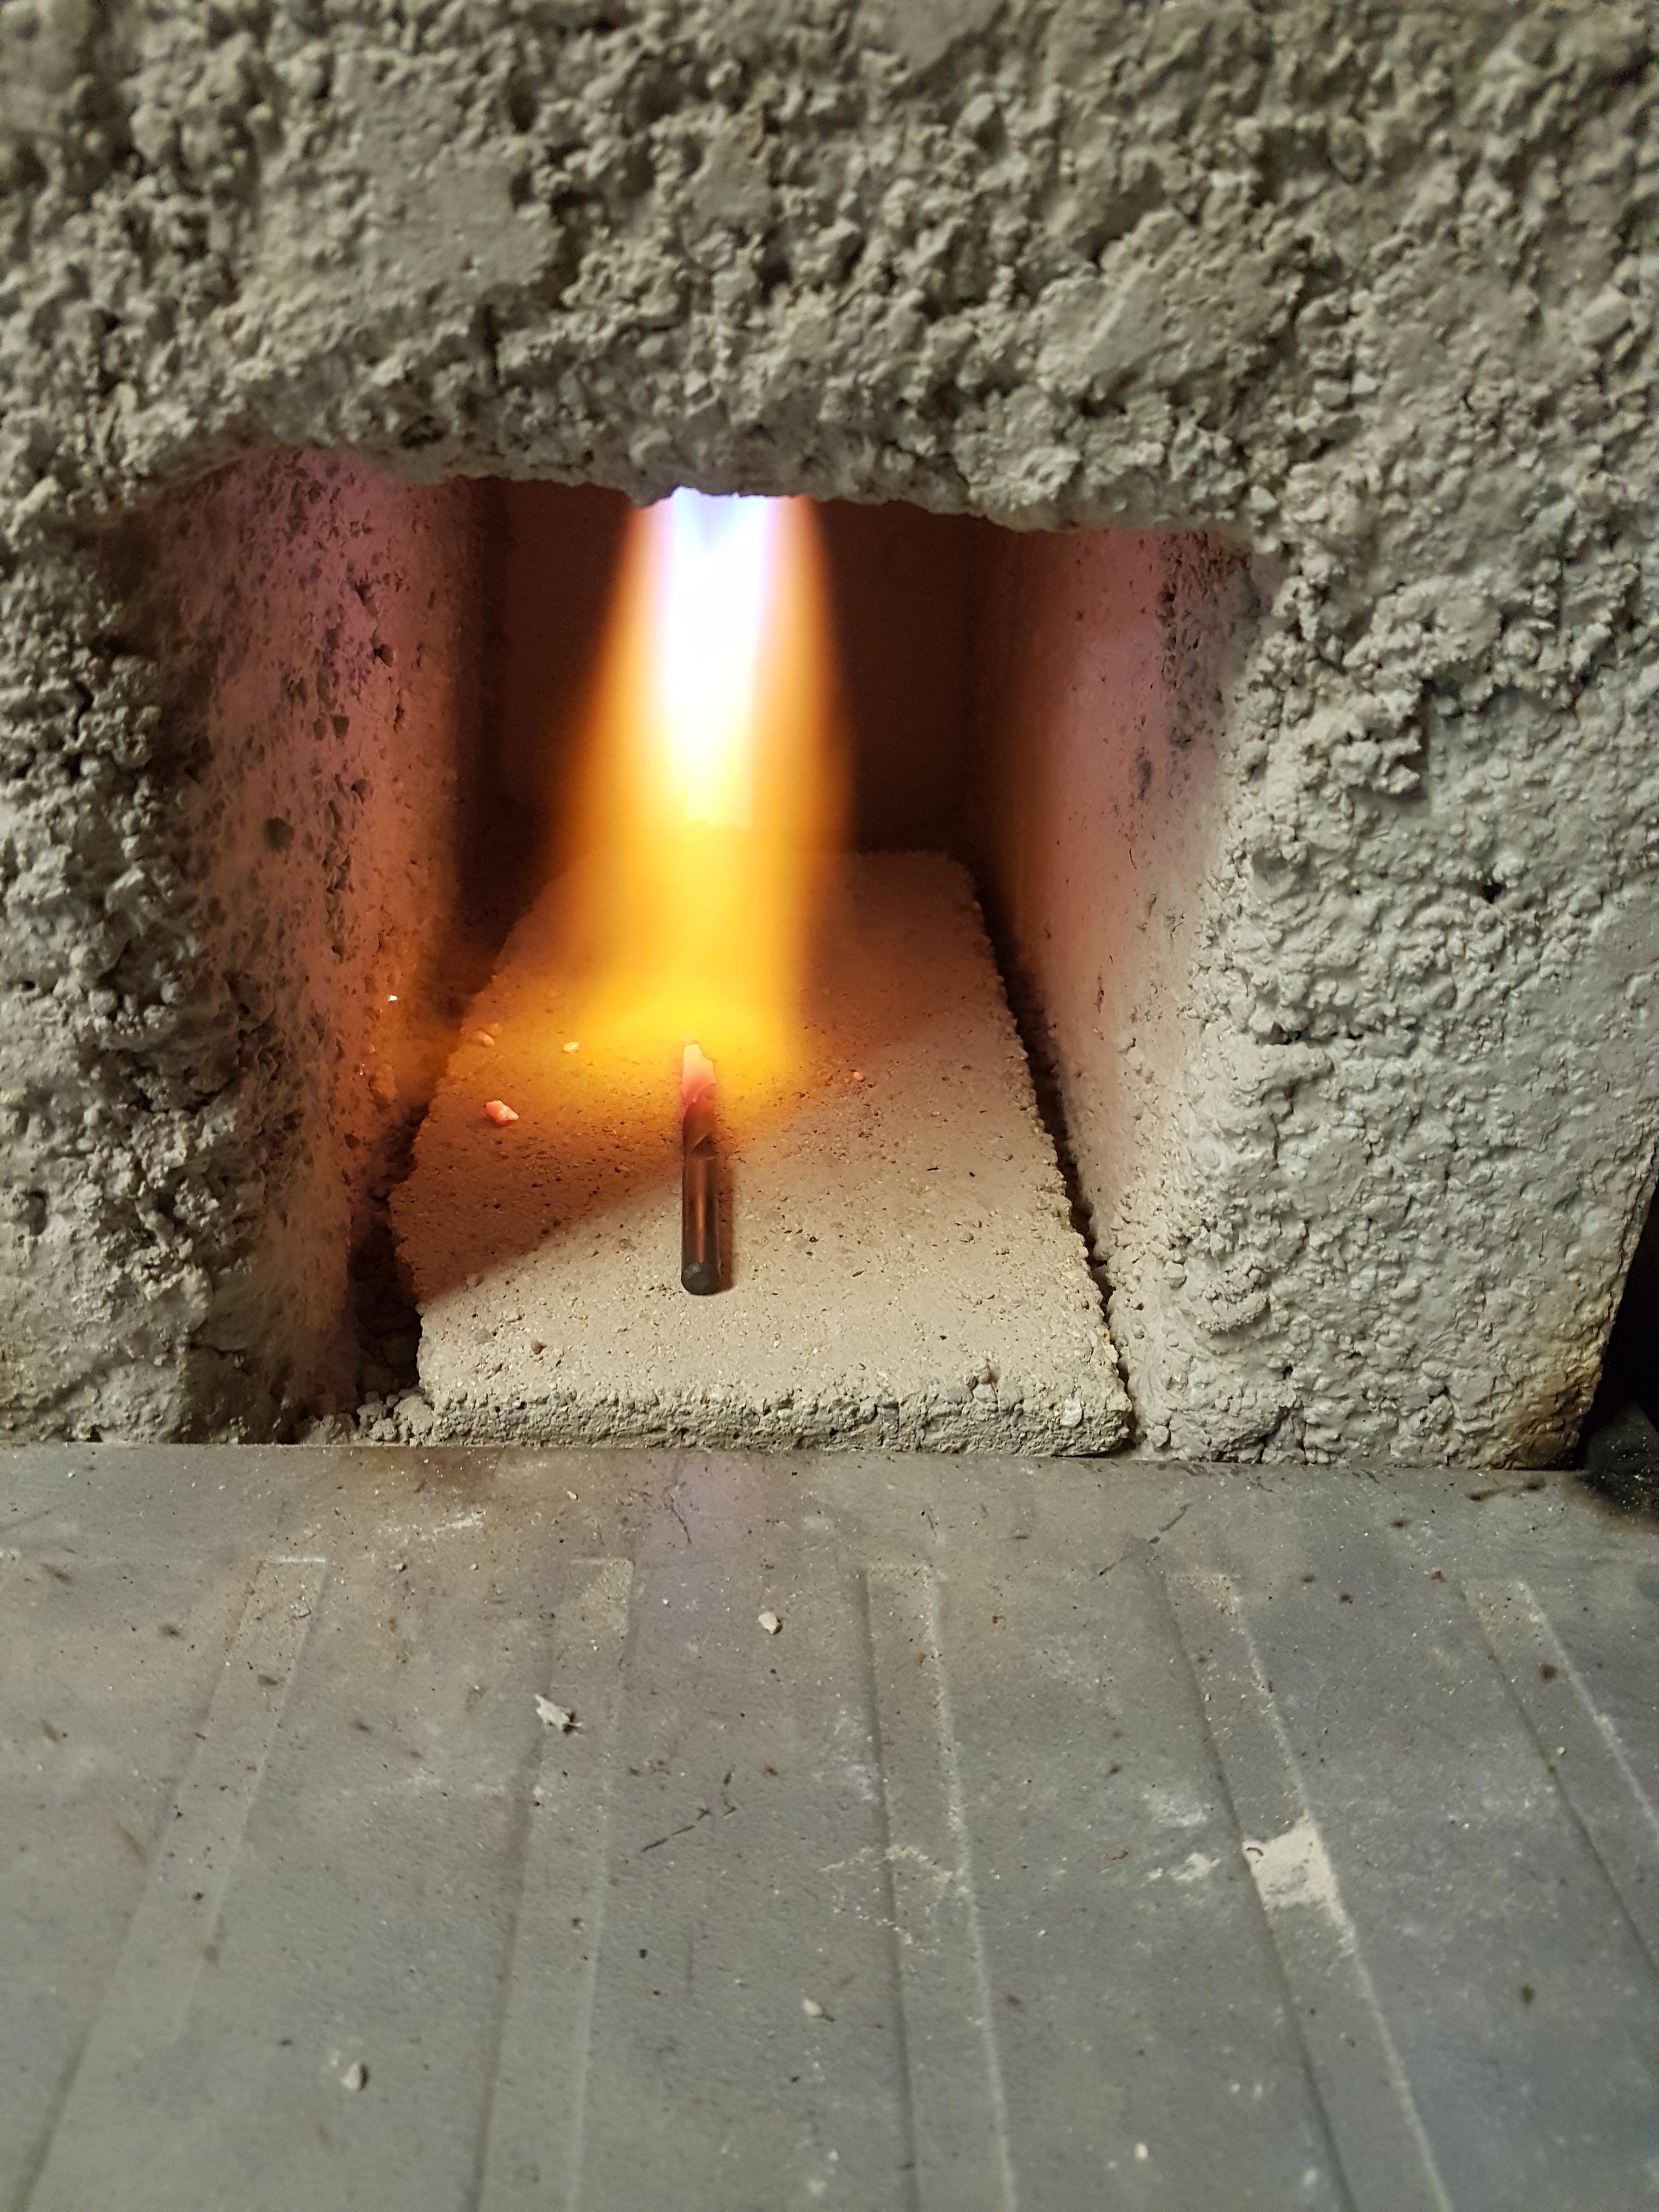
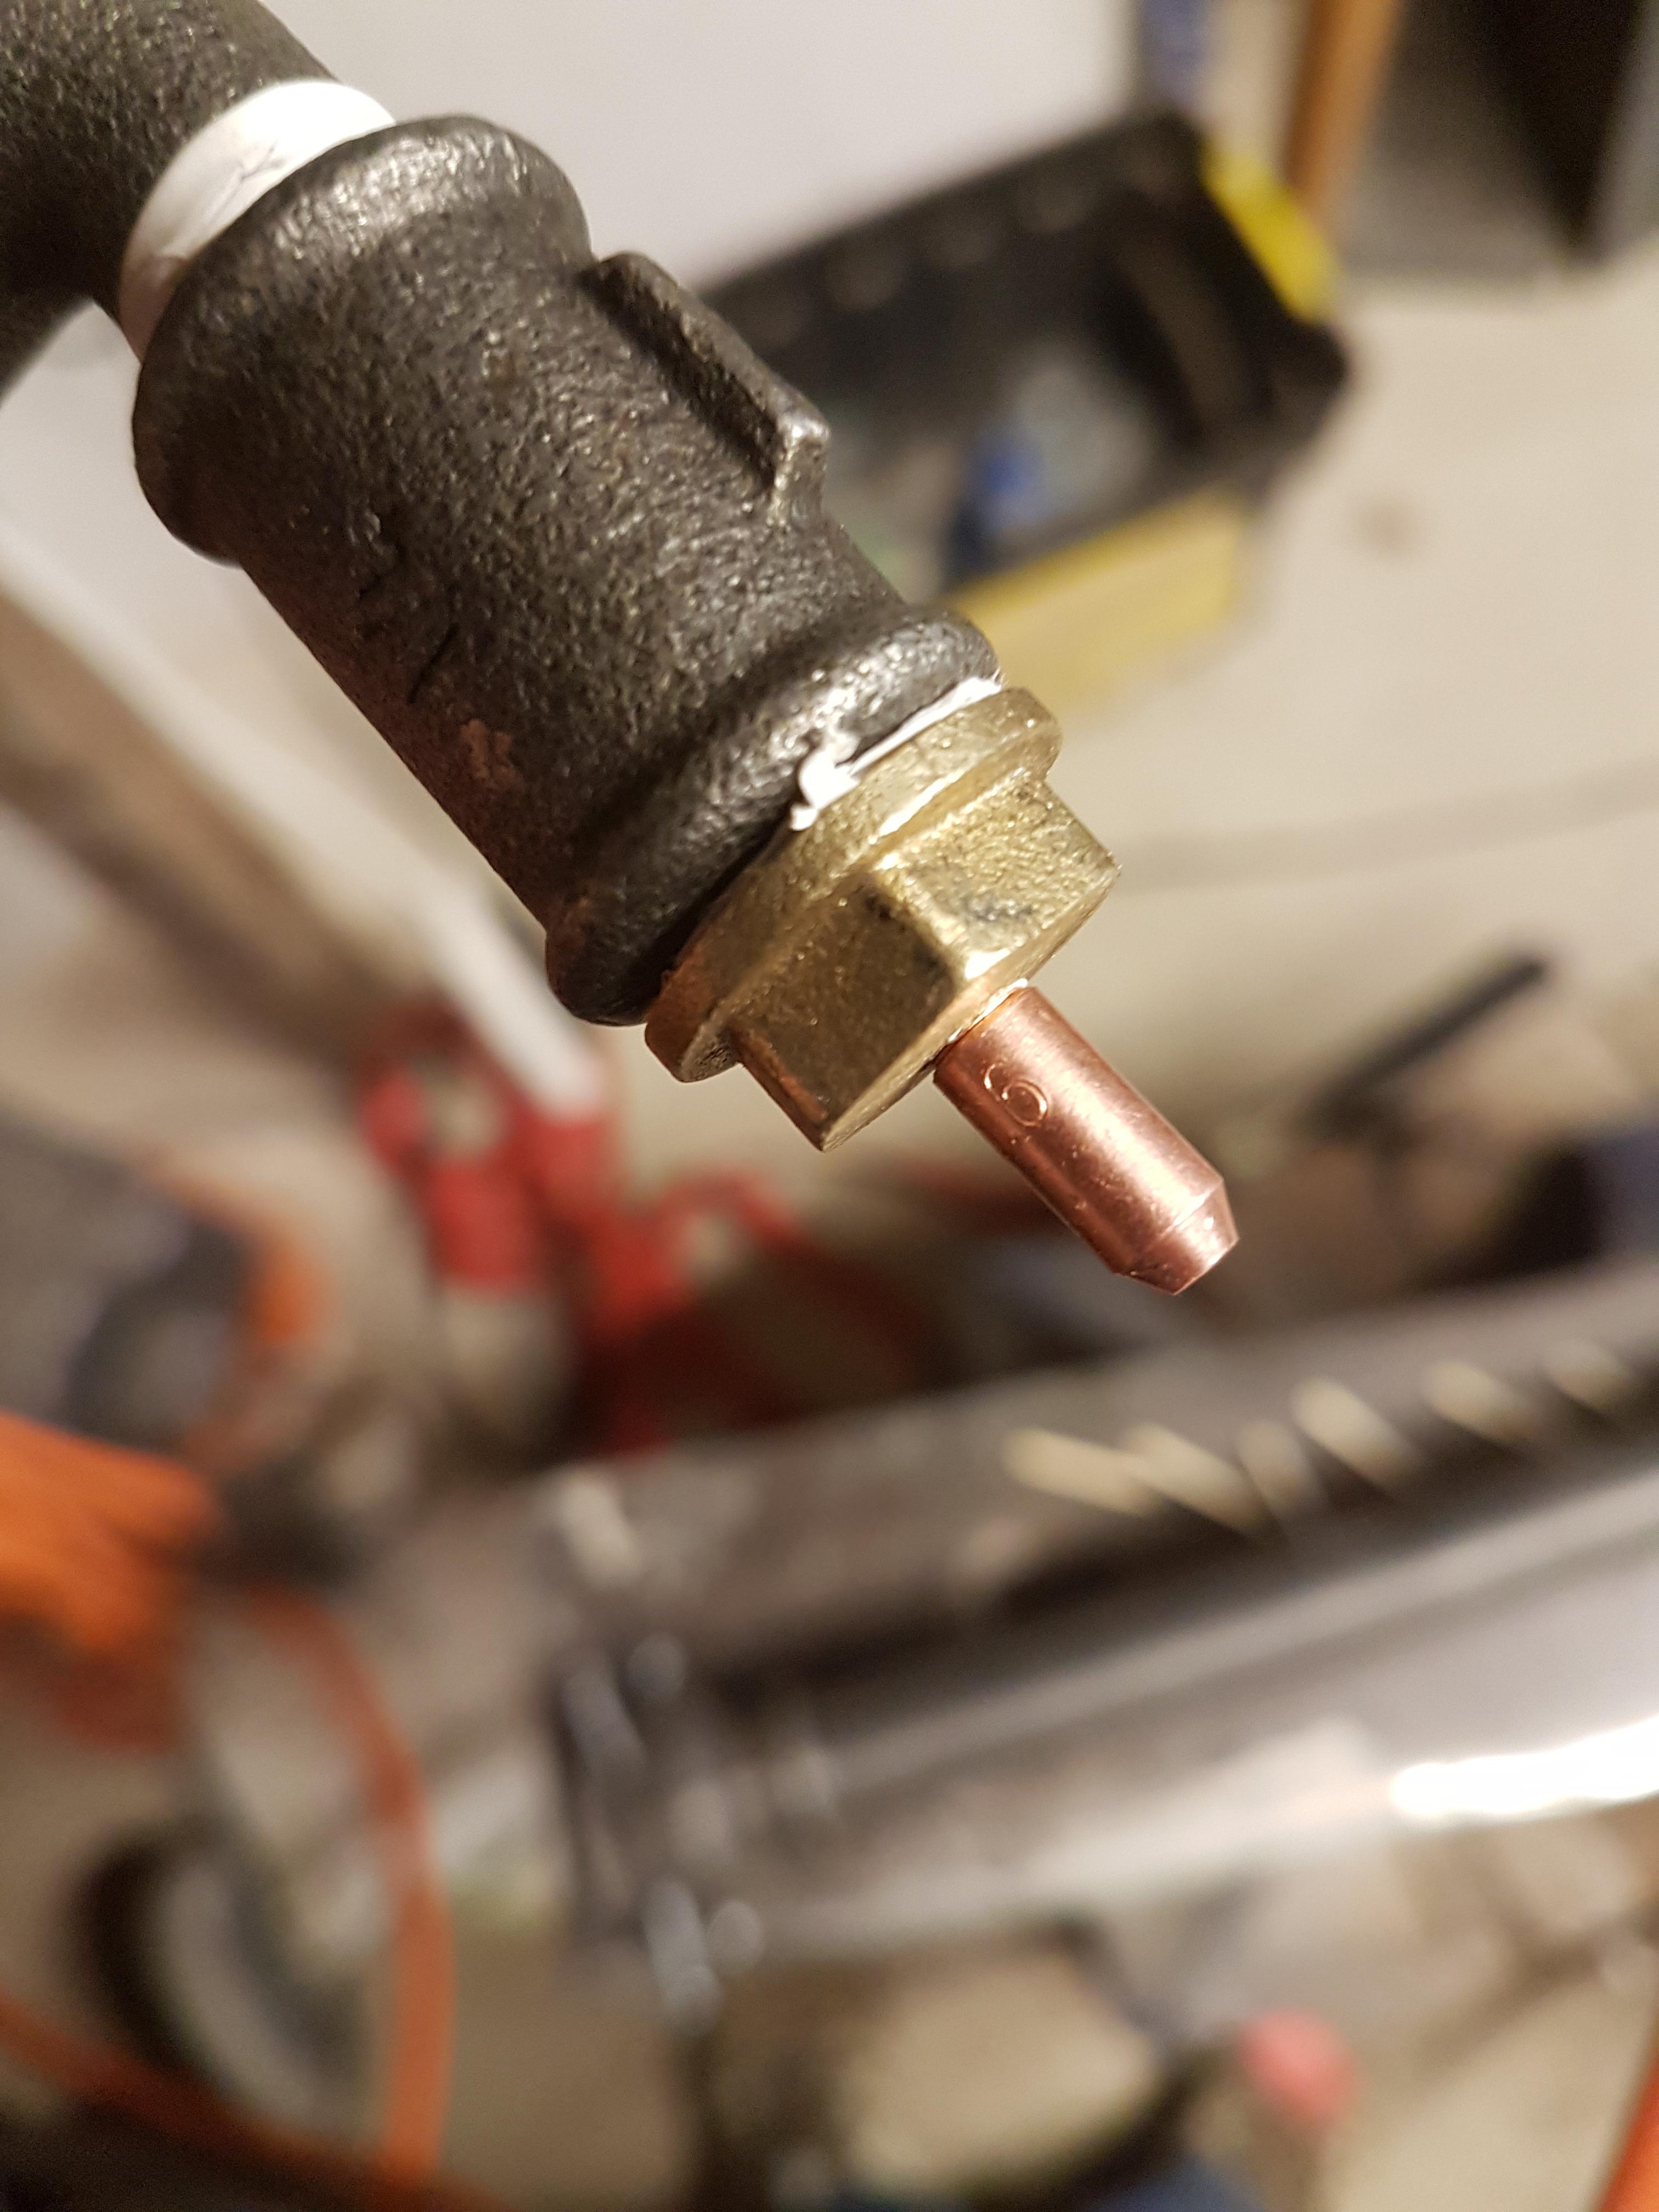
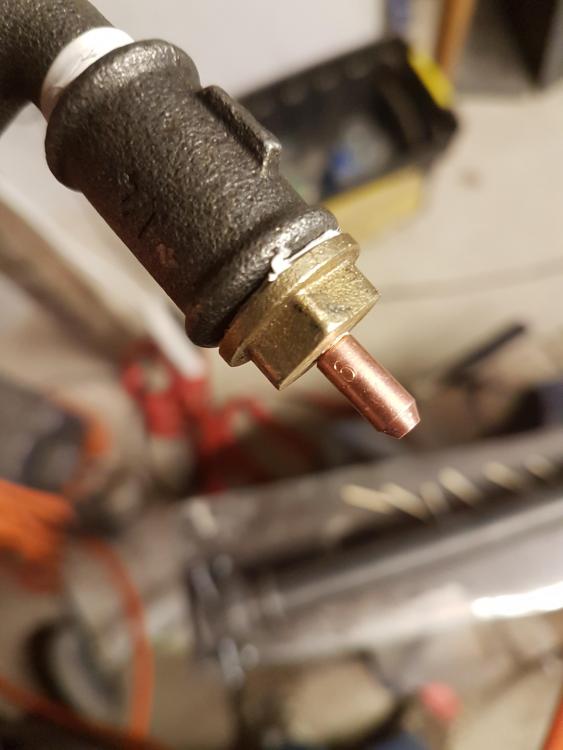
I've tapped a 0.6mm mig tip into the brass end cap....is this worse or better. The clip is it going from full power to lowest using a needle valve 20180909_091810.mp4
-
I used a 1mm drill bit in a brass end cap....I had to use a hand drill as the chuck on my other drills would not grip the tiny drill bit. I was very inaccurate when creating the hole so I could have made the hole too big. I have some spares so I'll try again and be less hamfisted
-
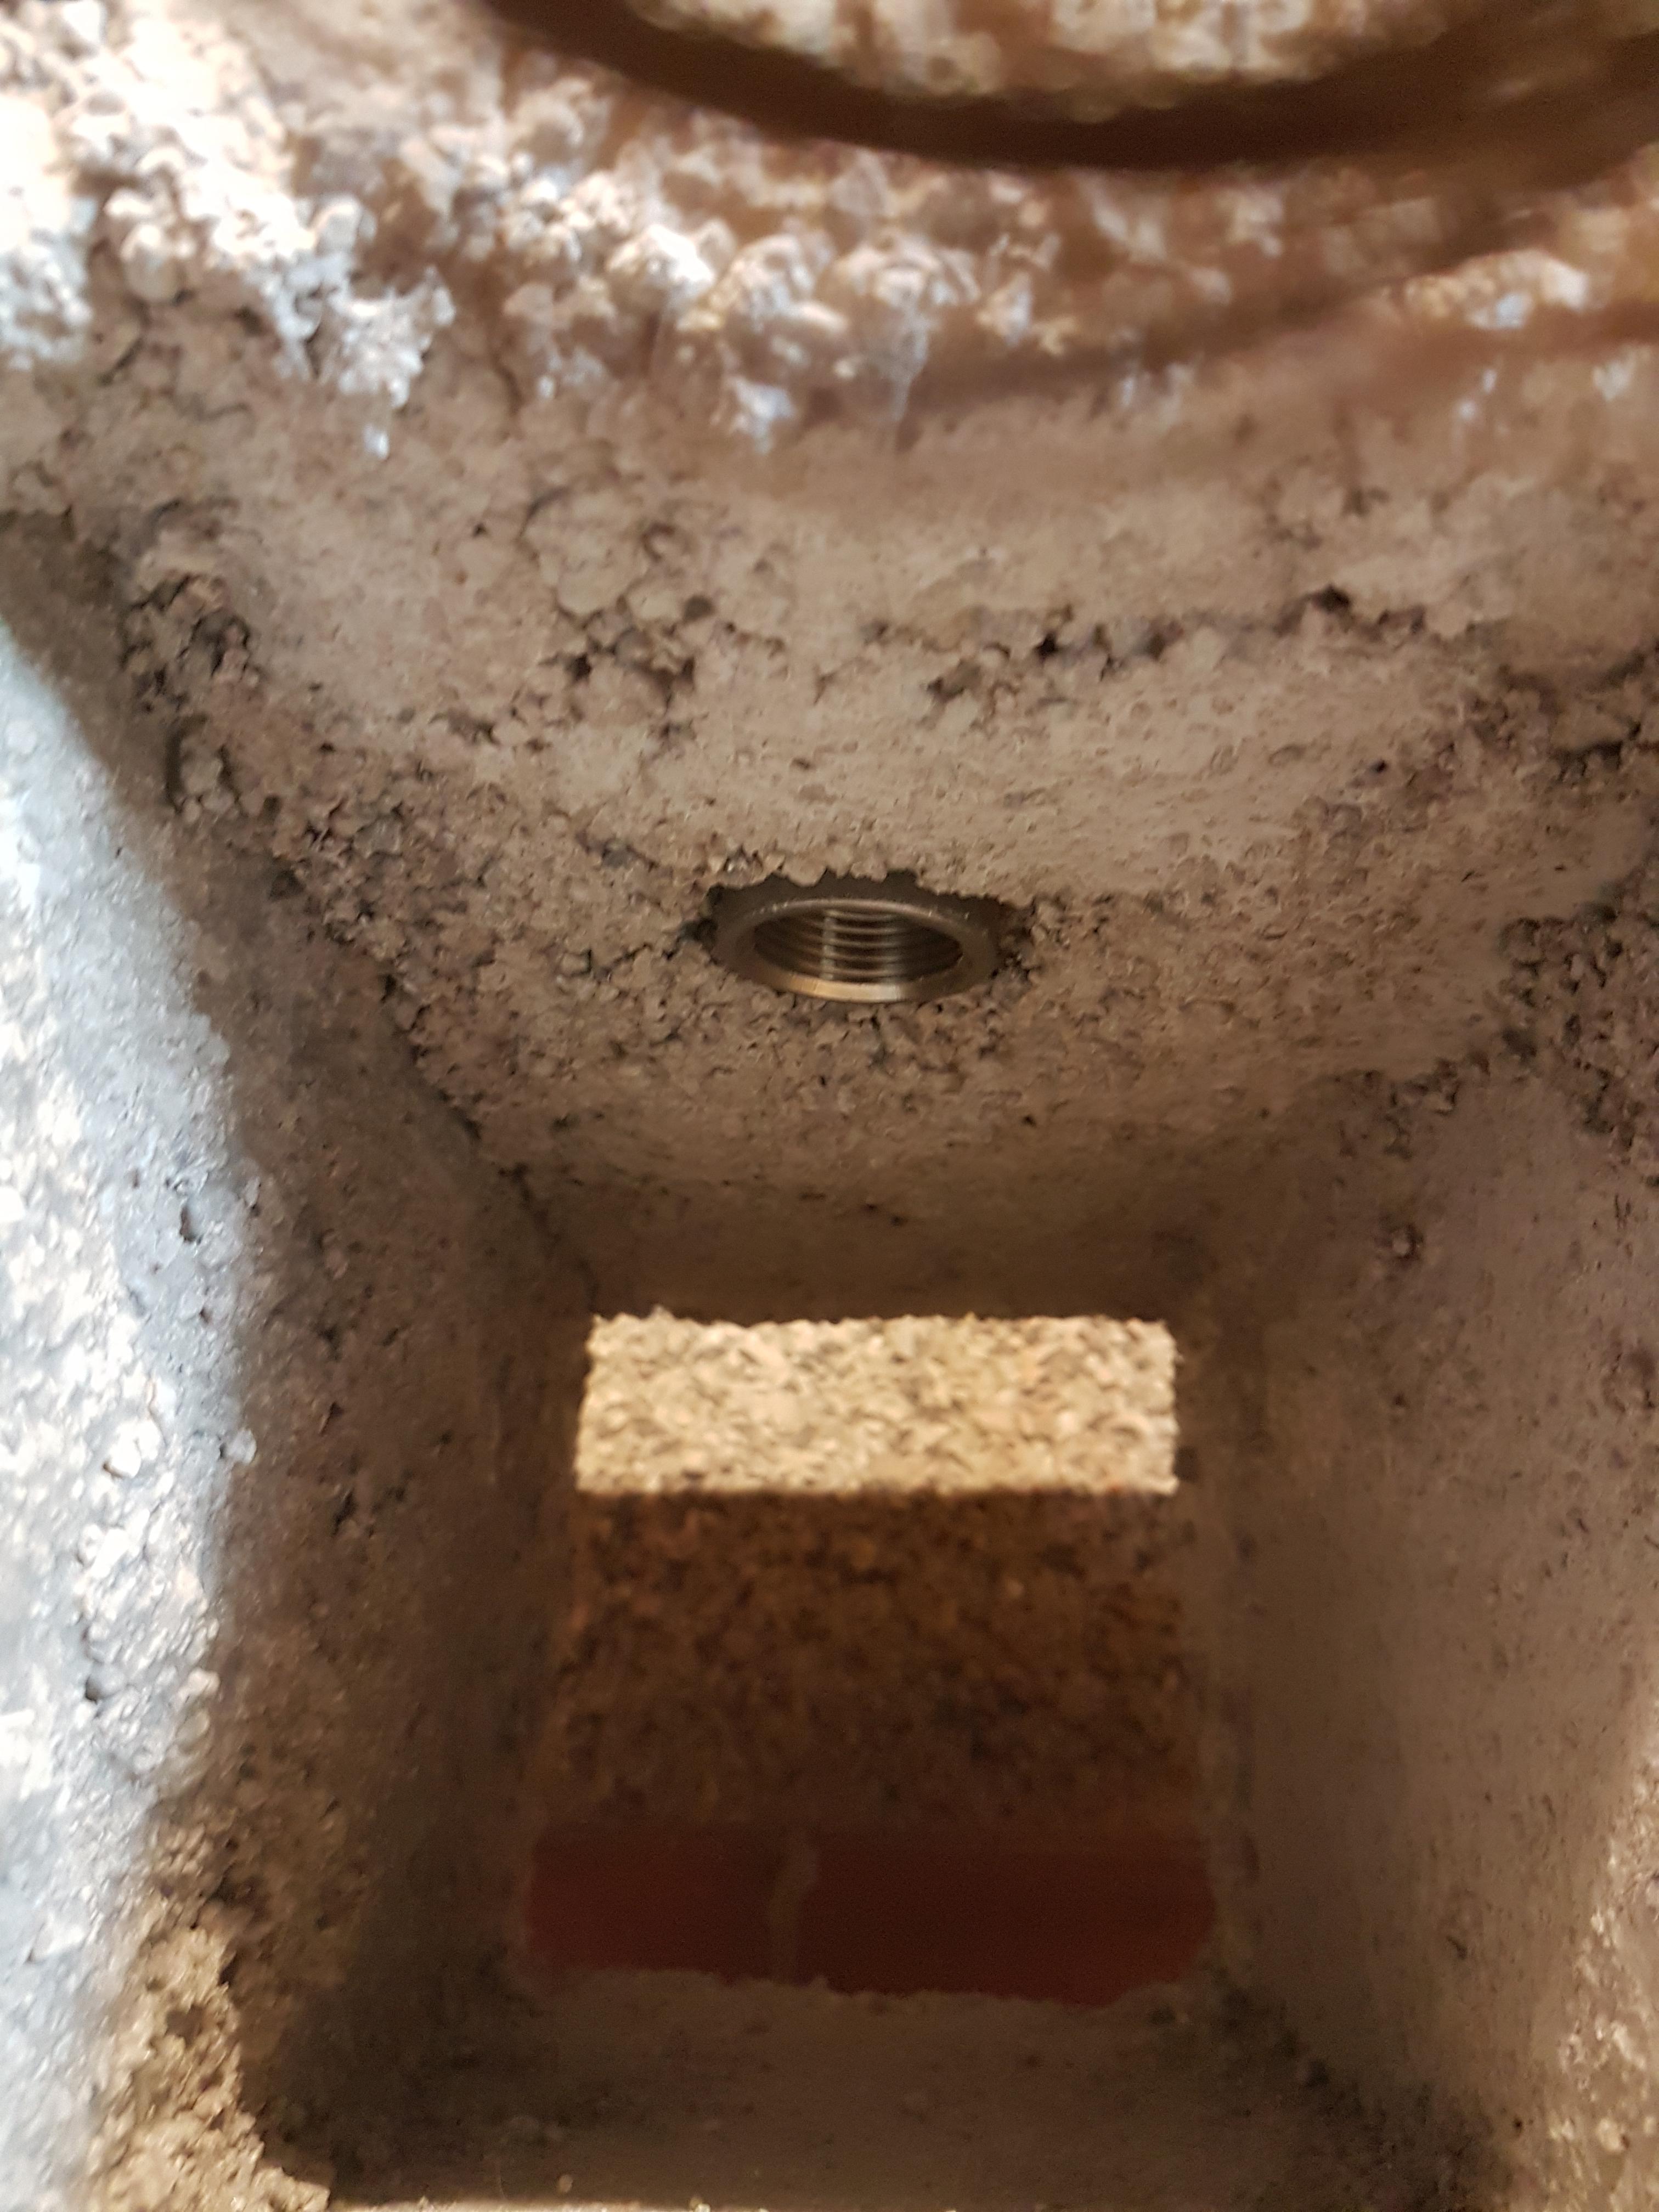
Hi Mikey- it's just a stainless steel reducing socket, parts are quite difficult to source in the UK and there was only one company (jtm plumbing) that had these in stock. Regarding the burner I need to do some reading to understand firstly what is wrong and then how to address it. MotoMike- getting an IR coating of some sort in the UK is also not a easy thing for some reason. The ends will be finished with a porch at front and doors front and rear, initially with sliding insulation bricks on 'rails. I have the parts for a second burner ....I'm just in initial testing and I may also create a movable wall for the rear to reduce the cavity size down while i learn the basics
-
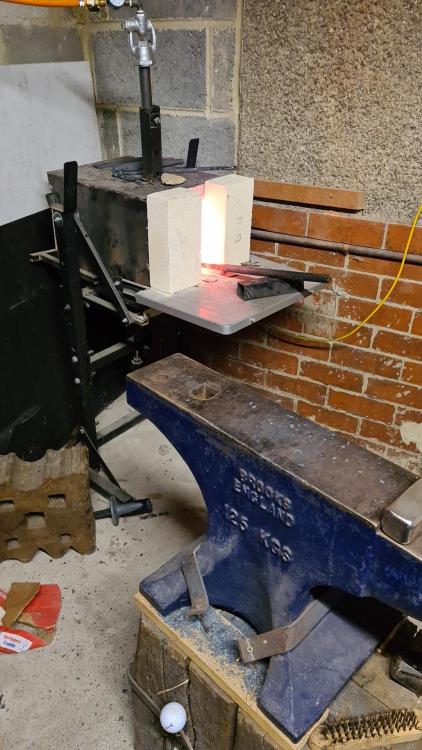
A night time burn and a stand built.... might put some metal in tomorrow.

-
A gentle firing
-
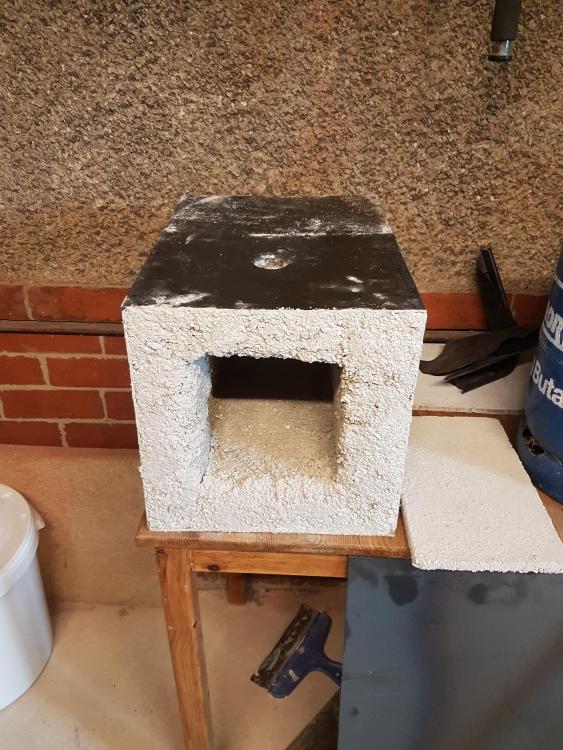
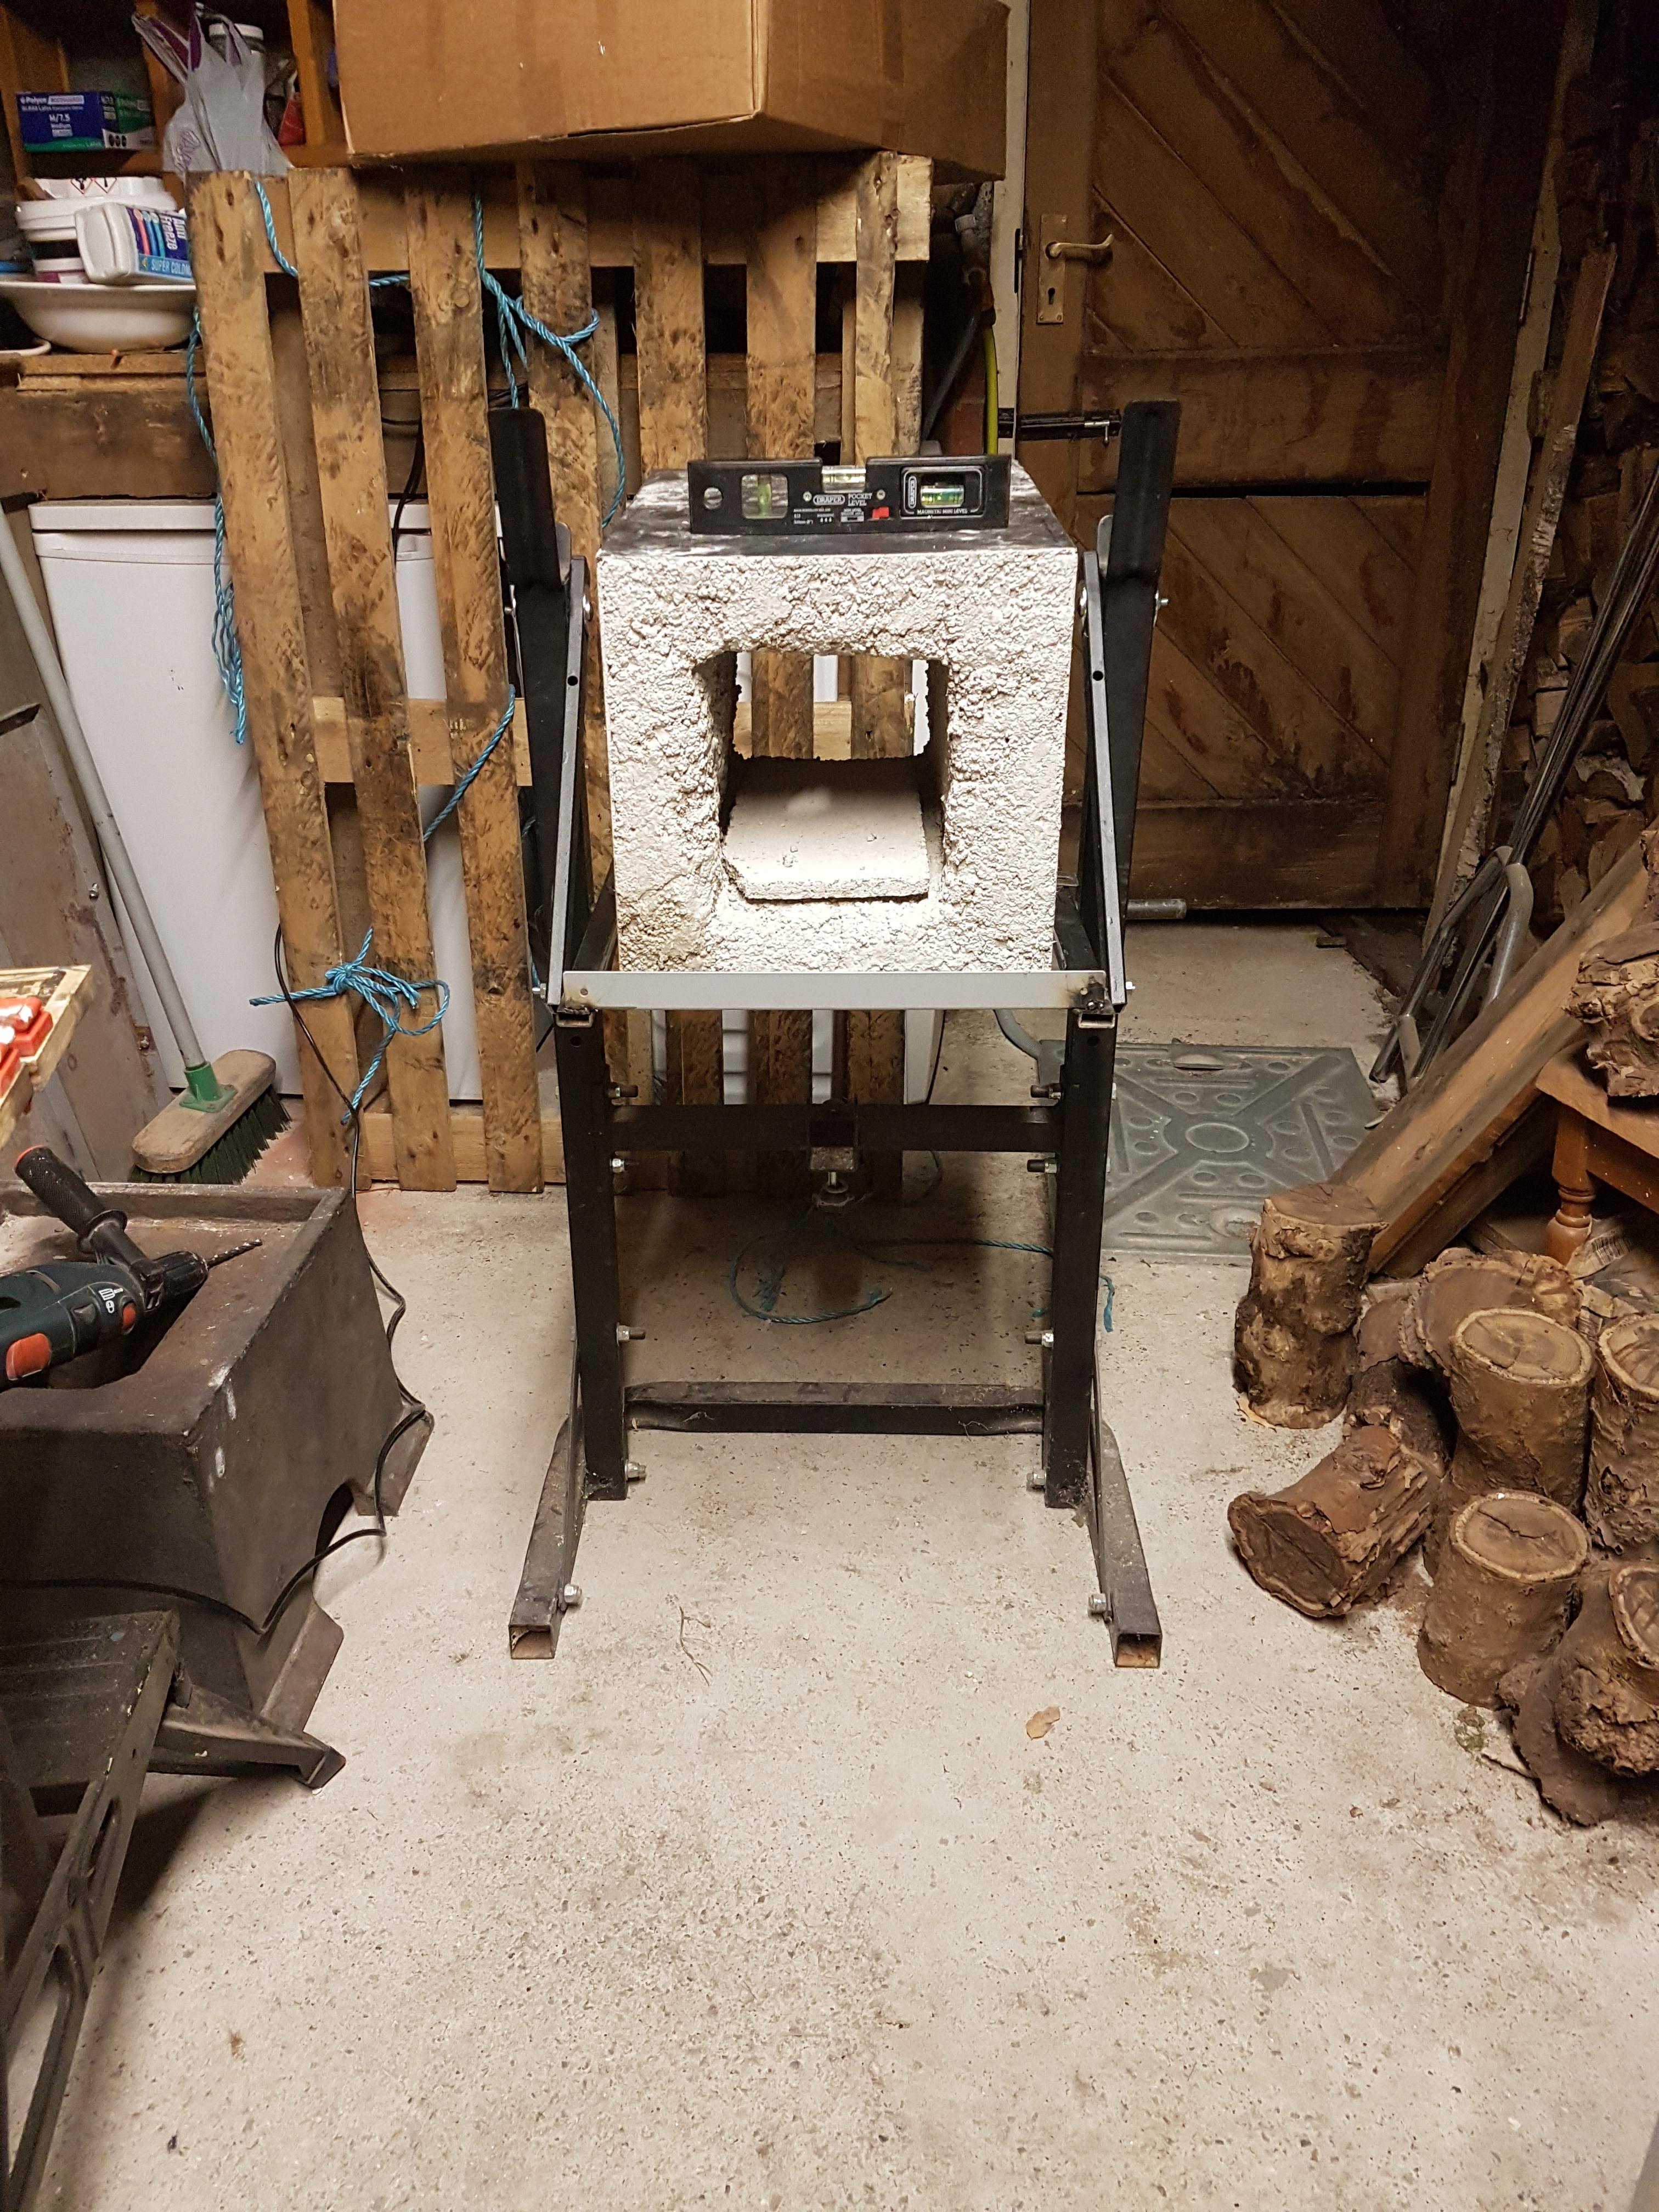
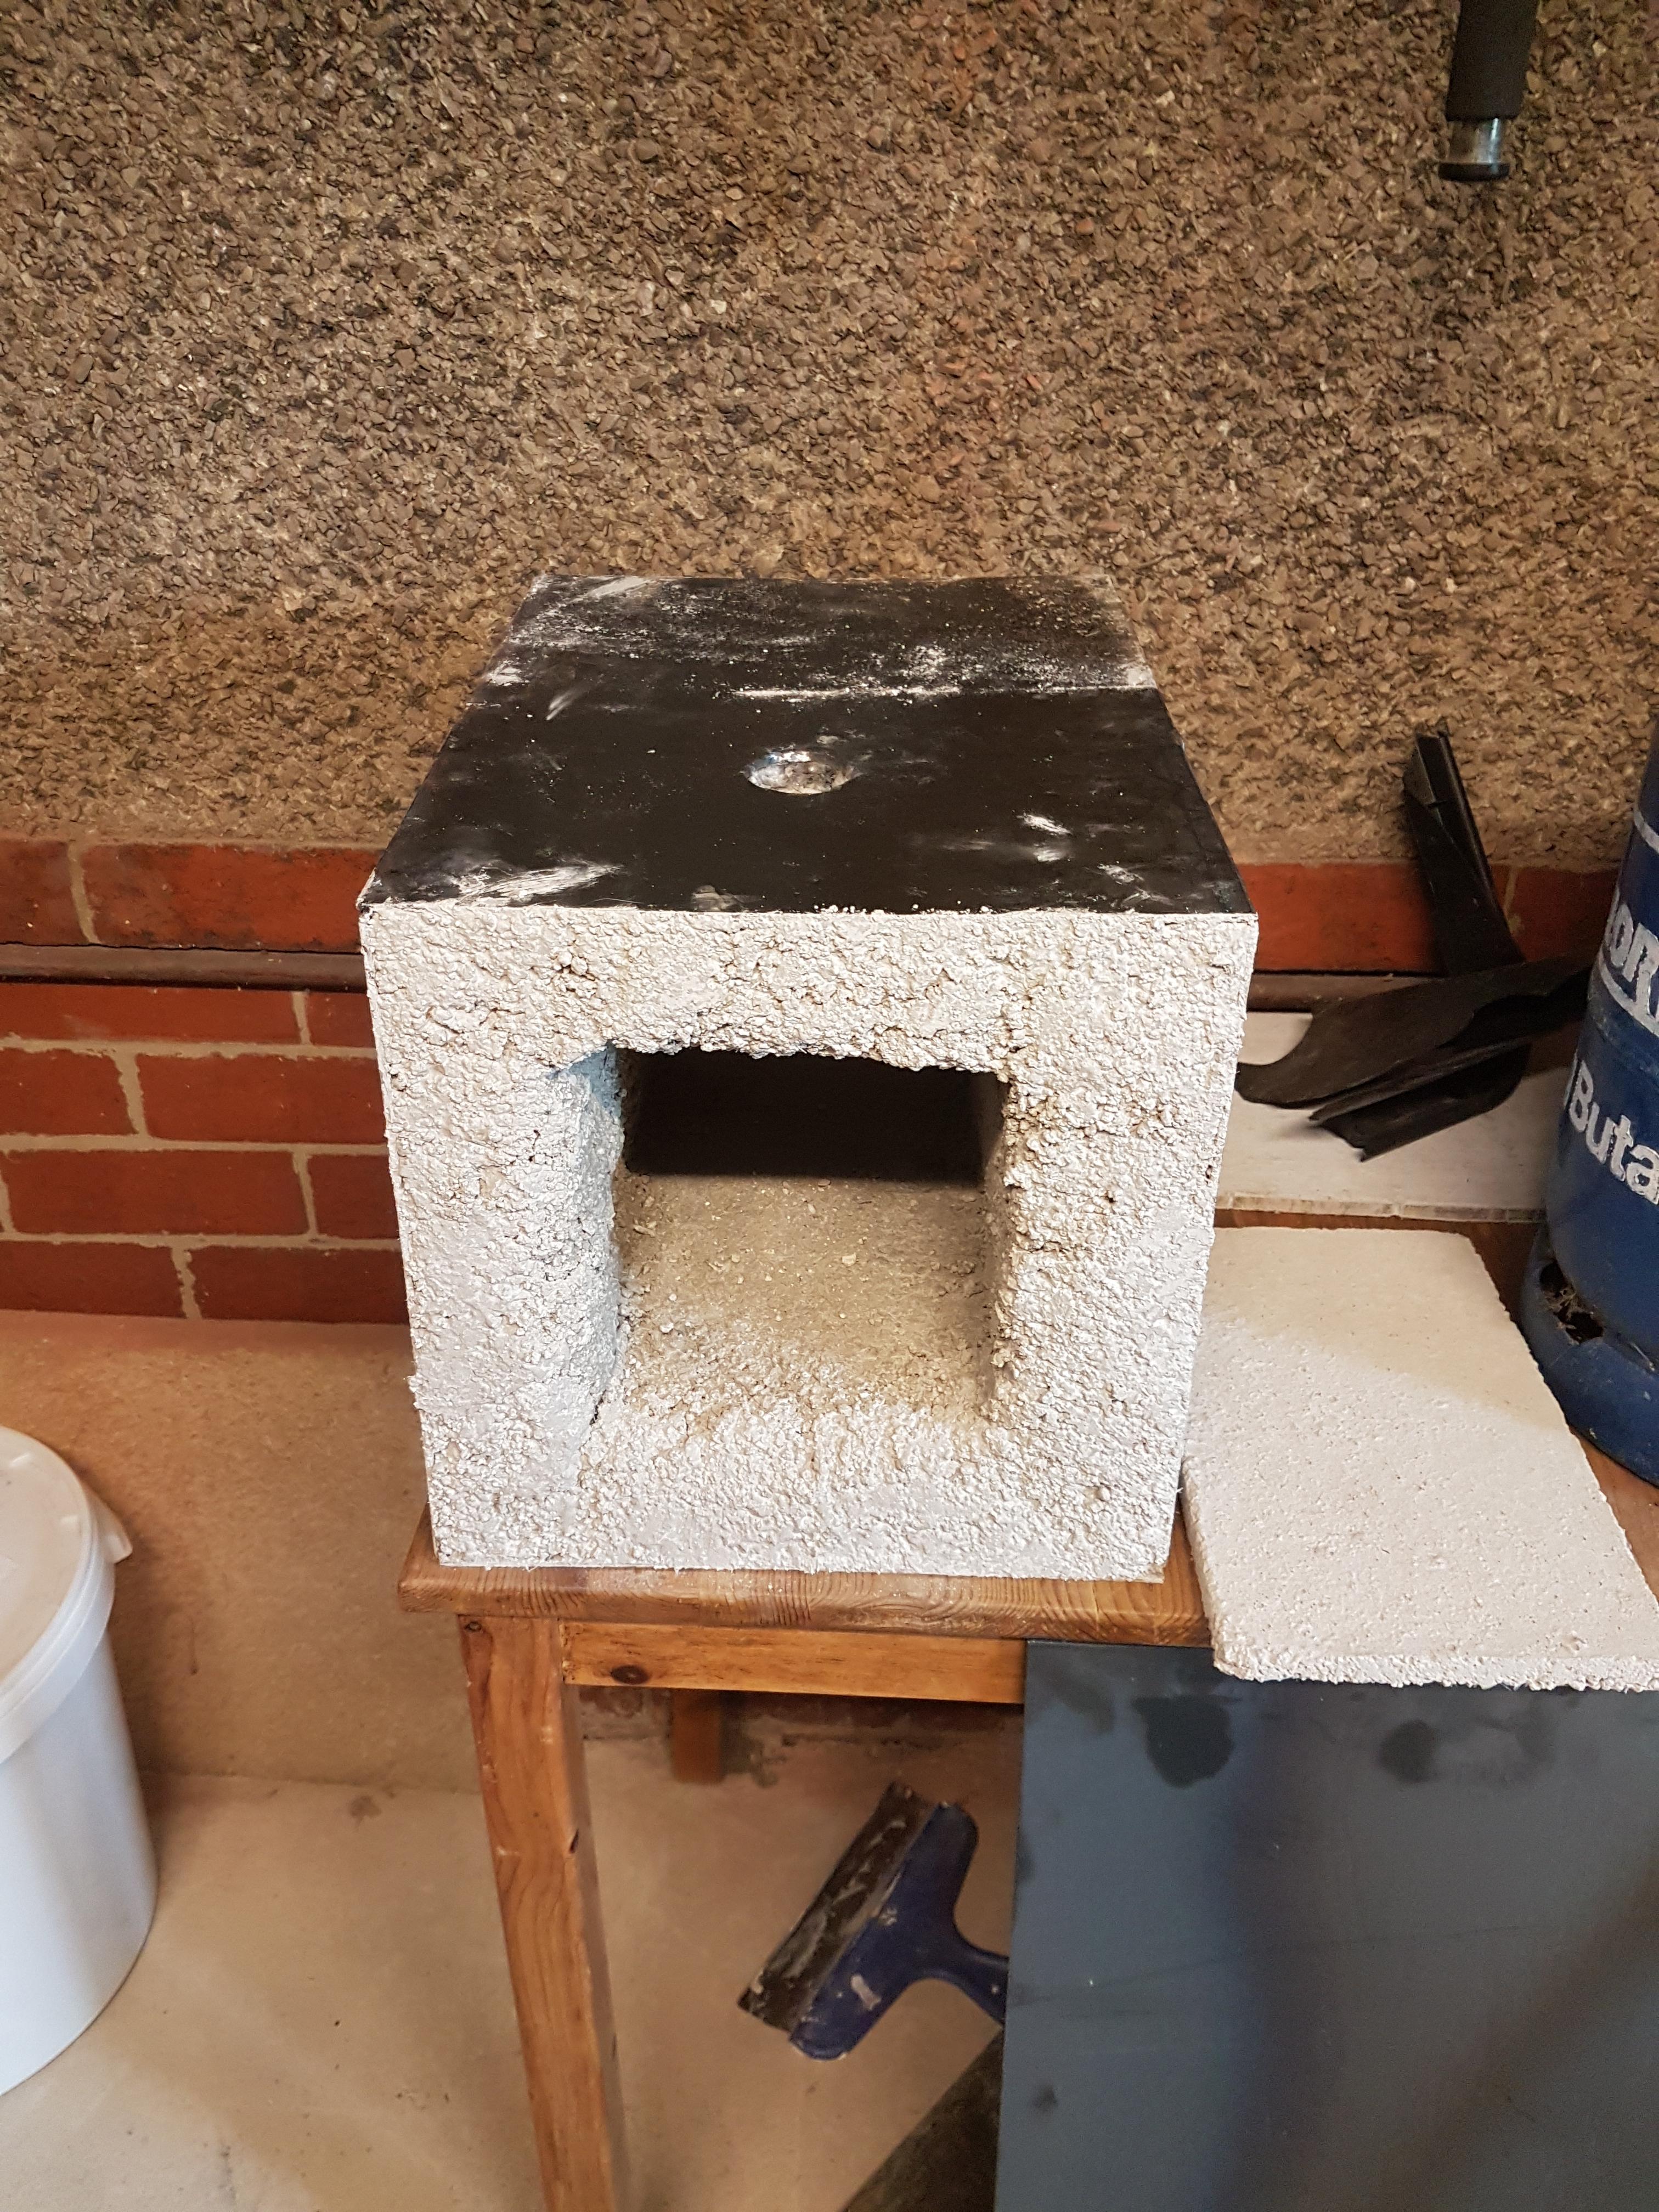
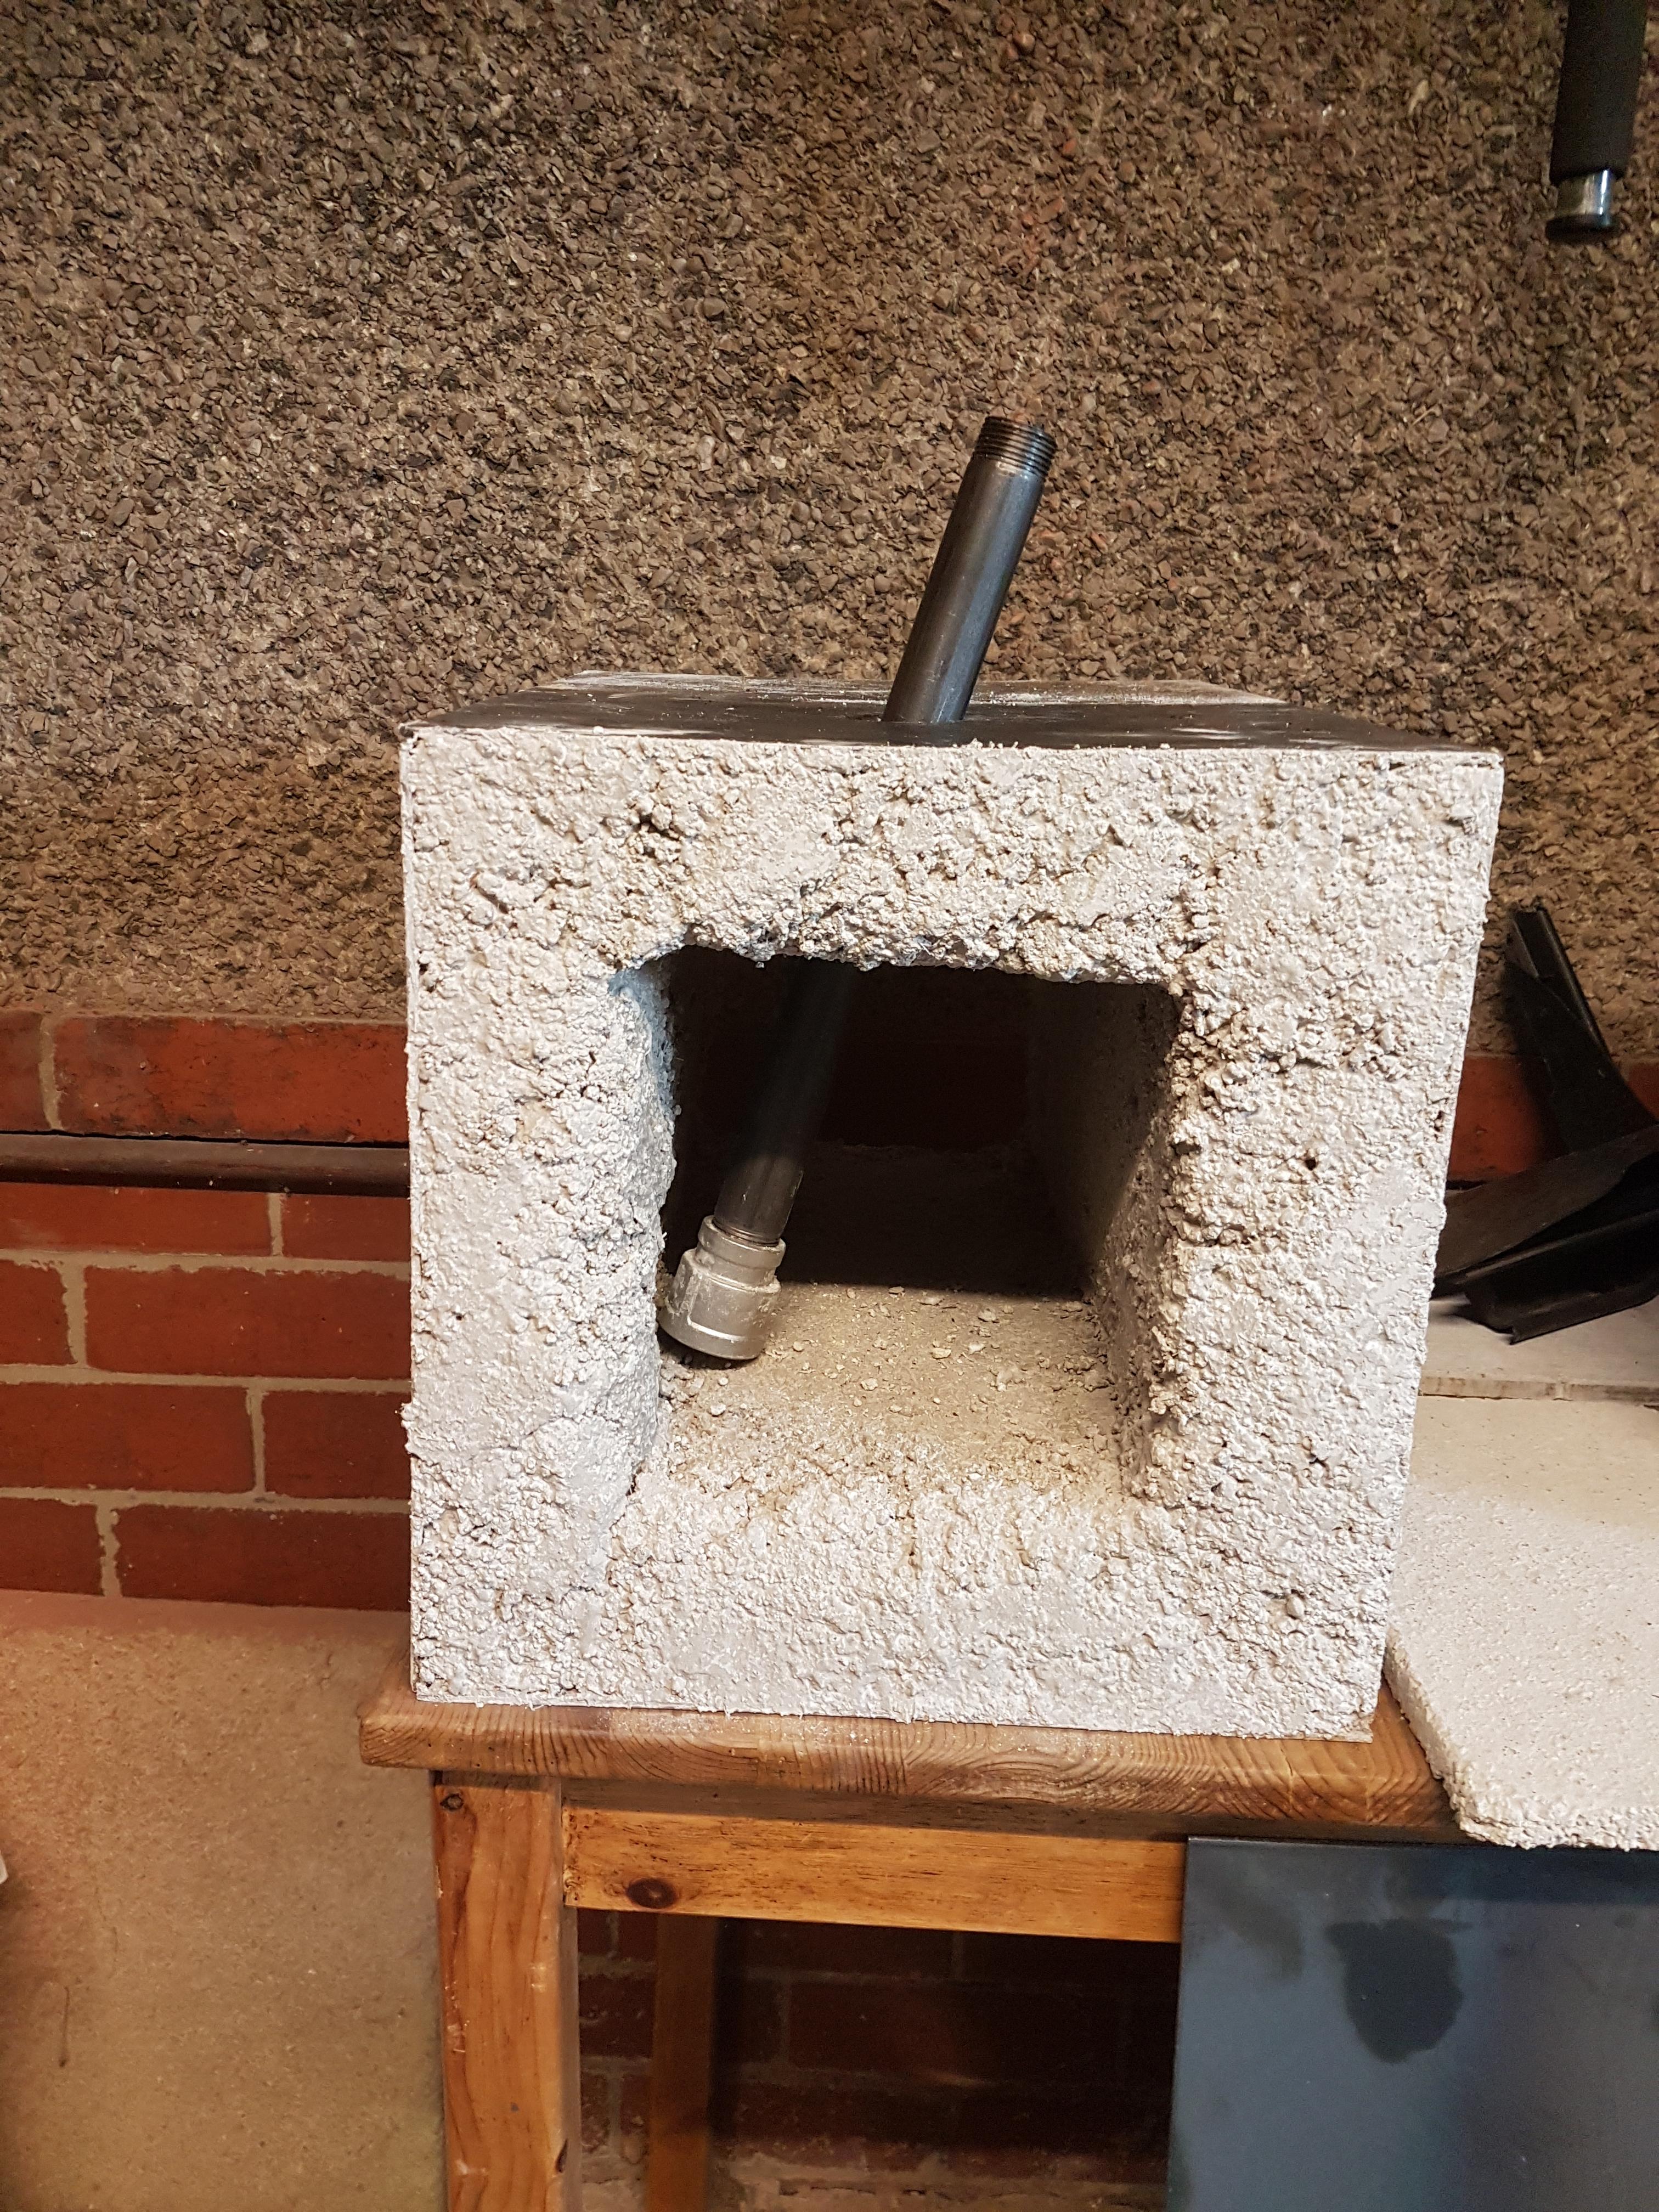
So originally I was going to build a forge using a 7kg butane bottle but realised after cutting the lid off that It was probably going to be on the small side after 2in of ceramic blanket and then refractory...so I changed it to a cubed self build body of 30x30x40cm leaving a roughly 18x18x40 cavity. Ive built one of the two burners that will go into the forge and tested it. I've also formed a floor out of the refractory that can be replaced as needed. I've not fitted the burner yet and will decide on the best angle (with the advice of this helpful community) first before completing the welds. The refractory has been curing for nearly a day and I will then take it through a couple of low heat cycles before a longer burn and hopefully it will stay in one piece I look forward to any critique and advice