JeremyMcG
Members
-
Joined
-
Last visited
Everything posted by JeremyMcG
-
Theophilus, I'm a neophyte at this, but I built my own forge in my garage and have made two very terrible knives so far. I live here in Vegas (upper north-west - near Centennial Hills) and you are more than welcome to come by and check out my VERY rudimentary and less-than-effective setup.
-
I'll research the draw filing. Thanks for the tip. As far as the forge welding of the 1095 - its mostly because I wanted to see if I could. The vast majority of videos show it being done with a press. I wanted to see if I could do it. I don't have an anvil. I have horrible hammers. I was using TINY block of bench steel clamped to my, well, bench. I didn't think there was even a small chance that I could make it work - but apparently, I did. Also - I'm 99.8% done with my absolute first knife shaped object. It's entirely too thin (this was a single 3/8" piece of 1095) to be used for anything other than saying "ARRRRR" when I'm slicing a tomato - but it's my first. I only used a grinder on the tang. Everything else was hammer forged. (And the handle, guard and pommel were belt sanded). I used an old castle nut I found under my car (need to figure where that came from) as the pommel, and use brass for the guard and whatever that's called before the pommel. 3/16" brass pins, and polypearl handle material. Shaped the handle with 160 grit on the belt sander - then slathered it with Turtle Wax polishing compound and went at it with 2000 grit. It's ugly. But, it's a death slayer for tomatoes. Having built the forge from scratch, and using terrible tools and zero idea what I'm doing - this could have come out a lot worse than it did.
-
Thanks - I'll try those on the next make. So, I went back to the first knife shaped object I attempted. Decided to finish it. It's too thin to be a camp or utility knife - but it wouldn't look too terribly awful on my mantle. d Had a successful quench. Got the guard peened and affixed tight. Did a temper in the oven and started on the scales. Attempted to answer my phone while working with the epoxy...that didn't work out well. Started to rough shape the handle. I still need to round the tang tail, thread it and make a pommel. Overall, about a million mistakes - but this was absolutely the first knife I've ever made - and more significantly - the first thing I ever attempted to forge...
-
I do not... Halp plz?
-
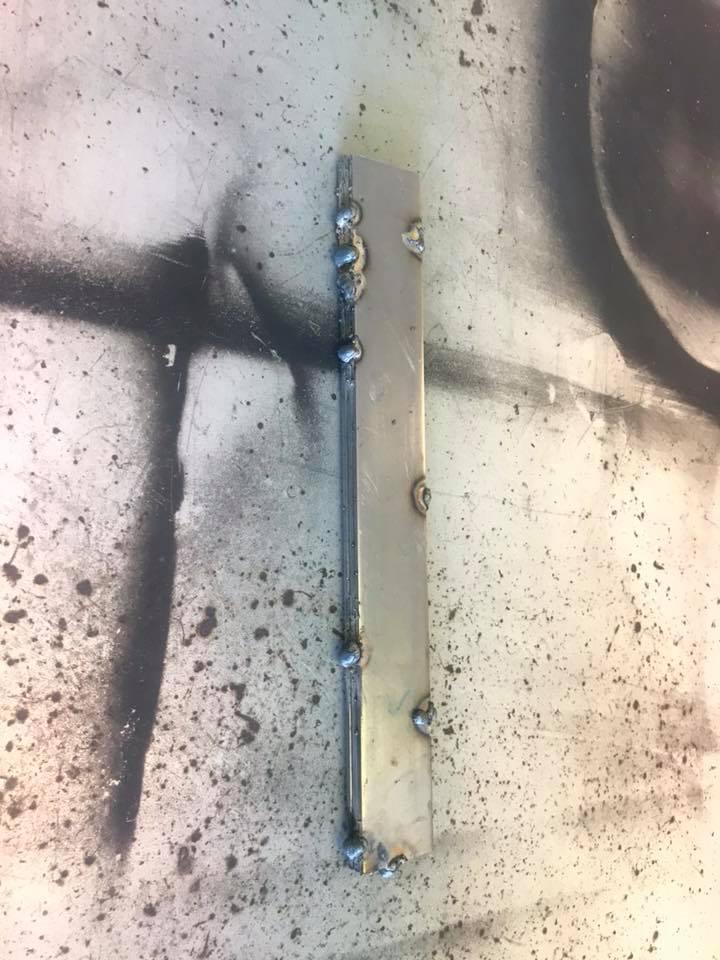
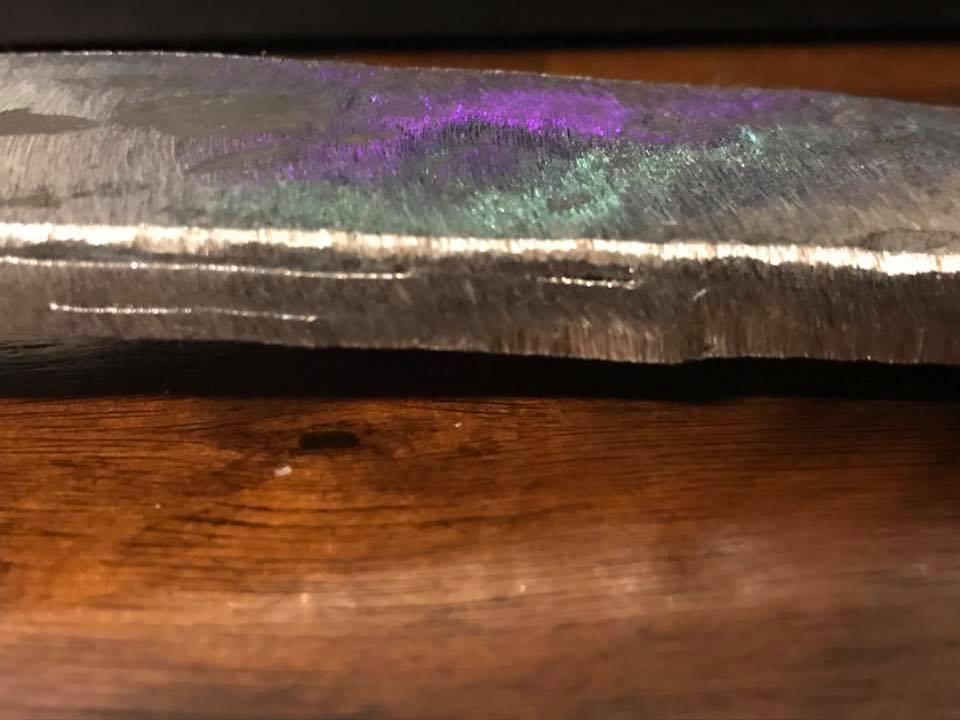
Well, while I wait on my handle spacers to come in for the Pirate Knife - I decided to grab that monstrosity of a forge weld I did and attempt to turn it into something. I'm still awful at welding - but this was done a few weeks or so ago - I've gotten moderately better since then. This was also a couple weeks ago - I've since really managed to get the welds to hold. It truly is a single piece of steel now. So the basic shape is starting to appear. Tips of knives give me issues. Most likely an equipment limitation, but I'm starting to get the hang of it. This is 3 pieces of 3/8" 1095 steel. Leaving the spine thick and trying to hammer the blade thin is a lesson in hammer control. I've not shaped anything with the grinder at all. A little more work on thinning the blade edge. No grinder used as of yet, except to cut into it to see if the welds held. I'm even managing to keep it fairly straight during the hammering. There is an axis twist - not sure how that happened and I need to think on how to fix it. It looks serrated. My hammers aren't the best, but honestly, it looks worse than it feels - most of that is scale that will come off. Going to toss it on the belt sander later today, remove the scale and look for cracks.
-
That's fair. I was just impressed that I managed to get them to not fall apart. After watching hundreds upon hundreds of videos on forge welding, and most using a power hammer, I was thinking that me, my 3lb sledge, and my trailer hitch didn't have a chance of making it work. Just getting the pieces to lie together and not curl up like I've seen on videos where the process failed was a win in my book. I'll finish this tomorrow then cut it in half and take a look at the cross section to see what it looks like. If it's all good, I'll try forge welding those two pieces together...
-
So, I just did what I was told I couldn’t do without a ton of practice. I forge welded three pieces of 1095 bar stock together into a single billet. This was three pieces of 1/8th x 1/2 x 12 1095. As you can see in the pictures, it's a nightmare of a mess - but BY JOVE it appears that the last 3 inches are, in fact, a solid piece. There was so much scale on it that I couldn't see if it were sticking, but since it wasn't flying apart, I kinda felt like it was working. Didn't know until I took the grinder to it. Tomorrow, I'll heat this up again and finish it - but I actually impressed myself today. Oh, and I still don't have an anvil. I did this by clamping a trailer-hitch receiver to my workbench and using that.


-
Well, it's getting there. I only have about 30-45 minutes every other day as it is now to do hobby stuff. Heated it back up and worked on the tip profile a bit and drew out the handle a bit more. I'm not a fan of the knife in general. But, keep in mind - it's my first. I ---was-- going for a camp-knife design, but as it got thinner and thinner, that went away. It is what it is. The edge geometry will be a very long flat-grind V-edge. I'm limited by what equipment I currently have and the fact that I've hammered it thin to begin with. Chance are, that when I put scales on this monstrosity, I will cover the indents and not sand the handle down in those areas...remains to be seen. Anyway - first attempt. I'll get better as time goes on.

-
Yeah - the forge is an "every other weekend hobby" - it will get there eventually. Just dealing with work and life seems to eat about 105% of my time.
-
1095. I'm really just ''playing'' at this point. That's the first thing I ever hammered out and I cheated as it was from flat stock, to begin with - so all the shaping was on the tip and handle. I didn't do much of anything else. Just trying to see how I control the hammer and judging the temp-colors of when it's too hot or too cold.
-
Well, here is my very first attempt at making a blade. I still have no anvil and everything was done on my concrete floor. I used a chisel and hammer to shape the handle. They say your first knife will suck... yup. At least, it's a knife shaped object. I have a loooooong way to go.
-
Thanks - you as well. I did 12 years. 10 of which I lied about a broken vertebra from Desert Storm...it caught up with me though. Update: My interior volume was too large. Shrank it with another layer of blanket. Covered the refractory cement on the ''lid'' with blanket as well. Heated up some 1095 stock - managed to hammer the tip of a knife shaped object out - but I have no anvil, so I'm just using my garage floor at the moment which isn't a good thing. Just toying around and finding which color seems good for hammering and learning when it's too cold. I have a LOT to learn about all of this. I honestly never expected the metal to cool down that rapidly. I get maybe 10 to 20 hits on it before it seems (IMO) to need to go back in the forge. Possibly the cement garage floor is sucking out the heat, or maybe this is normal. Like I said - lots to learn.
-
Language... I'm ex-military. 4 letter words are so much easier to pronounce. I'm also a fan of George Carlin - so that's what happened.
-
Yep. I'll be rigidizing the insulation; wearing a dust mask, and only forging outside. I like my lungs the way they are...
-
So, after the advice, reading, advice and more reading: I've ordered more ceramic fiber to decrease the interior volume of the forge, and I found some thin(ish) firebrick to lie on the bottom of the forge over the refractory cement. In theory, I should be good to go after I build and tune the burners.
-
MotoMike - thanks. Yes, I used a painting respirator when I installed the ceramic blanket. I did not rigidize the bottom before I applied the refractory cement. I will be rigidizing everything else tomorrow evening after the refractory cement dries. The refractory cement I used is Meeco's Red Devil 610 - rated for 3,000 deg F. (I hope that's the correct type) The ceramic fiber blanket I used was a 2" 8lb Morgan Ceramics blanket rated for 2600 deg. I understand your concern for the metal sticking out of the forge. I'll run it for a bit and if its problematic, I'll re-design. I should have plenty of room inside without the need of a back door, until I'm good enough to work on larger pieces... is the venting I've read about that important that I NEED a back door that's open?
-
Hi. I'm new. 47 years old. Living in Las Vegas. Military Vet (USAF). Driver of a 71 Corvette. Father of a 5 year old daughter. For some unknown reason, my daughter's absolute favorite TV show isn't a cartoon or anything on Disney; it's "Forged in Fire." Anyway, my kiddo is obsessed with this show. She's also in Karate. She has been training with a sword since she was 3 (so 2 years now) and she'll be competing on ESPN this October in the ATA Fall Nationals in Orlando. Anyway, she loves swords - and I enjoy building things. So, we started to discuss making a forge and learning how to make blades - with the end goal being that I will make her a sword when she earns her Black Belt. So, I began to make a home forge. Originally, I was going to make a box forge. (one that's rectangular). However, I've never welded before in my life, and I soon found out that I sucked. I decided that my welds most likely wouldn't stand up to the heat of a forge, and the last thing I needed was the forge breaking apart while the inside was 1500 deg F and burning down my house. So, I abandoned the idea of a box forge and instead went and got a 30lb propane tank, and cut the front completely off. I used the original idea of the forge for the base and continued to practice my welding. It's still ugly as XXXX, but they hold up to a sledgehammer hit. After cutting off the top of the tank, I cut a square hole for the ''entrance'' of the forge. After stripping the tank down, I covered it with 2000 deg heat resistant paint and ground down the sharp edges from the top cut. I marked the location for the burner holes in what is now the top of the tank. 5.25" center to center. This will be cut out for the propane burners to be inserted into the interior of the forge. ht Holes cut. I then welded two pieces of angle iron together and welded that to the entrance. Then covered that with a layer of 3000-degree refractor cement giving a support platform for the tools, tongs, rebar and such that will hang out of the forge. Found some 2" thick 2600-degree ceramic fiber blanket and lined the interior of the forge. Added a second layer of fiber blanket to the bottom for good measure. On top of the 2nd layer of fiber blanket, I applied a 1/2" thick layer of 3000-degree refractory cement for the base. This provides a solid interior platform for the steel to lie on as it heats up. On the inside of the lid, I plugged the gaps on either side of the tool platform and then filled in the concave shape of the lid with the refractory cement. Now, I have to let the cement cure for at least 24 hours, build and install the burners, and weld the front of the forge back together. It's been an entertaining project and the kiddo has enjoyed "helping." I have absolutely no idea if I'll ever be able to create a blade, but I figure that since she is only 2 years into Karate, I have a few years to practice until I'm able to actually make a sword. Now, tell me everything I did wrong... Please.