Travo
-
Posts
25 -
Joined
-
Last visited
Content Type
Profiles
Forums
Articles
Gallery
Downloads
Events
Everything posted by Travo
-
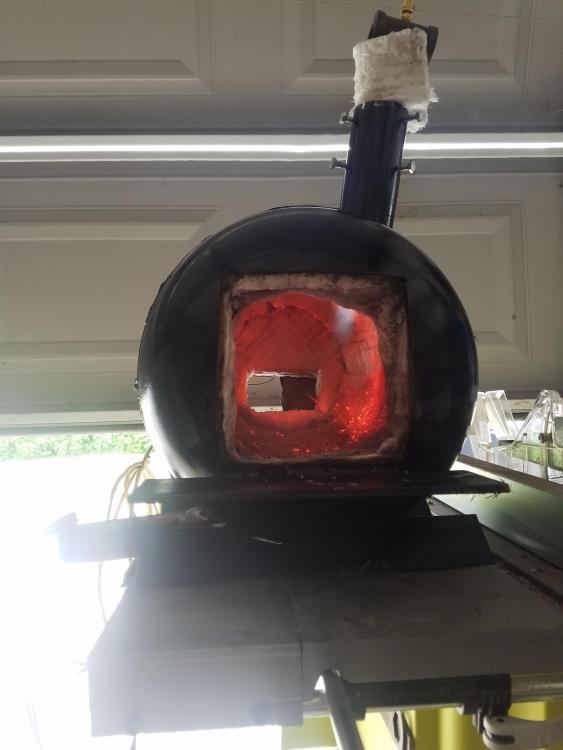
I am pleased with it. After it warms up it will hold 2200 at 7 psi. I only held it for about 10 minutes, but it worked great. It may start to drop off if I would have left it for longer, but like I said I am pleased with it. I was thinking of trying to extend the tee on the top of the burner. Figure it could not hurt to try. I am going to get 2 one inch close nipples and 2 one inch to 1 1/4 or 1 1/2 bell reducers and add a length of pipe to get the burner away from the heat. Say 8 inches. Have you tried this frosty? I will let you know If it helps any on mine.
-
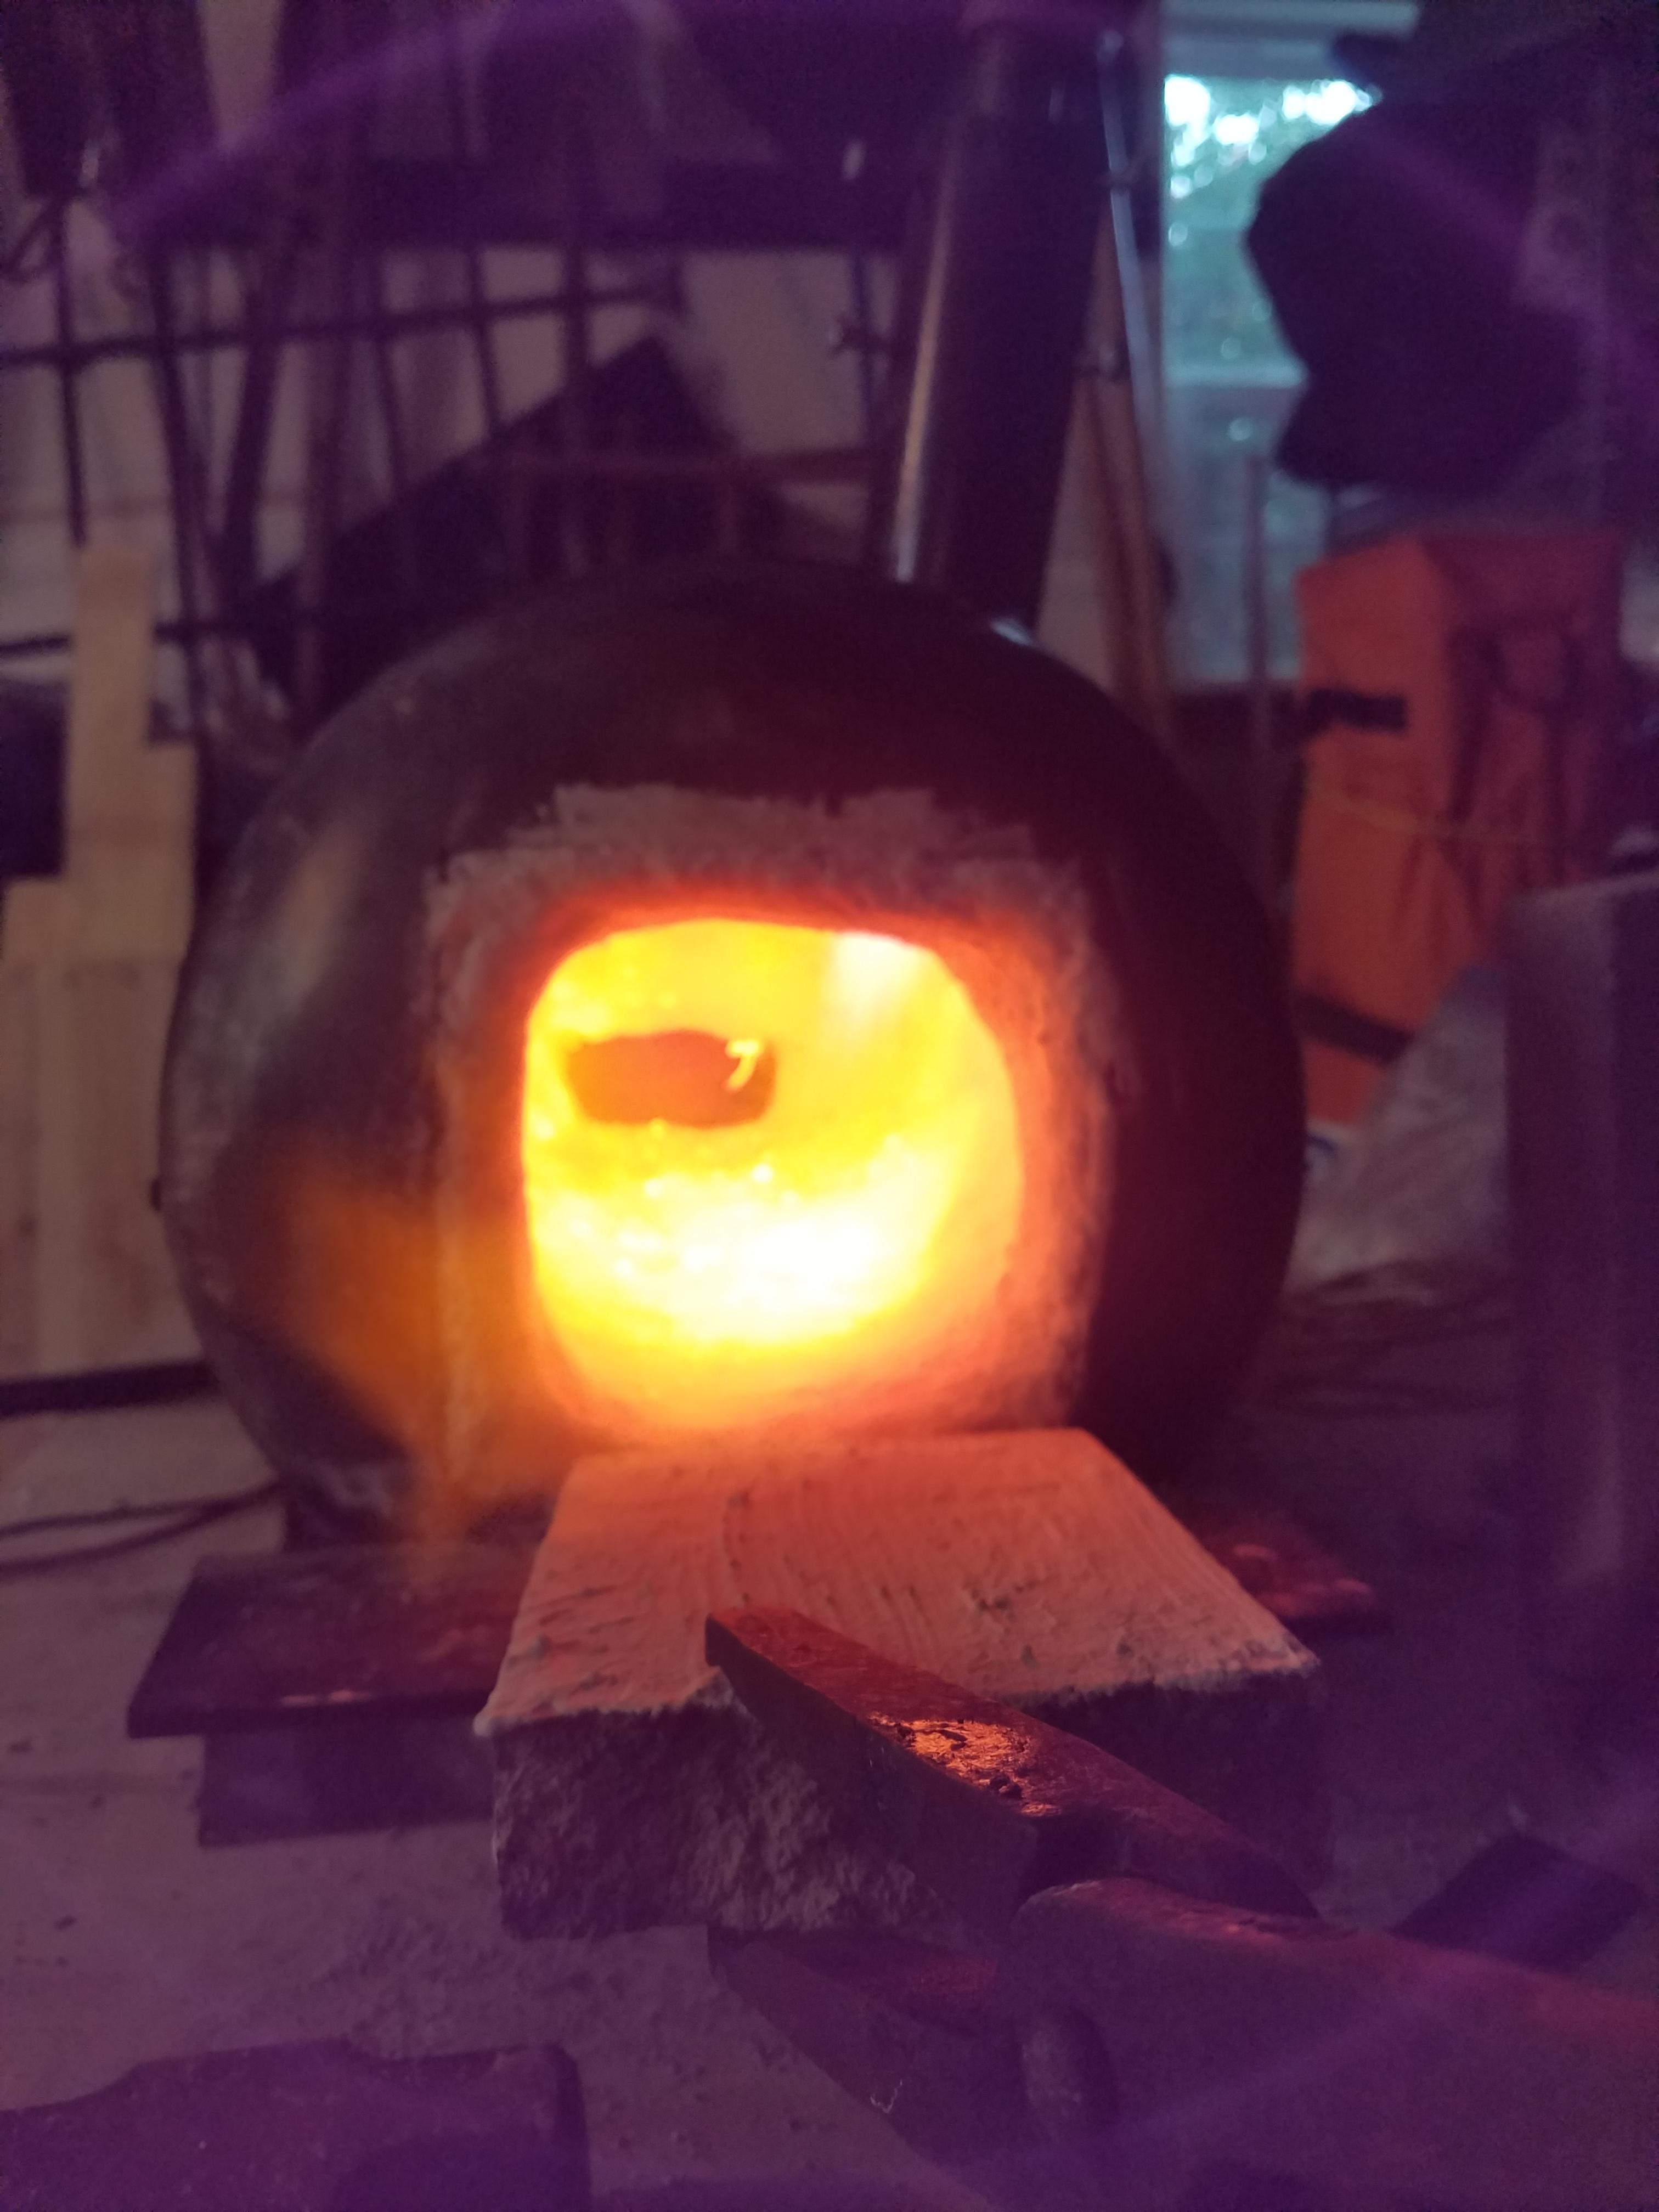
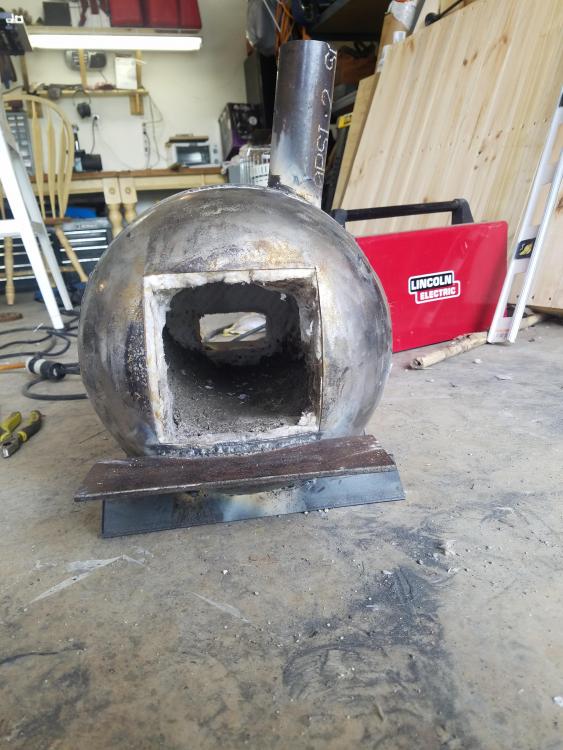
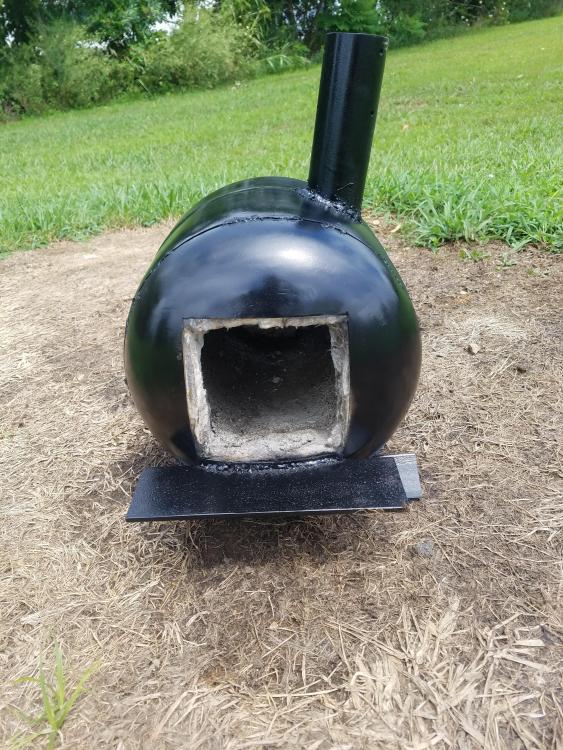
Well it is finally up and running. No cracks in the Kast-O-lite and the metrikote is applied. Made it to 2200 f according to the K thermocouple I have in the exhaust port.

-
I may have to order some. The bricks I have are rated for 2400 and are now coated with metrikote. They should reflect good enough until I get some. I am ready to fire tomorrow afternoon to "dry out" the Kast-O-lite after it has cured. Then all that is left is the metrikote and tuning the burner.
-
I am trying to source some of the bricks you speak of locally. I may have someone I can purchase them from, but I will not know for another week or so. I will paint the ones I have with metrikote for now. If all else fails I can order some. Would casting one out of Kast-O-lite work?
-
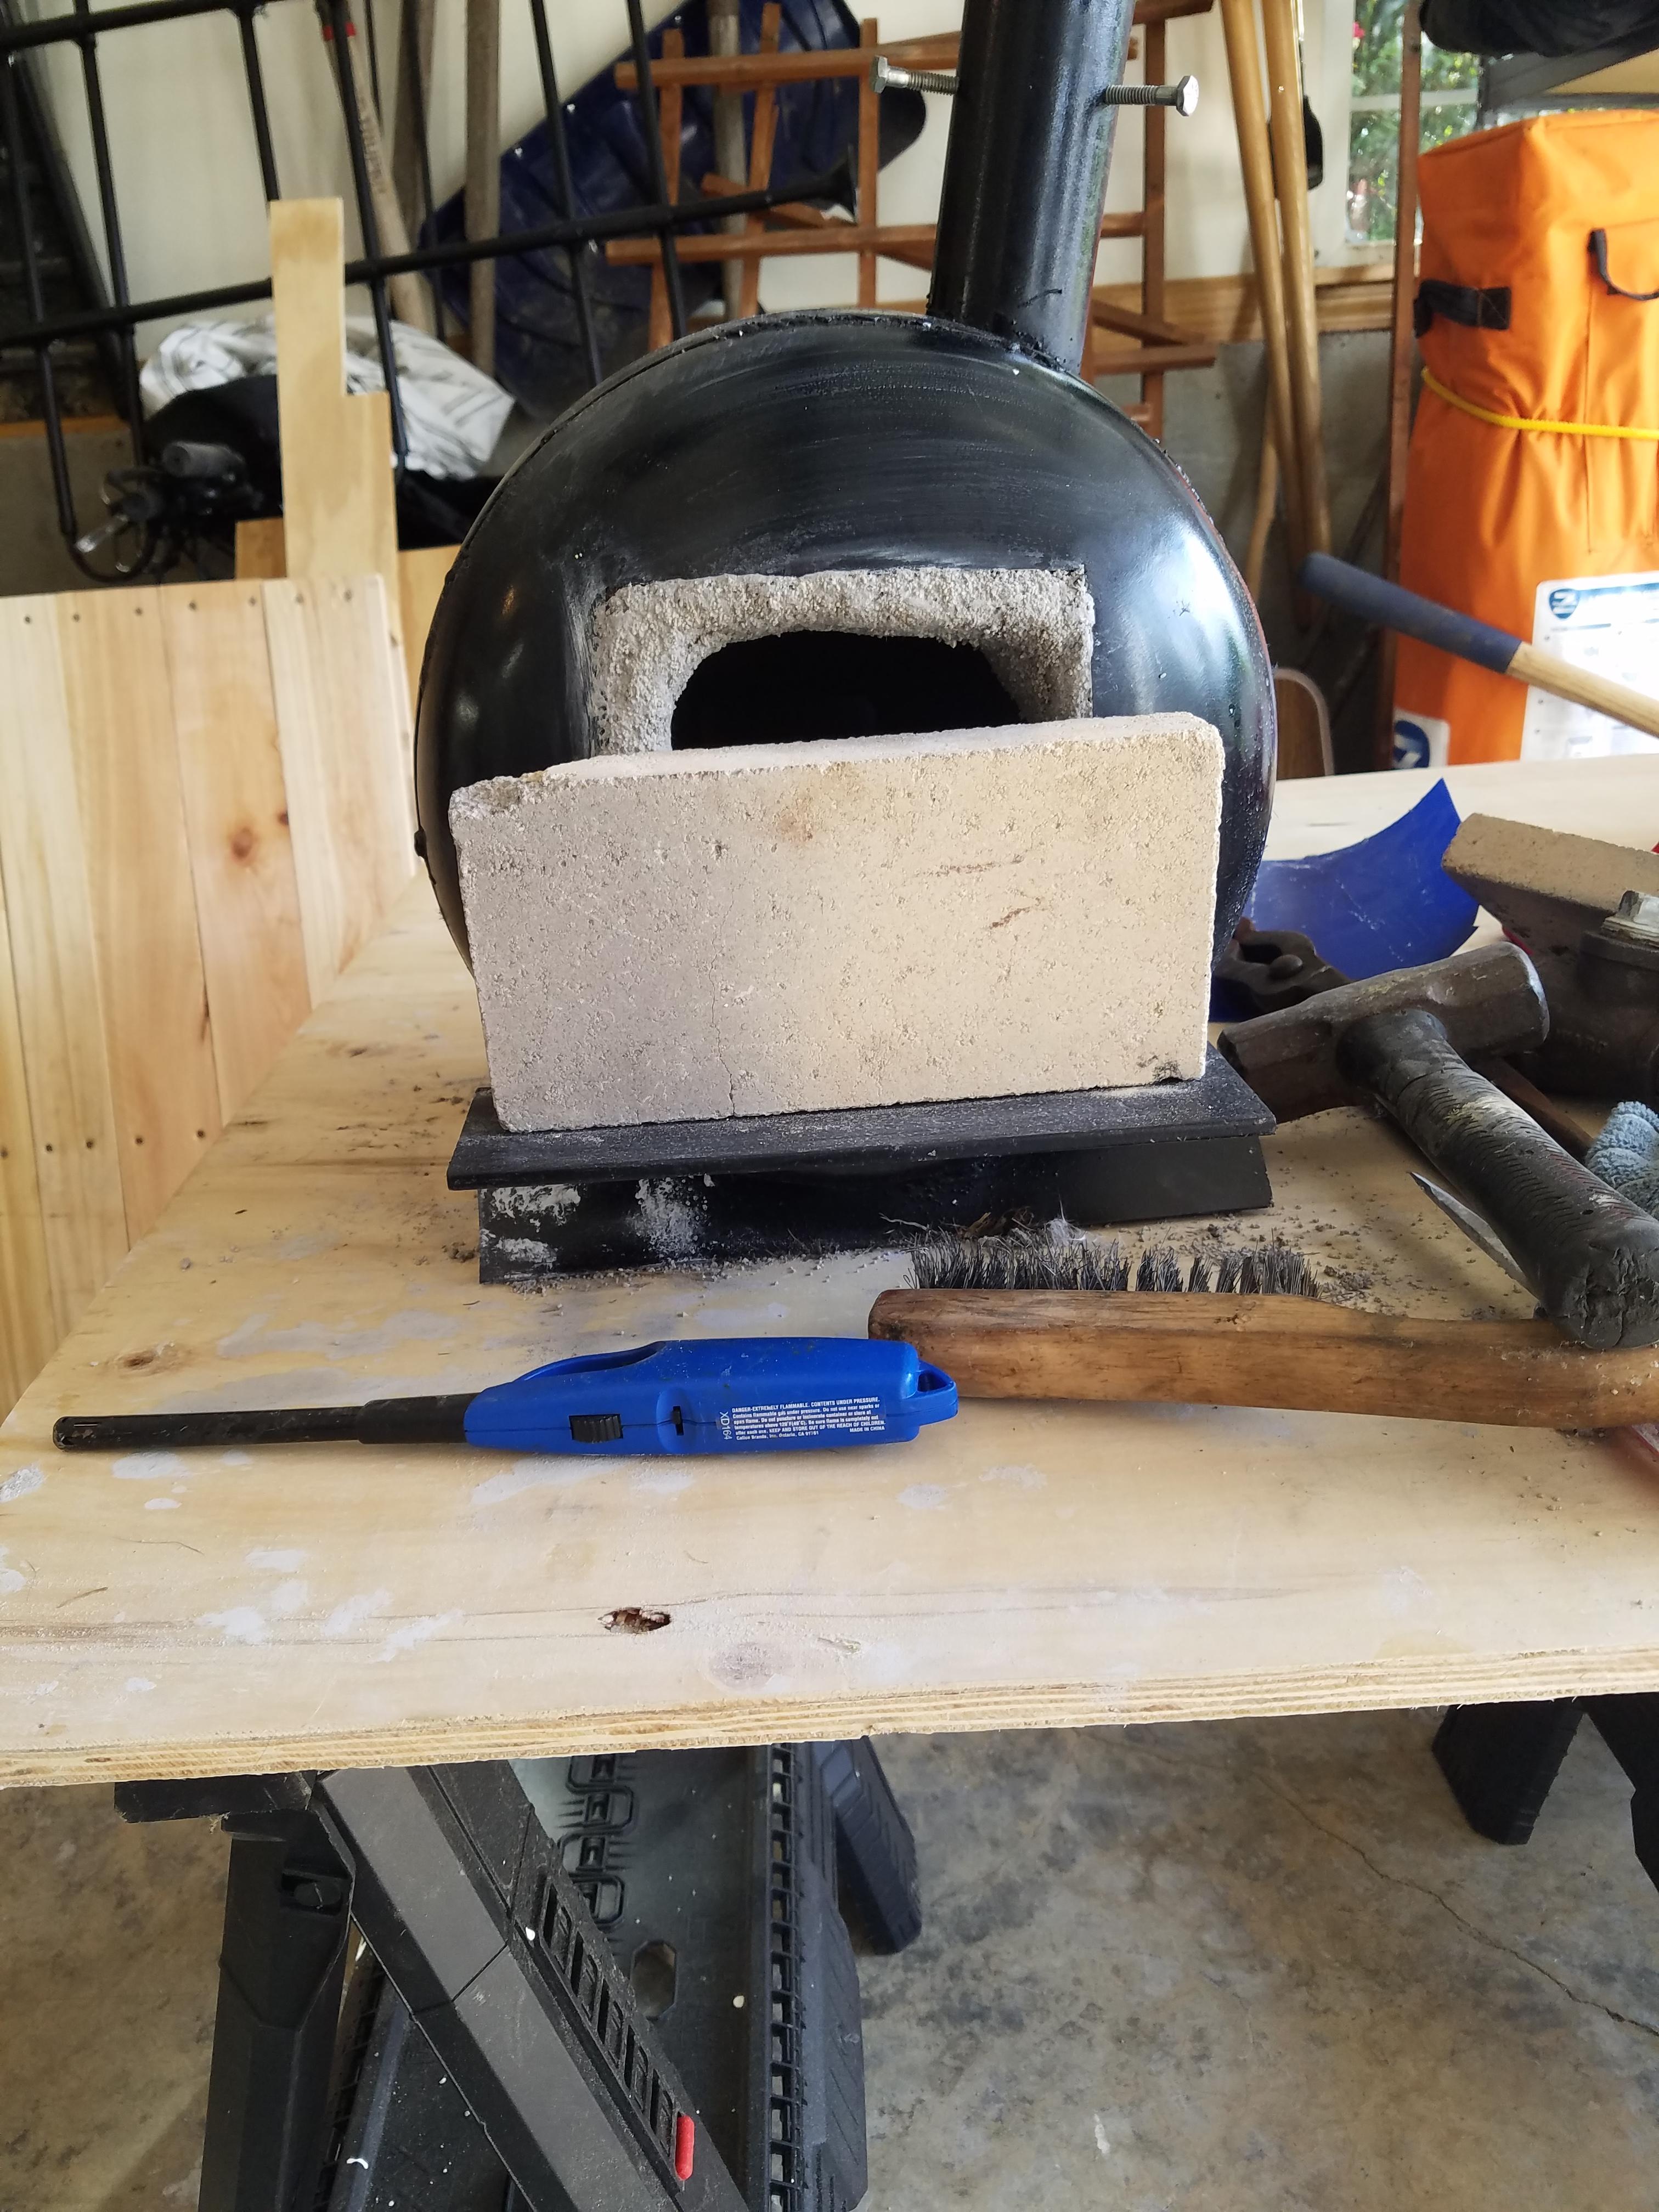
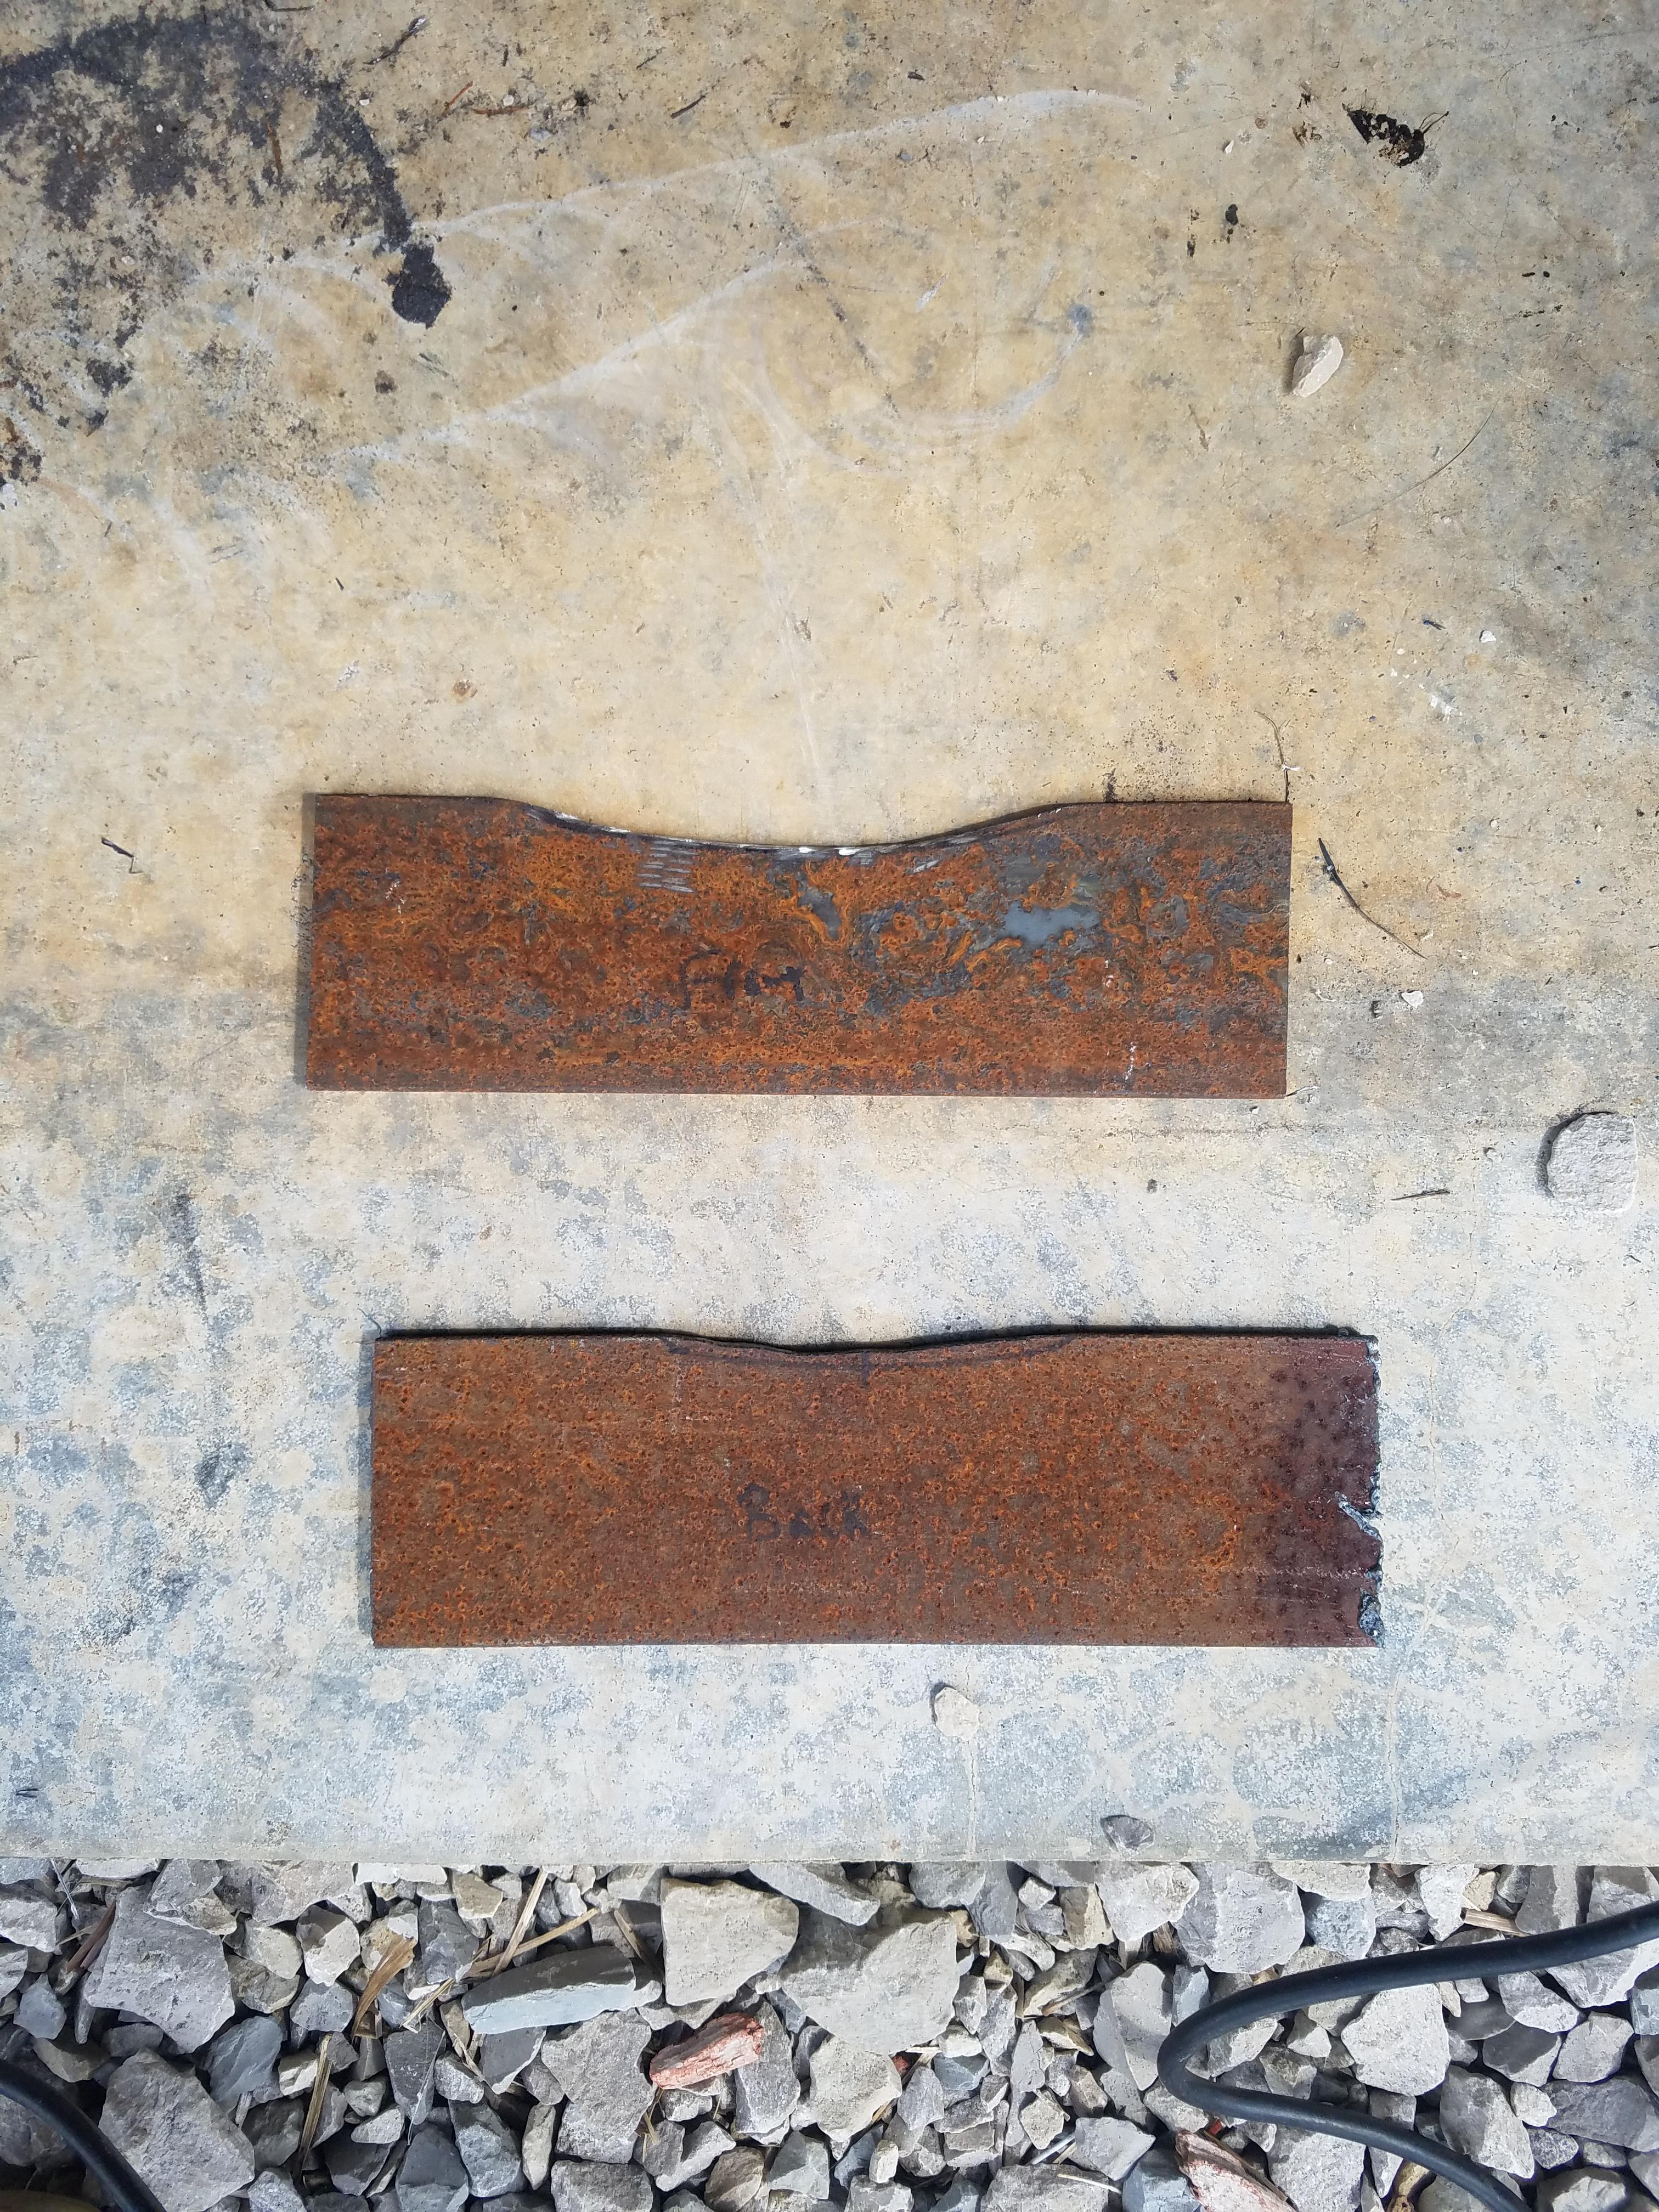
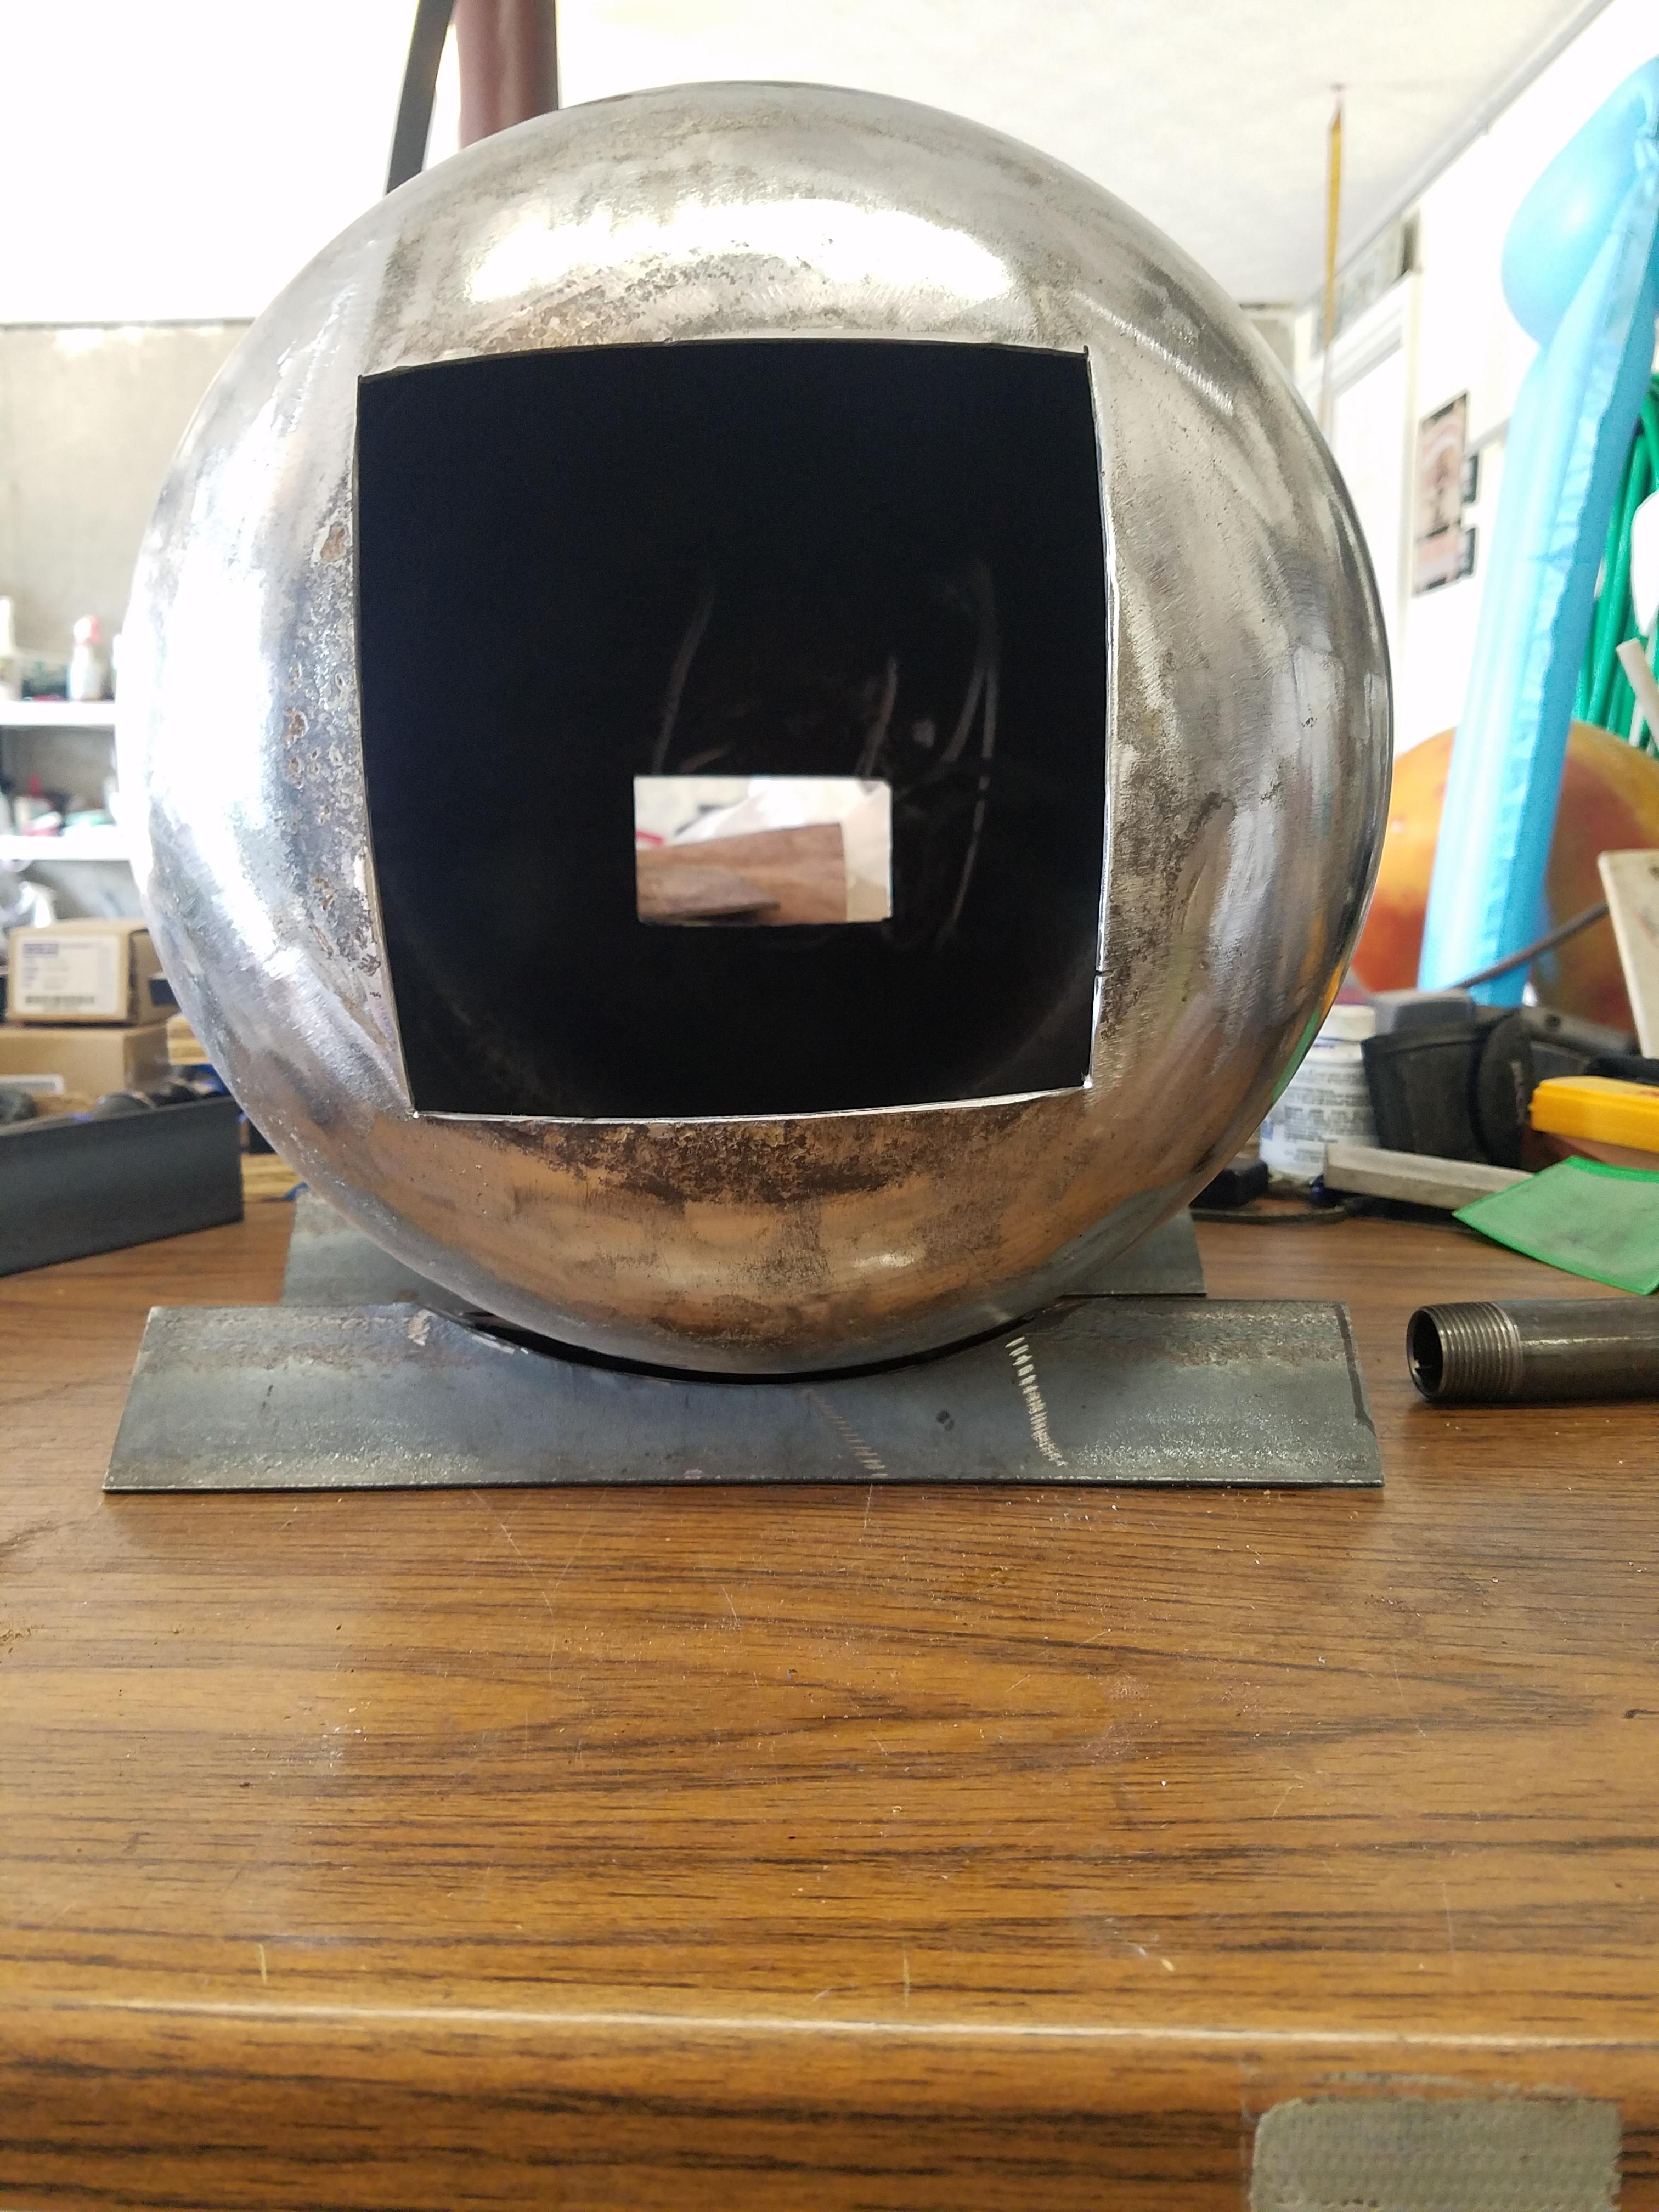
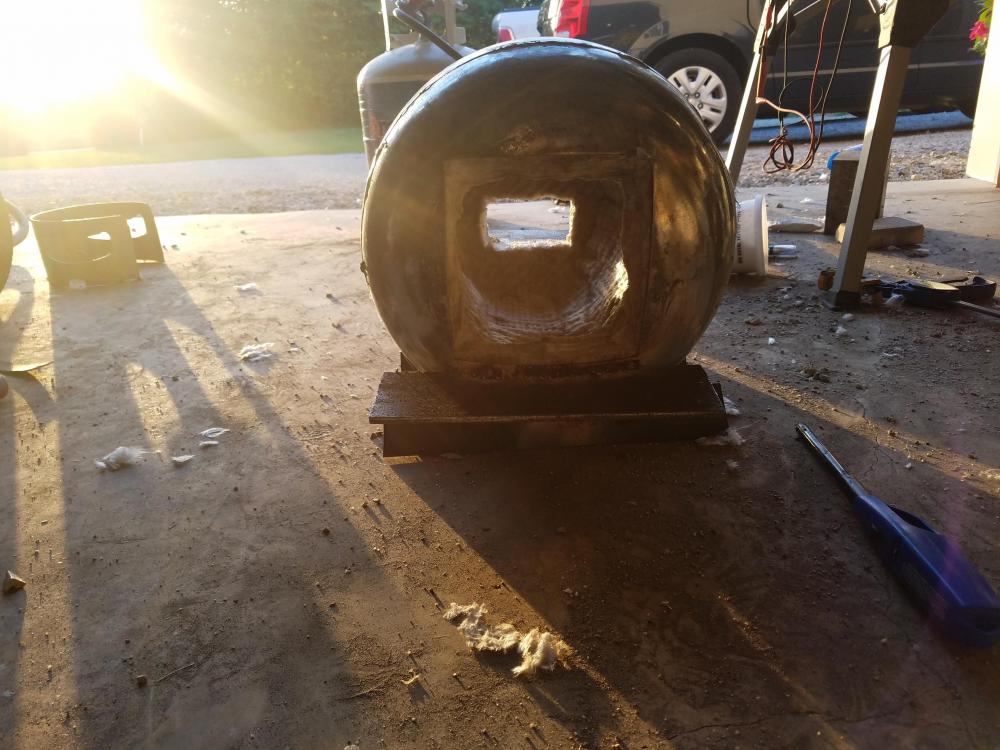
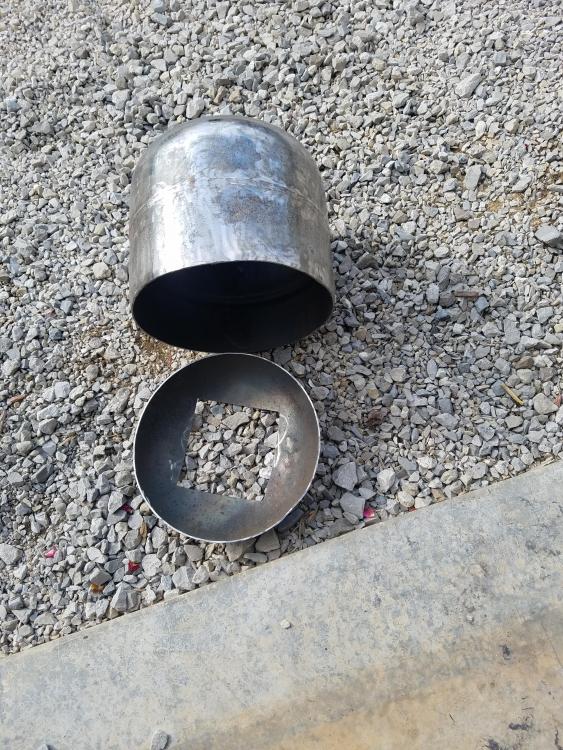
Here is pic wit the fire brick setup. I believe it will work pretty good. After the Kast-O-lite was put on I am wondering if I will need one on the back. It is a lot smaller now

-
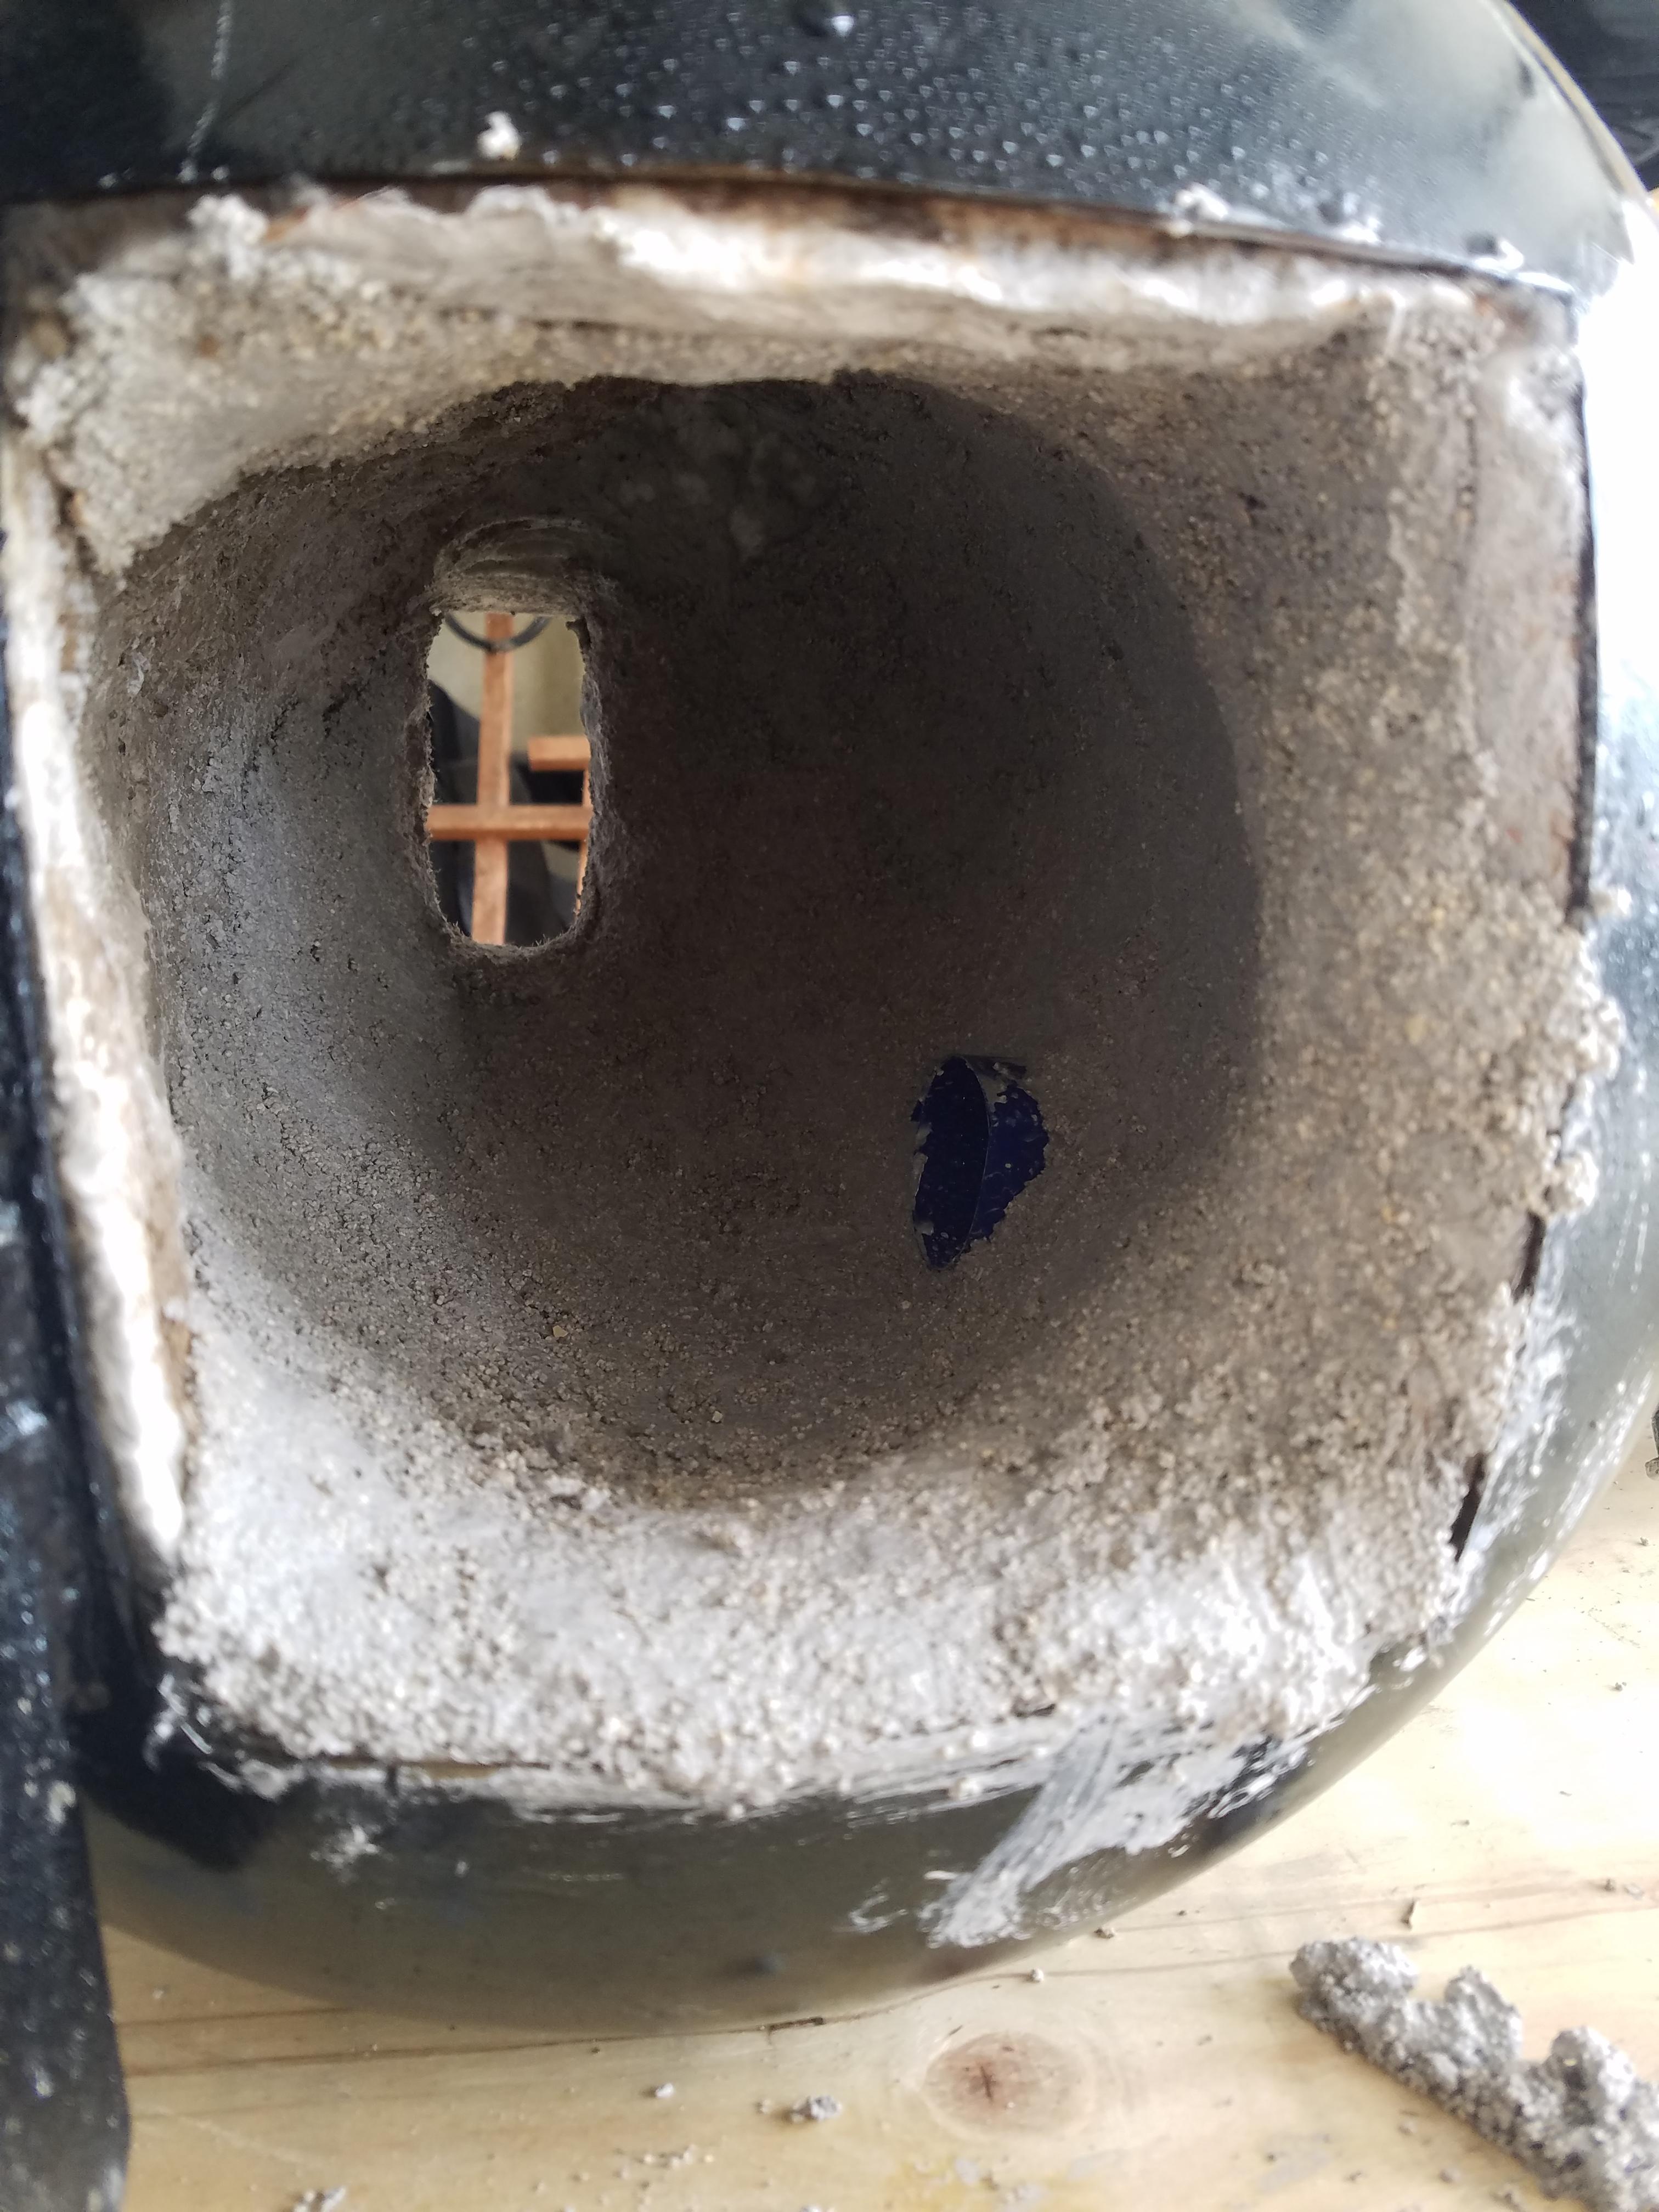
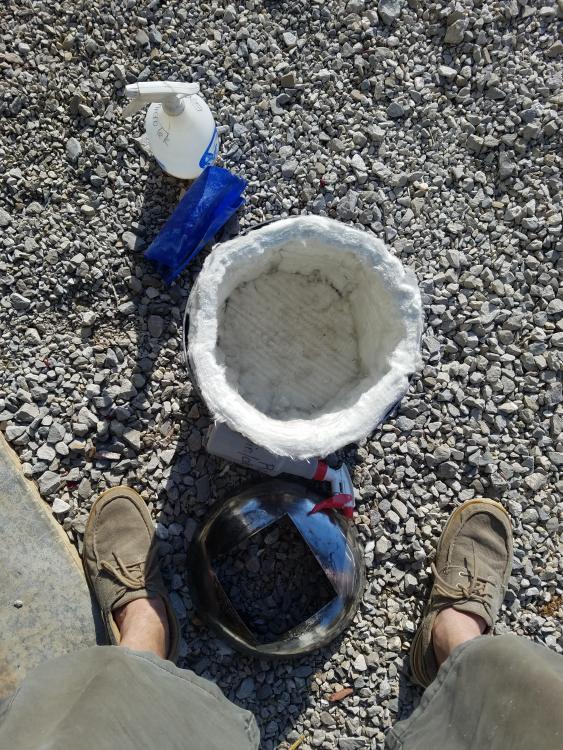
Thanks mikey. I did have the bricks over the opening but removed them to try and get a picture of the swirl. I am putting castolite in it now. As soon as it sets up some I will finish and let set until tomorrow. Here is a picture of the inside so far.

-
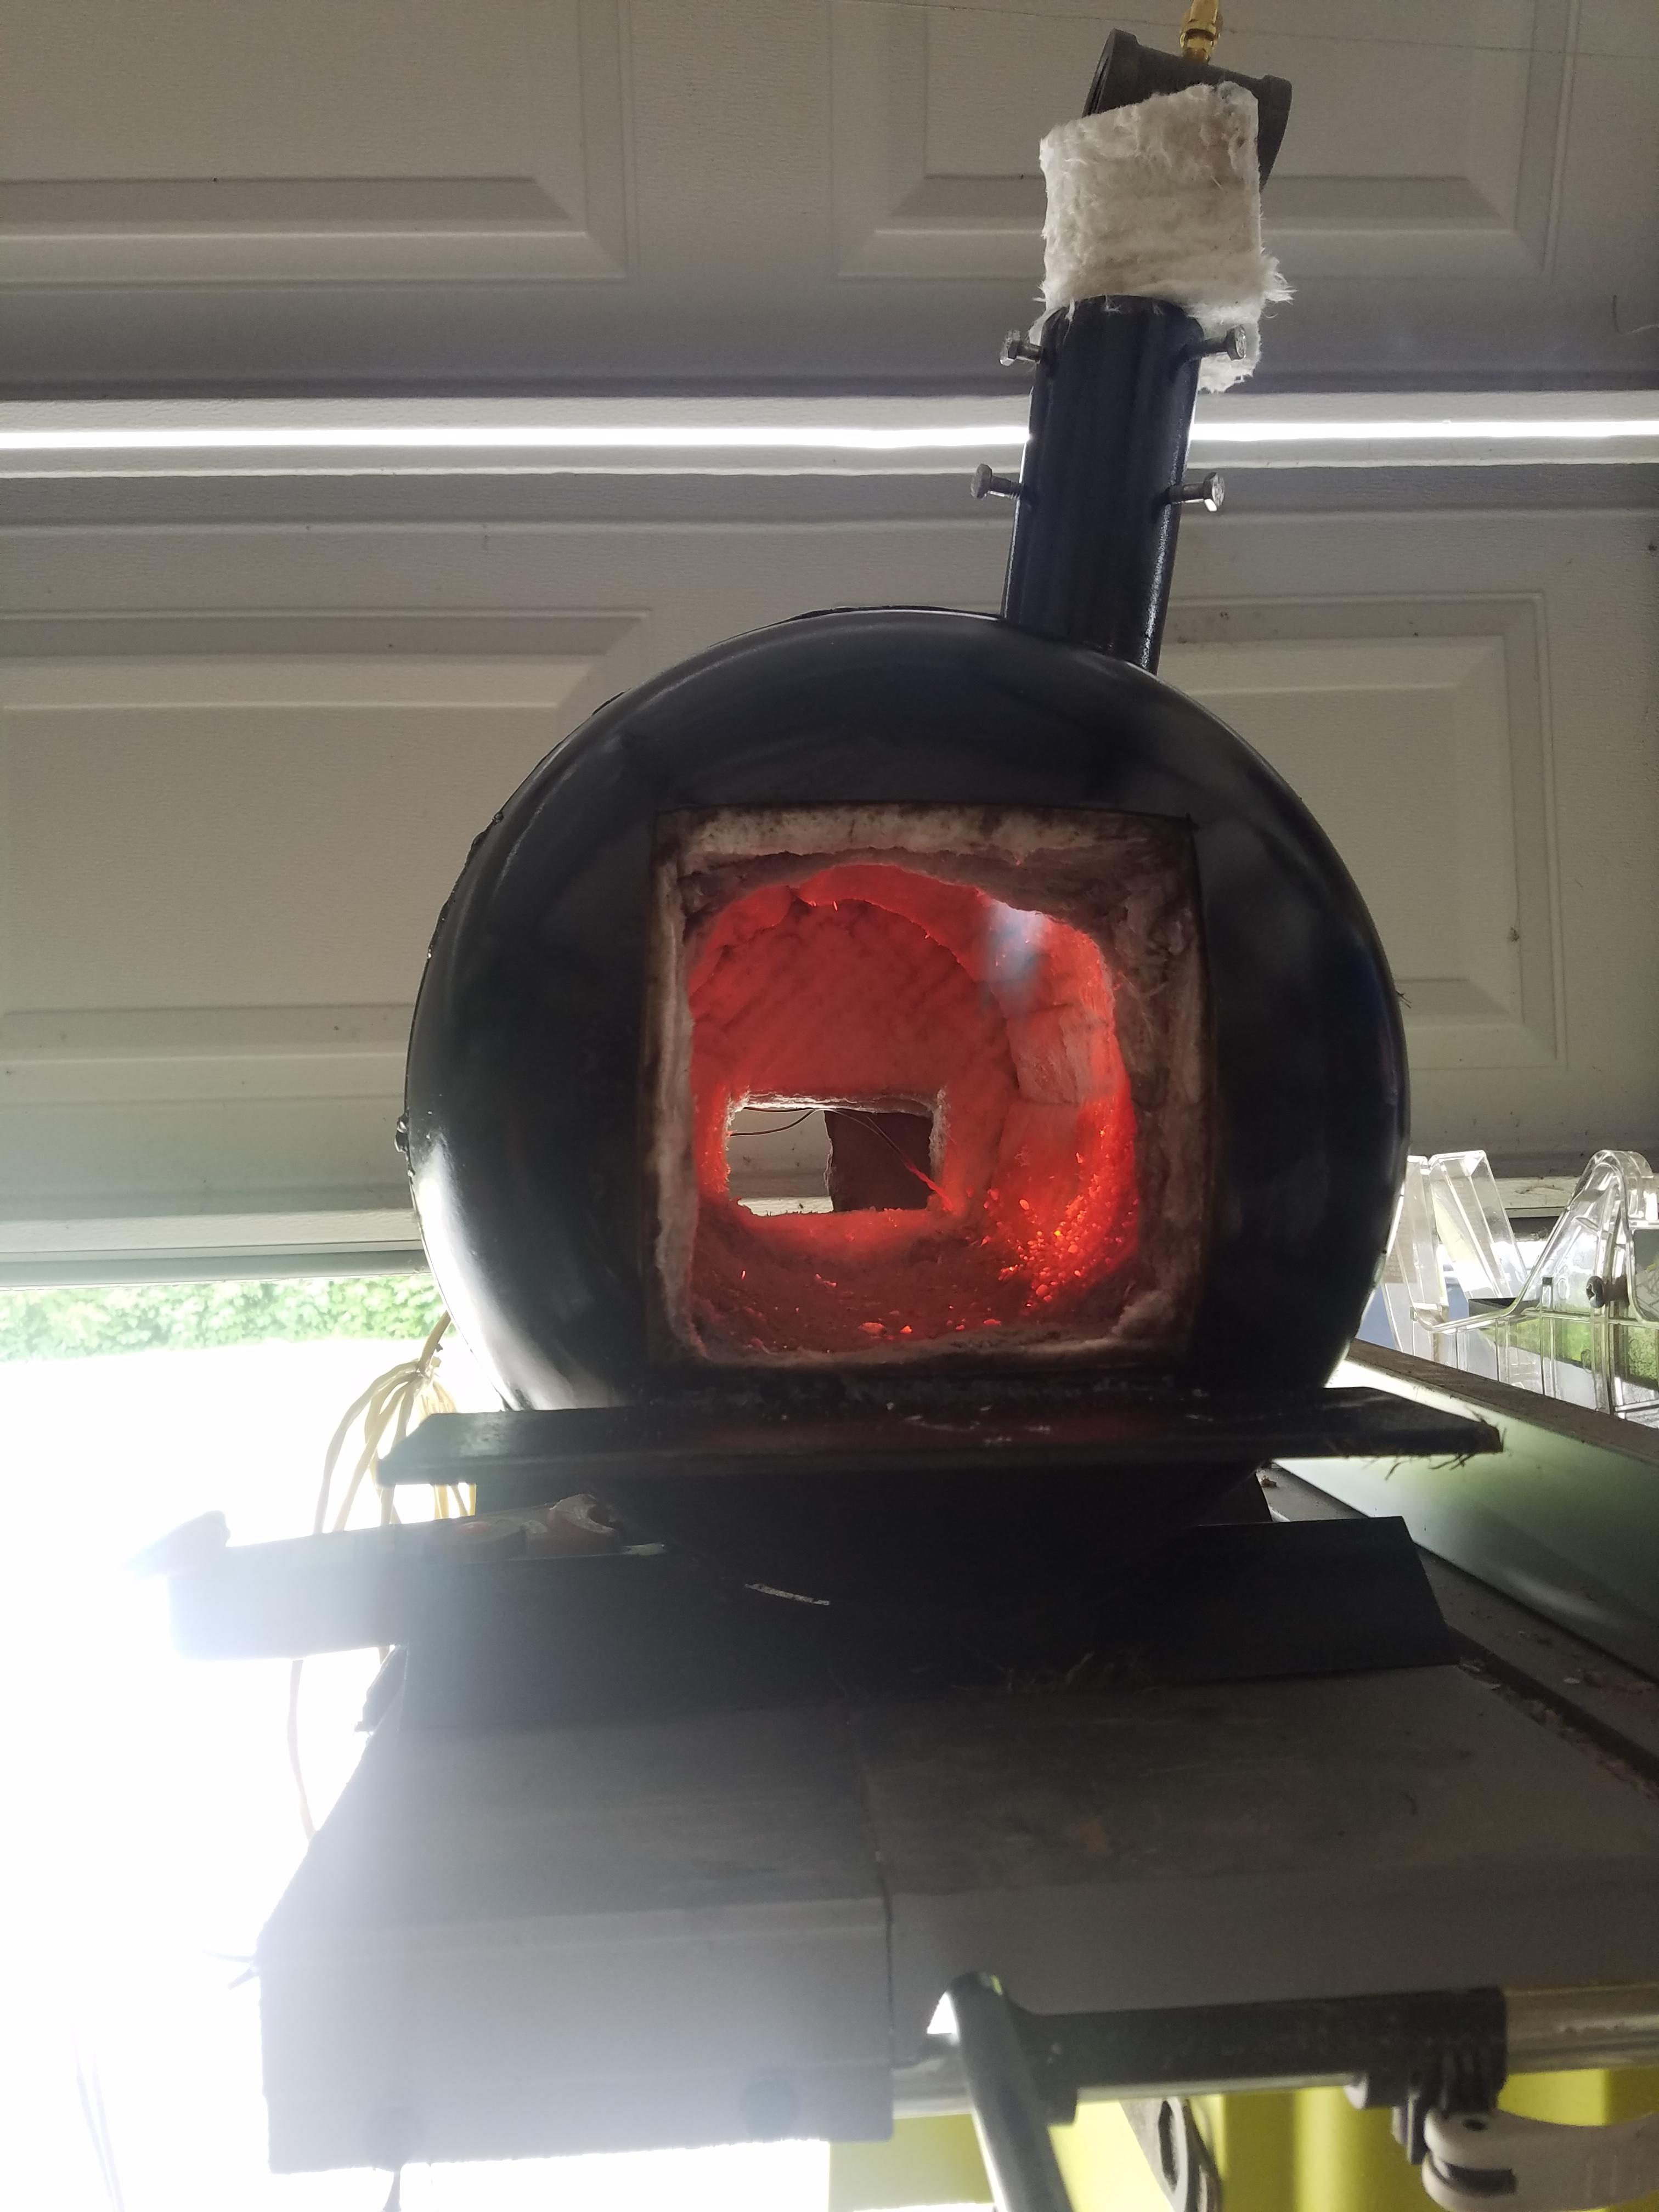
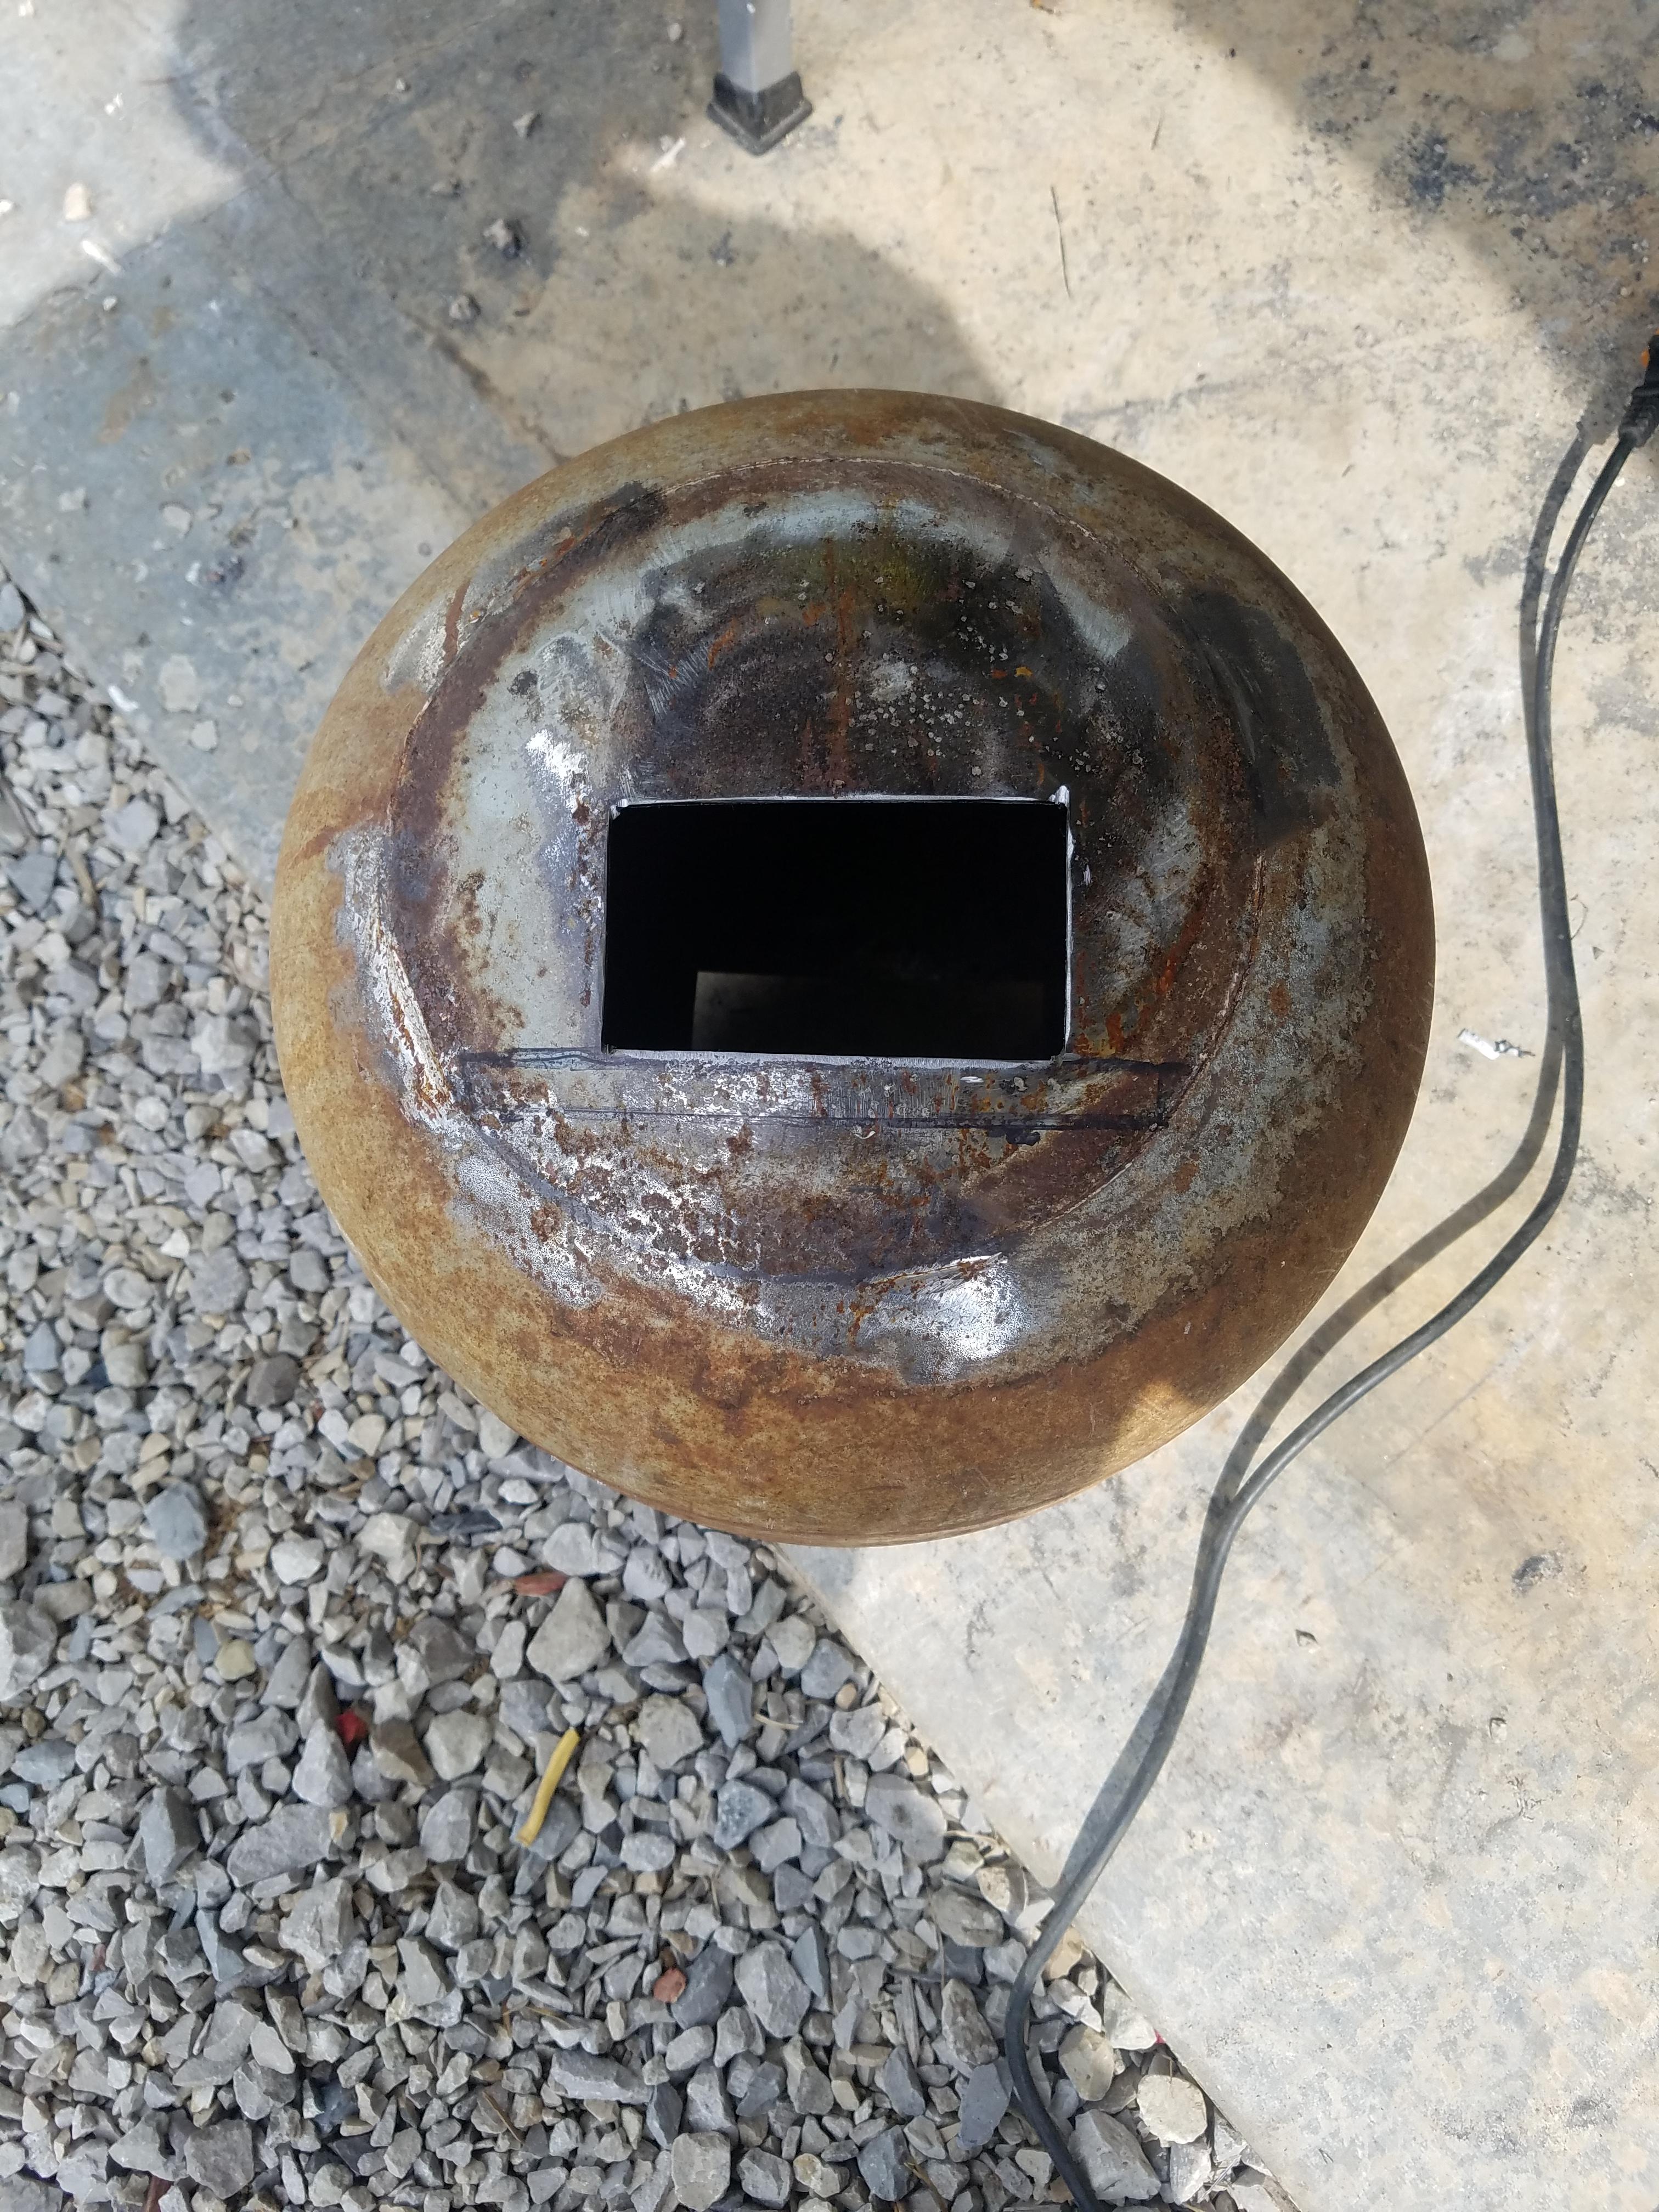
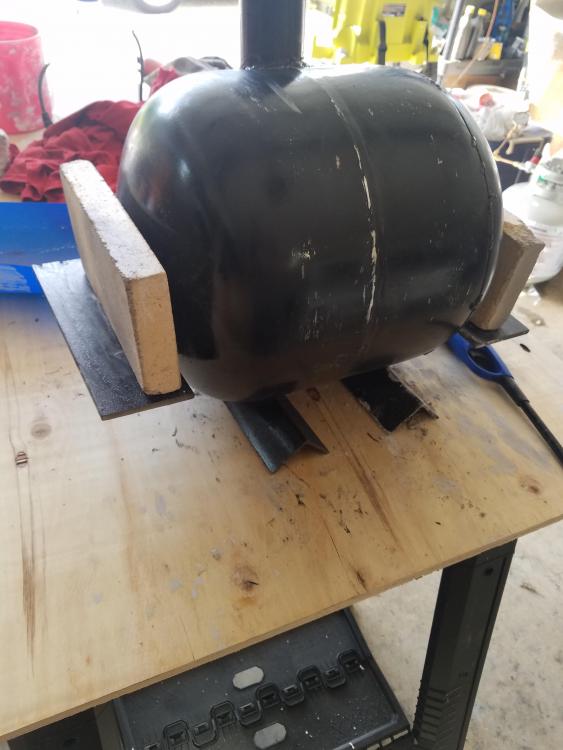
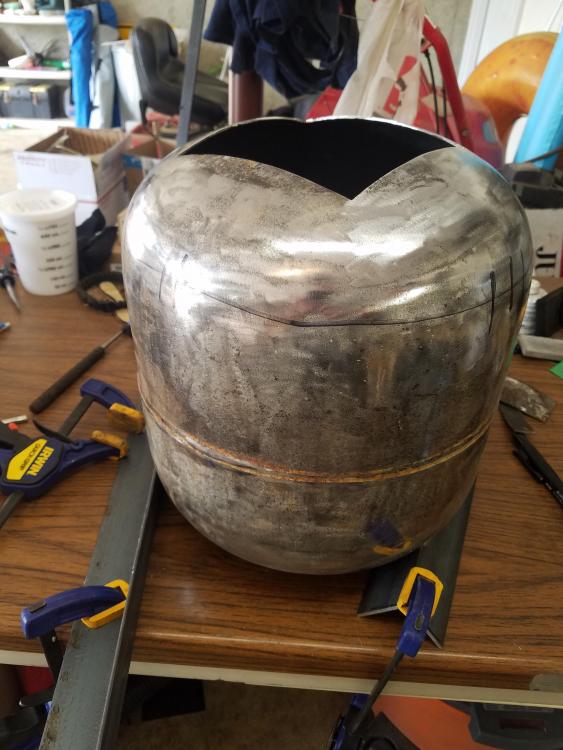
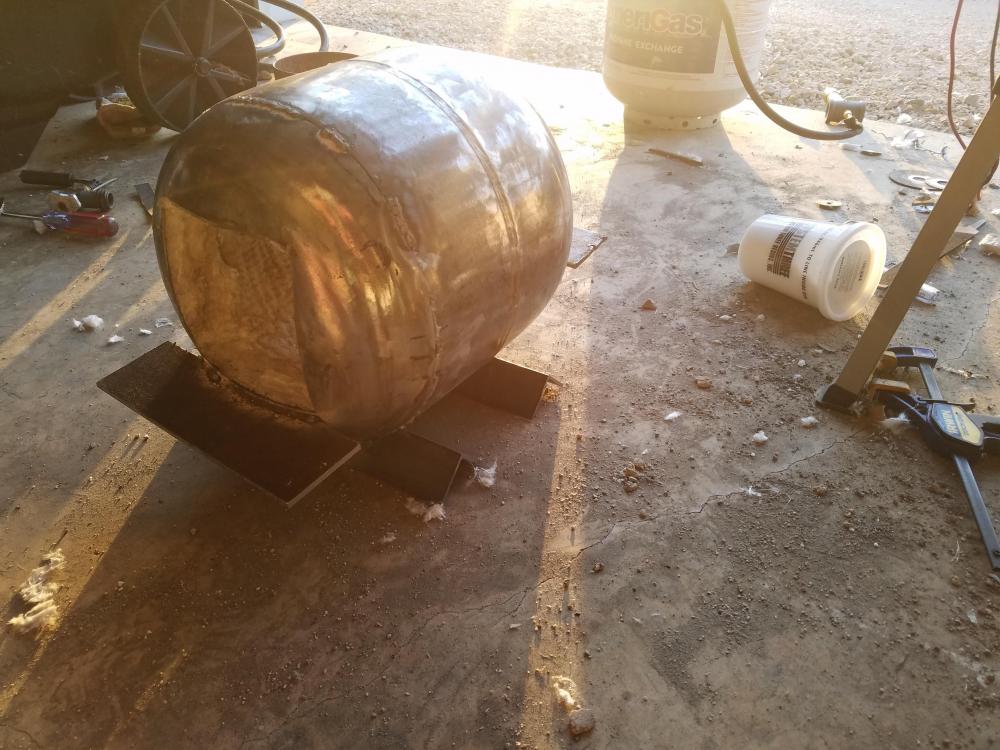
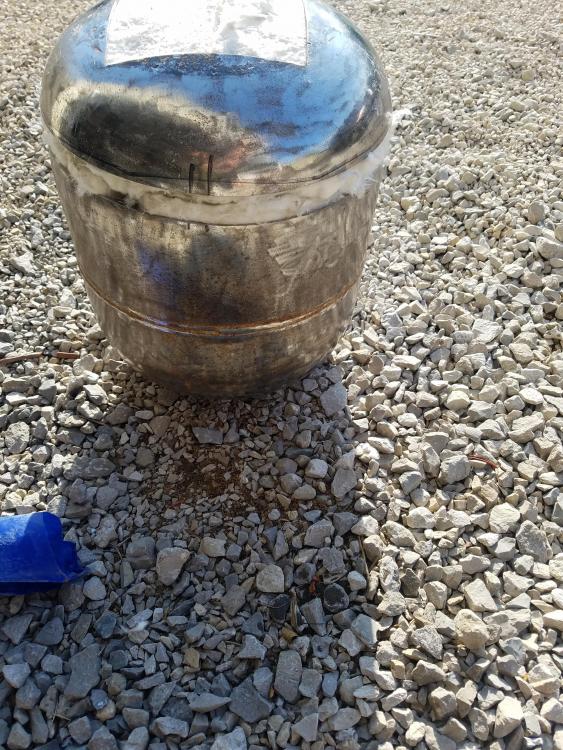
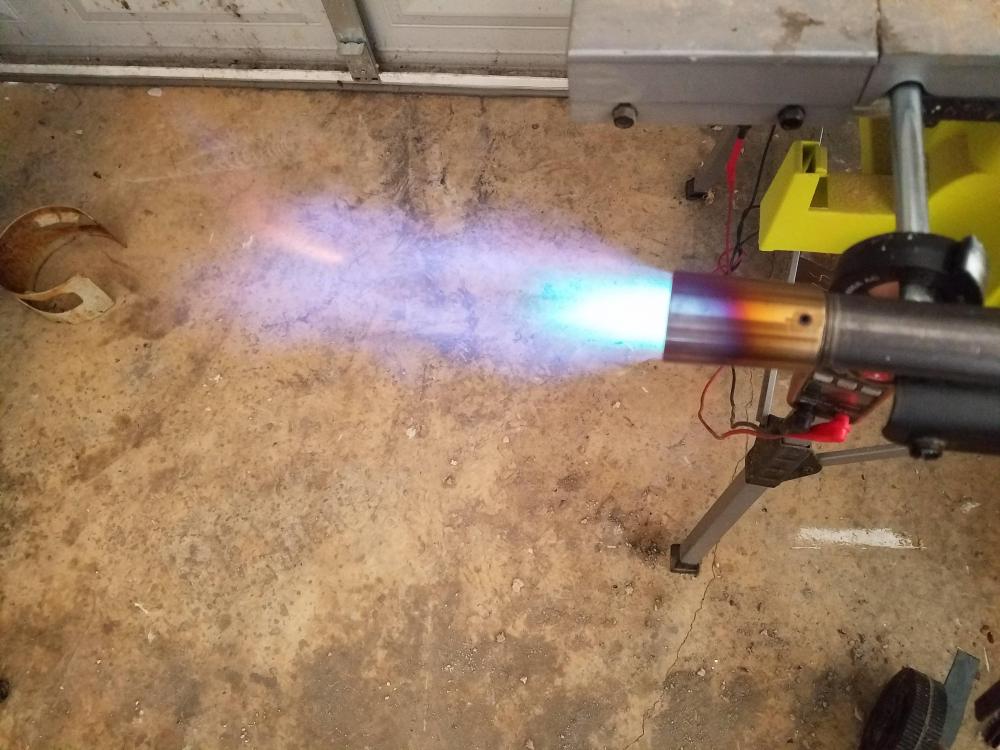
So I received my new regulator today. Hooked it up and fired the forge to finish the rigidizer. Funny thing, this one puts out a lot more propane and in return you get a lot more heat. Who would have guessed... but the inside the forge started to melt my isowool. It is not bad and I think it will be ok after I put the castolite over it. Thoughts? Here are some remaining pictures of the build. The flame has a nice swirl to it. Hard to see in the photos.
-
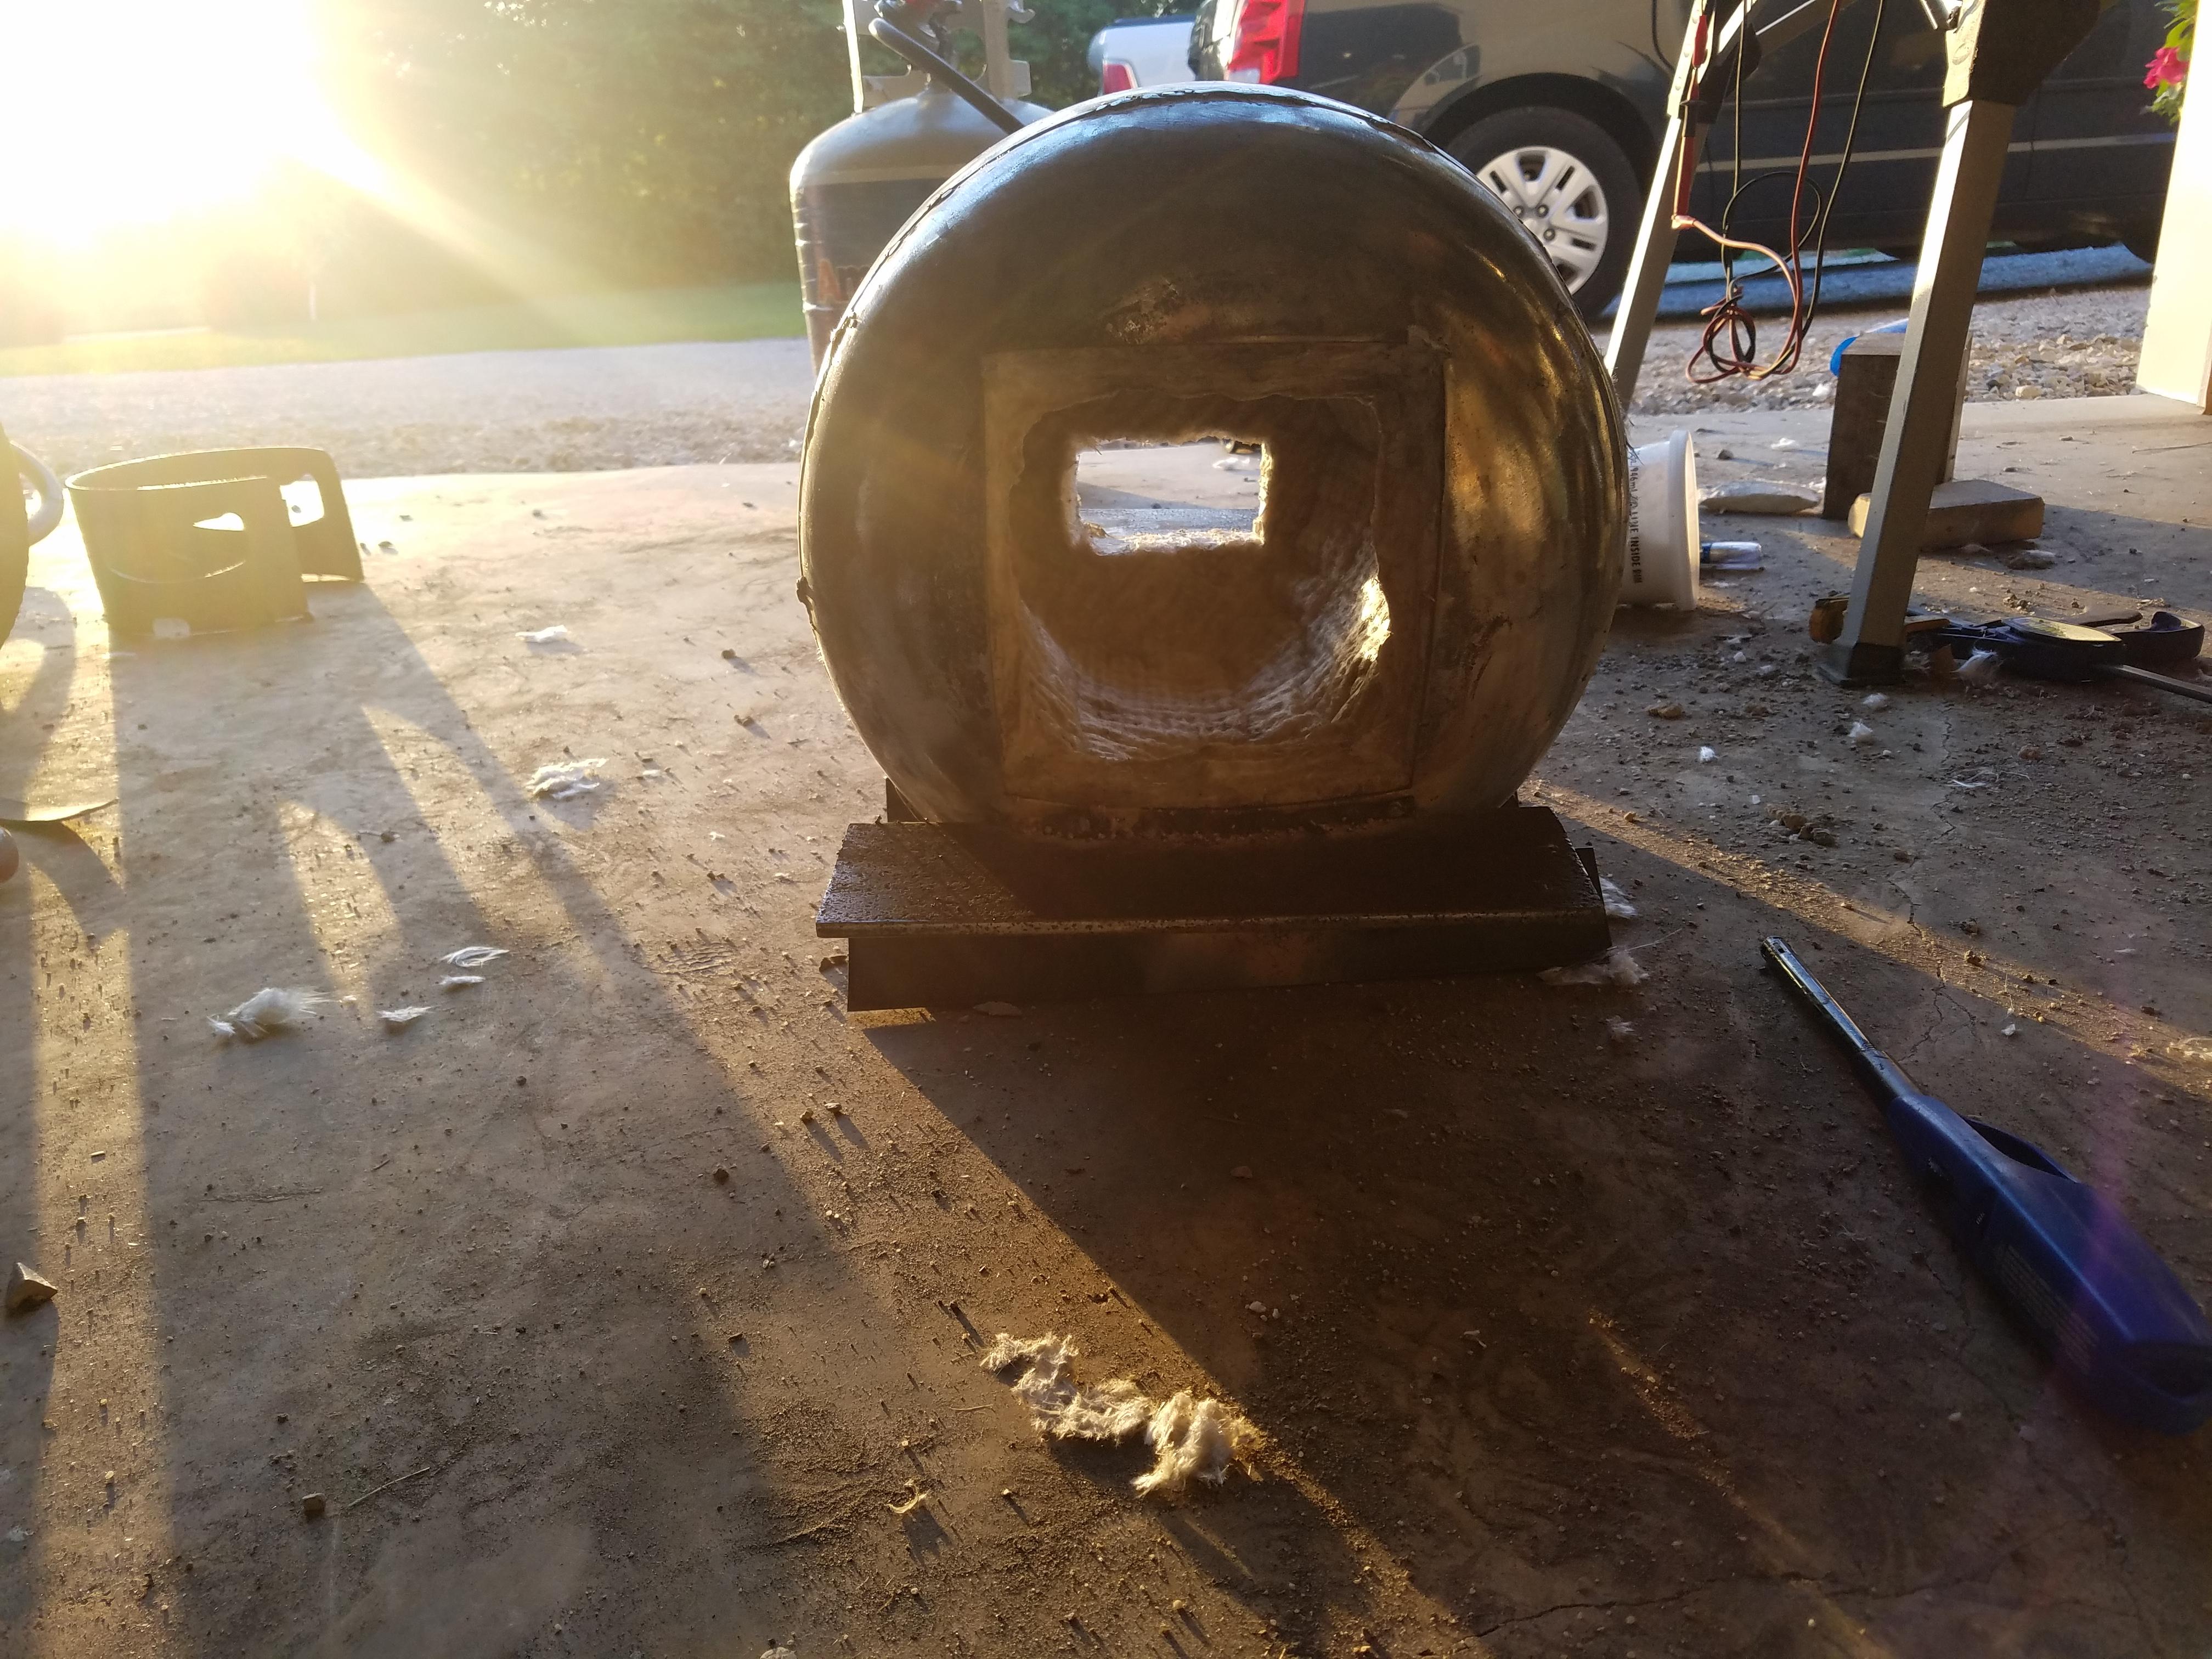
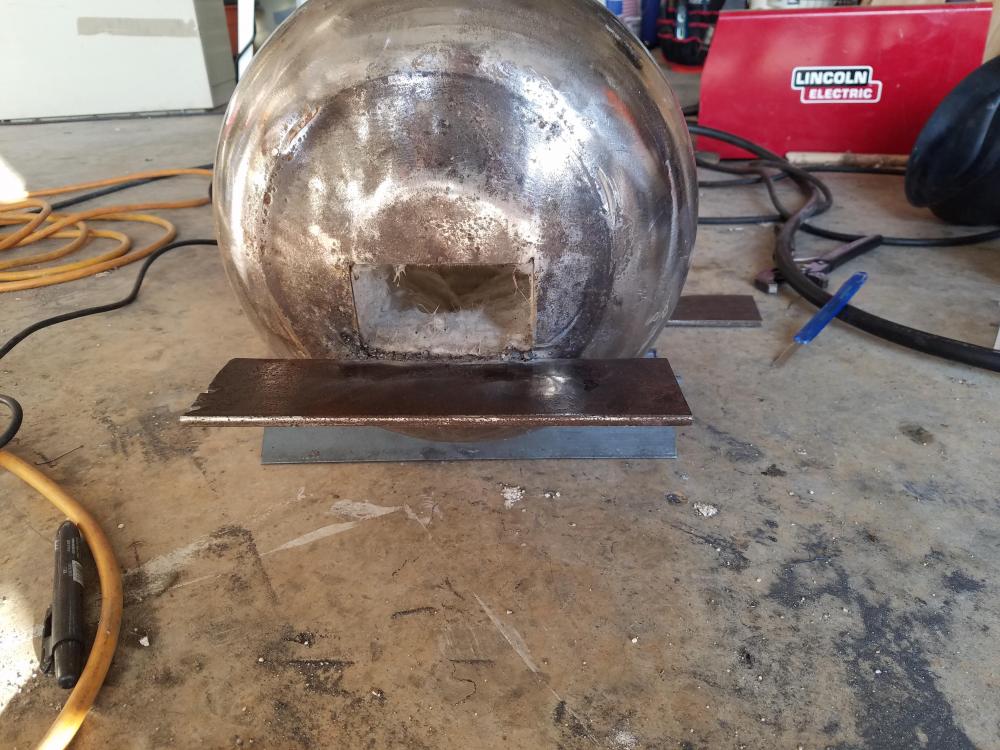
Thanks for the kind words. I did run into a small issue. The concrete floor I sat the forge on to tack the feet was out of level. The forge rocks a little when on a flat table. Nothing a few shims cannot fix though. For the floor I did not have any way to split a fire brick. I just poured it with some lower temp refractory I had. I think it is good to 2300. I will cast over it with the castolite then paint with metrikote. Hope to finish the casting of the floor and cutting the burner port tomorrow. Then all that will be left for Sunday is to cast the sides and top. We will see how much I can get done tomorrow. Have a feeling I will be sore. I did change the back opening to 3x4. It is able to be covered with a fire brick easily though. The shelves work great on each end. I ended up welding the front shelf about 1/4 inch low as recommended. I believe it will help.
-
Well here are the pics of the build for today. Here are the rest. Right now it is about 380 cu in. I think I am going to put another small strip of insulation on the bottom before I put the refractory in it. This should bring it to about 350 and one burner should work.


-
Thanks Frosty. I only had the burner running for a couple of minutes total. I was curious as to how the different length mig tips would alter the output. I am in the process now building the forge. Thanks to Wayne I have my Cast-O-Lite and metrikote to finish it. I hope to be able to finish by Sunday. We will see how the shoulder holds up. The flare is made from stainless. Hopefully it holds up well. If not I will try other materials. Possibly B16 or Inconel 625.
-
One last question. Should I cast the Cast-O-Lite on the insulation up inside the burner tube?
-
Here is a short video after it has been running for a while. This is with a 0 to 10 lb regulator full open. 20180719_191936.mp4
-
Almost looks like a limb cutter. Just a guess. Interesting though.
-
The first picture was just after I built it. I believe the flame is looking better now (at least I think it is). At least outside the forge. This is at a very low pressure.Saturday. 0 to 10 lb regulator turned way down. I know everyone is worried, but I will not be running off of a 10 lb regulator. My 0 to 30 lb should be here saturday.
-
Well here is what I am calling the final design. I did move the back vent door and vent platform down even with where the floor will be. it is also even with the front of the forge. Feel free to use this drawing at your leisure. Final propane tank forge Drawing v1.pdf
-
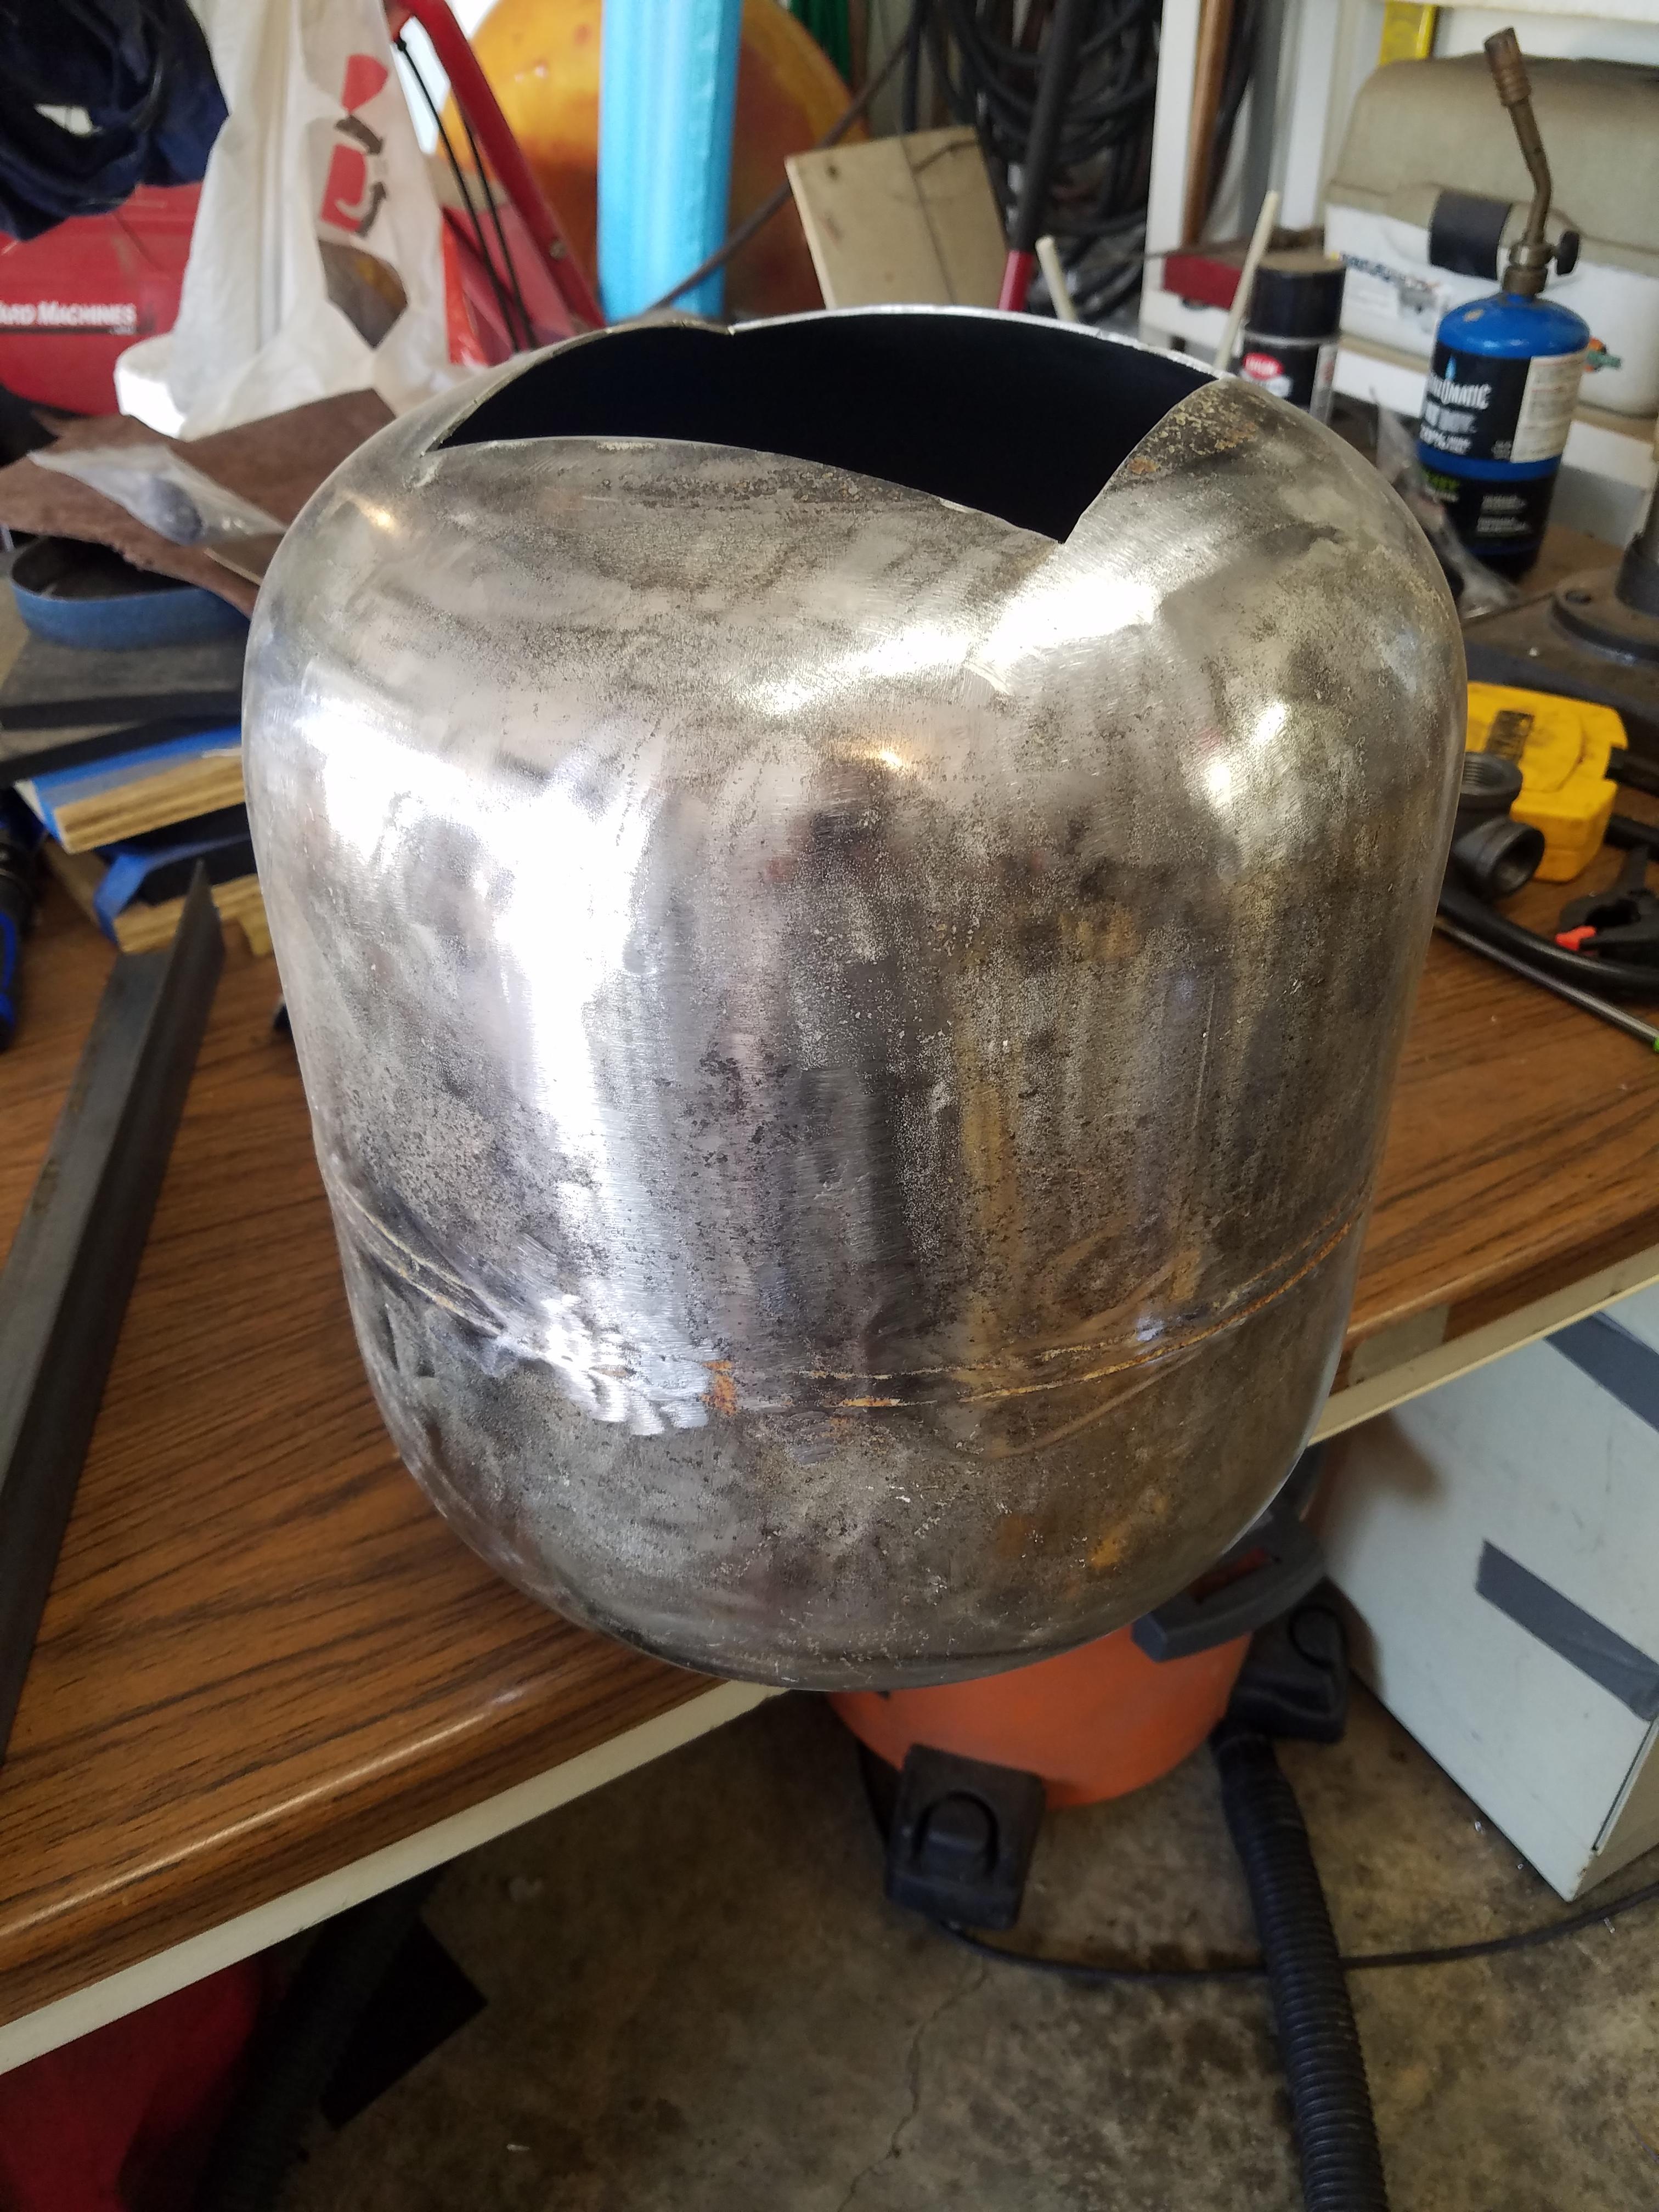
Yes I have it all. It looks like the only difference is the ID is a touch smaller. I have the burner up and running. Now to figure out how to tune it using Your directions. Motomike Thanks for the praises on the drawings. When they are complete it will be numerous pages with lots of detail hopefully. As for the burners, I currently have on built with material for a second if need be. I am guessing close to 345 cu in after it is built. Depends on how thick the forge floor is. I believe I will insulate, then calculate volume, then install burner tube(s). I think this will keep me from doing any mods to the burner locations later. You do have a good idea about the porch being lower than the forge opening. I will think about that. I do not see what it could hurt. If all else fails and u do not like it low, I could just put another plate on top of it. First step will be to cut the propane tank apart though. I already have part of the front cut out, but to insulate I am going to cut the end off then weld back on when I finish insulating both ends and the middle (seen this on youtube).

-
One last question. I bought refrigeration tubing by accident. I have all the fittings for this also. Can I use this as the supply to the burner?
-
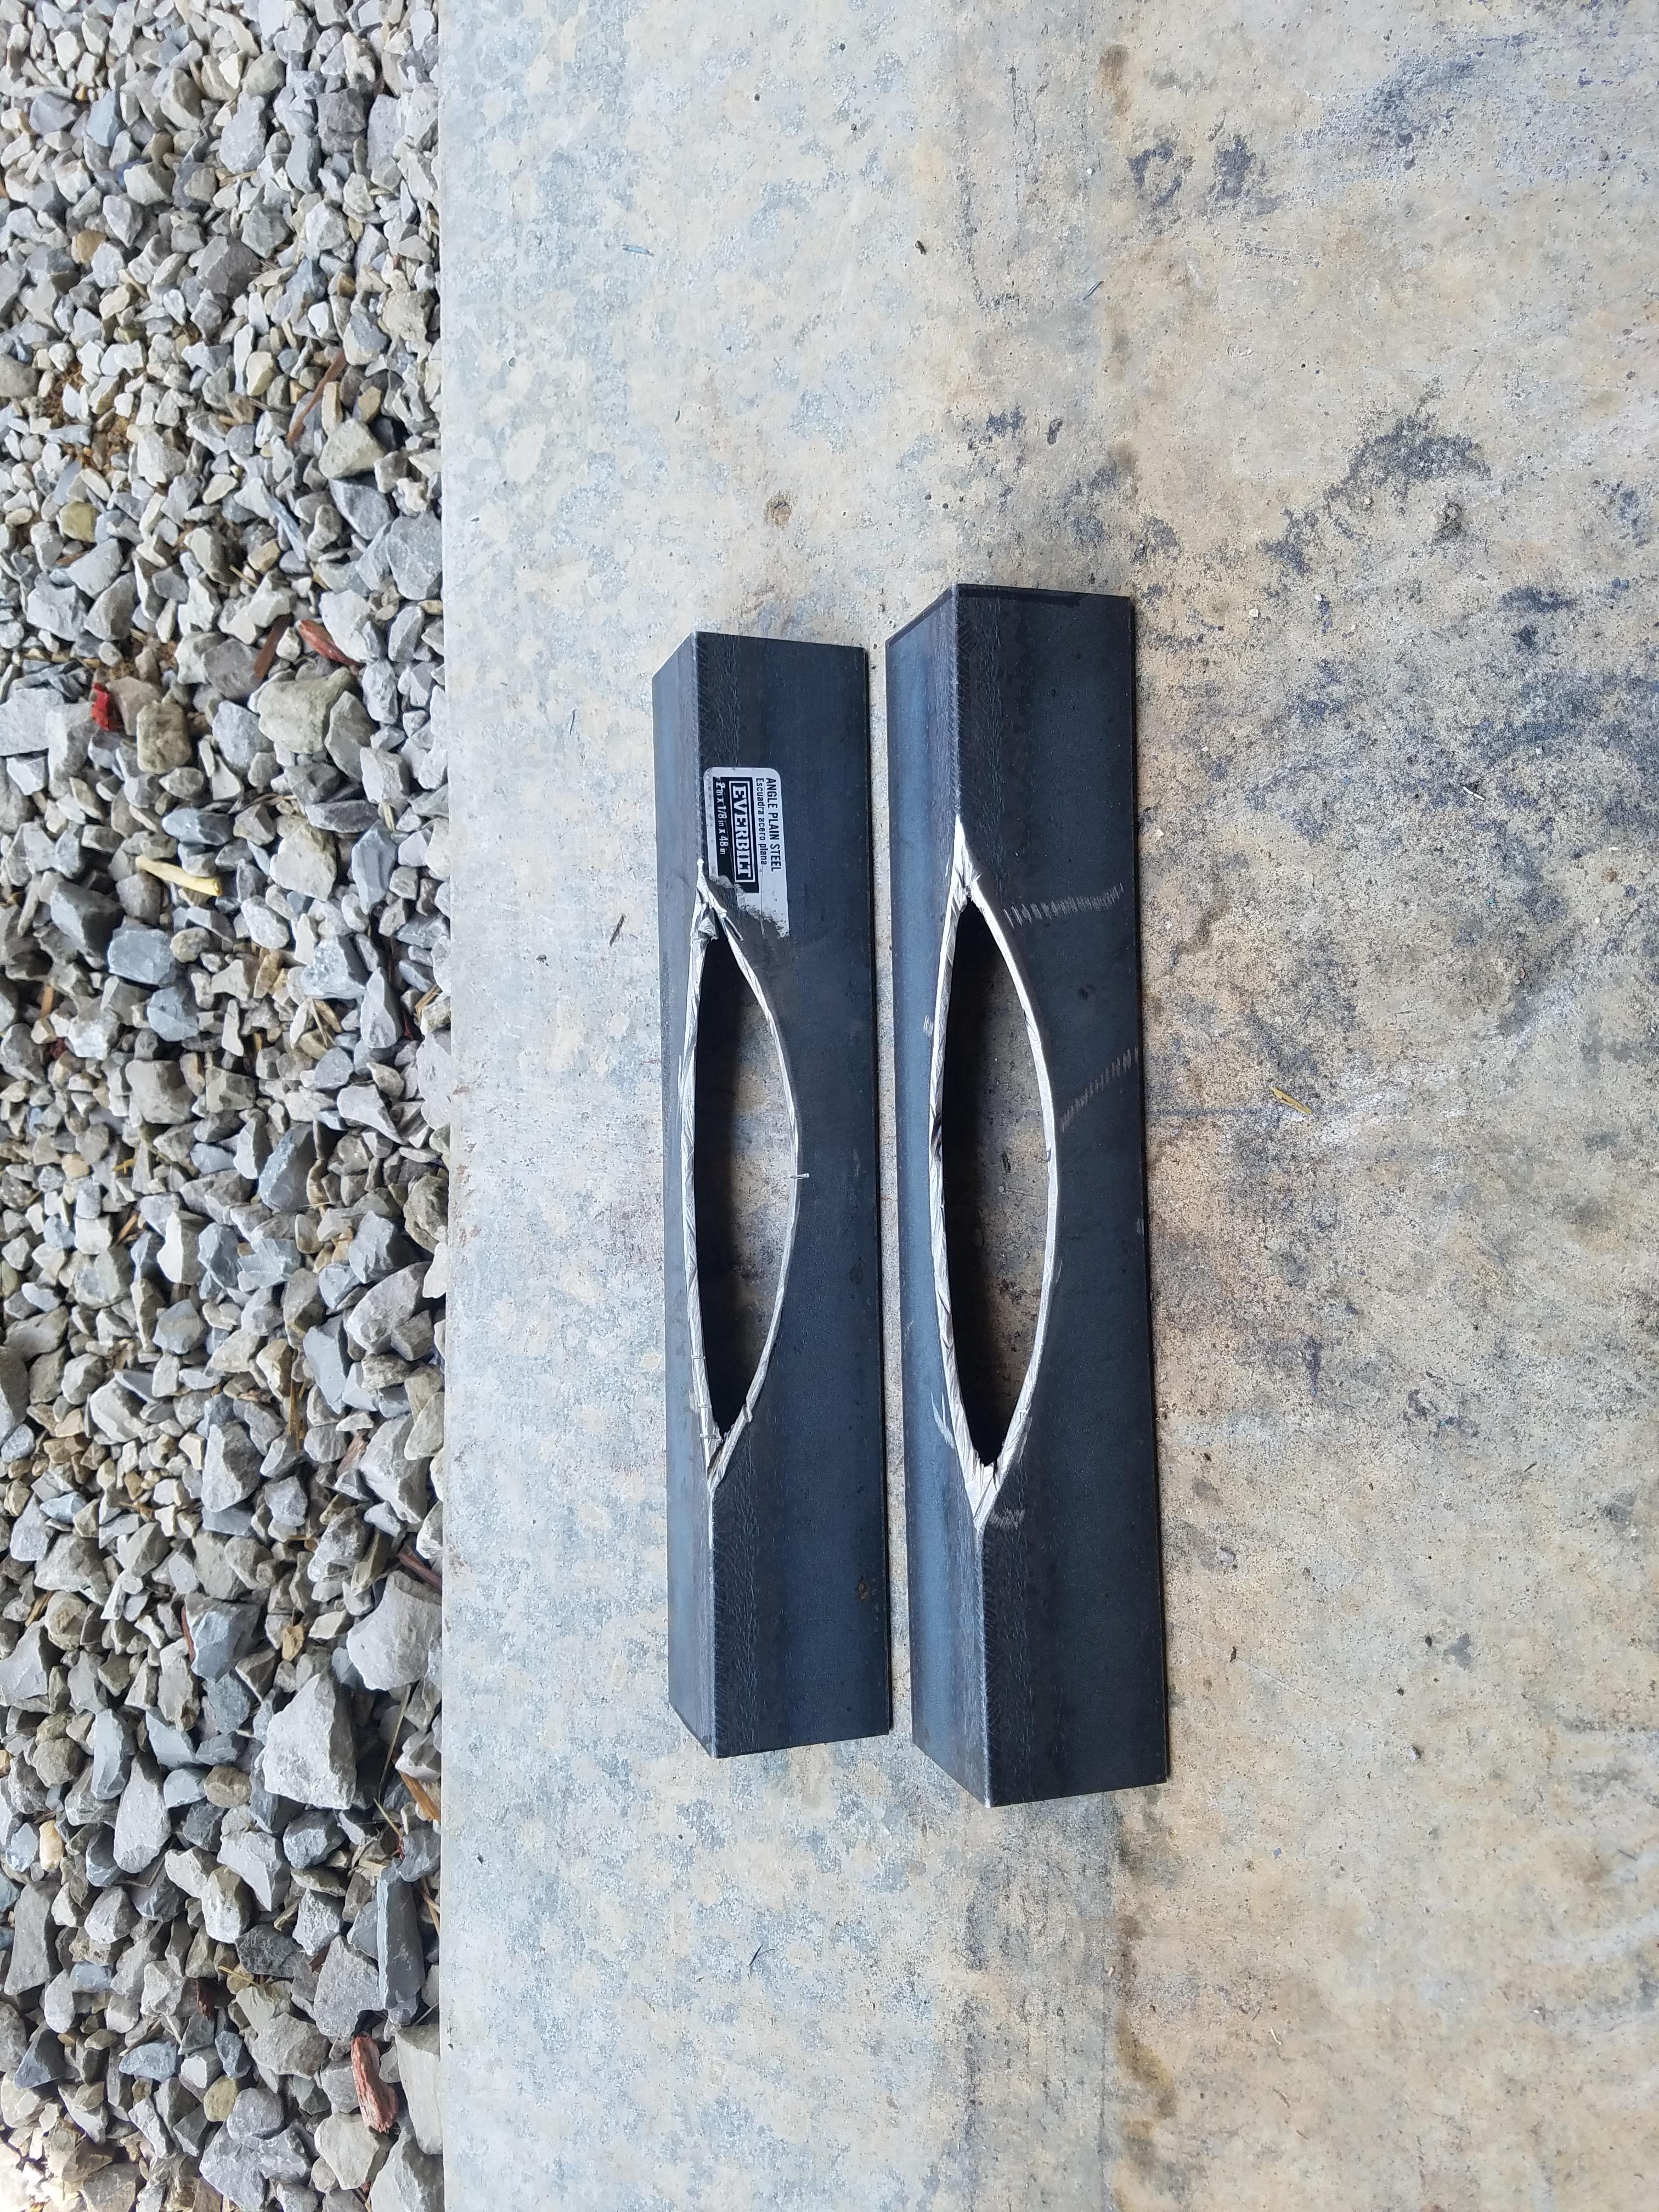
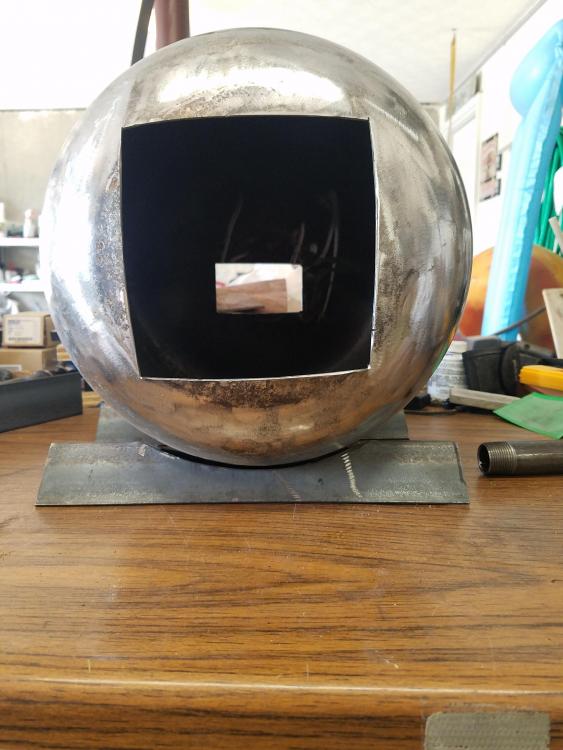
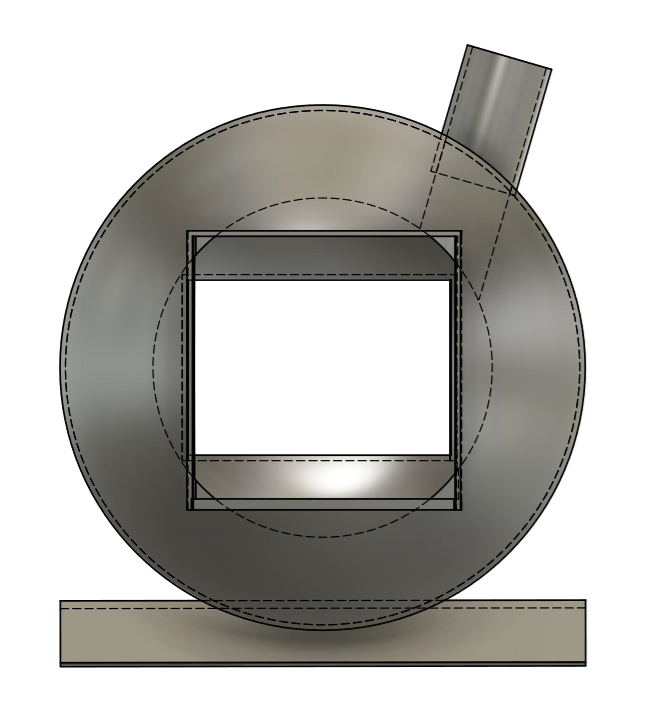
Here it is with the mods. I removed the bare metal around the openings and also tapped holes in the burner tube and installed 6 bolts, 3 in each row. the two rows are a little over an inch apart. I was not sure if the bottom of the back opening (the smaller one) should be the same elevation as the front. As it stands right now it is not. The floor will be semi-round after the Cast-O-Lite is poured. I am hoping to keep a somewhat round shape to assist with the swirl. I believe the Cast-O-Lite will come close to the bottom of the opening. I may pour it with some lower temp refractory that I already have or add a little more insulation in the bottom, then go over it with the Cast-O-Lite to make sure I have enough. I will see what it looks like as I build it. The drawing is kinda messy. Once I finalize I will clean it up and add the Frosty "T" burner drawing also (already approved by Frosty). Comments and criticisms are appreciated, and thank you all for your help! Propane tank forge REV 4.pdf
-
You have a good point about the bare metal. I was not thinking of that. So I will modify the drawing to delete the frames around the opening. I will still leave the bottom ones to sit fire bricks on. I also changed the rear opening to 6 inches long x 3 inches high. Do you feel this is still to large? i was thinking that it could be closed most of the way (if need be) with fire brick and rigidized isowool. The flare is just a starting point in the drawing. I believe the flare can actually be moved down the burner pipe also. I am using Fusion 360 3D design software to model it. It is free for hobbyists. I will draw the 2 rows of bolts in the burner tube also then repost and get some opinions. I almost have everything to start making it. Can's Wait!
-
Thanks Mikey! I will try it with a single burner first. I can always relocate later if need be. Sorry for clogging up the thread with all these drawings, but it is easier for me to describe what I am talking about. I hope that once the drawing is final, I could post it somewhere for other's new to the craft could find. I can add a parts list to it also. The front opening is 6x6 with a shelf to set the fire bricks on. The back is 4" tall and 6" wide with a shelf to support fire bricks to close it off. The frame around the openings is to help seal against the fire bricks. Here is a drawing showing the positioning of the "T" burner installed. This is what i was thinking on the burner depth to start.

-
kind of like this?
-
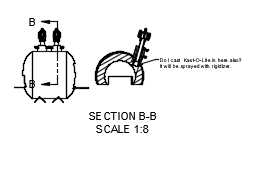
So are you saying using this photo I would need to angle the burner tubes so the flame shoots to the left slightly

-
I will modify the drawing and make the front opening large enough for my arm to go through and possibly try to draw some hinges to open the front. This was an oversight on my part. Thanks for the wisdom. The boxes on each end are just so the fire bricks have something to "seal' against. I thought this would be better than a round opening. So are you saying the position of the burners are OK, but the need to come in at an angle? It shows it better on the second page of the drawing. It is hard to find a good drawing of a forge for beginners. I figured if I could dial in a drawing it would make it easier for future beginner Smiths. I will also try to add the drawing of the Frosty "T" burners for a finished product. Thanks for all the help! Wayne, I have been looking at your site and really like it. I have already been in contact with you via email (yesterday) about ordering the Kast-O-Lite and Metricote. Thanks for the help!
-
I have now. The Google search tip is nice. I was trying to use the search at the top and was having marginal success. Thanks for the help.
-
Hello all! I am just starting out with the forging experience and I am trying to design my first forge from a propane tank. I have made a drawing and attached it. I would like all the critiquing everyone can stand. It will have 2 inches of isowool that will be sprayed with rigidizer followed by Kast O Lite, then Metricote. I am curious about my burner positions. they will be offset from TDC at 20 degrees. I will be making the Frosty design burners and running 2 of them at 3/4 inch diameter. I will leave it at that for now. Let me know what you think and I can change the design and re-post. Propane tank forge REV 0.pdf