
olydemon
-
Posts
44 -
Joined
-
Last visited
Content Type
Profiles
Forums
Articles
Gallery
Downloads
Events
Posts posted by olydemon
-
-
Here are a couple recent openers.
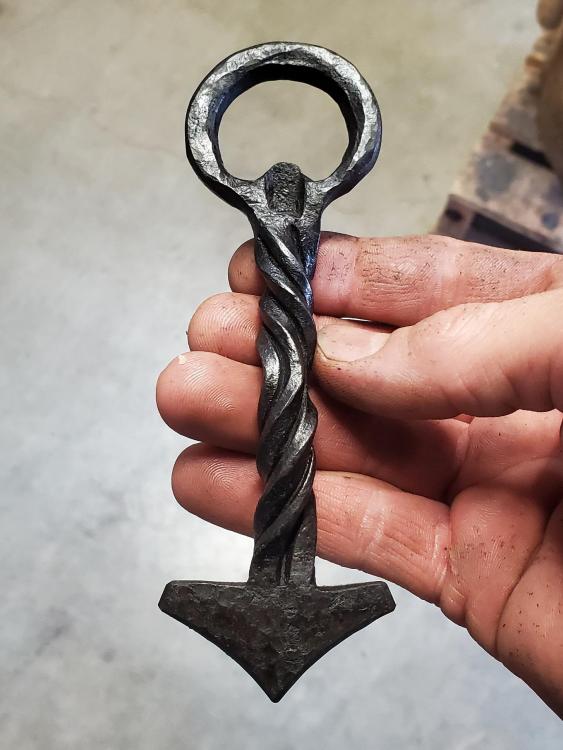
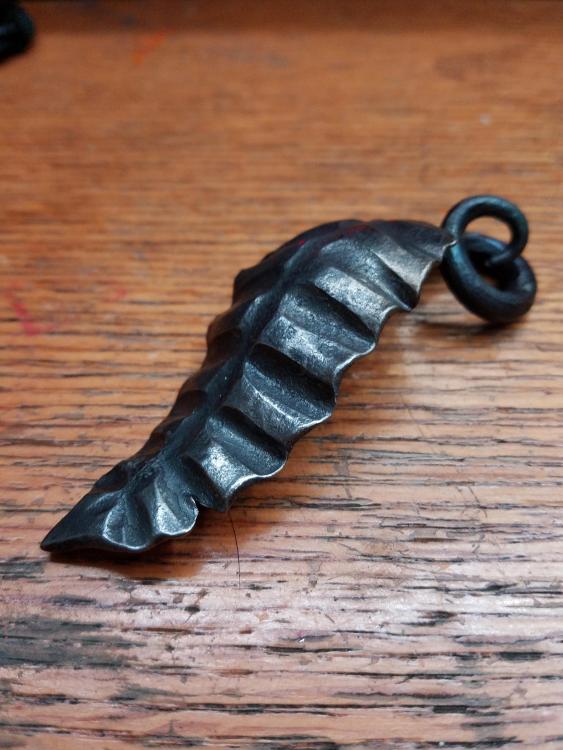
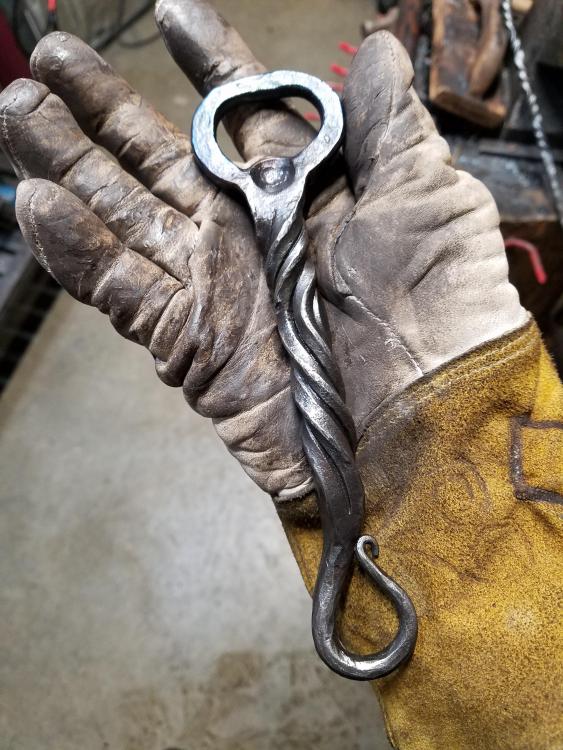
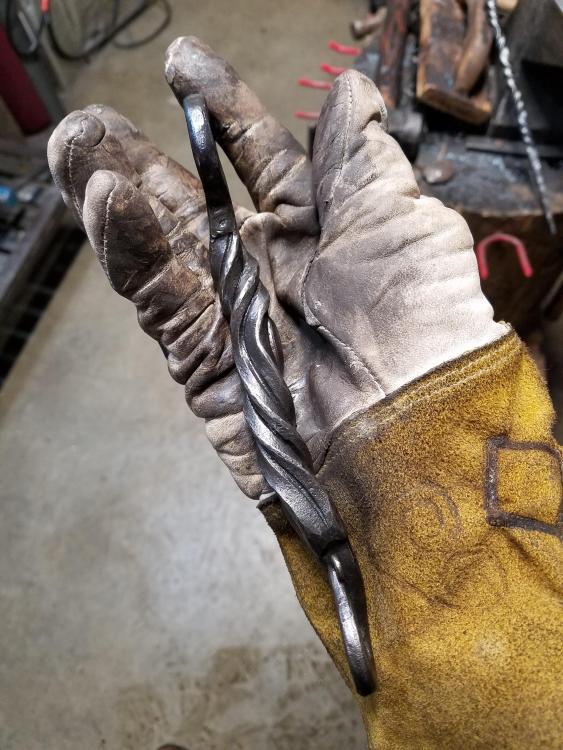
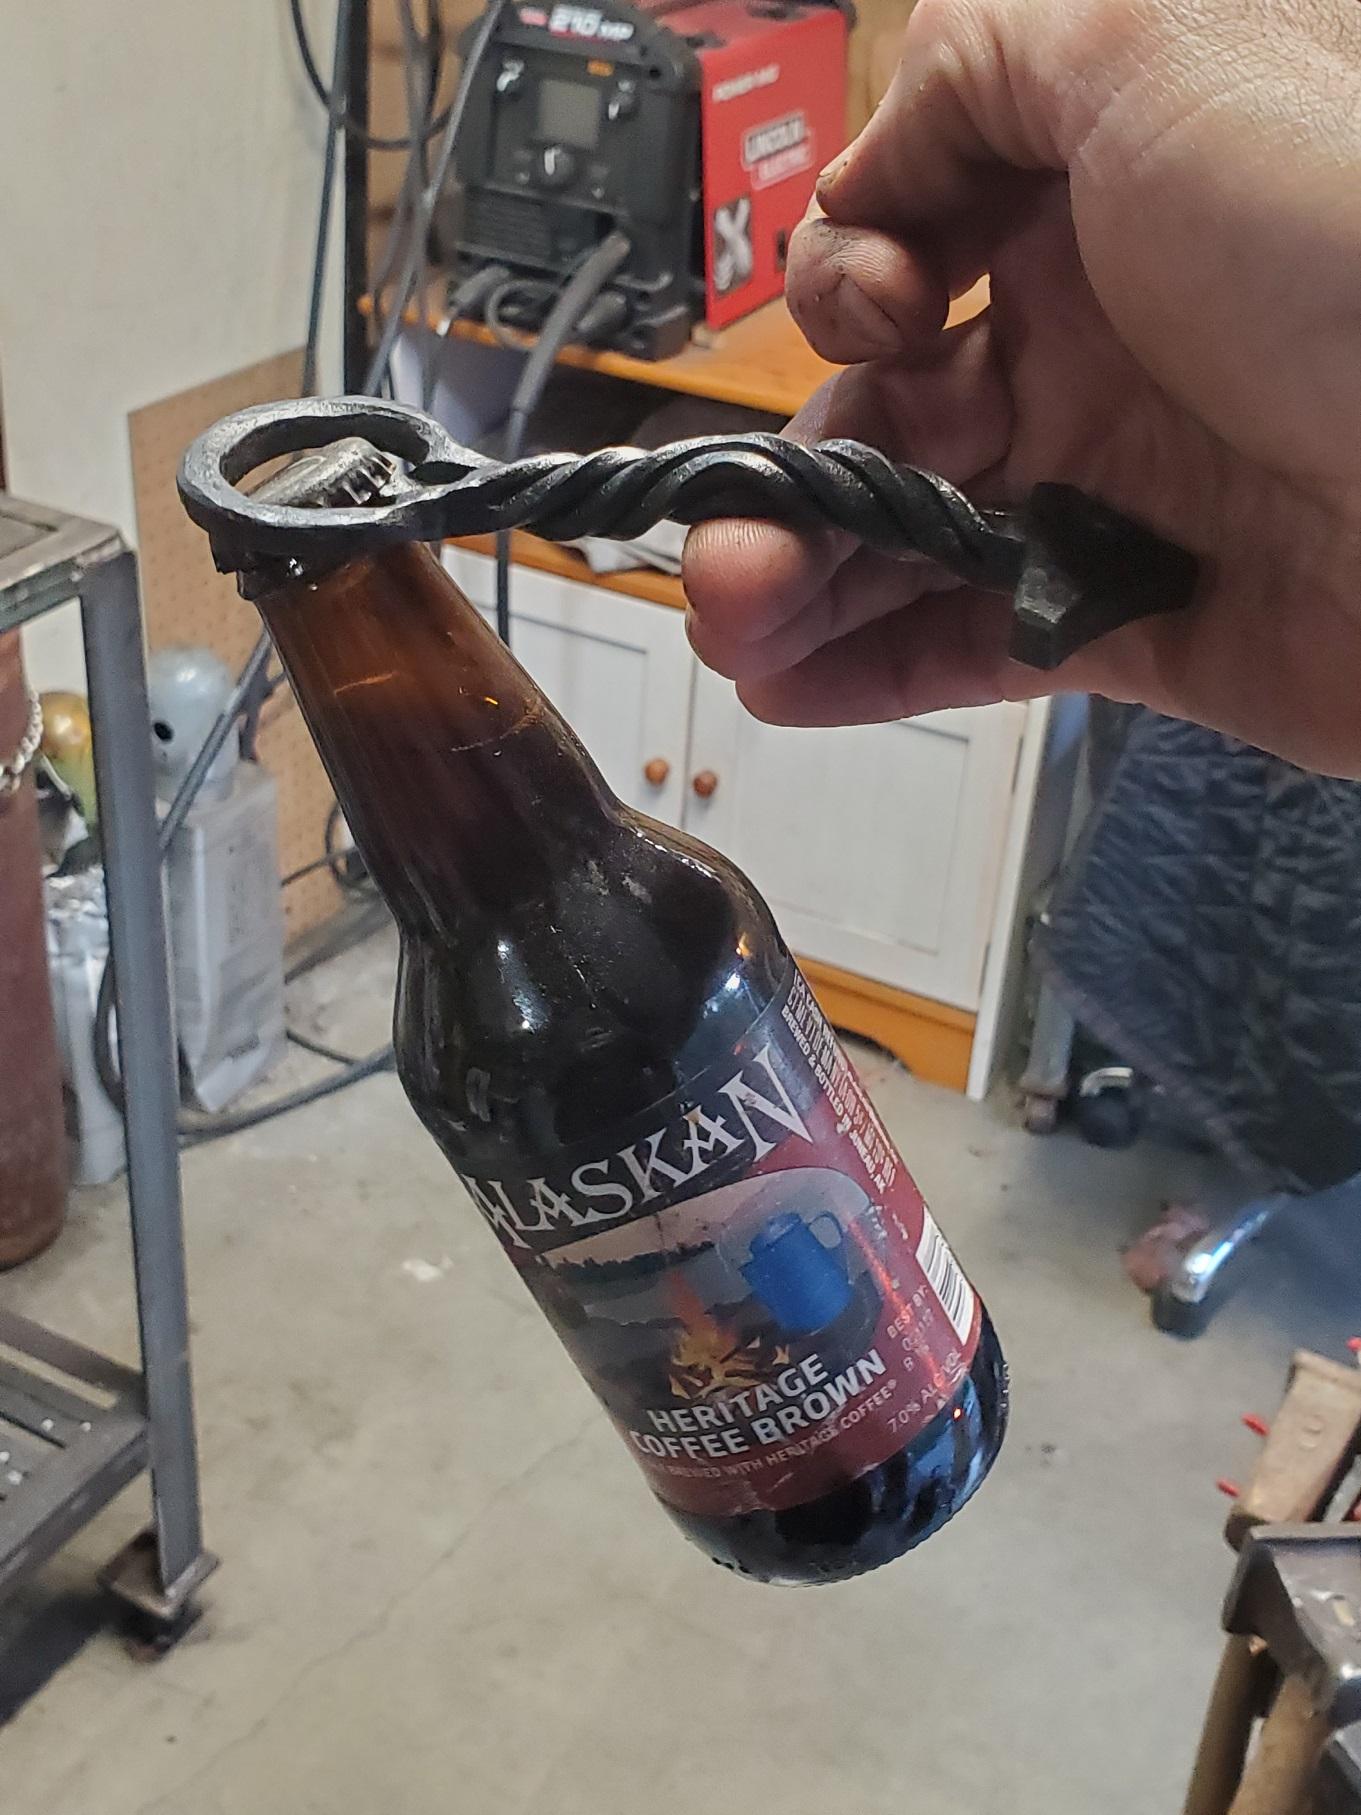
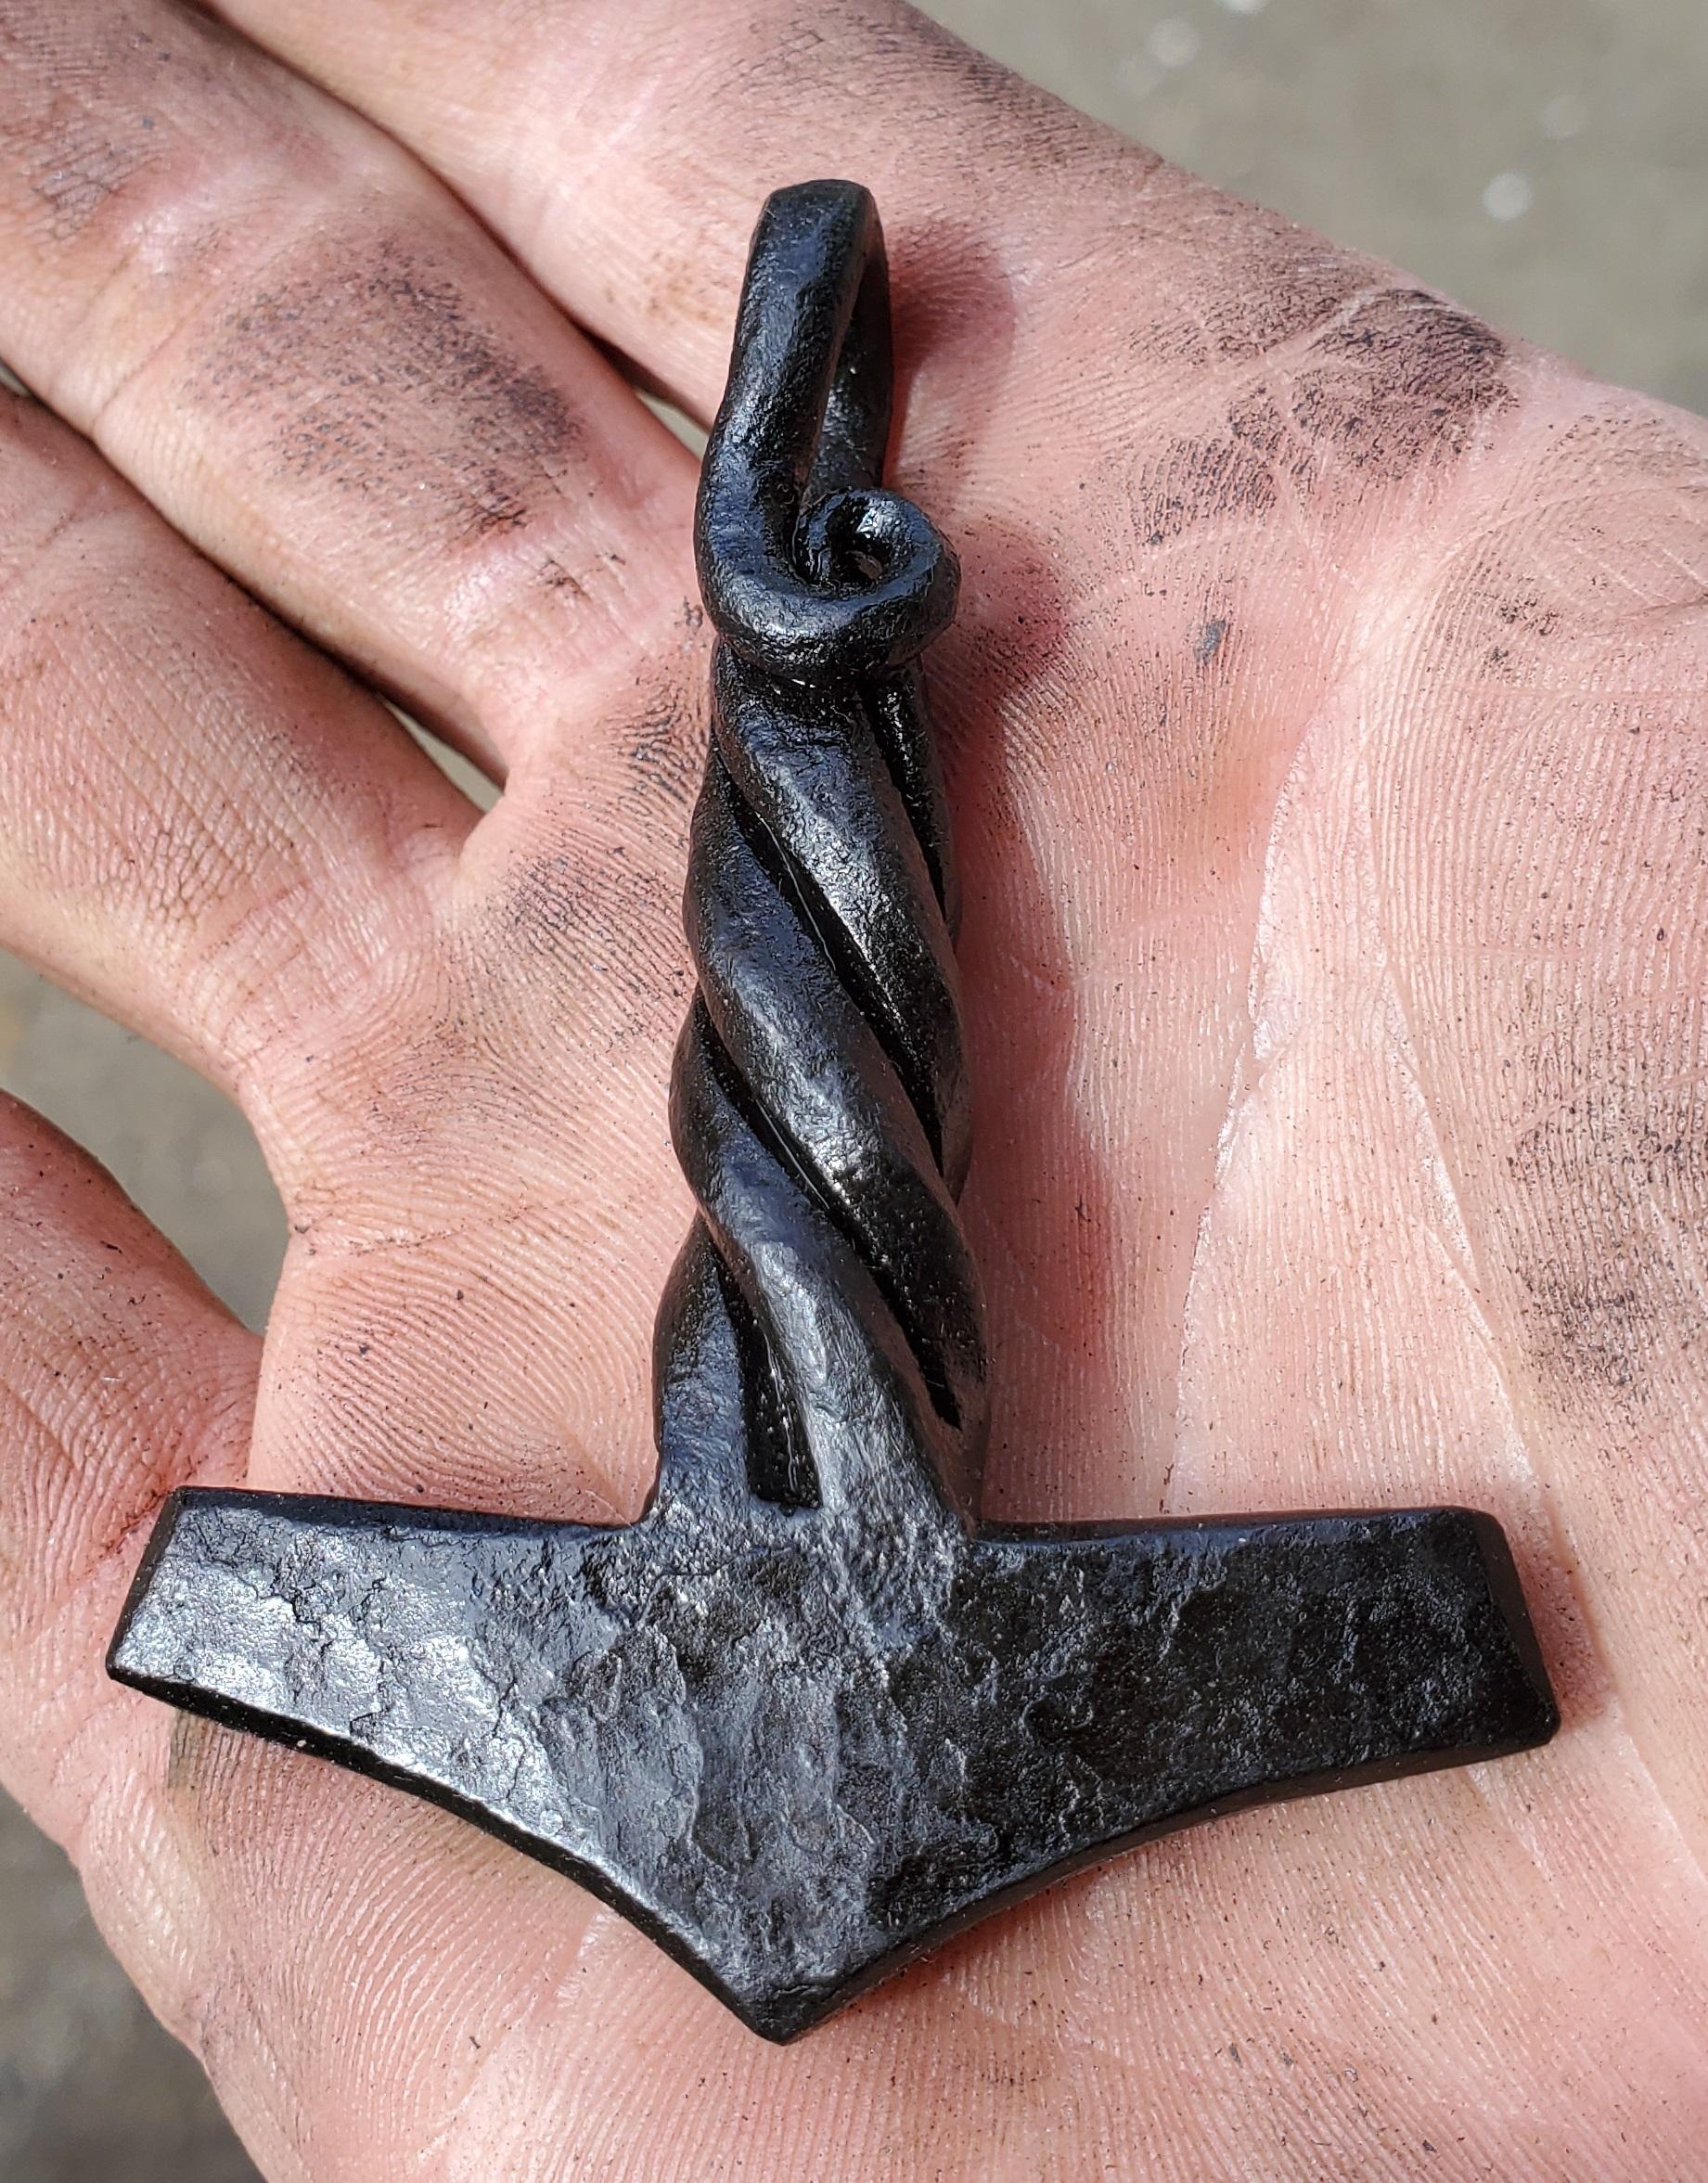
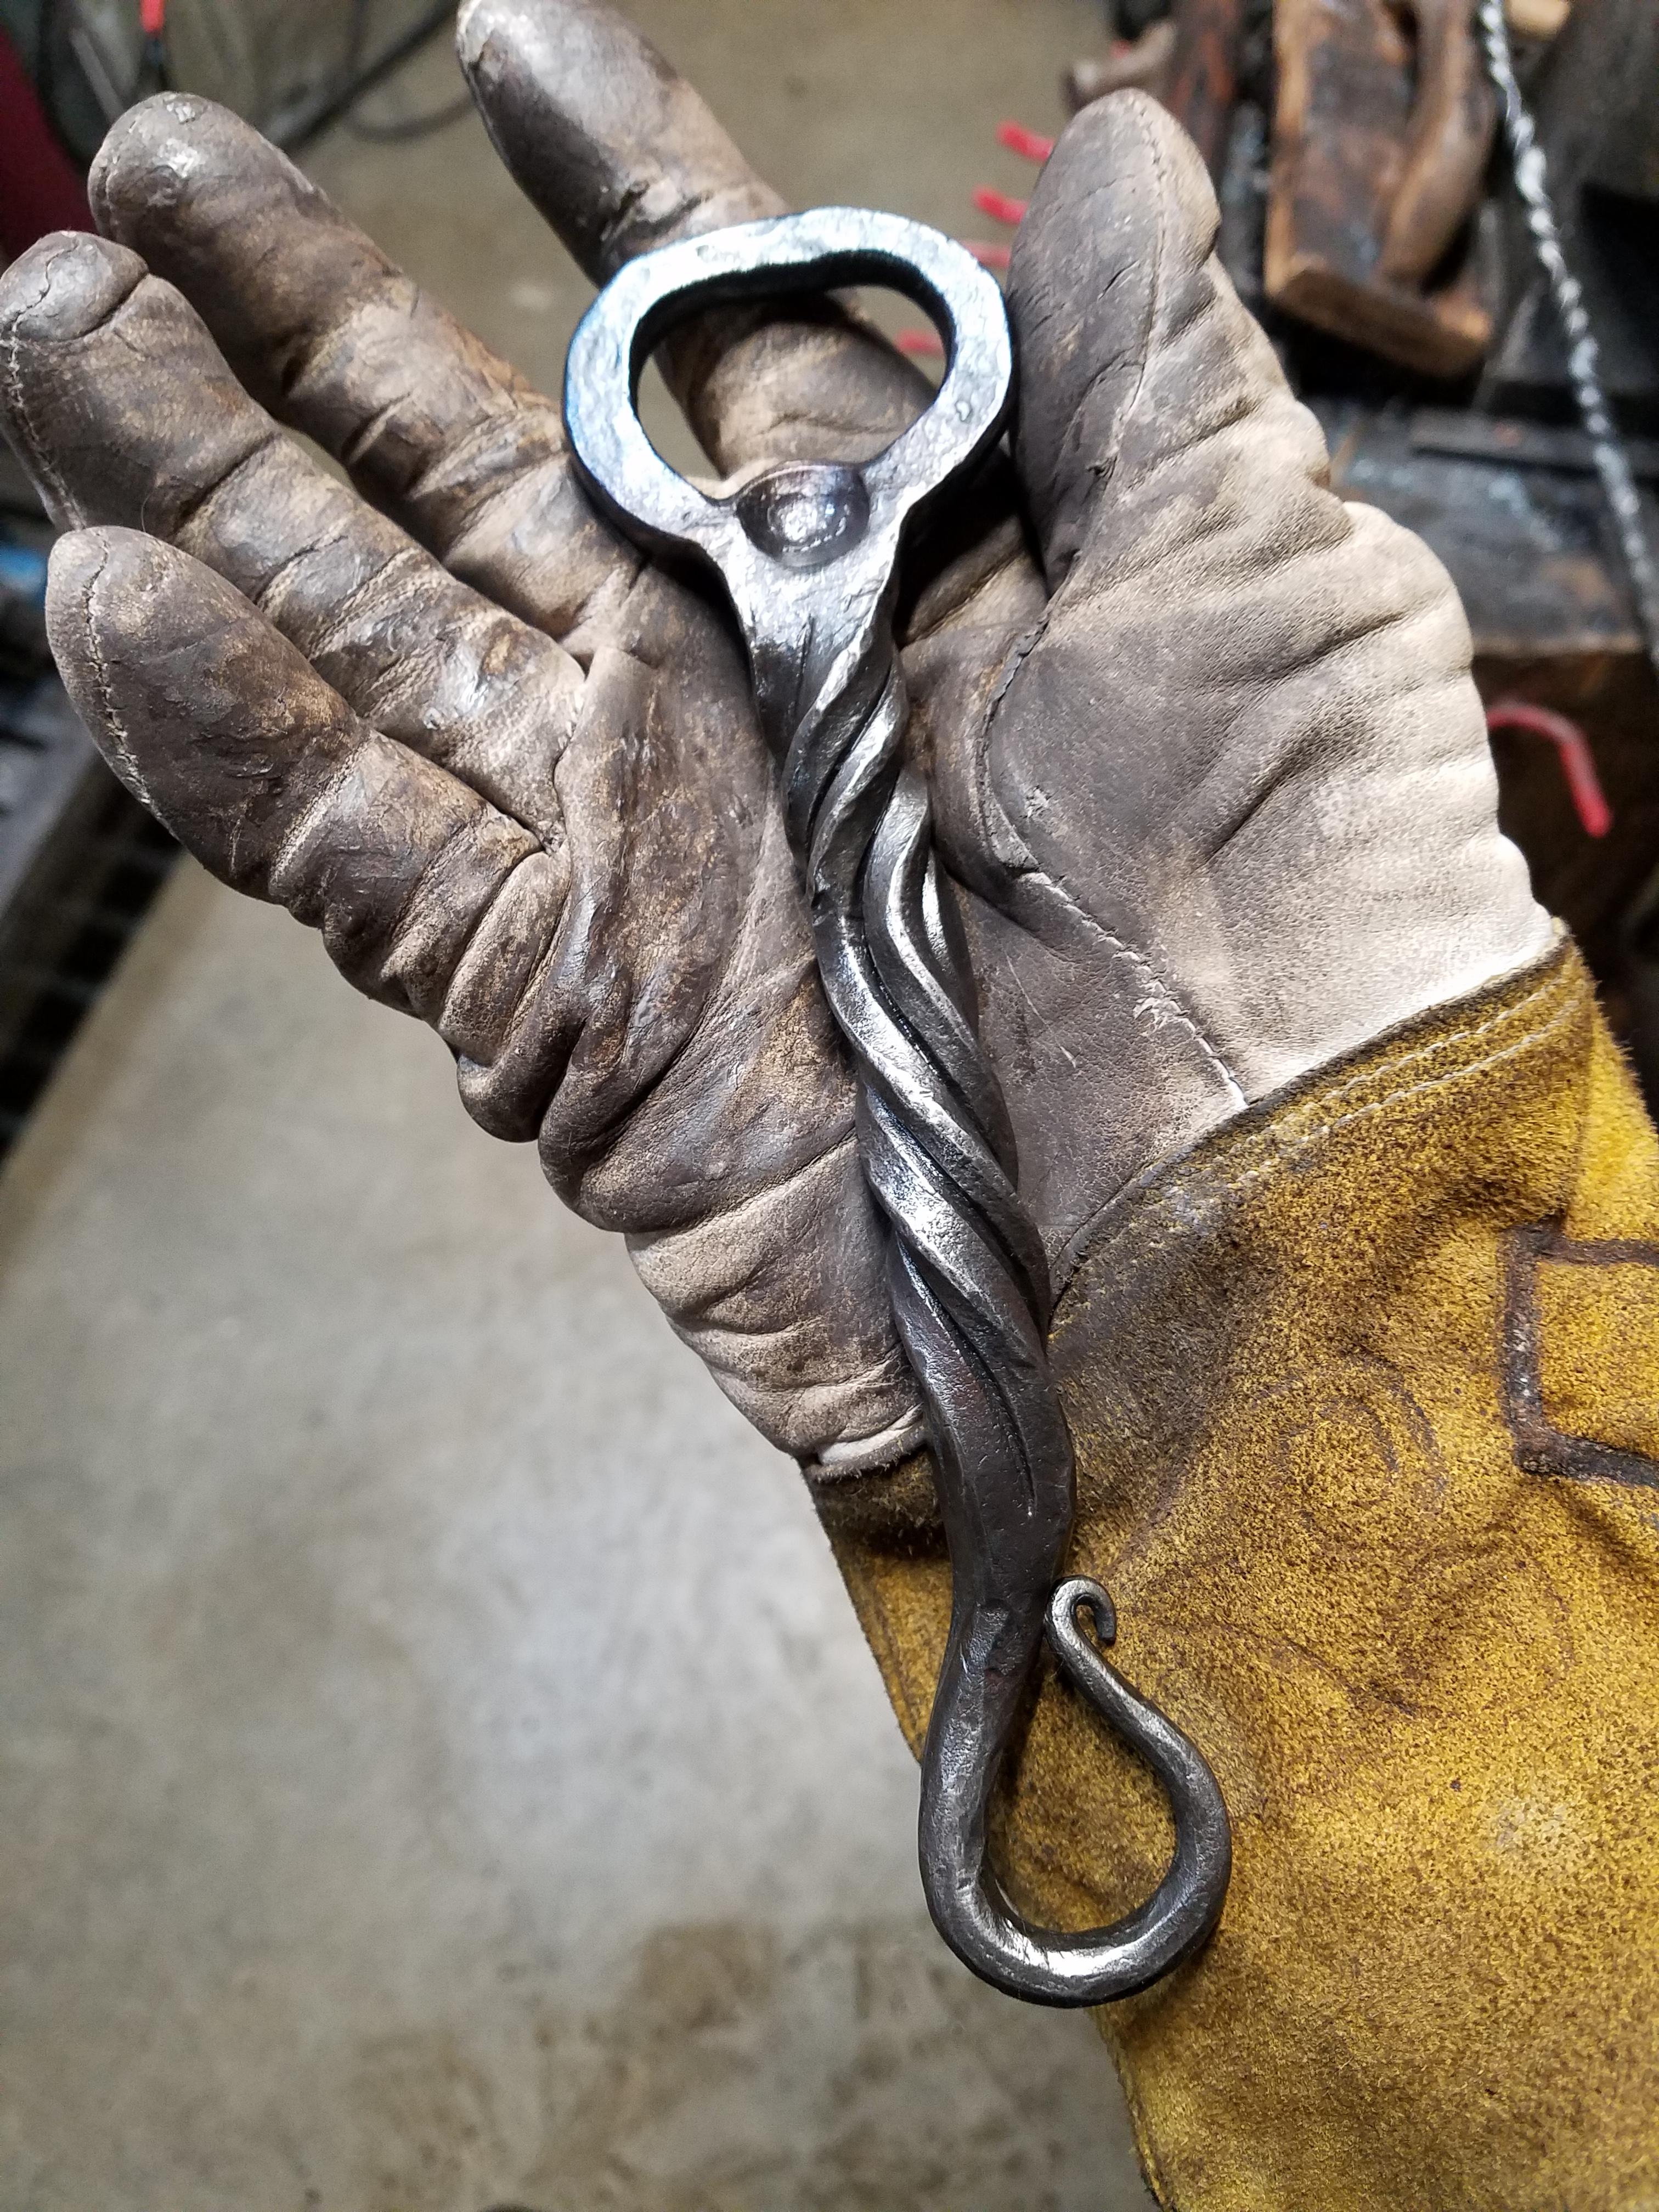
The hammer pendant one I made over the weekend. It was my backup stock for a custom Thor's hammer order from Etsy (pendant image included). The opener was made from 3/4" square bar. I always love this twist, not sure the proper name for it.. Was tough doing the veins... I did it after the hammer and opener ends were basically finished. On the flat it was not so bad... but the ones where it was on its side was tougher. Lucky my old Vulcan anvil was a perfect on the horn step down flat.
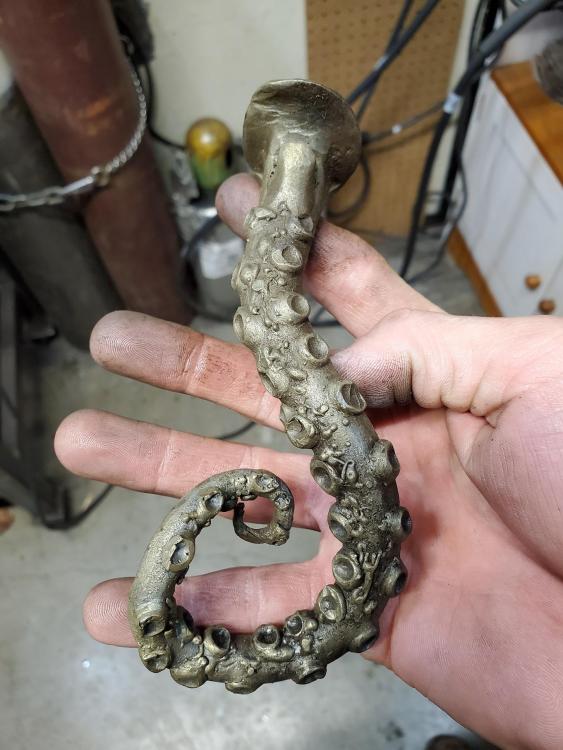
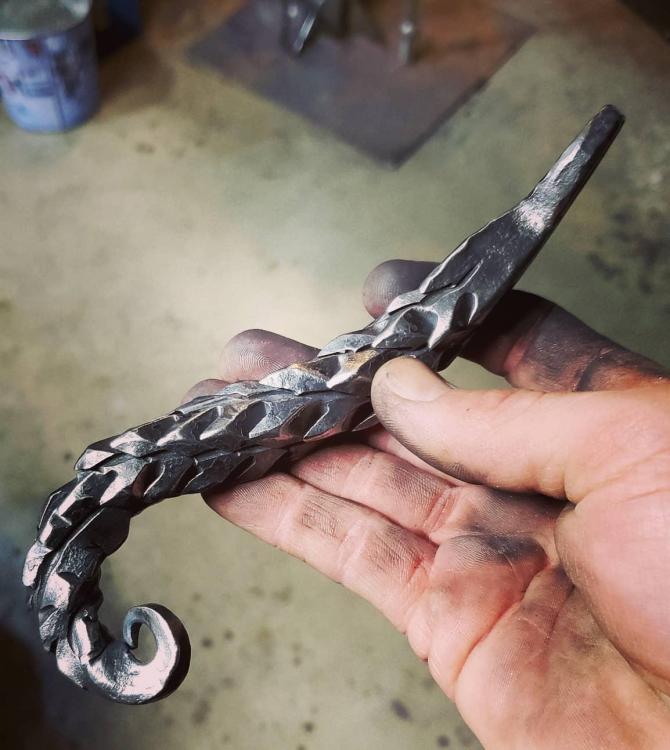
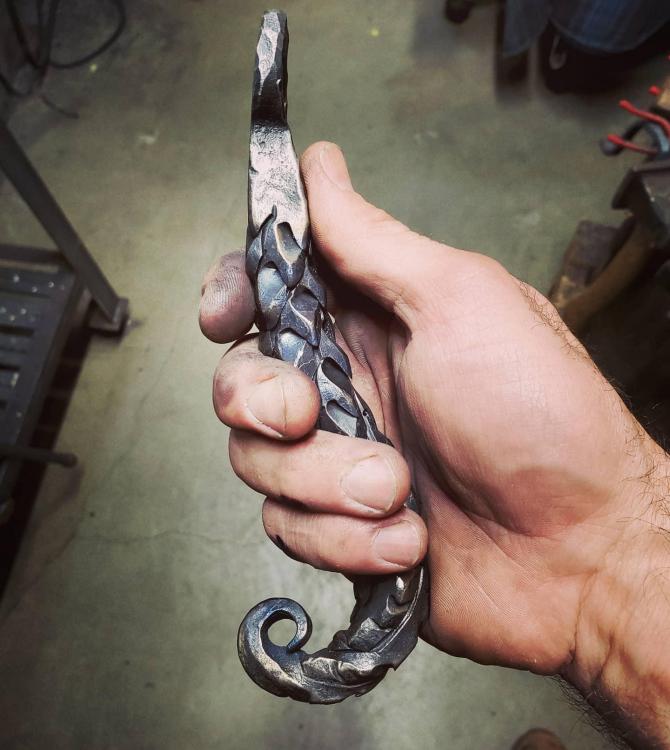
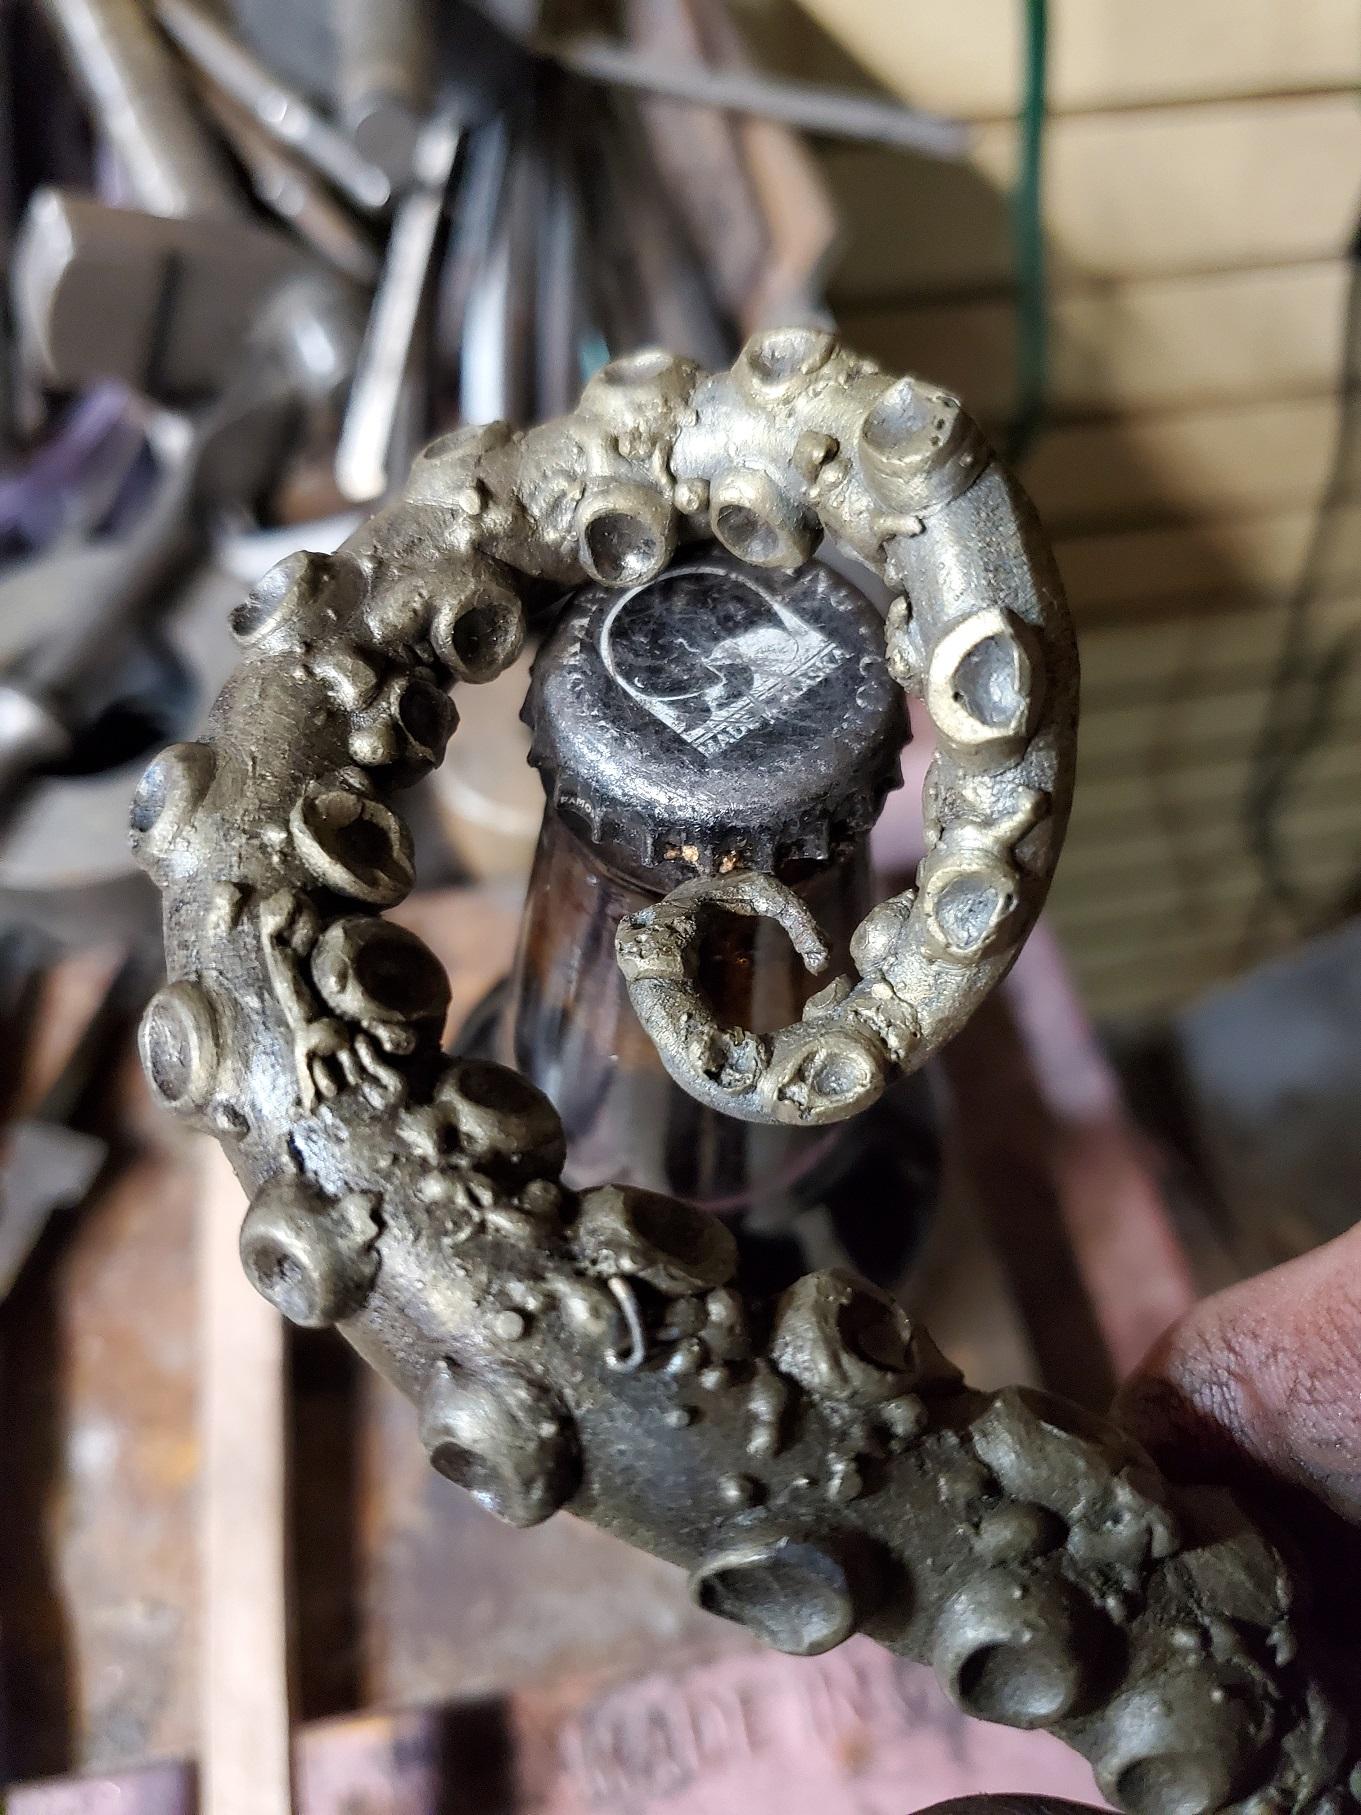
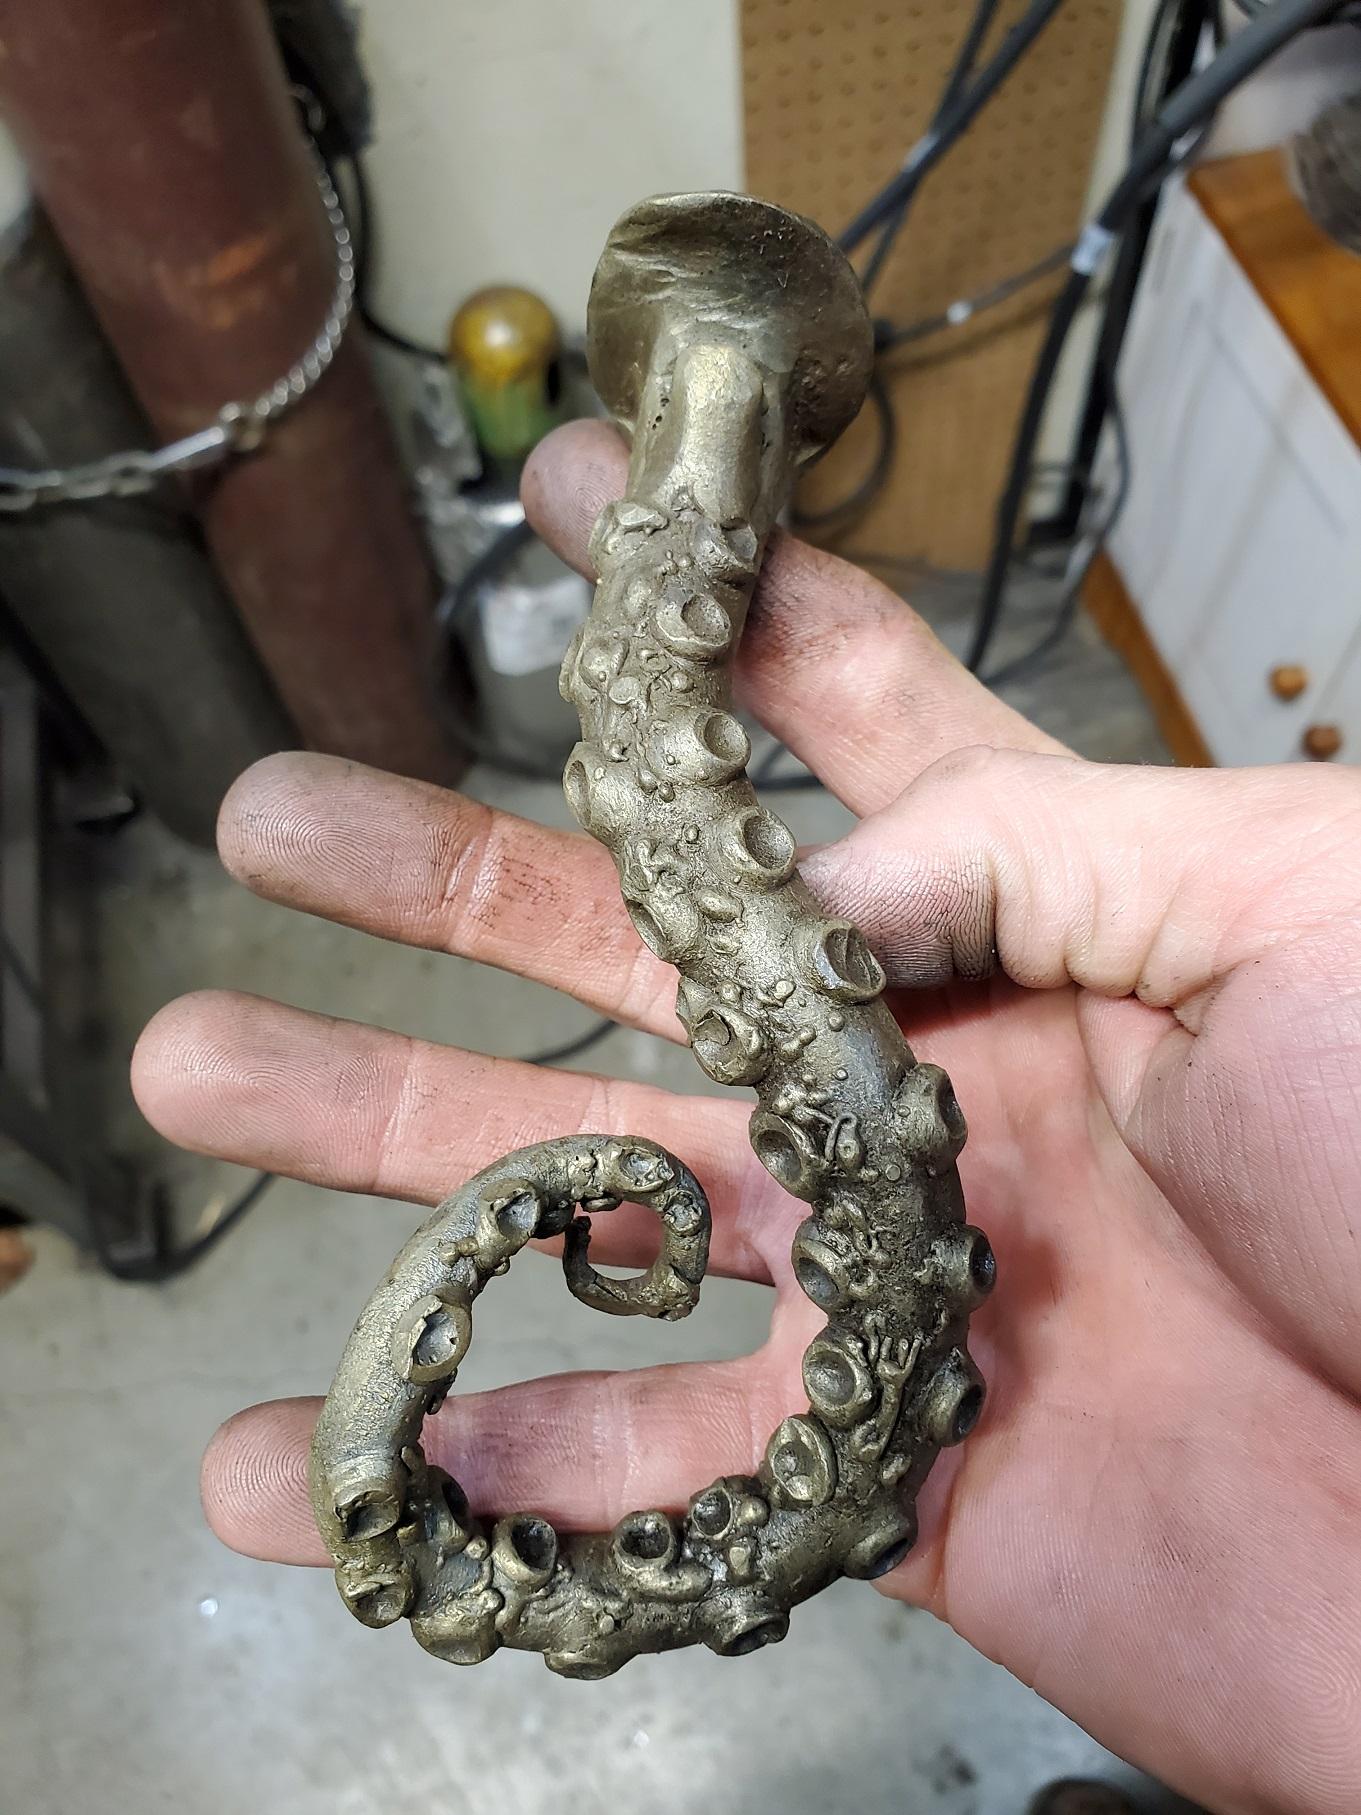
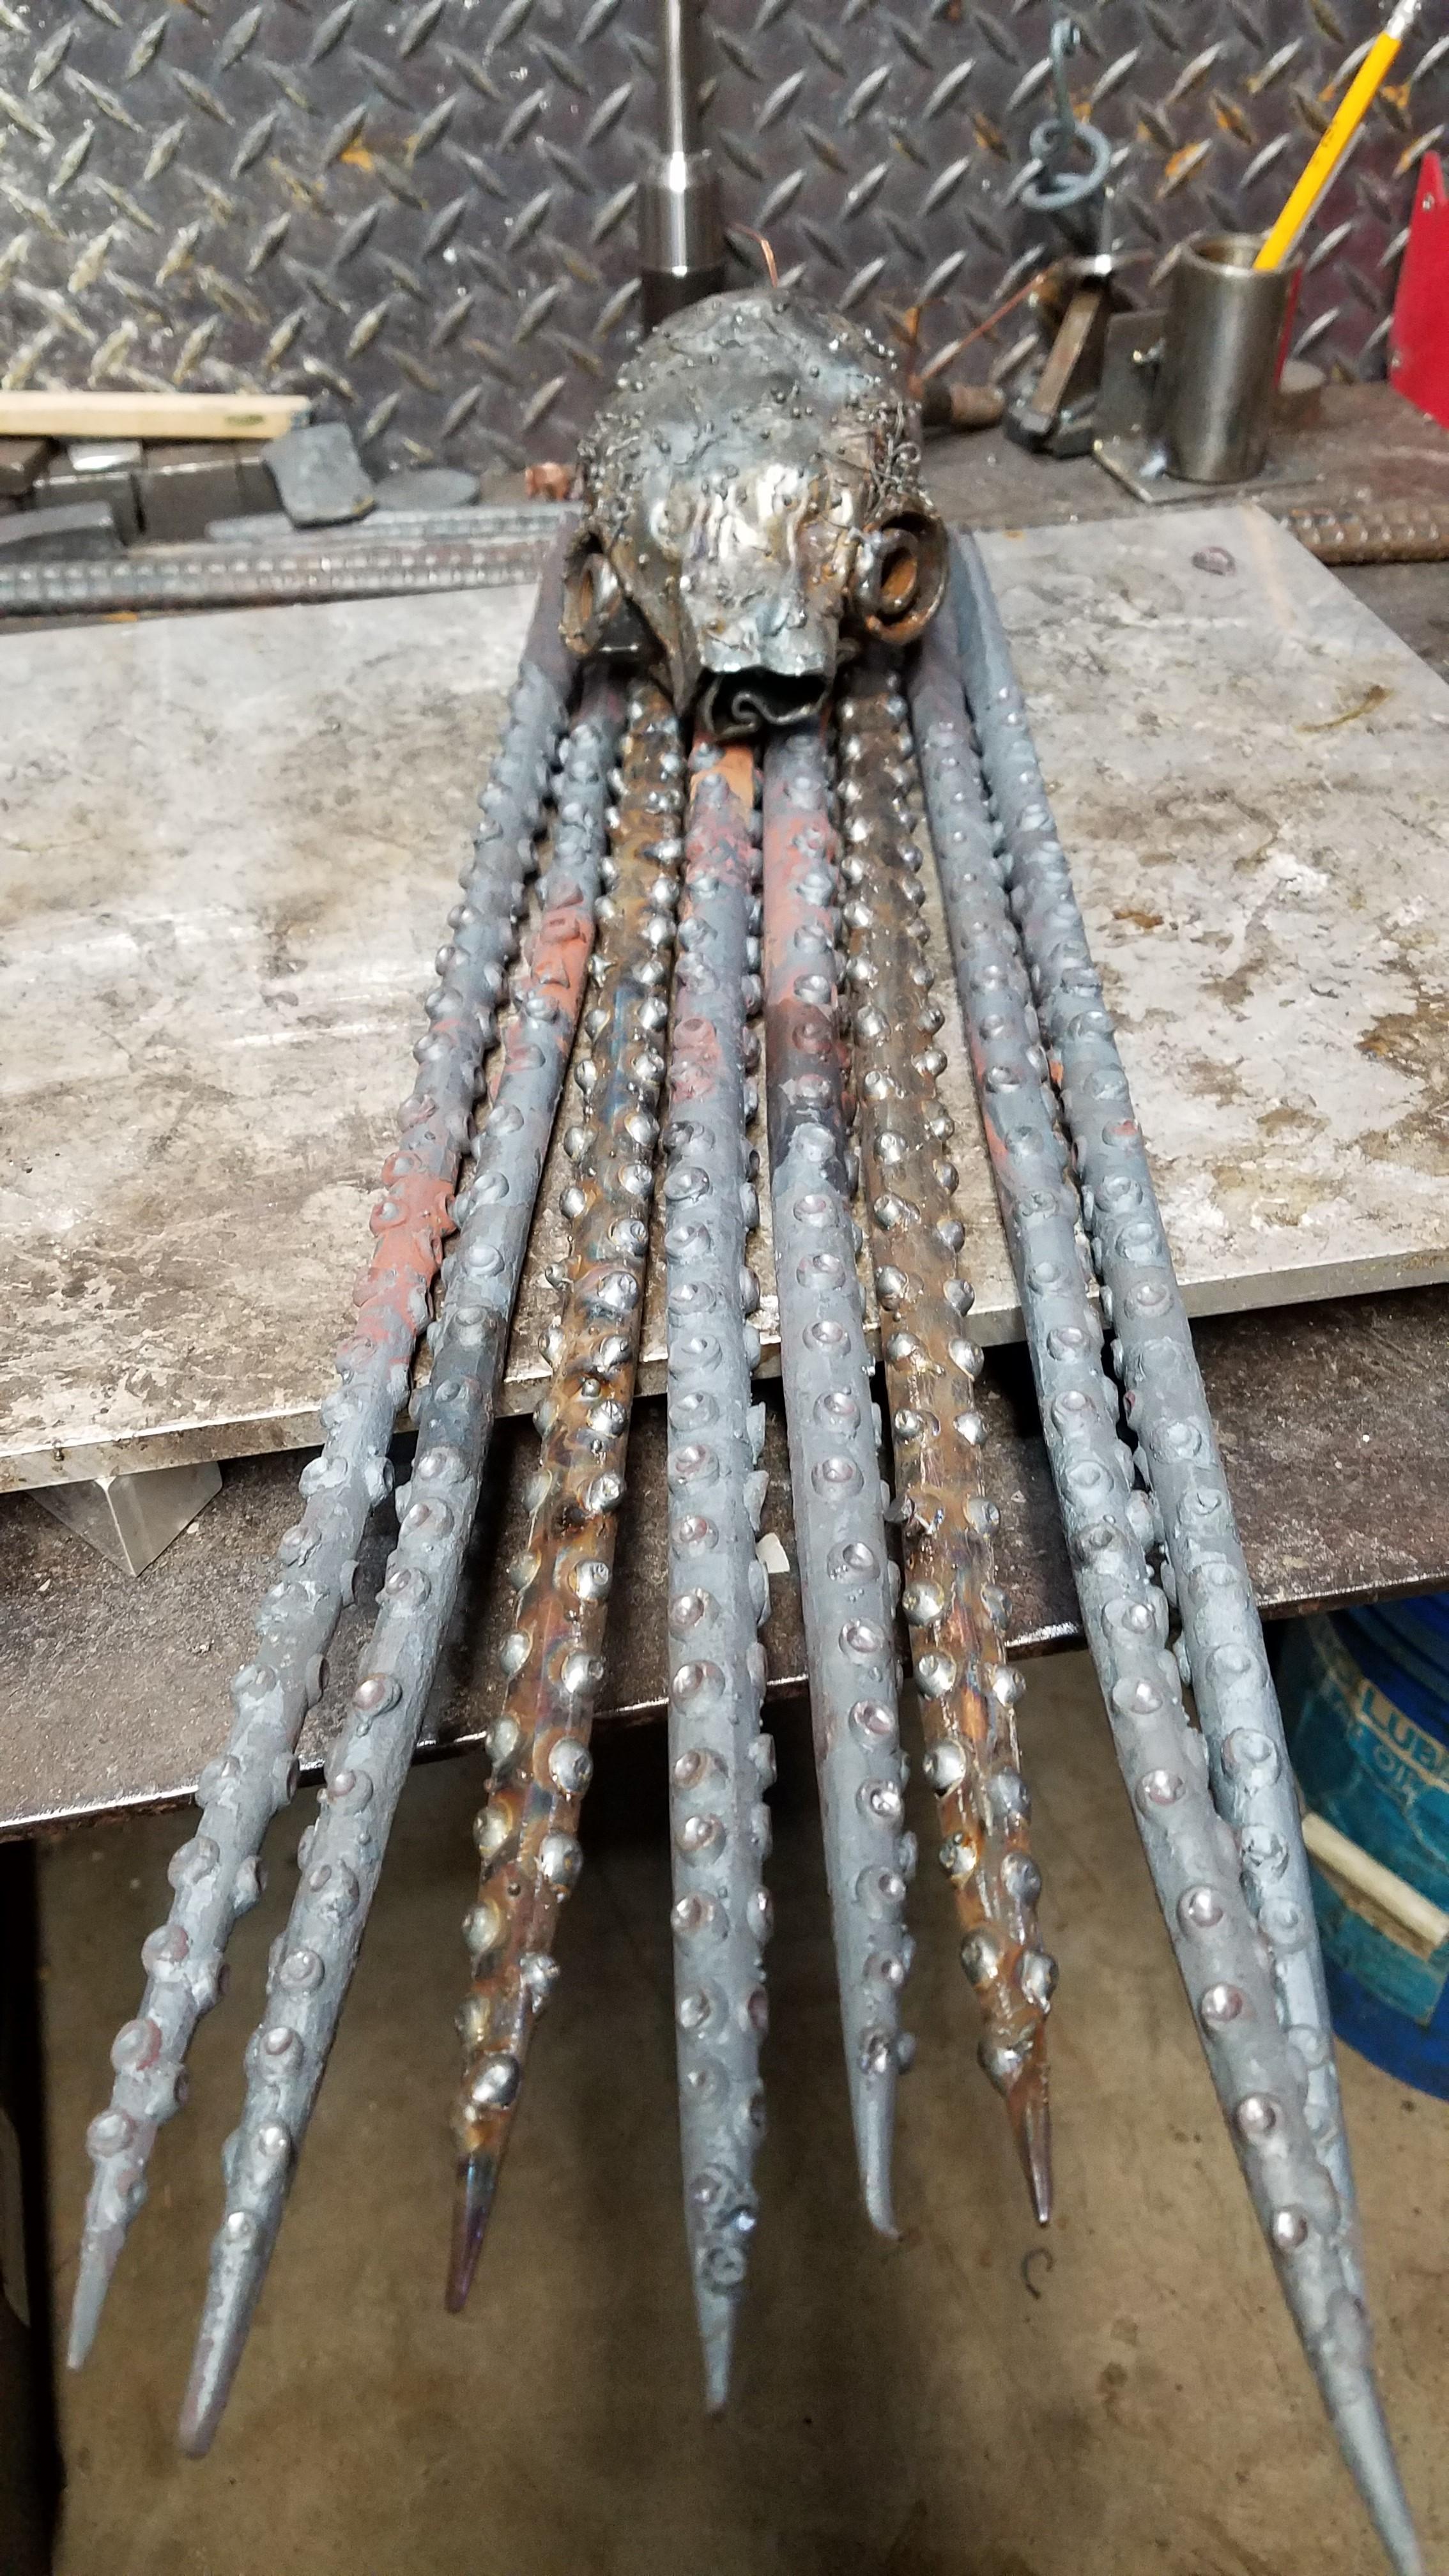
Another one I made is a Tentacle made from rail spike. I didn't intend to make it an opener, but a couple friends commented on my Instagram post giving me the idea. First one inspired me to make the hook on the big end. I welded a chunk to it and ground it down till it worked well. Then another friend commented on how it looked like the skinny end was perfect for hooking the cap. It wasn't my intent, but I reworked it until it did grab the cap. So I am gifting this to the first friend who has flowed me a bunch of welding supplies and knowledge.


-
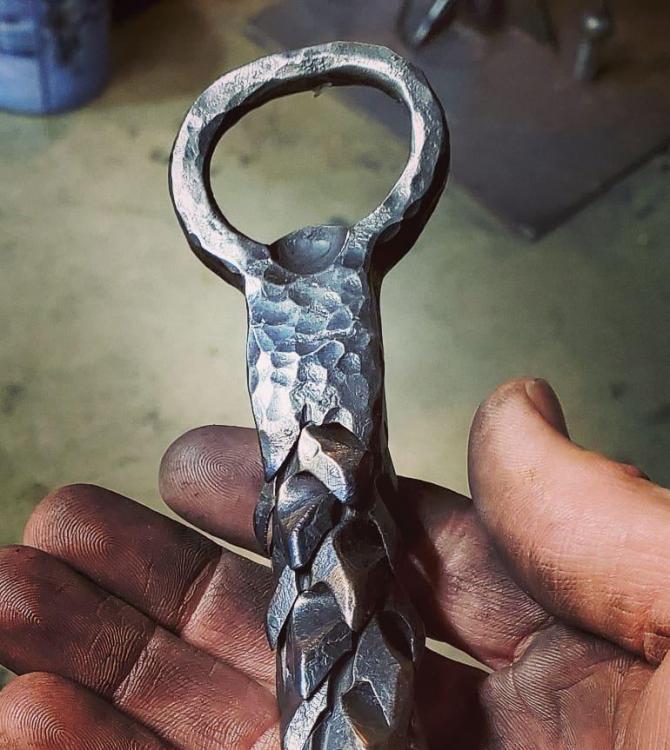
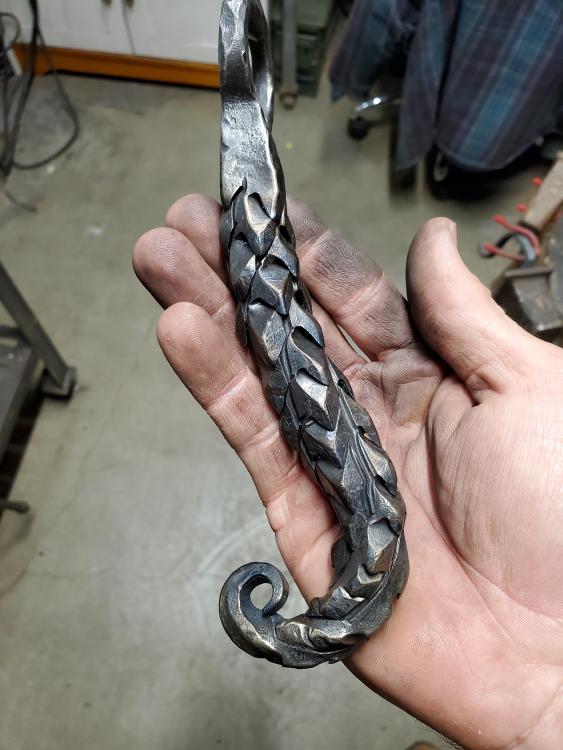
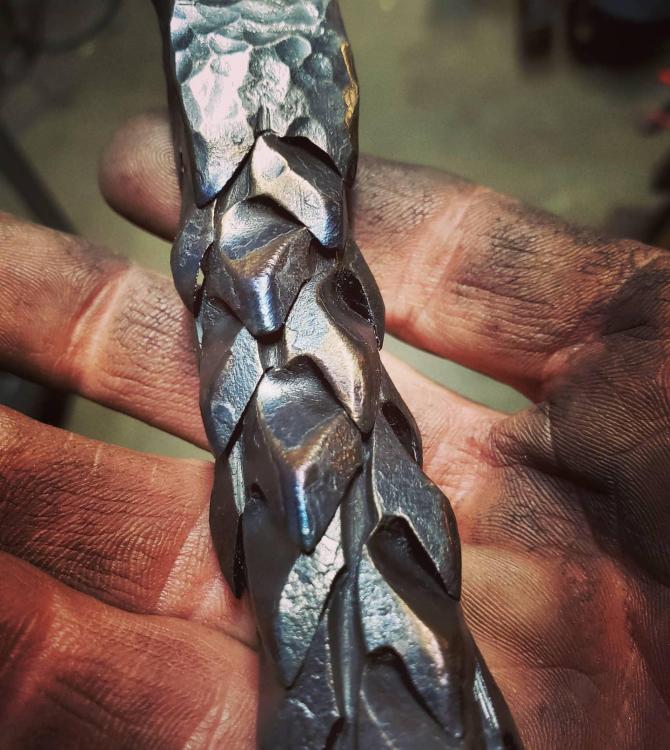
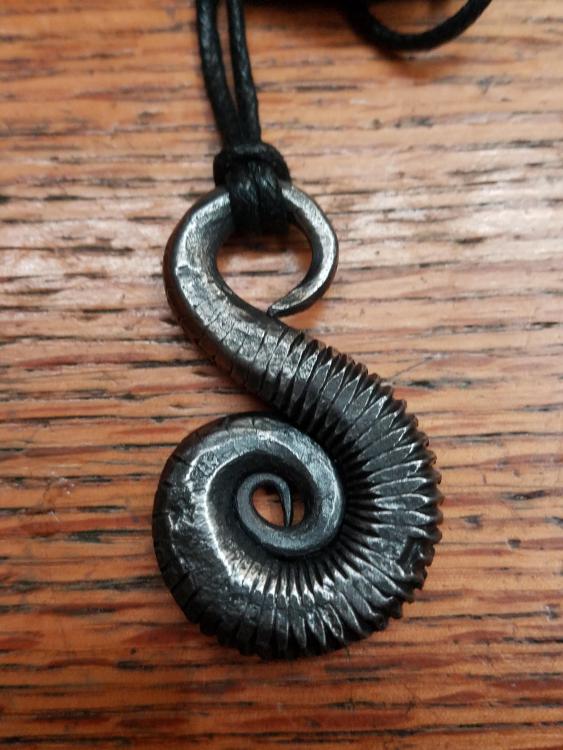
My first attempt at the Dragon Scale twist. Started with about 7" of 1" square. Tapered to about 3/16" at the end. I did the opener end taper and punch before cutting the diagonals. I tried to pre plan the cuts with partial success. Once cutting I messed up the first one cutting too deep and across the center line. In the finished piece its hard to see. Overall pretty fun project, may try again on a bit smaller stock.
-
I've bought stainless screws to make pendants from. I figure there is no coating on them and when its finished it shouldn't rust.
-
8 hours ago, Daswulf said:
Awesome stuff Oly.
Thank you!
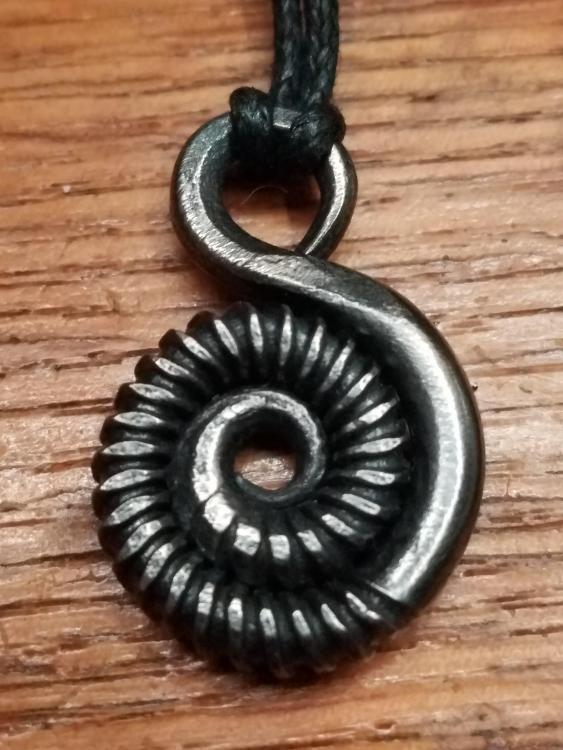
7 hours ago, pnut said:Olydemon, if you make another like the dragon with just a few tweaks you could have a very good seahorse. I'm gonna have to give some of those a try soon. They look like a good way to practice tapering and bending on the cheap.
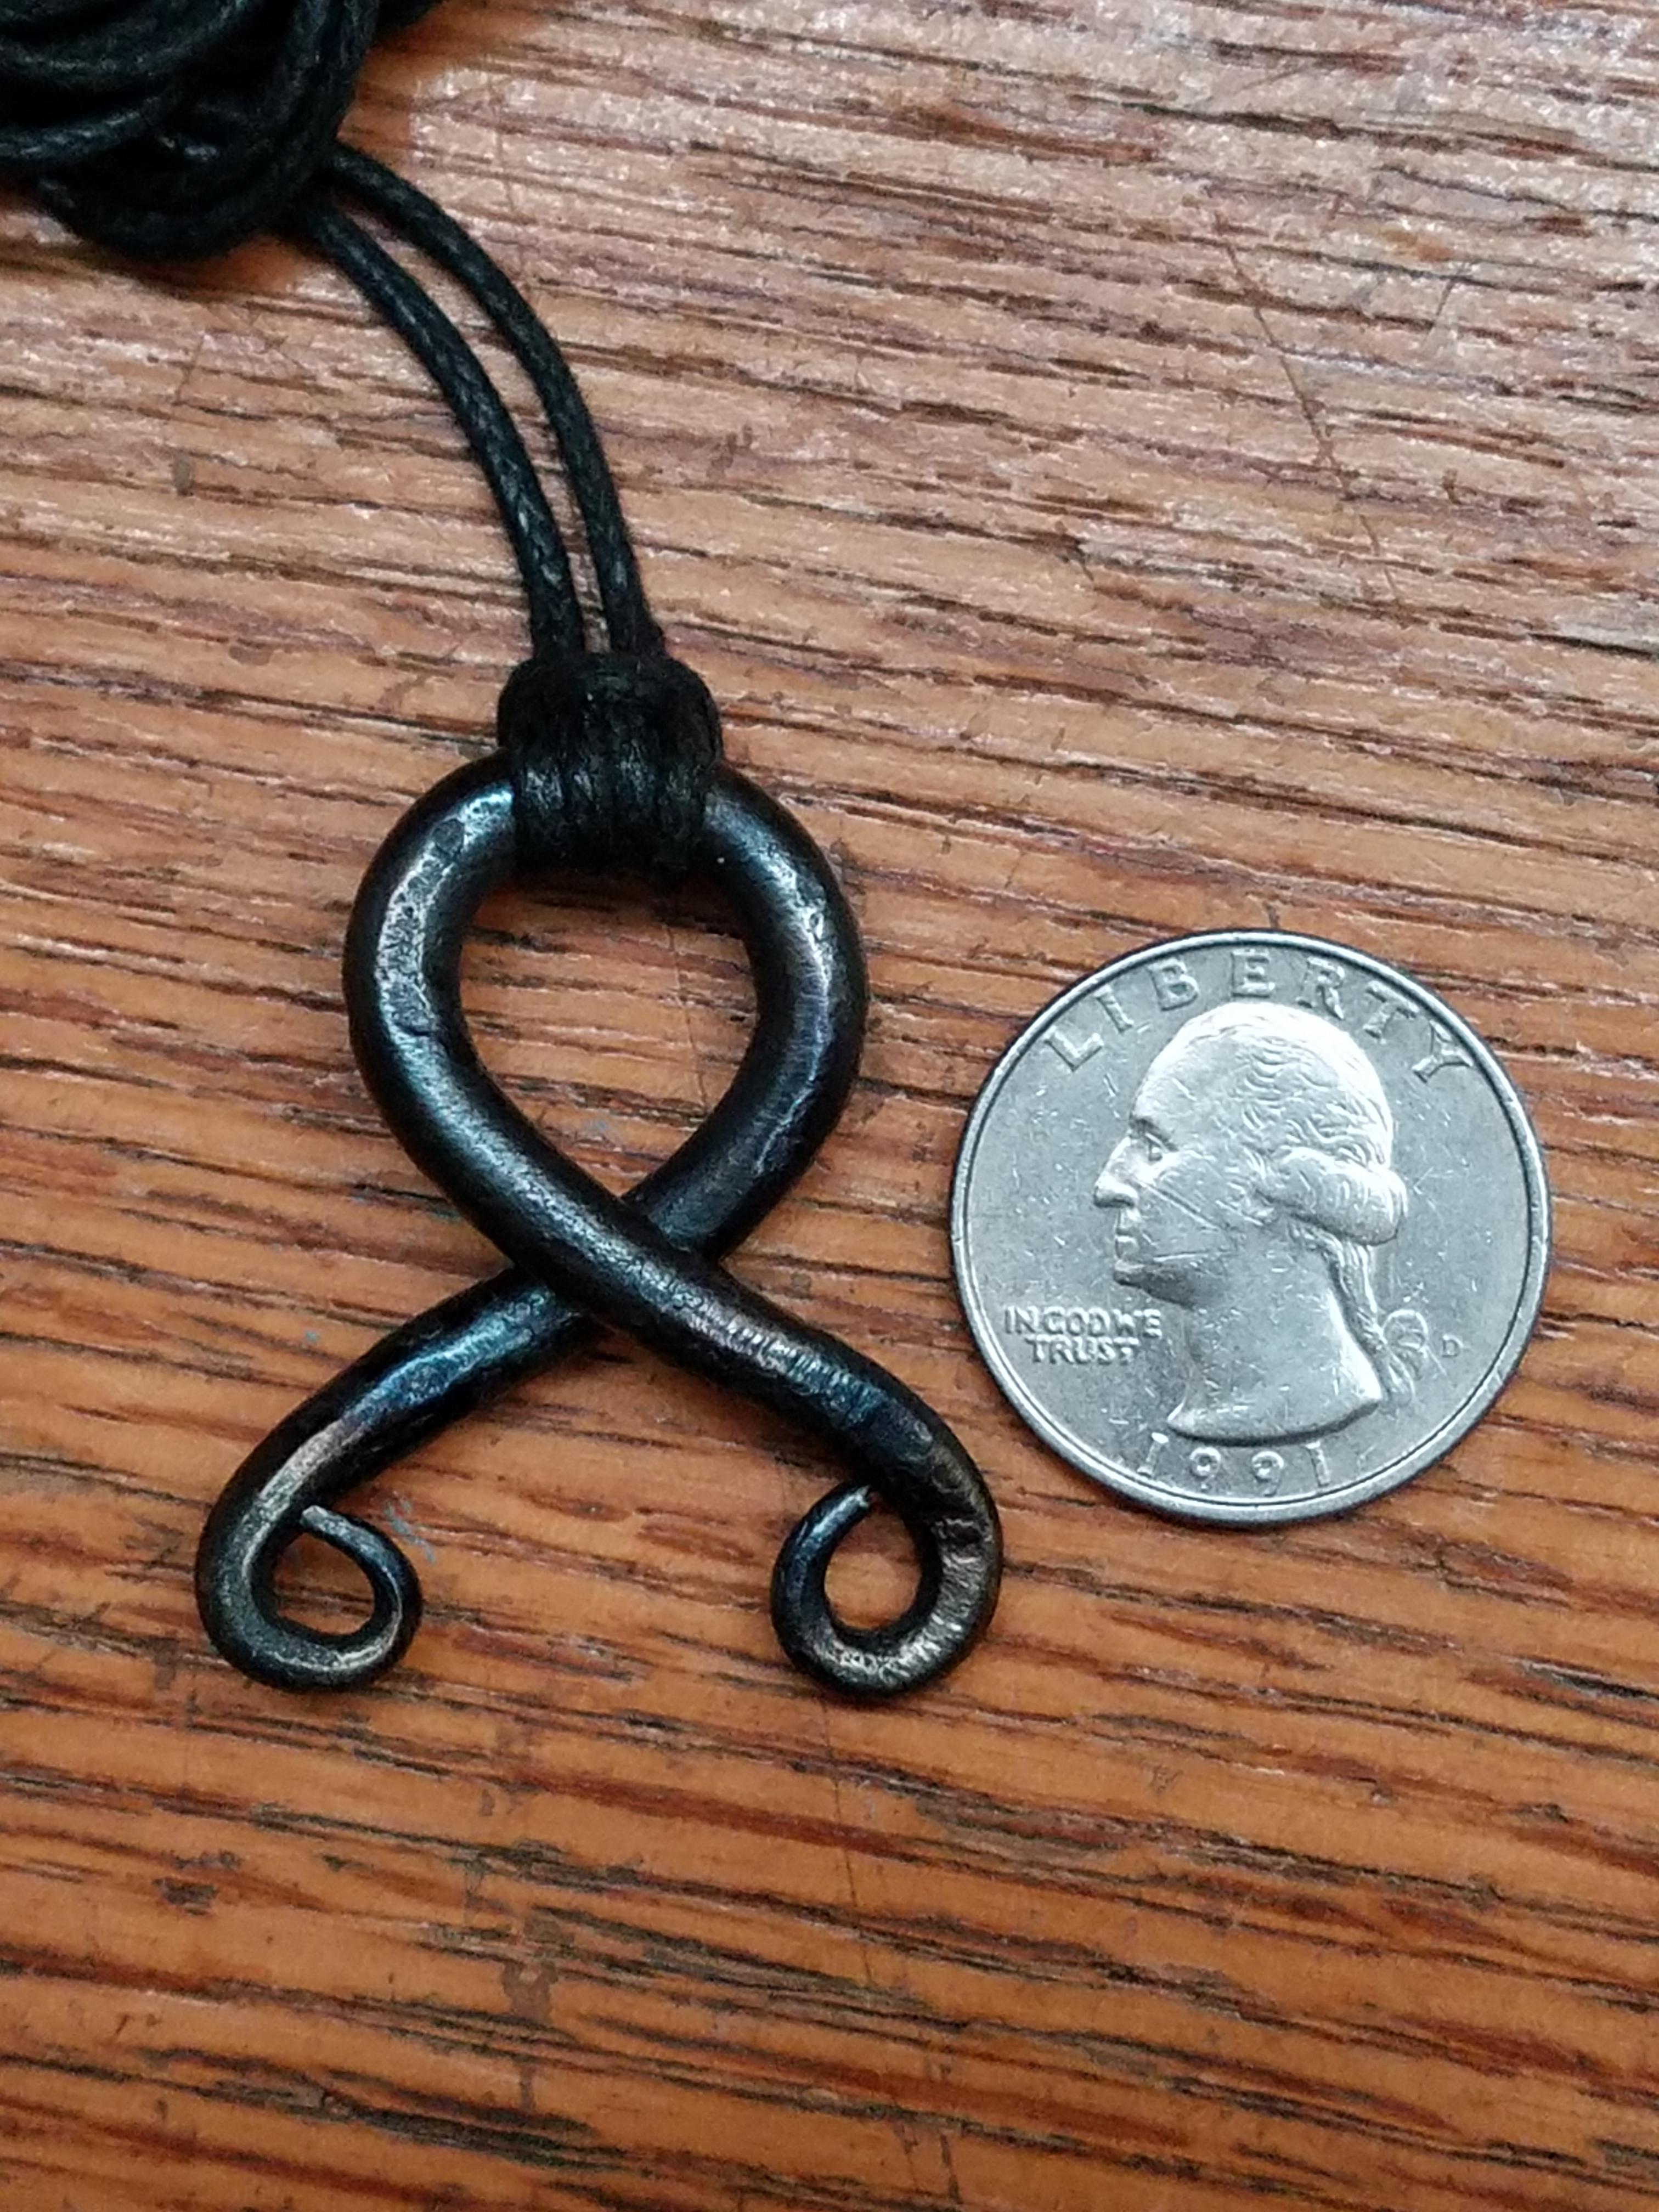
How big are they to start 3or4 inches?
Thank you. Its also a great lesson on handling small items...
I think the screws were probably 3".
-
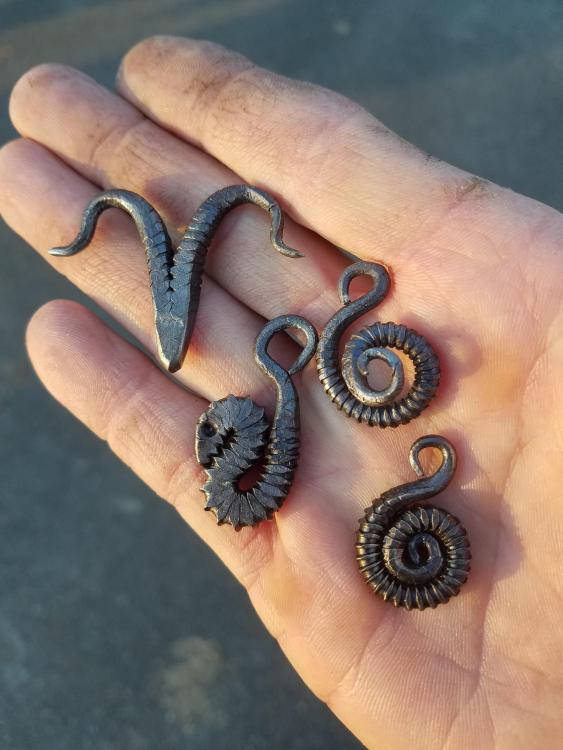
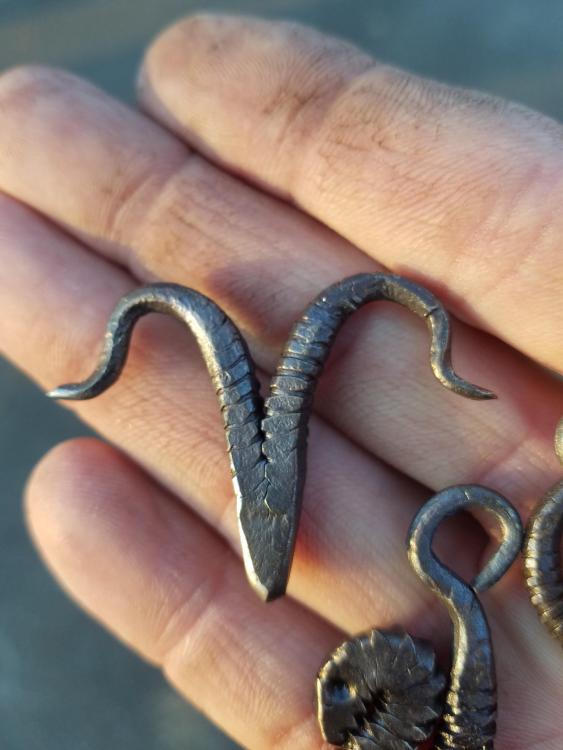
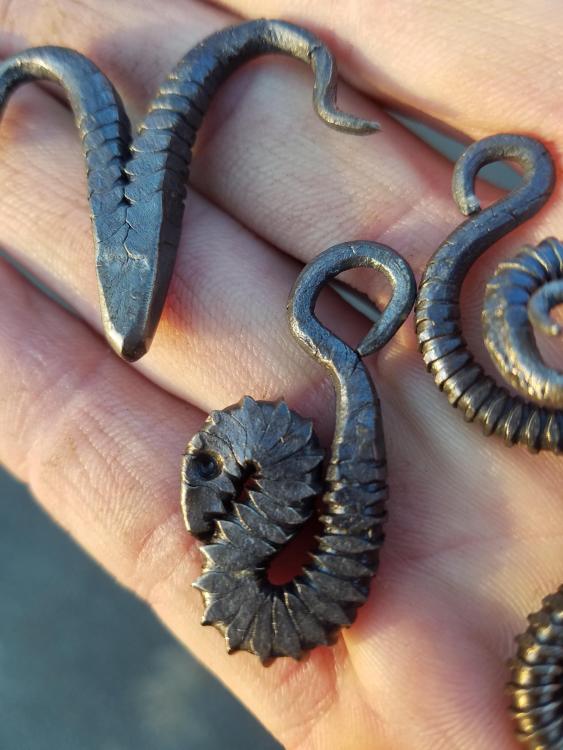
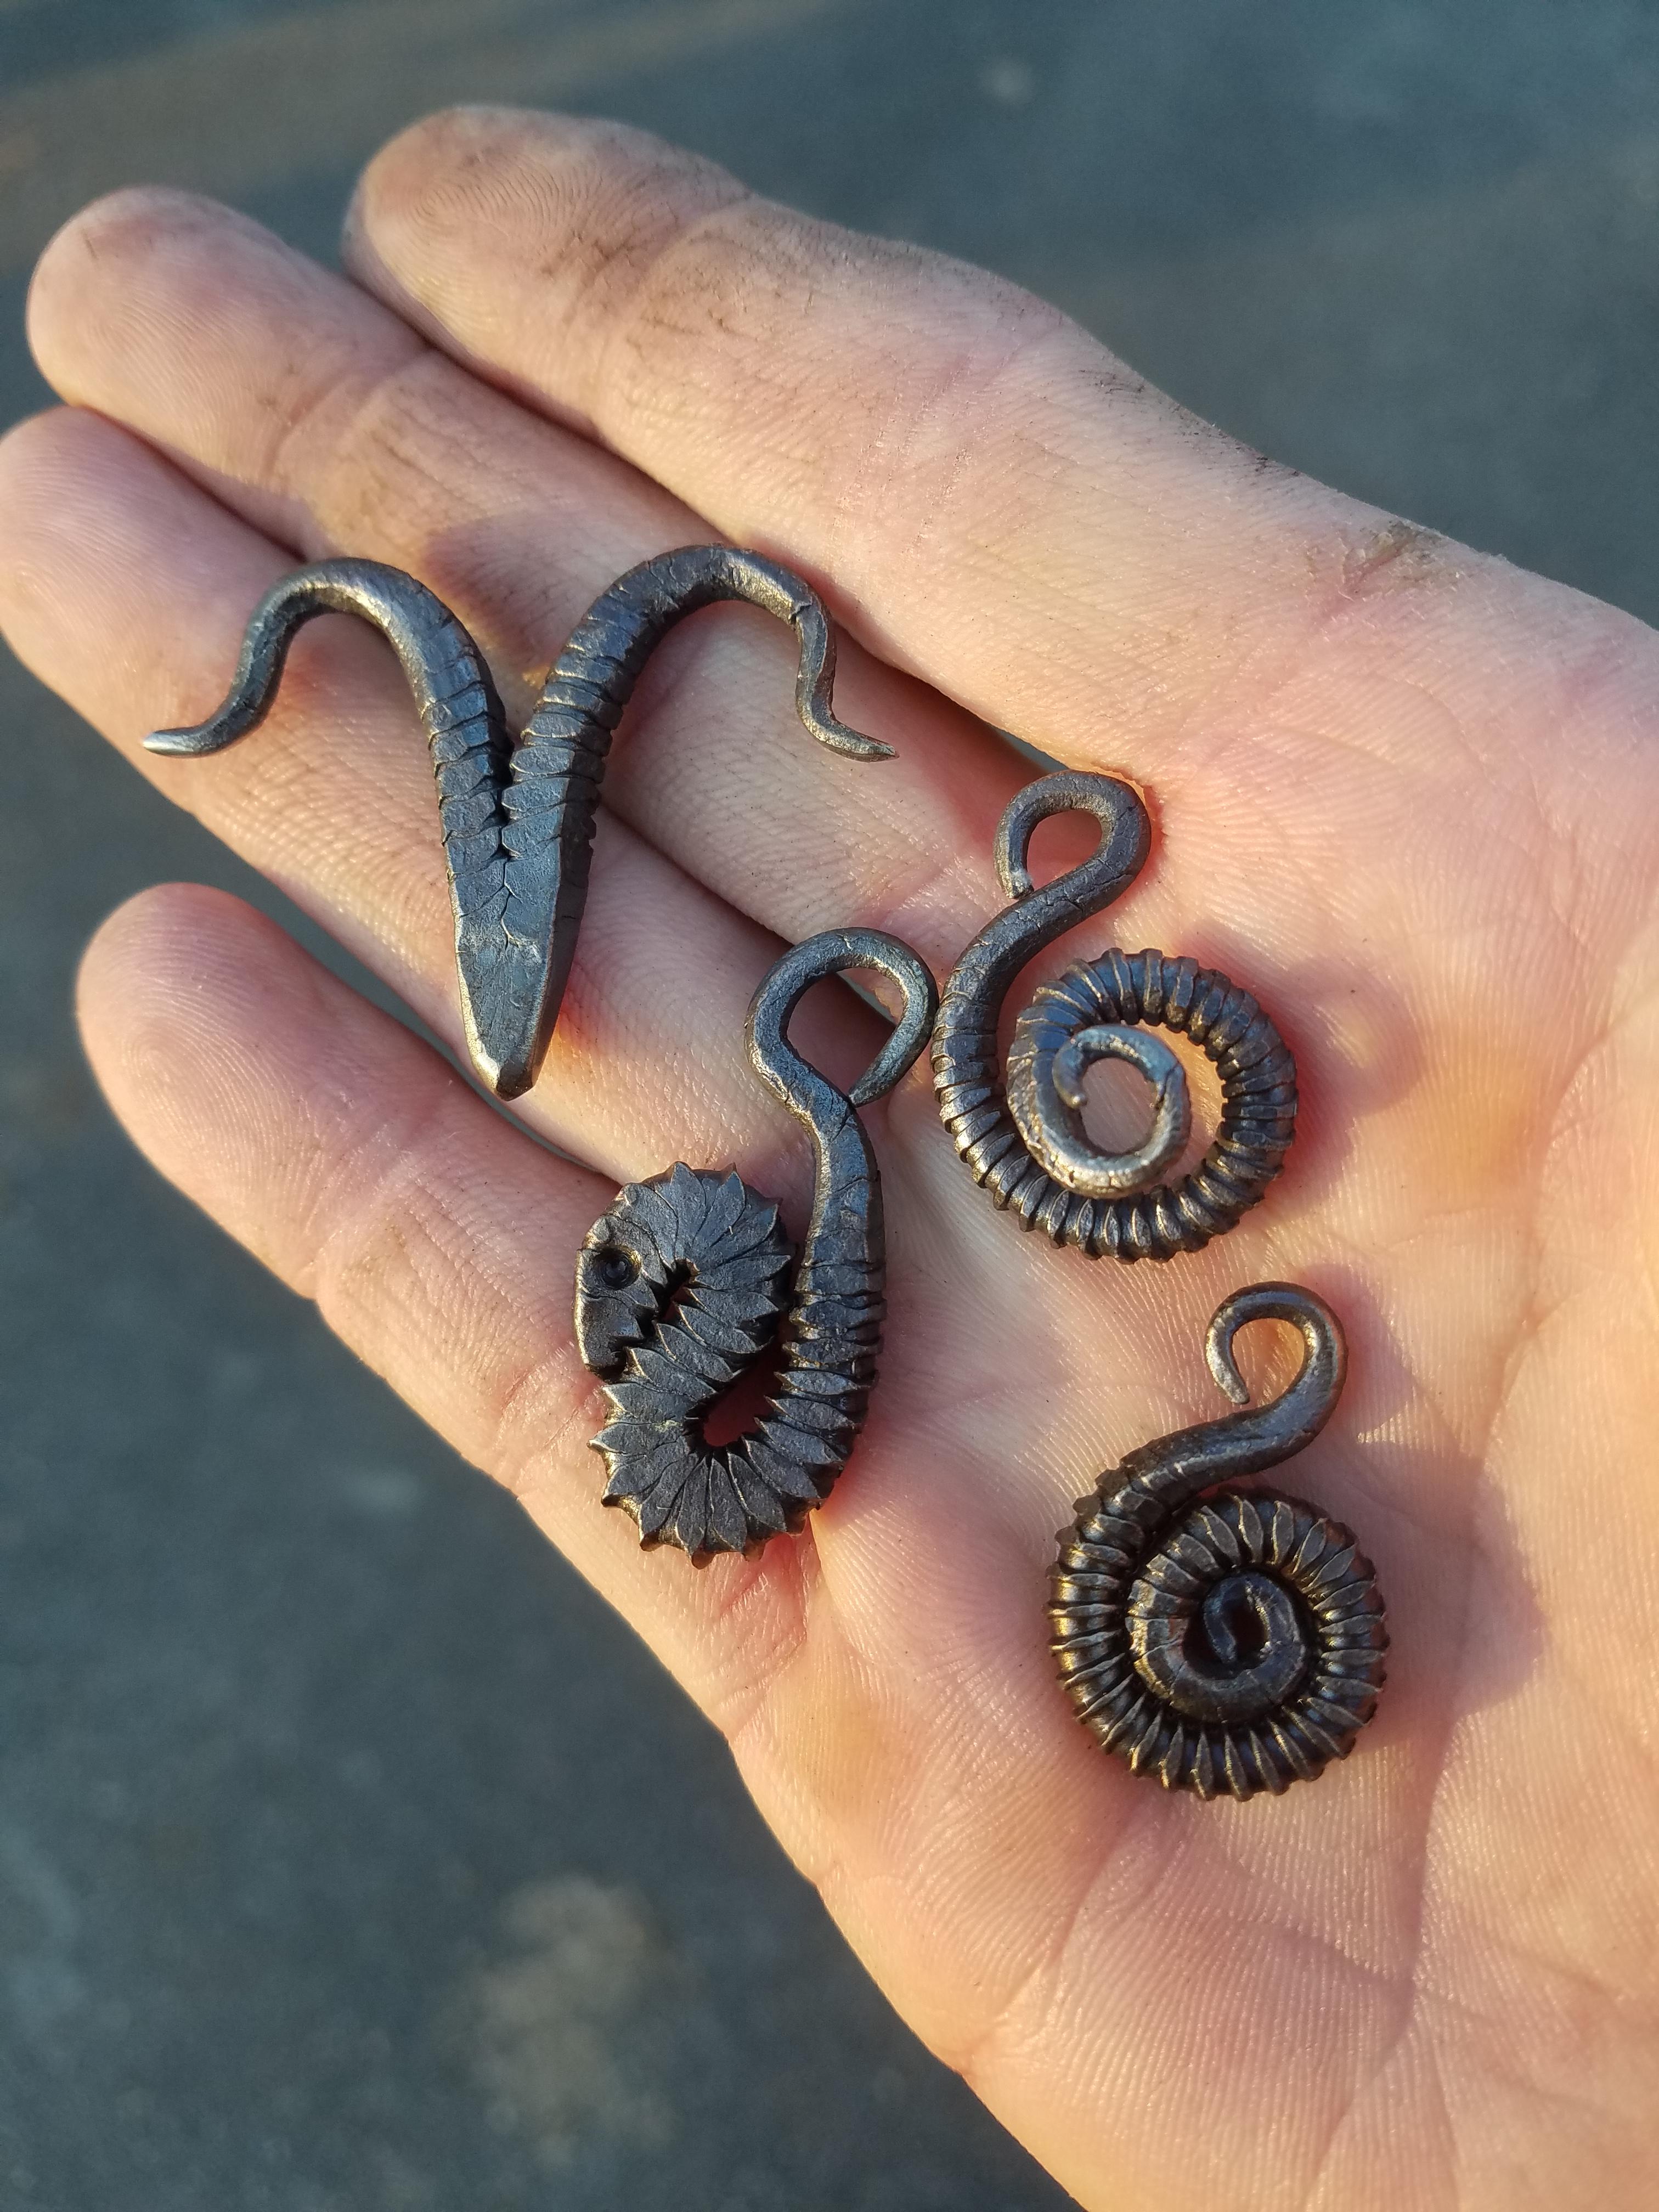
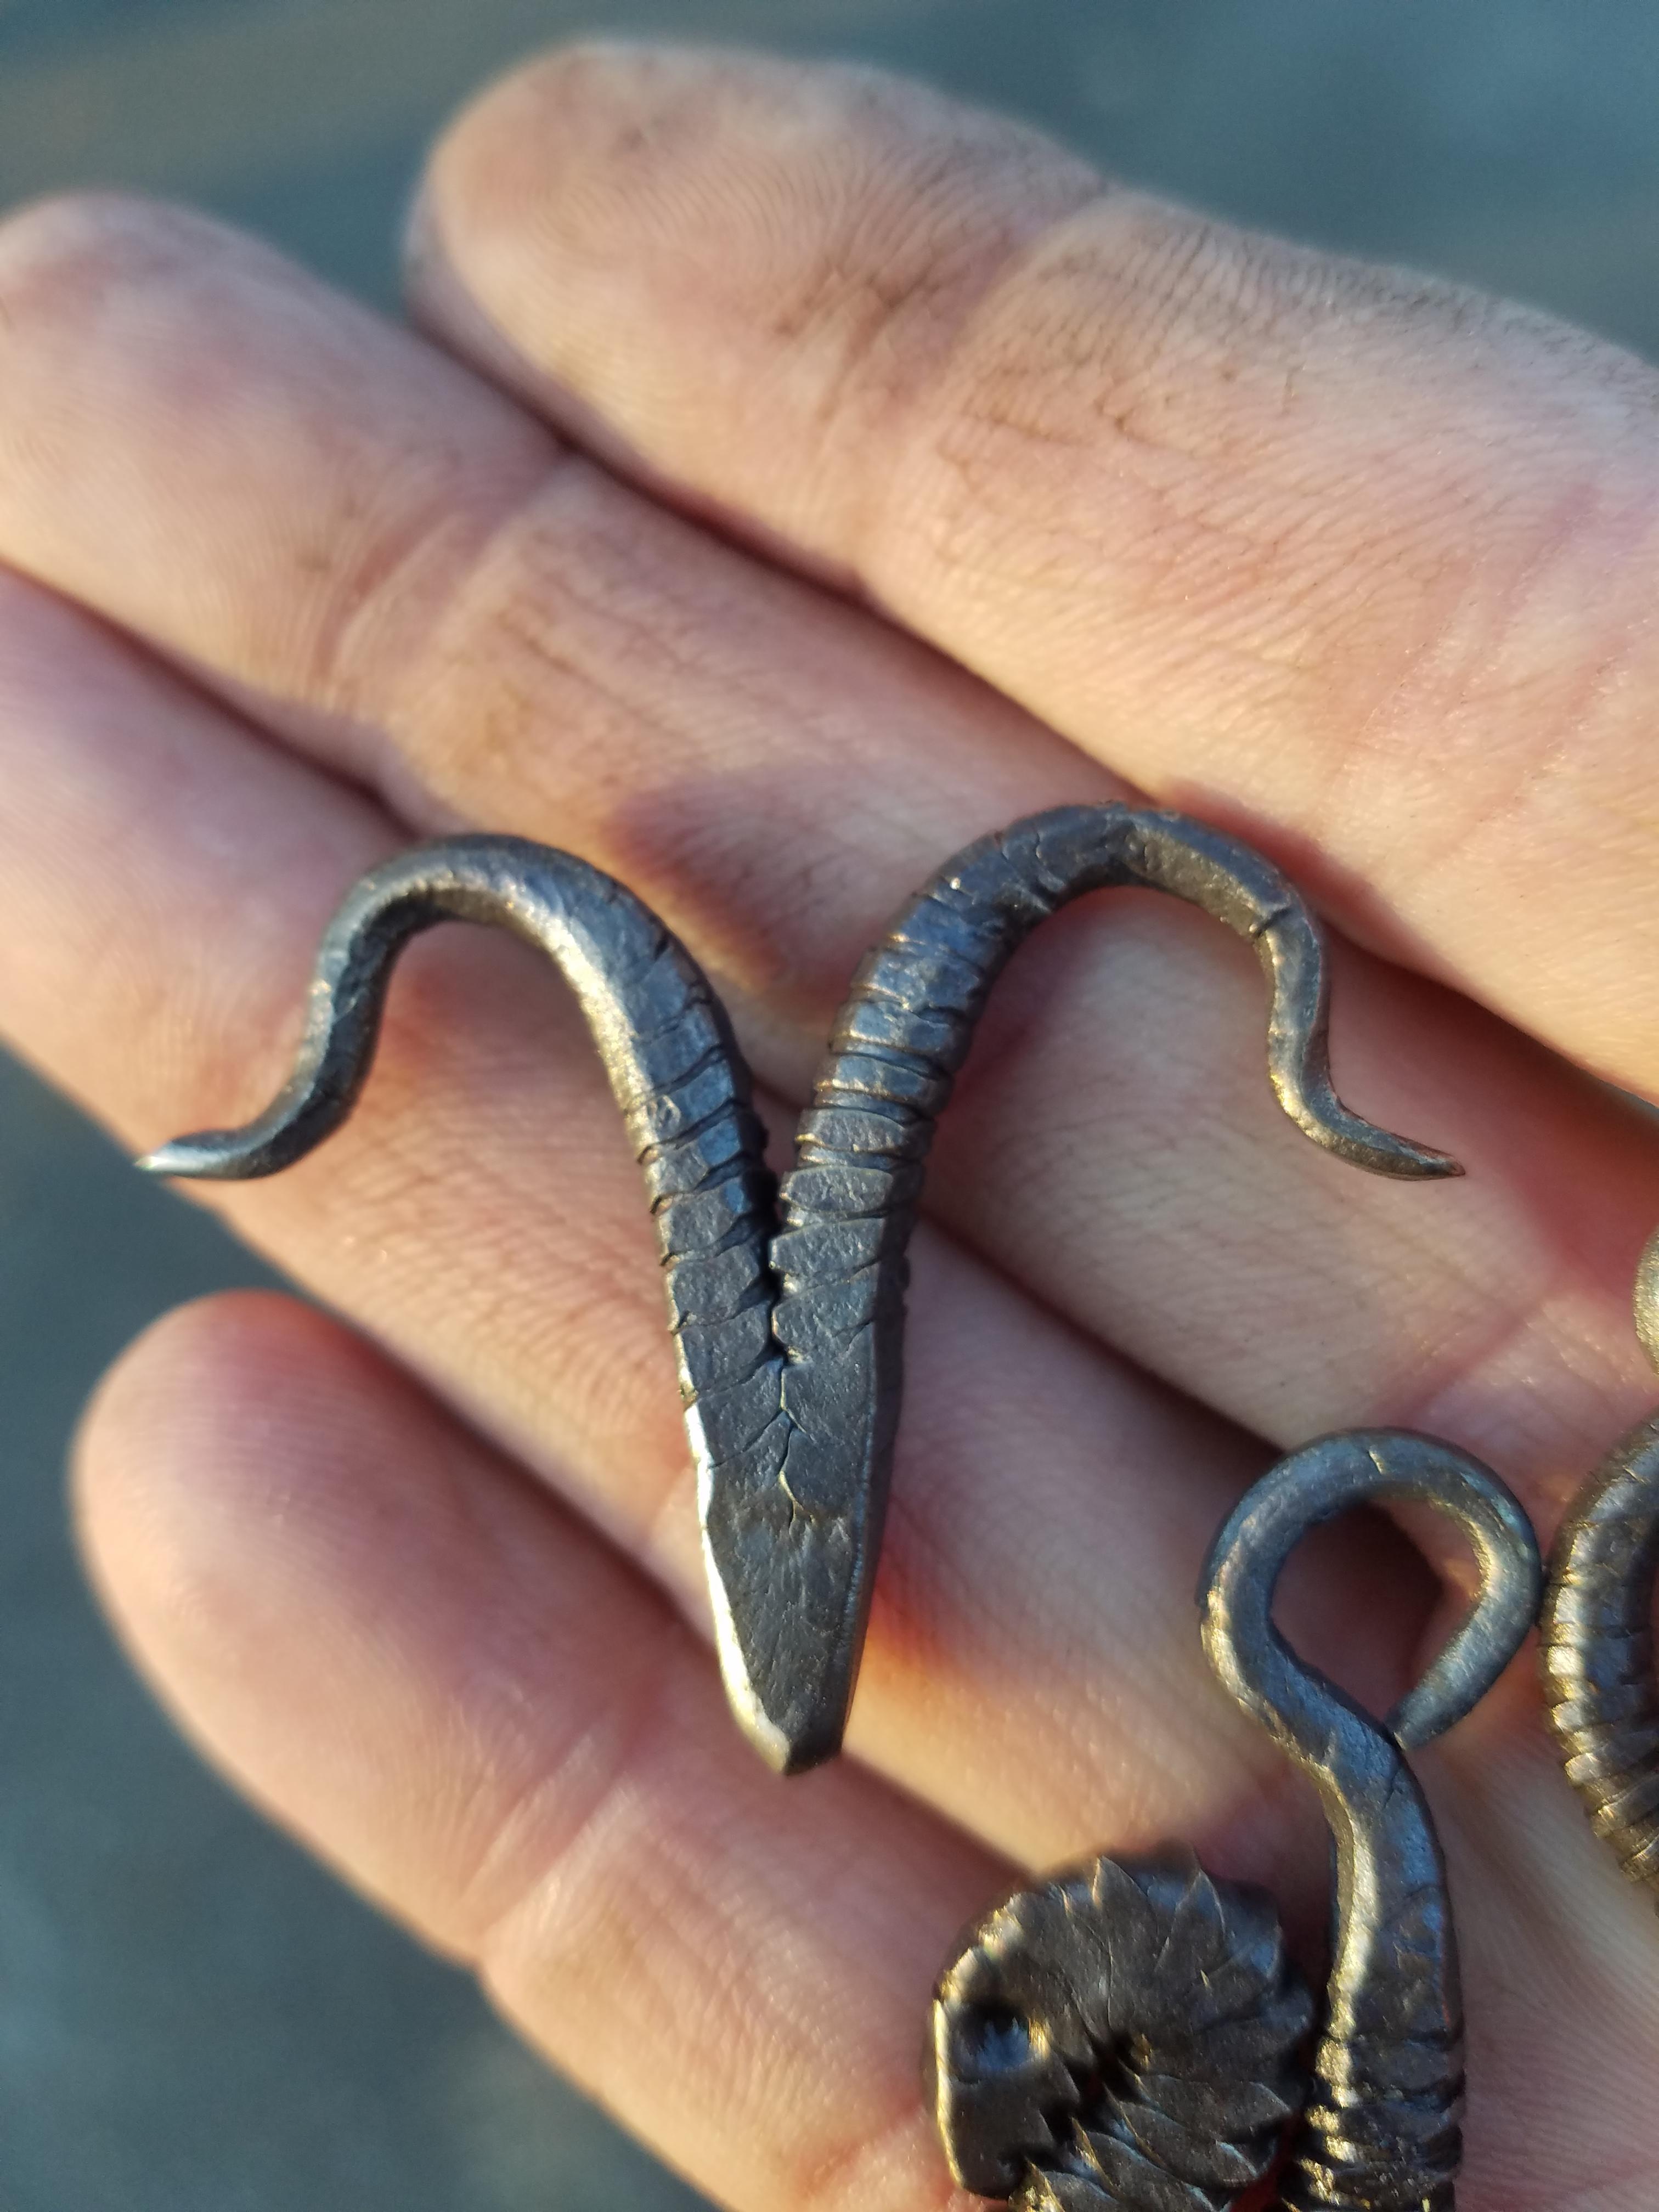
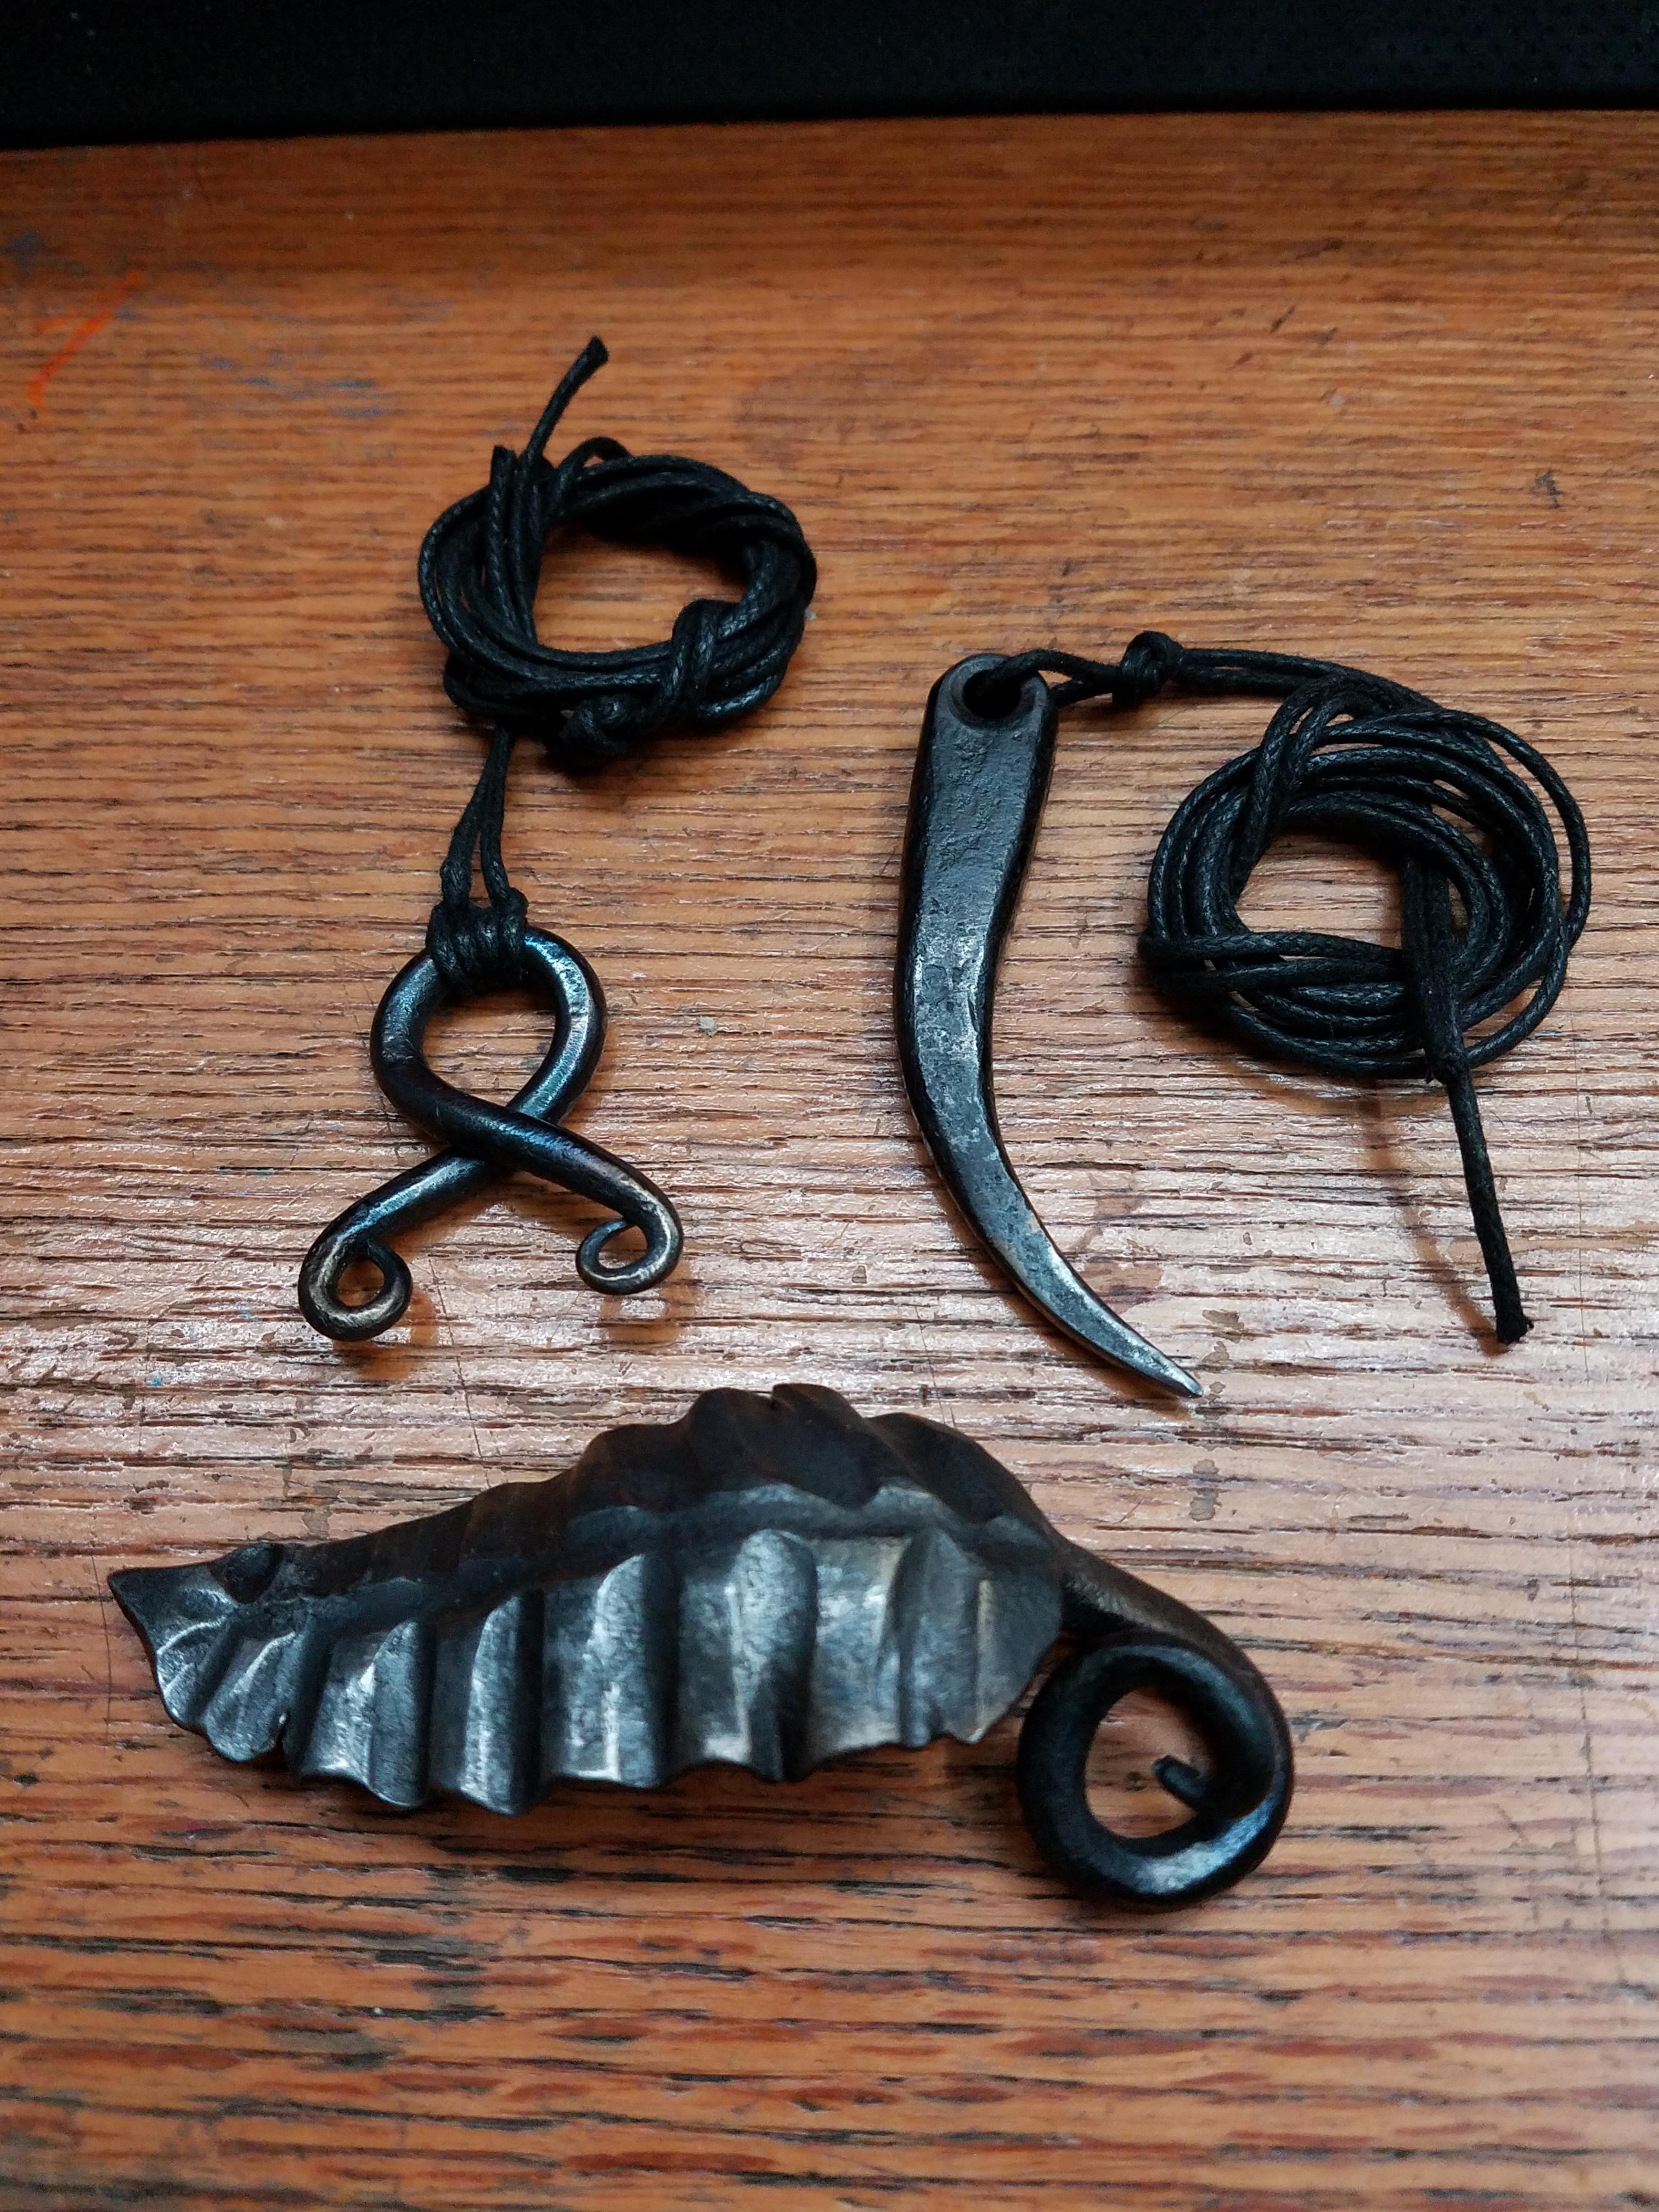
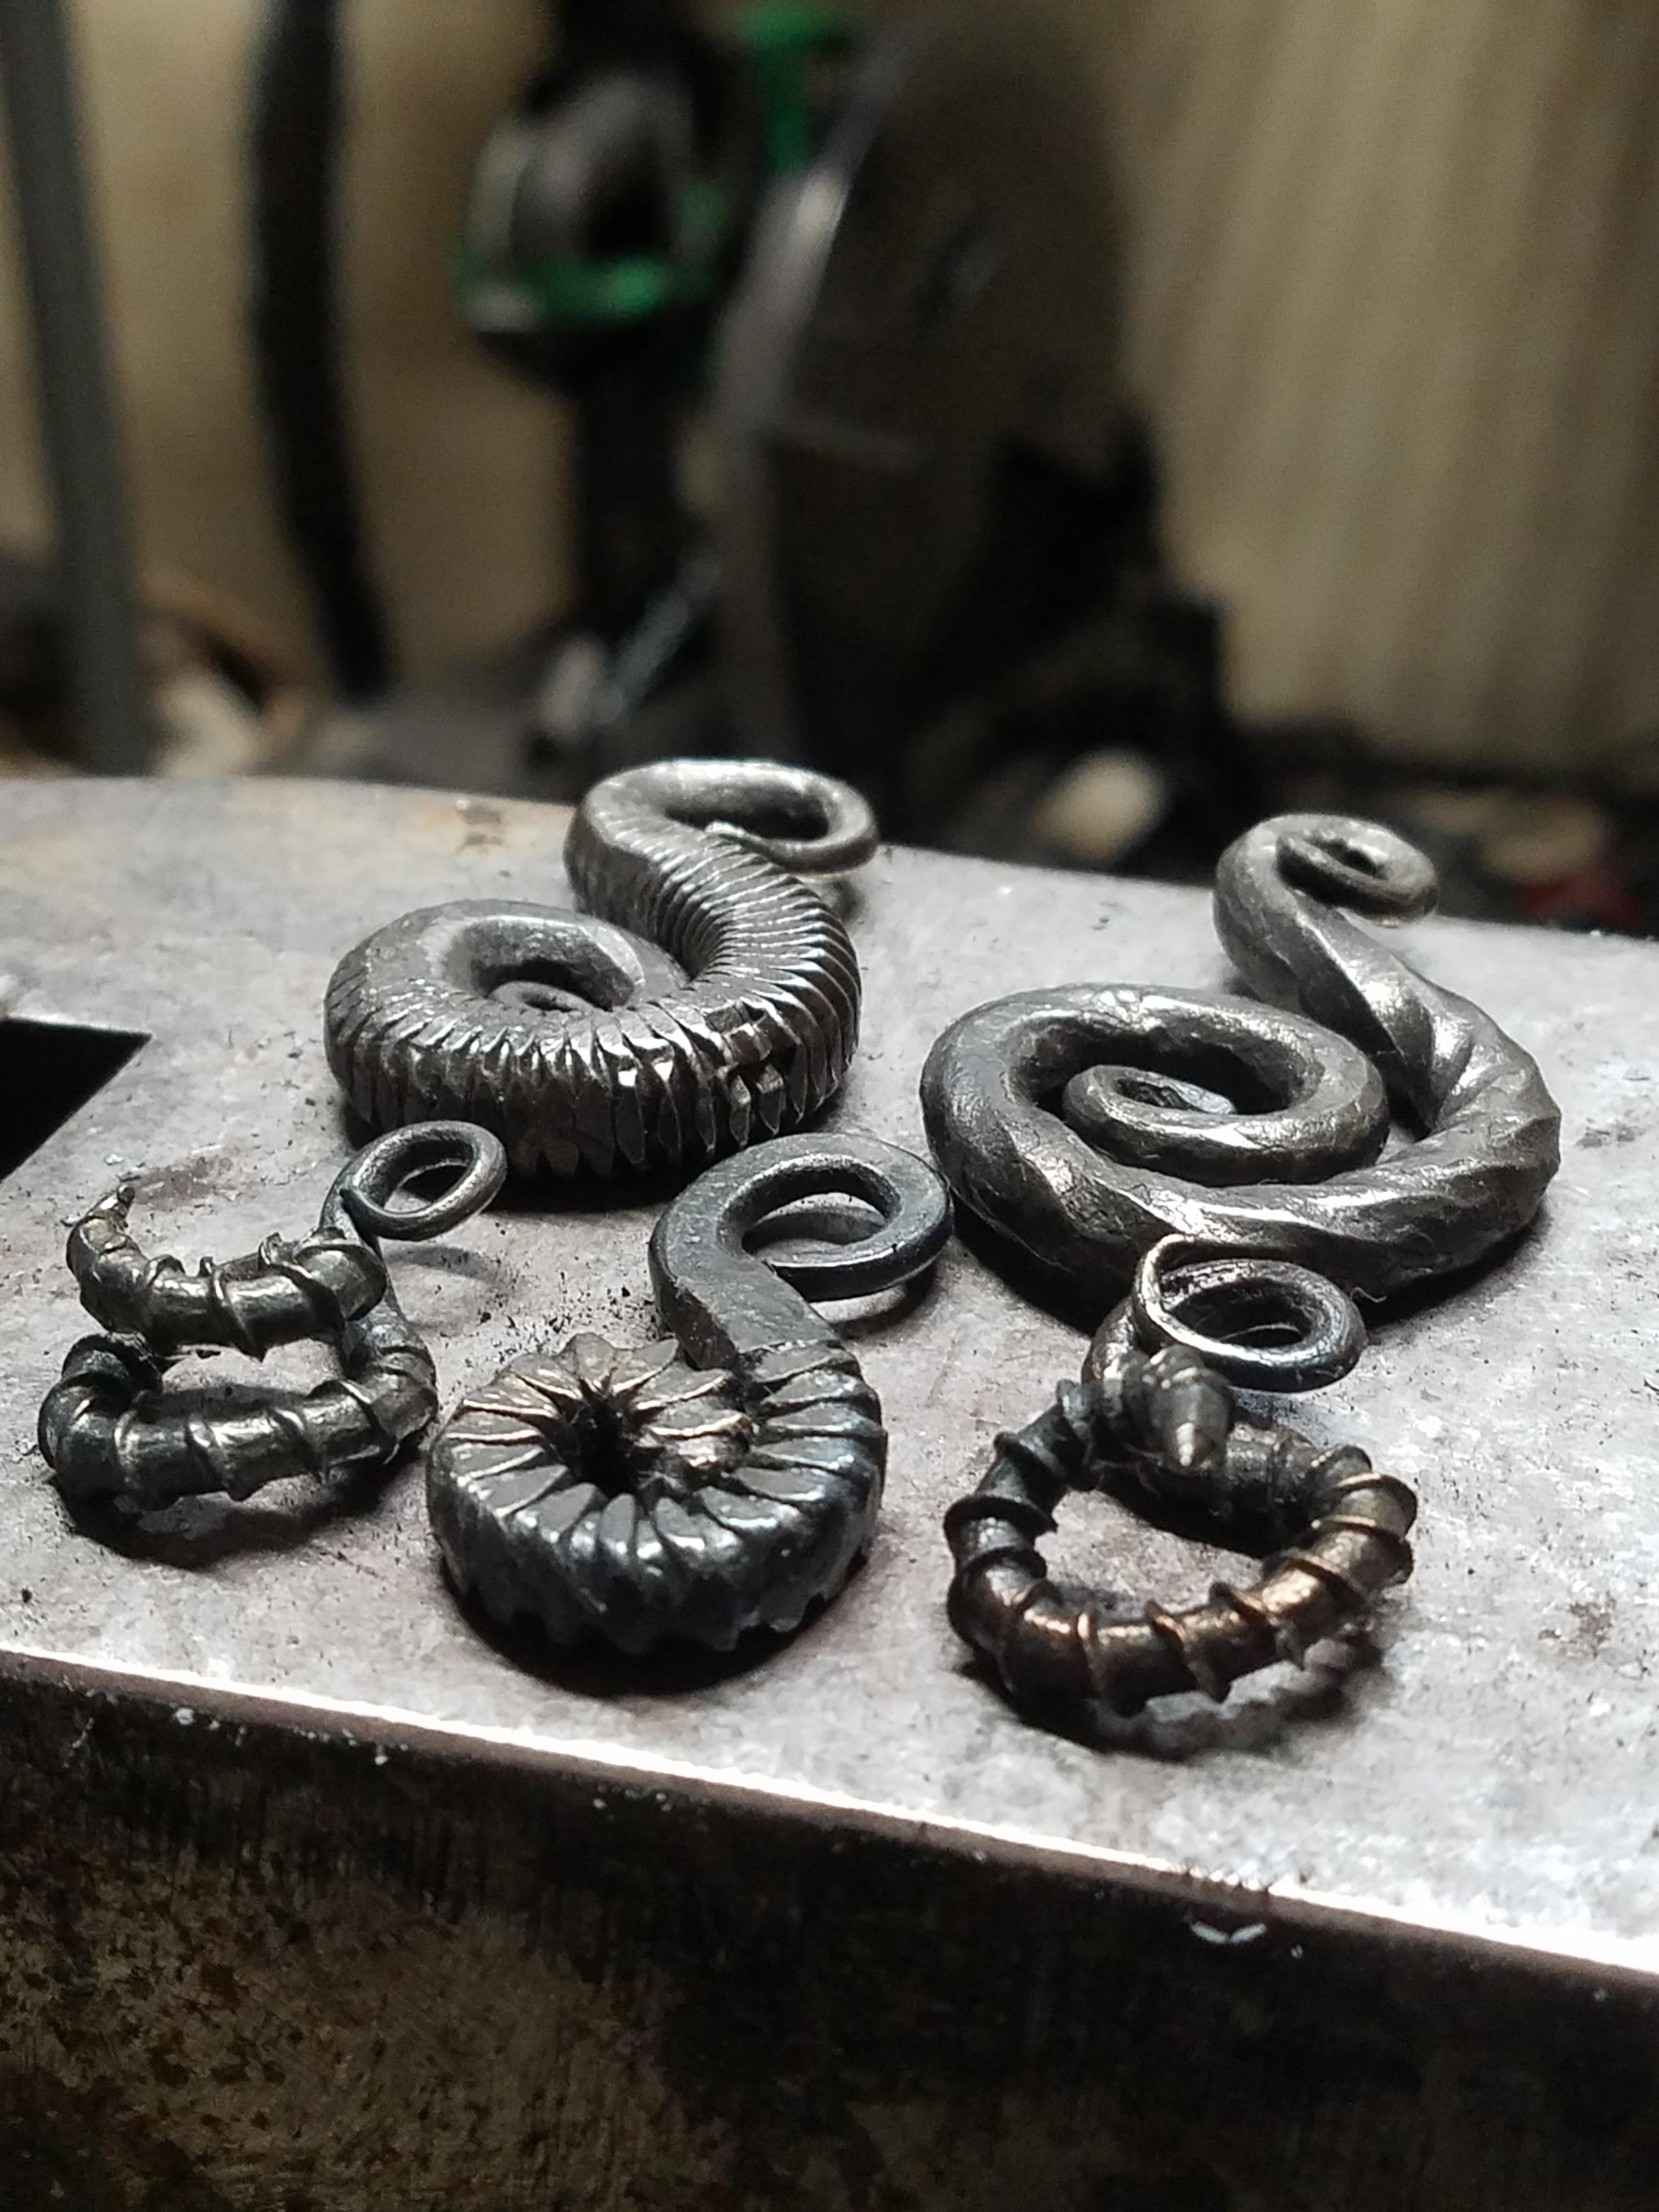
Made some more horn pendants today from stainless screws. One of them ended up looking like some sort of dragon so I punched an eye to finish it off.
-
I have but I found that I distorted the suckers a lot more when I tried to form the pendant loops...
-
28 minutes ago, Kevin Olson said:
Hey olydemon. Those tentacles are very interesting. Could you explain how you made them and possibly show the tools? Thankyou
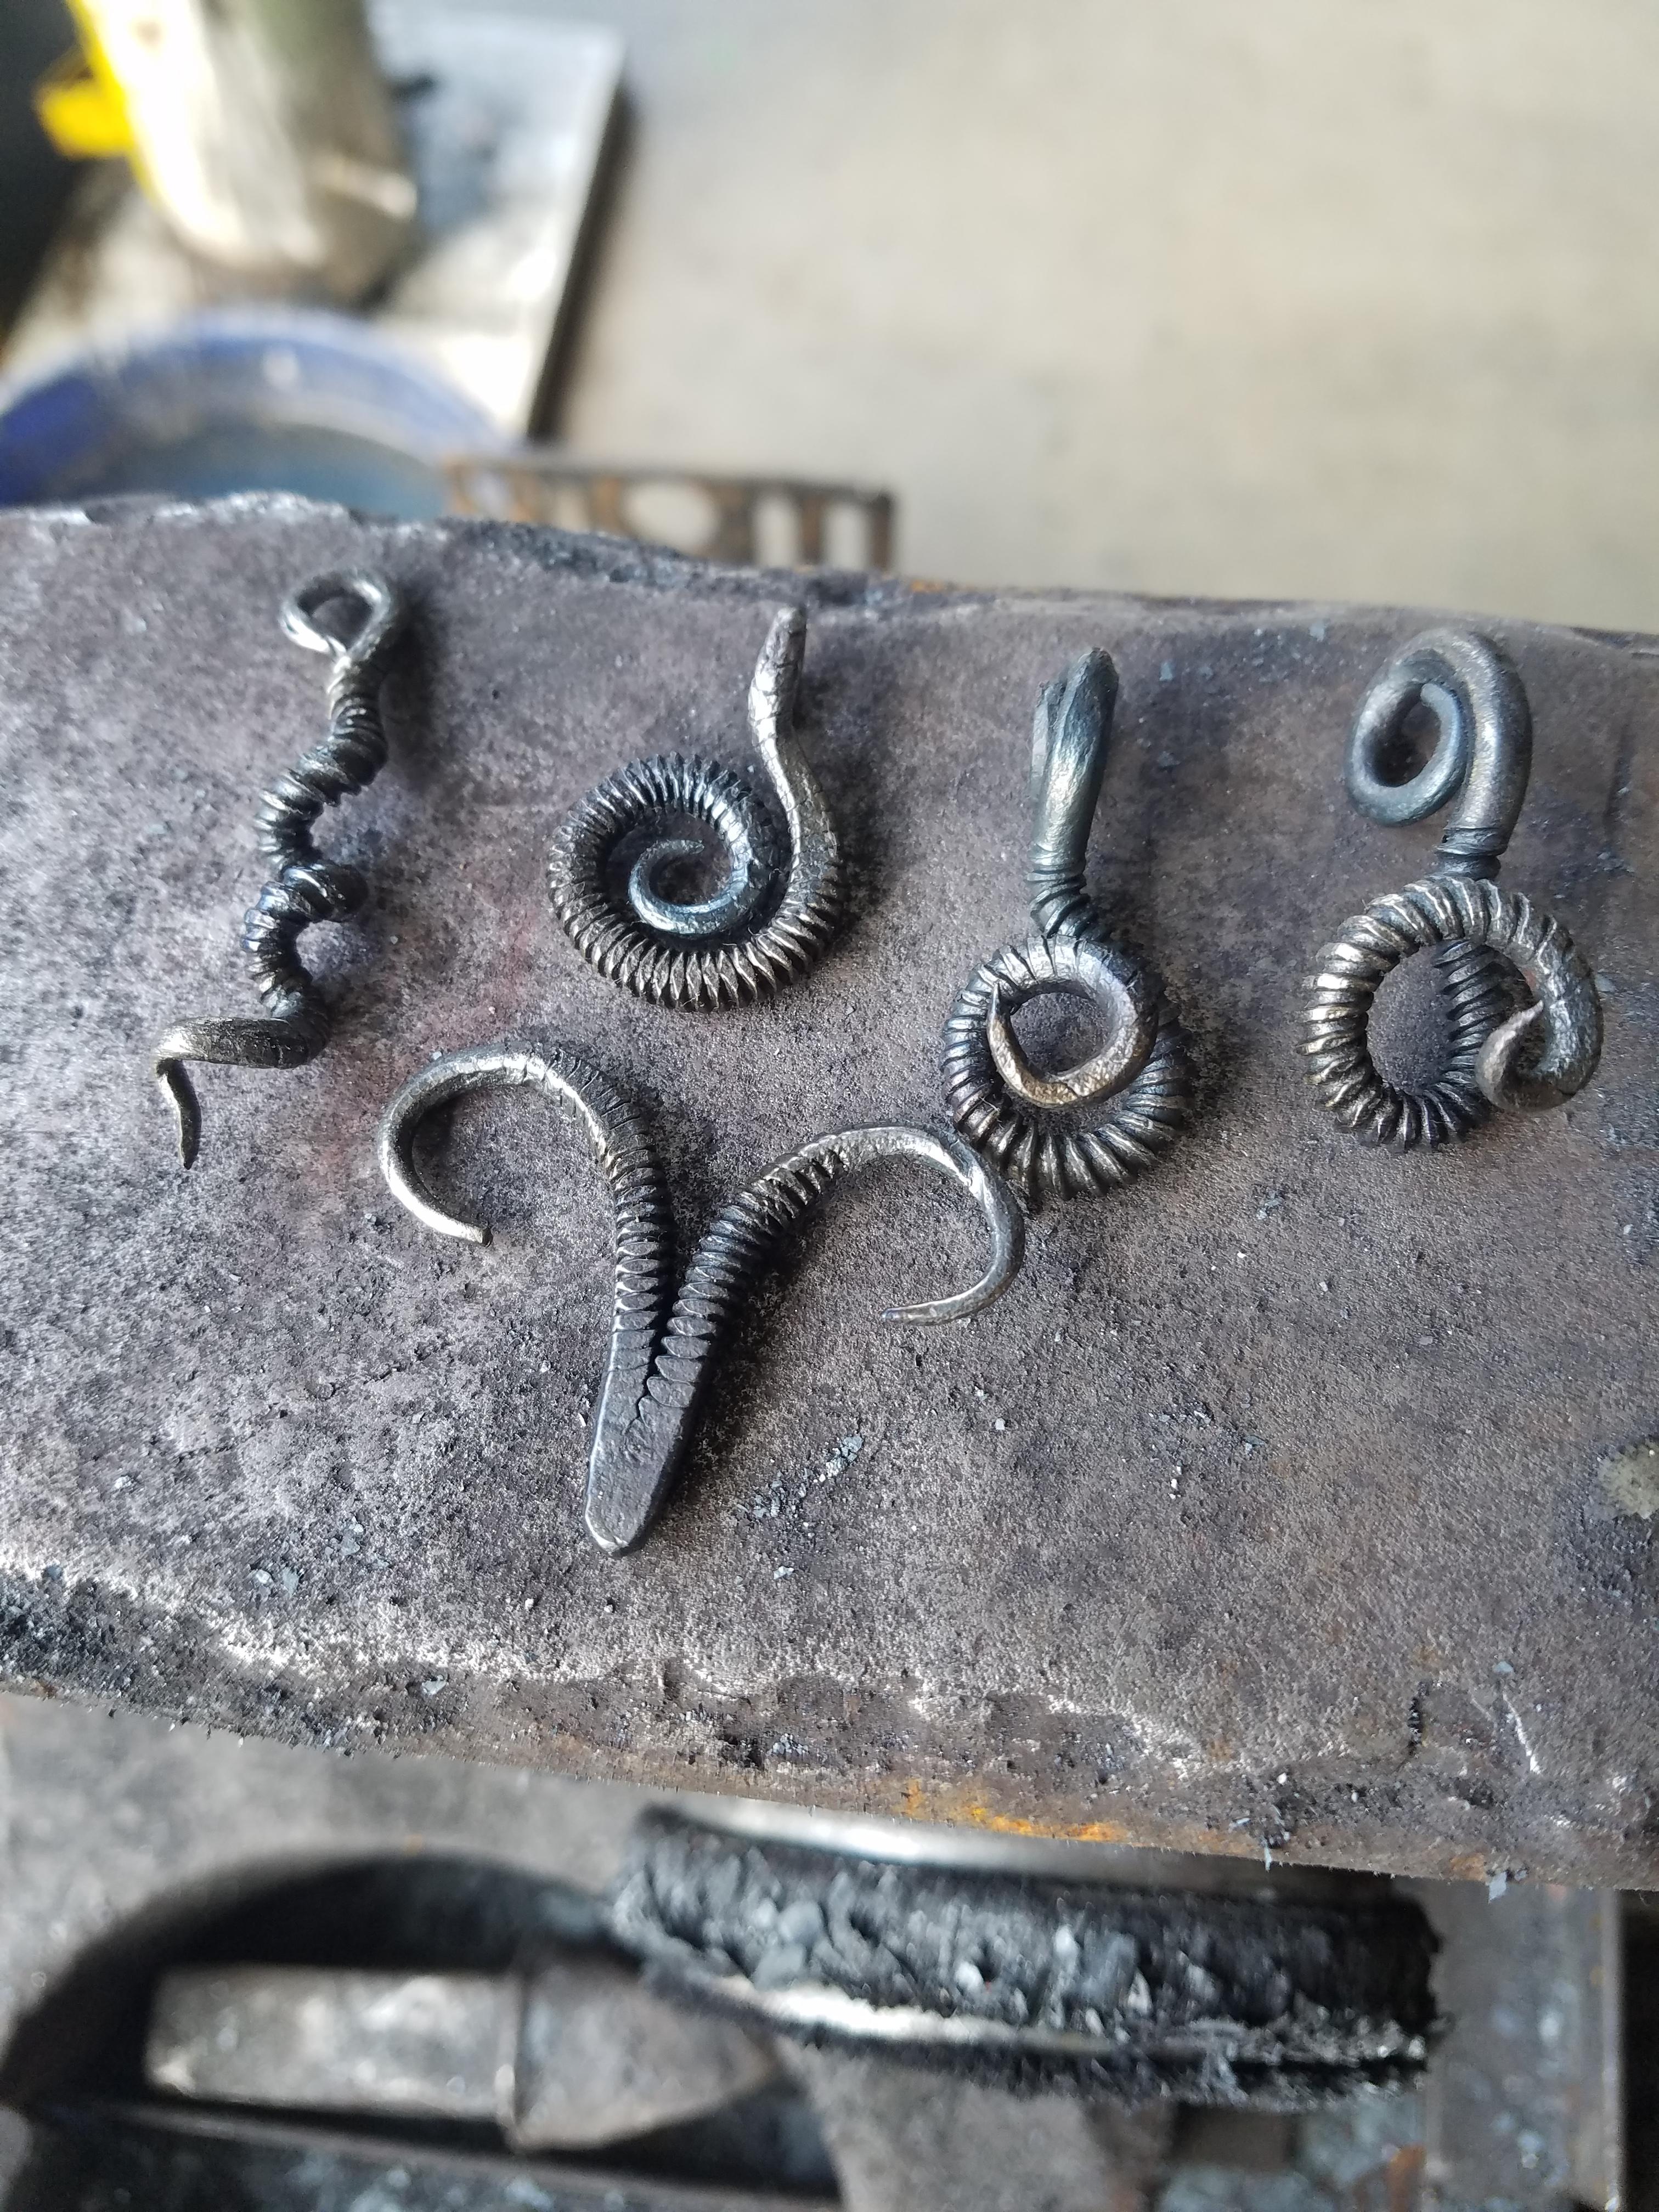
JHCC posted the exact video I would have. Only things I can add are...
1. After I weld the beads I heat the piece up again and flatten them down. It helps to create a nice spot to start the punch.
2. A helper when punching really helps makes the job easier. I have a jig I can use for the larger tentacles, like on the octopus I posted. But for these little pendant ones,. they are too samll for the jig so I get my oldest kid to help.
-
On 2/23/2019 at 1:15 PM, Daswulf said:
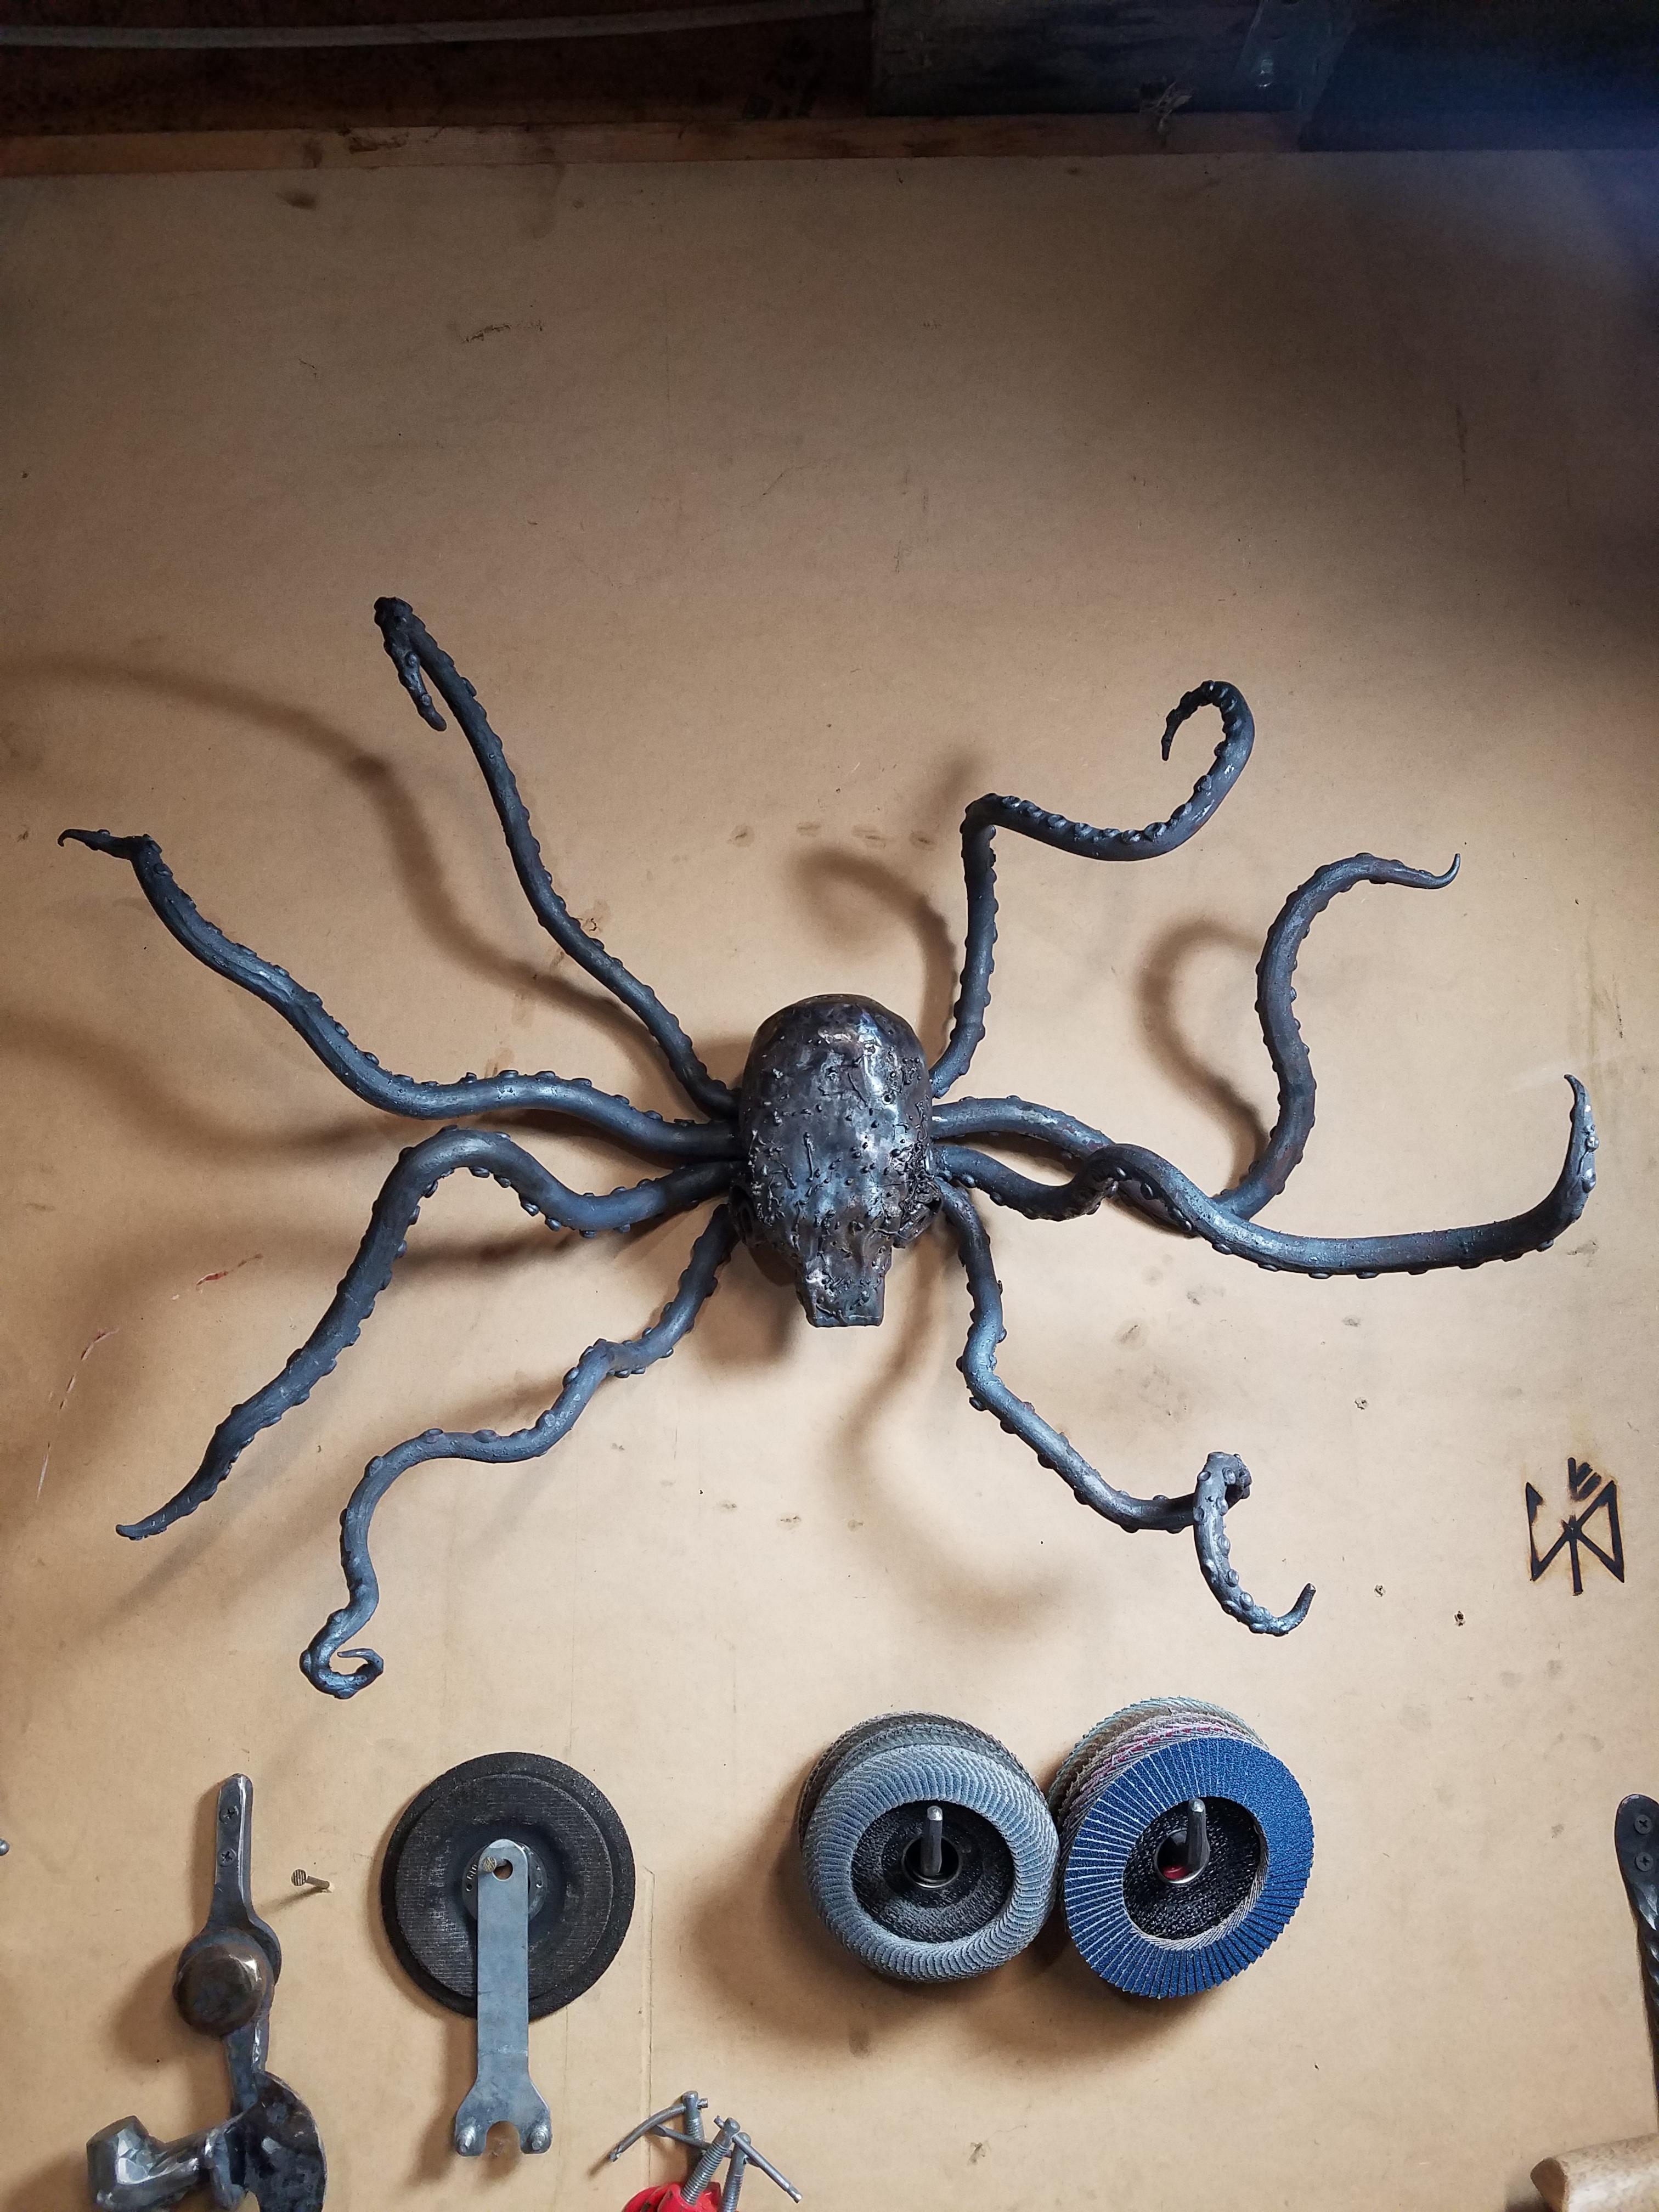
Olydemon, that's a wild looking octopus! Like the pendants too.
Thanks! Made some more tentacle pendants posted below.....
On 2/23/2019 at 3:35 PM, Cincinnatus said:Das, Olydemon, Aus, John - great looking pieces! Guess I need to get off my rear and finish some pieces.
Thanks!
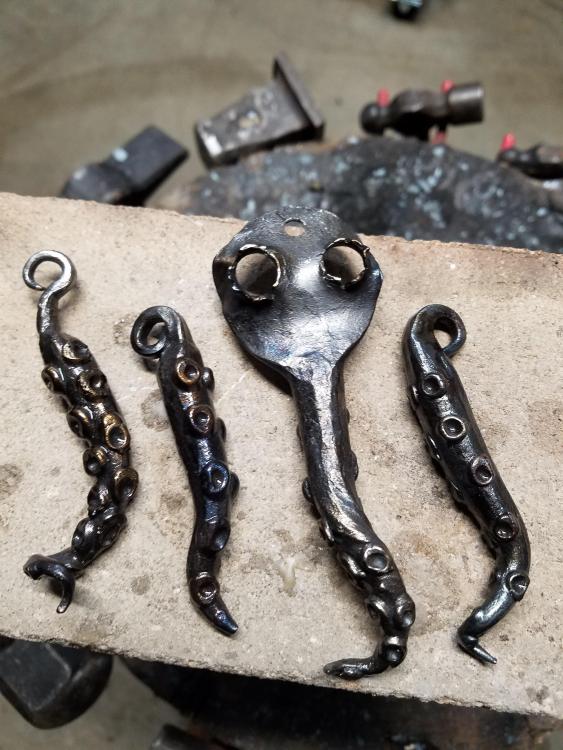
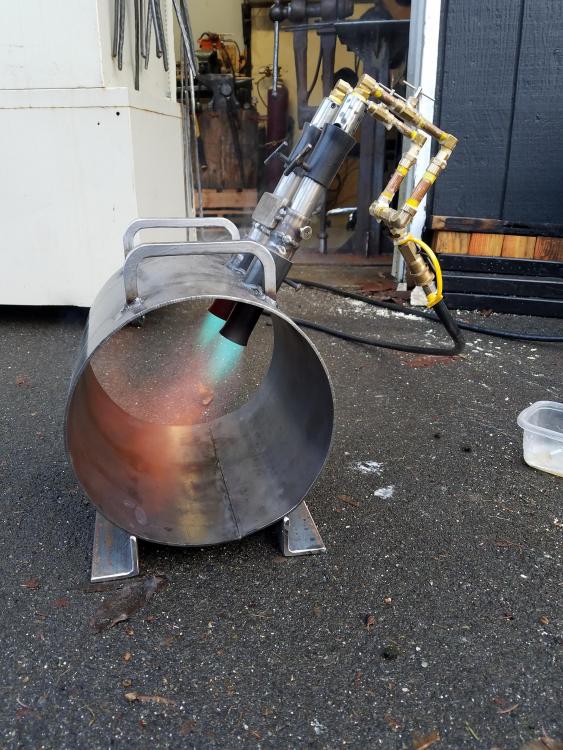
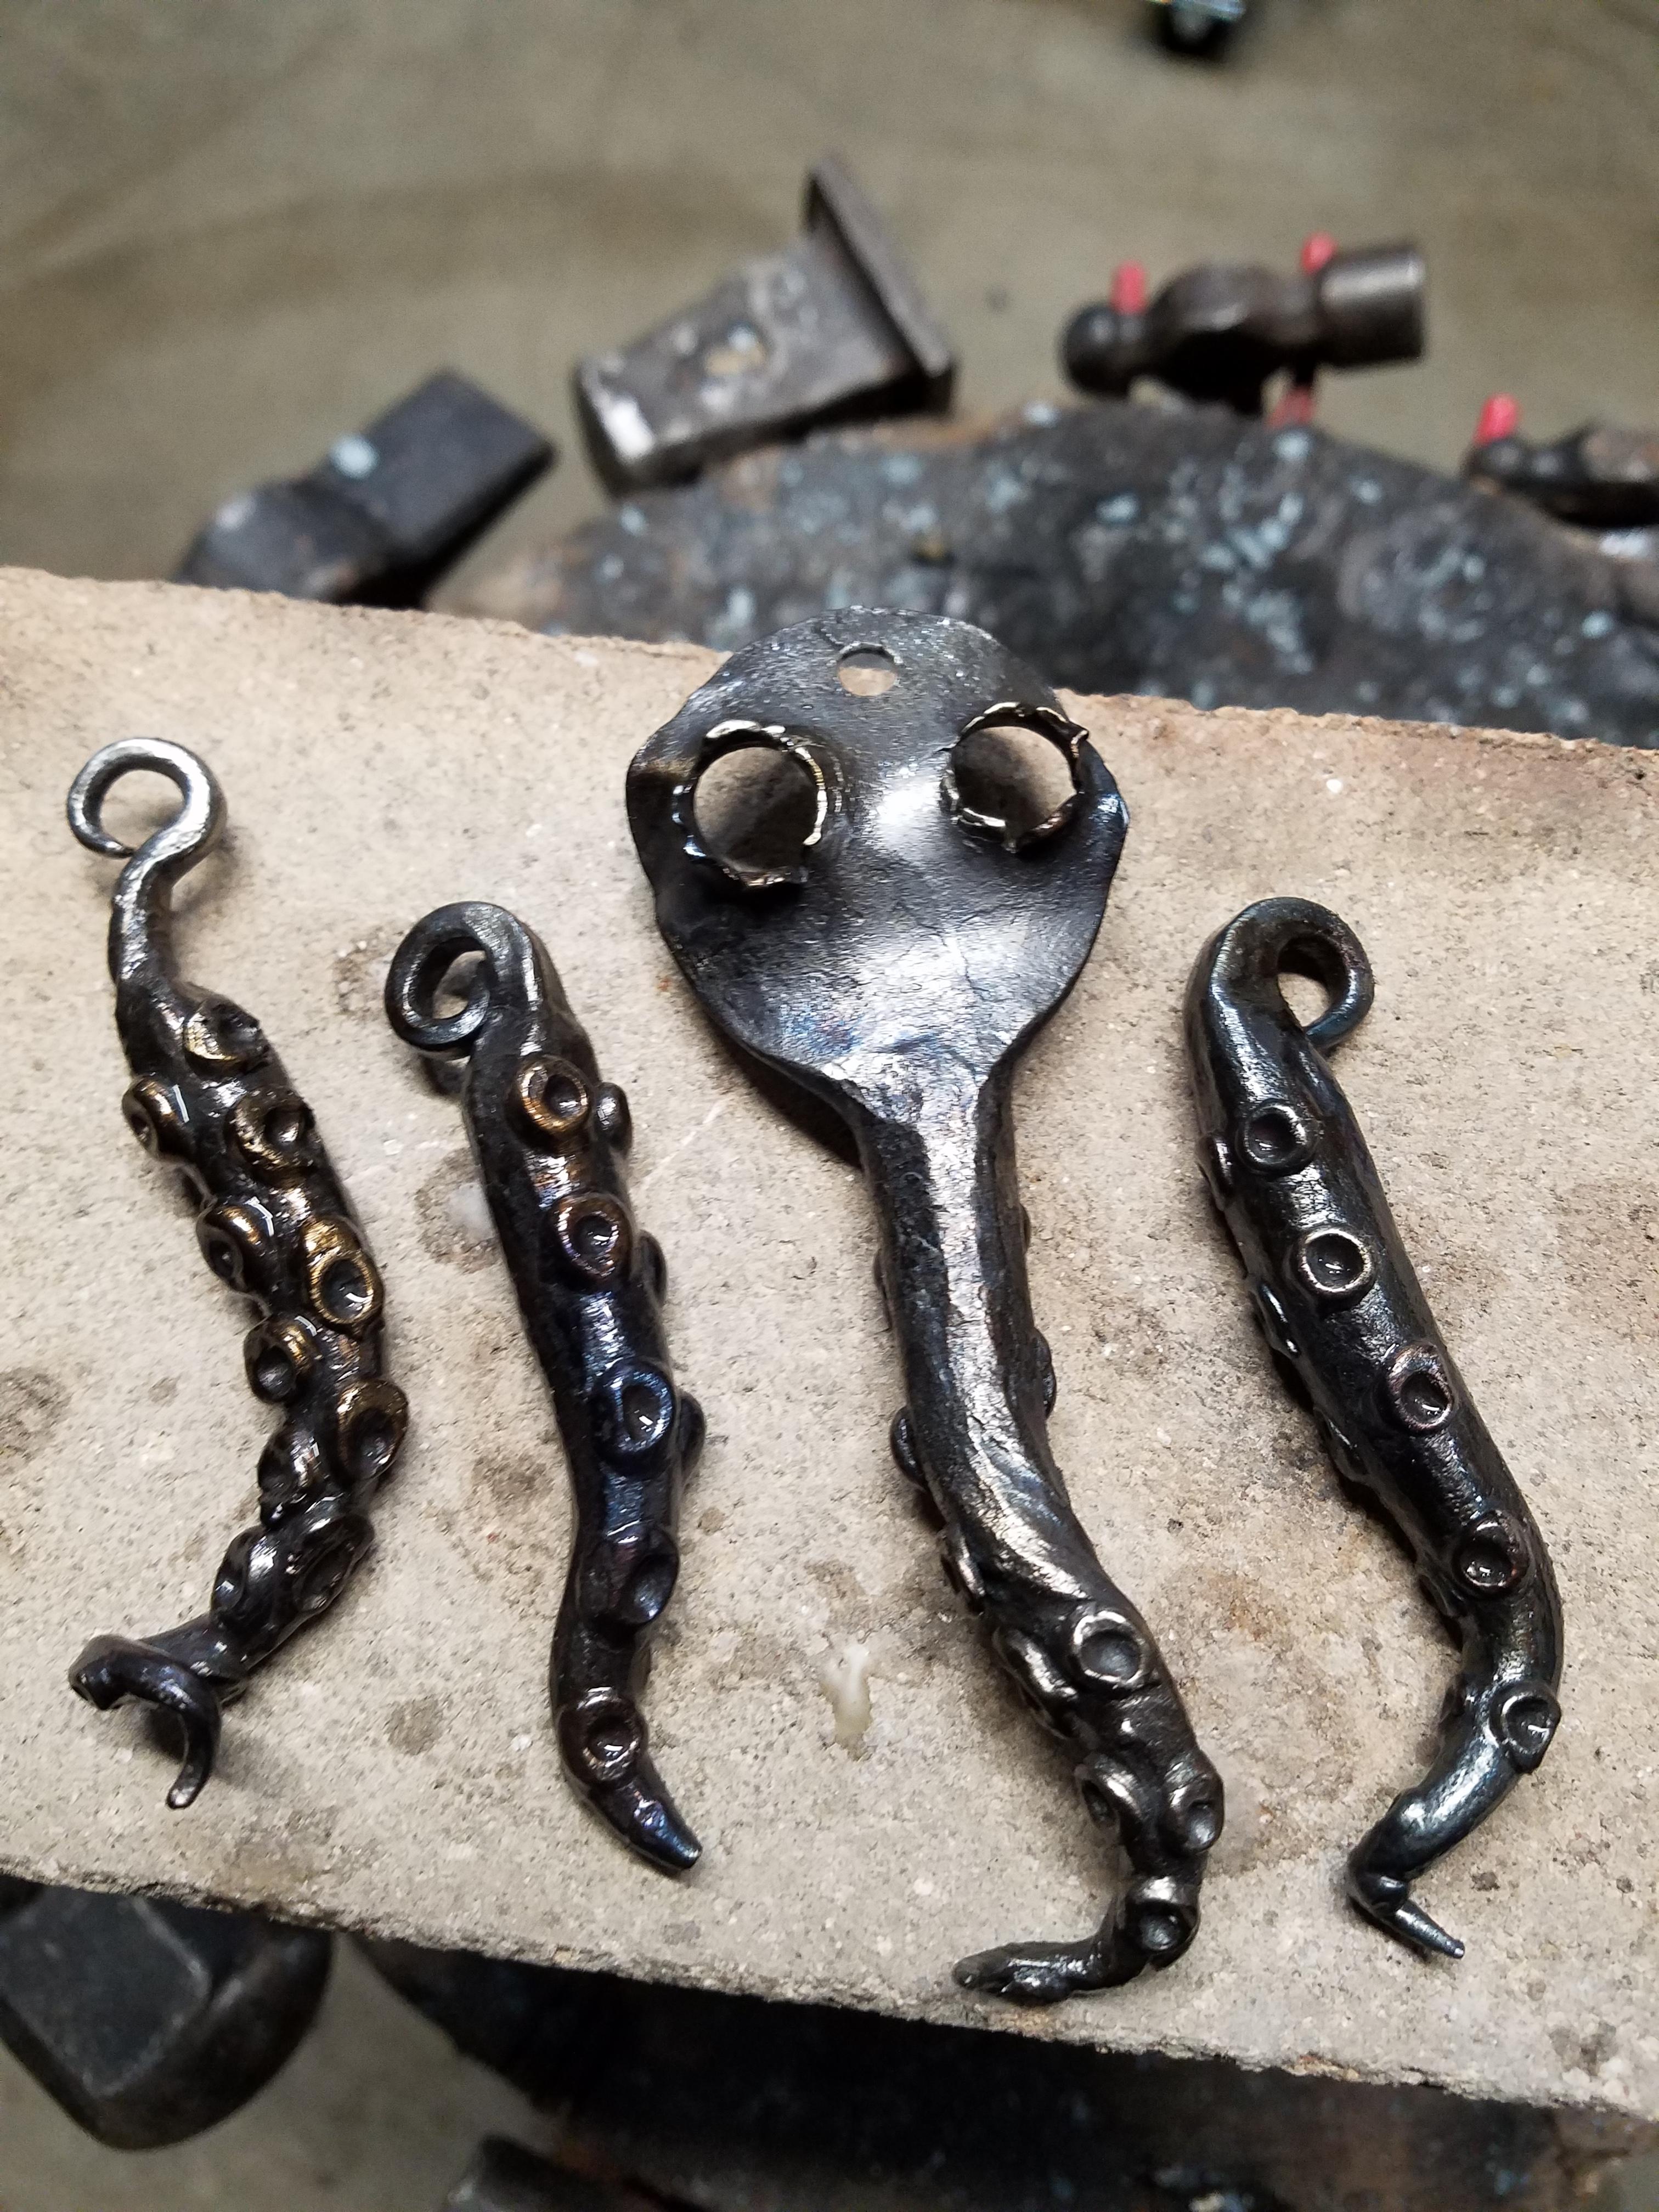
Today I made tentacles, a leaf, a tiny troll cross and a bear claw... and finished the gas lines to my double burner forge...


-
Really cool, it's almost a mixed media piece with the laser cut flat and forged tentacles. I need to make some tentacles this weekend for an etsy custom order.. Mine will be pendant size this time, but my last tentacle project was rather large... made from 3/8" and 1/2" bar....


ALSO.... (edit to add note since my reply to previous and a new post were merged)
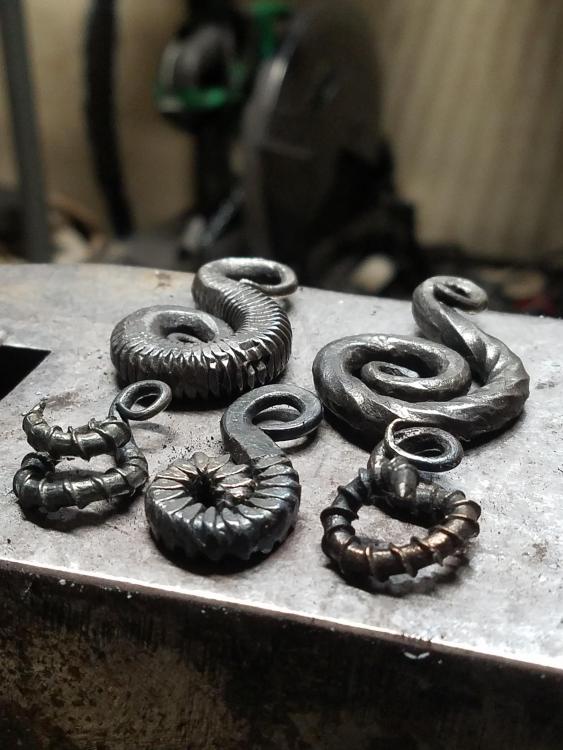
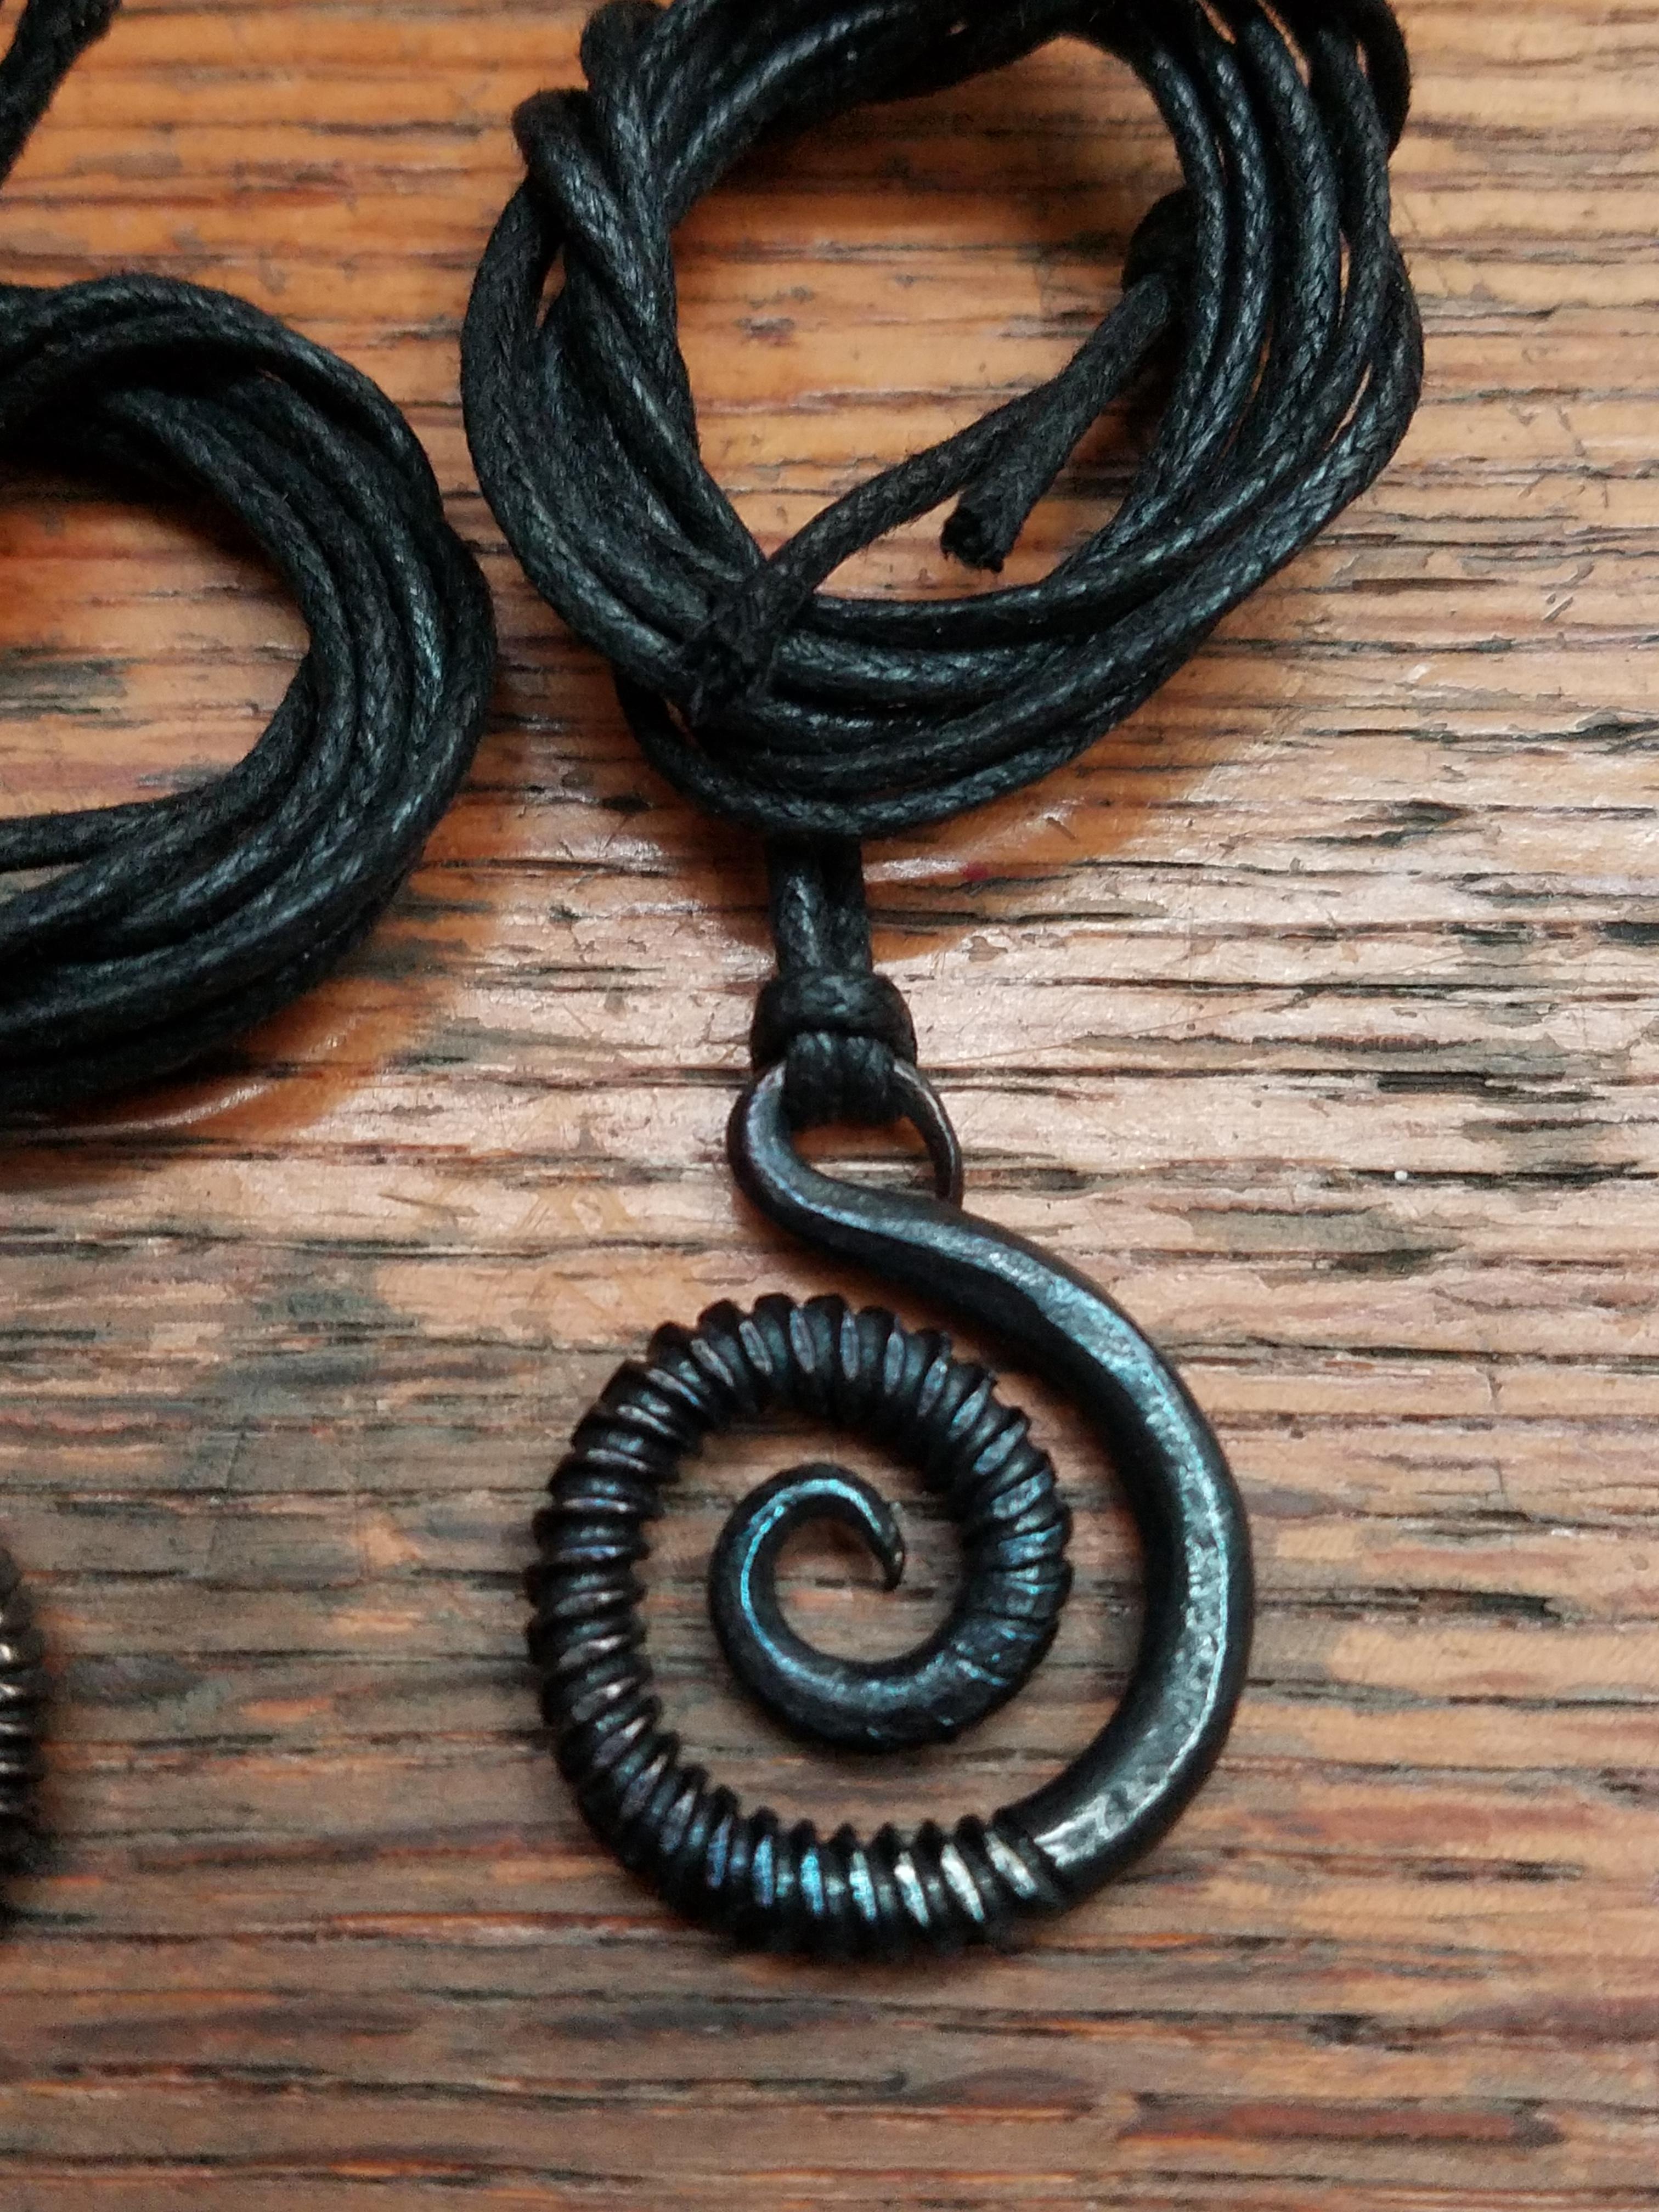
Not done today, but last weekend... Lots of pendants made from old screws....


-
23 hours ago, pnut said:
Have you tried rubbing anything dark into them then wiping off the high spots like you do with engraving.?
I have only treated a few with beeswax to protect from rust. The idea of coloring the low spots does sound interesting, may have to give it a try.
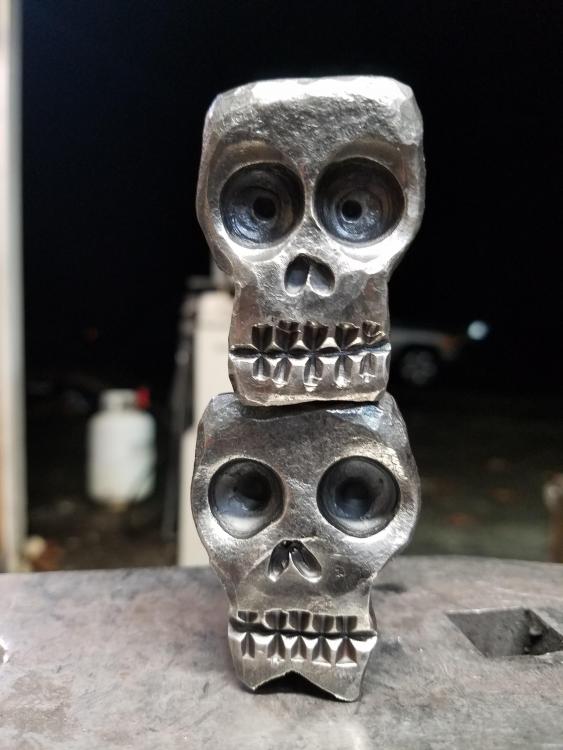
22 hours ago, ThomasPowers said:I've been known to glue beads into eye sockets.
Beads is a good idea. I was also thinking of drilling a few holes through the eyes, then smashing some copper wire into the holes.
-
On 1/28/2019 at 4:01 AM, pnut said:
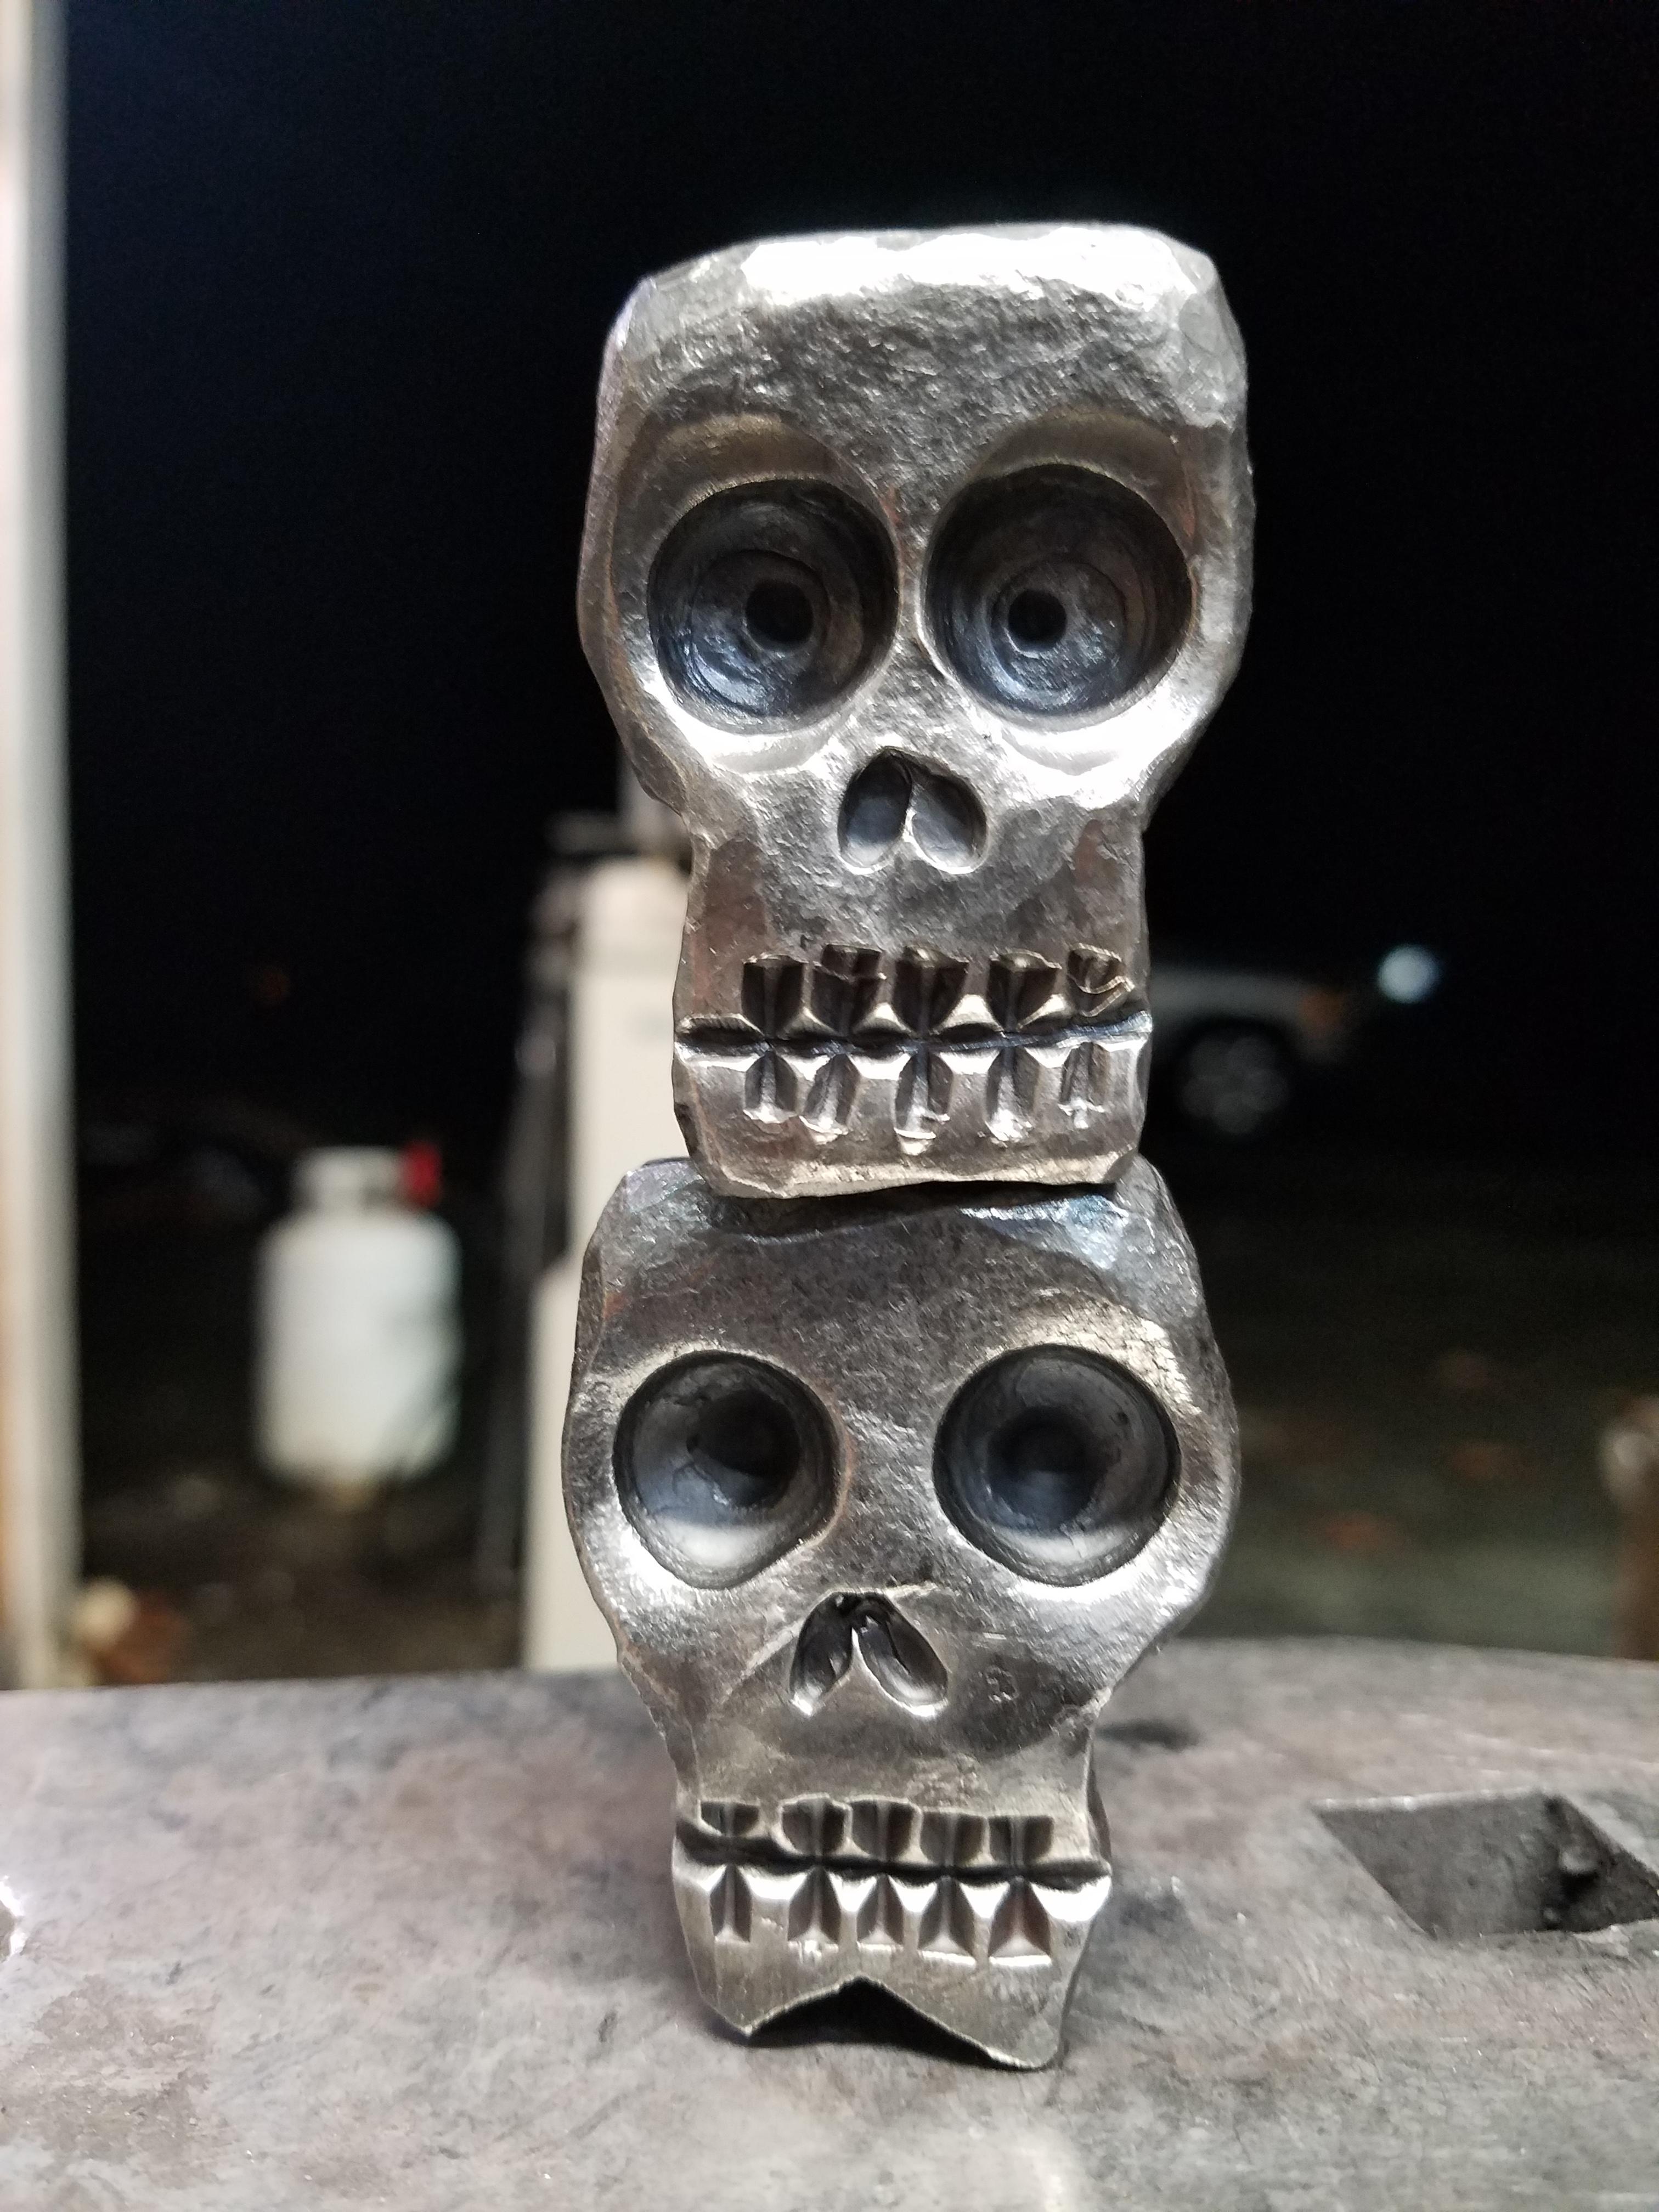
Olydemon, I've never seen anyone actually make a skull. How do you get the bulge at the top? Upset it or draw down the jaw?
Yea, basically a bit of both. I start by rounding the top some, then I go at the bottom of the jaw over the anvil. The last thing that gives some shape is punching the eyes.
-
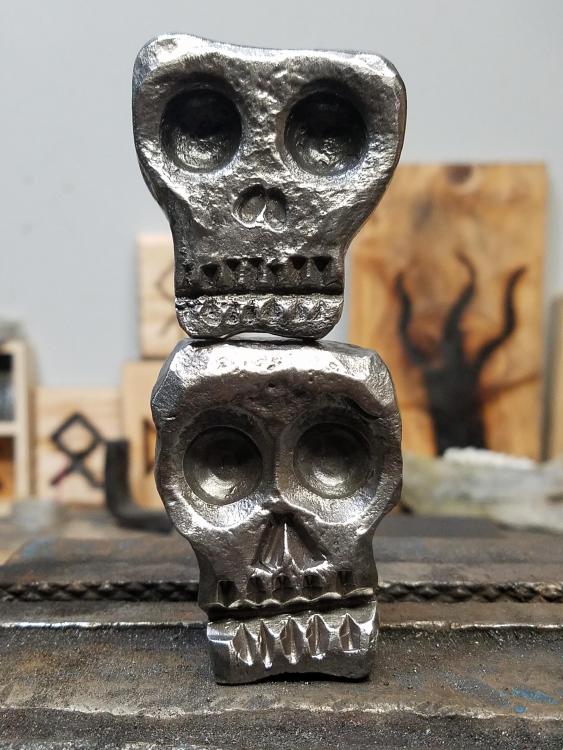
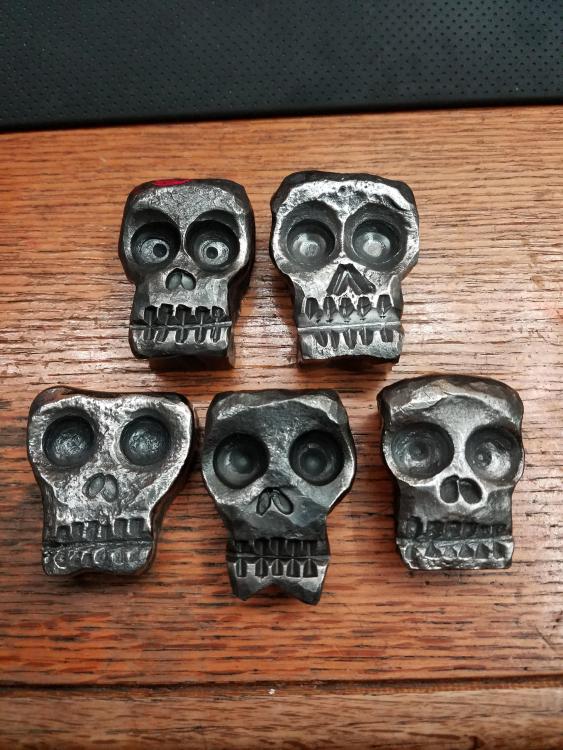
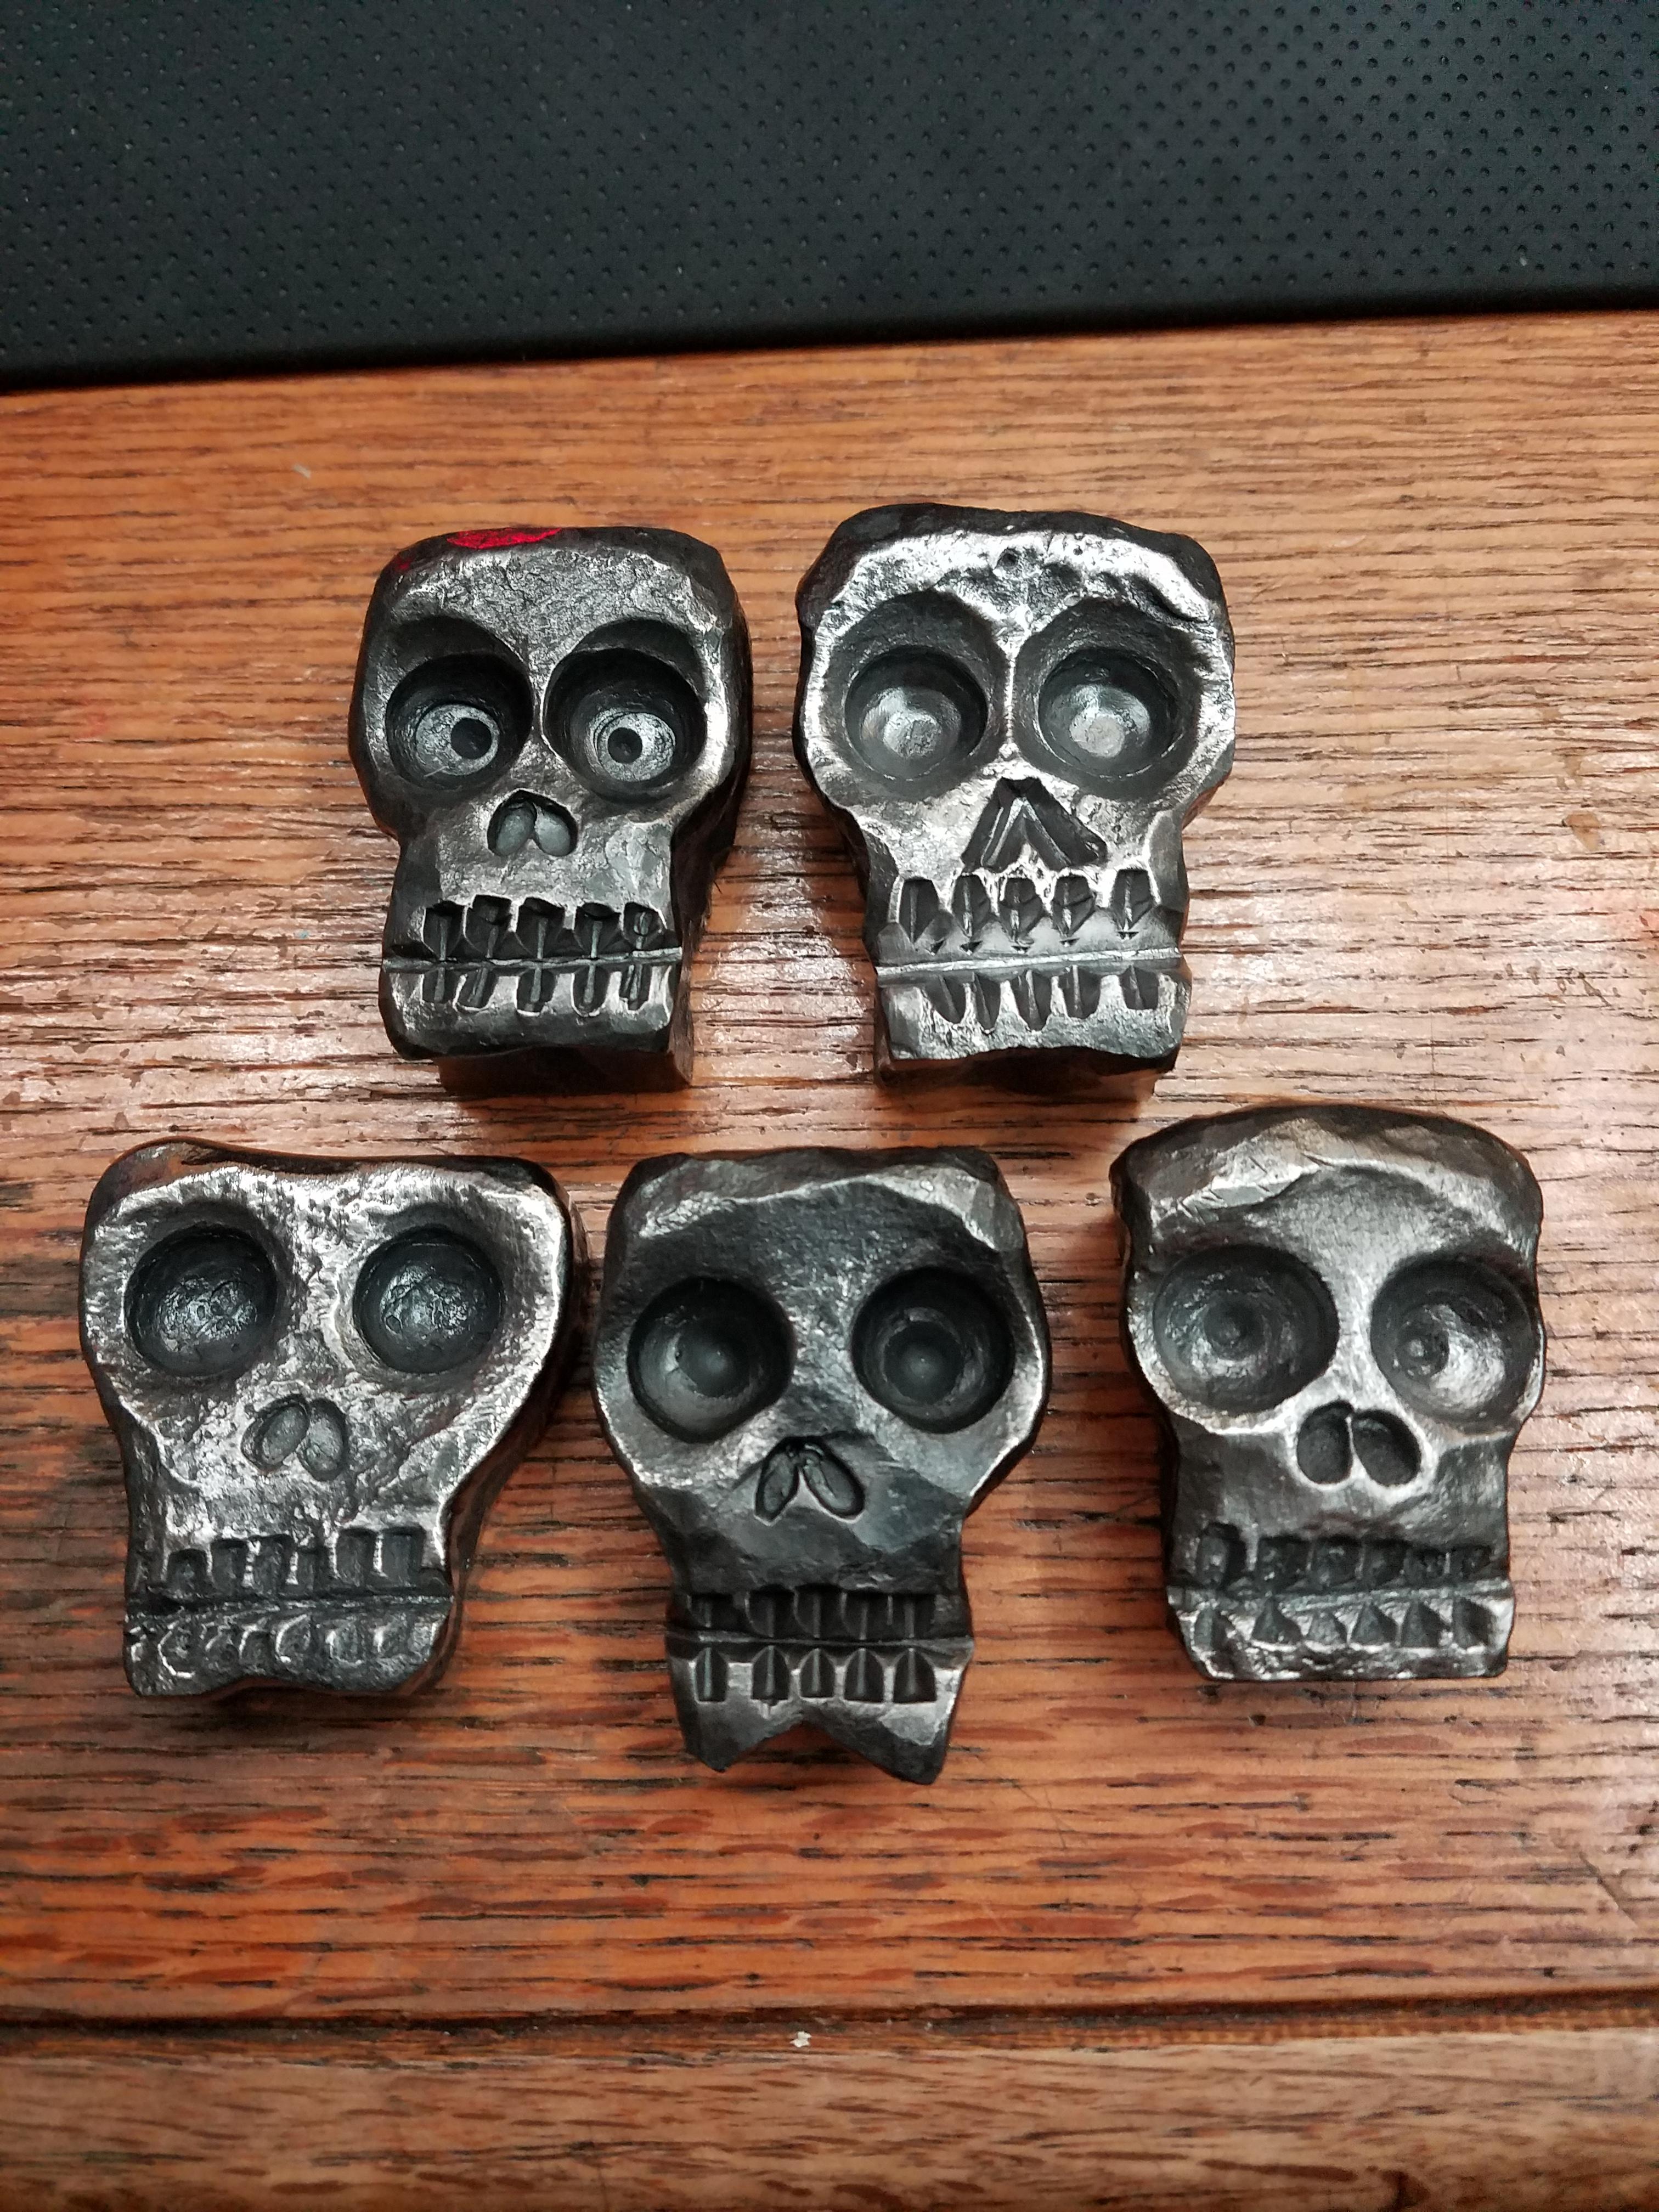
This weekend I worked on some blockhead style skulls. 3 are made from 4140 and 2 made from some random splitting wedge that was in my garage. I usually make smaller pendent sized skulls so trying these larger ones was a fun challenge.
The chunks of 1 inch x 1.5 inch 4140 sure takes a lot more effort to work than the 3/16" mild flat bar I am used to.
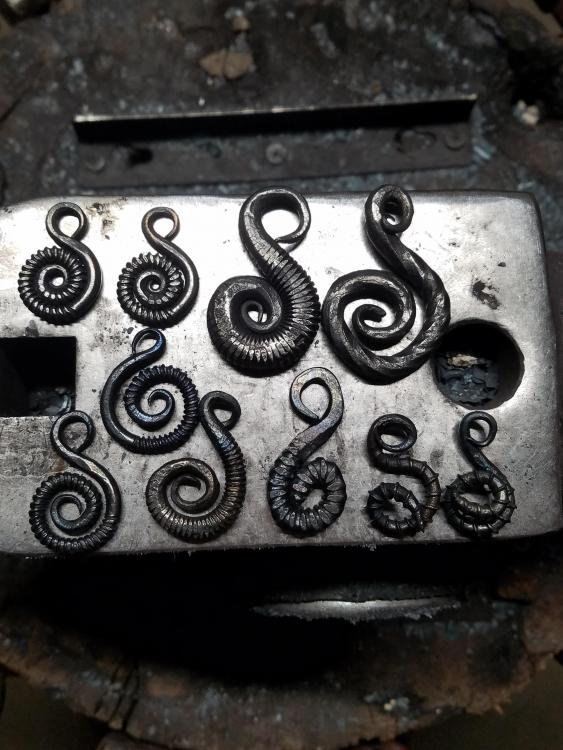
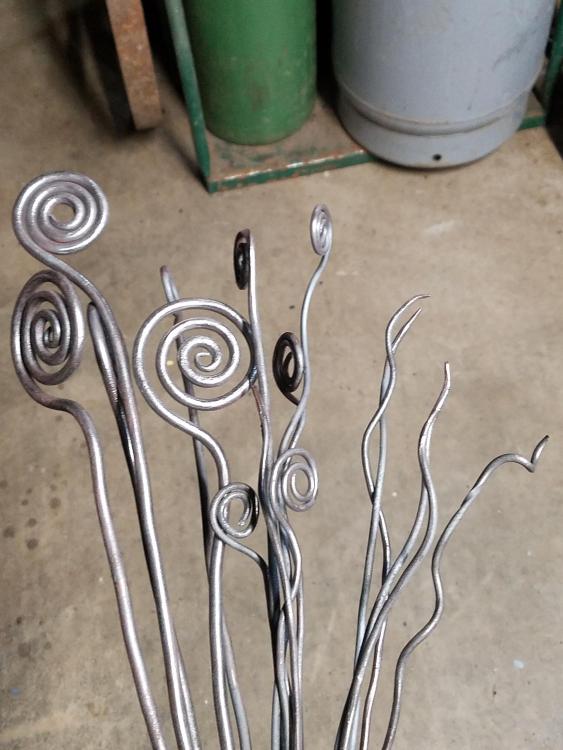
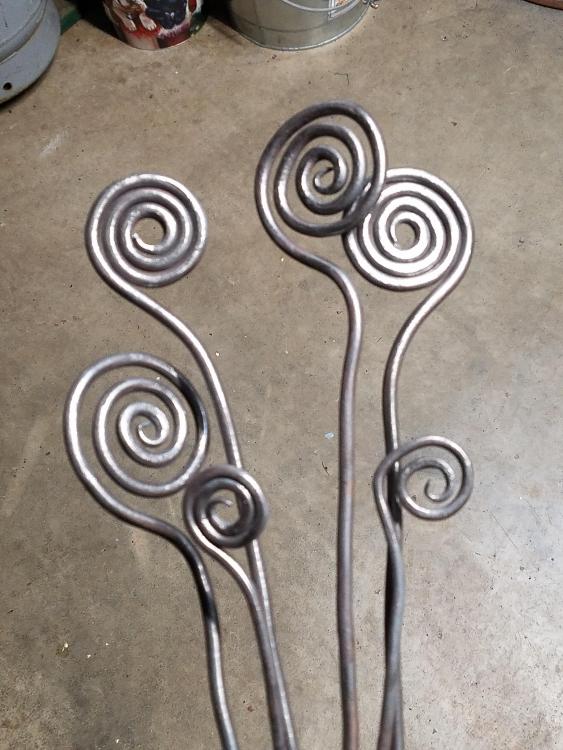
I also made some spirals out of spring steel to later be bunched like a plant, then welded into a large gear as a base for future yard art.
-
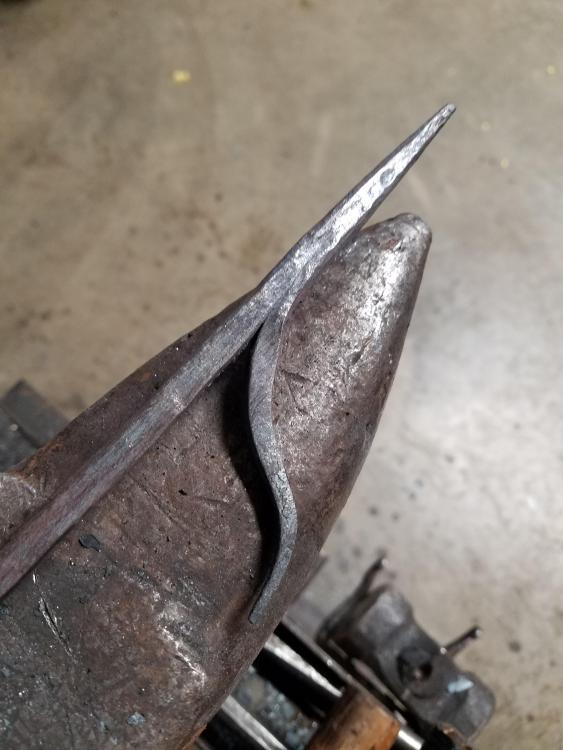
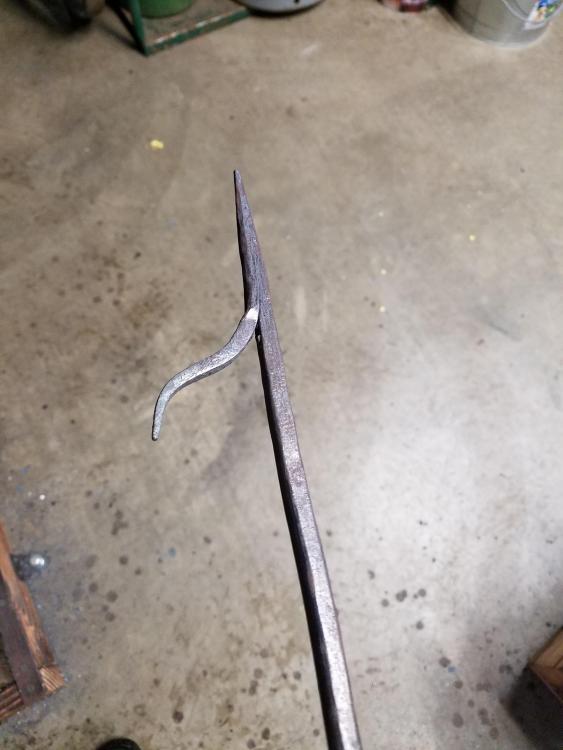
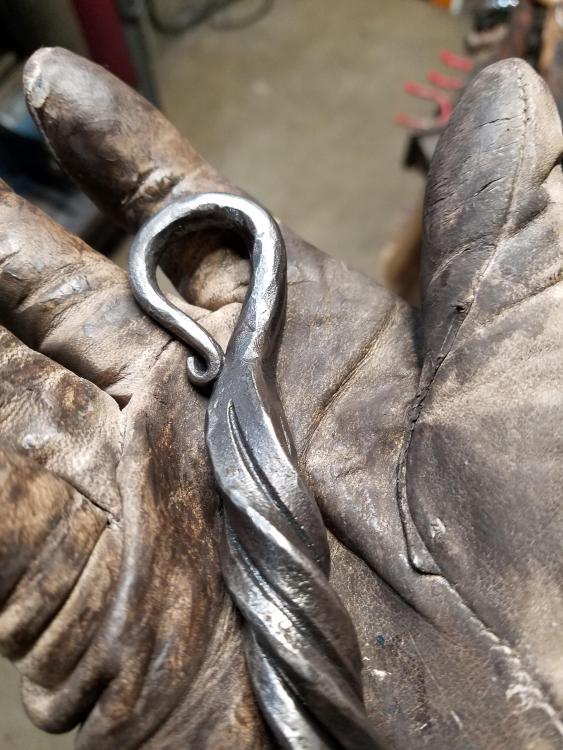
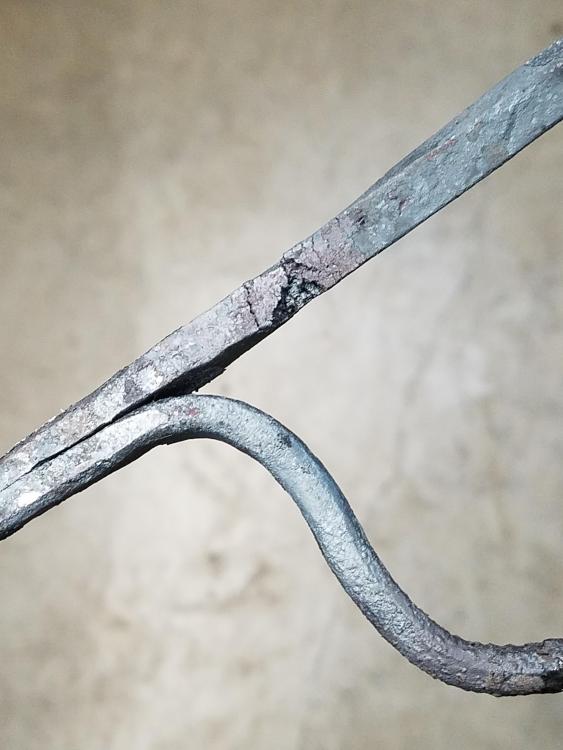
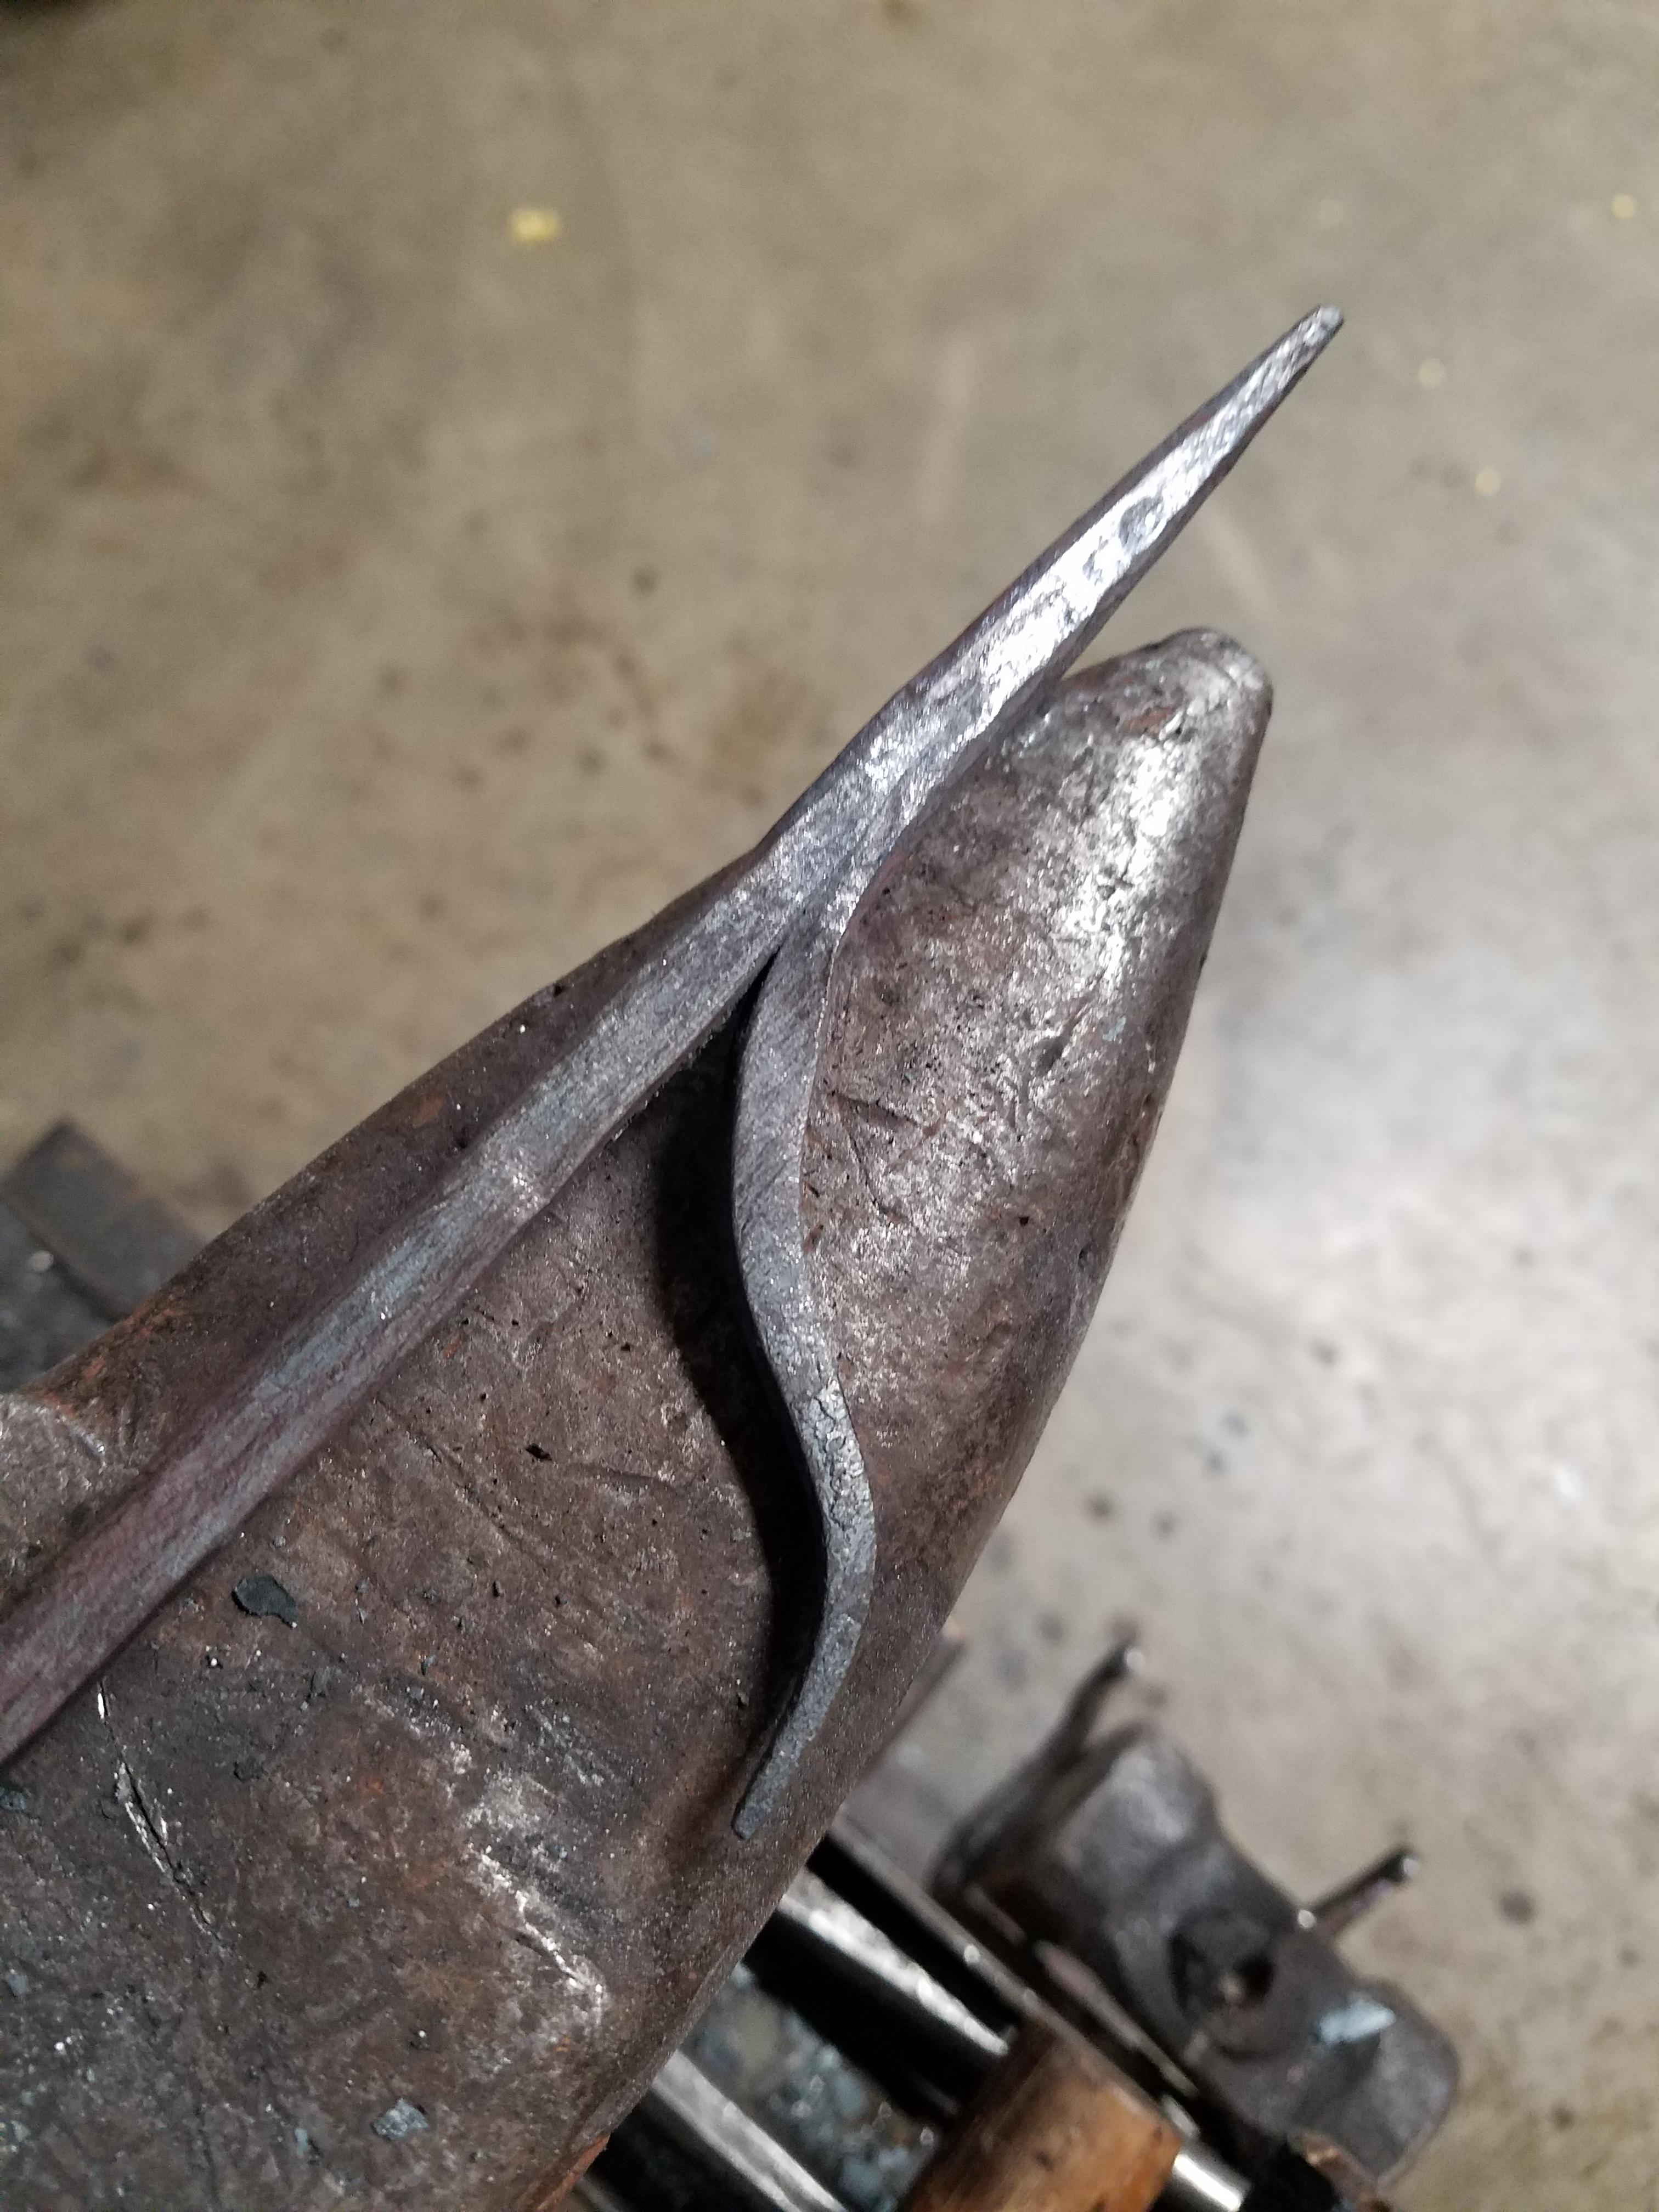
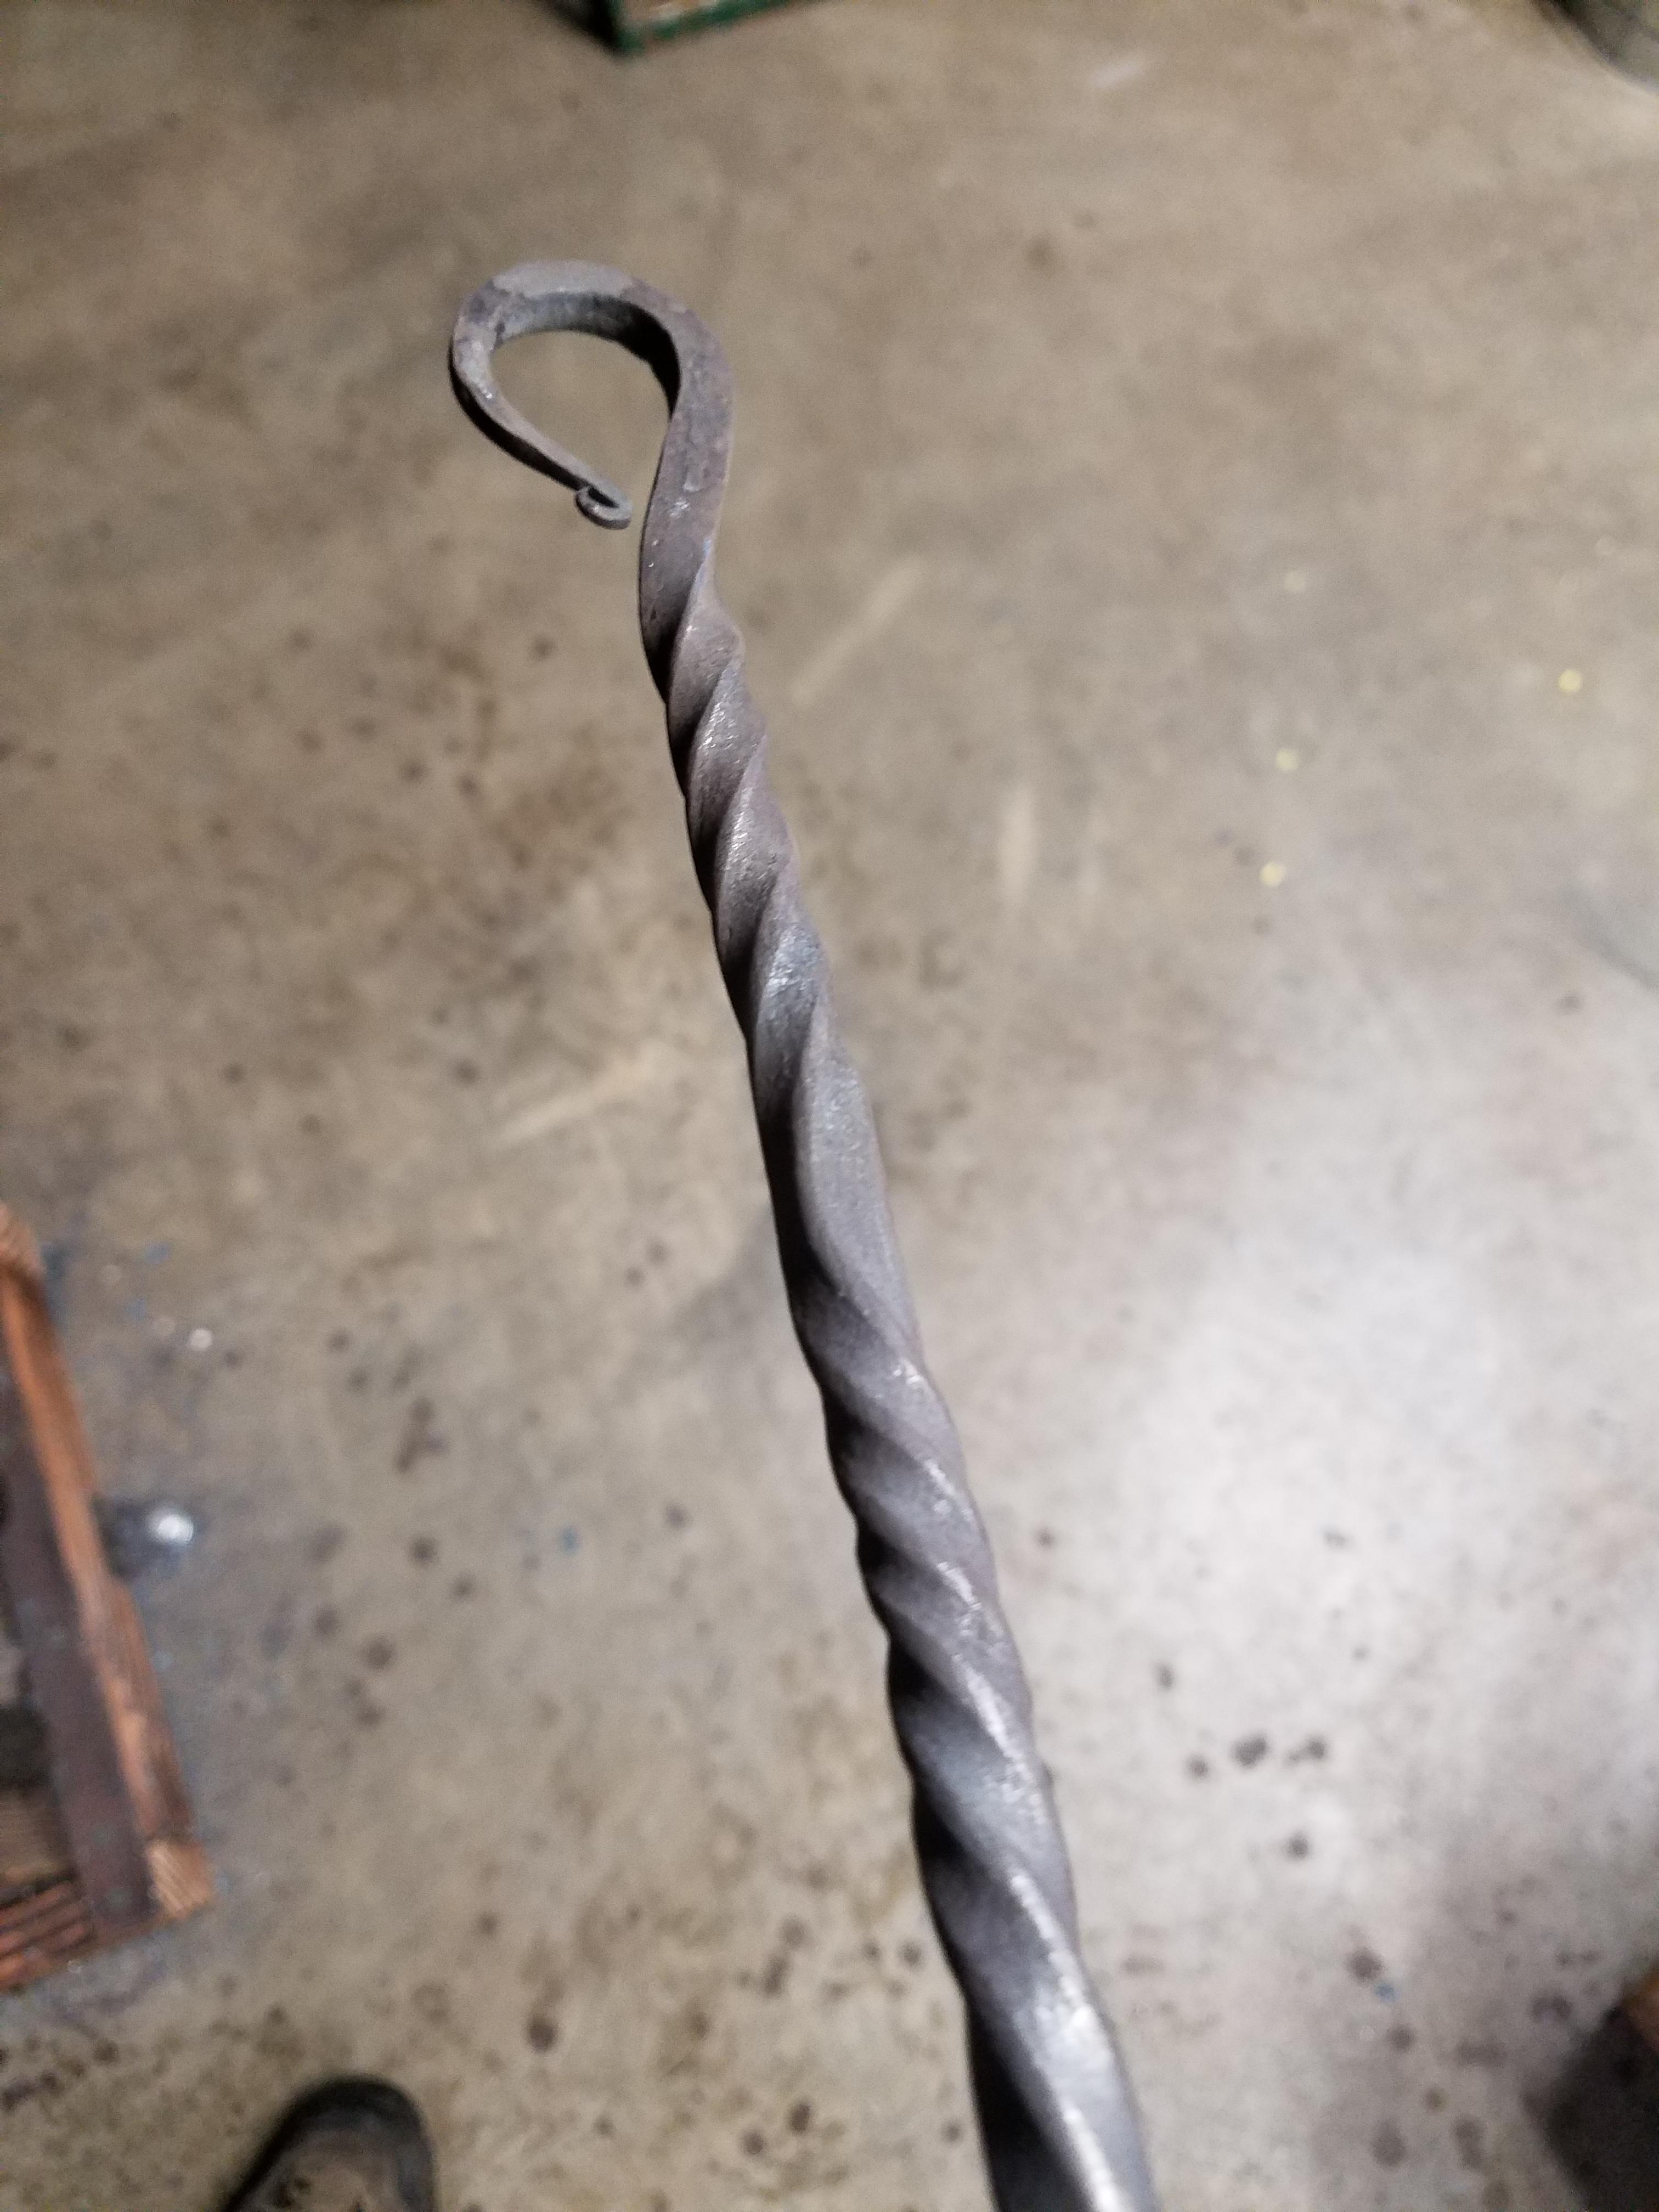
So a few months back I posted about failing trying to forge weld a fire poker. The consensus was that I either over heated it, or I had copper contamination in my forge (or both). I believe the copper has since been cleaned/burnt out of my forge so the other day I gave it another try. This time it worked with 2 things I made sure to do during the process. First, I filed the scale off to bare metal after the initial tapering of the poker end before bending to weld. Also once I started the process I didn't hit it on the side. I think last time my weld may have been weakened by hitting it on the side to even up the joint after it had slipped sideways. I didn't get a full length shot, but here are the 2 ends. The handle side just has a basic loop and reverse twist. The hook end also has a long one direction twist with it being round stock for the middle section, not shown in the photos. I know its not as fancy as others posted in this thread, but it feels good to finally get the weld figured out. Next one I will try to get a bit more fancy on the details.

-
Thanks! No effect just for a nice color.
-
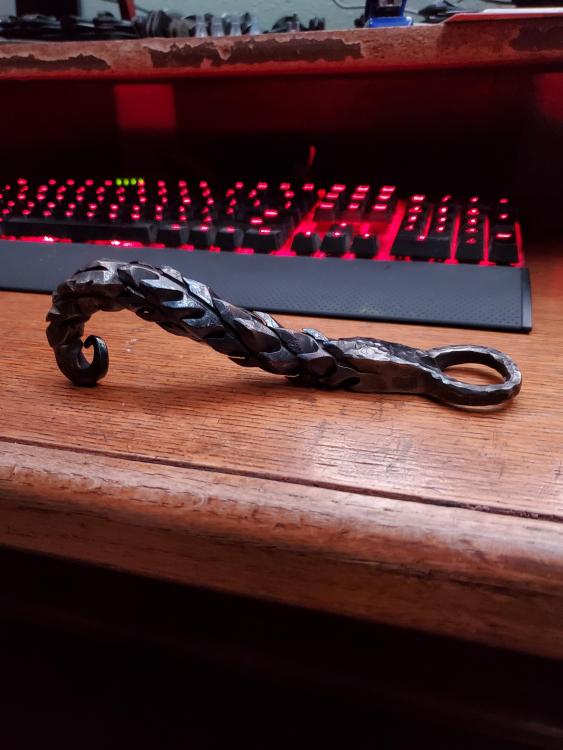
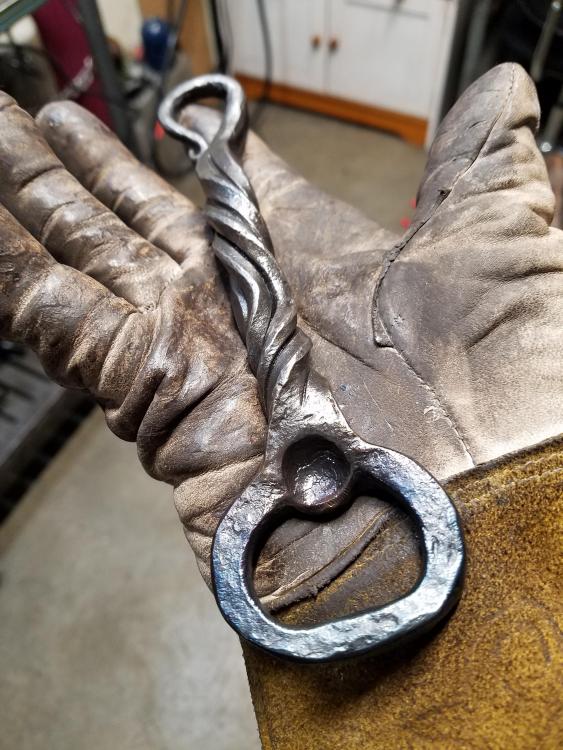
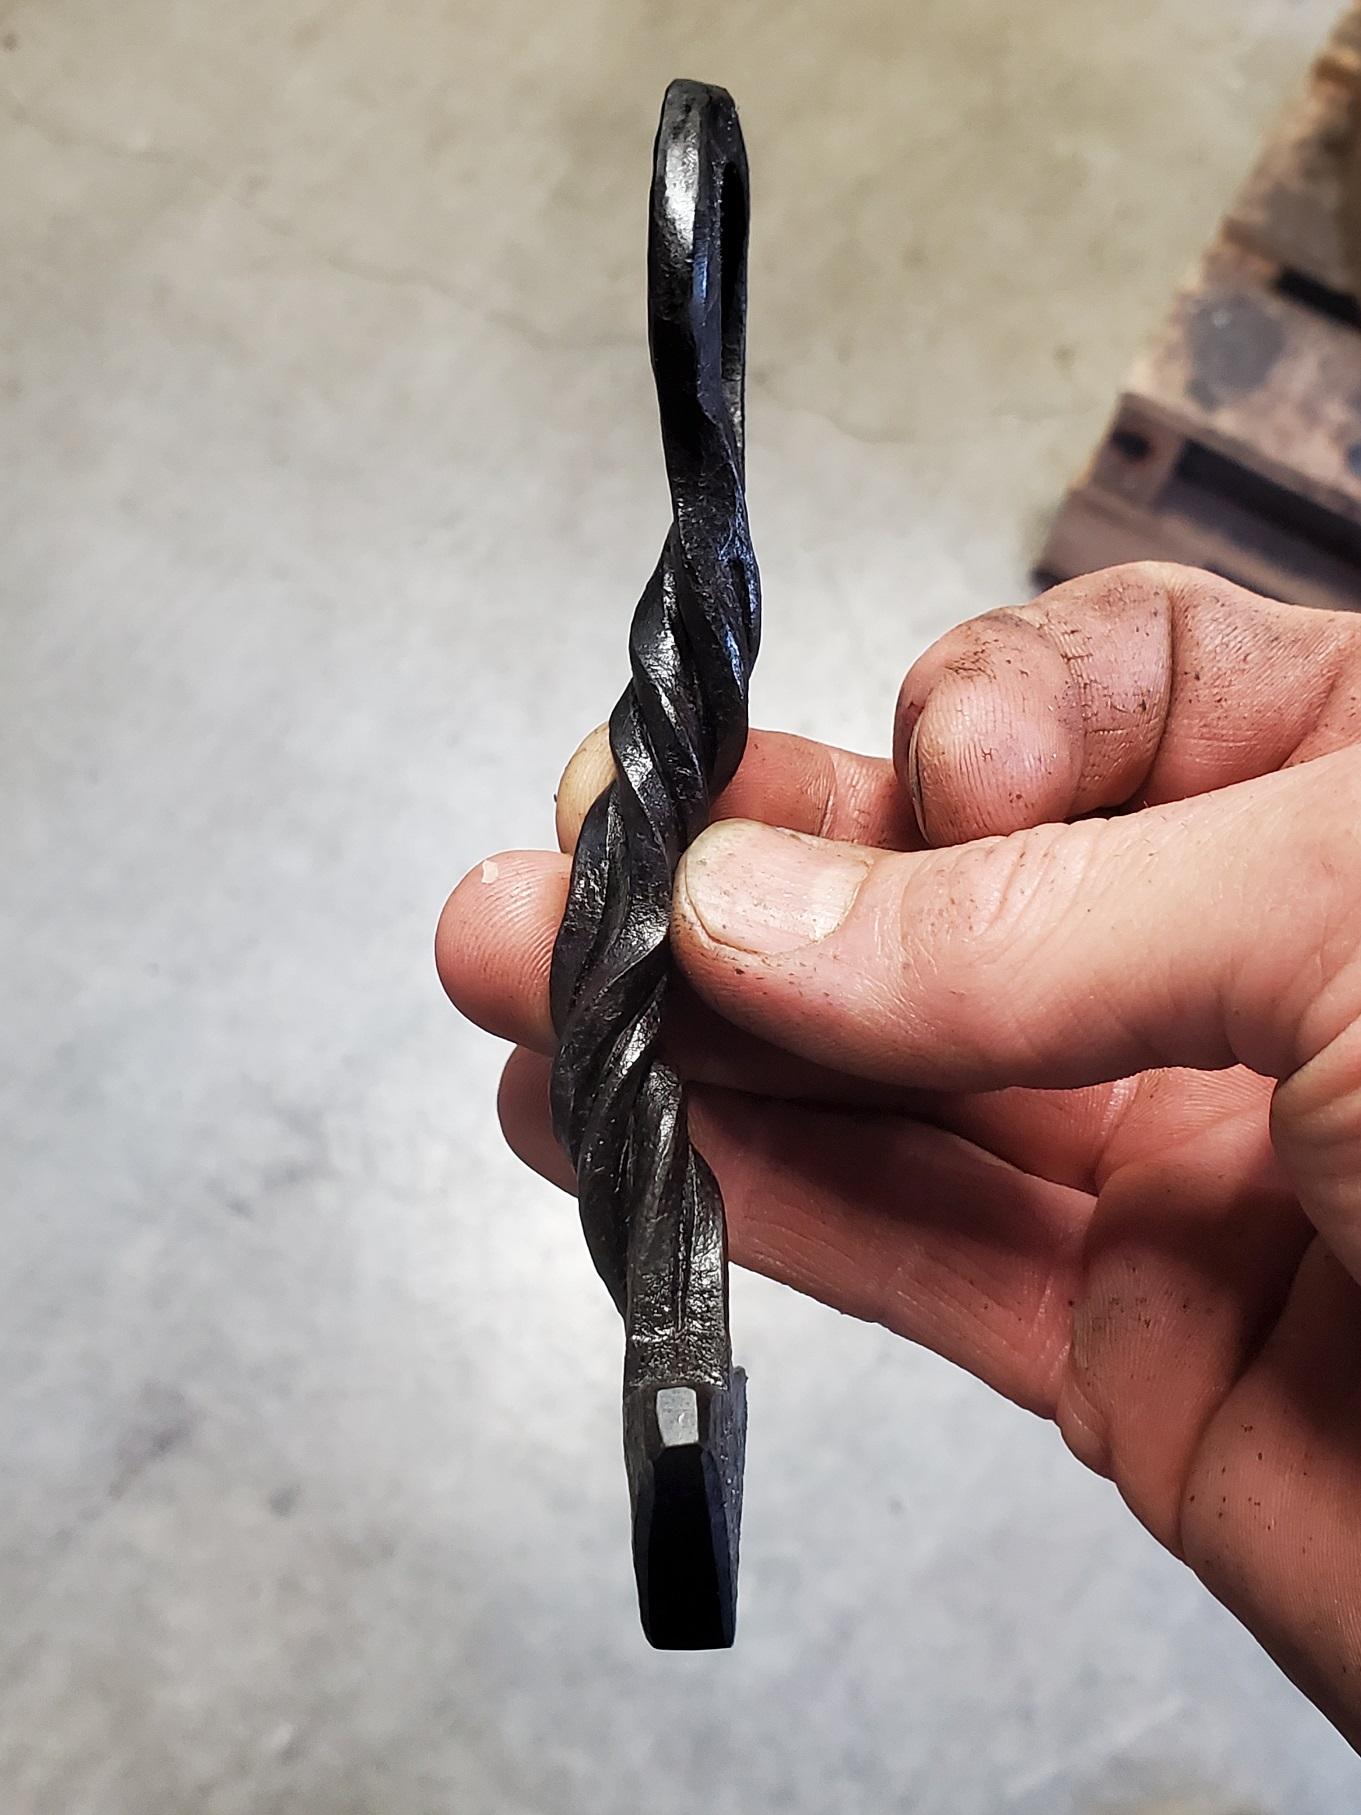
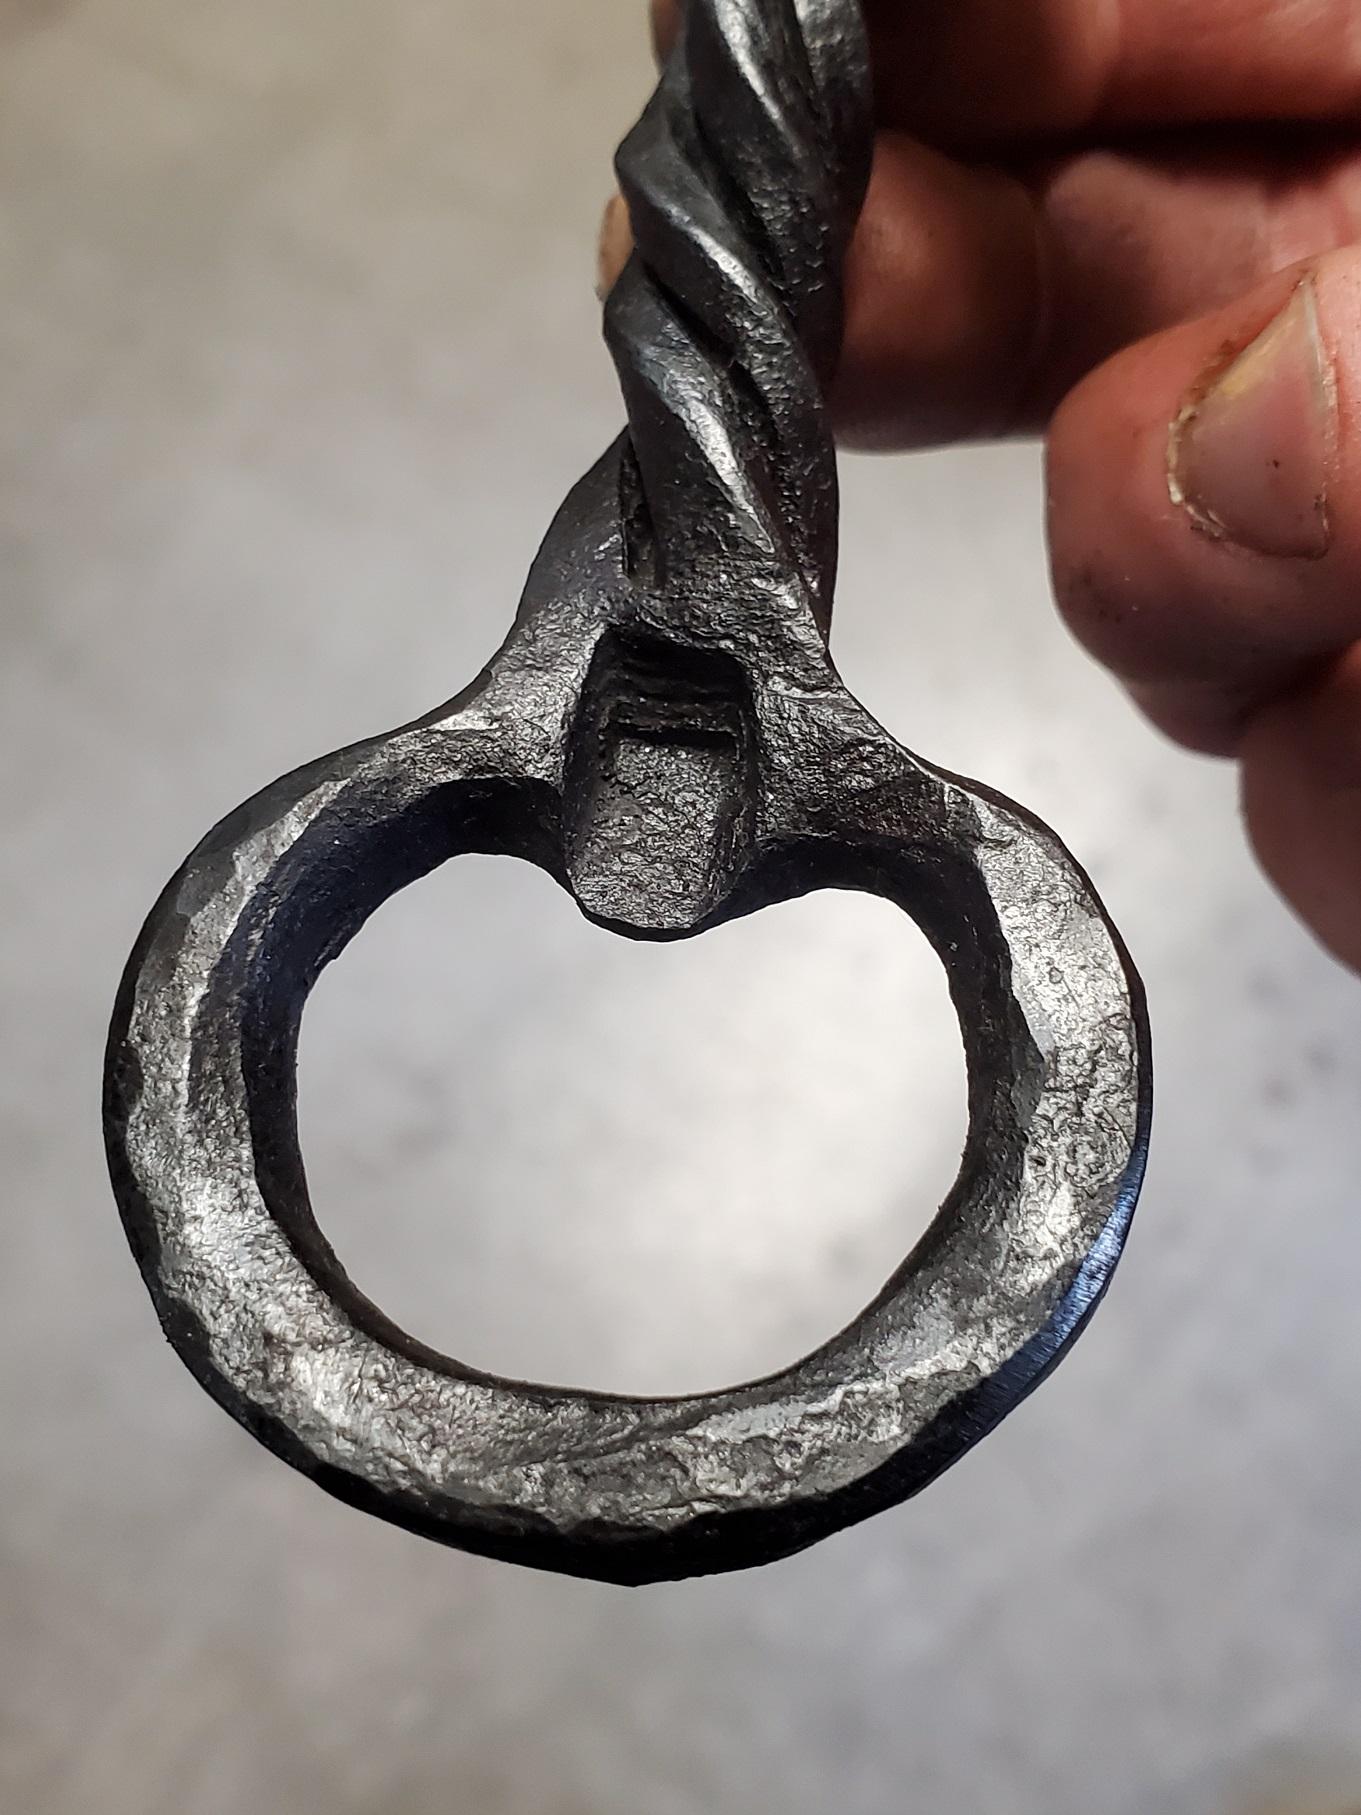
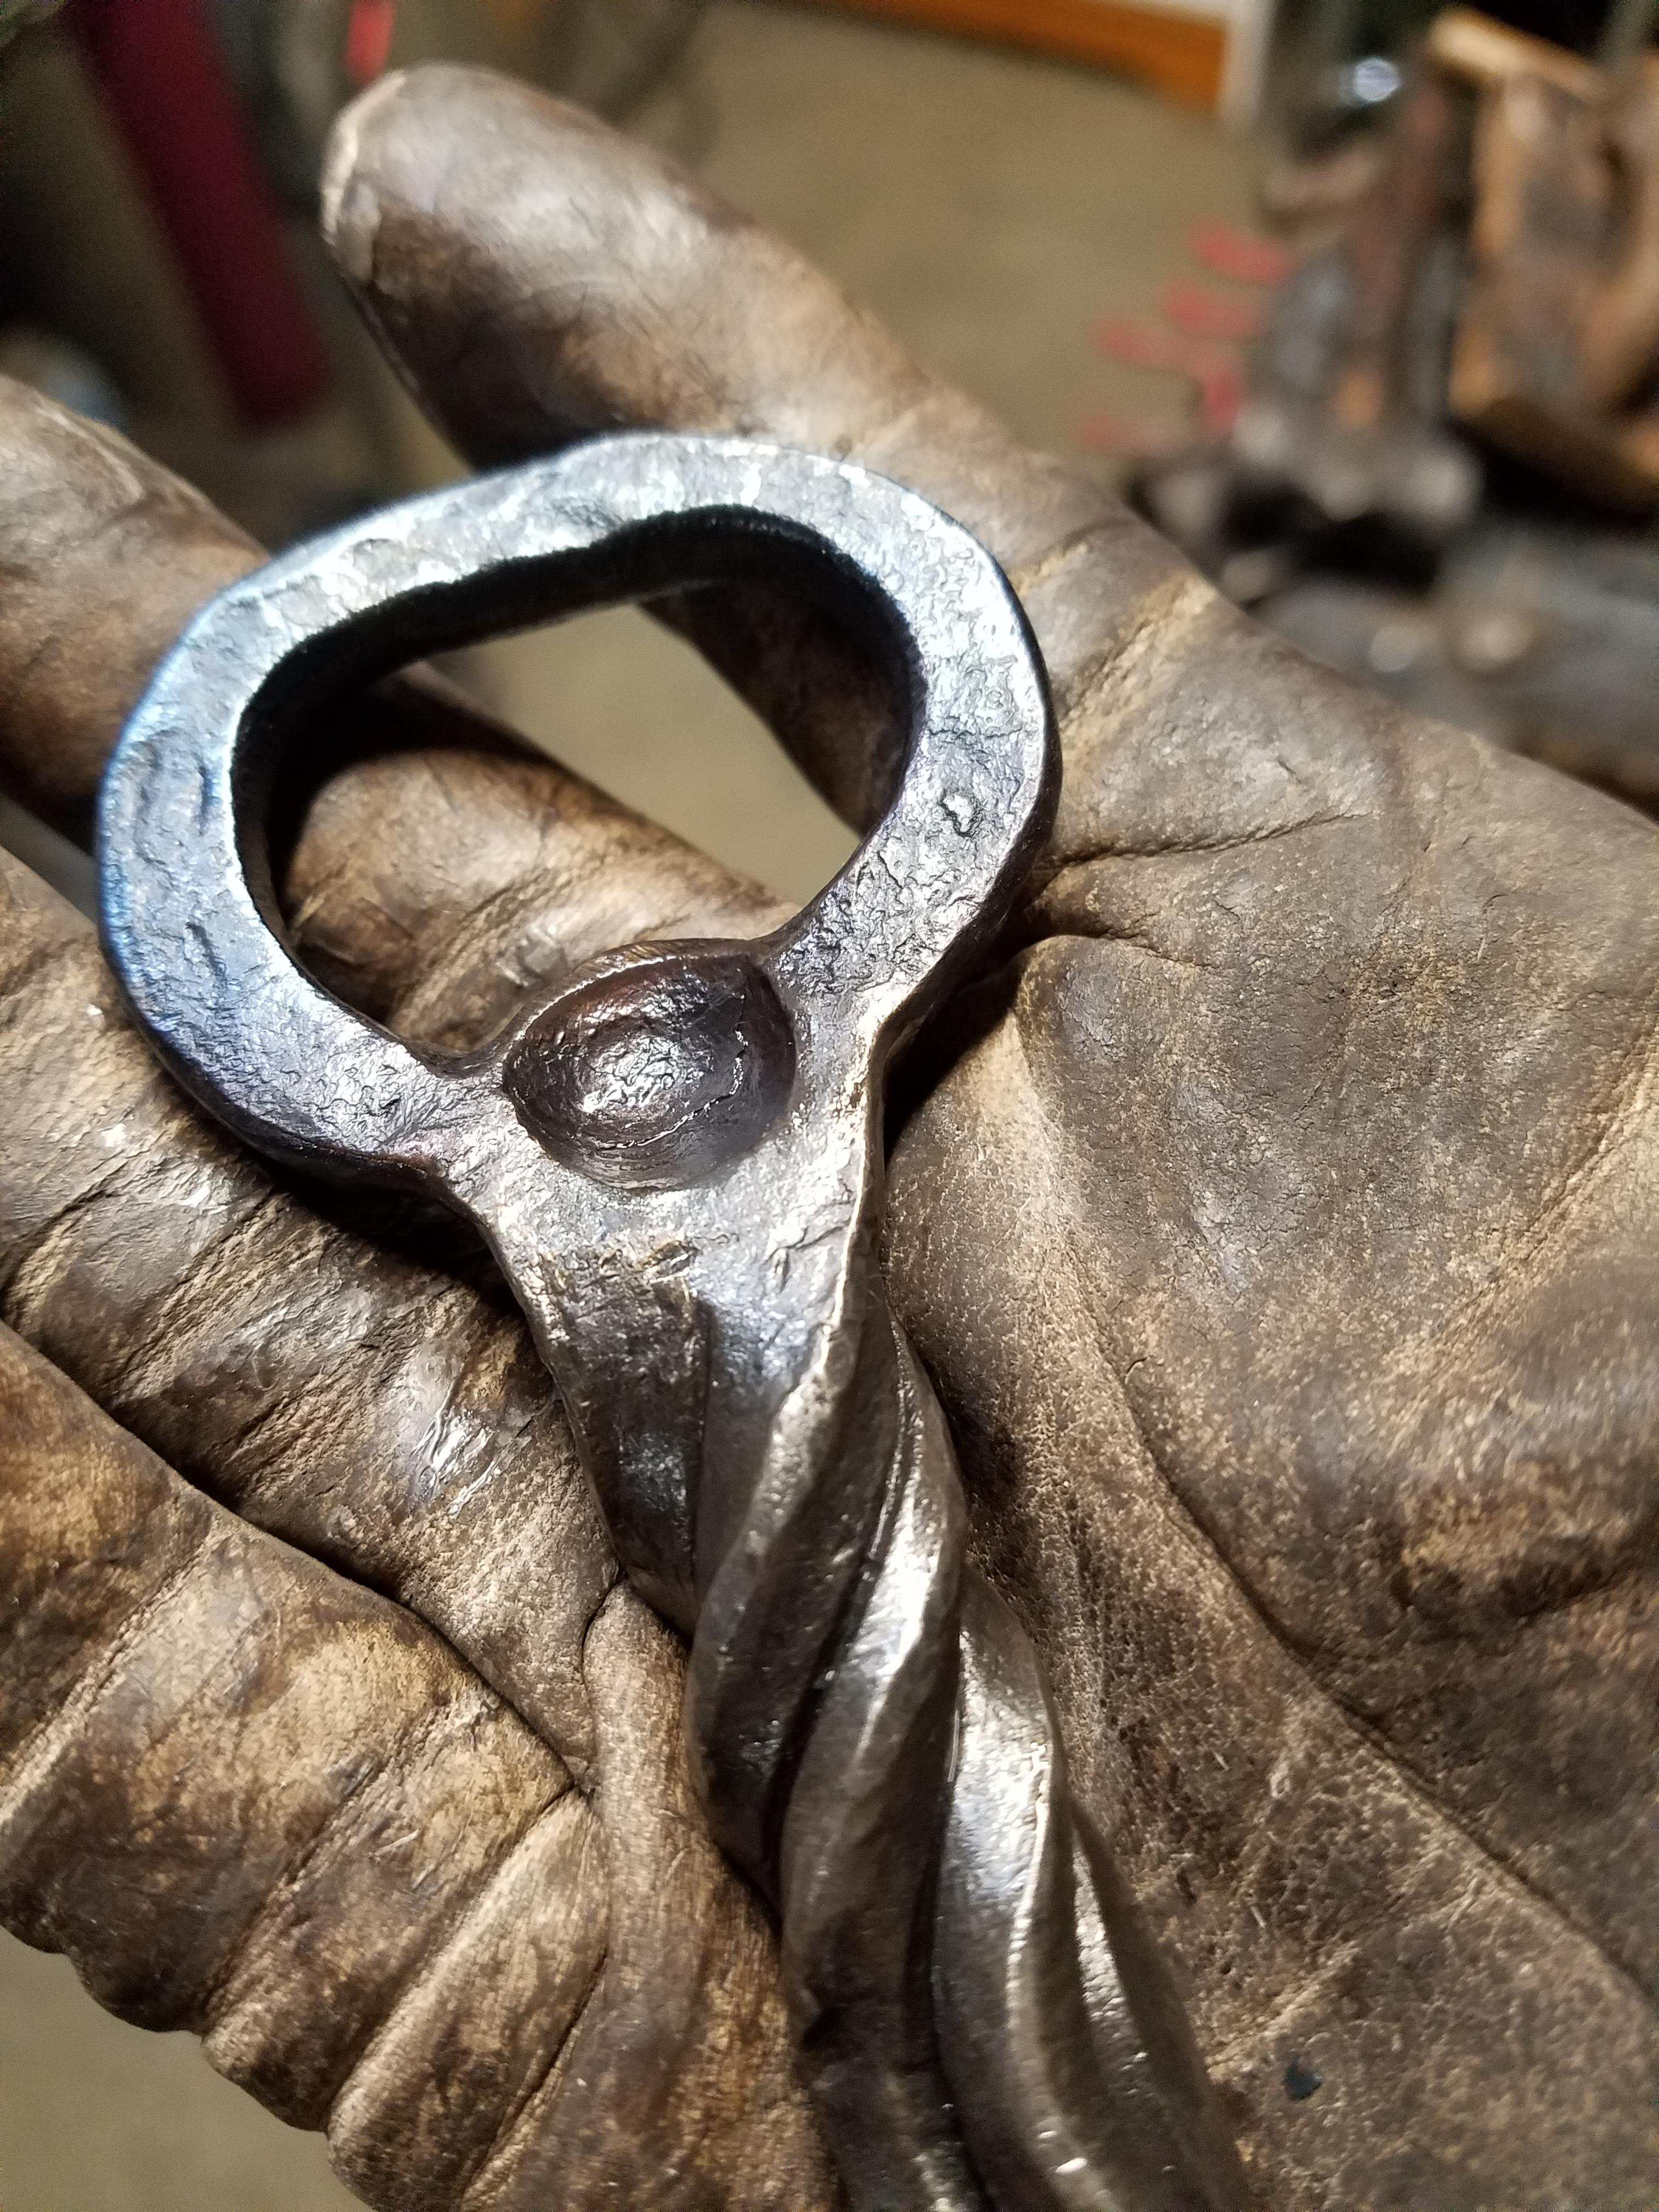
Made this opener from some 1/2" mild steel square bar. To get more material on the opener end I did a few rounds of upsetting the end to add bulk. I punched the hole in 2 heats. This is a pretty good improvement for myself. It used to take me like 5+ heats. Once drifted and shaped, I started to work on the chiseled lines. I was thinking I may try a cube twist, but I was running out of time for the night so I just decided to twist the lines.... and since I was on a reverse twist theme with my plant hook I did it again on this. At first I wasn't totally happy, but I gave it a bit more twist and it ended up looking pretty cool. Then to give it a little more flare I drew the tail down and curled it up. Finished with heat temper and a beeswax coating.

-
I tried to redo my failed fire poker forge weld, and failed again. Not sure what I'm doing wrong, but I gave up for the night. Didn't even have the energy to take photos to try to show the failure.
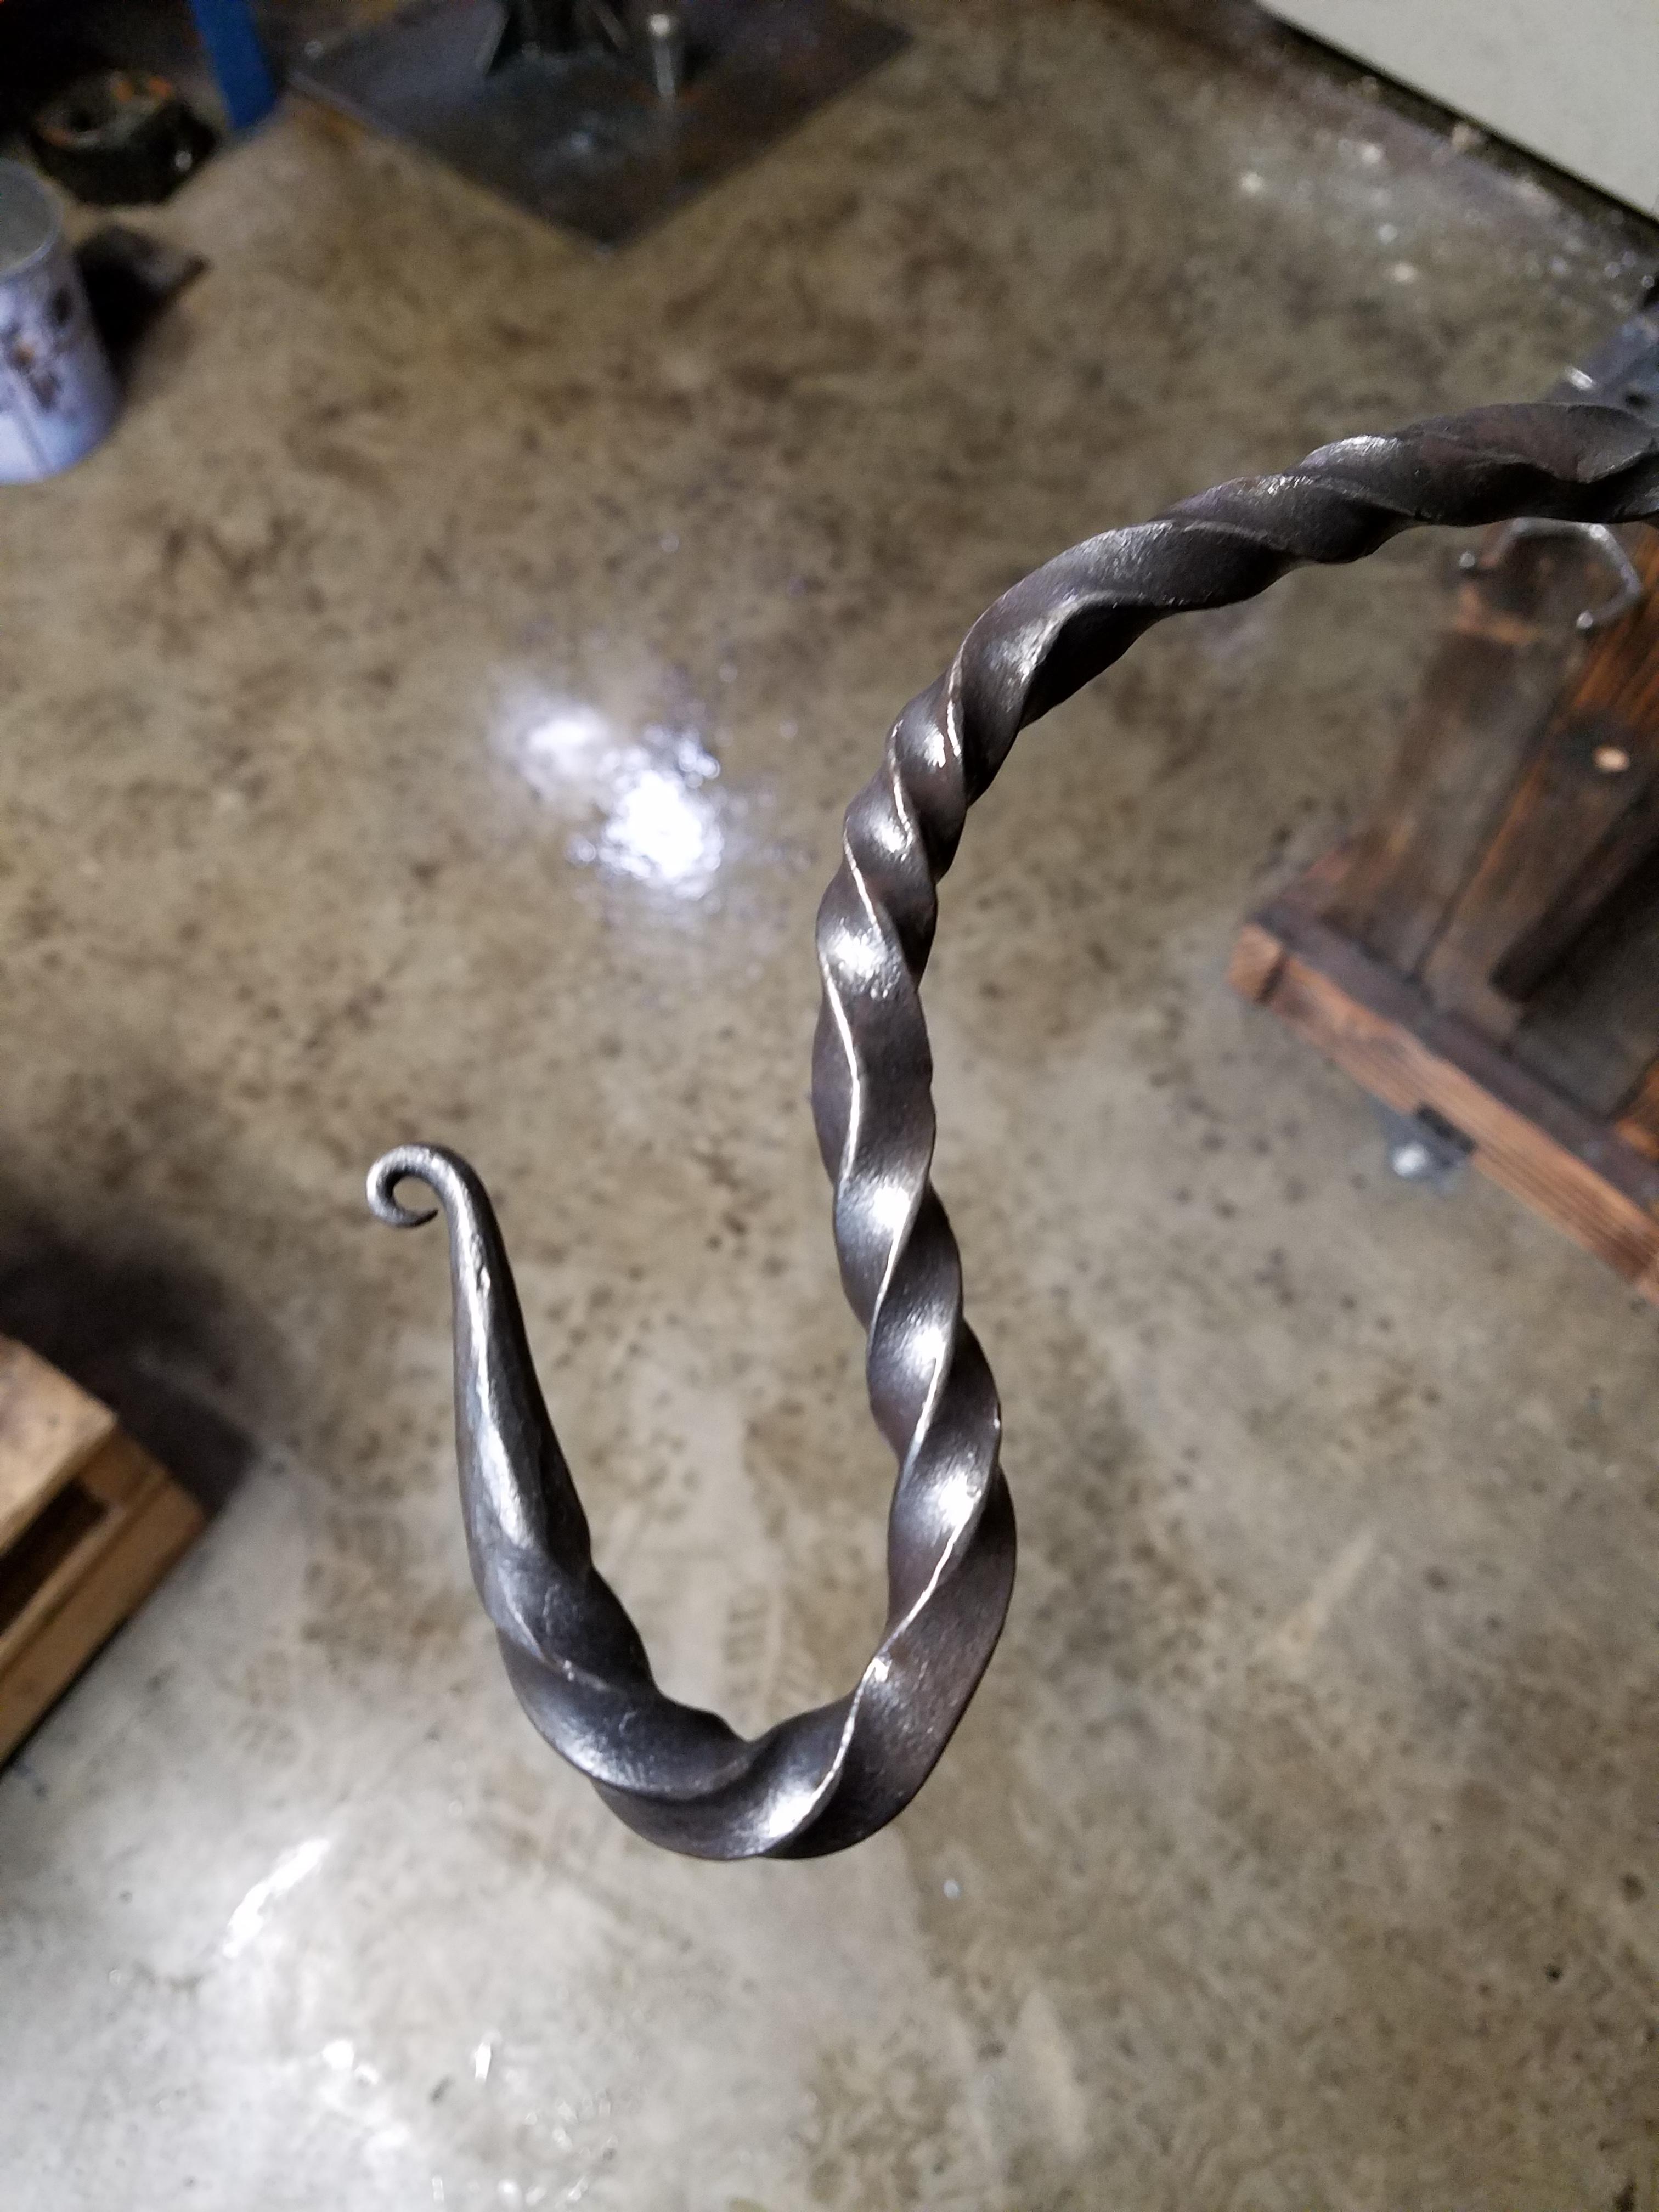
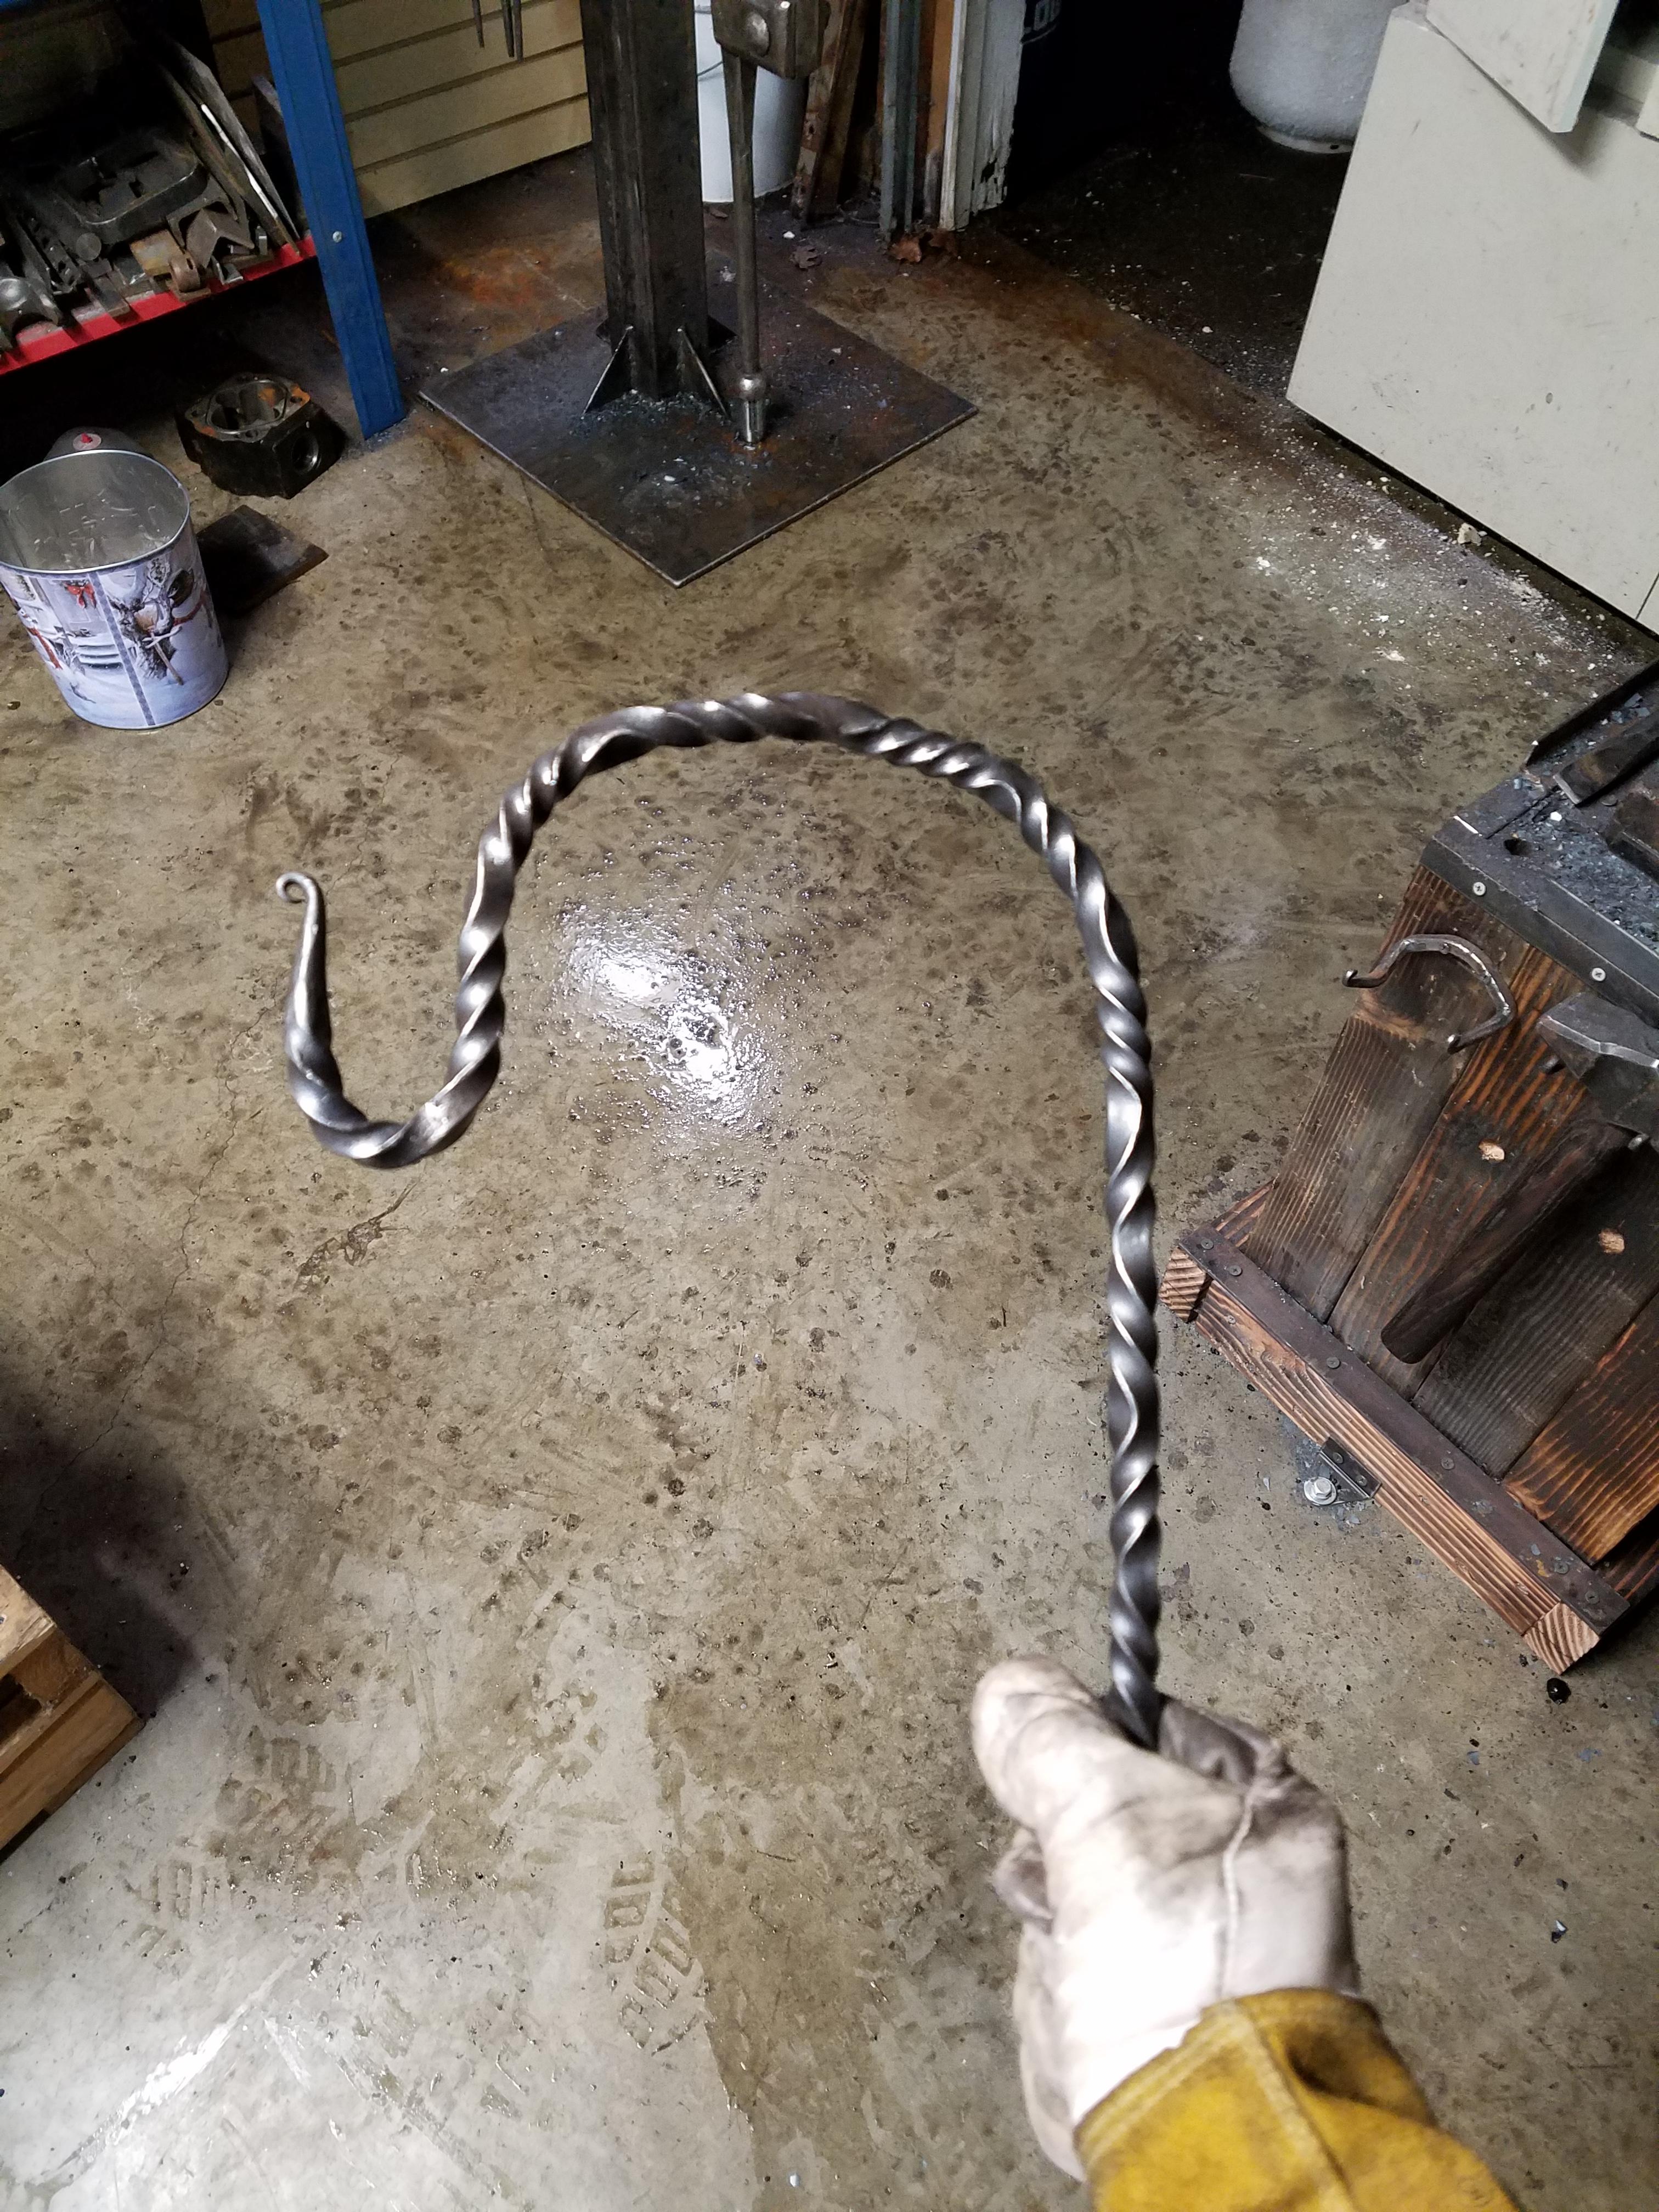
After that, I made a plant hook today with a reverse twist....or should I say Twists.... There is a local antique shop that wants me to make some items for them to have in their shop. The owner said she is asked for plant hangers all the time, so I figured I'd try to make a few. I wanted the top bend to be a bit more round, but I was fighting getting it right. I plan to make a bending jig to help keep them even.
Also made a bottle opener, but I will post that one to the BO thread.


-
40 minutes ago, ThomasPowers said:
I bet the piece being welded was not in contact with molten copper which is what seems to be the problem causer.
I don't follow. you said it was NOT in contact. Did you mean to say that it was in contact? It so, you are probably right. As stated before I've never had an issue with what bits of copper are left in the forge from accidentally letting a piece melt once.
6 minutes ago, ThomasPowers said:Which is way too hot for some alloys. I forget do we know for sure what this piece was made from?
I've cottage cheesed H-13 before thinking that as a high temp alloy it might work better in the yellow....
Also what was the ambient light like in the forge?
Thanks for the time to reply, and hopefully help me learn.
It was just plain mild steel from a local steel supplier, not home improvement store.. I would guess A36 if I remember correct.
Ambient light? Pretty bright I would say. I often have issues when its too dark seeing other things. Most all of these photos are pretty true to my shop lighting.
-
6 hours ago, Adun Clebr said:
Awesome stuff Mr. Powers, thanks for posting this. I learned from that study.
Back to the breaking issue; I may be looking at the pictures wrong, but I see 1) an obvious break, and 2) a separated forge weld on the poker tip (and the visual copperish hue).
The break- this part had to be sparkling/burning, right? This was covered above that it looks like it got too hot. It may have survived as a linear shaft until the twist got it.
The separated forge weld- just practice some more. Like I said, it looks like a good start on the poker. Personally, I ended up cutting a dozen pieces of 10"-12" long, 1/8" thick, 1" wide mild steel stock as forge welding test "coupons". I paired them up & practiced forge welding them together. I am not a professional forge welder, but this practice made my fourth (or fifth) poker actually be a user.
The part was not sparkling at all. It was a bright yellow.
-
7 hours ago, BLDSMTH said:
The sulfur in the copper causes red short at the temps we forge weld at and the molten copper infuses itself between the layers and contaminates the weld. The red short explains the crumbling and you can see the copper between the welds. Forging copper is different than melting copper and forging it doesn't leave any residue left over spilling molten copper does. Take a crucible and put it in the forge and melt it and then leave it in the forge and then try to forge weld.
So does this mean, even If I kept the piece off the floor, the fumes inside the forge would still contaminate my piece?
-
1 hour ago, Steve Sells said:
I agree it looks like copper, but I also assume he was smart enough to removed the visable copper from his fire and not leave it in there for later.
The photo looks like a smelting iron bloom that turned to cast iron, so honestly bad photography was my first guess
You are correct that there must still be some copper in the forge. Ive tried scraping it out and it hasnt been much of a problem untill recently trying to forge weld. I wonder if the borax caused the copper to pool up in the slurry the borax creates? I always seem to regret using borax for a few weeks after. I only have 1 forge, but am working in a 2 burner one I would like to have setup to FW in.
1 hour ago, ThomasPowers said:There can be an issue with molten copper infiltrating along grain boundaries; while I have forged a lot of copper in the forge; I don't allow it to melt and puddle on the floor. May I commend to your attention Intergranular Attack of Steel by Molten Copper published by the AWS. Look at the pictures of the cracks in it.
Thats interesting I will have to give that a read.
-
Just now, JHCC said:
The breakage definitely looks like burning.
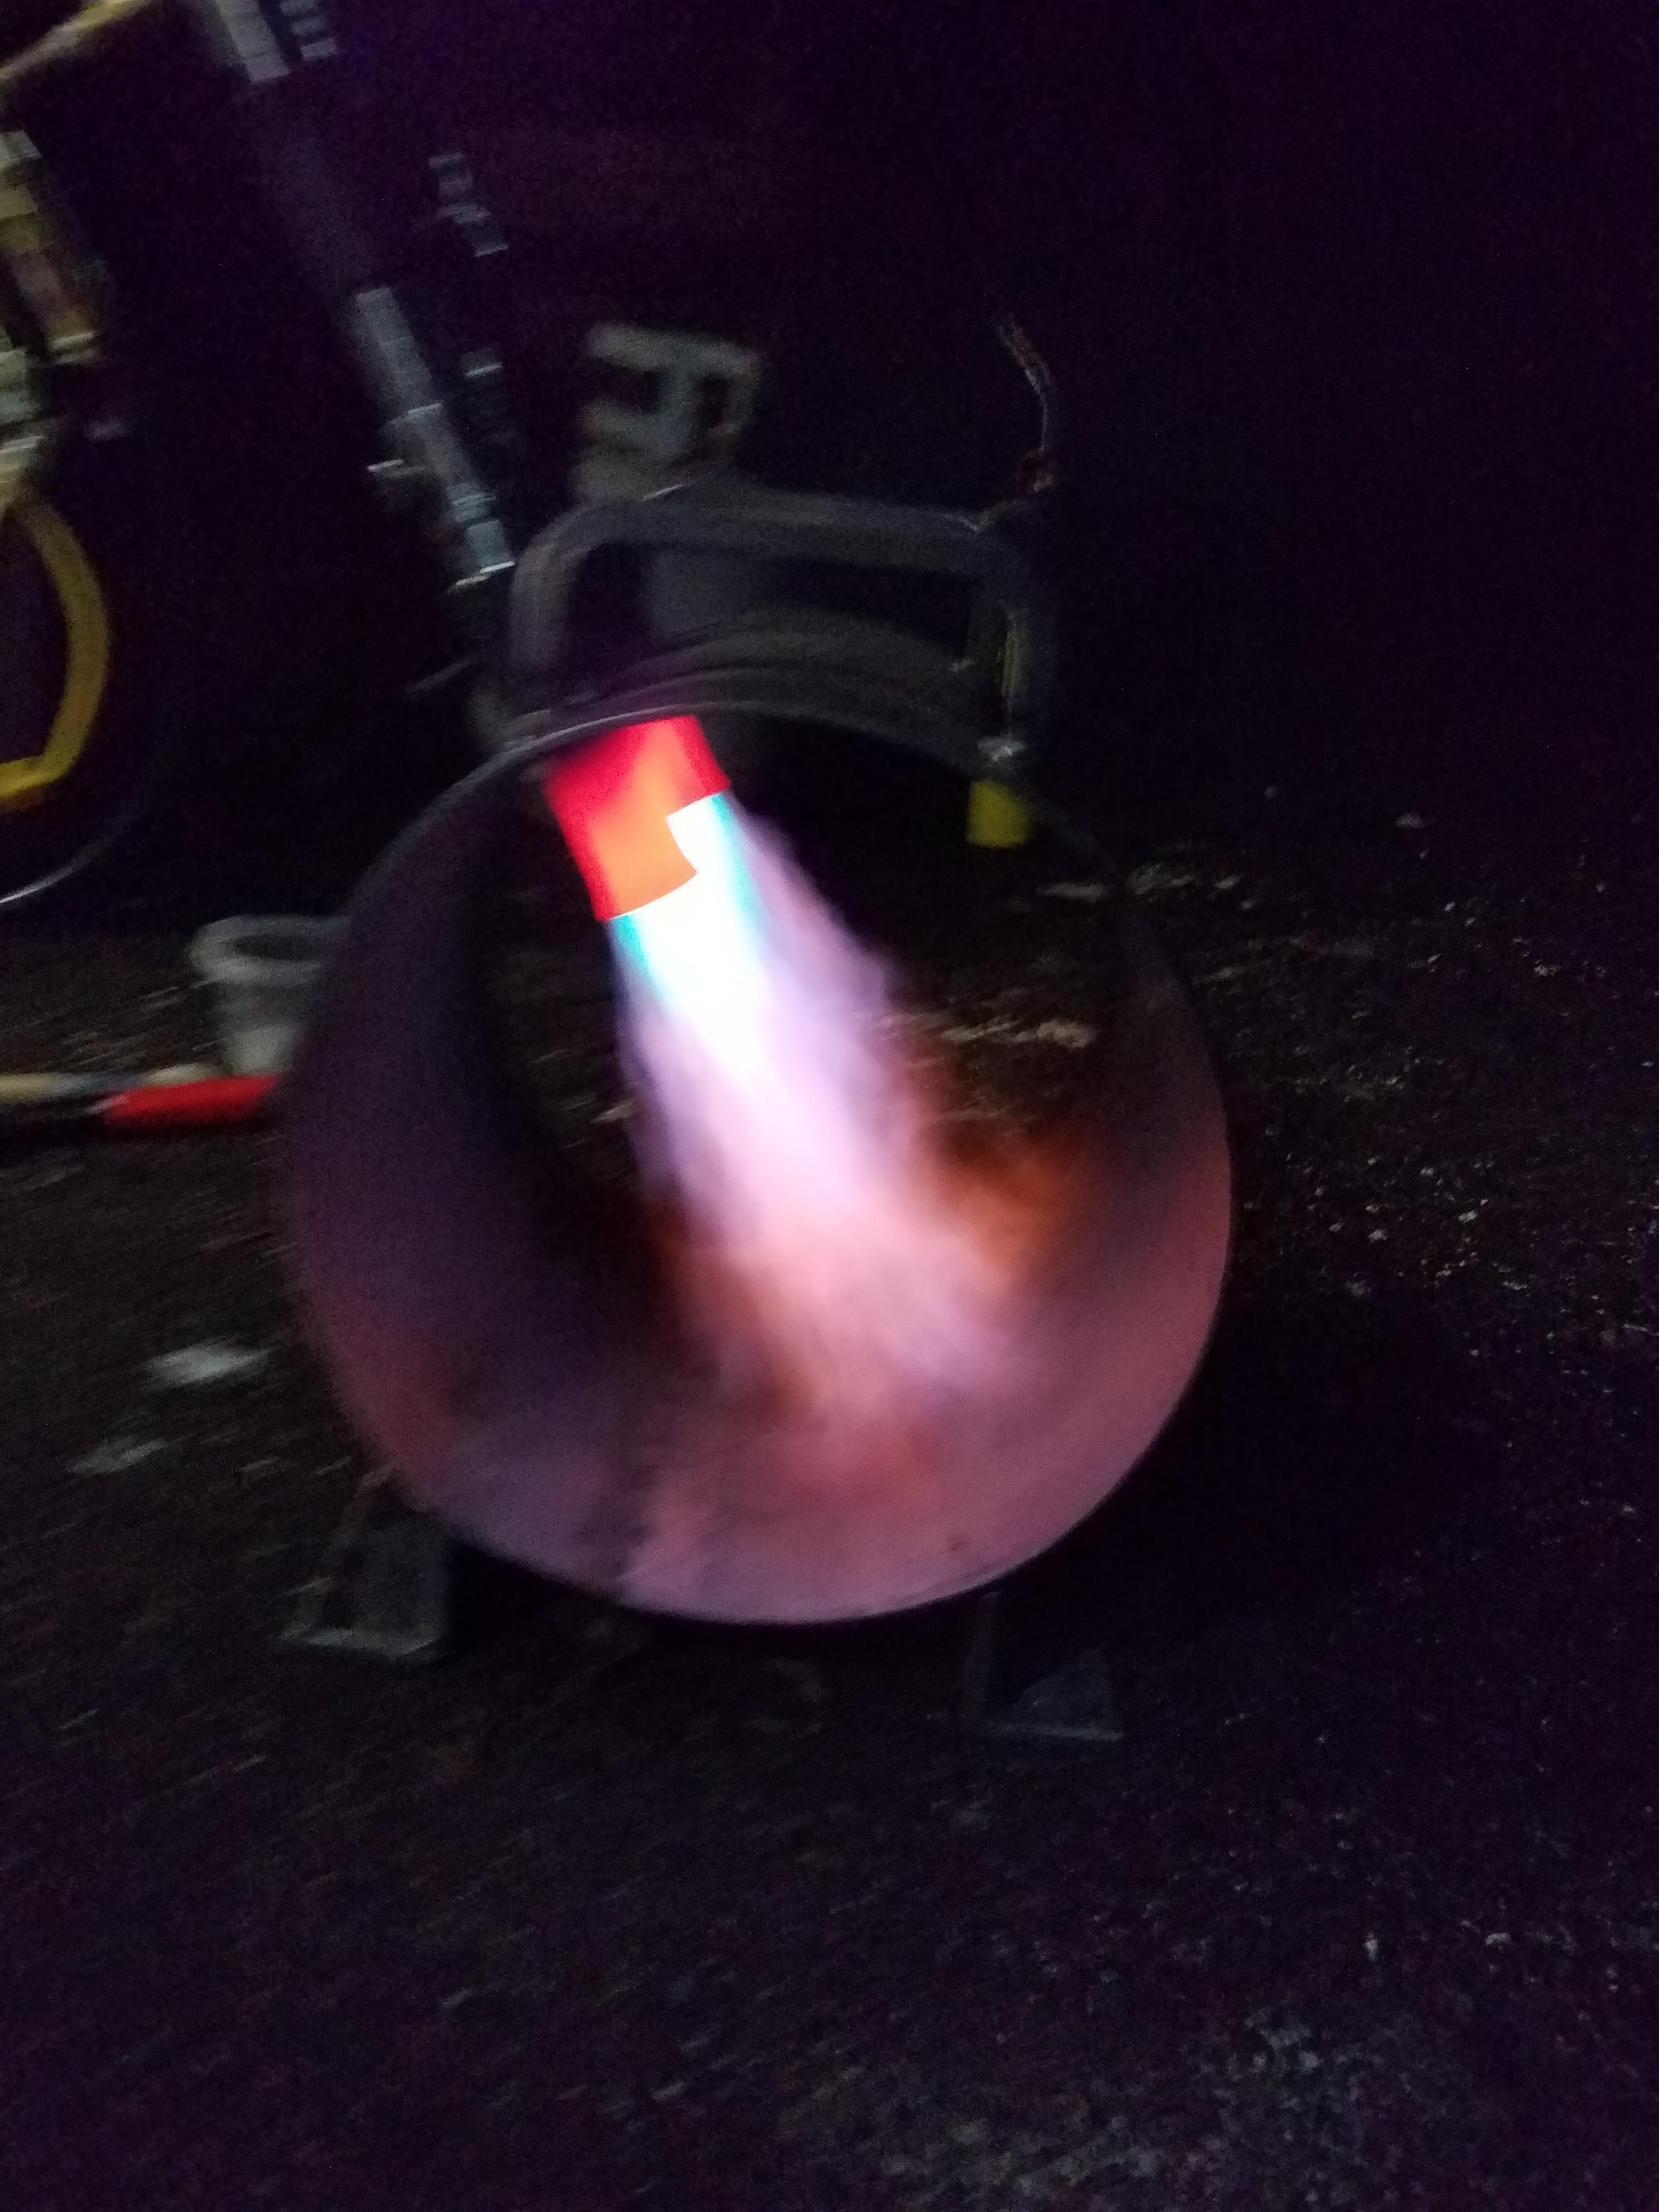
Are you using a gas forge, or solid fuel?
Propane. Single burner, 1" wool lining with hard fire brick floor.
-
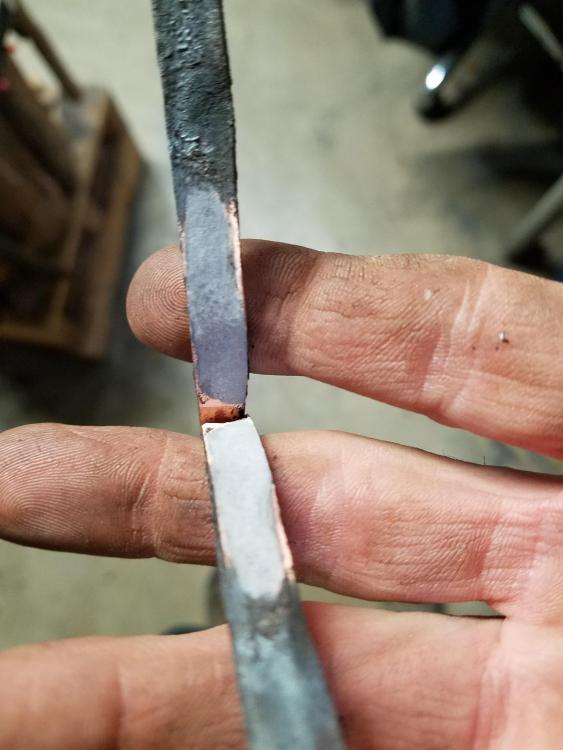
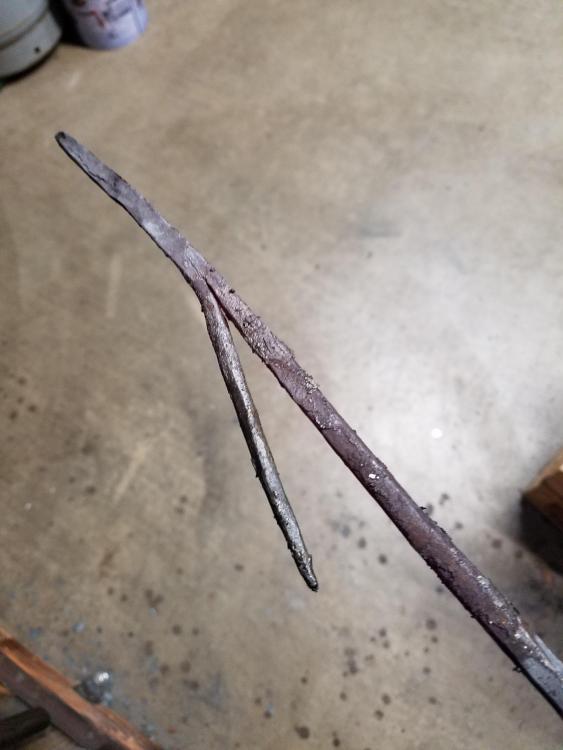
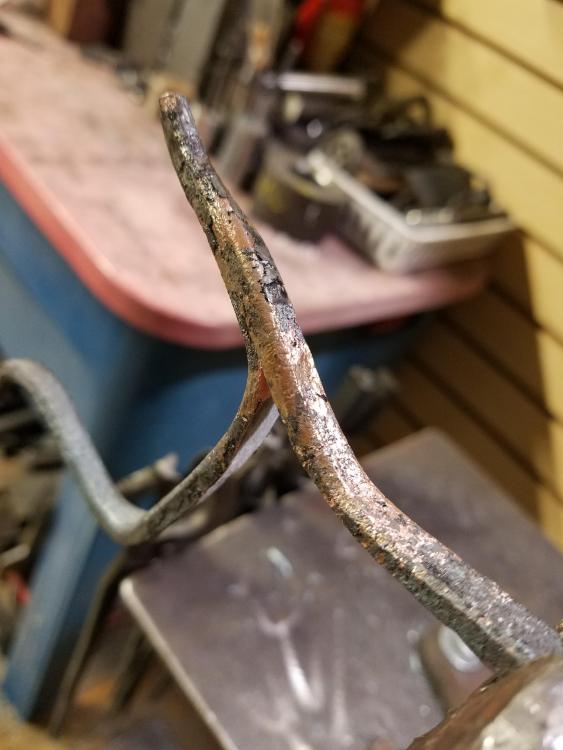
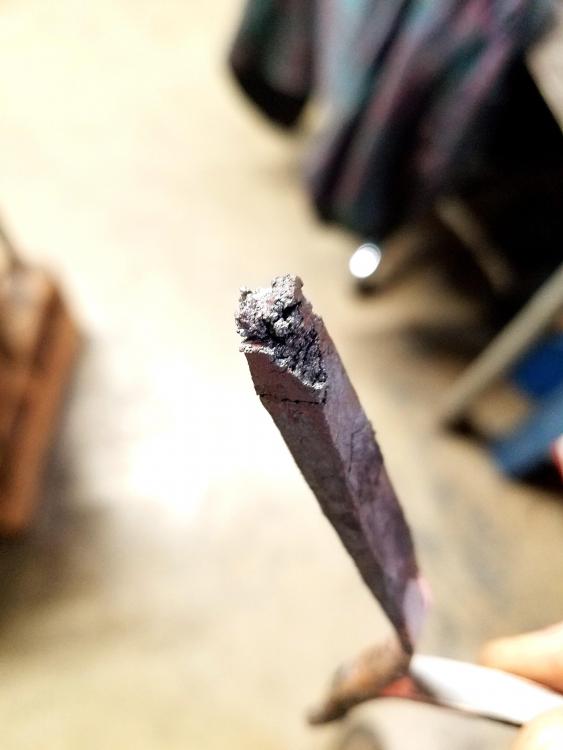
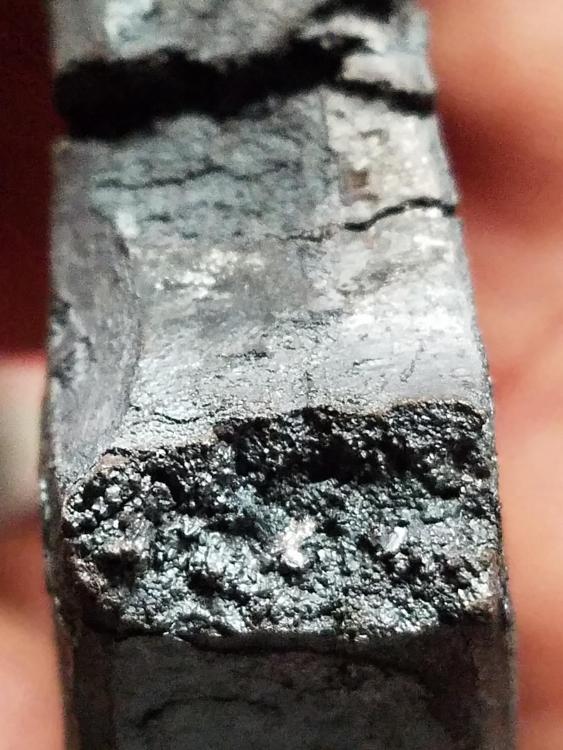
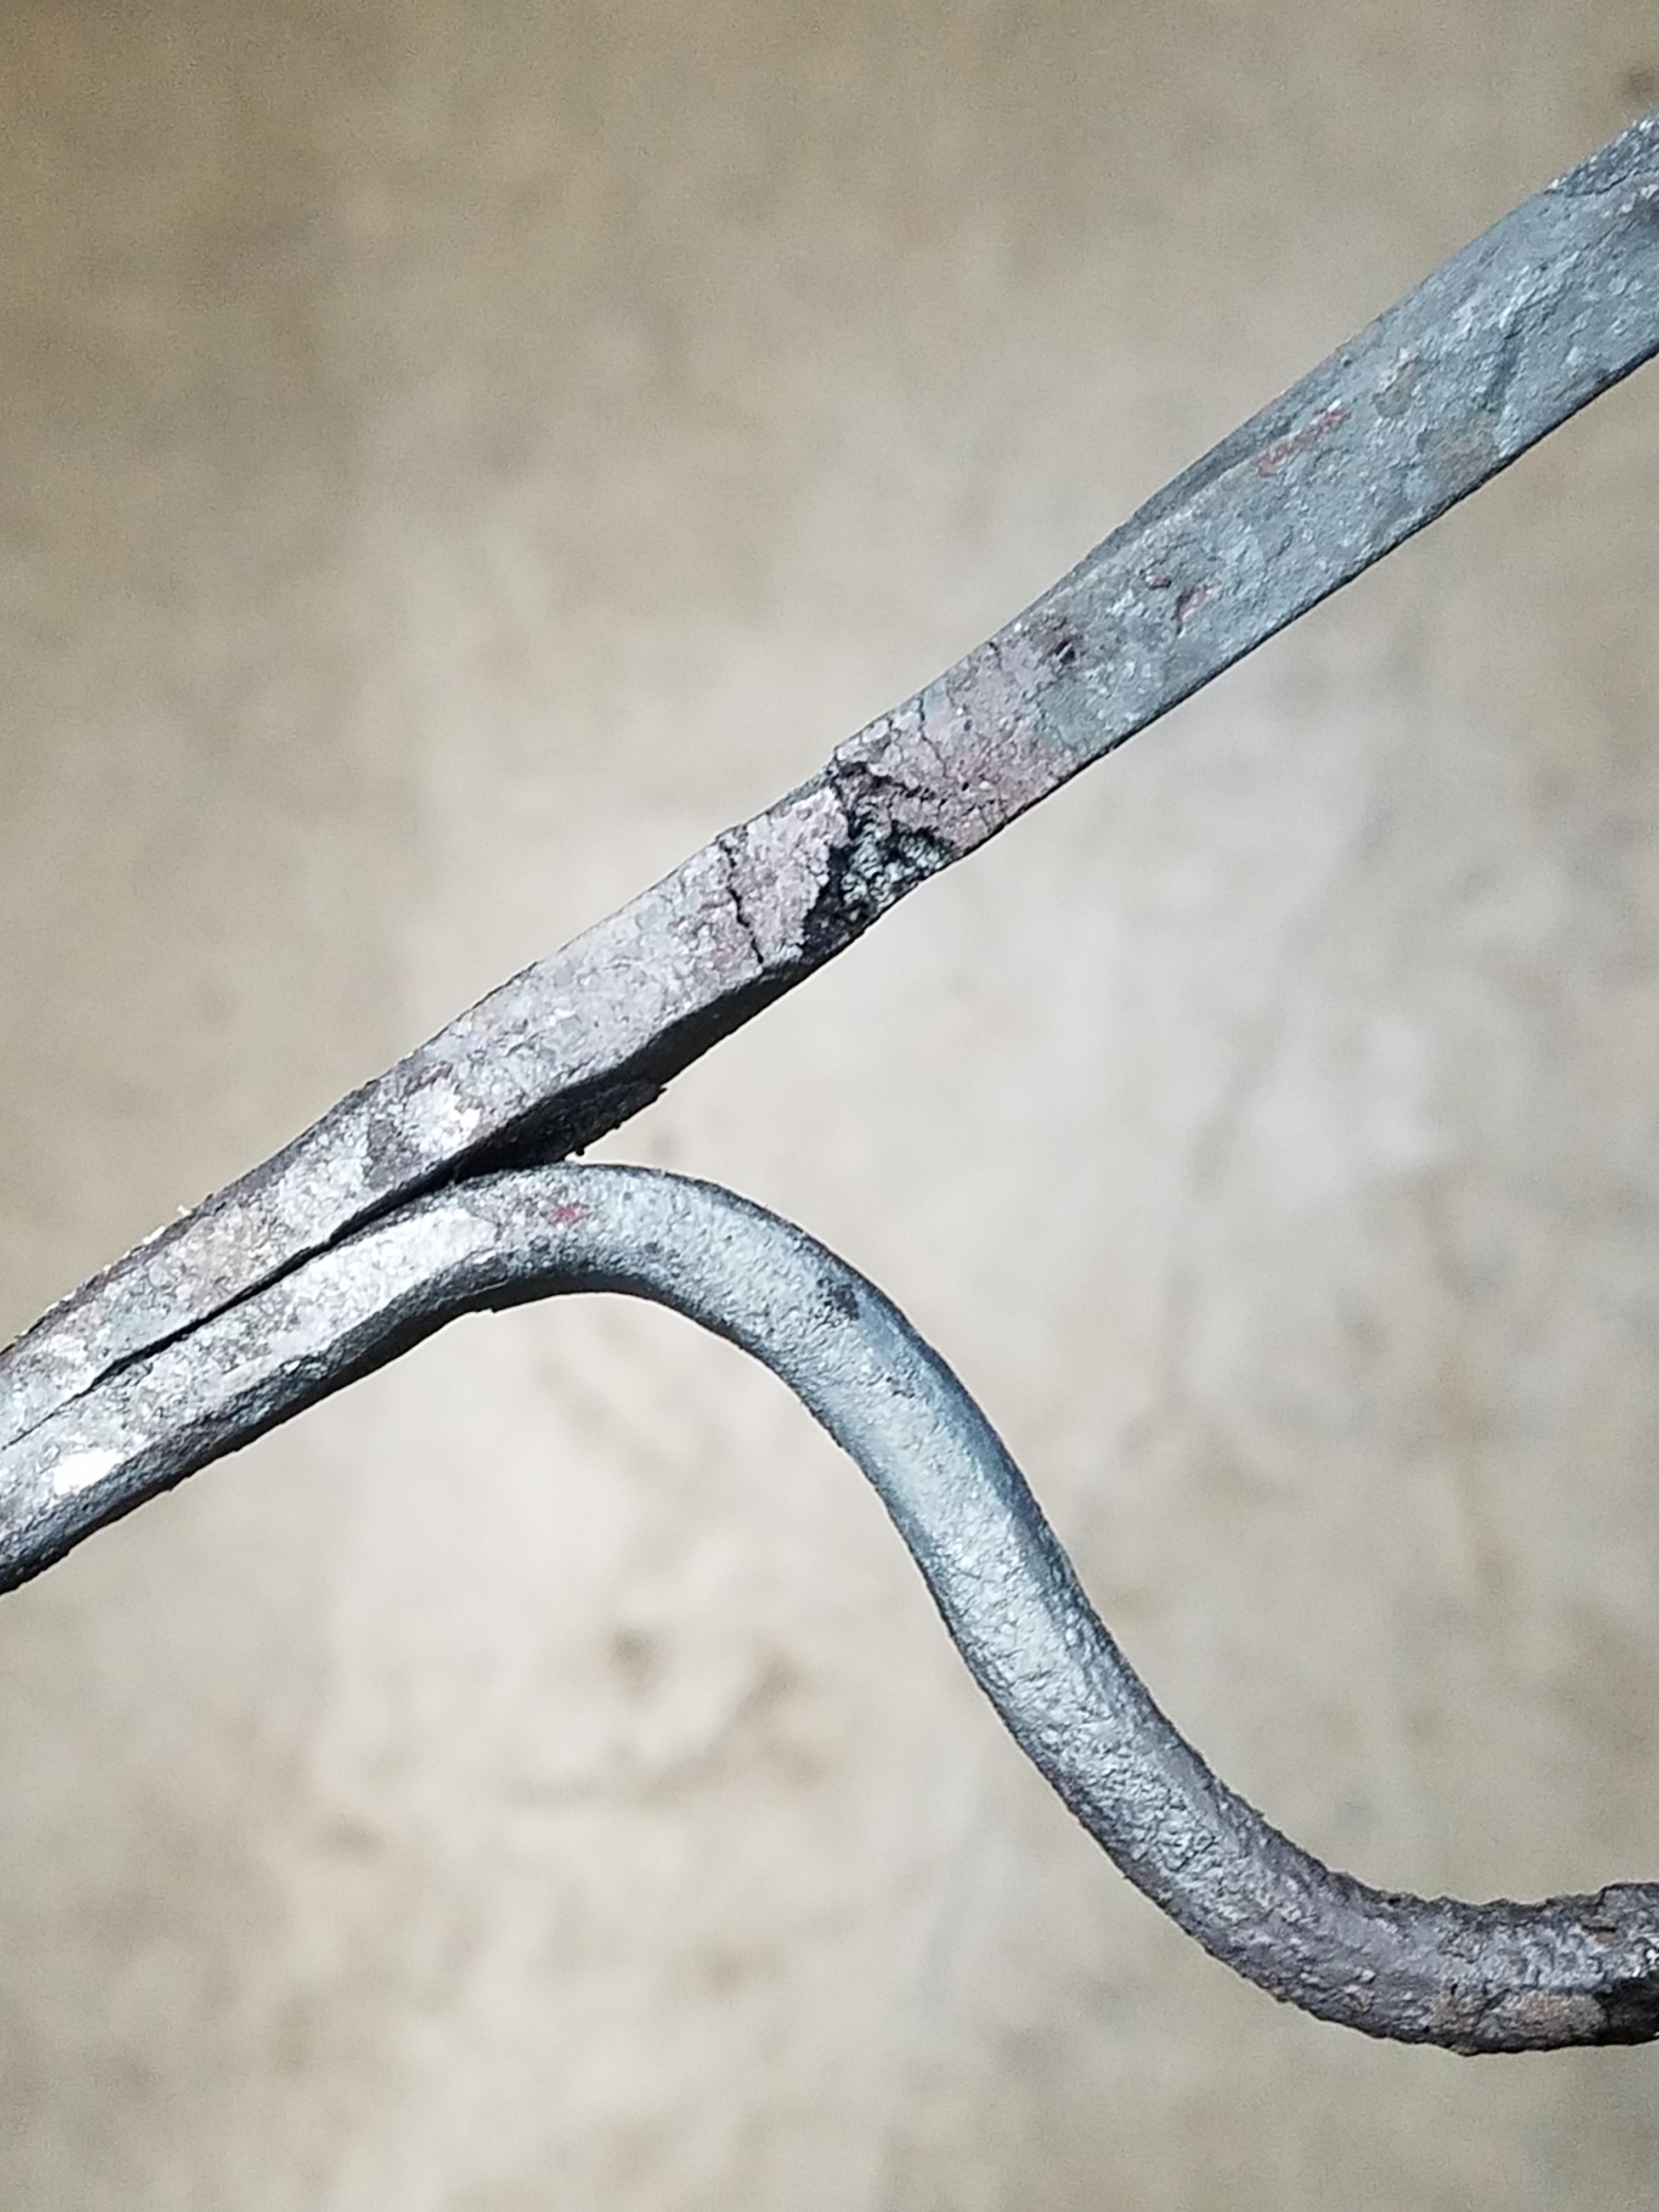
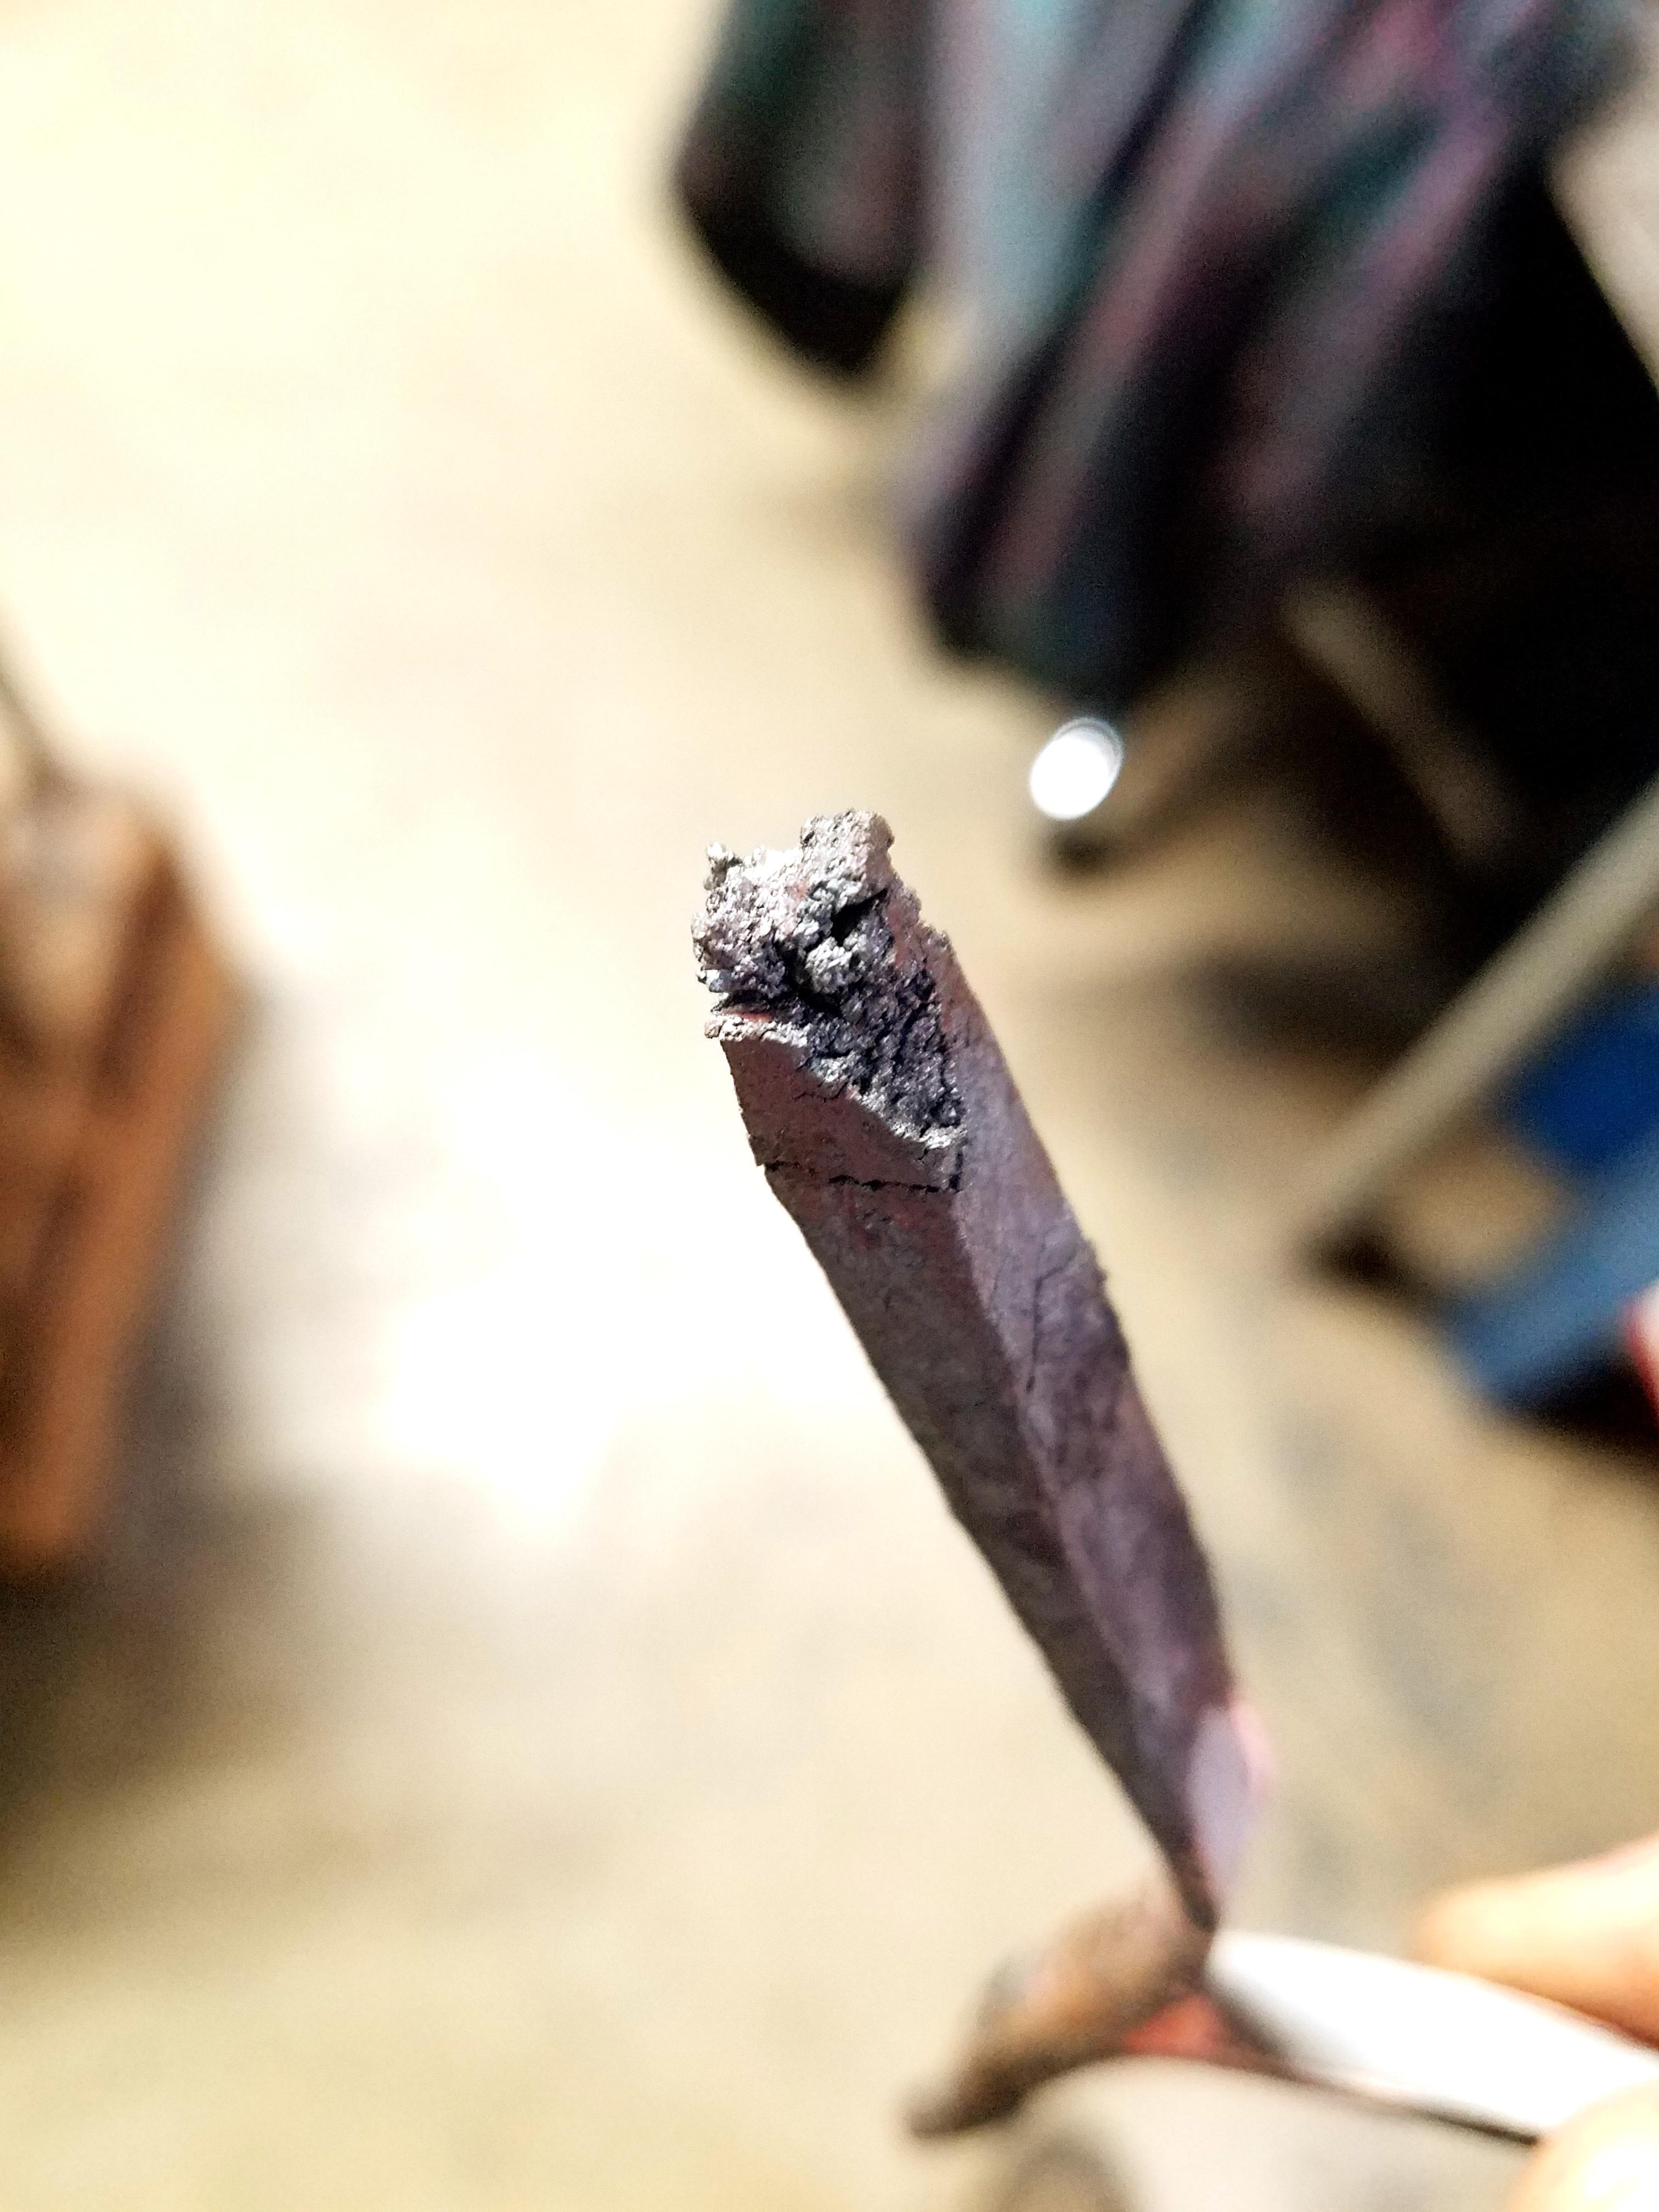
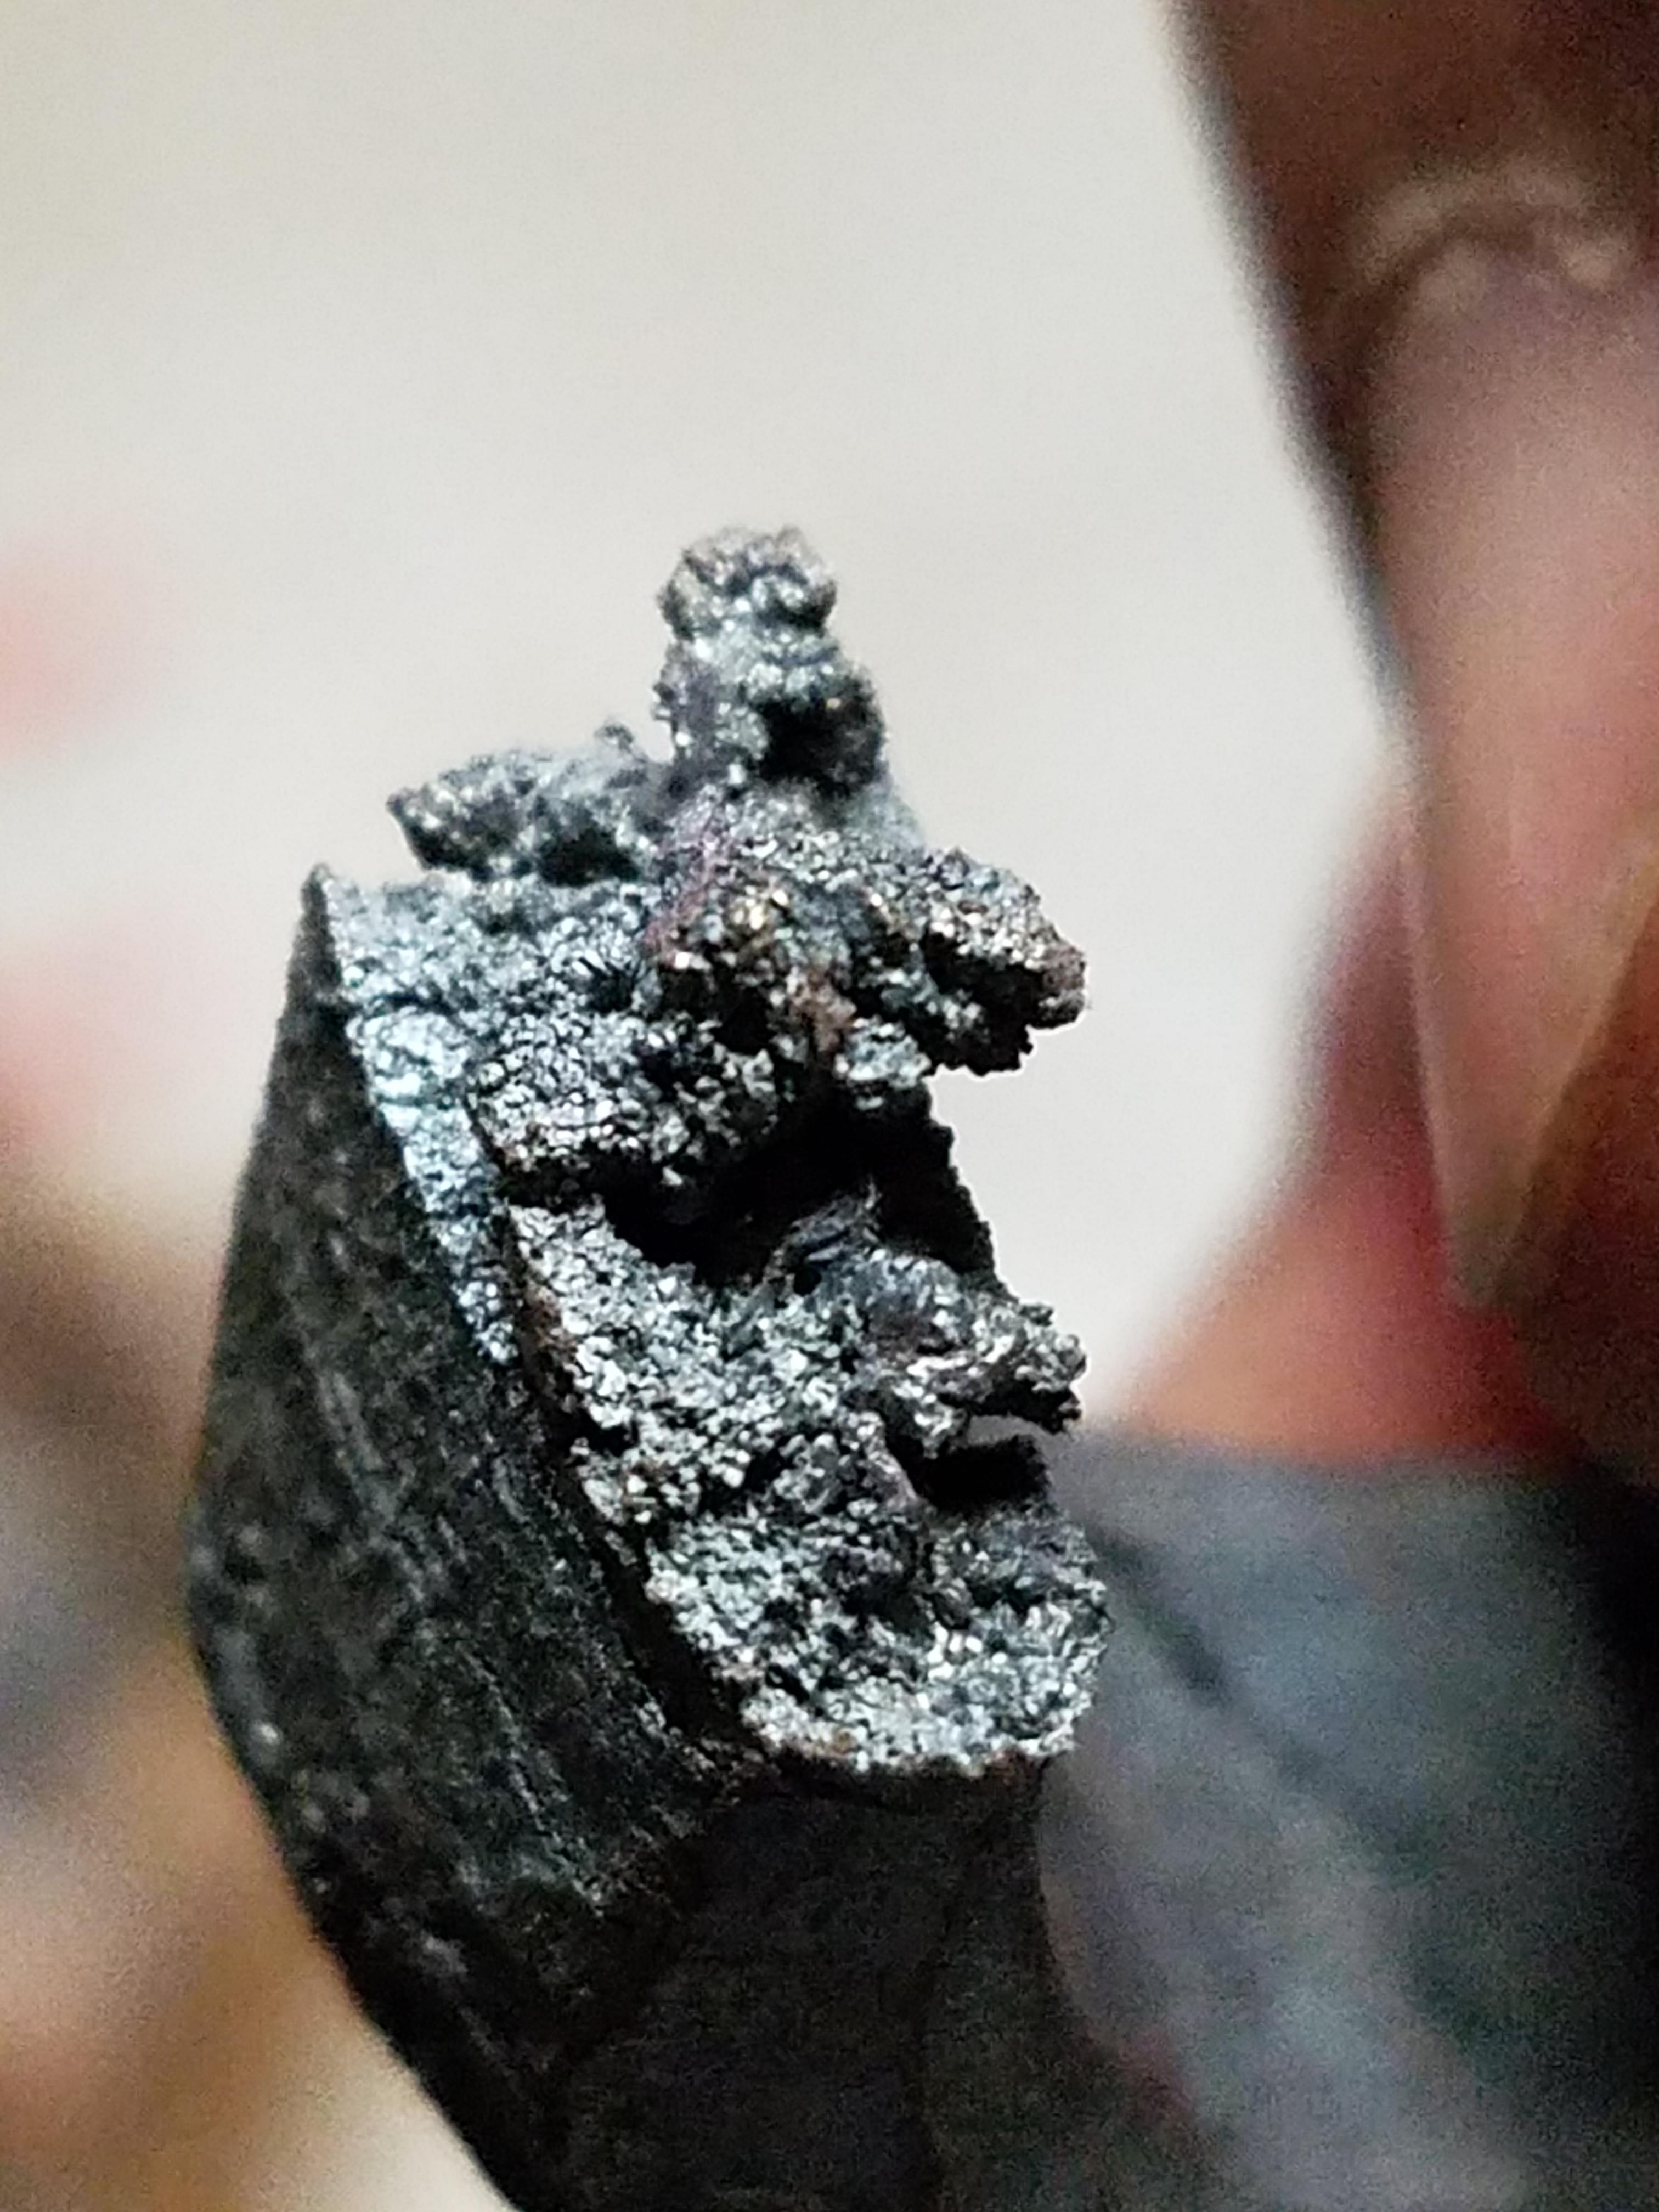
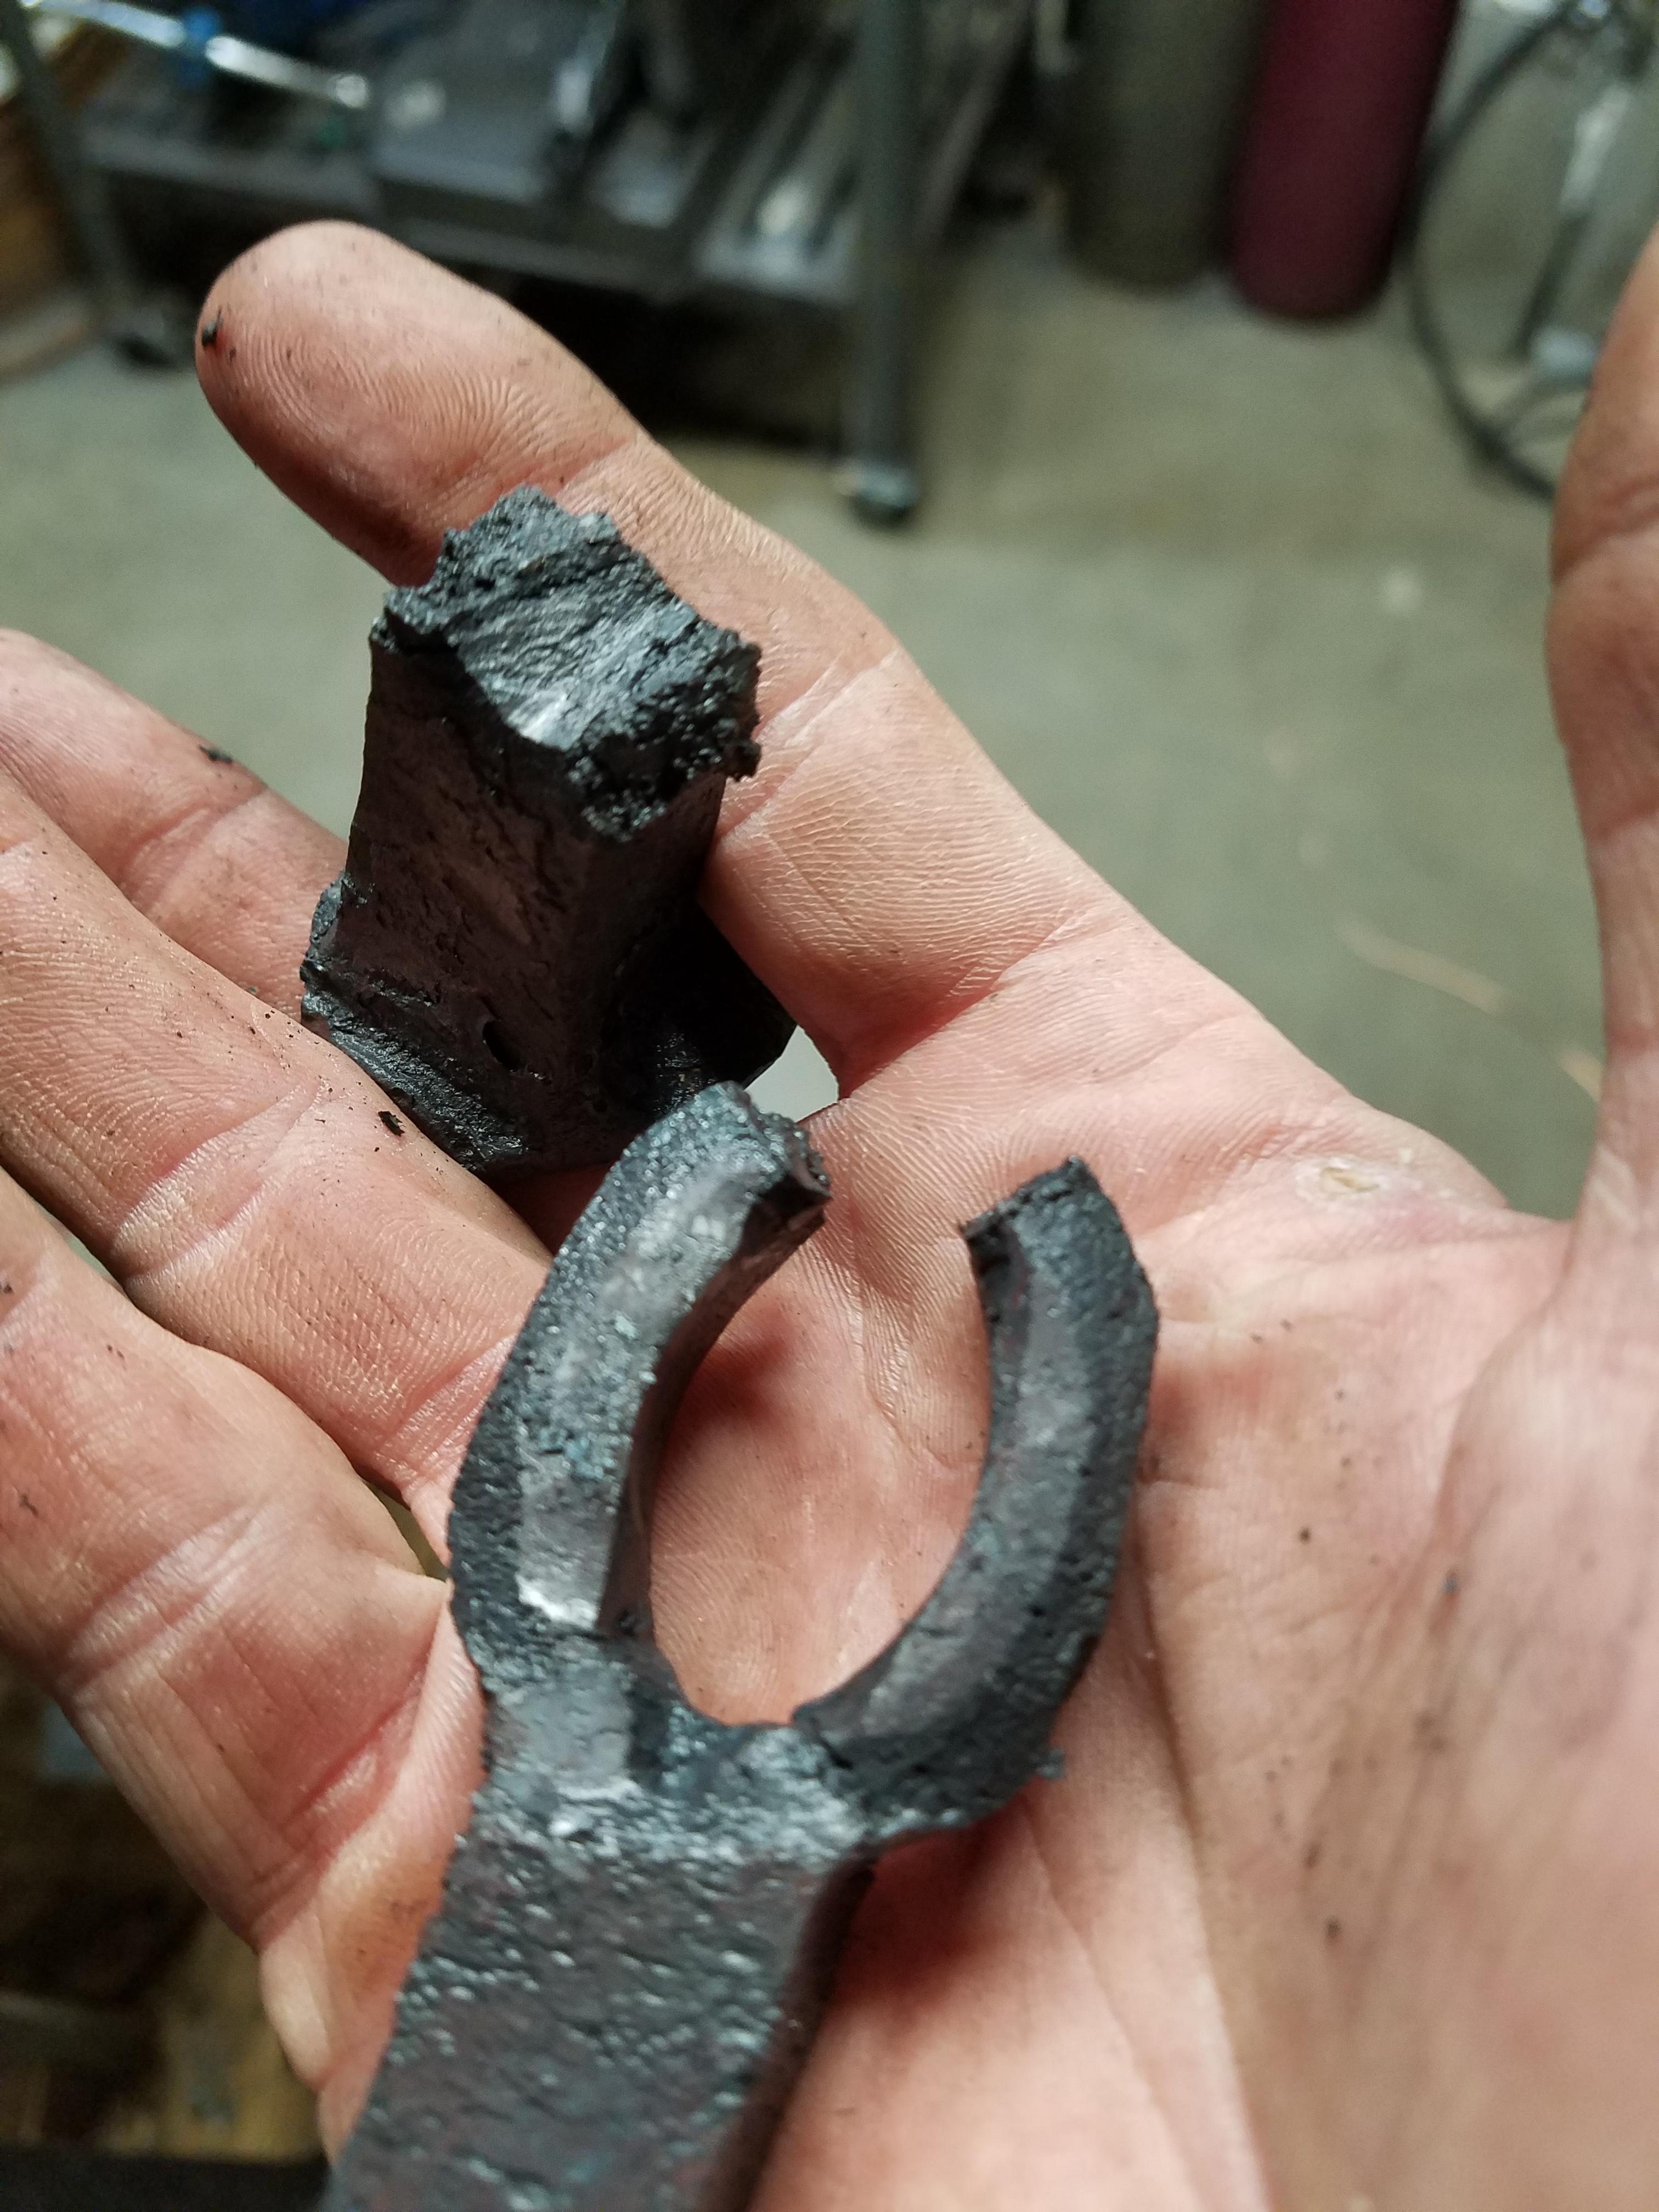
So I've managed to forge weld a few things with ok results (other than totally corrupting my forge floor with flux). The other night I tried to FW a fire poker for the first time and ended up failing miserably. It seemed everything was going pretty well at the beginning. I did hit it on the side and I think it split a little, but it was holding together. I got it bent up and thought I would put another twist in it. This is where it all went bad. I just felt the piece tear rather than twist. I thought I could maybe save it by welding (cheating I know)... but I decided to just break it off since the poker was probably too long anyways, and I figure I can try it again. Inspecting the failed end, I could see a bunch of copper on it. Long story short, a while back I melted some copper by accident and once in a while i get it transferred to my parts, often with cool results so I don't generally worry about it. I was able to rip apart a section of the weld by hand so Obviously it wasn't totally right. You can see in the photo showing the split, there is copper down inside between the layers. That contamination aside (I already have a plan to keep the next one off the floor), I'm more concerned about the torn stock. Is this from overheating? Basically did I burn it up? The only other time I've had my material looking like this was trying to make a Rail Spike hawks twice.. (last 3 photos). On these failures I split the eye then it cracked drifting it out. The failed area looked exactly like the fire poker failure.
So it this material crumbling and cracking a result of over heating?


-
On 12/4/2018 at 7:26 AM, ausfire said:
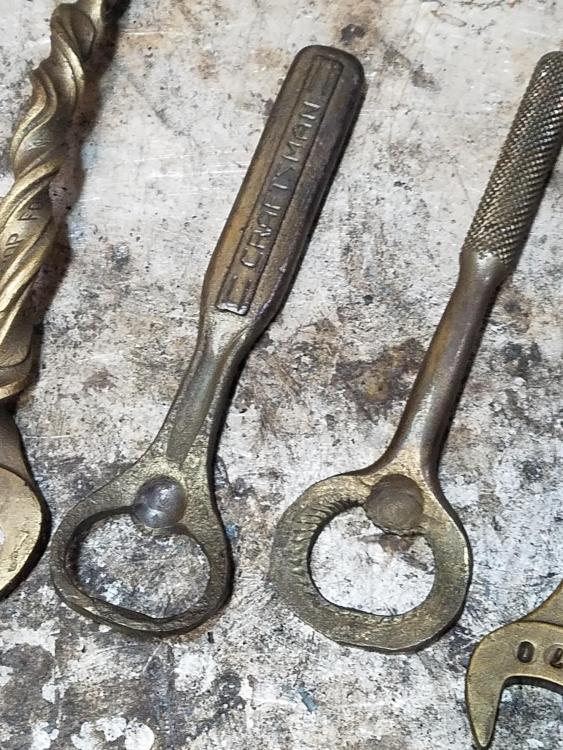
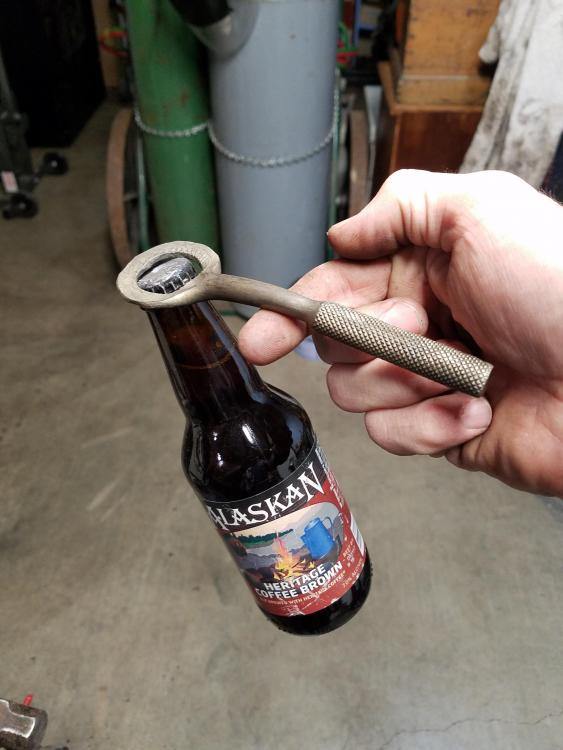
Some great openers there. The one with the knurled handle looks like a socket wrench with the middle knocked out.
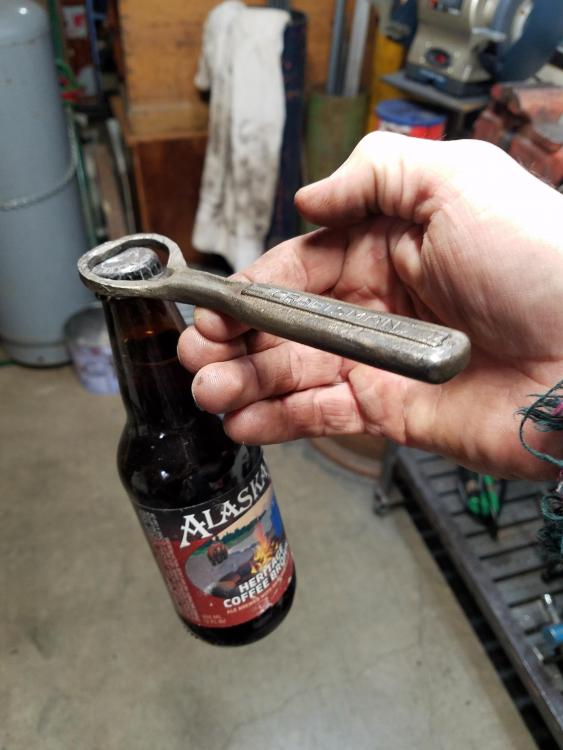
Thanks! The middle 2 are in fact old socket wrenches that had chipped ratchets so they didnt work well.
On 12/4/2018 at 9:37 AM, HojPoj said:Is that a commentary on the people attending the event?
Nice openers! I've got some similar fodder that I'd like to give the same treatment.
Yes, Bizarre old ladies making tiny felt replicas of their corgies...
-
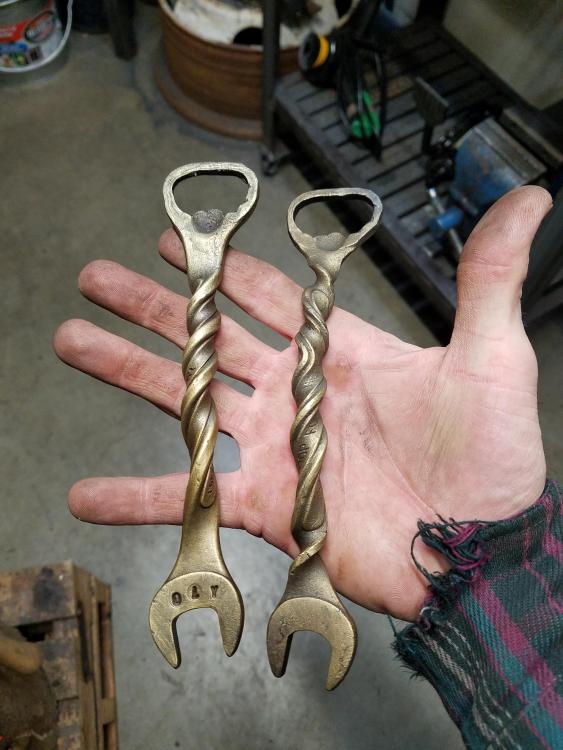
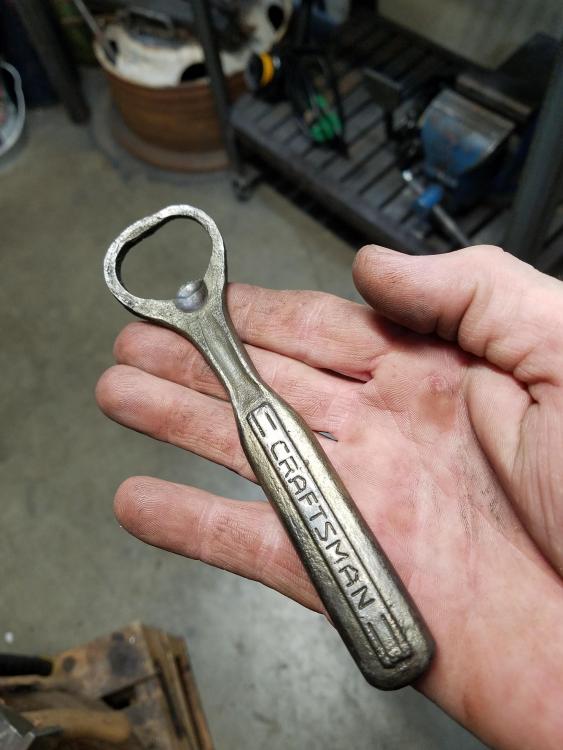
Scored a big bag of random tools recently, and also had some broken socket wrenches so tonight I took 2 of each and made some bottle openers.... The 5/8" open ended wrenches are nice to work with since there is no punching and drifting needed. I basically flatten them down, then work the ring down on the horn of my little anvil till they fit the bottle. The broken sockets took a little more work. The craftsman one had the internals that wouldn't come out so I just cut the end off,but I still had plenty of material to mash down before punching. The knurled handled one the internals popped out easy and I was left with a nice ring to flatten like the box wrenches. I finished them off with a brass brushing and beeswax. These are going to make their way to a craft bizarre next weekend.
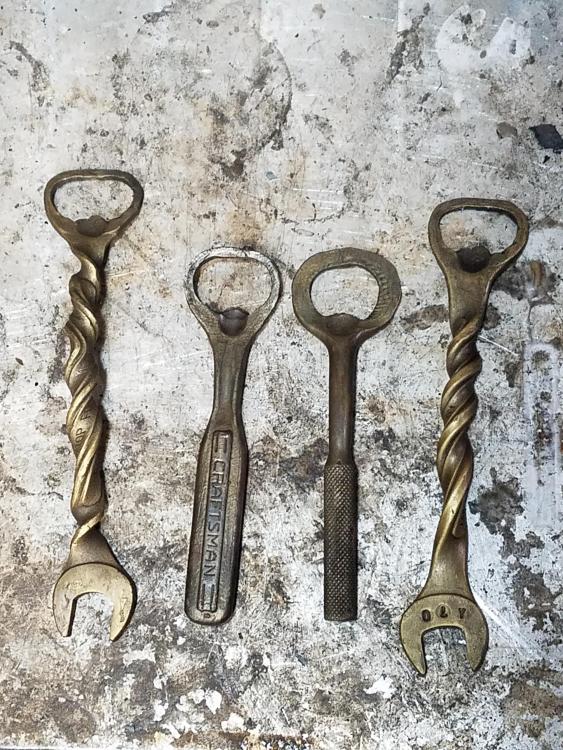

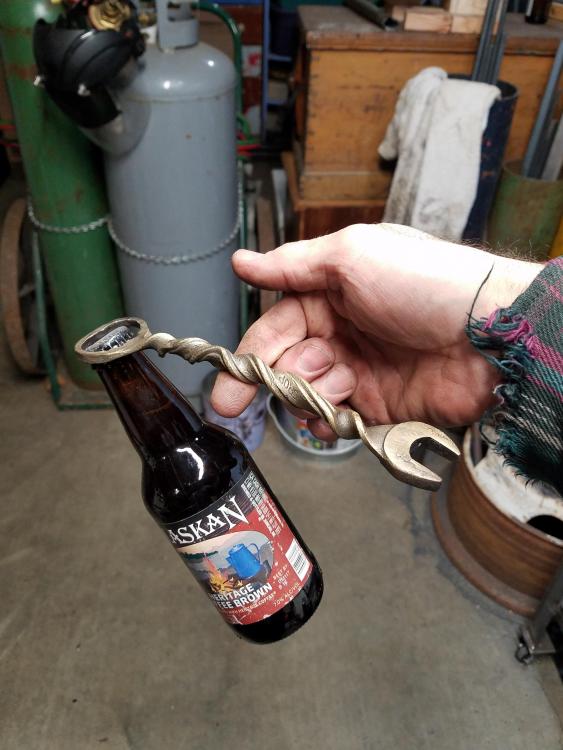


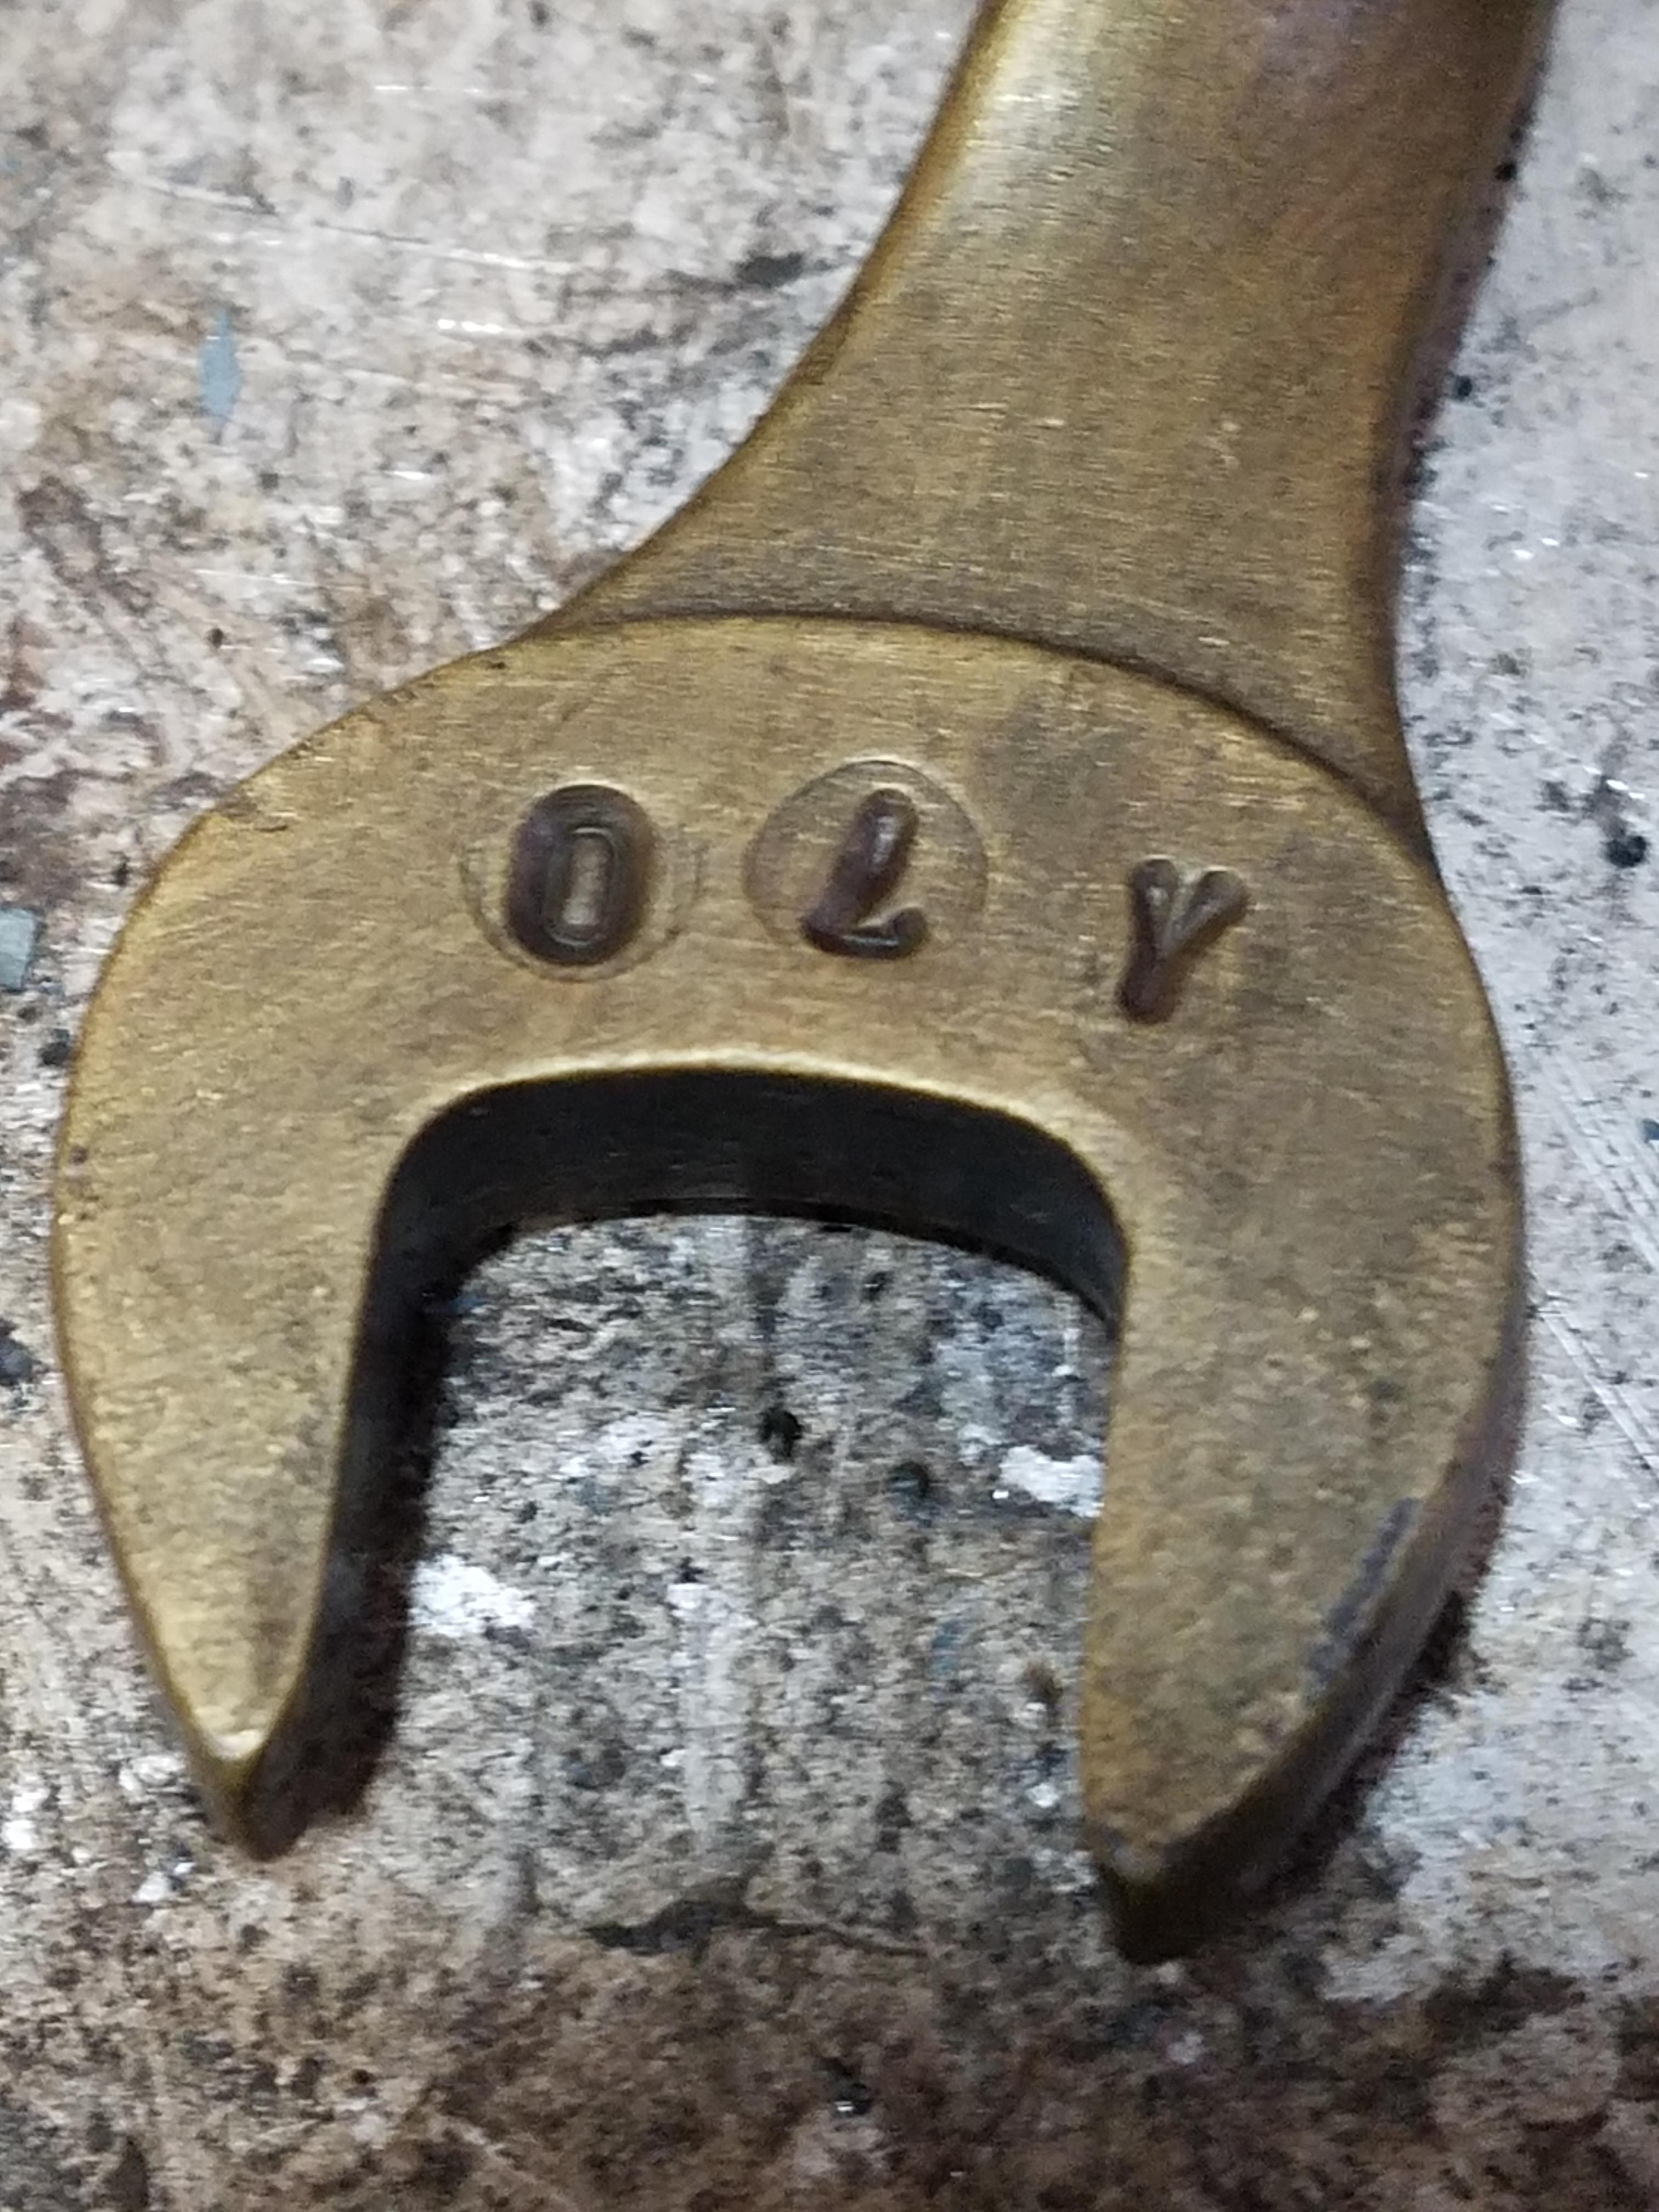


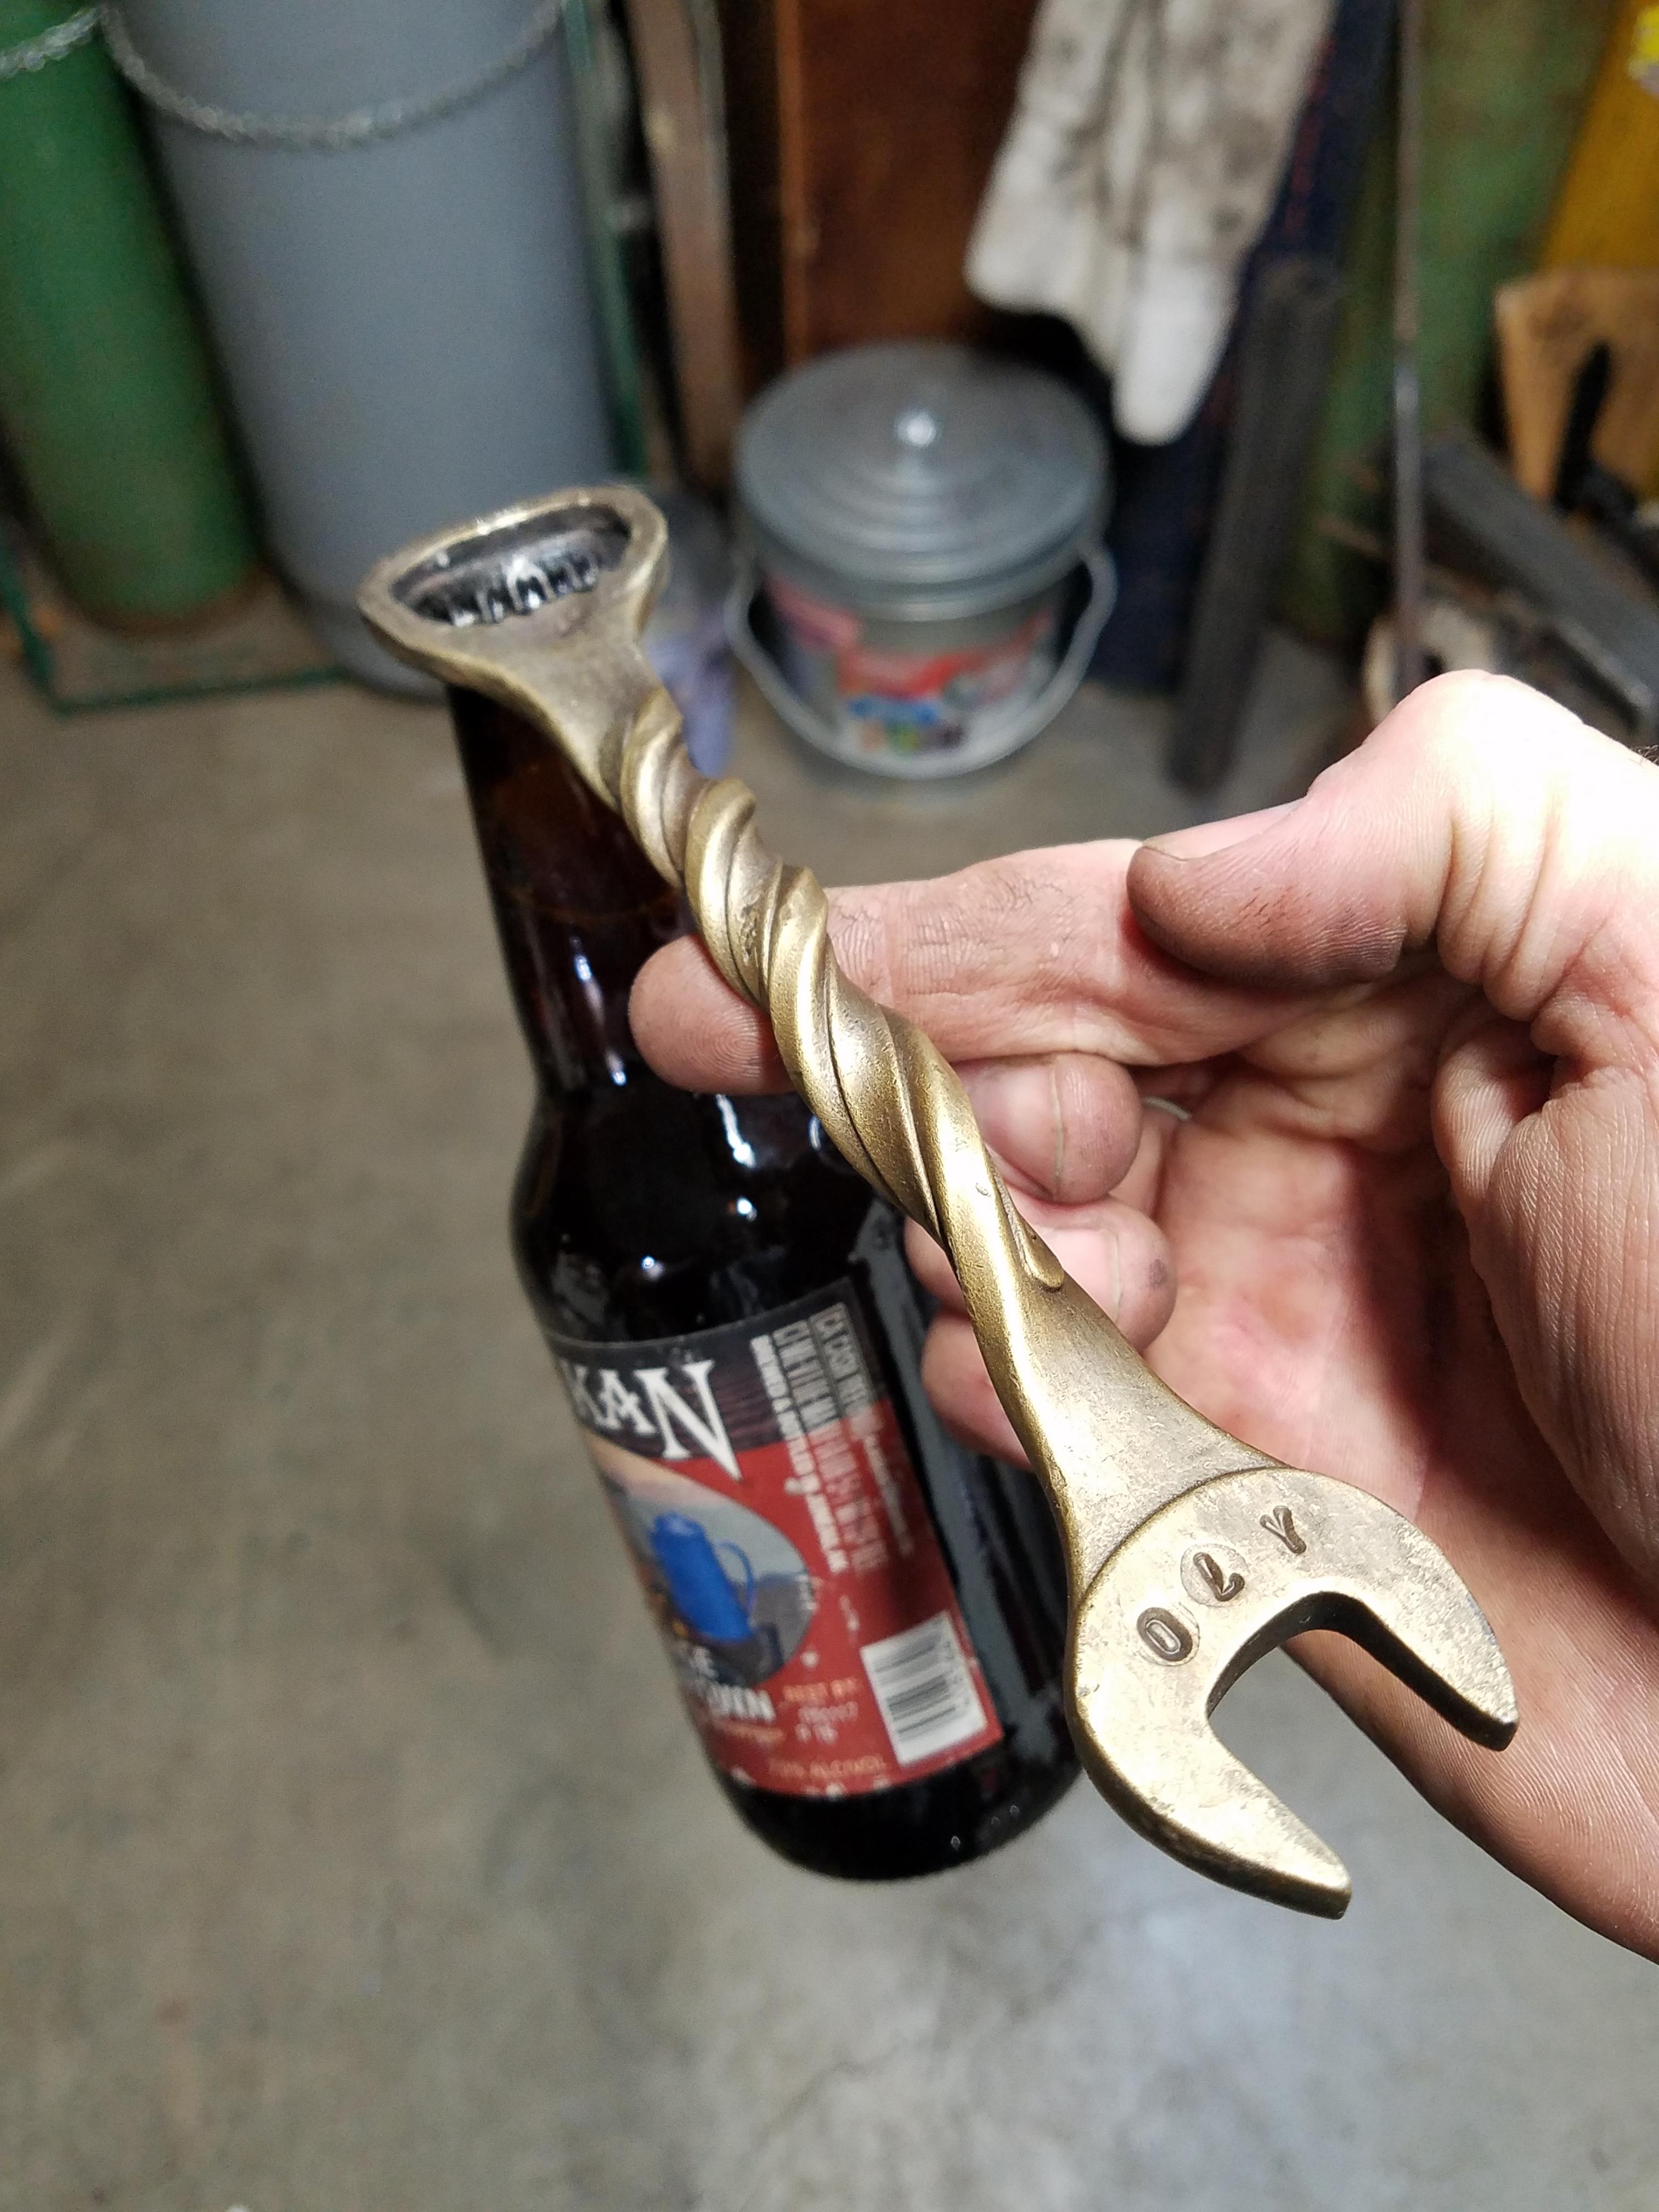


Show me your Bottle Openers!
in Blacksmithing, General Discussion
Posted
Thank you! And that's a good name for it...