DaveGas
-
Posts
24 -
Joined
-
Last visited
-
What did you do in the shop today?
DaveGas replied to Mark Ling's topic in Blacksmithing, General Discussion
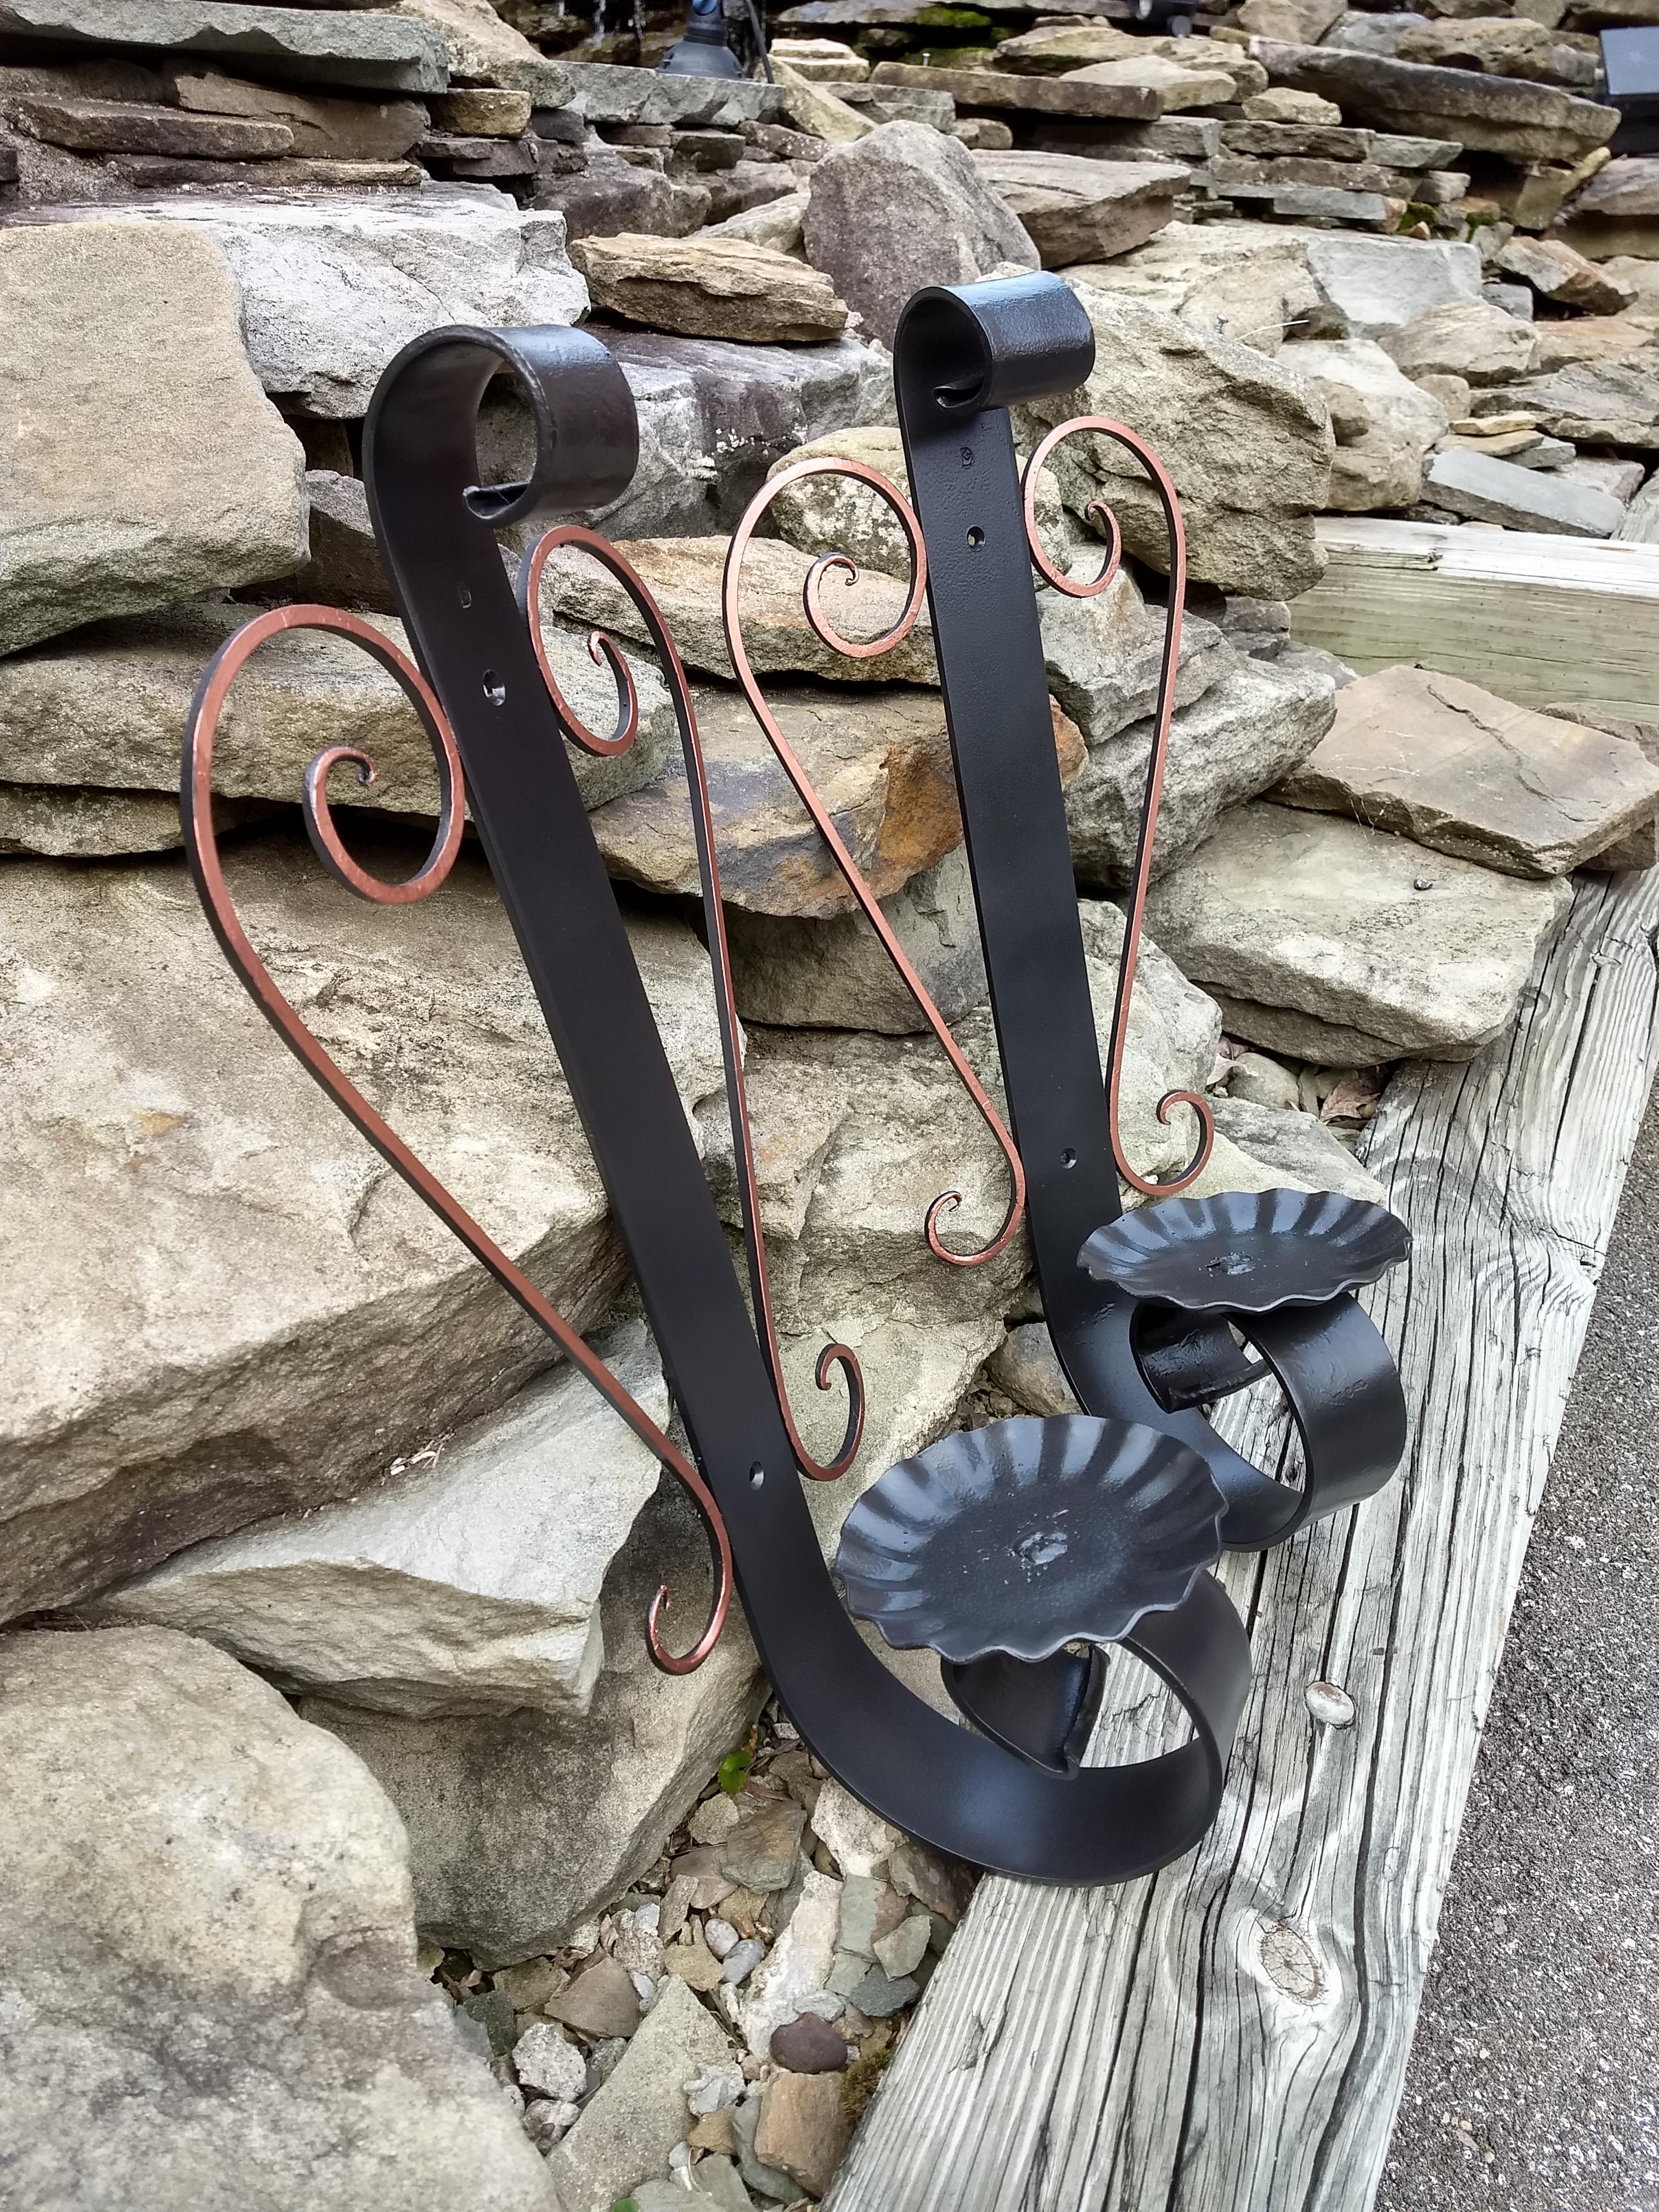
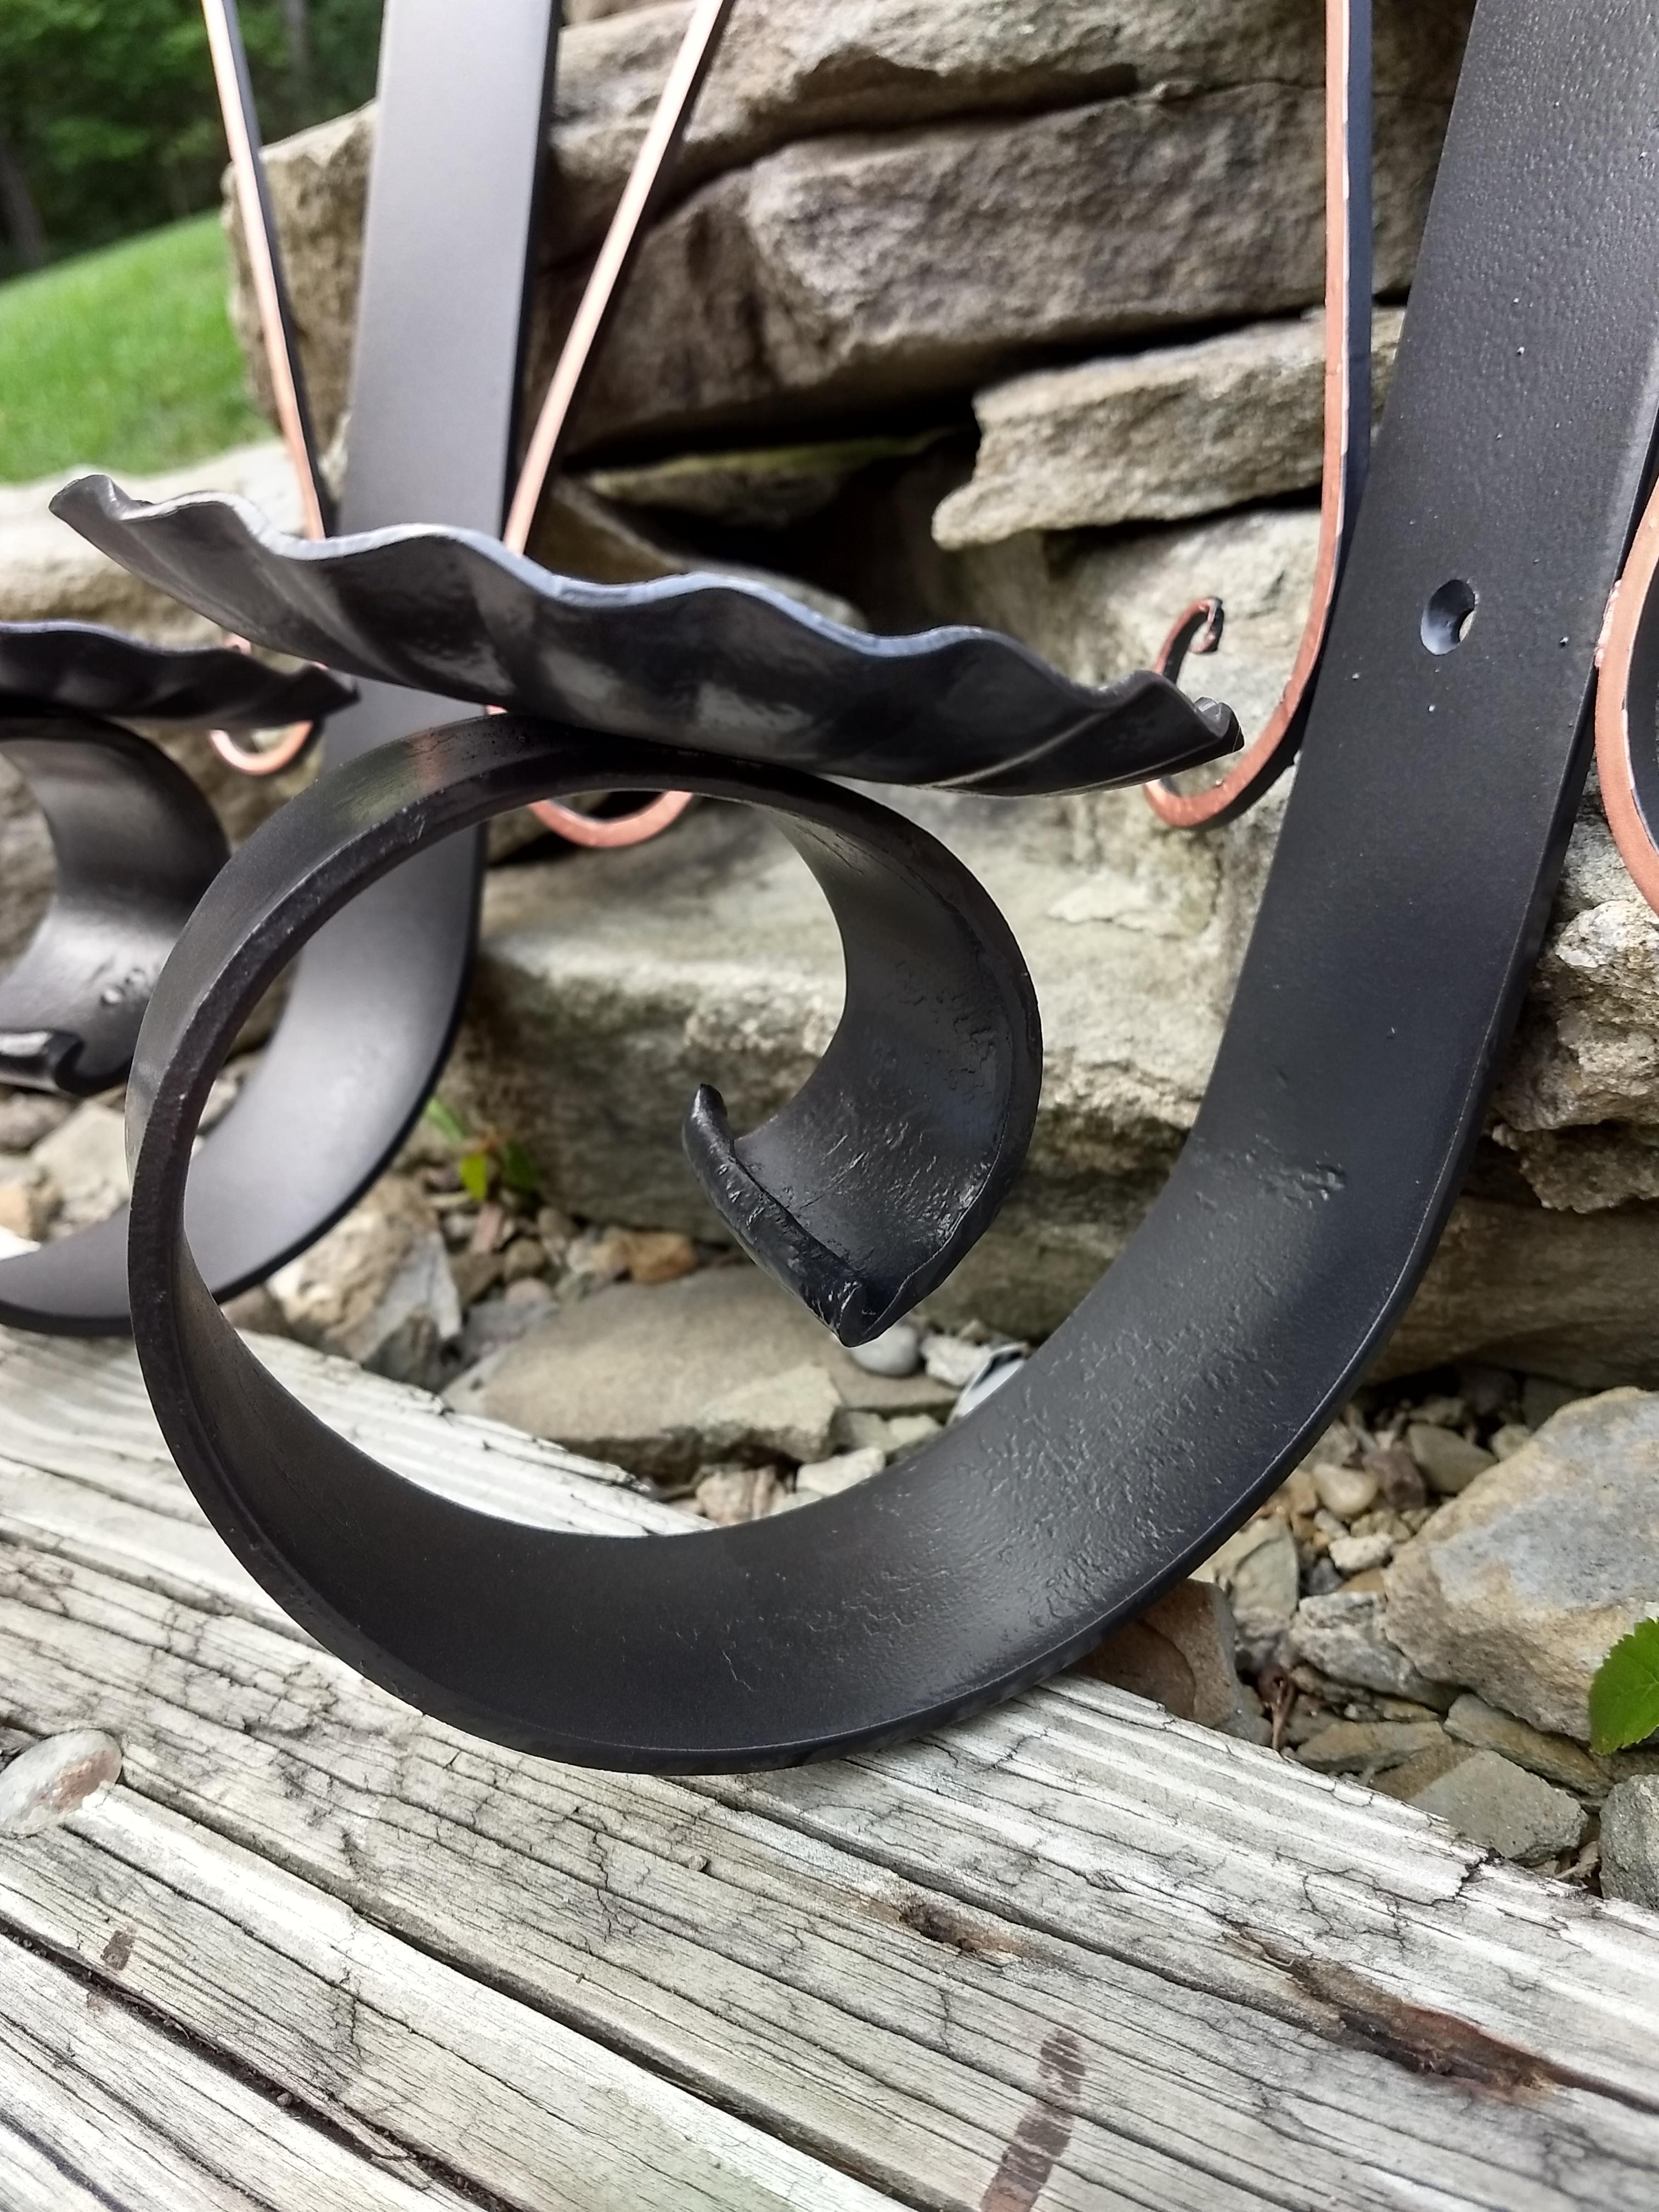
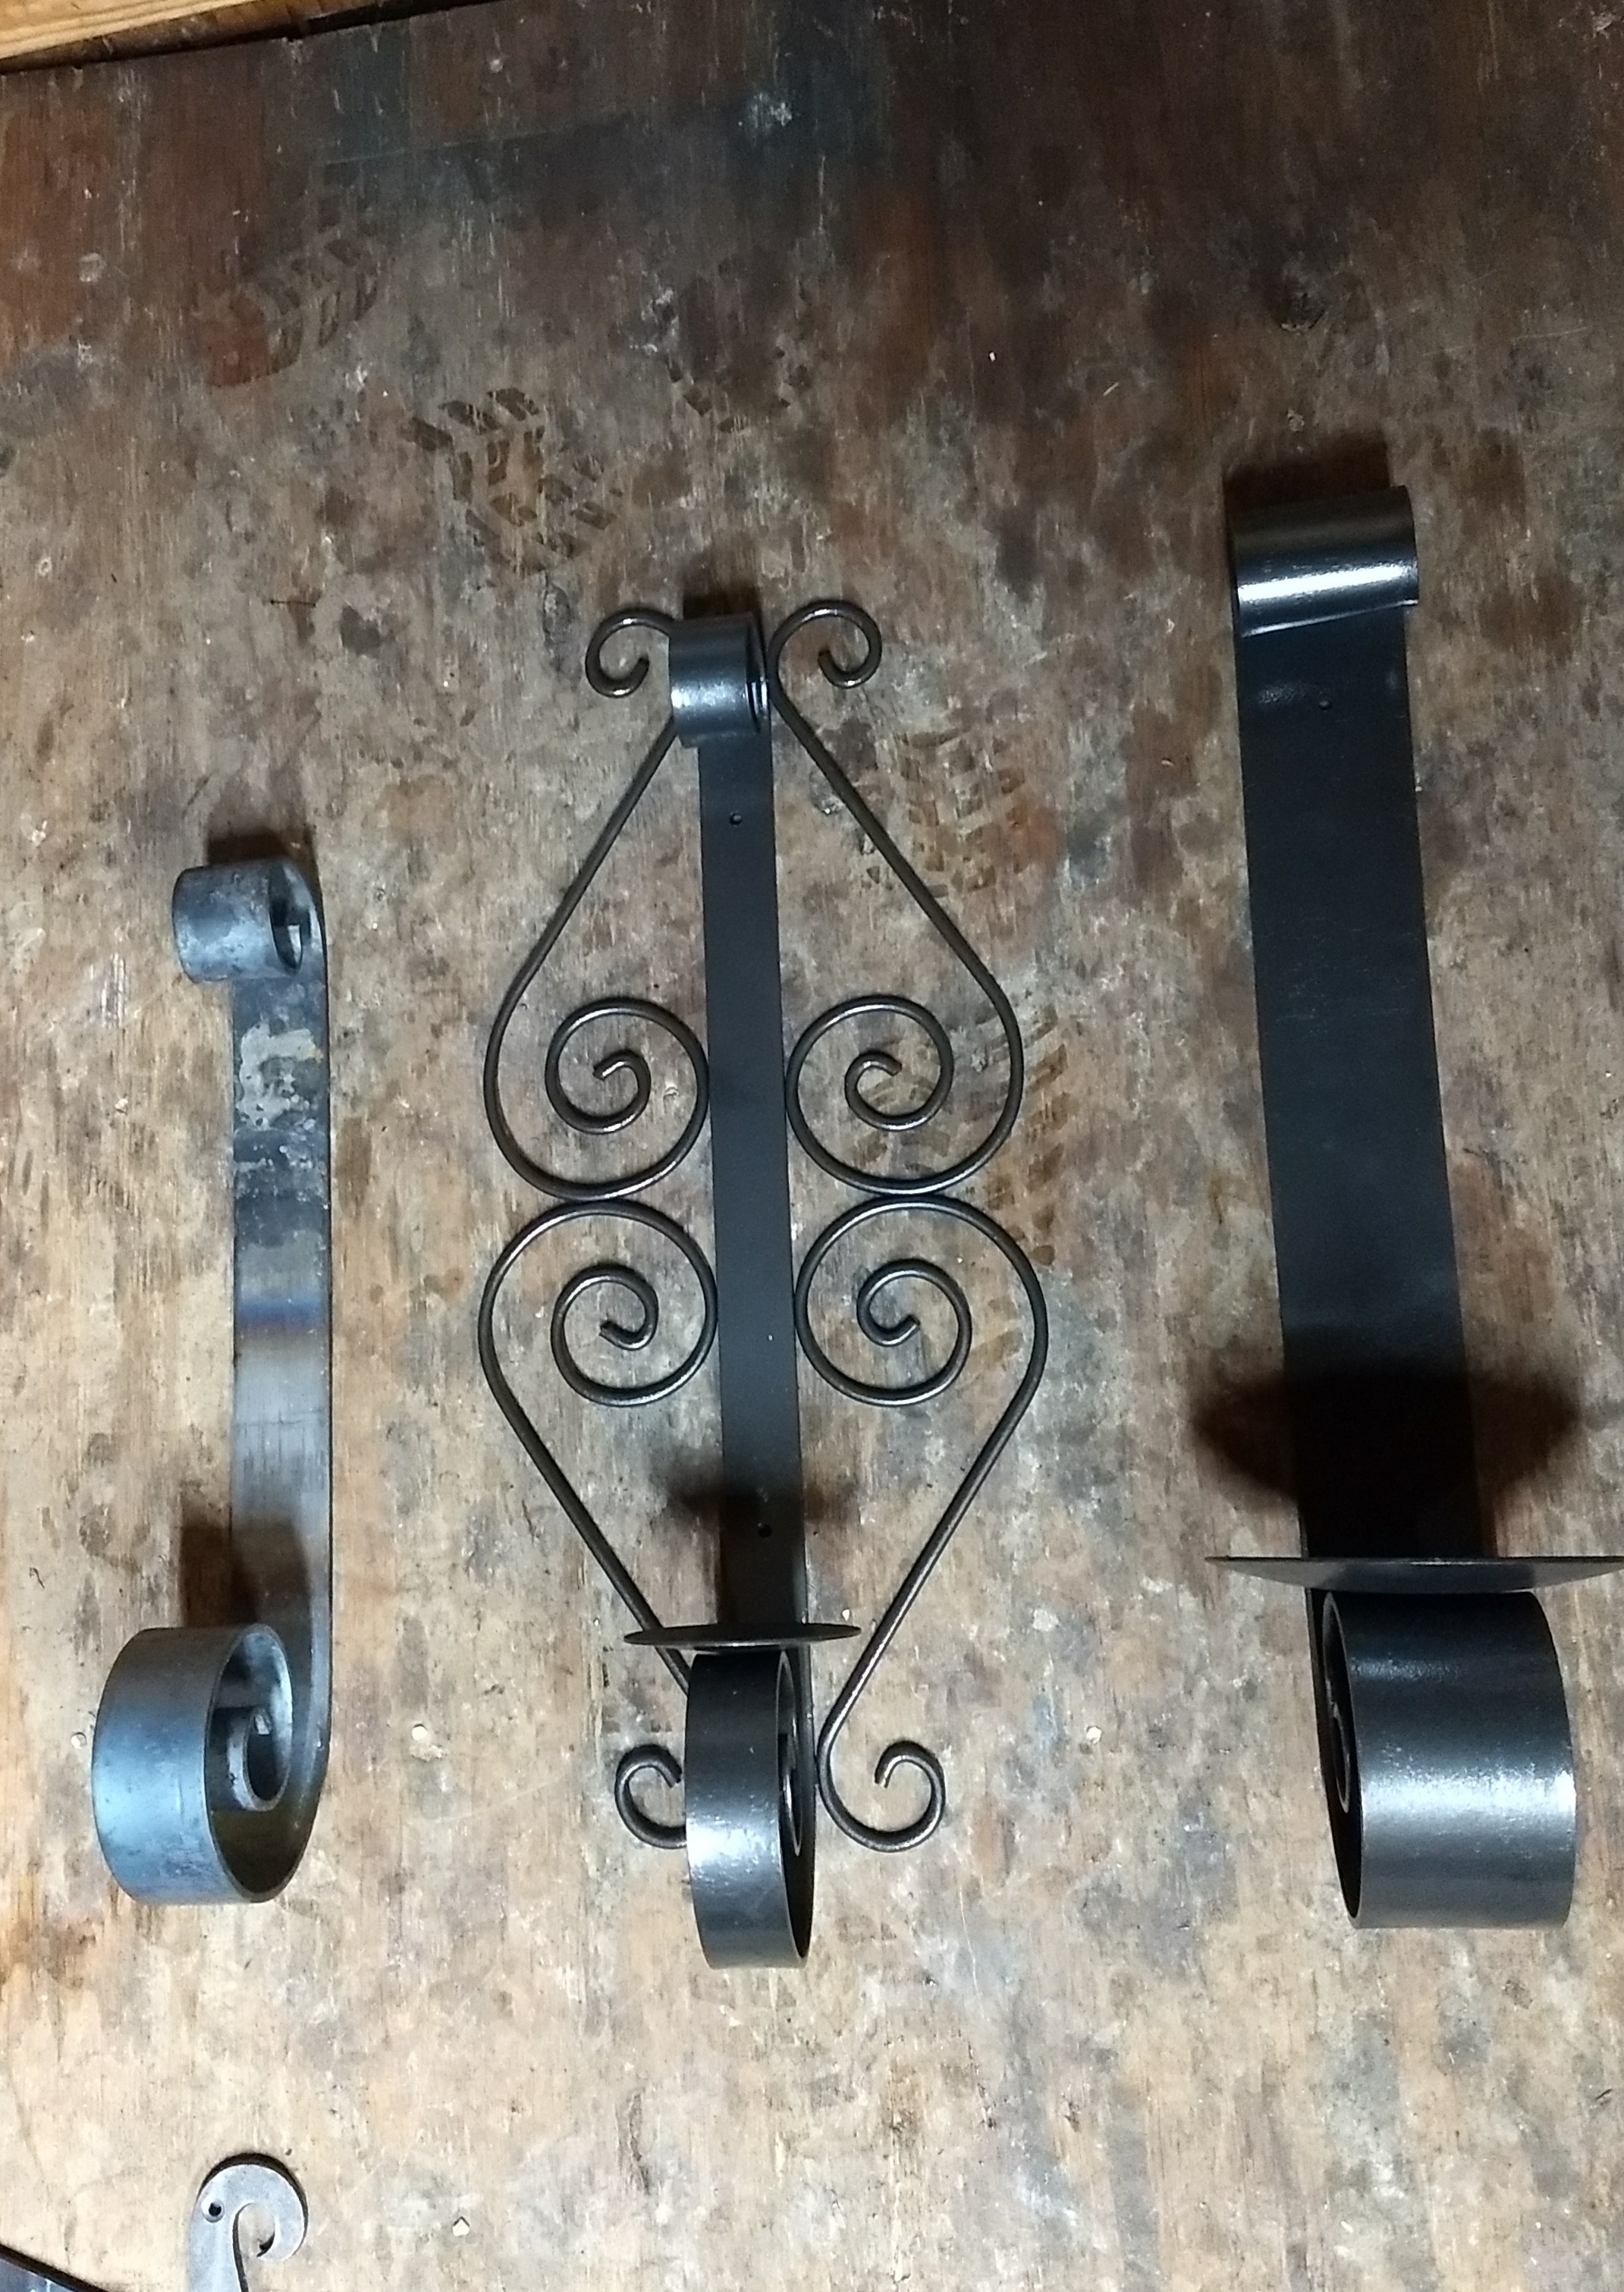
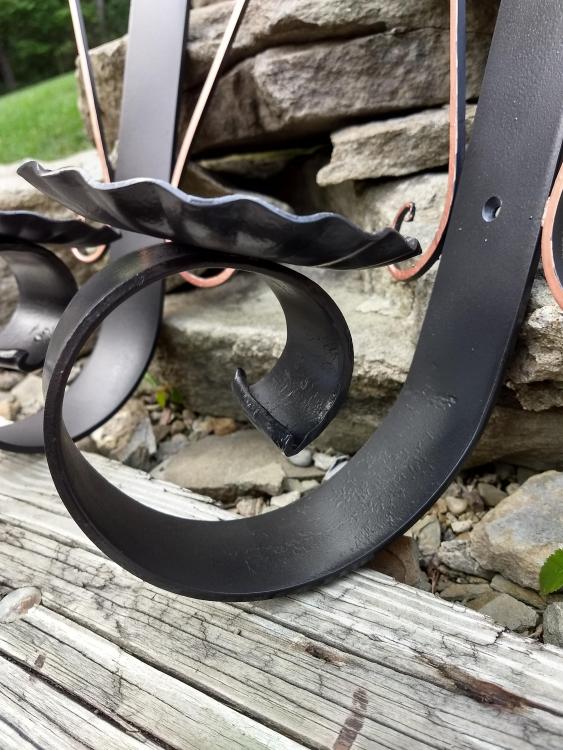
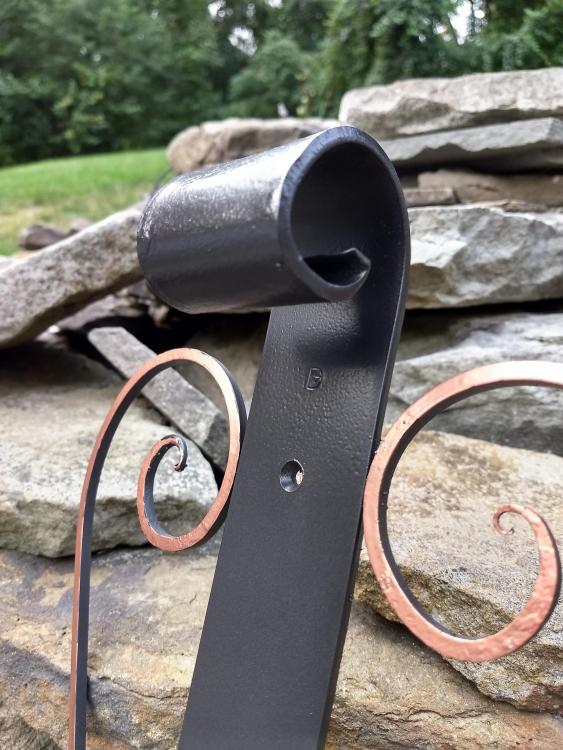
Finished up a set of sconces for my grandmother's 86th birthday. Took some advice off of some guys on here awhile ago and formed all of the scrolls freehand. Took a little longer but I'm happy with them. Used a copper leaf pen to add a little color in to the mix.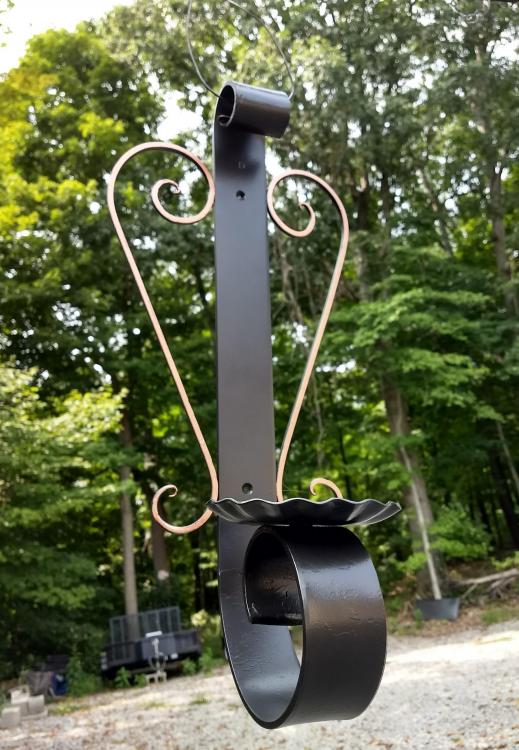


-
What did you do in the shop today?
DaveGas replied to Mark Ling's topic in Blacksmithing, General Discussion
They are about 8" tall and protrude 4" from the wall. Made out of 1/4" thick x 3/4" wide stock. The tapestry itself is around 54" wide by 38" long. Mod note: Please do not quote entire blocks of text and photos that are not relevant to your reply. It makes the forum hard to read and eats up bandwidth for our members who use dial-up internet. -
What did you do in the shop today?
DaveGas replied to Mark Ling's topic in Blacksmithing, General Discussion
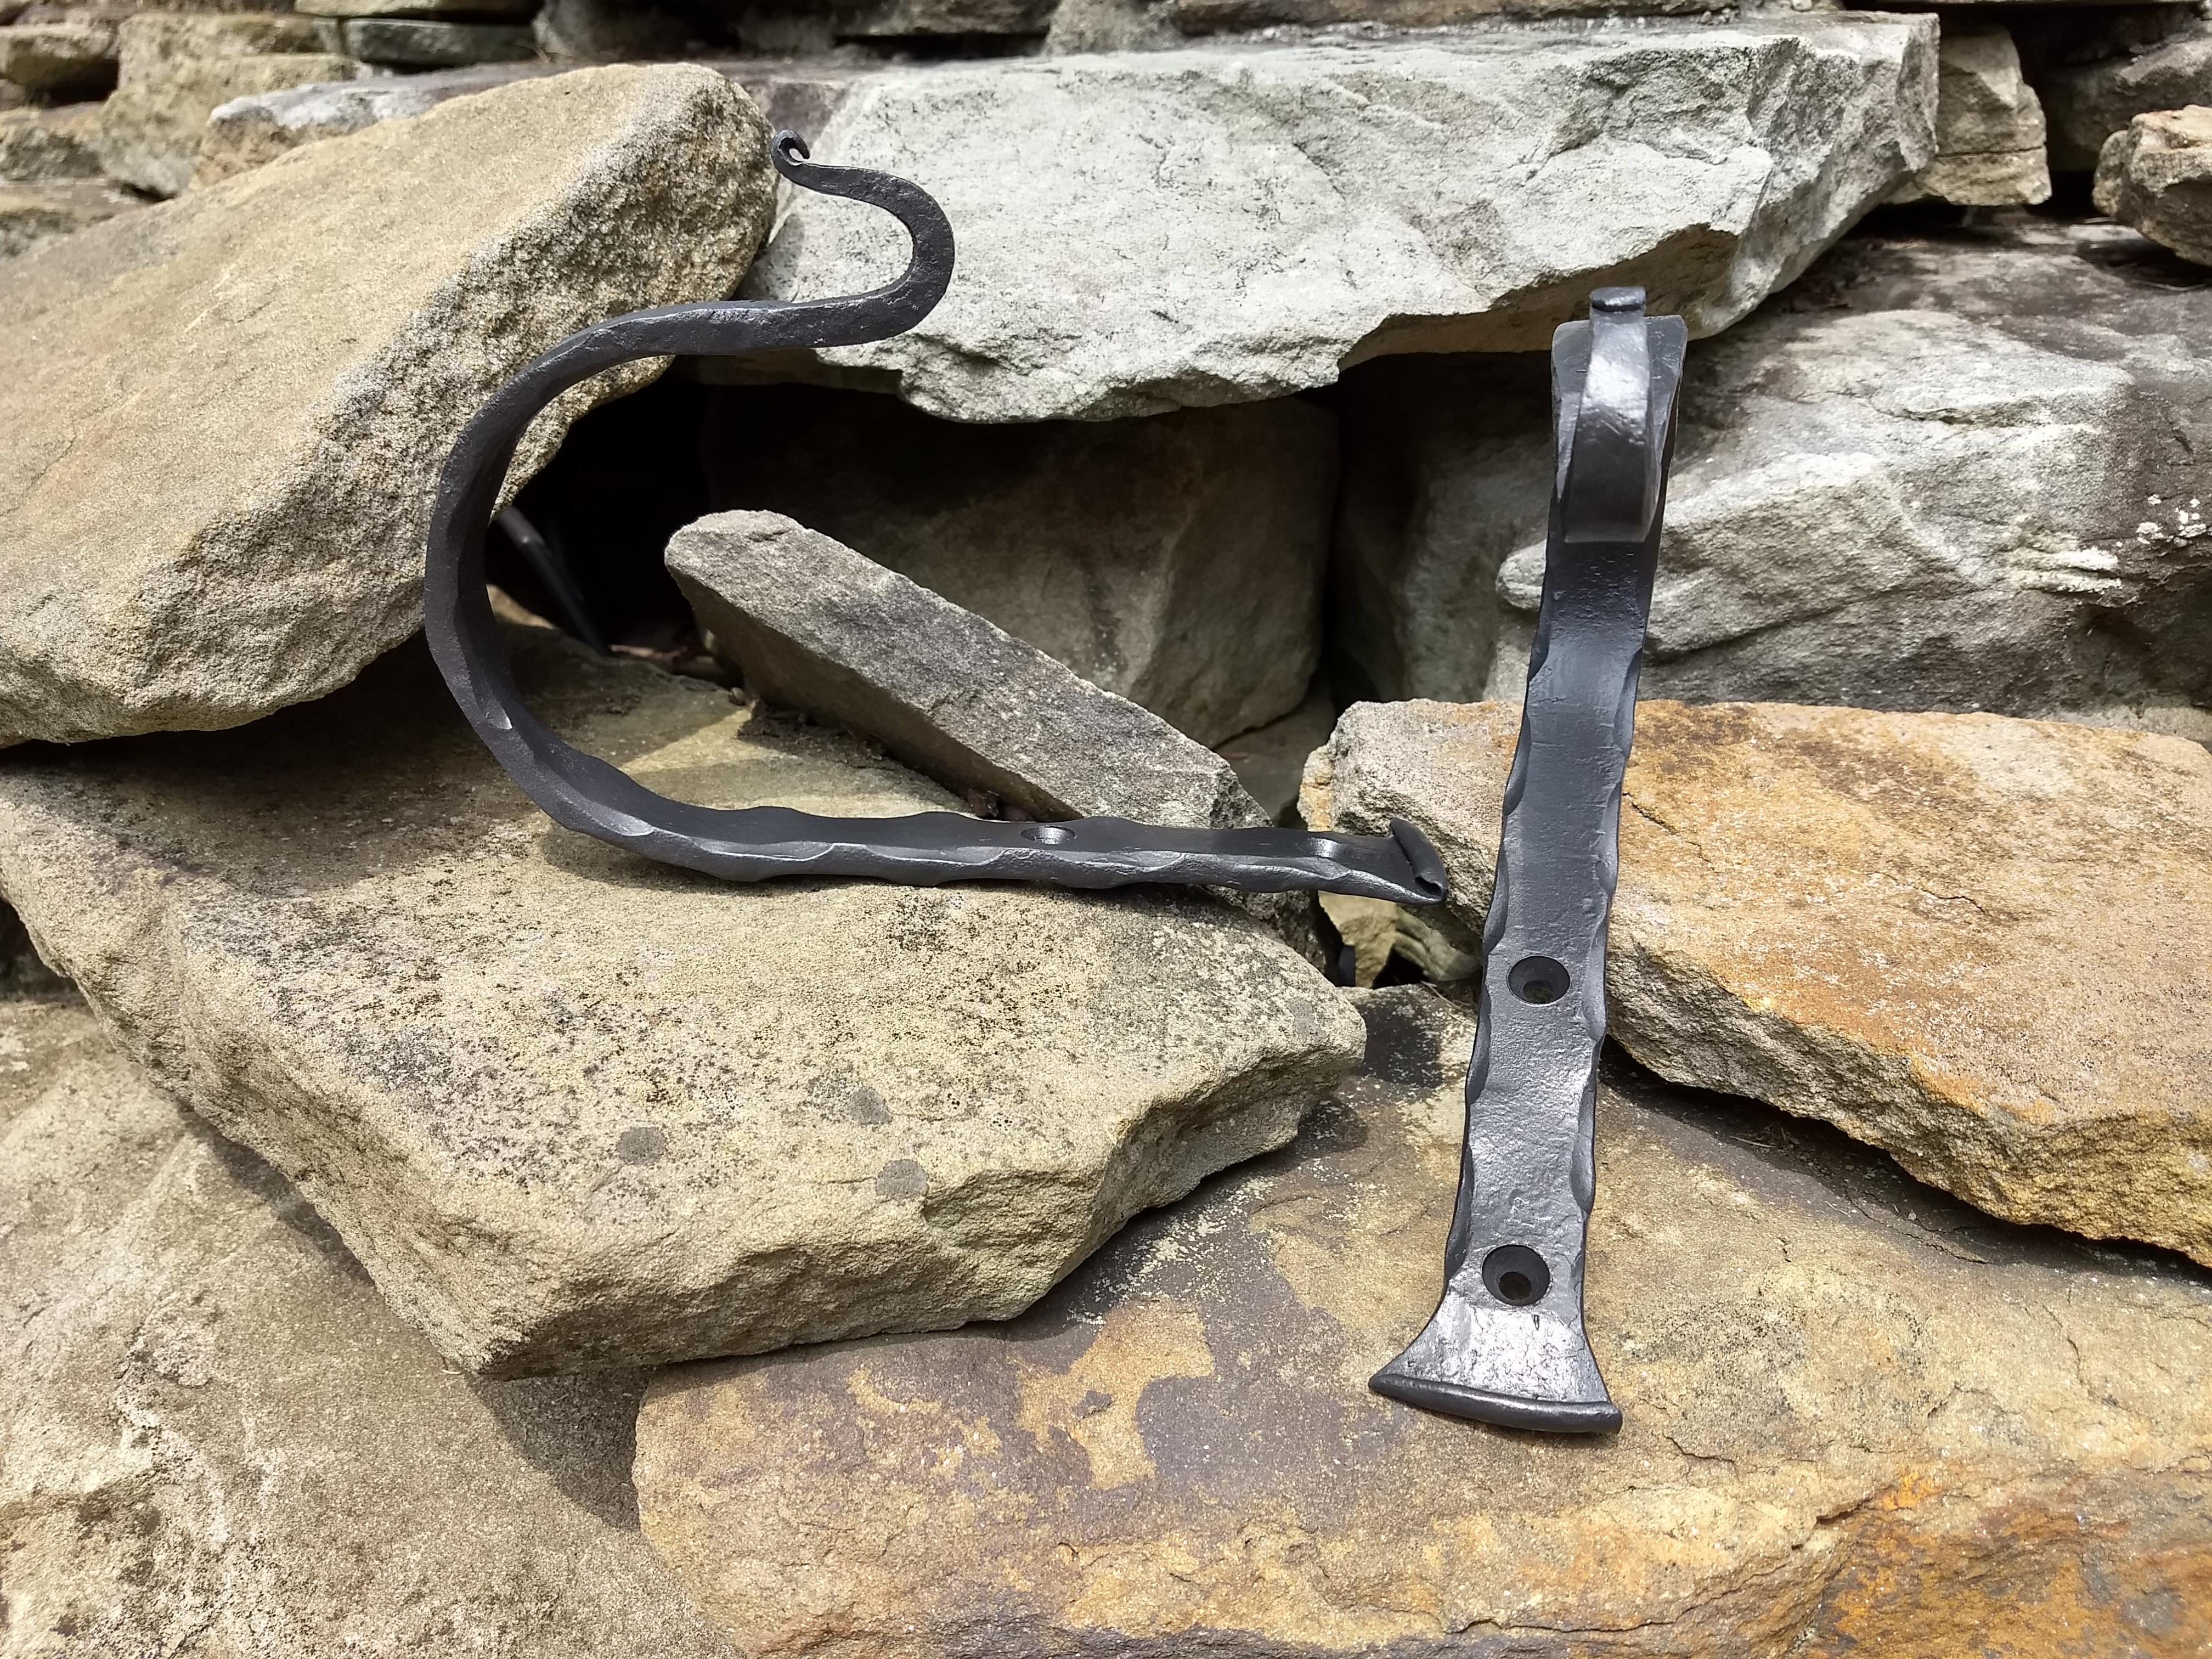
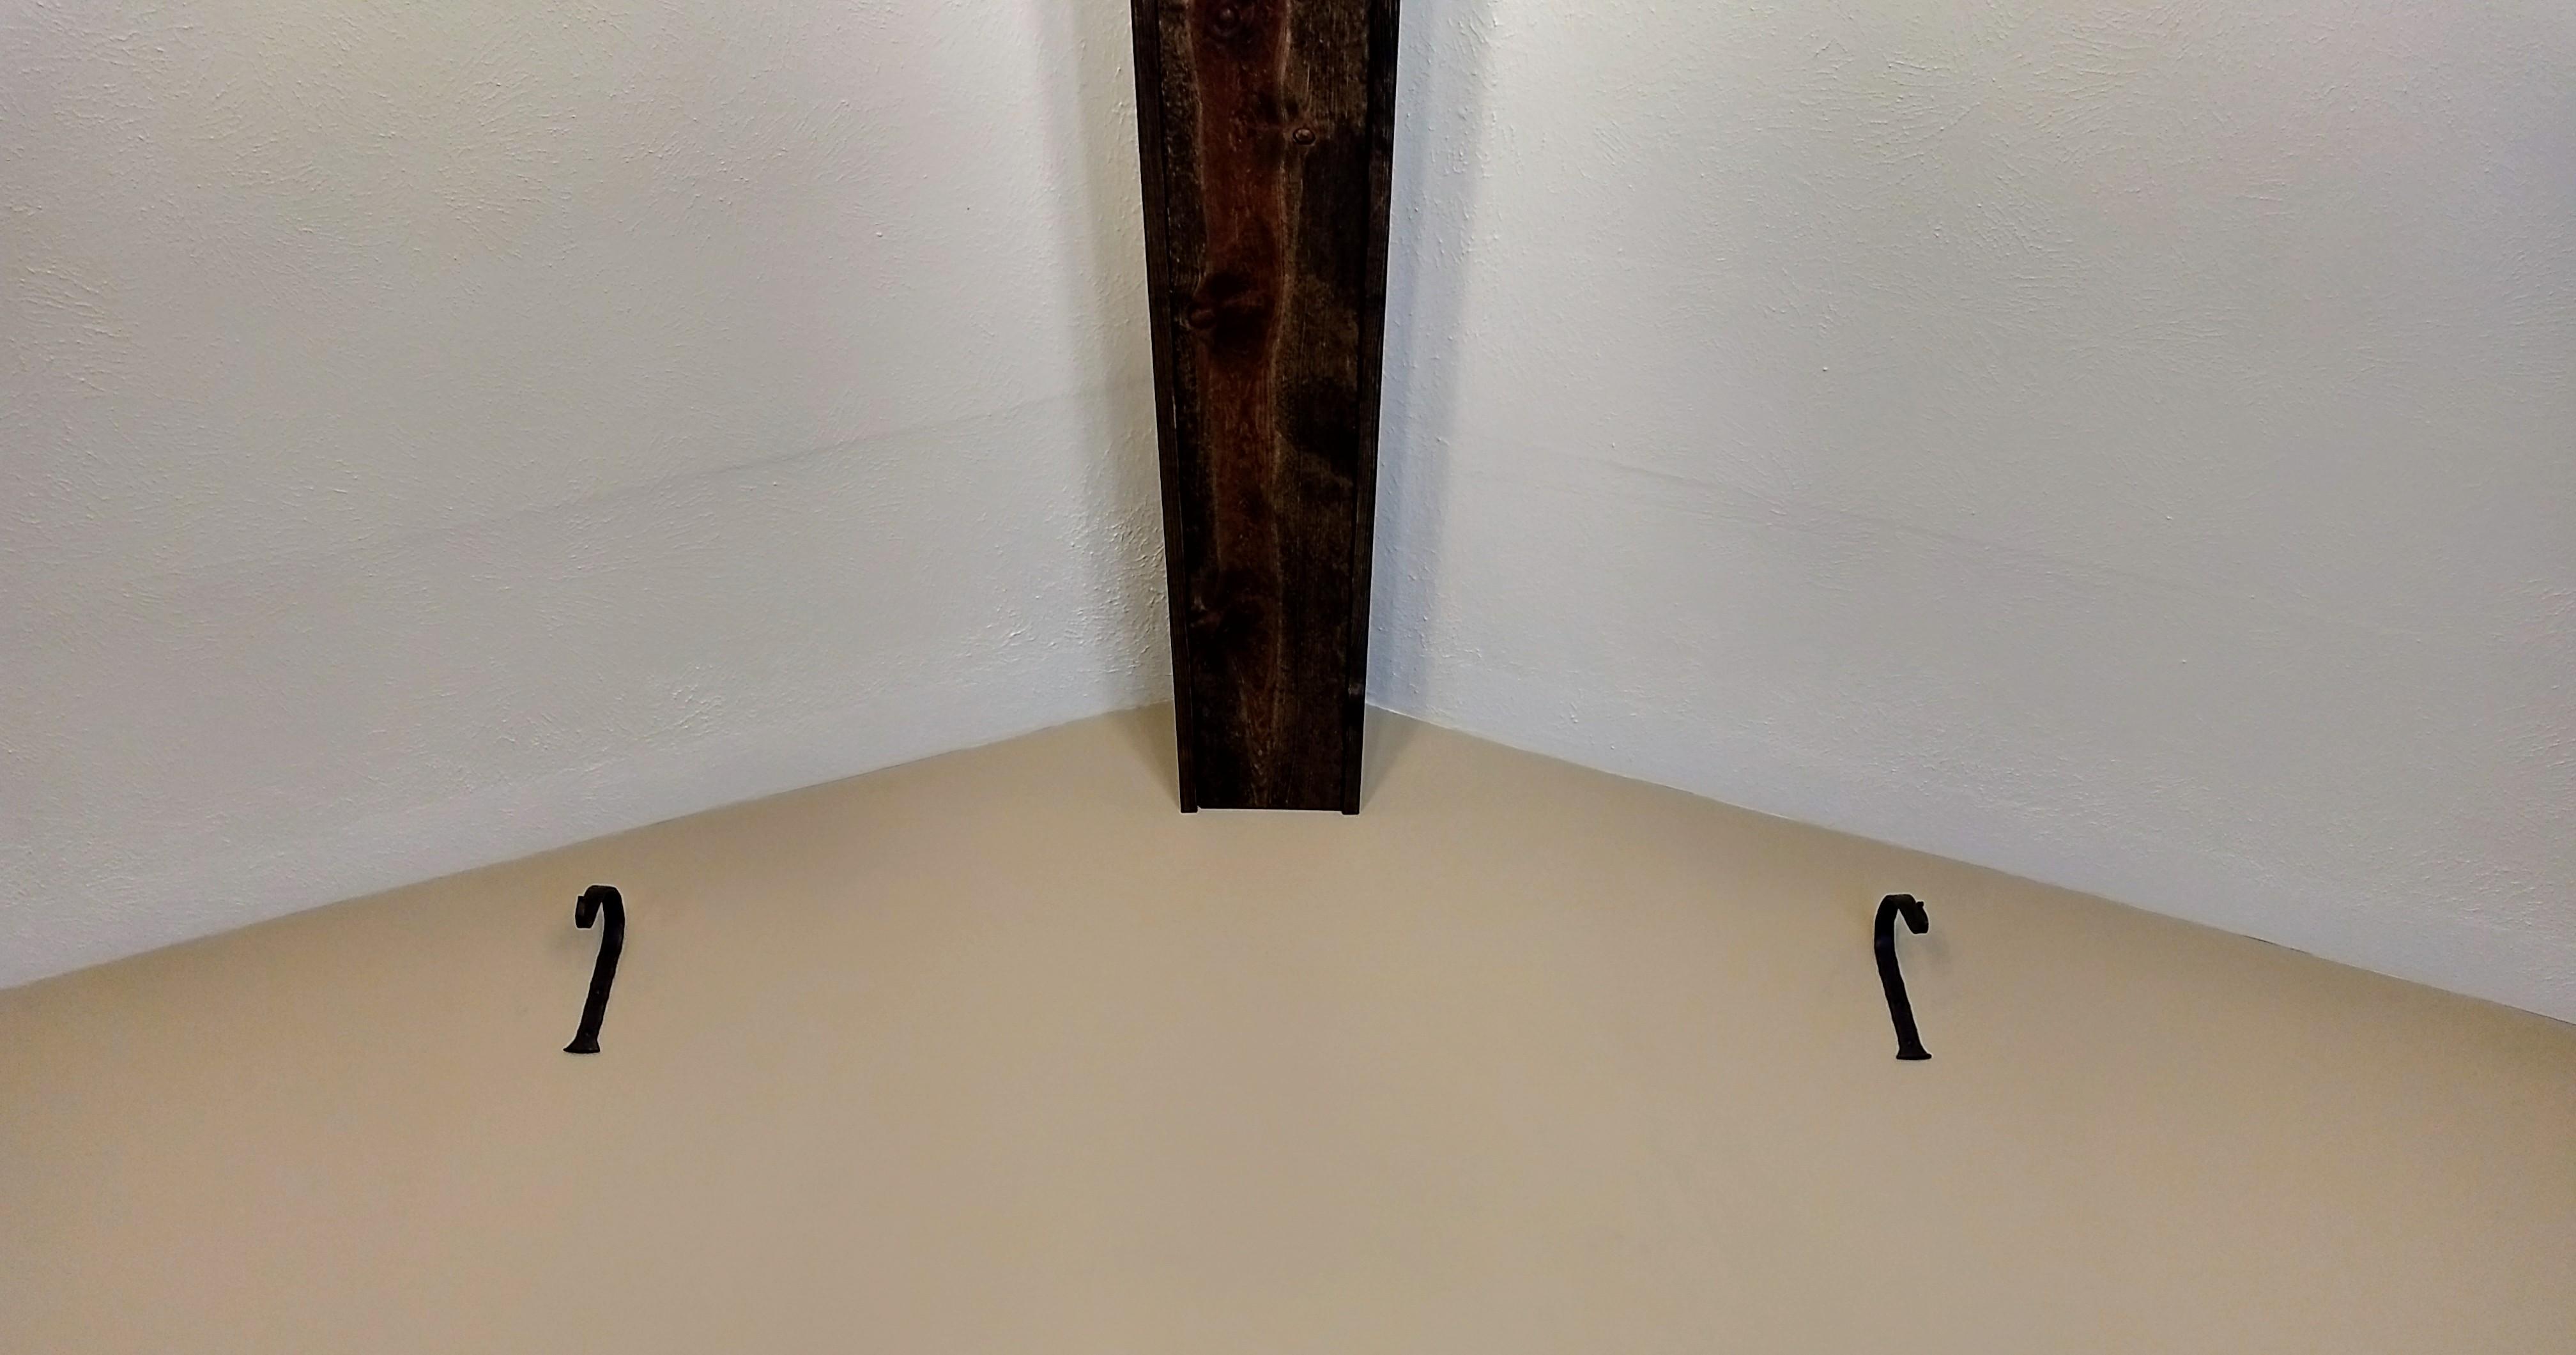
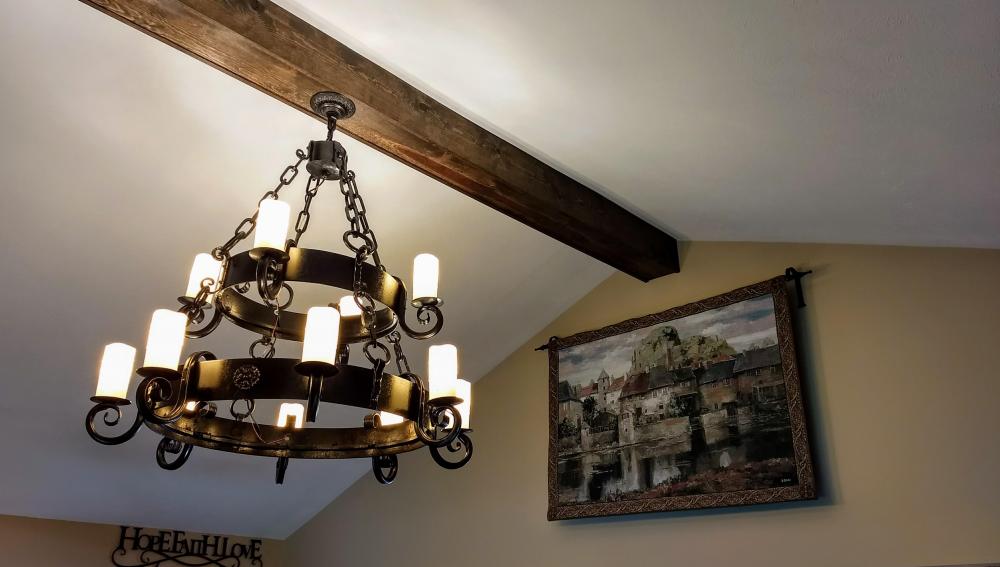
Made some small wall hooks to hold a tapestry that was given to me by my grandfather. Hung it next to the chandelier I did awhile back (finally got the wax candle covers in) and just like that we have a throne room. If anyone is looking for quality wax candle covers (both translucent and sleeves) take a look at Lumiere Candles, Inc. (https://www.candlecoverstore.com/main.sc;jsessionid=17B99B9FA38434328933EBCF4933E092.p3plqscsfapp002). They offer a discount to those in the trade.


-
What did you do in the shop today?
DaveGas replied to Mark Ling's topic in Blacksmithing, General Discussion
I also left a feast for the local tribe of raccoons where I oiled it. This whole project was a major learning experience. -
What did you do in the shop today?
DaveGas replied to Mark Ling's topic in Blacksmithing, General Discussion
I soaked it in my pond after applying the oil, dried it, then hit it with degreaser. Kept wiping til there was no residue left then applied the clear coat. The color remained and the residue was gone so I'm hoping it holds up. I had to manhandle it to hang it and definitely smacked it with plies and wire strippers quite a few times and didn't loose the finish so it should be okay. If not, I know someone who can take it down and try it again -
What did you do in the shop today?
DaveGas replied to Mark Ling's topic in Blacksmithing, General Discussion
Oiled (cooking oil from Sam's club) then finished with a Krylon satin finish clear coat. Had to buy a propane rose bud torch and a cheap mop... Made a massive mess but got some bronze, brown, red, and blacks. -
What did you do in the shop today?
DaveGas replied to Mark Ling's topic in Blacksmithing, General Discussion
Hung my first attempt at a chandelier today. Weighed in at 72 pounds. Still waiting for the wax candle covers to arrive.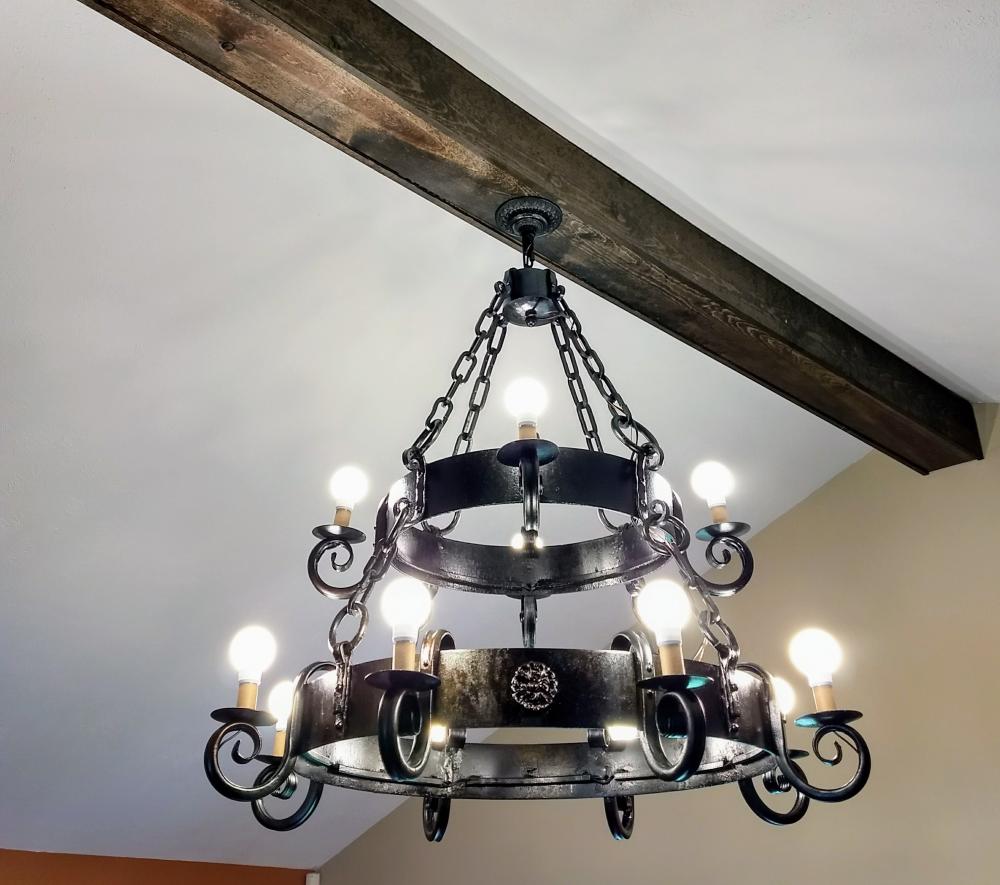
-
What did you do in the shop today?
DaveGas replied to Mark Ling's topic in Blacksmithing, General Discussion
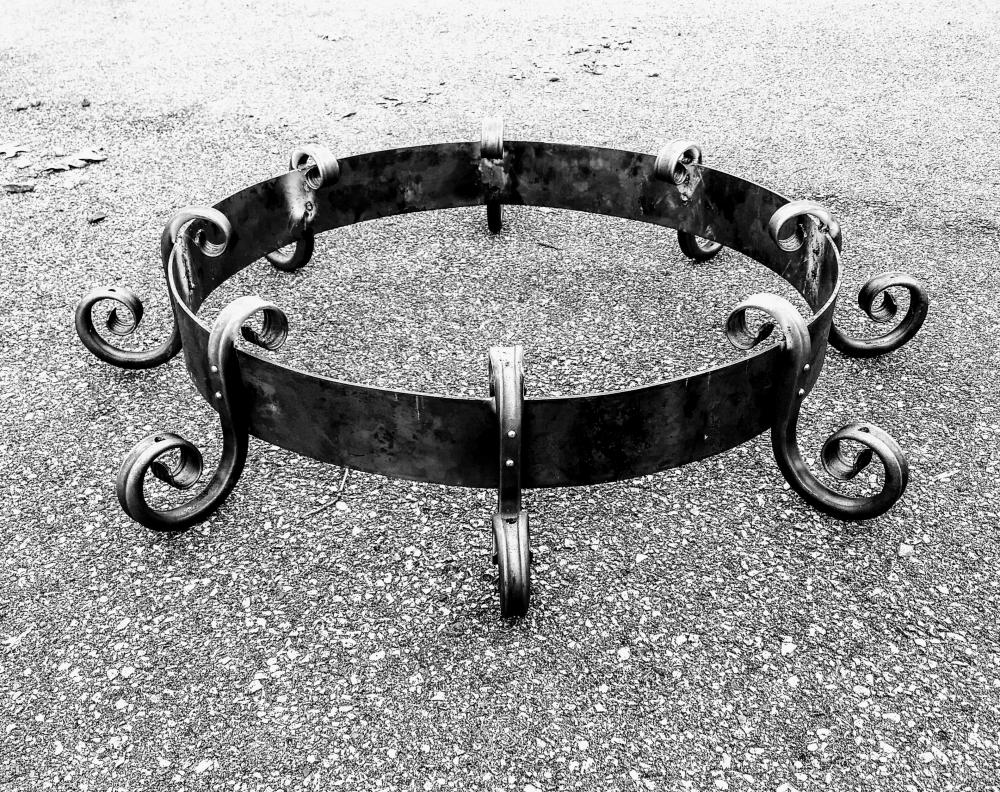
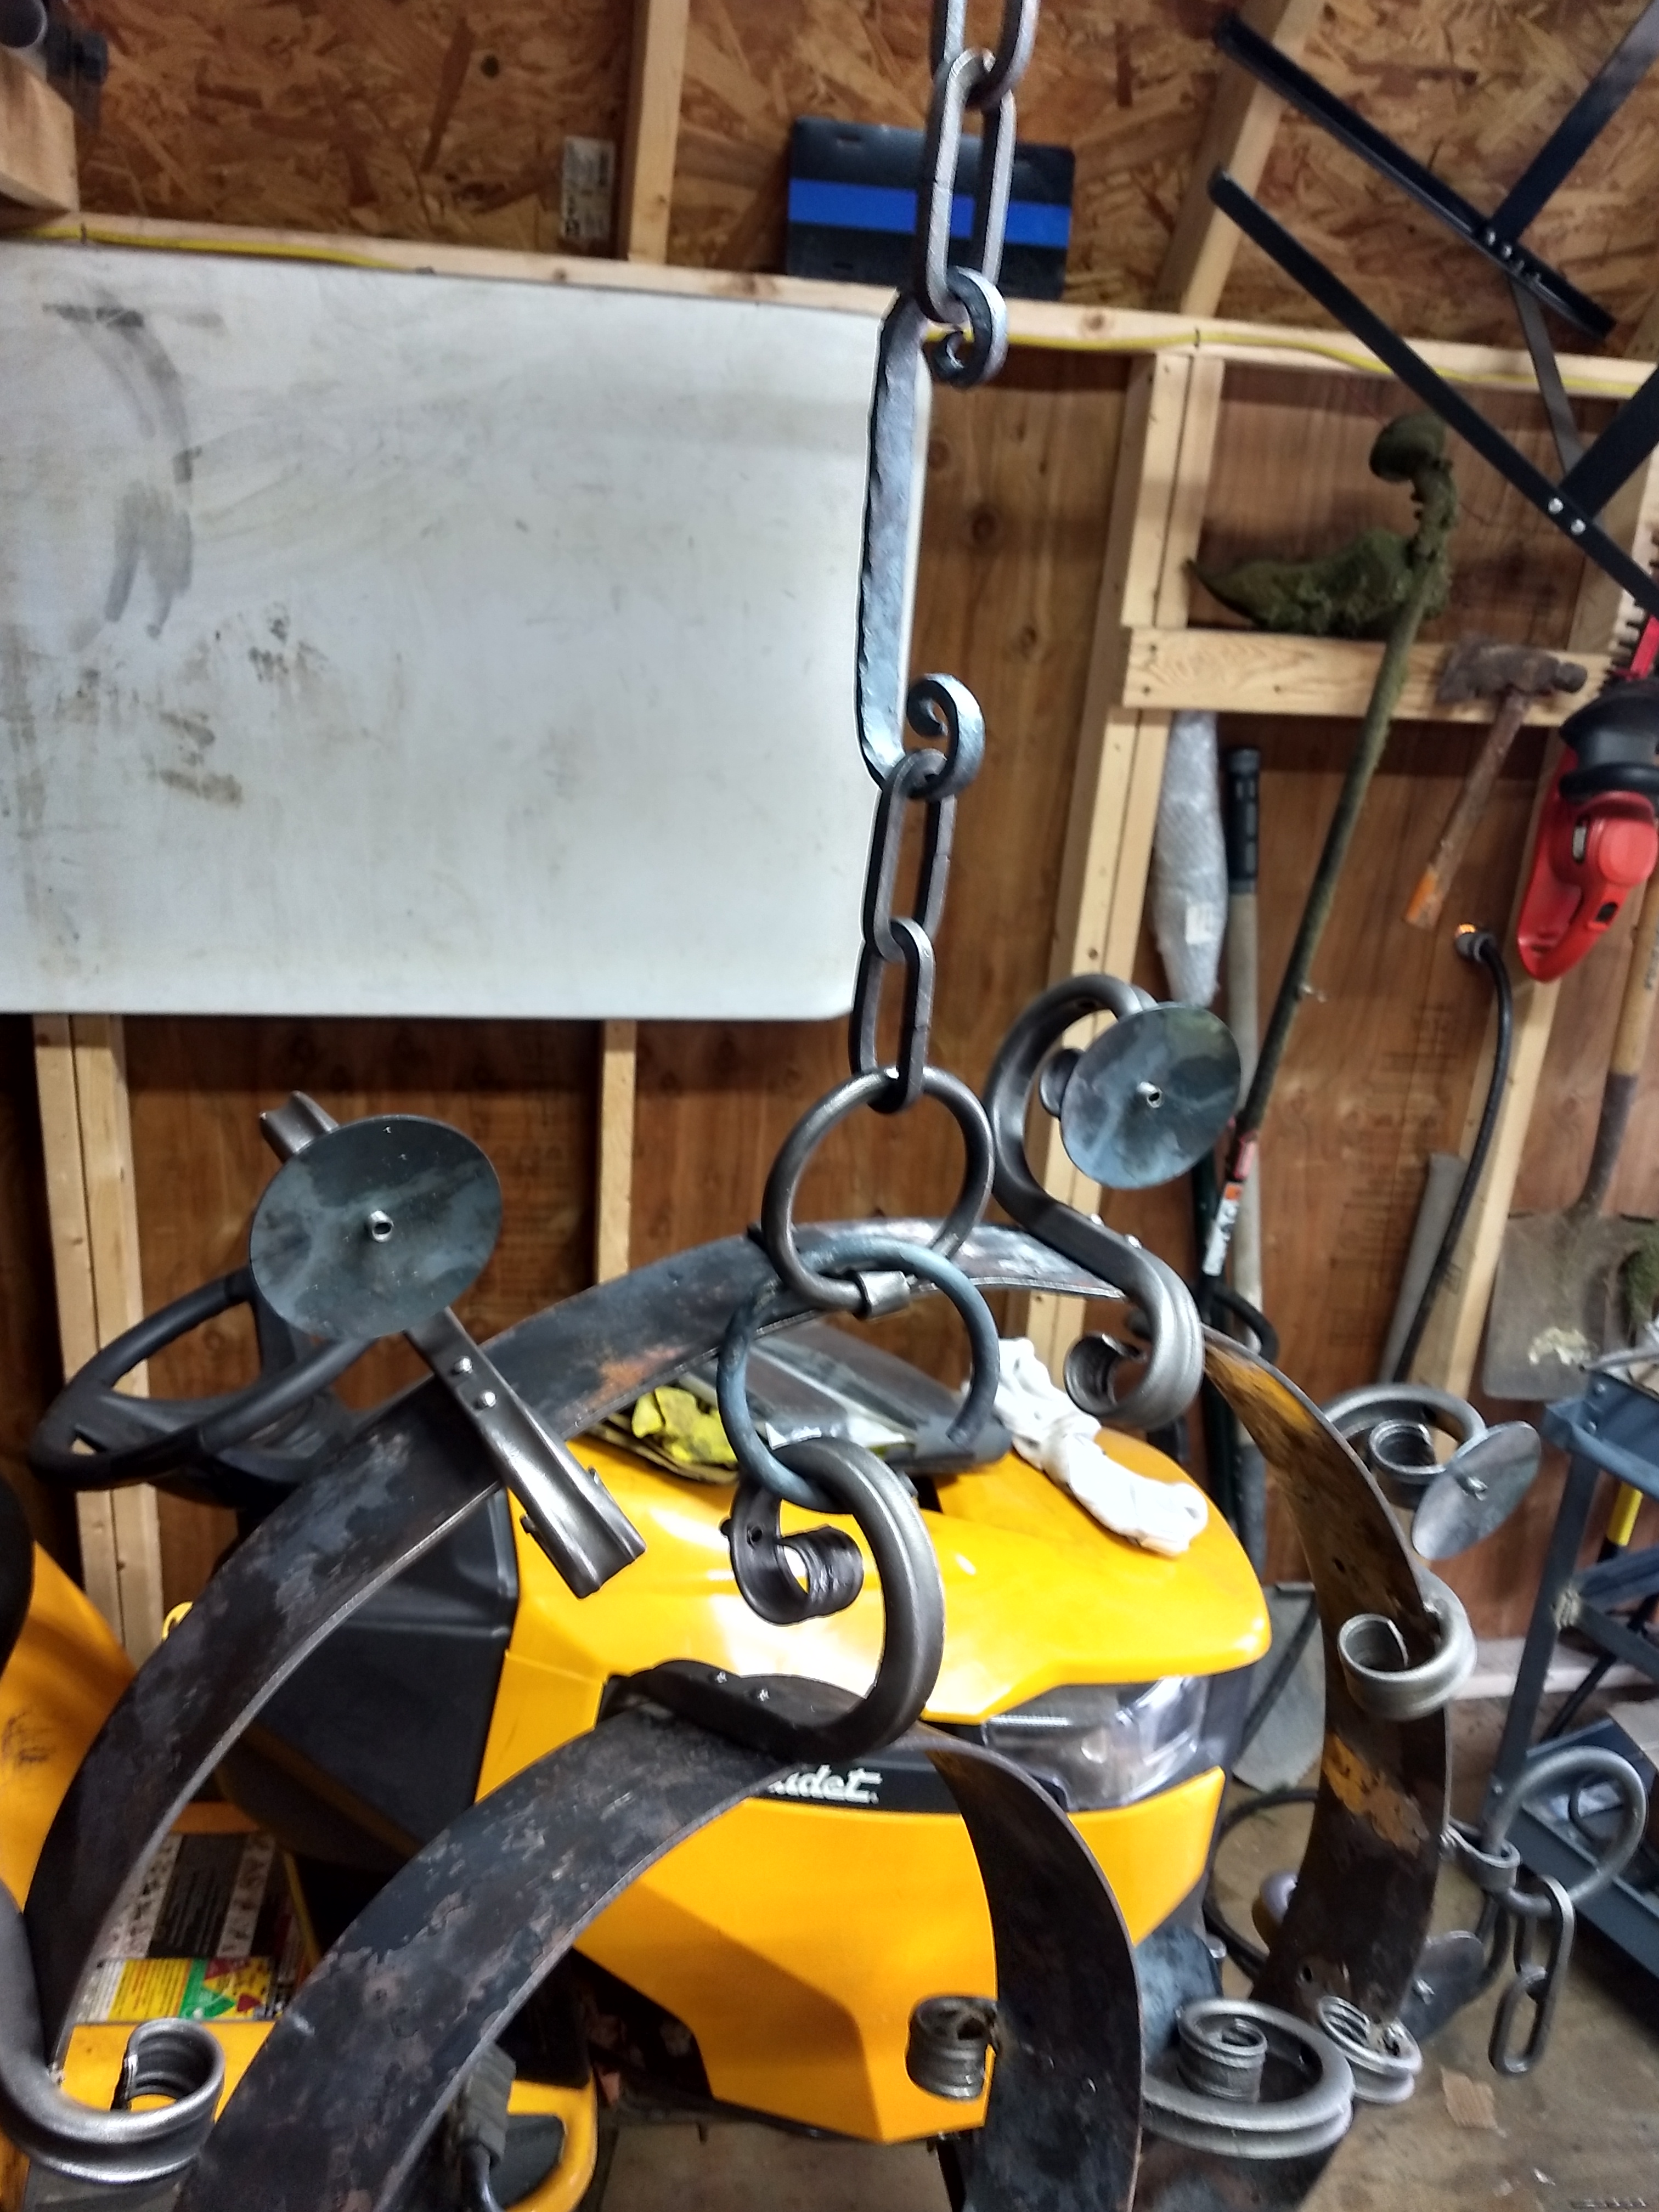
Did a lot of staring and beer drinking the other day as I began a hang test for my first chandelier project. Far from scientific, but if one scrolled hook can hold the entire weight of the project then four definitely can, right? Sounds reasonable. I plan on going hook to hook until I've done all of them and I'm satisfied. If anyone has experience with this subject I would appreciate input (I've never made an overhead piece before). So far it's weighing in at 76 pounds with chain and all. All load bearing pieces were riveted with two 1/4" and also welded on the upper ends to ensure they will hold (don't like the idea of this thing falling on my head so I'm not taking chances). When I mocked it up the entire chandelier is 69" tall. Turns out it's going to hang too low for where I wanted to put it. Plus side is that I have a split entry house with a cathedral ceiling in the living room. The 30" ring will be come the living room chandelier and the 20" ring will become the entry chandelier. It was originally supposed to be a 12 light, two tiered chandelier. Looking like I'll have one 8 light chandelier and one 4 light. Oh well, now I know and knowing is half the battle. I was thinking of 1/2" tubing running along the inside from light arm to light arm. Probably with a 1 inch gap between runs to splice and the wiring and hide the wire nuts inside of the light arms.

-
Where and how do you store propane, ox/ac gas etc?
DaveGas replied to Glenn's topic in Safety discussions
I have 2 #100 propane cylinders for my forge. They are outside the shop against the wall. Currently I'm using 5 gallon buckets to shelter the valves until I finally get around to throwing up a lean to. I bought a 50' hose and ran it through the shop wall via a fernco fitting on the outside. My forge is on wheels so I can move it around the shop (tight space so it's pushed to the wall once done and cooled). -
I definitely appreciate the feedback from both of you. Although I must admit that drawing (in the writing sense) has never been a strength of mine. I couldn't draw a scroll even if I used a stencil
-
While I have both of you here what would you recommend for the square stock? Taper then scroll, flatten then scroll, or flare and scroll?
-
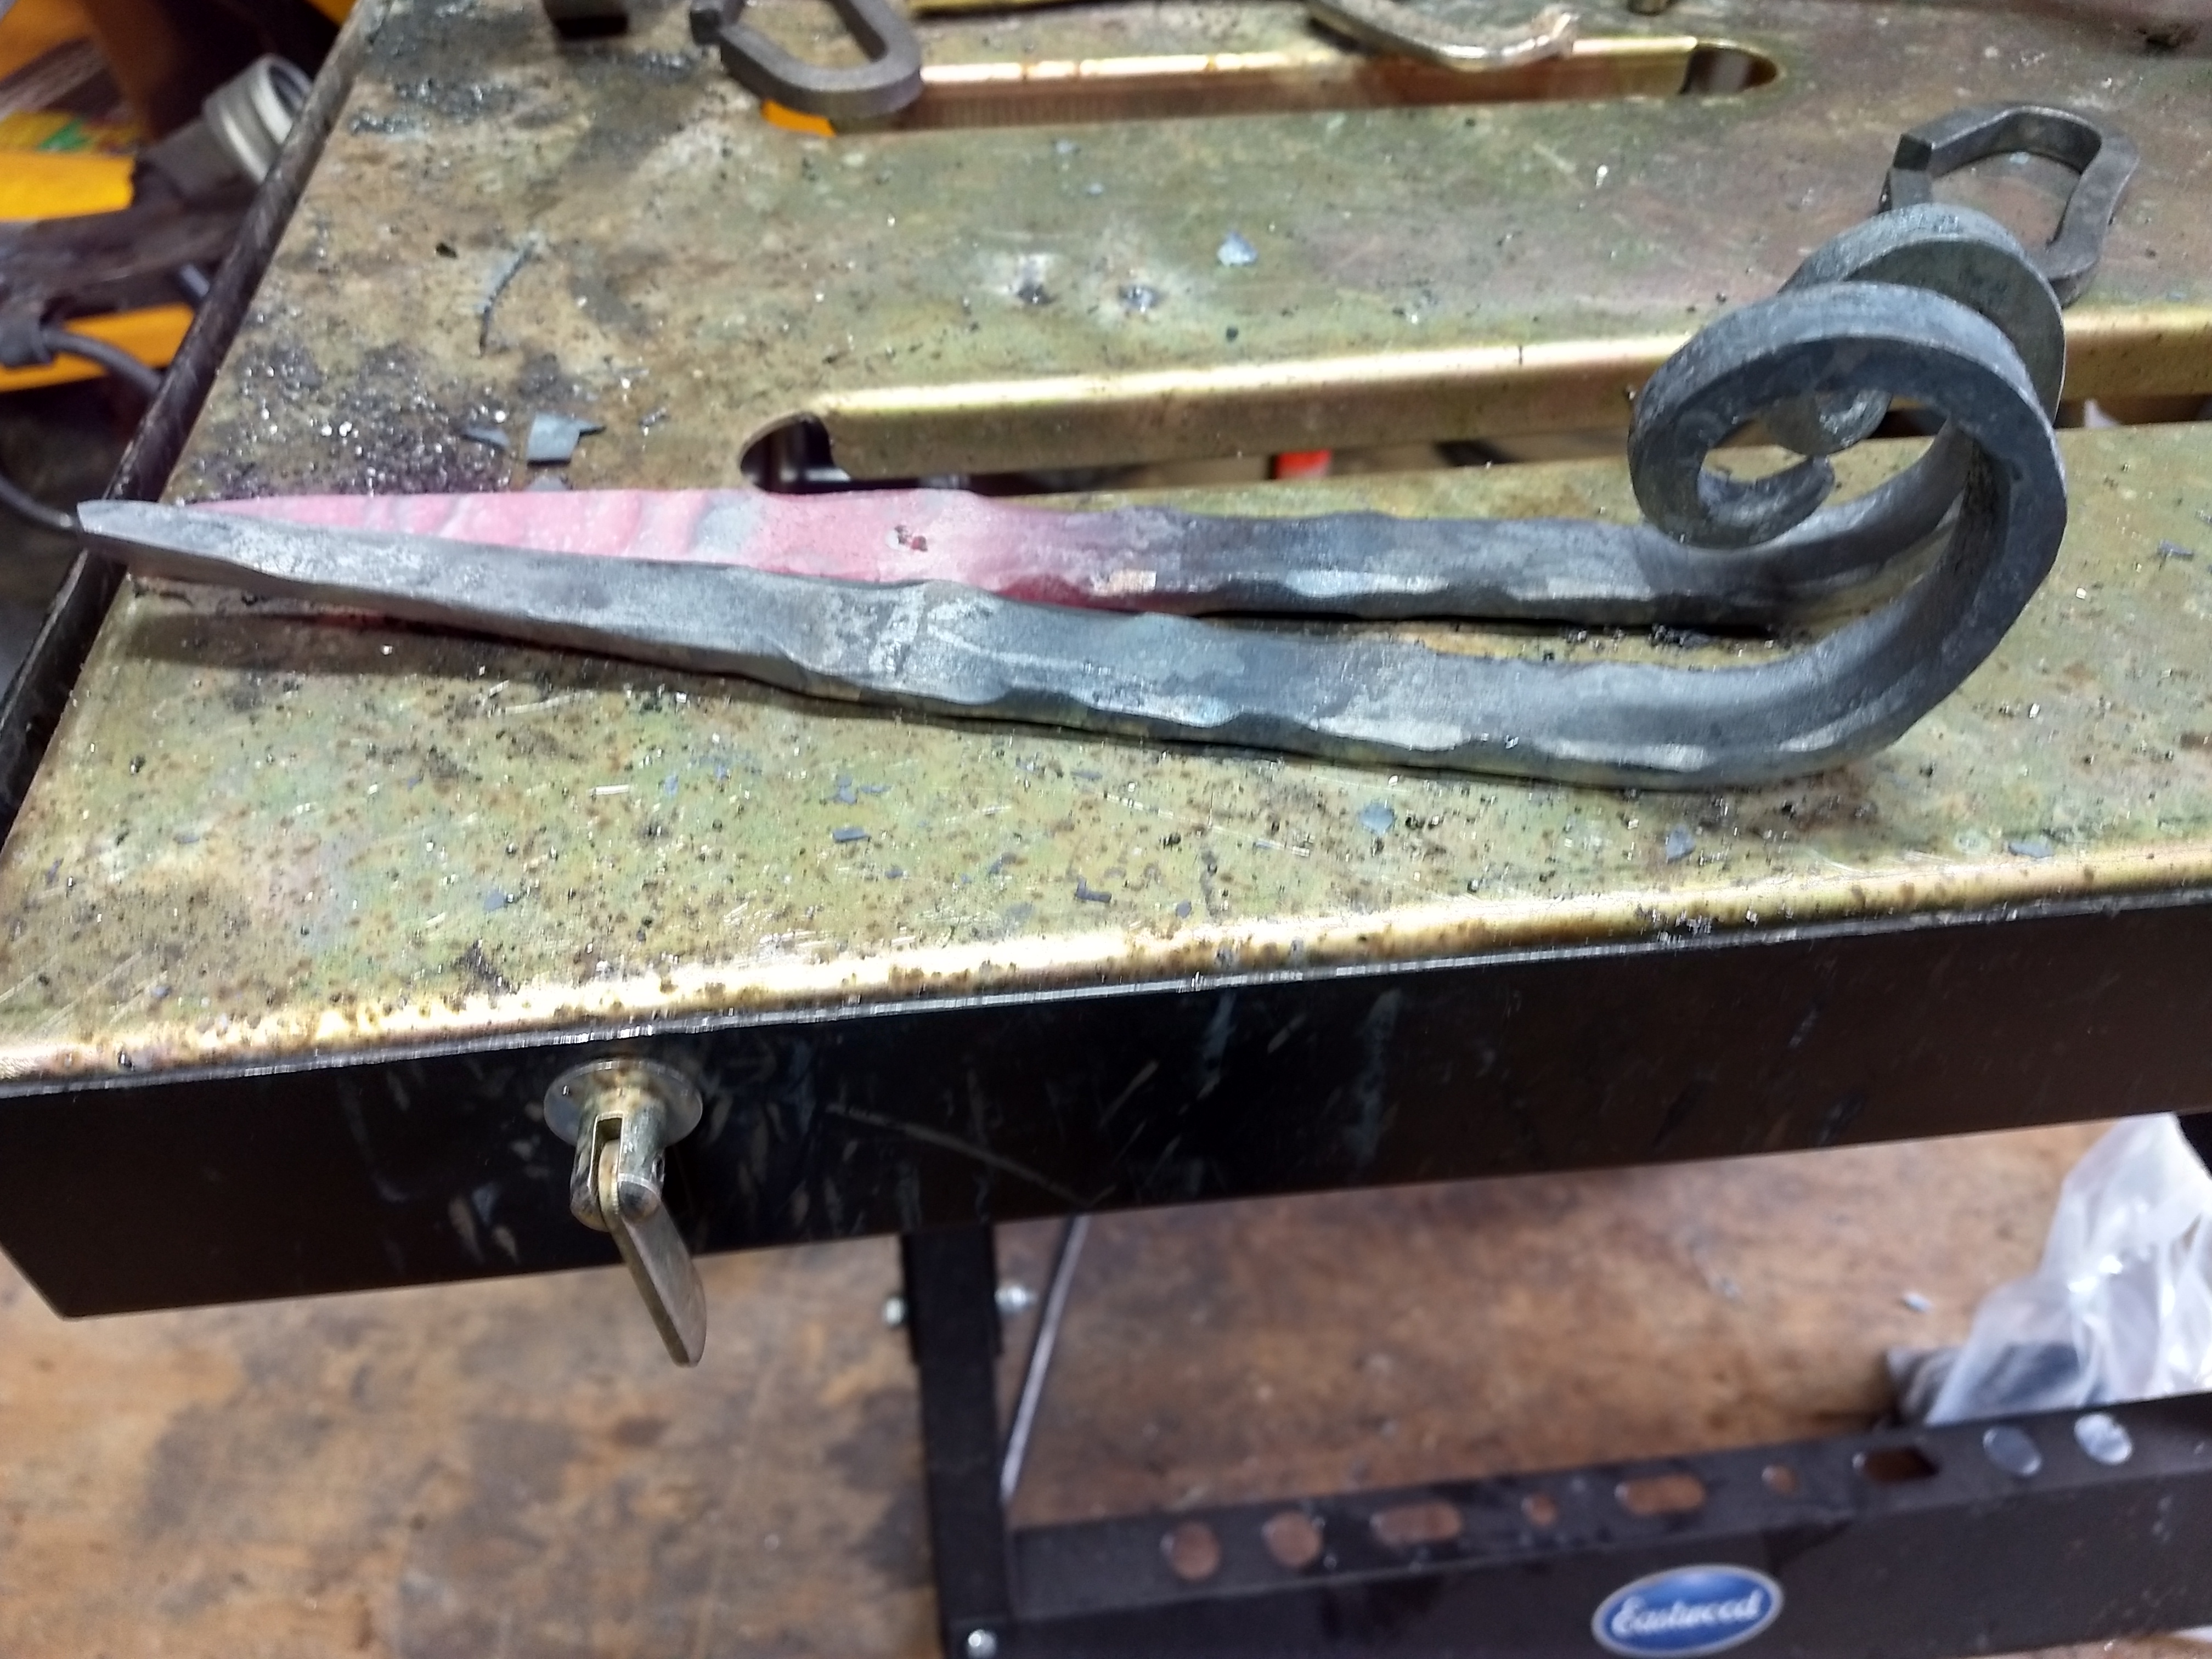
I thank you both for your input and it will be assimilated. The scrolls for the light arms were bought. I needed the grove to assist in hiding the wires as the wire fits in the channel. Long story short, the 3/4 tubing I had and scrolled was too big and overpowered the pieces even though the wiring was completely hidden. 1/2 was too small. Then I went with 5/8 and while they fit nicely proportionally, there wasn't enough room on the inside for wiring through the scrolled end so there was a 2 inch wire run on the exterior. My solution to aide in that was to purchase these as the wiring stays in the contour of the grove. The bender I was using also put groves in the tubing the wire rested on top instead of inside and my jigs wouldn't put a grove at all. This is a project I am doing for my living room and is the first one I've ever attempted so there is a massive learning curve on my part. On the upside I am learning a lot about proportional pieces.
-
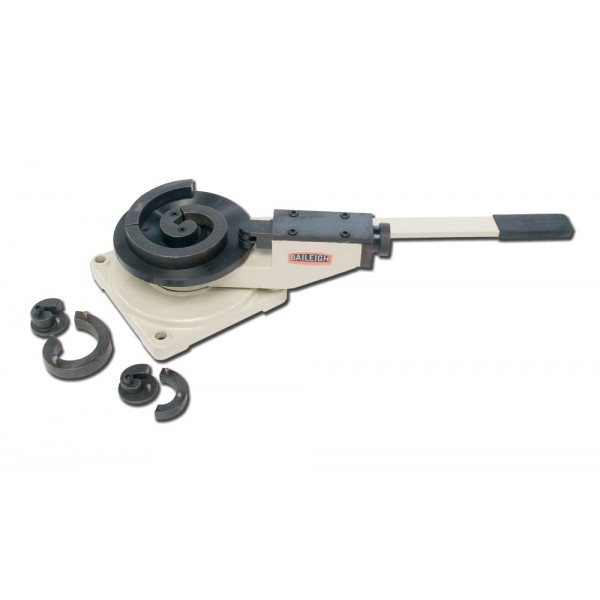
Depending on the stock I don't flatten the ends if they fit the bender. The larger tubes I must flatten based on thickness. As long as it's hot this bender has no problem bending flat bar 3/8 x 4". Hot only, would probably snap the handle on 3/16 cold.
-
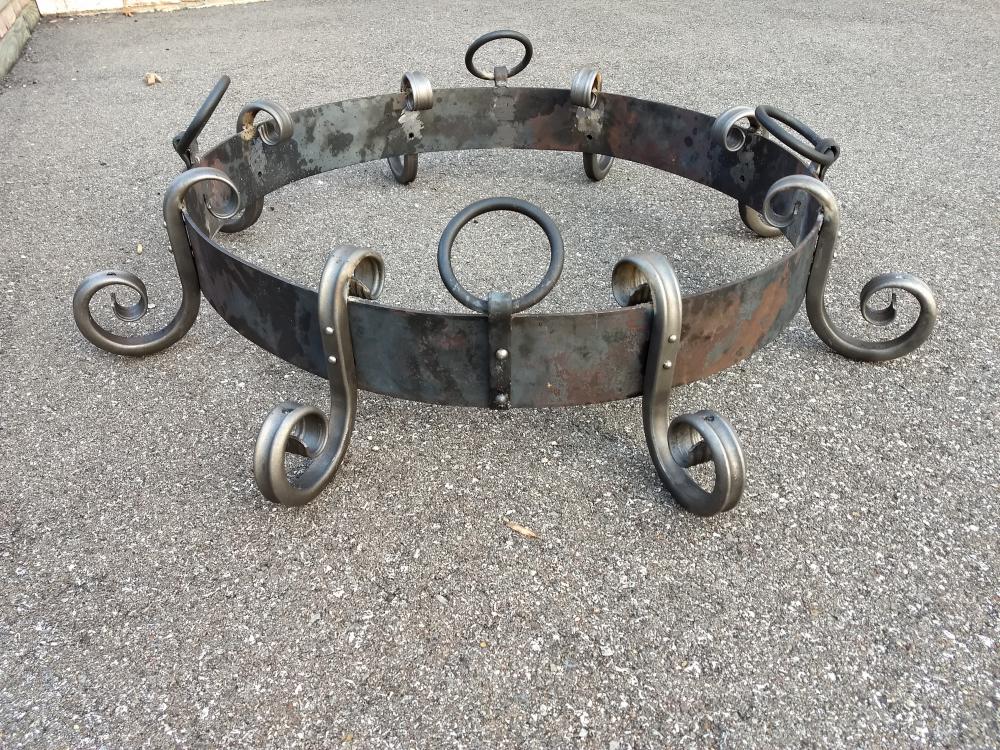
Just got the hanging rings on today. See below. I might resize the rings to 3 inch instead of 4 but I haven't decided for sure. I bend them hot. I usually bend them at the same time as the main scroll so if you stack all the scrolled pieces they will match perfectly. I also cut the pieces from the same stock; pretty standard stuff for us but when you tell a customer "all the same size pieces are cut from the same stock so if you unrolled everything you can match the cuts together perfectly" they eat it up.

-
Definitely heard the perfectionist line before. As for the round stock I just started with 3/16" solid round and scrolled them. I found the letters and numbers on an online shop actually so I can't take credit for them. I used a silver leaf pen to color them (copper looks great also). Just got the arms riveted on to the 30" chandelier ring today so I've attached a picture of that. Still have to add the candle trays and sockets once the nipples come in but it's coming along.