-
Posts
15 -
Joined
-
Last visited
Content Type
Profiles
Forums
Articles
Gallery
Downloads
Events
Everything posted by Bruno Medeiros
-
Whoops. Tried to get you that yellow hot photo, Frosty, but got distracted by warping. Thin face around the doors warped on the first heat. Might need to shave my firebrick doors down a bit, but otherwise I think it's still functional. If it ever becomes a big issue, I suppose I could cut off the face and replace it with thicker steel.
-
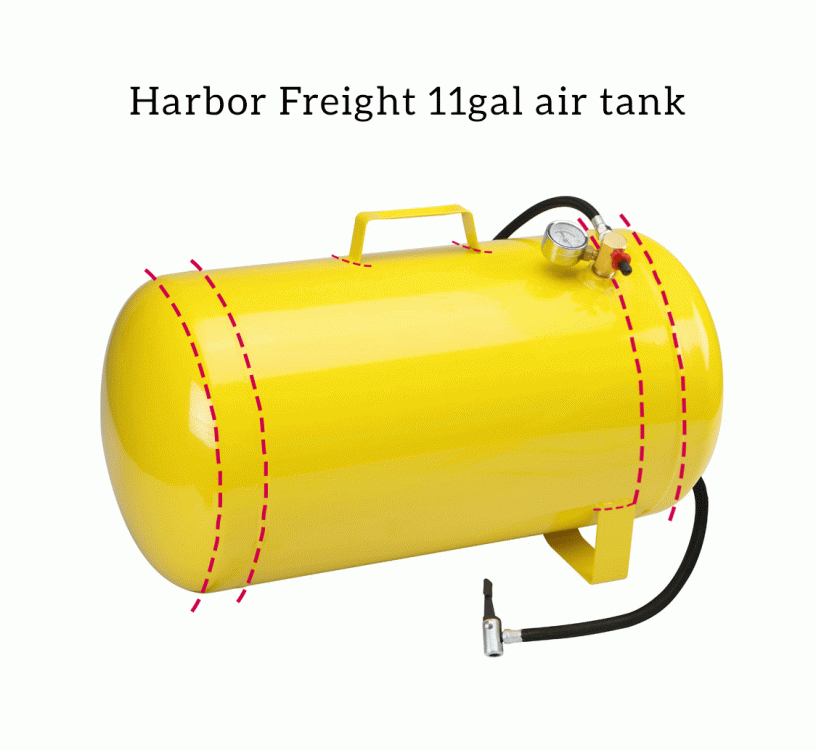
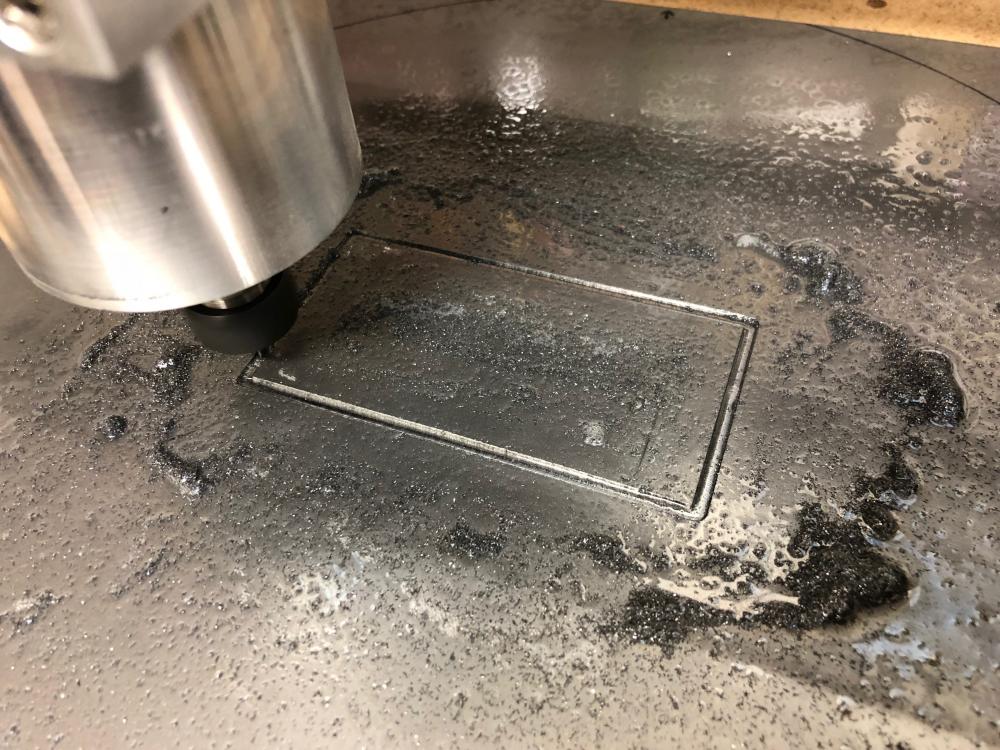
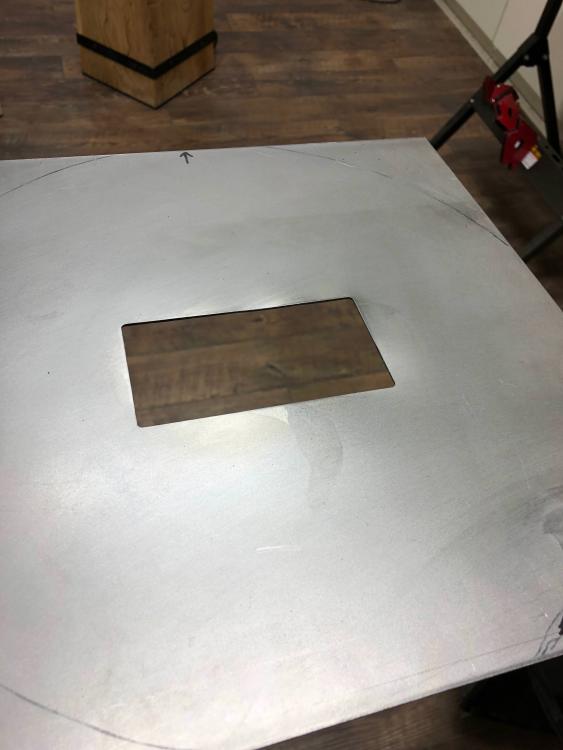
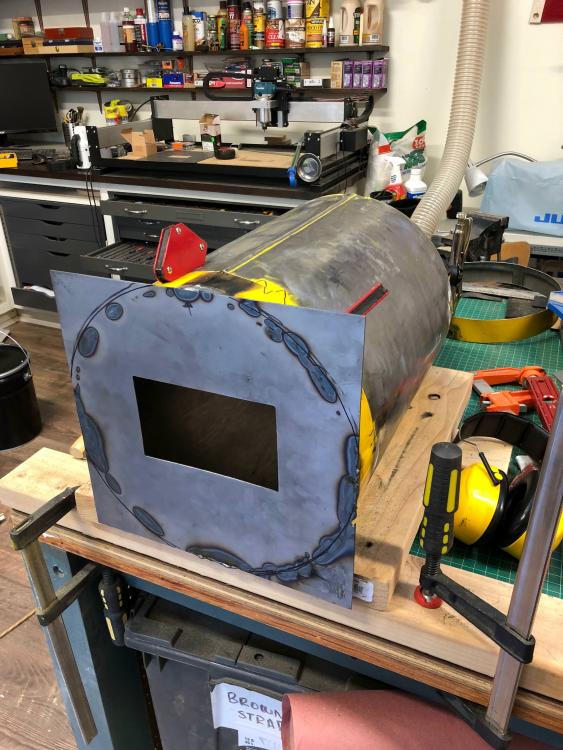
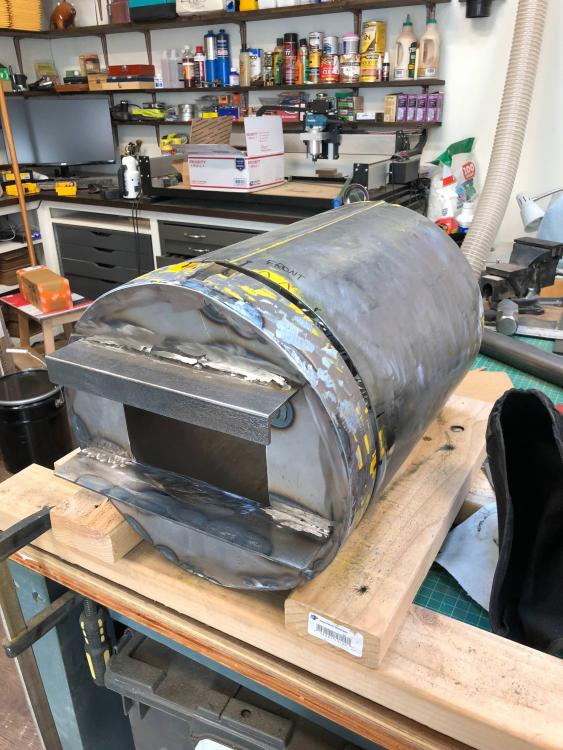
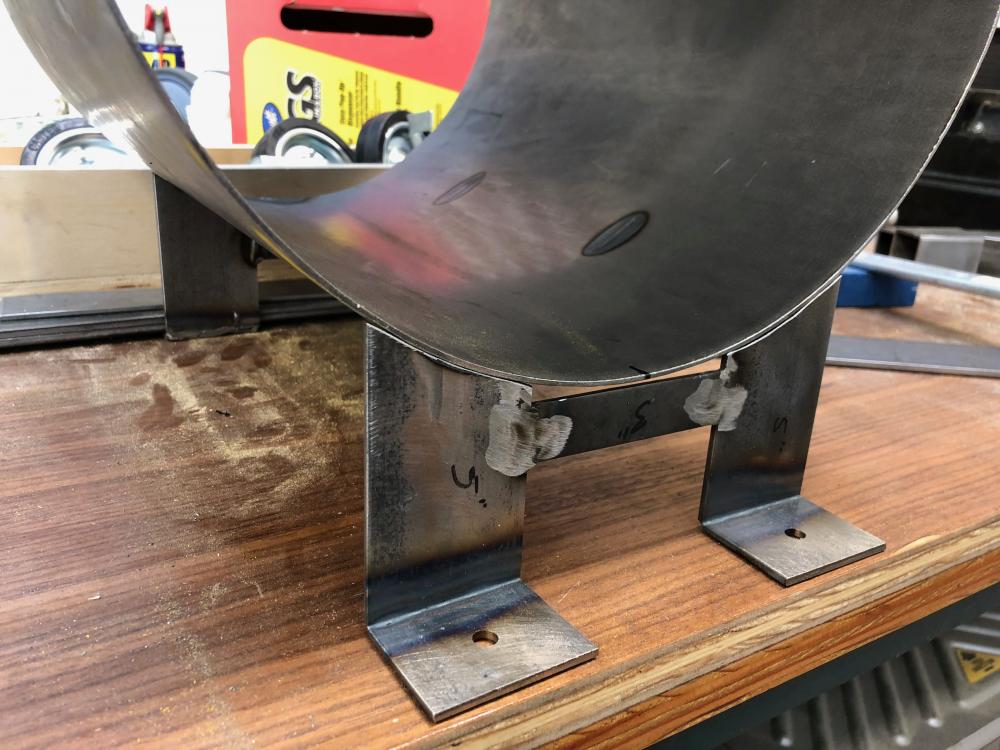
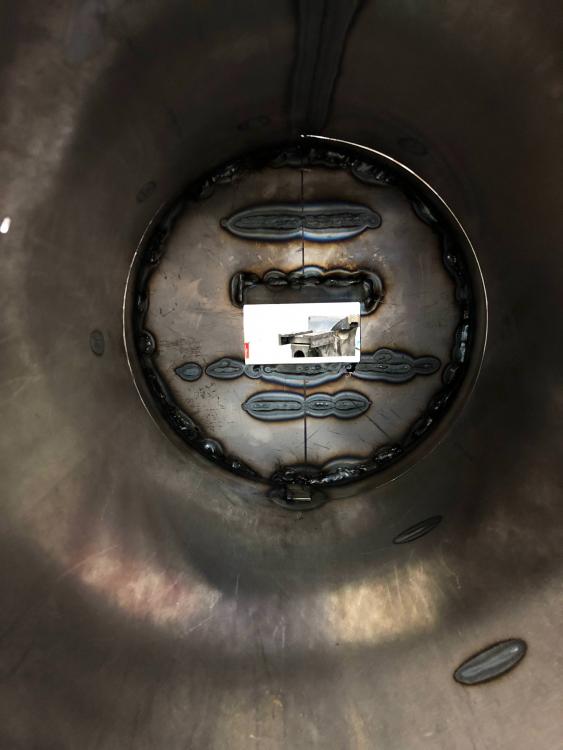
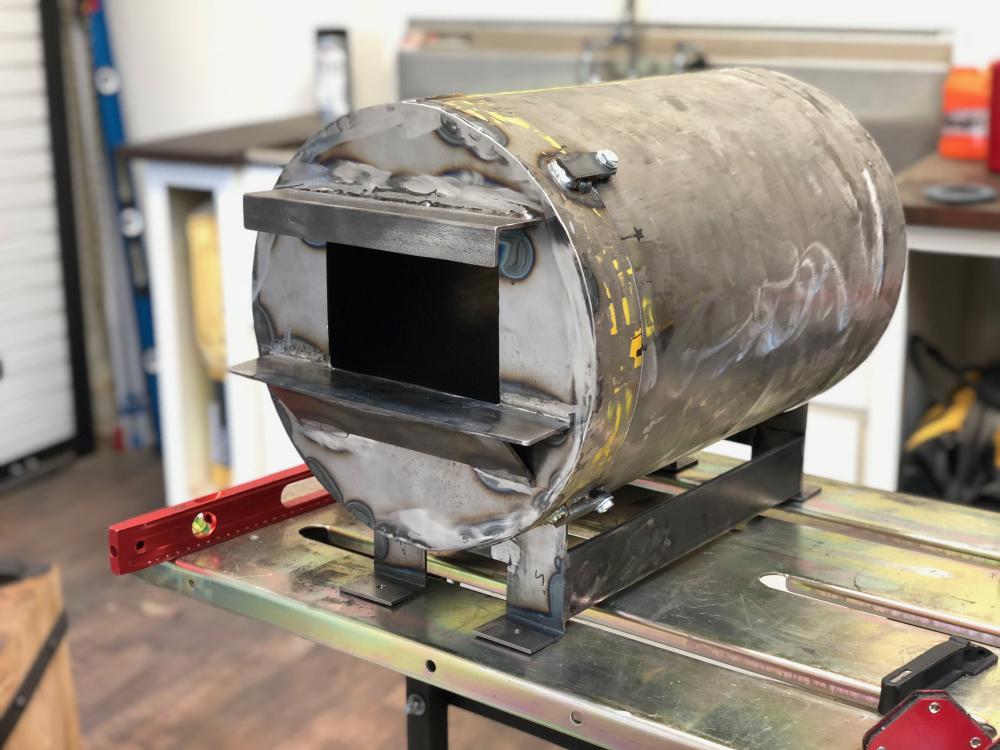
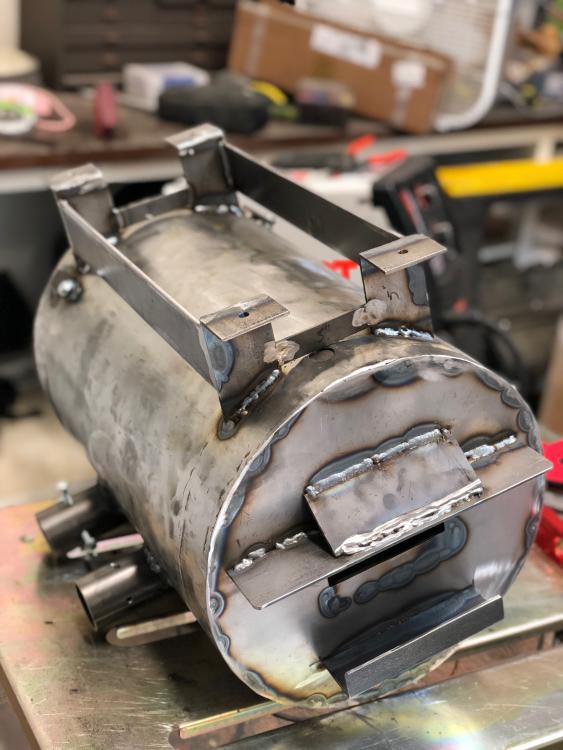
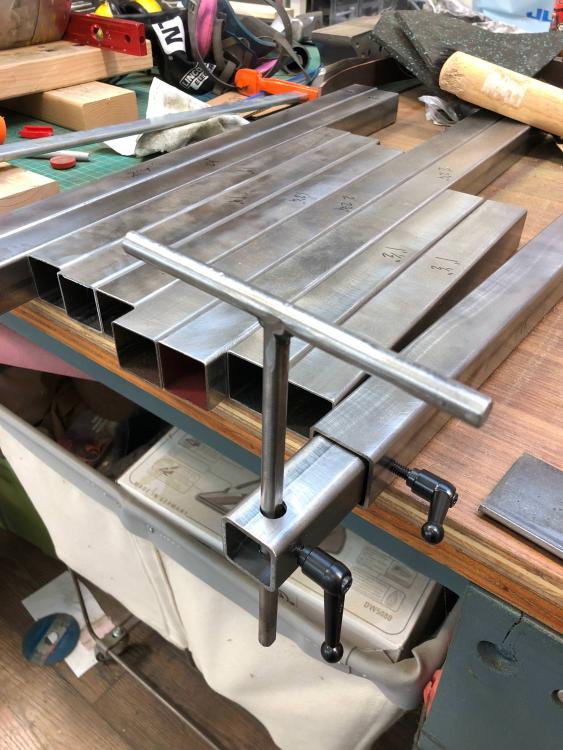
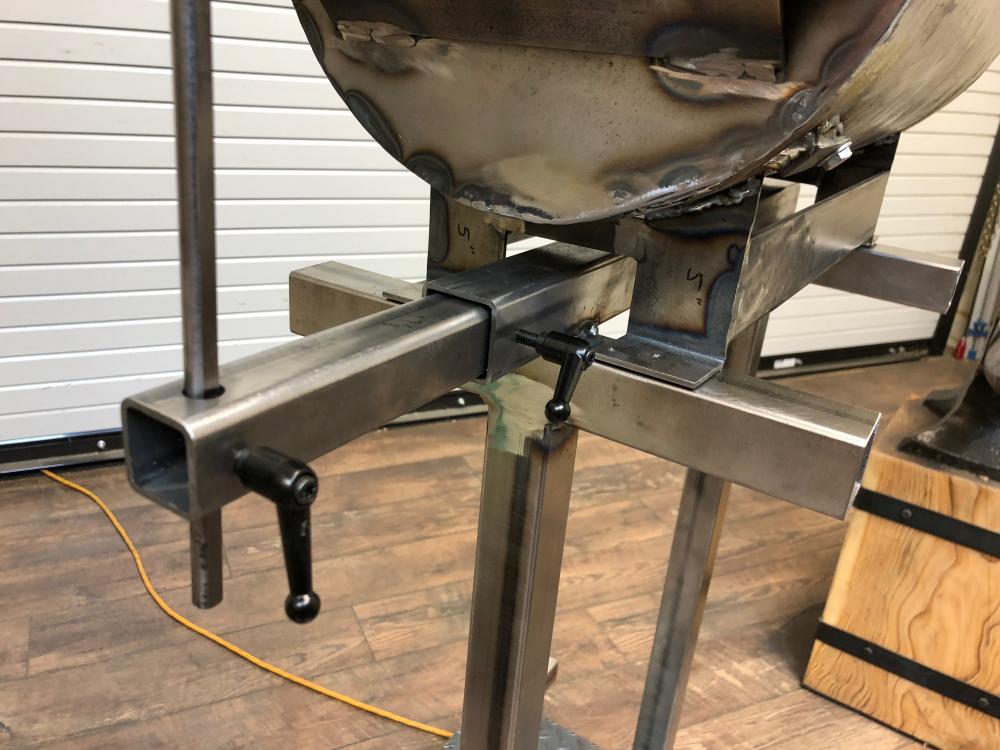
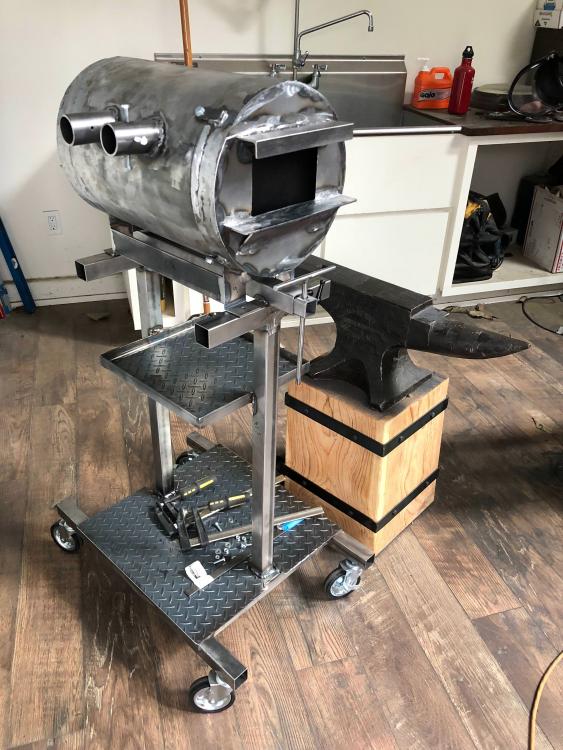
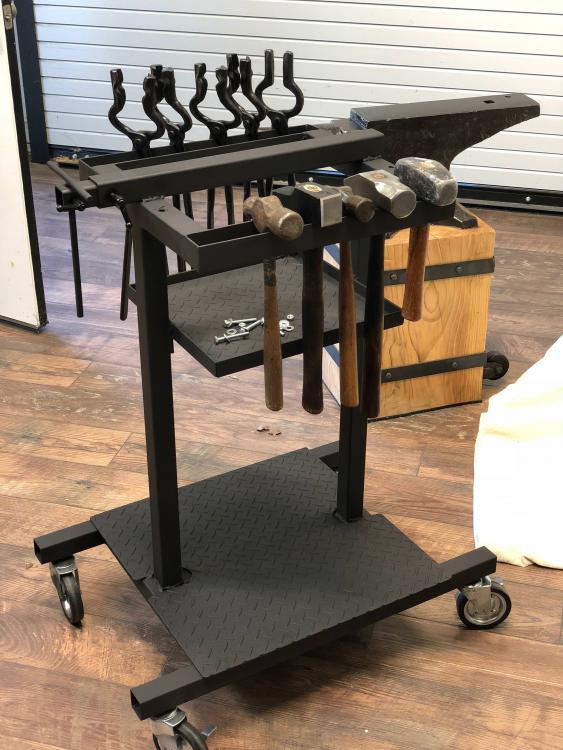
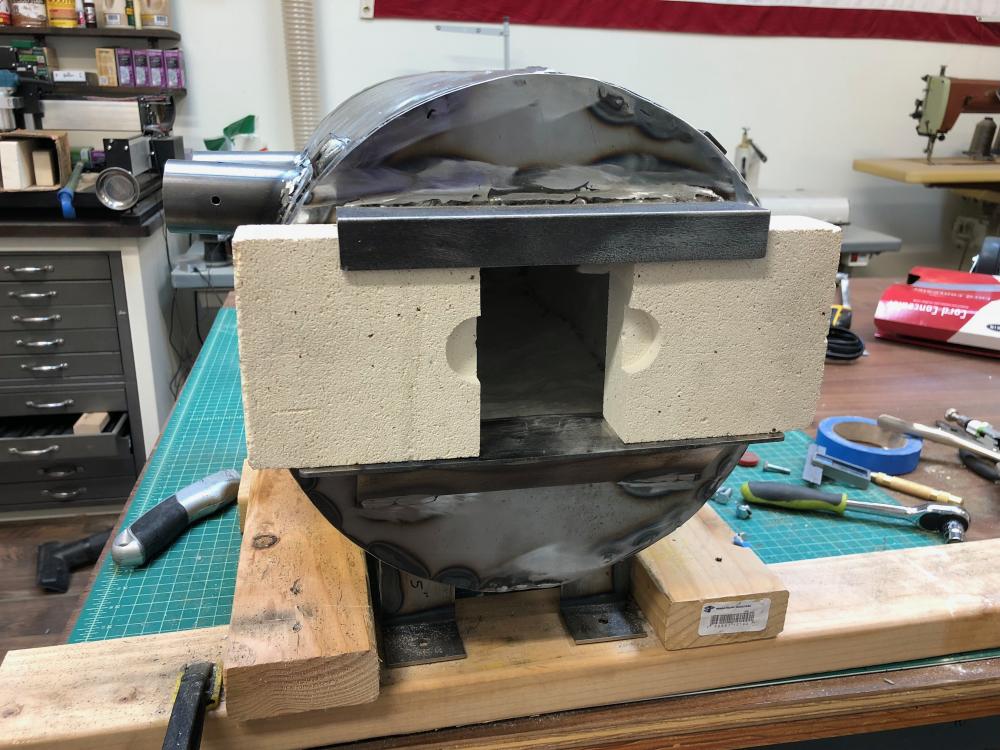
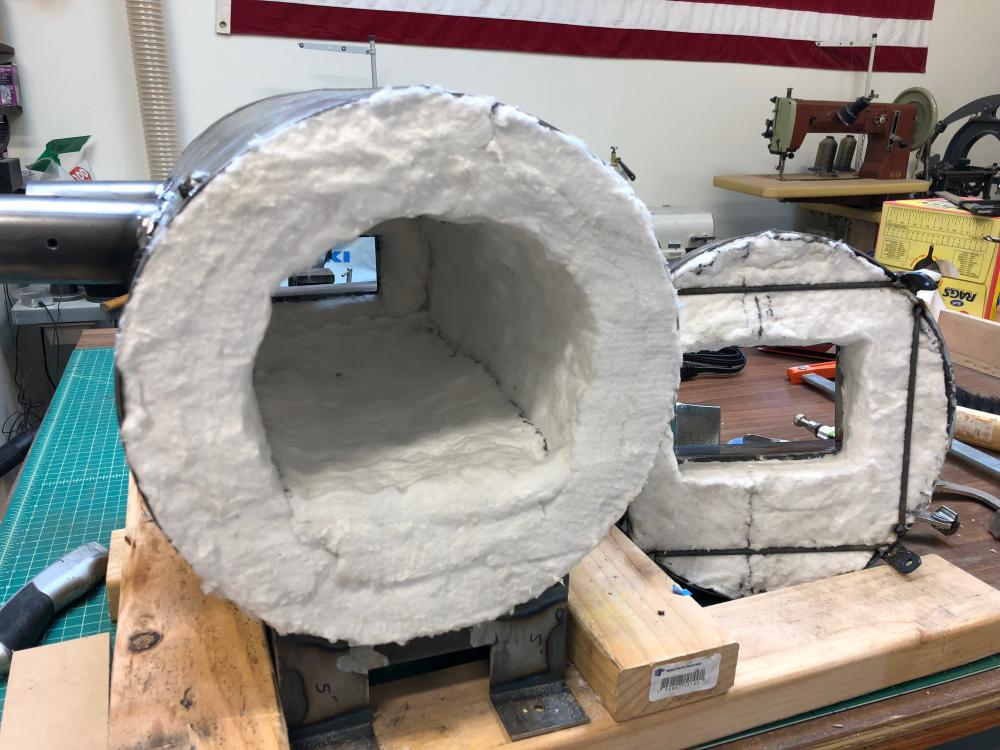
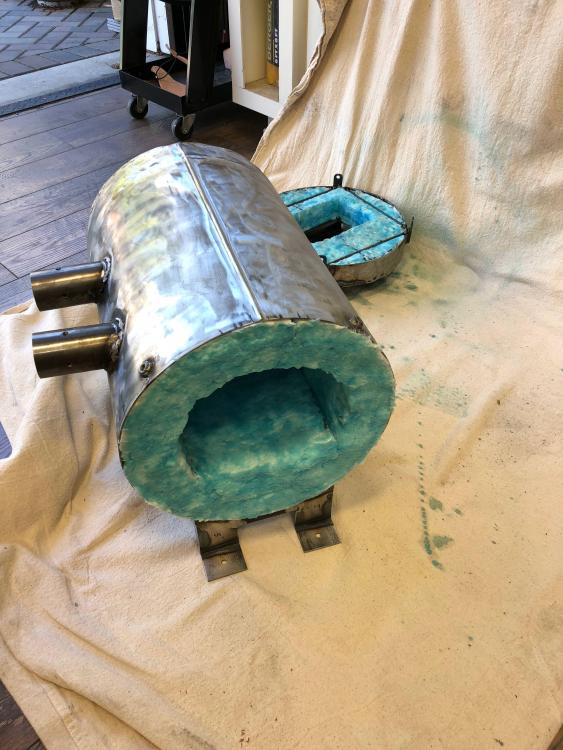
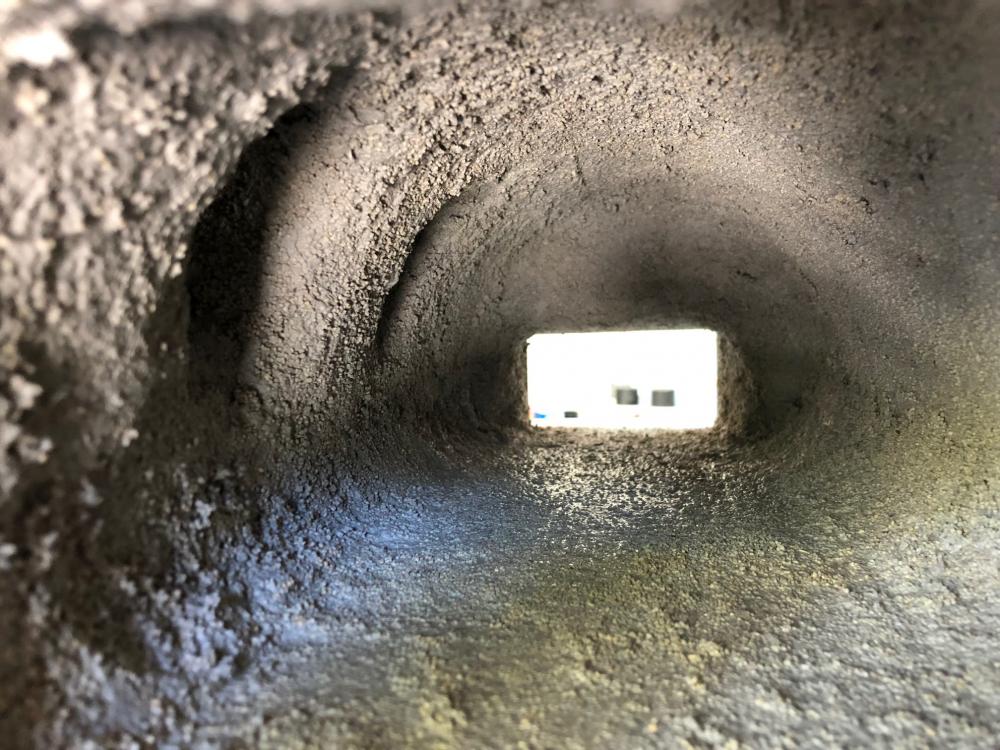
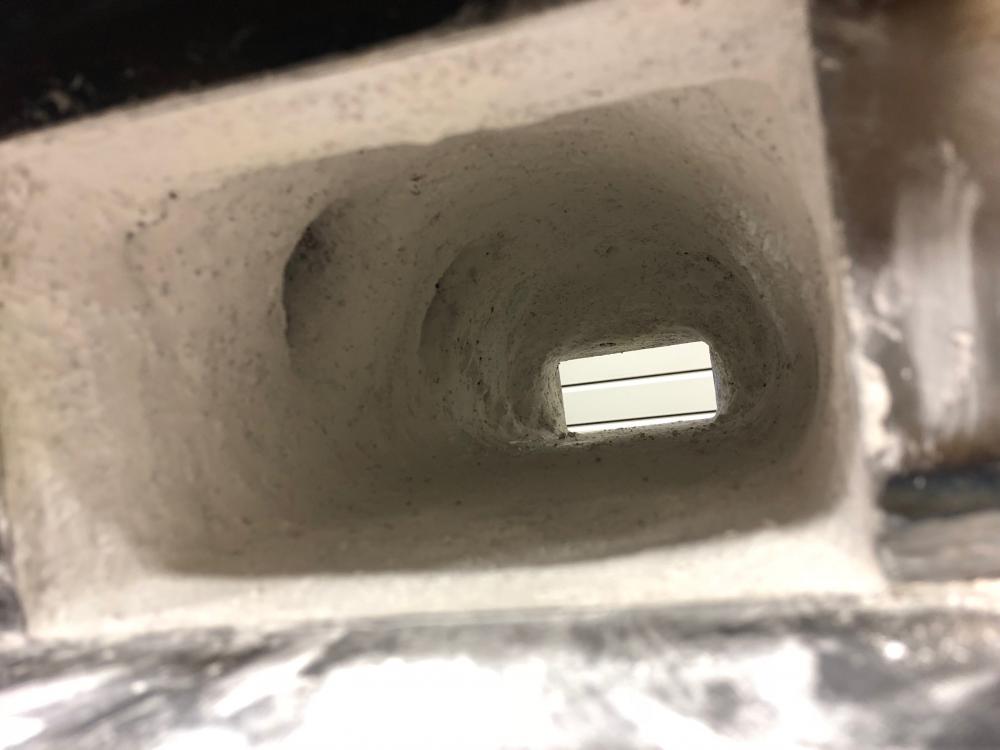
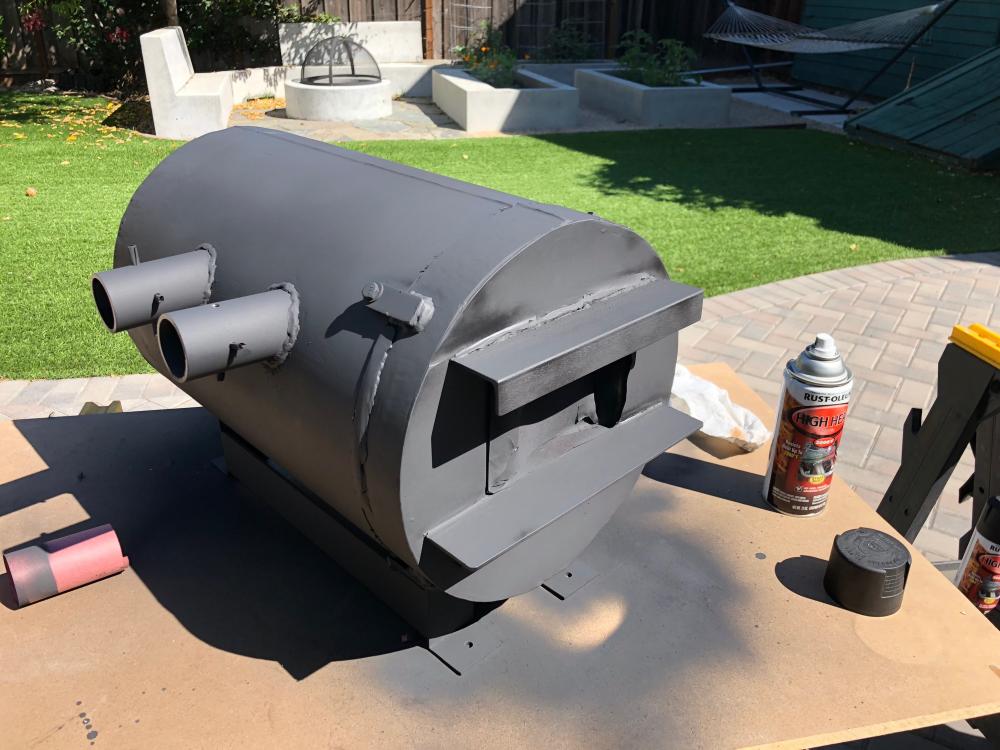
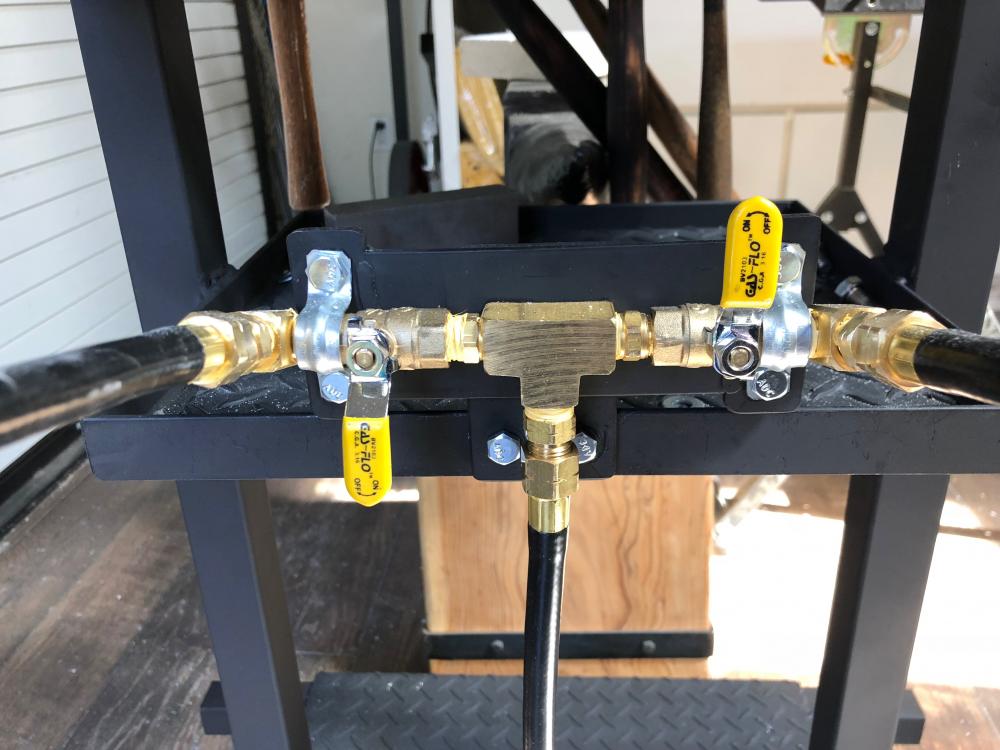
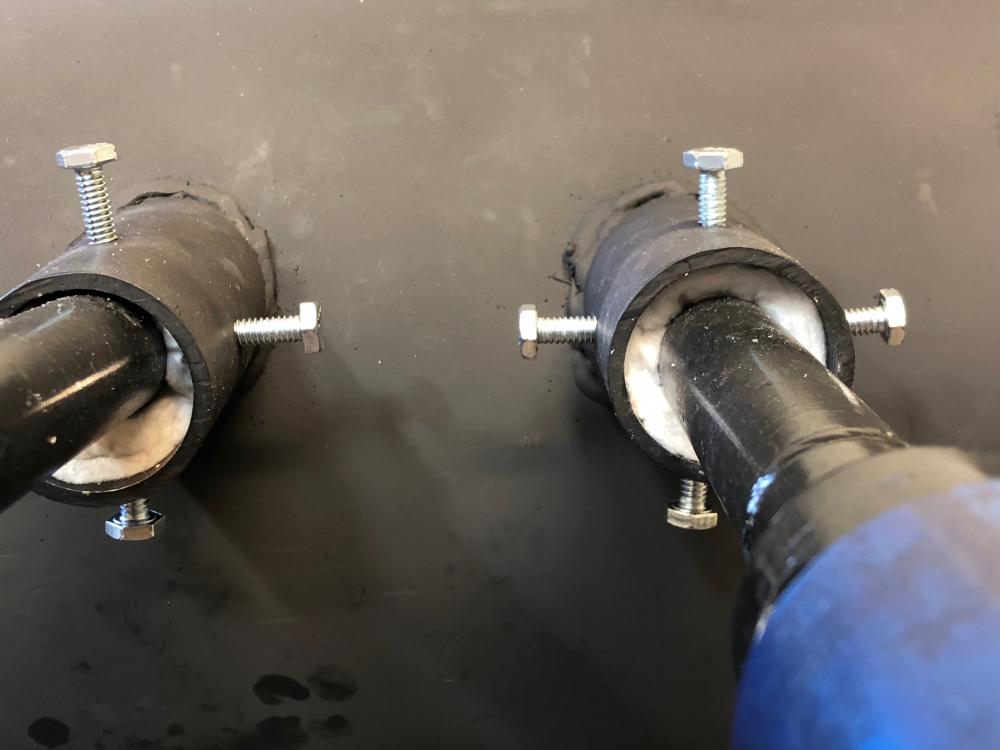
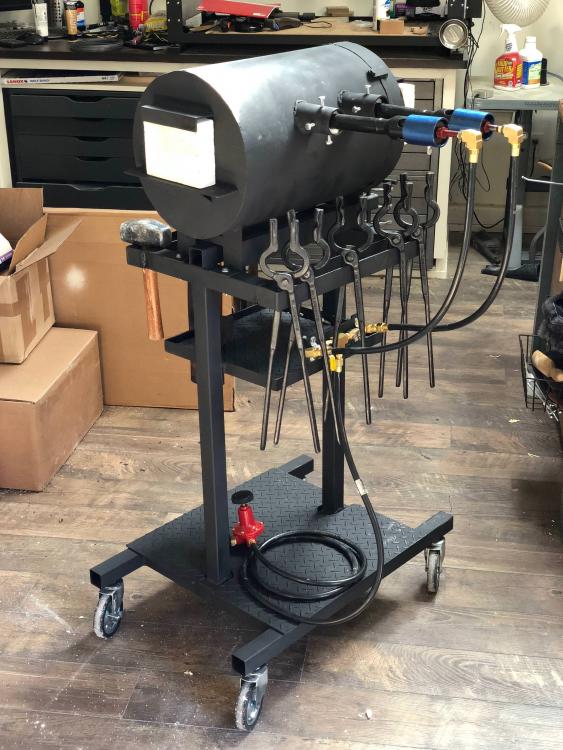
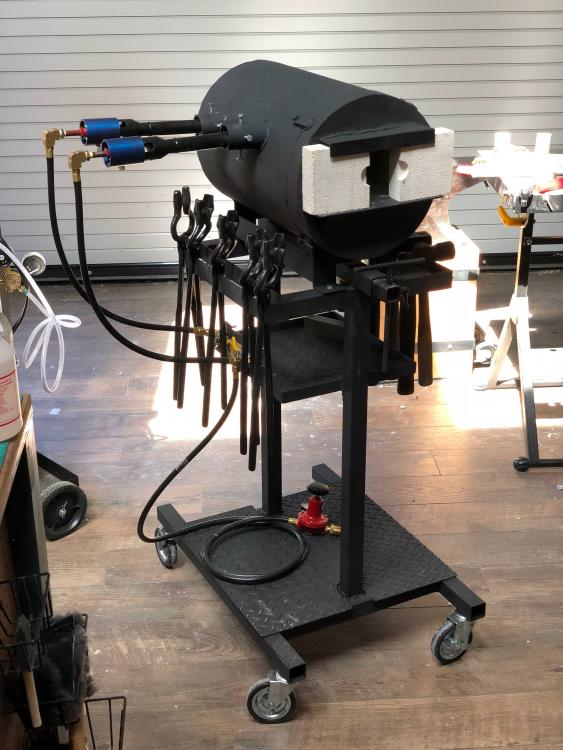
Alright, here's a build album for my two-burner forge. It's my first forge, so I probably did some things wrong, but hopefully this can help some other newbies. Here's a list of stuff I used for the main forge body and where I got it from (not included- various pieces of steel that I got from a local supplier): Harbor Freight 11 gal air tank 12x12" weldable sheet for forge faces (actually 12x11.875". eff you home depot) Adjustable screw handle things Insulating Firebrick 1" ceramic fiber blanket Fumed silica 15lbs Kast-o-Lite 30 1 pint Matrikote High heat spray paint Gas supply kit (mine is semi-custom) Hybridburners T-Rex burners I have two burners, but I probably could do with just one of the T-Rex burners. They are beasts. Well, that's it! I probably could have done thing better or cheaper, but I'm happy with it. Onto the photos: I forgot to start taking pictures in the beginning, but here is the air tank I used from Harbor Freight. I didn't want rounded ends, so I cut off the ends with an angle grinder. Then I cut back 2" from either side so I could use them as doors. I also cut off the handle, feet, and grinded off the hole for the air valve thingy. Milling out the front and back openings. Could have done this with an angle grinder, but I have a router cnc... so why not? Back door cut out pretty cleanly. Front face welded to front door/body. This project is the first time I've ever welded and ended up warping the thin face a little. I got it all worked out in the end, but just a warning to anyone else welding thin material for the first time. Front door almost complete! cut off the excess face, made a little porch and bracket to hold fire brick covers. Making and testing leg placement. I ended up permanently welding the back door on. Figured if I ever do maintenance I can do pretty much anything by just having the front be detachable. I was too lazy to make the front door be on a hinge, so I made little bolt bracket things that screw into the main body. There are 4 of them and they hold the front on nice and snug. Time to weld on the base! Also, you might have noticed I put little angle supports under the front and back porch. The welds are def strong enough to hold the porches on their own, but I figured this might help fight any warp due to the heat. I have no idea if it will or if it's even a concern, but it doesn't look bad so there it is. Cut out all the pieces for the rolling stand. In the foreground is the adjustable work rest for the forge. It can move in/out and up/down. Grind a flat in the rest rod so the set screw can set better. Here it is on the stand. Stand almost done! Just need to add tool holders and paint it. Ding! Stand is done. Used a forstner bit to drill a shallow hole and then cut a soft firebrick in half to make the front doors. The holes are so I can more easily use tongs to open the doors when they're closed. I picked up 12' of 1" ceramic fiber blanket on ebay and lined the forge with two layers of it. A little more on the bottom to make a flat floor. The particular blanket is rated to 2600 degrees. For the front door, I laid in insulation and then welded in thin rod to hold it in place. The rod gets buried in the insulation so it should be safe from the heat. Fumed silica + food coloring + water = ceramic fiber blanket rigidizer. Sprayed it on in a water sprayer. I'm not sure if this is 100% necessary but during my research it came up a lot so I just did it. Also got the fumed silica on ebay. It was pretty inexpensive and mind-bogglingly light. Next I added ~1/4" of refractory cement to every surface in the forge. I added a little extra to the area opposite of the burners since they'll be getting blasted. I used Kast-o-Lite 30 as my refractory. It's rated to 3000 degrees. After the cement has cured completely, I painted on a thin coat of Matrikote. It's an IR reflecting material that apparently works wonders with getting your forge hotter faster, similar to products like ITC-100 or Plistix (or so I've read). Anyway, it was cheap to buy a pint of it so it couldn't hurt! I also painted a coat on the forge facing sides of the firebrick doors. Painting the forge body. I don't know why I waited until everything else was done to paint it. Maybe I wanted to get the messy cement stuff out of the way first? Probably. Made a little bracket for my gas fittings and valves. Lined up my burners how I wanted them and then stuffed ceramic wool scrap in the gaps. The burners look misaligned, but it's actually the burner holders that are wonky. All done! Here's the back. And here's the front.
-
Finally finished my forge! Well, almost... still have to paint the main body. I'll post a full build album soon, but wanted to share the first fire. Thanks to everyone who gave me tips when I submitted my initial plans.
-
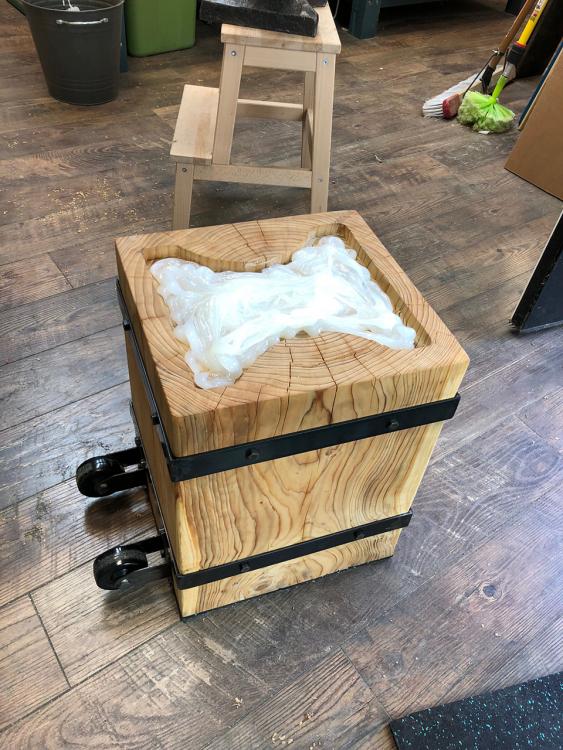
Thanks for the kind words everyone! It's some kind of cedar that a neighbor had cut down. Probably western red? The silicone is holding strong and I've already moved it around a couple of times without issue... BUT I am adding some "just in case" tie-downs tomorrow. Thanks! It's actually some relatively inexpensive laminate from Home Depot. Not an ideal floor for red hot steel, but it's my leatherwork shop and I'm just starting to get into blacksmithing.
-
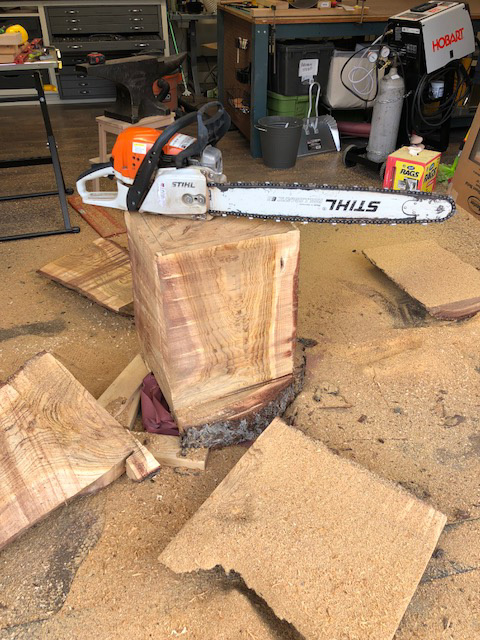
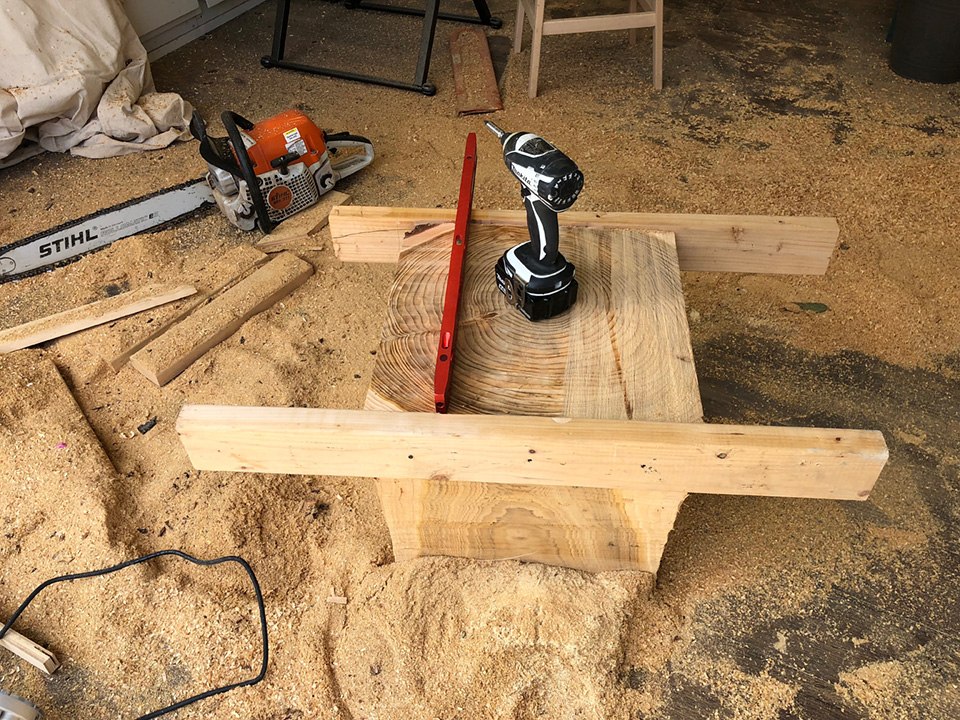
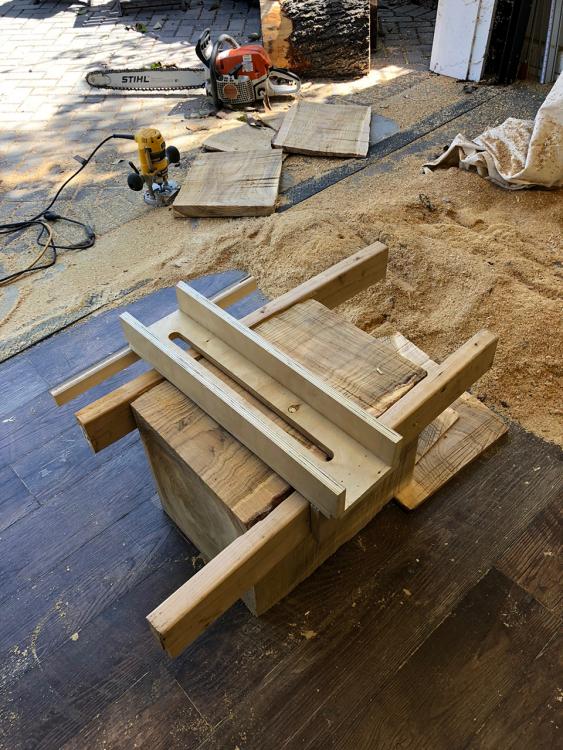
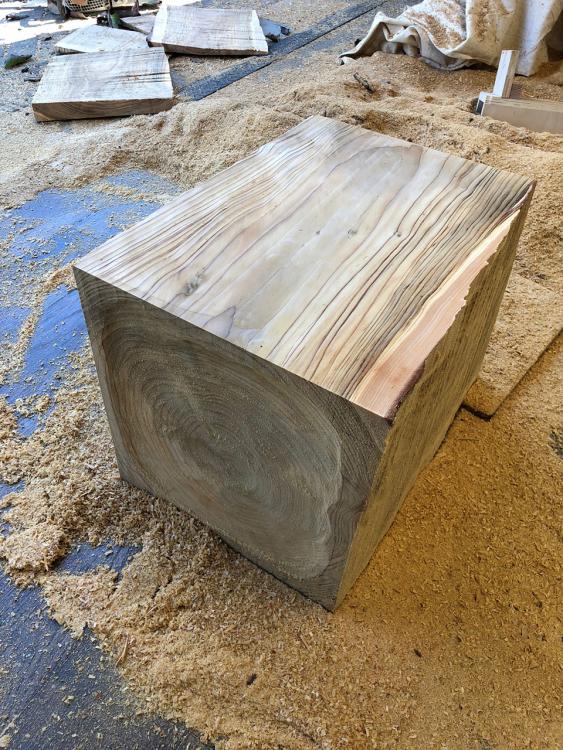
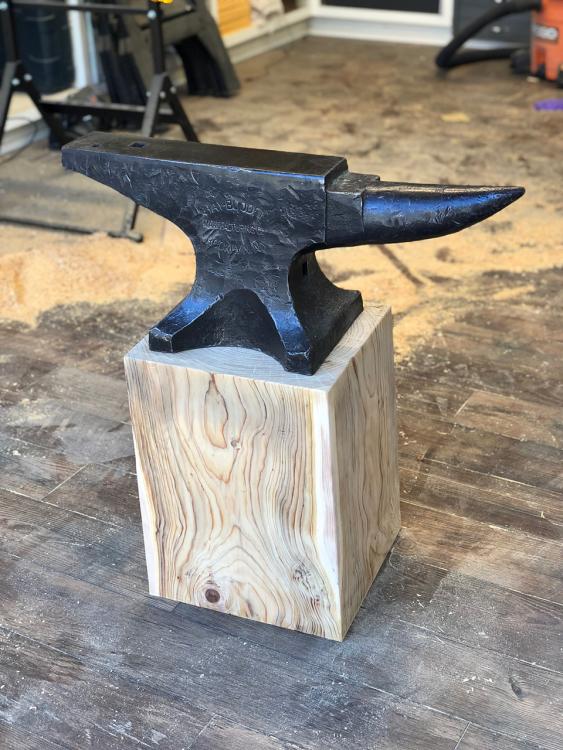
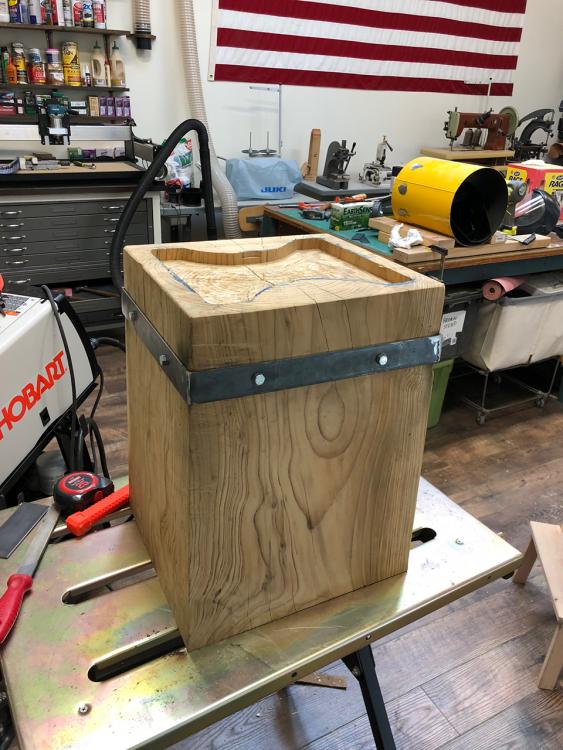
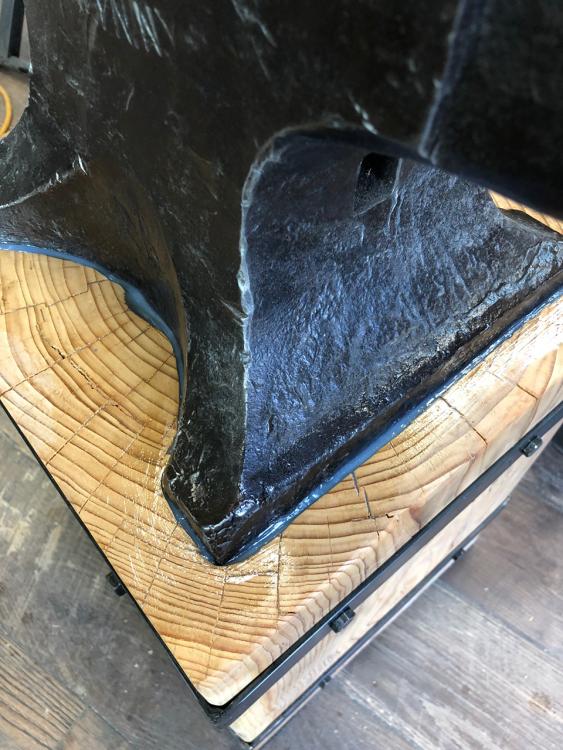
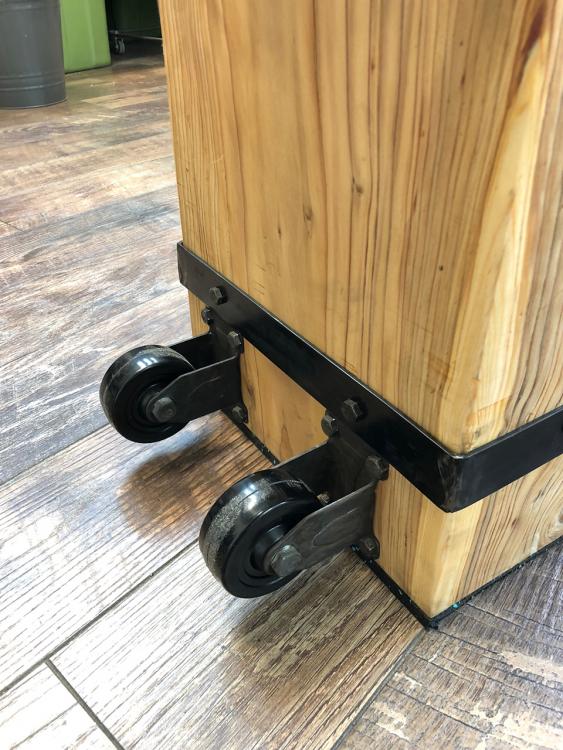
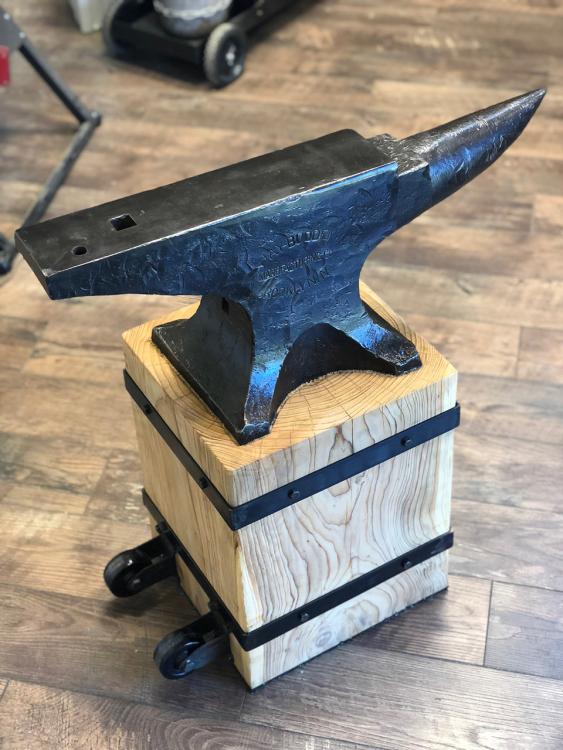
Shared my first anvil a couple of weeks ago and now wanted to share the stand I made for it. Got a fancy anvil and a stump that was too big. Step one. Rented a chainsaw and did rough cuts to get it close to where I want it. First step after rough cutting with the chainsaw was to make sure the top and bottom where flat and level. I made "good enough" router sled rails and a quick router sled to make it smoooooth. Router sled working on the sides. Also, at some point I used a low grit carbide cup wheel on my angle grinder to cup the bottom of the stand. The purpose of doing this, or so I've read, is that it greatly reduces any wobble that might show up from something getting lodged under the stand. Stand all smoothed out! Put the anvil on top so I could trace the base and rout out a 3/4" hole to place the anvil into. Top routed out for the anvil and started working on the steel banding. It's just made of 1.5 x 1/8" mild steel that I welded for a tight fit and then lag screwed into the stump. I'm not sure if that's the best solution, but it's what I did. Cold blued the steel to patina it black. Also did a quick job of it on the caster hardware because I didn't want shiny zinc on this stand. Casters added so I can easily move it around. An overly-heavy dose of silicone caulk to reduce anvil ring (It works *really* well, by the way)! I did a bad routing job and there was about a 1/8 gap around the base, but it didn't end up mattering. The silicone holds it real well. I didn't want to see the silicone so I kinda jammed sawdust on the top layer after this picture. Finished product! (I also added a 1/4" layer of rubber underneath the base because I had a bunch left over from building my home gym)
-

First anvil acquired! (173# HB)
Bruno Medeiros replied to Bruno Medeiros's topic in Anvils, Swage Blocks, and Mandrels
Yup! -

First anvil acquired! (173# HB)
Bruno Medeiros replied to Bruno Medeiros's topic in Anvils, Swage Blocks, and Mandrels
Probably too much, but I'm in a very anvil dry part of the country. $900 -
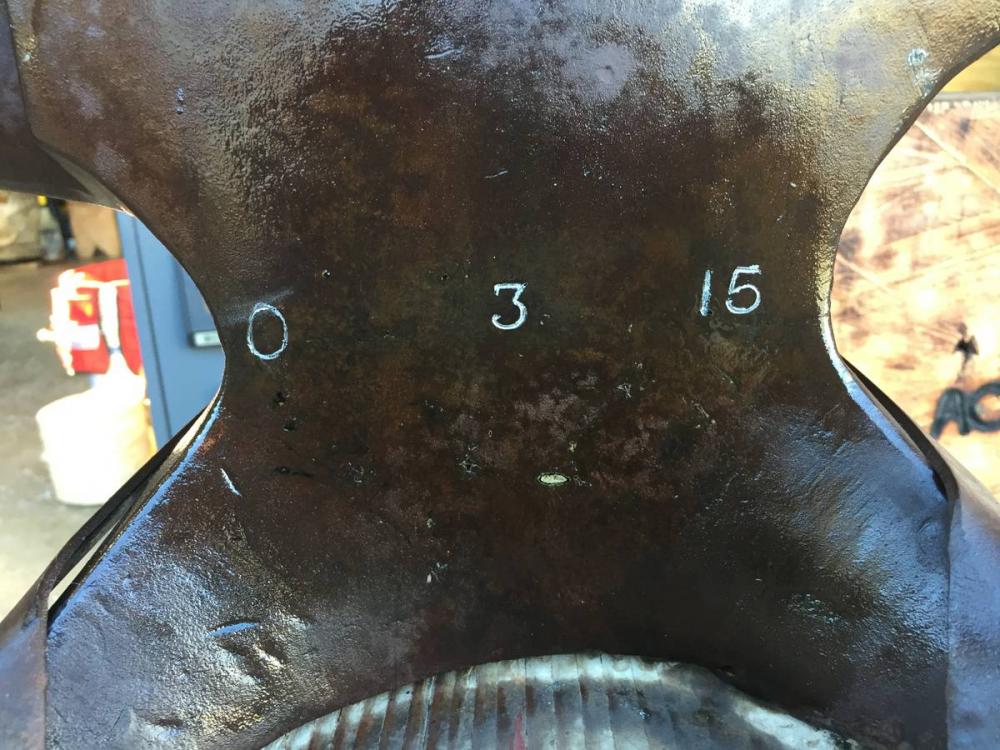
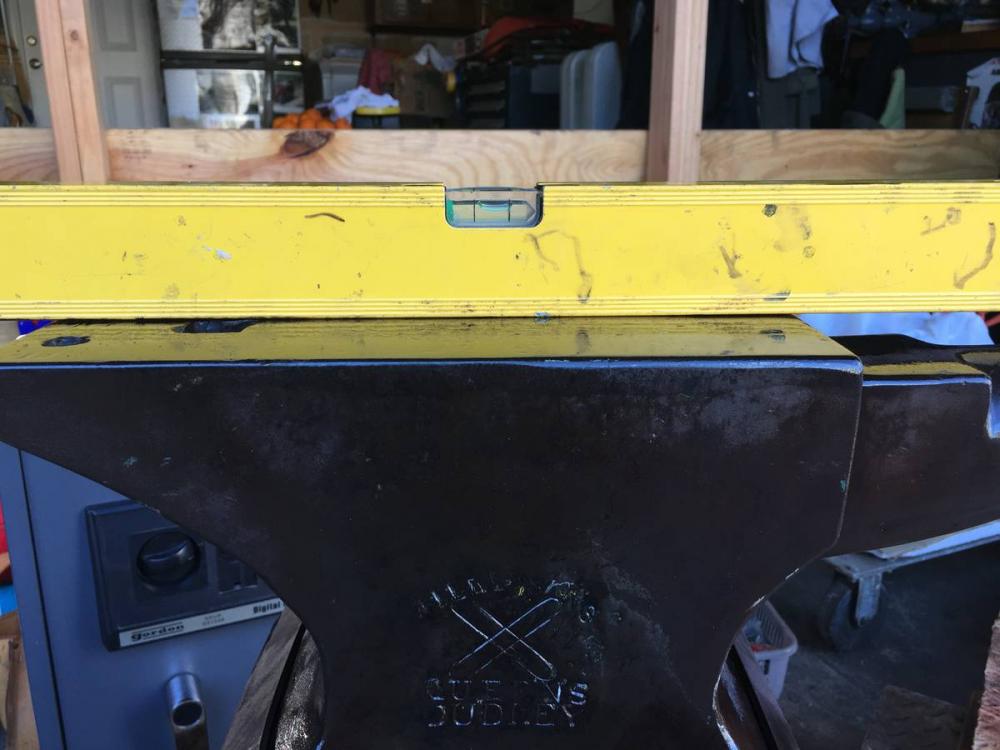
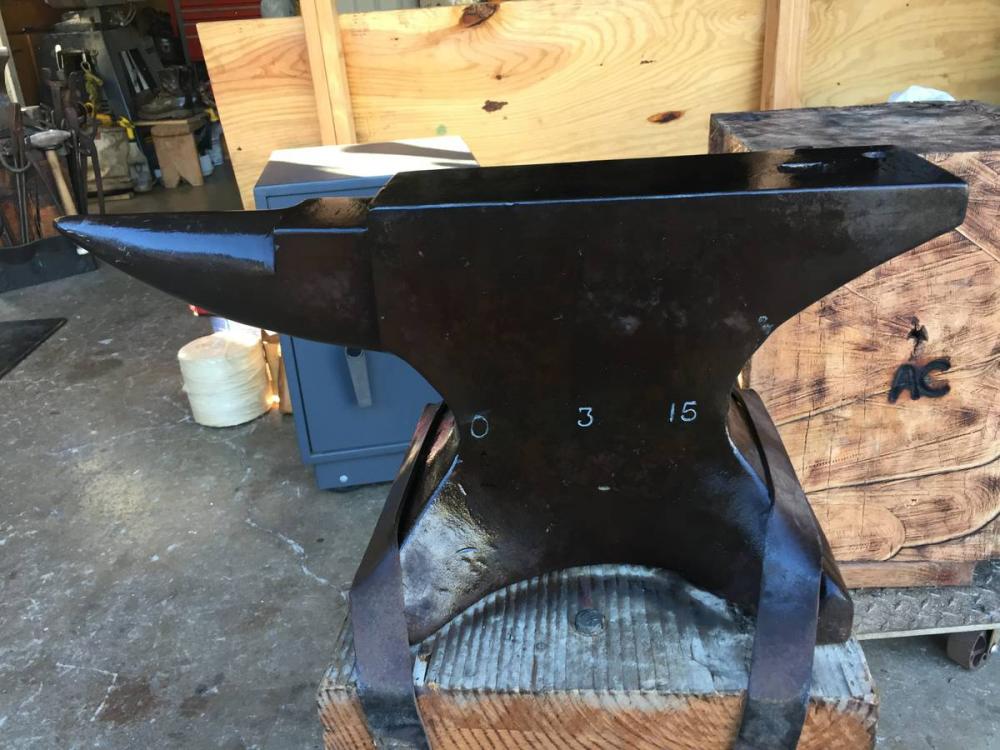
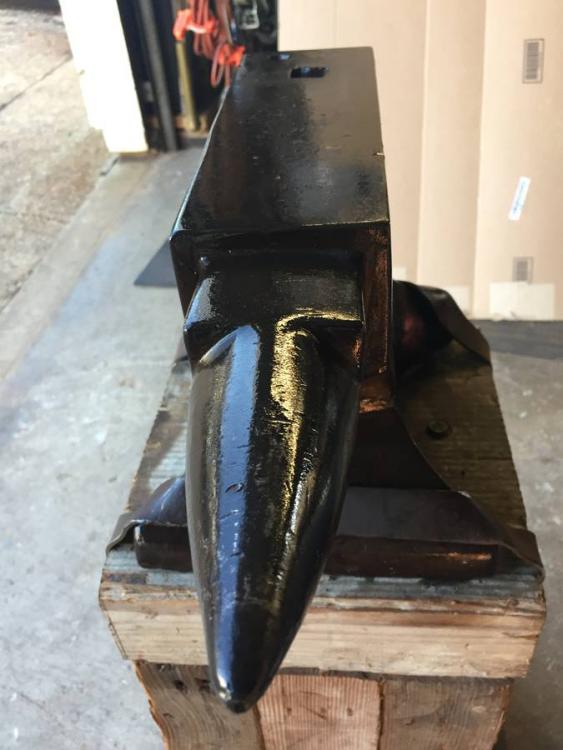
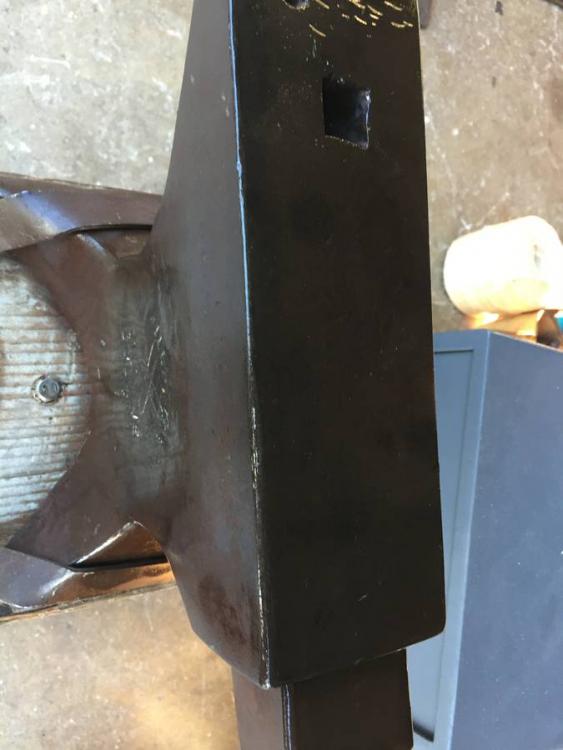
Hey gang, Finally bought my first anvil and I'm pretty psyched about it! It's a 173# Hay-Budden. I tested rebound with 1" ball bearing and it's ~90%. Serial# 18045. Anybody got any more info on this thing? Here are some pics (don't mind the giant stump, I'm going to resize it):
-

Beginner looking for feedback on 2-burner forge plans
Bruno Medeiros replied to Bruno Medeiros's topic in Gas Forges
Good point, thanks! -

Beginner looking for feedback on 2-burner forge plans
Bruno Medeiros replied to Bruno Medeiros's topic in Gas Forges
I already have the hybridburners t-rex burners. A coworker of mine had a failed foray into blacksmithing and sold both of them to me for the price of one. He never even mounted them! Thanks for the tip about Metrikote. I somehow missed it when looking at Wayne Coe's site. Also, Re: propane tank location. Glad to know! I didn't know it couldn't be kept there. Luckily, it'll be easy enough to move off the side while in use. -
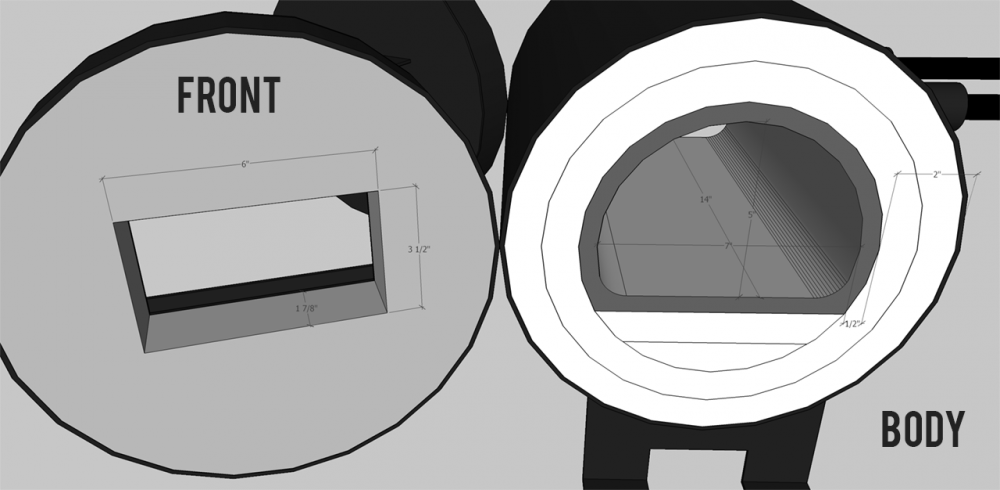
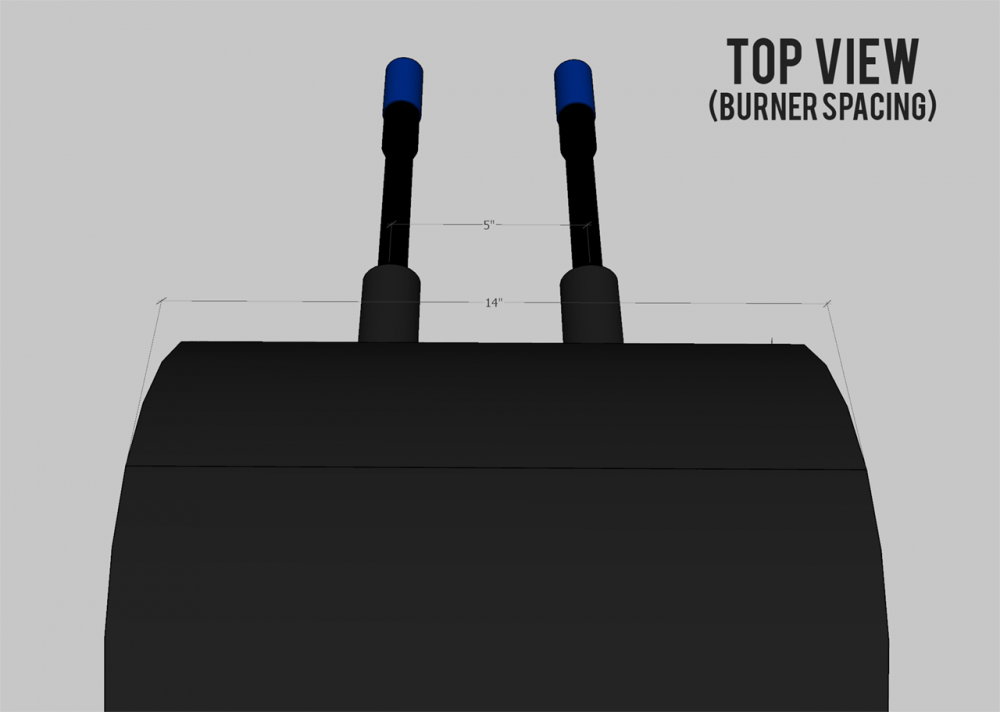
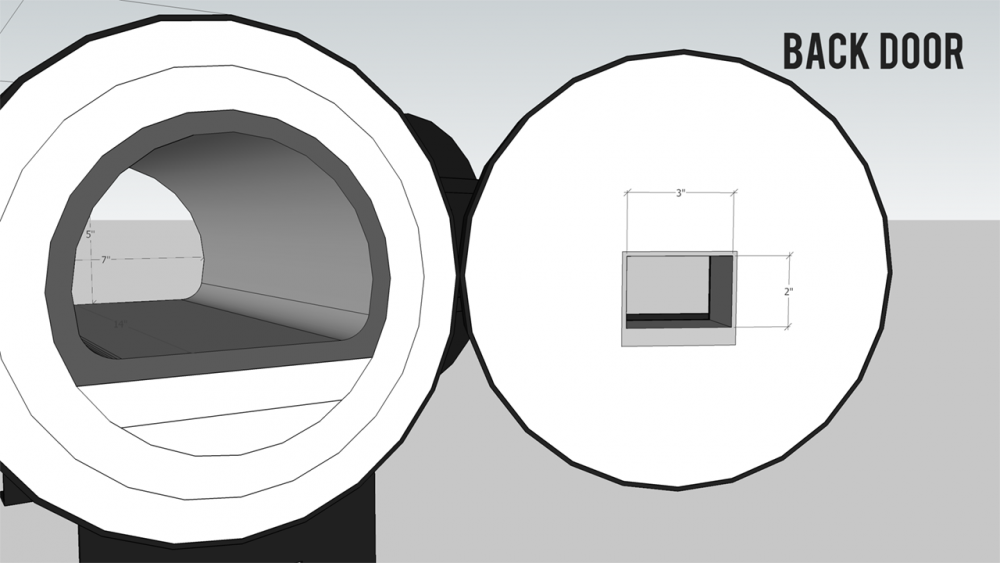
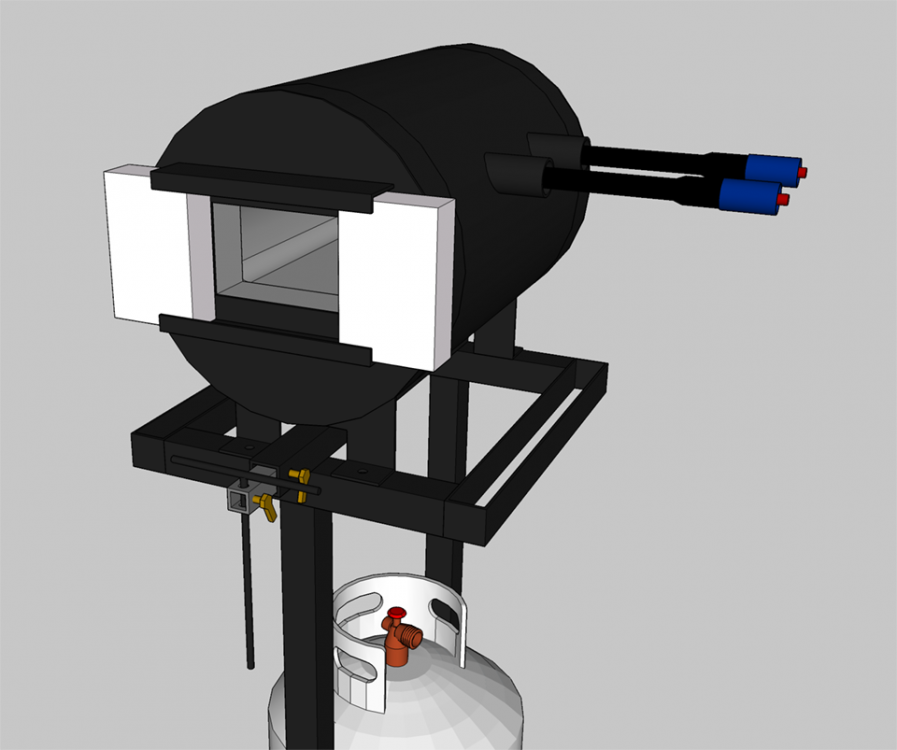
Hey gang, super newbie here! I've been overloading on info the past couple of months and decided that I'd rather build my own forge than buy a pre-made one. Before I go hog wild buying materials, I'd figure I'd get a gut check on my plans. Looking to eventually make hammers, hatchets, and kitchen cutlery. I think most of the info is in the photos, but just in case the text is too small here are some basic stats: Approx chamber volume: ~480 cubic inches Overall length (not including brick angle iron): 18" Main chamber: 7"x5"14" Kaowool: 2" Refractory: 1/2" ITC-100: Uh.. light coating? Front opening: 5"x3.5" Back opening: 3"x2" Burners: Two 3/4" T-Rex from hybridburners Burner spacing: 5" on center Thanks for any feedback!
-

Is this anvil worth it?
Bruno Medeiros replied to Bruno Medeiros's topic in Anvils, Swage Blocks, and Mandrels
Thanks, I'll take a look! -

Is this anvil worth it?
Bruno Medeiros replied to Bruno Medeiros's topic in Anvils, Swage Blocks, and Mandrels
Oops! Updated my profile. I'm from the SF Bay Area where everything that should be reasonably priced isn't. -
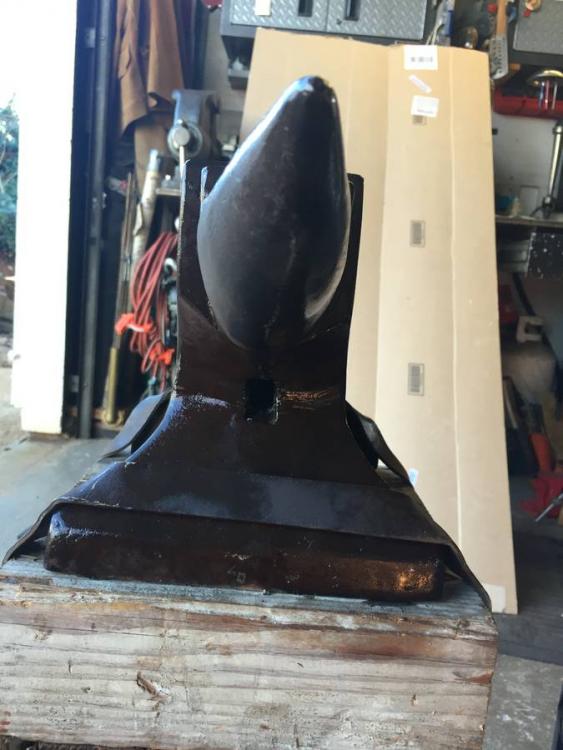
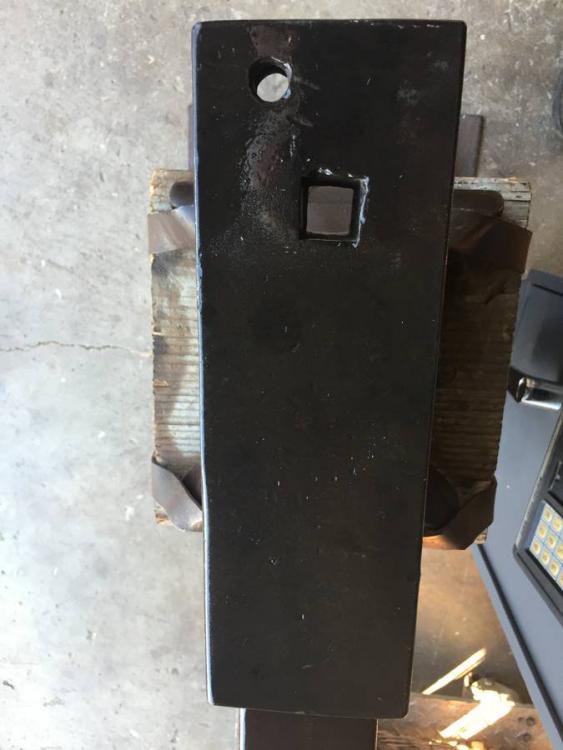
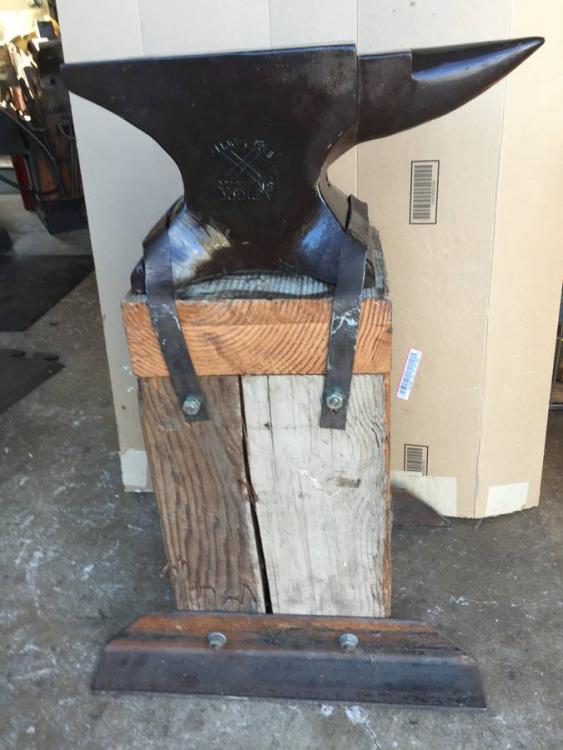
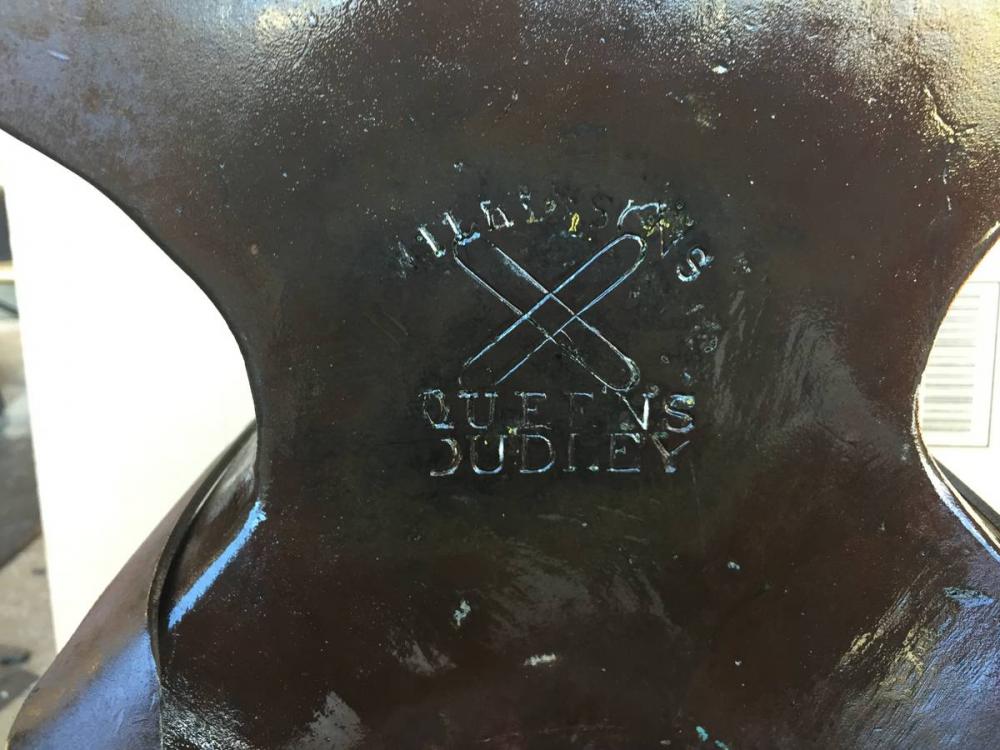
Hi, I'm new to anvils and blacksmithing and have the opportunity to purchase this anvil for $600 and am wondering if it's worth it. Seems to be an ~100lb Wilkonson & Sons / Queens Dudley anvil. Attached are a bunch of pictures of it:

