Jaja
-
Posts
16 -
Joined
-
Last visited
-
Well here are two more videos (sorry for uploading them multiple times...I'm having a hard time getting them to sit neatly in the post). Both videos are attempts to light the burner with the intake completely open, in open air. I have also attempted it in the forge and the result is the same. The second video (11.wmv) is attempting to light the flame in open air at high pressure. Lowering the pressure eventually results in the backfire and stuttering seen in the first video (1.wmv). Higher pressure doesn't seem to help in lighting the burner properly at fully open intake. Eventually I start smelling gas and I take that as a sign nothing is going to be burned and I'm approaching a possible explosion hazard. I will love to get more advice about the end of the burner...because I had some suspicions about it. I will definitely try to get that thing unscrewed so I can test different sized nozzles. Also, the regulator is rated for 0-40 psi. I don't have a pressure gauge so I can't say exactly what I'm running at. But to compensate for that I've tried all sorts of combinations. One of the videos I referred to used this regulator and it worked just fine (I can't post it here). I've seen this regulator in a lot of other setups as well. Here are more details on the regulator: https://www.amazon.com/gp/product/B0033JF0GE/ref=oh_aui_detailpage_o00_s01?ie=UTF8&psc=1 I have also noticed the jet is slightly pointed down relative to the mixing shaft. The misalignment is very slight. Its difficult to adjust it to be perfectly centered, but I will try to see if I can fix that during the next test...at least to eliminate or minimize any problems from that. My gut however (as much as that means here) is telling me that is not the problem however. MOV00893.AVI 11.wmv 1.wmv 11.wmv
-
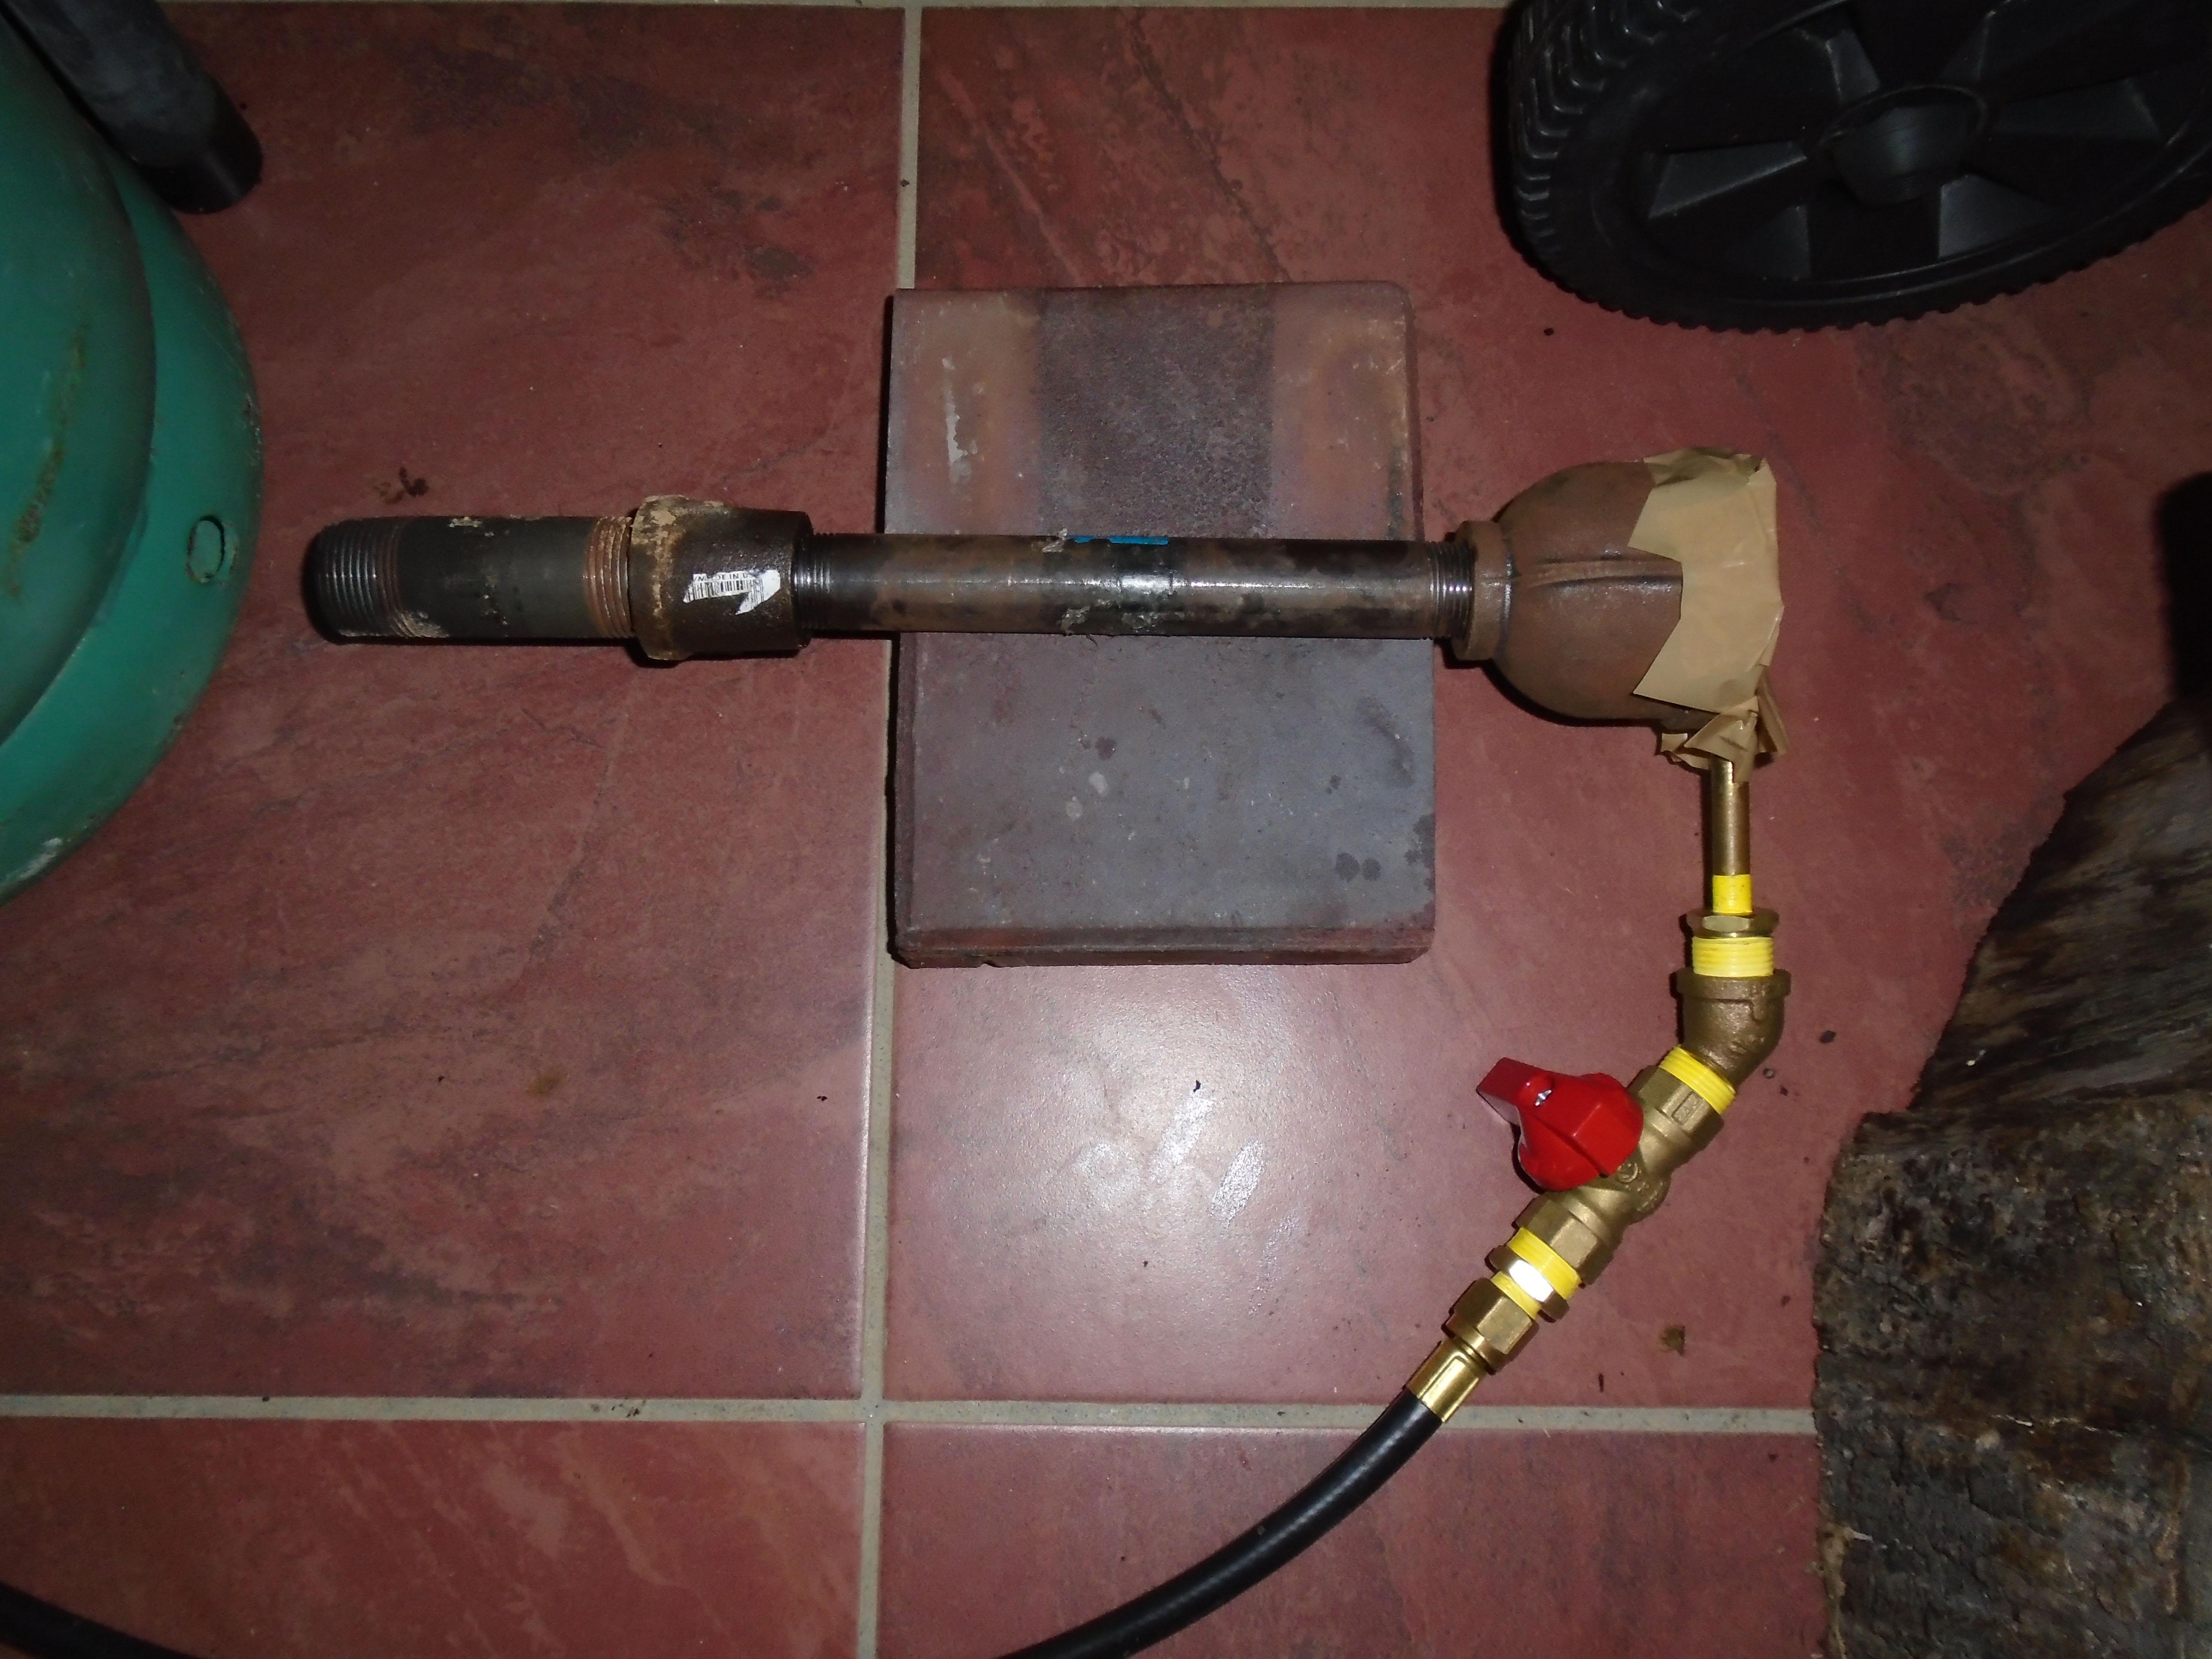
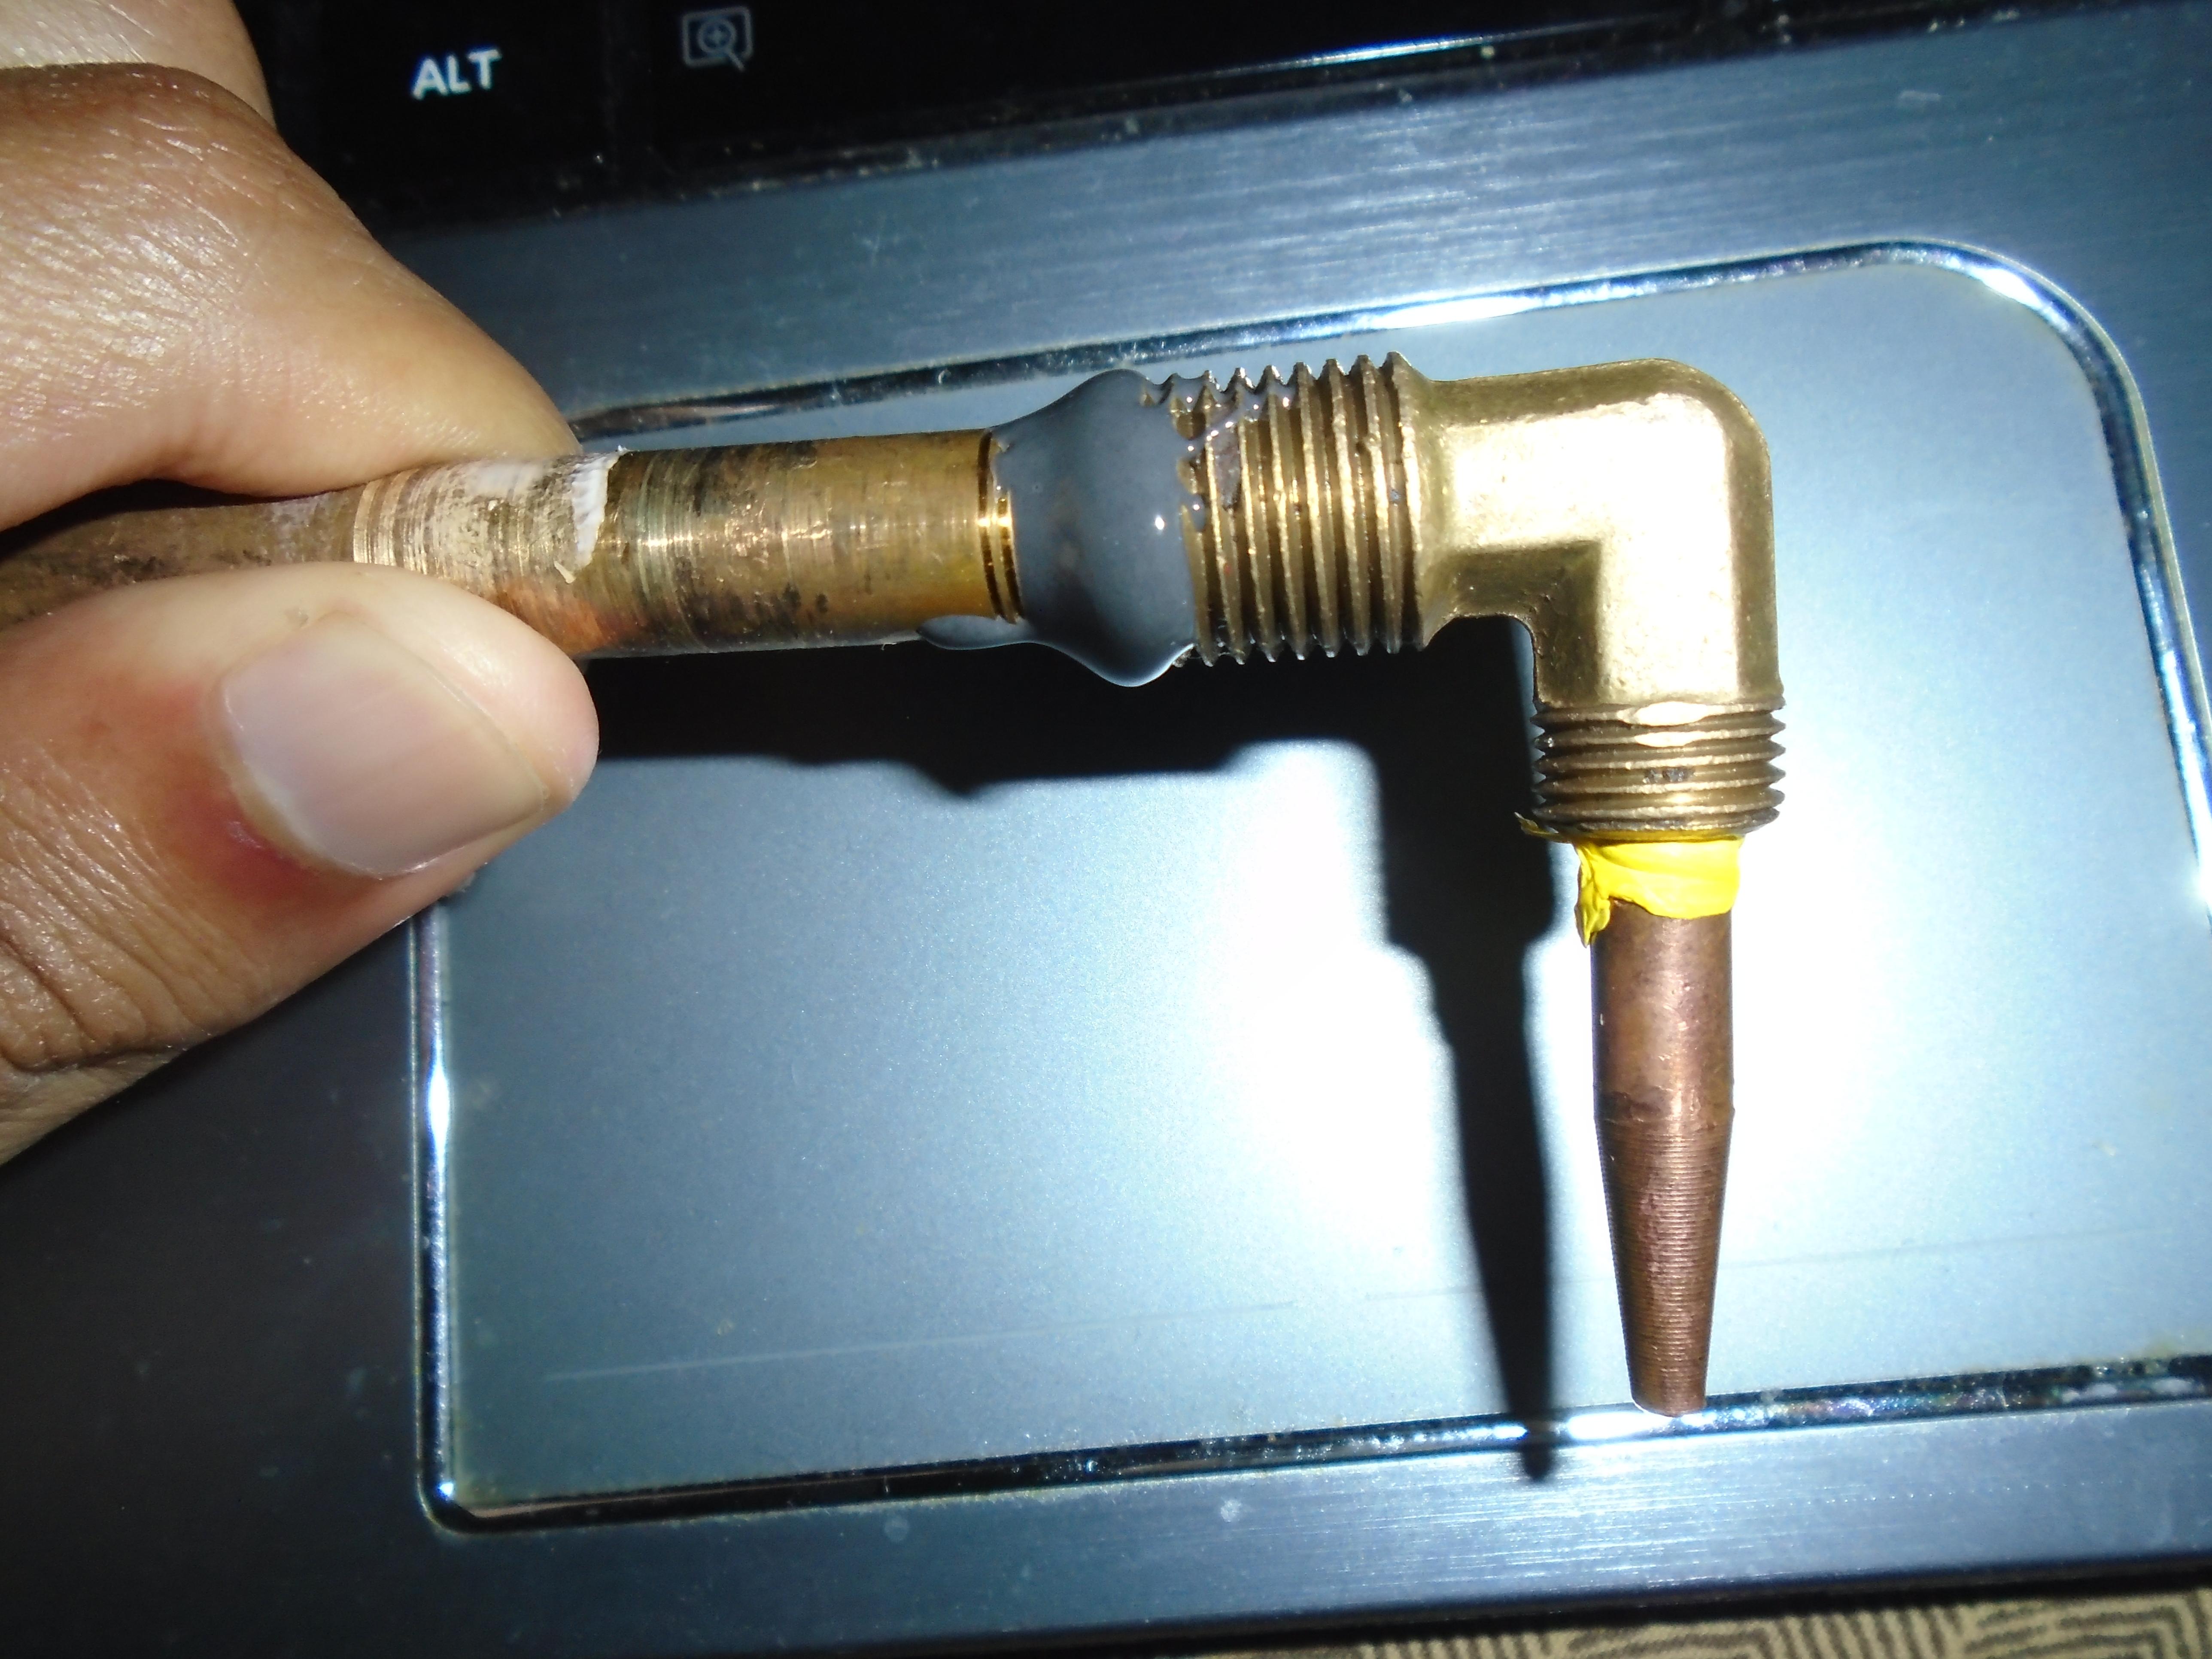
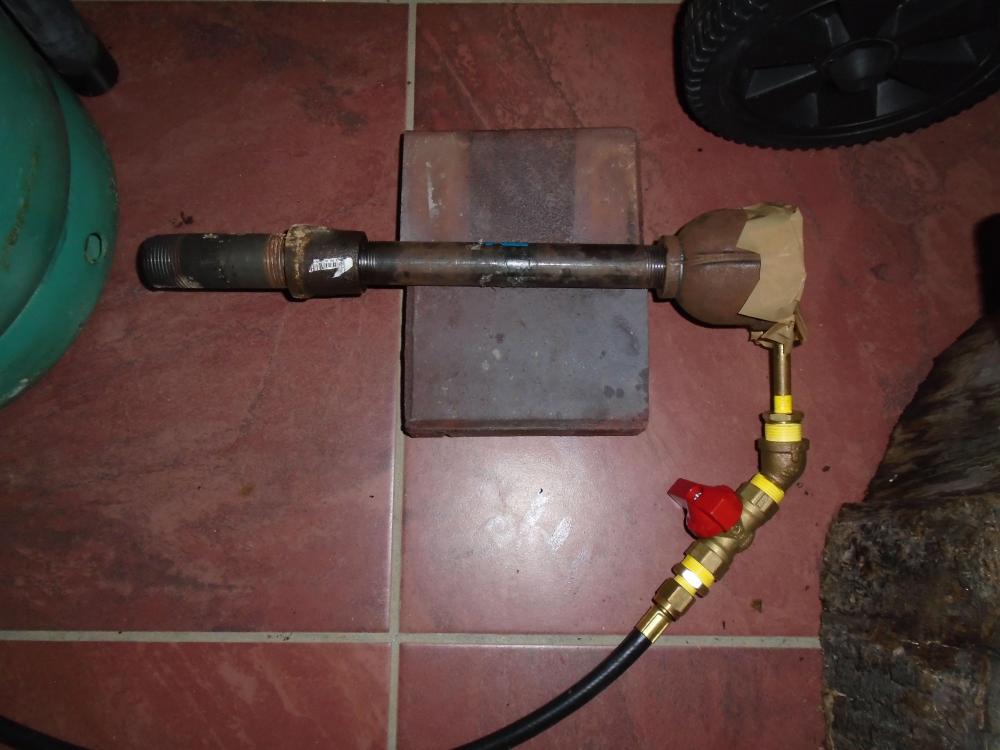
I based the design off of online research and some observations using another forge at a makerspace (not in my country). It was difficult to stick to a single design for several reasons, mainly sourcing the exact parts (took 6 months to order stuff online). So I tried to improvise. First I couldn't get the burner to light at all, so I dug around for a bit and learned the air-gas ratio could be wrong. I played around with the intake size until I eventually got it to light. The problem is the very first time it lit the flame burned way too close to the jet and there was lots of sputtering and popping. The flame was nice and straight and the burner roared however. Learning how to properly light the burner I finally got the flame to where it was supposed to be. But I can only seem to get one of two results: 1. A very, very quiet burner with a huge, "soft" flame. Achieved by almost completely covering the intake. Flame readily adjusts with increasing gas pressure. 2. A roaring burner with a rather small flame that often extinguishes itself. Intake was 1/4 way open. Flame extinguishes immediately with the slightest variation in gas pressure. Anything more than 1/4 way open for the intake would result in a flame that burns beautifully, but will not stay lit without a starting flame held against it. I used tape to adjust the size of the intake since I did not add a choke. Most designs I observed did not need it to operate. I experimented both in open air (including trying to shield the intake from the wind with the burner placed parallel to the wind) and in the forge itself. The results are almost the same however, its much easier to prevent the flame from being extinguished when its inside the forge. I also varied the height of the burner in the forge...same results. The intake is a 3/4" x 2" reducer. Jet is a 0.035" MIG tapered tip. Mixing shaft is 3/4" x 8". The end of the burner consists of a 3/4" x 1" reducer and a 1" x 4" nipple. I also considered replacing the end of the burner with a 1-1/2" x 3/4" reducer. I am unable to do so until I can get someone with a vise because its screwed in too tight to loosen by hand (trust me I've tried). That reducer was actually the original intake until I read that a 2" opening would be better. I had the opportunity to get both so I did. Again, replacing the current intake with the smaller reducer requires me to go to a workshop to drill and tap for the jet's clamp. Would it be possible to fix the problem with a modification to the current set up at home? edit1nosound.wmv MOV00896.AVI


-
Thanks :) The epoxy seal did end up standing up to the heat.
-
I will post a picture of the burner tomorrow (well later today by my time...sometime in the morning) sorry for the delay. I'll also post it with the frame of the forge so you guys can see how far from the heat it will be.
-
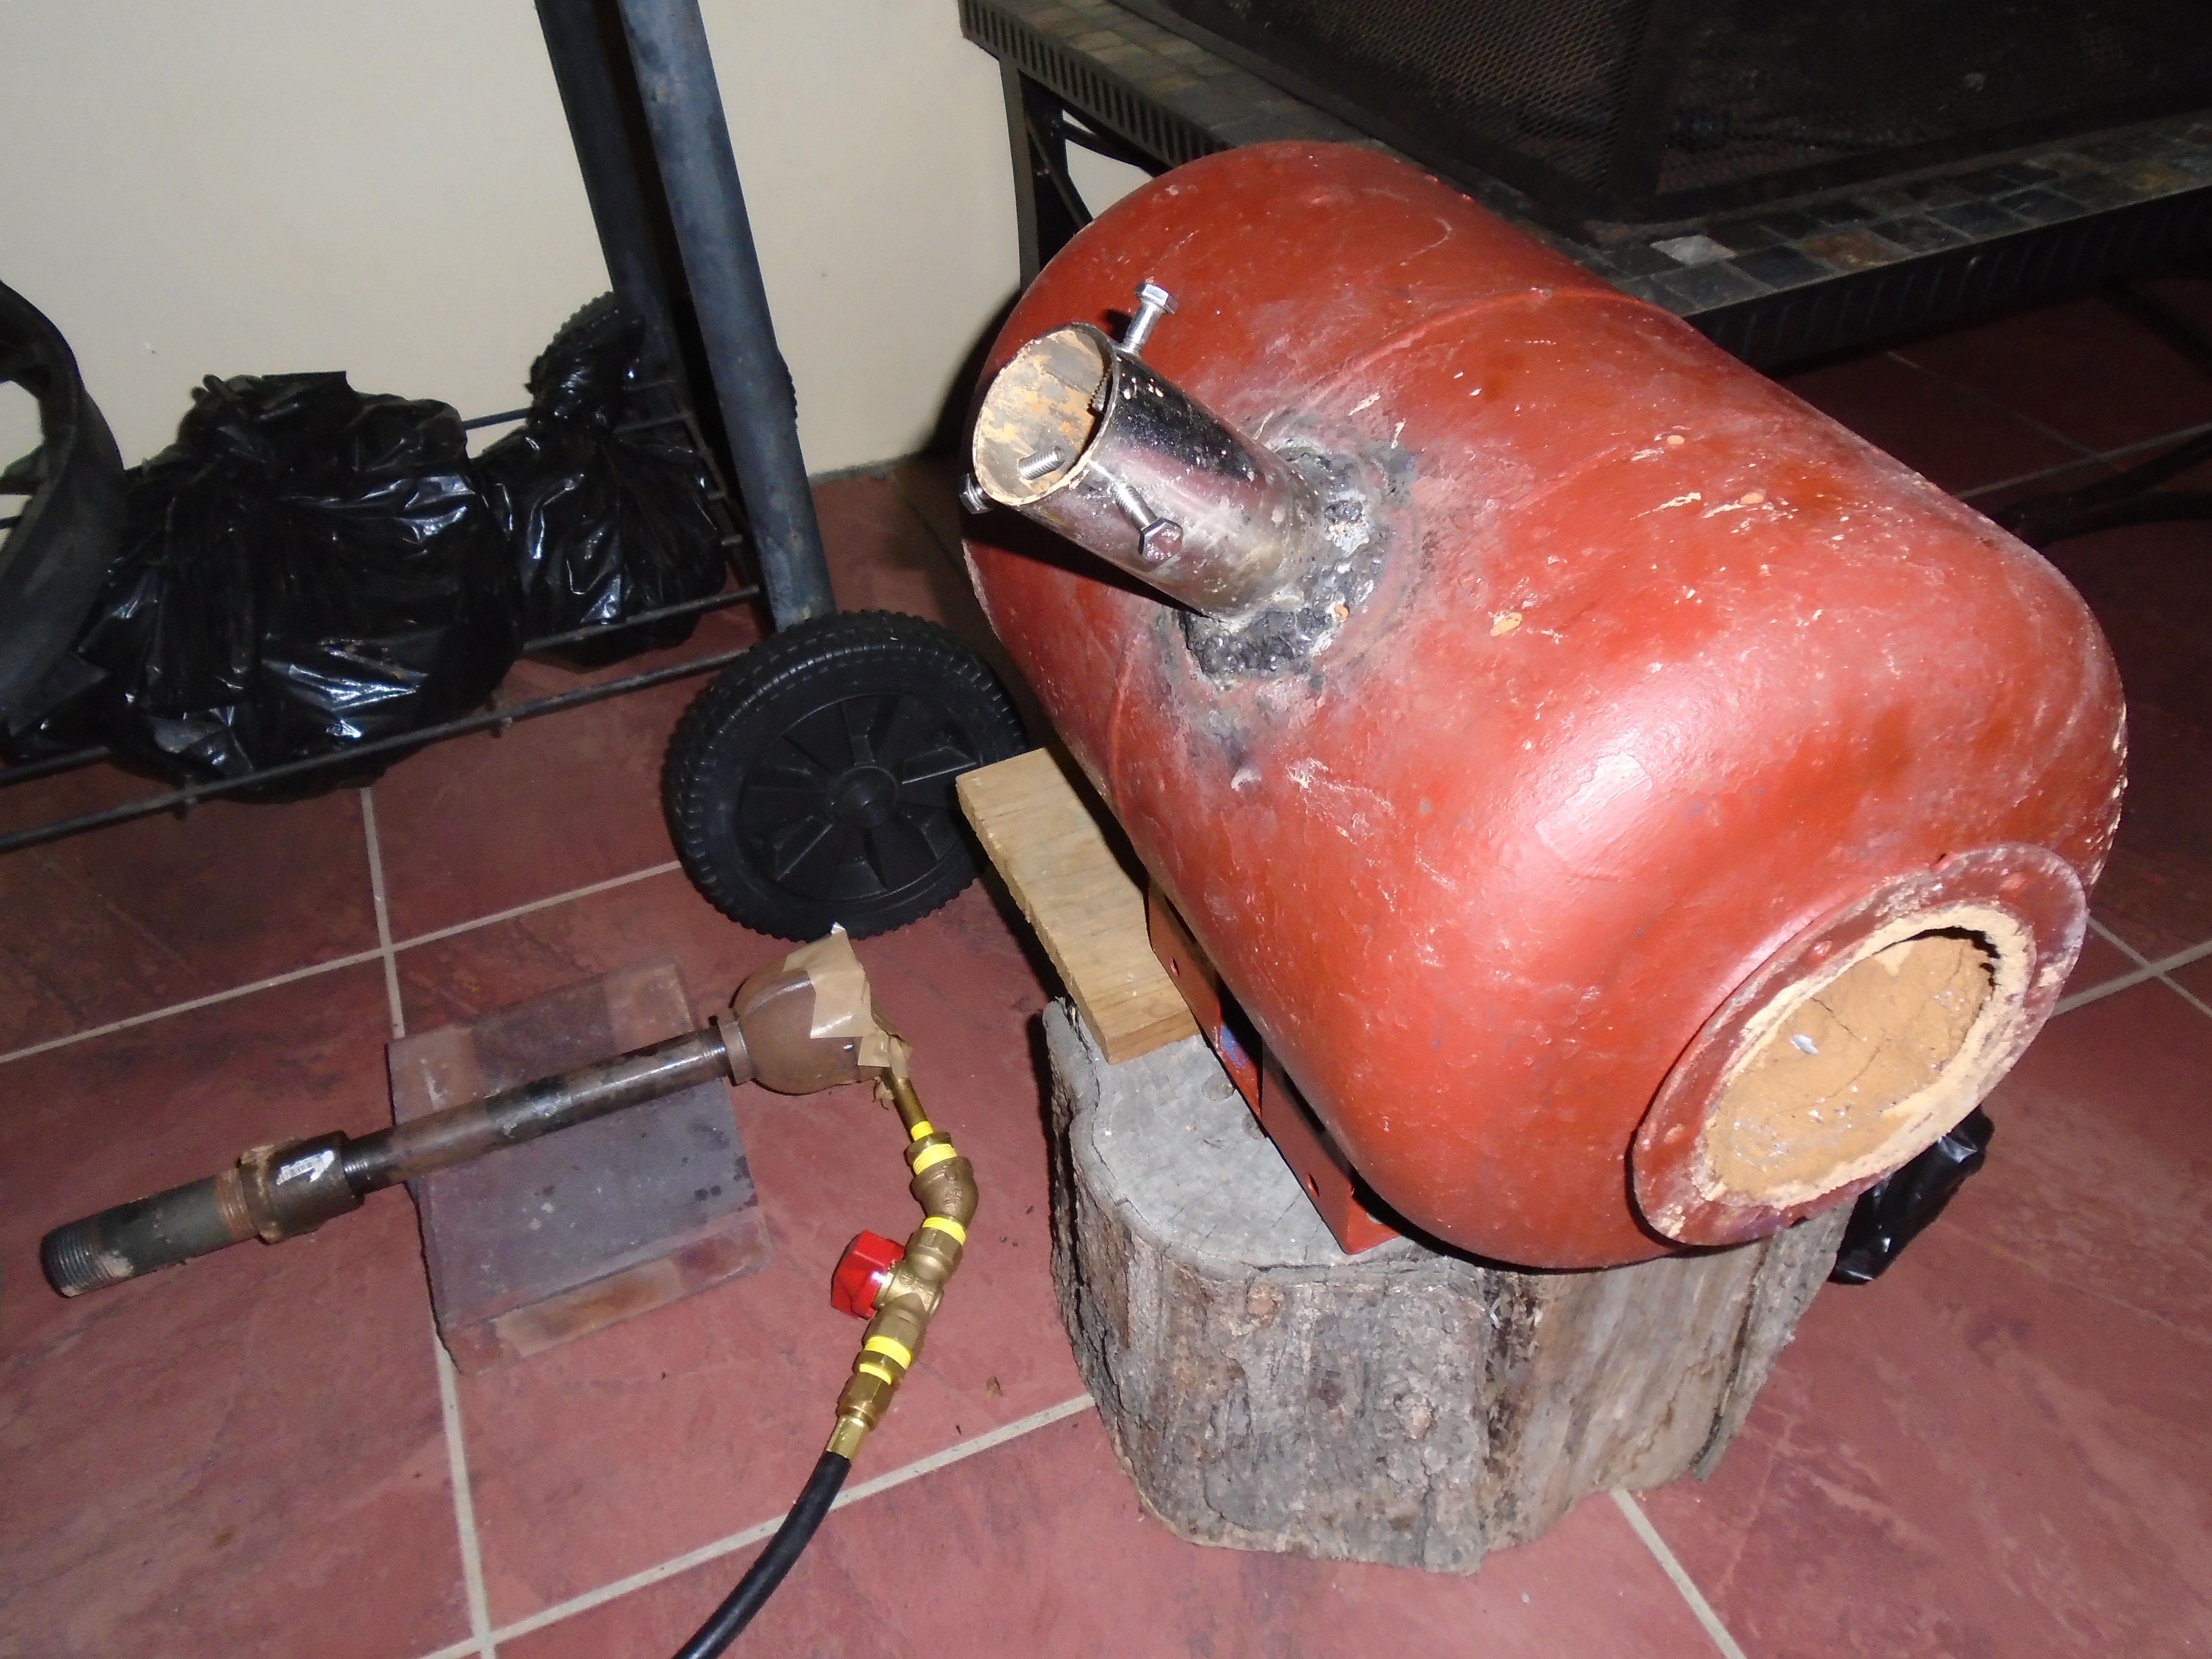
Here ya go. The dark grey blob is the epoxy. Don't have any pictures from before...its basically a threaded joint. No obvious gaps. The leak was very very small...without soap water I would have never detected it.

-
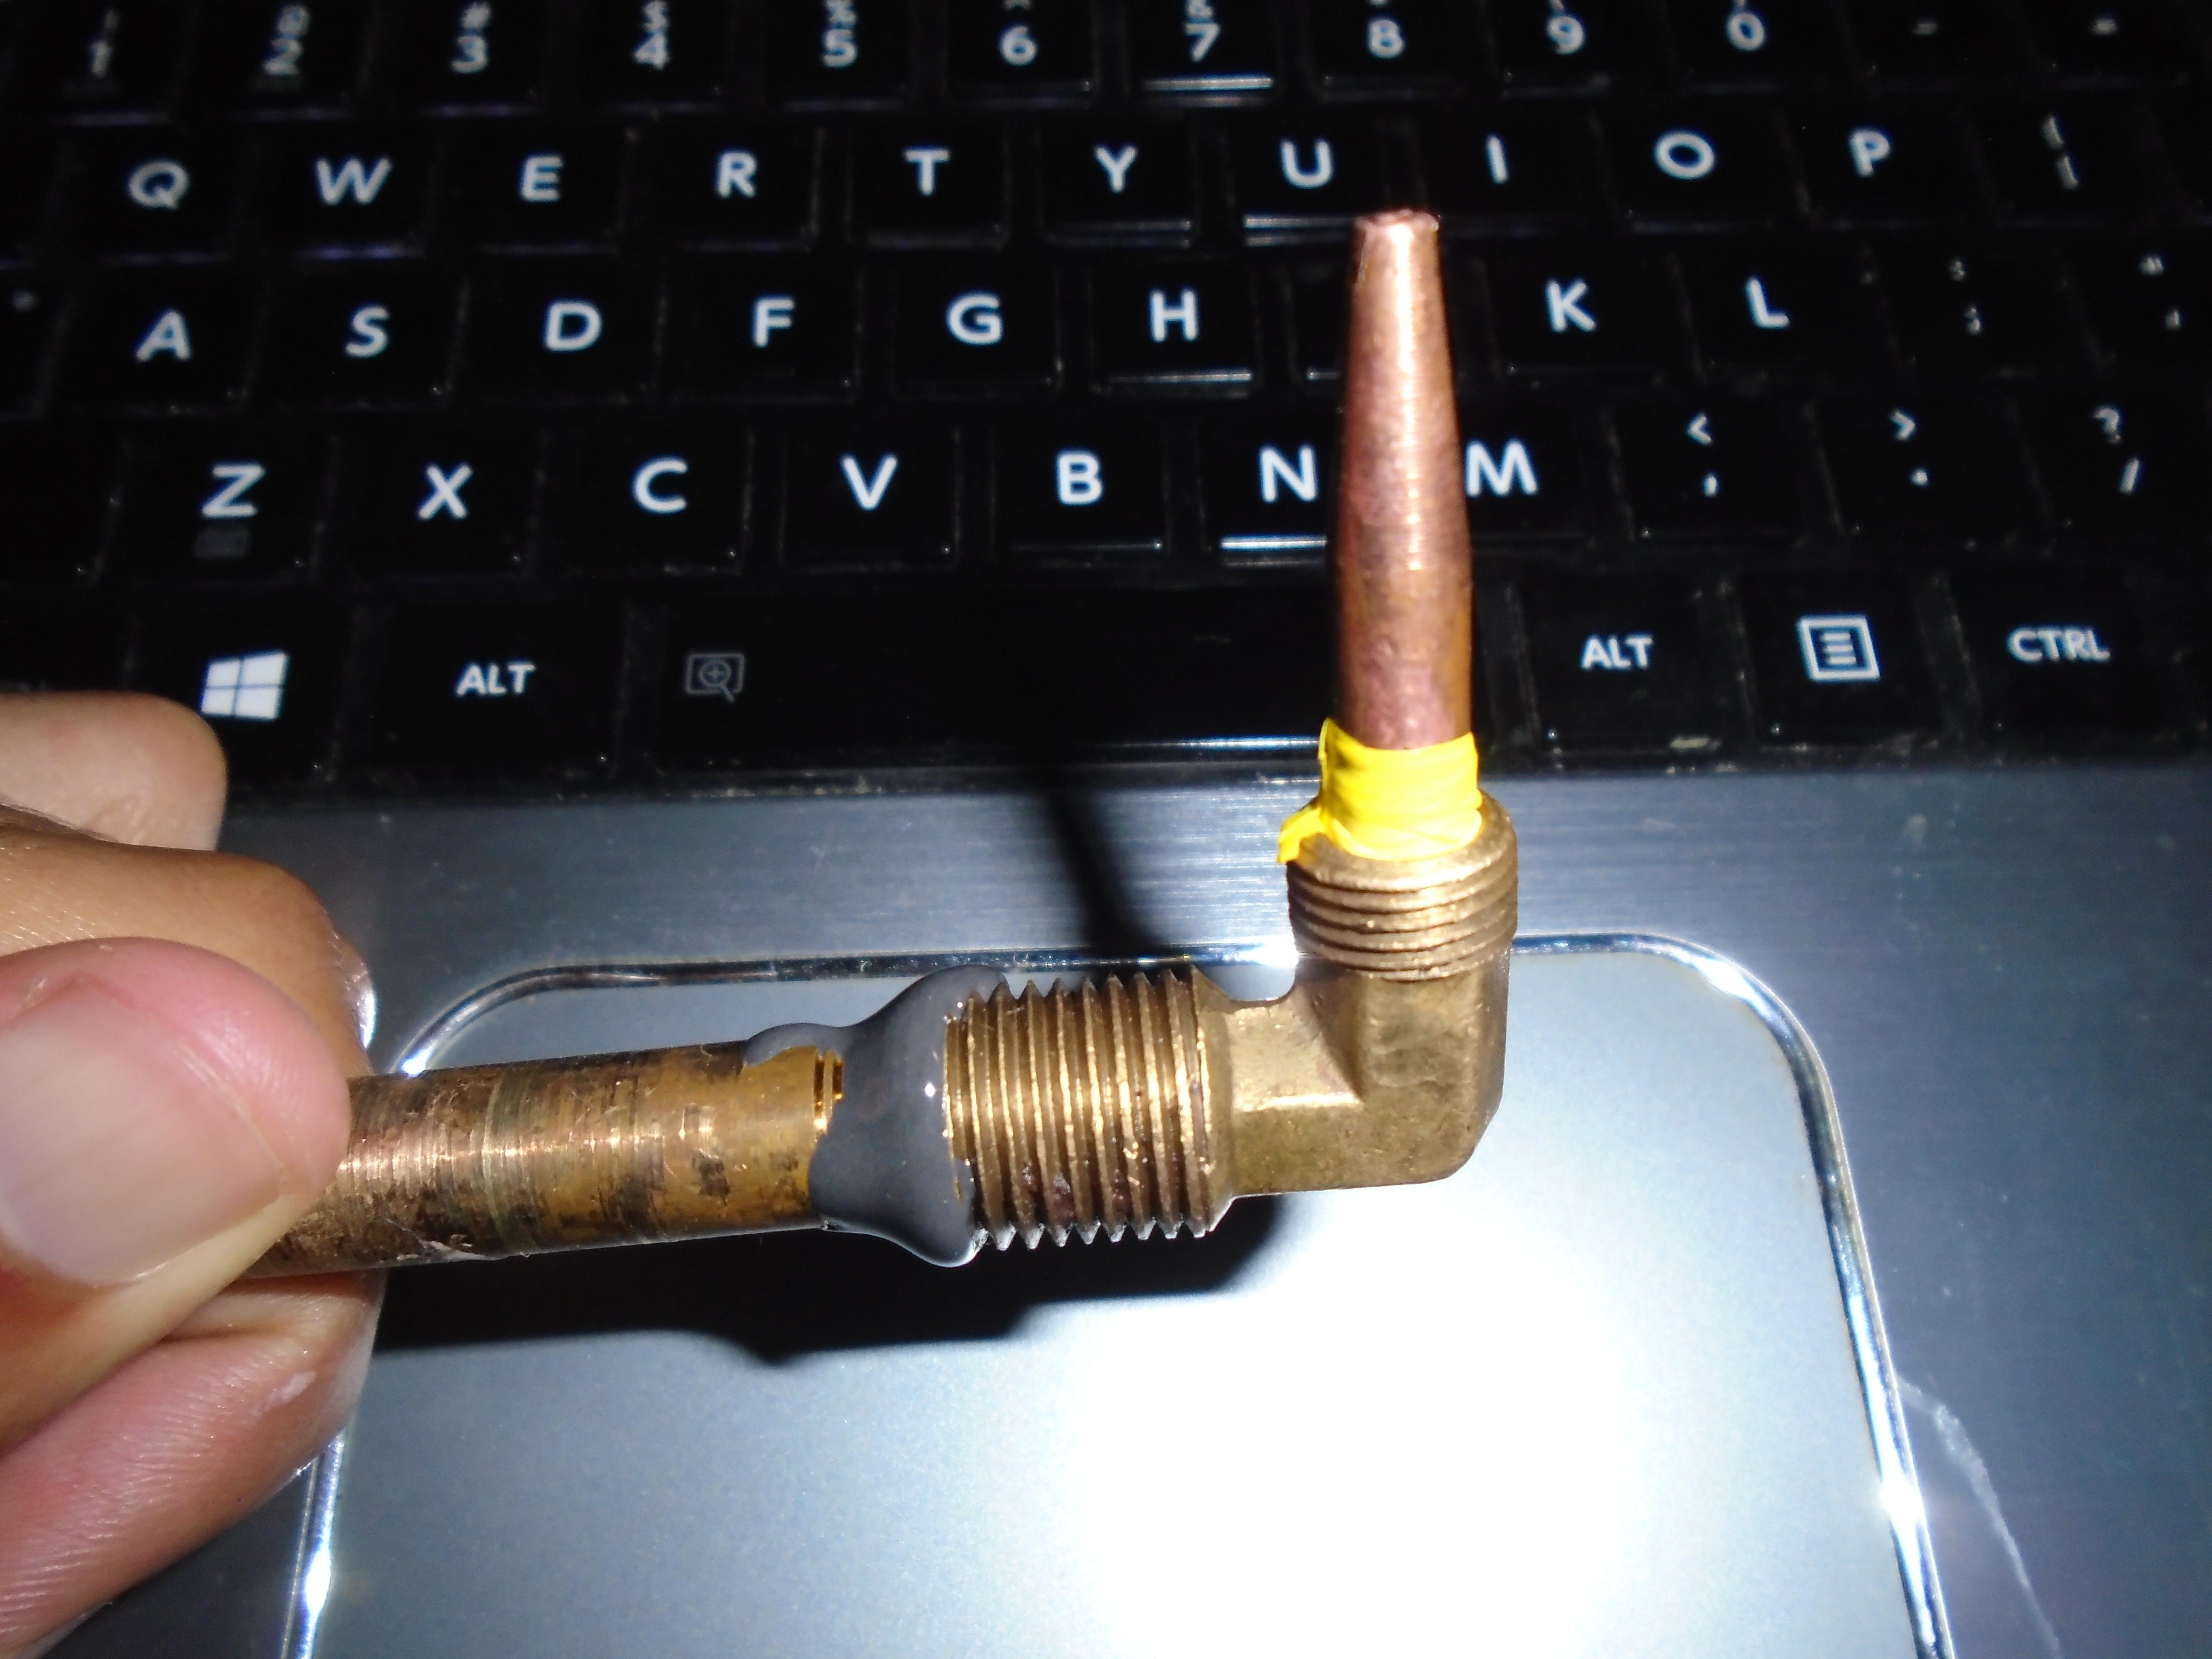
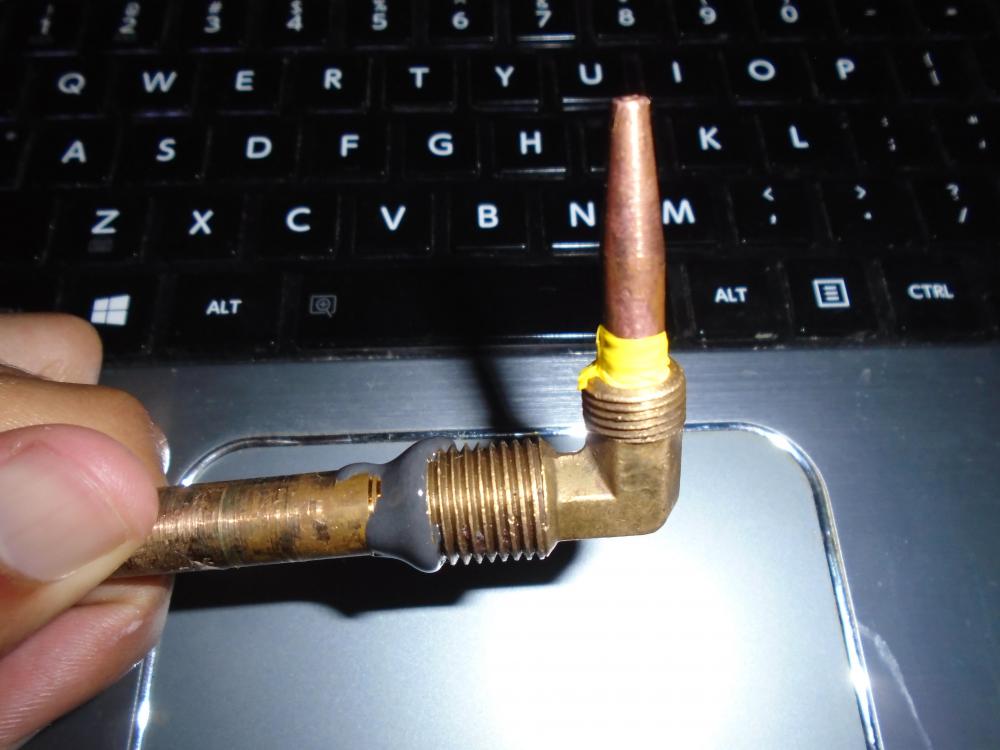
I have the (brass) pipes for the jet of my LPG forge sealed with teflon tape (the gas rated stuff) except in one spot. Basically I got help building the forge at a machine shop and they tightened xxxx xxx one of the fittings right before the jet tip. I asked them to remove them but they reassured me there is no way that thing would leak. I'm no expert but the way the guy explained it is the way he made the threads was in such a way the more you tighten it, the better the seal and the further dug in the part would become. I guess it was similar to how those 3/8 inch flares work where the end is slightly tapered to prevent gas from escaping. I trusted it. Testing my burner for leaks before lighting the very first time I find a slight leak in the exact spot. I tried pretty much everything to unscrew that thing. Redoing the part will cost me more money, which I am frankly not willing to spend assuming it cannot be unscrewed at this point (it cost me over 100 US plus the additional 100 US that got stolen from me the very same day to put together the casing and the burner :/). Heck the shop might even charge me just to unscrew it if they can. Where I live that's just the way business operates xxxx. So I was basically looking for a quick but effective solution at home, because I have spent over a year on this project and I won't be able to mess with it for...who knows how long after August (long story short, I won't be at home to work on it). I tried using some JB Kwik epoxy I had lying around to seal that area. The stuff is definitely going to stand up to the pressure, my worry is the heat. Its rated for 300F and though this part of the burner is about a foot or more away from the direct heat of the forge, I'm just not sure how hot it might get near the jet. So if you guys think the epoxy will hold safely, I will light burner tomorrow when the epoxy cures. If not, I'll have no choice but to find someone to help me unscrew the part....if its possible.
-
Thank you. I don't think the part I used for the flare has lead. So hopefully no toxic gasses.
-
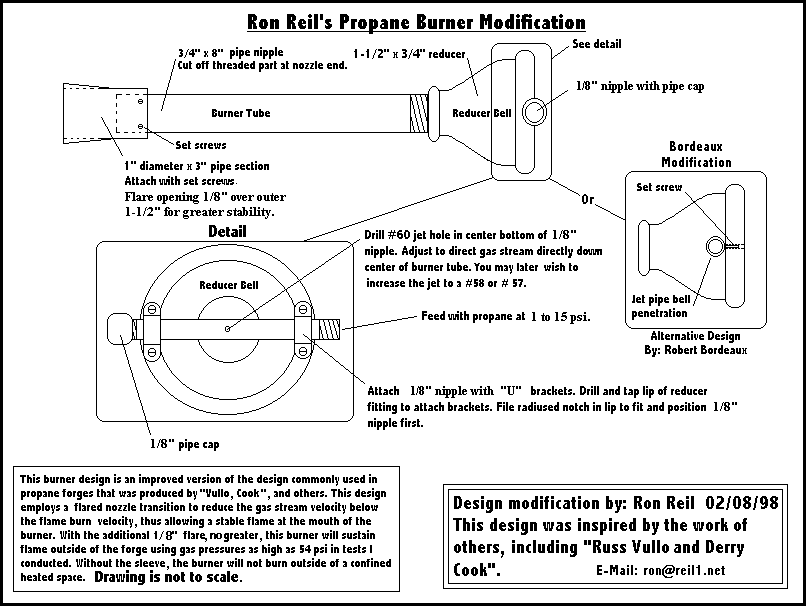
This part https://www.amazon.com/gp/product/B000BO7FSA/ref=oh_aui_detailpage_o00_s03?ie=UTF8&psc=1 (burner tube) is rated 150lb and this part https://www.amazon.com/gp/product/B0058DIM04/ref=oh_aui_detailpage_o00_s03?ie=UTF8&psc=1 (exhaust tube) is not rated at all. I am using an adapted version of a design MotoMike suggested (see attachment). So in truth, what's really going to be pressurized are the fittings up to the brass nipple (gas delivery tube). I'm still a newbie at this...so my main concern is the temperature these black steel fittings will reach causing degradation of the steel over time (thus releasing toxic particles). The brass fittings should not reach nearly as close to those temps hopefully.
-
While ordering some parts for a burner, I noticed some black steel fittings have a "max temperature". Typically around the 350 F range. I also noticed some are labelled "lead free". Does this temperature matter when you're burning gases at such high temperatures? I doubt the steel will melt...but maybe some noxious fumes might be produced and I want to avoid that early in my smithing-life while my lungs and brain still work Suggestions?
-
Still waiting for a response from them. I know I may seem a bit impatient but the plan was to get this done before the end of this week. Getting all the parts that is. I study abroad and this will likely be my last "vacation" home. Afterward its likely I'll be trying to settle elsewhere and find a job. But I will keep at it. If anyone has had any experience with these types of tanks and their connections (G.56 35mm clip on) then feel free to pitch in. I could use all the advice I can get.
-
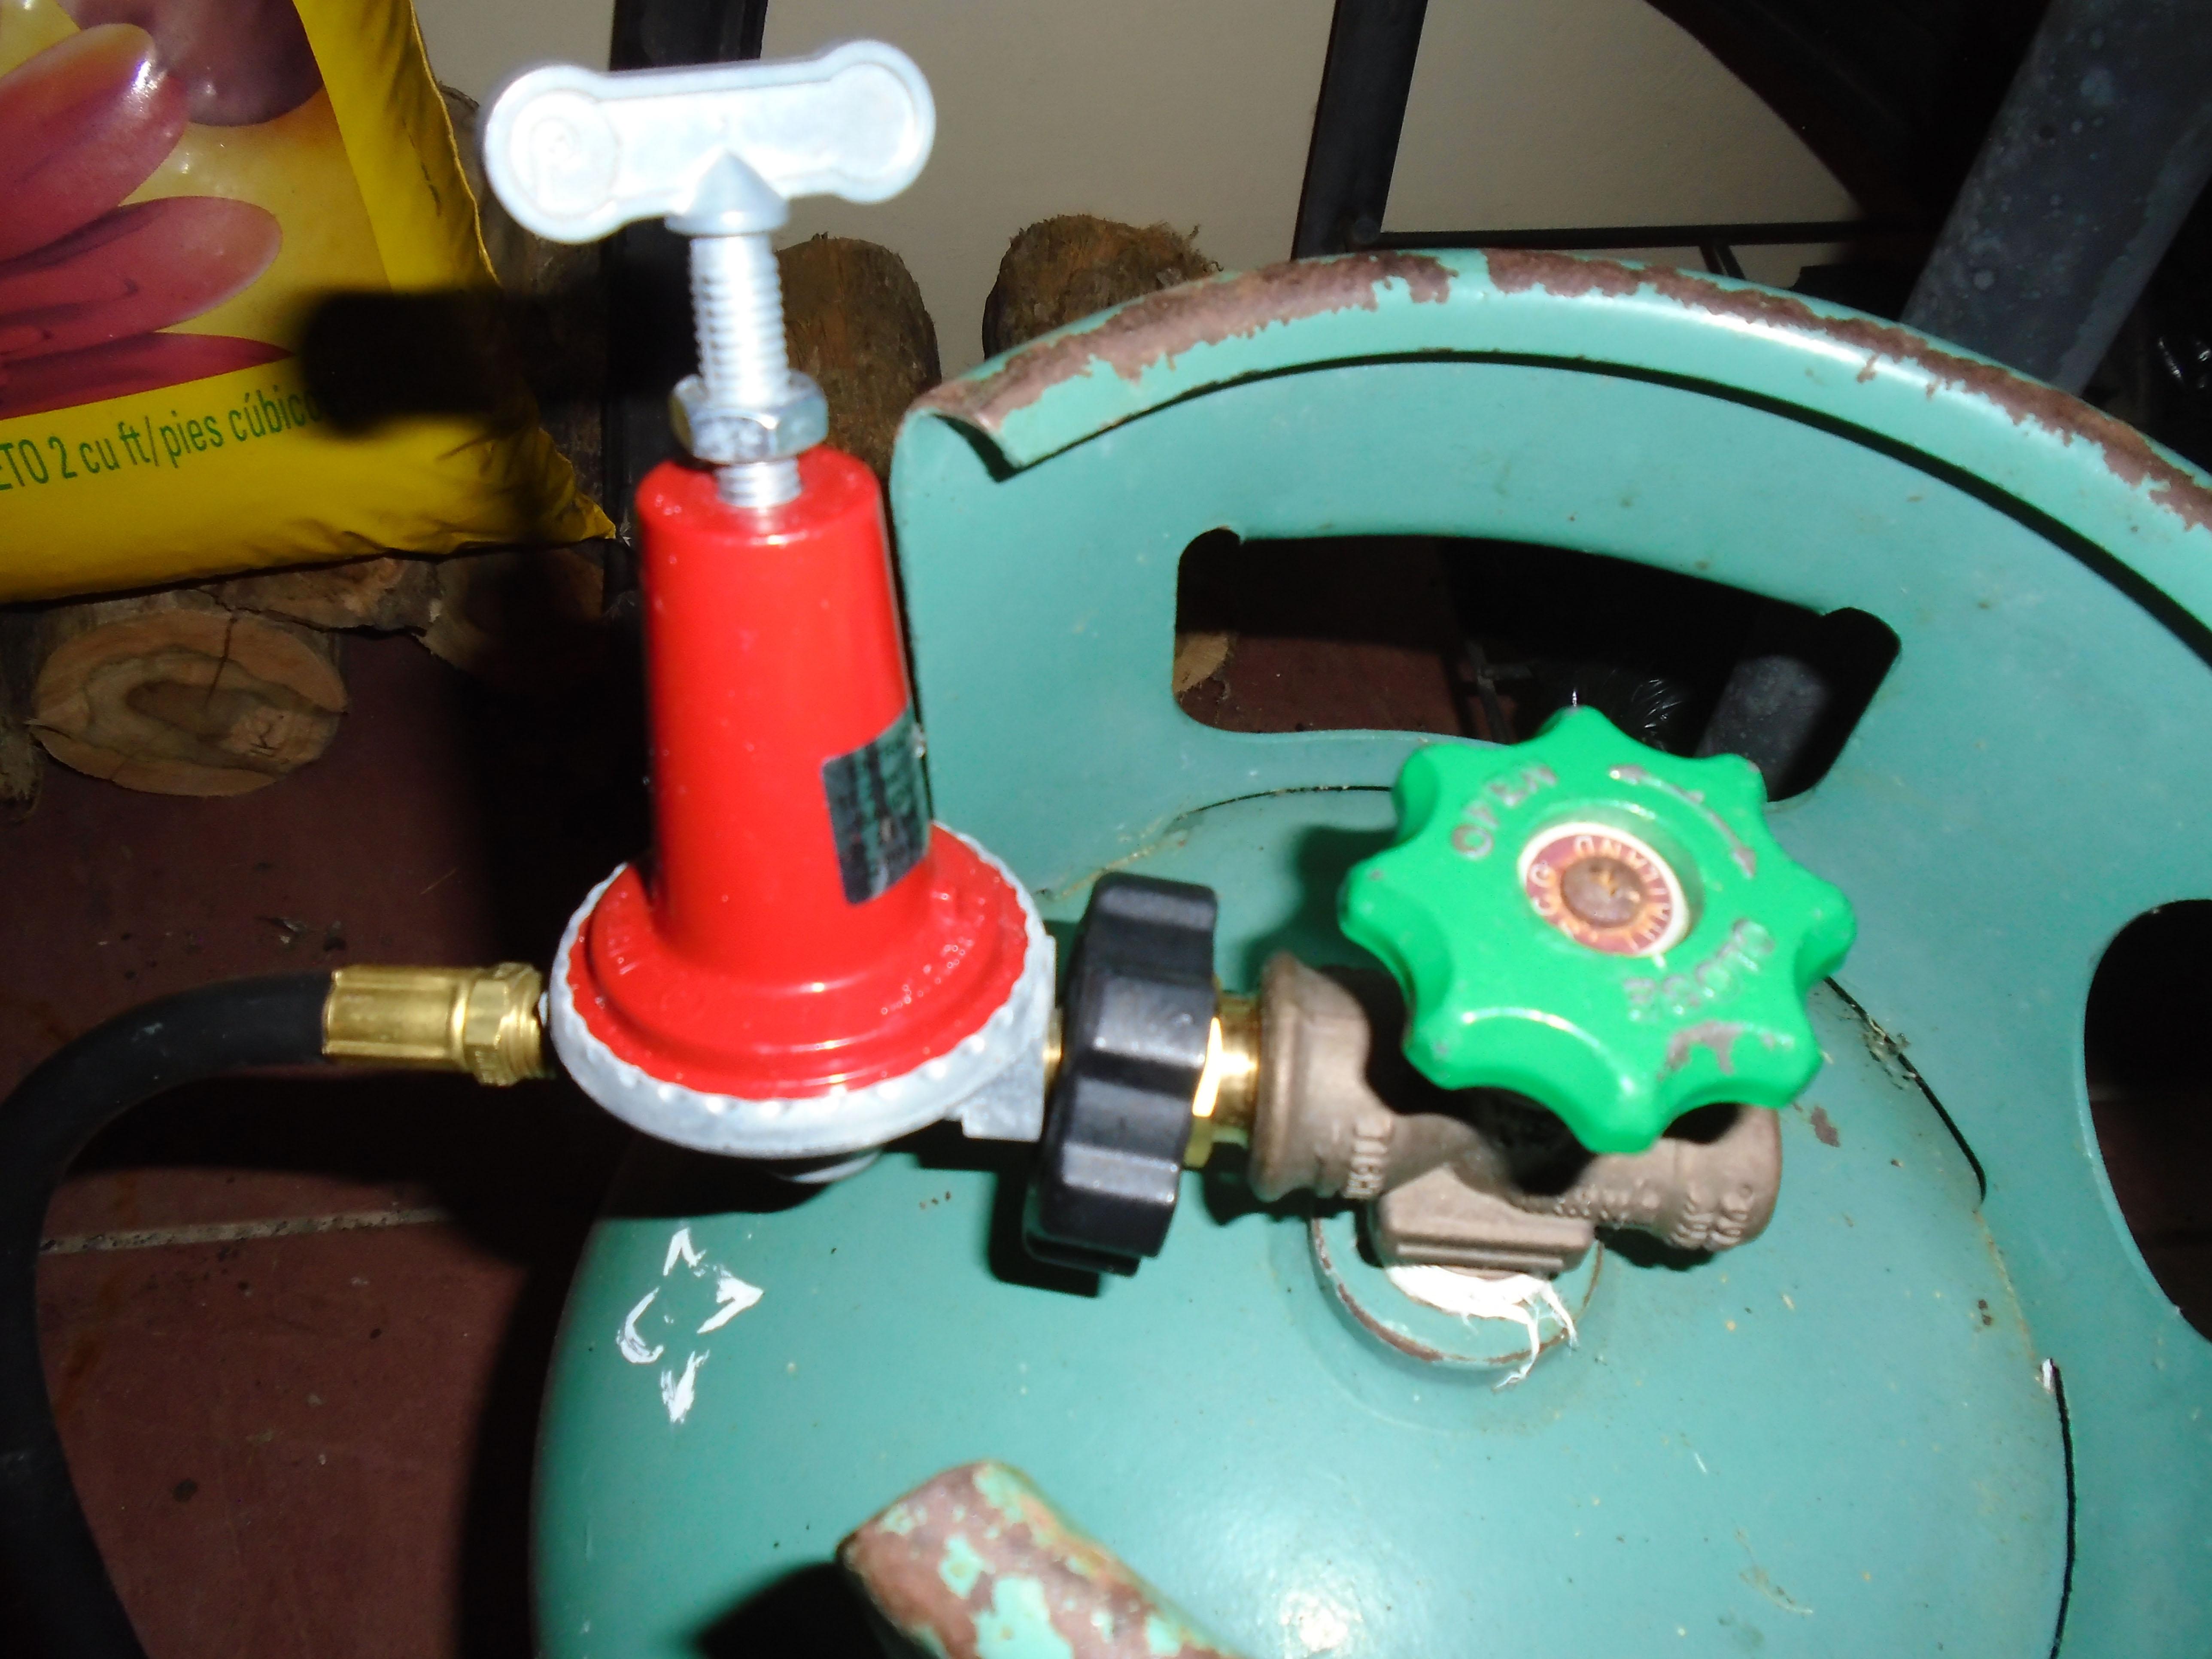
I like how you said threaded fittings. G.56 is not a threaded fitting. Its a 35mm clip on fitting. Hence the (apparent) need for an adapter (which seems to be darn near impossible to find on US Amazon). Good tip on the acetylene regulators. Just to clarify, my issue is not finding a regulator (with the required PSI) of the plethora of options out there. Its getting one that either directly fits the G.56 tank heads....or finding an adapter that will convert to any screw type fitting.
-
Thank you Also I am from Saint Lucia (West Indies) but currently reside in Trinidad and Tobago. I'll update my profile to suit.
-
The regulators sold locally are all for cooking. Pressure is too low. Hence why I need those regulators similar to the ones welders typically use (at least based on what I read they seem to work for forge applications...Im still learning), and these don't connect to the G.56 heads. Hence why I am going through all this trouble. Unless there is a simpler solution. I emailed the local gas company but I'm still waiting for a response. So just doing as much research as a I can in the mean time. Makes alot of sense. Though based on what I've read so far galvanized steel is not recommended for gas, especially natural gas if you ever decide to use it. I'll check out the original designs as well and modify them to suit if needed.
-
Assuming you are all using the same propane tank head. Unfortunately, its not the same everywhere. The fittings seem to vary. But it makes sense why its not mentioned now. Thanks I'll try switching to your design and see if it makes a difference in cost. MotoMike: I also noticed you have two parts between the nipple and the 1/8 npt to 1/4" female. Are those just to extend the length or do they have another purpose? If so, what parts are they? (Referencing the second picture in your original post btw).
-
Thats a pretty simple and cool design. I checked out your post. How did you connect the 1/8" nipple to your tank? That is the section people generally don't talk about when designing gas forges. Its a mystery what happens from your burner to the tank for me when I see these posts. Useless and excessive quote removed to reduce bandwidth